

Page 1
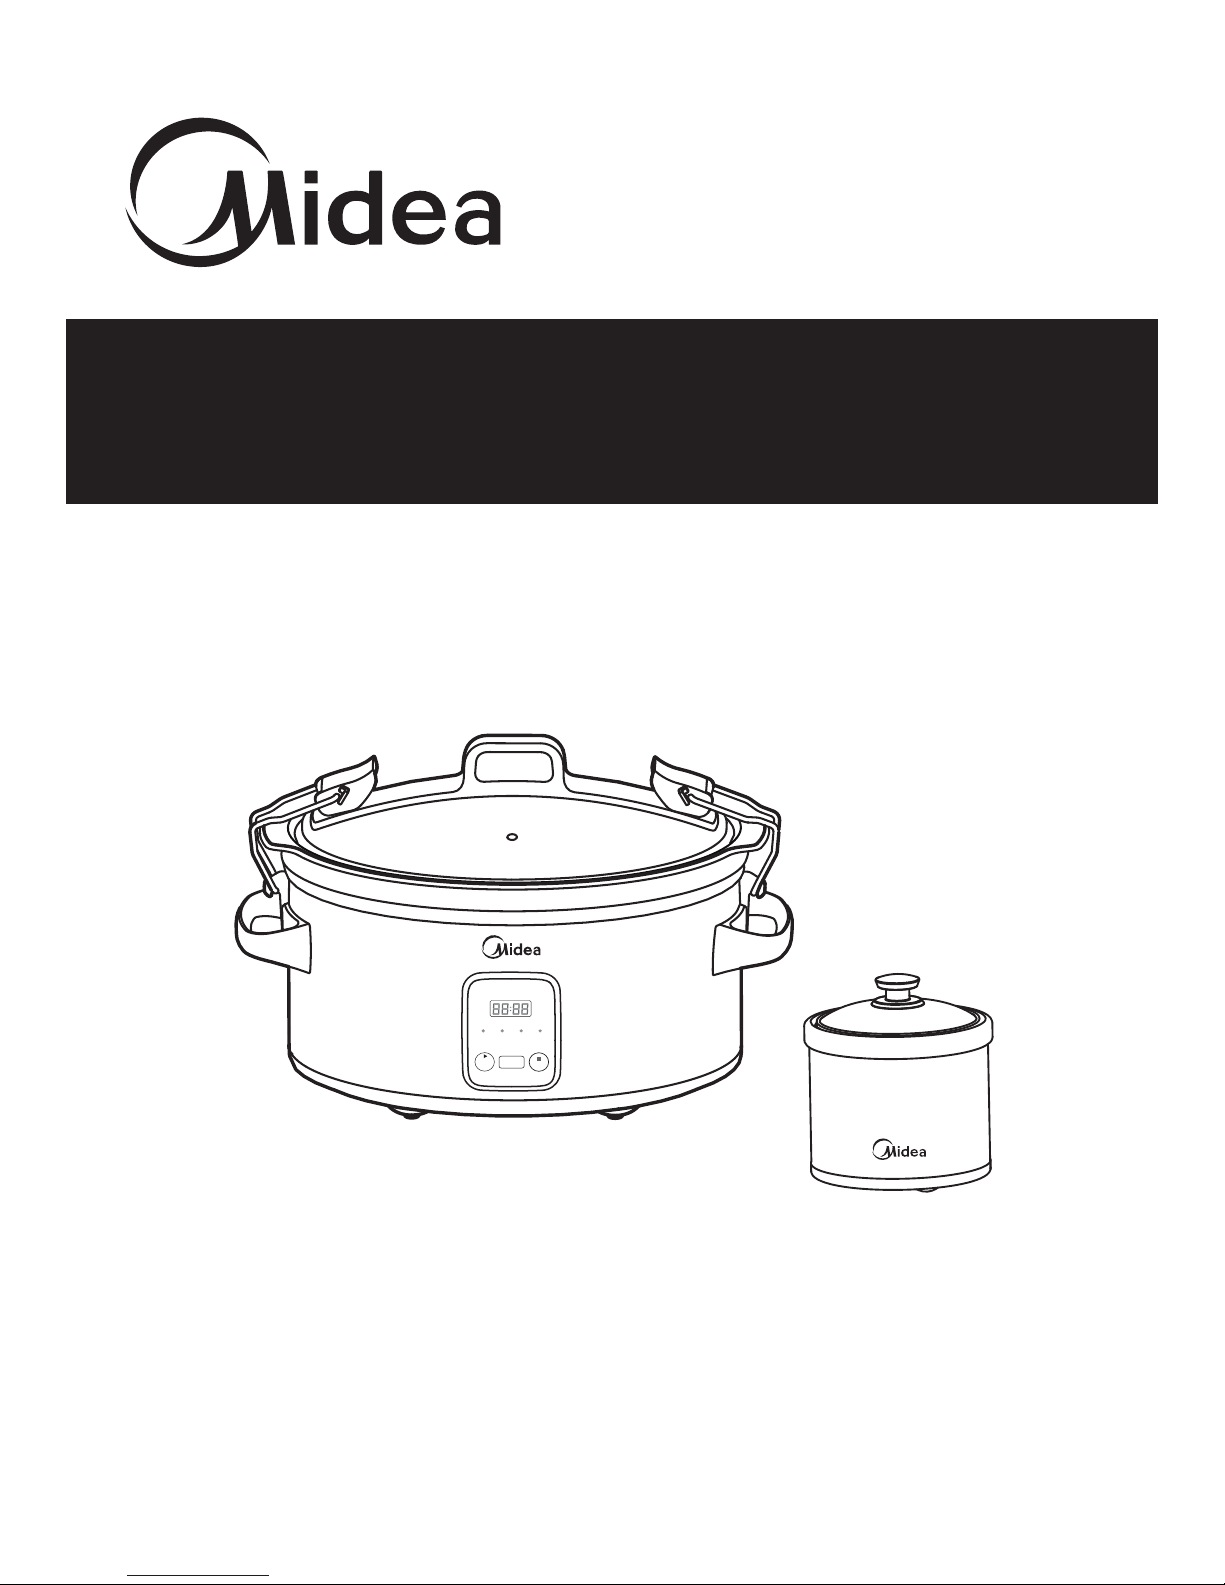
User Manual
Slow Cooker
Please read the manual carefully before operating your product.
Retain it for future reference.
MD-YHB06
MSC176TGDIP
Cook
Mode
STOP
Low Med High Warm
Cook
Time
Page 2

When using your electrical appliances, basic safety precautions should always be
followed to reduce the risk of fire, electric hazard and injury to persons, including the
following.
1. Read All Instructions.
2. Do not touch hot surface. Use handles or buttons of control panel. The unit body will
become very hot during long-time using, handle it carefully.
3. CAUTION: To reduce the risk or electric shock, cook only in removable container.
4. Close supervision is necessary when any appliance is used by or near children.
5. To protect against electrical shock, do not immerse cord, plug, or cooker body in
water or other liquid.
6. Do not add too much water beyond the edge of the porcelain inner pot, or the water
will flow out during cooking.
7. Unplug from outlet when do not in use and before cleaning. Allow to cool before
putting on or taking off parts, and before cleaning the appliance.
8. Do not operate any appliance with a damaged cord or plug or after the appliance
malfunctions or has been damaged in any manner. Return appliance to the nearest
authorized service facility for examination, repair, or adjustment.
9. The use of accessory attachment not recommended by the appliance manufacturer
may cause injuries.
10. Intended for countertop use only.
11. Do not use the appliance for other than intended use.
12. Do not use outdoors.
13. Extreme caution must be used when moving an appliance containing hot oil or
other hot liquids.
14. Do not let cord hang over edge of table and counter, or touch hot surface.
15. A short power-supply cord is used to reduce the risk resulting from it being
grabbed by children, becoming entangled in, or tripping over a longer cord.
16. WARNING: Spilled food can cause serious burns. Keep appliance and cord away
from children. Never drape cord over edge of counter, never use outlet below counter,
and never use with an extension cord.
17. Prior to first use, please make sure that the electric rating of the appliance is in
conformity with the current electric rating.
18. To disconnect, turn any control to “off”, then remove plug from wall outlet.
19. DO NOT place unit on or near a hot gas or electric burner, or in a heated oven.
20. Do NOT add frozen food to ceramic cooking vessels when cooking vessels are
HOT. DO NOT rinse with COLD water when ceramic cooking vessel is HOT.
IMPORTANT SAFEGUARDES
2
Page 3

SAVE THESE INSTRUCTIONS
21. DO NOT uncover the lid when in cooking, otherwise the heat will run out and more
cook time will be needed.
22. To reduce the risk or electric shock, cook only in removable container.
DO NOT cooking food directly in the Aluminum pot.
23. DO NOT place the ceramic inner pot on gas stove.
24. To avoid any cracks or spoilage that may bring to the slow cooker, proper
maintenance is necessary.
25. The appliance has a polarized plug (one blade is wider than the other). To reduce
the risk of electric shock, this plug is intended to fit into a polarized outlet only one way.
If the plug does not fit fully into the outlet, reverse the plug. If it still does not fit,
contact a qualified electrician. Do not attempt to modify the plug in any way.
26.
Important: only carry the slow cooker from the side handles on the cooking base.
Do NOT carry from the handle on the lid, even when locked.
27. HOUSEHOLD USE ONLY.
3
Page 4

4
1. Lid Handle
2. Glass Lid
3. Locking Lever
4. Locking Wire
5. Ceramic Casserole
6. Hook
7. Side Handle
8. Cooking base
9. Electronic Control
a)Digital Display
b)Cook Mode
c)Cook Time Button
d)STOP Button
e)Indicator lights
(LOW,MEDIUM,HIGH&WARM)
9a 9b 9c 9d 9e
1
3
2
4
5
6
7
6
7
8
Page 5
5
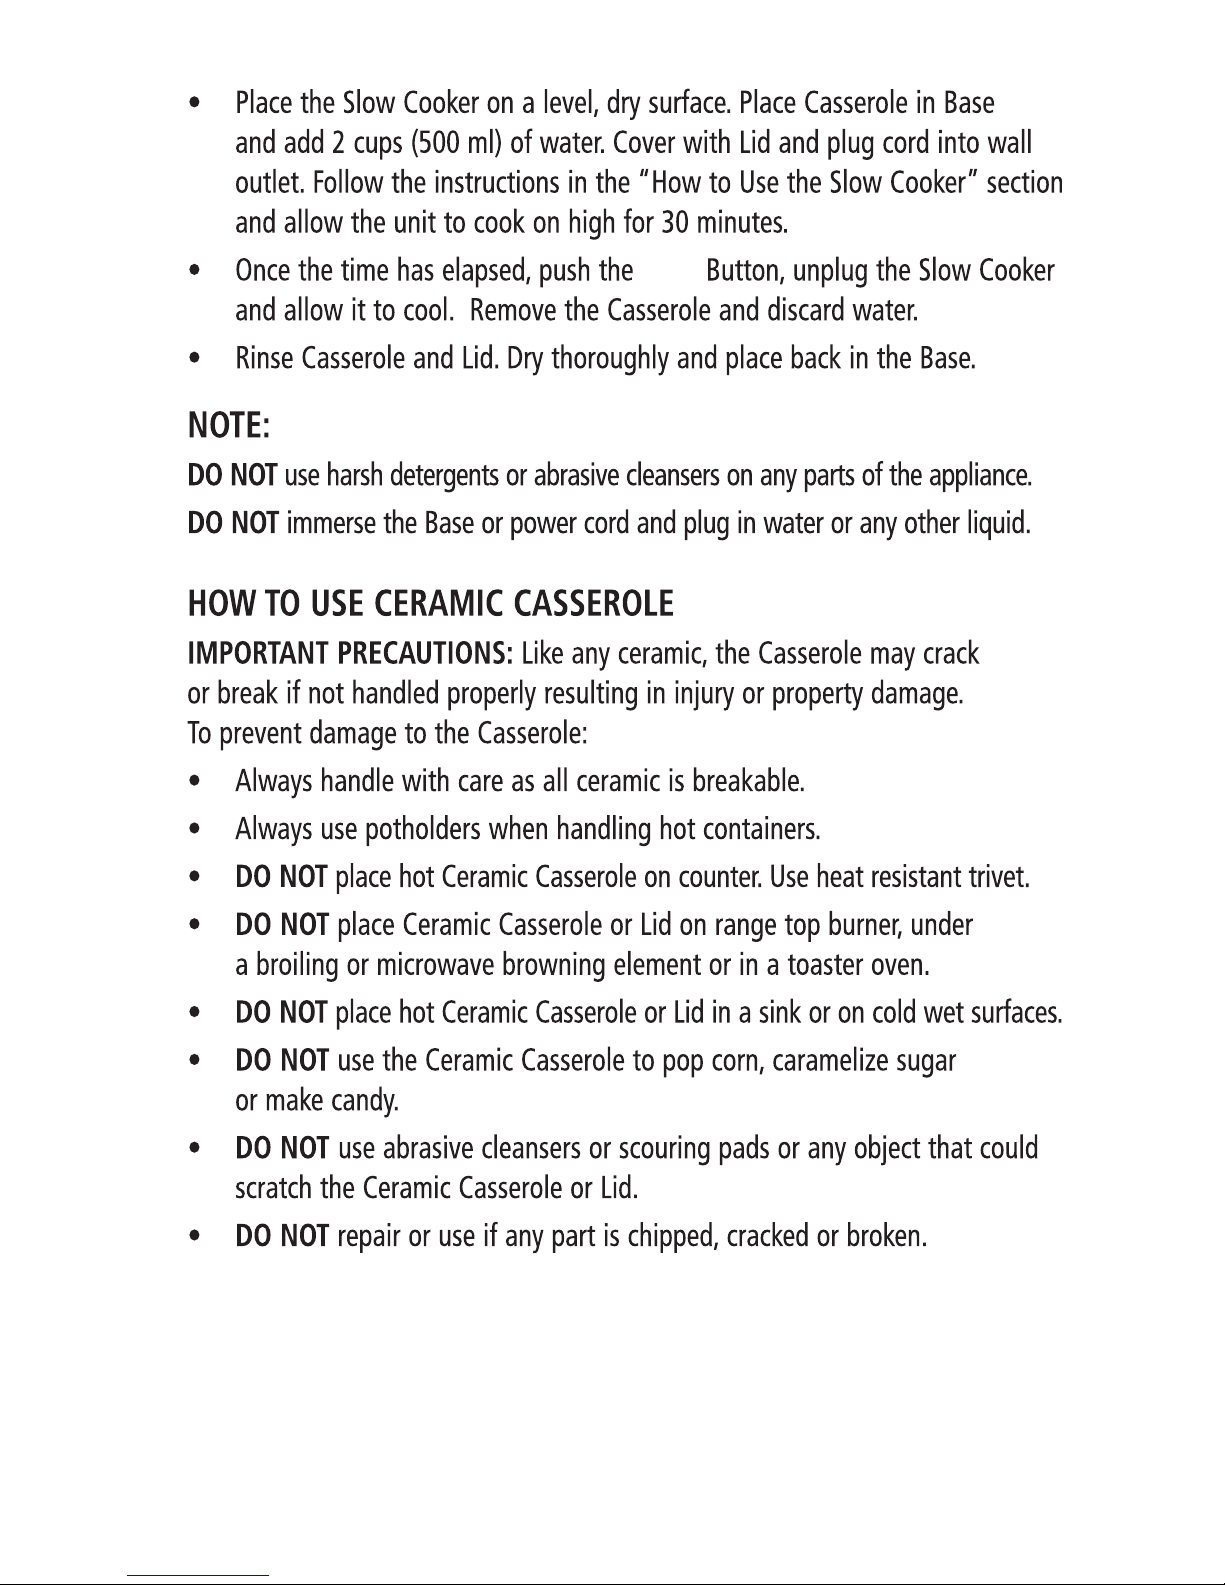
* DO NOT use the ceramic casserole to freezer, oven, and gas stove.
* DO NOT submerge cooker base in water or wash in dishwasher.
WIPE CLEAN ONLY.
USE: Both the Glass Lid and Ceramic Casserole can be cleaned in a dishwasher.
Stop
Page 6
6
Page 7
7
1. Place the Ceramic Casserole in Slow cooker base. Then place the
lid on top.
2. Fully extend locking levers outward. Then swing the locking wires
down and into hooks.
3. Lock the locking levers by pushing them toward the center of the lid
and down.
Caution:
Keep fingers away from locking wire to avoid pinching injury.
4. To unlock, pull the locking levers on the lid outward into the open
position and unhook wires.
5.
6.
7.
8.
Page 8
8
9.
Once the warming time has elapsed
Stop
Always slow cook with the lid on. It is OK to have the lid locked during
cooking, but not necessary.
- Do not open lid during first 2 hours of cooking; this allows heat to rise
efficiently.
- Open the lid as little as possible to assure even cooking. Every time
the lid is removed, the cooking time increases by 15–20 minutes.
Page 9
9
Page 10
10
Page 11
11
Page 12

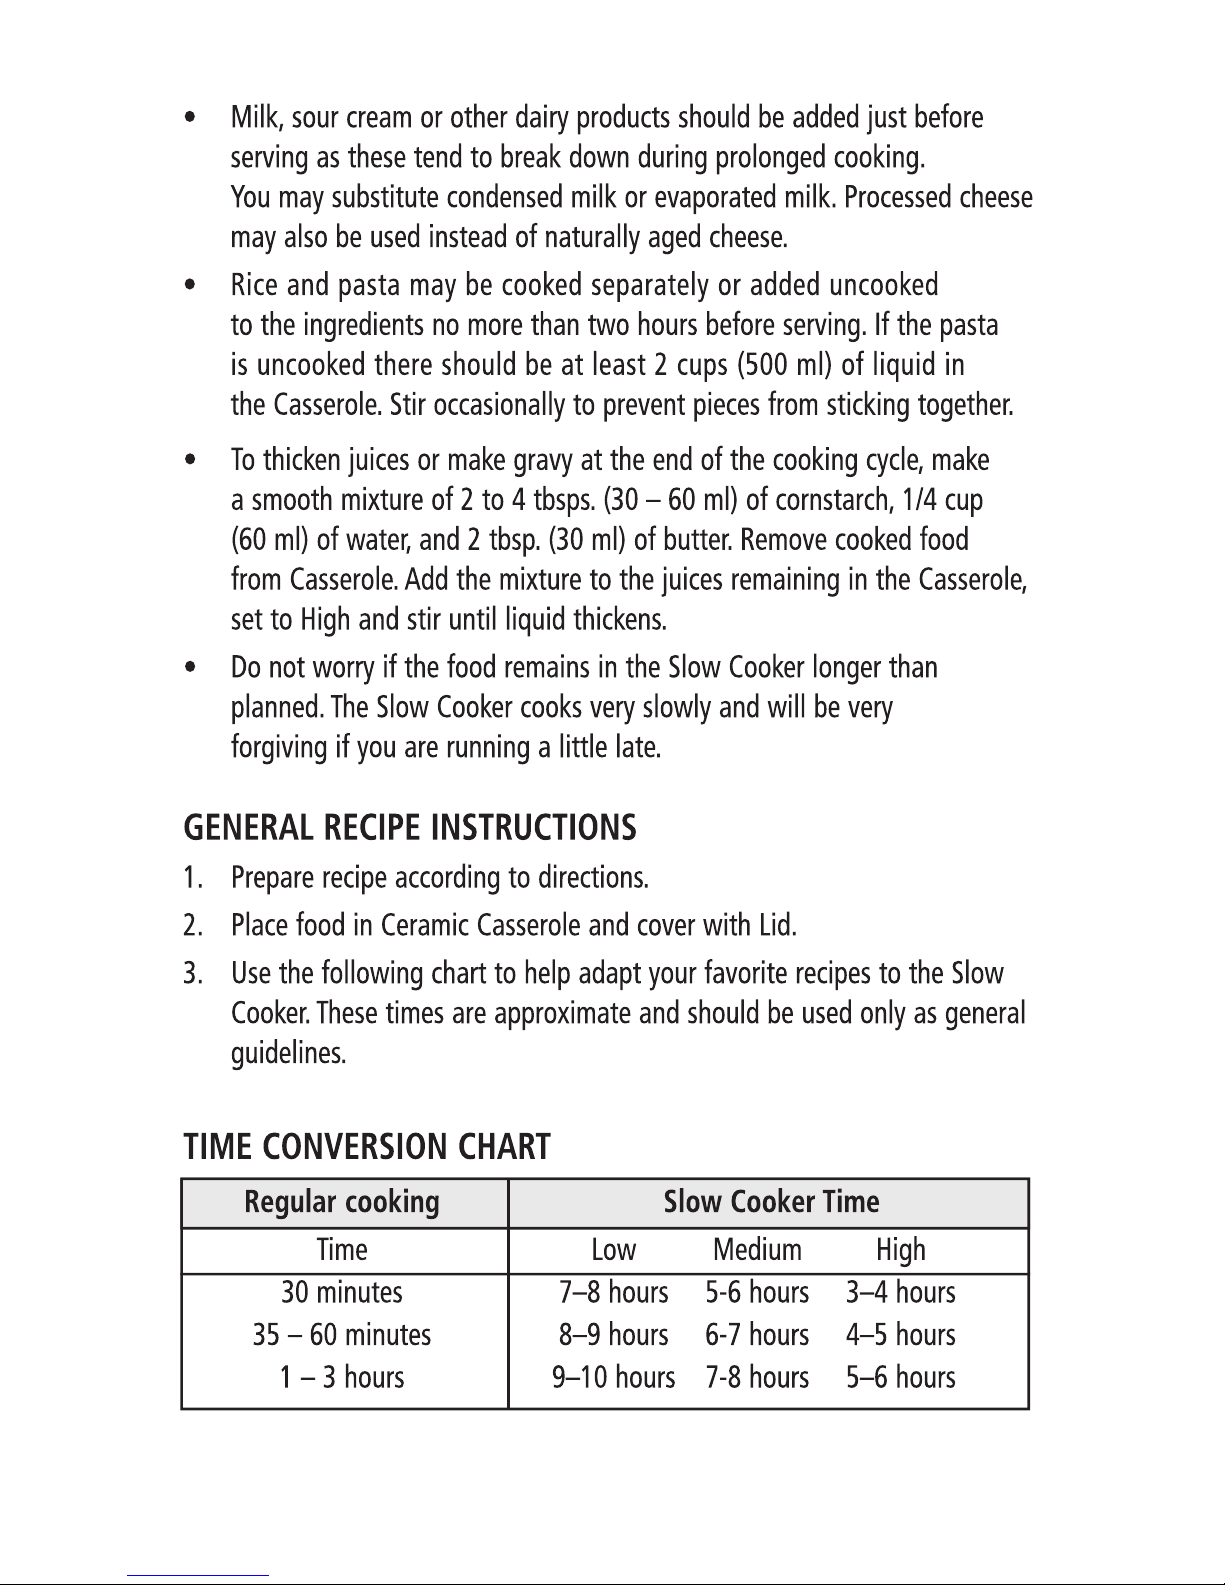
12
Cooker
Glass Lid
(Mini Slow Cooker)
Using Your 0.6Qt Warmer Crock
Cleaning Your 0.6Qt Warmer Crock
Always ensure the slow cooker is unplugged and cool before cleaning.IMPORTANT: The interior
crock will not withstand the shock of sudden temperature changes.To wash your mini slow
cooker right after cooling,use hot water.NEVER use cold water if the crock is still hot.
NOTE: your mini slow cooker does not have a removable crock.It is important to take special
cace to ensure the base,cord and housing does not get immersed in water while cleaning.
After emptying the contents of the mini slow cooker,fill the crock wirh hot or warm soapy water
to loosen food remains.For best results,allow the unit to soak for 15-30 minutes.Remove the
warm soapy water and wash the inside of the crock carefully.Use a cloth,nylon covered mesh
sponge or rubber spatula to gently scrape out the food residue.Rinse the crock and dry thoroughly.
Do not use abrasive cleaners or metal scoring pads on any part of the mini slow cooker.
You may wash the glass lid in warm soapy water.Rinse and dry thoroughly.
Wipe the outside of the mini slow cooker with a clean damp cloth and dry with a soft dry cloth.
0.6Qt Warmer Crock is designed for heating and keeping your favourite dips,sauces and
gravies at the perfect serving temperature.
It is important to note that this unit is not for use with uncooked meats.If your recipe includes
meat,you must ensure the food is fully cooked through before placing in the mini slow cooker.
1. Fill the mini crock with the prepared dip,sauce,gravy or chocolate. Do not fill over 1-1/4
cups(300ml).Cover the unit with the glass lid.
2.Plug your mini slow cooker into a 120V 60Hz AC-only outlet.
3. Heat the food for 15-60 minutes or until the dip,sauce,gravy or chocolate is completely
melted. It is important to stir the contents of the mini slow cooker occasionally while heating
or melting to ensure even heat distribution.
4.Remove the cover for serving.The dip will maintain the perfect serving temperature.Stir
occasionally.
NOTE: We do not recommend using your mini slow cooker for serving for longer than 3 hours.
0.6Qt Warmer Crock
Page 13
13
Page 14
14
Page 15

15
Page 16

MSC176TGDIP
MD-YHB06
CONSERVEZ CE MANUEL D’INSTRUCTIONS POUR CONSULTATION FUTURE
Cook
Mode
STOP
LowMed High Warm
Cook
Time
Manuel d'instructions
Mijoteuse
Page 17

2
PROTECTIONS IMPORTANTES
Des mesures de sécurité élémentaires, dont les suivantes, s'imposent lors
de l'utilisation d'un appareil électrique, an de réduire les risques d'incendie,
de choc électrique et de blessures.
1. Lire toutes les instructions.
2. Ne pas toucher les surfaces chaudes. Utilisez les poignées ou les
boutons du panneau de commande. Il faut faire attention au corps de
l'appareil qui risque de devenir très chaud pendant une longue utilisation.
3. ATTENTION : Pour réduire les risques d’électrocution, cuisiner
uniquement dans un récipient amovible.
4. Une attention particulière est nécessaire lorsque l'appareil est utilisé par
ou à proximité d'enfants.
5. Pour éviter tout risque d'électrocution, ne pas immerger le cordon
électrique, ni sa che ni l’unité dans l'eau ou tout autre liquide.
6. N’ajoutez pas trop d'eau dans le pot intérieur en porcelaine, car il risque
de déborder pendant la cuisson.
7. Débrancher l’appareil de la prise électrique lorsqu’il n’est pas utilisé ou
avant son nettoyage. Laissez l’appareil refroidir avant d'installer ou d'enlever
des pièces et avant de le nettoyer.
8. Ne pas faire fonctionner l’appareil avec un cordon ou une che
endommagés, après un dysfonctionnement de l’appareil ou s’il a été
endommagé de quelque manière que ce soit. Renvoyer l’appareil au centre
d’entretien autorisé le plus proche pour un examen, une réparation ou un
réglage.
9. L’utilisation d’accessoires non-recommandés par le fabricant de l’appareil
peut entrainer des blessures.
10. Prévu que pour une utilisation sur un plan de travail.
11. Ne pas utiliser cet appareil à des ns autres que celles pour lesquelles
il est destiné.
12. Ne pas utiliser à l'extérieur.
13. Une grande prudence doit être utilisée pour déplacer un appareil
contenant de l’huile ou un autre liquide chauds.
14. Ne pas laisser pendre le cordon d’alimentation de la table ou du
comptoir, ou toucher une surface chaude.
15. Une courte rallonge est utilisée pour réduire le risque qu’elle ne soit
attrapée par des enfants, qu’elle étrangle ou que l’on trébuche avec une
rallonge plus grande.
Page 18

3
16. MISE EN GARDE : Le déversement des aliments peut provoquer de
graves brûlures. Tenir l’appareil et le cordon à l’écart des enfants. Ne jamais
enrouler le cordon sur le bord du comptoir, ne jamais utiliser une prise sous
le comptoir et ne jamais utiliser avec une rallonge.
17. Avant la première utilisation de l'appareil, assurez-vous que les
exigences électriques de celui-ci peuvent être satisfaites par votre secteur.
18. Pour débrancher, tourner toute commande sur la position d’arrêt, puis
retirer la che de la prise de courant.
19. Ne pas placer l’unité sur ou à proximité d’un brûleur à gaz ou électrique,
ou dans un four.
20. NE JAMAIS ajouter d'aliments froids dans les récipients en céramique
lorsqu'ils sont CHAUDS. NE JAMAIS rincer à l'eau FROIDE lorsque le
récipient en céramique est CHAUD.
21. NE JAMAIS retirer le couvercle pendant la cuisson : la chaleur
s'échapperait et un temps de cuisson plus long serait nécessaire.
22. Pour réduire les risques d’électrocution, cuisiner uniquement dans un
récipient amovible. Ne faites pas cuire les aliments directement dans un pot
en aluminium.
23. NE JAMAIS placer le récipient interne en céramique sur la cuisinière à
gaz.
24. Un entretien approprié de la mijoteuse est nécessaire pour éviter toute
ssure ou détérioration.
25. Cet appareil à une prise polarisée (une lame est plus large que l’autre).
Pour réduire le risque d’électrocution, la che est prévue pour une prise de
courant polarisée qui ne s’insère que dans un sens. Si la che ne rentre pas
complètement dans la prise de courant, l’inverser. Si elle ne rentre toujours
pas, faire appel à un électricien qualié. Ne pas essayer de modier la che
de quelque façon que ce soit.
26. Important : saisir la mijoteuse uniquement par les poignées situées de
chaque côté de la base. Ne JAMAIS la saisir par la poignée du couvercle,
même lorsque ce dernier est verrouillé.
27. UTILISATION DU MÉNAGE SEULEMENT.
USAGE DOMESTIQUE UNIQUEMENT
Page 19

4
INTRODUCTION
La mijoteuse programmable est un appareil attrayant, pratique et facile à
utiliser qui vous permet de préparer des repas pour toute la famille avec
un minimum d'efforts. La casserole en céramique ovale est doublée d'un
couvercle en verre pratique qui permet de transporter le repas directement
sur la table. Ils peuvent être nettoyés facilement dans un lave-vaisselle.
DESCRIPTION DES PIECES
1) Poignée du couvercle
2) Couvercle en verre
3) Levier de verrouillage
4) Goupille de verrouillage
5) Casserole céramique
6) Crochet
7) Poignée latérale
8) Base de cuisson
9) Commande électronique
a) Écran digital
b) Mode de cuisson
c) Bouton de temps de cuisson
d) Bouton ARRÊTER
e) Voyant
(BAS, MOYEN, ÉLEVÉ & CHAUD)
AVANT LA PREMIERE UTILISATION
•
Déballer et retirer toutes les pièces et le matériel d'emballage du carton.
•
NE PAS brancher le cordon d'alimentation dans la prise avant d'avoir lu
ces instructions.
•
Laver la casserole et le couvercle dans de l'eau chaude savonnée.
Rincer et sécher soigneusement.
•
Nettoyer l'intérieur et l'extérieur de la Base avec un chiffon propre et
mouillé. Sécher avec un chiffon doux.
•
Placer la mijoteuse sur une surface plane et sèche. Placer la casserole
sur la base et ajouter 2 tasses (500 ml) d'eau. Couvrir à l'aide du
couvercle et brancher le cordon dans la prise. Suivre les instructions
dans la section “Comment utiliser la mijoteuse” et laisser cuire et en
réglant sur Élevé pendant 30 minutes.
9a 9b 9c 9d 9e
1
3
2
4
5
6
7
6
7
8
Page 20

5
•
Une fois que la minuterie s'est écoulée, appuyez sur le Bouton Arrêter,
débranchez la Mijoteuse et laissez-la refroidir.
•
Rincer la casserole et le couvercle. Bien sécher et replacer sur la base.
REMARQUE :
NE PAS utiliser de détergents agressifs ou de nettoyants abrasifs sur les
pièces de l'appareil.
NE PAS plonger la Base ou le cordon d'alimentation dans l'eau ou tout
autre liquide.
COMMENT UTILISER LA EN CÉRAMIQUE
PRÉCAUTIONS IMPORTANTES : Comme toute céramique, la casserole
peut se craqueler ou se casser si elle n'est pas manipulée correctement, ce
qui peut causer des blessures ou des dommages matériels.
Pour éviter des dommages sur la casserole :
•
Toujours manipuler avec soin car toute pièce e céramique est cassable.
•
Toujours utiliser des mitaines pour manipuler les récipients chauds.
•
NE PAS placer la casserole en céramique chaude sur le plan de travail.
Utiliser un sous-plat résistant à la chaleur.
•
NE PAS placer la casserole en céramique ou le couvercle sur le brûleur
d'une cuisinière, sous un grillage, un élément de micro-ondes capable
d'améliorer le brunissage ou un grille-pain four.
•
NE PAS placer la Casserole en céramique ou le couvercle dans un
évier ou sur des surfaces humides et froides.
•
NE PAS utiliser la casserole en céramique pour faire du pop-corn,
caraméliser du sucre ou faire des bonbons.
•
NE PAS utiliser des nettoyants abrasifs ou des tampons à récurer ou
tout autre objet qui pourrait gratter la casserole en céramique ou le
couvercle.
•
NE PAS réparer ou utiliser si une pièce est abîmée, craquelée ou cassée.
* NE PAS utiliser la casserole en céramique dans le congélateur, le four et la
cuisinière à gaz.
* NE plongez PAS la base du cuiseur dans l'eau et ne la mettez pas dans le
lave-vaisselle. ESSUYEZ-LA SIMPLEMENT.
UTILISER : Le couvercle en verre et la casserole en céramique peuvent être lavés
dans le lave-vaisselle
Page 21

6
ENTRETIEN : Utiliser uniquement des ustensiles en bois ou en plastique.
Les ustensiles en métal peuvent gratter ou marquer la céramique. La
casserole peut être lavée à la main ou dans un lave-vaisselle.
NE PAS laisser la Casserole en céramique tremper ou rester dans l'eau
pendant une période prolongée. La surface peut se ssurer si la casserole
est chauffée juste après avoir été trempée. Si le récurage est nécessaire,
utiliser uniquement des tampons en plastiques ou en nylon avec des
nettoyants non abrasifs.
•
NE JAMAIS soumettre la Casserole à des changements de
température soudains en le sortant par exemple directement du
réfrigérateur pour le mettre dans le four ou en le plongeant dans l'eau
lorsqu'il est chaud.
•
NE JAMAIS ajouter de l'eau froide dans une casserole en céramique
chaude.
•
NE JAMAIS le placer en contact avec une chaleur directe comme un
brûleur de cuisinière ou un élément de grillage.
•
NE JAMAIS chauffer la Casserole lorsqu'elle est vide. NE JAMAIS
préchauffer la Base.
•
NE JAMAIS ajouter d'aliments froids provenant du réfrigérateur
directement dans la Casserole.
•
TOUJOURS débrancher la Base et laisser refroidir la Casserole avant
de la nettoyer.
COMMENT UTILISER LE COUVERCLE EN VERRE
PRÉCAUTIONS IMPORTANTES : Le couvercle en verre peut se briser
s'il est exposé à la chaleur directe ou à des changements de température
brusques. Les ébréchures, les ssures ou les éraures profondes peuvent
également affaiblir le couvercle. Si le couvercle comporte des ébréchures,
des ssures ou des éraures, ne pas l'utiliser. Le mettre au rebut et
commander un couvercle de rechange.
TOUJOURS laisser refroidir le couvercle sur une surface sèche résistante
la chaleur avant de manipuler.
NE JAMAIS le placer sur une surface froide ou humide car il pourrait se
ssurer ou se briser.
NE JAMAIS utiliser le couvercle en verre dans un four conventionnel, à
convection ou à micro-ondes.
COMMENT UTILISER LA MIJOTEUSE
Une mijoteuse est facile à utiliser mais est différente d'une cuisson
conventionnelle.
Page 22

7
Cette brochure est prévue pour être utilisée comme directive générale et
contient plusieurs suggestions et des astuces utiles pour une cuisson lente
réussie. L'un des avantages de la cuisson lente réside dans le fait que
les repas peuvent être préparés à l'avance et le temps de cuisson peut
être réglé de sorte que les aliments soient prêts à être servis au moment
approprié. Il existe une multitude de recettes conçues spécialement pour
la cuisson lente qui sont facilement trouvables sur Internet ou des livres de
recette dans vos librairies et bibliothèques locales.
1. Placer la casserole en céramique dans la base de la Mijoteuse. Placer
ensuite le couvercle sur la casserole.
2. Écarter les leviers de verrouillage vers l'extérieur. Ensuite, basculer les
goupilles de verrouillage vers le bas et les insérer dans les crochets.
3. Bloquer les leviers de verrouillage en les poussant vers le centre du
couvercle puis vers le bas.
Attention : Tenir les doigts éloignés des goupilles de verrouillages an
de ne pas les pincer.
4. Pour déverrouiller, tirer les leviers du couvercle vers l'extérieur, en
position ouverte, et détacher les goupilles.
5. Brancher l'appareil sur la prise murale. L'afchage numérique clignote
“ ”.
6. Appuyer sur le bouton du mode Cuisson pour sélectionner Bas, Moyen,
Élevé ou Chaud.
(Appuyer une fois pour Bas, deux fois pour Moyen, 3 fois pour Élevé et
4 fois pour Chaud) Le paramètre par défaut de 6 heures (6:00) apparaît
sur l'afchage numérique si vous avez sélectionné Bas, Moyen, Élevé
ou Chaud. Après 3 secondes, le voyant s'illumine près de Bas, Moyen,
Élevé ou Chaud, selon le réglage sélectionné.
7. Régler le nombre de temps requis en appuyant sur le bouton "Temps de
cuisson". Chaque fois que vous appuyez sur le bouton Temps de cuisson,
le temps de cuisson augmente de 30 minutes à un maximum de 10
heures. Si vous n'appuyez pas sur le bouton Temps de cuisson pendant 3
secondes, le temps de cuisson sera celui afché sur le fenêtre d'afchage.
REMARQUE : Si vous préférez un temps de cuisson inférieur au réglage
par défaut de 6 heures, continuez d'appuyer sur le bouton Temps de
cuisson après 10 heures et le temps de cuisson afchera 30 minutes.
Appuyer pour augmenter le temps de cuisson par incrément de 30 minutes.
8. Une fois le temps de cuisson écoulé, l'appareil passe à "Chaud." Le temps
de cuisson par défaut du cycle Chaud est de 6 heures. REMARQUE : Si
vous préférez un temps d'avertissement inférieur au réglage par défaut
de 6 heures, continuez d'appuyer sur le bouton Temps de cuisson après
10 heures et le temps de cuisson afchera 30 minutes. Appuyer pour
augmenter le temps de cuisson par incrément de 30 minutes.
Page 23

8
9. Une fois que le temps de cuisson est écoulé, la mijoteuse s'éteint
automatiquement. Les voyants s'éteignent et l'afchage numérique
afche “ ”. Débrancher la mijoteuse de la prise murale.
REMARQUE : Pour arrêter la mijoteuse pendant la cuisson, appuyer
sur la Bouton Arrêter. L'afchage numérique clignote “ ”.
Débrancher la mijoteuse.
ASTUCES UTILES POUR UTILISER LA MIJOTEUSE
•
Ne pas utiliser la mijoteuse sans couvercle. Il est BON que le couvercle
soit verrouillé pendant la cuisson, mais ce n'est pas indispensable.
- Ne pas retirer le couvercle dans les 2 premières heures de cuisson ;
ceci permet à la chaleur d'augmenter efcacement.
- Retirer le couvercle aussi peu que possible an que la cuisson soit
homogène. À chaque fois que le couvercle est retiré, le temps de
cuisson est prolongé de 15- 20 minutes.
•
Le mélange n'est pas requis pendant la cuisson lente. Cependant, lors
de la cuisson sur Élevé, le mélange va occasionnellement permettre de
distribuer les parfums.
•
Pour les meilleurs résultats, la casserole doit être au minimum moitié
pleine.
•
Pour les soupes et les sauces, laissez un espace de 2” (5 cm) entre les
aliments et le couvercle pour laisser les ingrédients mijoter. Lorsque la
cuisson est réglée sur Élevé, vérier de temps en temps car certaines
soupes et les sauces peuvent bouillir.
•
Pendant la cuisson lente, il est plus approprié d'utiliser moins de
morceaux de viande tendre et bon marché que les variétés plus chères.
Retirer l'excédent de gras avant la cuisson et si nécessaire, faire brunir
la viande sur une cuisinière à l'aide d'une poêle en métal avant d'ajouter
la viande dans la casserole.
•
Plus la viande contient du gras, moins il est nécessaire d'ajouter du
liquide. Lors de la cuisson de la viande riche en gras, placer de gros
morceaux d'oignons sous la viande de sorte qu'elle ne cuise pas dans
la graisse. Les rôtis, lorsqu'ils sont cuits avec le réglage Bas, peuvent
être préparés sans ajouter de liquide.
•
Utiliser un thermomètre à viande pour déterminer si la viande est cuite
à votre goût.
•
Le poisson frais ou décongelé ou les fruits de mer doivent être ajoutés
dans la casserole une heure seulement avant d'être servis car ils
peuvent s'émietter en cas de cuisson prolongée.
Page 24

9
•
Puisque les légumes crus prennent plus de temps à cuire que la viande,
les couper en petits morceaux d'un diamètre de 1/2 pouce (12mm)
avant de les ajouter dans la casserole.
•
Le lait, la crème sure ou d'autres produits laitiers doivent être ajoutés
juste avant de les servir car ils tendent à se dissoudre en cas de
cuisson prolongée.
Vous pouvez remplacer le lait condensé ou le lait évaporé. Le
fromage fondu peut également être utilisé à la place du fromage vieilli
naturellement.
•
Le riz et les pâtes peuvent être préparés séparément ou ajoutés crus
aux ingrédients pas plus de deux heures avant d'être servis. Si les pâtes
sont crues,la casserole doit contenir au moins 2 tasses (500 ml) de liquide.
Mélanger occasionnellement pour empêcher les morceaux de coller.
•
Pour épaissir les jus ou recueillir du jus de viande à la n du cycle de
cuisson, faire un mélange onctueux de 2 à 4 cuillères à soupe. (30-60 ml)
d'amidon de maïs, 1/4 tasse (60 ml) d'eau, et 2 cuillères à soupes (30 ml)
de beurre. Retirer les aliments préparés de la casserole. Ajouter le
mélange au jus restant dans la casserole, régler sur Élevé et mélanger
jusqu'à ce que le liquide s'épaississe.
•
Il n'y a pas lieu de s'inquiéter si les aliments restent dans la mijoteuse
plus longtemps que prévu. La mijoteuse cuit les aliments très lentement
et sera très utile si vous êtes un peu en retard.
INSTRUCTIONSGENERALES SUR LA RECETTE
1. Préparer la recette selon les directives.
2. Placer les aliments dans la casserole en céramique et couvrir avec le
couvercle.
3. Utiliser le tableau suivant pour adapter vos recettes favorites à la
mijoteuse. Ces temps de cuisson sont approximatifs et ne doivent pas
être utilisés comme directives générales.
TABLEAU DECONVERSION DU TEMPS
Cuisson normale Temps de cuisson de la mijoteuse
Heure Bas Moyen Élevé
30 minutes 7-8 heures 5-6 heures 3-4 heures
35-60 minutes 8-9 heures 6-7 heures 4-5 heures
1-3 heures 9-10 heures 7-8 heures 5-6 heures
Page 25

10
4. Suivre les instructions dans la section "Comment utiliser la mijoteuse".
5. Utiliser une mitaine ou un gant de cuisine pour retirer délicatement le
couvercle. ATTENTION : Lorsque vous retirez le couvercle, tenez le
boulon et soulevez lentement le côté éloigné de vous pour permettre
à la vapeur de s'échapper avant de mettre le couvercle de côté. Pour
éviter des brûlures, toujours tenir le couvercle de sorte que la vapeur
puisse s'échapper loin de vos mains, vos bras et votre visage.
6. Utiliser des maniques ou des gants de cuisine pour saisir la casserole
en céramique par les poignées de chaque côté et la retirer de la base.
7. Toujours placer un sous-plat sous la casserole avant de la placer sur la
table. Servir le contenu.
ASTUCES UTILES POUR ADAPTER LES RECETTES
•
Le réglage Bas est recommandé pour une journée de cuisson. La
plupart des combinaisons viande et légumes nécessitent au moins
7 heures sur le réglage Bas.
•
Pour une meilleure saveur, utiliser des nes herbes pour épicer pendant
la préparation initiale. Si les herbes moulues et les épices sont utilisées,
mélanger pendant la dernière heure de cuisson.
•
Le temps requis pour préparer est affecté par plusieurs facteurs. L'eau
et le gras des aliments, sa température de démarrage et la taille des
pièces affectent le temps de cuisson. Par exemple, la viande coupée
en morceaux cuira plus vite qu'un rôti entier. Ajuster le temps en
conséquence.
•
Les recettes pour les casseroles de légumes doivent contenir du liquide
pour éviter que les côtés de la casserole s'écorchent.
•
Vous pouvez choisir de remplacer les ingrédients d'une recette. Par
exemple, une boîte de 12 oz. de bouillon de poulet peut être remplacé
par une boîte de soupe aux tomates de 10 oz. et 2 oz. d'un autre liquide
tel que l'eau ou le vin.
•
Les haricots en conserve peuvent être ajoutés directement dans
tout type de recette. Cependant, les haricots séchés (en particulier
les haricots rouges) doivent être trempés dans de l'eau et bouillis au
préalable. Après avoir bouilli 3 fois leur volume d'eau non salée, verser
l'eau et ajouter les haricots dans la recette. REMARQUE : Les haricots
doivent être ramollis complètement avant d'être combinés avec des
aliments sucrés et/ou acides, car ces derniers ont un effet durcisseur
sur les haricots. Dans ce cas, les haricots doivent mijoter jusqu'à ce
qu'ils soient tendres après avoir bouilli (environ 1-1/2 heures).
Page 26

11
ENTRETIEN ET NETTOYAGE
1. Cet appareil doit être nettoyé après chaque utilisation. Avant de
nettoyer, débrancher la Base et laisser refroidir l'appareil. NE PAS
utiliser de détergents agressifs ou de nettoyants abrasifs sur les pièces
de l'appareil.
2. Laver la casserole et le couvercle dans de l'eau chaude savonnée. Bien
rincer et sécher. Si des aliments collent sur la surface de la casserole,
la remplir avec de l'eau chaude savonnée et laisser reposer pendant
une heure avant de nettoyer. La casserole et le couvercle peuvent être
nettoyés dans un lave-vaisselle. Pour empêcher des dommages, les
placer soigneusement dans un égouttoir pour qu'ils ne se touchent pas
ou tout autre objet pendant les cycles de nettoyage.
3. Nettoyer l'extérieur et l'intérieur de la Base avec un chiffon doux et
mouillé. Sécher avec un chiffon doux. NE PAS plonger la Base ou le
cordon d'alimentation dans l'eau ou tout autre liquide.
4. Pour retirer les tâches de la casserole en céramique, nettoyer le
nettoyant non abrasif ou appliquer une mince pâte de bicarbonate sur
les zones affectées.
Pour retirer les traces d'eau ou de dépôts de minéraux, nettoyer avec
du vinaigre blanc distillé. Nettoyer avec de l'eau chaude savonnée,
rincer et nettoyer avec un chiffon doux.
5. Stocker toutes les pièces de la mijoteuse uniquement lorsqu'elles sont
nettoyées et sèches.
Ne jamais stocker lorsque la casserole est humide. Pour stocker,
placer la casserole à l'intérieur de la base et envelopper le couvercle
dans un chiffon doux ou une serviette avant de le poser à l'envers sur
la casserole. Ne jamais enrouler le cordon d'alimentation autour de la
base.
Page 27

12
Couvercle en verre
Cuiseur
Utiliser votre Panier thermos de 0
,6Qt
Le panier de cuisson 0
,6Qt est conçu pour chauffer et garder vos sauces
préférées à une température parfait
e.
Notez bien que la mijoteuse n'est p
as conçue pour la viande crue. Si
votre recette comprend de la viand
e, assurez-vous que les aliments sont
complètement cuits avant de les pl
acer dans la mini mijoteuse.
1.
Remplir la mini mijoteuse avec la sauce, le jus ou le chocolat préparé.
Ne pas verser plus de 1-1/4 tasse (300 ml). Recouvrir avec le couvercle
en verre.
2.
Brancher votre mini mijoteuse dans une prise CA uniquement 120v
60 Hz.
3.
Chauffer les aliments pendant 15-60 minutes ou jusqu'à ce que la
sauce ou le chocolat soit complètement fondu. Il est important de
remuer occasionnellement le contenu de la mini mijoteuse pendant la
cuisson pour que la chaleur soit distribuée de façon homogène.
4.
Retirer le couvercle pour le service. La sauce restera à une températur
e
parfaite. Remuer de temps en temps.
REMARQUE :
Nous conseillons de ne pas utiliser votre mini mijoteuse
pour un service de plus de 3 heure
s.
Nettoyage de votre Panier thermos de 0
,6Qt
Assurez-vous toujours que la mijot
euse soit débranchée et froide avant de
l
a nettoyer. IMPORTANT : Le récipient interne ne résistera pas à un choc lié
à un changement de température s
oudain. Pour laver votre mini mijoteuse
j
uste après son refroidissement, utiliser de l'eau chaude. Ne JAMAIS utilise
r
de l'eau froide si le récipient est en
core chaud.
Panier thermos de 0,6Qt
Page 28

13
RECETTES
RÔTI DE BOEUF
3 lb. (1,4 kg.) rôti
1 cuillère à café (5 ml) huile végétale
1-1/2 cuillère à café (8 ml) sel
1/4 cuillère à café (1,2 ml) piment
4 pommes, épépinées et coupées en gros
morceaux
1 oignon, découpé
1/2 tasse (125 ml) jus de pomme
3 cuillères à soupe (45 ml) farine
3 cuillères à soupe (45 ml) eau
Enlever l'excès de gras du rôti et enduire la viande d'huile. Saupoudrer de
sel et de piment. Placer les pommes et les oignonsau fond de la casserole
en céramique, puis placer le rôti au-dessus du mélange. Verser le jus de
pomme. Couvrir et laisser cuire sur le réglage Bas pendant 8 à 10 heures.
Retirer le rôti.
Former une pâte avec la farine et l'eau et mélanger avec la graisse de rôti
dans la casserole en céramique pour faire de la sauce et faire cuire jusqu'à
ce qu'elle s'épaississe. Découper le rôti et servir avec la sauce.
REMARQUE : Votre mini mijoteuse ne contient pas de récipient amovible.
Pendant le nettoyage, il est très important de s'assurer que la base, le
cordon et le boîtier ne soit pas immergé dans l'eau.
Une fois que la mini mijoteuse est vidée de son contenu, la remplir avec
de l'eau savonneuse chaude ou tiède pour détacher les aliments restants.
Pour de meilleurs résultats, laisser tremper pendant 15 - 30 minutes. Retirer
l'eau chaude savonneuse et laver soigneusement l'intérieur du récipient.
Utiliser un chiffon, une éponge couverte d'un let en nylon ou une spatule
en caoutchouc pour racler doucement les résidus de nourriture. Rincer la
mijoteuse et la sécher correctement.
Ne jamais utiliser de nettoyants abrasifs ou d'éponge à récurer sur les
pièces de la mini mijoteuse.
Vous pouvez laver le couvercle en verre avec de l'eau chaude savonneuse.
Rincer et sécher correctement.
Essuyer l'extérieur de la mini mijoteuse avec un chiffon propre humide et
sécher avec un chiffon doux sec.
Page 29

14
CHILI
2 lbs. (900 g) bœuf
2 boîtes haricots rouges, lavés et égouttés
1 large boîte de tomates, égouttées
2 oignons, coupés en gros dés
1 poivron, coupé en gros dés
2 gousses d'ail, pelés et émincés
2 cuillères à soupe (30 ml) poudre de chili
1 cuillère à café (5 ml) cumin
1 cuillère à café (5 ml) piment
1/2 cuillère à café (3 ml) sel
Dans une poêle, faire dorer le bœuf haché et faire sécher le gras.
Ajouter tous les ingrédients dans la casserole en céramique et mélanger.
Couvrir et laisser cuire sur le réglage Bas pendant 9 à 10 heures.
CASSEROLE POUR POULET ET LEGUMES
6 demi-poitrines de poulet, os dans (3-4 lbs,
1,4-1,8g)
1/4 cuillère à café (1,5 ml) paprika
1 cuillère à café (5 ml) sel
1/4 (1,5 ml) poivre blanc
2 cuillère à café (10 ml) poudre de poulet
2 tasses (500 ml) champignons, découpés
1 petit oignon, petits dés
1 tasse (250 ml) petites carottes
3/4 tasse (180 ml) vin blanc
1/2 tasse (125 ml) lait évaporé
2 cuillères à soupe (30 ml) amidon de maïs
Retirer la peau du poulet. Mélanger le paprika, le sel et le piment.
Saupoudrer sur le poulet. Placer le poulet dans la casserole en céramique.
Ajouter la poudre de poulet, les champignons et l'oignon. Verser le vin par
dessus. Ne pas mélanger.
Couvrir et laisser cuire sur le réglage B Élevé pendant 2-1/2 à 3 heures.
Retirer le poulet et les légumes et conserver chaud. Dans une petite
casserole, mélanger le lait évaporé et l'amidon de maïs jusqu'à ce que le
mélange devienne onctueux. Mélanger progressivement dans 2 tasses
Page 30

15
du liquide de cuisson. Mélanger avec la chaleur réglée sur Moyen jusqu'à
ce que le mélange bouillisse et s'épaississe. Servir avec du poulet et des
légumes.
SOUPE AUX NOUILLES ET POULET
3 lbs. (1,4 kg) poulet, découpé
2 qts. (2 L) eau
1 cuillères à soupe (15 ml) sel
1/2 cuillère à café (3 ml) piment
1 oignon, coupé en dés
2 tiges de céleri, coupées en dés
2 carottes, coupées en dés
1 feuille de laurier
1/3 tasse (85 ml) persil
6 oz. (140 g) nouilles
Placer tous les ingrédients à l'exception des nouilles dans la casserole en
céramique. Couvrir et laisser cuire sur le réglage Bas pendant 7 heures.
Retirer le poulet. Retirer les os de la viande. Jeter les os et couper le poulet
en petits morceaux. Remettre le poulet dans le bouillon et ajouter les
nouilles. Laisser cuire pendant 30 minutes sur Élevé. Retirer la feuille de
laurier et servir.
HARICOTS AU FOUR
2 boîtesde haricots blancs
1/3 tasse (85 ml) mélasse
1/4 tasse (60 ml) sucre brun
1 oignon, coupé en dés
1/4 lb (60 g) bacon, coupé en dés
1 cuillères à soupe (15 ml) moutarde
1/2 cuillère à café (3 ml) sel
Rincer les haricots. Mélanger tous les ingrédients dans la casserole en
céramique et laisser cuire sur Moyen pendant 7 heures ou jusqu'à ce que
les haricots soient tendres.
Page 31

MSC176TGDIP
MD-YHB06
GUARDAR ESTE MANUAL PARA FUTURAS REFERENCIAS
Cook
Mode
STOP
LowMed High Warm
Cook
Time
Manual de instrucciones
Olla de Cocción Lenta
Page 32

2
INSTRUCCIONES DE
SEGURIDAD IMPORTANTES
Cuando se utiliza cualquier artefacto eléctrico siempre se deben seguir
precauciones básicas de seguridad para reducir el riesgo de incendios,
descargas eléctricas y lesiones personales, incluyendo las siguientes:
1. Lea todas los instrucciones.
2. No toque las supercies calientes. Utilice las asas o los botones del
panel de control. El cuerpo del artefacto puede alcanzar altas temperaturas
si se utiliza durante un tiempo prolongado, manipúlelo con cuidado.
3. PRECAUCIÓN: Para reducir el riesgo de una descarga eléctrica, cocine
solamente en el recipiente de cocción desmontable.
4. Se requiere estricta supervisión cuando se utilice el artefacto cerca de
los niños.
5. Para protegerse contra descargas eléctricas, no sumerja el cable, el
enchufe ni el artefacto eléctrico en agua ni en ningún otro líquido.
6. No exceda el límite máximo del nivel de agua indicado en la la olla
interior de porcelana, de lo contrario el agua se derramará durante la
cocción.
7. Desenchufe el artefacto del tomacorriente cuando no esté en uso y
antes de limpiarlo. Deje enfriar el artefacto antes de colocar o retirar sus
piezas, y antes de limpiarlo.
8. No utilice el artefacto si el cable de alimentación o el enchufe están
dañados o si el artefacto no funciona correctamente o ha sido dañado de
alguna manera. Devuelva el artefacto al centro de servicio autorizado más
cercano para su revisión, reparación o mantenimiento.
9. El uso de accesorios no recomendados por el fabricante del artefacto
puede causar lesiones personales.
10. Solo para uso en un mueble o mostrador.
11. Utilice el artefacto solo para el n previsto.
12. No utilice este artefacto eléctrico en exteriores.
13. Tenga especial cuidado cuando mueva un artefacto que contenga
aceite caliente u otros líquidos calientes.
14. Evite que el cable cuelgue sobre el borde de una mesa o mostrador o
entre en contacto con supercies calientes.
15. Se provee un cable eléctrico corto para evitar que los niños jalen el
cable y reducir los riesgos de enredos o tropiezos que pueda causar un
cable largo.
Page 33

3
16. ADVERTENCIA: Tenga cuidado al derramar los alimentos ya que
pueden provocar quemaduras graves. Mantenga el artefacto y el cable
de alimentación fuera del alcance de los niños. No deje que el cable
cuelgue sobre el borde de un mostrador ni utilice un tomacorriente que se
encuentre debajo de un mostrador ni utilice un cable de extensión.
17. Antes de utilizar el artefacto por primera vez, asegúrese de que la
clasicación eléctrica del artefacto corresponde con la clasicación eléctrica
actual.
18. Para desconectar el artefacto, apague el control y retire el enchufe del
tomacorriente.
19. No coloque el artefacto sobre o cerca de una hornilla de gas o eléctrica
ni de un horno caliente.
20. NO añadir alimentos congelados a recipientes de cocina de cerámica
cuando estos estén CALIENTES. NO lavar con agua FRÍA cuando el
recipiente de cocina esté CALIENTE.
21. NO levantar la tapa cuando cocina, de hacerlo podría escaparse el
calor y podría ser necesario utilizar más tiempo de cocinado.
22. Para reducir el riesgo de una descarga eléctrica, cocine solamente en
el recipiente de cocción desmontable. No cocine los alimentos directamente
en la olla de aluminio.
23. NO colocar el recipiente de cerámica interior encima del fuego de gas.
24. Se requiere realizar el mantenimiento de olla de cocción lenta para
evitar cualquier tipo de rajadura o deterioro.
25. Este artefacto cuenta con un enchufe polarizado (una clavija es más
ancha que la otra). Para reducir el riesgo de una descarga eléctrica,
este artefacto cuenta, este enchufe está diseñado para entrar en un
tomacorriente polarizado de una sola manera. Si el enchufe no entra
correctamente en el tomacorriente, colóquelo al revés. Si aún así no entra,
póngase en contacto con un electricista calicado. No intente modicar el
enchufe de ninguna manera.
26. Importante: solamente transporte la olla de cocción lenta por las asas
laterales de la base de cocina. No transportar la olla por las asas de la
tapa, incluso si está cerrada.
27. USO DOMÉSTICO SOLAMENTE.
SOLO PARA USO DOMÉSTICO
Page 34

4
INTRODUCCIÓN
La olla de cocción lenta programable tiene un diseño práctico, atractivo y
fácil de utilizar que le ayudará a preparar comida para toda la familia con
muy poco esfuerzo. La olla de cerámica oval y la tapa de vidrio puede
utilizarse como una olla práctica en la que se puede llevar la comida a la
mesa. Es apta para usarla en el lavaplatos para facilitar su limpieza.
DESCRIPCIÓN DE LAS PARTES
1) Asa de la tapa
2) Tapa de vidrio
3) Palanca de bloqueo
4) Cable de bloqueo
5) Olla cerámica
6) Gancho
7) Asa lateral
8) Base de cocina
9) Control eléctrico
a) Pantalla digital
b) Modo de cocción
c) Botón del tiempo de cocción
d) Botón de STOP
e) Luces indicadoras
(BAJO, MEDIO, ALTO y CALIENTE)
ANTES DEL PRIMER USO
•
Desembalar y quitar todas las partes y materiales del paquete de
cartón.
•
NO conectar el cable eléctrico en una toma de corriente antes de leer
estas instrucciones.
•
Lavar la olla y la tapa en agua caliente y jabonosa. Aclarar con
abundante agua y secar.
•
Limpiar el interior y el exterior de la base con un paño limpio y húmedo.
Secar la olla y la tapa con un paño suave.
9a 9b 9c 9d 9e
1
3
2
4
5
6
7
6
7
8
Page 35

5
•
Colocar la olla de cocción lenta encima de una supercie seca.
Colocar la olla en la base y añadir dos tazas (500 ml) de agua. Cubrir
con la tapa y conectar el cable en la toma de corriente. Seguir las
instrucciones de la sección “Cómo utilizar la olla de cocción lenta" y
dejar que el aparato cocine durante 30 minutos.
•
Una vez pasado este tiempo pulsar el botón de Stop (apagado),
desconectar la olla de cocción lenta y dejar que se enfríe.
•
Enjaguar la olla y la tapa. Secar cuidadosamente y colocar de nuevo en
la base.
NOTA:
NO utilizar detergentes fuertes o limpiadores abrasivos para limpiar
ninguna parte del aparato.
NO sumergir la base, el cable eléctrico ni el enchufe en agua ni en ningún
otro líquido.
CÓMO UTILIZAR LA OLLA CERÁMICA
PRECAUCIONES IMPORTANTES: Como cualquier cerámica, la olla
puede agrietarse o romperse si no se maneja de manera adecuada.
Para evitar los daños a la olla:
•
Manipular con cuidado, como cualquier cerámica se puede romper.
•
Utilizar siempre manoplas cuando maneje recipientes calientes.
•
NO colocar la cacerola de cerámica caliente encima de la encimera.
Utilizar un trébede resistente.
•
NO colocar la olla de cerámica o la tapa encima de la cocina, debajo de
una fuente de calor o del microondas o de un horno tostador.
•
NO colocar la olla de cerámica o la tapa en el fregadero o encima de
supercies mojadas.
•
NO utilizar la olla de cerámica para hacer palomitas de maíz,
caramelizar azúcar o hacer caramelo.
•
NO utilizar limpiadores abrasivos, desengrasantes o cualquier objeto
que pueda dañar la olla de cerámica o la tapa.
•
NO reparar o utilizar cualquiera de las partes si está agrietada o rota.
* NO colocar la olla de cerámica en el frigoríco, en el horno ni encima de la cocina.
* NO lavar la base de la olla de cocción en el lavaplatos. LIMPIAR CON UN PAÑO
SOLAMENTE.
USO: Tanto la tapa de vidrio como la olla cerámica pueden limpiarse en el lavaplatos.
Page 36

6
CUIDADO: Utilizar solamente utensilios de plástico o de madera. Los
utensilios de metal pueden rayar o dejar marcas en la cerámica. La olla
puede lavarse a mano o en el lavaplatos.
NO dejar la olla de cerámica en agua por un período de tiempo demasiado
largo. Calentar la olla después que esta haya estado sumergida durante
demasiado tiempo puede provocar grietas en la supercie. Si es necesario
desengrasar el aparto utilizar solamente estropajos de plástico o nylon con
limpiadores no abrasivos.
•
NO someta nunca la olla a cambios de temperatura bruscos, como
quitarla de la nevera y ponerla directamente en el horno o sumergirla
en agua cuando está caliente.
•
NO añadir nunca agua fría a una olla cerámica caliente.
•
NO colocar nunca el aparato en contacto directo con una fuente de
calor intensa como encima de un hornillo o debajo de una fuente de
calor fuerte como un asador.
•
NO calentar nunca la olla cuando está vacía. No precalentar nunca la
base.
•
NO añadir nunca alimentos fríos de la nevera directamente en la olla.
•
Desconectar SIEMPRE la base y dejar que la olla se enfríe antes de
limpiarla.
CÓMO UTILIZAR LA TAPA DE VIDRIO
PRECAUCIONES IMPORTANTES: La tapa de vidrio puede romperse
debido a la exposición directa a fuentes de calor o por cambios de
temperatura bruscos. Roturas, grietas o rayas profundas pueden dañar
la tapa. Si la tapa está rota, agrietada o rayada no utilizarla. Desecharla y
realizar otro pedido.
Dejar SIEMPRE que la tapa se enfríe encima de una supercie seca
resistente al calor antes de su manipulación.
NO colocar nunca la tapa en una supercie mojada o fría ya que esto
puede provocar que se rompa o se agriete.
NO utilizar nunca la tapa de vidrio en un horno convencional o de
convección ni en un microondas.
CÓMO UTILIZAR LA OLLA DE COCCIÓN LENTA
Es fácil utilizar una olla de cocción lenta pero es diferente de la cocción
convencional.
Este folleto debe ser utilizado como guía general y contiene sugerencias y
consejos útiles para cocinar con la olla de cocción lenta con éxito. Uno de
Page 37

7
los benecios de la cocción lenta es que las comidas pueden prepararse
con antelación y se pueden ajustar el tiempo de cocción para que la comida
esté lista para ser servida en el momento adecuado. Hay muchas recetas
especialmente diseñadas para la cocción lenta y se pueden encontrar
fácilmente en Internet o en libros de recetas en su librería o biblioteca local.
1. Colocar la olla de cerámica en la base de la olla de cocción lenta.
Entonces colocar la tapa.
2. Extender completamente las palancas de bloqueo hacia afuera. Mover
entonces los cables de bloqueo para que encajen con los ganchos.
3. Bloquear las palancas de bloqueo al tirar de ellas hacia el centro de la
tapa y hacia abajo.
Precaución: Mantener los dedos alejadas de los cables de bloqueo
para evitar lesiones.
4. Para desbloquear, tirar de las palancas de bloqueo en la tapa hacia
afuera, hacia la posición abierta y desenganchar los cables.
5. Conectar el aparato a una toma de corriente. La pantalla digital
parpadeará “ ”.
6. Presionar el botón del modo de cocción y seleccionar Bajo, Medio, Alto
o Caliente.
(Pulse una vez para Bajo, dos para Medio, 3 para Alto y 4 para
Caliente); se mostrará la conguración predeterminada de 6 horas (6:00)
en la pantalla digital si ha seleccionado Bajo, Medio, Alto o Caliente.
Después de 3 segundos la luz indicadora se iluminará al lado de Bajo,
Medio, Alto o Caliente según la conguración seleccionada.
7. Establecer la cantidad de tiempo requerida al presionar el botón
de "tiempo de cocción". Cada vez que presione el botón de tiempo
de cocción el tiempo aumentará 30 minutos, hasta un máximo de
10 horas. Si no presiona el botón de tiempo de cocción durante 3
segundos el tiempo de cocción será el tiempo que se muestra en la
ventana de visualización.
NOTA: Si preere menos tiempo de cocción que la conguración
predeterminada de 6 horas, siga presionando el botón de tiempo de
cocción hasta pasadas las 10 horas y el tiempo de cocción mostrado
será de 30 minutos. Presione para aumentar el tiempo en incrementos
de 30 minutos.
8. Una vez que el tiempo de cocción haya terminado, la unidad cambiará
a "Caliente". El tiempo predeterminado del ciclo caliente es de 6 horas.
NOTA: Si preere menos tiempo de calentamiento que la conguración
predeterminada de 6 horas, siga presionando el botón de tiempo de
cocción hasta pasadas las 10 horas y el tiempo de cocción mostrado
será de 30 minutos. Presione para aumentar el tiempo en incrementos
de 30 minutos.
Page 38

8
9. Una vez que el tiempo de calentamiento ha pasado, la olla de cocción
lenta se apaga automáticamente. Las luces indicadores se apagarán y
la pantalla digital mostrará “ ”. Desconectar la olla de cocción lenta
de la toma eléctrica.
NOTA: Para detener el calentamiento durante el proceso de cocción,
presionar el botón de Stop (apagado). La pantalla digital parpadea
“ ”. Desconectar la olla de cocción lenta.
CONSEJOS ÚTILES PARA LA UTILIZACIÓN DE LA OLLA
DE COCCIÓN LENTA
•
Cocinar siempre lentamente con la tapa puesta. Está bien tener la tapa
bloqueada durante la cocción, pero no es necesario.
- No abra la tapa durante las 2 primeras horas de cocción; esto va a
permitir que el calor aumente ecientemente.
- Abra la tapa tan poco como sea posible para asegurar una cocción
uniforme. Cada vez que se levanta la tapa el tiempo de cocción
aumenta entre 15 y 20 minutos.
•
No es necesario remover cuando se utiliza una olla de cocción lenta.
Sin embargo, cuando se utiliza la cocción alta, remover ocasionalmente
puede ayudar a distribuir los sabores.
•
Para obtener los mejores resultados la olla debería estar medio llena.
•
Para sopas y estofados, dejar un espacio de 5 cm (2 pulgadas) entre
los alimentos y la parte superior para permitir que los ingredientes se
cocinen a fuego lento. Con la cocción Alta, comprobar el contenido
de la olla de cocción lenta de vez en cuando ya que algunas sopas y
estofados pueden llegar a hervir.
•
Cuando se utiliza la olla de cocción lenta es mejor utilizar cortes de
carnes menos tiernos, más baratos que las variedades más caras.
Quitar el exceso de grasa antes de cocinar si hace falta, dorar la carne
con una sartén de metal antes de añadir la carne a la olla.
•
Cuando más grande sea el contenido de grasa de la carne menos
líquido hace falta. Al cocinar carne con grandes contenidos de grasa,
colocar rodajas de cebolla grandes debajo de la carne para que no se
cocine encima de la grasa. Los asados, cuando se cocinan en cocción
Baja, pueden preparase sin añadir ningún líquido.
•
Utilizar un termómetro para determinar si la carne se ha cocinado a su
gusto.
•
El pescado o marisco fresco o congelado debe añadirse a la olla
solamente una hora antes de servir ya que pueden romperse si se
cocinan durante demasiado tiempo.
Page 39

9
•
Ya que los vegetales crudos tardan más tiempo en cocinarse que la
carne, es mejor cortarlos en pequeñas piezas de 12 mm de diámetro
antes de añadirlos a la olla.
•
La leche, la crema agria u otros productos lácteos deben añadirse
antes de servir ya que estos tienden a estropearse si se cocinan
durante demasiado tiempo.
También puede utilizar leche condensada o evaporada. El queso
procesado también puede utilizarse en sustitución del queso madurado.
•
El arroz y la pasta pueden cocinarse por separado o añadirse sin
cocinar a los otros ingredientes dos horas antes de servir. Si la pasta es
añadida sin cocinar previamente debe haber 2 tazas (500 m) de líquido
como mínimo en la olla. Remover ocasionalmente para evitar que se
pegue.
•
Para espesar jugos o hacer salsas al nal del ciclo de cocción hacer
una mezcla homogénea con 2-4 cucharadas (30-60 ml) de harina
de maíz 1/4 de taza (60 ml) de agua y 2 cucharadas. (30 ml) de
mantequilla. Quitar los alimentos cocinados de la olla. Añadir la mezcla
de jugos que quedan en la olla, colocarlo en la posición de Alto y
mezclarlo hasta que el líquido espese.
•
No se preocupe si los alimentos están durante más tiempo del
planeado en la olla de cocción lenta. La olla de cocción lenta cocina
muy lentamente y no importa si llega un poco tarde.
INSTRUCCIONES DE RECETAS GENERALES
1. Prepare las recetas según las instrucciones.
2. Coloque los alimentos en la olla de cerámica y cúbrala con la tapa.
3. Utilice la siguiente tabla para que le ayude a adaptar sus recetas
preferidas a la olla de cocción lenta. Estos tiempos son aproximados y
deberían usarse como directrices generales.
TABLA DE CONVERSIÓN DE TIEMPOS
Cocina
convencional
Tiempo con la olla de cocción lenta
Tiempo Bajo Medio Alto
30 minutos 7-8 horas 5-6 horas 3-4 horas
35-60 minutos 8-9 horas 6-7 horas 4-5 horas
1-3 horas 9-10 horas 7-8 horas 5-6 horas
Page 40

10
4. Siga las instrucciones que encontrará en la sección de "Cómo utilizar
la olla de cocción" lenta.
5. Mediante el uso de un guante o una manopla levante la tapa con
cuidado. PRECAUCIÓN: al levantar la tapa, agarre el asa y levante
la tapa despacio por el lado que está alejado de usted para permitir
que el vapor escape antes de levantar la tapa por completo. Para
evitar quemaduras, aguantar siempre la tapa para que el vapor que se
escapa no toque sus manos, brazos ni cara.
6. Mediante el uso de un guante o una manopla agarrar la olla de
cerámica por las asas de ambos lados para quitarla de la base.
7. Colocar siempre un trébede debajo de la cazuela antes de colocarla
encima de la mesa o de la encimera. Servir el contenido.
CONSEJOS ÚTILES PARA ADAPTAR LAS RECETAS
•
La cocción Baja es recomendada para cocinar durante toda el día. La
mayoría de combinaciones de carne y vegetales requieren 7 horas
como mínimo de cocción Baja.
•
Para potenciar los sabores utilizar hiervas y especies enteras durante
la preparación inicial. Si se utilizan hiervas o especies trituradas,
añadirlas durante la última hora de cocción.
•
El tiempo requerido de cocción puede variar debido a muchos factores.
El contenido de agua y grasa de los alimentos, su temperatura inicial y
el tamaño de las piezas afectará al tiempo de cocción. Por ejemplo, la
carne cortada en trozos pequeños se cocinará más rápidamente que
un asado entero. Ajustar el tiempo según sea conveniente.
•
Las recetas de verduras deben contener líquido para prevenir que se
quemen en los lados de la olla.
•
Puede escoger sustituir ingredientes en una receta. Por ejemplo, una
lata de 360 ml de caldo de pollo puede ser cambiada por una lata de
300 ml de sopa de tomate y añadir otros 60 ml de otro líquido como
agua o vino.
•
Los frijoles en lata se pueden añadir directamente a cualquier receta.
Sin embargo, los frijoles secos (especialmente los frijoles rojos) deben
remojarse en agua y hervirse primero. Después de hervirlos con 3 veces
su volumen de agua sin sal, desechar el agua y añadir los frijoles a la
receta. NOTA: Los frijoles deben estar completamente suaves antes
de combinarlos con alimentos dulces y/o ácidos, ya que estos tienen
un efecto endurecedor de los frijoles. En este caso, los frijoles deben
cocerse a fuego lento hasta que estén tiernos (entre 1 hora y 1 hora
y media).
Page 41

11
INSTRUCCIONES DE CUIDADO Y LIMPIEZA
1. Este aparato debe limpiarse después de cada uso. Desconectar
siempre la base y dejar que la olla se enfríe antes de limpiarla. NO
utilizar detergentes fuertes o limpiadores abrasivos para limpiar ninguna
parte del aparato.
2. Lavar la olla y la tapa en agua caliente y jabonosa. Aclarar con
abundante agua y secar. Si algún alimento se queda pegado a la
supercie de la olla, deberá llenarla con agua tibia jabonosa y dejarla
en remojo durante una hora antes de limpiarla. La cazuela y la tapa
pueden lavarse en el lavaplatos. Para evitar dañar las diferentes partes
hay que colocarlas cuidadosamente en la rejilla del lavaplatos de modo
que no se toquen ni toquen ningún otro objeto durante el ciclo de
limpieza.
3. Limpiar el interior y el exterior de la base con un paño húmedo. Secar
con un paño suave. NO sumergir la base, el cable eléctrico ni el
enchufe en agua ni en ningún otro líquido.
4. Para quitar cualquier mancha de la olla de cerámica limpiarla con
limpiadores no abrasivos o aplicar una na pasta de bicarbonato en las
áreas afectadas.
Para eliminar las manchas de agua o los depósitos minerales limpiarla
con vinagre blanco destilado. Limpiar la olla con agua caliente
jabonosa, aclarar y secar con un paño suave.
5. Guardar todas las piezas de la olla de cocción lenta solamente cuando
estén limpias y secas.
Nunca guarde la cazuela si está mojada. Para guardarla, colocar la
cazuela dentro de la base y envolver la tapa con un paño suave o una
toalla antes de almacenar la olla boca abajo. No envolver nunca el
cable eléctrico alrededor de la base.
Page 42

12
Tapa de vidrio
Olla de cocción
Uso del recipiente para mantener el calor de 473 ml
El recipiente para mantener el calor de 473 ml está diseñado para calentar
y mantener sus aderezos, salsas y jugos en una temperatura perfecta.
Es importante tener en cuenta que no se puede utilizar con carnes crudas.
Si su receta incluye carne, debe asegurar que los alimentos se cocinan por
completo antes de colocarlos en la mini olla de cocción lenta.
1. Llenar el mini recipiente con el aderezo, la salsa, el jugo o el chocolate.
No llenarlo más que 1-1/4 tazas (300 ml). Cubrir la unidad con la tapa
de vidrio.
2. Enchufar su mini olla de cocción lenta en una toma de corriente alterna
120 v 60 Hz solamente.
3. Calentar la comida durante 15-60 minutos o hasta que el aderezo, la salsa,
el jugo o el chocolate esté completamente disuelto. Es importante mezclar
el contenido de la mini olla de cocción lenta ocasionalmente mientras se
calienta o se deshace para asegurar una distribución uniforme del calor.
4. Quitar la tapa para servir. La salsa se mantendrá en la temperatura de
servir perfecta. Remover ocasionalmente.
NOTA: No recomendamos utilizar la mini olla de cocción lenta para servir
durante más de 3 horas.
Limpieza del recipiente caliente de 473 ml
Asegúrese siempre que la olla de cocción lenta está desenchufada y fría
antes de limpiarla. IMPORTANTE: El interior del recipiente no soportará los
cambios de temperatura repentinos. Lavar su mini olla de cocción lenta una
vez fría y utilizar agua caliente. NO utilice nunca agua fría si el recipiente
está todavía caliente.
Recipiente para mantener el calor de 473 ml
Page 43

13
RECETAS
TERNERA ASADA A LA CAZUELA
1,4 kg de carne de ternera
1 cucharadita (5 ml) de aceite vegetal
1-1/2 cucharadita (8 ml) de sal
1/4 cucharadita (1,2 ml) de pimienta
4 manzanas, sin corazón y cortadas en grandes
trozos
1 cebolla, cortada en rodajas
1/2 taza (125 ml) de zumo de manzana
3 cucharadas (45 ml) de harina
3 cucharadas (45 ml) de agua
Retirar el exceso de grasa de la carne y cubrir la carne con aceite.
Espolvorear con sal y pimienta. Colocar las manzanas y las cebollas en la
parte inferior de la cazuela de cerámica, luego colocar la mezcla encima.
Verter el zumo de manzana. Tapar y dejar cocer a temperatura baja durante
8-10 horas. Quitar el asado.
Hacer una pasta con la harina y el agua y mezclar en la cazuela de
cerámica para hacer la salsa y cocinar hasta que espese. Cortar el asado y
servir con la salsa.
NOTA: Su mini olla de cocción lenta no tiene un recipiente extraíble. Es
importante tomar medidas de cuidado especiales para asegurar que la
base, el cordón y el recipiente no entran en contacto con agua durante la
limpieza.
Después de vaciar el contenido de la mini olla de cocción lenta, llene el
recipiente con agua jabonoso caliente o tibia para despegar cualquier resto
de comida. Para obtener mejores resultados, dejarla en remojo durante
15 - 30 minutos. Desechar el agua jabonosa caliente y lavar el interior del
recipiente con cuidado. Utilizar un paño, una esponja recubierta de nilón
o una espátula de goma para eliminar suavemente cualquier resto de
comida. Lavar el recipiente y secarlo a fondo.
No utilice limpiadores abrasivos o limpiadores metálicos en cualquier parte
de la mini olla de cocción lenta.
Puede lavar la tapa de vidrio en agua jabonoso tibia. Aclarar con abundante
agua y secar.
Limpiar las supercies exteriores de la mini olla de cocción lente y secar
con un paño limpio y húmedo. Secar con un paño suave.
Page 44

14
CHILI CON CARNE
900 g de carne picada
2 latas de frijoles, lavados y escurridos
1 lata grande de tomates, escurridos
2 cebollas, a trozos grandes
1 pimiento verde, a trozos grandes
2 dientes de ajo, pelados y cortados
2 cucharadas (30 ml) de chili en polvo
1 cucharadita (5 ml) de comino
1 cucharadita (5 ml) de pimienta
1/2 cucharadita (3 ml) de sal
En una sartén grande dorar la carne picada y retirar el exceso de grasa.
Añadir todos los ingredientes en la olla cerámica y remover. Cubrir y
cocinar a baja temperatura durante 9-10 horas.
ESTOFADO DE POLLO Y VERDURAS
6 pechugas de pollo, con hueso (3-4 libras, 1,4-1,8 g)
1/4 cucharadita (1,5 ml) de pimentón
1 cucharadita (5 ml) de sal
1/4 (1,5 ml) de pimienta blanca
2 cucharaditas (10 ml) de caldo de pollo en polvo
2 tazas (500 ml) de champiñones, cortados
1 cebolla pequeña, a trozos pequeños
1 taza (250 ml) de mini zanahorias
3/4 tazas (180 ml) de vino blanco
1/2 tazas (125 ml) de leche evaporada
2 cucharadas (30 ml) de harina de maíz
Quitar la piel del pollo. Mezclar el pimentón, la sal y la pimienta.
Espolvorearlo encima del pollo. Colocar el pollo en la olla de cerámica.
Añadir el caldo de pollo en polvo, los champiñones y la cebolla. Verter el
vino encima. No mezclar.
Cubrir y cocinar a alta temperatura durante 2-1/2 y 3 horas. Quitar el pollo y
los vegetales y dejarlos en caliente. En una olla pequeña mezclar la leche
evaporada y la harina de maíz hasta que esté suave. Verter poco a poco
2 tazas del líquido de cocción. Remover a fuego medio hasta que la mezcla
hierva y espese. Servir con pollo y vegetales.
Page 45

15
SOPA DE FIDEOS DE POLLO
1,4 kg de pollo, troceado
2 cuartos de galón (2 litros) de agua
1 cucharada (15 ml) de sal
1/2 cucharadita (3 ml) de pimienta
1 cebolla, picada
2 tallos de apio, cortados en trozos
2 zanahorias, cortadas en trozos
1 hoja de laurel
1/3 tazas (85 ml) de perejil
140 g de deos
Colocar todos los ingredientes menos los deos en la olla de cerámica.
Cubrir y cocinar a baja temperatura durante 7 horas. Quitar el pollo. Quitar
la carne del hueso. Tirar los huesos y cortar el pollo en pequeños trozos.
Volver a poner el pollo en el caldo y añadir los deos. Cocinar a alta
temperatura durante 30 minutos. Quitar la hoja de laurel y servir.
FRIJOLES COCIDOS
2 latas de frijoles blancos
1/3 taza (85 ml) de melazas
1/4 taza (60 ml) de azúcar moreno
1 cebolla, picada
60 g tocino, a dados
1 cucharada (15 ml) de mostaza
1/2 cucharadita (3 ml) de sal
Lavar los frijoles. Mezclar todos los ingredientes en la olla de cerámica
y cocinar a fuego medio durante 7 horas o hasta que los frijoles estén
tiernos.
 Loading...