

Page 1

Microwave Oven
Model: MMO19S3AST
en
INSTRUCTION MANUAL
Power supply: 120V
~
Frequency: 60Hz
Warning:
Before using this product,
please read this manual carefully
and keep it for future reference.
The design and specifications
are subject to change without
prior notice for product
improvement. Consult with your
dealer or manufacturer for
details.
Free 3 months
extension* of the
original limited warranty
period! Simply text a
picture of your proof of
purchase to:
1-844-224-1614
*The warranty extension is for the
three months immediately following
the completion of the product’s
original warranty period.
Page 2

Dear user
THANK YOU and CONGRATULATIONS on your purchase of this
high-quality Midea product. Your Midea represents
the state of the art, and is designed for reliable, trouble-free
performance. Please take a moment to register your new
Microwave Oven.
Register your new at www.midea.com under
the Support tab.
For future reference, record your product model and serial
numbers located on the inside frame of the
Model Number________________________________________
Serial Number_________________________________________
.
Microwave Oven.
Microwave Oven
Microwave Oven.
.
Contents
Precautions to avoid possible Exposure to excessive
microwave Energy....................................................................3
Specifications..................................................................... ......3
Important safety instructions...............................................4
Grounding instructions...........................................................6
Radio interference....................................................................7
Utensils..........................................................................................7
Part names...................................................................................9
Control panel..............................................................................10
Manual cooking..........................................................................11
Sensor cooking..........................................................................16
One touch cook.........................................................................20
Auto cooking..............................................................................24
Auto defrost................................................................................29
Convenient features.................................................................34
Maintenance................................................................................42
...
Page 3

PRECAUTIONS TO AVOID POSSIBLE
3
EXPOSURE TO EXCESSIVE
MICROWAVE ENERGY
(a) Do not attempt to operate this oven with the door open since open
door operation can result in harmful exposure to microwave energy. It
is important not to defeat or tamper with the safety interlocks.
(b) Do not place any object between the oven front face and the door
or allows
(c) Do not operate the oven if it is damaged. It is particulary important that
the oven door close properly and that there is no damage to the:
(1) DOOR (bent)
(2) HINGES AND LATCHES (broken or loosened)
(3) DOOR SEALS AND SEALING SURFACES
(d) The oven should not be adjusted or repaired by anyone except
properly qualified service personnel.
food residue to build up between the oven and door.
Specifications
Model:
Rated Voltage:
Rated Input Power(Microwave):
Rated Output Power(Microwave):
M
M O19S3AST
120V~60Hz
1550 W
1000 W
Specifications
Instuctions
Safety
Materials Part Names
Operation Maintenance
Page 4

IMPORTANT SAFETY INSTRUCTIONS
Specifications
Safety
Instuctions
MaterialsPart Names
Operation
Maintenance
4
WARNING
When using electrical appliances basic safety precautions should be
followed, including the following:
WARNING - To reduce the risk of burns, electric shock, fire, injury to persons
or exposure to excessive microwave energy:
1. Read all instructions before using the appliance.
2. Read and follow the specific: "PRECAUTIONS TO AVOID POSSIBLE
EXPOSURE TO EXCESSIVE MICROWAVE ENERGY " found on page 3.
3. This appliance must be grounded. Connect only to properly grounded
outlet. See "GROUNDING INSTRUCTIONS" found on page 6.
4. Install or locate this appliance only in accordance with the provided
installation instructions.
5. Some products such as whole eggs and sealed containers - for example,
closed glass jars - are able to explode and should not be heated in this
oven.
6. Use this appliance only for its intended use as described in the manual. Do
not use corrosive chemicals or vapors in this appliance. This type of oven
is specifically designed to heat, cook or dry food. It is not designed for
industrial or laboratory use.
7. As with any appliance, close supervision is necessary when used by
children.
8. Do not operate this appliance if it has a damaged cord or plug, if it is not
working properly, or if it has been damaged or dropped.
9. This appliance should be serviced only by qualified service personnel.
Contact nearest authorized service facility for examination, repair, or
adjustment.
10. Do not cover or block any openings on the appliance.
11. Do not store this appliance outdoors. Do not use this product near waterfor example, near a kitchen sink, in a wet basement, near a swimming
pool, or similar location.
12. Do not immerse cord or plug in water.
13. Keep cord away from heated surface.
14. Do not let cord hang over edge of table or counter.
15. When cleaning surfaces of door and oven, use only mild, nonabrasive
soaps, or detergent applied with a sponge or soft cloth.
16. To reduce the risk of fire in the oven cavity:
1). Do not overcook food. Carefully attend appliance when paper, plastic,
or other combustible materials are placed inside the oven to facilitate
cooking.
2). Remove wire twist-ties from paper or plastic bag before placing bag in
oven.
Page 5

3). If material inside of the oven ignite, keep oven door closed, turn oven
5
o, and disconnect the power cord, or shut o power at the fuse or
circuit breaker panel.
4). Do not use the cavity for storage purposes. Do not leave paper
products, cooking utensils, or food in the cavity when not in use.
17. Liquids such as water, coee, or tea are able to be overheated beyond
:
the boiling point without appearing to be boiling. Visible bubbling or
boiling when the container is removed from the microwave oven is not
always present.
THIS COULD RESULT IN VERY HOT LIQUID SUDDENLY BOILING OVER
WHEN
THE CONTAINER IS DISTURBED OR A UTENSIL IS INSERTED
INTO THE
LIQUID.
To reduce the risk of injury to persons:
1) Do not overheat the liquid.
2) Stir the liquid both before and halfway through heating it.
3) Do not use straight-sided containers with narrow necks.
4) After heating, allow the container to stand in the microwave oven for a
short time before removing the container.
5) Use extreme care when inserting a spoon or other utensil into the
container.
18. Do not operate any heating or cooking appliance beneath the appliance.
(Exception: A microwave oven qualified for such as lye based
above another heating appliance.)
19. Do not mount unit over or near any portion of heating or cooking
appliance. (Exception: A microwave oven qualified for use above
another heating appliance.)
20. Do not mount over a sink.
21 . Do not store anything directly on top of the appliance surface when the
appliance is in operation.
22. Clean Ventilation Hoods Frequently -
Do not let grease accumulate on
the hood or filter.
23. When cooking food on the stove top under the oven, turn on the fan.
24. Use care when cleaning the vent-hood filter. Corrosive cleaning agents,
such aslye-based oven cleaners, may damage the filter.
25. Suitable for use above both gas and electric cooking equipment.
Specifications
Instuctions
Safety
Materials Part Names
Operation Maintenance
SA E THESE INSTRUCTIONS
V
Page 6

GROUNDING INSTRUCTIONS
6
This appliance must be grounded. In the event of an electrical short circuit,
grounding reduces the risk of electric shock by providing an escape wire for
the electric current. This appliance is equipped with a cord having a grounding wire with a grounding plug. The plug must be plugged into an outlet that
is properly installed and grounded.
WARNING
WARNING - Improper use of the grounding can result in a risk of electric
Specifications
shock.
Consult a qualified electrician or serviceman if the grounding instructions are
not completely understood, or if doubt exists as to whether the appliance is
properly grounded. If it is necessary to use an extension cord, use only a
3-wire extension cord that has a 3-blade grounded plug, and 3-slot recepta-
Safety
Instuctions
cle that will accept the plug on the appliance. The marked rating of the
extension cord shall be equal to or greater than the electrical rating of the
appliance.
DANGER - Electric Shock Hazard
MaterialsPart Names
Touching some of the internal components can cause serious personal injury
or death.
Do not disassemble this appliance.
WARNING - Electric Shock Hazard
Improper use of the grounding can result in electric shock. Do not plug into
an outlet until appliance is properly installed and grounded.
1. A short power supply cord is provided to reduce the risks resulting from
becoming entangled in or tripping over a longer cord.
2. Longer cord sets or extension cords are available and may be used if care
is exercised in their use.
Operation
3. If a long cord or extension cord is used:
1) The marked electrical rating of the cord set or extension cord should be
at least as great as the electrical rating of the appliance.
2) The extension cord must be a grounding-type 3-wire cord.
3) The longer cord should be arranged so that it will not drape over the
Maintenance
counter top or tabletop where it can be pulled on by children or tripped
over unintentionally.
Page 7

RADIO INTERFERENCE
7
1. Operation of the microwave oven may cause interference to your radio, TV
or similar equipment.
2. When there is interference, it may be reduced or eliminated by taking the
following measures:
1) Clean door and sealing surface of the oven
2) Reorient the receiving antenna of radio or television.
3) Relocate the microwave oven with respect to the receiver.
4) Move the microwave oven away from the receiver.
5) Plug the microwave oven into a dierent outlet so that microwave oven
and the other device
are on dierent branch circuits.
Specifications
Instuctions
Safety
UTENSILS
CAUTION - Personal Injury Hazard
Tightly-closed utensils could explode. Closed containers should be opened
and plastic pouches should be pierced before cooking.
See the instructions on "Materials you can use in microwave oven or to be
avoided in microwave oven."
There may be certain non-metallic utensils that are not safe to use for
microwaving. If in doubt, you can test the utensil in question following the
procedure below.
Utensil Test:
1. Fill a microwave-safe container with 1 cup of cold water (250ml) along with
the utensil in question.
2. Cook on maximum power for 1 minute.
3. Carefully feel the utensil. If the empty utensil is warm, do not use it for
microwave cooking.
4. Do not exceed 1 minute cooking time.
Materials Part Names
Operation Maintenance
Page 8

Materials you can use in microwave oven
8
Utensils Remarks
Browning dish Follow manufacturer* instructions. The bottom of browning dish
Dinnerware Microwave-safe only. Follow manufacturer's instructions. Do not
Glass jars Always remove lid. Use only to heat food until just warm. Most
Glassware Heat-resistant oven glassware only. Make sure there is no
Specifications
Oven cooking
bags
Paper plates
Safety
and cups
Instuctions
Paper towels Use to cover food for reheating and absorbing fat. Use with
Parchment
paper
Plastic Microwave-safe only. Follow the manufacturer* instructions.
MaterialsPart Names
Plastic wrap Microwave-safe only. Use to cover food during cooking to retain
Thermometers Microwave-safe only (meat and candy thermometers).
must be at least 3/16 inch (5mm) above the turntable. Incorrect
usage may cause the turntable to break.
use cracked or chipped dishes.
glass jars are not heat resistant and may break.
metallic trim. Do not use cracked or chipped dishes.
Follow manufacturer* instructions. Do not close with metal tie.
Make slits to allow steam to escape.
Use for short-term cooking/warming only. Do not leave oven
unattended while cooking.
supervision for short-term cooking only.
Use as a cover to prevent splattering or a wrap for steaming.
Should be labeled "Microwave Safe". Some plastic containers
soften, as the food inside gets hot. "Boiling bags" and tightly
closed plastic bags should be slit, pierced or vented as
directed by package.
moisture. Do not allow plastic wrap to touch food.
Operation
Maintenance
Wax paper Use as a cover to prevent splattering and retain moisture.
Materials to be avoided in microwave oven
Utensils Remarks
Aluminum tray May cause arcing. Transfer food into microwave-safe dish.
Food carton with
metal handle
Metal or metaltrim-
med utensils
Metal twist ties May cause arcing and could cause a fire in the oven.
Paper bags May cause a fire in the oven.
Plastic foam Plastic foam may melt or contaminate the liquid inside when
Wood Wood will dry out when used in the microwave oven and may
May cause arcing. Transfer food into microwave-safe dish.
Metal shields the food from microwave energy. Metal trim may
cause arcing.
exposed to high temperature.
split or crack.
Page 9
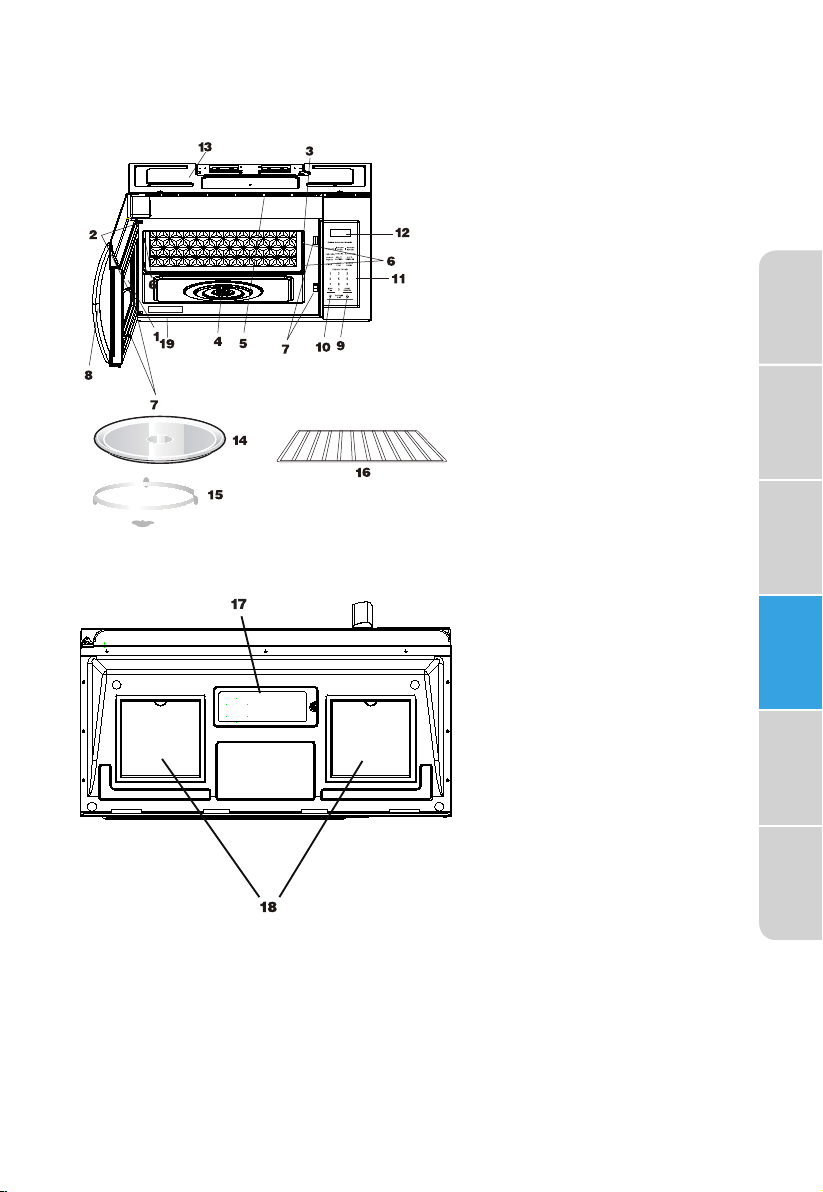
FRONT VIEW
9
BOTTOM VIEW
PART NAMES
1. Microwave oven door with see through window
2. Door hinges
3. Waveguide cover:
DO NOT REMOVE.
4. Turntable motor shaft
5. Microwave oven light
It will light when microwave oven is
operating or door is open.
6. Rack holders
7. Safety door latches
The microwave oven will not
operate unless the door is securely
closed.
8. Handle
9. Light hi/lo/o pad
Press the light hi/lo/off pad once
for high, twice for low and three
times to turn o the light.
10. Vent hi/lo/o pad
Press the vent hi/lo/off pad once
for high speed, twice for low speed
and three times to turn o the fun.
11. Auto-Touch control panel
12. Time display: Digital display, 99
minutes, 99 seconds
13. Ventilation openings
14. Removable turntable
The turntable will rotate clockwise
or counterclockwise. Only remove
for cleaning.
15. Removable turntable support
First, carefully place the turntable
support in the motor shaft in the
center of the microwave oven floor.
Place the support ring on the
microwave oven floor. Then, place
the turntable on the turntable
support securely.
16. Rack for 2-level cooking/ reheating
17. Light cover
18. Grease filters
19. Menu label
Specifications
Instuctions
Safety
Materials Part Names
Operation Maintenance
Page 10

CONTROL PANEL
10
The 7-digit interactive display spells out operating steps and
shows cooking hints.
1b
1d
1e
Specifications
Safety
Instuctions
MaterialsPart Names
Operation
Maintenance
1f
1i
1a
1g
1c
1h
(1) Display:
The display includes a clock and indicators
that show the time of day, cooking time
settings, cook powers, sensor, quantities, weights
and cooking functions selected.
1a. SENSOR:
Icon displayed when using sensor cook.
1b. TIMER:
Icon displayed when timer is being set or running.
1c. COOK:
Icon displayed when starting microwave cooking.
1d. DEFR:
Icon displayed when defrosting food.
1e. LOCK:
Icon displayed control lock.
1f. PRESS AGAIN FOR OPTIONS:
Icon displayed when additional options are
available.
1g. PRESS START:
Icon displayed when a valid function can be
started.
1i. MICRO:
Icon displayed when using micro .
(2) Sensor Reheat (5 different settings) (P19)
(3) Auto Cook (P )
(4) Auto Defrost (P2 )
(5) Power Level (11power levels available) (P1 )
(6) Numeric pads (0 thru 9)
(7) START +30 sec (P12)
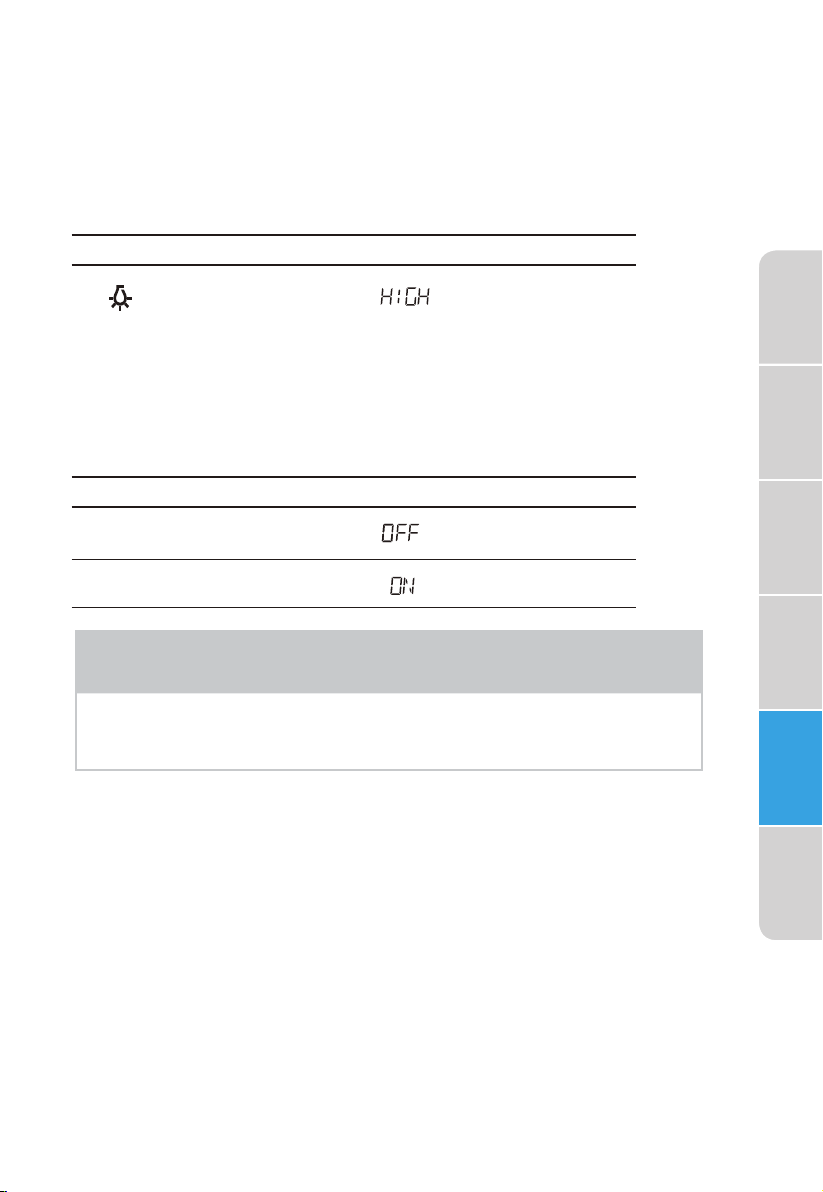
(8) Surface Light (High/Low/Off)
~Press this pad to adjust the brightness of
surface lights. (P41)
(9) Potato (1-4 potatoes) (P22)
(10) Sensor Cook (P16)
(11) Popcorn (P )
(12) Veggies (P
(13) Snacks (P )
(14) Melt Soften (P23)
(15) Timer (On-Off) (P40)
(16) Clock & Settings (P1 ) (P )
(17) Quick Start ( 9 instant key settings) (P12)
(18) Stop/Clear (P1 )
(19) Exhaust (High/Low/Off) ~ Use to turn the
exhaust fan off, or to adjust fan speed. (P )
(20) Turntable (On-Off) (P41)
24
9
20
20)
21
1
wave
5
1 34
41
Note:For detailed information, please go to relative page listed above.
Page 11

• Before operating your new oven make sure you read and under-
11
stand this Use and Care Guide completely.
• The clock can be disabled when the microwave is first plugged in
and the STOP key is selected.
To re-enable the clock foll w clock instructions.
To Set the Clock
o
• Suppose you want to enter the correct time of day 10:59
Specifications
Touch :
Display Shows:
1. User pref
2. 1 0 5 9
3.
"Start/Enter/+30 Sec"
NOTE
1. If you begin to enter in an incorrect time (e.g. 2:89) the 8
is an invalid digit and cannot be entered. Enter the correct
time.
2. If you touch Stop lear while setting the clock, the
display will show the last time of day set or a blank display if
no time of day has been set.
" "
C
MANUAL COOKING
Instuctions
Safety
Materials Part Names
Operation Maintenance
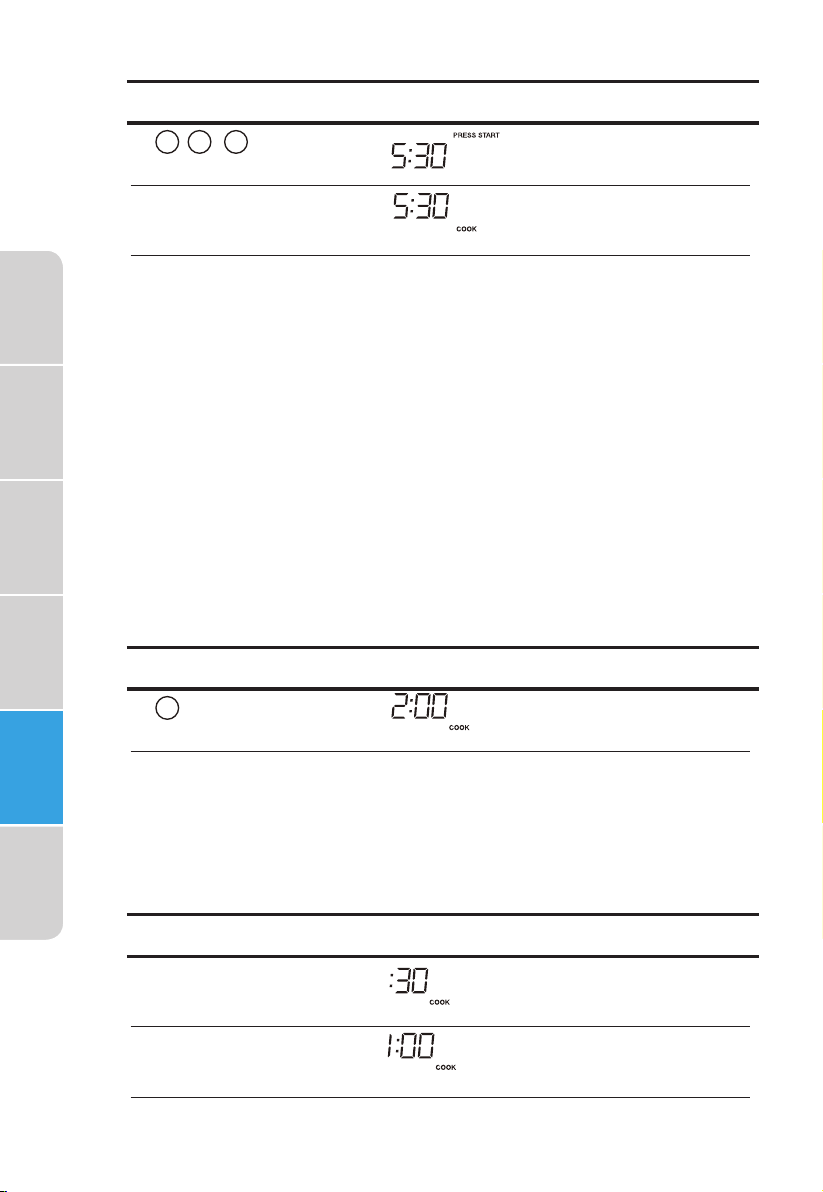
Time Cooking
Your Over the Range Microwave Oven can be programmed for
99 minutes 99 seconds (99 :99). Always enter the seconds after
the minutes, even if they are both zeros.
• Suppose you want to cook for 5 minutes, 30 seconds at 100%
power,
Page 12
Specifications
12
Touch :
Display Shows:
1. 5 3 0
2.
"Start/Enter/+30 Sec"
Time counting down
Interrupting Cooking
You can stop the oven during a cycle by opening the door. The
oven stops heating and the fan turns off, but the light stays on.
To restart cooking, close the door and ouch
+30 Sec .
"
t
S"tart/Enter/
"
Safety
Instuctions
MaterialsPart Names
Operation
Maintenance
If you do not want to continue cooking, open the door and
touch "Stop Clear"
Using One Touch Start
This is a time saving pad that will automatically start cooking 2
seconds after the numeric key is selected. Press 1 for 1 minute,
2 for two minutes, all the way to 9 for nine minutes.
Touch :
Display Shows:
1. 2
Time counting down
Using Add 30 Sec.
This is a time-saving pad. It is a simplified feature that lets you
quickly set and start microwave cooking at 100% power.
• Suppose you want to cook for one minute.
Touch :
1.
"Start/Enter/+30 Sec"
Display Shows:
2.
"Start/Enter/+30 Sec"
Time counting down
Page 13
NOTE
13
“Food” will be displayed if a quick start cooking cycle or +30 sec
key is not selected within 5 minutes of placing food in the
microwave. You must open then close the door again to clear
''Food" from the display.
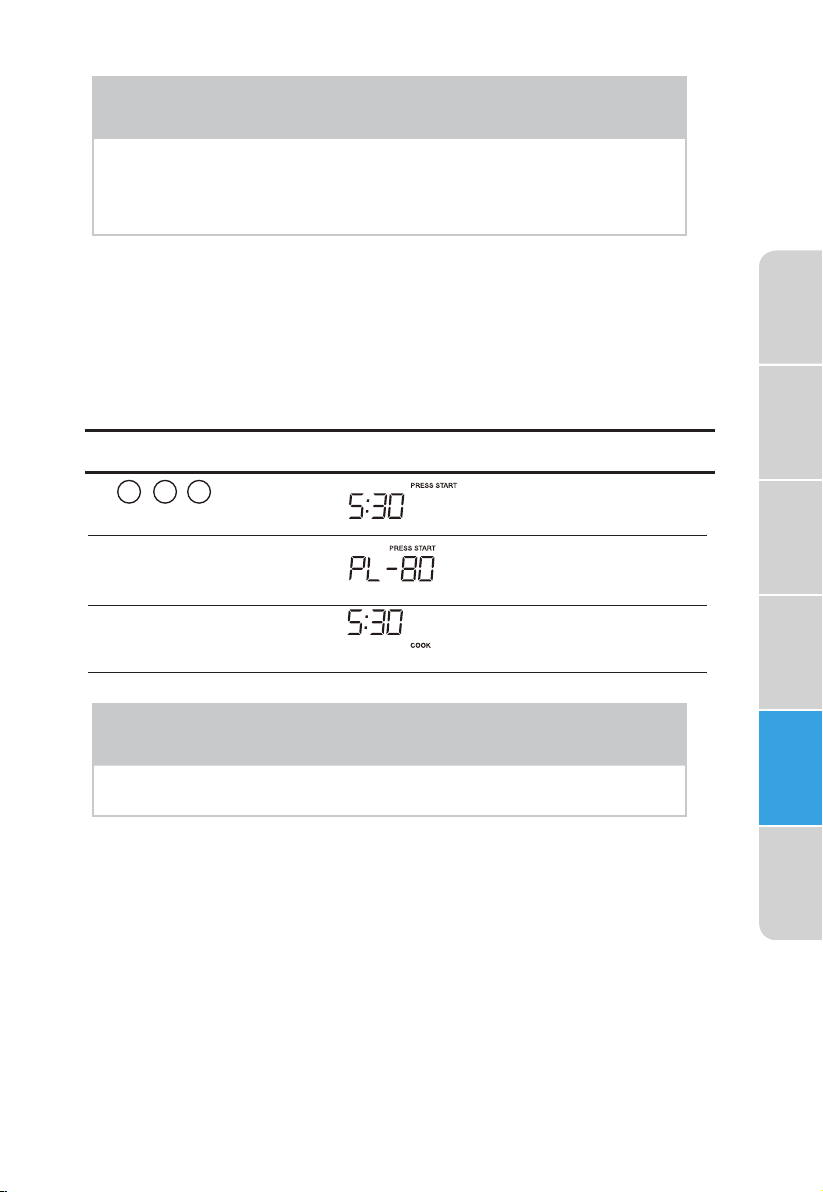
Setting Timed Cooking With Power Level
This feature lets you program a specific cook time and power.
For best results, there are 10 power level settings in addition to
HIGH (100%) power.
• Suppose you want to cook for 5 minutes, 30 seconds at 80%
power.
Specifications
Instuctions
Safety
Touch :
Display Shows:
1. 5 3 0
2.
"Power Level" 3 times
3.
"Start/Enter/+30 Sec"
Time counting down
NOTE
If you do not select a power level, the oven will automatically
cook a t HIGH (100% ) power.
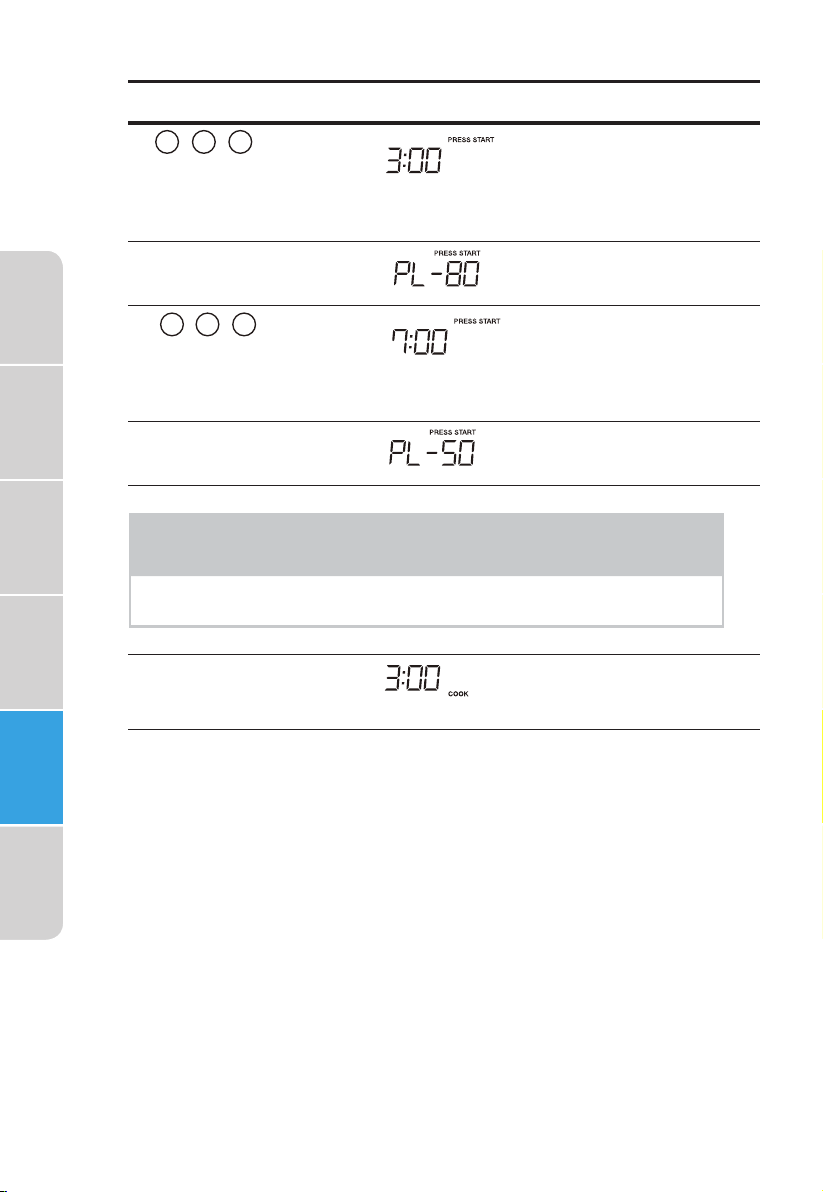
Setting Two-Stage Cooking
For best results , some recipes call for different power levels
during a cook cycle. You can program your oven for two power
level stages during the cooking cycle.
• Suppose you want to set a 2-stage cook cycle. The first stage is a
3 minute cook time at 80% cook power then a 7 minute cook time
at 50% cook power.
Materials Part Names
Operation Maintenance
Page 14
Specifications
14
Safety
Instuctions
Touch :
1. 3 0 0
To set a 3 minute
cook time for first
stage.
2.
"Power Level" 3 times
3. 7 0 0
To set a 7 minute
cook power for the
second stage.
"Power Level" 6 times
4.
Display Shows:
MaterialsPart Names
Operation
Maintenance
NOTE
You can program a "0" power second stage for standing time
inside the oven.
5.
"Start/Enter/+30 Sec"
Time counting down
Page 15

To Set Power Level
15
There are eleven preset power levels.
Using lower power levels increases the cooking time which is
recommended for foods such as cheese, milk and long slow
cooking of meats. Consult cookbook or recipes for specific
recommendations.
PRESS POWER LEVEL
PAD NUMBER OF TIMES
FOR DESIRED POWER
APPROXIMATE
PERCENTAGE
OF POWER
COMMON
WORDS FOR
POWER LEVELS
POWER LEVEL x 1 100% High
POWER LEVEL x 2 90%
POWER LEVEL x 3 80%
POWER LEVEL x 4 70% Medium High
POWER LEVEL x 5 60%
POWER LEVEL x 6 50% Medium
POWER LEVEL x 7 40%
POWER LEVEL x 8 30% Med Low/Defrost
POWER LEVEL x 9 20%
POWER LEVEL x 10 10% Low
POWER LEVEL x 11 0%
Using the Rack
The rack allows several foods to be cooked or reheated at one
time. However, for the best cooking and reheating, use Turntable
ON function and cook with SENSOR COOKING or AUTO COOKING
without the rack. When the rack is used, set time and power level
manually. Allow plenty of space around and between the dishes.
Pay close attention to the cooking and reheating progress. Reposition the foods and reverse them from the rack to turntable and/or
stir them at least once during any cooking or reheating time. After
cooking or reheating, stir if possible. Using a lower power level will
assist in better cooking and reheating uniformity.
Specifications
Instuctions
Safety
Materials Part Names
Operation Maintenance
Avoid:
• Storing the rack in the microwave oven when not in use.
• Popping popcorn with the rack in the microwave oven.
• Using any browning dish on the rack.
• Using SENSOR COOKING and AUTO COOKING with the rack.
• Cooking directly on the rack—use microwave-safe cookware.
Page 16

Specifications
16
NOTE
Turntable on/off function can be used in Manual Operation.
See page 41.
Manual Defrost
If the food that you wish to defrost is not listed on the Defrost
chart or is above or below the limits in the amount column on
the Defrost chart (see page 31-32), you need to defrost manually.
You can defrost any frozen food, either raw or previously cooked,
by using power level for 30%.
Safety
Instuctions
MaterialsPart Names
Operation
Maintenance
For either raw or previously cooked frozen food cook
approximately
minutes
for 1 pound of
4 minutes per pound. For example, defrost 4
frozen spaghetti sauce.
Always stop the oven periodically to remove or separate the
portions that are defrosted. If food is not defrosted at the end of
the estimated defrosting time, program the oven in 1 minute
increments on power level 30% until totally defrosted.
When using plastic containers from the freezer, defrost only long
enough to remove from the plastic in order to place in a
microwave-safe dish.
SENSOR COOKING
Sensor cooking has an electronic controlled sensor that detects
the vapor (moisture and humidity) emitted from the food as it
heats. The sensor adjusts the cooking times and power level for
various foods and quantities automatically.
Using Sensor Settings:
1. Be sure the exterior of the cooking container and the interior
of the oven are dry. Wipe off any moisture with a dry cloth or
paper towel.
2. The oven works with foods at normal storage temperature.
For example, popcorn would be at room temperature.
3. More or less food than the quantity listed in the chart should
be cooked following the guidelines in any microwave cookbook.
Page 17

4. During the first part of SENSOR COOKING, food name will
17
appear in the display. Do not open the oven door or press
the STOP clear pad during this part of the cycle. The meas urement of vapor will be interrupted.
When the sensor detects the vapor emitted from the food,
remainder of cooking time will appear. Door may be opened
when remaining cooking time appears in the display. At this
time, you may stir or season food, as desired.
5. If the sensor does not detect vapor properly when popping
popcorn, the oven will turn off, and the correct time of day
will be displayed. If the sensor does not detect vapor properly
when cooking other foods, AN ERROR CODE will be displayed,
and the oven will turn off.
6. Check food for temperature after cooking. If additional time is
needed, continue to cook manually.
Specifications
Instuctions
Safety
Covering Foods:
You may use the following to cover your foods:
1. Casserole lid.
2. Plastic wrap: Use plastic wrap recommended for microwave
cooking. Cover dish loosely; allow approximately 1/2 inch to
remain uncovered to allow steam to escape. Plastic wrap
should not touch food.
3. Wax paper: Cover dish completely; fold excess wrap under
dish to secure. If dish is wider than paper, overlap two pieces
at least one inch to cover.
Be careful when removing any covering to allow steam to escape
away from you.
NOTES FOR SENSOR COOKING
1. The final cooking result will vary according to the food condition
(e.g. initial temperature, shape, quality). Check food for temperature
after cooking. If additional time is needed, continue to cook
manually.
2. Stay near the oven while it’s in use and check cooking progress
frequently so that there is no chance of overcooking food.
3. When SENSOR COOKING is selected Turntable On is automatically
set for optimum cooking.
Materials Part Names
Operation Maintenance
Page 18

Sensor Cook
18
You can cook foods by pressing the sensor cook pad multiple
times. You don’t need to calculate cooking time or power level.
• Suppose you want to cook frozen breakfast
Specifications
Safety
Instuctions
MaterialsPart Names
Operation
Maintenance
Touch :
1.
"Sensor Cook"
"Sensor Cook"
2.
3.
"Sensor Cook"
4.
"Sensor Cook"
5.
"Start/Enter/+30 Sec"
Display Shows:
Sensor Cook chart
FOOD
1.Bacon 1-3 slices Place bacon strips on a microwave bacon
2. Frozen Dinner 10 oz./ 20 oz. Place in an appropriately sized microwave
3. Rice 1-2 cups Place rice and twice as much liquid (water,
4. Frozen Breakfast 8-12 oz. Place in an appropriately sized microwave
AMOUNT PROCEDURE
rack for best results. (Use dinner plate lined
with paper towels if rack is not available).
container. Cover with plastic wrap . After
cooking, stir and allow to stand for 3
minutes.
chicken or vegetable stock) in a 2 quart
microwave dish. Cover with plastic wrap and
vent. After cooking, allow to stand for 10
minutes. Stir for fluffier rice.
container. Cover with plastic wrap . After
cooking, stir and allow to stand for 3
minutes.
Page 19

Sensor Reheat
19
Touch :
1.
"Sensor Reheat"
"Sensor Reheat"
2.
3.
"Sensor Reheat"
4.
"Sensor Reheat"
5.
"Sensor Reheat"
"Start/Enter/+30 Sec"
6.
Display Shows:
Sensor Reheat chart
FOOD
Beverage 1 - 3 cups To reheat beverages.
Dinner Plate 1-2 Plates Place on a low plate. Cover with vented
Soup/Sauce 1 Cup Place in shallow microwavable casserole.
Casserole/Lasagna 10.5 Oz Place in a microwavable bowl or casserole.
AMOUNT PROCEDURE
Stir liquid briskly before and after heating to
avoid eruption.
plastic wrap.
Let stand 3 minutes after cooking.
Cover with vented plastic wrap. After
cooking, stir and let stand 3 minutes.
Cover with vented plastic wrap. After
cooking, stir and let stand 3 minutes.
Specifications
Instuctions
Safety
Materials Part Names
Operation Maintenance
Roll/Muffin 1-3 Pieces Place on paper towel. Do not cover.
Page 20
Specifications
20
Safety
Instuctions
ONE TOUCH COOKING
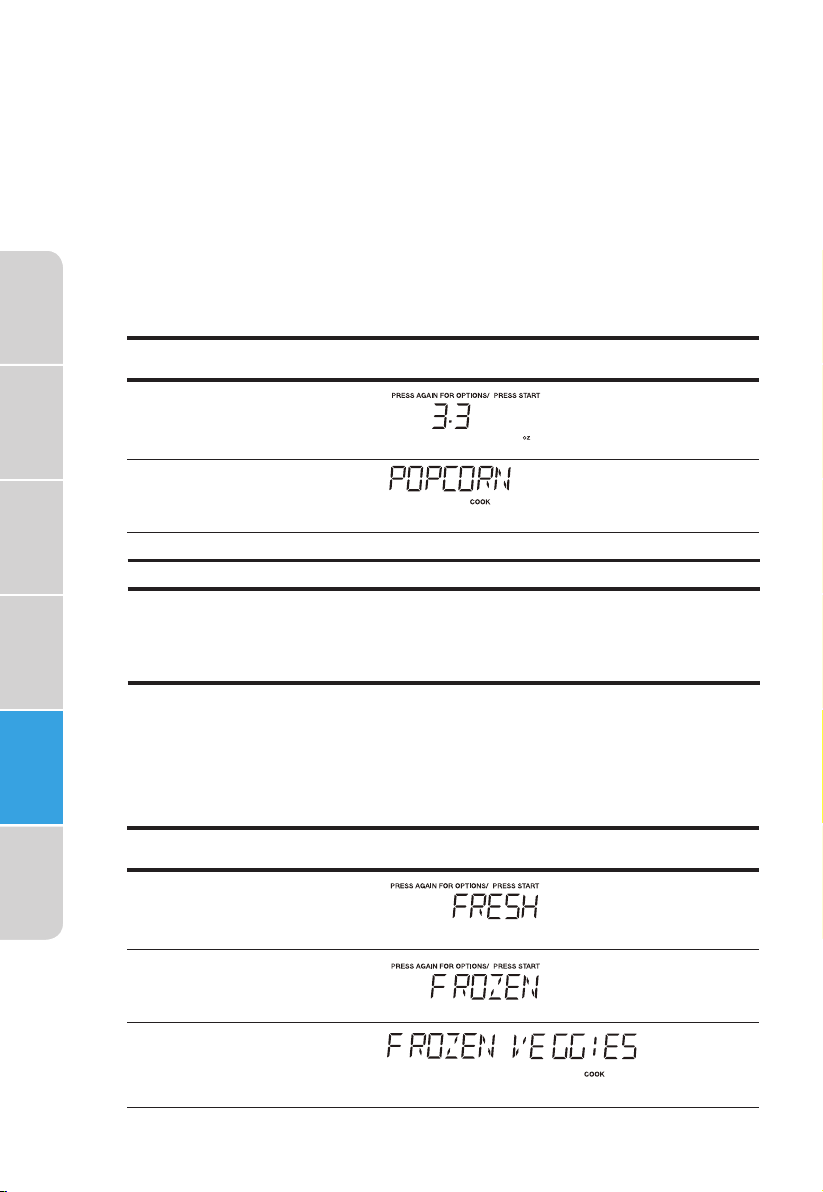
Popcorn
The Popcorn button on the quick touch pad lets you pop
3.3, 3.0, or a 1.75 ounce bag of commercially packaged
microwave popcorn. Pop only one package at a time. If
you are using a microwave popcorn popper, follow
manufacturer's instructions.
• Suppose you want to pop a 3.3 oz. popcorn.
Touch :
"Popcorn"
1.
"Start/Enter/+30 Sec"
2.
Display Shows:
Time counting down
MaterialsPart Names
Operation
Maintenance
Amount
3.30oz.
3.00 oz.
1.75 oz.
Veggies
Press popcorn pad
once
2 times
3 times
There are 2 options (Frozen Vegetables , Fresh Vegetables) under
the Veggies.
• Suppose you want to cook two cups of frozen veggies.
Touch :
1.
"Veggies"
"Veggies"
2.
"Start/Enter/+30 Sec"
3.
Display Shows:
Time counting down
Page 21
NOTES
21
1.
Remove the metal shelf from the microwave oven when cooking
popcorn. Do not use regular paper bags. Do not re-pop un-popped
kernels. Do not pop popcorn in glass cookware.
Vegetables chart
FOOD
(Initial temperature)
1. Frozen Veggies
(-
0.4 )
F
2. Fresh Veggies
(
41 )
F
Broccoli
Brussels sprouts
Cabbage
Cauliflower (flowerets)
Cauliflower (whole)
Spinach
Zucchini
Carrots, sliced
Corn on cob
Green beans
Winter squash
- diced
- halves
AMOUNT PROCEDURE
2 Cups
2 Cups Wash and place in casserole. Add no water
No need to add water. Cover contents
with lid or plastic wrap.
Press the vegetables button two times
for Frozen Vegetables. After cooking,
stir and let stand, covered for 3 minutes.
if vegetables have just been washed. Cover
with lid for tender vegetables. Use plastic
wrap for tender-crisp vegetables. Press the
vegetables one time for Fresh
Vegeta-
covered, for 2 to 5 minutes.
Wash and place in casserole. Add 1-4 tbsp.
water. Cover with lid for tender vegetables.
Use plastic wrap cover for tender-crisp
vegetables. Press the vegetables button
one time for fresh vegetables. After cooking
stir, Let stand, covered, for 2 to 5 minutes.
button once
bles. After cooking, stir,
Let stand,
Snack Menu
Snack Menu is for cooking/heating foods that take a short amount
of time
.
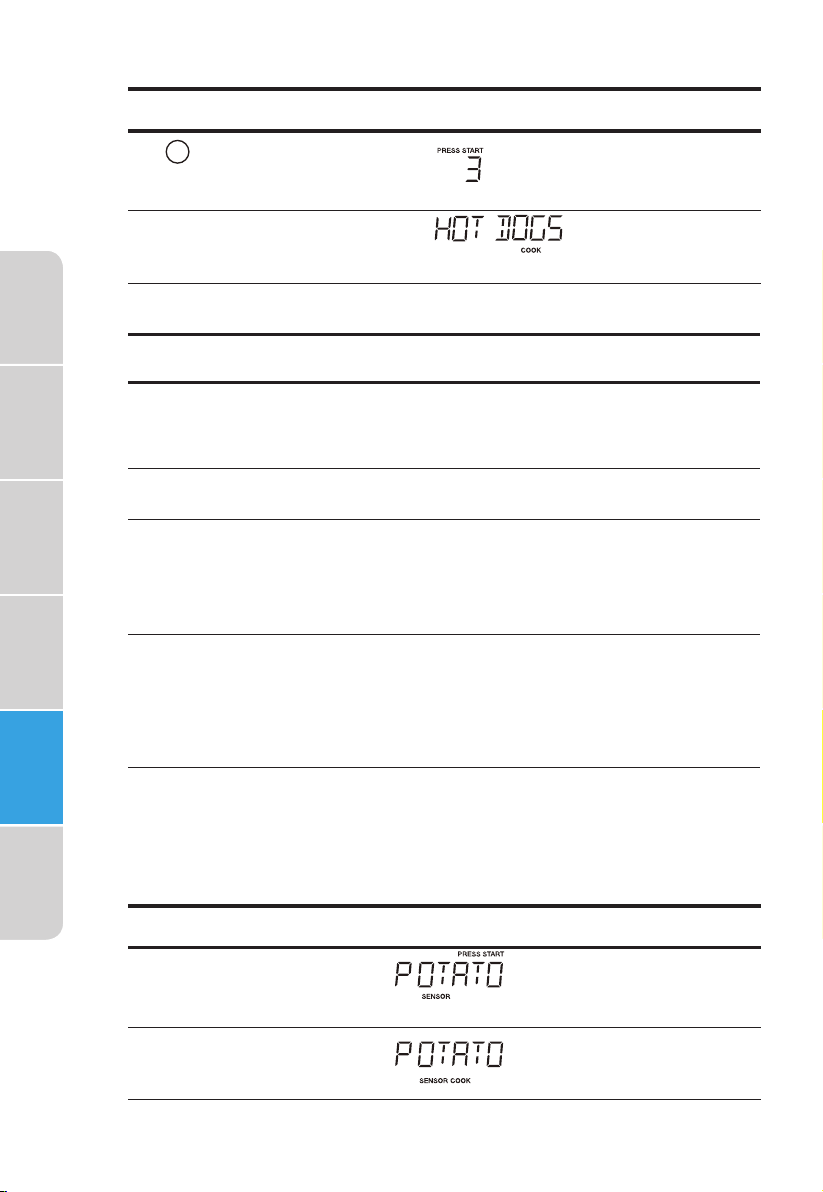
• Suppose you want to reheat 3 hot dogs.
Specifications
Instuctions
Safety
Materials Part Names
Operation Maintenance
Touch :
1.
" "
Snack Menus
Snack Menus
2.
"Start/Enter/+30 Sec"
3.
Display Shows:
Page 22
Specifications
22
Touch :
4. 3
5.
"Start/Enter/+30 Sec"
Snack Menu chart
FOOD
Display Shows:
Time counting down
AMOUNT PROCEDURE
Safety
Instuctions
MaterialsPart Names
Operation
Maintenance
1. Frozen MW Pizza
2. Hot Dogs
3. Meal in a Cup
4. Frozen
kids Meals
(6 - 8 oz) Use for frozen microwave pizza. Remove
1 - 6 Pieces Place hot dog in bun. Wrap each with paper
2.39 oz This setting is ideal for individual portions of
8.8 oz
from package and unwrap. Follow package
directions for use of package and/or silver
crisping disk.
towel or napkin.
canned food packed in a small microwaveable container, usually 6 to 8 ounces.
After cooking, stir food and allow to stand
1 or 2 minutes.
Use this button for frozen, convenience foods.
Remove package from outer wrapping and
follow package directions for cooking. After
cooking, let stand, covered for 1 to 3 minutes.
This setting will provide satisfactory results for
most frozen meals.
Potato
• Suppose you want to cook 1 to 4 baked Potatoes.
Touch :
"Potato"
1.
Display Shows:
2.
"Start/Enter/+30 Sec"
Page 23
NOTES
23
1. Cooking times are based on an average 8 ounce potato.
Baked Potato chart
FOOD
AMOUNT PROCEDURE
Specifications
Potato*
* It is not necessary to enter amount or number.
1-4 servings
Pierce with fork in several places. Place on
a paper towel on the turntable. After cooking,
remove from oven and let stand for 5
minutes.
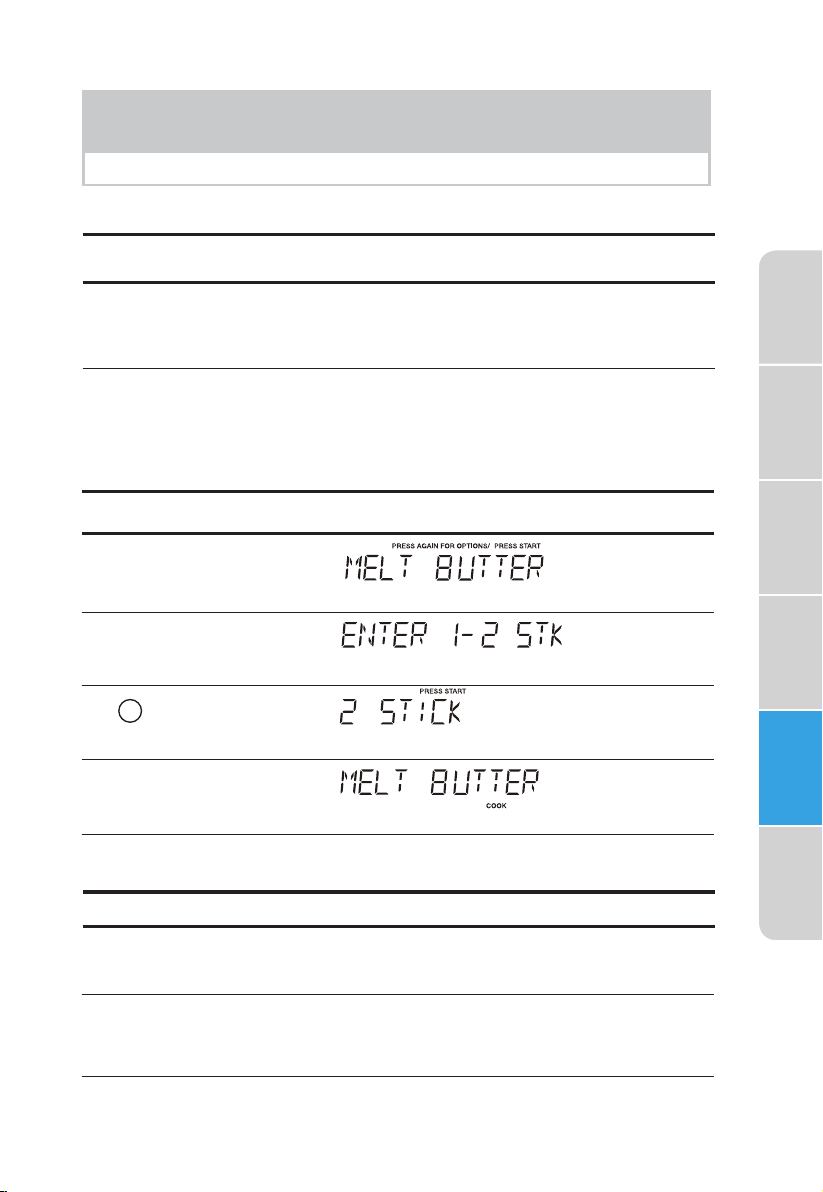
Setting Melt/Soften
The oven uses low power to melt and soften items. See the following table.
• Suppose you want to melt 2 sticks of butter.
Touch :
1.
"Melt/Soften"
2.
"Start/Enter/+30 Sec"
3.
2
"Start/Enter/+30 Sec"
4.
Display Shows:
Time counting down
Instuctions
Safety
Materials Part Names
Operation Maintenance
Melt Table
CATEGORY
MELT BUTTER
MELT CHOCOLATE
SOFTEN
ICE CREAM
AMOUNT DIRECTION
1 or 2 sticks Unwrap and place in microwavable container.
No need to cover butter. Stir at the end of
cooking to complete melting.
2, 4 or 8 oz. Chocolate chips or squares of baking choco-
late may be used. Unwrap squares and place
in microwavable container. Stir at the end of
cooking to complete melting.
Pint, 1.5 Quart. Place container in oven. lcecream will be soft
enough to make scooping easier.
Page 24
MELT TABLE
24
CATEGORY
AMOUNT DIRECTION
Specifications
Safety
Instuctions
MaterialsPart Names
Operation
SOFTEN
CREAM CHEESE
3 or 8 oz. Unwrap and place in microwavable contai-
ner. Cream cheese will be at room temperature and ready for use in recipe.
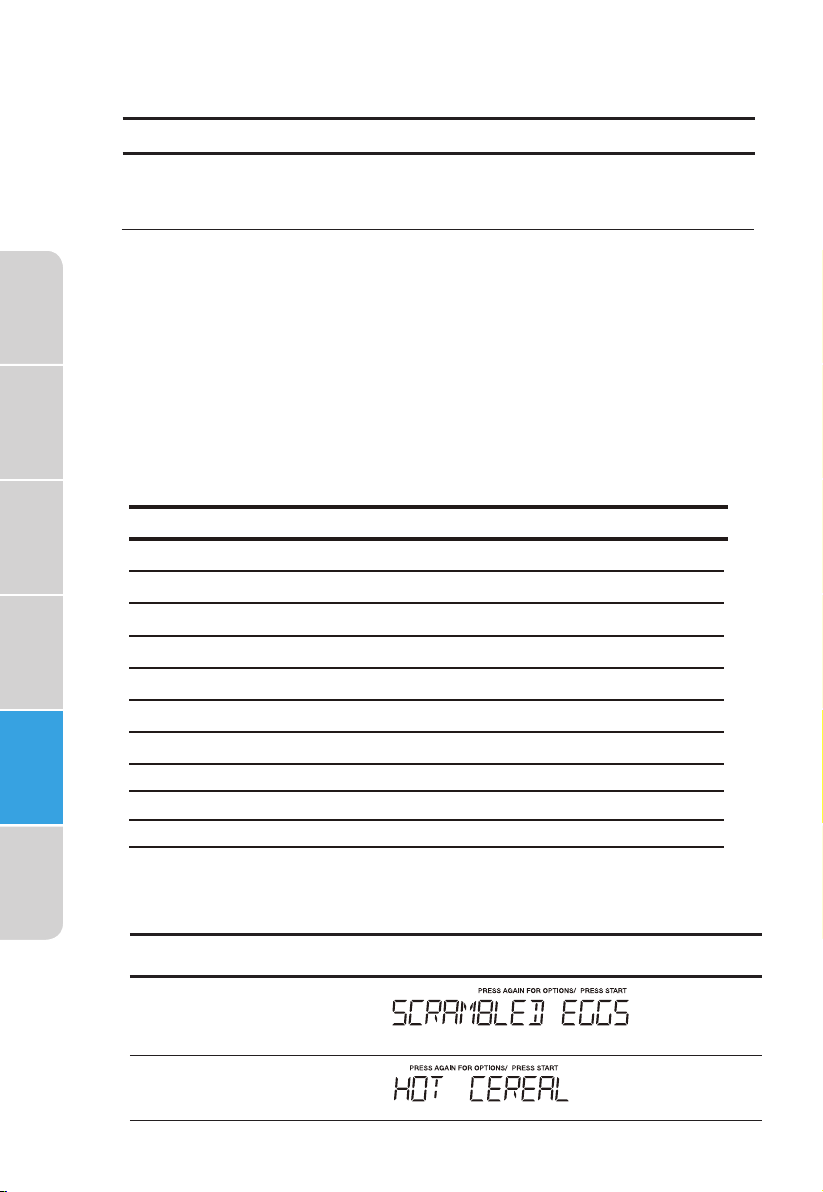
AUTO COOKING
Auto Cook
Auto cook is divided into 2 parts-Quick Meals (Scrambled Eggs, Hot Cereal,
Frozen Pizza, Fudge Brownies) and Dinner Recipes (Garlic Shrimp, Asiago Red
Potatoes, Roasted Vegetable Medley, Lemon and Shrimp Risotto, White
Chicken Chili).
Key
Auto Cook x1 Scrambled Eggs 1 - 6 Eggs
Auto Cook x2 Hot Cereal 1 - 3 Servings
Auto Cook x3 Frozen Pizza 12 oz
Auto Cook x4 Fudge Brownies 18-19 oz
Auto Cook x5 Garlic Shrimp Per Recipe
Auto Cook x6 Stuffed Mushrooms Per Recipe
Auto Cook x7 Asiago Red Potatoes Per Recipe
Auto Cook x8 Roasted Vegetable Medley Per Recipe
Auto Cook x9 Lemon Shrimp Risotto Per Recipe
Auto Cook x10 White Chicken Chili Per Recipe
Food Amount
Maintenance
Quick Meals
• Suppose you want to cook Hot Cereal for 3 serving
Touch :
1.
"Auto Cook"
"Auto Cook"
2.
Display Shows:
Page 25
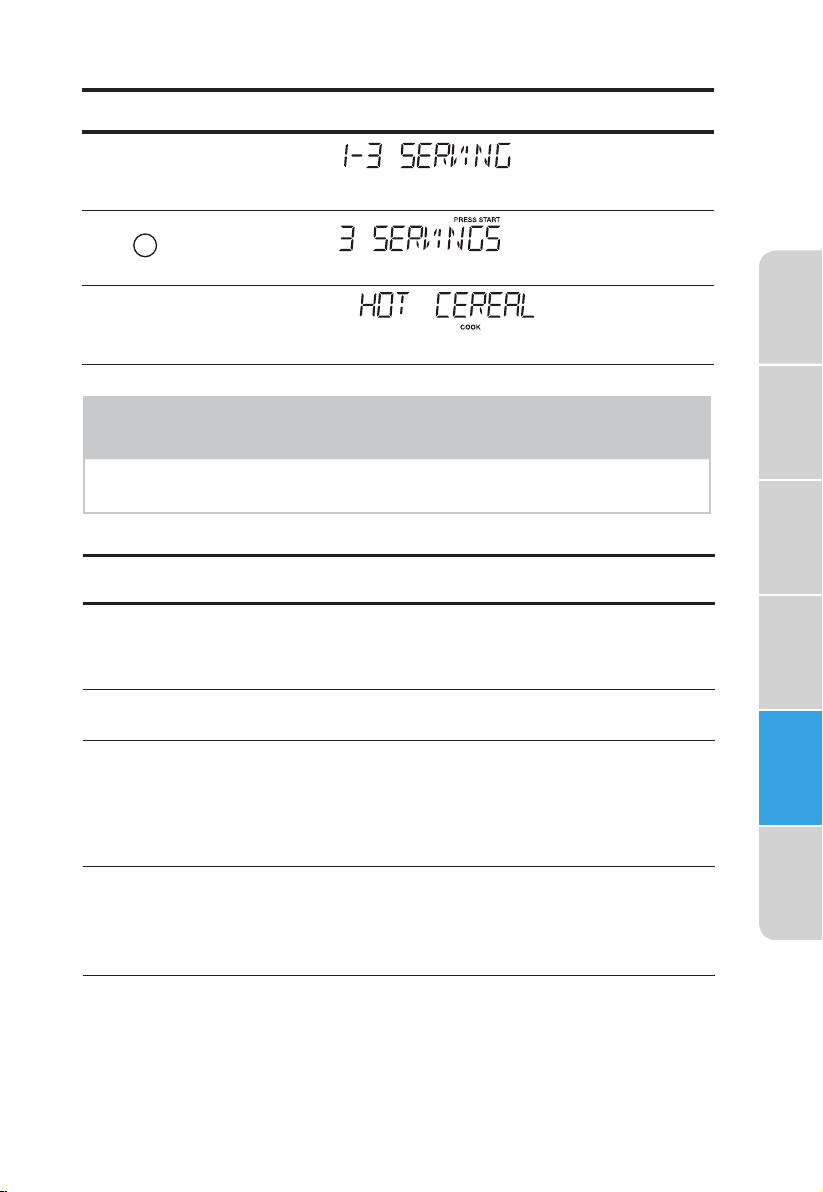
Touch :
25
3.
"Start/Enter/+30 Sec"
4.
3
5.
"Start/Enter/+30 Sec"
Display Shows:
Time counting down
NOTES
When AUTO COOKING selected, Turntable On is automatically set
" "
for optim cooking.
Quick Meals chart
FOOD
al
AMOUNT PROCEDURE
Specifications
Instuctions
Safety
Materials Part Names
1. Scrambled Eggs
2. Hot Cereal
3. Frozen Pizza
4. Fudge Brownies
1 - 6 eggs
1- 3 servings Place hot dog in bun. Wrap each with paper
12 oz This setting is ideal for individual portions of
18-19 oz Prepare brownie mix according to package
Use for frozen Eggs, Hot Cereal, PIzza,
Remove from package and unwrap.
Follow package directions for use of
package and/or silver crisping disk.
towel or napkin.
canned food packed in a small microwaveable container, usually 6 to 8 ounces. Remove
inner metal lid and replace outer microwave-
able lid. After cooking, stir food and allow to
stand 1 or 2 minutes.
directions. Spoon batter into an 8 x 8 inch
microwave safe glass dish that has been
coated with cooking spray. Select "Fudge
Brownies" under the Auto Cook menu.
Operation Maintenance
Page 26
Dinner Recipes
26
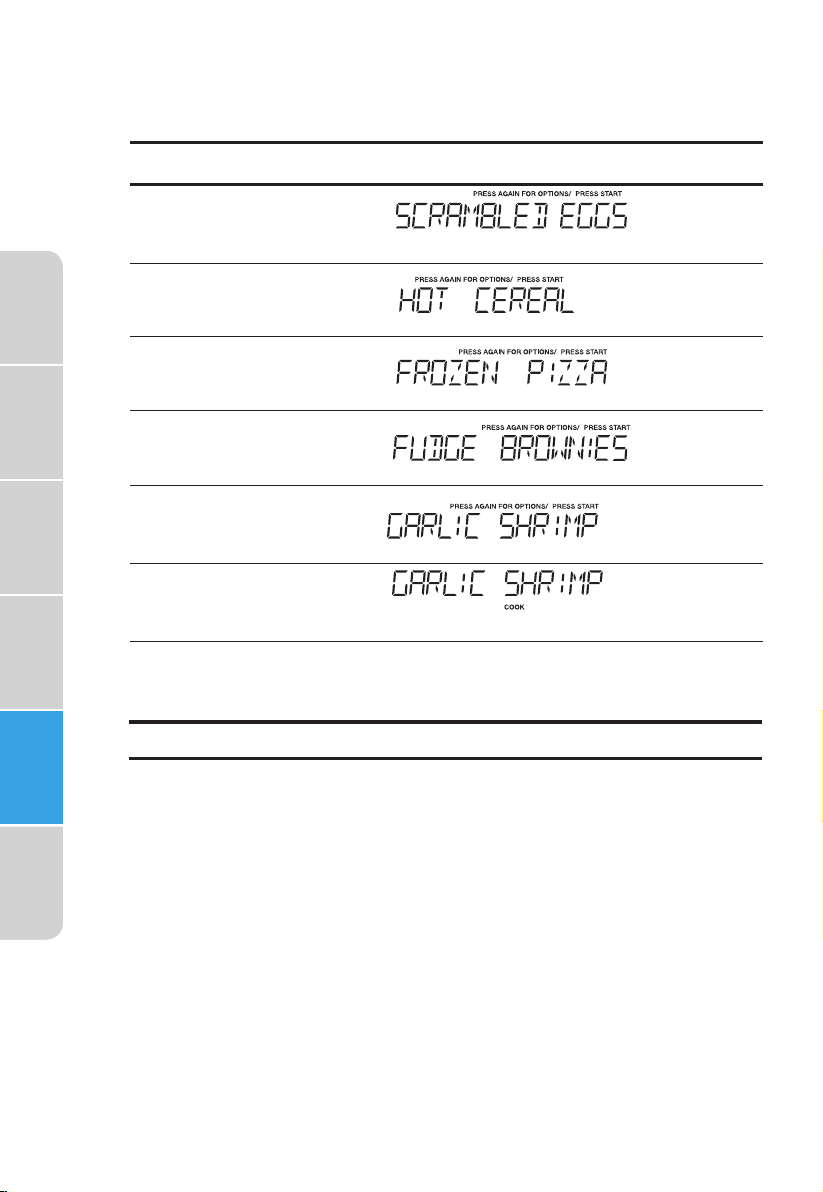
• Suppose you want to cook Garlic shrimp.
Specifications
Safety
Instuctions
MaterialsPart Names
Touch :
"Auto Cook"
1.
"Auto Cook"
2.
"Auto Cook"
3.
"Auto Cook"
4.
5.
"Auto Cook"
6.
"Start/Enter/+30 Sec"
Dinner Recipes
Display Shows:
Time counting down
Garlic Shrimp
Operation
Maintenance
¼ cup butter
6 cloves garlic, minced
2 tablespoons chopped fresh chives
2 tablespoons lemon juice
1 tablespoon chili pepper paste
Salt to taste
1 pound raw, peeled and deveined large shrimp
Place butter in a 2 quart microwave safe casserole dish with lid. Microwave on
High power for 1 minute or until butter is melted. Stir in garlic, and microwave
for an additional 1 minute. Stir in chives, lemon juice, chili pepper paste, and salt.
Add shrimp, tossing to coat evenly. Cover, and microwave on High power for 5
minutes, or until shrimp is opaque, stirring after 3 minutes. Serve over hot
cooked rice if desired.
Page 27

Stuffed Mushrooms
27
1 pound whole baby bella mushrooms
2 tablespoons butter, melted
1 bunch green onion, chopped
¼ cup shredded Parmesan cheese
2 tablespoons bread crumbs
1 teaspoon lemon juice
¼ teaspoon garlic pepper
Crushed red pepper to taste
Remove stems from mushrooms and set aside. Arrange mushroom caps on micr-
owave safe plate. Finely chop reserved mushroom stems. Combine butter, chopped
mushroom stems, and green onion in a 1 quart microwave safe dish; microwave on
High power for 2 minutes. Add remaining ingredients and mix well. Spoon stuffing
into mushroom caps. Microwave on High power for 4 to 5 minutes, or until mushrooms are tender.
Specifications
Instuctions
Safety
Asiago Red Potatoes
1 ¼ pound red potatoes, peeled and thinly sliced
2 tablespoons all purpose flour
½ teaspoon salt
1 ¼ cups milk
1 tablespoon butter, melted
5 ounces shredded Asiago cheese
Combine potatoes, flour, and salt in a zip top plastic bag; seal bag and shake to
coat potatoes. Transfer potatoes to a lightly greased 2 quart microwave safe
casserole dish. Add milk and butter, stirring well. Cover and microwave on 80%
power for 12 minutes or until potatoes are tender; sprinkle with cheese and
microwave on 80% power for an additional minute or until cheese melts.
Roasted Vegetables Medley
1 cup baby carrots
1 cup sliced yellow squash
1 cup sliced zucchini
½ cup sliced red bell pepper
½ cup thinly sliced onion
1 tablespoon butter
Garlic and herb seasoning to taste
Combine carrots, squash, zucchini, bell pepper, and onion in a 2 quart microwave
safe casserole dish. Dot with butter and sprinkle with seasoning. Cover, and
microwave on High power for 8 minutes or to desired degree of doneness.
Materials Part Names
Operation Maintenance
Page 28

Specifications
28
Lemon and Shrimp Risotto
2 teaspoons butter
2 teaspoons olive oil
2 tablespoons finely chopped shallot
4 cups chicken broth
¼ cup fresh squeezed lemon juice
2 cups risotto
1 pound medium shrimp, peeled and deveined
1 cup frozen peas, thawed
2 teaspoons grated lemon zest
¼ teaspoon black pepper
¾ teaspoon salt
Combine butter, olive oil, and shallot in a 1 quart microwave safe dish. Microwave
on High for 1 minute or until shallot is tender. Set aside.
Safety
Instuctions
MaterialsPart Names
Operation
Maintenance
Combine chicken broth and lemon juice in a 2 quart microwave safe measuring
cup or casserole dish. Cover with lid or vented plastic wrap. Microwave on High
power for 10 minutes. Stir in reserved shallot mixture and risotto. Cover and
continue to microwave on 50% power for 20 minutes. Stir in shrimp, peas, grated
lemon zest, pepper, and salt. Cover and microwave on 50% power for 5 minutes
or until shrimp is opaque.
White Chicken Chili
1 pound boneless, skinless chicken breast, cubed
½ cup chopped onion
3 garlic cloves, minced
1 (15 ounce) can white beans, drained
1 (4 ounce) can chopped green chili pepper
1 cup chicken broth
1 ½ teaspoon chili powder
¾ teaspoon cumin
½ teaspoon salt
½ teaspoon black pepper
½ cup chopped fresh cilantro
2 tablespoons fresh lime juice
Combine chicken, onion, and garlic in a 2.5 quart microwave safe dish. Cover, and
microwave on High for 6 minutes, or until chicken is fully cooked and onion is
tender, stirring after 3 minutes.
Add white beans, chili pepper, chicken broth, chili powder, cumin, salt and pepper,
stirring well. Cover and microwave on High for 10 minutes, stirring after 5 minutes.
Stir in cilantro and lime juice before serving.
Page 29

AUTO DEFROST
29
Using Auto Defrost
The auto defrost feature provides you with the best defrosting method for frozen
foods. The cooking guide will show you which defrost sequence is recommended
for the food you are defrosting.
For added convenience, the Auto Defrost includes a built-in beep mechanism that
reminds you to check, turn over, separate, or rearrange the food in order to get the
best defrost results. Three different defrosting levels are provided:
1. MEAT
2. POULTRY
3. FISH
Available weight is 0.1-6.0 lbs
• Suppose you want to defrost 1.2 lbs of fish.
Specifications
Instuctions
Safety
Touch :
1.
"Auto Defrost"
2.
"Auto Defrost"
3.
"Auto Defrost"
4.
"Start/Enter/+30 Sec"
1 and 2
5.
To enter weight
6.
"Start/Enter/+30 Sec"
Display Shows:
Time counting down
NOTES
The oven will beep during the cycle. At this time, open the
door and turn, separate, or rearrange the food. Remove any portions
that have thawed. Return frozen portions to the oven and touch
"Start/Enter/+30 Sec"
to resume the defrost cycle.
"DEFROST"
Materials Part Names
Operation Maintenance
Page 30

Specifications
30
Safety
Instuctions
MaterialsPart Names
Operation
Maintenance
Operating Tips
For best results, remove fish, shell fish, meat and poultry from its original closed
paper or plastic package (wrapper). Otherwise, the wrap will hold steam and juice
close to the foods, which can cause the outer surface of the food to cook.
For best results, roll your ground meat into a ball before freezing. During the
DEFROST cycle, the microwave will signal when it is time to turn the meat over.
Scrape off any excess frost from the meat and continue defrosting.
Place foods in a shallow container or on a microwave roasting rack to catch drippings.
This table shows food type selections and the weights you can set for each type. For
best results, loosen or remove covering on food.
KEY PRESS
Auto Defrost x 1
Auto Defrost x 2
Auto Defrost x 3
Category WEIGHTS YOU CAN SET
Meat
Poultry
Fish
(tenths of a pound)
0.1 to 6.0 lbs
0.1 to 6.0 lbs
0.1 to 6.0 lbs
Weight conversion table
You are probably used to measuring food in pounds and ounces that are
fractions of a pound (for example, 4 ounces equals 1/4 pound). However,
in order to enter the weight of food in Auto Defrost, you must specify
pounds and tenths of a pound. If the weight on the food package is in
fractions of a pound, you can use the following table to convert the weight
to decimals.
Equivalent Weight
OUNCES
1.6
3.2
4.0
4.8
6.4
8.0
9.6
11.2
12.0
12.8
14.4
16.0
DECIMAL WEIGHT
10
20
25 One-Quarter Pound
30
40
50 One-Half Pound
60
70
75 Three-Quarters Pound
80
90
1.0 One Pound
NOTES
If the weight is between two decimals, round down to the lower
weight for best defrosting results.
Page 31

Auto Defrost Table
31
NOTE:
Large, fatty pieces of meat or meat in irregular shapes, should have
the narrow or fatty areas shielded at the beginning of the defrost
Meat Settings
sequence.
FOOD
SETTING AT BEEP SPECIAL INSTRUCTIONS
BEEF
Ground Beef,
Bulk
Ground Beef,
Patties
Round Steak MEAT Turn over. Cover warm areas with
Tenderloin
Steak
Stew Beef MEAT Remove thawed portions with fork.
Pot Roast,
Chuck Roast
Rib Roast MEAT Turn over. Cover warm areas with
Rolled Rump
Roast
MEAT Remove thawed portions with fork.
MEAT Separate and rearrange.
MEAT Turn over. Cover warm areas with
MEAT Return remainder to oven.
MEAT Turn over. Cover warm areas with
Turn over. Return remainder to oven.
aluminum foil.
aluminum foil.
Separate remainder.
aluminum foil.
aluminum foil.
LAMB
Cubes for
Stew
Chops
(1 inch thick)
MEAT Turn over. Cover warm areas with
MEAT Remove thawed portions with fork.
aluminum foil.
Return remainder to oven.
PORK
Chops
(1/2 inch thick)
Hot Dogs MEAT Separate and rearrange.
Spareribs
Country-style
Ribs
Sausage,
Links
Sausage,
Bulk
Loin Roast,
Boneless
MEAT Separate and rearrange.
MEAT Turn over. Cover warm areas with
MEAT Separate and rearrange.
MEAT Remove thawed portions with fork.
MEAT Turn over. Cover warm areas with
aluminum foil.
Turn over. Return remainder to oven.
aluminum foil.
Do not defrost less than 1/4 lb.
Freeze in ball shape.
Do not defrost less than 2 oz.
patties.
Depress center when freezing.
Place in a microwave safe dish.
Place in a microwave safe dish.
Place in a microwave safe dish.
Place in a microwave safe dish.
Place in a microwave safe dish.
Place in a microwave safe dish.
Place in a microwave safe dish.
Place in a microwave safe dish.
Place in a microwave safe dish.
Place in a microwave safe dish.
Place in a microwave safe dish.
Place in a microwave safe dish.
Place in a microwave safe dish.
Place in a microwave safe dish.
Specifications
Instuctions
Safety
Materials Part Names
Operation Maintenance
Page 32

Auto Defrost Table (Continued)
32
Poultry Settings
Specifications
Safety
Instuctions
MaterialsPart Names
Operation
Maintenance
FOOD
SETTING AT BEEP SPECIAL INSTRUCTIONS
CHICKEN
Whole
(up to 6 lbs)
Cut-up Separate pieces and rearrange.
POULTRY Turn over breast side down.
Cover warm areas with aluminum foil.
Turn over. Cover warm areas with
aluminum foil.
CORNISH
HENS
Whole
POULTRY
Turn over. Cover warm areas with
aluminum foil.
TURKEY
Breast
(up to 6 lbs)
POULTRY
Turn over. Cover warm areas with
aluminum foil.
Fish Settings
FOOD
SETTING AT BEEP SPECIAL INSTRUCTIONS
FISH
Fillets FISH Turn over. Separate fillets when
Steaks FISH Separate and rearrange.
Whole FISH Turn over
partially thawed, if possible.
SHELLFISH
Crab meat FISH
Lobster tails FISH
Shrimp FISH
Scallops FISH
Place chicken breast-side up in a
microwave safe dish. Finish defro
sting by immersing in cold water.
Remove giblets when chicken is
partially-defrosted.
Place in a microwave safe dish.
Finish defrosting by immersing in
cold water.
Place in a microwave safe dish.
Finish defrosting by immersing in
cold water.
Place in a microwave safe dish.
Finish defrosting by immersing in
cold water.
Place in a microwave safe dish.
Carefully separate fillets under cold
water.
Place in a microwave safe dish.
Run cold water over to finish
defrosting.
Place in a microwave safe dish.
Cover head and tail with foil; do not
let foil touch sides of microwave.
Finish defrosting by immersing in
cold water.
Place in a microwave safe dish.Break apart. Turn over.
Place in a microwave safe dish.Break apart. Turn over.
Place in a microwave safe dish.Break apart. Turn over.
Place in a microwave safe dish.Break apart. Turn over.
Page 33

Defrosting Tips
33
• When using Auto Defrost, the weight to be entered is the net weight in pounds
and tenths of pounds (the weight of the food minus the container).
• Before tarting, make sure to remove any and all metal twist-ties that often come
with frozen food bags, and replace them with strings or elastic bands.
• Open containers, such as cartons, before placing them in the oven.
• Always slit or pierce plastic pouches or packaging.
• If food is foil wrapped, remove foil and place food in a suitable container.
• Slit the skin of skinned food, such as sausage.
• Bend plastic pouches of food to ensure even defrosting.
• Always underestimate defrosting time. If defrosted food is still icy in the center,
return it to the microwave oven for more defrosting.
• The length of defrosting time varies according to how solidly the food is frozen.
• The shape of the package effects how quickly food will defrost. Shallow
packages will defrost more quickly than a deep container.
• As food begins to defrost, separate the pieces. change
• Use small pieces of aluminum foil to shield parts of food such as chicken wings,
leg tips, fish tails, or areas that start to get warm. Make sure the foil does not
touch the sides, top, or bottom of the oven. The foil can damage the oven lining.
• For better results, let food stand after defrosting.
• Turn over food during defrosting or standing time.
•
s
more easily to quicker.
Break apart and remove food as required.
Specifications
Instuctions
Safety
Materials Part Names
Operation Maintenance
Page 34

CONVENIENT FEATURES
34
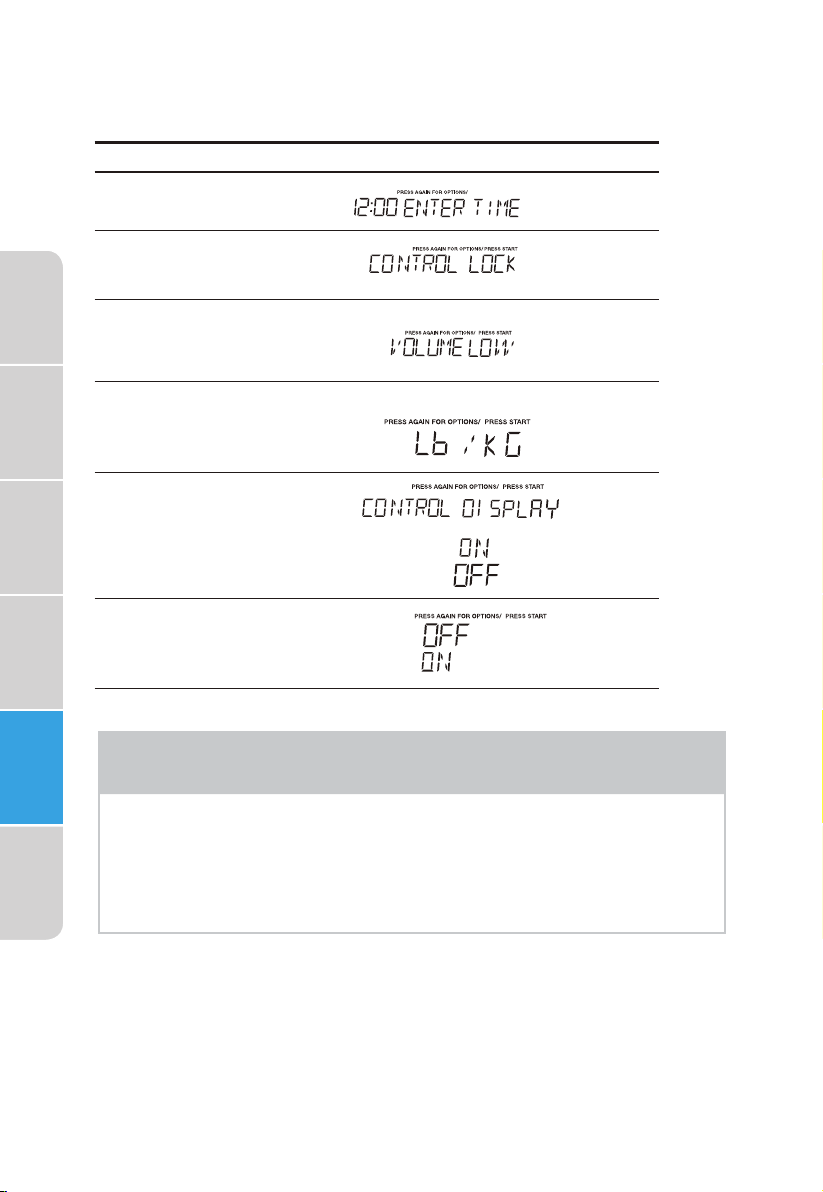
1. User pref
The microwave oven has settings that allow you to customize the operation for
your convenience. Below is the table showing the various settings. Touch the
key multiple times to scroll to the desired setting function.
User pref
Specifications
Safety
Instuctions
(1). Setting Clock
MaterialsPart Names
Operation
The clock can be disabled when the microwave is first plugged in and the
"Stop/Clear"
To re-enable the clock follow clock instructions.
• Suppose you want to set the clock for 10:59.
Key press
User pref X 1
User pref X 2
User pref X 3
User pref X 4
User pref X 5
User pref X 6
key is selected.
1.
"User Pref"
1 0
2.
3.
"Start/Enter/+30 Sec"
5 9
Option
Clock
Control Lock
Volume (Off/Low/Med/High)
Weight (lb/kg)
Display Shows:Touch :
Clock dispiay
Demo
Maintenance
NOTES
1. If you begin to enter in an incorrect time (e.g. 2:89) the 8 is an invalid digit
and cannot be entered.
Enter the correct time.
2. If you touch while setting the clock, the display will show the
last time of day set or a blank display if no time of day has been set.
"Stop/Clear"
Page 35

(2). Setting Control Lock On/Off
35
To turn ON Control Lock .
"User Pref"
1.
2.
"User Pref"
.
3
"Start/Enter/+30 Sec"
To turn
then touch
OFF the Control Lock, touch
"Start/Enter/+30 Sec"
Display Shows:Touch :
Specifications
Instuctions
Safety
User pref
.
4
"Start/Enter/+30 Sec"
Materials Part Names
Operation Maintenance
Page 36

(3). Turning Sound Low/Med/High/Off
36
Audible signals are available to guide you when setting and using your oven.
A programming tone
•
Three tones
•
signal the end of a Kitchen Timer count down.
will sound each time you touch a button.
Specifications
Safety
Instuctions
MaterialsPart Names
Operation
Three tones
•
• Suppose you want to turn the audible signal off.
1.
"User Pref"
"User Pref"
2.
3.
"User Pref"
4.
"Start/Enter/+30 Sec"
signal the end of a cooking cycle.
Display Shows:Touch :
NOTES
When the cooking cycle is completed END will be displayed and the
audible signal will sound if the sound is turned on.
Maintenance
Page 37

(4 ). Setting Weight Lb/ Kg
37
• Suppose you want to toggle weight between pounds & kilograms.
Display Shows:Touch :
"User Pref"
1.
"User Pref"
2.
3.
"User Pref"
4.
"User Pref"
"Start/Enter/+30 Sec"
5.
kg
Ib
NOTES
If the display shows kg, pressing the button will reset
the oven controls to lbs. To return to kg, you will have to press
four times and then press .
"Start/Enter/+30 Sec"
"Start/Enter/+30 Sec"
"User Pref"
Specifications
Instuctions
Safety
Materials Part Names
Operation Maintenance
Page 38
(5). Setting Clock Display
38
• Suppose you want to set the language.
Specifications
Safety
Instuctions
MaterialsPart Names
1.
"User Pref"
2.
"User Pref"
"User Pref"
3.
4.
"User Pref"
5.
"User Pref"
6.
"Start/Enter/+30 Sec"
Display Shows:Touch :
Operation
Maintenance
NOTES
When is pressed and the previous setting was English
"Start/Enter/+30 Sec"
it will be set to
press
"User Pref"
French. If you want switch back to English you will have to
five times and then press .
"Start/Enter/+30 Sec"
Page 39

(6). Setting Demo Mode On/Of
39
• Suppose you want to enter Demo mode. When Demo mode is ON
programming functions will work in a rapid countdown mode with no cooking
power.
Display Shows:Touch :
1.
"User Pref"
2.
"User Pref"
3.
"User Pref"
4.
"User Pref"
"User Pref"
5.
6.
"User Pref"
7.
"Start/Enter/+30 Sec"
Specifications
Instuctions
Safety
Materials Part Names
Operation Maintenance
NOTES
"Start/Enter/+30 Sec"
When is pressed and the previous setting was OFF
will
it will be set
to again
press
to ON. If you want to turn the demo mode back OFF
User pref six times and then press .
"Start/Enter/+30 Sec"
you
then
have
Page 40

2. Setting Kitchen Timer
40
Your microwave oven can be used as a kitchen timer. You can set up to 99
minutes, 99 seconds.
The kitchen timer can be used while the microwave oven is running.
o set the timer for three minutes. T
•
Display Shows:Touch :
1.
"Timer"
Specifications
Safety
Instuctions
MaterialsPart Names
Operation
Maintenance
2.
"Timer"
3.
03 0
Timer starts
counting down
3. Using Vent Fan
The vent button controls the fan, which has 2-speeds. If the vent
fan is off, the first press of the button will set the fan to High,
second touch will be LOW and third will be OFF.
• Suppose you want to set the vent fan speed to LOW from the OFF position.
Display Shows:Touch :
1.
Hi | Low | Off
2.
Hi | Low | Off
NOTES
If the temperature from the range or cooktop below the oven gets too hot,
the vent fan will automatically turn on to protect the oven.
It may stay on up to an hour to cool the oven.
When this occurs, the Vent button will not turn the fan off.
Page 41
4. Using Cooktop Light
41
The light icon button controls the cooktop light. If the light is OFF
the first touch of the light button will turn the light ON (high),
second touch will reduce the power of the light to Low and third
touch will be OFF.
• Suppose you want to set the light for HIGH from the OFF position.
Display Shows:Touch :
1.
Hi | Low | Off
5. Setting Turntable On/Off
Press Turntable On-Off to turn the turntable on or off.
For best cooking results, leave the turntable on. It can be turned off for large
dishes.
Display Shows:Touch :
1.
"Turntable On-Off"
"Turntable On-Off"
2.
NOTES
Sometimes the turntable can become hot to the touch during and after
cooking. Do not run the oven empty without food in it.
Specifications
Instuctions
Safety
Materials Part Names
Operation Maintenance
Page 42

MAINTENANCE
42
Troubleshooting
If your microwave oven is not functioning properly, please refer
to the below troubleshooting tips below.
If this does not fix the problem, please call your local authorized
service technician.
Specifications
Safety
Instuctions
MaterialsPart Names
Operation
Maintenance
TROUBLE
Oven will not start
Arcing or sparking
Unevenly cooked
foods
Overcooked foods
Undercooked foods
Improper defrosting
POSSIBLE CAUSE POSSIBLE REMEDY
a. Electrical cord for oven is
not plugged in.
b. Door is open.
c. Wrong operation is set.
a. Materials to be avoided in
microwave oven were used.
b. The oven is operated when
empty.
c. Spilled food remains in the
cavity.
a. Materials to be avoided in
microwave oven were used.
b. Food is not defrosted
completely.
c. Cooking time, power level
is not suit ble.
d. Food is not turned or stirred.
Cooking time, power level is
not suitable.
a. Materials to be avoided in
microwave oven were used.
b. Food is not defrosted
completely.
c. Oven ventilation ports are
restricted.
d. Cooking time, power level is
not suitable.
a. Materials to be avoided in
microwave oven were used.
b. Cooking time, power level is
not suitable.
c. Food is not turned or stirred.
a. Plug into the outlet.
b. Close the door and try
again.
c. Check instructions.
a. Use microwave-safe
cookware only.
b. Do not operate with oven
empty.
c. Clean cavity with wet towel.
a. Use microwave-safe
cookware only.
b. Completely defrost food.
c. Use correct cooking time,
power level.
d. Turn or stir food.
Use correct cooking time,
power level.
a. Use microwave-safe
cookware only.
b. Completely defrost food.
c. Check to see that oven ventil ation ports are not restricted.
d. Use correct cooking time,
power level.
a. Use microwave-safe
cookware only.
b. Use correct cooking time,
power level.
c. Turn or stir food.
Page 43

Name, address and telephone number
M
A
P
name and address
odel number and serial number
clear, detailed description of the problem
roof of purchase including dealer or retailer
IF YOU NEED SERVICE:
1.
Before contacting us to arrange service, please determine whether your product requires repair.
Some questions can be addressed without service. Please take a few minutes to review the
Troubleshooting section of the User Manual, or visit https:// . idea.com/us/support
2.
All warranty service is provided exclusively by our authorized Midea Service Providers, in the
U.S. and Canada.
I
n the U.S.A. or Canada, call 1-866-646-4332.
If outside the 50 States of the United States or Canada, contact your authorized Midea dealer to
determine whether another warranty applies.
Midea will repair or replace, without charge, any defects due to faulty materials or workmanship for
one full year from the date of purchase. For further detail of warranty coverage and warranty repair
information, visit
FIRST YEAR LIMITED WARRANTY (PARTS AND LABOR)
www.midea.com
Midea Customer Service
1 YEAR PARTS AND LABOR
or call
1-866-646-4332.
www m
Consumer will be responsible for:
■
Diagnostics, removal, transportation and reinstallation cost required because of service.
■
Costs of service calls that are a result of items listed under NORMAL RESPONSIBILITIES
OF THE CONSUMER**
NORMAL RESPONSIBILITIES OF THE CONSUMER**
This warranty applies only to products in ordinary household use, and the
consumer is
1.
Proper use of the appliance in accordance with the instructions provided with the product.
2.
Routine maintenance and cleaning necessary to keep the good working condition.
3.
Proper installation by an authorized service professional in accordance with instructions provided
with the appliance and in accordance with all local plumbing, electrical and / or gas codes.
4.
Proper connection to a grounded power supply of sufficient voltage, replacement of blown
fuses, repair of loosened connections or defects in house wiring.
5.
Expenses for making the appliance accessible for servicing.
6.
Damages to finish after installation.
YOUR SOLE AND EXCLUSIVE REMEDY UNDER THIS LIMITED WARRANTY SHALL BE PRODUCT
REPAIR OR REPLACEMENT AS PROVIDED HEREIN. Service must be provided by a Midea designated
service company. This limited warranty is valid only in the 50 States of the United States or Canada
and applies only when the major appliance is used in the country in which it was purchased. This
limited warranty is effective from the date of original consumer purchase. Proof of original purchase
date is required to obtain service under this limited warranty.
responsible for the items listed below:
Page 44

1. Failure caused by damage to the unit while in your possession (other than damage caused
WHAT IS NOT COVERED
by defect or malfunction), by its improper installation, or by unreasonable use of the product,
including without limitation, failure to provide reasonable and necessary maintenance or to
follow the written Installation and Instruction Manual.
2. Products purchased “as-is” or refurbished are not covered by this warranty.
Service calls to repair or replace consumables such as light bulbs air filters etc.,
3.
or handles, knobs and other cosmetic parts.
Product that has been transferred from its original owner.
4.
5. Interior or exterior rust on the unit.
Damages caused by services performed by persons other than authorized Midea servicers; use
6.
of parts other than Midea replacement parts; obtained from persons other than such Midea
customer service; or external causes such as abuse, misuse, inadequate power supply or acts of
God.
Service calls resulting from improper installation of your product.
7.
Service calls to instruct you on the use of your product.
8.
Surcharges including, but not limited to, any after hour, weekend, or holiday service calls, tolls,
9.
ferry trip charges, or mileage expense for service calls to remote areas, including the state of
Alaska.
If the unit is put to commercial, business, rental, or other use or application other than for
10.
consumer use, we make no warranties, express or implied, including but not limited to, any
implied warranty of merchantablility or fitness for particular use or purpose.
11. Product that has been removed outside the USA or Canada.
Products without original serial numbers or products that have serial numbers which have been
altered or cannot be readily determined.
NOTE:
Some states do not allow the exclusion or limitation of incidental or consequential damages.
So this limitation or exclusion may not apply to you.
The cost of repair or replacement under these excluded circumstances shall be borne
by the
customer.
DISCLAIMER OF IMPLIED WARRANTIES
IMPLIED WARRANTIES, INCLUDING ANY IMPLIED WARRANTY OF MERCHANTABILITY OR
IMPLIED WARRANTY OF FITNESS FOR A PARTICULAR PURPOSE, ARE LIMITED TO ONE
YEAR OR THE SHORTEST PERIOD ALLOWED BY LAW. Some states and provinces do not allow
limitations on the duration of implied warranties of merchantability or fitness, so this limitation may
not apply to you. This warranty gives you specific legal rights, and you also may have other rights
that vary from state to state or province to province.
DISCLAIMER OF REPRESENTATIONS OUTSIDE OF WARRANTY
Midea makes no representations about the quality, durability, or need for service or repair of this
major appliance other than the representations contained in this warranty. If you want a longer or
more comprehensive warranty than the limited warranty that comes with this major appliance, you
should ask Midea or your retailer about buying an extended warranty.
LIMITATION OF REMEDIES; EXCLUSION OF INCIDENTAL AND CONSEQUENTIAL
DAMAGES
YOUR SOLE AND EXCLUSIVE REMEDY UNDER THIS LIMITED WARRANTY SHALL BE PRODUCT
REPAIR AS PROVIDED HEREIN. MIDEA SHALL NOT BE LIABLE FOR INCIDENTAL OR
CONSEQUENTIAL DAMAGES. Some states and provinces do not allow the exclusion or limitation of
incidental or consequential damages, so these limitations and exclusions may not apply to you. This
warranty gives you specific legal rights, and you also may have other rights that vary from state to
state or province to province.
05/19
Page 45

Horno Microondas
Modelo: MMO19S3AST
Fuente de alimentación: 120 V~
Frecuencia: 60 Hz
es
MANUAL DE
INSTRUCCIONES
Advertencia:
Antes de utilizar este producto,
lea este manual cuidadosamente
y guárdelo para consultarlo en el
futuro. El diseño y las
especificaciones están sujetos a
cambios sin previo aviso con el
fin de mejorar el producto.
Consulte con su distribuidor o
fabricante para obtener más
detalles.
¡Extensión gratuita de
3 meses* del período de
garantía limitada original!
Simplemente envíe una
foto de su comprobante
de compra a:
1-844-224-1614
*La extensión de la garantía es por
los tres meses inmediatamente
posteriores a la finalización del
período de garantía original del
producto.
Page 46

Estimado usuario
GRACIAS y FELICIDADES por la compra de este producto de
alta calidad de Midea. Su horno microondas de Midea representa
la modernidad, y está diseñado para un rendimiento confiable y
sin problemas. Tómese un momento para registrar su nuevo
horno microondas.
Registre su nuevo horno microondas en www.midea.com en la
pestaña Soporte.
Para referencia futura, registre el modelo de su producto y los
números de serie ubicados en el marco interior del horno
microondas.
Número de modelo_____________________________________
Número de serie______________________________________
_
Contenido
Precauciones para evitar una posible exposición al
exceso de energía de microondas.....................................47
Especificaciones........................................................................47
Instrucciones de seguridad importantes.........................48
Instrucciones para conexión a tierra................................50
Interferencia de radio...............................................................51
Utensilios.......................................................................................51
Nombres de las piezas............................................................53
Panel de control........................................................................54
Cocción manual.........................................................................55
Cocción por sensor.................................................................60
Cocción con un solo toque...................................................64
Cocción automática................................................................68
Descongelación automática.................................................73
Características útiles...............................................................78
Mantenimiento...........................................................................86
Page 47

PRECAUCIONES PARA EVITAR UNA
POSIBLE EXPOSICIÓN AL EXCESO
DE ENERGÍA DE MICROONDAS
(a) No intente utilizar este horno microondas con la puerta abierta ya que
esto puede provocar una exposición peligrosa a la energía de
microondas. Es importante no anular ni manipular indebidamente los
dispositivos de seguridad.
(b) No coloque ningún objeto entre la parte frontal del horno microondas
y la puerta ni permita que la suciedad o residuos de limpiadores se
acumulen en las superficies de sellado.
(c) No utilice el horno microondas si está dañado. Es importante que la
puerta del horno microondas cierre apropiadamente y que no hayan
daños en:
(1) PUERTA (inclinación)
(2) BISAGRAS Y PESTILLOS (rotos o flojos)
(3) SELLOS DE PUERTA Y SUPERFICIES HERMÉTICAS
(d) El horno microondas no debe ser ajustado ni reparado por nadie que
no sea personal de servicio técnico debidamente calificado.
Especificaciones
Modelo:
Voltaje nominal:
Potencia de entrada nominal (microondas):
Potencia de salida nominal (microondas):
MMO19S3AST
120 V ~ 60 Hz
1550 W
1000 W
Especificaciones
Instrucciones
de seguridad
Materiales
Nombres de
las piezas
Funcionamiento Mantenimiento
47
Page 48

INSTRUCCIONES DE SEGURIDAD
IMPORTANTES
ADVERTENCIA
Al utilizar aparatos eléctricos, se deben seguir siempre las precauciones
básicas de seguridad, que incluyen las siguientes:
ADVERTENCIA - Para reducir el riesgo de quemaduras, descargas
eléctricas, incendios, lesiones a personas o exposición
excesiva a energía de microondas:
1. Lea todas las instrucciones antes de utilizar el aparato.
2. Lea y siga: "PRECAUCIONES PARA EVITAR UNA POSIBLE EXPOSICIÓN
AL EXCESO DE ENERGÍA DE MICROONDAS" en la página 47.
3. Este aparato debe estar conectado a tierra. Conecte únicamente a un
Especificaciones
de seguridad
Instrucciones
Materiales
las piezas
Nombres de
FuncionamientoMantenimiento
tomacorriente debidamente conectado a tierra. Consulte
“INSTRUCCIONES PARA CONEXIÓN A TIERRA” en la página 50.
4. Instale o coloque este artefacto solo de acuerdo con las instrucciones
de instalación proporcionadas.
5. Algunos productos como huevos enteros y recipientes sellados, por
ejemplo, frascos de vidrio cerrados, pueden explotar por lo que no
deben calentarse en este horno.
6. Utilice este artefacto solo para el uso previsto como se describe en
este manual. No utilice productos químicos ni vapores corrosivos en
este aparato. Este tipo de horno está diseñado específicamente para
calentar, cocinar o secar los alimentos. No está diseñado para uso
industrial o de laboratorio.
7. Como cualquier aparato, deberá ser supervisado cuando sea utilizado
por niños.
8. No utilice este artefacto si el cable de alimentación o enchufe están
dañados, si no funciona correctamente o si tiene daños o se ha caído.
9. Este aparato debe ser reparado únicamente por personal de servicio
calificado. Póngase en contacto con el centro de servicio autorizado
más cercano para una evaluación, reparación o ajuste.
10. No cubra ni bloquee ninguna ranura del aparato.
11. No guarde este aparato al aire libre. No utilice este aparato cerca del
agua, por ejemplo, cerca del fregadero de la cocina, de una base
mojada, de piscinas o lugares similares.
12. No sumerja el cable de alimentación ni el enchufe en el agua.
13. Mantenga el cable de alimentación alejado de superficies calientes.
14. No cuelgue el cable de alimentación sobre el borde de la mesa o
mostrador.
15. Cuando limpie las superficies de la puerta y el horno, utilice solo
jabones suaves no abrasivos o detergente aplicado con una esponja o
paño suave.
16. Para reducir el riesgo de incendio en la cavidad del horno:
1). No cocine demasiado los alimentos. Esté atento cuando coloque
papeles, plástico u otros materiales inflamables dentro del horno
para facilitar la cocción.
48
Page 49

2). Retire los sujetadores metálicos de las bolsas de papel o de
plástico antes de colocarlas en el horno.
3). Si los materiales dentro del horno empiezan a arder, mantenga
cerrada la puerta del horno, apáguelo y desconecte el cable de
alimentación o desconecte la energía en la caja de fusibles o en el
panel del interruptor automático.
4). No utilice la cavidad del horno para almacenar objetos. No deje
productos de papel, utensilios de cocina o alimentos en la cavidad
del horno cuando no esté en uso.
17. Los líquidos, como agua, café o té pueden sobrecalentarse más allá
del punto de ebullición sin que pueda notarse que están hirviendo.
No siempre habrá burbujas o vapor de ebullición visibles al retirar el
recipiente del horno microondas.
ESTO PODRÍA PROVOCAR UN DERRAME IMPREVISTO DE LÍQUIDOS
DEMASIADO CALIENTES AL INTRODUCIR UNA CUCHARA U OTRO
UTENSILIO EN EL LÍQUIDO.
Para reducir el riesgo de lesiones a personas:
1) No sobrecaliente el líquido.
2) Agite el líquido antes y durante el calentamiento.
3) No utilice recipientes de lados rectos y cuello angosto.
4) Después de calentar, deje reposar el recipiente en el horno
microondas durante un corto tiempo antes de retirarlo.
5) Tenga mucho cuidado al insertar una cuchara u otro utensilio en el
recipiente.
18. No utilice ningún aparato de calefacción o de cocina debajo del horno
microondas. (Excepción: Un horno microondas calificado para usarse
encima de otro aparato de calefacción.)
19. No coloque el aparato sobre o cerca de ningún aparato de
calefacción o de cocina. (Excepción: Un horno microondas calificado
para usarse encima de otro aparato de calefacción.)
20. No coloque el horno microondas sobre un fregadero.
21. No almacene nada directamente sobre la superficie del aparato
cuando éste en funcionamiento.
22. Limpie las ranuras de ventilación con frecuencia. No deje que se
acumule grasa en las ranuras de ventilación o filtros de grasa.
23. Cuando esté cocinando alimentos en la cocina debajo del horno
microondas, encienda el ventilador.
24. Tenga cuidado al limpiar la ranura de ventilación y los filtros de grasa.
Los agentes de limpieza corrosivos como los limpiadores con lejía,
pueden dañar los filtros de grasa.
25. Este aparato es adecuado para usarlo encima de una cocina a gas o
eléctrica.
Especificaciones
Instrucciones
de seguridad
Materiales
Nombres de
las piezas
Funcionamiento Mantenimiento
GUARDE ESTAS INSTRUCCIONES
49
Page 50

INSTRUCCIONES PARA
CONEXIÓN A TIERRA
Este aparato debe estar conectado a tierra. En caso que se produzca un
cortocircuito eléctrico, la conexión a tierra reduce el riesgo de descarga
eléctrica al proporcionar una vía de escape para la corriente eléctrica.
Este aparato está equipado con un cable que tiene una conexión a tierra
con un enchufe a tierra. El enchufe debe estar conectado a un
tomacorriente que esté correctamente instalado y conectado a tierra.
Especificaciones
ADVERTENCIA
ADVERTENCIA - El uso inapropiado del enchufe con toma a tierra puede
causar una descarga eléctrica.
Consulte a un electricista o técnico de servicio calificado si las
instrucciones de conexión a tierra no se entienden completamente, o si
de seguridad
Instrucciones
existen dudas sobre si el aparato está conectado a tierra correctamente.
Si es necesario utilizar un cable de extensión, utilice solo un cable de
extensión de 3 clavijas que tenga un enchufe con conexión a tierra de
3 clavijas y un tomacorriente de 3 clavijas que acepte el enchufe del
aparato. La clasificación marcada del cable de extensión debe ser igual o
Materiales
mayor que la clasificación eléctrica del aparato.
PELIGRO - Peligro de descarga eléctrica
Tocar algunos de los componentes internos puede causar graves lesiones
personales o la muerte.
las piezas
Nombres de
No desarme este aparato.
ADVERTENCIA - Peligro de descarga eléctrica
El uso inadecuado de la conexión a tierra puede provocar una descarga
eléctrica. No lo enchufe en un tomacorriente hasta que el aparato esté
correctamente instalado y conectado a tierra.
FuncionamientoMantenimiento
1. Se proporciona un cable de alimentación corto con el propósito de
reducir el riesgo de tropezarse o enredarse con un cable más largo.
2. Se pueden utilizar cables de extensión solo si se usan con cuidado.
3. Si se utiliza un cable de extensión:
1) La clasificación eléctrica marcada en el cable de extensión debe ser
por lo menos igual que la clasificación eléctrica del aparato.
2) El cable de extensión debe ser un cable de 3 hilos con conexión a
tierra.
3) El cable de extensión debe colocarse de tal manera que no cuelgue
del borde de un mostrador ni de una mesa para que no pueda ser
tirado por un niño o alguien pueda tropezarse accidentalmente.
50
Page 51

INTERFERENCIA DE RADIO
1. El funcionamiento del horno microondas puede causar interferencias
en su radio, televisor o equipos similares.
2. Cuando hay interferencia, ésta puede reducirse o eliminarse tomando
las siguientes medidas:
1) Limpie la puerta y la superficie de sellado del microondas.
2) Reoriente la antena receptora de la radio o la televisión.
3) Reubique el microondas con respecto al receptor.
4) Coloque el microondas lejos del receptor.
5) Enchufe el microondas en un tomacorriente diferente de forma que
el microondas y el receptor estén en circuitos diferentes.
Especificaciones
Instrucciones
de seguridad
UTENSILIOS
PRECAUCIÓN - Riesgo de lesiones personales
Los recipientes demasiado cerrados podrían explotar. Los recipientes
cerrados deben abrirse y las bolsas de plástico deben perforarse antes
de cocinar.
Consulte el manual de instrucciones en "Materiales que puede utilizar en
el horno microondas o Materiales a evitar en el horno microondas"
Existen algunos utensilios de cocina no metálicos que no son seguros
para utilizar en el hornos microondas. En caso de duda, puede probar los
utensilios de cocina en cuestión siguiendo el procedimiento a
continuación.
Prueba de los utensilios de cocina:
1. Inserte los utensilios de cocina en cuestión y un recipiente para
microondas lleno con 1 taza (250 ml) de agua fría en el horno
microondas.
2. Cocine a máxima potencia durante 1 minuto.
3. Sienta cuidadosamente la superficie de los utensilios de cocina. Si los
utensilios de cocina está calientes, no los utilice para cocinar en el
horno microondas.
4. No exceda 1 minuto de cocción.
Materiales
Nombres de
las piezas
Funcionamiento Mantenimiento
51
Page 52

Materiales que puede utilizar en el horno microondas
Utensilios Comentarios
Plato para dorar Siga las instrucciones del fabricante*. El fondo del plato para dorar
Vajilla Utilice solamente envolturas aptas para microondas. Siga las
Jarras de vidrio Retire siempre la tapa. Utilice únicamente para calentar los
Cristalería Utilice solo cristalería apta para horno microondas. Asegúrese de
Especificaciones
Bolsas de cocción
para horno
Platos y vasos de
papel
Toallas de papel Utilícelo para cubrir los alimentos para recalentar y absorber la
de seguridad
Instrucciones
Papel de horno Utilícelo como cubierta para evitar salpicaduras o como envoltura
Plástico Utilice solamente envolturas aptas para microondas. Siga las
Materiales
Envoltura de
plástico
las piezas
Nombres de
Termómetros
Papel encerado Utilícelo como cubierta para evitar salpicaduras y para retener la
debe estar por lo menos a 3/16 pulg. (5 mm) por encima del plato
giratorio. El uso incorrecto podría causar la rotura del plato giratorio.
instrucciones del fabricante. No utilice platos agrietados ni astillados.
alimentos hasta que estén tibios. La mayoría de las jarras de vidrio
no son resistentes al calor y podrían romperse.
que no contengan decoraciones metálicas. No utilice platos
agrietados ni astillados.
Siga las instrucciones del fabricante*. No cierre con amarres metálicos.
Realice perforaciones para permitir que se escape el vapor.
Utilícelos solamente por poco tiempo de cocción o para calentar.
No deje el horno microondas desatendido durante la cocción.
grasa. Utilícelas con supervisión solo por poco tiempo de cocción.
para cocinar al vapor.
instrucciones del fabricante*. Utilice solamente si está etiquetado
como "Apto para microondas". Algunos recipientes de plástico se
ablandan al calentarse la comida en el interior. Las "Bolsas para
hervir" y las bolsas de plástico selladas deben cortarse, perforarse
o ventilarse, como se indica en el paquete.
Utilice solamente envolturas aptas para microondas. Utilícela para
envolver los alimentos durante la cocción y para retener la humedad.
No permita que la envoltura de plástico toque los alimentos.
Utilice solamente termómetros aptos para microondas (termómetros
para carnes y caramelos).
humedad.
Materiales a evitar en el horno microondas
Utensilios Comentarios
FuncionamientoMantenimiento
Bandeja de aluminio Podría causar arcos eléctricos. Utilice un plato apto para microondas.
Cartón para alimentos
con asa de metal
Utensilios de metal o
adornados con metal
Alambres de amarre Podría causar arcos eléctricos y puede provocar un incendio en
Bolsas de papel Podría provocar un incendio en el horno microondas.
Espuma de plastico La espuma de plástico puede derretir o contaminar el líquido en
Madera La madera se seca cuando se usa en el horno microondas y
Podría causar arcos eléctricos. Utilice un plato apto para
microondas.
El metal protege el alimento de la energía de microondas. Los
adornos de metal pueden provocar arcos eléctricos.
el horno microondas.
el interior cuando se expone a altas temperaturas.
puede partirse o agrietarse.
52
Page 53

NOMBRES DE LAS PIEZAS
VISTA FRONTAL
VISTA INFERIOR
1. Puerta del horno con ventana
transparente
2. Bisagras de la puerta
3. Cubierta de la guía de ondas:
NO LA RETIRE.
4. Eje del motor del plato giratorio
5. Lámpara del horno microondas
Se enciende cuando el horno
microondas está en funcionamiento
o si la puerta se encuentra abierta.
6. Portarejillas
7. Pestillos de seguridad de la puerta
El horno microondas no funcionará
a menos que la puerta esté bien
cerrada.
8. Manija
9. Almohadilla iluminada de
alto/bajo/apagado
Presione la almohadilla luminosa
de alto/bajo/apagado una vez para
alto, dos veces para bajo y tres
veces para apagar la luz.
10. Almohadila de ventilador de
alto/bajo/apagado
Presione la almohadilla luminosa del
ventilador de alto/bajo/apagado
una vez para alta velocidad, dos
veces para baja velocidad y tres
veces para apagar el ventilador.
11. Panel de control con pantalla táctil
automática
12. Visualización de la hora: Pantalla
digital, 99 minutos, 99 segundos
13. Ranuras de ventilación
14. Plato giratorio extraíble
El plato giratorio girará en sentido
horario o antihorario. Retire el plato
giratorio solo para limpiarlo.
15. Soporte del plato giratorio extraíble
Primero, coloque cuidadosamente el
soporte del plato giratorio en el eje
del motor en el centro del piso del
interior del horno microondas.
Luego, coloque el plato giratorio en
el soporte del plato giratorio de
forma segura.
16. Rejilla para cocinar / recalentar de
2 niveles
17. Cubierta ligera
18. Filtros de grasa
19. Etiqueta de menú
Especificaciones
Instrucciones
de seguridad
Materiales
Nombres de
las piezas
Funcionamiento Mantenimiento
53
Page 54

La pantalla interactiva de 7 dígitos detalla los pasos de funcionamiento
1b
1d
1e
Especificaciones
de seguridad
Instrucciones
Materiales
las piezas
Nombres de
FuncionamientoMantenimiento
Nota: Para obtener
información detallada, vaya
a la página correspondiente
indicada anteriormente.
54
PANEL DE CONTROL
y muestra sugerencias de cocción.
(1) Pantalla:
1f
1i
1g
1a
1c
1h
La pantalla incluye un reloj e indicadores que
muestran la hora del día, los ajustes del tiempo de
cocción, potencia de cocción, sensor, cantidades,
pesos y funciones de cocción seleccionadas.
1a. SENSOR:
Icono que se muestra cuando utiliza la cocción por
sensor.
1b. TEMPORIZADOR:
Icono que se muestra cuando el temporizador se está
configurando o funcionando.
1c. COCCIÓN:
Icono que se muestra al iniciar la cocción en el horno
microondas.
1d. DESCONGELADO:
Icono que se muestra al descongelar los alimentos.
1e. SEGURO:
Icono que se muestra en el bloqueo de control.
1f. PRESIONE DE NUEVA PARA MÁS OPCIONES
Icono que se muestra cuando hay opciones
adicionales disponibles.
1g. PRESIONE INICIO:
Icono que se muestra cuando se puede iniciar una
función válida.
1h. kg, oz, lb:
Icono que se muestra cuando elige el peso.
1i. MICROONDAS:
Icono que se muestra cuando utiliza el horno
microondas.
(2) Sensor de recalentamiento (5 ajustes diferentes)
(P63)
(3) Cocción automática (P68)
(4) Descongelación automática (P73)
(5) Nivel De Potencia (11 niveles de potencia
disponibles) (P59)
(6) Almohadillas numéricas (0 al 9)
(7) INICIAR+30 SEGUNDOS (P56)
(8) Luz de superficie (Alta / Baja / Apagada)
~ Presione este botón para ajustar el brillo de las
luces de superficie. (P85)
(9) Papa (1-4 papas) (P66)
(10) Cocción por sensor (P60)
(11) Palomitas de maíz (P64)
(12) Vegetales (P64)
(13) Botanas (P65)
(14) Derretir Suavizar (P67)
(15) Temporizador (Encendido-Apagado) (P84)
(16) Reloj y configuración (P55) (P78)
(17) Arranque Rápido (9 ajustes de botones
instantáneos) (P56)
(18) Detener/Borrar (P55)
(19) Exhaust (Alta / Baja / Apagada) ~ Utilícelo para
apagar el ventilador de extracción o para ajustar
la velocidad del ventilador. (P85)
(20) Charola giratoria (Encendido-Apagado) (P85)
Page 55

• Antes de usar su nuevo horno, asegúrese de haber leído y
entendido completamente esta Guía de uso y cuidado.
• El reloj se puede deshabilitar cuando el horno microondas se
conecta por primera vez y se selecciona el botón STOP.
Para volver a habilitar el reloj siga las instrucciones de
configuración del reloj.
Para establecer la hora
• Suponga que desea ingresar la hora correcta del día 10:59.
Pulse: Pantalla muestra:
1. User pref
3. "Start/Enter/+30 Sec"
NOTA
1. Si introduce una hora incorrecta (por ejemplo, 2:89),
el 8 es un dígito no válido y no se puede introducir.
Introduzca la hora correcta.
2. Si pulsa "Stop/Clear" mientras configura el reloj, la
pantalla mostrará la última hora del día establecida o una
pantalla en blanco si no se establece ninguna hora del día.
Especificaciones
Instrucciones
de seguridad
Materiales
Nombres de
las piezas
Funcionamiento Mantenimiento
COCCIÓN MANUAL
Tiempo de cocción
Este horno microondas puede ser programado para 99 minutos
y 99 segundos (99:99). Introduzca siempre los segundos
después de los minutos, incluso si ambos son ceros.
• Suponga que desea cocinar durante 5 minutos, 30 segundos al
100% de potencia.
55
Page 56

Especificaciones
de seguridad
Instrucciones
Pulse: Pantalla muestra:
2. "Start/Enter/+30 Sec"
Cuenta regresiva
Interrupción de la cocción
Puede detener el horno durante un ciclo tan solo abriendo la
puerta. El horno dejará de calentar y el ventilador se apagará,
pero la luz se mantendrá encendida. Para reiniciar la cocción,
cierre la puerta y presione "Start/Enter/+30 Sec".
Si no desea continuar con la cocción, abra la puerta y
presione "Stop Clear".
Uso del inicio con un solo toque
Materiales
las piezas
Nombres de
FuncionamientoMantenimiento
Este es un botón de ahorro de tiempo que iniciará
automáticamente la cocción dos segundos después de haber
sido seleccionado. Presione 1 durante 1 minuto, 2 durante dos
minutos, hasta 9 durante nueve minutos.
Pulse: Pantalla muestra:
Cuenta regresiva
Uso de la función Agregar 30 Seg.
Este es un botón para ahorrar tiempo. Es una función
simplificada que le permite ajustar e iniciar rápidamente la
cocción al 100% de potencia.
• Suponga que desea cocinar durante 1 minuto.
Pulse: Pantalla muestra:
1. "Start/Enter/+30 Sec"
2. "Start/Enter/+30 Sec"
Cuenta regresiva
56
Page 57
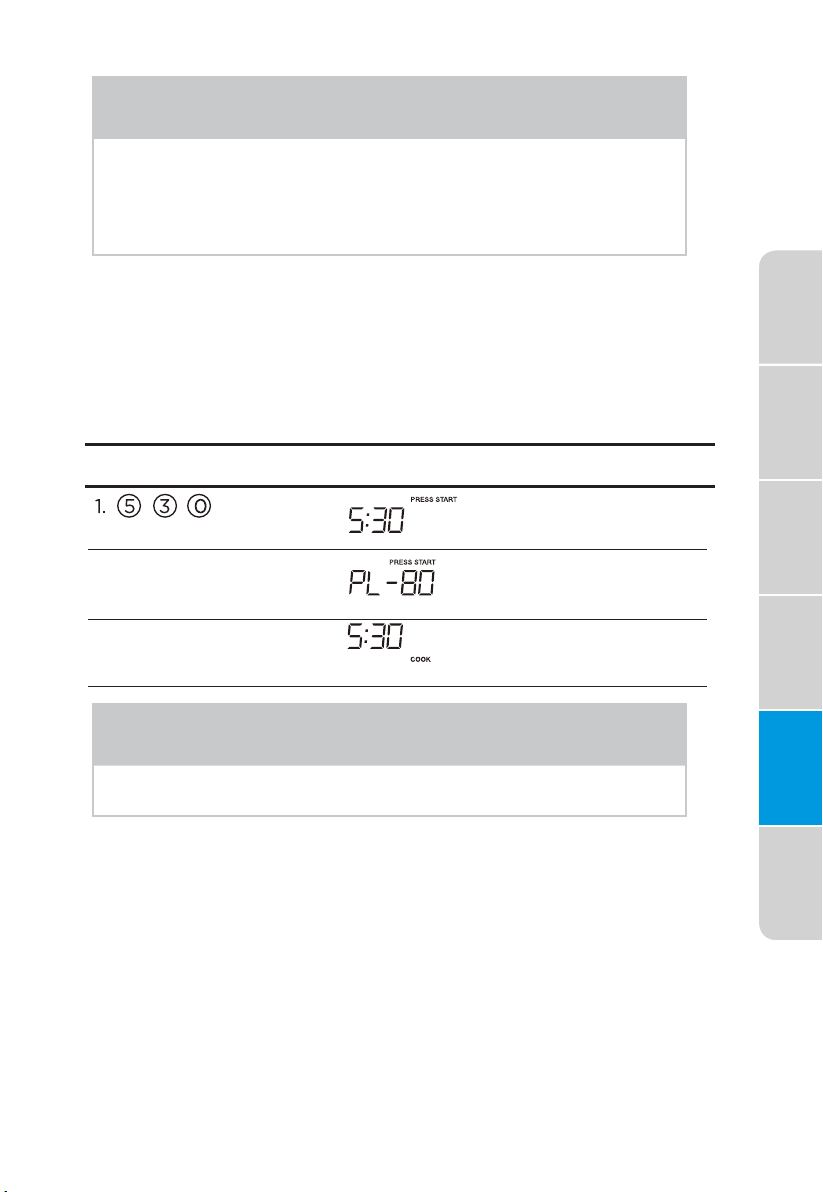
NOTA
Se mostrará el mensaje "Food" si no se selecciona un ciclo de
cocción de inicio rápido o se presiona el botón +30 seg.
después de 5 minutos de colocar la comida en el microondas.
Abra y luego vuelva a cerrar la puerta para eliminar el mensaje
"Food" de la pantalla.
Configuración del tiempo de cocción con el nivel de potencia
Esta función le permite programar un tiempo y una potencia
de cocción específicos. Para obtener mejores resultados, hay
10 ajustes de nivel de potencia además de la potencia ALTA
(100%).
• Suponga que desea cocinar durante 5 minutos, 30 segundos
al 80% de potencia.
Pulse: Pantalla muestra:
2. "Power Level" 3 veces
3. "Start/Enter/+30 Sec"
Cuenta regresiva
Especificaciones
Instrucciones
de seguridad
Materiales
Nombres de
las piezas
NOTA
Si no selecciona un nivel de potencia, el horno automáticamente
cocinará usando el nivel de potencia ALTA (100%).
Configuración de cocción de dos etapas
Para obtener mejores resultados, algunas recetas necesitan
distintos niveles de potencia durante un ciclo de cocción.
Puede programar su horno en dos etapas de niveles de
potencia durante el ciclo de cocción.
• Suponga que desea establecer un ciclo de cocción de dos
etapas. La primera etapa será de una cocción de 3 minutos al
80% de potencia, y la segunda será de 7 minutos al 50% de
potencia.
Funcionamiento Mantenimiento
57
Page 58

Pulse: Pantalla muestra:
Para establecer un tiempo
de cocción de 3 minutos
para la primera etapa.
2. "Power Level" 3 veces
Especificaciones
de seguridad
Instrucciones
Materiales
las piezas
Nombres de
FuncionamientoMantenimiento
Para establecer un nivel
de potencia de 7 minutos
para la segunda etapa.
4. "Power Level" 6 veces
NOTA
Puede programa una segunda etapa con un nivel de potencia
"0" para usarlo como tiempo de reposo dentro del horno.
"Start/Enter/+30 Sec"
5.
Cuenta regresiva
58
Page 59

Para establecer el nivel de potencia
Hay once niveles de potencia preestablecidos.
El uso de niveles de potencia más bajos aumenta el tiempo
de cocción, lo que es recomendable para alimentos como el
queso, la leche y la cocción lenta y prolongada de carnes.
Consulte el libro de cocina o las recetas para obtener
recomendaciones específicas.
PRESIONAR EL BOTÓN POWER
LEVEL VARIAS VECES PARA
OBTENER LA POTENCIA DESEADA
POWER LEVEL x 1
PORCENTAJE
APROXIMADO
DE POTENCIA
PALABRAS COMUNES
POR NIVEL DE
POTENCIA
Alto
POWER LEVEL x 2
POWER LEVEL x 3
POWER LEVEL x 4
Medio Alto
POWER LEVEL x 5
POWER LEVEL x 6
Medio
POWER LEVEL x 7
POWER LEVEL x 8
Medio Bajo / Descongelar
POWER LEVEL x 9
POWER LEVEL x 10
Bajo
POWER LEVEL x 11
Uso de la rejilla
La rejilla permite cocinar o recalentar diversos alimentos a la vez.
Sin embargo, para una mejor cocción y recalentamiento, utilice la
función Encendido del plato giratorio y cocine con SENSOR
COOKING o AUTO COOKING sin la rejilla. Al utilizar la rejilla,
establezca el tiempo y el nivel de potencia manualmente. Deje
suficiente espacio alrededor y entre los platos. Preste especial
atención al progreso de la cocción o recalentado. Vuelva a colocar
los alimentos e inviértalos de la rejilla al plato giratorio o revuélvalos
al menos una vez durante cualquier tiempo de cocción o
recalentamiento. Después de cocinar o recalentar, revuelva si es
posible. Si utiliza un nivel de potencia bajo le ayudará a obtener una
mejor uniformidad de cocción y recalentamiento.
Especificaciones
Instrucciones
de seguridad
Materiales
Nombres de
las piezas
Funcionamiento Mantenimiento
Evite:
• Guardar la rejilla en el horno microondas cuando no esté en uso.
• Preparar palomitas de maíz con la rejilla en el horno microondas.
• Utilizar una fuente para dorar en la rejilla.
• Utilizar la función SENSOR COOKING y AUTO COOKING con la
rejilla en el interior del horno microondas.
• Cocinar directamente sobre la rejilla. Utilice utensilios aptos para
microondas.
59
Page 60

Especificaciones
de seguridad
Instrucciones
Materiales
las piezas
Nombres de
NOTA
La función de encendido / apagado del plato giratorio se puede
utilizar en el funcionamiento manual. Consulte la página 85.
Descongelación manual
Si los alimentos que desea descongelar no están en la lista de la
tabla de Descongelación o están por encima o por debajo de los
límites en la columna de cantidad en la tabla de Descongelación
(vea la página 75-76), deberá descongelar manualmente.
Puede descongelar cualquier alimento congelado, ya sea crudo
o previamente cocido, usando el nivel de potencia del 30%.
Para los alimentos congelados crudos o previamente cocinados,
la regla general es de aproximadamente 4 minutos por libra. Por
ejemplo, descongele durante 4 minutos por 1 libra de salsa de
espaguetis congelada.
Detenga siempre el horno periódicamente para retirar o separar
las porciones descongeladas. Si los alimentos no se descongelan
al final del tiempo estimado de descongelación, programe el
horno en incrementos de 1 minuto en el nivel de potencia del
30% hasta que se descongelen totalmente.
Cuando utilice recipientes de plástico para congelar, descongele
solo el tiempo suficiente para sacar el alimento contenido en el
recipiente y colocarlo en un recipiente apto para microondas.
FuncionamientoMantenimiento
60
COCCIÓN POR SENSOR
La cocción por sensor emplea un sensor de control electrónico
que detecta el vapor (humedad) emitido por los alimentos al
calentarse. El sensor establece de forma automática los tiempos
de cocción y el nivel de potencia para diferentes alimentos y
cantidades.
Uso de los ajustes del sensor:
1. Asegúrese de que el exterior del recipiente de cocción y el
interior del horno estén secos. Limpie la humedad con un
paño seco o una toalla de papel.
2. El horno funciona con alimentos a temperatura normal de
almacenamiento. Por ejemplo, con las palomitas de maíz
funcionaría a temperatura ambiente.
3. Si tiene más o menos comida que la cantidad indicada en la
tabla, debe cocinarla siguiendo los pasos de cualquier libro
de cocina para horno microondas.
Page 61

4. Durante la primera parte de la SENSOR COOKING, aparecerá
el nombre del alimento en la pantalla. No abra la puerta del
horno ni presione el botón Stop Clear durante esta parte del
ciclo. Se interrumpirá la medición del vapor.
Cuando el sensor detecta el vapor emitido por los alimentos,
aparecerá el tiempo restante de cocción. Puede abrir la
puerta cuando aparece el tiempo de cocción restante en la
pantalla. En este momento, puede revolver o condimentar los
alimentos, según desee.
5. Si el sensor no detecta el vapor correctamente al cocinar
palomitas de maíz, el horno se apagará y se mostrará la hora
actual en la pantalla. Si el sensor no detecta el vapor
apropiadamente al cocinar otros alimentos, se mostrará un
código de error y el horno se apagará.
6. Verifique la temperatura de los alimentos después de la
cocción. Si es necesario cocinar durante más tiempo hágalo
de manera manual.
Envoltura de alimentos:
Utilice la envoltura recomendada en la tabla de alimentos:
1. Tapa de cacerola.
2. Envoltura de plástico: Utilice una envoltura de plástico
recomendada para cocción en microondas. Envuelva el plato
de forma suelta; deje un espacio de casi 1/2 pulgada sin cubrir
para permitir la salida de vapor. La envoltura de plástico no
debe tocar los alimentos.
3. Papel encerado: Cubra el plato completamente; doble el
exceso de la envoltura debajo del plato para asegurarlo. Si el
plato es más ancho que el papel, sobreponga por lo menos
una pulgada de dos pedazos para cubrirlo.
Tenga cuidado al retirar cualquier envoltura para permitir la
salida de vapor lejos de usted.
Especificaciones
Instrucciones
de seguridad
Materiales
Nombres de
las piezas
Funcionamiento Mantenimiento
NOTAS PARA LA COCCIÓN POR SENSOR
1. El resultado final de cocción variará según el estado de los
alimentos (por ejemplo, la temperatura inicial, la forma, la
calidad). Verifique la temperatura de los alimentos después de la
cocción. Si es necesario cocinar durante más tiempo hágalo de
manera manual.
2. Permanezca cerca del horno mientras está en uso y verifique el
progreso de la cocción con frecuencia para evitar que los
alimentos se cocinen demasiado.
3. Cuando se selecciona SENSOR COOKING, el encendido del plato
giratorio se configura automáticamente para una cocción óptima.
61
Page 62

Cocción por sensor
Usted puede cocinar los alimentos presionando el botón
Sensor Cook varias veces. No es necesario calcular el tiempo
de cocción ni el nivel de potencia.
• Suponga que desea preparar el desayuno congelado
Pulse: Pantalla muestra:
1. "Sensor Cook"
Especificaciones
de seguridad
Instrucciones
Materiales
las piezas
Nombres de
FuncionamientoMantenimiento
2. "Sensor Cook"
3. "Sensor Cook"
4. "Sensor Cook"
5. "Start/Enter/+30 Sec"
Tabla de cocción por sensor
ALIMENTO
1. Tocino
2. Cena
congelada
3. Arroz
4. Desayuno
congelado
CANTIDAD PROCEDIMIENTO
1-3 rebanadas Coloque las tiras de tocino en una rejilla para
10 onzas/ 20 onzas
1-2 tazas
8-12 onzas
microondas para obtener mejores resultados.
(Utilice un plato revestido con toallas de
papel si la rejilla no está disponible).
Coloque en un recipiente de tamaño
apropiado apto para microondas. Cubra con
una envoltura de plástico. Después de cocinar,
revuelva y deje reposar durante 3 minutos.
Coloque el arroz y el doble de líquido (agua,
caldo de pollo o verduras) en un recipiente
de 2 litros apto para microondas. Utilice
plástico para cubrir el recipiente y haga
agujeros para ventilar. Después de cocinar,
deje reposar durante 10 minutos. Revuelva
para obtener un arroz más esponjoso.
Coloque en un recipiente de tamaño
apropiado apto para microondas. Cubra con
una envoltura de plástico. Después de cocinar,
revuelva y deje reposar durante 3 minutos.
62
Page 63

Sensor de recalentamiento
Pulse: Pantalla muestra:
1.
"Sensor Reheat"
2. "Sensor Reheat"
3. "Sensor Reheat"
4. "Sensor Reheat"
5. "Sensor Reheat"
6. "Start/Enter/+30 Sec"
Tabla del sensor de recalentamiento
ALIMENTO
Bebida
Plato de cena
Sopa / Salsa 1 taza Coloque en una recipiente poco profundo apto
Cazuela / Lasagna 10.5 onzas Coloque en un bol o contenedor para microondas.
Panecillo / Muffin
CANTIDAD PROCEDIMIENTO
1 - 3 tazas Para recalentar bebidas.
Revuelva el líquido rápidamente antes y después
de calentar para evitar erupciones.
1-2 platos Coloque en un plato bajo. Cubra con una
envoltura plástica ventilada.
Deje reposar 3 minutos después de cocinar.
para microondas.
Cubra con una envoltura plástica ventilada.
Después de cocinar, revuelva y deje reposar
3 minutos.
Cubra con una envoltura plástica ventilada.
Después de cocinar, revuelva y deje reposar
3 minutos.
1-3 porciones Coloque sobre una toalla de papel. No cubra.
Especificaciones
Instrucciones
de seguridad
Materiales
Nombres de
las piezas
Funcionamiento Mantenimiento
63
Page 64

COCCIÓN CON UN SOLO TOQUE
Palomitas de maíz
El botón Popcorn en el panel táctil rápido le permite preparar
palomitas de maíz para microondas de 3.3, 3.0 o 1.75 onzas.
Coloque un solo paquete a la vez. Si utiliza una máquina de
palomitas de maíz para microondas, siga las instrucciones del
fabricante.
• Suponga que desea preparar palomitas de maíz de 3.3 onzas.
Especificaciones
de seguridad
Instrucciones
Materiales
las piezas
Nombres de
FuncionamientoMantenimiento
Pulse: Pantalla muestra:
1. "Popcorn"
2. "Start/Enter/+30 Sec"
Cuenta regresiva
Cantidad
3.30 onzas
3.00 onzas
1.75 onzas
Vegetales
Presione el botón popcorn
una vez
2 veces
3 veces
La función Vegetales tiene 2 opciones (Vegetales congelados,
Vegetales frescos).
• Suponga que desea cocinar dos tazas de verduras
congeladas.
Pulse: Pantalla muestra:
1.
"Veggies"
64
2. "Veggies"
3. "Start/Enter/+30 Sec"
Cuenta regresiva
Page 65

NOTAS
1. Retire la rejilla de metal del horno microondas antes de preparar
las palomitas de maíz. No utilice bolsas de papel normales. No
vuelva a hacer estallar los granos sin reventar. No prepare
palomitas de maíz en recipientes de vidrio.
Tabla para verduras
ALIMENTO
(Temperatura inicial)
1. Vegetales
congelados
(-0.4F)
2. Vegetales frescos
(41F)
Brócoli
Col de bruselas
Repollo
Coliflor (flores)
Coliflor (entera)
Espinaca
Calabacín
Zanahoria en rodajas
Mazorca de maíz
Vainita
Zapallo de invierno
- en cubitos
- en mitades
2 tazas
2 tazas
No es necesario añadir agua. Cubra el
contenido con una tapa o un envoltorio
de plástico.
Presione el botón Vegetables dos veces
para las verduras congeladas. Después de
cocinar, revuelva, deje reposar, cubierto,
durante 3 minutos.
Lave y coloque en la cacerola. No añada
agua si las verduras acaban de ser lavadas.
Cubra con la tapa para las verduras tiernas.
Utilice un envoltorio de plástico para las
verduras tiernas y crujientes. Presione el
botón Vegetables una vez para las verduras
frescas. Después de cocinar, revuelva, deje
reposar, cubierto, de 2 a 5 minutos.
Lave y coloque en la cacerola. Añade de
1 a 4 cucharadas de agua. Cubra con la tapa
para las verduras tiernas. Utilice un
envoltorio de plástico para las verduras
tiernas y crujientes. Presione el botón
Vegetables una vez para las verduras
frescas. Después de cocinar, revuelva,
deje reposar, cubierto, de 2 a 5 minutos.
Menú de aperitivos
El Menú de aperitivos es para cocinar / calentar alimentos que
requieren poco tiempo.
• Suponga que desea recalentar 3 perros calientes.
PROCEDIMIENTOCANTIDAD
Especificaciones
Instrucciones
de seguridad
Materiales
Nombres de
las piezas
Funcionamiento Mantenimiento
Pulse: Pantalla muestra:
1.
Snack Menus
" "
Snack Menus
2. " "
3.
"Start/Enter/+30 Sec"
65
Page 66

Especificaciones
Pulse: Pantalla muestra:
5. "Start/Enter/+30 Sec"
Cuenta regresiva
Tabla de menú de aperitivos
ALIMENTO
CANTIDAD PROCEDIMIENTO
de seguridad
Instrucciones
Materiales
las piezas
Nombres de
FuncionamientoMantenimiento
1. Pizza
congelada
para
microondas
2. Perros
calientes
3. Comida en
una taza
4. Comida
congelada
(6 - 8 onzas)
1 - 6 piezas Coloque el perro caliente en el pan. Envuelva
2.39 onzas Esta configuración es ideal para porciones
8. 8 onzas
Utilice para pizza congelada de horno
microondas. Retire de la caja y siga las
instrucciones del paquete. Siga las
instrucciones del paquete para la cantidad
correcta y uso del disco de aluminio.
cada uno con papel toalla o servilleta.
individuales de alimentos enlatados
envasados en un recipiente pequeño apto
para microondas, generalmente de 6 a
8 onzas. Después de la cocción, revuelva
la comida y déjela reposar durante
1 o 2 minutos.
Utlice este botón para alimentos
congelados y cocinados previamente.
Retire la cubierta de la caja y siga las
instrucciones del paquete. Después de
cocinar, deje reposar, cubierto de
1 a 3 minutos. Obtendrá resultados
satisfactorios para la mayoría de las
comidas congeladas.
Papa
• Suponga que desea cocinar de 1 a 4 papas al horno.
Pulse: Pantalla muestra:
1. "Potato"
66
2. "Start/Enter/+30 Sec"
Page 67

NOTAS
1. Los tiempos de cocción se basan en una papa promedio de 8 onzas.
Tabla de patata al horno
ALIMENTO
Papa*
* No es necesario introducir cantidad o número.
Configuración de función fundir/ablandar
El horno utiliza baja potencia para fundir y ablandar los alimentos. Consulte la
siguiente tabla.
• Suponga que desea derretir dos barras de mantequilla.
Pulse: Pantalla muestra:
1.
"Melt/Soften"
2. "Start/Enter/+30 Sec"
CANTIDAD PROCEDIMIENTO
1-4 porciones
Perfore la papa con un tenedor en varias
partes. Coloque en un papel toalla sobre
el plato giratorio. Después de cocinarlas,
retírelas del horno y déjelas reposar
envueltas durante 5 minutos.
Especificaciones
Instrucciones
de seguridad
Materiales
Nombres de
las piezas
4. "Start/Enter/+30 Sec"
Cuenta regresiva
Tabla para derretir
CATEGORÍA CANTIDAD DIRECCIÓN
MANTEQUILLA
CHOCOLATE
HELADO
1 o 2 palitos Desenvuelva y coloque en un recipiente apto para
2, 4 o 8 onzas Se pueden utilizar trocitos o cuadrados de
Degustacion,
1.5 litros.
microondas.
No es necesario cubrir la mantequilla. Revuelva al
finalizar la cocción hasta que se derrita por completo.
chocolate para hornear. Desenvuelva los cuadrados
de chocolate y colóquelos en un recipiente apto
para microondas. Revuelva al finalizar la cocción
hasta que se derrita por completo.Pinte
Coloque el recipiente en el horno. El helado quedará
lo suficientemente suave para hacerlo más fácil.
Funcionamiento Mantenimiento
67
Page 68

TABLA PARA DERRETIR
CATEGORÍA CANTIDAD DIRECCIÓN
QUESO
CREMA
3 o 8 onzas Desenvuelva y coloque en un recipiente apto para
microondas. El queso crema estará a temperatura
ambiente y listo para usar en la receta.
Especificaciones
de seguridad
Instrucciones
Materiales
las piezas
Nombres de
FuncionamientoMantenimiento
COCCIÓN AUTOMÁTICA
Cocción automática
La cocción automática se divide en 2 partes: comidas rápidas (huevos
revueltos, cereales calientes, pizza congelada, brownies de chocolate) y
recetas para la cena (camarones al ajo, papas rojas asiago, verduras asadas,
risotto de limón y camarones, chili de pollo blanco).
Botón
Auto Cook x1
Auto Cook x2
Auto Cook x3
Auto Cook x4
Auto Cook x5
Auto Cook x6
Auto Cook x7
Auto Cook x8
Auto Cook x9
Auto Cook x10
Comidas rápidas
• Suponga que desea preparar cereales calientes para tres personas.
Alimento Cantidad
Huevos revueltos 1-6 huevos
Cereal caliente 1-3 porciones
Pizza congelada
Brownies de chocolate
Camarones al ajo Por receta
Champiñones rellenos
Papas rojas asiago
Ensalada de verduras asadas Por receta
Risotto de camarones y limón Por receta
Chili de pollo blanco Por receta
12 onzas
18-19 onzas
Por receta
Por receta
68
Pulse: Pantalla muestra:
1.
"Auto Cook"
2. "Auto Cook"
Page 69

Pulse: Pantalla muestra:
"Start/Enter/+30 Sec"
3.
5. "Start/Enter/+30 Sec"
Cuenta regresiva
NOTAS
Si selecciona "AUTO COOKING", el plato giratorio se enciende
automáticamente para una cocción óptima.
Tabla de comidas rápidas
ALIMENTO
1. Huevos
revueltos
2. Cereal
caliente
3. Pizza
congelada
4. Brownies de
chocolate
CANTIDAD PROCEDIMIENTO
1-6 huevos
1-3 porciones Coloque el perro caliente en el pan. Envuelva
12 onzas Esta configuración es ideal para porciones
18-19 onzas Prepare la mezcla de brownie de acuerdo con
Úselo para huevos congelados, cereales calientes,
pizzas. Retire del paquete y desenvuelva. Siga las
instrucciones del paquete para la cantidad
correcta y uso del disco de aluminio.
cada uno con papel toalla o servilleta.
individuales de alimentos enlatados envasados
en un recipiente pequeño apto para microondas,
generalmente de 6 a 8 onzas. Retire la tapa de
metal interior y vuelva a colocar la tapa exterior
para microondas. Después de la cocción, revuelva
la comida y déjela reposar durante 1 o 2 minutos.
las instrucciones del paquete. Coloque la masa
en un recipiente de vidrio apto para
microondas de 8 × 8 pulgadas que haya sido
cubierto con aceite en aerosol. Seleccione
"Fudge Brownies" en el menú Auto Cook.
Especificaciones
Instrucciones
de seguridad
Materiales
Nombres de
las piezas
Funcionamiento Mantenimiento
69
Page 70

Recetas para la cena
• Suponga que desea cocinar camarones al ajo.
Pulse: Pantalla muestra:
"Auto Cook"
1.
2. "Auto Cook"
Especificaciones
de seguridad
Instrucciones
Materiales
las piezas
Nombres de
FuncionamientoMantenimiento
3. "Auto Cook"
4. "Auto Cook"
5. "Auto Cook"
6. "Start/Enter/+30 Sec"
Cuenta regresiva
Recetas para la cena
Camarones al ajo
¼ de taza de mantequilla
6 dientes de ajo picados
2 cucharadas de cebollín fresco picado
2 cucharadas de jugo de limón
1 cucharada de pasta de pimiento
Sal al gusto
1 libra de camarones grandes crudos, pelados y desvenados
Coloque la mantequilla en una cacerola con tapa de 2 litros apta para
microondas. Cocine en el microondas a alta potencia durante 1 minuto o hasta
que la mantequilla se derrita. Añada el ajo y cocine en el microondas durante
un minuto más. Añada el cebollín, el jugo de limón, la pasta de pimiento y la
sal. Añada los camarones, revolviendo para cubrirlos uniformemente. Cubra,
y cocine en el microondas a alta potencia durante 5 minutos, o hasta que los
camarones se oscurezcan, revolviendo después de 3 minutos. Sirva sobre
arroz cocido caliente si lo desea.
70
Page 71

Champiñones rellenos
1 libra de champiñones enteros
2 cucharadas de mantequilla derretida
1 manojo de cebolla verde picada
¼ de taza de queso parmesano rallado
2 cucharadas de pan rallado
1 cucharadita de jugo de limón
¼ de cucharadita de ajo pimienta
Pimienta roja machacada al gusto
Retire los tallos de los champiñones y déjelos a un lado. Coloque los
champiñones en un recipiente apto para microondas. Pique finamente los tallos
de los champiñones. Combine la mantequilla, los tallos de los hongos picados y
la cebolla verde en un plato de 1 litro apto para el microondas; caliéntelo en el
microondas a alta potencia durante 2 minutos. Agregue los ingredientes
restantes y mezcle bien. Con una cuchara, coloque el relleno en los
champiñones. Cocine en el microondas a alta potencia durante 4 o 5 minutos,
o hasta que los champiñones estén tiernos.
Especificaciones
Instrucciones
de seguridad
Papas rojas asiago
1¼ de libra de tomates rojos, pelados y finamente rebanados
2 cucharadas de harina para todo uso
½ cucharadita de sal
1¼ tazas de leche
1 cucharada de mantequilla derretida
5 onzas de queso asiago rallado
Mezcle las papas, la harina y la sal en una bolsa de plástico con cierre; selle la bolsa y agite para
cubrir las papas. Coloque las papas en una cacerola de 2 litros ligeramente engrasada apta para
microondas. Añada la leche y la mantequilla, revolviendo bien. Cubra y cocine en el
microondas a 80% de potencia durante 12 minutos o hasta que las papas estén tiernas;
espolvoree con queso y cocine en el microondas al 80% de potencia durante un minuto más o
hasta que el queso se derrita.
Ensalada de verduras asadas
1 taza de zanahorias pequeñas
1 taza de calabaza amarilla en rodajas
1 taza de calabacín en rodajas
½ taza de pimiento rojo rebanado
½ taza de cebolla finamente rebanada
1 cucharada de mantequilla
Ajo y hierbas condimentadas al gusto
Combine las zanahorias, la calabaza, el calabacín, el pimiento y la cebolla en una cacerola de
2 litros apta para microondas. Puntee con mantequilla y espolvoree con condimento. Cubra, y
ponga el microondas a alta potencia durante 8 minutos o hasta el grado deseado de cocción.
Materiales
Nombres de
las piezas
Funcionamiento Mantenimiento
71
Page 72

Especificaciones
de seguridad
Instrucciones
Materiales
las piezas
Nombres de
FuncionamientoMantenimiento
Risotto de camarones y limón
2 cucharaditas de mantequilla
2 cucharaditas de aceite de oliva
2 cucharadas de chalota finamente picada
4 tazas de caldo de pollo
¼ taza de jugo de limón fresco exprimido
2 tazas de risotto
1 libra de camarones medianos, pelados y desvenados
1 taza de guisantes congelados, descongelados
2 cucharaditas de ralladura de limón
¼ de cucharadita de pimienta negra
¾ de cucharadita de sal
Combine el caldo de pollo y el jugo de limón en un recipiente de 1 litro apto
para microondas. Cocine en el microondas a alta potencia durante 1 minuto o
hasta que la chalota esté tierna. Retire.
Combine el caldo de pollo y el jugo de limón en un recipiente de 2 litros apto
para microondas. Cubra con una tapa o envoltura de plástico ventilada. Cocine
en el microondas a alta potencia durante 10 minutos. Agregue la mezcla de
chalotas y el risotto. Cubra y continúe la cocción en el microondas al 50% de
potencia durante 20 minutos. Añada el camarón, los guisantes, la ralladura de
limón, la pimienta y la sal. Cubra y cocine en el microondas al 50% de potencia
durante 5 minutos o hasta que los camarones se oscurezcan.
Chili de pollo blanco
1 libra de pechuga de pollo deshuesada, sin piel, en cubos
½ taza de cebolla picada
3 dientes de ajo picados
1 (15 onzas) de frijoles blancos, escurridos
1 (4 onzas) de pimiento verde picado
1 taza de caldo de pollo
1 ½ cucharadita de chile en polvo
¾ de cucharadita de comino
½ cucharadita de sal
½ cucharadita de pimienta negra
½ taza de cilantro fresco picado
2 cucharadas de jugo de limón fresco
72
Combine el pollo, la cebolla y el ajo en un recipiente de 2.5 litros apto para
microondas. Cubra y cocine en el microondas durante 6 minutos, o hasta que
el pollo esté completamente cocido y la cebolla esté tierna, revolviendo
después de 3 minutos.
Añada los frijoles blancos, pimiento, caldo de pollo, pimiento en polvo, comino,
sal y pimienta, revolviendo bien. Cubra y cocine en el microondas a
temperatura alta durante 10 minutos, revolviendo después de 5 minutos.
Añada el cilantro y el jugo de limón antes de servir.
Page 73
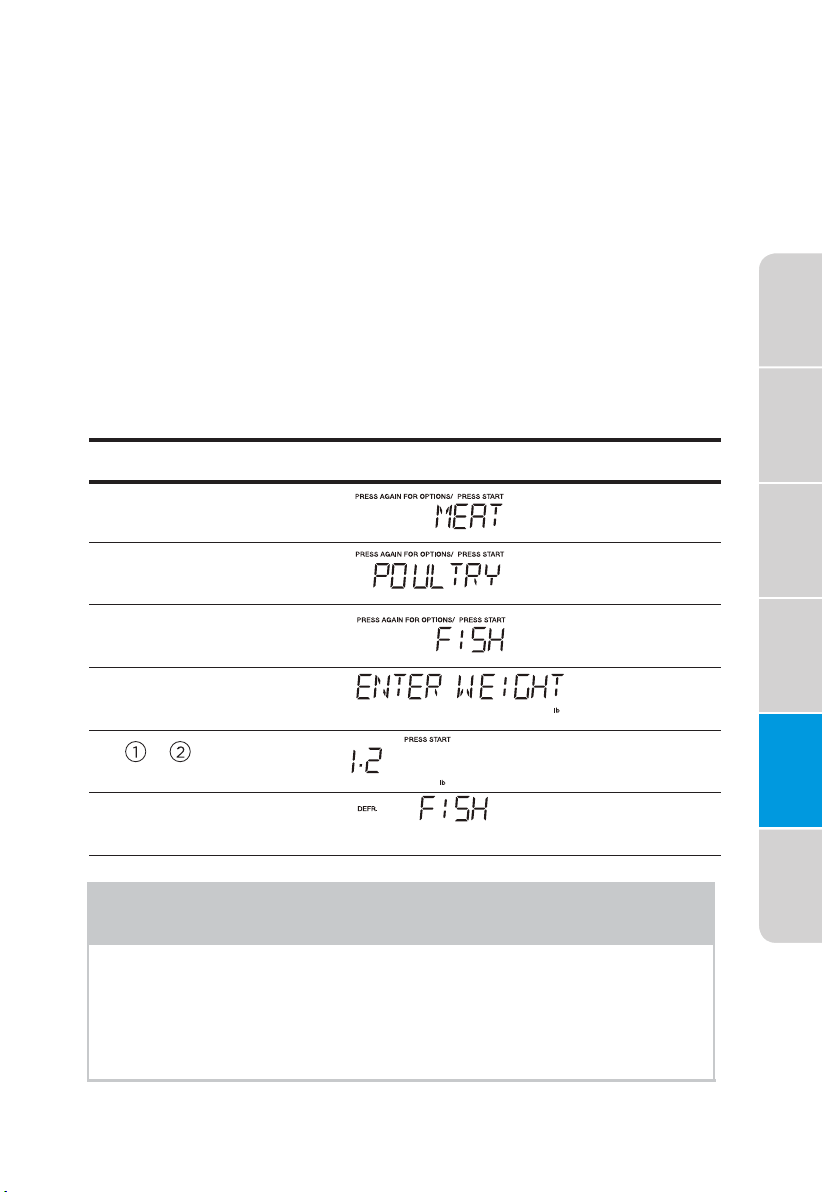
DESCONGELACIÓN AUTOMÁTICA
Uso de la descongelación automática
La función de descongelación automática le proporciona el mejor método de
descongelación para alimentos congelados. La guía de cocción le mostrará qué
secuencia de descongelación se recomienda para el alimento que está
descongelando.
Para mayor comodidad, el descongelamiento automático incluye un mecanismo
de pitidos incorporado que le recuerda que debe revisar, dar la vuelta, separar o
reorganizar los alimentos para obtener los mejores resultados de
descongelación. Se proporcionan tres niveles diferentes de descongelación:
1. CARNE
2. POLLO
3. PESCADO
El peso disponible es 0.1-6.0 lbs.
• Suponga que desea descongelar 1.2 libras de pescado.
Pulse: Pantalla muestra:
Especificaciones
Instrucciones
de seguridad
"Auto Defrost"
1.
2. "Auto Defrost"
3. "Auto Defrost"
4. "Start/Enter/+30 Sec"
5. y
Introducir el peso
6. "Start/Enter/+30 Sec"
Cuenta regresiva
NOTAS
El horno emitirá un pitido durante el ciclo de
"DESCONGELACIÓN". En este momento, abra la puerta y gire,
separe o reorganice los alimentos. Retire las porciones que se
hayan descongelado. Regrese las porciones congeladas al horno
y pulse "Start/Enter/+30 Sec" para reanudar el ciclo de
descongelación.
Materiales
Nombres de
las piezas
Funcionamiento Mantenimiento
73
Page 74

Consejos de funcionamiento
• Para obtener mejores resultados, retire el pescado, el marisco, la carne y las
• Para obtener mejores resultados, enrolle la carne molida en una bola antes de
• Coloque los alimentos en un recipiente poco profundo o en una rejilla de
Esta tabla muestra las selecciones de tipos de alimentos y los pesos que puede
establecer para cada tipo. Para obtener mejores resultados, afloje o retire la
Especificaciones
de seguridad
Instrucciones
Materiales
las piezas
Nombres de
FuncionamientoMantenimiento
cubierta de los alimentos.
aves de su paquete original cerrado de papel o plástico (envoltorio). De lo
contrario, el envoltorio mantendrá el vapor y el jugo cerca de los alimentos,
lo que puede causar que la superficie exterior de los alimentos se cocine.
congelarla. Durante el ciclo de DESCONGELACIÓN, el microondas indicará
cuándo es el momento de dar la vuelta a la carne. Quite el exceso de escarcha
de la carne y continúe descongelándola.
asado para microondas para atrapar las gotas de grasa.
PULSE LA TECLA
Descongelación automática X 1
Descongelación automática X 2
Descongelación automática X 3
Categoría
Carne
Pollo
Pescado
PESOS QUE PUEDE ESTABLECER
(décimas de una libra)
0.1 a 6.0 lbs
0.1 a 6.0 lbs
0.1 a 6.0 lbs
Tabla de conversión de peso
Probablemente esté acostumbrado a medir los alimentos en libras y onzas que
son fracciones de una libra (por ejemplo, 4 onzas es igual a 1/4 libra). Sin
embargo, con el fin de introducir el peso de los alimentos en Descongelación
Automática, debe especificar libras y décimas de una libra. Si el peso en el
paquete de alimentos está en fracciones de una libra, puede utilizar la siguiente
tabla para convertir el peso en decimales.
Peso equivalente
ONZAS
1.6
3.2
4.0
4.8
6.4
8.0
9.6
11.2
12.0
12.8
14.4
16.0
PESO DECIMAL
10
20
25 Un cuarto de libra
30
40
50 Media libra
60
70
75 Tres cuartos de libra
80
90
1.0 Una libra
74
NOTAS
Si el peso está entre dos decimales, coloque el peso inferior hacia
abajo para obtener mejores resultados de descongelación.
Page 75

Tabla de descongelación automática
NOTA: La carne de forma irregular y grandes trozos grasos de carne deben
tener las áreas estrechas o grasas protegidas con papel de aluminio al inicio
de la secuencia de descongelación.
Configuración para carne
ALIMENTO
CONFI-
GURACIÓN
EN EL PITIDO
CARNE DE RES
Carne molida,
a granel
Carne molida,
hamburguesas
Bistec
redondo
Filete de
lomo
Estofado de
carne
Asado de
carne, asado
de cerdo
Asado de
costilla
Rollo de asado Dar la vuelta. Cubre las áreas
CARNE
CARNE
CARNE
CARNE
CARNE
CARNE
CARNE
CARNE
Retire las porciones descongeladas con
un tenedor.
Dar la vuelta. Regrese el resto al horno.
Separar y volver a colocar.
Dar la vuelta. Cubre las áreas calientes
con papel de aluminio.
Dar la vuelta. Cubre las áreas calientes
con papel de aluminio.
Retire las porciones descongeladas
con un tenedor.
Separar el resto.
Regrese el resto al horno. Coloque en un recipiente apto para
Dar la vuelta. Cubre las áreas
calientes con papel de aluminio.
calientes con papel de aluminio.
CORDERO
Cubos para
estofado
Chuletas
(1 pulgada de
espesor)
CARNE
CARNE
Dar la vuelta. Cubre las áreas calientes
con papel de aluminio.
Retire las porciones descongeladas con
un tenedor.
Regrese el resto al horno.
PUERCO
Chuletas
(1/2 pulgada
de espesor)
Perros
calientes
Costillas de
cerdo estilo
campestre
Salchicha,
Enlaces
Salchicha,
a granel
Lomo asado,
sin hueso
CARNE
CARNE
CARNE
CARNE
CARNE
CARNE
Separar y volver a colocar.
Separar y volver a colocar.
Dar la vuelta. Cubre las áreas calientes
con papel de aluminio.
Separar y volver a colocar.
Retire las porciones descongeladas con
un tenedor.
Dar la vuelta. Regrese el resto al horno.
Dar la vuelta. Cubre las áreas calientes
con papel de aluminio.
INSTRUCCIONES
ESPECIALES
No descongele menos de 1/4 lb.
Congele en forma de bola.
No descongele hamburguesas de
menos de 2 onzas.
Presione el centro cuando se congele.
Coloque en un recipiente apto para
microondas.
Coloque en un recipiente apto para
microondas.
Coloque en un recipiente apto para
microondas.
microondas.
Coloque en un recipiente apto para
microondas.
Coloque en un recipiente apto para
microondas.
Coloque en un recipiente apto para
microondas.
Coloque en un recipiente apto para
microondas.
Coloque en un recipiente apto para
microondas.
Coloque en un recipiente apto para
microondas.
Coloque en un recipiente apto para
microondas.
Coloque en un recipiente apto para
microondas.
Coloque en un recipiente apto para
microondas.
Coloque en un recipiente apto para
microondas.
Especificaciones
Instrucciones
de seguridad
Materiales
Nombres de
las piezas
Funcionamiento Mantenimiento
75
Page 76

Tabla de descongelación automática (Continuación)
Configuración para aves de corral
Especificaciones
de seguridad
Instrucciones
Materiales
Configuración para pescado
ALIMENTO
CONFI-
GURACIÓN
EN EL PITIDO
POLLO
Entero
(hasta 6 libras)
Cortado Separe las piezas y vuelva a
POLLO Voltee la pechuga hacia abajo.
Cubre las áreas calientes con papel
de aluminio.
colocarlas.
Dar la vuelta. Cubre las áreas
calientes con papel de aluminio.
PECHUGA
Gallinas
enteras
POLLO
Dar la vuelta. Cubre las áreas
calientes con papel de aluminio.
PAVO
Pechuga
(hasta 6 libras)
POLLO
Dar la vuelta. Cubre las áreas
calientes con papel de aluminio.
INSTRUCCIONES
ESPECIALES
Coloque la pechuga de pollo hacia
arriba en un recipiente apto para
microondas. Termine de descongelar
sumergiendo en agua fría. Retire las
menudencias cuando el pollo esté
parcialmente descongelado.
Coloque en un recipiente apto para
microondas.
Termine de descongelar sumergiendo
en agua fría.
Coloque en un recipiente apto para
microondas.
Termine de descongelar
sumergiendo en agua fría.
Coloque en un recipiente apto para
microondas.
Termine de descongelar
sumergiendo en agua fría.
las piezas
Nombres de
FuncionamientoMantenimiento
76
ALIMENTO
CONFI-
GURACIÓN
EN EL PITIDO
PESCADO
Filetes
Bistecs
Entero Dar la vuelta
PESCADO
PESCADO
PESCADO
Dar la vuelta. Separe los filetes
cuando estén parcialmente
descongelados, si es posible.
Separar y volver a colocar.
PESCADO DE MARCA
Carne de
cangrejo
Colas de
langosta
Camarones
Escalopas
PESCADO
PESCADO
PESCADO
PESCADO
Separar. Dar la vuelta.
Separar. Dar la vuelta.
Separar. Dar la vuelta.
Separar. Dar la vuelta.
INSTRUCCIONES
ESPECIALES
Coloque en un recipiente apto para
microondas.
Separe cuidadosamente los filetes
con agua fría.
Coloque en un recipiente apto para
microondas.
Coloque agua fría encima para
terminar de descongelar.
Coloque en un recipiente apto para
microondas.
Cubra la cabeza y la cola con papel de
aluminio; no deje que la lámina toque
los lados del microondas. Termine de
descongelar sumergiendo en agua fría.
Coloque en un recipiente apto para
microondas.
Coloque en un recipiente apto para
microondas.
Coloque en un recipiente apto para
microondas.
Coloque en un recipiente apto para
microondas.
Page 77

Consejos para la descongelación
• Cuando se utiliza Descongelación automática, el peso a introducir es el peso
neto en libras y décimas de libras (el peso de la comida menos el envase).
• Antes de comenzar, asegúrese de quitar todos y cada uno de los ganchos
metálicos que suelen venir con bolsas de alimentos congelados y
reemplazarlos con cuerdas o bandas elásticas.
• Abra los envases, como los cartones, antes de colocarlos en el horno.
• Siempre corte o perfore las bolsas de plástico o los envases.
• Si los alimentos están envueltos en papel aluminio, retire el papel aluminio y
coloque los alimentos en un recipiente adecuado.
• Retire la piel de los alimentos con piel, como las salchichas.
• Dobl las bolsas de plástico de los alimentos para asegurar una descongelación
uniforme.
• Siempre subestime el tiempo de descongelación. Si los alimentos
descongelados todavía están helados en el centro, devuélvalos al horno de
microondas para continuar con la descongelación.
• La duración del tiempo de descongelación varía según la forma en que los
alimentos estén congelados.
• La forma del envase afecta la rapidez con que los alimentos se descongelan.
Los envases poco profundos se descongelarán más rápidamente que los
envases profundos.
• A medida que el alimento comience a descongelarse, separe los pedazos para
que puedan ser descongelados fácil y rápidamente.
• Utilice pequeños trozos de papel de aluminio para proteger partes de los
alimentos tales como alitas de pollo, puntas de patas, colas de pescado o áreas
que comiencen a calentarse. Asegúrese de que el papel de aluminio no toque
los lados, la parte superior o la parte inferior del horno. La lámina puede dañar
el revestimiento del horno.
• Para obtener mejores resultados, deje reposar los alimentos después de
descongelarlos.
• Voltee los alimentos durante el tiempo de descongelación o reposo.
• Separe y retire los alimentos según sea necesario.
Especificaciones
Instrucciones
de seguridad
Materiales
Nombres de
las piezas
Funcionamiento Mantenimiento
77
Page 78

CARACTERÍSTICAS ÚTILES
1. Preferencias del usuario
El horno microondas tiene ajustes que le permiten personalizar el
funcionamiento para su comodidad. A continuación se muestra la tabla que
muestra los distintos ajustes. Pulse el botón User pref varias veces para
desplazarse a la función de ajuste que desee.
Pulse La Tecla
Especificaciones
de seguridad
Instrucciones
(1). Configuración del reloj
Materiales
El reloj se puede deshabilitar cuando se conecta primero el horno
microondas y se selecciona el botón "Stop/Clear".
Siga las instrucciones para volver a habilitar el reloj.
• Suponga que desee establecer el reloj a las 10:59.
Pulse: Pantalla muestra:
las piezas
Nombres de
1. "User Pref"
FuncionamientoMantenimiento
3. "Start/Enter/+30 Sec"
User pref X 1
User pref X 2
User pref X 3
User pref X 4
User pref X 5
User pref X 6
Opción
Reloj
Bloqueo de control
Volumen (Bajo / Medio / Alto / Desactivado)
Peso (lb/kg)
Visualización del reloj
Demo
78
NOTAS
1. Si introduce una hora incorrecta (por ejemplo, 2:89), el 8 es un dígito no
válido y no se puede introducir.
Introduzca la hora correcta.
2. Si pulsa "Stop/Clear" mientras configura el reloj, la pantalla mostrará la
última hora del día establecida o una pantalla en blanco si no se
establece ninguna hora del día.
Page 79

(2). Configuración de activación/desactivación del bloqueo de control
Para activar el bloqueo de control.
Pulse: Pantalla muestra:
1. "User Pref"
2. "User Pref"
3. "Start/Enter/+30 Sec"
Para apagar el bloqueo de control, pulse User pref y
luego presione "Start/Enter/+30 Sec"
4. "Start/Enter/+30 Sec"
Especificaciones
Instrucciones
de seguridad
Materiales
Nombres de
las piezas
Funcionamiento Mantenimiento
79
Page 80

(3). Reproducción de sonido bajo/medio/alto/silencio
Las señales audibles están disponibles para guiarlo cuando configure y utilice el
horno.
• Un tono de programación sonará cada vez que presione un botón.
• Tres tonos señalan el final de la cuenta regresiva del temporizador de cocina.
• Tres tonos señalan el final de un ciclo de cocción.
• Suponga que desea desactivar la señal audible.
1. "User Pref"
Especificaciones
2. "User Pref"
de seguridad
Instrucciones
3. "User Pref"
Materiales
Pulse: Pantalla muestra:
las piezas
Nombres de
FuncionamientoMantenimiento
4. "Start/Enter/+30 Sec"
80
NOTAS
Cuando se complete el ciclo de cocción, se mostrará FIN y la señal
audible sonará si el sonido está activado.
Page 81

(4). Configuración del peso Lb/Kg
• Suponga que desea cambiar el peso entre libras y kilogramos.
Pulse: Pantalla muestra:
1. "User Pref"
2. "User Pref"
3. "User Pref"
4. "User Pref"
Especificaciones
Instrucciones
de seguridad
5. "Start/Enter/+30 Sec"
kg
Ib
NOTAS
Si la pantalla muestra kg, presione el botón "Start/Enter/+30 Sec" para
restablecer los controles del horno a lbs. Para volver a kg, presione
"User Pref" cuatro veces y luego presione "Start/Enter/+30 Sec".
Materiales
Nombres de
las piezas
Funcionamiento Mantenimiento
81
Page 82
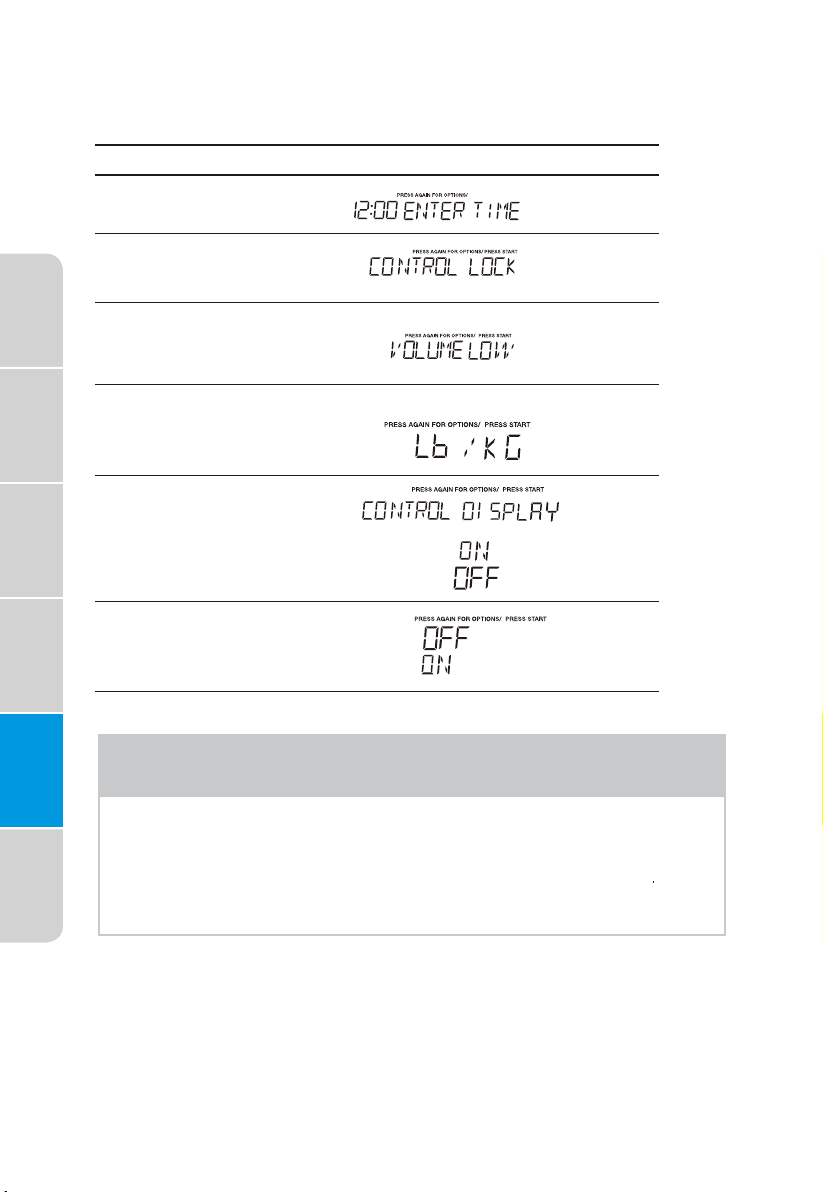
(5). Configuración de visualización del reloj
• Suponga que desea establecer el idioma.
Pulse: Pantalla muestra:
1. "User Pref"
2. "User Pref"
3. "User Pref"
Especificaciones
4. "User Pref"
de seguridad
Instrucciones
5. "User Pref"
Materiales
6. "Start/Enter/+30 Sec"
las piezas
Nombres de
FuncionamientoMantenimiento
82
NOTAS
Cuando se presiona "Start/Enter/+30 Sec" y el ajuste anterior fue en
inglés se establecerá en francés. Si desea cambiar de nuevo al inglés
tendrá que volver a presionar "User Pref" cinco veces y luego presione
"Start/Enter/+30 Sec".
Page 83

(6). Configuración de activación/desactivación del modo de demostración
• Suponga que desea entrar en el modo Demo. Cuando el modo de
demostración está activado, las funciones de programación funcionarán
en un modo de cuenta regresiva rápida sin potencia de cocción.
Pulse: Pantalla muestra:
1. "User Pref"
2. "User Pref"
3. "User Pref"
4. "User Pref"
5. "User Pref"
6. "User Pref"
7. "Start/Enter/+30 Sec"
Especificaciones
Instrucciones
de seguridad
Materiales
Nombres de
las piezas
Funcionamiento Mantenimiento
NOTAS
Cuando se pulsa "Start/Enter/+30 Sec" y la configuración anterior estaba en
APAGADO, entonces se ajustará a ENCENDIDO. Si desea volver a APAGAR
el modo demo, tendrá que volver a pulsar "User pref" seis veces y después
"Start/Enter/+30 Sec".
83
Page 84
2. Configuración del temporizador de cocina
Su horno microondas se puede utilizar como un temporizador de cocina.
Puede configurar hasta 99 minutos, 99 segundos.
El temporizador de cocina se puede utilizar mientras el horno microondas
está funcionando.
• Suponga que desea establecer el temporizador durante tres minutos.
Especificaciones
de seguridad
Instrucciones
Materiales
las piezas
Nombres de
3. Uso del ventilador
El botón controla el ventilador de 2 velocidades. Si el ventilador está
apagado, la primera pulsación del botón pondrá el ventilador en Alto,
la segunda en BAJO y la tercera en APAGADO.
• Supongamos que desea configurar la velocidad del ventilador a BAJA
2.
Pulse: Pantalla muestra:
1. "Timer"
3.
"Timer"
desde la posición de APAGADO.
Pulse: Pantalla muestra:
El temporizador inicia la
cuenta regresiva
1.
Alto | Bajo | Apagado
Alto | Bajo | Apagado
FuncionamientoMantenimiento
84
NOTAS
Si la temperatura de la placa de cocción debajo del horno se calienta
demasiado, el ventilador se encenderá automáticamente para proteger el
horno.
Puede permanecer encendido hasta una hora para enfriar el horno.
Cuando esto ocurre, el botón Vent no apagará el ventilador.
Page 85

4. Uso de la luz de la placa de cocción
El botón controla la luz de la placa de cocción. Si la luz está APAGADA, el
primer toque del botón luminoso ENCENDERÁ la luz (alta), el segundo
toque reducirá la potencia de la luz a Baja y el tercer toque la APAGARÁ.
• Supongamos que desea configurar la luz para ALTA desde la posición de
APAGADO.
Pulse: Pantalla muestra:
1.
Alto | Bajo | Apagado
5. Configuración de encendido/apagado del plato giratorio
Presione encendido/apagado del plato giratorio para encender o
apagar el plato giratorio.
Para obtener mejores resultados de cocción, deje el plato giratorio
encendido. Se puede apagar para platos grandes.
Pulse: Pantalla muestra:
1. "Turntable On-Off"
2. "Turntable On-Off"
NOTAS
A veces, el plato giratorio puede calentarse al tacto durante y después
de la cocción. No utilice el horno vacío sin comida dentro.
Especificaciones
Instrucciones
de seguridad
Materiales
Nombres de
las piezas
Funcionamiento Mantenimiento
85
Page 86

Solución de problemas
Si su horno microondas no funciona correctamente, consulte las siguientes
recomendaciones para la solución de problemas.
Si esto no soluciona el problema, póngase en contacto con el servicio técnico
autorizado de su localidad.
Especificaciones
de seguridad
Instrucciones
Materiales
las piezas
Nombres de
FuncionamientoMantenimiento
El horno no enciende
Arcos eléctricos y
chispas
Alimentos cocidos
de forma desigual
Alimentos
sobrecocidos
Alimentos mal
cocidos
Descongelación
incorrecta
MANTENIMIENTO
POSIBLE SOLUCIÓNPOSIBLE CAUSAPROBLEMA
a. El cable eléctrico del horno no
está enchufado.
b. La puerta está abierta.
c. Se estableció una operación
incorrecta.
a. Se utilizaron materiales no aptos
para horno microondas.
b. El horno funciona cuando está
vacío.
c. Quedan restos de comida en el
interior del horno.
a. Se utilizaron materiales no aptos
para horno microondas.
b. La comida no se descongela
completamente.
c. El tiempo de cocción y el nivel
de potencia no son adecuados.
d. La comida no se da vuelta ni se
revuelve.
El tiempo de cocción y el nivel de
potencia no son adecuados.
a. Se utilizaron materiales no aptos
para horno microondas.
b. La comida no se descongela
completamente.
c. Los puertos de ventilación del
horno están obstruidos.
d. El tiempo de cocción y el nivel
de potencia no son adecuados.
a. Se utilizaron materiales no aptos
para horno microondas.
b. El tiempo de cocción y el nivel
de potencia no son adecuados.
c. La comida no se da vuelta ni se
revuelve.
a. Conecte el horno al
tomacorriente.
b. Cierre la puerta e inténtelo de
nuevo.
c. Verifique las instrucciones.
a. Utilice únicamente utensilios de
cocina aptos para microondas.
b. No utilice el horno microondas
vacío.
c. Limpie el interior del horno con
una toalla húmeda.
a. Utilice únicamente utensilios
de cocina aptos para
microondas.
b. Descongele completamente los
alimentos.
c. Utilice el tiempo de cocción y
el nivel de potencia adecuados.
d. Voltee o revuelva los alimentos.
Utilice el tiempo de cocción y el
nivel de potencia adecuados.
a. Utilice únicamente utensilios de
cocina aptos para microondas.
b. Descongele completamente los
alimentos.
c. Verifique que los puertos de
ventilación del horno no estén
obstruidos.
d. Utilice el tiempo de cocción y
el nivel de potencia adecuados.
a. Utilice únicamente utensilios
de cocina aptos para
microondas.
b. Utilice el tiempo de cocción y
el nivel de potencia adecuados.
c. Voltee o revuelva los alimentos.
86
Page 87
ADJUNTE SU RECIBO AQUÍ. SE REQUIERE UN
COMPROBANTE DE COMPRA PARA OBTENER EL
SERVICIO DE GARANTÍA.
Por favor, tenga disponible la siguiente información
■ Nombre, dirección y número de teléfono
■ Número de modelo y número de serie
■ Una descripción clara y detallada del problema
■ Comprobante de compra, incluido el nombre y la
dirección del distribuidor o vendedor
SI REQUIERE SERVICIO:
1. Antes de contactarnos para solicitar el servicio, determine si su producto requiere
reparación. Algunas preguntas pueden ser atendidas sin necesidad de solicitar el servicio.
Tómese unos minutos para revisar la sección Solución de problemas del Manual del usuario o
visite https://www. midea.com/us/support
2. Todo el servicio de garantía es proporcionado exclusivamente por nuestros proveedores de
servicios autorizados de Midea, en los Estados Unidos y Canadá.
En los EE.UU. o Canadá, llame al 1-866-646-4332.
Si está fuera de los 50 estados de los Estados Unidos o Canadá, póngase en contacto con su
distribuidor autorizado de Midea para determinar si se aplica otra garantía.
GARANTÍA LIMITADA DE UN AÑO (PIEZAS Y MANO DE OBRA)
Midea reparará o reemplazará, sin cargo, cualquier defecto debido a materiales o mano de obra
defectuosos durante un año completo a partir de la fecha de compra. Para obtener más detalles
sobre la cobertura de la garantía y la información de reparación de la garantía, visite
www.midea.com o llame al 1-866-646-4332.
Usted será responsable de:
■ El diagnóstico, la eliminación, el transporte y el costo de reinstalación necesarios debido al
servicio.
■ Los costos de las llamadas de servicio resultantes de los artículos listados en
RESPONSABILIDADES NORMALES DEL CONSUMIDOR**
RESPONSABILIDADES NORMALES DEL CONSUMIDOR**
Esta garantía se aplica únicamente a los productos de uso doméstico normal, y el consumidor
será responsable de los artículos que se enumeran a continuación:
1. Uso adecuado del aparato de acuerdo con las instrucciones proporcionadas con el producto.
2. Mantenimiento y limpieza de rutina necesarios para mantener el buen estado de
funcionamiento.
3. Instalación adecuada por un profesional de servicio autorizado de acuerdo con las
instrucciones proporcionadas con el aparato y de acuerdo con todas las normas locales de
plomería, electricidad y gas.
4. Conexión adecuada a una fuente de alimentación con conexión a tierra de suficiente voltaje,
sustitución de fusibles quemados, reparación de conexiones sueltas o defectos en el cableado
de la casa.
5. Gastos por hacer accesible el aparato para su reparación.
6. Daños a los acabados una vez finalizada la instalación.
SU ÚNICO Y EXCLUSIVO DERECHO BAJO ESTA GARANTÍA LIMITADA SERÁ LA REPARACIÓN O
REEMPLAZO DEL PRODUCTO COMO SE INDICA EN EL PRESENTE DOCUMENTO. El servicio
debe ser proporcionado por una compañía de servicio designada por Midea. Esta garantía
limitada es válida solo en los 50 estados de los Estados Unidos o Canadá y se aplica solo cuando
el aparato se utiliza en el país en el que se compró. Esta garantía limitada es efectiva desde la
fecha de compra original del consumidor. Se requiere prueba de la fecha de compra original para
obtener servicio bajo esta garantía limitada.
Servicio de atención al cliente de Midea
1 AÑO EN PIEZAS Y MANO DE OBRA
QUE CUBRE ESTÁ GARANTÍA
Page 88

QUE NO CUBRE ESTÁ GARANTÍA
1. Falla causada por daño a la unidad mientras esté en su posesión (que no sea daño causado
por defecto o mal funcionamiento), por su instalación incorrecta, o por uso no razonable del
producto, incluyendo sin limitación, no proporcionar mantenimiento razonable y necesario o
no seguir las indicaciones del Manual de instrucciones e instalación.
2. Productos adquiridos "tal cual" o reacondicionados que no están cubiertos por esta garantía.
3. Llamadas de servicio para reparar o reemplazar consumibles como bombillas, filtros de aire,
etc., o perillas, manijas u otras piezas decorativas.
4. Productos que hayan sido transferidos del propietario original a un tercero.
5. Óxido en el interior o exterior de la unidad.
6. Daños causados por servicios realizados por personas ajenas a los servicios autorizados de
Midea; uso de piezas que no sean piezas genuinas de Midea o piezas obtenidas de personas
que no pertenezcan al servicio autorizado de atención al cliente de Midea, o causas externas
como abuso, mal uso, suministro eléctrico inadecuado o desastres naturales.
7. Llamadas de servicio resultantes de una instalación incorrecta del producto.
8. Llamadas de servicio para instrucciones sobre el uso del producto.
9. Costos adicionales que incluyen, sin limitarse, cualquier llamada de servicio fuera de las horas
de oficina, durante los fines de semana o días feriados, peajes, cargos por viaje en ferry o
gastos de kilometraje por llamadas de servicio en áreas remotas, incluido el estado de Alaska.
10. Si la unidad se utiliza para fines comerciales, empresariales, de alquiler u otro uso o aplicación
que no sea para el consumidor, no ofrecemos ninguna garantía, expresa o implícita, incluida,
entre otras, cualquier garantía implícita de comerciabilidad o idoneidad para un uso o
propósito particular.
11. Productos que hayan sido retirados fuera de los EE.UU. o Canadá.
Productos sin números de serie originales o productos con números de serie alterados o que
no pueden determinarse con facilidad.
NOTA: Algunos estados no permiten la exclusión o limitación de daños incidentales o
consecuentes. Por lo tanto, es posible que esta limitación o exclusión no se aplique en su caso.
El costo de reparación o sustitución en estas circunstancias excluidas estará a cargo del cliente.
LAS GARANTÍAS IMPLÍCITAS, INCLUIDA CUALQUIER GARANTÍA IMPLÍCITA DE
COMERCIABILIDAD O GARANTÍA IMPLÍCITA DE IDONEIDAD PARA UN PROPÓSITO
PARTICULAR, SE LIMITAN A UN AÑO O AL PERÍODO MÁS CORTO PERMITIDO POR LA LEY.
Algunos estados y jurisdicciones no permiten limitaciones en la duración de las garantías
implícitas de comerciabilidad o idoneidad, por lo que es posible que estas limitaciones no sean
aplicables en su caso. Esta garantía le otorga derechos legales específicos, y también puede tener
otros derechos que varían de un estado a otro, o de una jurisdicción a otra.
RENUNCIA DE RESPONSABILIDAD DE DECLARACIONES FUERA DE LA GARANTÍA
Midea no será responsable de la calidad, durabilidad o necesidad de servicio o reparación de este
aparato, aparte de las responsabilidades contenidas en esta garantía. Si desea una garantía mayor
o más completa que la garantía limitada que viene con este aparato, solicite a Midea o a su
proveedor información sobre la compra de una garantía extendida.
LIMITACIÓN DE RECURSOS; EXCLUSIÓN DE DAÑOS INCIDENTALES Y CONSECUENTES
SU ÚNICO Y EXCLUSIVO DERECHO BAJO ESTA GARANTÍA LIMITADA SERÁ LA REPARACIÓN
DEL PRODUCTO COMO SE INDICA EN EL PRESENTE DOCUMENTO. MIDEA NO SERÁ
RESPONSABLE DE LOS DAÑOS INCIDENTALES O CONSECUENTES. Algunos estados y
jurisdicciones no permiten la exclusión o limitación de daños incidentales o consecuentes, por lo
que es posible que estas limitaciones y exclusiones no se apliquen en su caso. Esta garantía le
otorga derechos legales específicos, y también puede tener otros derechos que varían de un
estado a otro, o de una jurisdicción a otra.
RENUNCIA DE RESPONSABILIDAD DE GARANTÍAS IMPLÍCITAS
05/19
Page 89

FOUR A MICROONDE
Modèle : MMO19S3AST
Alimentation : 120V~
Fréquence : 60Hz
fr
GUIDE D'UTILISATION
Attention :
Avant d'utiliser ce produit,
veuillez lire attentivement ce
manuel et le garder pour s'y
référer dans le futur. La
conception et les spécifications
sont indiquées sous réserve de
modifications pour l’amélioration
du produit. Consultez votre
revendeur ou le fabricant pour les
détails.
Extension gratuite de
3 mois * de la période de
garantie limitée initiale !
Envoyez simplement
une photo de votre
preuve d’achat à :
1-844-224-1614
* L’extension de garantie est pour
les trois mois suivant immédiatement
après la fin de la période de
garantie du produit.
Page 90

Cher utilisateur
Nous vous REMERCIONS et FÉLICITONS pour votre achat de ce
produit Midea de haute qualité. Votre four micro-ondes Midea
représente l’état de l’art et est conçu pour des performances
fiables et sans problème. Prenez un moment pour enregistrer
votre nouveau four à micro-ondes.
Enregistrez votre nouveau four à micro-ondes sur
www.midea.com sous l’onglet Support.
Pour toute référence future, notez les numéros de modèle et de
série de votre produit sur le cadre intérieur du four à
micro-ondes.
Numéro de modèle______________________________________
Numéro de série________________________________________
Table des matières
Précautions pour éviter l’exposition possible à une
énergie micro-ondes excessive............................................91
Caractéristiques.........................................................................91
Consignes de sécurité importantes...................................92
Instructions de mise à la terre.............................................94
Interférence radio.....................................................................95
Ustensiles.....................................................................................95
Noms des pièces.......................................................................97
Panneau de commande.........................................................98
Cuisson manuelle......................................................................99
Cuisson par capteur...............................................................104
Cuisson à une touche............................................................108
Cuisine automatique...............................................................112
Décongélation automatique................................................117
Fonctionnalités pratiques....................................................122
Maintenance..............................................................................130
Page 91

PRECAUTIONS POUR EVITER
L'EXPOSITION POSSIBLE A
L'ENERGIE MICROONDE EXCESSIVE
(a) N’essayez pas de faire fonctionner ce four avec la porte ouverte car
cela peut entraîner une exposition nocive à l’énergie des micro-ondes.
Il est important de ne pas annuler ou altérer les dispositifs de
verrouillage de sécurité.
(b) Ne placez aucun objet entre la face avant du four et la porte et ne
laissez pas de résidus d’aliments s’accumuler entre le four et la porte.
(c) N’utilisez pas le four s’il est endommagé. Il est particulièrement
important que la porte du four se ferme correctement et qu’il n’y ait
aucun dommage aux :
(1) PORTE (courbée)
(2) CHARNIÈRES ET LOQUETS (cassés ou desserrés)
(3) JOINTS DE PORTE ET SURFACE D’ÉTANCHÉITÉ
(d) Le four ne doit pas être réglé ou réparé par quelqu’un qui n'est pas un
personnel de dépannage qualifié.
Caractéristiques
Spécifications
Consignes de
sécurité
Matériaux Noms des
Modèle :
Tension nominale :
Puissance nominale d'entrée (microonde) :
Puissance nominale de sortie (microonde) :
MMO19S3AST
120V~60Hz
1550 W
1000 W
pièces
Opérations Maintenance
91
Page 92

CONSIGNES DE SÉCURITÉ IMPORTANTES
ATTENTION
Lors de l’utilisation d’appareils électriques, des précautions de sécurité
de base doivent être respectées, notamment les suivantes :
ATTENTION - Pour réduire les risques de brûlures, d’électrocution,
d’incendie, de blessures ou d’exposition à une énergie
micro-ondes excessive :
1. Lisez toutes les instructions avant d'utiliser l'appareil.
2. Lisez et suivez les spécificités : « PRÉCAUTIONS POUR ÉVITER
L’EXPOSITION POSSIBLE À UNE ÉNERGIE MICRO-ONDES
Spécifications
sécurité
Consignes de
MatériauxNoms des
pièces
OpérationsMaintenance
EXCESSIVE » à la page 91.
3. Cet appareil doit être mis à la terre. Branchez uniquement à une prise
correctement mise à la terre. Voir « INSTRUCTIONS DE MISE À LA
TERRE » à la page 94.
4. Installez ou placez ce four uniquement conformément aux
instructions d’installation fournies.
5. Certains produits tels que les œufs entiers et les récipients
scellés - par exemple bocaux en verre fermés - peuvent exploser
et ne doivent pas être chauffés dans un four à micro-ondes.
6. N’utilisez cet appareil que pour les utilisations prévues décrites dans
ce manuel. N’utilisez pas de produits chimiques ou de vapeurs
corrosifs dans cet appareil. Ce four à micro-ondes est spécialement
conçu pour chauffer, cuire ou sécher des aliments. Il n’est pas conçu
pour une utilisation industrielle ou en laboratoire.
7. Comme pour tout appareil, une surveillance étroite est nécessaire
lorsqu’il est utilisé par des enfants.
8. N'utilisez pas ce four si le cordon ou la fiche est endommagé, s'il ne
fonctionne pas correctement, s'il est endommagé ou s'il est tombé.
9. Cet appareil ne doit être entretenu que par du personnel qualifié.
Contactez le centre de service agréé le plus proche pour examen,
réparation ou réglage.
10. Ne couvrez ni bloquez les ouvertures de l’appareil.
11. Ne rangez pas cet appareil à l’extérieur. N’utilisez pas ce four près de
l’eau, par exemple près d’un évier de cuisine, dans un sous-sol
humide, près d’une piscine ou dans des endroits similaires.
12. N’immergez pas le cordon ou la fiche dans l’eau.
13. Gardez le cordon éloigné des surfaces chaudes.
14. Ne laissez pas le cordon pendre du bord d’une table de travail ou d’un
comptoir.
15. Lors du nettoyage des surfaces de la porte et du four, utilisez
uniquement des savons ou détergents doux non abrasifs appliqués
avec une éponge ou un chiffon doux.
16. Pour réduire le risque d’incendie dans la cavité du four :
1). Ne faites pas trop cuire les aliments. Surveillez attentivement
l'appareil si vous avez placé un objet en papier, plastique ou autre
matériau combustible dans la cavité pour faciliter la cuisson.
92
Page 93

2). Retirez les attaches métalliques des sacs en papier ou en plastique
avant de les placer dans le four à micro-ondes.
3). Si des matériaux à l’intérieur du four à micro-ondes s’enflamment,
gardez la porte fermée, éteignez le four et débranchez le cordon
d’alimentation ou coupez l’alimentation au niveau du fusible ou du
panneau de disjoncteur.
4). N’utilisez pas la cavité à des fins de rangement. Ne laissez pas de
produits en papier, d’ustensiles de cuisine ou de nourriture dans la
cavité lorsqu’elle n'est pas utilisée.
17. Les liquides, tels que l’eau, du café ou du thé, peuvent surchauffer
au-delà du point d’ébullition sans avoir l’air de bouillir. Un
bouillonnement ou une ébullition visible lorsque le récipient est retiré
du four à micro-ondes n’apparaît pas toujours.
CELA POURRAIT EN RÉSULTER DES LIQUIDES TRÈS CHAUDS QUI
DEVIENNENT SOUDAINEMENT EN ÉBULLITION LORSQUE LE
RÉCIPIENT EST PERTURBÉ OU UN USTENSILE EST INSÉRÉ DANS LE
LIQUIDE.
Pour réduire le risque de blessures aux personnes :
1) Ne surchauffez pas le liquide.
2) Remuez le liquide avant et à mi-cuisson.
3) N’utilisez pas de récipients à parois droites à col étroit.
4) Après chauffage, laissez le récipient reposer dans le four à
micro-ondes pendant un court instant avant de retirer le récipient
5) Soyez extrêmement prudent lorsque vous insérez une cuillère ou
un autre ustensile dans le récipient.
18. N’utilisez aucun appareil de chauffage ou de cuisson sous l’appareil.
(Exception : Un four à micro-ondes ainsi qualifié comme base
au-dessus d’un autre appareil de chauffage.)
19. Ne montez pas l’appareil sur ou à proximité d’une partie de l’appareil
de chauffage ou de cuisson. (Exception : Un four à micro-ondes ainsi
qualifié comme base au-dessus d’un autre appareil de chauffage.)
20. Ne le montez pas au-dessus d’un évier.
21. Ne mettez aucun objet directement sur la surface de l’appareil
lorsqu’il est en marche.
22. Nettoyez fréquemment les hottes de ventilation - Ne laissez pas la
graisse s’accumuler sur la hotte ou le filtre.
23. Lorsque vous faites cuire des aliments sur la cuisinière sous le four,
allumez le ventilateur.
24. Faites attention lors du nettoyage du filtre de la hotte. Les agents de
nettoyage corrosifs, tels que la soude, peuvent endommager le filtre.
25. Il peut être utilisé avec des ustensiles de cuisson au gaz et électriques.
Spécifications
Consignes de
sécurité
Matériaux Noms des
pièces
Opérations Maintenance
CONSERVER LE PRÉSENTE MANUEL
93
Page 94

INSTRUCTIONS POUR LA MISE
A LA TERRE
Cet appareil doit être mis à la terre. En cas de court-circuit, la mise à la
terre réduit le risque d'électrocution en fournissant un fil d'échappement
pour le courant électrique. Cet appareil est équipé avec un fil électrique
ayant un conducteur et une prise de terre. La fiche doit être branchée
dans une prise correctement installée et mise à la terre.
ATTENTION
Spécifications
ATTENTION - Une mauvaise utilisation de la mise à la terre peut entraîner
un risque de choc électrique.
Consulter un électricien qualifié ou un réparateur si les instructions de
mise à la terre ne sont pas parfaitement comprises ou si un doute existe
sur la bonne mise à la terre de l'appareil. S’il est nécessaire d’utiliser une
sécurité
Consignes de
rallonge, utilisez uniquement une rallonge à 3 fils dotée d’une fiche de
mise à la terre à 3 broches et des prises à 3 positions qui acceptent la
fiche de l’appareil. La puissance nominale de la rallonge doit être égale
ou supérieure à la puissance électrique de l’appareil.
MatériauxNoms des
DANGER - Danger d'électrocution
Toucher des composants internes peut causer de graves blessures
corporelles ou le décès.
Ne pas démonter cet appareil.
pièces
ATTENTION - Danger d'électrocution
La mauvaise utilisation de la terre peut entrainer une électrocution. Ne
pas brancher à une prise de courant tant que l'appareil n'est pas installé
correctement et mis à la terre.
1. Le fil d'alimentation est court pour réduire le risque de le coincer ou de
OpérationsMaintenance
trébucher dessus s'il est plus long.
2. Des jeux de cordons plus longs ou des rallonges sont disponibles et
peuvent être utilisés si un soin particulier est apporté à leur utilisation.
3. Si un long cordon ou une rallonge est utilisée :
1) La capacité électrique du fil ou de la rallonge doit être au moins
aussi grande que la capacité de l'appareil.
2) La rallonge doit être à 3 fils avec une mise à la terre.
3) Le cordon doit être disposé de manière à ne pas pendre du plan de
travail de la cuisine ou d’une table où il pourrait être tiré par des
enfants ou faire trébucher quelqu'un par accident.
94
Page 95

INTERFÉRENCE RADIO
1. Le fonctionnement du four à micro-ondes peut provoquer des
interférences avec votre radio, télévision ou équipement similaire.
2. Lorsqu’il y a des interférences, elles peuvent être réduites ou
éliminées en prenant les mesures suivantes :
1) Nettoyez la porte et les surfaces d'étanchéité du four
2) Réorientez l’antenne de réception de la radio ou du téléviseur.
3) Déplacez le four à micro-ondes par rapport au récepteur.
4) Éloignez le four à micro-ondes du récepteur.
5) Branchez le four à micro-ondes dans une autre prise de sorte qu’il
se trouve sur un circuit différent des autres appareils.
Spécifications
Consignes de
sécurité
USTENSILES
MISES EN GARDE - Danger de blessure corporelle
Les ustensiles hermétiquement fermés peuvent exploser. Les récipients
fermés doivent être ouverts et les sachets en plastique doivent être
percés avant la cuisson.
Voir les instructions dans « Matériaux pouvant être utilisés ou non dans
un four à microonde ».
Certains ustensiles non métalliques ne sont pas sûrs pour être utilisés
pour le microonde. En cas de doute, vous pouvez tester l'ustensile en
question en procédant de la façon suivante.
Test d'ustensile :
1. Remplir un conteneur à microonde avec 250 ml d'eau froide et y
déposer l'ustensile.
2. Chauffer à puissance max. pendant 1 minute.
3. Toucher doucement l'ustensile. Si l'ustensile vide est chaud, ne pas
l'utiliser pour la cuisson au microonde.
4. Ne pas dépasser 1 minute.
Matériaux Noms des
pièces
Opérations Maintenance
95
Page 96

Matériaux que vous pouvez utiliser dans un four à
micro-ondes
Ustensiles Remarques
Plat à rôtir Suivez les instructions du fabricant *. Le fond du plat doit être à au
Vaisselle Uniquement prévue pour le microonde. Suivre les instructions du
Pots en verre Toujours retirer le couvercle. Utiliser uniquement jusqu'à ce que
Verrerie Uniquement le verre résistant à la chaleur. S'assurer qu'il n'y a
Spécifications
Sacs de cuisson au
four
Assiettes et tasses
en papier
sécurité
Consignes de
Serviettes en papier Utiliser pour couvrir les aliments à réchauffer et absorber le gras.
Papier parchemin Utiliser comme couvercle pour éviter les éclaboussures ou
Plastique Uniquement prévue pour le microonde. Suivez les instructions du
MatériauxNoms des
Enveloppe en
plastique
pièces
Thermomètres Sûr pour le microonde uniquement (thermomètres à viande ou
Papier ciré Utiliser comme couvercle pour éviter les éclaboussures ou retenir
Materiaux a eviter dans le four a microonde
OpérationsMaintenance
Ustensiles Remarques
Plateau en aluminium Peut provoquer un arc. Mettre les aliments dans un conteneur
Carton alimentaire
avec poignée
métallique
Ustensiles métalliques
ou recouverts de métal
Lien métalliques Peuvent provoquer un arc et entrainer un incendie dans le four.
Sacs en papier Peuvent prendre feu dans le four.
Mousse en plastique La mousse en plastique peut fondre ou contaminer le liquide
Bois Le bois sèche quand il est utilisé dans le microonde et peut se
moins 5 mm du plateau. Un mauvais usage peut briser le plateau.
fabricant. Ne pas utiliser des plats fendus ou ébréchés.
les aliments soient chauds. La plupart des pots en verre ne
résistent pas à la chaleur et peuvent casser.
pas de garniture métallique. Ne pas utiliser des plats fendus ou
ébréchés.
Suivez les instructions du fabricant *. Ne pas fermer avec un
couvercle métallique. Fendre pour permettre à la vapeur de
s'échapper.
N'utiliser que pour la cuisson ou réchauffage court. Ne pas laisser
la cuisson sans surveillance.
N'utiliser que pour la cuisson courte.
envelopper pour cuire à la vapeur.
fabricant *. Doit être estampillé « Sûr pour le microonde ». Certains
conteneurs en plastique s'amollissent quand les aliments deviennent
chauds. Les sacs à bouillir et les sacs en plastiques fermés doivent
être fendus, percés ou ventilés comme indiqué sur l'emballage.
Uniquement prévue pour le microonde. Utiliser pour couvrir les
aliments pendant la cuisson pour retenir l'humidité. Ne pas laisser
l'enveloppe en plastique toucher les aliments.
gâteau).
l'humidité.
prévu pour microonde.
Peut provoquer un arc. Mettre les aliments dans un conteneur
prévu pour microonde.
Le métal bloque les microondes sur les aliments. Les garnitures
métalliques provoquent les arcs.
contenu en l'exposant à de hautes températures.
fendre ou craquer.
96
Page 97

NOMS DES PIÈCES
VUE DE FACE
VUE DE DESSOUS
1. Porte du four à micro-ondes avec
fenêtre transparente
2. Charnières de porte
3. Couvercle du guide d’ondes :
NE PAS ENLEVER.
4. Arbre moteur du plateau tournant
5. Lumière du four à micro-ondes
Il s’allume lorsque le four à
micro-ondes fonctionne ou que la
porte est ouverte.
6. Supports de grille
7. Verrous de sécurité de porte
Le four à micro-ondes ne
fonctionne que si la porte est
bien fermée.
8. Poignée
9. Touche Lumière El/Fb/Eteinte
Appuyez sur la touche
Lumière El/Fb/Eteinte une fois
pour élevée, deux fois pour faible et
trois fois pour éteindre la lumière.
10. Touche Ventilateur El/Fb/Eteint
Appuyez sur la touche
Ventilateur El/Fb/Eteint une fois
pour vitesse élevée, deux fois pour
vitesse faible et trois fois pour
arrêter le ventilateur.
11. Panneau de commande tactile
12. Affichage de l’heure : Affichage
numérique, 99 minutes, 99 secondes
13. Ouvertures de ventilation
14. Plateau tournant amovible
Le plateau tournant tourne à la fois
dans le sens horaire et antihoraire.
Retirer uniquement pour le
nettoyage.
15. Support du plateau tournant
amovible
Placez soigneusement le support
du plateau tournant dans l’arbre du
moteur situé au centre de la cavité
du four à micro-ondes. Placez
l’anneau de support au fond du four
à micro-ondes. Ensuite, placez
fermement le plateau tournant sur
son support.
16. Grille pour cuisson/réchauffage à
2 niveaux
17. Couvercle de lumière
18. Filtre à graisse
19. Libellé du menu
Spécifications
Consignes de
sécurité
Matériaux Noms des
pièces
Opérations Maintenance
97
Page 98

PANNEAU DE CONTROLE
L’écran interactif à 7 chiffres décrit les étapes de fonctionnement
et affiche des conseils de cuisson.
1b
1d
1e
Spécifications
sécurité
Consignes de
MatériauxNoms des
pièces
OpérationsMaintenance
Remarque : Pour plus d’informations reportez-vous à la page
98
relative ci-dessus.
1f
1i
1a
1g
1c
1h
(1) Écran :
L’affichage comprend une horloge et des indicateurs
qui indiquent l’heure, les réglages du temps de
cuisson, les puissances de cuisson, le capteur, les
quantités, les poids et les fonctions de cuisson
sélectionnées.
1a. CAPTEUR :
Icône affiché lors de l’utilisation de la cuisson par
capteur.
1b. MINUTEUR :
Icône affiché lorsque le minuteur est réglé ou en
cours de fonctionnement.
1c. CUISSON :
Icône affiché lors du démarrage de la cuisson au four
à micro-ondes.
1d. DEFR :
Icône affiché lors de la décongélation des aliments.
1e. VERROUILLAGE :
Icône affiché lors du verrouillage des commandes.
1f. APPUYEZ À NOUVEAU POUR LES OPTIONS :
Icône affiché lorsque des options supplémentaires
sont disponibles.
1g. APPUYEZ SUR START :
Icône affiché lorsqu’une fonction valide peut être
démarrée.
1h. kg, oz, lb :
Icône affiché lors du choix du poids.
1i. MICRO :
Icône affiché lors de l’utilisation du four à
micro-ondes.
(2) Réchauffage par capteur (5 réglages différents)
(P107)
(3) Cuisine automatique (P112)
(4) Décongélation automatique (P117)
(5) Niveau de puissance (11 niveaux de puissance
disponibles) (P103)
(6) Pavé numérique (0 à 9)
(7) START +30 sec (P100)
(8) Lumières de surface (Élevé/Faible/Désactivé)
~ Utilisez ces touches pour régler la luminosité
des éclairages de surface. (P129)
(9) Pommes de terre (1-4 patates) (P110)
(10) Cuisson par capteur (P104)
(11) Pop-corn (P108)
(12) Légumes (P108)
(13) Snacks (P109)
(14) Faire fondre/ramollir (P111)
(15) Minuteur (Démarrer – Arrêter) (P128)
(16) Heure & Réglages (P99) (P122)
(17) Démarrage rapide (9 réglages de touche
instantanés) (P100)
(18) Arrêt / Effacer (P99)
(19) Échappement (Élevé/Faible/Arrêter) ~ Permet
d’arrêter le ventilateur d’extraction ou de
régler la vitesse du ventilateur. (P129)
(20) Plaque tournante (Démarrer – Arrêter) (P129)
Page 99
• Avant de faire fonctionner votre nouveau four, lisez et
comprenez entièrement ce guide d’utilisation et d’entretien.
• L’horloge peut être désactivée lorsque le four à micro-ondes
est branché pour la première fois et que la touche « STOP » est
appuyée.
Pour réactiver l’horloge, suivez les instructions données par
l’horloge.
Réglage de l’horloge
• Supposons que vous souhaitez entrer l’heure correcte de la
journée 10:59
Touchez : L’écran affiche :
Spécifications
1. User pref
3. « Start/Enter/+30 Sec »
REMARQUE
1. Vous ne pouvez pas entrer une heure incorrecte
(ex. 2:89), le 8 est un chiffre non valide et ne peut pas
être entré. Entez l’heure correcte.
2. Si vous touchez « Stop/Clear » pendant le réglage de
l’heure, l’écran affiche la dernière heure du jour réglée
ou un affichage vide si aucune heure n’a été réglée.
CUISSON MANUELLE
Cuisson chronométrée
Votre four à micro-ondes à grande portée peut être programmé
pour 99 minutes 99 secondes (99:99). Entrez toujours les
secondes après les minutes, même si elles sont toutes les deux
nulles.
• Supposons que vous souhaitez cuire pendant 5 minutes,
30 secondes à 100% de puissance.
Consignes de
sécurité
Matériaux Noms des
pièces
Opérations Maintenance
99
Page 100

Spécifications
Touchez : L’écran affiche :
2. « Start/Enter/+30 Sec »
Compte à rebours
Interrompre la cuisson
Vous pouvez arrêter le four pendant un cycle en ouvrant la
porte. La ventilation s’arrête de chauffer et le ventilateur
s’éteint, mais la lumière reste allumée. Pour redémarrer la
cuisson, fermez la porte et touchez « Start/Enter/+30 Sec ».
sécurité
Consignes de
MatériauxNoms des
pièces
OpérationsMaintenance
Si vous ne souhaitez pas poursuivre la cuisson, ouvrez la
porte et touchez « Stop Clear »
Utilisation de One Touch Start (démarrage instantané)
Il s’agit d’une touche permettant de gagner du temps qui
lance automatiquement la cuisson 2 secondes après la
sélection de la touche numérique. Appuyez sur 1 pendant
1 minute, 2 pendant deux minutes, jusqu’à 9 pendant neuf
minutes.
Touchez : L’écran affiche :
Compte à rebours
Utilisation de Add 30 Sec.
C’est une touche qui permet de gagner du temps. Il s’agit
d’une fonction simplifiée vous permettant de régler et de
démarrer rapidement la cuisson au four à micro-ondes à 100%
de puissance.
• Supposons que vous vouliez cuisiner pendant une minute.
Touchez : L’écran affiche :
1. « Start/Enter/+30 Sec »
100
2. « Start/Enter/+30 Sec »
Compte à rebours
 Loading...