

Page 1

Quick Start Guide
DP48
Dual 48 Channel Personal Monitor Mixer with SD Card Recorder,
Stereo Ambience Microphone and Remote Powering
Page 2

2 3Quick Start GuideDP48
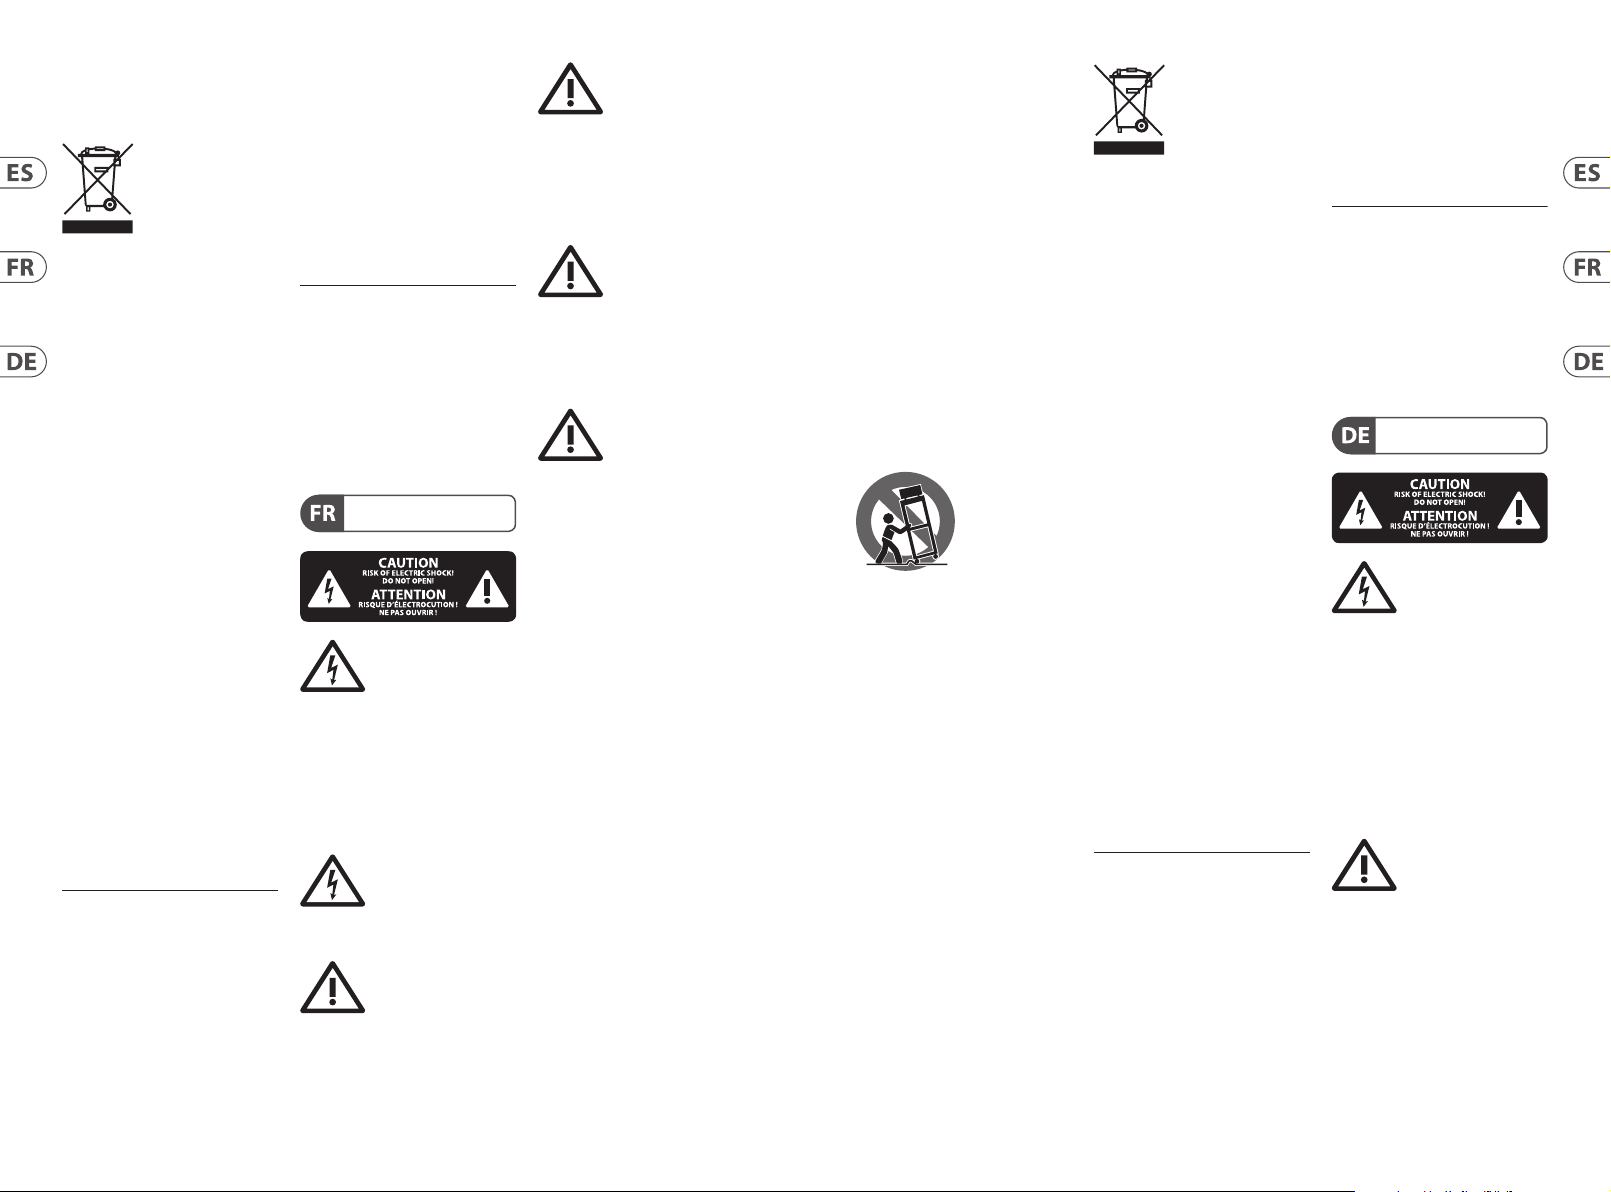
Impor tant Safety
Instructions
Terminals marked with
this symbol carry
electrical current of
sucient magnitu de to constitute risk
of electr ic shock. Use only high-qualit y
professional sp eaker cables with ¼" TS
or twist-locking plugs pre-installed.
Allother installati on or modication
should be per formed only by
qualiedpersonnel.
This symbol, wherever it
appears, aler ts you to the
presence of uninsulated
dangerous voltag e inside the enclosure
- voltage that may be su cient to
constitute a r isk ofshock.
This symbol, wherever it
appears, alerts you to
important operating and
maintenance instructions in the
accompanying literature. Please read
themanual.
Caution
To reduce the risk of
electric shock, do not
remove the top cover (or the rear
section). No user ser viceable parts inside.
Refer ser vicing to qualiedpersonn el.
Caution
To reduce the risk of
re or elec tric shock, do
not expose th is appliance to rain and
moisture. Theapp aratus shall not
be exposed to d ripping or splashing
liquids and no objec ts lled with
liquids, such as vase s, shall be placed
on the apparatus.
Caution
These service instructions
are for use by quali ed
service p ersonnel only. Toreduce
the risk of elec tric shock do not
perfor m any servicing other than that
contained in the operation instructions.
Repairshave to be p erformed by
qualied serviceper sonnel.
1. Read these instructions.
2. Keep these instructions.
3. Hee d all warnings.
4. Follow all instruc tions.
5. Do not use this apparatus
near water.
6. Clean only wit h dry cloth.
7. Do not bl ock any ventilation
openings. Inst all in accordance with the
manufacturer’s instructions.
8. Do not install near any heat
sources such as radiators, heat registers,
stoves, or other ap paratus (including
ampliers) that produce heat.
9. Do not defeat the safe ty purpose
of the polarize d or grounding-type
plug. A polarize d plug has two blades
with one wider than the other.
A grounding-t ype plug has two blades
and a third groun ding prong. The wide
blade or the third prong are provided
for your safe ty. Ifthe provided plug
does not t into you r outlet, consult
an electr ician for replacement of the
obsolete outlet.
10. Protec t the power cord from being
walked on or pinc hed particularly
at plugs, convenience receptacles,
and the point whe re they exit from
the apparatus.
11. Use only attachments/accessories
specied by themanu facturer.
12. Use only with
the cart, s tand,
tripod, bracket, or
table specied by
the manufacturer,
orsold with
the apparatus . When a cart is used,
use cautio n when moving the cart /
apparatus comb ination to avoid injury
from tip-over.
13. Unplug this apparatus during
lightning storms or when unused for
long periods of time.
14. Refer all servicing to q ualied
service personnel. Servicing is required
when the apparatus has been damaged
in any way, such as power supply cord
or plug is damaged, liquid ha s been
spilled or objec ts have fallen into the
apparatus, the app aratus has been
exposed to r ain or moisture, does not
operate normally, or has be endropped.
15. The appar atus shall be connected
to a MAINS socket ou tlet with a
protective earthing connection.
16. Where t he MAINS plug or an
appliance coupler is us ed as the
disconnect device, the disconnect
device shall remain readily operable.
17. Correct dispo sal of
this product: This
symbol indic ates that
this product must not
be disposed of wi th
household waste, according to the
WEEE Direct ive (2012/19/EU) and your
national law. This product sh ould be
taken to a collec tion center licensed for
the recyc ling of waste electric al and
electronic equipment (EEE).
The mishandling of this t ype of waste
could have a possibl e negative impact
on the environment and human health
due to potentially hazar dous
substances that are generally
associated wi th EEE. At the same time,
your cooperation in t he correct disposal
of this produc t will contribute to the
ecient use of natural resources. For
more inform ation about where you can
take your waste equipment for
recycling, p lease contact your local cit y
oce, or your household waste
collection ser vice.
18. Do not ins tall in a conned space,
such as a book cas e or similar unit.
19. Do not p lace naked ame
sources, such as lighted candles,
on the apparatus.
20. Please kee p the environmental
aspect s of battery disposal in m ind.
Batterie s must be disposed-of at a
battery collection point.
21. Use this app aratus in tropical
and/or moderate climates.
LEGAL DISCLAIMER
Music Tribe accepts no liabilit y for
any loss which may be su ered by
any person who r elies either wholly
or in part upon any description,
photograph, or st atement contained
herein. Technical spec ications,
appearances and other information
are subject to c hange without notice.
All trademar ks are the propert y
of their respec tive owners. Midas,
Klark Teknik, La b Gruppen, Lake,
Tannoy, Turbosound, TC Electronic,
TC Helicon, Behringer, Bugera,
Auratone and Coolaudi o are
trademarks or registered trademarks
of Music Tribe Global Brands Ltd.
© Music Tribe Global Brands Ltd.
2019 All rights reser ved.
LIMITED WARRANTY
For the applicab le warranty terms and
conditions and addit ional information
regarding Music Tribe’s Limited
Warranty, please see comp lete details
online at musictribe.com/warranty.
Zhongshan Eurotec
Electronics Limited
No. 10 Wanmei Road, South Ch ina
Modern Chinese Medicine Park,
Nanlang Town, 528451, Zhongshan
City, Guangdong Provi nce, China
Instrucciones de
seguridad
Las terminales marcadas
con este símbolo
transportan corriente
eléctri ca de magnitud suciente como
para constituir un riesgo de descarga
eléctr ica. Utilicesolo cables de alt avoz
profesionales y de alt a calidad con
conector es TS de 6,3 mm o de bayoneta
prejados. Cualquier otra instalación o
modicación d ebe ser realizada
únicamente por un té cnicocualicado.
Este símbolo, siempre que
aparece, leadvie rte de la
presencia de voltaje
peligroso sin aislar de ntro de la caja;
estevoltaje pu ede ser suciente para
constituir un r iesgo dedescarga.
Este símbolo, siempre que
aparece, leadvi erte sobre
instrucciones operativas y
de mantenimiento q ue aparecen en la
documentación adjunta. Por favor,
leaelmanual.
Atención
Para reducir e l riesgo de
descarga eléctric a, no
quite la tapa (olaparte p osterior).
Nohay piezas en el in terior del equipo
que puedan ser rep aradas por el
usuario. Sies neces ario, póngase en
contacto con pers onal cualicado.
Atención
Para reducir el r iesgo
de incendio o desc arga
eléctr ica, no exponga este aparato a la
lluvia, humedad o alguna ot ra fuente
que pueda salpicar o derramar algún
líquido sobre e l aparato. Nocoloque
ningún tipo de recipiente para líquidos
sobre elapar ato.
Atención
Las instrucciones
de servicio deben
llevarlas a cabo exclu sivamente
personal cualica do. Paraevitar el
riesgo de una descarga eléctrica,
no realice reparac iones que no se
encuentren descritas en el manual de
operaciones. Lasreparaciones deben
ser realizadas exclusivamente por
personalcualicado.
1. Lea las instrucciones.
2. Conserve e stas instruccione s.
3. Pre ste atención a todas
las advertencias.
4. Siga todas las ins trucciones.
5. No u se este aparato cerca
del agua.
6. Limpie es te aparato con un
paño seco.
7. No bloq uee las aberturas
de ventilación. Inst ale el equipo
de acuerdo con las instrucciones
del fabricante.
8. No instale e ste equipo cerca de
fuentes de ca lor tales como radiadores,
acumuladores d e calor, estufa s u otros
aparatos (incluyendo amplicadores)
que puedan producir calor.
9. No elimine o deshabilite nunca
la conexión a tier ra del aparato o del
cable de alimentación de corriente.
Unenchufe polar izado tiene dos polos,
uno de los cuales tiene u n contacto
más ancho que el otr o. Una clavija
con puesta a ti erra dispone de tres
contactos: do s polos y la puesta a
tierra. El contac to ancho y el tercer
contacto, respe ctivamente, son los que
garantizan una mayor seguridad. Si el
enchufe suministrado con el equipo
no concuerda con la toma de co rriente,
consulte con un elec tricista para
cambiar la toma de corr iente obsoleta.
10. Coloque el c able de suministro de
energía de mane ra que no pueda ser
pisado y que esté protegido de objetos
alados. Ase gúrese de que el cable de
suministro de energía esté protegido,
especialment e en la zona de la clavija y
en el punto donde s ale del aparato.
11. Use únicamente los dispositivos
o accesorios especicados por
el fabricante.
12. Use
únicamente la
carretilla,
plataforma,
trípode, soporte o
mesa especicados
por el fabricante o suministrados junto
con el equipo. Alt ransportar el equip o,
tenga cuidado par a evitar daños y
caídas al tropezar con algún obst áculo.
13. Desenchufe el equipo durante
tormentas o si no v a a utilizarlo durante
un periodo largo.
14. Confíe las reparacion es
únicamente a servicios té cnicos
cualicados. La unidad requiere
mantenimiento siempre que haya
sufrido algún daño, si el c able de
suministro de energía o el enchufe
presentaran daños, sehubiera
derramado un líquido o hubieran caído
objetos dentro de l equipo, si el aparato
hubiera est ado expuesto a la humedad
o la lluvia, si ha dejado de fun cionar de
manera normal o si ha suf rido algún
golpe o caída.
15. Al conec tar la unidad a la toma de
corriente eléctrica asegúrese de que
la conexión disponga de una unión
atierra.
Page 3
4 5Quick Start GuideDP48
16. Si el enchu fe o conector
de red sirve com o único medio
de desconexión, éste debe ser
accesiblefácilmente.
17. Cómo debe
deshacerse de este
aparato: Este símbolo
indica que este aparato
no debe ser trat ado
como basura orgánica, según lo
indicado en la Dir ectiva WEEE (2012/19/
EU) y a las normativas ap licables en su
país. En lugar de ello deberá llevarlo al
punto limpio más cerc ano para el
reciclaje de sus el ementos eléctricos/
electró nicos (EEE). Al hacer esto estará
ayudando a prevenir la s posibles
consecuencias negativas para el medio
ambiente y la salud que p odrían ser
provocadas po r una gestión inadecuada
de este tipo de ap aratos. Además,
el reciclaje de ma teriales ayudará a
conservar los r ecursos naturales. Para
más informaci ón acerca del reciclaje de
este aparato, póngas e en contacto con
el Ayuntamiento de su ciu dad o con el
punto limpio local.
18. No inst ale esta unidad en un
espacio muy r educido, tal como
encastrada e n una librería o similar.
19. No coloque objeto s con
llama, como una vela encendid a,
sobre este aparato.
20. Tenga presentes todas las
advertenc ias relativas al reciclaje
y correcta eliminación de las pilas.
Las pilas deben ser siempre eliminadas
en un punto limpio y nun ca con el resto
de la basura orgánica.
21. Use este ap arato en rangos de
temperatura moderados y/o tropicales.
NEGACIÓN LEGAL
Music Tribe no admite ningún tipo
de responsabilida d por cualquier
daño o pérdida que pud iera sufrir
cualquier persona por conar total
o parcialmente en la des cripciones,
fotografías o armaciones
contenidas en este documento.
Las especicaciones técnicas,
imágenes y otras informaciones
contenidas en este d ocumento están
sujetas a modic aciones sin previo
aviso. Todas las marcas comerciales
que aparecen aquí s on propiedad
de sus respec tivos dueños. Midas,
Klark Teknik, La b Gruppen, Lake,
Tannoy, Turbosound, TC Electronic,
TC Helicon, Behringer, Bugera,
Auratone y Coolaud io son marcas
comerciales o marcas registradas
de Music Tribe Global Brands Ltd.
© Music Tribe Global Brands Ltd.
2019 Reservados todo s los derechos.
GARANTÍA LIMITADA
Si quiere conocer los d etalles y
condiciones aplicables de la garantía
así como informac ión adicional sobre
la Garantía limitada d e Music Tribe,
consulte online toda la información en
la web musictribe.com/warranty.
Consignes de sécurité
Les points rep érés par ce
symbole portent une
tension électrique
susante pour cons tituer un risque
d’électrocution. Utilisez uniquement
des câbles d’enceintes professionnels
de haute qualité avec che s Jack mono
6,35 mm ou ches à verrou illages déjà
installées. Touteautr e installation ou
modication doit être eectuée
uniquement par un personnel qualié.
Ce symbole aver tit de la
présence d’une tensi on
dangereuse et non i solée à
l’intérieur de l ’appareil - elle peut
provoquer des chocs électriques.
Attention
Ce symbol signale le s
consignes d’utilisation
et d’entre ! Tienimpor tantes dans
la documentat ion fournie. Lisez les
consignes de sécurité du manuel
d’utilisation del’appareil.
Attention
Pour éviter tou t risque
de choc électrique,
ne pas ouvri r le capot de l’appareil
ni démonter le pann eau arrière.
L’intérieur de l’appareil ne possède
aucun élément ré parable par
l’utilisateur. Laissertou te réparation à
un professionnelq ualié.
Attention
Pour réduir e les risques
de feu et de cho c
électrique, n’exposez pas cet appareil
à la pluie, à la moisissure, auxg outtes
ou aux éclabous sures. Ne posez pas
de récipient contenant un liquide sur
l’appareil (unvase par e xemple).
Attention
Ces consignes de
sécurité et d’entretien
sont destinées à un personnel
qualié. Pour évit er tout risque de
choc électrique, n’eectuez aucune
réparation sur l ’appareil qui ne soit
décrite par le ma nuel d’utilisation.
Les éventuelles r éparations doivent
être eec tuées uniquement p ar un
technicienspécialisé.
1. Lisez ces consignes.
2. Conservez ce s consignes.
3. Re spectez tous les avert issements.
4. Respectez toutes les
consignes d’utilisation.
5. N’utilisez jamais l ’appareil à
proximité d’un liquide.
6. Net toyez l’appareil avec un
chion sec.
7. Veillez à ne pa s empêcher la
bonne ventilatio n de l’appareil via se s
ouïes de ventilatio n. Respectezles
consignes du fabricant concernant
l’installation del’appareil.
8. Ne placez pas l ’appareil à
proximité d’une sour ce de chaleur telle
qu’un chauage, une cui sinière ou tout
appareil dégageant de la chaleur (y
compris un ampli depui ssance).
9. Ne supprimez jamais la sécurité
des prises b ipolaires ou des prises
terre. Les prises bipolaires possèdent
deux contac ts de largeur diérente.
Leplus large est le co ntact de sécurité.
Les prises terre possèdent deux
contact s plus une mise à la terr e
servant de s écurité. Si la prise du bloc
d’alimentation ou du cordon d’alimentation fou rni ne correspond pas à
celles de votre installation électrique,
faites app el à un électricien po ur
eect uer le changement de prise.
10. Installez le cordon d’alimentation
de telle façon que per sonne ne puisse
marcher dessu s et qu’il soit protégé
d’arêtes coupantes. Assurez-vous
que le cordon d’alimentatio n est
suffisam ment protégé, notamment
au niveau de sa prise é lectrique et
de l’endroit où il est r elié à l’appareil;
cela est égalemen t valable pour une
éventuelle rallonge électrique.
11. Utilisez exclusivement
des accessoire s et des appareils
supplémentaires recommandés par
lefabricant.
12. Utilisez
exclusivement des
chariots, des
diables,
desprésentoirs,
despieds et des
surfaces de t ravail recommandés par le
fabricant o u livrés avec le produit.
Déplacezpréc autionneusement tout
chariot ou diabl e chargé pour éviter
d’éventuelles blessu res en cas dechute.
13. Débranchez l’appareil de la
tension sec teur en cas d’orage ou si
l’appareil reste inuti lisé pendant une
longue période de temps.
14. Les travaux d’entretien de
l’appareil doivent être eectués
uniquement par du personnel qualifié.
Aucunentreti en n’est nécessaire s auf si
l’appareil est endommagé de quelque
façon que ce soit (dommag essur le
cordon d’alimentation o u la prise par
exemple), siun liquide ou un obje t
a pénétré à l’in térieur du châssis, si
l’appareil a été ex posé à la pluie ou
à l’humidité, s’i l ne fonctionne pas
correc tement ou à la suite d’une chute.
15. L’appareil doit être connec té à une
prise secteur dotée d’une protection
par mise à la terr e.
16. La pr ise électrique ou la p rise
IEC de tout appareil dé nué de bouton
marche/arrêt doit rester accessible
enpermane nce.
17. Mise au rebut
appropriée de ce
produit: Ce symbole
indique qu’en accord
avec la direc tive DEEE
(2012/19/EU) et les lois en vigueur dan s
votre pays, ce pro duit ne doit pas être
jeté avec les déc hets ménagers.
Ce produit doit ê tre déposé dans un
point de collec te agréé pour le
recyclag e des déchets d’équipeme nts
électriques et électroniques (EEE).
Une mauvaise manipulat ion de ce type
de déchet s pourrait avoir un impac t
négatif sur l’environn ement et la santé
à cause des substances potentiellement
dangereuses généralement associées à
ces équipements. En même temps,
votre coopérat ion dans la mise au rebut
de ce produit contr ibuera à l’utilisation
ecace des ressources naturelles.
Pour plus d’informations sur l’endroit
où vous pouvez dé poser vos déchets
d’équipements pour le recyclage,
veuillez contac ter votre mairie ou votre
centre local de co llecte des déchets.
18. N’installez p as l’appareil dans un
espace conné tel qu’une bibliothèque
ou meuble similaire.
19. Ne placez jamais d’objets
enammés, tels que des b ougies
allumées, sur l’appareil.
20. Garde z à l’esprit l’imp act
environnemental lorsque vous mettez
des piles au rebu s. Les piles usées
doivent être dép osées dans un point de
collecte adapté.
21. Utilisez l’appareil dans un climat
tropical et/ou modéré.
DÉNI LÉGAL
Music Tribe ne peut être te nu pour
responsable pour toute perte pouvant
être subie par tou te personne se
ant en partie ou en to talité à
toute description, photographie
ou armation contenue dans ce
document. Les c aractéristique s,
l’apparence et d’autres informations
peuvent faire l ’objet de modicat ions
sans noticat ion. Toutes les marque s
appartiennent à leurs propriétaires
respect ifs. Midas, Klark Teknik,
Lab Grupp en, Lake, Tannoy,
Turbosound, TC Elect ronic, TC Helicon,
Behringer, Bugera, Auratone et
Coolaudio sont de s marques ou
marques déposées de Music Tribe
Global Brands Ltd. © Music Tribe Global
Brands Ltd. 2019 Tous droits réser vés.
GARANTIE LIMITÉE
Pour connaître l es termes et conditions
de garantie applicables, ainsi que
les informations supplémentaires et
détaillées sur la G arantie Limitée de
Music Tribe, consultez le site Interne t
musictribe.com/warranty.
Wichtige
Sicherheitshinweise
Vorsicht
Die mit dem Symbo l
markierten Anschlüsse
führen so viel Spannung, dassdie
Gefahr eine s Stromschlag s besteht.
Verwenden Sie nur ho chwertige,
professionelle Lautsprecherkabel
mit vorinst allierten 6,35 mm
MONO-Klinkensteckern oder
Lautsprecherstecker mit
Drehverriegelung. Alle anderen
Installationen oder Modikationen
sollten nur von qualiziertem
Fachpersonal ausgeführt werden.
Achtung
Um eine Gefährdung
durch Stromschlag
auszuschließen, darf die
Geräteabdeckung bzw.
Geräterückwandnicht abgenommen
werden. ImInnern de s Geräts benden
sich keine vom Benutzer reparierbaren
Teile. Reparaturarbeiten dürfen
nur von qualiziertem Personal
ausgeführtwerden.
Page 4

6 7Quick Start GuideDP48
Achtung
Um eine Gefährdung
durch Feuer bzw.
Stromschlag auszuschließen, darf
dieses Gerät weder Regen oder
Feuchtigkeit ausgesetzt werden
noch sollten Spritzwasser oder
tropfende Flüs sigkeiten in das Gerät
gelangen können. Stellen Sie keine
mit Flüssigkeit gefüllten Gegenstände,
wie z. B. Vasen, aufdasGer ät.
Achtung
Die Servi ce-Hinweise sind
nur durch qualiziertes
Personal zu b efolgen. Umeine
Gefährdung durch Stromschlag zu
vermeiden, f ühren Sie bitte keinerlei
Reparature n an dem Gerät durch,
dienicht in der Bedienungsanleitung
beschrieben sind. Reparaturen
sind nur von qualiziertem
Fachpersonaldurchzuführen.
1. Lesen Sie diese Hinweise.
2. Bewahren Sie diese Hinweise auf.
3. Beac hten Sie alle Warnhinweise.
4. Befolg en Sie alle
Bedienungshinweise.
5. B etreiben Sie das Gerät nicht in
der Nähe vonWasser.
6. Reinigen Si e das Gerät mit einem
trockenen Tuch.
7. Blockieren Sie nicht die
Belüftungsschlitze. Beachten
Sie beim Einbau des Ge rätes die
Herstellerhinweise.
8. Stellen Sie das Gerä t nicht in der
Nähe von Wärmequellen au f. Solche
Wärmequellen sind z. B. Heizkörper,
Herde oder andere Wärme erzeugende
Geräte (auch Verstär ker).
9. Entfernen Sie in keinem Fall
die Sicherheitsvorrichtung von
Zweipol- oder gee rdeten Steckern. Ein
Zweipolstecker hat zwei unterschiedlich
breite Steckkont akte. Ein geerdeter
Stecker hat zwei Steck kontakte
und einen dritten Erdungskontakt.
Derbreitere Ste ckkontakt oder der
zusätzliche Erdungskontakt dient
Ihrer Sicherheit . Falls das mitgeliefer te
Steckerformat nicht zu Ihrer Steckdose
passt, wenden Sie si ch bitte an
einen Elektriker, damit die Steckdose
entsprechend ausgetauscht wird.
10. Verlegen Sie das Ne tzkabel so,
dass es vor Tritten und sc harfen Kanten
geschützt ist und nicht beschädigt
werden kann. Ach ten Sie bitte
insbesondere im Bereich der Stecker,
Verlängerungskabel und an der Stelle,
an der das Netzk abel das Gerät verlässt,
aufausreichende nSchutz.
11. Das Gerät muss je derzeit mit
intaktem Schutzleiter an das Stromnet z
angeschlossen sein.
12. Sollte der Hauptnetzstecker
oder eine Gerätesteckdose die
Funktionseinheit zum Abschalten sein,
muss diese immer zugänglich sein.
13. Verwenden Sie nur Zusatzge räte/
Zubehörtei le, dielaut Herste ller
geeignet sind.
14. Verwenden
Sie nur Wagen,
Standvo rrichtungen, Stative,
Halter oder Tische,
die vom Hersteller
benannt oder im Lieferumfang des
Geräts enthalte n sind. Falls Sie einen
Wagen benutzen, s eien Sie vorsichtig
beim Bewegen d er
Wagen - G e rä t ko mb in a ti o n,
umVerletzungen durch Stolpern
zuvermeiden.
15. Ziehen Sie den Netzs tecker bei
Gewitter o der wenn Sie das Gerät
längere Zeit nicht benut zen.
16. Lassen Sie alle Wartungsarbeiten
nur von qualiziertem ServicePersonal ausf ühren. EineWartung
ist notwen dig, wenn das Gerät in
irgendeiner Weise beschädigt wurde
(z. B. Beschädigung des Netzkabels
oder Stecker s), Gegenstän de oder
Flüssigkeit in das Geräteinn ere gelangt
sind, das Gerät Reg en oder Feuchtigkeit
ausgesetzt wurde, das Gerät nicht
ordnungsgemäß funktioniert oder auf
den Boden gef allen ist.
17. Korrek te
Entsorgung dieses
Produkts: Dieses Symbol
weist darauf hin, das
Produkt entsprechend
der WEEE Direk tive (2012/19/EU) und
der jeweiligen nationalen G esetze nicht
zusammen mit Ihren Haushal tsabfällen
zu entsorge n. DiesesProdukt sollte b ei
einer autorisierten Sammelstelle für
Recycling elektrischer und
elektronischer Geräte (EEE) abgegeben
werden. Wegen bedenklicher
Substanzen, diegenerell mit
elektrischen und elektronischen
Geräten in Verbindung stehen, könnte
eine unsachgemäße Behandlung dieser
Abfallar t eine negative Auswirkung au f
Umwelt und Gesundheit haben.
Gleichzeitig gewähr leistet Ihr Beitrag
zur richtigen Entsorgung dieses
Produkt s die eektive Nut zung
natürlicher Re ssourcen. Fürweitere
Informationen zur Entsorgung Ihrer
Geräte bei einer Re cycling-Stelle
nehmen Sie bit te Kontakt zum
zuständigen städtischen Büro,
Entsorgungsamt oder zu Ihrem
Haushaltsabfallentsorgerauf.
18. Installie ren Sie das Gerät nicht
in einer beengten Umgebung, zum
Beispiel Bücherregal oder ähnliches.
19. Stellen Si e keine Gegenstände mit
oenen Flammen, etwa brennende
Kerzen, auf das Ger ät.
20. Beachten Sie bei der Entsorgung
von Batterien den UmweltschutzAspekt. Batterien müssen bei einer
Batterie-Sammelstelle entsorgt
werden.
21. Verwenden Sie da s Gerät in
tropischen und/oder gemäßigten
Klimazonen.
HAFTUNGSAUSSCHLUSS
Music Tribe übernimmt keine Haftung
für Verluste, die Personen entstanden
sind, die sich ganz oder teilweis e auf
hier enthaltene Beschreibungen,
Fotos oder Aussagen verlassen haben.
Technische Daten, Erscheinungsbild
und andere Informationen können
ohne vorherige Ankündigung
geändert werden. Alle Warenzeichen
sind Eigentum der jeweiligen Inhaber.
Midas, Klark Teknik, L ab Gruppen,
Lake, Tannoy, Turbosound,
TC Elec tronic , TC Helico n,
Behringer, Bugera, Auratone und
Coolaudio sind Warenzeichen oder
eingetragene Warenzeichen der
Music Tribe Global Brands Ltd.
© Music Tribe Global Brands Ltd.
2019 Alle Rechte vorbehalten.
BESCHRÄNKTE GARANTIE
Die geltenden Garantiebedingungen
und zusätzliche Informationen
bezüglich der von Music Tribe
gewährten beschränkten
Garantie nden Sie o nline unter
musictribe.com/warranty.
Instruções de
Segurança Importantes
Aviso!
Terminais marcados
com o símbolo carre gam
corrente elétr ica de magnitude
suciente para con stituir um risco de
choque elét rico. Use apenas cabos
de alto-falantes de alta qualidade
com plugues TS de ¼" ou plugues
com trava de torçã o pré-instalados.
Todas as outras instalaçõe s e
modicaçõe s devem ser efetuadas por
pessoasqualicadas.
Este símbolo, onde quer
que o encontre, aler ta-o
para a leitura da s
instruções de manuseamento que
acompanham o equip amento. Por favor
leia o manual deinstruções.
Atenção
De forma a dim inuir
o risco de choq ue
eléctr ico, nãoremover a cober tura
(ouasecção de trás). Não existe m peças
substituí veis por parte do utilizado r no
seu interior. Para esse e feito recorrer a
um técnicoqualic ado.
Atenção
Para reduzir o r isco de
incêndios ou choques
eléctr icos o aparelho não deve ser
exposto à ch uva nem à humidade.
Alémdisso, não deve ser su jeito a
salpicos, nem deve m ser colocados em
cima do aparelho objectos contendo
líquidos, taiscomojarras.
Atenção
Estas ins truções de
operação devem s er
utilizadas, eme xclusivo, por técnicos
de assistência qualicados. Para evitar
choques eléc tricos não proceda a
reparações ou intervenções, que
não as indicadas nas ins truções
de operação, sa lvo se possuir as
quali-cações necess árias. Para evitar
choques eléc tricos não proceda a
reparações ou intervenções, que
não as indicadas nas ins truções de
operação. Só o de verá fazer se possuir
as qualicaçõesnecessár ias.
1. Leia estas inst ruções.
2. Guarde estas instru ções.
3. Pr este atenção a todos os avisos.
4. Siga todas as inst ruções.
5. Não u tilize este dispositivo per to
de água.
6. Limpe ap enas com um pano seco.
7. Não obs trua as entradas de
ventilação. Instale d e acordo com as
instruções do fabricante.
8. Não instale pe rto de quaisquer
fontes de calo r tais como radiadores,
bocas de ar quen te, fogões de s ala
ou outros aparelhos (incluindo
amplicadores) que produzam calor.
9. Não anule o objectivo de
segurança das chas polarizadas ou
do tipo de ligação à ter ra. Uma cha
polarizada dispõ e de duas palhetas
sendo uma mais larg a do que a outra.
Uma cha do tipo ligaç ão à terra dispõe
de duas palhetas e u m terceiro dente
de ligação à terra. A p alheta larga ou
o terceiro dente sã o fornecidos para
sua segurança. S e a cha fornecida
não encaixar na sua tomada, consulte
um electr icista para a substituiç ão da
tomada obsoleta.
10. Proteja o cabo d e alimentação de
pisadelas ou aper tos, especialmente
nas chas, exte nsões, e no local de
saída da unidad e. Certique-se de
que o cabo elé ctrico está pr otegido.
Verique particu larmente nas chas,
nos receptácu los e no ponto em que o
cabo sai doap arelho.
11. O aparelho tem de est ar sempre
conecta do à rede eléctrica com o
condutor de pr otecção intacto.
12. Se utilizar uma cha de
rede princi pal ou uma tomada de
aparelhos para desligar a unidade
de funcionamen to, esta deve es tar
sempre acessível.
13. Utilize apenas ligações/acessórios
especicados pelofabricante.
14. Utilize apenas
com o carrinho,
estrutura, tripé,
suporte, ou mesa
especicados pelo
fabricante ou
vendidos com o disp ositivo.
Quandoutilizar u m carrinho, tenha
cuidado ao mover o conju nto carrinho/
dispositivo para evitar danos provocados
pela terpidação.
15. Desligue este dispositivo durante
as trovoadas ou quando não fo r
utilizado durante longos períodos
detempo.
16. Qualquer tipo de reparação
deve ser sempr e efectuado por
pessoal quali cado. É necessária uma
reparaçã o sempre que a unidade tiver
sido de alguma forma danicada,
como por exempl o: no caso do cab o de
alimentação ou cha se encontrarem
danicados; naeventualidade de
líquido ter sido derramado ou objectos
terem caído par a dentro do dispositivo;
no caso da unidade te r estado exposta
à chuva ou à humidad e; seesta
não funcionar nor malmente, ou se
tiver caíd o.
17. Correc ta eliminação
deste produ to: este
símbolo indic a que o
produto não deve se r
eliminado juntamente
com os resíduos dom ésticos, segundo a
Direct iva REEE (2012/19/EU) e a legislação
nacional. Este pr oduto deverá ser levado
para um centro de reco lha licenciado para
a reciclagem de r esíduos de
equipamentos eléctricos e electrónicos
(EEE). O tratamento incorre cto deste tipo
de resíduos pode ter u m eventual
Page 5

8 9Quick Start GuideDP48
impacto negativo no ambiente e na
saúde humana devid o a substâncias
potencialmente peri gosas que estão
geralmente ass ociadas aos EEE. Ao
mesmo tempo, a sua colabora ção para a
eliminação corre cta deste produto irá
contribuir par a a utilização eciente dos
recursos nat urais. Paramais informação
acerca dos locais onde poderá deixar o
seu equipamento u sado para reciclagem,
é favor contac tar os serviços municip ais
locais, a entidad e de gestão de resíduos
ou os servi ços de recolha de
resíduosdomésticos.
18. Não inst ale em lugares
connados, tais como estantes ou
unidades similares.
19. Não colo que fontes de
chama, tais como velas aces as,
sobre o apare lho.
20. Favor, obedecer os aspectos
ambientais de descarte de bateria.
Baterias devem se r descartadas em um
ponto de coletas de baterias.
21. Use este ap arelho em climas
tropicais e/ou moderados.
LEGAL RENUNCIANTE
O Music Tribe não se responsa biliza
por perda alguma q ue possa ser
sofrida po r qualquer pessoa que
dependa, seja de maneira completa
ou parcial, de qualquer descr ição,
fotograa, ou declaração aqui
contidas. Dados técnicos, aparências
e outras informações es tão sujeitas
a modicaçõe s sem aviso prévio.
Todas as marcas são prop riedade
de seus respectivos donos. Midas,
Klark Teknik, La b Gruppen, Lake,
Tannoy, Turbosound, TC Electronic,
TC Helicon, Behringe r, Bugera, Auratone
e Coolaudio são ma rcas ou marcas
registrada s do Music Tribe Global Brand s
Ltd. © Music Tribe Global Brands Ltd.
2019 Todos direito s reservados.
GARANTIA LIMITADA
Para obter os termos d e garantia
aplicáveis e condições e informações
adicionais a respeito da garantia
limitada do Music Tribe, favor ver icar
detalhes na ínteg ra através do website
musictribe.com/warranty.
Page 6

Welcome!
Features
•
•
•
•
•
•
•
•
•
•
•
•
•
•
•
•
•
•
•
•
•
About this manual
For additional information
10 11Qui ck Start GuideDP48
1. Introduction
Welcome!
Thank you for purchasing the DP48 Personal Monitor Mixer!
The DP48 unit is housed in a compact format suitable for mounting on microphone stands with the optional DP48MB
mounting bracket system (sold separately).
All user controls are laid out for ease of use on the top
The DP48 Dual Monitoring Mixer uses a low-latency, oating point audio engine to provide excellent stage and
IEM (In Ear Monitoring) sound with independent mixes for one or two users. The mixer
di erent modes: SINGLE (one mix for one musician, with dual MY GROUP knobs available) and DUAL (separate mixes
for two musicians).
The DP48’s AES50 connection provides 48 individual input channels at 48 kHz/24-bit resolution that can freely
12 stereo groups. All 12 stereo groups feature semi-parametric 3-band EQ, compression and reverb sends. Mixes A and B
each have their own EQ processing and an adjustable brickwall limiter to prevent excessive levels on the phones outputs.
DP48 also includes an automatic con
guration function to simplify Channel-to-Group assignments when setting up mixes.
Now, instead of manually setting up your Groups from scratch, DP48 can automatically evaluate the AES50 datastream
and assign to Groups 1-12 all channels that share speci c common features, such as channel
This auto-con guration function thereby allows the engineer to easily distribute his mix structure throughout the
connected IEM (In Ear Monitoring) world.
panel, while all primary connectors are on the DP48’s rear panel.
can be operated in two
be mixed to
colours or channel names.
Features
• Dual 48 channel personal monitor mixer compatible
with MIDAS personal monitoring system hubs
• 12 stereo groups enable rapid creation and balancing of
personal mixes from fully con gurable stem groups
• Dual mix feature allows independent control of two
complete monitor mixes
• Integrated SD card interface for stereo recording and
playback of rehearsal sessions and performances
• Built-in stereo ambience microphone provides on-stage
sound feed to remove sense of isolation with in-ear
monitors
• Studio-quality reverb adds spatial ambience to personal
in-ear mixes, independent from main console
• Remotely powered via direct AES50 connection from
MIDAS hubs featuring Power over Ethernet (PoE)
• Separate DC power supply allows daisy-chaining of DP48
personal monitor mixers and use without any PoE hub
• Compatible with any 44.1/48 kHz AES50-equipped
devices including Midas and Behringer digital consoles
and I/O boxes
• Midas PRO SERIES and M32 console input channel
labelling and colour information transmitted to DP48
personal monitor mixer via AES50 input channels
• AES50 return channels allow personal mixes to be sent
back to the console or hub for connection to wireless IEM
transmitters
• Remote operation up to 100 m via screened CAT5/5e
cable
• Remote setup and control of DP48 personal monitor
mixer via MIDAS hubs
• Full remote control of another DP48 when both
connected to the same hub or used in daisy chain
con guration
• High-contrast 2.4" colour TFT display screen provides
clear overview of mix parameters, meters and group
assignments
• Analogue stereo auxiliary input for local click track
• High power headphone output for use in all stage
monitoring environments
• Fully adjustable limiter allows for safe monitoring levels
within sound exposure limits
• Mounts securely on microphone stand with DP48MB
adaptor (not included)
• 10-Year Warranty Program*
• Designed and engineered in the U.K.
*Warranty details can be found at musictribe.com/support
About this manual
This is the operation manual for the DP48 Personal Monitor Mixer. This manual is intended to help get your unit installed
and in operation as quickly as possible by giving you unpacking, installation, connection, setting up and operating
instructions. To help familiarise you
with the DP48, there is a description of the top and rear panels, along with
easy-to-follow user instructions.
For additional information
For an extra overview and summary of DP48’s signal ow and architecture, see the supplemental Block Diagram/
Operations Chart posted to the DP48 product page online at
www.midas.com/p/P0BMX/Downloads.
Page 7

•
•
Unpacking
•
•
•
Power
Connecting up
12 13Quick Star t GuideDP4 8
2. Getting Started
Unpacking
Carefully unpack your DP48 unit. Then, inspect the unit carefully for any signs of damage that may have occurred during
transit and notify the courier immediately if you discover any.
Check the contents of your DP48 equipment package. If there are any parts missing, incorrect or faulty, please contact your
local distributor or MIDAS support.
Inside this box, you should nd the following items:
• DP48 personal mixer
• external power supply
• Quick Start Guide
Please retain the original packing in case you should need to return the equipment to the manufacturer or supplier,
or transport or ship the unit later.
Power
The DP48 unit can be powered remotely over the AES50 connection or by directly connecting the included
external power supply.
NOTE: When powering on, if the position of the MONITOR MIX A or MONITOR MIX B knob is higher than approx.
25% (9
o’clock), the device will remain locked, audio is muted, and the following indication will appear on the display:
This security mechanism protects your ears and saves your headphones from damage due to excessive high volume. To
unlock the device and reactivate audio, just turn both
Connecting up
The DP48 unit uses the following leads and connectors:
AES50 Connections:
Neutrik EtherCON with status indication
Primary Analogue Inputs:
Aux Inputs – Balanced ¼" TRS connectors
Primary Analogue Outpu t s:
Phones – Stereo dual ¼" TRS connectors
knobs fully counter-clockwise.
Mono Line Out– Balanced ¼" TRS connectors
Power Connections:
Remote power over AES50
External DC power supply
3. Top and Rear Panels
(1)
(4)
(2)
(3)
(19)
(1) VOLUME knob controls the
overall output volume for the
knob’s respective mix.
(2) MY GROUP knob can be
assigned to one of the 12
Groups to permanently control
that Group’s level on the
respective MIX A/MIX B output
(3) MIX A/MIX B buttons allow
you to select the mix’s
processing, including EQ,
Limiter and Reverb return.
(4) SETUP button accesses
the settings mixer modes,
SD recorder, reverb type,
AUX IN input, ambience mic,
brightness, remote control and
other general preferences.
(5) SD-REC button opens the
2-track recording/playback
operations when a FAT32
formatted SD card is present in
the rear panel slot (see 24).
(6) PRESETS (SETUP and SD-REC
pressed concurrently) allows
you to store and load complete
mix presets. You can import/
export mix presets on SD cards,
or use one of the 12 internal
(6)
memory slots. Use the RESET
function to clear the 12
memory
the preferred factory status.
(7) DISPLAY shows data about
the current mix, including
parameters, channel levels and
channel groups.
(8) SELECT/EDIT push encoder
allows you to select and adjust
various parameters.
(9) EDIT button allows access to
the Level and Pan adjustments
for input signals assigned to
the selected Group. The default
setting for Level and Pan is
0 dB center. The selected Group
will be soloed automatically
while making adjustments in
Edit Mode.
(10) ASSIGN button is used to
assign channels to groups.
NOTE: Please note
the following:
• the selected AES50 input
channel will be soloed
automatically to make channel
assignments easier.
(7)
(20)
slots and re-establish
(8)
(9)
(10)(5)
(18)(11) (12) (13) (14) (15)
(17)
(16)
• when either a MIX A/MIX B
button OR any Group button
is active, then the processing
(i.e., EQ, Compressor and
Reverb) for that Group or
mix can be adjusted.
(11) LOW ( ) button selects the
bass equilisation parameter for
the currently-selected group,
or for the selected Mix A or B.
Make adjustments by rotating
the SELECT/EDIT push encoder.
The LOW ( ) button also
acts as a control
for SD recording/playback.
(12) MID ( ) button selects the
mid-range equilisation
parameter for the
currently-selected group, or for
the selected Mix A or B.
Make adjustments by rotating
the SELECT/EDIT push encoder.
The MID( ) button also acts
as a control for
SD recording/playback.
Page 8

•
•
•
•
•
•
•
•
•
14 15Quick Star t GuideDP48
(21) (22) (24) (25) (26) (27)(23)
(13) HIGH ( ) button selects the
treble equilisation parameter
for the currently-selected
group, or for the selected
Mix A or B. Make adjustments
by rotating the SELECT/EDIT
push encoder. The HIGH( )
button also acts as a control for
SD recording/playback.
(14)
COMP( ) button opens the
Group COMPRESSOR or LIMITER
windows, depending on the
selected GROUPS 1-12 or MIX A/
MIX B button:
•
when GROUPS 1-12 buttons
are selected, you can adjust
that Group’s compression
settings
•
when MIX A or MIX B buttons
are selected, you can adjust
the peak limiting threshold
for the selected mix. (NOTE:
The limiter is always on.)
The COMP( ) button also
acts as a control for SD
recording/playback.
(15)
REVERB(<<) button opens
adjustment dialogs with
these parameters:
•
Reverb send level for the
selected group
•
Reverb return level for the
selected mix
The REVERB(<<) button
also acts as a control for
SD recording/playback.
(16)
PAN (>>) button accesses
panorama settings for the
currently-selected Group,
sent to MIX A and MIX B.
The PAN (>>) button
also acts as a control for
SD recording/playback.
(17)
MIC button selects the ambient
mic audio for equaliser or mix
level adjustment. Any of the
illuminated neighbouring
buttons (LOW, MID, HIGH
or PAN) may be selected
for editing.
(18)
AUX IN button selects
the auxiliary audio input
for equaliser or mix level
adjustment. Any of the
illuminated neighbouring
buttons (LOW, MID, HIGH
or PAN) may be selected
for editing.
(19)
GROUPS 1-12 buttons select
Group audio for equaliser or mix
level adjustment. Any of the
illuminated buttons (LOW, MID,
HIGH, COMP, REVERB or PAN)
may be selected for editing.
(20)
GROUP LEVEL knobs allow
direct level adjustment for any
Group currently selected by the
GROUPS 1-12 buttons, going to
MIX A or MIX B.
(21)
DC INPUT connects the
included external power supply.
Please use only MIDAS external
power supplies.
(22)
POWER button switches the
unit on and o .
(23)
AES50 THRU/IN EtherCON
sockets provide connection
to digital consoles. The AES50
connection can pass audio and
control data in both directions
via shielded Cat-5e Ethernet
cables. The AES50 IN socket
also accepts remote PoE (Power
over Ethernet) for adapter-free
operation for the rst DP48
connected over AES50. E ach
socket has a pair of red and
green LEDs, which indicate
the following:
•
Green pulsating and red
extinguished = valid audio
and valid control data;
active link.
•
Green constantly illuminated
and red extinguished = valid
audio and valid control data;
standby link.
•
Green extinguished and
red illuminated = no clock
sync available, no audio;
link has failed.
(24)
DATA/REC slot allows you to
record a personal stereo mix
directly to SD card media.
Mixes recorded to a SD card
can be played back to Mix A or
Mix B directly (the playback
Level is set in pg. 3/8 of the
Setup menu).
(25)
AUX IN inputs allow additional
line-level stereo (L and R inputs)
or mono (L input only)
inputs to be routed into
the mix using cables with
¼" TRS connectors (e.g., for
inserting a local click track or
metronome signal).
(26)
PHONES A/B outputs sends the
active mix out for monitoring
over headphones or other
monitoring systems.
(27)
MONO output jacks can be
used to send out a line-level,
balanced mono signal over
cables with ¼ " TRS connectors
(e.g., for feeding a local
stage monitor).
4. Operation
Controls and indicators
For any operation, the function buttons usable for that operation will illuminate with a white backlight to show the buttons
are active. For example, the LOW/MID/HIGH equaliser or COMP (compressor) buttons will illuminate when either a GROUPS
1-12 or MIX A/MIX B button is pressed.
Any selection can be toggled on/o by pressing the button repeatedly. When a speci c function button is not available,
please consider switching other active functions o rst.
In some menus, the REVERB(<<) and PAN(>> ) buttons are
Choosing a mix mode
As a rst step, you should choose a mix mode to suit your needs. For example, are you sharing the same DP48 mixer with
another musician, or will you be the only musician using the mixer?
Each of the mix modes—SINGLE and DUAL—de
• SINGLE mode only uses MIX A, but this mode also allows you to assign the left and right MY GROUP knobs to di erent
Groups for extra control on the y. Use shortcut “MIX A” [“MIX B”] + any of the GROUPS 1-12 number buttons to assign
the left [right] group to the MY GROUP knobs.
• DUAL mode permits the same Groups to have di erent level and panorama settings for MIX A and MIX B
NOTE: For both MIX A and MIX B, the underlying channel-to-Group con gurations remain the same.
To choose a mix mode
1. Press the SETUP button to access the SETUP screens.
2. Select page 1/8 by rotating the SELECT/EDIT push encoder or pressing the REVERB(<<) and PAN(>> ) buttons.
3. Rotate the SELECT/EDIT push encoder to reach the
4. Press the SELECT/EDIT push encoder to activate the parameter for adjustment.
5. Rotate the SELECT EDIT push encoder to choose your desired mix mode.
Saving and managing mix presets
You may save entire mix setting presets, include all Group and parameter assignments, to any of 12 internal storage slots.
The storage slots will save presets even after the DP48 has been powered o .
To save a mix preset
1. Press the SETUP and SD-REC buttons together to access the PRESETS screen.
2. Rotate the SELECT/EDIT push encoder to scroll to the SAVE option.
3. Press the SELECT/EDIT push encoder. A prompt will appear that asks you to choose
your current mix preset.
4. Press one of the GROUPS 1-12 buttons to choose a storage slot. For storage slots that already contain a saved
mix preset, the matching GROUPS 1-12 button will be illuminated.
5. If you sel
6. Use the SELECT/EDIT push encoder to choose the YES option if you wish to overwrite the
ect a slot that already contains a saved preset, a prompt will appear asking if you wish to overwrite the
preset already in the storage slot.
used to navigate between pages.
ne what parameters are in common for both MIX A and MIX B:
rst entry, MIXER MODE.
a storage slot in which to save
storage slot.
Page 9

•
•
•
•
•
•
•
•
•
•
·
·
·
·
·
•
•
·
·
·
·
·
16 17Quick Star t GuideDP48
7. The system will take you back to the PRESETS page.
8. Press either SETUP or SD-REC individually to exit back to the top-level MIX A/MIX B METERS screen.
PRESETS 1/2 screen
MIX A/MIX B METERS screen
To load a saved mix preset
1. Press the SETUP and SD-REC buttons together to access the PRESETS screen.
2. Rotate the SELECT/EDIT push encoder to scroll to the LOAD option.
3. Press the SELECT/EDIT push encoder. A prompt will appear that asks you to choose
which to load a mix preset.
4. Press one of the GROUPS 1-12 buttons to choose a storage slot. For storage slots that already contain a saved
mix preset, the matching GROUPS 1-12 button will be illuminated.
5. The system will then
6. Press either SETUP or SD-REC individually to exit back to the top-level MIX A/MIX B METERS screen.
automatically take you back to the PRESETS page.
a storage slot from
To reset mix parameters back to default settings
1. Press the SETUP and SD-REC buttons together to access the PRESETS screen.
2. Rotate the SELECT/EDIT push encoder to scroll to the RESET option.
3. Press the SELECT/EDIT push encoder. A prompt will appear that asks you to
4. Use the SELECT/EDIT push encoder to choose the YES option if you do indeed wish to reset and initialize.
5. The system will then automatically take you back to the PRESETS page.
6. Press either SET
NOTE: To control which parameters are protected from a Reset/Preset Load command, go to the PRESETS LOCK section on
pg. 2/2 of the PRESETS screen to choose
UP or SD-REC individually to exit back to the top-level MIX A/MIX B METERS screen.
your lock preferences from the following options:
con rm your decision to reset.
• LOCK ASSIGN (on/o ) allows you to protect the input channel-to-Group assignments from any Reset or
Preset Load actions
• LOCK A (on/o ) protects the MIX A processing (without the Group levels) from any Reset or Preset Open/Load actions
• LOCK B (on/o ) protects the MIX B processing (without the Group levels) from any Reset or Preset Load actions
• LOCK GROUPS (on/o ) protects the Group processing settings (e.g., equaliser, limiter, aux – including MIX levels) from
any Reset or Preset Load actions.
The RESET function will return DP48 to a default state, as follows:
• Internal Preset memory will not be cleared with Reset
• If any AES50 input signals are available to DP48, and you slowly turn up the VOLUME control, all AES50 signals should
become audible immediately, without further con guration
• All 48 input channels are spread over the 12 Groups (i.e., 4 channels per Group)
• Default Group channel panning is centered
• Default Group member level setting is 0 dB individual level
• Mix A and B
all EQ 0 dB, Low=200Hz, Mid=2kHz, High= 6kHz
Limiter -30 dB and Reverb Return o
Mic centered at -10 dB, with +20dB switch on
Aux In centered at -10 dB, with +12dB switch on
HALL Reverb selected
• Remote functions o
• All Group default levels are set as follows:
set to -10 dB level, center panning
all EQ gain = 0 dB (Low = 200Hz, Mid = 2kHz, High = 6kHz)
Compressor 0% and Reverb Send o
All groups mixed to both Mix A and B
MY GROUP is not assigned yet
PRESETS 2/2 screen
Auto-Con guration of Channels and Groups
DP48’s “ASSIGN BY” macro features automatic mapping of incoming AES50 channels to Groups. This mapping can be done
by using channel colour and channel name information, as set up by the FOH or monitor engineer at the mixing board.
NOTE: The SETUP/ASSIGN BY macros
the function is launched. The function does NOT automatically update, so if the engineer subsequently changes his setup,
you will need to re-launch the AutoCon g function to capture the new
automatic mappings manually at any time, if you are not satis ed with the results.
only map channels once, according to the AES50 channel colours/names at the time
con guration to your DP48. You can also change the
Page 10

•
·
·
·
·
·
•
·
·
·
·
·
•
·
·
•
•
·
·
•
·
·
·
·
•
·
·
18 19Quick Start G uideDP48
To auto-con gure the channel-group assignments, press the SETUP button and choose your preferred ASSIGN BY function
on the SETUP screen:
SETUP 1/8 screen
• ASSIGN BY NAME uses channel name information in the AES50 datastream to automatically map input channels to DP48
Groups, including the following details:
Con rm/cancel that channels will be assigned to Groups 1-12 by channel name
Function clears all previous Group channel assignments
Channels with speci c leading characters such as - ‘ * ( ) , . / [ ] < > will be mixed to their assigned Group with
0 dB level and panned to center
Input channels with di erent leading characters will not be assigned automatically
Channels can later be re-assigned manually pressing the ASSIGN button
• ASSIGN BY COLOUR uses channel colour information in the AES50 datastream to automatically map input channels to
DP48 Groups, including the following details:
Con rm/cancel that channels will be assigned to Groups 1-12 by colour
Function clears all previous Group channel assignments
Input channels coloured WH (white) or BK (black) will not be assigned
By default, channels will be mixed to their assigned Group with 0 dB level and panned to center
Channels can later be re-assigned manually by pressing the ASSIGN button
• GROUP NAMES IMPORT is an alternative method that allows you to name all Groups by using an external word processor
(e.g., Microsoft Word, Open O ce Writer, or a simple text editor) or a spreadsheet/calculation program, such as
Microsoft Excel or Open O ce Ca
Example procedure using a text editor:
1. Open the text editor and start a new empty document.
2. Write the group names in one line, separated by “ , ” or “ ; ”.
3. Save the le in .csv format to a SD Card.
4. Insert this SD card in your DP48.
Go to SETUP screen page 8/8.
5.
6. Select GRP NAMES.
7. Select IMPORT.
lc.
Example procedure using a spreadsheet/calculation program:
1. Open the spreadsheet/calculation program, and start with an empty chart.
2. Insert one group name per cell (from left to right).
3. Save the le in .csv format to an SD Card.
4. Now follow Steps 4-7 as
NOTES:
1. Do NOT use special characters, such as umlauts/vowels (Ä, Ö, Ü).
2. Case shift (large/small letters) is generally supported.
3. Group names are limited to max. 7 characters (incl. blank spaces).
SETUP 7/8 screen
The SETUP 7/8 screen allows you to choose a preference for the channel-group when a RESET is done. Default is “12 STEREO”.
• CLEAR ALL deletes all input channel assignments from all Groups.
• ULTRANET 12 automatically creates 12 mono Groups:
Function clears all existing channel assignments from all Groups
Function maps AES50 input channels 33-44 to Groups 1-12.
• ULTRANET 16 automatically creates 8 mono and 4 stereo Groups:
Function clears all existing channel assignments from all Groups
Function assigns AES50 channels as follows:
Input channels 33-40 are assigned to Groups 1-8
Input channels 41-48 are assigned as stereo pairs to Groups 9-12
• 12 STEREO automatically creates 12 stereo Groups from the rst 24 AES50 channels:
Function architecture assumes the FOH engineers will provide stereo stem groups for monitoring, rather than
individual sources
Function will work best with groups of instruments, such as drums, horns, strings, choir, keys, bass, guitars,
and so on, that mainly need level adjustments by the musician using DP48
described in the text editor procedure.
Page 11

•
•
•
·
·
·
20 21Quick Star t GuideDP48
Con guring input Channels and Groups
To access ASSIGN mode, rst make sure the SETUP, SD-REC, MIX A and MIX B buttons are not illuminated.
In ASSIGN mode, the GROUP/CHANNEL ASSIGN screen will show the 48 available AES50 channels as a series of
varying colors. The Group number and channel number will appear on the left side of the screen.
GROUP/CHANNEL ASSIGN screen
In the GROUP/CHANNEL ASSIGN screen, you can judge the assignment status of an individual channel by the following color
cues:
• Amber frame – channel is selected
• Blue frame – channel is assigned to the currently-active Group
• Flashing – an audio signal is present in the channel
boxes with
To assign/unassign a channel to a Group
1. Press the INPUT CHANNEL/ASSIGN button to enter the GROUP/CHANNEL ASSIGN screen.
2. Choose a Group by pressing one of the GROUPS 1-12 buttons along the lower edge of the DP48 top panel.
Channels assigned to the currently-selected Group will
NOTE: For easy channel identi cation, soloed audio from the selected AES50 channel will replace the MIX A/B audio.
3. Rotate the SELECT/EDIT push encoder to scroll to the desired channel. When the desired channel is ready for
lection, the channel’s box will change color from a gray to an amber frame.
se
4. Press the SELECT/EDIT push encoder to assign/unassign the selected channel to the current Group. The selected
channel’s box will change color to a blue
assigned to the current Group.
*The incoming AES50 datastream may also include channel name and colour-coding information, depending on the
AES50 source.
ll with an amber frame to indicate the channel has successfully been
appear blue.
Setting the input channel levels and panorama
The top-level MIX A/MIX B METERS screen only displays level settings for Groups.
Levels and panning for individual channels can only be adjusted and set individually within Groups. Once channel levels
and panning are set within a Group, you can then ba
METERS screen.
lance levels and panning between entire Groups in the MIX A/MIX B
INPUT CHANNEL EDIT screen
To edit levels and panning within a Group
1. Before editing channel levels and panning, make sure your overall Mix Volume and Group levels are loud enough
that you can hear audio from the input channels.
2. Press the INPUT CHANNEL/EDIT button to enter the INPUT CHANNEL screen.
3. Choose a
4. Channels assigned to the currently-selected Group will appear as blue boxes. If no blue boxes are
5. Use the REVERB(<<) and PAN(>>) buttons to select an input channel within the group. The selected channel will
6. Rotate the SELE
7. Repeat steps 5-6 until the mix for Members in this Group is set, then consider moving on by pressing another
8. When
9. You can then take the following actions:
speci c Group by pressing one of the GROUPS 1-12 buttons. The selected Group is automatically soloed
and will replace the MIX A/MIX B audio.
visible, then the
selected Group is still empty.
appear as an amber box with a blue ll.
CT/EDIT push encoder to adjust the currently-active Level or Pan parameter. Push the encoder to
select between LEVEL and PAN.
Group button.
done, pressing the EDIT button again will bring you back to the selected Group processing page,
and Group Solo will be switched o automatically.
adjust that Group's mix level in relation to the other Groups by turning the respective GROUP LEVEL control
make adjustments to that Group’s processing, i.e., Compressor, Reverb Send or Equaliser.
press that Group's button again to go back to the metering overview (idle) screen
To set Group levels in your nal mix
To begin creating your nal mix, you will be directly setting levels for entire Groups of channels by using the
GROUP LEVEL knob.
1. Select a Group for level setting by pressing one of the GROUPS 1-12 buttons. The system will take you to
Group’s GROUP/LEVEL screen.
2. Rotate the GROUP LEVEL knob to adjust the Group’s overall level by .5 dB increments. The left GROUP LEVEL knob
will control LEVEL A going to MIX A, while the right GROUP LEVEL knob
3. Select another Group for level adjustment by pressing one of the GROUPS 1-12 buttons.
4. Repeat steps 1-3 until satisfactory levels have been set for all Groups.
5. To exit, de-select the currently-active Group by pressing that
NOTE: At any time, you may adjust a Group’s level by selecting that Group’s GROUPS 1-12 button and then rotating the
GROUP LEVEL knob for the currently-active mix.
controls the LEVEL B for MIX B.
Group’s GROUPS 1-12 button.
that
Page 12

22 23Quick Start Guid eDP48
To set Group panning in your nal mix
If necessary, entire Groups can be shifted together in the stereo eld. Most of the time you will be setting up stereo
panning when you rst con gure your AES50 channels into Groups, but when needed you can shift the entire Group’s
overall panning at
1. Select a Group for panning adjustment by pressing the GROUPS 1-12 button.
2. Press the SELECT/EDIT push encoder to toggle between PAN A and PAN B (sent to MIX A and MIX B).
3. Rotate the SELECT/EDIT push encoder unti
4. Repeat steps 1-3 until panning for all Groups has been set.
5. To exit, de-select the currently-active Group by pressing that Group’s GROUPS 1-12 button.
once.
l the Group’s overall left-to-right panning is in the desired spot.
Assigning one of the 12 Groups to the MY GROUP knob
Use the MY GROUP knob to make quick adjustments of your personal Group level versus the rest of the mix. The MY GROUP
knob is available at all times for your personal level adjustments, no matter what operation menu is active in the display.
Your personal Group assigned
channels (e.g., vocals and guitar together, with levels balanced internally within the Group).
NOTE: Each MY GROUP knob can only be assigned ONE Group
to the MY GROUP knob may contain a single channel (e.g., vocals or guitar only) or several
at any given time.
To assign a Group to the MY GROUP knob
1. Press and hold the MIX A or MIX B button.
2. Press the GROUPS 1-12 button of the Group you wish to assign to the MY GROUP knob. The screen will show the
active MIX (A or B) in the big blue eld, while the l
assigned to the MY GROUP knob.
3. Rotate the MY GROUP knob to adjust the Group’s LEVEL indicated by the LED ring around the MY GROUP knob.
4. To see the LEVEL change
turn the assigned MY GROUP knob, you will see the dB value changing for LEVEL A (MIX A) / LEVEL B (MIX B).
NOTE: If a Group is not assigned
5. Press the Group’s illuminated GROUPS 1-12 button or the illuminated MIX A/B button (from Step 1 above), to exit
back to the top-level MIX A/MIX B METERS
6. You may now use the MY GROUP knob to make immediate adjustments to your personal Group’s mix level without
having to access any additional screens.
7. To assign a di erent Group to MIX A or MIX B, repeat steps 1-2 and press a di erent GROUPS 1-12 button.
un-assign the currently-assigned Group from a MY GROUP knob, repeat steps 1-2 and press the GROUPS 1-12
button for the currently-assigned Group. Now, the white eld showing the Group number in the bottom corner
will disappear from the big blue MIX A (or MIX
NOTE: The rst time you rotate the un-assigned MY GROUP knob, the system will launch a prompt window telling you
how to assign a Group to the knob. Once you have assigned a Group to the MY GROUP knob, the automated prompt will no
longer appear unless you later un-assign the Group without assigning another Group.
expressed in dB values, press the assigned Group’s GROUPS 1-12 button. Then, when you
to MIX A/B, the LEVEL A/B will not change by turning one of the MY GROUP knobs.
ower corner of the blue eld will show the Group number
screen.
To
B) eld.
Adding EQ and reverb to your nal mix
To add EQ and reverb to your nal mix, follow these steps:
1. Press the MIX A/MIX B button to enter the MIX screen.
2. Press the LOW/MID/HIGH buttons to access the equaliser settings. Control buttons for LOW, MID, HIGH, COMP and
REVE
RB will illuminate.
3. Rotate the SELECT/EDIT push encoder to raise or lower the level of the selected frequency band.
4. Press and rotate the SELECT/EDIT push encoder to adjust the selected frequency band’s cuto (shelving) or center
point (parametric).
screen.
5. Press the REVERB button access the REVERB level settings.
6. Rotate the SELECT/EDIT push encoder to raise the REVERB level to your desired
7. When you are done, press the MIX A/MIX B button to exit.
NOTE: To change the reverb type, press SETUP and go to page 4/8 of the SETUP menu to choose between AMBIENCE, CLUB,
HALL or CATHEDRAL reverb programs.
The composite equalisation curve created by your adjustments will appear at the top of the
setting.
Protect your hearing (setting Volume and Limiter)
The Limiter comes AFTER the nal VOLUME control in the signal chain, so the speci c Limiter threshold you choose will
depend on how loud you set the nal mix Volume.
For best results, we recommend you set your nal MIX A/MIX B
place a hard cap over the output that can contain any volume spikes and surges.
To prevent hearing fatigue or damage, consider setting the Limiter threshold as low as possible. With the right thresho
setting, you will have a safe upper limit you cannot exceed no matter what happens in the heat of the performance.
To set the nal VOLUME and LIMITER parameters, play some audio through your headset and follow these steps:
1. Press the MIX A/MIX B
REVERB will illuminate.
2. Slowly turn up the VOLUME to the maximum level you will need for your headset.
3. Press the COMP button to access the LIMITER
4. Rotate the SELECT/EDIT push encoder to lower the LIMITER threshold downward to your desired setting. We
recommend you lower the threshold until the “L” indicator on the screen begins to light, which shows that the
is beginning to react to volume peaks in the signal.
LIMITER
5. When you are done, press the MIX A/MIX B button to exit.
button to enter the MIX screen. Control buttons for LOW, MID, HIGH, COMP and
Volume rst, and then bring down the Limiter threshold to
ld
threshold for adjustment.
Page 13

·
·
·
·
·
·
24 25Quick Start GuideDP48
SOLO mode
To help with identi cation, DP48 will automatically solo the audio for speci c functions and under speci c conditions,
such as the following:
ASSIGN—While assigning input channels to a Group, the selected input channel will be soloed for easy
identi cation. When you exit ASSIGN, the channel solo will be deactivated automatically.
EDIT—While editing the Group mix of the assigned input channels, the selected Group will be
soloed automatically. When you exit EDIT, the Group solo will be deactivated automatically.
Group Processing—If you wish to listen to a Group in solo, e.g., to adjust that Group’s processing, just press
and hold the respective GROUPS 1-12, MIC or AUX IN buttons. That button’s LED will begin ashing, and the Group
display will show a
Solo Mode will also behave in the following ways:
When you switch to a di erent Group or select the MIC or AUX IN buttons while in Solo Mode, the solo will follow
your selection to the newly-selected Group or input.
When you de-select the soloed Group or press any other button, such as MIX A/MIX B or SETUP, the solo is switched
o automatically.
You can also press and hold the soloed Group button again to switch o the solo.
yellow “S” above the group number.
Speci cations
Connections
Phones Mix A / B2 x ¼ " TRS, stereo, unbalanced, 25 Ω
Line Mix A / B2 x ¼ " TRS, mono, balanced, 1 kΩ
Aux in 2 x ¼ " TRS, unbalanced, 20 kΩ
AES50 Thru / In2 x RJ45
Equalizer
Low ±15 dB, semi-parametric, low shelving
Mid ±15 dB, semi-parametric, peak
High ±15 dB, semi-parametric, high shelving
Frequency 20 Hz to 22 kHz, adjustable
Output
Limiter Ratio ∞:1
Level, max. +12.8 dBu (Phones)
Mix A / Mix B2 x stereo
AES50
Audio channels @ 48 kHz48
Sample rate 44.1 / 48 kHz
Sample word length 24 bit
Clock synchronization AES50 IN
Latency min. 70 μs per node (AES50)
Cable Ethernet CAT 5e
Cable length max. 100 m
Data / Rec
SD/SDHC format FAT32
Card memory Up to 32 GB supported
Power Supply
AES50 input PoE (IEEE802.3af)
Power consumption max. 14 W (with DC adaptor)
Mains connection External power supply 24 VDC / 600 mA (included)
Dimensions / Weight
Dimensions (H x W x D) 69 x 242 x 16 4 mm (2.72 x 9.53 x 6.46")
Weight 1.3 kg (2.9 lbs)
2 x ¼ " TRS, mono, unbalanced, 500 Ω
2 x ¼ " TRS,
balanced, 40 kΩ
Page 14

26 27Quick Start G uideDP48
Other important information
Important information Aspectos importantes
1. Register online.
Pleaseregister your new Music Tribe
equipment right after you purchase
it by visiting midasconsoles.com.
Registeringyour purchase using our
simple online form helps us to process
your repair claims more quickly and
e ciently. Also, read the terms and
of our warranty, ifapplicable.
conditions
2. Malfunction. Should your
Music Tribe Authorized Reseller not be
located in your vicinity, you may contact
the Music Tribe Authorized Ful ller for
your country listed under “Support” at
midasconsoles.com. Shouldyour country
not be listed, pleasecheck if your problem
dealt with by our “OnlineSupport”
can be
which may also be found under “Support”
at midasconsoles.com. Alternatively,
please submit an online warranty claim
at midasconsoles.com BEFORE returning
theproduct.
3. Power Connections.
Beforeplugging the unit into a power
socket, please
make sure you are using the
correct mains voltage for your particular
model. Faulty fuses must be replaced
with fuses of the same type and rating
withoutexception.
1. Registro online.
Lerecomendamos que registre su
nuevo aparato Music Tribe justo
después de su compra accediendo a
la página web midasconsoles.com.
Elregistro de su compra a través de
nuestro sencillo sistema online nos
ayudará a resolver cualquier incidencia
que se presente a la mayor brevedad
posible. Además,aproveche para leer
los términos y condiciones de nuestra
garantía, siesaplicable en sucaso.
2. Averías. En el caso de que no
exista un distribuidor Music Tribe en
las inmediaciones, puede ponerse en
contacto con el distribuidor Music Tribe
de su país, queencontrará dentro del
apartado “Support” de nuestra página
web midasconsoles.com. En caso de
que su país no aparezca en ese listado,
acceda a la sección “Online Support”
(quetambiénencontrará dentro
del apartado “Support” de nuestra
páginaweb) y compruebe si su problema
aparece descrito y solucionado allí.
Deforma alternativa, envíenos a través
de la página web una solicitud online de
soporte en periodo
devolvernoselaparato.
3. Conexiones de corriente.
Antes de enchufar este aparato a una
salida de corriente, asegúrese de que
dicha salida sea del voltaje adecuado
para su modelo concreto. En caso de
que deba sustituir un fusible quemado,
deberáhacerlo por
especi caciones, sinexcepción.
de garantía ANTES de
otro de idénticas
Informations importantes
1. Enregistrez-vous
enligne. Prenezle temps
d’enregistrer votre produit Music Tribe
aussi vite que possible sur le site Internet
midasconsoles.com. Lefait d’enregistrer
le produit en ligne nous permet de gérer
les réparations plus rapidement et plus
e cacement. Prenezégalement le
temps de lire les
termes et conditions de
notregarantie.
2. Dysfonctionnement. Si vous
n’avez pas de revendeur Music Tribe près
de chez vous, contactez le distributeur
Music Tribe de votre pays: consultez la
liste des distributeurs de votre pays dans
la page “Support” de notre site Internet
midasconsoles.com. Si votre pays n’est
pas dans la liste, essayez
de résoudre votre
problème avec notre “aideen ligne” que
vous trouverez également dans la section
“Support” du site midasconsoles.com.
Vouspouvez également nous faire
parvenir directement votre demande de
réparation sous garantie par Internet sur
le site midasconsoles.com AVANT de nous
produit.
renvoyer le
3. Raccordement au secteur.
Avant de relier cet équipement au secteur,
assurez-vous que la tension secteur
de votre région soit compatible avec
l’appareil. Veillez à remplacer les fusibles
uniquement par des modèles exactement
de même taille et de même valeur
électrique — sans aucune
exception.
Weitere w ichtige
Informationen
1. Online registrieren.
Bitteregistrieren Sie Ihr neues
Music Tribe-Gerät direkt nach dem Kauf
auf der Website midasconsoles.com.
WennSie Ihren Kauf mit unserem
einfachen online Formular registrieren,
könnenwir Ihre Reparaturansprüche
schneller und e zienter bearbeiten.
Lesen Sie bitte auch unsere
Garantiebedingungen, fallszutre end.
2. Funktionsfehler. Sollte sich
kein Music Tribe Händler in Ihrer Nähe
be nden, können Sie den Music Tribe
Vertrieb Ihres Landes kontaktieren, der auf
midasconsoles.com unter „Support“
aufgeführt ist. Sollte Ihr Land nicht
aufgelistet sein, prüfen Sie bitte, ob Ihr
Problem von unserem „Onl
ine Support“
gelöst werden kann, den Sie ebenfalls
auf midasconsoles.com unter „Support“
nden. Alternativ reichen Sie bitte
Ihren Garantieanspruch online auf
midasconsoles.com ein, BEVOR Sie das
Produktzurücksenden.
3. Stromanschluss. Bevor Sie das
Gerät an eine Netzsteckdose anschließen,
prüfen Sie bitte,
obSie die korrekte
Netzspannung für Ihr spezielles Modell
verwenden. Fehlerhafte Sicherungen
müssen ausnahmslos durch Sicherungen
des gleichen Typs und Nennwerts
ersetztwerden.
Outras Informações
Importantes
1. Registre-se online. Porfavor,
registreseu novo equipamento
Music Tribe logo após a compra visitando
o site midasconsoles.com Registrar sua
compra usando nosso simples formulário
online nos ajuda a processar seus
pedidos de reparos com maior rapidez
e e ciência. Além disso, leia nossos
termos e condições
de garantia, caso
sejanecessário.
2. Funcionamento
Defeituoso. Casoseufornecedor
Music Tribe não esteja localizado nas
proximidades, vocêpode contatar
um distribuidor Music Tribe para o
seu país listado abaixo de “Suporte”
emmidasconsoles.com. Se seu país
não estiver na lista, favor checar se seu
problema pode ser resolvido com o
nosso “Suporte
Online” que também
pode ser achado abaixo de “Suporte”em
midasconsoles.com. Alternativamente,
favorenviar uma solicitação de garantia
online em midasconsoles.com ANTES da
devolução doproduto.
3. Ligações. Antes de ligar a unidade
à tomada, assegure-se de que está a
ltagem correcta para o modelo
utilizar a vo
em questão. Osfusíveis com defeito
terão de ser substituídos, sem qualquer
excepção, porfusíveis do mesmo tipo e
correntenominal.
Page 15

28 29Quick Start Guid eDP48
FEDERAL COMMUNICATIONS
COMMISSION COMPLIANCE
INFORMATION
SUPPLIER’S DECLARATION OF
CONFORMITY (SDoC)
PRODUCT FAMILY MODEL/MODEL/
DP48
MODEL/MODEL/
Responsible Party Name: Music Tribe Commercial NV Inc.
Address: 5270 Procyon Street
Phone Number: +1 702 800 8290
DP48
complies with the FCC rules as mentioned in the followingparagraph:
This equipment has been tested and found to comply with the limits
for a Class A digital device, pursuant to part 15 of the FCC Rules.
These limits are designed to provide reasonabl
harmful interference when the equipment is operated in a commercial
environment. This equipment generates, uses, and can radiate radio
frequency energy and, if not installed and used in accordance with
the instruction manual, may cause harmful interference to radio
communications. Operation of this equipment in a residential area
is likely to cause harmful interference in which case the user will be
required to correct the interference at his own expense.
This equipment complies with Part 15 of the FCC Rules. Operation is
subject to the following two conditions:
(1) this device may not cause harmful interference, and
(2) this device must accept any interference received,
includinginterference that may cause undesired operation.
Las Vegas, NV 89118
USA
e protection against
Caution!
Any changes or modi cations not expressly approved by the party
responsible for compliance could void the user's authority to operate
the equipment.
Warning: O peration of this e quipment in a res idential
environment could cause radio interference.
Page 16

 Loading...