

Page 1
Assembly & Installation Instructions
MODEL: A19002、A20003
IMPORTANT SAFETY INSTRUCTIONS:
•
Warning: If any special control devices are used with this fixture, follow the instructions carefully to assure
full compliance with N.E.C. requirements. If there are any questions, contact a qualified electric contractor.
•
Warning: This product can expose you to chemicals including lead, which is known to the State of California,
to cause cancer or birth defects or other reproductive harm. For more information, please go to
www.P65Warnings.ca.gov
•
Caution: Electrician installation highly recommended. All glass is fragile, use care when handling glass
component(s) and or lamp(s). Read instructions carefully and turn electricity off at the main circuit breaker
panel before beginning installation.
Important Notice:
This is a generic instruction sheet used for various fixtures.
The finish, numbers of heads/arms, and style of fixture / glass / shade / diffuser may vary.
(Required Supply Circuit: 120V, 60Hz. Bulb Type: 1*E26*60W Max)
Compatible Bulb Type
(NOT Included)
The mostly suggested bulb type is 8W LED ST58
COMPONENTS INCLUDED IN THE PACKAGE
Fixture with hardware
Glass
Deco cap & deco nuts
Parts included in parts bag
Parts X 2 for 2 pack item
ASSEMBLY & INSTALLATION STEPS:
1. Open the box from top, take out all the components, parts bag and manual from the box carefully.
2. Check all the components against the parts list. Make sure get each parts on list. If any parts missing
and glass damage, please contact the seller to get a replacement.
Parts are NOT included for which is shown as 0 under QTY.
PARTS LIST (Parts QTY X 2 for 2 pack item)
Part Name
QTY
Code
Part Name
QTY
Code
Junction Box
0
A
Wire Nut
3
I
Leading Wire
0
B
Wire2J
(1.25") Mounting Screw
2
C
Socket1K
Cross Bar Mounting Bracket
1
D
Deco Cap
1
L
Stud2E
Deco Nut
3
M
Backplate
1
F
Socket Ring
1
N
Cap Nut
2
G
Glass1O
Swivel1H
Light Bulb
0
P
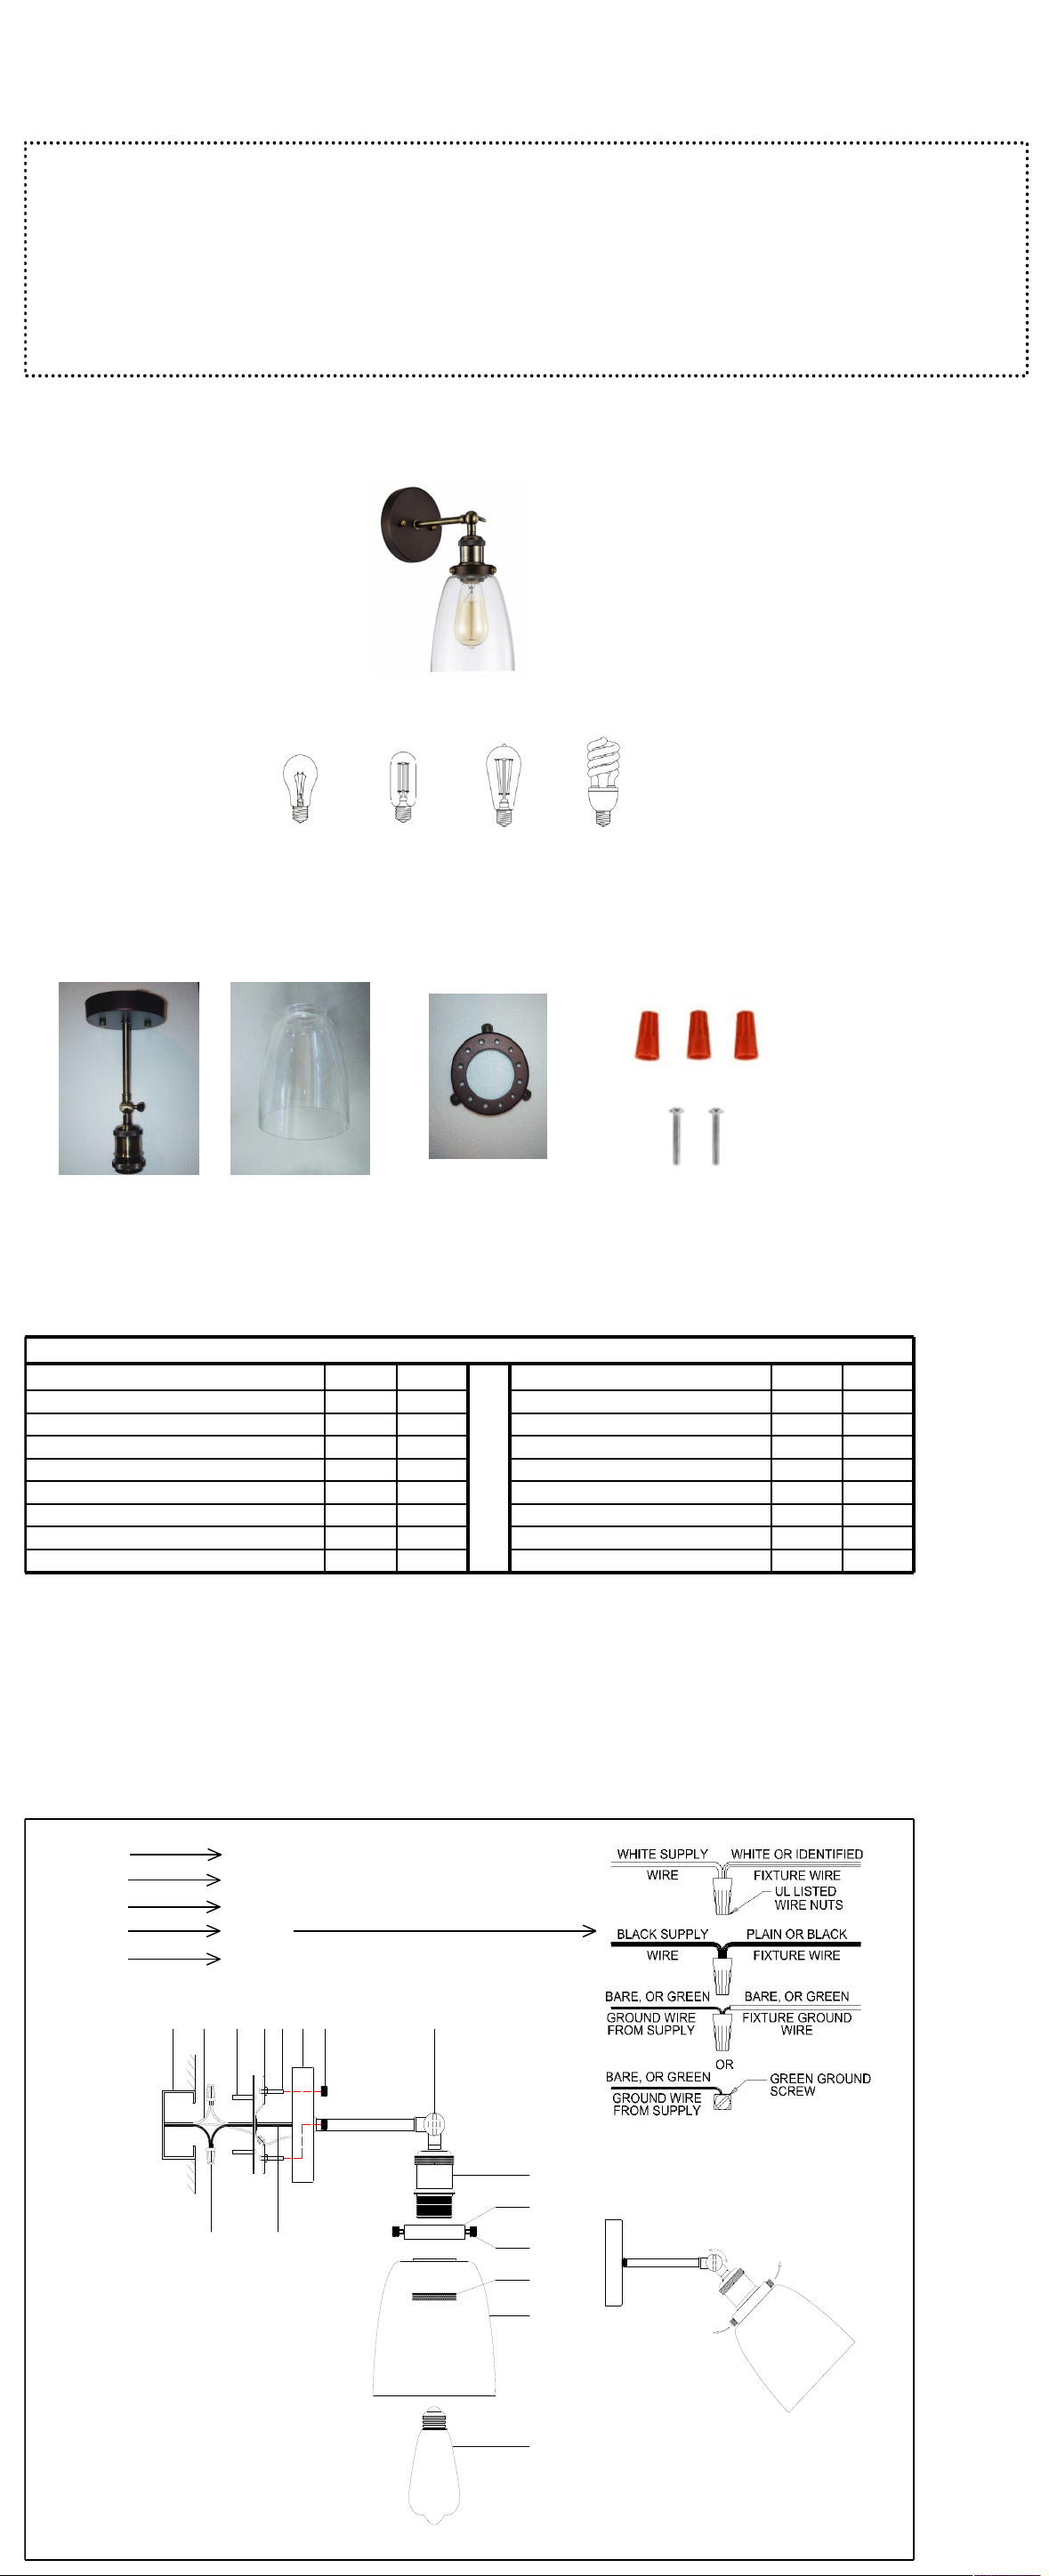
3. Refer to the illustration while doing assembly and follow the steps as below:
I
Assemble the glass (O) and deco cap (L) to the socket (K), fix with socket ring (N),
tighten the deco nuts (M). Screw on the bulb (P) onto socket (K).
II
Thread two studs (E) onto the mounting bracket (D) at proper position.
III
Attach the mounting bracket (D) to the junction box (A) by two mounting screws (C).
Adjust the mounting bracket to make the fixture installed at a horizental level.
IV
Connect wires according to the wiring diagram as below.
V
Attach the backplate (F) to two studs (E) and fix with two cap nuts (G).
Adjust the arm to the proper position by twisting the swivel (H).
Illustration of assembly and wiring:
I. P, N, O, L
K
II. EDIII. C, D
A
IV. B, J
I
V. G, F
E
A B C D E
I J
F G H
K
L
M
N
O
P
 Loading...