

Microtemp Electrics AMT-300 Operation Manual
4 in 1 Soil Survey Instrument
Model: AMT-300
Operation Manual
4 in 1 Soil Survey Instrument
Model: AMT-300
Overview
AMT-300 4 in 1 soil survey instrument can test moisture of soil, PH value,
temperature and environment sunlight intensity using a probe with the length of 200mm.
The unit can easily display various readings with oversize LCD.
The unit also has low battery indication and auto power off function. It is saving
time, energy, of high efficiency. The unit assures quality of flowers and grasses planting
and garden virescence.
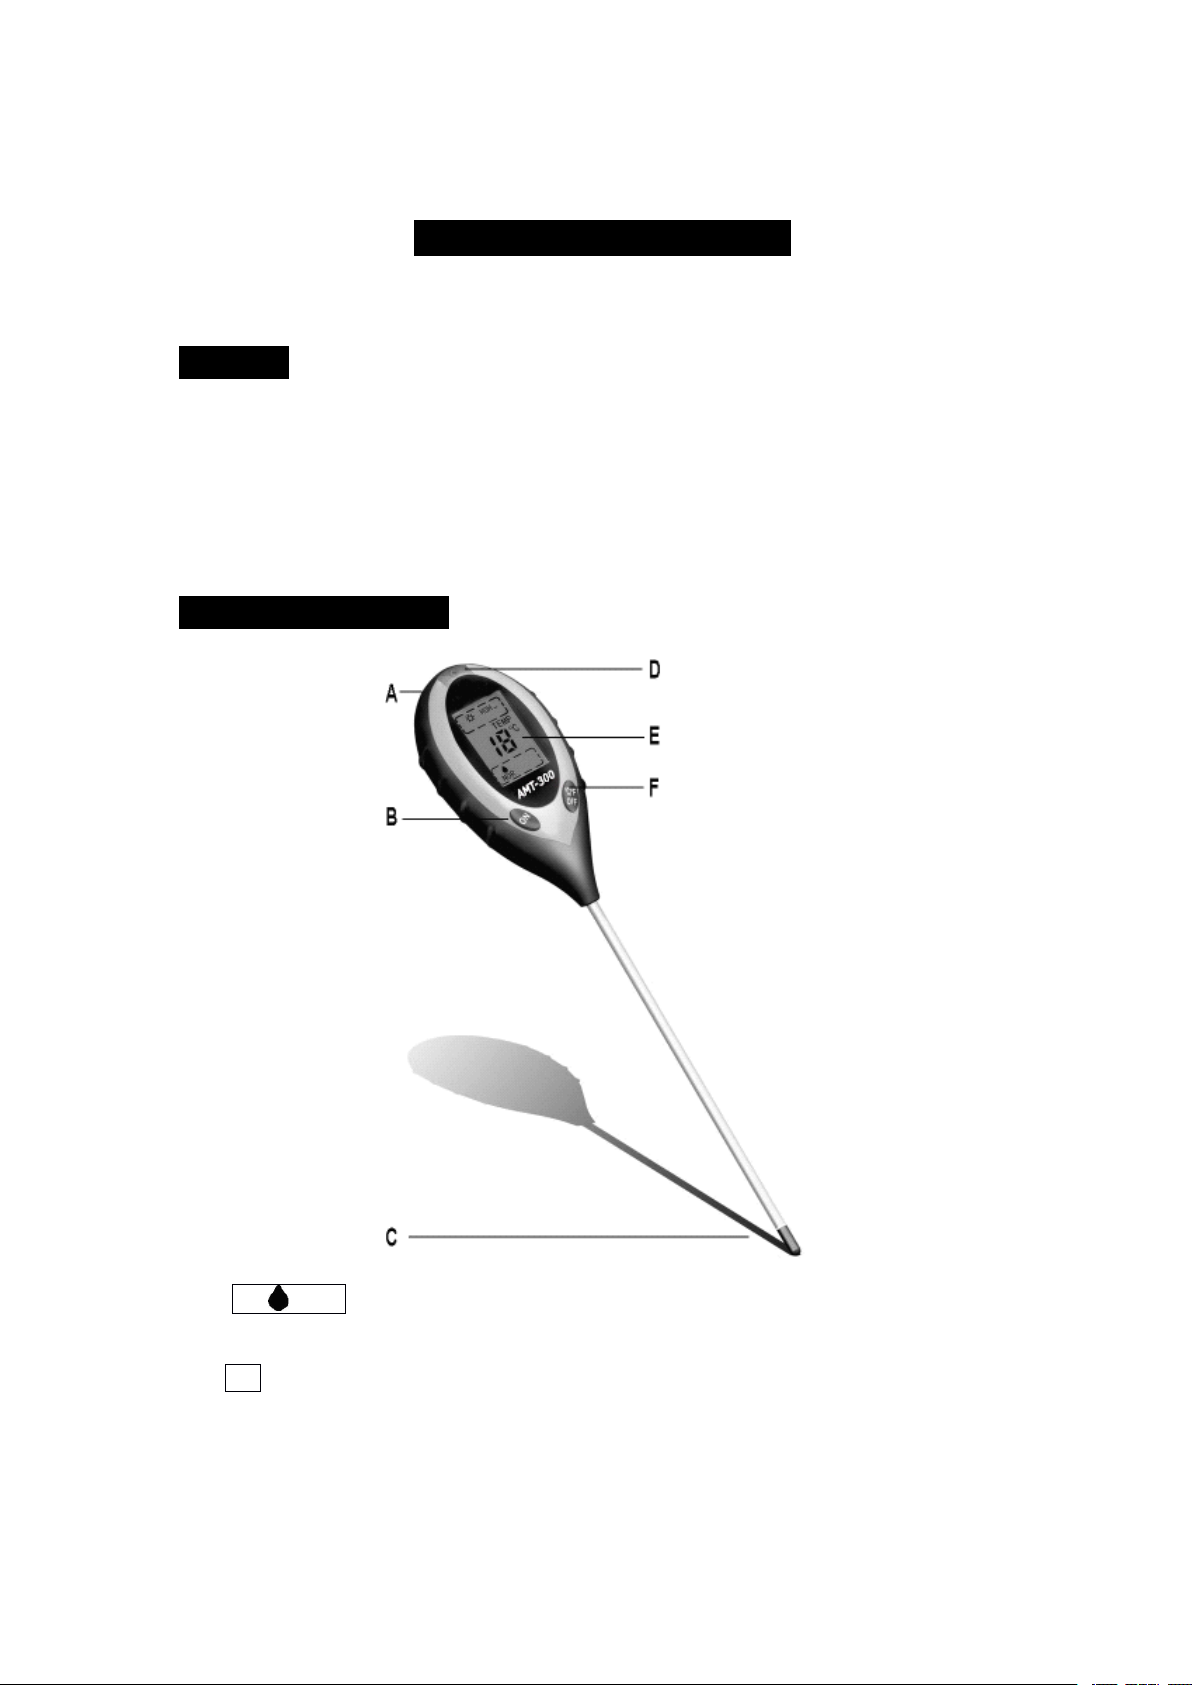
TOOL COMPONENTS
A. PH/ TEMP KEY------mode switch: Set the mode for PH value 、 temperature or
moisture.
B. ON KEY------press the key to start the unit.
C. TEST PROBE------can test PH value 、 moisture and temperature.
D. LIGHT SENSOR WINDOW------can induct sunlight intensity of measured
environment.
E. LCD DISPLAY SCREEN
1
F.
℃ / ℉ OFF KEY------temperature unit switch/power off key: under temperature
mode, press the key to
s
elect temperature unit as ℃ or ℉ ( original temperature
unit : ℃ ). Keep pressing the key for about 3 seconds to power off.
G. PROTECTING BUSHING --- Please take the protecting bushing away when using
the test probe. Put on the protecting bushing when it
is
not in use to protect the test
probe.
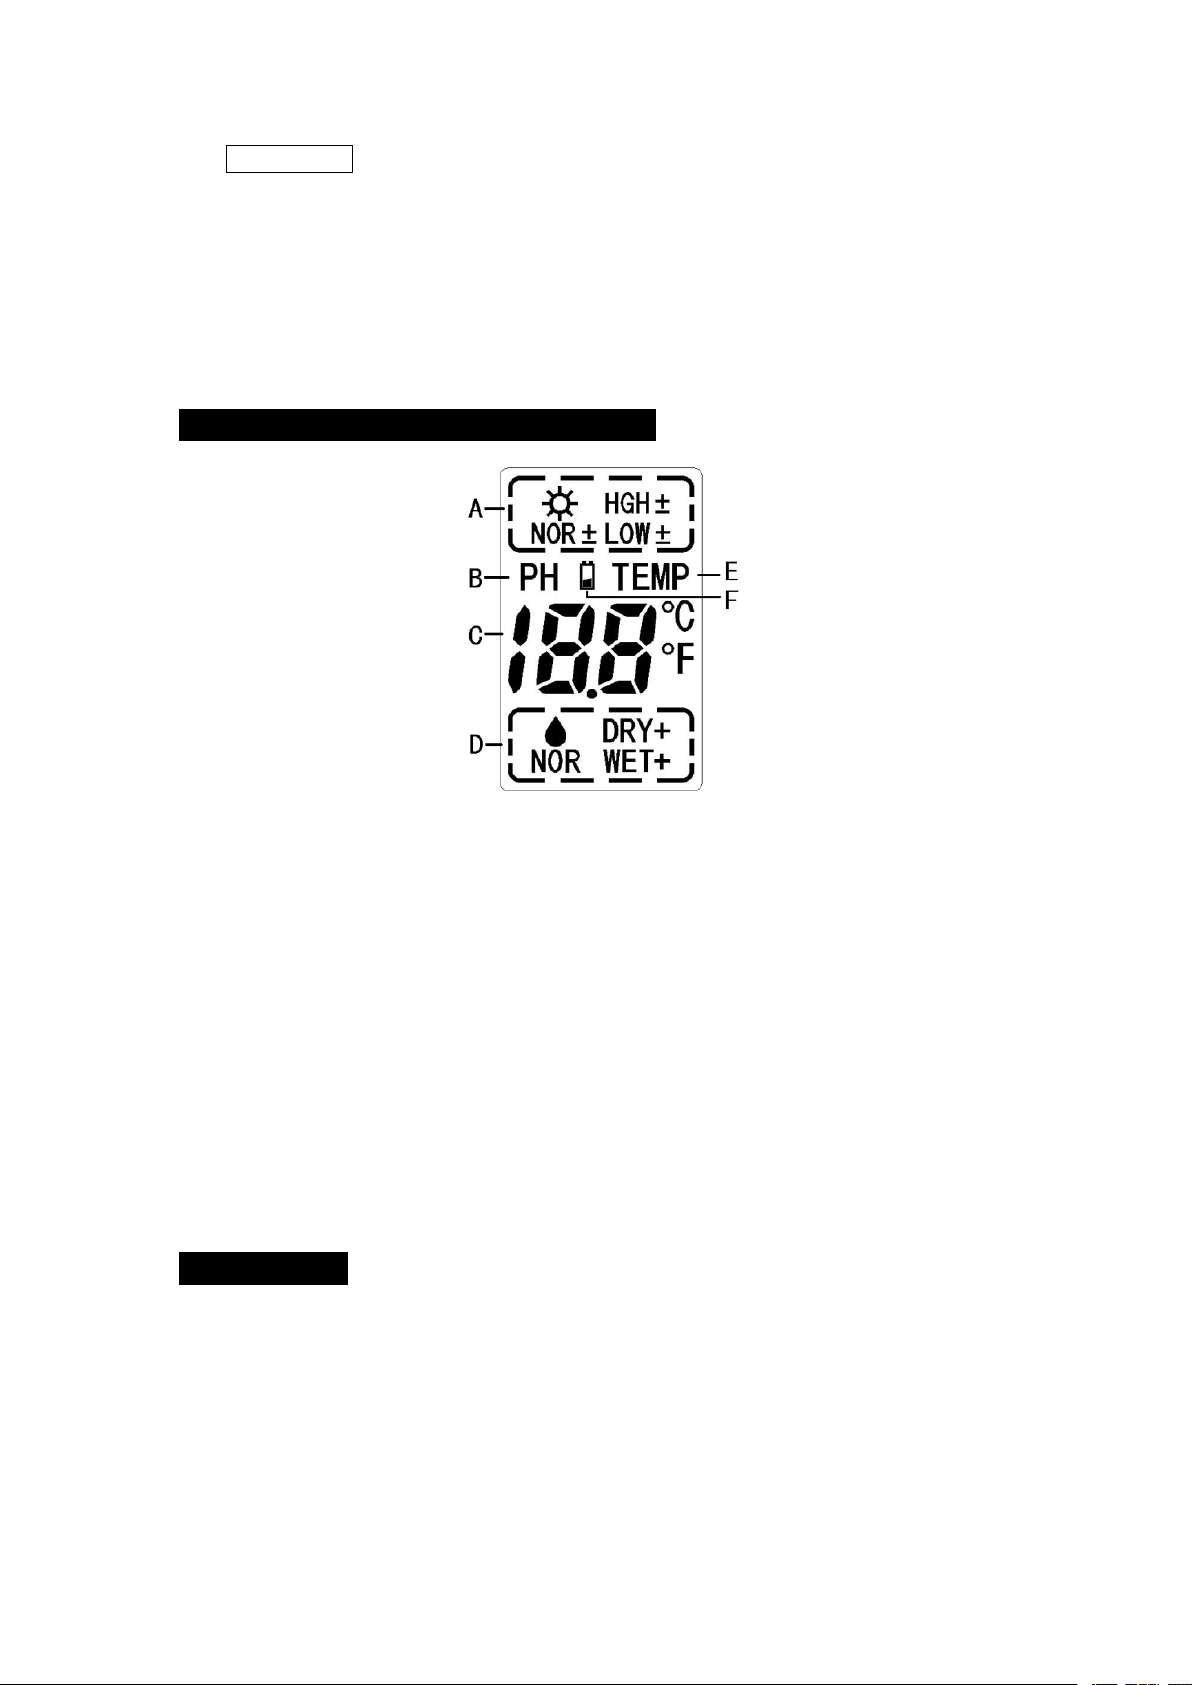
ILLUSTRATION OF DISPLAY SCREEN
A. Sunlight intensity display area------9 levels: LOW- 、 LOW 、 LOW+ 、 NOR- 、 NOR
NOR+ 、 HGH- 、 HGH 、 HGH+ , each increasing in amount and quality. LOWsignifies an extremely dim environment. HGH+ signifies an extremely bright
environment.
B. PH function display
C. PH or temperature value display------It shows 3.5 to 9.0 for PH value and -9 ℃ to
+50 ℃ (16 ℉ to 122 ℉ ) for temperature. “ Lo ” or “ HH ” indicates the value
is
out of
the measurable range.
D. Moisture display area------5 levels: DRY+ 、 DRY 、 NOR 、 WET 、 WET+ , each
increasing
in
wetness. WET+ signifies an extremely wet environment while DRY+
signifies an extremely dry environment.
E. Temperature function display.
F.
Low battery display------The symbol will display on the LCD continuously when the
battery is low.
HOW TO USE
Please install one 9 volt battery before use.
● BATTERY INSTALLATION
、
Open the battery compartment door on the back of the tool and plug one 9 volt
block battery onto the battery connector. Put the battery back to the compartment and
close the door.
● OPERATION GUIDE
2
 Loading...