

Page 1

Trademarks
Microtek®, ScanMaker®, and
ScanWizardTM Pro are
trademarks or registered
trademarks of Microtek
International, Inc.
Macintosh® and Apple® are
registered trademarks of
Apple Computer, Inc.
Windows® is a registered
trademark of Microsoft
Corporation. All other
products or name brands are
trademarks of their
respective holders.
Important
Documents you scan may be
protected under copyright
law. The unauthorized use of
such documents could be a
violation of the rights of the
copyright holder. Microtek
bears no responsibility for
the unauthorized use of
copyrighted materials.
Microtek TMA1600
Installing and Getting Started
Contents
Introduction ................................................................................................................ 2
Unpacking the TMA1600 ............................................................................................ 2
Unlocking the TMA1600 ............................................................................................. 3
Shipping the TMA1600 ....................................................................................... 3
Installing the TMA1600 .............................................................................................. 4
Positioning Your Originals .......................................................................................... 6
Positioning transparent originals....................................................................... 6
A. Using the 35mm Slide Template ............................................................ 8
B. Using the 35mm Filmstrip Template ...................................................... 9
C. Using the 6 x 9 cm Filmstrip Template ................................................. 10
D. Using the 4" x 5" Film Template ........................................................... 11
Positioning X-ray originals ............................................................................... 12
Positioning reflective originals ........................................................................ 13
Your First Scan ......................................................................................................... 15
Performing Color Calibration .................................................................................. 17
The color calibration target.............................................................................. 17
Before you calibrate ......................................................................................... 17
Calibrating your target .....................................................................................18
Loading a profile ............................................................................................... 19
Specifications ........................................................................................................... 20
Copyright © 2001 Microtek International, Inc. http://www.microtek.com
I49-003257 A, December 2001
Page 2
This document describes the features of the Transparent Media
Adapter (TMA1600) and provides information on how to install
the TMA1600.
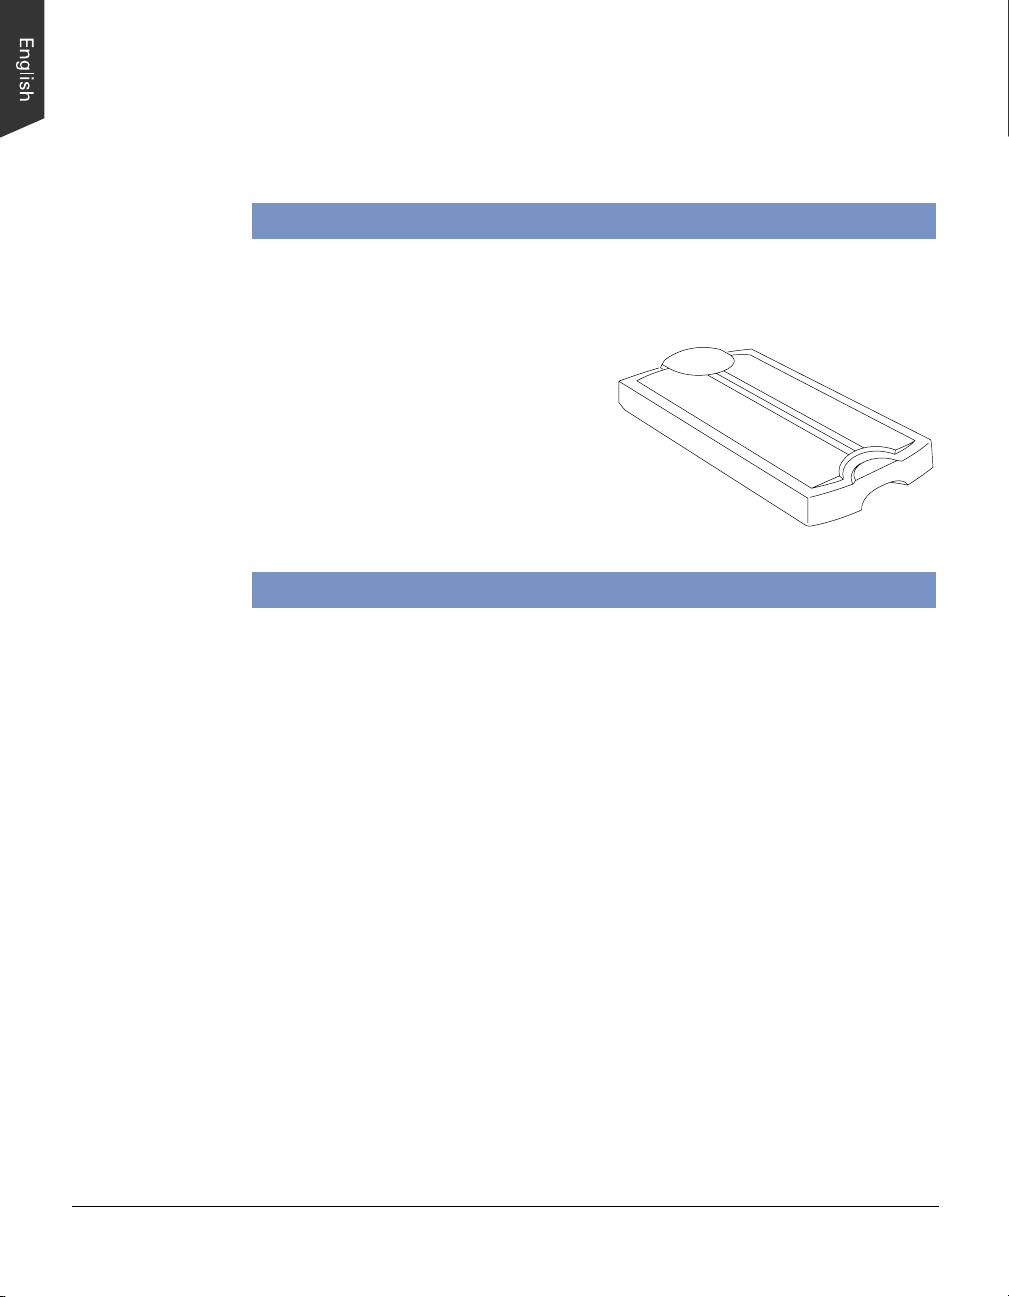
Introduction
The TMA1600 is an optional scanner accessory used to scan slides and
transparencies and is used with the ScanMaker 9800XL.
The TMA1600 mounts onto the scanner
in place of the scanner's standard
document cover or scanner lid. The
TMA1600 can be mounted on or removed
from the top of the scanner in the same
way as the scanner lid.
Unpacking the Package
The TMA1600 is packaged as an assembled unit, ready to be installed on the scanner.
After unpacking the TMA1600, make sure that the following items are included:
• TMA1600 unit
• T emplates (35mm slide, 35mm filmstrip, 6 x 9 cm filmstrip, and 4" x 5" film)
• Black plates (one for reflective, one for 6 x 9 cm filmstrip)
• Kodak Q-60E1 color target (Transparency)
• Documentation- includes Microtek TMA1600 Installing and Getting Started,
Unlock card, and other inserts.
2 Microtek TMA1600 Installing and Getting Started
Page 3
Unlocking the TMA1600
Note
: To prevent damage to the TMA1600 moving parts, the TMA1600 carriage is
locked into place prior to shipment. You must unlock the carriage before starting to
operate the scanner. Failure to do so may damage the TMA1600.
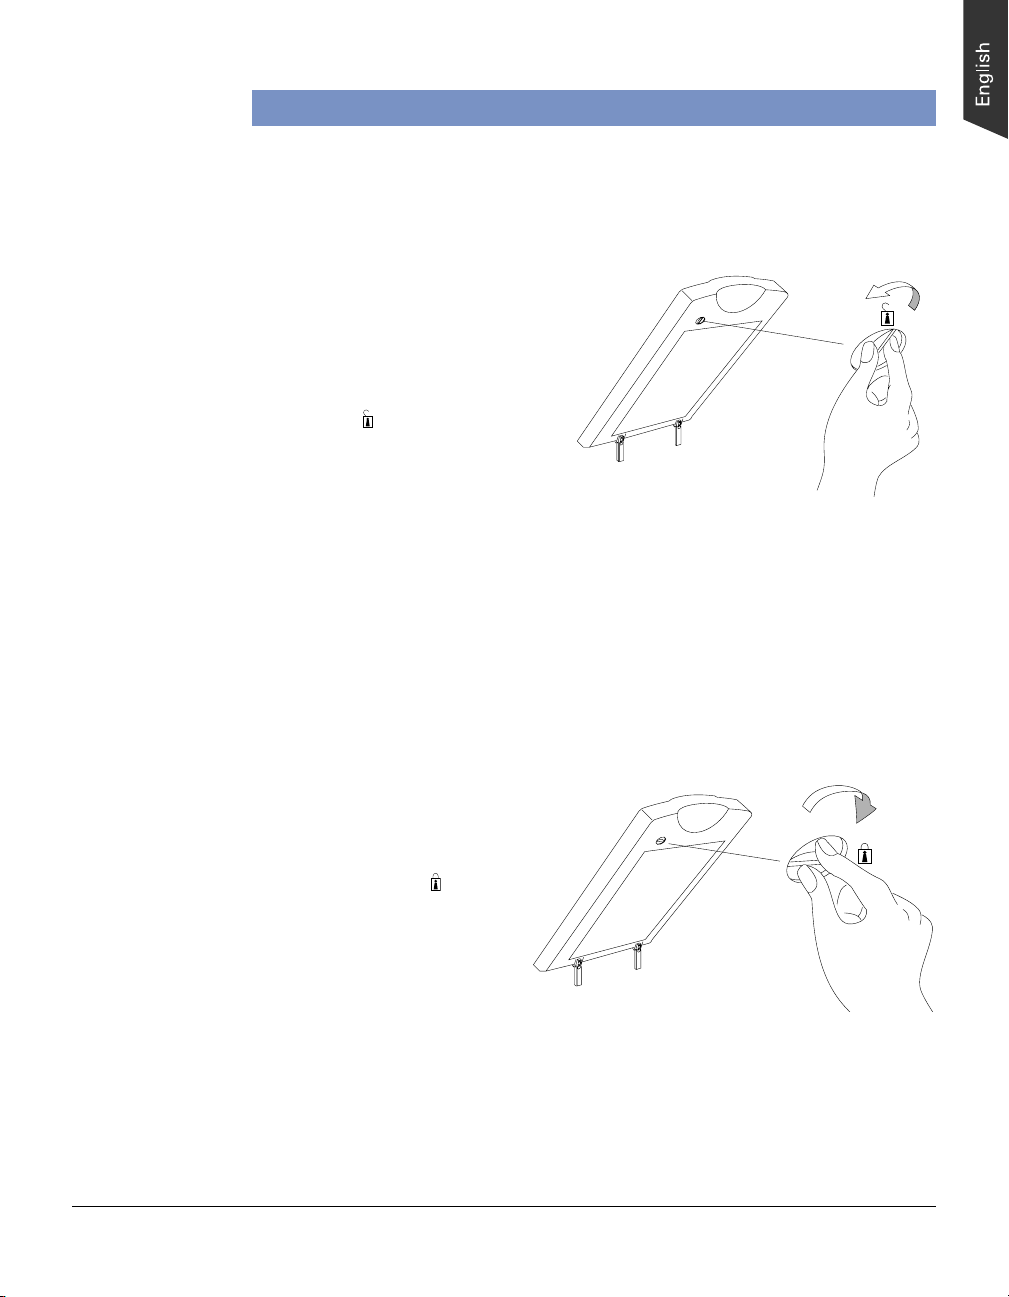
T o unlock the TMA1600, follow the steps below:
1 . Look for the unlocking knob at the
base of the TMA1600.
2 . Turn the locking knob
counterclockwise to the unlock
position “ ”.
Shipping the TMA1600
If you have to transport the TMA1600, the TMA1600 must be locked. To lock the
TMA1600, follow the steps below:
1. Make sure the TMA1600 is connected to the scanner, then turn off the scanner if
your scanner is on.
2 . Set the scanner SCSI ID number to “9”.
3 . Turn on your scanner . The TMA1600 carriage will move to the standby position in
5 minutes.
4. When the indicators on the
front of your TMA1600 and
scanner stop blinking, turn
the locking knob clockwise to
the lock position “ ” .
5. Turn off your scanner and
disconnect the TMA1600
connector from the scanner.
The TMA1600 is ready for
transport.
Note
: To use the scanner again at a future time, be sure to reset the scanner ID to
its original number before step #2. Otherwise, the scanner ID will be left at SCSI ID
9 and will not work.
Microtek TMA1600 Installing and Getting Started 3
Page 4
Installing the TMA1600
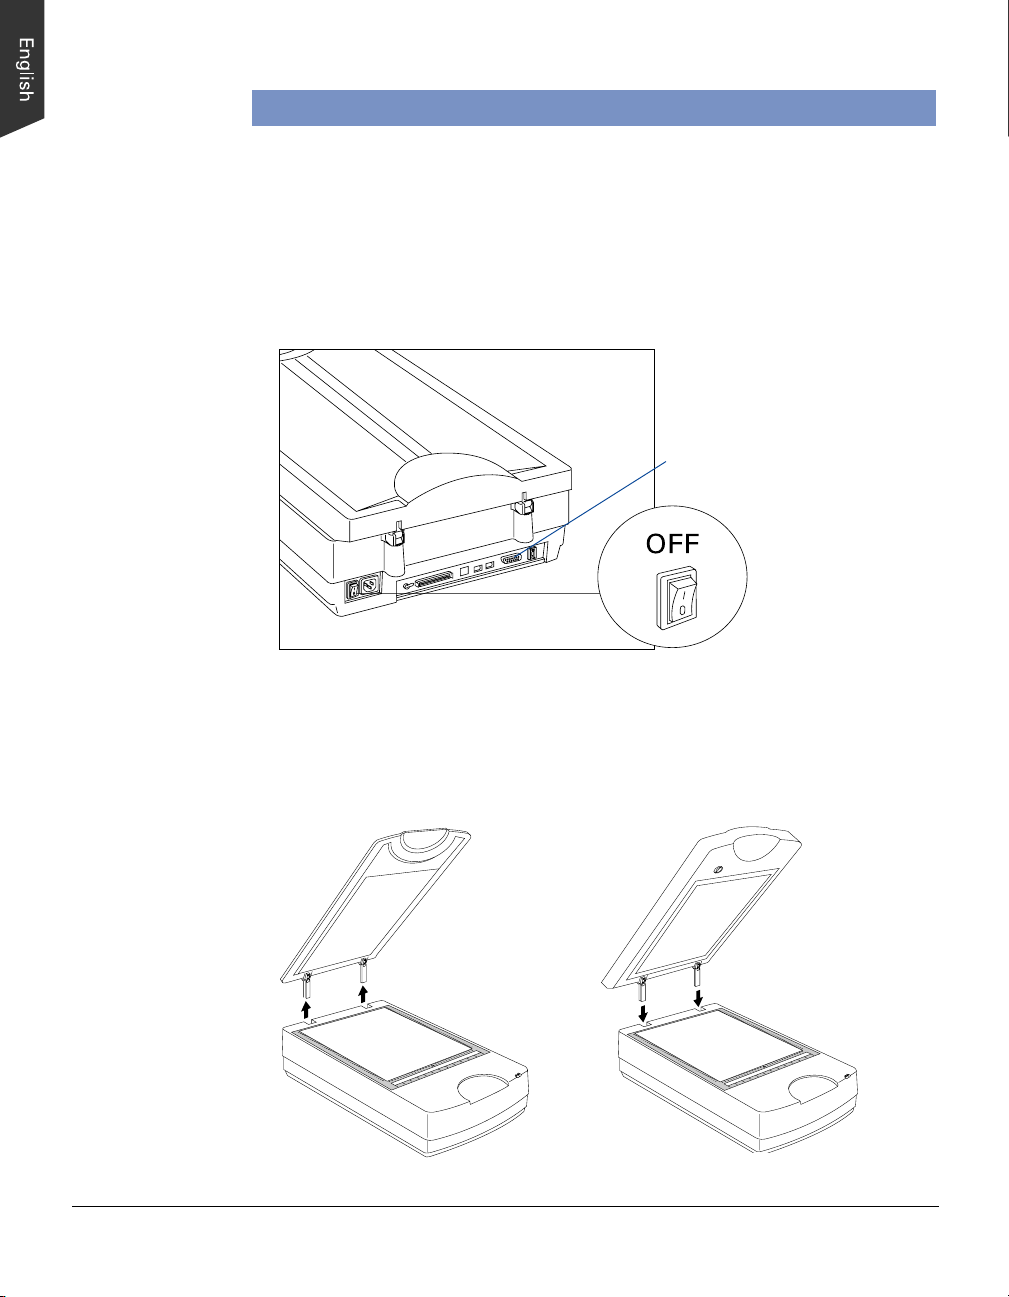
Before you begin using the scanner with the TMA1600, make sure that:
• Your scanner is off. (T urn the scanner's power switch to “Off”)
• Y our scanner is compatible with the TMA1600.
• Your scanner has been installed and is working properly .
• Y our TMA1600 is unlocked.
15-pin
Accessory port
T o install the TMA1600, follow these steps:
1. Remove the scanner lid, then attach the TMA1600 by sliding the posts at the rear
of the TMA1600 into the holes.
4
3
2
1
0
1
2
3
5
4 Microtek TMA1600 Installing and Getting Started
6
5
3
5
6
5
4
3
2
1
0
1
2
Page 5
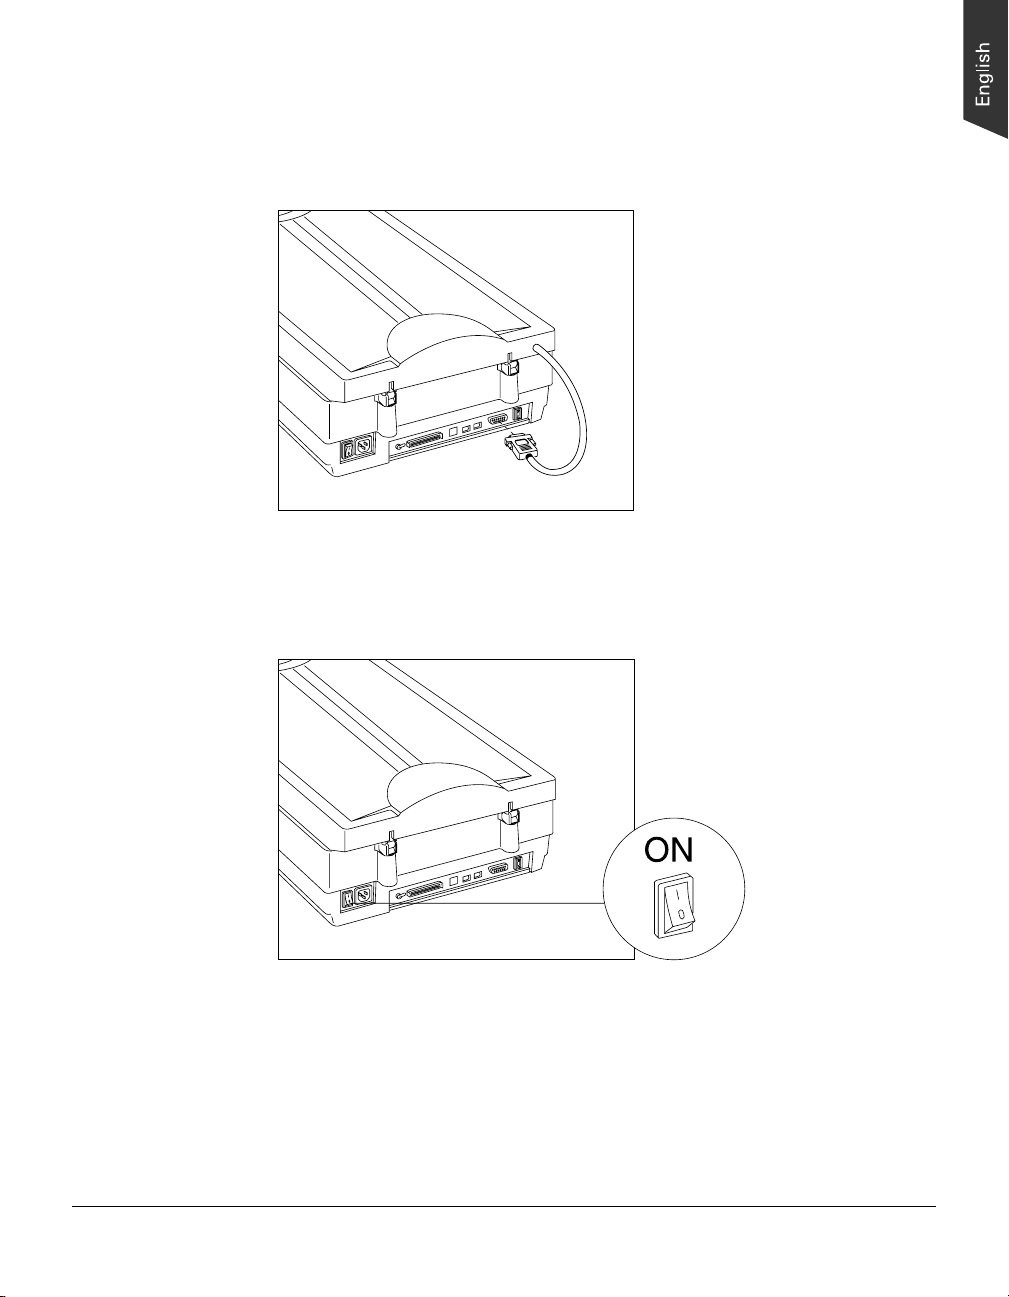
2 . Gently lower the TMA1600 down onto the scanner glass surface.
3. Plug the TMA1600's connector into the 15-pin Accessory port at the back panel
of the scanner. Secure the connector by tightening the retaining screws.
4. Turn the scanner's power switch to “On,” and wait for the green lights on the
scanner and TMA1600's front panel to stop blinking and stay on steady.
5 . The system will detect your TMA1600 automatically.
Microtek TMA1600 Installing and Getting Started 5
Page 6
Positioning Your Originals
When the TMA1600 has been installed successfully, you can scan slides,
transparencies, negative film, as well as reflective materials such as photographic or
prints. Y ou do not need to remove the TMA1600 to scan reflective materials.
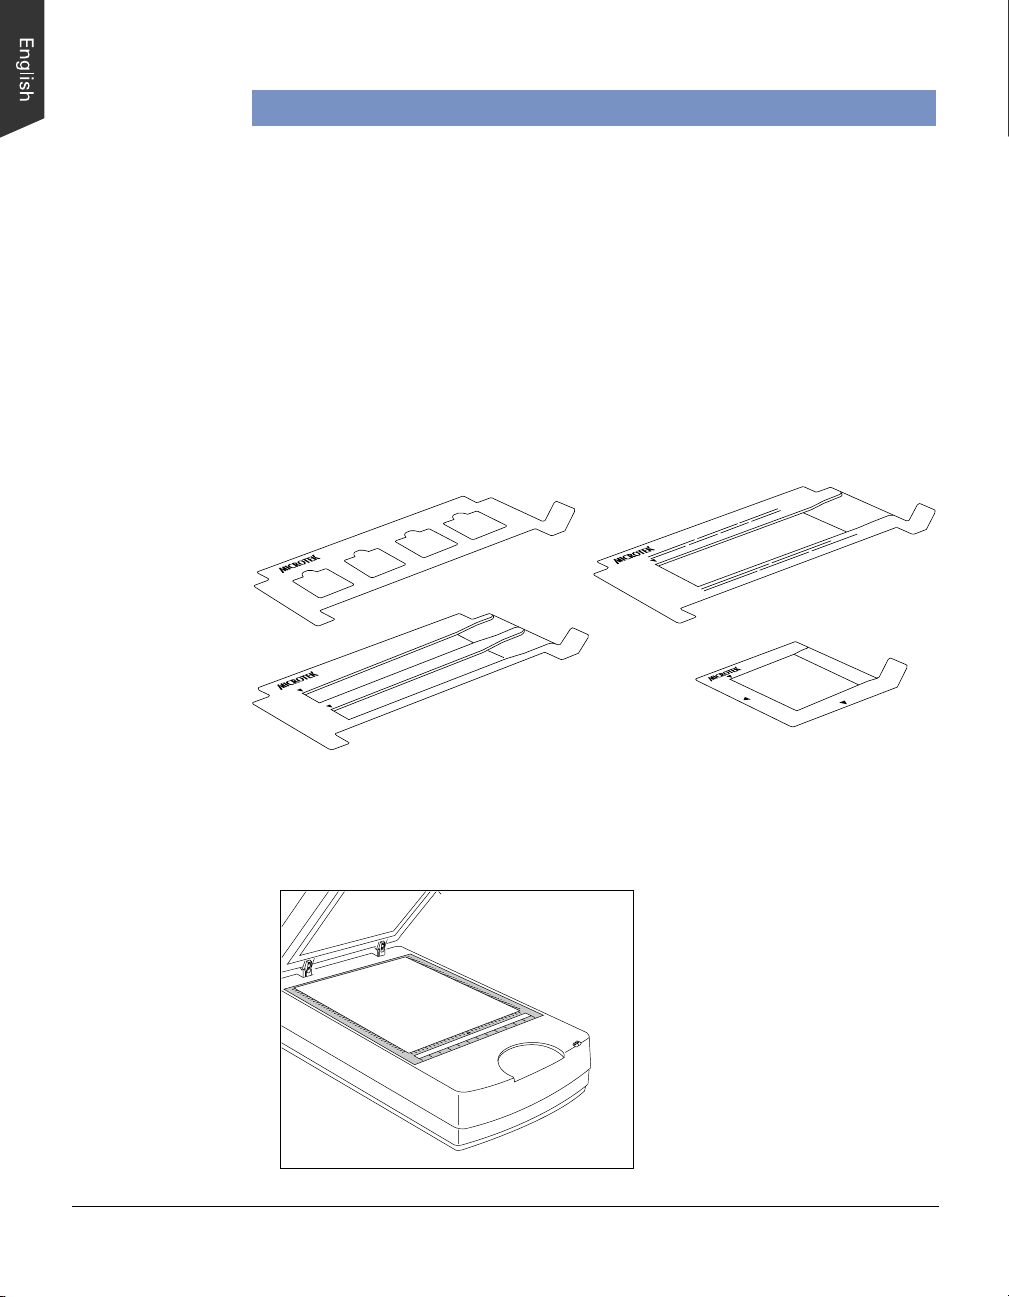
Positioning transparent originals
T o scan various sizes of transparent originals, you will need the correct template that
match the film to be scanned together with the black plate.
The template is used to block out light around the transparent originals, achieving
better image quality. Included in the scanner accessories package are four types of
templates – 35mm slide template, 35mm filmstrip template, 6 x 9 cm filmstrip template,
and 4" x 5" film template.
Follow the steps below to position transparent originals:
1. Raise the TMA1600, and make sure that nothing is on the scanner glass surface.
1
2
3
4
5
6 Microtek TMA1600 Installing and Getting Started
6
5
4
3
2
1
0
Page 7

2 . Load the film face down inside the template. The side of the template (which reads
“Microtek” logo) should face up. For details on how to load the different sizes of
film into the template, refer to other sections of this chapter.
3 . [Optional] If the black plate* is available, slide it until its edge is against the film.
For details on the black plate, see page 14.
4 . Place the template (side reading “Microtek logo” facing up) on the scanner glass
surface. Make sure that the template's front corners are firmly aligned against the
top ruler of the scanner, and that the two edges (left and right) fit within the
scanner glass area.
The Grabber is used for removing
6
5
4
3
2
1
0
1
2
3
4
5
6
the template out of the scanner
glass surface.
0
0123456123456
Please note that the calibration
window on the glass surface
should be kept clear and free from
any obstruction during scanning.
Templates are designed for
multiple placement. If you purchase
6
5
4
3
2
1
0
1
2
3
4
5
6
additional templates, simply place
templates side by side. The glass
surface can hold up to four
templates at a time. For 35mm
filmstrip templates, the scanner
can scan 7 filmstrips at most (i.e.,
the filmstrip nearest the back of the
scanner is thus out of the scanning
range).
5 . Gently lower the TMA1600 down onto the scanner glass surface.
Microtek TMA1600 Installing and Getting Started 7
Page 8

A. Using the 35mm Slide Template
The 35mm Slide T emplate can hold up to four mounted slides at a time. During
operation, it is recommended that the template be placed on the glass surface first,
and the slides loaded into the template next.
1 . Place the template (which the side reads “Microtek” logo should face up) on the
scanner glass surface.
Make sure that the template's
6
5
4
3
2
1
0
1
2
3
4
5
6
front corners are firmly
aligned against the top ruler
of the scanner, and that the
top edges (left and right) fit
within the scanner glass area.
2 . Load the film face down inside the frame of template.
2
1
0
1
2
3
4
5
6
8 Microtek TMA1600 Installing and Getting Started
6
5
4
3
Align the slide against
the bottom-left corner
of the frame
Page 9

B. Using the 35mm Filmstrip Template
The 35mm Filmstrip T emplate can hold up to two strips at a time.
1 . Load the film face down inside the template. Slide the film along the slots of the
template until its edge is against the side of the template (indicated by an arrow
mark ).
Align the edge
of the film frame
with the arrow
mark of the
template
2. Place the template assembly on the scanner glass surface.
6
5
4
3
2
1
0
1
2
3
4
5
6
Microtek TMA1600 Installing and Getting Started 9
Page 10

C. Using the 6 x 9 cm Filmstrip Template
The 6 x 9 cm Filmstrip T emplate allows you to scan varying sizes of transparencies,
including 6 x 4.5 cm, 6 x 6 cm, 6 x 7 cm, and 6 x 9 cm. The maximum number of film that
can be loaded depends on the size of your film. (e.g., the 6 x 4.5 cm can hold up to 4
pieces of film, the 6 x 9 cm can hold up to 2 pieces of film)
1 . Load the film face down inside the template. Slide the film along the slots of the
template until its edge is against the side of the template (indicated by an arrow
mark ).
Align the edge
of the film frame
with the arrow
mark of the
template
2 . Slide the black plate* until its edge is against the film, thus covering the blank
spaces. The side of the black plate (which reads “This side up”) should face up.
3. Place the template assembly on the scanner glass surface.
4
3
2
1
0
1
2
3
4
5
6
10 Microtek TMA1600 Installing and Getting Started
6
5
Page 11

D. Using the 4" x 5" Film Template
The 4" x 5" Film T emplate can hold one piece of 4" x 5" film at a time.
1 . Load the film face down inside the template. Slide the film along the slots of the
template until its edge is against the inner edge of the template (indicated by an
arrow mark ).
Align the edge
of the film frame
with the arrow
mark of the
template
2. Place the template assembly on the scanner glass surface. Center the top of the
template along the top ruler on the scanner, aligning the template's arrow mark to
meet the arrow mark on the scanner's top ruler.
Please note that the
6
5
4
3
2
1
0
1
2
3
4
5
6
calibration window on the
glass surface should be kept
clear and free from any
obstruction during scanning.
Microtek TMA1600 Installing and Getting Started 11
Page 12

Positioning X-ray originals
The maximum scanning area of X-ray originals is 12" x 16".
Follow the steps below to position X-ray originals:
1. Raise the TMA1600, and make sure that nothing is on the scanner glass surface.
6
5
4
3
2
1
0
1
2
3
4
5
2 . Place the X-ray original face down on the scanner glass surface. Center the top of
the X-ray original along the top ruler on the scanner.
0
1
2
3
4
5
3 . Gently lower the TMA1600 down onto the scanner glass surface.
12 Microtek TMA1600 Installing and Getting Started
Please note that the
calibration window on the
glass surface should be kept
clear and free from any
obstruction during scanning.
6
5
4
3
2
1
Page 13

Positioning reflective originals
T o scan reflective originals, you will need the black plate*.
Follow the steps below to position reflective originals:
1. Raise the TMA1600, and make sure that nothing is on the scanner glass surface.
2 . Place the reflective original face down on the scanner glass surface. Center the top
of the template along the top ruler on the scanner.
Please note that the
calibration window on the
glass surface should be kept
clear and free from any
obstruction during scanning.
6
5
4
3
2
1
0
1
2
3
4
5
3 . Peel the protective film from the black plate.
4 . Put the black plate on top of the reflective original to
cover it. The side of the black plate (which reads “This
side up”) should face up.
6
5
4
3
2
1
0
1
2
3
4
5
5 . Gently lower the TMA1600 down onto the scanner glass surface.
Microtek TMA1600 Installing and Getting Started 13
Page 14

*Black plate
Light from the TMA1600 and other ambient light during scanning may result in
overexposed images. The black plate is used to shield unwanted light out, ensuring
correct exposure and optimal image quality during scanning.
Caution:
1 . The black plate may become dirty over time and with prolonged use. To clean the
plate, use a white cotton cloth dipped in some water, and gently wipe the plate
surface. This ensures that the black plate is in optimal condition at all times.
2 . The protective film covers the black plate during shipping and prevents it from
being scratched. When peeling the film from the plate, be careful not to tear or
bend the black plate.
14 Microtek TMA1600 Installing and Getting Started
Page 15

Monitor selection
shown here is set
in the ColorSync
Control Panel.
Color Matching
features
Your First Scan
1 . Launch ScanWizard Pro from your image editing application. T o do this, choose
the Import or Acquire command from the File menu of your image editing
application, then select ScanWizard Pro.
To operate ScanWizard Pro in the stand-alone batch mode in Macintosh systems,
go to the Apple menu, and choose the Batch Scan command. In Windows, launch
ScanWizard Pro from the Start menu in W indows.
The first time you launch ScanWizard Pro, you will be asked to perform Color
Matching for your monitor and printer.
If Color Matching was set up when you first installed the scanner, you will not
have to do this procedure again for the TMA1600.
Immediately updates the Preview window image
when a new setting is selected. This will reflect
colors consistent with the newly selected
profile.
2 . Once ScanWizard Pro is launched, go to the Preview window , and click the Scan
Material icon. From the submenu that appears, choose either Positive
Transparency or Negative, depending on the film type. Y ou will notice the change
in the appearance of the icon.
3 . Click the Overview button to start an overview, and you will see the image appear
in your Preview window.
Microtek TMA1600 Installing and Getting Started 15
Page 16

4 . Select the Scan Frame tool from the Toolbar in the Preview window , and choose
the area to be scanned by dragging a rectangle around it. You will see a flashing
frame (marquee) around the selected area.
Settings Window
5 2643
Scan Job Queue window
Info window
Preview window
5
5 . Click the Prescan button to start an overview , and you will see the thumbnail
image appear in your Scan Job Queue window.
6 . If you like what you see in the Preview window, click the Scan button to start
scanning. The image is then delivered to your image editing application program,
where the image can be saved, printed, or modified further.
If you launch ScanWizard Pro in “batch” mode, you may be asked to input a file
name for the scanned image.
For more details on various scanning scenarios, refer to the ScanWizard Pro
User's Guide included in your scanner package.
16 Microtek TMA1600 Installing and Getting Started
Page 17

Performing Color Calibration
The Microtek Scanner ICC Profiler (MSP) is a scanner calibration and profiling utility
program exclusively designed for Microtek scanners. Used together with the color
calibration target, the ICC Profiler determines the color attributes of your scanner
accurately, then generates an ICC profile tailored exclusively for the scanner you are
using under ScanWizard Pro.
The Microtek Scanner ICC Profiler utility is included in the CD-ROM that contains
ScanWizard Pro. Select the Micr otek Scanner ICC Profile option to install.
The color calibration target
Included in your scanner package is an industry-standard Kodak transparency color
target (Kodak Q-60E1, size 4" x 5").
The calibration target is very delicate and must be handed carefully , as follows:
• Gently remove the target from its protective sleeve and avoid touching the target
image surface.
• When not in use, keep the target in its sleeve and away from light and heat.
Note
: To keep the colors in your scanner consistent, you should perform color
calibration on a regular basis. Professional photographers, graphic designers or
others who require extremely precise color may wish to calibrate the scanner every
time it is used.
Before you calibrate
Before calibration, make sure that the Scanner ICC Profiler program is successfully
installed, and that the calibration target is placed on your scanner correctly.
Proper positioning of the transparency target on the scanner is important for
successful calibration, or calibration will not take place.
1. Place the template on the scanner glass surface.
The calibration window of the template should point to the front of the scanner,
and the side (which reads “Microtek” logo) should face up.
2. Place the target face down on the scanner glass surface. Note that the side of the
target (with the woman's portrait) is positioned toward the right side of the
scanner.
Microtek TMA1600 Installing and Getting Started 17
Page 18

3. Using the scanner's top ruler as a reference point, adjust the target position so
that it is placed horizontally in the center of the glass surface.
6
5
4
3
2
1
0
0
1
2
3
4
5
6
Make sure the woman's
portrait lies towards the
right side of the scanner.
Please note that the
calibration window on the
glass surface should be kept
clear and free from any
obstruction during scanning.
Calibrating your target
1. With the target properly positioned in the scanner, turn on your scanner and let it
warm up for about five minutes.
2 . Launch the Microtek Scanner ICC calibration program.
In Macintosh, locate the Microtek ICC Profile folder, and double-click the ICC
Profile icon. In Windows, select the Start menu, Programs, Microtek ScanW izard
Pro for Windows, then Microtek Scanner ICC Pr ofiler.
3 . The main dialog box appears. Set the appropriate parameters, click the Start
Profiling button, then follow the screen instructions to generate your ICC profile.
18 Microtek TMA1600 Installing and Getting Started
Choose the scanner model
you are currently using.
Select "Positive"
Select the date code and
target type to match
your target
Page 19

4 . Give a file name to save the created ICC profile. For details, refer to the help file of
your Scanner ICC Profiler program.
5 . When done, click the Close button to exit Scanner ICC Profiler program
Loading a profile
Once the profile has been produced, follow the steps below to load the profile you
just created.
1 . Launch ScanWizard Pro.
2 . From the Preview window, click the Scan Material icon, select “Positive
Transparency” in Macintosh; select “Positive Film” in W indows.
3 . From the Settings window, click on the Scanner Profile list box and select the
profile you have just created.
Microtek TMA1600 Installing and Getting Started 19
Page 20

Specifications
Scanning Modes Color, grayscale, and black & white in a single
scanning pass
48-bit color input and output
(approx. 281 billion colors)
16-bit grayscale
(approx. 65,536 shades of gray)
Scanning area Transparent: 12" x 16" (305 x 406 mm)
Reflective: 12" x 17" (305 x 431.8 mm)
Resolution Optical: 1600 dpi x 3200 dpi
Interpolated: 12800 dpi x 12800 dpi
Dimensions (L x W x H) 24.05" x 14.33" x 2.36" (611 x 364 x 60 mm)
Weight 9.03 lb. (4.1 kg)
Voltage AC 100V to 240V , 47-63 Hz
Environment Operating temperature: 50° to 104°F (10° to 40°C)
Relative humidity: 20% to 85%
20 Microtek TMA1600 Installing and Getting Started
 Loading...