

Page 1
Copyright©2004 Microtek International, Inc. http://www.microtek.com
I49-003761A, July 2004
Microtek ADF-700
Installing and Getting Started
Introduction
The ADF-700 is a sheet feeder accessory for the Microtek ScanMaker i700.
ADF-700
The ADF-700 allows automatic scanning of up to 50 sheets of original scan material
from A6 size (4.14" x 5.83") up to legal size (8.5" x 14"). Sheets to be scanned are fed
from the feeder's top tray, guided and scanned as they pass the scanner's image
sensor, and then exit into the feeder's bottom tray.
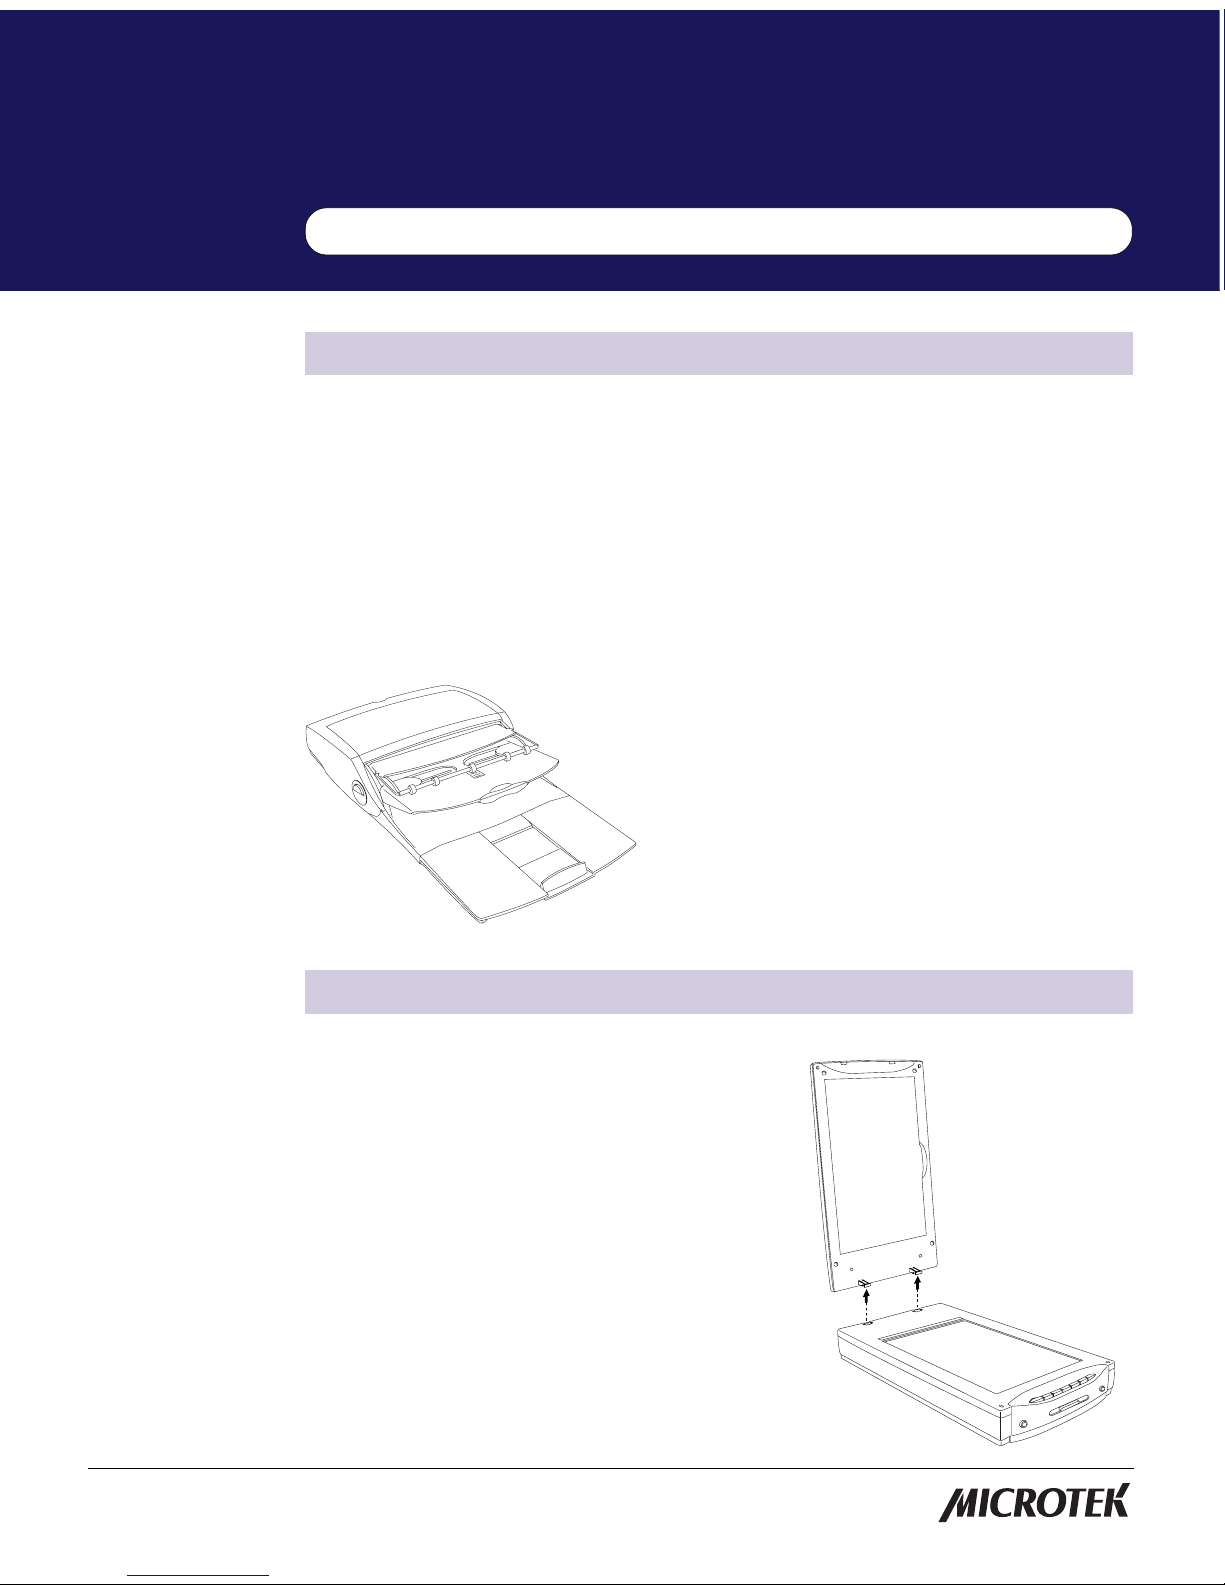
The ADF-700 installs easily by mounting onto the top of the ScanMaker i700 in place
of the scanner lid, which is removed to make way for the document feeder .
Trademarks
Microtek®, ScanMaker, and
ScanWizard® are trademarks
or registered trademarks of
Microtek International, Inc.
All other products or name
brands are trademarks of
their respective holders.
Important
Documents you scan may be
protected under copyright
law. The unauthorized use of
such documents could be a
violation of the rights of the
copyright holder. Microtek
bears no responsibility for
the unauthorized use of
copyrighted materials.
Installing the ADF-700
Before you proceed with installation of ADF700, make sure your scanner is turned off.
1. Remove the scanner lid. To do so, open the
lid until it stands vertically , then pull
upward to remove.
Note: Please check the firmware
version on your ScanMaker i700 before
installing the ADF-700. If your firmware
version is below 0.63, download the
firmware updater. When the firmware
update is complete, restart your
computer and continue the installation
of the ADF-700. For more details on
downloading, refer to the Addendum at
the end of this user guide.
Page 2
2 Microtek ADF-700 Installing and Getting Started
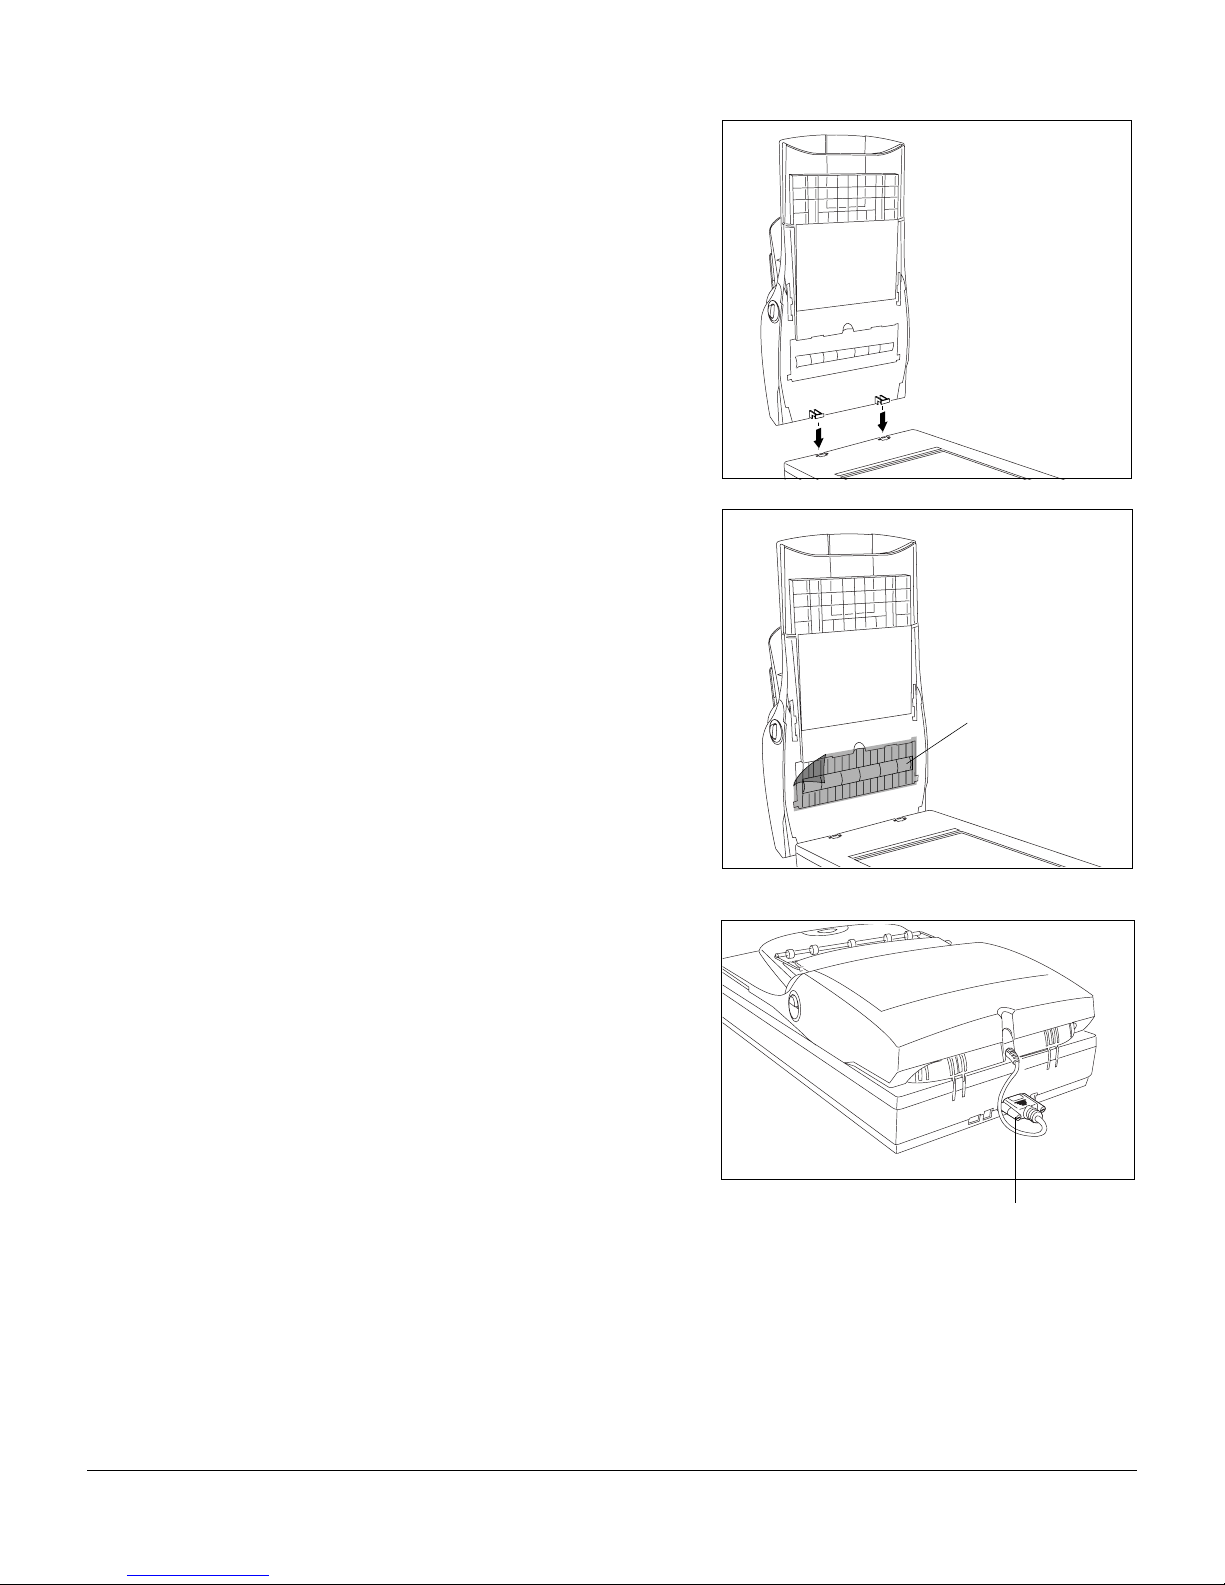
2 . Carefully align and insert the feeder
studs into the hinge slots originally
used by the scanner cover.
3 . Remove the protective film from the
transparent cover of the scan
sensor area, then lower the
ADF-700.
4. Plug the feeder's connector into the
15-pin Accessory port at the back
panel of the scanner. Secure the
connector by tightening the
retaining screws.
Protective Film
15-pin connector
5. Turn on your scanner, and wait for the light on the scanner’s front panel to stop
blinking and stay on steady . Your system will detect the scanner with ADF-700
automatically , indicating that the ADF-700 is ready to be used.
Page 3
Microtek ADF-700 Installing and Getting Started 3
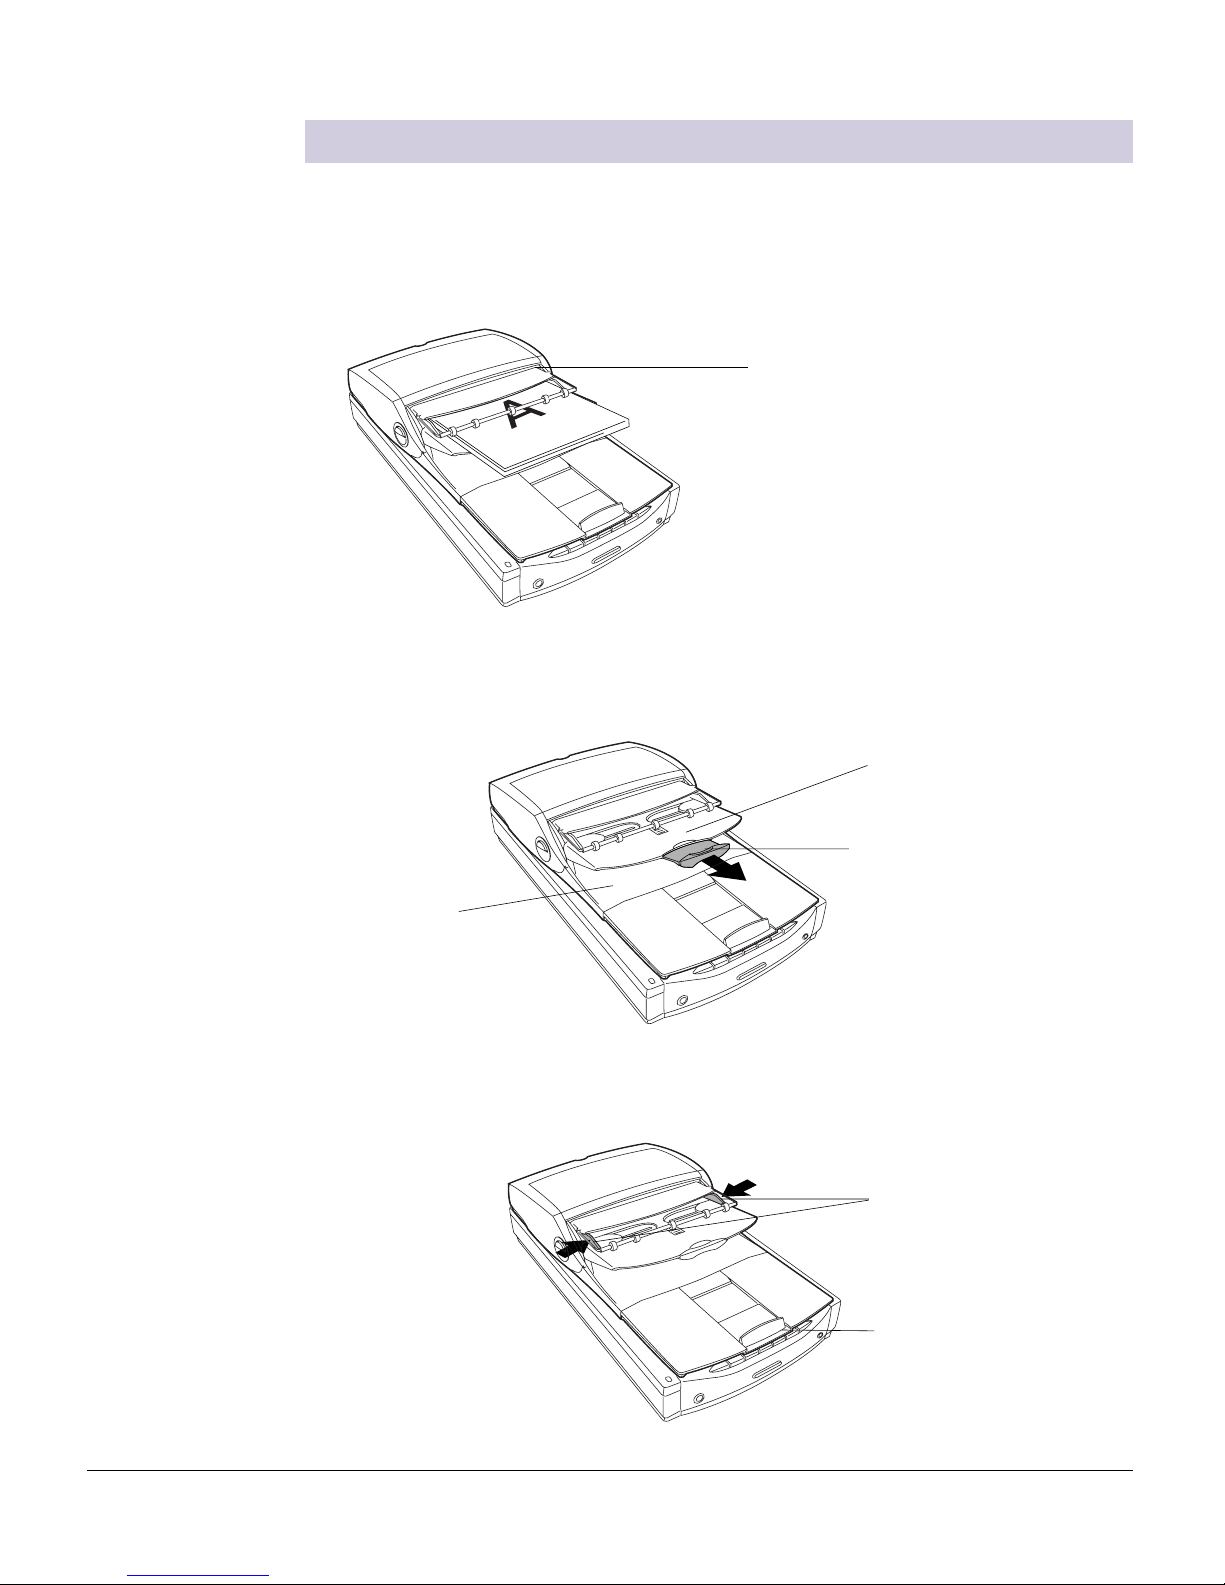
1. Open the top Tray Flap and load the stack of originals on the Document Feed
Tray, with the side to be scanned facing up. Push the stack of papers into the tray,
until the paper's edges touch the feeder rollers.
2. Pull out the top Tray Extender for better paper support if the length of the
originals exceeds 10 inches.
Placing Paper in the ADF-700
Note: The document feeder is not
designed for scanning photos; doing
so may damage your originals.
Microtek accepts no responsibility for
damage that may arise from misuse of
equipment.
Tray Flap
Tray Extender
Document Feed Tray
Document Tray
Guide Arms
Paper Guide
(supports paper
sizes including A6,
A5, A4, Letter, and
Legal size)
3 . Align the material with the center of the top tray by sliding in the two Guide Arms
toward the stacked sheets if the width of the originals is less than 8.5 inches.
Page 4
4 Microtek ADF-700 Installing and Getting Started
Scanning with the ADF-700
Scanning for Archiving / Scanning to File
The ADF-700 can be used to scan material for archiving. For instance, an image
“record” can be kept of a multiple-page legal document, or image files can be kept of
important documents such as birth certificates and tax records. Scanning for
archiving (also known as scanning to file) is different from scanning for OCR, which
is explained in the next section
1 . Place the material to be scanned on the Document Feed T ray. The material could
consist of either a single sheet of paper or a stack of paper.
2. Launch ScanW izar d 5 in stand-alone mode or from your image-editing software. If
you are not sure how to do this, refer to your ScanWizard documentation.
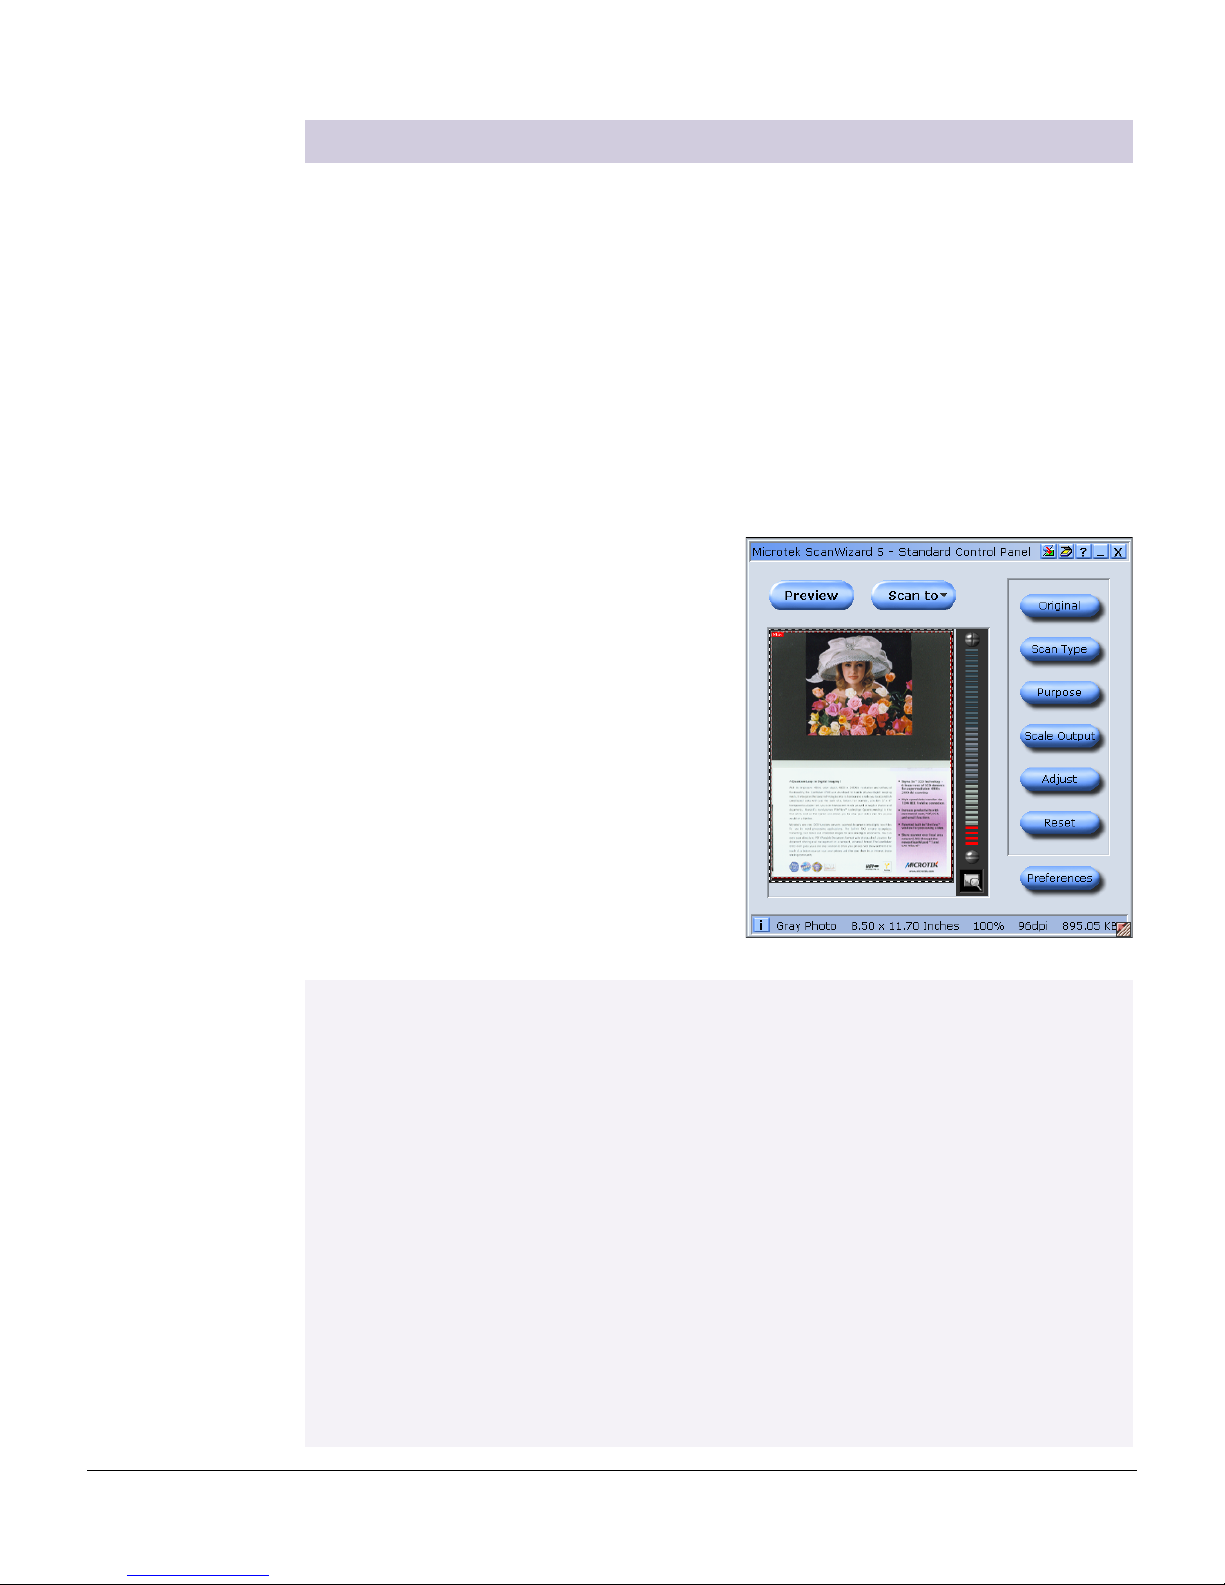
3. Specify your own scan settings by
clicking on the Tool buttons in the
Standard Control Panel; or by selecting
the appropriate setup items from the
Settings window in the Advanced
Control Panel.
4. Click and hold the Scan to button to start
multiple, automatic scanning.
After the scan, the scanned and
processed image can be saved as a file,
opened in an image-editing program, sent
to print, attached to an e-mail, or
uploaded to a website.
Before you use the ADF-700 extensively, you may wish to use the “preview” feature
Previewing can be useful to see if the physical mechanism in your ADF-700 is working
properly in conjunction with the ScanWizard 5 scanning software. Previewing requires only
the use of a single sheet of paper (with some text or material on it). Once the paper-scanning
mechanism is established and verified, you can then proceed to use the ADF-700
extensively and with assurance.
To do the preview, follow the steps below:
1. Load a piece of paper from the paper stack into the ADF’s Document Feed Tray.
2. Click the Preview button to perform a preliminary view of the entire image. When done,
a preview image appears in the preview window.
At this moment, the previewed page is delivered to the document tray from the ADF's
Document Feed Tray. Load the previewed page, along with the paper stack, on the
ADF's Document Feed Tray. You are now ready to scan.
Page 5

Microtek ADF-700 Installing and Getting Started 5
Scanning for OCR
1. Place the documents to be scanned on the Document Feed Tray.
2. Launch ScanW izar d 5 in stand-alone mode or from your image-editing software.
In the ScanWizard 5 Standard Control Panel, specify the following settings:
a) Click the Original
button, then select
Text Document as your
scan material type.
b) Click the Scan T ype
button, then select
Black & White as your
output image type.
c) Click the Purpose
button, then select
OCR T ext.
Selecting this check box will create files
under the specified file name, and
numbers are added serially and in order
to generate multiple file names for the
scanned/saved documents.
For example, assuming the document is
saved as "Sample," the first document
will be Sample.001, followed by
Sample.002, Sample.003, etc.
Note: When scanning colored text originals, you must select “Photo” and use
either True Color/Web Color (unless B/W is the chosen output).
4. Click and hold the Scan to button. When the options menu appears, select OCR.
5. When the OCR: Save As dialog box appears, use the default “Document” file
name, or key in your preferred file name and select the export file format (.rtf, .txt,
.htm, .xls, or .pdf ) .
Page 6

6 Microtek ADF-700 Installing and Getting Started
6. The default language for OCR is English. To change the language, select your
preferred language from the OCR Language options menu.
7. Click Save to start OCR scanning from the top sheet. The scanned document will
be saved to your chosen folder.
• If the check box “Send document to application after saving” is enabled, the
saved file is automatically opened to your designated application for further
editing.
• If the check box “Save multiple pages as a single file” is enabled, all pages of
the originals are scanned before they are saved under a single file name.
T ake note that this will not work if the chosen output file format is PDF. The
PDF file format can only be saved and assigned with individual file names for
each page when you perform OCR scanning.
Page 7

Microtek ADF-700 Installing and Getting Started 7
Fixing Paper Jams
Earlobe Levers
1. Open the feeder cover by lifting the two
Earlobe Levers located on each side of the
cover .
2. With the cover fully opened, pull out the
jammed document from the feeder by
doing the following:
• Pull the paper in a forward direction if
paper is jammed in the first stage
(paper feed) rollers.
• If the paper is jammed in the second
stage (scanning) rollers , you may pull
it out in either direction (forward or
backward).
You can also open the transparent
cover of the scan sensor area (at the
bottom of the feeder) to pull out the
jammed paper .
Page 8

8 Microtek ADF-700 Installing and Getting Started
Cleaning the Rollers
Prolonged use of the ADF-700 may result in accumulation of ink and other residue on
the feeder's rollers, affecting their efficiency. Check for residue on the rollers if paper
flow through the rollers becomes erratic. Open the feeder cover periodically to clean
the rollers with a lint-free cloth or a swab moistened with water.
Note: Do not attempt to turn the roller while cleaning, as this may damage the train
drive mechanism of the ADF-700.
Roller
Roller
Maintenance
Cleaning the Scan Sensor Cover
The transparent cover of the scan sensor area at the bottom of the feeder needs to be
cleaned regularly to maintain clear transparency for quality scanning. Use nonabrasive lint-free cloth to gently wipe both surfaces of the cover . To remove stains,
use cotton swabs moistened with rubbing alcohol.
Page 9

Microtek ADF-700 Installing and Getting Started 9
How to Replace the Rubber Pad
The rubber pad in your Auto Document Feeder (ADF) is designed to make document
feeding smooth. After scanning approximatley 30,000 sheets through the ADF , the
rubber pad may become worn out, and problems such as document double-feeds may
occur. In this case, check the rubber pad and replace it with a new one if needed; two
rubber pads are included in your scanner package for this purpose. Follow the
procedures below for replacing the rubber pad.
Earlobe Levers
1. Open the feeder cover by lifting the
two Earlobe Levers on each side of
the cover.
Rubber Pad
2. With the cover fully opened, press the
two arms of the rubber pad inward with
your fingers to pull out the rubber pad.
3. Insert and push the new rubber pad into the
compartment until it snaps into place.
4 . Close the feeder cover.
Page 10

10 Microtek ADF-700 Installing and Getting Started
Specifications
Capacity 50 sheets of copy bond paper (unfolded)
Paper Basis Weight 16 to 24 lb.
Paper Size Min. A6 (105 mm x 148 mm) (4.14" x 5.83")
Max. Legal (21.59 cm x 35.56 cm) (8.5" x 14")
Accuracy Paper skew: ±1º
Paper length: ±1%
1 failure per 500 pages
(Failure occurs in the form of no feeds, multiple feeds, or paper
jam)
Connector 15-pin subminiature D-shell
Physical Dimensions: 21.14" x 11.61" (537 mm x 295 mm)
Input tray height: 3.14" (80 mm)
Weight 5.73 lb. (2.6 kg)
Power Consumption 6.5 W (max.)
Operating 50ºF to 95ºF (10ºC to 35ºC)
Environment 10% to 85% relative humidity
Page 11

Microtek ADF-700 Installing and Getting Started 11
Addendum: Checking Your Firmware Version
You can check the firmware version of your scanner through the ScanW izard 5
scanning software. This can be done with either the Standard Control Panel or the
Advanced Control Panel.
Make sure your scanner is connected and turned on, then launch ScanWizard 5.
a) In the Standard Control Panel, click the
Scanner Info icon ( ) on the right
corner of the window, and choose
Scanner Information.
A dialog box will appear showing the
scanner type, model, firmware version,
and status.
b) In the Advanced Control Panel, go to
the Scanner menu in the Preview
window and choose Scanner Probe.
A dialog box will appear showing the
scanner ID, type, and firmware version.
Websites for Firmwar e Downloads
If you need to download the firmware for the ScanMaker i700, go to the appropriate websites below:
• America: http://www .support.microtek.com/patch_files.phtml
• Europe: http://download.microtek.de/drivers
• Asia Pacific: http://202.39.72.2/Singapore/W eb/driver2004.php
• T aiwan & China: ftp://ftp.microtek.com.tw/pub/Firmware/i700/filename
 Loading...