

Page 1
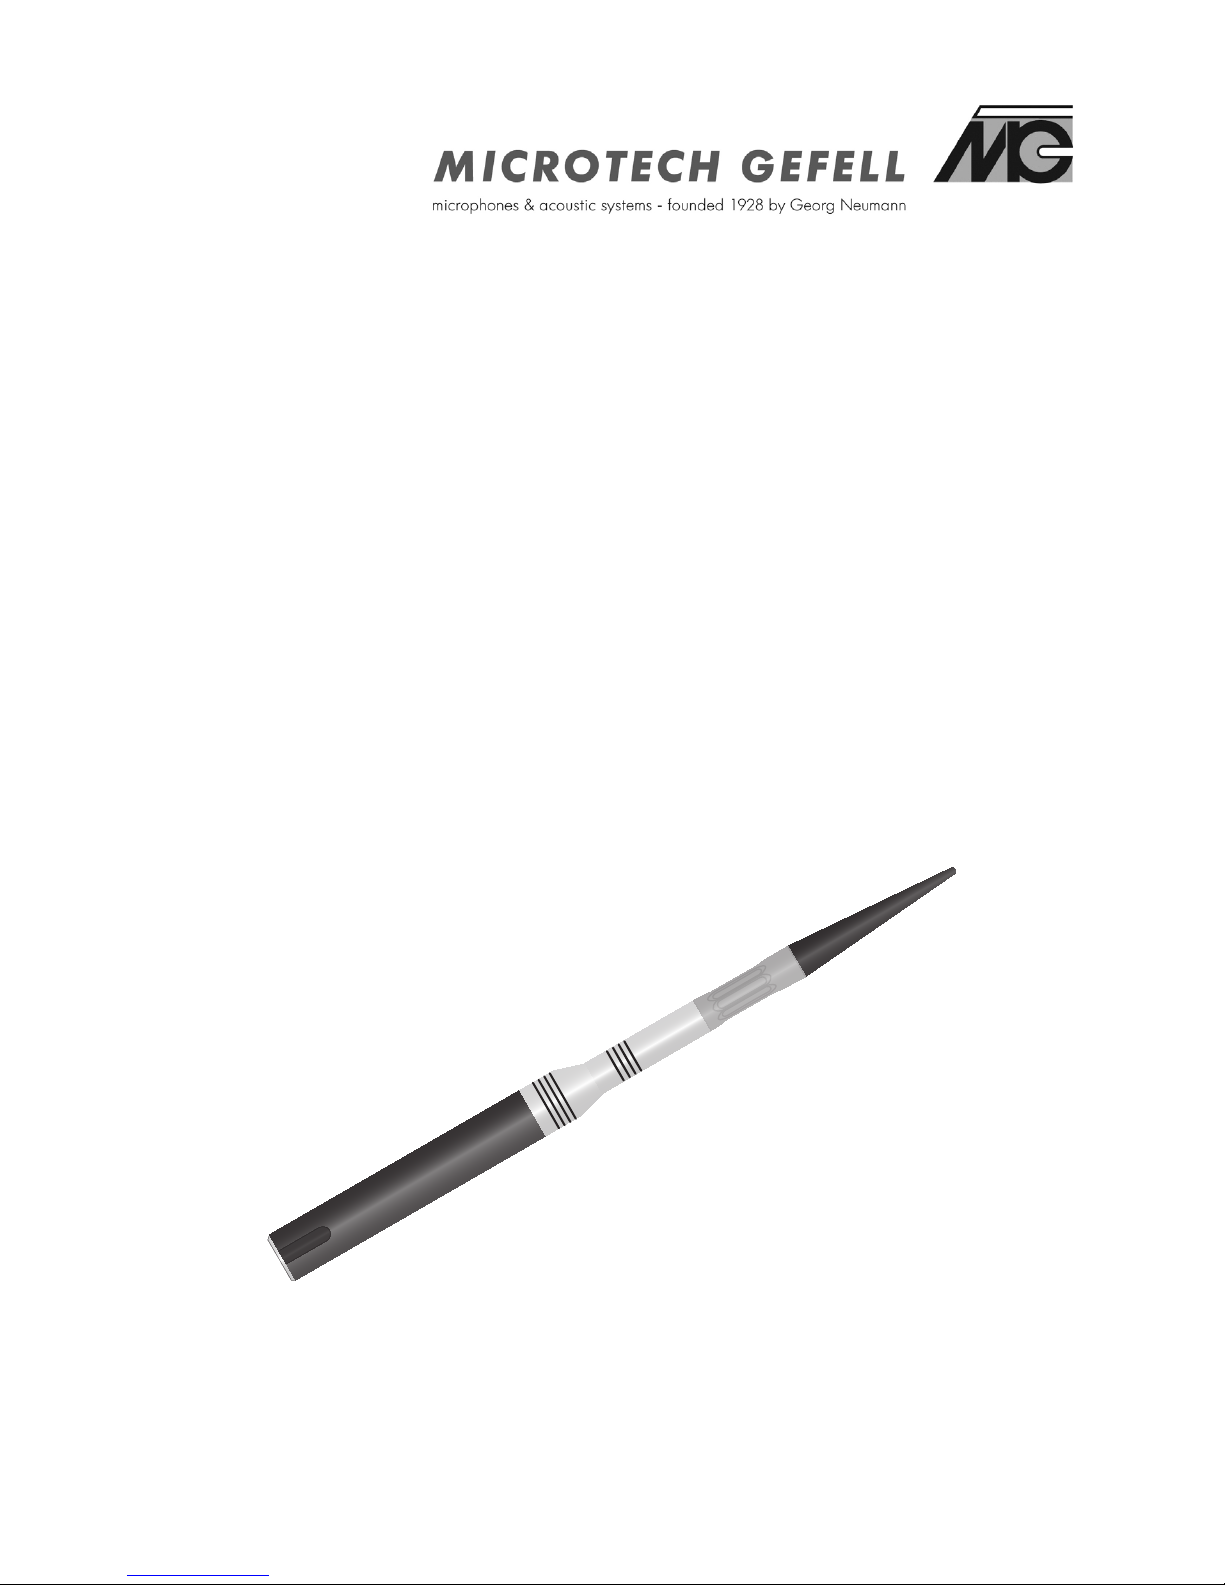
Weather protector
Modell: WS 1
date of issue: 21.05.2012
Handbook
Page 2

Microtech Gefell GmbH
Georg-Neumann-Platz
D-07926 Gefell
Germany
+49 (0) 36649-882-0
+49 (0) 36649-882-11
www.microtechgefell.de
[email protected]
Address:
Telephone:
Fax:
Internet:
E-mail:
Page 3

Page 4
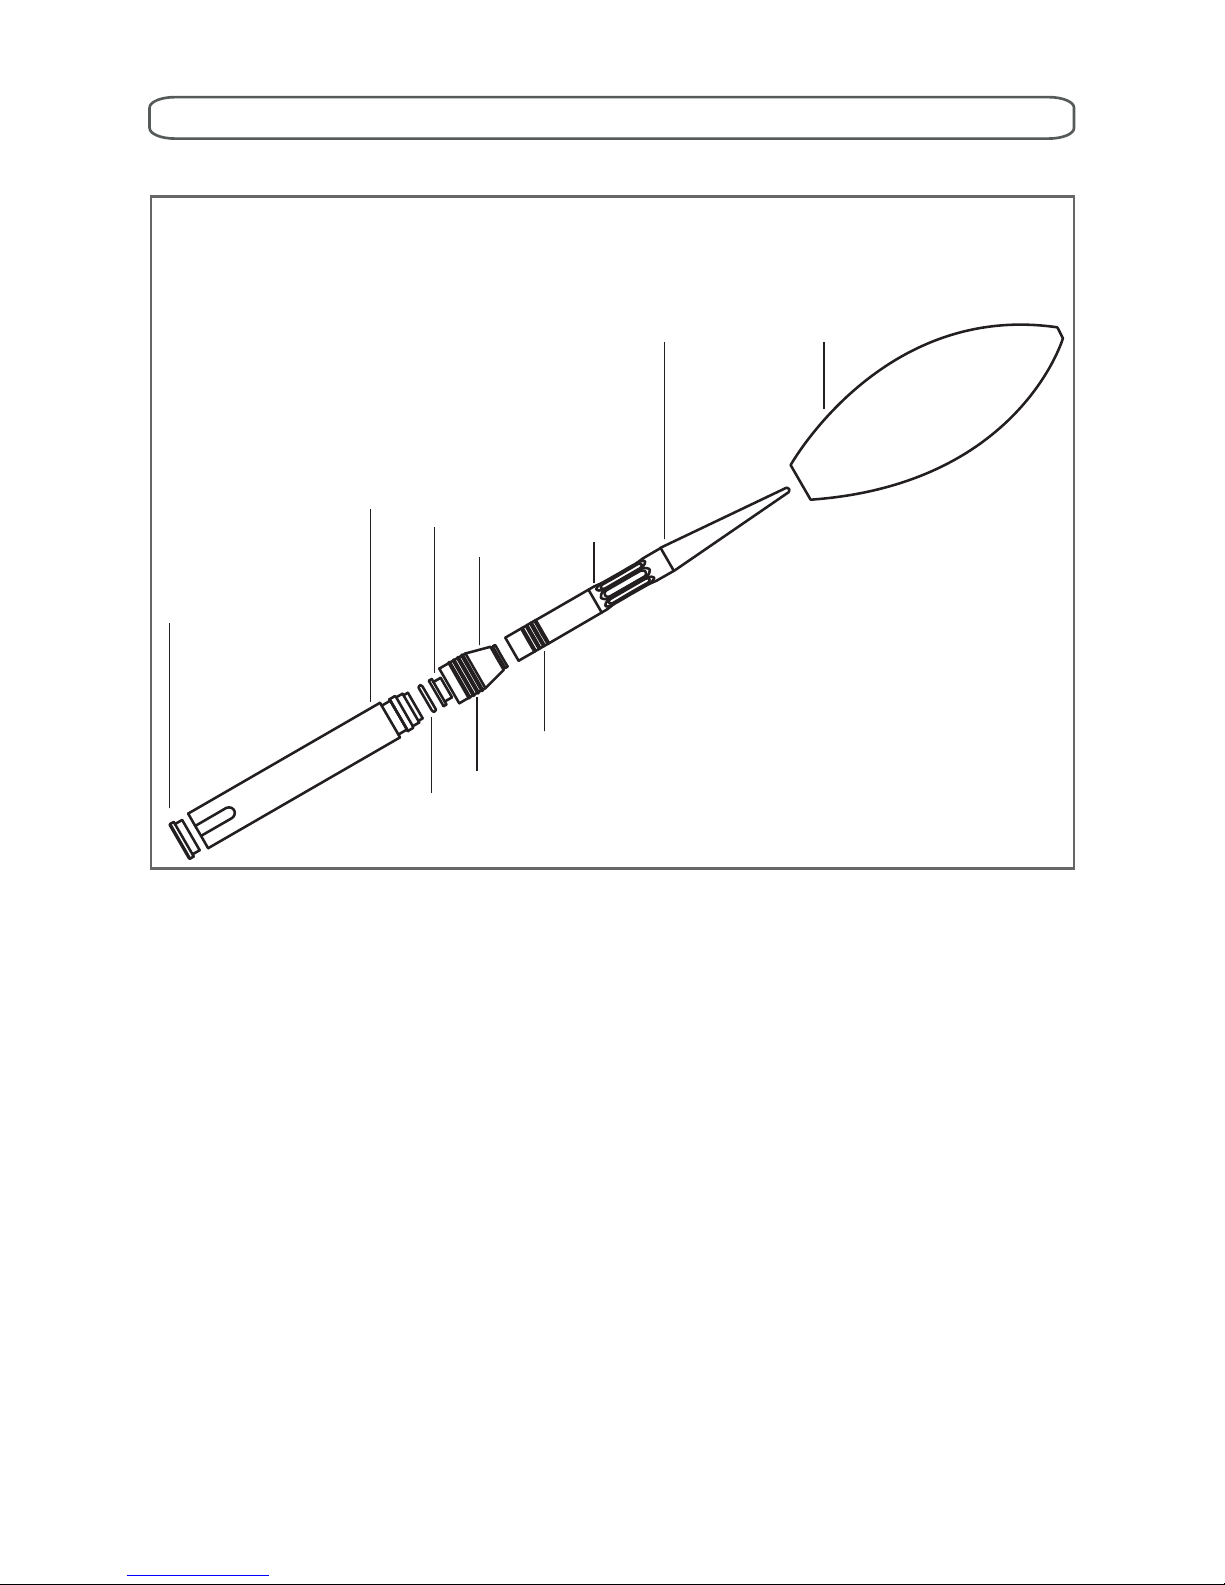
Operating elements
to
r
oi
d
al r
i
n
gs
cl
a
mpin
g nut
me
sh
b
u
s
h
w
eather
pro
of
e
n
c
lo
s
ure
we
ath
erproof pipe
w
i
n
d
sc
r
een
c
a
p with
tri
p
o
d
thre
ad
t
Page 5

Table of Contents
1 General information 6
1.1 About this manual ........................................................ 6
1.2 Danger and information signs ....................................6
1.3 General safety instructions ......................................... 7
1.3.1 Intended use ..................................................... 7
1.3.2 Unauthorised person ....................................... 7
1.3.3 Normal use ........................................................ 7
1.4 Delivery contents .........................................................8
1.5 Technical data ..............................................................9
2 Initial Steps 10
2.1 Setting up the unit .....................................................11
2.2 Assembling the clamping nut ................................... 12
2.3 Installing the windscreen ..........................................12
2.4 Installing the tripod .................................................... 13
2.5 Calibrating the unit ....................................................13
2.6 Disassembling and storage of the device ...............14
2.6.1 Storage in the transport case ....................... 14
2.6.2 Separate storage ............................................ 16
3 Cleaning the device 17
4 Warranty 18
5 Disposal of old equipment 19
Page 6
Please read this user guide carefully before the
initial use to prevent physical injury or damage to
property.
Keep this user guide at a suitable place during the
whole product life cycle in case questions may arise
later on.
Pass this user guide on to any user or any
subsequent owners to ensure a permanent safe use
of the product.
1 General information
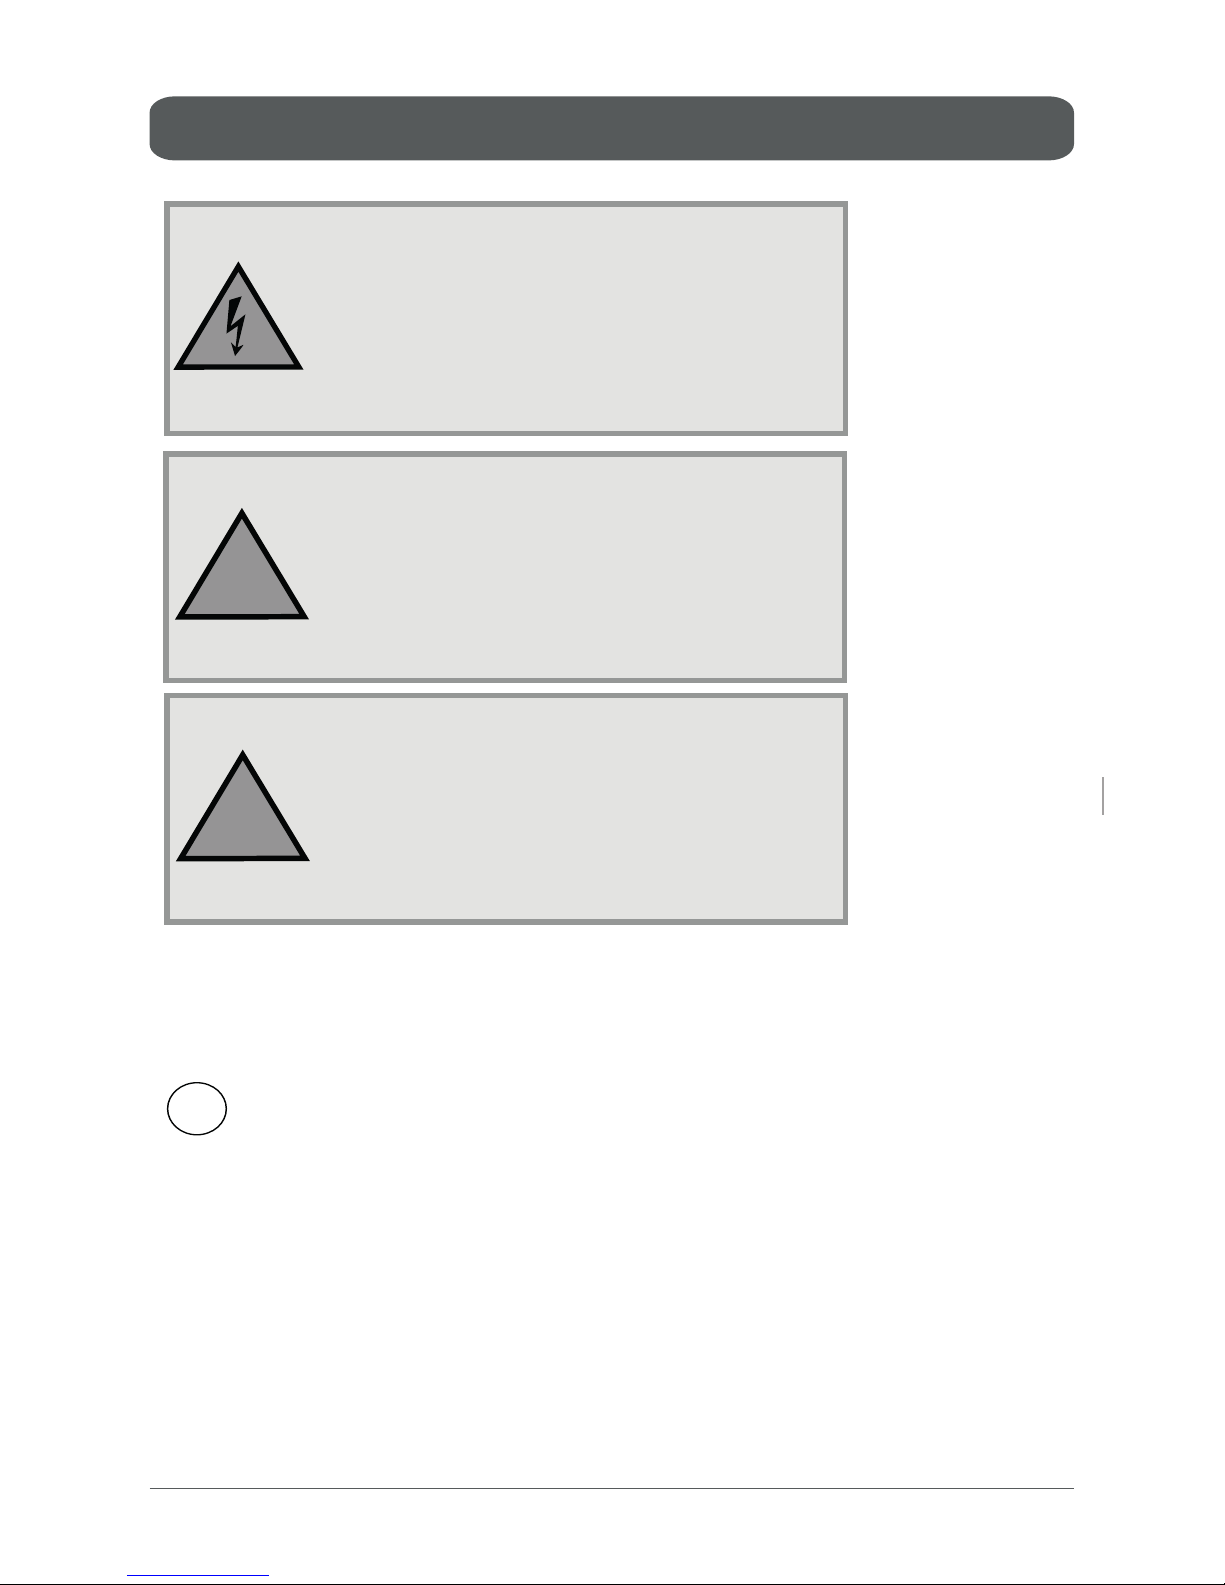
Danger!
Warns of life threatening injuries
from an electric shock.
Warning!
Warns of injuries.
!
Caution!
Warns of damage to property.
!
Gives additional information.
i
1.1 About this manual
1.2 Danger and information signs
1 General information 1.1 About this manual
06
Page 7
1.3.1 Intended use
• The WS 1 is an accessory for measuring
microphones.
• It serves solely to protect the measuring
microphones against gentle weather conditions
(drizzle, light wind, fog, etc.) for outside use
within a temporary limit of 24 hours.
• The product is designed for outside use.
1.3.3 Normal use
Danger!
• AlwaysusetheTA202dehumidierofferedby
Microtech Gefell GmbH for measurements with
the WS 1.
• Do not use the WS 1 in case of thunderstorm,
storm, heavy rain or other extreme weather
conditions.
1.3.2 Unauthorised person
• This product may not be used by children or
persons with impaired physical, sensory or
mental abilities, or by persons who do have
a lack of experience, unless they are being
supervised.
1.3 General safety instructions
1.3 General safety instructions
07
Page 8
!
Warning!
• Arrange all cables so that they do not cause the
risk of tripping.
• Set up the microphone so that it causes no risk
by falling over.
!
Caution!
• Do not use the measuring microphone capsules
with a laterally placed capillary.
• Only touch the weatherproof pipe at the
rubberized toroidal rings intended for this
purpose.
• Exclusively use the WS 1 with 1/2“ measuring
microphones.
• Repairs should only be carried out by service
personnel of the Microtech Gefell GmbH.
The delivery contents include the following
elements:
• WeatherproongWS1
• Windscreen W100
• Transport case
• Handbook
Make sure that all parts are in perfect condition.
Otherwise contact the Microtech Gefell GmbH in
case of any complaints.
1.4 Delivery contents
1 General information 1.4 Delivery contents
08
Page 9

1.5 Technical data
Dimensions:
Weight:
1.5 Technical data
09
Total length: 363 mm
Weatherproof enclosure:
Length: 137 mm
Diameter: 24 mm
Clamping nut:
Length: 33 mm
Diameter: 24 mm
Weatherproof pipe:
Length: 193 mm
Diameter: 16 mm
Windscreen:
Length: 180 mm
Diameter: 70 mm
WS 1: 334 g
Transport case: 3500 g
Page 10
2 Initial Steps
10
Caution!
Always use the TA 202 dehumidier
offered by Microtech Gefell GmbH for
measurements with the WS 1 to avoid
penetration of air humidity into the
measuring microphone. Air humidity
can cause damage to the measuring
microphone capsule.
Danger!
Take care to prevent water getting into
the interior of the measuring microphone.
Penetration of water into the microphone
may cause an electric shock, which at
worst leads to health damage.
Caution!
Only touch the weatherproof pipe at the
rubberized toroidal rings intended for this
purpose.
To much force effect on the weatherproof
pipe can cause damage or breakage to the
material.
2 Initial Steps 2.1 Setting up the unit
!
!
During measurements with following measuring
microphone capsule by Microtech Gefell GmbH, class 1
tolerance elds are met according DIN EN 61672-1 for
horizontal sound incidence:
• MK 221, MK 222, MK 223 (suituable for microphone
amp MV 203, MV 203.3)
• MK 222 E, MK 222 BE, MK 250, MK 250 B, MK 255
(suituable for microphone amp MV 204, MV 204.3,
MV 210, MV 220)
Microtech Gefell assumes no further warranties, as no
values for measurements with measuring microphone
capsules by other manufacturers exist.
Page 11
2.1 Setting up the unit
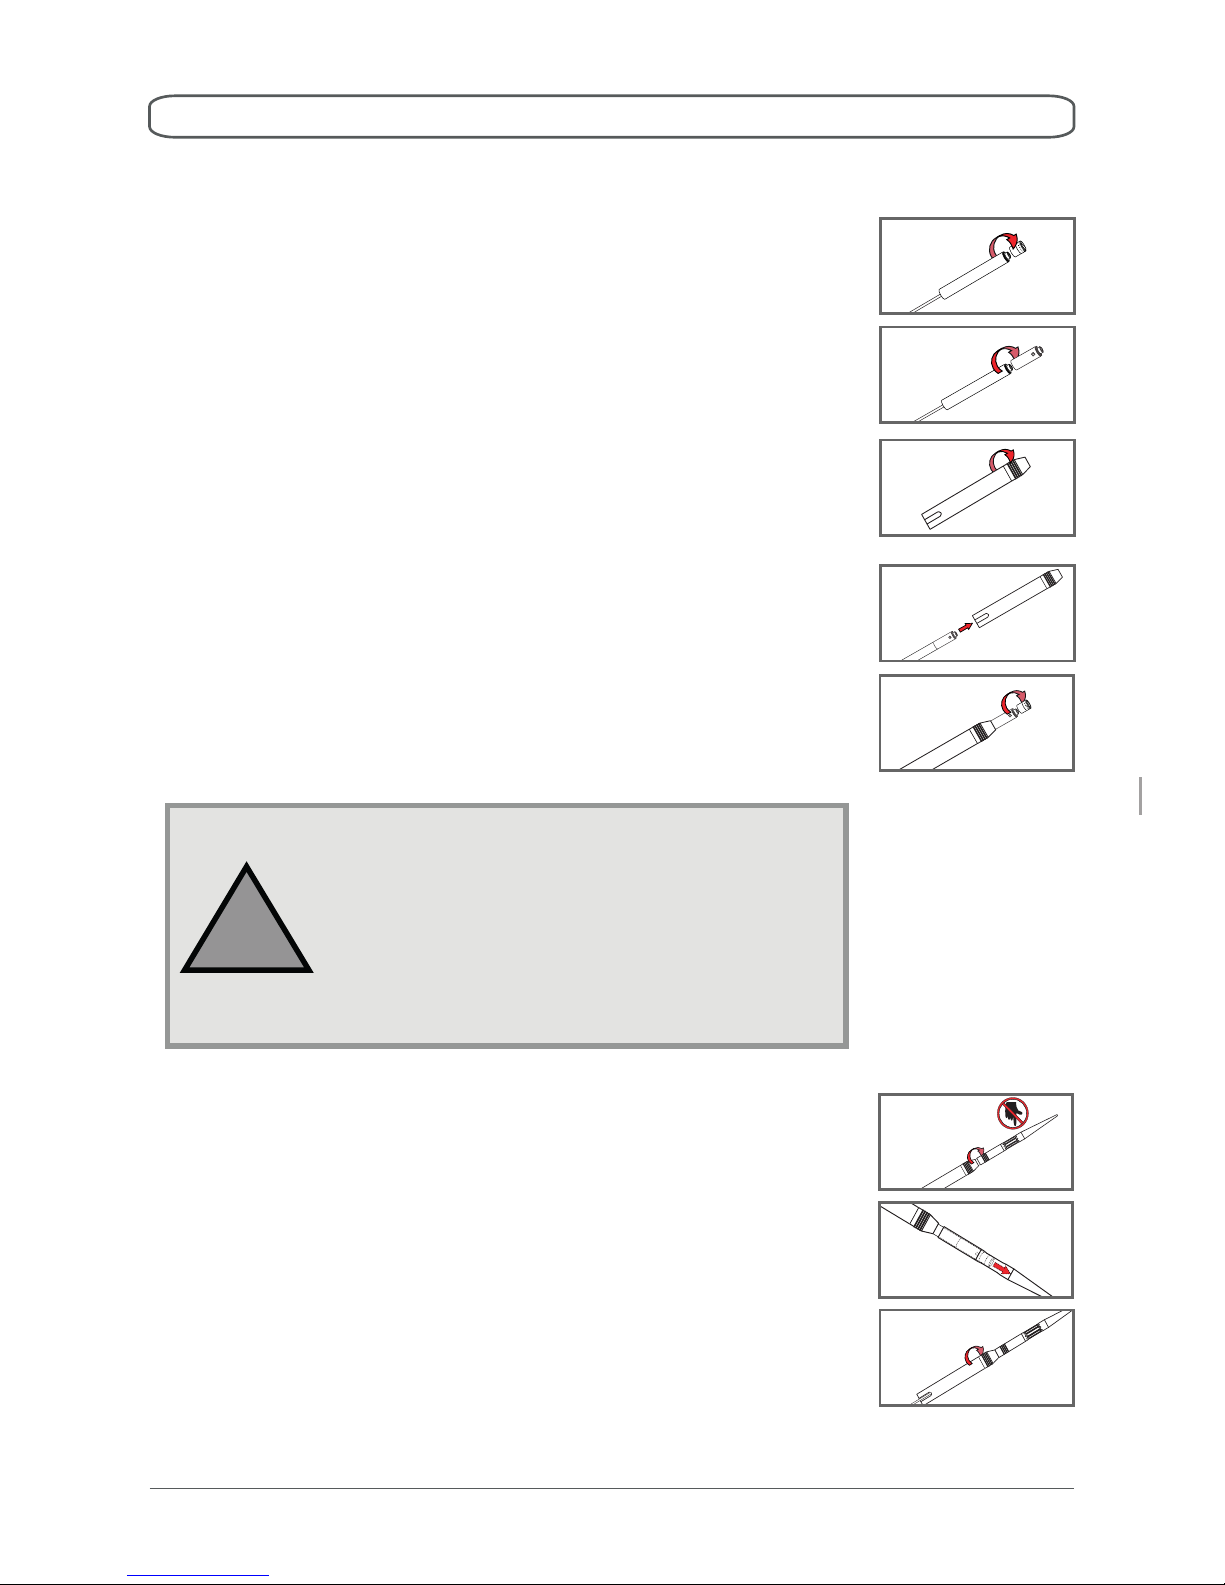
The WS 1 is designed for vertical installation.
1. Unscrew the measuring microphone capsule of
themeasuringmicrophoneamplier.
2. Screwthedehumidierontothemeasuring
microphoneamplier.
3. Loosen the clamping nut approx. one turn off the
weatherproof enclosure to release the clamping.
4. Guide the measuring microphone amp through
the weatherproof enclosure.
5. Screw the measuring microphone capsule onto
thedehumidier.
11
2.1 Setting up the unit
6. Screw the weatherproof pipe onto the clamping
nut.
7. Slide the measuring microphone carefully into the
weatherproof pipe up to the stop.
8. Screw the weatherproof enclosure and the
clamping nut together again, to clamp the
measuring microphone.
Caution!
Only touch the weatherproof pipe at the
rubberized toroidal rings intended for
this purpose. Improper contact can cause
damages.
!
Page 12
12
2.3 Installing the windscreen
2 Initial Steps 2.2 Assembling the clamping nut
i
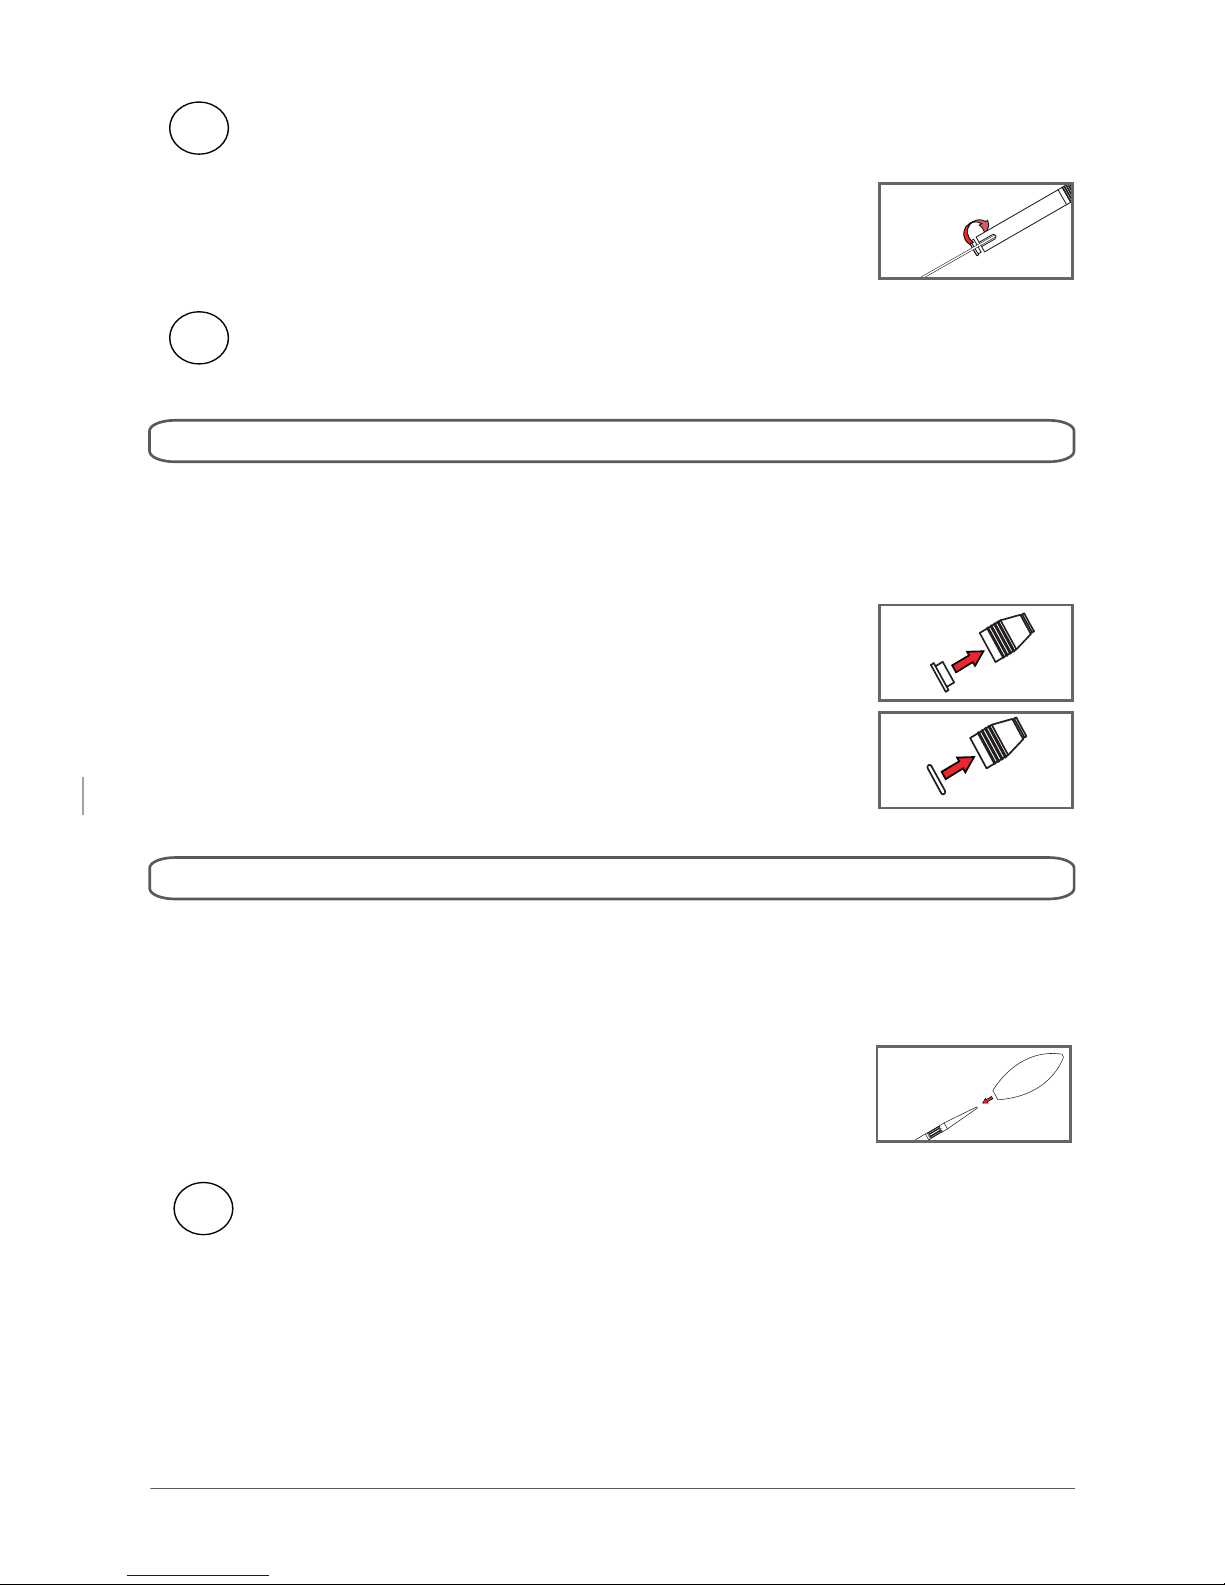
The microphone cable is laterally lead to the
outside through a slot on the weatherproof
enclosure.
9. Screw the cap into the weatherproof enclosure.
i
The cap may be xed with a larger coin or a wide
screwdriver.
To perform as accurate as possible, Microtech Gefell
GmbH recommends suggests to always use the windscreen
W 100.
• Guide the windscreen over the weatherproof
pipe.
i
Push the windscreen until it covers the rst two
toroidal rings of the clamping nut.
2.2 Assembling the clamping nut
At delivery the clamping nut is assembled. Should it be
necessary to reassemble it during the product life cycle,
proceed as follows:
1. Insert the bush with its narrow side into the lower
end of the clamping nut.
2. Press the toroidal ring onto the bush.
Page 13
2.5 Calibrating the unit
For measurements conforming to standards, calibrating
the entire measuring chain is generally required before
starting the measurements.
!
Caution!
A calibration may only be carried out by
professional staff as improper handling
of calibration equipment can damage or
destroy the measuring microphone.
2.4 Installing the tripod
!
Warning!
Please ensure that the tripod stands
securely on the ground and is secured
adequately from falling over. Through
improper installation the tripod can fall
over and thereby injure people.
The WS 1 is designed for tripods with 3/8“ threads.
• Screw the WS 1 onto the tripod with the tripod
thread in the cap.
i
A thread-adapter is required if the tripod thread is
larger or smaller than 3/8“.
13
2.4 Installing the tripod
Page 14
2.6 Disassembling and storage of the device
Danger!
Disconnect the microphone cable from
the measuring instrument or power
supply before disassembling the device.
An electric shock can cause serious
damage to your health.
14
2 Initial Steps 2.6 Disassembling and storage of the device
2.6.1 Storage in the transport case
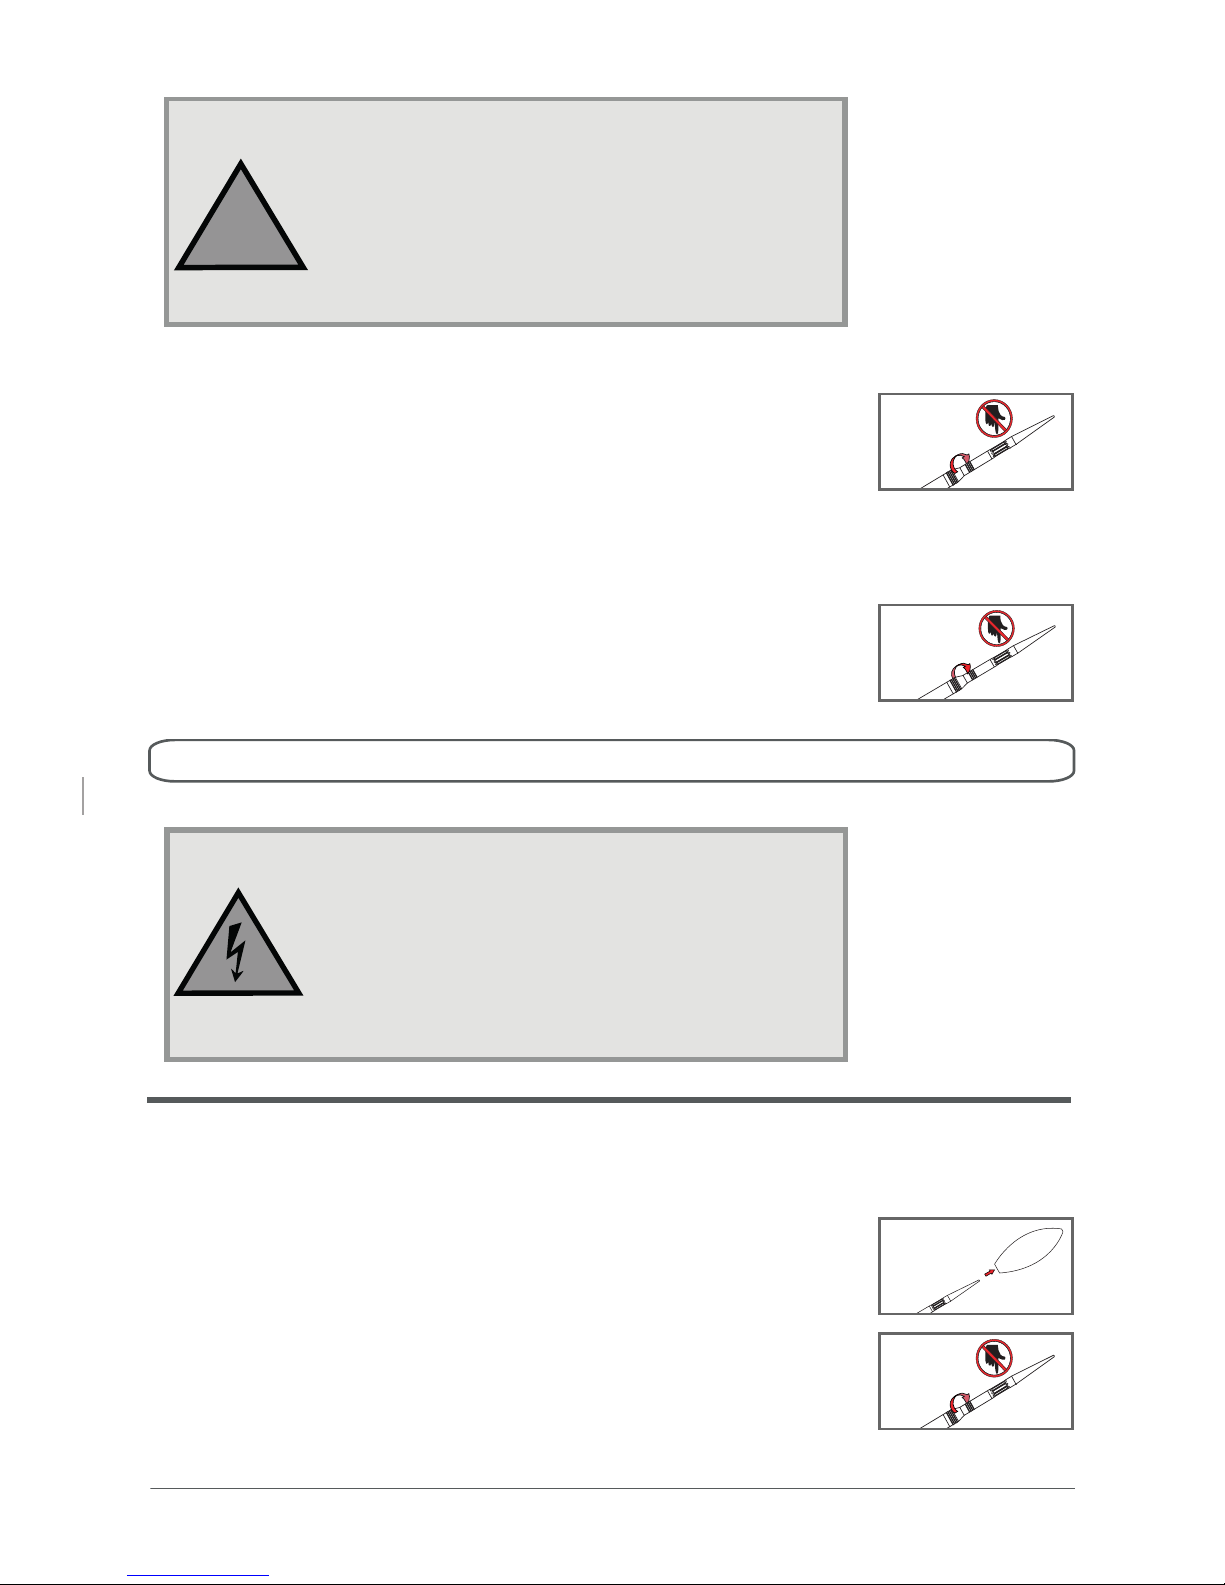
1. Unscrew the tripod of the thread in the cap.
2. Pull the windscreen from the weatherproof pipe.
3. Unscrew the clamping nut from the weatherproof
pipe.
1. Unscrew the clamping nut from the weatherproof
pipe.
2. Calibrate the measuring microphone with
calibration equipment.
3. Screw the weatherproof pipe onto the clamping
nut again.
Caution!
Only touch the weatherproof pipe at the
rubberized toroidal rings intended for
this purpose. Improper contact can cause
damages.
!
Page 15
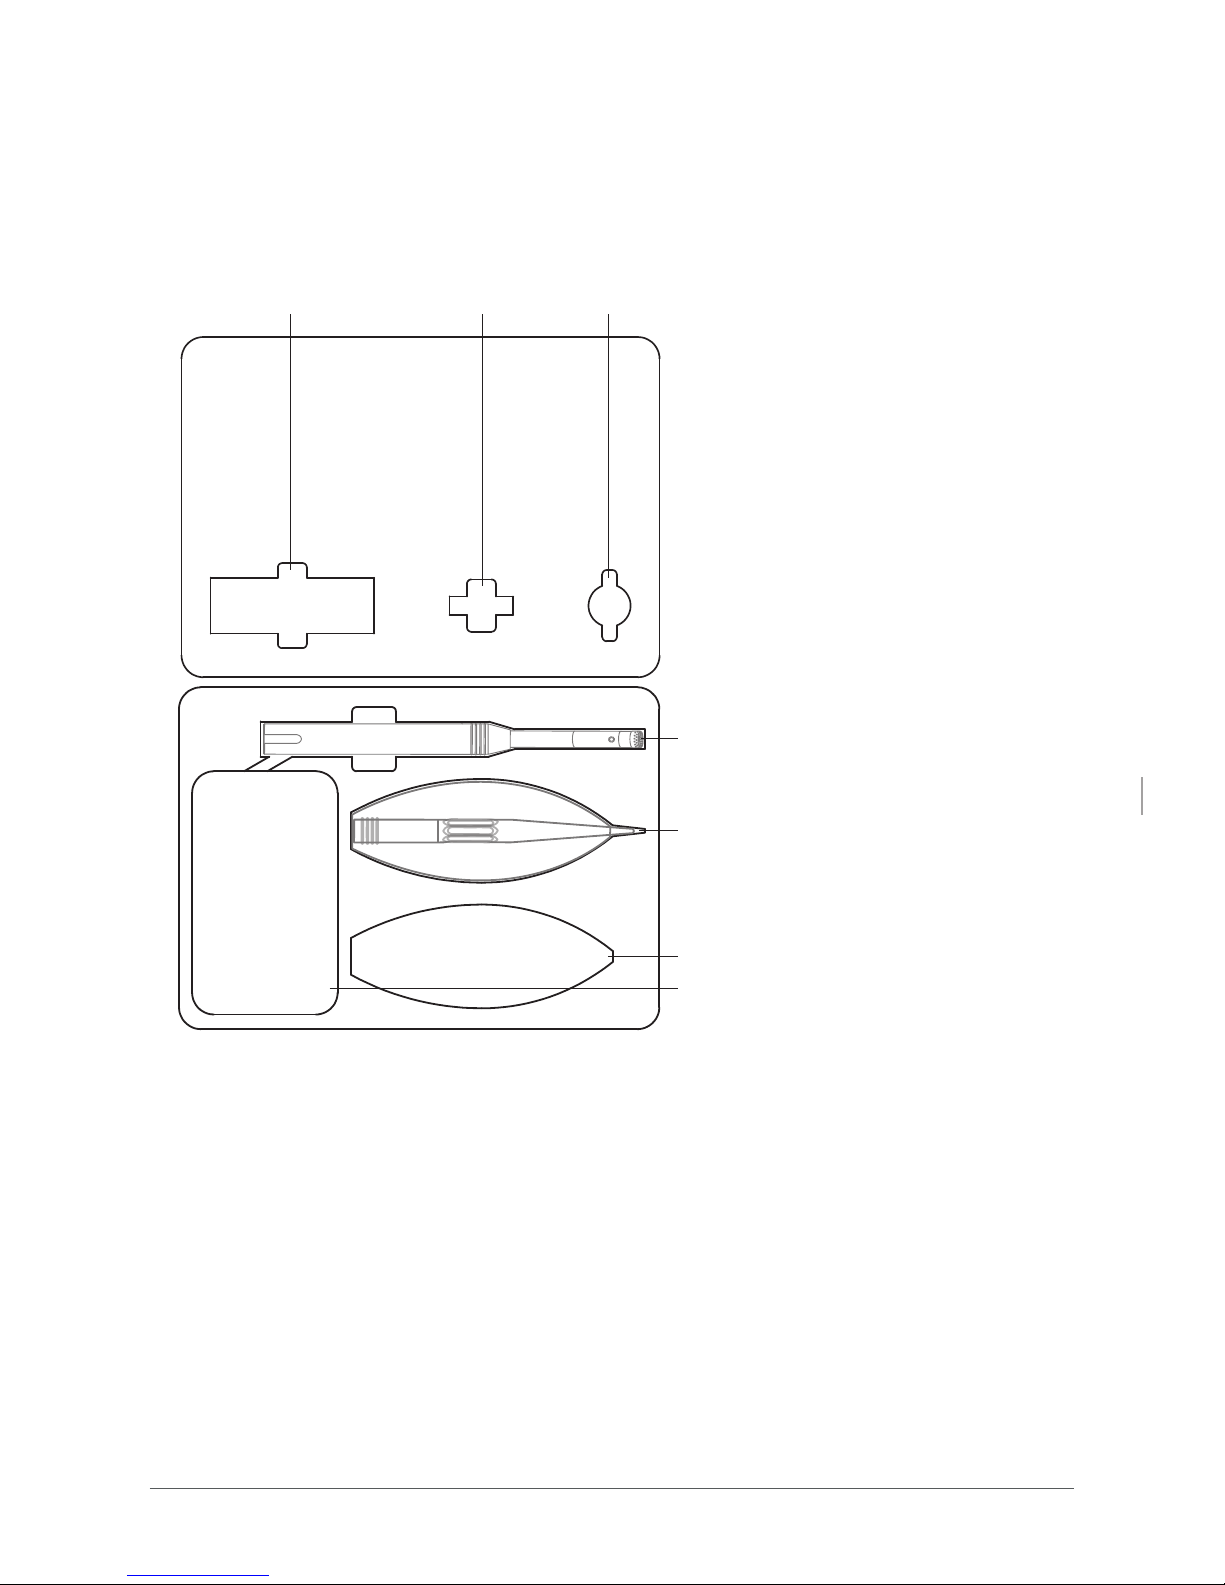
4. Put the WS 1 and the measuring microphone into
the recesses of the transport case in assembled
condition.
15
2.6 Disassembling and storage of the device
we
a
ther
p
roof pipe
an
d w
i
ndscreen
cal
i
bration
equipment
de
h
um
i
d
i
fier
s
pa
r
e
sp
a
r
e
m
e
asuri
n
g
microphon
e
ca
p
su
le
w
e
a
t
h
erproof
enclosure and
me
asu
ring
micripho
n
e
sp
are winds
c
ree
n
c
a
b
l
e
(
o
p
t
i
onal
)
(o
p
t
io
nal)
(o
pt
i
on
al)
(opti
o
nal)
Page 16
2.6.2 Separate storage
16
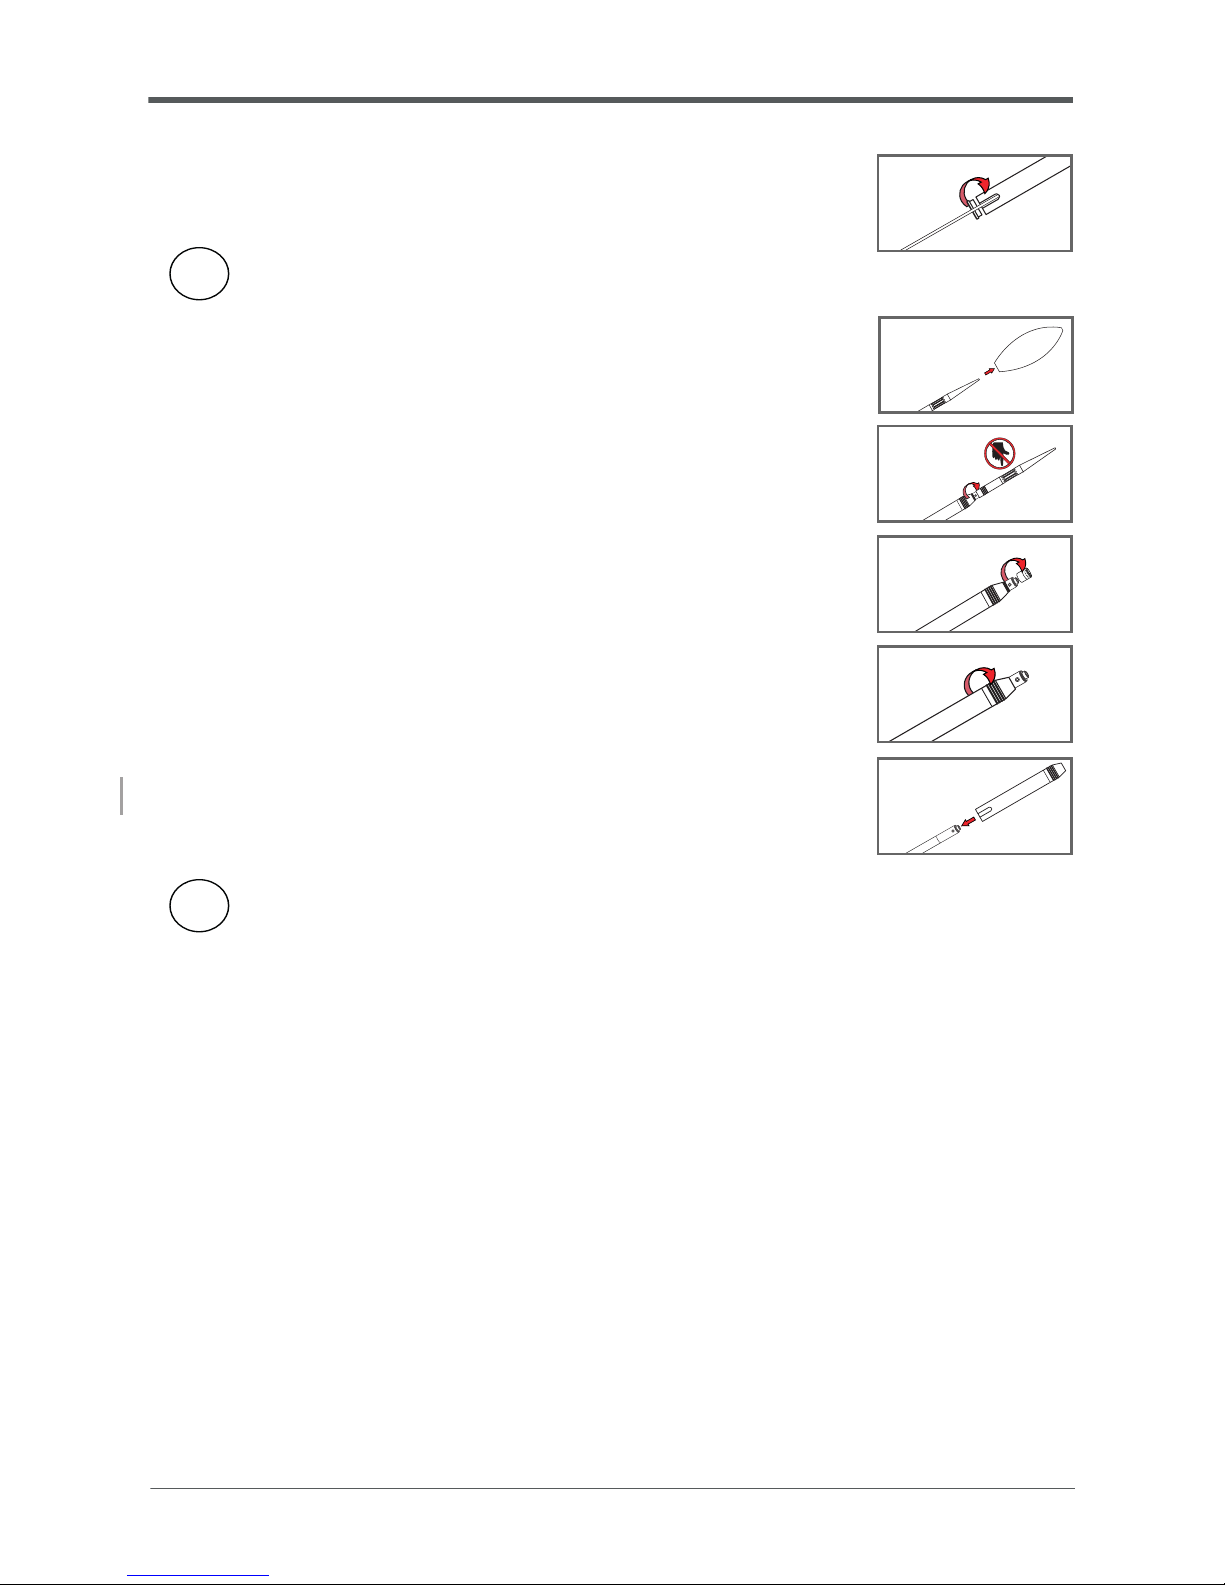
1. Screw the cap out of the weatherproof enclosure.
i
The cap may be unfastened with a larger coin or a
wide screwdriver.
2. Pull the windscreen from the weatherproof pipe.
3. Unscrew the weatherproof pipe from the
clamping nut.
4. Unscrew the measuring microphone capsule
fromthedehumidier.
5. Loosen the clamping nut approx. one turn
from the weatherproof enclosure to release the
clamping.
6. Pulltheamplieroutoftheweatherproof
enclosure.
i
The individual components of the WS 1 must be
protected against damage and stored in dry and
well tempered place.
2 Initial Steps 2.6 Disassembling and storage of the device
Page 17
3 Cleaning the device
!
Caution!
Never use chemicals and aggressive or
abrasive cleaners to avoid scratching or
damaging of the enclosure.
• Clean the clamping nut, the weatherproof
enclosureandthecapoftheweatherproong
from the outside with a soft and lint-free cloth.
i
Should the mesh of the weatherproof pipe be
polluted or damaged during its life cycle, please
contact Microtech Gefell GmbH.
17
Danger!
Disconnect the microphone cable from
the measuring instrument or power
supply before disassembling the device.
An electric shock can cause serious
damage to your health.
!
Caution!
Keep the mesh free from all types of
pollution to avoid any damage to this
area.
Page 18

4 Warranty
The Warranty Period towards contractual
customers shall be two years for new items and
one year for secondhand items, in each case
starting at the time of passage of risk (e.g. at the
time of handover of the goods to the forwarding
company etc.).
Any defects or damage caused by negligent or
improper treatment or incorrect installation or
non-compliancewiththeinterfacespecications
given by Microtech Gefell GmbH or the technical
conditionsspeciedontherelevantdata
sheets, or the use of inappropriate accessories
oranymodicationoftheoriginalpartsbythe
contractual customers, or by any third parties not
commissioned by Microtech Gefell GmbH, shall
not be covered by the warranty.
Regular wear and tear shall also be excluded from
warranty.
18
4 Warranty
Page 19

5 Disposal of old equipment
Your contribution to environmental protection:
To avoid risk to human health or to the environment,
this product may not be disposed with the household
waste. At the end of its life cycle it should be brought
to a collection point for the recycling of electrical
and electronic devices. For more information
please consult your municipal authorities or local
government.
This is an important contribution to recycling. (EU
directive 2002/96/EC).
19
 Loading...