

Page 1
ITC
In-The-CAnAL
OperatiOns Manual
Page 2
Congratulations!
You’ve just taken the first
step on your journey toward
better hearing. Use this
manual as a guide to the
use and care of your new
hearing instruments. If you
have questions, your hearing
professional is trained and
willing to help.
Your new hearing instruments are customized to your
hearing loss and lifestyle. Your hearing professional
can make changes to the instruments to match your
needs. He or she will make note of these changes in
boxes like the one shown below.
Page 3

1
CONTENTS
About Your Hearing Instruments . . . . . . . . . . . . . 2
Features and Controls . . . . . . . . . . . . . . . . . . . . . . 3
Identification . . . . . . . . . . . . . . . . . . . . . . . . . . . . . 4
Batteries . . . . . . . . . . . . . . . . . . . . . . . . . . . . . . . . 5
Insertion and Removal . . . . . . . . . . . . . . . . . . . . . . 10
On, Off and Volume Control . . . . . . . . . . . . . . . . . 12
Optional Features . . . . . . . . . . . . . . . . . . . . . . . . . 14
Using the Telephone . . . . . . . . . . . . . . . . . . . . . . . 16
Directional Microphones . . . . . . . . . . . . . . . . . . . . 22
Feedback . . . . . . . . . . . . . . . . . . . . . . . . . . . . . . . . 24
Handling and Care . . . . . . . . . . . . . . . . . . . . . . . . 25
Troubleshooting Guide . . . . . . . . . . . . . . . . . . . . . 30
Communication Strategies . . . . . . . . . . . . . . . . . . 31
FDA Information . . . . . . . . . . . . . . . . . . . . . . . . . . 36
Page 4

2
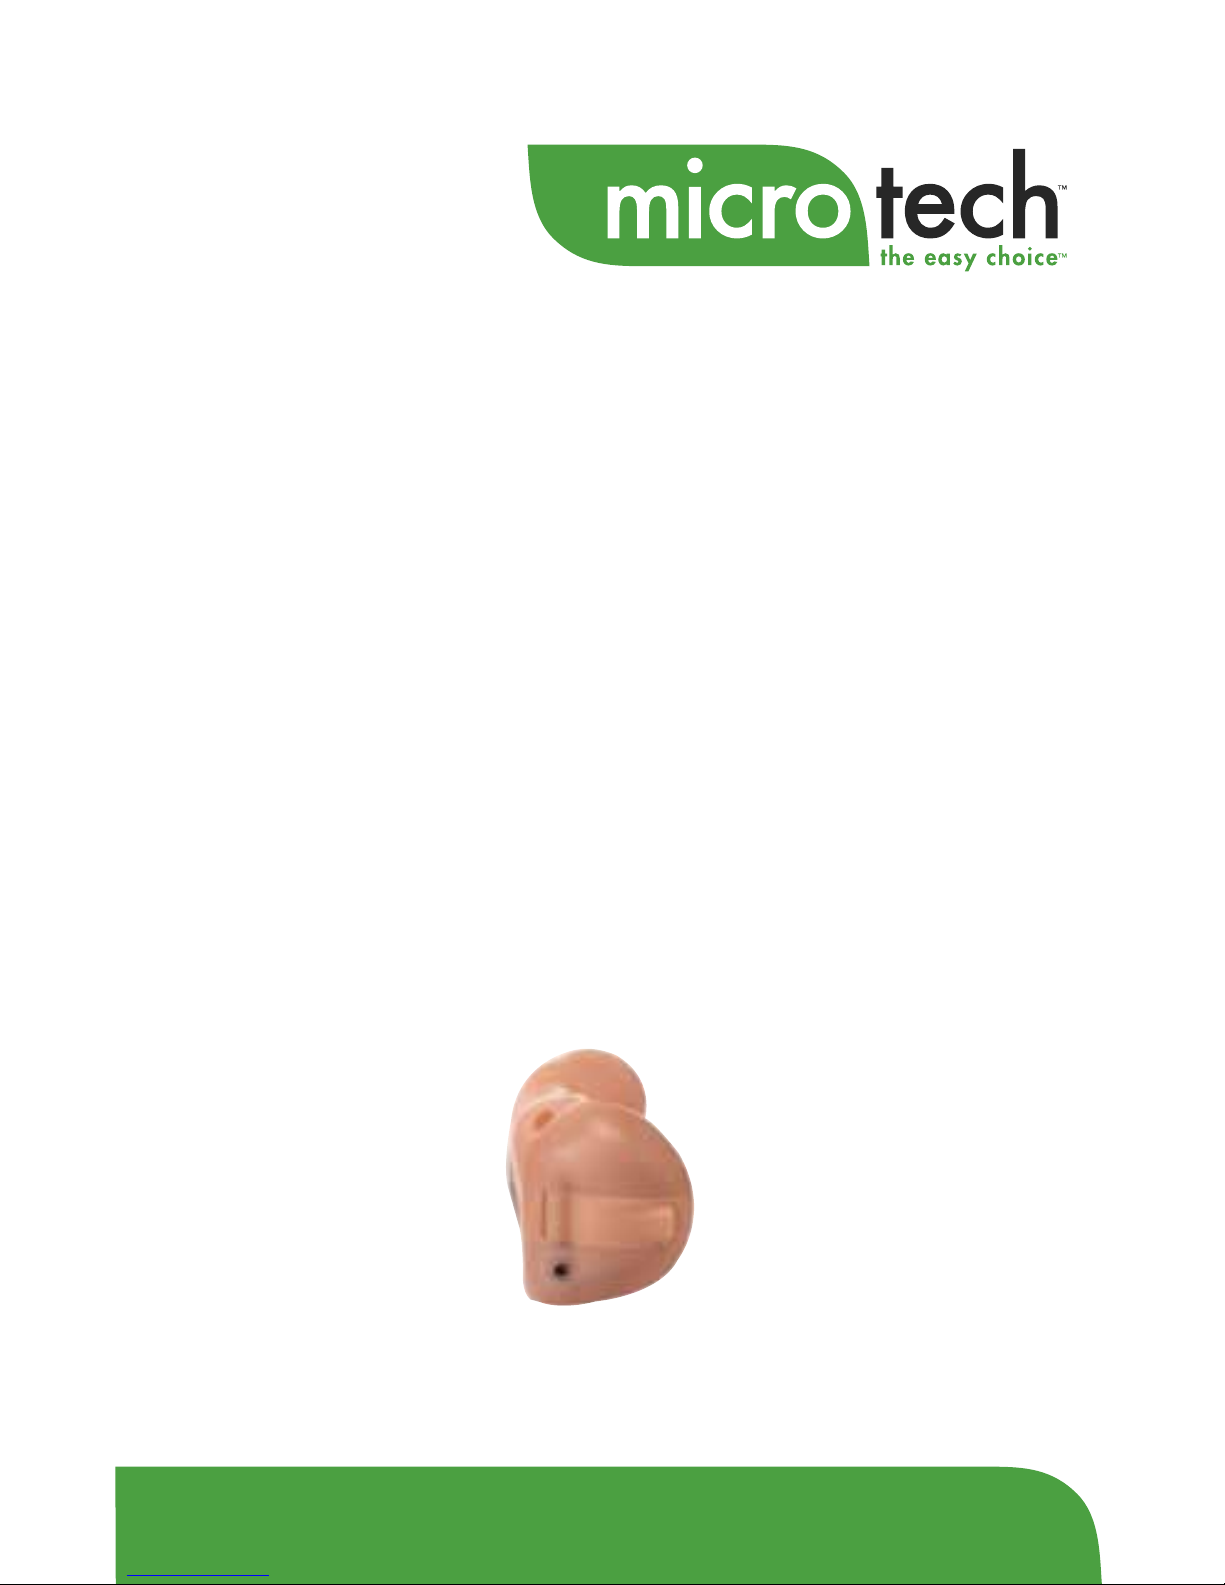
You have Mini-Canal or In-The-Canal (ITC) hearing
instruments. Your hearing instruments were made
for you, to treat your hearing loss. Your hearing
professional will check which features your hearing
instruments have.
ABOUT YOUR HEARING INSTRUMENTS
Your hearing instrument features include:
Multimemory settings
Automatic telephone response
Automatic telecoil
Telecoil
Directional microphones
Page 5
3
Your hearing instruments
may contain a different
combination of features
and controls, depending
on the specific options
selected for you.
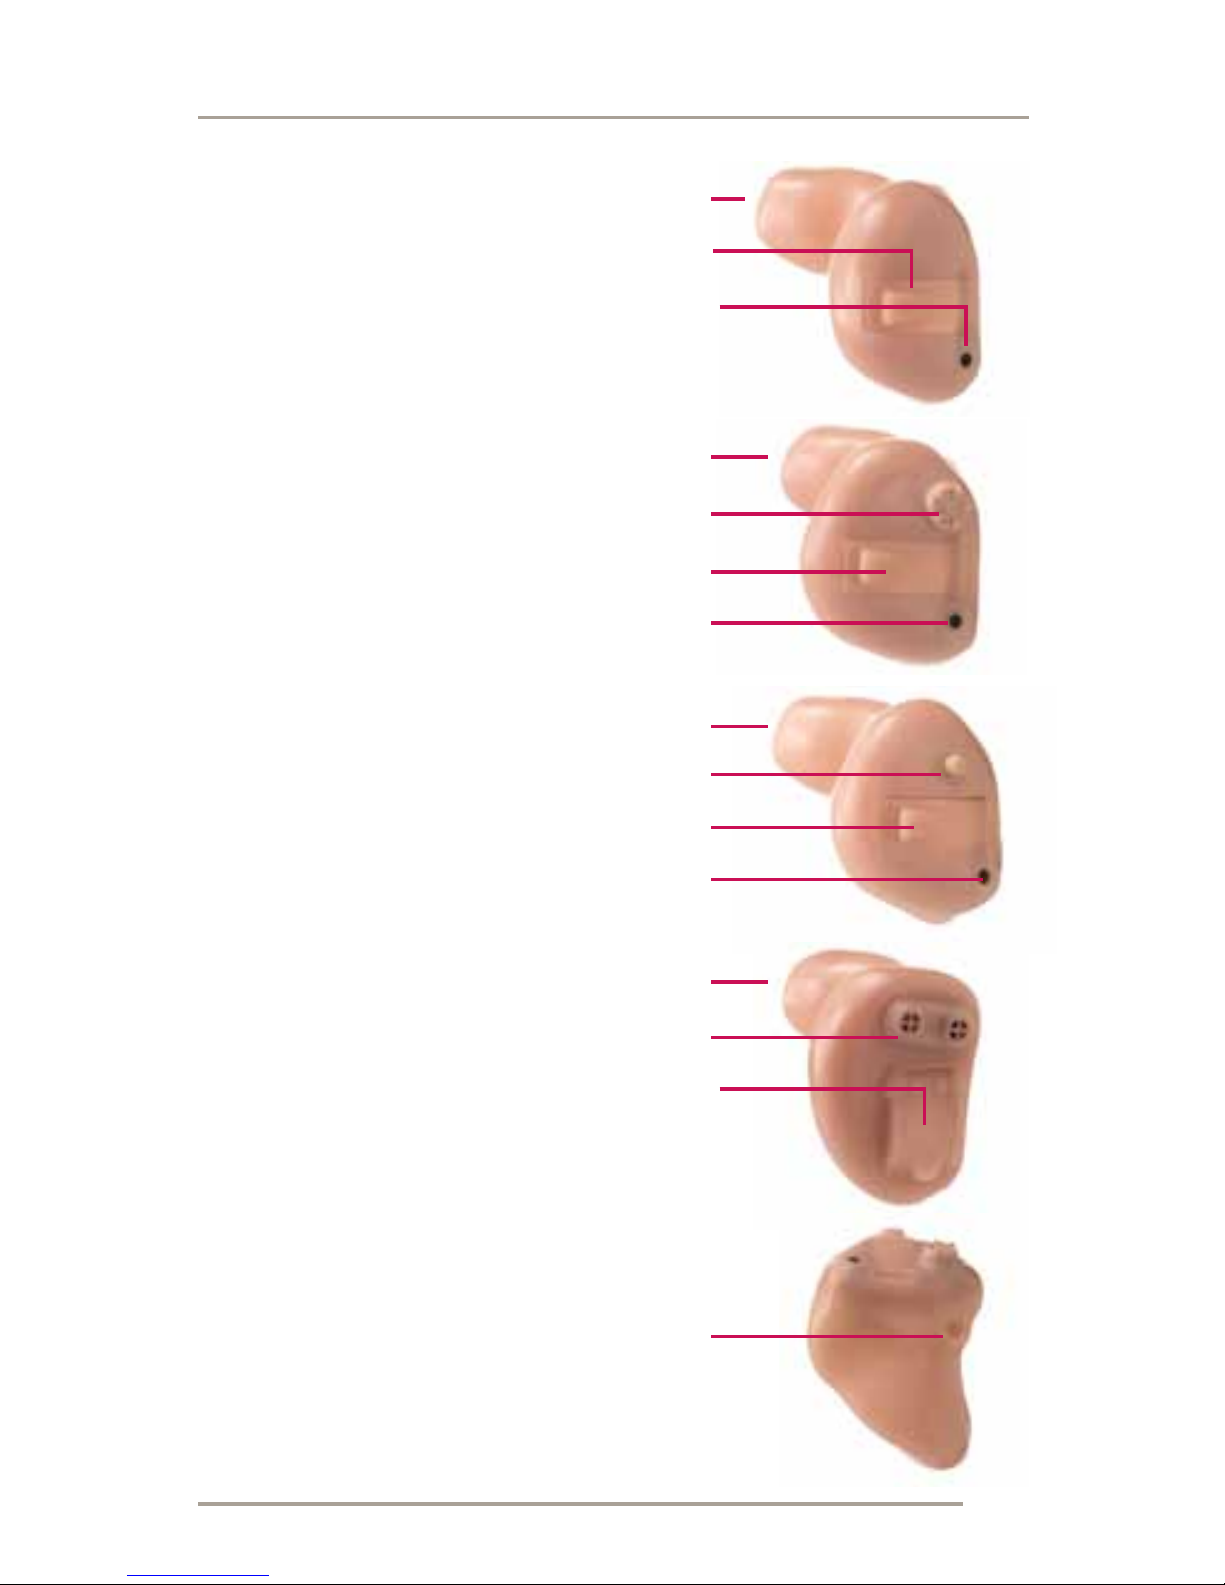
FEATURES AND CONTROLS
1 = MICROPHONE
SOUND INLET(S)
2 = BATTERY
COMPARTMENT
3 = MULTIMEMORY
BUTTON (OPTIONAL)
4 = VOLUME CONTROL
(OPTIONAL)
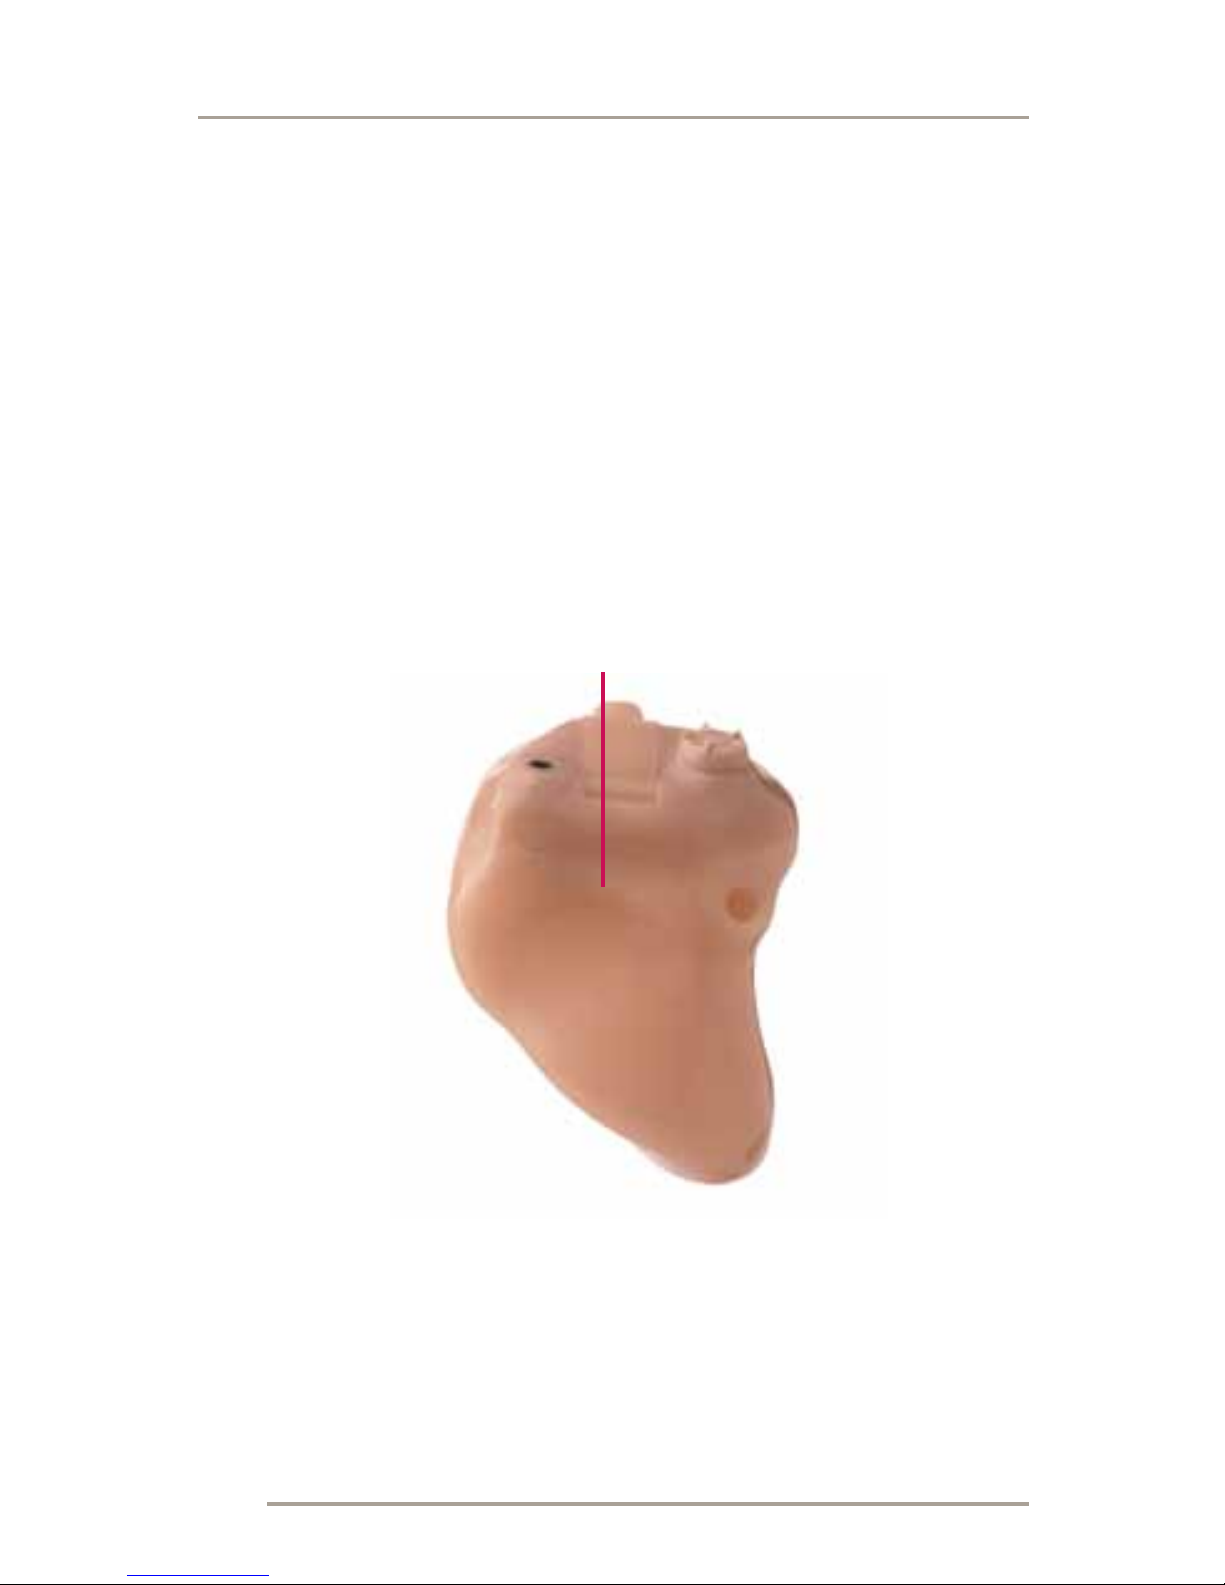
5 = VENT (OPTIONAL)
6 = RECEIVER OPENING
6
4
2
1
6
1
2
Page 6
4
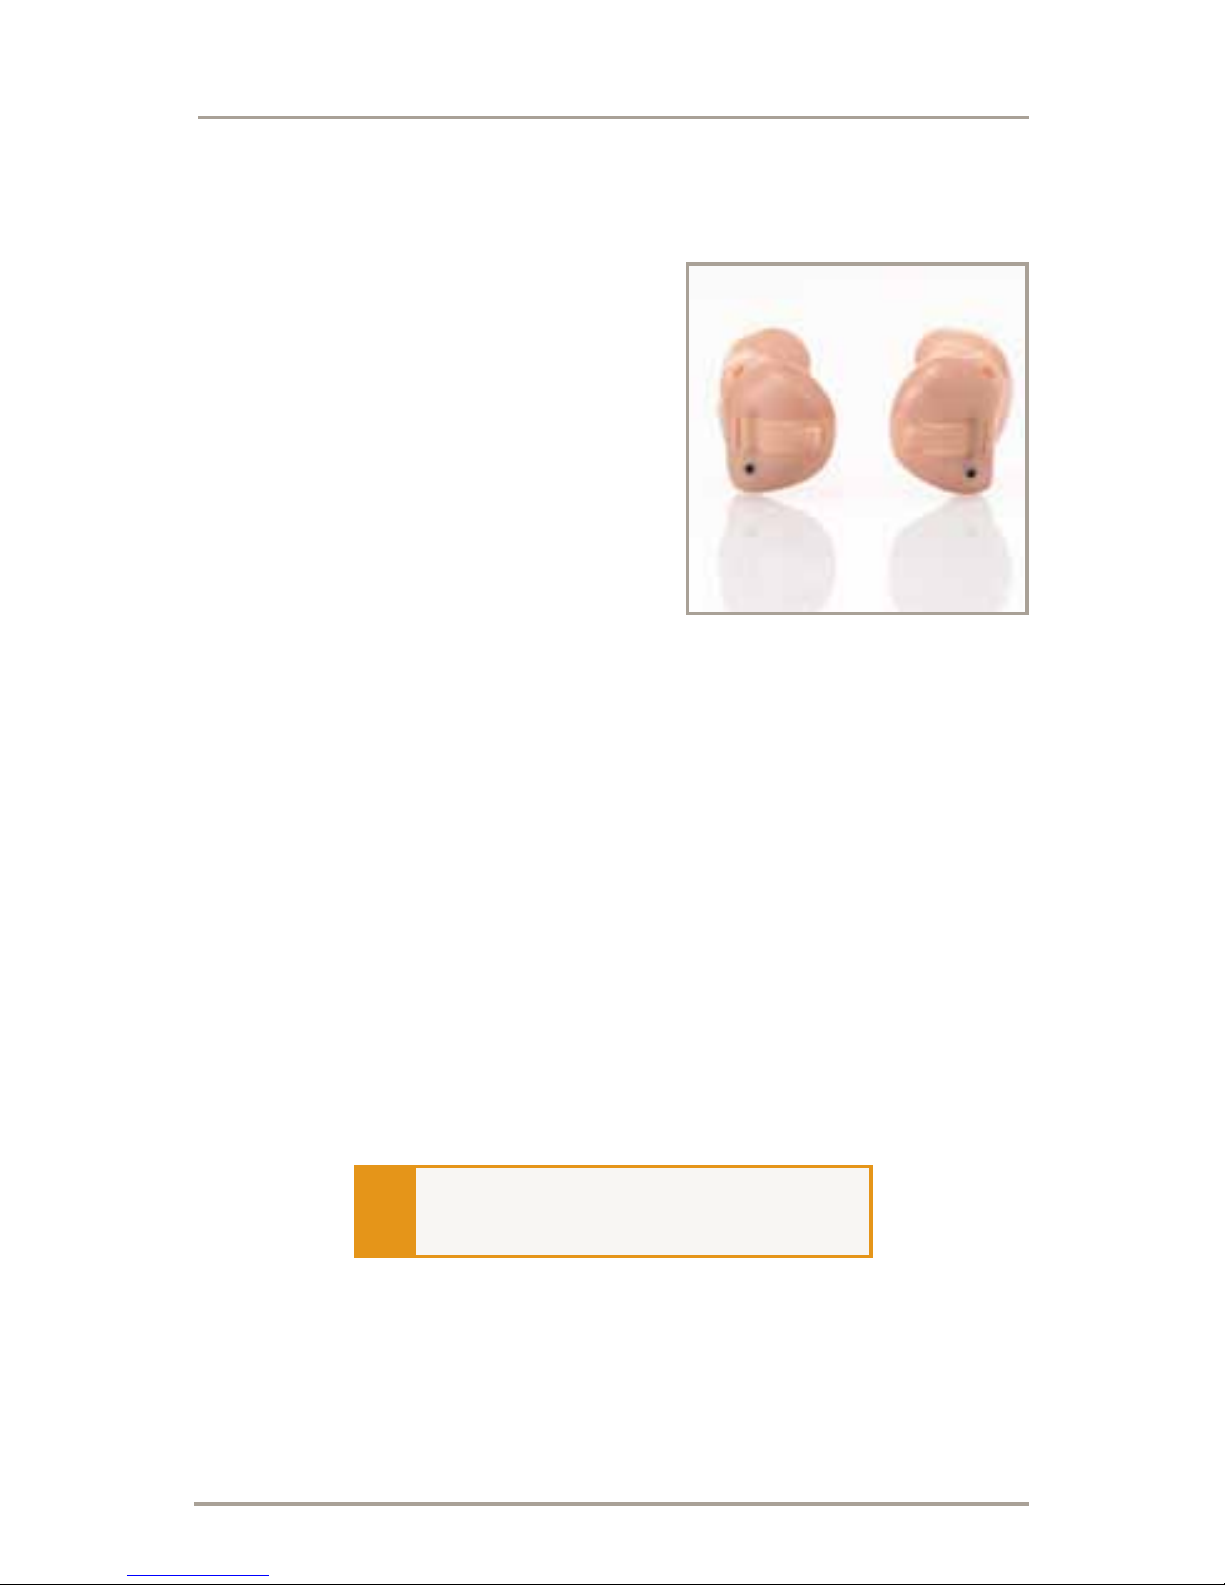
Each instrument can be identified by its serial
number, located on the outside shell.
Serial Number and Identification
Your hearing instruments are identified by the color
marking of the serial number on the shell of the
instrument. RED is for RIGHT, while BLUE is for LEFT.
IDENTIFICATION
00-00000000
Page 7
5
Battery Size
Battery sizes can be identified by a color code on
the packaging. Instruments like yours commonly
use either a size 10A battery (yellow marking on the
package), or size 312 battery (brown marking on
the package).
It is very important to use the correct size and type
battery for your hearing instrument.
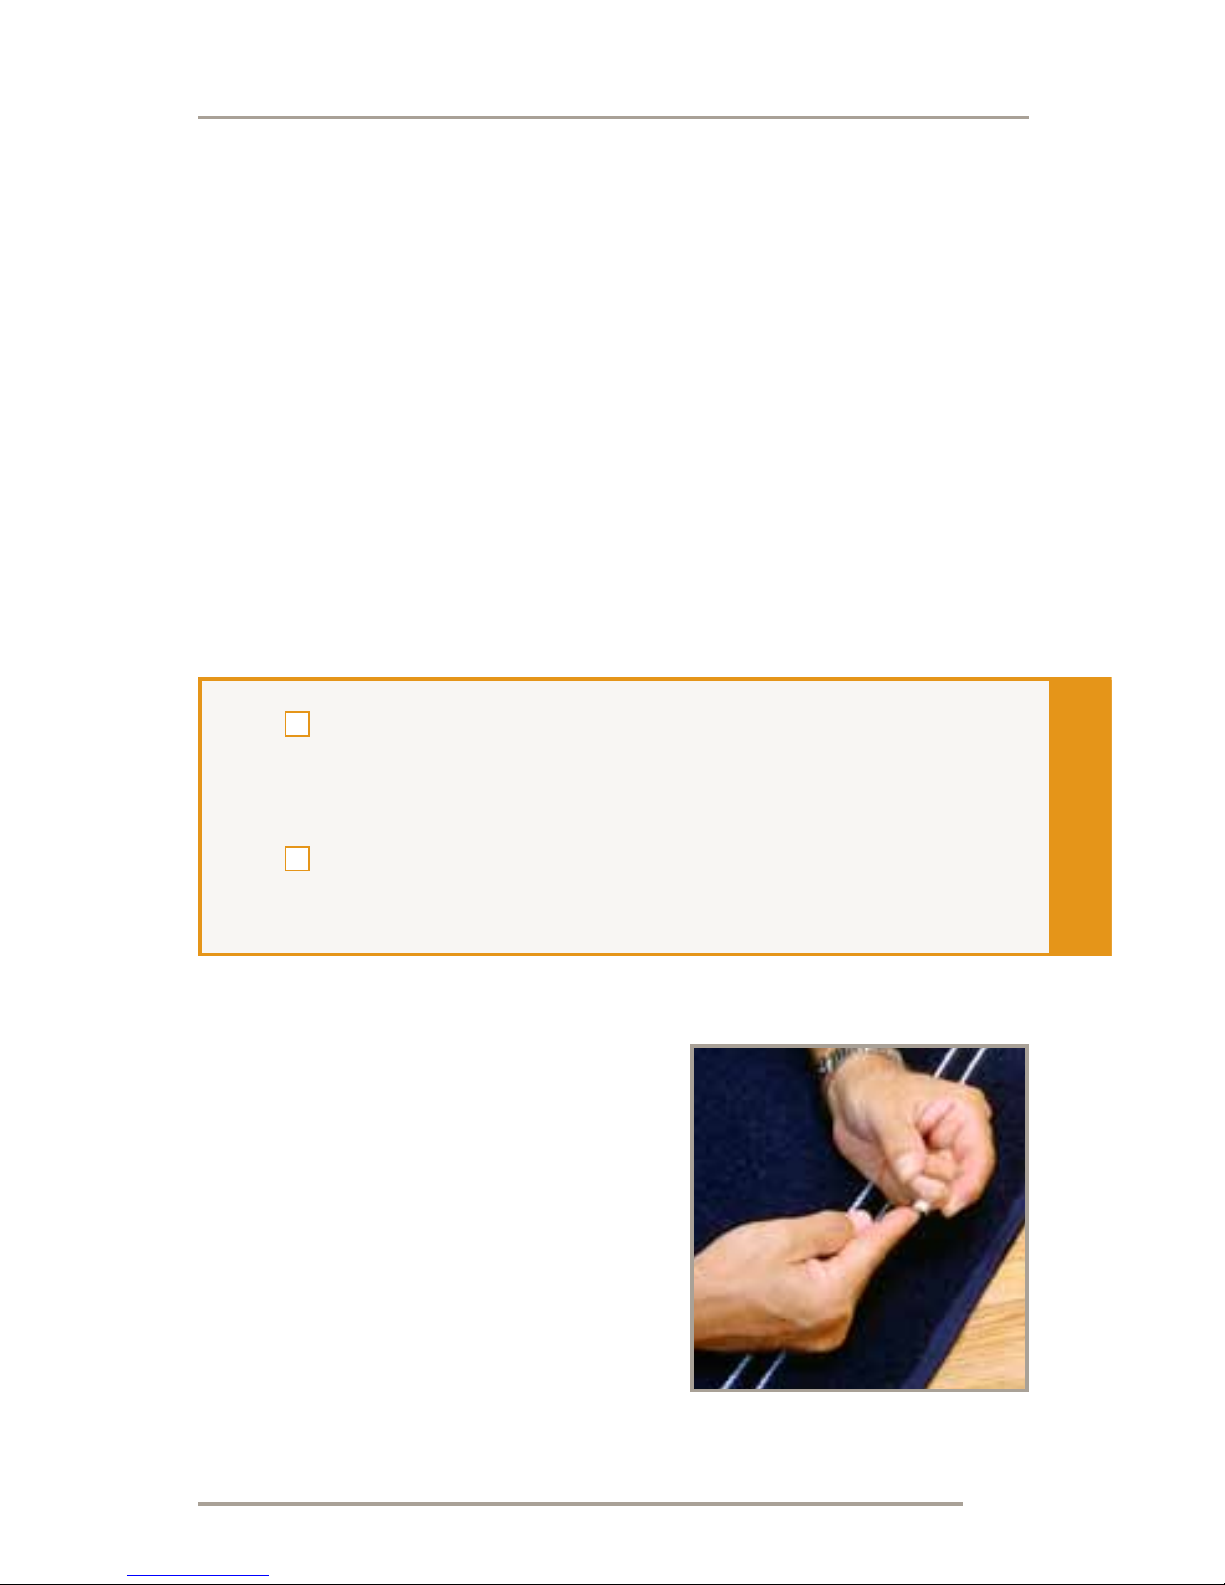
Because of their size, it’s a
good idea to change and
replace batteries at a table
or desk to reduce the risk of
dropping the instrument
or battery.
BATTERIES
Your hearing instruments use a size _______
battery.
Your batteries have a _________ mark on
the package.
Page 8

6
To insert or replace
the battery, open the
compartment by placing
your fingernail under the
edge of the swing-out door
and gently pulling outward.
Do not open the battery
door too far or damage is
likely to occur.
Changing Batteries
Remove the old battery by
pushing it out the top of the
fully opened door.
DO NOT pull it out the side
of the door.
Place the new battery in the
compartment with the plus (+) sign facing up.
BATTERIES
Page 9

7
Close the battery
compartment by swinging
the door until it snaps shut.
NEVER FORCE THE DOOR
SHUT. This could result
in serious damage. If the
door will not close easily,
check that the battery is placed properly in the
compartment and is not upside down.
Low Battery Indicator
Your hearing professional will check the box below
if the low battery indicator for your instruments is
turned on.
When the low battery indicator is turned on, your
hearing instruments will beep four times going from
a high-to-low pitch when the battery’s voltage is low.
Replace the battery when you hear these tones.
BATTERIES
The low battery indicator is turned on.
Page 10

8
When the battery is too weak to power the hearing
instrument, you will hear a tone for two seconds and
the instrument will shut down. Replace the battery
when this happens.
Battery Caution
Because batteries can vary in size and performance,
your hearing professional is your best source for
lifespan estimates and verification that you are using
the proper size and type.
To help prevent the accidental ingestion of batteries,
keep them out of the reach of children and pets.
Always check your medication before ingesting –
batteries have been mistaken for pills.
BATTERIES
m WARNING:
HEARING INSTRUMENT BATTERIES ARE
DANGEROUS IF SWALLOWED.
National Button Battery
Ingestion Hotline
(202) 625-3333
Page 11

9
Never put batteries in your mouth for any reason,
as they can easily be unintentionally swallowed.
Dispose of used batteries immediately,
using the proper waste or
recycling receptacle.
BATTERIES
Page 12

10
Before placing your instruments into your ears, make
certain the batteries are inserted properly and the
battery doors are closed securely.
NEVER use the battery compartment door to insert
or remove the instrument! Damage may occur, as the
door is not designed to withstand the pressure.
To insert your instrument, hold it between your
thumb and forefinger with
the volume control toward
the top of your ear. The
battery compartment should
be facing away from your
ear canal.
Note: If your hearing
instrument has directional
microphones, you will insert
the instrument with the
volume control toward the
bottom of your ear.
INSERTION AND REMOVAL
Page 13

11
Gently push the instrument
in until it is resting
comfortably inside
your canal.
There are two methods
of removing the hearing
instrument from your ear.
One way is by using your
finger to gently massage the
area behind your earlobe.
The soft pressure should
work the instrument out of
your ear.
The other method is to reach
into the ear with the thumb
and forefinger, and gently
pull the instrument out.
INSERTION AND REMOVAL
Page 14

12
The volume control of your hearing instrument
enables you to turn the instrument “on” and “off,” as
well as adjust the amount of amplification provided
by the instrument.
Your instruments are ready
for use when a functioning
battery is properly placed in
the compartment and the
battery door is closed.
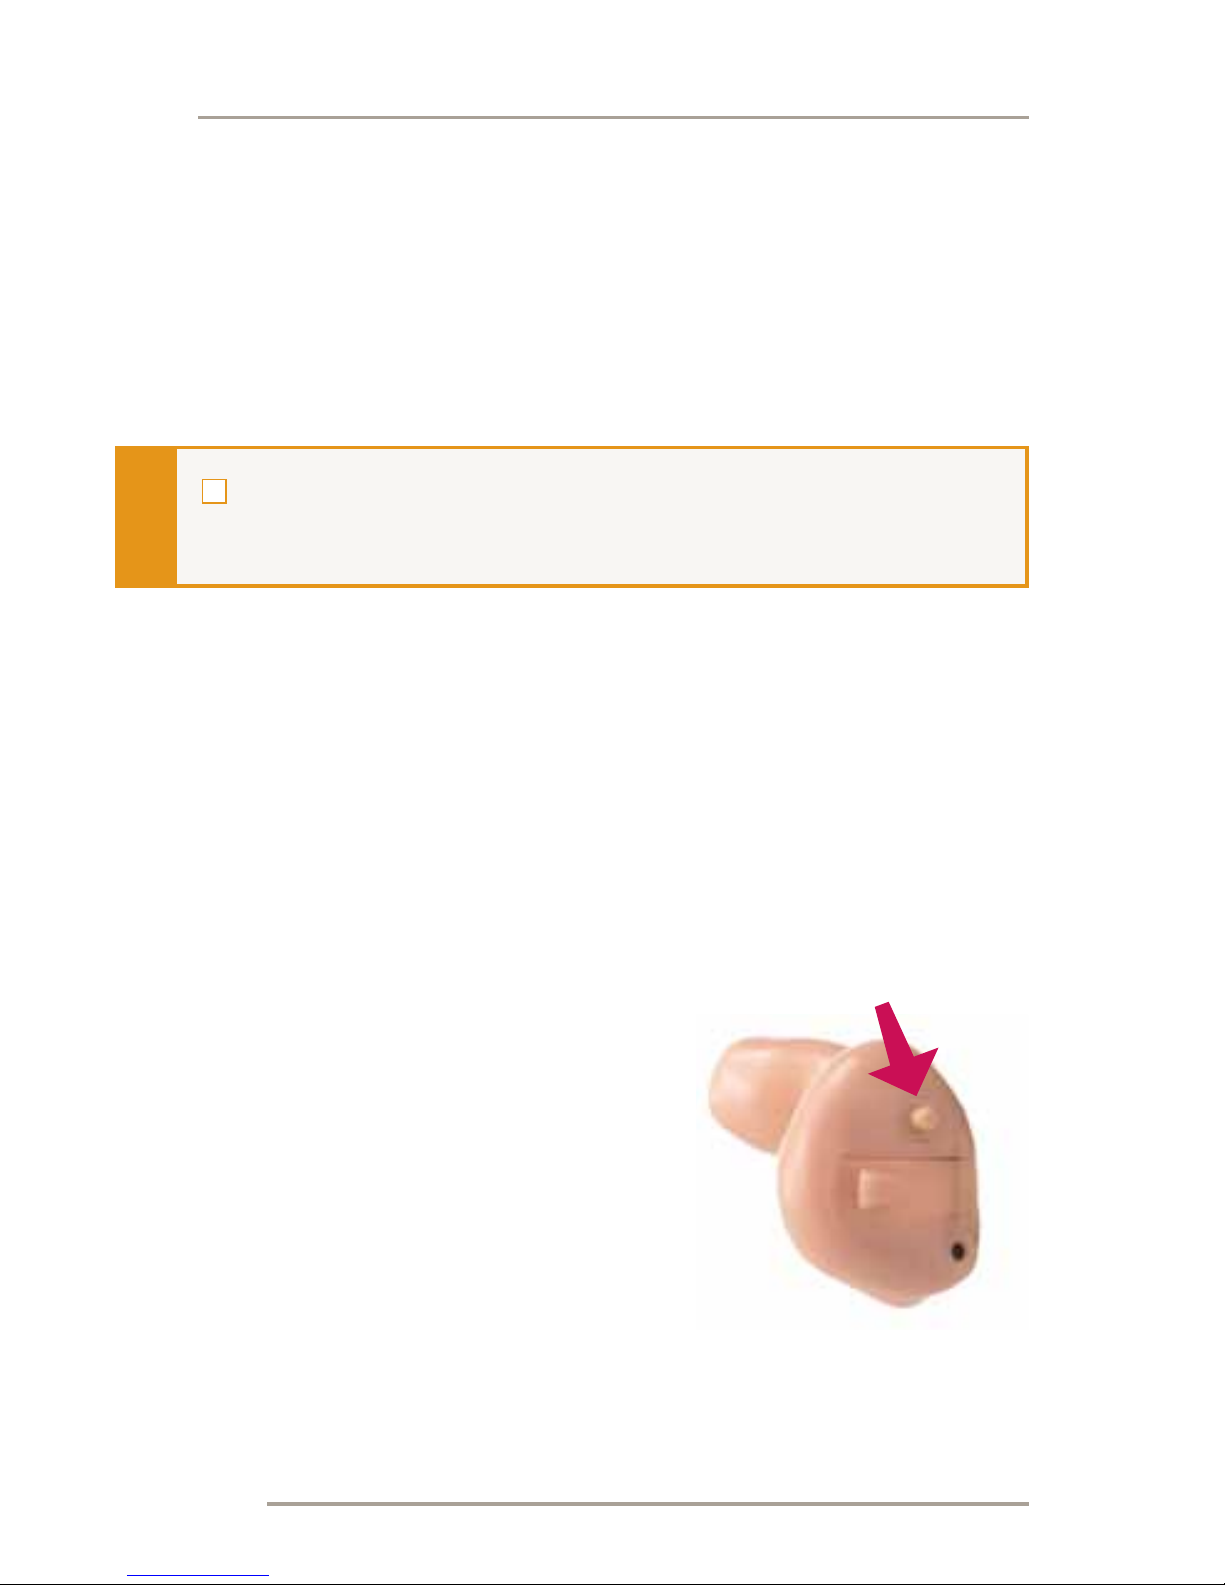
To turn the instrument “on,” use your fingertip to
rotate the volume control forward, toward your face.
You should feel it “click”
on if the instrument was
correctly turned off. To make
sounds louder, continue to
rotate the control forward,
toward your face. Your
hearing instruments may
be programmed to “beep”
when you reach the correct setting.
ON, OFF AND VOLUME CONTROL
ON OR VOLUME
INCREASE
Page 15

13
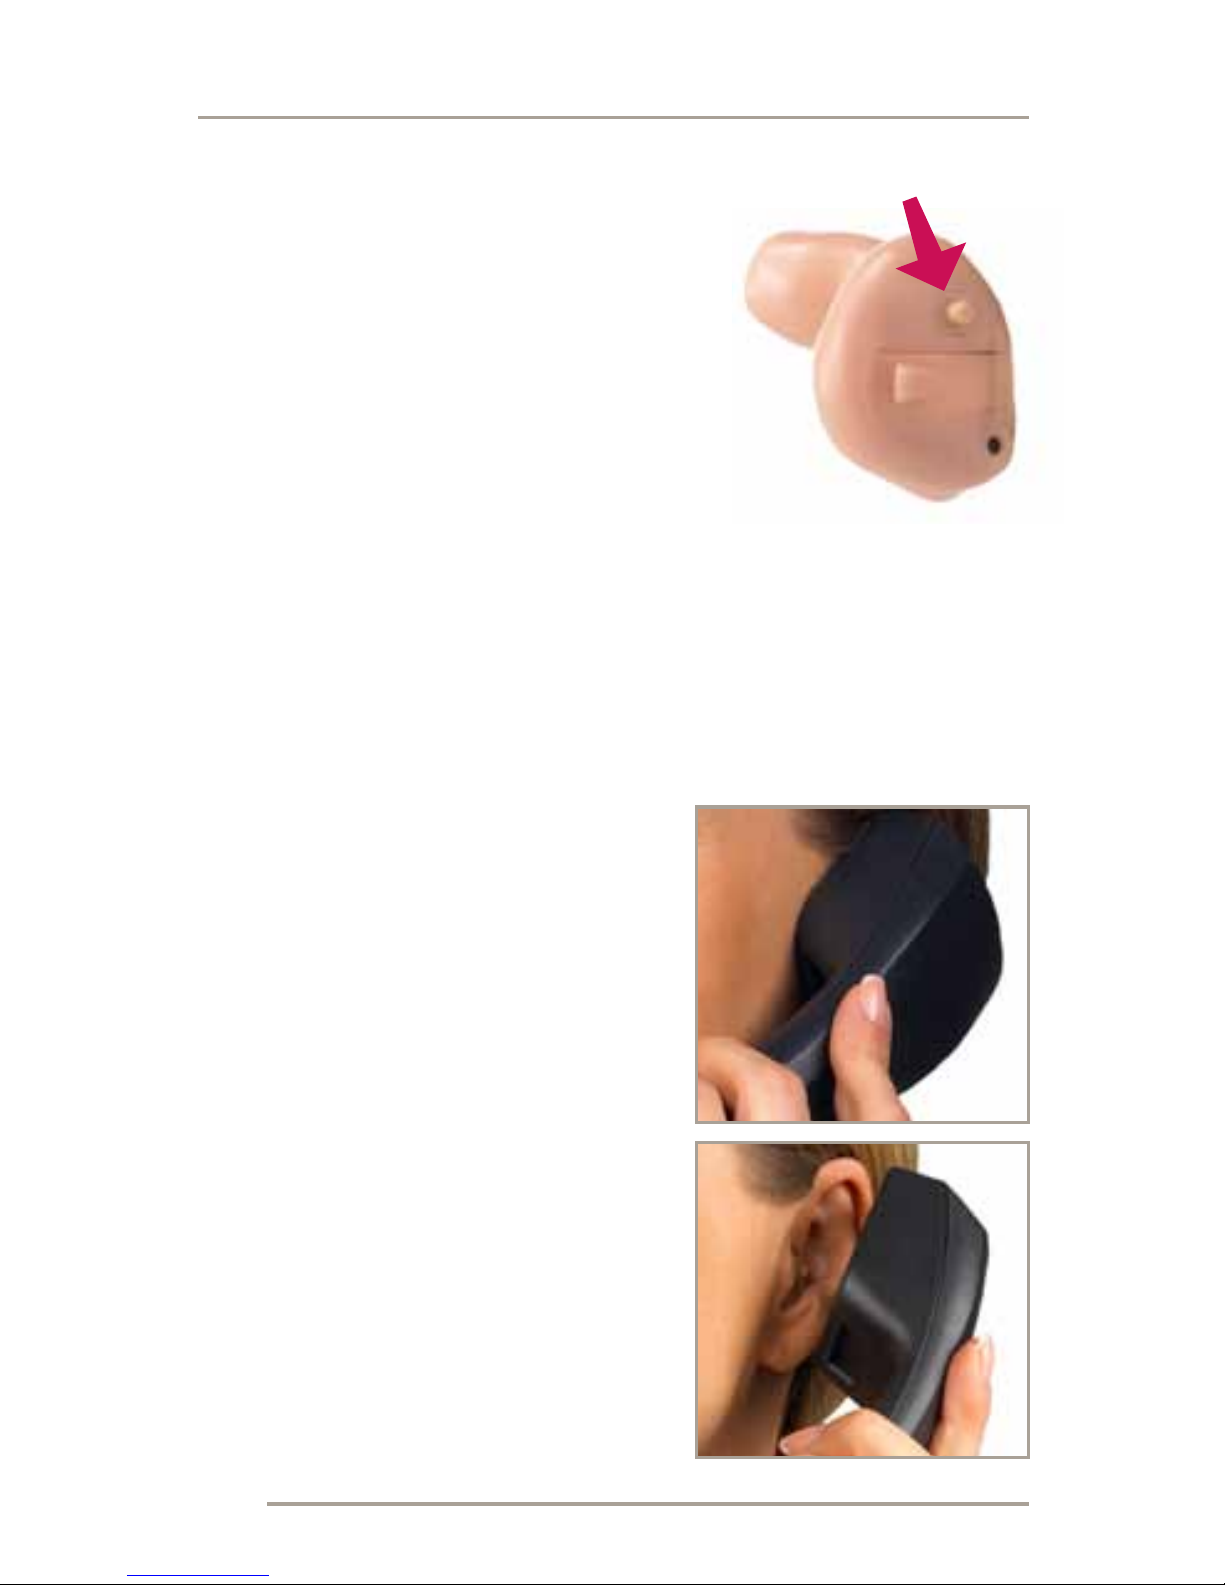
To make sounds softer, use
your fingertip to rotate the
control toward the back of
your head.
To turn the instrument “off,”
rotate the control further
backwards, until you feel it
“click” and the control no longer turns.
Some hearing instruments are programmed to have
a power on delay. Your hearing professional will
check the box below if your hearing instruments have
this feature.
The power on delay means that your instruments will
take several seconds to power up once they have
been turned on. This feature allows you to get the
hearing instruments in your ear before they start to
amplify sound.
ON, OFF AND VOLUME CONTROL
Your hearing instruments have a power
on delay.
DECREASE VOLUME
OR OFF
DECREASE VOLUME
OR OFF
Page 16
14
Multimemory Settings
Your hearing professional will place a check in
the box below if your hearing instruments have a
multimemory push button.
While your hearing instruments make many
adjustments automatically, the multimemory push
button lets you select a different memory setting
for your current listening environment; for example,
when you are using the telephone or sitting in a
noisy restaurant.
When first turned on, your
instruments are most likely
programmed for normal
listening environments.
Additional settings are
accessed by pressing
the button on the
hearing instrument.
OPTIONAL FEATURES
Your hearing instruments have a multimemory
push button.
Page 17

15
When changing the settings, there may be an audible
beep or indicator to let you know where the memory
is located. For example, the hearing instrument will
beep twice for memory 2. Your hearing professional
will work with you to set the memories to your
preference. With your hearing professional, use the
table below to write in the memory settings for
your instruments.
MEMORY
NO.
ENVIRONMENT/
LISTENING SITUATION
BEEP/
INDICATOR
1
2
3
4
Special Instructions:
OPTIONAL FEATURES
Page 18

16
Your hearing instruments are equipped with
tools to help you effectively communicate on the
telephone. Your hearing professional will check the
box/boxes that represent the telephone settings in
your instruments.
USING THE TELEPHONE
Your hearing instruments have the following
telephone setting(s):
Automatic telephone response
Automatic telecoil
Telecoil. The telecoil is located in memory
position ________.
A beep or indicator tone is enabled on your
instruments to signal you when the device
switches to the telephone setting
Page 19

17
Automatic Telephone Response and
Automatic Telecoil
These options activate the telephone response
automatically when used with a hearing aid
compatible telephone. To use, place the telephone
receiver on your ear as you normally would and
the hearing instrument will select the telephone
setting. It might be necessary to move the telephone
receiver slightly to find the best reception. Once
the telephone is removed from the ear, the hearing
instrument will switch back to the normal
listening mode.
Note: If you have a hearing aid compatible phone,
but your Automatic Telephone Response or
Automatic Telecoil does not switch to the telephone
setting automatically, your hearing professional can
provide you with a small magnet to place on your
telephone receiver. This magnet will help activate
your automatic telephone option.
USING THE TELEPHONE
Page 20
18
Telecoil and Manual Switching
Hearing instruments with a
manual telecoil allow you to
switch the devices to telephone
mode when needed.
Manually switched telecoils
are activated by choosing the
telecoil setting using the multimemory button.
General Telephone Use
Some hearing instruments
work best by holding the
phone close to, but not fully
covering your ear. In some
instances, if you encounter
whistling (feedback), tilt the
receiver at an angle until
the whistling stops. Your
hearing professional can give
instructions and techniques
for your specific needs.
Page 21

19
USING THE TELEPHONE
Some hearing aid users have reported a buzzing
sound in their hearing aids when they are using cell
phones, indicating that the cell phone and hearing
aid may not be compatible. According to the ANSI
C63.19 standard (ANSI C63.19-2006 American
National Standard Methods of Measurement of
Compatibility Between Wireless Communications
Devices and Hearing Aids), the compatibility of
a particular hearing aid and cell phone can be
predicted by adding the rating for the hearing aid
immunity to the rating for the cell phone emissions.
For example, the sum of a hearing aid rating of 2
(M2/T2) and a telephone rating of 3 (M3/T3) would
result in a combined rating of 5. Any combined rating
that equals at least 5 would provide “normal use”;
a combined rating of 6 or greater would indicate
“excellent performance.”
The immunity of this hearing aid is at least M2/T2. The
equipment performance measurements, categories
and system classifications are based upon the best
information available but cannot guarantee that all
users will be satisfied.
Page 22

20
NOTE: The performance of individual hearing aids
may vary with individual cell phones. Therefore,
please try this hearing aid with your cell phone or, if
you are purchasing a new phone, be sure to try it with
your hearing aid prior to purchase. For additional
guidance, please ask your cell phone provider for
the booklet entitled “Hearing Aid Compatibility with
Digital Wireless Cell Phones.”
USING THE TELEPHONE
Page 23

21
Special Instructions:
USING THE TELEPHONE
Page 24

22
If you have directional microphones, your hearing
professional will place a check in the appropriate
box below:
Your hearing instruments
are equipped with directional
microphones to help
improve understanding
in noisy situations like
restaurants, parties, and
other crowded environments.
When the directional
microphones are
automatically activated, or
activated by pushing the
multimemory push button,
DIRECTIONAL MICROPHONES
Your directional microphones are
activated automatically.
Your directional microphones are activated by
pushing the multimemory push button. The
memory position is _________.
Page 25

23
sounds that are in front of you will become more
audible, while sounds from the sides and behind you
will be reduced.
When your instruments are in the directional mode, it
is especially important that you face people you are
listening to and keep them in your direct line of sight.
Special Instructions:
DIRECTIONAL MICROPHONES
Page 26

24
Feedback is caused by amplified sounds escaping
from the ear canal that make their way back to the
instrument’s microphone. Your new instruments use
the most advanced digital technology available with
a unique feedback suppression program. If feedback
occurs after the instrument has been inserted
correctly and the volume set to a comfortable level,
contact your hearing professional.
FEEDBACK
Page 27

25
Your hearing instruments represent the ultimate
in miniature technology, especially when you
consider the environment in which they function.
Heat, moisture and foreign substances can result in
degraded performance.
Proper care and maintenance go a long way toward
ensuring trouble-free performance. Do your best
to keep the hearing instruments clean at all times.
Handling the hearing instruments with clean hands is
a good starting point. In addition:
Clean the Hearing Instruments Daily
• Itisagoodideato
perform all cleaning and
battery changes above
a soft cloth on a desk
or table; this will keep
the instrument from a
damaging fall to a hard
surface if dropped
HANDLING AND CARE
Page 28
26
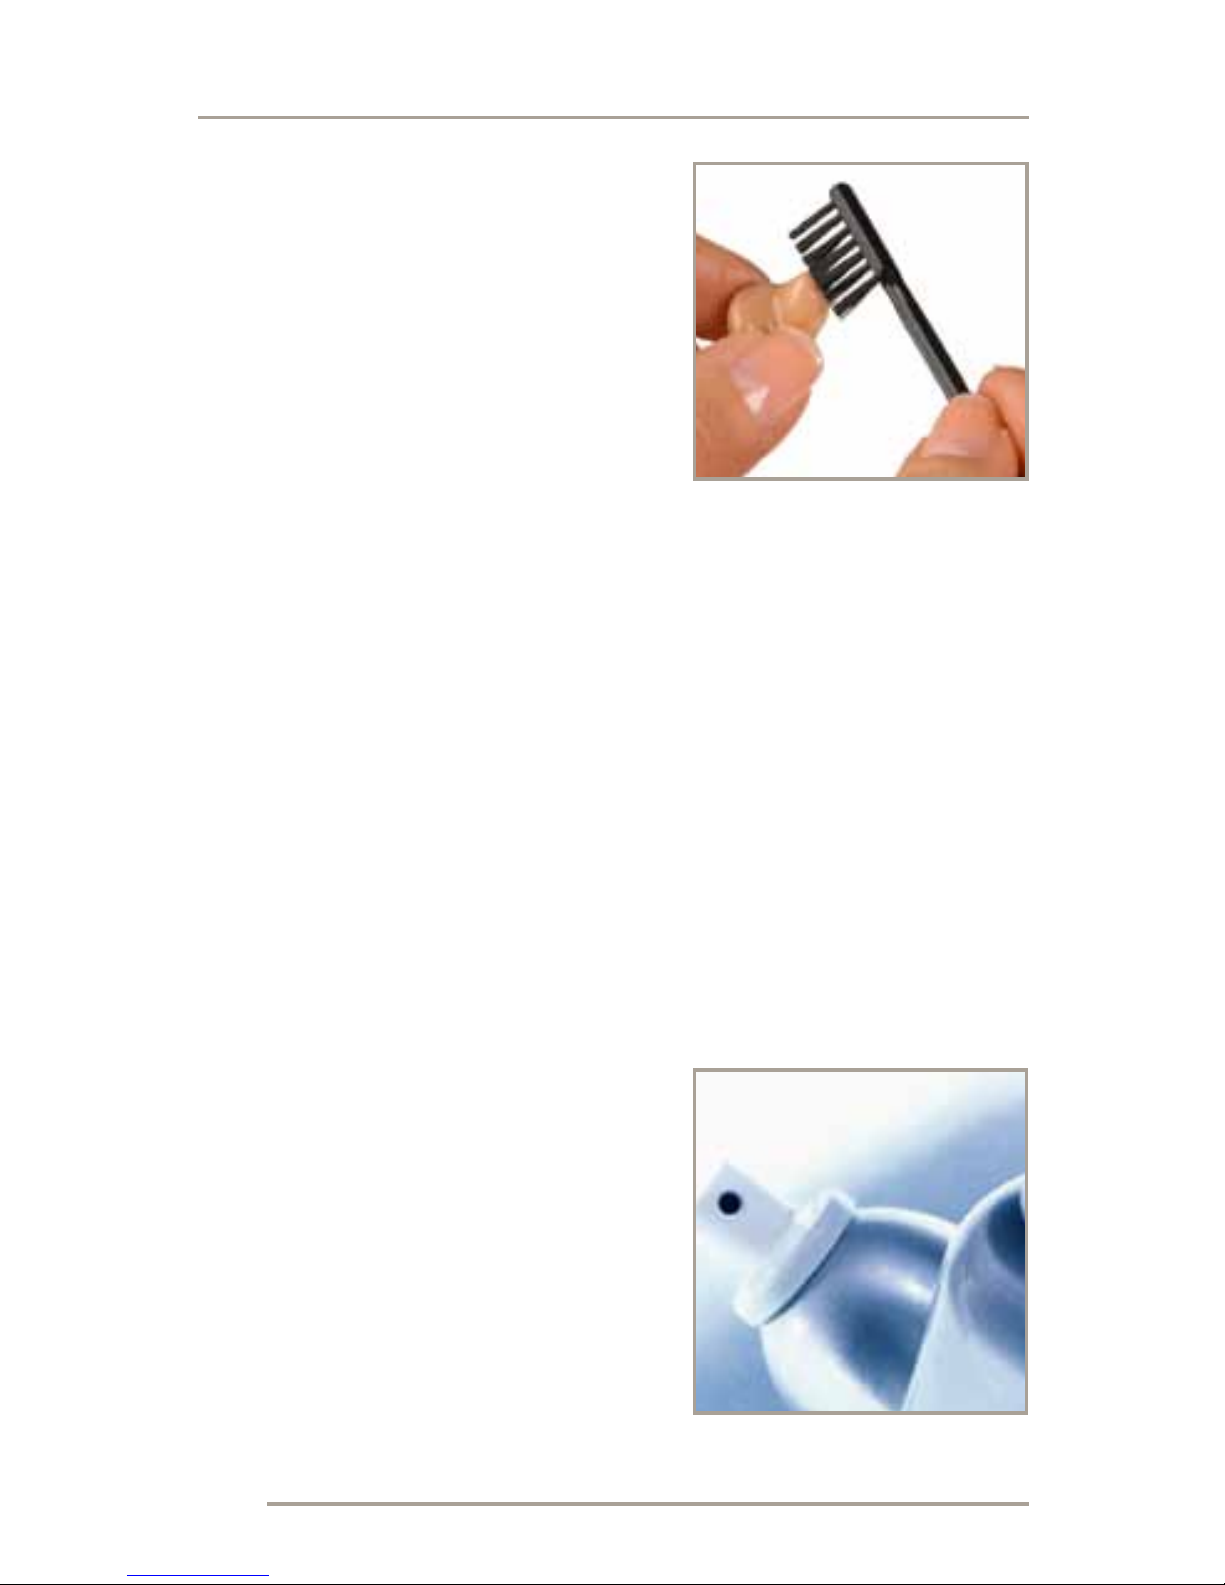
• Usethecleaningbrush/
waxloop and/or a soft, dry
cloth to remove earwax or
other particles that may
accumulate around the
canal, volume control,
and battery compartment;
never use water, solvents,
cleaning fluids or oil to clean your instruments
• Becarefulnottoinsertthecleaningtoolsinto
the inside of the hearing aid and never take your
hearing instruments apart
• Ifyourhearingaidhasawaxguard,consultthe
instructions that come with it and talk to your
hearing professional
• Donotwearyourhearing
instruments while using
hair spray, spray paint,
or any other sticky
sprays that can clog
the microphone
HANDLING AND CARE
W
Page 29

27
Store Your Hearing Instruments in a Dry, Safe
Place Away from Direct Sunlight or Heat to Avoid
Extreme Temperatures
• Whennotwearingyourhearinginstruments,turn
them off and open the battery compartment door
• Storeyourinstruments
where you can easily find
them, but safely out of
reach of pets and children;
hearing instruments
can attract curious pets
resulting in possible
damage or being chewed
beyond repair
HANDLING AND CARE
W
Page 30

28
Keep Your Hearing Instruments Away from Moisture
• Yourinstrumentsmaybe
so comfortable that you
forget you are wearing
them; develop the habit
of checking your ears
before going swimming
or taking a shower; do
the same with clothing
pockets before they
are washed
• Shouldyourhearing
instruments get wet,
dispose of the battery
and set the instrument
on a towel in a safe place, leaving the battery
compartment door open to promote air
drying overnight
• Nevertrytodryouthearinginstrumentsby
putting them in a microwave or oven, or by using a
blow dryer
HANDLING AND CARE
W
W
Page 31

29
When to Call Your Hearing Professional
• Severereactions,dischargefromtheear,
excessive wax, or other unusual conditions warrant
immediate medical attention
• Painorsorenessinoraroundtheearisnormally
caused by pressure from the earmold on a
particularly sensitive area, and may easily be
corrected through trimming and polishing by your
hearing professional
• Ifforanyreasonaninstrumentfails,donot
attempt to fix it yourself; this will likely violate any
applicable warranties. Should your instruments
fail or perform unsatisfactorily, first check the
troubleshooting guide on page 28; if problems
persist, contact your hearing professional.
HANDLING AND CARE
Page 32

30
SYMPTOM POSSIBLE
CAUSES
SOLUTIONS
Not Working
Low battery Replace battery
Blocked
receiver
opening
Clean the
devices
(see page 23)
Not Loud
Enough
Blocked
receiver
opening
Clean the
devices
(see page 23)
When was your
hearing last
checked?
Contact
your hearing
professional
Intermittent
Moisture Follow
instructions on
page 26
Defective
device
Contact
your hearing
professional
Automatic
Telephone
Response
Not
Switching
Telephone
does not
have a strong
enough signal
to activate the
switching
See your
hearing
professional
for magnet
TROUBLESHOOTING GUIDE
Page 33

31
Helpful Reminders for You
How quickly you adjust to your hearing instruments
depends on how often you wear them. However,
don’t assume that you will hear and understand all
speech with your hearing instruments. When you
first start, you will notice an increase in the noise
levels around you. This noise has probably always
been there, but with your hearing loss, you might
not have noticed this background noise. Remember
that it may take awhile to get used to hearing sounds
louder than before. As with anything new, it will take
time and patience as you adapt to this new way
of hearing.
Hearing is only part of how we exchange thoughts,
ideas and feelings. Reading lips, facial expressions
and gestures can enhance the learning process and
supplement what amplification alone may miss. It
is important to keep in mind that the best way to
communicate is by:
COMMUNICATION STRATEGIES
Page 34

32
• Lookingatthe
person who is
speaking and sitting
face-to-face in a
quiet room
• Minimizing
distractions; for
example, doing
dishes at the sink
and trying to have
a conversation is
difficult even
for those with
normal hearing
• Movingcloserto
the speaker and
within sight
COMMUNICATION STRATEGIES
W
Page 35

33
• Tryingdifferent
locations in a
room that has
poor acoustics
• Lettingothersknow
what you need;
remember that most
people don’t know you and cannot “see” your
hearing problem
• Rememberingyoumighthaveamemorysetting
for a specific situation
COMMUNICATION STRATEGIES
Page 36

34
Helpful Reminders for Your Friends and Family
Many people initially treat hearing problems as an
individual matter, something that can be dealt with
by themselves. Remember that communication
involves more than just one person. The continued
understanding and support of family and friends are
crucial as you pursue improved hearing. Your friends
and family can help by:
• Beingsuretheyhave
your full attention
before beginning
to speak
• Lookingatyouor
sitting face-to-face
in a quiet room
• Speakingclearlyand
at a normal rate; shouting or talking directly
into the ear can actually make understanding
more difficult
COMMUNICATION STRATEGIES
Page 37

35
• Rephrasingratherthanrepeatingthesamewords
over, as you may find it easier to understand
different words
• Minimizing
distractions by not
speaking with a full
mouth, covering
their mouth, or with
distractions such as
a television or radio
COMMUNICATION STRATEGIES
W
Page 38

36
FDA INFORMATION
The following additional information is provided in compliance
with U.S. Food and Drug Administration (FDA) regulations:
WARNING TO HEARING AID DISPENSERS. A hearing aid
dispenser should advise a prospective hearing aid user to consult
promptly with a licensed physician (preferably an ear specialist)
before dispensing a hearing aid if the hearing aid dispenser
determines through inquiry, actual observation, or review of any
other available information concerning the prospective user, that
the prospective user has any of the following conditions:
i. Visible congenital or traumatic deformity of the ear.
ii. History of active drainage from the ear within the previous
90 days.
iii. History of sudden or rapidly progressive hearing loss within
the previous 90 days.
iv. Acute or chronic dizziness.
v. Unilateral hearing loss of sudden or recent onset within the
previous 90 days.
vi. Audiometric air-bone gap equal to or greater than
15 decibels at 500 Hertz (Hz), 1,000 Hz and 2,000 Hz.
vii. Visible evidence of significant cerumen accumulation or a
foreign body in the ear canal.
viii. Pain or discomfort in the ear.
Special care should be exercised in selecting and fitting a hearing
aid whose maximum sound pressure level exceeds 132 decibels
because there may be risk of impairing the remaining hearing of
the hearing aid user.
RF IMMUNITY RATING. These hearing aids have a cell phone
immunity rating of M2/T2. For your cell phone to be compatible
with these hearing instruments, the cell phone needs an immunity
rating of M3/T3 or higher. Please consult your cell phone
specifications for your cell phone immunity rating.
IMPORTANT NOTICE FOR PROSPECTIVE HEARING AID USERS.
Good health practice requires that a person with a hearing loss
have a medical evaluation by a licensed physician (preferably a
physician who specializes in diseases of the ear) before purchasing
a hearing aid. Licensed physicians who specialize in diseases of
Page 39

37
FDA INFORMATION
MicroTech Hearing Instruments
6425 Flying Cloud Drive
Eden Prairie, MN 55344
www.mthearing.com
the ear are often referred to as otolaryngologists, otologists,
or otorhinolaryngologists. The purpose of the medical evaluation
is to assure that all medically treatable conditions that may affect
hearing are identified and treated before the hearing aid
is purchased.
Following the medical evaluation, the physician will give you
a written statement that states that your hearing loss has been
medically evaluated and that you may be considered a candidate
for a hearing aid. The physician will refer you to an audiologist or
hearing aid dispenser, as appropriate, for a hearing aid evaluation.
The audiologist or hearing aid dispenser will conduct a hearing aid
evaluation to assess your ability to hear with and without a hearing
aid. The hearing aid evaluation will enable the audiologist or
dispenser to select and fit a hearing aid to your individual needs.
If you have reservations about your ability to adapt to
amplification, you should inquire about the availability of a trialrental or purchase-option program. Many hearing aid dispensers
now offer programs that permit you to wear a hearing aid for a
period of time for a nominal fee after which you may decide if you
want to purchase the hearing aid.
Federal law restricts the sale of hearing aids to those individuals
who have obtained a medical evaluation from a licensed
physician. Federal law permits a fully informed adult to sign a
waiver statement declining the medical evaluation for religious or
personal beliefs that preclude consultation with a physician. The
exercise of such a waiver is not in your best health interest and its
use is strongly discouraged.
CHILDREN WITH HEARING LOSS. In addition to seeing
a physician for a medical evaluation, a child with a hearing
loss should be directed to an audiologist for evaluation and
rehabilitation since hearing loss may cause problems in language
development and the educational and social growth of a child. An
audiologist is qualified by training and experience to assist in the
evaluation and rehabilitation of a child with a hearing loss.
Page 40

© 2007-2010 MicroTech Hearing Instruments All Rights Reserved
79456-004 6/10 BKLT9456-06-EE-MT Rev. G
6425 Flying Cloud Drive
Eden Prairie, MN 55344
800.745.4327
www.microtechhearingpro.com
 Loading...