

Plain Heat Press Manual
Model. No.: SHT-15/20/24LP1
CONTENTS
I. Assembly Drawing -----------------------------------------------------------------------------------2
II. Technical Parameters ------------------------------------------------------------------------------2
III. Operation Process ----------------------------------------- --------------------------------------3-4
IV. Maintenance ------------------------------------------------------------------------------------------5
V. Trouble Shooting For Transfer Print Quality-----------------------------------------------5
VI. Circuit Diagram -------------------------------------------------------------------------------------6
VII. Explosion View ----------------------------------------------------------------------------------7-8
- 1 -
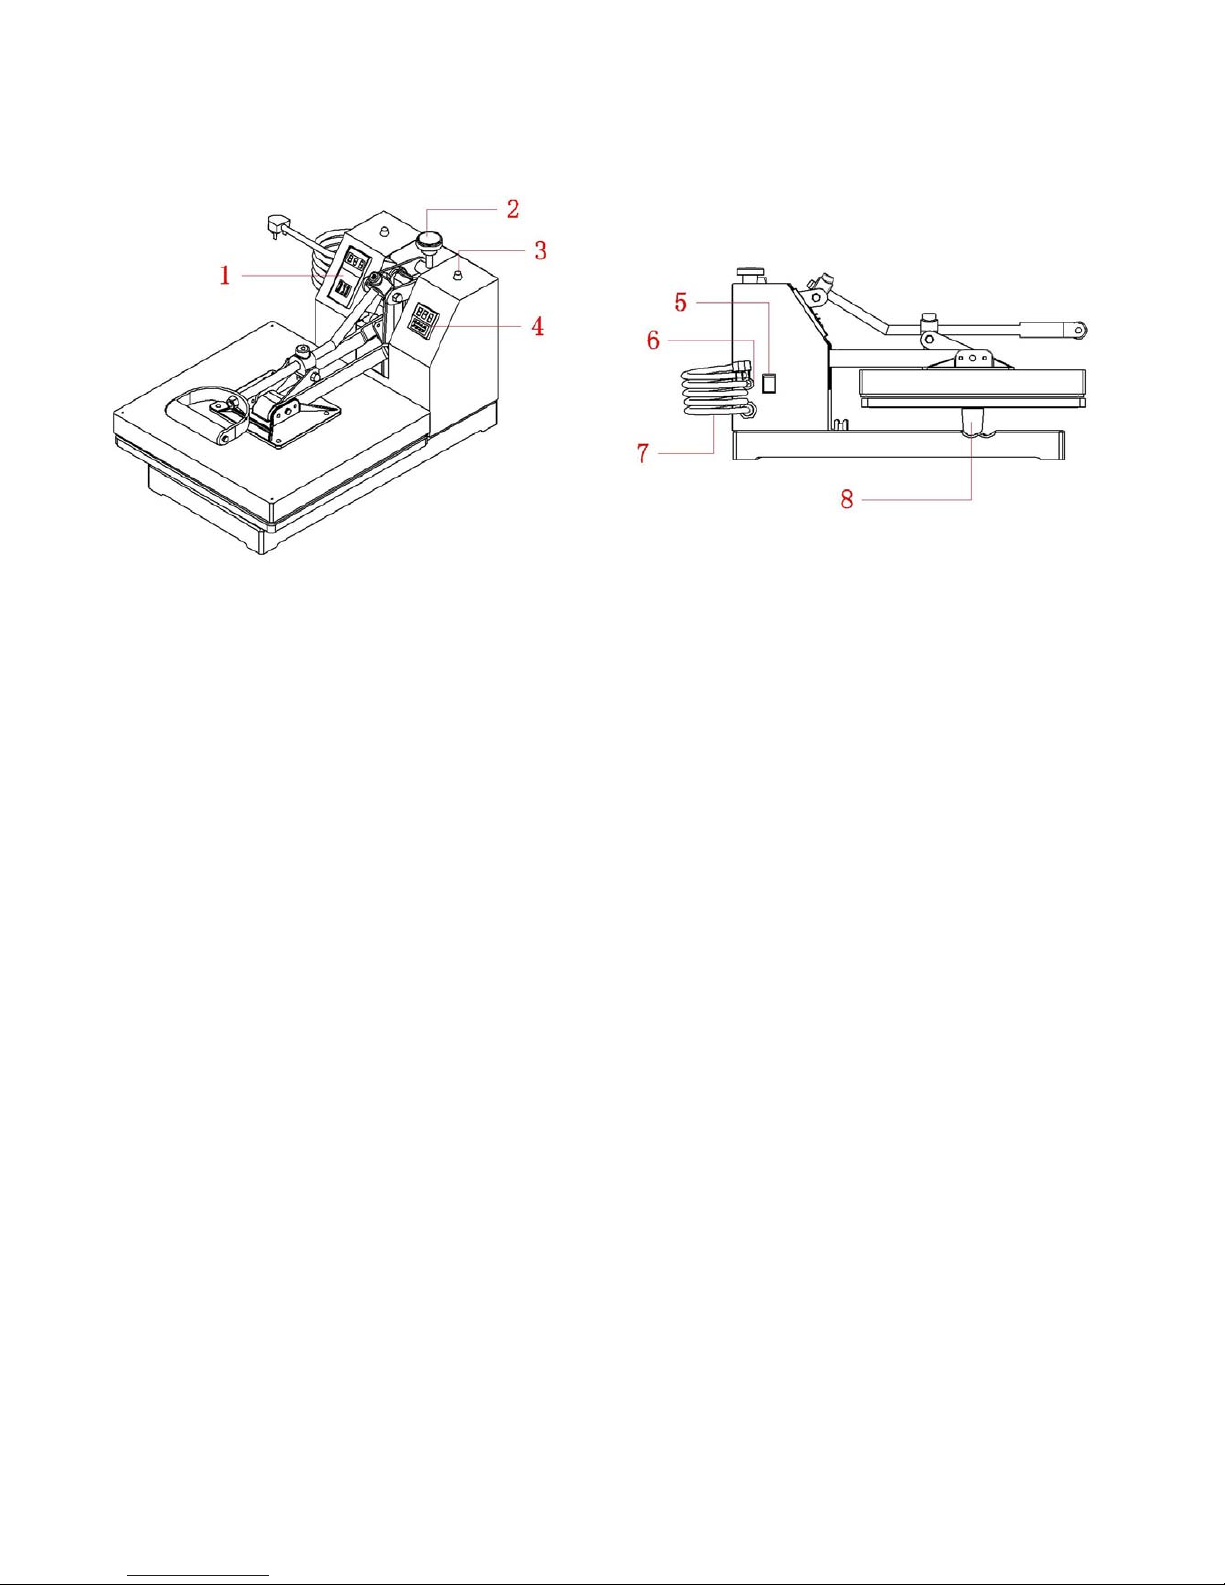
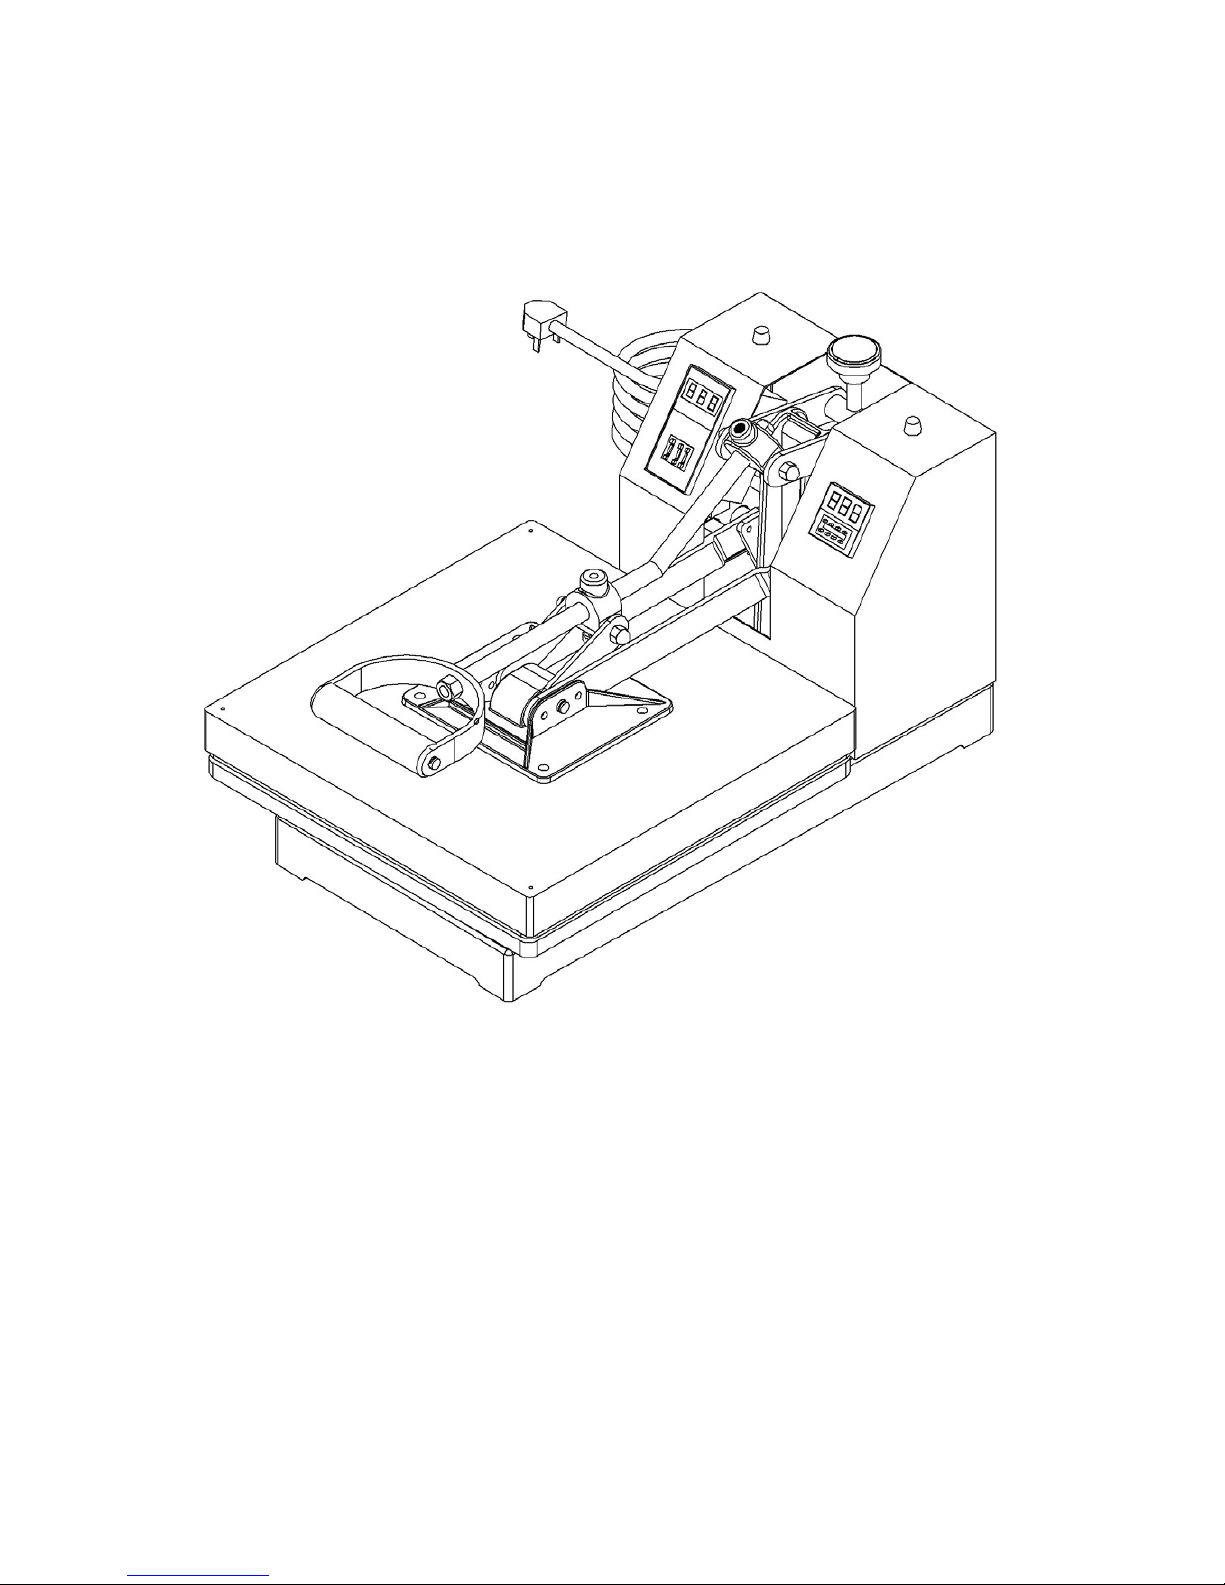
I. Assembly Drawing
○
1
Temp Controller ○2Pressure Adjuster ○3Time Indicator Light ○4Time Controller
○
5
Power Switch ○6Fuse ○7Power Cord ○8Under Plate Stander
II. Technical Parameters
1. Model No.: SHT-15/20/24LP1
2. Machine Dimensions: 395*595*600mm
3. Heat Platen Size: 38x38cm/ 40x50cm/ 40x60cm
4. Printable Articles Max Size: 400*600*30mm
5. Voltage: 220V/1 Phase; 120V/1 Phase
6. Power: 220V/1.8KW ; 110V/1.2KW
7. Recommend Setting: 30~280s; 180~210℃.
Time Range: 0~999s
Maximum Temp: 225°C
8. Packing Size: 710*490*450mm/ 750*610*510mm/ 740*510*710mm/
9. Gross Weight:: 29kg/ 33kg/ 38kg
- 2 -

III. Operating Process
1. Set temperature required
Turn on power switch, the green light
on, and temperature display shows
–L-, and the temperature goes rising.
It shows Centigrade Degrees.
Press ‘’-‘’ or “+” button to set
the temperature you need.
The temperature is rising now.
2. Set time required
Press the ‘’-‘’ or “+” button to set
the transfer time, it depends on
different transfer materials.
When rising to the set temperature,
close down the heat platen. Then
the time controller starts to
countdown.
Once the time is up, the buzzer
will send out sound. Then open
the heat platen
3. Printing methods
Step 1: Make sure the cord is connected well to the wall socket. Lift up the handle to open the press. The press
should always be in the open position when the press is heating. Place the object (i.e. T-shirt , Mouse Pad
etc) and transfer paper with images facing down the object on under plate; adjust the pressure to be
moderate and switch on the press.
Step 2: Temperature indicator light is on. Set the temperature according to different transfer material.
Recommended temperature is 180 ~200℃℃
Step 3: Then set the time according to different transfer material.
Step 4: When the temperature rise to the set temperature, the buzzer sends out sounds; then close down heat
platen (meantime the sounds stop) and starts to transfer.
Step 5: Time is counting down; once time is up, the buzzer will send out a sound again, then open up the heat
- 3 -

- 4 -
platen (meantime the sounds stop).
Step 6: Work finish and t ake out the object. If you w ant to print on another object, place the object on press bed and
confirm the TIME and TEMPERATURE set as last time, then repeat above process. Unplug the power cord
when is machine is not in use.
Step 7: Consult the Transfer Paper instructions on whether to peel cold or hot, Here are suggested Pressing time
guidelines for different transfer paper.
Ink-Jet Transfer Paper (fabric) 14-18 seconds
Laser Copier/Printer Transfer Paper (fabric) 18-25 seconds
Sublimation Transfers (onto Fabrics) 25-30 seconds
Sublimation Transfers (onto FR-Plastic/Woods) 60-70 seconds
Step 8: Mouse pads, coasters and other thicker materials may also be pressed. Simply adjust the pressure adjust
gear - clockwise to increase pressure, and counterclockwise to decrease pressure.
4. Recommendations:
1) Ceramic tile transfer: (Mugs & Plates transfer is similar)
Set temperature: 180 .℃
Set time: 15 seconds
2) T-shirt transfer:
Set temperature: 180 .℃
Set time: (chemical fiber use for sublimation transfer paper: 30-50seconds; pure cotton use for T-shirt
transfer paper: 10-20seconds)
NOTE:
1) Please switch off the machine and unplug the power cord when the machine is not in use.
2) The heat platen will cool down to the room temperature, if heat press stays unused for more than 30 minutes.
3) The heat-releasing fan will automatically starts when the temperature of heat platen reaches 80 degree C (176
degree F). It helps to reduce the temperature of electrical parts and prolong the service life of them.
4) For better maintenance of heat press, the maximum setting temperature is 210 degrees C (410 degrees F).
5) To avoid re-heating the first transfer when printing double sided T-Shirts, insert a sheet of cardboard in between
the shirt, adjust the height to less pressure, then press.
6) Heat platen may pivot slightly back and forth rotationally. This is due to movement allowance within the clamp
assembly, and is normal.

- 5 -
IV. Maintenance
1. No action after turn on the machine
1). Check the plug whether it connects well or whether it is broken.
2). Check the power switch or temp. & time controller whether it is broken.
3). Check the fuse whether it has been burnt out.
4). Indicating light is on, but no display on screen, check the 5 cable of Railway transformer. If it’s loosening,
showing the problem is poor connection. If they connects well, showing that the Transformer is faulty.
2. Turn the power switch on, light is in the bright, the Temperature controller only displays –L-- and no any
other changes.
Checking the connection of Thermocouple whether it’s loosened. Or the Thermocouple is broken.
3. Turn the power switch on, light is in the bright, the Temperature controller only displays –H-- and no any
other changes.
Checking the temperature controller if it’s with interior damping, or the controller is broken.
4. Turn the power switch on, light is in the bright, the Temperature controller displays incomplete data.
Checking the nixie tube or the electronic component whether it’s damaged.
5. The machine is at state of working: Press the Limit Switch, Time controller shows no countdown.
1). Checking the connection of Limit Switch if it’s loosened.
2). Checking the switch whether it’s pressed properly.
3). If above steps are good, maybe the Limit Switch is broken.
6. The heat platen is heating well, but the Time Controller countdown even the platen is not pressed down.
Checking the two cables of Limit Switch whether they are connected mistakenly. If the connection is reversed, the
problem would exist.
7. The setting temp and time becomes abnormal after exchange the heat platen
1). Please reset the temp and time according the operation process manual.
8. Other notice
1). In order to prolong the machine service life, please add the lubrication oil regularly on the joints.
2). In order to keep the heat platen's good transfer effect, you need to protect the heat platen carefully whenever
you are using it or not.
3). Please keep the machine in dry place.
4). If you are not able to solve the electrical parts problem, please kindly contact the supplier and get technical
support
V. Trouble shooting for transfer print quality
1. If the print color is pale: the temperature is too low / the pressure is not correct / or not pressed long enough.
2. If the print color is too brown or the transfer paper is almost burnt: reduce the setting temperature
2. If the print is blurring: too much transfer time causes proliferation.
3. If print color is different/ partial transfer effect is not good enough: the pressure is not enough / or not pressed
long enough / or poor quality transfer paper.
4. If transfer paper stick to the object after transfer: the temperature is too high/ or poor quality printing ink.

VI. Circuit Diagram
KO: Power Switch FU: Fuse(15A/25A) SSR: Solid State Relay EH1 EH2: Heating pipe
ST: Thermocouple L2: Temperature Indicator Light X1: Terminal SJ: Thermostat
SA: Limit Switch KJ: Time Relay L1: Time Indicator Light HA: Buzzer
- 6 -
 Loading...