

Microtec APDL-20, APDL-24 User Manual
Automatic Double Location Heat Transfer Press Manual
Model. No.: APDL-20/24
CONTENTS
I. Assembly Drawing -----------------------------------------------------------------------------------2
II. Technical Parameters ------------------------------------------------------------------------------2
III. Operation Process ----------------------------------------- --------------------------------------3-4
IV. Maintenance -------------------------------------------------------------------------------------------5
V. Trouble Shooting For Transfer Print Quality-------------------------------------------------6
VI. Explosion View ---------------------------------------------------------------------------------------7
- 1 -
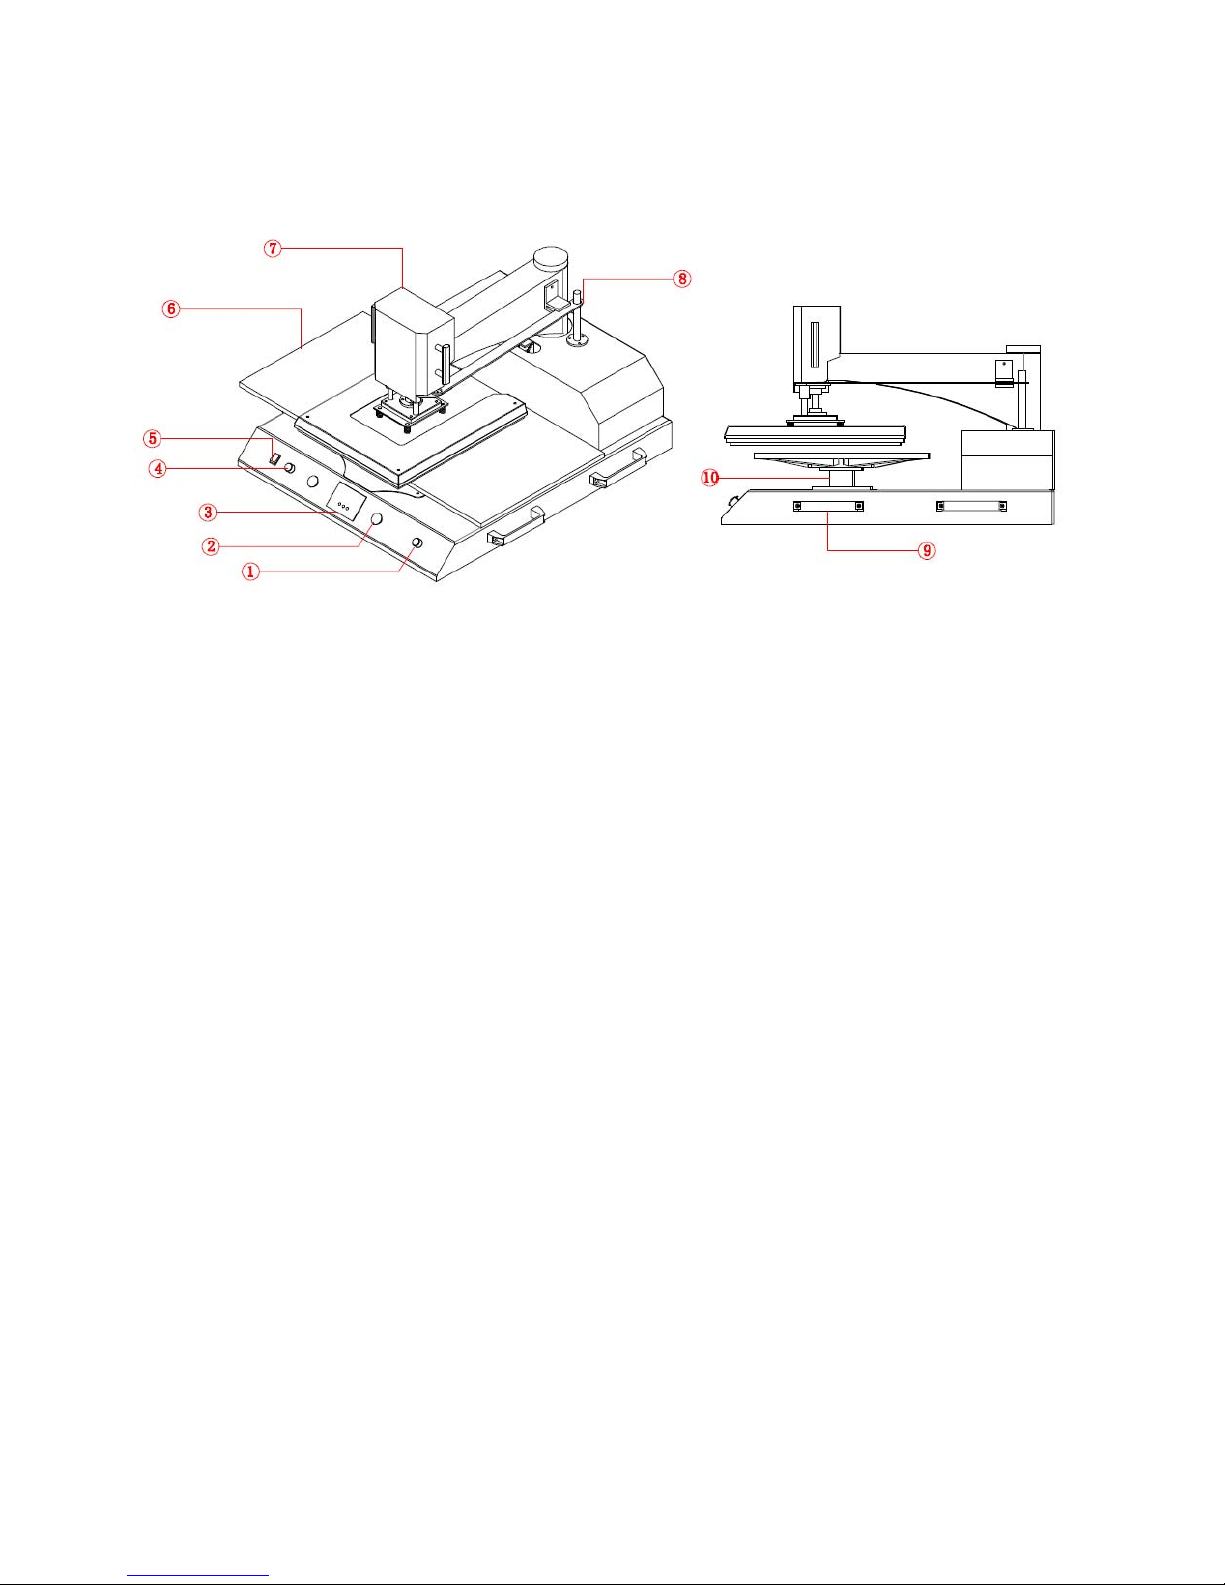
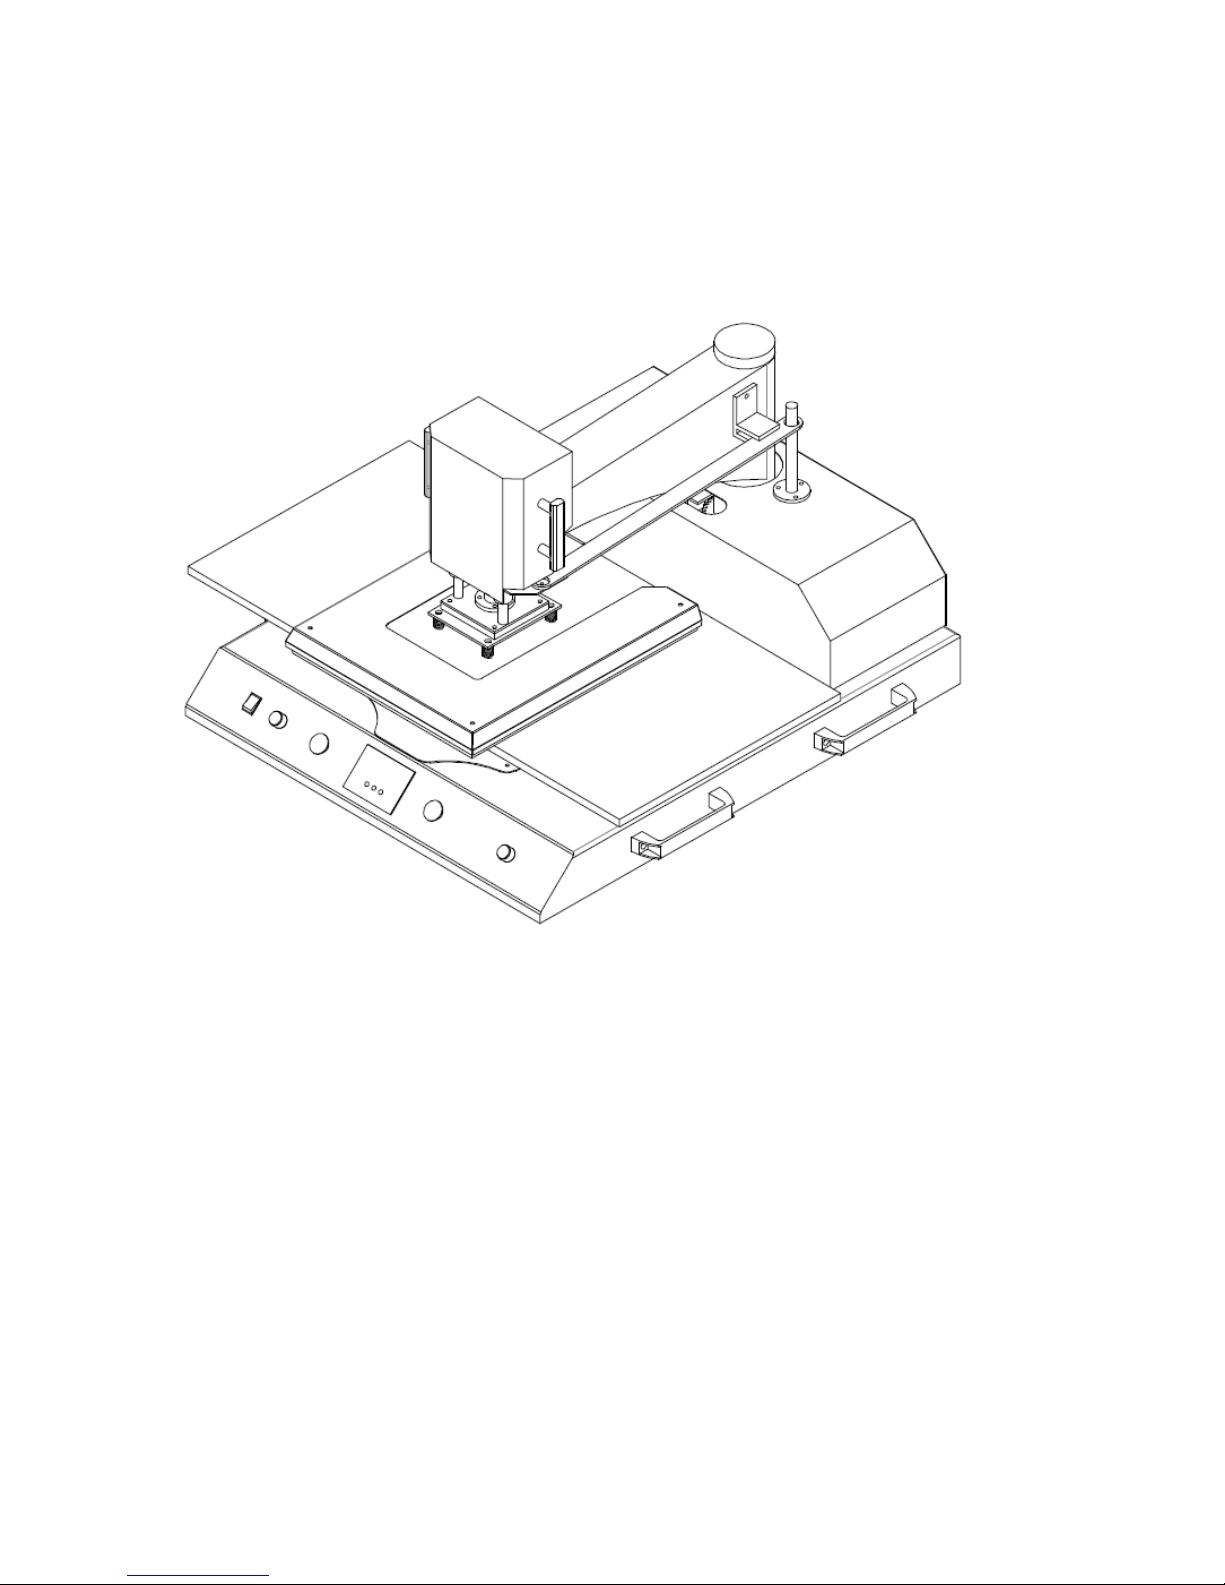
I. Assembly Drawing
① Emergency Stop Button ② Start Switch ③ GY-04 Digital Controller ④ Operation Mode Arrow Button
⑤ Power Switch ⑥ Under Plate ⑦ Swing Head ⑧ Shaft Fix plate
⑨ Side Handle ⑩ Installation Part for Base Plate
II. Technical Parameters
1. Model No.: APDL-20/24
2. Machine Dimensions: 1010*970*505mm
3. Heat Platen Size: 40x50cm/ 40x60cm
4. Printable Articles Max Size: 400*600*10mm
5. Voltage: 220V/1Phase; 120V/1 Phase
6. Power: 220V/1.8KW ; 110V/1.2KW
7. Recommend Setting: 30~280s; 180~210 .℃
Time Range: 0~999s
Maximum Temp: 225°C
8. Packing Size: 1100*1100*940mm
9. Gross Weight:: 231kg ( Wooden Package)
- 2 -
III. Operation Process
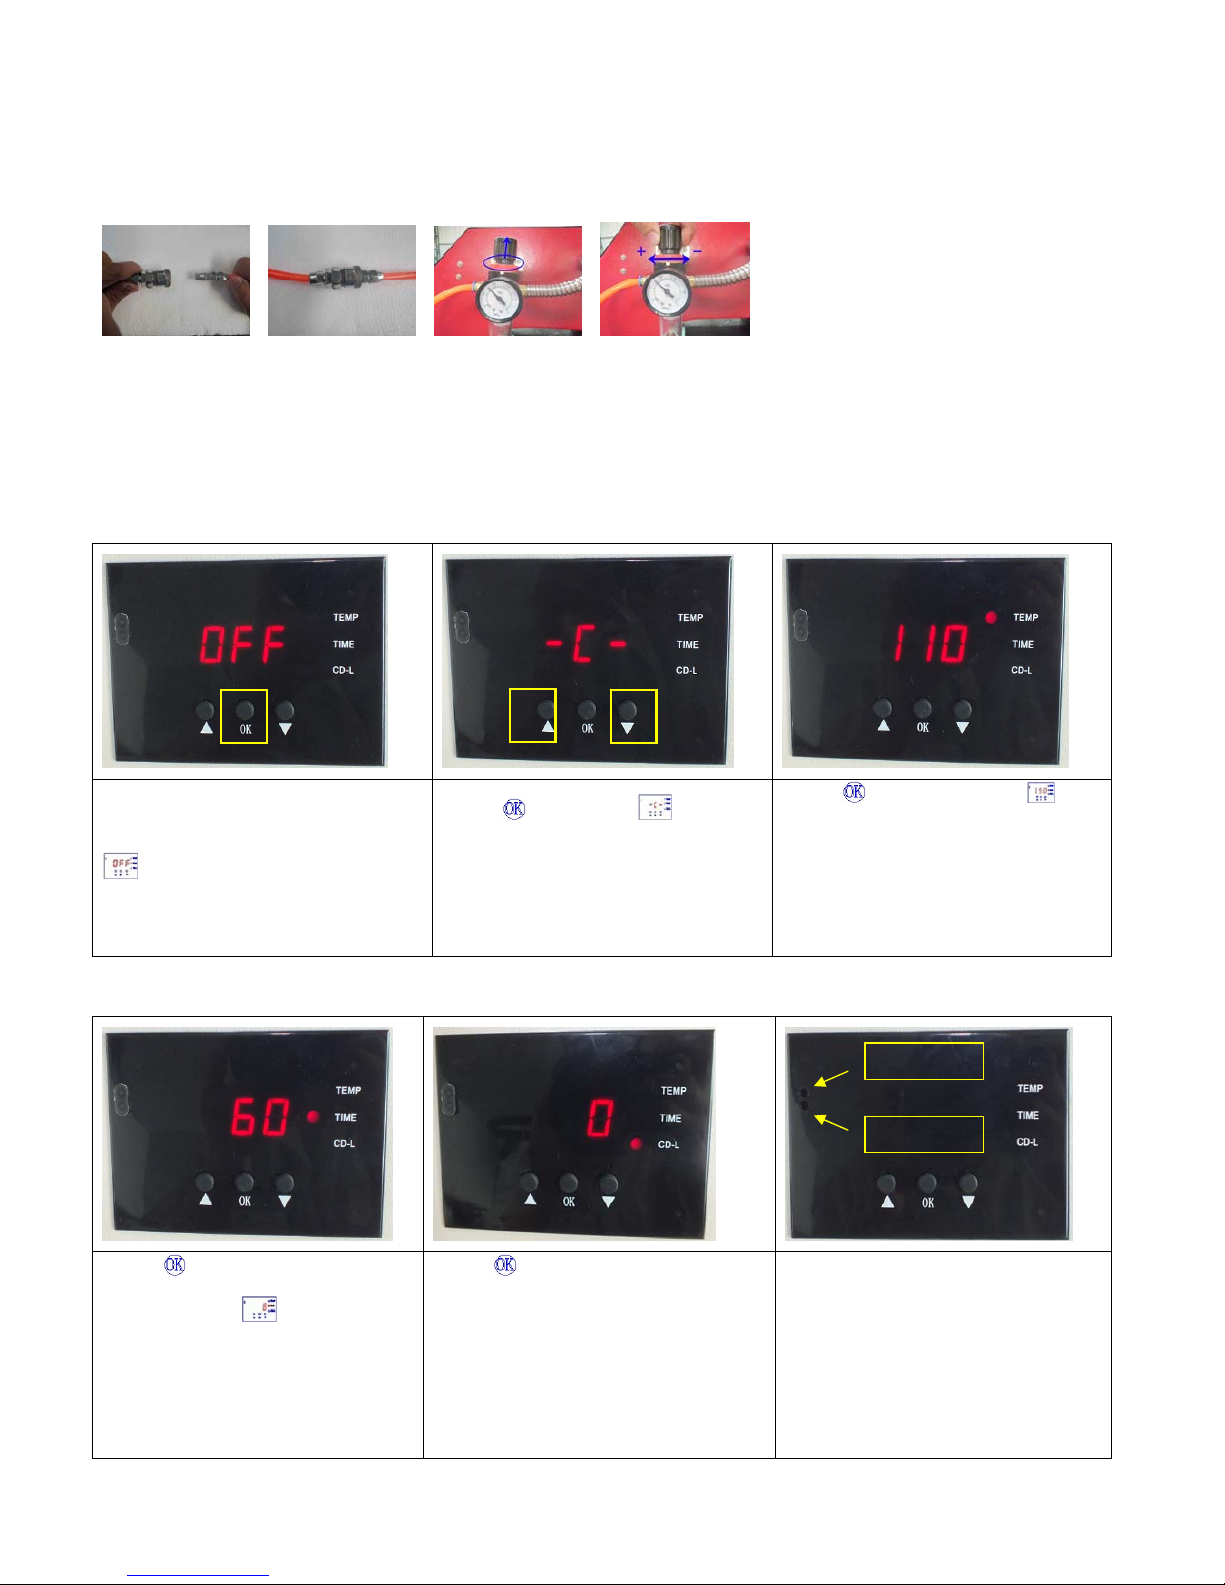
1. How to adjust the pressure:
1. Connect the heat press with air compressor or air sources.
2. Lift up the cap of air valve as the picture shown
3. Revolve the cap anticlockwise, the air pressure goes down; contrariwise, the air pressure goes up; when you
finish the pressure adjustment, push down the cap.
4. Suggested air pressure is 0.4~0.5Mpa/ 70-80Psi. It depends on the transfer materials.
2. Set temperature required
Turn on power switch, temperature
light is ON. The digital display shows
.
Press
button, the light is
on (C denotes Celsius). Press
arrows “△” or “▽” to select “℃” or
“℉” (F denotes
Fahrenheit)
according to your habits.
Press
button, the temp light
is on. Select with arrows the
temperature according to different
transfer material (Normally
180℃~200℃)
3. Set time required
Note: There are two small port in
front side of the digital display.
Press button after temperature
setting and the
time light is
on. Select with arrows the time
according to different transfer
material.
Press
button after time setting;
the display shows the temperature
starts to rise. “CD-L” shows the time
counting down during your transfer.
If the real temperature is lower than
digital controller shown, you can
adjust the “hot port”; Clockwise to
raise temperature; anticlockwise to
reduce temperature.
- 3 -
 Loading...