

MicroStrain 3DM-DH3 Quick Start Manuals

Quick Start Guide
3DM-DH3
Version
• 3DM-DH3
• 3DM-DH3™ software 1.0.2
Starter Kit
The 3DM-DH3
• 3DM-DH3
• RS-422 communication and power ribbon cable (3 meters)
• EasySYNC
• EasySYNC
• USB cable (2 meters)
• 9 VDC power supply (100-240VAC, 4 universal adapters)
• 3DM-DH3
Software Installation
• Insert the 3DM-DH3
• Insert the EasySYNC
Hardware Installation
• Insert the 16-pin black connector on the RS-422 ribbon cable into the end connector on
• Connect the 9-pin DB9 connector of the ribbon cable into the EasySYNC
• Set the EasySYNC
• Connect the power supply to the power pigtail on the RS-422 ribbon cable and into a
• Connect the USB cable to the EasySYNC
• Depress the 2-position red switch on the ribbon cable to its IN position.
Software Operations
• Launch the 3DM-DH3
• Click File and a drop-down menu will appear.
• Click Connect and the Connect window will appear.
™
Downhole Orientation Sensor and Data Logger
™
firmware 10
™
starter kit contains:
™
orientation sensor/datalogger
™
RS-422/RS-232 adapter
™
driver CD
™
utility software CD (Windows® XP, Vista, 7)
™
utility software CD into your CD-ROM drive and follow the on-
screen instructions to install the software.
™
driver CD into your CD-ROM drive and follow the on-screen
instructions to install the driver.
the 3DM-DH3
™
observing the keyway.
connector.
™
dip switches 1, 2, 3 and 4 to the ON position to enable RS-422
operation.
power receptacle.
™
utility software and the Main screen will appear.
™
Serial
™
USB connector and into your host PC.
1
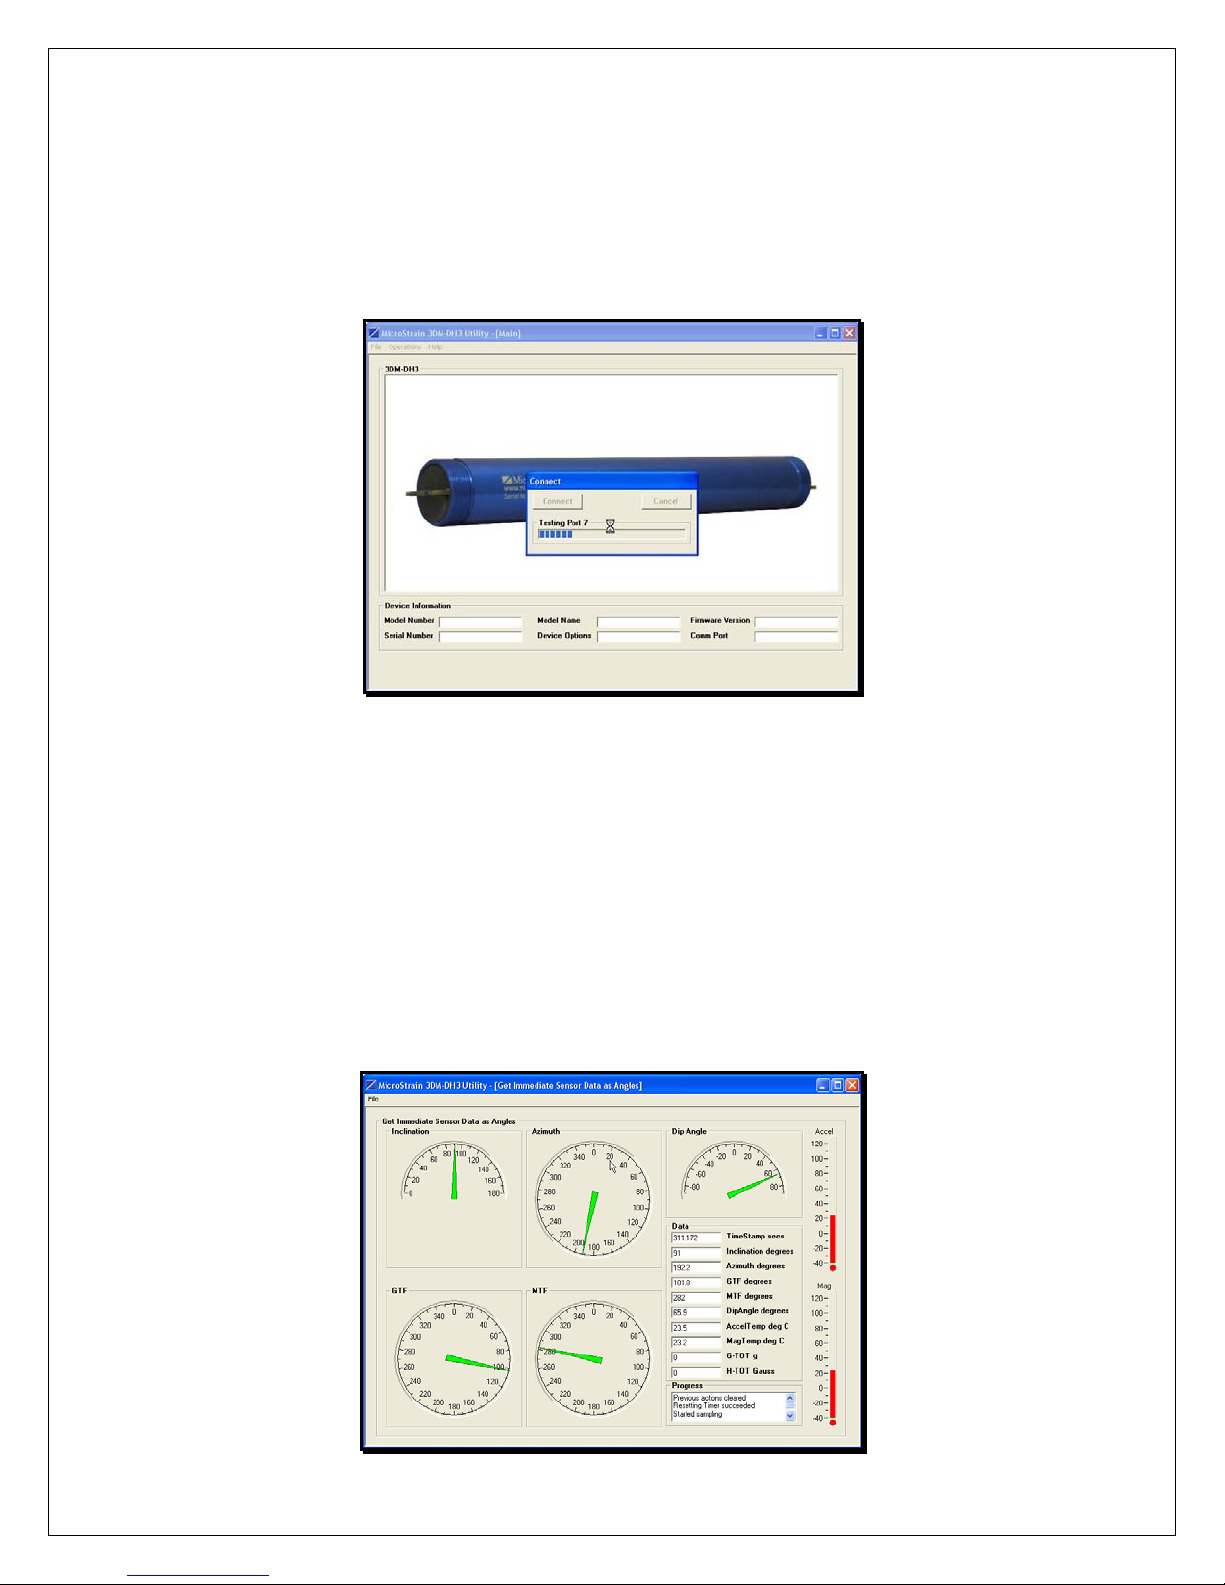
• Click the Connect button and the application will auto-detect the 3DM-DH3
™
• When found, a message box will appear indicating successful connection.
• Click OK and the message box will disappear.
• The model number, serial number, model name, device options, firmware version and
comm port will now be displayed.
Figure 1
• Click Operations and a drop-down menu will appear.
• Click Data.
• Click Get Immediate Sensor Data As Angles and the Get Immediate Sensor Data As
Angles screen will appear.
• Click File and a drop-down menu will appear.
• Click Get Immediate Sensor Data As Angles.
™
• The software will begin continuous sampling of the 3DM-DH3
for inclination, azimuth,
dip angle, GTF, MTF, G-TOT, H-TOT, accelerometer temperature and magnetometer
temperature.
• All measurements will be output to the screen and automatically written to file.
.
Figure 2
2
 Loading...