

Microsoft Corporation Zune Home AV Pack User Manual
ZUNE HOME A/V PACK
MODULE AUDIO-VIDÉO
À DOMICILE ZUNE
PAQUETE ZUNE A/V
PARA EL HOGAR
Start. Démarrer. Iniciar.
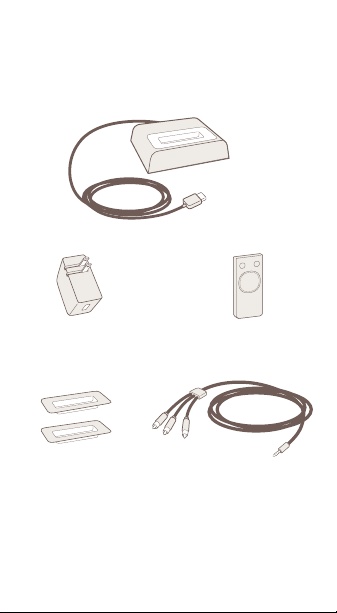
Dock
AC Adapter
Adapter Plates
Wireless Remote
for Dock
A/V Output Cable
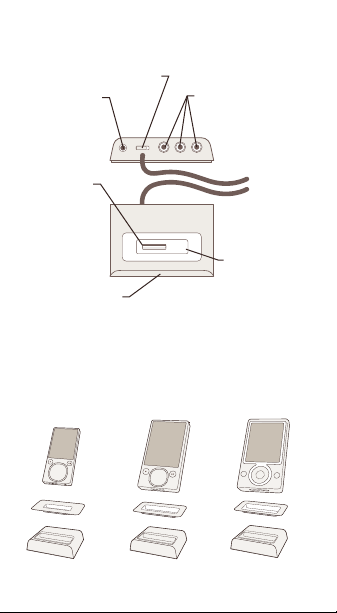
ZUNE DOCK
Video
A/V
Output Jack
Selector
Component Video
Output Jacks
Device
Connector
Zune Adapter
Plate
IR Receiver
For Wireless Remote
The removable Zune adapter plates
accommodate multiple Zune models. The
dock is packaged with the adapter plate for
the Zune 4GB and Zune 8GB in place.
ZUNE 4GB/8GB ZUNE 80GB ZUNE 30GB
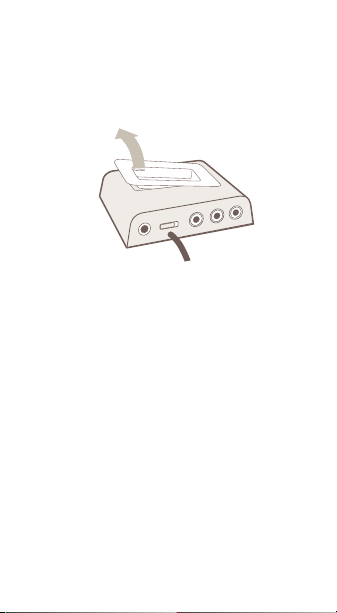
To swap Zune adapter plates:
1 HookyourngerintotheslotontheZune
adapter plate and lift it out as shown.
2 Choose the adapter plate that’s labeled for
your model.
Labels are printed on the underside of
each adapter plate. To check your Zune
model, see the back of the device. If the
capacity is not listed, you have the original
Zune 30GB.
3 Set the Zune adapter plate into place.
IMPORTANT
Make sure the correct Zune adapter
plate is in place before you connect your
Zune. Connecting a device without an
adapter plate—or with the wrong adapter
plate—could damage the dock and your
device.
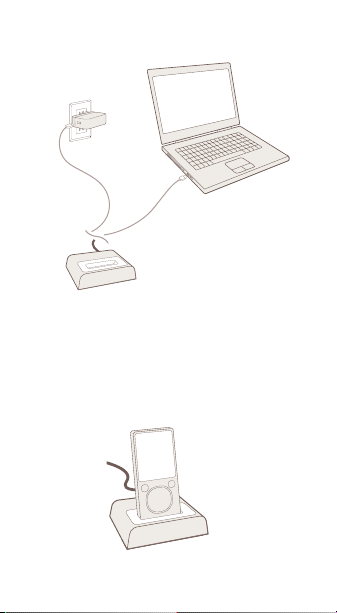
SYNC AND CHARGE
You have two connection options. To charge,
connect Zune or the dock to the Zune AC
Adapter and plug it into a power outlet.
Want to charge while you sync? Connect
the dock to your computer and set Zune in
the dock.
8
G
B
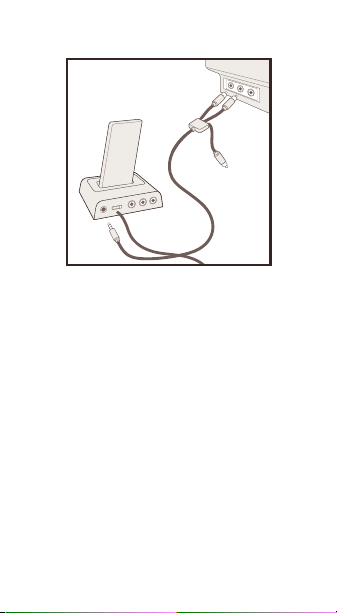
ZUNE 4GB/8GB
To listen to music through your stereo from a
Zune 4GB or Zune 8GB:
1 Connect the minijack plug on the supplied
A/V output cable to the A/V output jack on
the Zune dock.
2 Connect the red and white RCA plugs on
the output cable to the corresponding
inputs on your stereo.
The Zune 4GB and Zune 8GB don’t offer video
output.
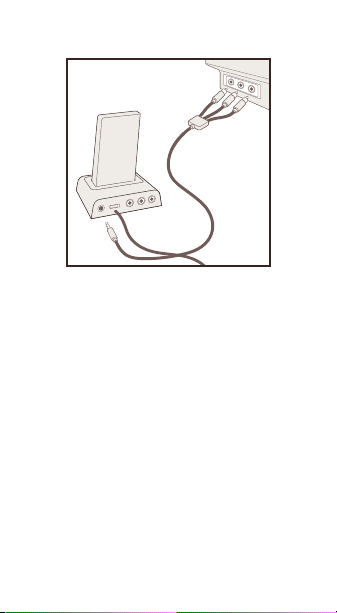
ZUNE 30GB
The original Zune 30GB supports standard
composite video.
To view composite video:
1 Connect the minijack plug on the supplied
A/V output cable to the A/V output jack on
the Zune dock.
2 Connect the A/V cable’s red, white, and
yellow RCA plugs to the corresponding
audio and video inputs on your TV or
monitor.
Or, you can listen through your stereo
by plugging the red and white audio
connectors into your stereo rather than
your TV.

3 If you’ve used the component video
outputs with a Zune 80GB, switch the
video selector back to composite video.
4 On your Zune, go to Settings, Display,
The original Zune 30GB doesn’t offer
component video output.
and select On. The Zune screen
TV Out
will go blank, and the output will be sent to
your TV or monitor.
To revert from the TV screen to the Zune
screen, go back to TV Out and select Off,
or simply remove Zune from the dock.
80
G
B
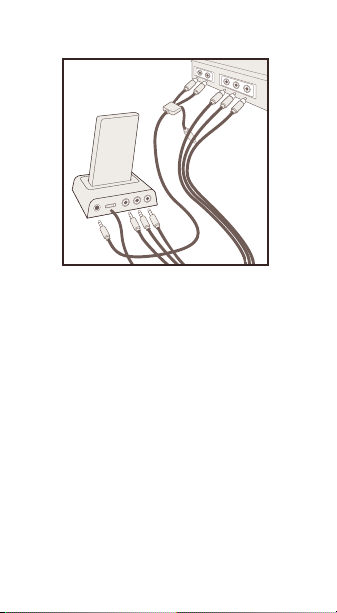
ZUNE 80GB
The Zune 80GB supports high-quality
component video as well as standard
composite video.
To view component video:
1 Remove the cover from the back of
the dock and set the video selector to
component video.
2 Connect a component video cable (sold
separately) to the dock.
Match the cable’s green, blue, and red
RCA plugs to the corresponding jacks on
the dock.
3 Connect the other end of the cable to a
compatible TV or monitor.

4 On your Zune, go to Settings, Display,
TondoutifyourTViscompatiblewiththe
dock, make sure its inputs match either the
A/V output cable’s yellow RCA plug or the
dock’s green, blue, and red output jacks.
Video quality varies depending on the quality
of the original video and the sync settings in
your Zune software.
To learn about maximizing the quality of video
on your Zune device, see the User’s Guide at
www.zune.net/support.
For audio:
1
2
and select On. The Zune screen
TV Out
will go blank, and the output will be sent to
your TV or monitor.
To revert from the TV screen to the Zune
screen, go back to TV Out and select Off,
or simply remove Zune from the dock.
Connect the minijack plug on the supplied
A/V output cable to the A/V output jack on
the Zune dock.
Connect the red and white RCA plugs on
the output cable to the corresponding
inputs on your TV or stereo.
 Loading...