

Page 1

Nokia C5–00 User Guide
Cyan
Magenta
Yellow
Black
Cyan
TARKISTA
Magenta
Issue 1
Yellow
Black
Page 2

2Contents
Cyan
Magenta
Yellow
Black
Contents
Safety 4
Get started 5
Keys and parts 5
Insert SIM card and battery 5
Insert a memory card 6
Wrist strap 7
Charge the battery 7
Switch the device on and off 8
Volume control 8
Connect a compatible headset 8
Antenna locations 8
Transfer content from another
device 8
Install Ovi Suite 9
Ovi by Nokia 9
About Ovi Store 10
Remove a memory card 10
Remove battery and SIM card 10
Basic use 11
Write text 11
Menu 12
Display indicators 12
Shortcuts 14
Offline profile 14
Access codes 15
Configuration settings 15
Settings wizard 15
Remote lock 16
Personalise your device 16
Home screen 16
Contacts bar 16
Themes 17
Profiles 18
Telephone 18
Make a call 18
Answer a call 19
Make a video call 19
Call and data registers 20
Call divert 20
Contacts 20
Stay connected with your online
friends 20
Copy contacts 21
Manage names and numbers 21
Save and edit names and numbers 22
Ringing tones, images, and call text for
contacts 22
Messaging 23
About messaging 23
Write and send messages 23
E-mail 24
About Chat 26
About Ovi Contacts 26
Connect to the service 27
Instant messaging 27
Connectivity 31
Connect your computer to web 31
About Bluetooth 31
Send and receive data with
Bluetooth 31
Synchronisation 32
Web 33
About Web browser 33
Browse the web 33
About Search 33
Subscribe to a web feed 33
Discover nearby events 34
Positioning 34
Cyan
Magenta
Yellow
www.nokia.com/support
Black
Page 3

Contents 3
Cyan
Magenta
Yellow
Black
About GPS 34
About assisted GPS (A-GPS) 34
Maps 35
Landmarks 40
GPS data 40
Music and audio 41
Ovi Music 41
FM Radio 41
Camera 42
Capture an image 42
Record a video clip 42
Images and videos 42
About Gallery 42
About Share online 43
Time management 43
Calendar 43
Alarm clock 44
Clock settings 44
Settings 45
Device and SIM card security 45
Restore original settings 45
Data management 45
Protected content 45
Find help 46
Support 46
Keep your device software and
applications up to date 46
Prolong battery life 47
In-device help 48
Product and safety information 49
Protect the environment 49
Save energy 49
Recycle 49
www.nokia.com/support
Cyan
Magenta
Yellow
Black
Page 4

4Safety
Cyan
Magenta
Yellow
Black
Safety
Read these simple guidelines. Not
following them may be dangerous or
illegal. Read the complete user guide for
further information.
SWITCH OFF IN RESTRICTED AREAS
Switch the device off when
mobile phone use is not
allowed or when it may cause
interference or danger, for
example, in aircraft, near
medical equipment, fuel,
chemicals, or blasting areas.
ROAD SAFETY COMES FIRST
Obey all local laws. Always keep
your hands free to operate the
vehicle while driving. Your first
consideration while driving
should be road safety.
INTERFERENCE
All wireless devices may be
susceptible to interference,
which could affect
performance.
QUALIFIED SERVICE
Only qualified personnel may
install or repair this product.
KEEP YOUR DEVICE DRY
Your device is not waterresistant. Keep it dry.
PROTECT YOUR HEARING
Listen to a headset at a
moderate level, and do not hold
the device near your ear when
the loudspeaker is in use.
BATTERIES, CHARGERS AND OTHER
ACCESSORIES
Use only batteries, chargers,
and other accessories approved
by Nokia for use with this
device. Do not connect
incompatible products.
Cyan
Magenta
Yellow
www.nokia.com/support
Black
Page 5

Get started
Cyan
Magenta
Yellow
Black
Keys and parts
Get started 5
1 Earpiece
2 Display
3 Left selection key
4 Home key
5 Call key
6 Number keys
7 Secondary camera lens
8 Navi™ key (scroll key). Can also be
used to capture images.
9 Right selection key
10 Clear key C
11 End/Power key
12 Microphone
www.nokia.com/support
13 Charger connector
14 Micro USB connector
15 Nokia AV connector (3.5 mm)
16 Camera flash
17 Volume keys. Can also be used to
zoom when using the camera.
18 Memory card slot
19 Main camera lens
20 Back cover release button
21 Wrist strap eyelet
22 Loudspeaker
Note: The surface of this device
does not contain nickel in the platings.
The surface of this device contains
stainless steel.
Insert SIM card and battery
Important: Do not use a mini-UICC
SIM card, also known as a micro-SIM card,
a micro-SIM card with an adapter, or a SIM
card that has a mini-UICC cutout (see
Cyan
Magenta
Yellow
Black
Page 6

6Get started
Cyan
Magenta
Yellow
Black
figure) in this device. A micro SIM card is
smaller than the standard SIM card. This
device does not support the use of microSIM cards and use of incompatible SIM
cards may damage the card or the device,
and may corrupt data stored on the card.
1 To remove the back cover of the
device, pull the release button (1)
toward the bottom of the device, and
lift the cover off (2).
2 Slide the SIM card into the SIM card
holder. Make sure the contact area is
facing down. The battery must be
removed before you can insert the SIM
card.
4 To replace the back cover, carefully
align the top lugs (1), and line up the
back cover, then gently press down
until the cover locks into place (2).
Insert a memory card
The memory card may be supplied with
the device, and may already be inserted.
1 Open the memory card slot cover.
3 Insert the battery.
Cyan
Magenta
2 Place the card in the slot with the
contact area facing up.
3 Push the card gently to lock it into
place. Close the slot cover.
www.nokia.com/support
Yellow
Black
Page 7

Wrist strap
Cyan
Magenta
Yellow
Black
Thread the wrist strap, and tighten it.
A wrist strap may not be included.
Charge the battery
Your battery has been partially charged at
the factory, but you may need to recharge
it before you can switch on your device for
the first time.
If the device indicates a low charge, do the
following:
1 Connect the charger to a wall outlet.
2 Connect the charger to the device.
Get started 7
You do not need to charge the battery for
a specific length of time, and you can use
the device while it is charging. If the
battery is completely discharged, it may
take several minutes before the charging
indicator appears on the display or before
any calls can be made.
Tip: If you have old compatible Nokia
chargers, you can use them with your
device by attaching the CA-44 charger
adapter to the old charger. The adapter is
available as a separate accessory.
USB charging
You can use USB charging when a wall
outlet is not available. When charging
your device with the USB data cable, the
charging time is longer. USB charging
efficiency varies significantly. In some
cases, it may take a very long time for
charging to start and the device to start
functioning.
With USB charging, you can also transfer
data with the USB data cable while
charging the device.
1 Connect a compatible USB device to
your device using a compatible USB
data cable.
Depending on the type of the device
that is used for charging, it may take
a while for charging to start.
2 If the device is switched on, select
from the available USB mode options
on the display of the device.
3 When the battery is fully charged,
disconnect the charger from the
device, then from the wall outlet.
www.nokia.com/support
Cyan
Magenta
Yellow
Black
Page 8

8Get started
Cyan
Magenta
Yellow
Black
Switch the device on and off
Press and hold the power key to switch the
device on and off. Press the power key
briefly to end a call or close an application.
If the device asks for a PIN code, enter the
PIN code, and select OK.
If the device asks for the lock code, enter
the lock code, and select OK. The factory
setting for the lock code is 12345.
To set the correct time zone, time, and
date, select the country you are presently
in, then enter the local time and date.
Volume control
To adjust the earpiece or loudspeaker
volume during a call or when listening to
an audio file, use the volume keys.
To activate or deactivate the loudspeaker
during a call, select Loudsp. or Handset.
Connect a compatible headset
Antenna locations
Avoid touching the antenna area
unnecessarily while the antenna is
transmitting or receiving. Contact with
antennas affects the communication
quality and may cause a higher power
level during operation and may reduce the
battery life.
Transfer content from another device
Select
With the Switch application, you can
transfer content, such as contacts,
between two compatible Nokia devices.
The type of content that can be
transferred depends on the model of the
device from which you want to transfer
> Settings > Switch.
Cyan
Magenta
Yellow
www.nokia.com/support
Black
Page 9

Get started 9
Cyan
Magenta
Yellow
Black
content. If the other device supports
synchronisation, you can also synchronise
data between the other device and your
device. Your device notifies you if the
other device is not compatible.
If the other device cannot be switched on
without a SIM card, you can insert your SIM
card in it. When your device is switched on
without a SIM card, the offline profile is
automatically activated.
The other device must support Bluetooth
connectivity.
Transfer content
To retrieve data from your other device for
the first time:
1 Activate Bluetooth connectivity in
both devices.
2 Select the device from which you want
to transfer content. You are asked to
enter a code on your device. Enter a
code (1-16 digits), and select OK. Enter
the same code on the other device,
and select OK. The devices are now
paired.
For some device models, the Switch
application is sent to the other device
as a message. To install the Switch
application on the other device, open
the message, and follow the
instructions.
3 From your device, select the content
you want to transfer from the other
device.
Content is transferred from the memory of
the other device to the corresponding
location in your device.
Transfer time depends on the amount of
data to be transferred. You can cancel the
transfer and continue later.
The synchronisation is two-way, and the
data in both devices is the same. If an item
is deleted from either device, it is deleted
from the other device when
synchronising; you cannot restore deleted
items by synchronising.
To view the log of the last transfer, select
a shortcut in the main view and
Options > View log.
Install Ovi Suite
With the Nokia Ovi Suite application for PC,
you can easily access the files on your
Nokia C5-00, your other Nokia devices,
and Ovi, all from a single view. You can
transfer and synchronise messages,
contacts, images, music, and more
between your computer and device. You
can also register for a Nokia account,
share your images on Ovi, update your
device software, download maps, and
keep your content secure and accessible.
For more information, go to the support
area at www.ovi.com.
For information on how to install Ovi
Suite, see the included Ovi Suite leaflet.
If you do not want to install Ovi Suite, you
can delete the installation files from the
memory card to increase the available
memory on the card.
Ovi by Nokia
With Ovi by Nokia, you can find new
places and services, and stay in touch with
www.nokia.com/support
Cyan
Magenta
Yellow
Black
Page 10

10 Get started
Cyan
Magenta
Yellow
Black
your friends. You can do, for example, the
following:
• Download games, applications,
videos, and ringtones to your device
• Find your way with free walk and
drive navigation, plan trips, and view
locations on a map
• Get a free Ovi Mail account
• Get music
Some items are free of charge, others you
may need to pay for.
The available services may also vary by
country or region, and not all languages
are supported.
To access Nokia's Ovi services, go to
www.ovi.com, and register your own
Nokia account.
For more help and information, go to
www.ovi.com.
About Ovi Store
With Ovi Store, you can download
mobile games, applications, videos,
pictures, themes, and ringtones to your
device. Some items are free of charge;
others you need to pay for with your credit
card or on your phone bill. The availability
of payment methods depends on your
country of residence and your network
service provider. Ovi Store offers content
that is compatible with your mobile
device and relevant to your tastes and
location.
Select
or go to www.ovi.com.
Remove a memory card
Important: Do not remove the
memory card when an application is using
it. Doing so may damage the memory card
and the device, and corrupt data stored on
the card.
1 Press the power key briefly, and select
Remove memory card > Yes.
2 Open the memory card slot cover.
3 Press the memory card gently to
release it.
4 Pull the card out, and select OK.
5 Close the slot cover.
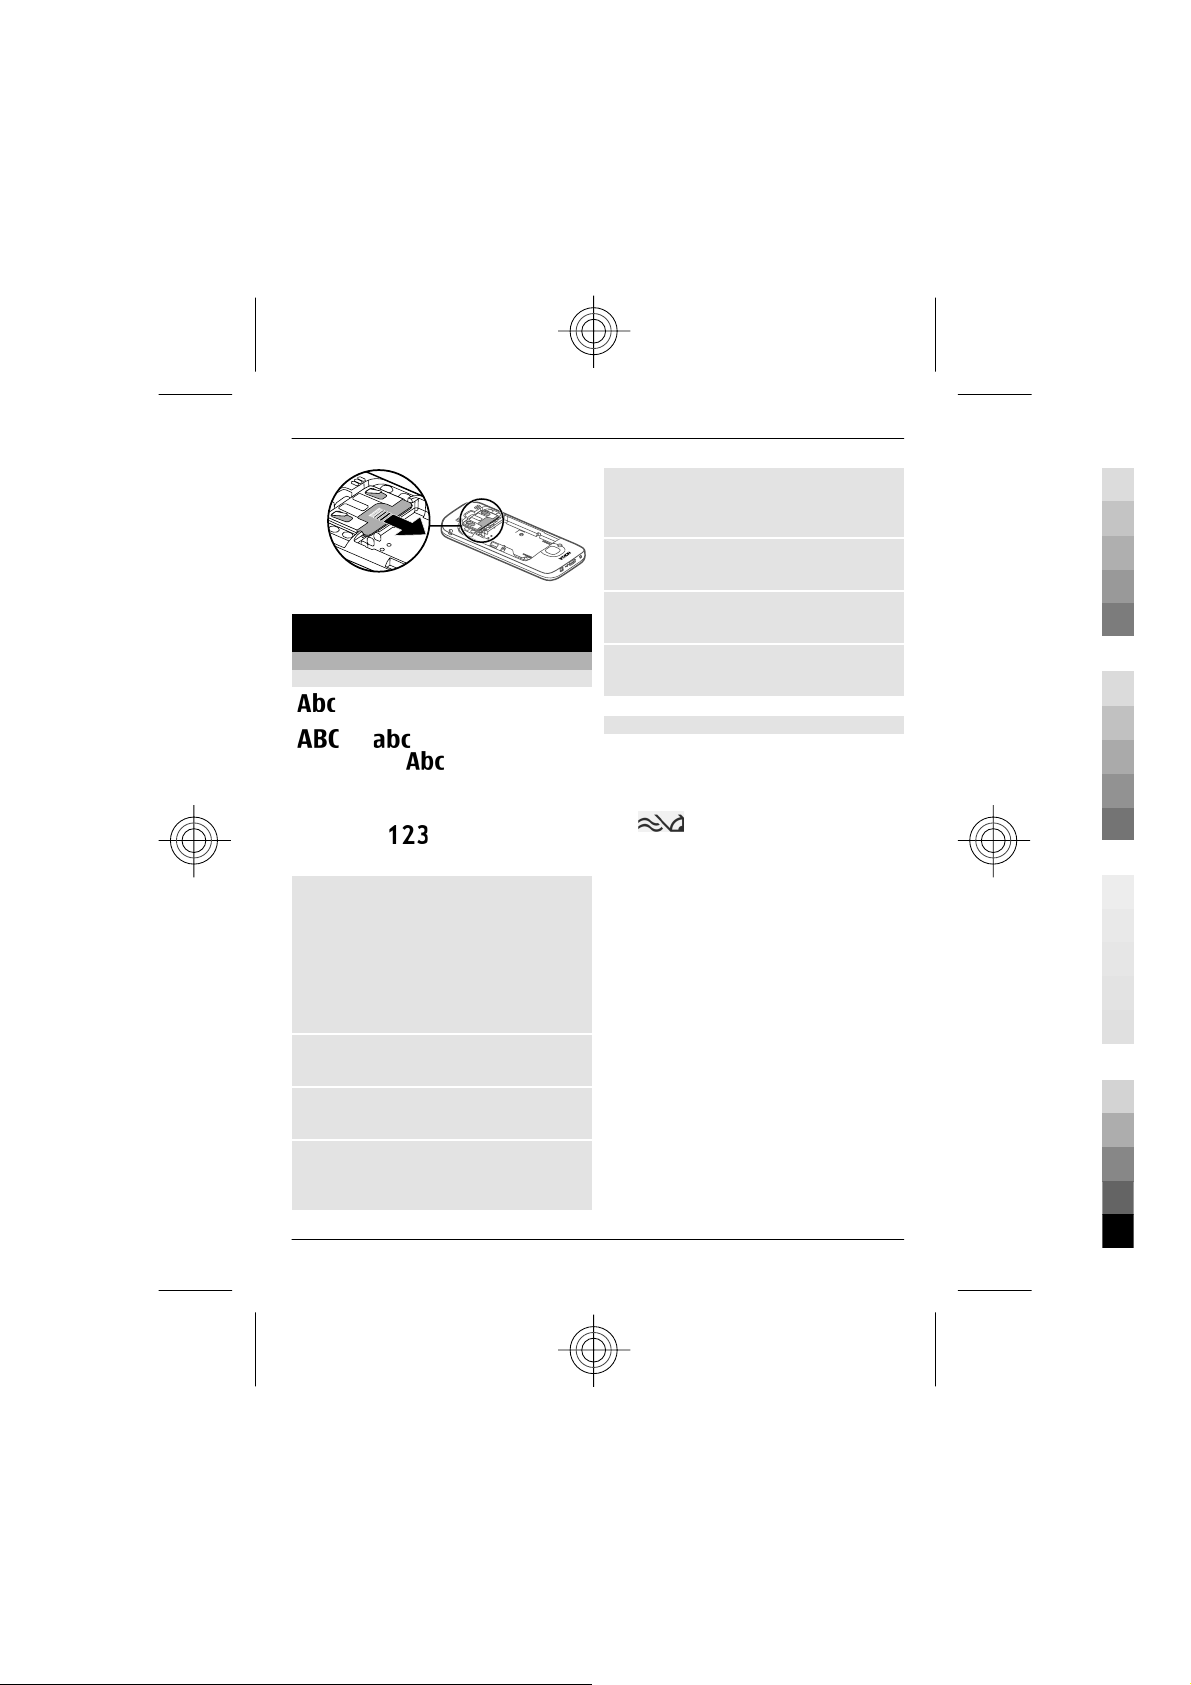
Remove battery and SIM card
1 To remove the back cover of the
device, pull the release button (1)
toward the bottom of the device, and
lift the cover off (2).
2 Remove the battery.
3 Carefully pull the SIM card out of the
SIM card holder.
Cyan
Magenta
Yellow
www.nokia.com/support
Black
Page 11
Basic use
Cyan
Magenta
Yellow
Black
Write text
Traditional text input
indicates traditional text input.
and indicate the uppercase
and lowercase.
sentence case, that is, the first letter of the
sentence is written in uppercase and all
the other letters are automatically written
in lowercase.
mode.
To write text with the keypad, press a
number key, 2-9, repeatedly until the
desired character is displayed. There are
more characters available for a number
key than are printed on the key. If the next
letter is located on the same key as the
present one, wait until the cursor is
displayed, and enter the letter.
To insert a number, press and hold the
number key.
To switch between the different character
cases and modes, press #.
To erase a character, press the clear key.
Press and hold the clear key to erase more
than one character.
indicates the
indicates number
Basic use 11
To enter the most common punctuation
marks, press 1 repeatedly until the
desired punctuation mark is displayed.
To add special characters, press and hold
*.
To add a smiley, press *, and select More
emoticons and a smiley.
To insert a space, press 0. To insert a line
break, press 0 three times.
Predictive text input
1 To activate or deactivate predictive
text input, press # twice quickly. This
activates or deactivates predictive
text input for all editors in the device.
indicates that predictive text
input is activated.
2 To write the desired word, press the
keys 2-9. Press each key once for each
letter.
3 When you have finished writing the
word, and it is correct, scroll right to
confirm it, or press 0 to add a space.
If the word is not correct, press *
repeatedly to view the matching
words in the dictionary.
If the ? character is displayed after the
word, the word you intended to write
is not in the dictionary. To add a word
to the dictionary, select Spell, enter
the word (up to 32 letters) using
traditional text input, and select OK.
The word is added to the dictionary.
When the dictionary is full, the new
word replaces the oldest added word.
www.nokia.com/support
Cyan
Magenta
Yellow
Black
Page 12
12 Basic use
Cyan
Magenta
Yellow
Black
Write the first part of a compound word;
to confirm it, scroll right. Write the second
part of the compound word. To complete
the compound word, press 0 to add a
space.
Change the writing language
When you are writing text, you can change
the writing language. For example, if you
press the 6 key repeatedly to reach a
specific character, changing the writing
language gives you access to characters in
a different order.
If you are writing text using a non-Latin
alphabet and want to write Latin
characters, for example e-mail or web
addresses, you may need to change the
writing language. To change the writing
language, select Options > Input
options > Writing language, and a
writing language that uses Latin
characters.
Copy and delete text
1 To select letters and words, press and
hold #, and at the same time scroll left
or right. To select lines of text, press
and hold #, and at the same time
scroll up or down.
2 To copy the text, press and hold #, and
at the same time select Copy.
To delete the selected text, press the
clear key C.
3 To paste the text, scroll to the desired
location, press and hold #, and at the
same time select Paste.
Menu
Press
.
In the menu, you can access the functions
in your device.
To open an application or a folder, select
the item.
If you change the order of the functions in
the menu, the order may differ from the
default order described in this user guide.
To mark or unmark an item in
applications, press #.
To change the menu view, select
Options > Change Menu view.
To close an application or a folder, select
Options > Exit.
To display and switch between open
applications, press and hold the home
key, and select an application.
Display indicators
The device is being used in a 3G
network or a GSM network (network
service). The bar next to the icon
indicates the signal strength of the
network at your current location.
The higher the bar, the stronger the
signal.
High-speed downlink packet access
(HSDPA) / high-speed uplink packet
access (HSUPA) (network service) in
the 3G network is activated.
You have activated the offline
profile, and the device is not
connected to a cellular network.
Cyan
Magenta
Yellow
www.nokia.com/support
Black
Page 13

Basic use 13
Cyan
Magenta
Yellow
Black
The battery charge level. The higher
the bar, the more charge remains in
the battery.
You have unread messages in the
Inbox folder in Messaging. If the
indicator is blinking, your Inbox is
full and you need to remove old
messages from the Inbox before
you can receive new messages.
You have received new e-mail in the
remote mailbox.
There are messages waiting to be
sent in the Outbox folder in
Messaging.
You have missed calls.
The keys of the device are locked.
An alarm is active.
You have activated the silent
profile, and the device does not ring
for an incoming call or message.
Bluetooth connectivity is activated.
A Bluetooth connection is
established. When the indicator is
blinking, your device is trying to
connect with another device.
A GPRS packet data connection is
available (network service).
indicates that the connection is
active.
connection is on hold.
An EGPRS packet data connection is
available (network service).
indicates that the connection is
active.
connection is on hold.
A 3G packet data connection is
available (network service).
indicates that the connection is
active.
connection is on hold.
HSDPA/HSUPA is supported and
available (network service). The
icon may vary between regions.
indicates that the connection is
active.
connection is on hold.
Your device is connected to a
computer with a USB data cable.
The second phone line is being used
(network service).
All calls are forwarded to another
number. If you have two phone
lines, a number indicates the active
line.
A headset or a loopset is connected
to the device.
indicates that the
indicates that the
indicates that the
indicates that the
www.nokia.com/support
Cyan
Magenta
Yellow
Black
Page 14

14 Basic use
Cyan
Magenta
Yellow
Black
A hands-free car kit is connected to
the device.
Your device is synchronising.
Other indicators may also be displayed.
Shortcuts
Here are some of the available keyboard
shortcuts in your device. Shortcuts can
make the use of the applications more
efficient.
General shortcuts
Power key
* Press and hold to activate
# Press and hold to activate
Call key Press once to view a list of
Home
key
Press and hold to switch
your device on and off.
Press once to switch
between profiles.
or deactivate Bluetooth
connectivity.
or deactivate the silent
profile.
recently dialled numbers.
Press to go to the home
screen from an open
application.
Press and hold to switch
between open
applications.
Home screen
Left
selection
key + *
Call key Open the call log.
Home
key
0 Press and hold to open
1 Press and hold to call your
Number key
(2–9)
Offline profile
To quickly activate the Offline profile,
press the power key briefly, and select
Offline.
To switch to another profile, press the
power key briefly, and select a profile.
When the Offline profile is active, all
connections that use radio frequencies
are closed. However, you can use your
device without the SIM card and listen to
the radio or music. Remember to switch
off your device when wireless phone use
is prohibited.
Lock and unlock the
keypad and keyboard.
Open the main menu.
your homepage in Web
browser.
voice mailbox.
Call a phone number using
speed dialling. To activate
speed dialling, select
> Settings and
Phone > Call > Speed
dialling.
Cyan
Magenta
Important: In the offline profile
you cannot make or receive any calls, or
www.nokia.com/support
Yellow
Black
Page 15

Basic use 15
Cyan
Magenta
Yellow
Black
use other features that require cellular
network coverage. You may be able to call
the official emergency number
programmed into your device.To make
calls, you must first change to another
profile.
Access codes
Select
To define how your device uses the access
codes and security settings, select
General > Security > Phone and SIM
card and from the following:
• The PIN (UPIN) code, su pplied with the
• The PIN2 (UPIN2) code, supplied with
• PUK (UPUK) and PUK2 (UPUK2) codes
• The security code helps to protect
> Settings.
SIM (USIM) card, helps to protect the
card against unauthorised use.
some SIM (USIM) cards, is required to
access certain services.
may be supplied with the SIM (USIM)
card. If you enter the PIN code
incorrectly three times in succession,
you are asked for the PUK code. If the
codes are not supplied, contact your
service provider.
your phone against unauthorised use.
You can create and change the code,
and set the phone to request the code.
Keep the code secret and in a safe
place separate from your phone. If
you forget the code and your phone is
locked, your phone will require
service. Additional charges may apply,
and all the personal data in your
device may be deleted. For more
information, contact a Nokia Care
point or your device dealer.
• The barring password is required
when using the call barring service to
restrict calls to and from your phone
(network service).
Configuration settings
Before you can use multimedia
messaging, e-mail, synchronisation,
streaming, and the browser, you must
have the proper configuration settings in
your device. Your device may
automatically configure browser,
multimedia messaging, access point, and
streaming settings based on the SIM card
used. If not, you can use the Settings
wizard application to configure the
settings. You may receive the settings as
a configuration message that you can save
to your device. For more information on
availability, contact your service provider
or nearest authorised Nokia dealer.
When you receive a configuration
message, and the settings are not
automatically saved and activated, 1 new
message is displayed. To save the
settings, select Show > Options > Save.
You may need to enter a PIN code
provided by the service provider.
Settings wizard
With Settings wizard, you can define email and connection settings. The
availability of the items in Settings wizard
depends on the features of the device, SIM
card, service provider, and the data in the
Settings wizard database.
Select
To get the best results when using
Settings wizard, keep your SIM card
> Settings > Sett. wizard.
www.nokia.com/support
Cyan
Magenta
Yellow
Black
Page 16

16 Personalise your device
Cyan
Magenta
Yellow
Black
inserted in the device. If the SIM card is not
inserted, follow the instructions on the
display.
Select from the following:
Operator — Define the operator-specific
settings, such as MMS, internet, WAP, and
streaming settings.
{Missing display text mapping for
'qtn_setwiz_email_text.settingwizard
5' in language 'en'} — Set up a POP,
IMAP, or Mail for Exchange account.
Video sharing — Define video sharing
settings.
The settings available for editing may
vary.
Remote lock
You can lock your device from another
device using a text message. To enable
your device to be locked remotely, and to
define the lock message to be used, select
> Settings > Settings > General >
Security and Phone and SIM card >
Remote phone locking. When you have
entered the message, select OK. The
message can be up to 20 characters long.
To lock your device, send the lock message
as a text message to your mobile phone
number. To unlock your device later,
select Unlock, and enter the lock code.
Personalise your device
Home screen
When you have switched on the device,
and it is registered to a network, the
device is in the home screen and ready for
use.
To open a list of most recently dialled
numbers, press the call key.
To call your voice mailbox, press and hold
1.
To use voice commands or voice dialling,
press and hold the right selection key.
To change the profile, press the power key
briefly, and select a profile.
To open a connection to the web, press
and hold 0.
To modify the home screen, select
Settings and General >
Personalisation > Standby mode and
from the following:
Standby theme — Select a home screen
theme.
Shortcuts — Add shortcuts to
applications or events, or assign shortcuts
to the scroll key, depending on the
selected home screen theme.
Contacts bar
To add a contact to your home screen,
select the Add contact icon and a contact
from the list.
To create a new contact, select
Options > New contact, enter the
details, and select Done. You can also add
an image to the contact information.
To add a web feed for a contact, select the
Add feed icon, the desired feed from the
list, and Done.
To create a new feed, select Options >
New feed.
>
Cyan
Magenta
Yellow
www.nokia.com/support
Black
Page 17
Personalise your device 17
Cyan
Magenta
Yellow
Black
To update a feed, select Refresh.
To remove a contact from the home
screen, in the contact information view,
select the Settings icon and Remove.
Themes
Change the display theme
Select > Settings > Themes.
Select from the following:
General — Change the theme used in all
applications.
Menu view — Change the theme used in
the main menu.
Standby — Change the theme used in the
home screen.
Wallpaper — Change the background
image of the home screen.
Power saver — Select an animation for
the power saver.
Call image — Change the image
displayed during calls.
To activate or deactivate the theme
effects, select General > Options >
Theme effects.
Download a theme
Select
To download a theme, select General >
Download themes > Options > Go
to > New web page. Enter the web
address from which you want to
download your theme. Once the theme is
downloaded, you can preview or activate
the theme.
> Settings > Themes.
To preview a theme, select Options >
Preview.
To activate a theme, select Options >
Set.
Talking theme
Select
Standby > Talking theme.
When the talking theme is activated, a list
of functions supported by the talking
theme is displayed in the active standby
mode. As you scroll through the functions,
the device reads the displayed functions
aloud. Select the desired function.
To listen to the entries in your contacts
list, select Call features > Contacts.
To listen to information on your missed
and received calls, and dialled numbers,
select Call features > Recent calls.
To make a call by entering the phone
number, select Call features > Dialler
and the desired numbers. To enter a
phone number, scroll to the digits and
select them one by one.
To call your voice mailbox, select Call
features > Voice mailbox.
To use voice commands to make a call,
select Voice commands.
To have your received messages read
aloud, select Message reader.
> Settings > Themes and
www.nokia.com/support
Cyan
Magenta
Yellow
Black
Page 18
18 Telephone
Cyan
Magenta
Yellow
Black
To listen to the current time, select
Clock. To listen to the current date, scroll
down.
If the calendar alarm expires when you are
using voice aid, the application reads the
calendar alarm content aloud.
To listen to the available options, select
Options.
Profiles
Select > Settings > Profiles.
You can adjust and customise the ringing
tones, alert tones, and other device tones
for different events, environments, or
caller groups. The active profile is shown
at the top of the display in the standby
mode. However, if the active profile is
General, only today's date is shown.
To create a new profile, select Options >
Create new, and define the settings.
To customise a profile, select a profile and
Options > Personalise.
To activate a profile, select a profile and
Options > Activate.
To set the profile to be active until a
certain time within the next 24 hours,
scroll to the profile, select Options >
Timed, and set the time. When the time
expires, the profile changes back to the
previously active non-timed profile. When
the profile is timed,
standby mode. The Offline profile cannot
be timed.
is displayed in the
To delete a profile that you created, select
Options > Delete profile. You cannot
delete the predefined profiles.
When the Offline profile is activated, your
connection to the cellular network is
closed. All radio frequency signals
between the device and the cellular
network are prevented. If you try to send
a message, it is placed in the Outbox
folder, and is sent only when another
profile is activated.
You can also use your device without a SIM
card. If you remove the SIM card, the
Offline profile is activated.
Important: In the offline profile
you cannot make or receive any calls, or
use other features that require cellular
network coverage. You may be able to call
the official emergency number
programmed into your device.To make
calls, you must first change to another
profile.
When you use the Offline profile, you can
still use Bluetooth connectivity.
Remember to comply with any applicable
safety requirements when you establish
and use a Bluetooth connection.
Telephone
Make a call
To make a call, enter the phone number,
including the area code, and press the call
key.
Cyan
Magenta
Yellow
www.nokia.com/support
Black
Page 19
Telephone 19
Cyan
Magenta
Yellow
Black
Tip: For international calls, add the +
character that replaces the international
access code, and enter the country code,
area code (omit the leading 0, if
necessary), and phone number.
To end the call or cancel the call attempt,
press the end key.
To make a call using the saved contacts,
open the contacts. Enter the first letters of
the name, scroll to the name, and press
the call key.
To make a call using the log, press the call
key to view up to 20 numbers that you last
called or attempted to call. Scroll to the
desired number or name, and press the
call key.
To adjust the volume of an active call, use
the volume keys.
To switch from a voice call to a video call,
select Options > Switch to video call.
The device ends the voice call and makes
a video call to the recipient.
Answer a call
To answer a call, press the call key.
To reject a call, press the end key.
To mute the ringing tone instead of
answering a call, select Silence.
When you have an active call and the call
waiting feature (network service) is
activated, to answer a new incoming call,
press the call key. The first call is put on
hold. To end the active call, press the end
key.
Make a video call
To make a video call, enter the phone
number or select the recipient from the
contacts list and Options > Call > Video
call. When the video call starts, the
camera of the device is activated. If the
camera is already in use, video sending is
disabled. If the recipient of the call does
not want to send video back to you, a still
image is shown instead. To define the still
image sent from your device instead of
video, select
Phone > Call > Image in video call.
To disable the sending of audio, video, or
video and audio, select Options >
Disable > Sending audio, Sending
video, or Sending aud. & video.
To adjust the volume of an active video
call, use the volume keys.
To use the loudspeaker, select Options >
Activate loudspeaker. To mute the
loudspeaker and use the earpiece, select
Options > Activate handset.
To swap the places of images, select
Options > Swap images.
To zoom the image on the display, select
Options > Zoom and scroll up or down.
To end the video call and make a new
voice call to the same recipient, select
Options > Switch to voice call.
> Settings and
www.nokia.com/support
Cyan
Magenta
Yellow
Black
Page 20
20 Contacts
Cyan
Magenta
Yellow
Black
Call and data registers
Select
To view recently missed, received, and
dialled calls, select Recent calls.
Tip: To view the dialled numbers when in
the standby mode, press the call key.
To view the approximate duration of calls
to and from your device, select Call
duration.
To view the amount of data transferred
during packet data connections, select
Packet data.
Call divert
Select
divert.
Divert incoming calls to your voice
mailbox or to another phone number. For
details, contact your service provider.
Select the type of calls to divert and from
the following:
All voice calls or All fax calls — Divert all
incoming voice or fax calls. You cannot
answer the calls, only divert the calls to
another number.
If busy — Divert incoming calls if you
have an active call.
If not answered — Divert incoming calls
after your device rings for a specified
length of time. Select the length of time
for the device to ring before diverting the
call.
> Log.
> Settings and Phone > Call
If out of reach — Divert calls when the
device is switched off or out of network
coverage.
If not available — Divert calls if you have
an active call, do not answer, or the device
is switched off or out of network coverage.
To divert calls to your voice mailbox, select
a call type, a diverting option,
andOptions > Activate > To voice
mailbox.
To divert calls to another phone number,
select a call type, a diverting option, and
Options > Activate > To other
number. Enter the number, or select
Find to retrieve a number saved in
Contacts.
To check the current diverting status,
scroll to the diverting option, and select
Options > Check status.
To stop diverting calls, scroll to the
diverting option, and select Options >
Deactivate.
Contacts
Stay connected with your online
friends
You can synchronise the contact
information on your device with contacts
you have on Facebook. You can also create
a new Facebook account directly from
your device.
When you allow synchronisation, you are
able to view your contacts' Facebook
profile information, such as their picture
Cyan
Magenta
Yellow
www.nokia.com/support
Black
Page 21
Contacts 21
Cyan
Magenta
Yellow
Black
and status updates, in the Contacts
application on your device. You are also
informed of how many contacts were
synchronised.
After sychronisation, the Contacts icon
is visible on your friends' profile, and
you can call and send messages also using
the Facebook application.
Synchronising your contacts and
retrieving status updates are network
services. Roaming and data transfer
charges may apply. If the social
networking service is not available or
functioning correctly, you may not be able
to synchronise or retrieve status updates.
This feature may not be available in
certain regions.
Link your online friends to your
contacts list
You can link your friends' Facebook
profiles to their contact information in
your device. After this, you can see your
friends' latest status updates in your
contacts list and contact them using the
Facebook application.
Select
When you use the Facebook application
for the first time, you are prompted to
synchronise the application with Contacts,
to link your Facebook friends to your
contacts list.
To synchronise the Facebook application
later, in the Facebook application, select
Options > Settings > Rematch all
contacts > Match.
> Applications > Facebook.
Link a contact manually
1 Select
2 Select a contact and Options >
Facebook > Match to friend.
3 In the Facebook application, select the
friend and Match.
Tip: You can link your Facebook friends to
your contacts list also starting from the
Facebook application.
Remove the linking
1 Select
2 Select the contact and Options >
Facebook > Remove match.
Copy contacts
Select
When you open the contacts list for the
first time, the device asks if you want to
copy names and numbers from the SIM
card to your device.
Start copying
Select OK.
Cancel copying
Select Cancel.
The device asks if you want to view the SIM
card contacts in the contacts list. To view
the contacts, select OK. The contacts list
opens, and the names stored on your SIM
card are indicated with
Manage names and numbers
Select
> Contacts.
> Contacts.
> Contacts.
.
> Contacts.
www.nokia.com/support
Cyan
Magenta
Yellow
Black
Page 22
22 Contacts
Cyan
Magenta
Yellow
Black
Delete a contact
Go to a contact, and select Options >
Delete.
Delete several contacts
1 To mark a contact to be deleted, go to
the contact, and select Options >
Mark/Unmark.
2 To delete the marked contacts, select
Options > Delete.
Copy a contact
Go to a contact, and select Options >
Copy and the desired location.
Send a contact to another device
Select the contact and Options > View
details > Options > Send business
card.
Listen to the voice tag assigned to a
contact
Select the contact and Options > View
details > Options > Voice tag details >
Options > Play voice tag.
When entering contacts or editing voice
commands, do not use very short or
similar names for different contacts or
commands.
Using voice tags may be difficult in a noisy
environment or during an emergency, so
you should not rely solely upon voice
dialling in all circumstances.
Save and edit names and numbers
Select
> Contacts.
Add a new contact to the contacts list
1 Select Options > New contact.
2 Fill in the appropriate fields, and
select Done.
Edit a contact
Select a contact and Options > View
details > Options > Edit.
Ringing tones, images, and call text for
contacts
You can define a ringing tone for a contact
or contact group, and an image and call
text for a contact. When the contact calls
you, the device plays the selected ringing
tone and shows the call text or image (if
the caller’s phone number is sent with the
call and your device recognises it).
Select
Add more fields to a contact details
view
Select the contact and Options > Edit >
Options > {Missing display text
mapping for
'qtn_phob_opt_item_add.phonebook'
in language 'en'}.
Define a ringing tone for a contact or
contact group
Select the contact or contact group and
Options > Ringing tone, and select a
ringing tone.
Remove the ringing tone from a
contact
Select Default tone from the list of
ringing tones.
> Contacts.
Cyan
Magenta
Yellow
www.nokia.com/support
Black
Page 23
Messaging 23
Cyan
Magenta
Yellow
Black
Add an image for a contact
Select a contact saved in the device
memory and Options > Edit > Add
image, and select an image from Photos
Define a call text for a contact
Select the contact and Options > Edit >
Add text for call. Enter the call text, and
select OK.
View, change or remove the image
from a contact
1 Select a contact and Options > Edit.
2Go to Image, and select Options and
the desired option.
Messaging
About messaging
With Messaging (network service), you
can send and receive text, multimedia,
audio, and e-mail messages. You can also
receive web service messages, cell
broadcast messages, and special
messages containing data, and send
service commands.
Select
The available messaging types may vary.
For more information, contact your
service provider.
Before sending or receiving messages,
you may need to do the following:
• Insert a valid SIM card in the device
• Verify that the network supports the
> Messaging.
and be located in the service area of a
cellular network.
messaging features you want to use
and that they are activated on your
SIM card.
• Define the internet access point
settings on the device.
• Define the e-mail account settings on
the device.
• Define the text message settings on
the device.
• Define the multimedia message
settings on the device.
The device may recognise the SIM card
provider and automatically configure
some of the message settings. If not, you
may need to define the settings manually;
or contact your service provider to
configure the settings.
The appearance of a picture message may
vary depending on the receiving device.
Only devices that have compatible
features can receive and display
multimedia messages. The appearance of
a message may vary depending on the
receiving device.
Write and send messages
Select
Before you can create a multimedia
message or write an e-mail, you must
have the correct connection settings in
place.
If the item you inserted in a multimedia
message is too large for the network, the
device may automatically reduce the size.
Check the size limit of e-mail messages
with your service provider. If you attempt
> Messaging.
www.nokia.com/support
Cyan
Magenta
Yellow
Black
Page 24
24 Messaging
Cyan
Magenta
Yellow
Black
to send an e-mail message that exceeds
the size limit of the e-mail server, the
message is left in the Outbox folder, and
the device attempts to resend it
periodically. Sending an e-mail requires a
data connection, and continuous
attempts to resend the e-mail may
increase your data transfer costs. In the
Outbox folder, you can delete such a
message, or move it to the Drafts folder.
1 Select New message.
2 To send a text or multimedia message
(MMS), select Message. To send a
multimedia message that includes
one sound clip, select Audio
message. To send an e-mail, select Email.
3 In the To field, press the scroll key to
select recipients or groups from the
contacts list, or enter the recipient’s
phone number or e-mail address. To
insert a semicolon (;) that separates
the recipients, press *. You can also
copy and paste the number or address
from the clipboard.
4 In the subject field, enter the subject
of the message for a multimedia or an
e-mail message. To hide or display
fields when writing a text or
multimedia message, select
Options > Message header fields.
5 In the message field, write the
message. To add a template or note
to a text or multimedia message,
select Options > Insert content >
Insert text > Template or Note. To
add a template to an e-mail message,
select Options > Insert template.
6 To add a media file to a multimedia
message, select Options > Insert
content, the file type and source of
the media file, and then the desired
file. To add a business card, slide,
note, or other file to the message,
select Options > Insert content >
Insert other.
7 To capture an image or record a video
or sound clip for a multimedia
message, select Options > Insert
content > Insert image > New,
Insert video clip > New, or Insert
sound clip > New.
8 To add an attachment to an e-mail,
select Options > Add attachment,
the memory, and the file to attach.
indicates an e-mail attachment.
9 To send the message, select
Options > Send, or press the call key.
The available options may vary.
You can send text messages that are
longer than the character limit for a single
message. Longer messages are sent as
two or more messages. Your service
provider may charge accordingly.
Characters with accents, other marks, or
some language options, take more space,
and limit the number of characters that
can be sent in a single message.
You may not be able to send video clips
that are saved in the MP4 file format or
that exceed the size limit of the wireless
network in a multimedia message.
E-mail
Set up your e-mail
With the Nokia e-mail wizard, you can set
up your corporate e-mail account, such as
Cyan
Magenta
Yellow
www.nokia.com/support
Black
Page 25
Messaging 25
Cyan
Magenta
Yellow
Black
Microsoft Outlook, Mail for Exchange, or
Intellisync, and your internet e-mail
account.
When setting up your corporate e-mail,
you may be prompted for the name of the
server associated with your e-mail
address. Ask your company IT department
for details.
1 On the home screen, select the e-mail
wizard.
2 Enter your e-mail address and
password. If the wizard is not able to
configure your e-mail settings
automatically, you need to select your
e-mail account type and enter the
related account settings.
If your device contains any additional email clients, those are offered to you when
you start the e-mail wizard.
Send e-mail
Select
1 Select your mailbox and Options >
2 In the To field, enter the recipient's e-
3 In the Subject field, enter the subject
> Messaging.
Create email.
mail address. If the recipient's e-mail
address can be found in Contacts, start
entering the recipient's name, and
select the recipient from the proposed
matches. If you add several recipients,
insert ; to separate the e-mail
addresses. Use the Cc field to send a
copy to other recipients, or the Bcc
field to send a blind copy to recipients.
If the Bcc field is not visible, select
Options > More > Show Bcc field.
of the e-mail.
4 Enter your message in the text area.
5 Select Options and from the
following:
Add attachment — Add an
attachment to the message.
Priority — Set the priority of the
message.
Flag — Flag the message for followup.
Insert template — Insert text from
a template.
Add recipient — Add recipients to
the message from Contacts.
Editing options — Cut, copy, or paste
the selected text.
Input options — Activate or
deactivate predictive text input, or
select the writing language.
6 Select Options > Send.
The available options may vary.
Read e-mail
Select
To read a received e-mail message, select
the mailbox, and select the message from
the list.
To reply to the message sender, select
Options > Reply. To reply to the sender
and all other recipients, select Options >
Reply to all.
To forward the message, select
Options > Forward.
> Messaging.
www.nokia.com/support
Cyan
Magenta
Yellow
Black
Page 26
26 Messaging
Cyan
Magenta
Yellow
Black
Reply to a meeting request
Select
You can reply to meeting requests only if
you have activated calendar data
synchronisation.
Select a received meeting request,
Options, and from the following:
Accept — Accept the meeting request.
Decline — Decline the meeting request.
Forward — Forward the meeting request
to another recipient.
Remove from calendar — Remove a
cancelled meeting from your calendar.
Delete e-mails
Select
To delete an e-mail message, select the
message and Options > Actions >
Delete. The message is placed in the
Deleted items folder, if available. If there
is no Deleted items folder available, the
message is deleted permanently.
To empty the Deleted items folder, select
the folder and Options > Empty deleted
items.
Switch between e-mail folders
Select
To open another e-mail folder or mailbox,
select Inbox at the top of the display.
Select the e-mail folder or mailbox from
the list.
> Messaging and a mailbox.
> Messaging and a mailbox.
> Messaging and a mailbox.
About Chat
With IM (network service), you can
exchange instant messages with your
friends. You can access several chat
services or communities simultaneously
and switch between them. If you want to,
for example, browse the web, you can
leave the IM application to run in the
background, and still be notified of new
instant messages.
The IM application is preinstalled on your
device. To start chatting, select
Applications > Chat.
Using network services and downloading
content to your device may result in data
traffic costs.
About Ovi Contacts
With Ovi Contacts, you can stay connected
with the people who matter most. Search
for contacts, and discover friends in the
Ovi community. Keep in touch with your
friends - chat, share your location and
presence information, and easily follow
what your friends are up to and where
they are.
You can also sync your contacts, calendar,
and other content between your Nokia
device and Ovi. Your important
information is stored and kept up to date
both in your device and on the web. With
Ovi Contacts, you can make your contacts
list dynamic and be confident that your
contacts are stored in Ovi.
You must have a Nokia account to use the
service. Create an account on your mobile
device, or go to www.ovi.com on your PC.
>
Cyan
Magenta
Yellow
www.nokia.com/support
Black
Page 27
Messaging 27
Cyan
Magenta
Yellow
Black
Using Ovi Contacts may involve the
transmission of large amounts of data
through your service provider's network.
For information about data transmission
charges, contact your network service
provider.
Connect to the service
Select
tab.
Connect to Ovi Contacts
Select Go online and the connection
method.
Close the connection
Select Options > {Missing display text
mapping for
'qtn_friends_options_sign_out.xmppp
bkplugin' in language 'en'}.
A packet data connection may generate
additional data transmission charges. For
pricing details, contact your network
service provider.
Select Go online > Options and from the
following:
Select — Select the item.
Go online — Connect to the service if you
are offline.
My profile — Edit your profile
information.
Recommend to friend — Invite a contact
to join Ovi Contacts. The invitation is sent
as a text message.
Settings — Modify the Ovi Contacts
settings.
The available options may vary.
> Contacts, and open the Ovi
Instant messaging
About Instant messaging
Instant messaging (IM) (network service)
allows you to converse with other people
using instant messages and join
discussion forums (IM groups) with
specific topics. Various service providers
maintain compatible IM servers that you
can log in to after you register to an IM
service. Service providers may differ in
their support of features.
Before you can use Instant messaging, yo u
must save the settings to access the
service that you want to use. The settings
may be preconfigured in your device, or
you may receive the settings as a
configuration message from the service
provider that offers the IM service. You can
also enter the settings manually.
IM views
In the application main view, select
User ID — to view your own IM status and
identity
Conversations — to view a list of IM
conversations, chat groups, and received
invitations, and to open a chat group,
conversation or invitation
To view your contacts, select a contact list
name.
The following options are available:
New conversation — Start or continue a
conversation with an IM user.
New IM contact — Create, edit, or view
the online status of your IM contacts.
Saved conversations — View a previous
instant messaging session that you saved.
www.nokia.com/support
Cyan
Magenta
Yellow
Black
Page 28
28 Messaging
Cyan
Magenta
Yellow
Black
When you open a conversation, the
conversation view shows the messages
that have been sent and received. To send
a new message, type the message in the
editing box at the bottom of the screen.
Connect to an IM server
1 To connect to the instant messaging
(IM) server in use, open IM, and select
Options > Log in.
2 Enter your user ID and password, and
press the scroll key to log in. You
obtain the user ID and password for
the IM server from your service
provider.
3 To log out, select Options > Log
out.
Start a new conversation
To start a new IM conversation, in the
application main view, scroll to an IM
contact list. If the list is closed, press the
scroll key to expand it to show the
contacts in the list.
Scroll to the desired contact in the contact
list. An icon indicates the availability of
the contact. To start a conversation with
the contact, press the scroll key.
When you have selected a contact, the
conversation view will open with the
editor box in focus, and you can start to
type your message in the editor box.
View and start conversations
Under the Conversations heading you can
see a list of the contacts with whom you
have an ongoing conversation. Ongoing
conversations are automatically closed
when you exit IM.
To view a conversation, scroll to a
participant, and press the scroll key.
To continue the conversation when you
are viewing it, write your message, and
press the scroll key.
To return to the conversations list without
closing the conversation, select Back.
To close the conversation, select
Options > End conversation.
To start a new conversation, select
Options > New conversation.
Change your own status
In the application main view, select the
first item and a new status.
Modify your personal IM preferences
Select Options > Settings >
Preferences and from the following:
Use screen name (shown only if IM
groups are supported by the server) — To
enter a nickname, select Yes.
Show my availability — To allow others
to see if you are online, select To
everyone.
Allow messages from — To allow
messages from all, select All.
Allow messages from — To allow
messages only from your contacts, select
IM contacts only. IM invitations are sent
by contacts who want you to join their
groups.
Cyan
Magenta
Yellow
www.nokia.com/support
Black
Page 29
Messaging 29
Cyan
Magenta
Yellow
Black
Sort IM contacts — Select how your
contacts are sorted: Alphabetically or By
online status.
Availability reloading — To select how
to update information about whether
your contacts are online or offline, select
Automatic or Manual.
Offline contacts — Select whether
contacts with an offline status are shown
in the contacts list.
Own message colour — Select the
colour of the instant messages you send.
Received message colour — Select the
colour of the instant messages you
receive.
Show date/ time info — To view the
date and time of the instant messages in
conversations, select Yes.
IM alert tone — Change the tone that
sounds when you receive a new instant
message.
Retrieve IM contact lists
You can retrieve contact lists from the
server, or add a new contact to a contact
list. When you log in to the server, the
previously used contact lists are retrieved
from the server automatically.
Record chats
When viewing the content of a
conversation, to record the messages that
are exchanged during a conversation or
while you are joined to an IM group, select
Options > Save conversation.
To stop recording, select Options > Stop
recording.
To view the recorded chats, in the main
view, select Options > Saved
conversations.
Search for IM groups and users
To search for IM groups and users, in the
IM community main view, first scroll to an
item such as one of your own status items,
or to an item within one of your IM contact
lists.
To search for groups, select Options >
New conversation > Search for
groups . You may be able to search by
group name, topic, and members (user
ID).
To search for users, select Options > New
IM contact > Search from server. You
may be able to search by user's name, user
ID, phone number, and e-mail address.
When a search is complete, select
Options and from the following:
More results — To retrieve further search
results.
Previous results — To retrieve previous
search results if they are available.
Add to IM contacts — To add a contact
to your IM contacts.
Open conversation — To open a
conversation with a contact.
Send invitation — To invite a contact to
chat.
Blocking options — To block messages
from a contact, add a contact to the
blocked list, or view the list of blocked
contacts.
www.nokia.com/support
Cyan
Magenta
Yellow
Black
Page 30
30 Messaging
Cyan
Magenta
Yellow
Black
Join — To join the chat group.
Save — To save a retrieved chat group as
a favourite visible under the
Conversations heading.
New search — To start a new search with
different criteria.
The available options will vary depending
on the IM server.
IM groups
To join an IM group saved under the
Conversations heading, scroll to the group
you want to join and press the scroll key.
After you join an IM group, you can view
the messages that are exchanged there
and send your own messages.
To send a message, write the message in
the editing box at the bottom of the
screen, and press the scroll key.
To send a private message to a
participant, select Options > Send
private message.
To reply to a private message sent to you,
select the message and Options >
Reply.
To invite IM contacts who are online to
join the IM group, select Options > Send
invitation.
To prevent receiving messages from
certain participants, select Back >
Options > Blocking options.
To leave the IM group, select Options >
Leave IM group.
IM server settings
Select Options > Settings. The settings
may be preconfigured in your device, or
you may receive the settings as a
confirmation message from the service
provider that offers the IM service. You
obtain the user ID and password from
your service provider when you register to
the service. If you do not know your user
ID and password, contact your service
provider.
The following settings are available:
Preferences — Modify your IM settings.
Servers — View a list of all defined IM
servers.
Default server — Change the IM server to
which you want to connect.
IM login type — To log in automatically
when you start IM, select On app. start-
up.
To add a new server to your list of IM
servers, select Servers > Options > New
server. Enter the following server
settings:
Server name — The name of the chat
server.
Access point in use — The access point
you want to use for the server.
Web address — The URL address of the
IM server.
User ID — Your user ID.
Password — Your login password.
Cyan
Magenta
Yellow
www.nokia.com/support
Black
Page 31
Connectivity 31
Cyan
Magenta
Yellow
Black
Connectivity
Connect your computer to web
You can use your device to connect your
PC to the web.
1 Connect the data cable to the USB
connectors of your device and your PC.
2 Select Connect PC to web. The
necessary software is automatically
installed from your device to the PC.
3 Accept the installation in your PC.
Accept also the connection, if
prompted. When the connection to
the web is established, the web
browser of your PC opens.
You must have administrator rights to
your PC, and the autorun option enabled
in the PC.
If you use Mac OS, select PC Suite as the
connection method. For more
information, see www.nokia.com/
support.
About Bluetooth
Bluetooth technology in your device
enables wireless connections between
electronic devices within a range of 10
metres (33 feet). A Bluetooth connection
can be used to send images, videos, text,
business cards, calendar notes, or to
connect wirelessly to devices that use
Bluetooth technology.
Since devices using Bluetooth technology
communicate using radio waves, your
device and the other devices do not need
to be in direct line-of-sight. The two
devices only need to be within a
maximum of 10 metres of each other,
although the connection can be subject to
interference from obstructions such as
walls or other electronic devices.
Several Bluetooth connections can be
active at a time. For example, if your
device is connected to a headset, you can
also transfer files to another compatible
device at the same time.
This device is compliant with Bluetooth
Specification 2.1 + EDR supporting the
following profiles: Advanced Audio
Distribution, Audio/Video Remote Control,
Basic Imaging, Basic Printing, Device ID,
Dial-up Networking, File Transfer, Generic
Audio/Video Distribution, Generic Access,
Generic Object Exchange, Handsfree,
(Human Interface Device) Headset, Object
Push, Phone Book Access, Serial Port, and
SIM Access. To ensure interoperability
between other devices supporting
Bluetooth technology, use Nokia
approved accessories for this model.
Check with the manufacturers of other
devices to determine their compatibility
with this device.
Send and receive data with Bluetooth
Select
Bluetooth.
1 When you activate Bluetooth
2 Select Bluetooth > On.
3 Select My phone's visibility >
> Settings > Connectivity >
connectivity for the first time, you are
asked to name your device. Give your
device a unique name to make it easy
to recognise if there are several
Bluetooth devices nearby.
Shown to all or Define period. If you
select Define period, you need to
www.nokia.com/support
Cyan
Magenta
Yellow
Black
Page 32
32 Connectivity
Cyan
Magenta
Yellow
Black
define the time during which your
device is visible to others. Your device
and the name you entered can now be
seen by other users with devices using
Bluetooth technology.
4 Open the application where the item
you want to send is stored.
5 Select the item and Options >
Send > Via Bluetooth. The device
searches for other devices using
Bluetooth technology within range
and lists them.
Tip: If you have sent data using
Bluetooth connectivity before, a list of
the previous search results is
displayed. To search for more
Bluetooth devices, select More
devices.
6 Select the device with which you want
to connect. If the other device
requires pairing before data can be
transmitted, you are asked to enter a
passcode.
When the connection has been
established, Sending data is displayed.
The Sent folder in the Messaging
application does not store messages sent
using Bluetooth connectivity.
To receive data using Bluetooth
connectivity, select Bluetooth > On and
My phone's visibility > Shown to all to
receive data from a non-paired device or
Hidden to receive data from a paired
device only. When you receive data
through Bluetooth connectivity,
depending on the settings of an active
profile, a tone sounds, and you are asked
if you want to accept the message in
which the data is included. If you accept,
the message is placed in the Inbox folder
in the Messaging application.
Tip: You can access the files in the device
or on the memory card using a compatible
accessory that supports the File Transfer
Profile Client service (for example, a
laptop computer).
A Bluetooth connection is disconnected
automatically after sending or receiving
data. Only Nokia Ovi Suite and some
accessories such as headsets may
maintain a connection even if not actively
used.
Synchronisation
With the Sync application, you can
synchronise your notes, messages,
contacts, and other information with a
remote server.
Select
Sync.
You may receive synchronisation settings
as a configuration message from your
service provider.
A synchronisation profile contains the
necessary settings for synchronisation.
When you open the application, the
default or previously used
synchronisation profile is displayed.
Include or exclude content types
Select a content type.
Synchronise data
Select Options > Synchronise.
> Settings > Connectivity >
Cyan
Magenta
Yellow
www.nokia.com/support
Black
Page 33
Web 33
Cyan
Magenta
Yellow
Black
Create a new synchronisation profile
Select Options > New sync profile.
Manage synchronisation profiles
Select Options and the desired option.
Web
About Web browser
With the Web browser application, you
can view hypertext markup language
(HTML) web pages on the internet as
originally designed. You can also browse
web pages that are designed specifically
for mobile devices, and use extensible
hypertext markup language (XHTML), or
the wireless markup language (WML).
To browse the web, you need to have an
internet access point configured in your
device.
Browse the web
Select
Go to a website
Select the web address bar, enter a web
address, and select
Tip: To search the internet, select the web
address bar, enter the search word, and
select the link below the web address bar.
Zoom in or out
Place two fingers on the screen, and slide
your fingers together or apart.
> Web.
.
A cache is a memory location that is used
to store data temporarily. If you have, or
have tried to, access confidential
information or a secure service, requiring
passwords, clear the cache after each use.
Empty the cache
Select
text mapping for
'qtn_browsers_fldr_privacy.wmlbrows
er' in language 'en'} > Clear privacy
data > Cache.
About Search
Select
Search (network service) enables you to
use various internet-based search services
to find, for example, websites and images.
The content and availability of the services
may vary.
Subscribe to a web feed
You don't have to visit your favourite
websites regularly to keep up with what's
new on them. You can subscribe to web
feeds and get links to latest content
automatically.
Select
Web feeds on web pages are usually
indicated with
share, for example, the latest news
headlines or blog entries.
Go to a blog or web page that contains a
web feed, and select
the desired feed.
> > {Missing display
> Applications > Search.
> Web.
. They are used to
> and
www.nokia.com/support
Cyan
Magenta
Yellow
Black
Page 34
34 Positioning
Cyan
Magenta
Yellow
Black
Update a feed
In the Web feeds view, select and hold the
feed, and from the pop-up menu, select
Refresh.
Set a feed to automatically update
In the Web feeds view, select and hold the
feed, and from the pop-up menu, select
Edit > Automatic updates.
Discover nearby events
Are you looking for interesting things to
do near your current location? With Here
and now, you can get information about,
for example, the weather, events, cinema
times, or restaurants nearby.
Select
1 Select
2 Browse the available services, and for
Some services may not be available in all
countries, and may be provided only in
selected languages. The services may be
network dependent. For more
information, contact your network service
provider.
> Web.
> > Here and
now.
more information, select the service.
Positioning
These applications require a GPS
connection.
About GPS
The availability and quality of GPS signals
may be affected by your location, satellite
positions, buildings, natural obstacles,
weather conditions and adjustments to
GPS satellites made by the United States
government. GPS signals may not be
available inside buildings or
underground.
Do not use GPS for precise location
measurement, and never rely solely on the
location information provided by GPS and
cellular networks.
The coordinates in the GPS are expressed
using the international WGS-84
coordinate system. The availability of the
coordinates may vary by region.
About assisted GPS (A-GPS)
Your device supports A-GPS (network
service). When you activate A-GPS, your
device receives useful satellite
information from an assistance data
server over the cellular network. With the
help of assisted data, your device can
obtain the GPS position faster.
Your device is preconfigured to use the
Nokia A-GPS service, if no service providerspecific A-GPS settings are available. The
assistance data is retrieved from the Nokia
A-GPS service server only when needed.
You must have an internet access point
defined in the device to retrieve
assistance data from the Nokia A-GPS
service over a packet data connection.
Define an access point for A-GPS
Select
and {Missing display text mapping for
'qtn_loc_app_settings.location' in
language 'en'} > {Missing display text
mapping for
'qtn_loc_settings_supl.locsuplsettings'
in language 'en'} > {Missing display
> Applications > GPS data
Cyan
Magenta
Yellow
www.nokia.com/support
Black
Page 35
Positioning 35
Cyan
Magenta
Yellow
Black
text mapping for
'qtn_loc_supl_apn.locsuplsettings' in
language 'en'}. Only a packet data
internet access point can be used for this
service. Your device asks for the internet
access point when GPS is used for the first
time.
Maps
Maps overview
Select > Maps.
Welcome to Maps.
Maps shows you what is nearby, helps you
plan your route, and guides you where
you want to go.
• Find cities, streets, and services.
• Find your way with turn-by-turn
directions.
• Synchronise your favourite locations
and routes between your mobile
device and the Ovi Maps internet
service.
• Check weather forecasts and other
local information, if available.
Some services may not be available in all
countries, and may be provided only in
selected languages. The services may be
network dependent. For more
information, contact your network service
provider.
Almost all digital cartography is
inaccurate and incomplete to some
extent. Never rely solely on the
cartography that you download for use in
this device.
Some content is generated by third
parties and not Nokia. The content may be
inaccurate and is subject to availability.
View your location and the map
See your current location on the map, and
browse maps of different cities and
countries.
Select
available. If your position is not available,
If only cell ID based positioning is
available, a red halo around the
positioning icon indicates the general
area you might be in. In densely populated
areas, the accuracy of the estimate
increases, and the red halo is smaller than
in lightly populated areas.
Move on the map
Use the scroll key. By default, the map is
oriented north.
View your current or last known
location
Press 0.
Zoom in or out
Press * or #.
If you browse to an area not covered by
the maps that are stored on your device
and you have an active data connection,
new maps are automatically downloaded.
Map coverage varies by country and
region.
> Maps and My position.
marks your current position, if
indicates your last known position.
www.nokia.com/support
Cyan
Magenta
Yellow
Black
Page 36
36 Positioning
Cyan
Magenta
Yellow
Black
Share location
Publish your current location to Facebook,
together with text and a picture. Your
Facebook friends can see your location on
a map.
Select
To share your location, you need a Nokia
account and a Facebook account.
1 Sign in to your Nokia account, or, if
2 Sign in to your Facebook account.
3 Select your current location.
4 Enter your status update.
5 To attach a picture to your post, select
6 Select Share location.
Manage your Facebook account
In the main view, select Options >
Account > Share location settings >
Facebook.
Sharing your location and viewing the
location of others requires an internet
connection. This may involve the
transmission of large amounts of data and
related data traffic costs.
The Facebook terms of use apply to
sharing your location on Facebook.
Familiarise yourself with the Facebook
terms of use and the privacy practices.
Before sharing your location to others,
always consider carefully with whom you
are sharing it. Check the privacy settings
of the social networking service you are
> Maps and Share loc..
you do not yet have one, select Create
new account.
Add a photo.
using as you might share your location
with a large group of people.
Find a location
Maps helps you find specific locations and
businesses.
Select
1 Enter search words, such as a street
2 Select Submit.
3 In the list of proposed matches, go to
Return to the list of proposed matches
Select List.
Search for different types of nearby
places
Select Browse categories and a category,
such as shopping, accommodation, or
transport.
If no search results are found, ensure the
spelling of your search terms is correct.
Problems with your internet connection
may also affect results when searching
online.
To avoid data transfer costs, you can also
get search results without an active
internet connection, if you have maps of
the searched area stored on your device.
> Maps and Search.
address or postcode. To clear the
search field, select Clear.
the desired item. To display the
location on the map, select Map.
To view the other locations of the
search result list on the map, scroll up
or down.
Cyan
Magenta
Yellow
www.nokia.com/support
Black
Page 37
Positioning 37
Cyan
Magenta
Yellow
Black
Drive to your destination
When you need turn-by-turn directions
while driving, Maps helps you get to your
destination.
Select
Drive to a destination
Select Set destination and the
appropriate option.
Drive to your home
Select Drive home.
When you select Drive home or Walk
home for the first time, you are prompted
to define your home location. To later
change the home location, do the
following:
1 In the main view, select Options >
2 Select the appropriate option.
Tip: To drive without a set destination,
select Map. Your location is displayed on
the centre of the map as you move.
Change views during navigation
Press the scroll key, and select 2D view,
3D view, Arrow view, or Route
overview.
Obey all local laws. Always keep your
hands free to operate the vehicle while
driving. Your first consideration while
driving should be road safety.
> Maps and Drive.
Settings > Navigation > Home
Location > Change > Redefine.
Get voice guidance
Voice guidance, if available for your
language, helps you find your way to a
destination, leaving you free to enjoy the
journey.
Select
When you use drive or walk navigation for
the first time, you are asked to select the
language of the voice guidance, and
download the appropriate files.
If you select a language that includes
street names, also the street names are
said aloud. Voice guidance may not be
available for your language.
Change the voice guidance language
In the main view, select Options >
Settings > Navigation > Drive
guidance or Walk guidance and the
appropriate option.
Deactivate voice guidance
In the main view, select Options >
Settings > Navigation > Drive
guidance or Walk guidance and None.
Repeat the voice guidance for car
navigation
In the navigation view, select Options >
Repeat.
Adjust the volume of the voice
guidance for car navigation
In the navigation view, select Options >
Volume.
> Maps and Drive or Walk.
www.nokia.com/support
Cyan
Magenta
Yellow
Black
Page 38
38 Positioning
Cyan
Magenta
Yellow
Black
Walk to your destination
When you need directions to follow a
route on foot, Maps guides you over
squares, and through parks, pedestrian
zones, and even shopping centres.
Select
Walk to a destination
Select Set destination and the
appropriate option.
Walk to your home
Select Walk home.
When you select Drive home or Walk
home for the first time, you are prompted
to define your home location. To later
change the home location, do the
following:
1 In the main view, select Options >
2 Select the appropriate option.
Tip: To walk without a set destination,
select Map. Your location is displayed on
the centre of the map as you move.
Plan a route
Plan your journey, and create your route
and view it on the map before setting off.
Select
Create a route
1 Go to your starting point.
2 Press the scroll key, and select Add to
> Maps and Walk.
Settings > Navigation > Home
Location > Change > Redefine.
> Maps and My position.
route.
3 To add another route point, select
Add new route point and the
appropriate option.
Change the order of the route points
1 Go to a route point.
2 Press the scroll key, and select Move.
3 Go to the place where you want to
move the route point to, and select
OK.
Edit the location of a route point
Go to the route point, press the scroll key,
and select Edit and the appropriate
option.
View the route on the map
Select Show route.
Navigate to the destination
Select Show route > Options > Start
driving or Start walking.
Change the settings for a route
The route settings affect the navigation
guidance and the way the route is
displayed on the map.
1 In the route planner view, open the
Settings tab. To get to the route
planner view from the navigation
view, select Options > Route
points or Route point list.
2 Set the transportation mode to
Drive or Walk. If you select Walk,
one-way streets are regarded as
normal streets, and walkways and
routes through, for example, parks
and shopping centres, can be used.
3 Select the desired option.
Cyan
Magenta
Yellow
www.nokia.com/support
Black
Page 39
Positioning 39
Cyan
Magenta
Yellow
Black
Select the walking mode
Open the Settings tab, and select Walk >
Preferred route > Streets or Straight
line. Straight line is useful on off-road
terrain as it indicates the walking
direction.
Use the faster or shorter driving route
Open the Settings tab, and select Drive >
Route selection > Faster route or
Shorter route.
Use the optimised driving route
Open the Settings tab, and select Drive >
Route selection > Optimised. The
optimised driving route combines the
advantages of both the shorter and the
faster routes.
You can also choose to allow or avoid
using, for example, motorways, toll roads,
or ferries.
Maps shortcuts
General shortcuts
To zoom in or out on the map, press * or
#.
To return to your current location, press
0.
To change the map type, press 1.
To tilt the map, press 2 or 8.
To rotate the map, press 4 or 6. To return
the map back to the north up position,
press 5.
Pedestrian navigation shortcuts
To save a location, press 2.
To search for locations by categories,
press 3.
To adjust the volume of the pedestrian
navigation guidance, press 6.
To view the list of route points, press 7.
To adjust the map for night-time usage,
press 8.
To view the dashboard, press 9.
Car navigation shortcuts
To adjust the map for daytime or nighttime usage, press 1.
To save the current location, press 2.
To search for locations by categories,
press 3.
To repeat the voice guidance, press 4.
To find a different route, press 5.
To adjust the volume of voice guidance,
press 6.
To add a stopover to the route, press 7.
To view traffic information, press 8.
To view the dashboard, press 9.
www.nokia.com/support
Cyan
Magenta
Yellow
Black
Page 40
40 Positioning
Cyan
Magenta
Yellow
Black
Landmarks
With Landmarks, you can save the
position information of specific locations
in your device. You can sort the saved
locations into different categories, such as
business, and add other information to
them, such as addresses. You can use your
saved landmarks in compatible
applications, such as GPS data.
Select
Landmarks.
The coordinates in the GPS are expressed
using the international WGS-84
coordinate system.
Select Options and from the following:
New landmark — Create a new
landmark. To make a positioning request
for your current location, select Current
position. To select the location from the
map, select Select from map. To enter the
position information manually, select
Enter manually.
Edit — Edit or add information to a saved
landmark (for example, a street address).
Add to category — Add a landmark to a
category in Landmarks. Select each
category to which you want to add the
landmark.
Send — Send one or several landmarks to
a compatible device. Your received
landmarks are placed in the Inbox folder
in Messaging.
You can sort your landmarks into preset
categories, and create new categories. To
edit and create new landmark categories,
open the categories tab, and select
Options > Edit categories.
> Applications >
GPS data
Route guidance
Select
and Navigation.
Start the route guidance outdoors. If
started indoors, the GPS receiver may not
receive the necessary information from
the satellites.
Route guidance uses a rotating compass
on the device display. A red ball shows the
direction to the destination, and the
approximate distance to it is shown inside
the compass ring.
Route guidance is designed to show the
straightest route and the shortest
distance to the destination, measured in
a straight line. Any obstacles on the route,
such as buildings and natural obstacles,
are ignored. Differences in altitude are not
taken into account when calculating the
distance. Route guidance is active only
when you move.
To set your trip destination, select
Options > Set destination and a
landmark as the destination, or enter the
latitude and longitude coordinates.
To clear the destination set for your trip,
select Stop navigation.
Trip meter
Select
and Trip distance.
The trip meter may not be accurate,
depending on the availability and quality
of your GPS connection.
> Applications > GPS data
> Applications > GPS data
Cyan
Magenta
Yellow
www.nokia.com/support
Black
Page 41
Music and audio 41
Cyan
Magenta
Yellow
Black
To turn trip distance calculation on or off,
select Options > Start or Stop. The
calculated values remain on the display.
Use this feature outdoors to receive a
better GPS signal.
To set the trip distance and time and
average and maximum speeds to zero,
and to start a new calculation, select
Options > Reset. To set the trip meter
and total time to zero, select Restart.
Music and audio
Ovi Music
With Ovi Music (network service), you can
search, browse, buy, and download music
to your device.
Select
To download music, you first need to
register for the service.
Downloading music may involve
additional costs and the transmission of
large amounts of data (network service).
For information about data transmission
charges, contact your network service
provider.
To access Ovi Music, you must have a valid
internet access point in the device. You
may be asked to select the access point to
use when connecting to Ovi Music.
Select the access point
Select Default access point.
The availability and appearance of Ovi
Music settings may vary. The settings may
> Applications > Ovi Music.
also be predefined and you may not be
able to modify them. When browsing Ovi
Music, you may be able to modify the
settings.
Modify Ovi Music settings
Select Options > Settings.
Ovi Music is not available for all countries
or regions.
FM Radio
Listen to the radio
Select
Search for a station
Select
Go to the next or previous saved
station
Select
Select Options and from the following:
Activate loudspeaker — Listen to the
radio using the loudspeaker.
Manual tuning — Change the frequency
manually.
Station directory — View available
stations based on location (network
service).
Save station — Save the current station.
Stations — View your saved stations.
Play in background — Return to the
standby mode while listening to the FM
radio in the background.
> Applications > Radio.
or .
or .
www.nokia.com/support
Cyan
Magenta
Yellow
Black
Page 42
42 Camera
Cyan
Magenta
Yellow
Black
The quality of the radio broadcast
depends on the coverage of the radio
station in that particular area.
You can make a call or answer an incoming
call while listening to the radio. The radio
is muted during an active call.
Camera
Capture an image
Select
When capturing an image, note the
following:
• Use both hands to keep the camera
• The quality of a digitally zoomed
• The camera goes into battery saving
• Keep a safe distance when using the
1 To switch from video mode to image
2 Press the scroll key. Do not move the
Capture images with the secondary
camera
1 Select Options > Use secondary
> Camera.
steady.
image is lower than that of a nonzoomed image.
mode after about a minute of
inactivity.
flash. Do not use the flash on people
or animals at close range. Do not cover
the flash while taking a picture.
mode, if necessary, select
or hide the toolbar, in landscape
mode, scroll left or right.
device before the image is saved and
the final image displayed.
camera.
. To show
2 To capture an image, select Capture.
Do not move the device before the
image is saved and the final image
displayed.
Zoom in or out when capturing an
image
Use the zoom keys.
Leave the camera open in the
background and use other
applications
Press the menu key. To return to the
camera, press the scroll key.
Record a video clip
1 To switch from image mode to video
mode, if necessary, select image
mode from the active toolbar.
2 To start recording, select Start. A red
record icon
3 To pause recording, select Pause. To
resume, select Continue. If you pause
recording and do not press any key
within one minute, the recording
stops.
To zoom in or out, use the zoom keys.
4 To stop recording, select Stop. The
video clip is automatically saved in
Photos.
is displayed.
Images and videos
About Gallery
Select
videos and from the following:
Captured — View all the images and
video clips you have captured.
> Gallery > Images &
Cyan
Magenta
Yellow
www.nokia.com/support
Black
Page 43
Time management 43
Cyan
Magenta
Yellow
Black
Months — View images and video clips
categorised by the month they were
captured.
Albums — View the default albums and
the ones you have created.
Tags — View the tags you have created
for each item.
Downloads — View items and video clips
downloaded from the web or received as
a multimedia or e-mail message.
Share online — Post your images to the
web.
Files stored on your compatible memory
card (if inserted) are indicated with
To copy or move files to another memory
location, select a file, Options > Move
and copy, and the appropriate option.
About Share online
Select
online.
With Share online (network service), you
can post your images, video clips, and
sound clips from your device to
compatible online sharing services, such
as albums and blogs. You can also view
and send comments to the posts in these
services, and download content to your
compatible Nokia device.
The supported content types and the
availability of the Share online service
may vary.
> Applications > Share
Time management
Calendar
About Calendar
Select
With calendar, you can create and view
scheduled events and appointments, and
switch between different calendar views.
In the month view, calendar entries are
marked with a triangle. Anniversary
entries are also marked with an
exclamation mark. The entries of the
selected day are displayed as a list.
.
To open calendar entries, select a calendar
view and an entry.
Whenever you see the icon, scroll right
to access a list of available actions. To
close the list, scroll left.
Create calendar entries
Select
You can create the following types of
calendar entries:
• Meeting entries remind you of events
• Meeting requests are invitations that
• Memo entries are related to the whole
• Anniversary entries remind you of
> Calendar.
> Calendar.
that have a specific date and time.
you can send to the participants.
Before you can create meeting
requests you must have a compatible
mailbox configured to your device.
day but not to a specific time of the
day.
birthdays and special dates. They
www.nokia.com/support
Cyan
Magenta
Yellow
Black
Page 44
44 Time management
Cyan
Magenta
Yellow
Black
refer to a certain day but not a specific
time of the day. Anniversary entries
are repeated every year.
• To-do entries remind you of a task
that has a due date but not a specific
time of the day.
To create a calendar entry, select a date,
Options > New entry, and the entry type.
To set the priority for meeting entries,
select Options > Priority.
To define how the entry is handled during
synchronisation, select Private to hide
the entry from viewers if the calendar is
available online, Public to make the entry
visible to viewers, or None to not copy the
entry to your computer.
To send the entry to a compatible device,
select Options > Send.
To make a meeting request of a meeting
entry, select Options > Add
participants.
Alarm clock
Select
To view your active and inactive alarms,
open the alarms tab. To set a new alarm,
select Options > New alarm. Define the
repetition, if needed. When an alarm is
active,
To turn off the sounding alarm, select
Stop. To stop the alarm for a certain time
period, select Snooze.
> Applications > Clock.
is displayed.
If your device is switched off when an
alarm is due, your device switches itself on
and starts sounding the alarm tone.
Tip: To define the time period after which
the alarm sounds again when you set it to
snooze, select Options > Settings >
Alarm snooze time.
To cancel an alarm, select Options >
Remove alarm.
To change the time, date, and clock type
settings, select Options > Settings.
To automatically update the time, date,
and time zone information to your device
(network service), select Options >
Settings > Automatic time update >
On.
Clock settings
Select Options > Settings.
To change the time or date, select Time or
Date.
To change the clock shown on the home
screen, select Clock type > Analogue or
Digital.
To allow the mobile phone network to
update the time, date, and time zone
information to your device (network
service), select Automatic time
update > On.
To change the alarm tone, select Clock
alarm tone.
Cyan
Magenta
Yellow
www.nokia.com/support
Black
Page 45
Settings 45
Cyan
Magenta
Yellow
Black
Settings
Device and SIM card security
Select
General > Security.
To change the PIN code, select Phone and
SIM card > PIN code. The new code must
be 4 to 8 digits long. The PIN code protects
your SIM card against unauthorised use
and is provided with the SIM card. After
three consecutive incorrect PIN code
entries, the code is blocked, and you need
to use the PUK code to unblock it before
you can use the SIM card again.
To set the keypad to lock automatically
after a defined period, select Phone and
SIM card > Keypad autolock period.
To set a time-out period after which the
device is automatically locked and can be
used only if the correct lock code is
entered, select Phone and SIM card >
Phone autolock period. Enter the length
of the time-out period in minutes, or
select None to deactiveate the autolock
feature. When the device is locked, you
can still answer incoming calls, and calls
may still be possible to the official
emergency number programmed into
your device.
To change the lock code, select Phone
and SIM card > Lock code. The default
lock code is 12345. Enter the current code
and then the new code twice. The new
code must be 4-255 characters long.
Alphanumeric (uppercase and lowercase)
characters can be used. The device notifies
you if the lock code is not properly
formatted.
> Settings > Settings >
Restore original settings
To restore the original device settings,
select
Factory settings. To do this, you need
your device lock code. After resetting, the
device may take a longer time to switch
on. Documents, contact information,
calendar entries, and files are unaffected.
> Settings and General >
Data management
Protected content
Digital rights management (DRM)
protected content, for example some
media files, such as images, music, or
video clips, comes with an associated
licence that defines your rights to use the
content.
You can view the details and status of the
licences, and reactivate and remove
licences.
Manage digital rights licences
Select
Digital rights management
Content owners may use different types of
digital rights management (DRM)
technologies to protect their intellectual
property, including copyrights. This
device uses various types of DRM software
to access DRM-protected content. With
this device you can access content
protected with WMDRM 10, and OMA DRM
1.0 and 2.0. If certain DRM software fails
to protect the content, content owners
may ask that such DRM software's ability
to access new DRM-protected content be
> Applications > Licences.
www.nokia.com/support
Cyan
Magenta
Yellow
Black
Page 46
46 Find help
Cyan
Magenta
Yellow
Black
revoked. Revocation may also prevent
renewal of such DRM-protected content
already in your device. Revocation of such
DRM software does not affect the use of
content protected with other types of DRM
or the use of non-DRM-protected content.
If your device has OMA DRM-protected
content, to back up both the licence and
the content, use the backup feature of
Nokia Ovi Suite.
Other transfer methods may not transfer
the licence which need to be restored with
the content for you to be able to continue
the use of OMA DRM-protected content
after the device memory is formatted. You
may also need to restore the licence in
case the files on your device get corrupted.
If your device has WMDRM-protected
content, both the licence and the content
will be lost if the device memory is
formatted. You may also lose the licence
and the content if the files on your device
get corrupted. Losing the licence or the
content may limit your ability to use the
same content on your device again. For
more information, contact your service
provider.
Find help
Support
When you want to learn more about how
to use your product or you are unsu re how
your device should function, go to
www.nokia.com/support, or using a
mobile device, nokia.mobi/support. You
can also read the in-device guide. Select
> Help.
If this does not resolve your issue, do one
of the following:
• Reboot your device. Switch off the
device, and remove the battery. After
about a minute, replace the battery,
and switch on the device.
• Restore the original factory settings
• Update your device software
If your issue remains unsolved, contact
Nokia for repair options. Go to
www.nokia.com/repair. Before sending
your device for repair, always back up your
device data.
Keep your device software and
applications up to date
About device software and application
updates
With device software updates and
application updates, you can get new
features and enhanced functions for your
device. Updating the software may also
improve your device performance.
Cyan
Magenta
Yellow
www.nokia.com/support
Black
Page 47
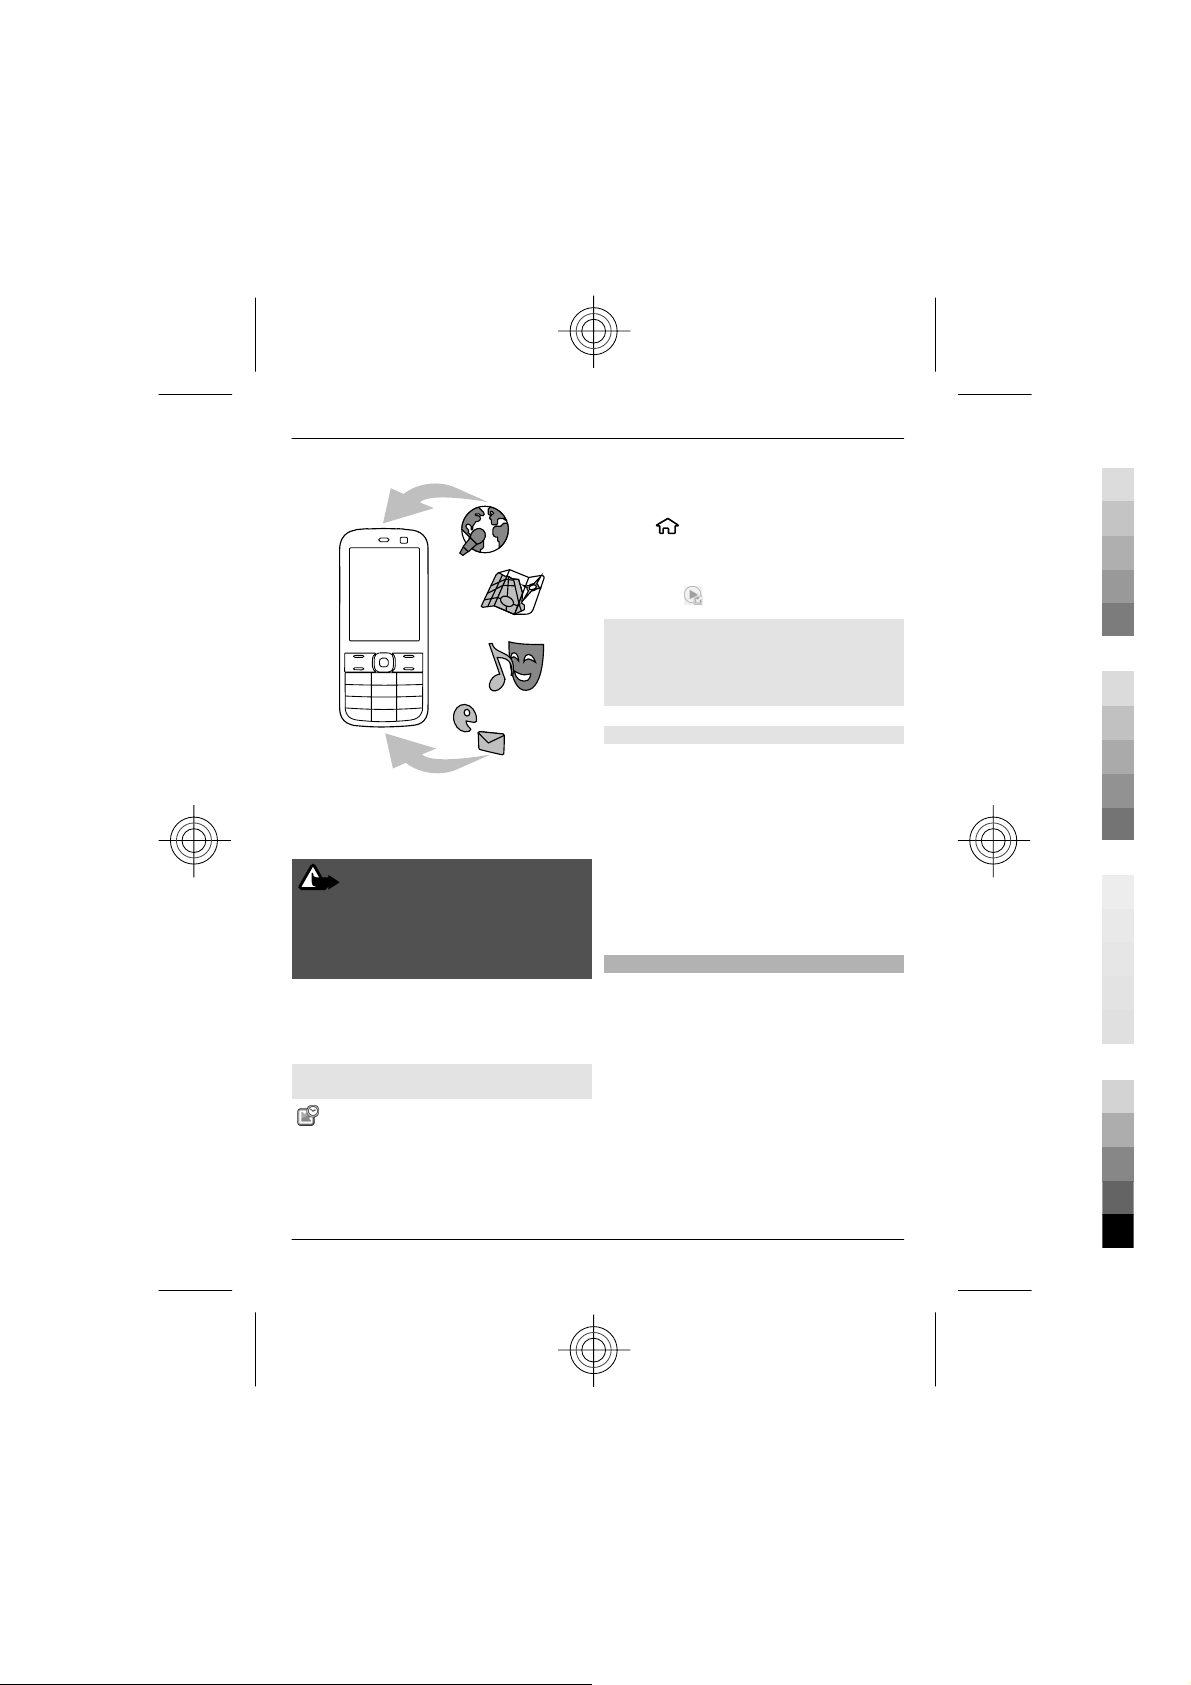
It is recommended that you back up your
Cyan
Magenta
Yellow
Black
personal data before updating your
device software.
Warning:
If you install a software update, you
cannot use the device, even to make
emergency calls, until the installation is
completed and the device is restarted.
After you update your device software or
applications, the instructions in the user
guide may no longer be up to date.
Update device software and
applications using your device
You can check if there are updates
available for your device software or for
individual applications, and then
download and install them to your device
(network service). You can also set your
device to automatically check for updates
Find help 47
and notify you when important or
recommended updates are available.
Select
If there are available updates, select
which updates to download and install,
and select
Set your device to automatically check
for updates
Select Options > Settings > Auto-check
for updates.
Update device software using your PC
You can use the Nokia Software Updater
PC application to update your device
software. To update your device software,
you need a compatible PC, a high-speed
internet connection, and a compatible
USB data cable to connect your device to
the PC.
To get more information and to download
the Nokia Software Updater application,
go to www.nokia.com/softwareupdate.
Prolong battery life
Many features in your device increase the
demand on battery power and reduce the
battery lifetime. To save battery power,
note the following:
• Features that use Bluetooth
> Settings > SW update.
.
technology, or allowing such features
to run in the background while using
other features, increase the demand
on battery power. Deactivate
Bluetooth technology when you do
not need it.
www.nokia.com/support
Cyan
Magenta
Yellow
Black
Page 48
48 Find help
Cyan
Magenta
Yellow
Black
• If you have set Packet data
connection to When available in
connection settings, and there is no
packet data coverage (GPRS), the
device periodically tries to establish a
packet data connection. To prolong
the operating time of your device,
select
Connection > Packet data > Packet
data connection > When needed.
• The Maps application downloads new
map information when you scroll to
new areas on the map, which
increases the demand on battery
power. You can prevent the automatic
download of new maps.
• If the signal strength of the cellular
network varies much in your area,
your device must scan for the
available network repeatedly. This
increases the demand on battery
power.
If the network mode is set to dual
mode in the network settings, the
device searches for the 3G network.
You can set the device to use only the
GSM network. To use only the GSM
network, select
Phone > Network > Network
mode > GSM.
• The backlight of the display increases
the demand on battery power. In the
display settings, you can change the
length of the time-out period after
which the backlight is switched off.
Select
Personalisation > Display > Light
time-out.
• Leaving applications running in the
background increases the demand on
> Settings and
> Settings and
> Settings and General >
battery power. To close the
applications you are not using, press
and hold the menu key, scroll to the
application, and press C.
• To save power, activate the power
save mode. Press the power key, and
select Activate power saving. To
deactivate it, press the power key, and
select Deactivate power saving. You
may not be able to change the
settings of certain applications when
the power save mode is activated.
In-device help
Your device contains instructions to help
to use the applications in your device.
To open help texts from the main menu,
select
which you want to read instructions.
When an application is open, to access the
help text for the current view, select
Options > Help.
When you are reading the instructions, to
change the size of the help text, select
Options > Decrease font size or
Increase font size.
You may find links to related topics at the
end of the help text.
If you select an underlined word, a short
explanation is displayed.
Help texts use the following indicators:
> Help and the application for
Link to a related help topic.
Link to the application being
discussed.
Cyan
Magenta
Yellow
www.nokia.com/support
Black
Page 49
When you are reading the instructions, to
Cyan
Magenta
Yellow
Black
switch between help texts and the
application that is open in the
background, select Options > Show
open apps. and the desired application.
Protect the environment
Save energy
You do not need to charge your battery so
often if you do the following:
• Close applications and data
connections, for example, your
Bluetooth connection, when not in
use.
• Deactivate unnecessary sounds, such
as key tones.
Recycle
When this device has reached the end of
its working life, all of its materials can be
recovered as materials and energy. To
guarantee the correct disposal and reuse,
Nokia co-operates with its partners
through a program called We:recycle. For
information on how to recycle your old
Nokia products and where to find
collection sites, go to www.nokia.com/
werecycle, or using a mobile device,
nokia.mobi/werecycle, or call the Nokia
Contact Center.
Recycle packaging and user guides at your
local recycling scheme.
Protect the environment 49
The crossed-out wheeled-bin symbol on
your product, battery, literature, or
packaging reminds you that all electrical
and electronic products, batteries, and
accumulators must be taken to separate
collection at the end of their working life.
This requirement applies in the European
Union. Do not dispose of these products as
unsorted municipal waste. For more
information on the environmental
attributes of your device, see
www.nokia.com/ecodeclaration.
Product and safety information
Network services and costs
Your device is approved for use on the (E)GSM 850, 900, 1800
and 1900 MHz networks, and UMTS 900 and 2100 MHz HSDPA
and HSUPA networks. To use the device, you need a
subscription with a service provider.
Using network services and downloading content to your
device requires a network connection and may result in data
traffic costs. Some product features require support from the
network, and you may need to subscribe to them.
Take care of your device
Handle your device, battery, charger and accessories with
care. The following suggestions help you protect your
warranty coverage.
• Keep the device dry. Pre cipitation, humidity, and all
types of liquids or moisture can contain minerals that
corrode electronic ci rcuits. If your device gets wet,
remove the battery, and allow the device to dry.
• Do not use or store the device in dusty or dirty areas.
Moving parts and electronic components can be
damaged.
• Do not store the device in high temperatures. High
temperatures can shorten the life of the device,
damage the battery, and warp or melt plastics.
www.nokia.com/support
Cyan
Magenta
Yellow
Black
Page 50
50 Product and safety information
Cyan
Magenta
Yellow
Black
• Do not store the device in cold temperatures. When the
device warms to its normal temperature, moisture can
form inside the device and damage electronic circuits.
• Do not attempt to open the device other than as
instructed in the user guide.
• Unauthorised modifications may damage the device
and violate regulations governing radio devices.
• Do not drop, knock, or shake the device. Rough
handling can break internal circuit boards and
mechanics.
• Only use a soft, clean, dry cloth to clean the surface of
the device.
• Do not paint the device. Paint can clog the moving parts
and prevent proper operation.
• Switch off the device and remove the battery from time
to time for optimum performance.
• Keep your device away from magnets or magnetic
fields.
• To keep your important data safe, store it in at least
two separate places, such as your device, memory card,
or computer, or write down important information.
During extended operation, the device may feel warm. In
most cases, this condition is normal. If you suspect the device
is not working properly, take it to the nearest authorised
service facility.
Recycle
Always return your used electronic products, batteries, and
packaging materials to dedicated collection points. This way
you help prevent uncontrolled waste disposal and promote
the recycling of materials. Check product environmental
information and how to recycle your Nokia products at
www.nokia.com/werecycle, or with a mobile device , http://
nokia.mobi/werecycle.
About Digital Rights Management
When using this device, obey all laws and respect local
customs, privacy and legitimate rights of others, including
copyrights. Copyright protection may prevent you from
copying, modifying, or transferring images, music, and other
content.
Content owners may use different types of digital rights
management (DRM) technologies to protect their intellectual
property, including copyrights. This device uses various types
of DRM software to access DRM-protected content. With this
device you can access content protected with WMDRM 10, and
OMA DRM 1.0 and 2.0. If certain DRM software fails to protect
the content, content owners may ask that such DRM
software's ability to access new DRM-protected content be
revoked. Revocation may also prevent renewal of such DRMprotected content already in you r device. Revocation of such
DRM software does not affect the use of content protected
with other types of DRM or the use of non-DRM-protected
content.
Digital rights management (DRM) protected content come s
with an associated licence that defines your rights to use the
content.
If your device has OMA DRM-protected content, to back up
both the licences and the content, use the backup feature of
Nokia Ovi Suite.
Other transfer metho ds may not transfer the licences which
need to be restored with the content for you to be able to
continue the use of OMA DRM-protected content after the
device memory is formatted. You may also need to restore
the licences in case the files on your device get corrupted.
If your device has WMDRM-protected content, both the
licences and the content will be lost if the device memory is
formatted. You may also lose the licences and the content if
the files on your device get corrupted. Losing the licences or
the content may limit your ability to use the same content on
your device again. For more information, contact your service
provider.
Some licences may be connected to a specific SIM card, and
the protected content can be accessed only if the SIM card is
inserted in the device.
Batteries and chargers
Battery and charger information
Your device is intended for use with a BL-5CT rechargeable
battery. Nokia may make additional battery models available
for this device. Always use original Nokia batteries.
This device is intended for use when supplied with power
from the following chargers: AC-8, AC-15. The exact Nokia
charger model number may vary depending on the plug type,
identified by E, X, AR, U, A, C, K, or B.
The battery can be charged and discharged hundreds of
times, but it will eventually wear out. When the talk and
standby times are noticeably shorter than normal, replace the
battery.
Battery safety
Always switch the device off and disconnect the charger
before removing the battery. When you unplug a charger or
an accessory, hold and pull the plug, not the cord.
Cyan
Magenta
Yellow
www.nokia.com/support
Black
Page 51
Product and safety information 51
Cyan
Magenta
Yellow
Black
When your charger is not in use, unplug it from the electrical
plug and the device. Do not leave a fully charged battery
connected to a charger, as overcharging may shorten the
battery’s lifetime. If left unused, a fully charged battery will
lose its charge over time.
Always keep the battery between 15°C and 25°C (59°F and
77°F). Extreme temperatures reduce the capacity and lifetime
of the battery. A device with a hot or cold battery m ay not
work temporarily.
Accidental short-circuiting can happen when a metallic object
touches the metal strips on the battery, for example, if you
carry a spare battery in your pocket. Short-circuiting may
damage the battery or the connecting object.
Do not dispose of batteries in a fire as they may explode.
Dispose of batteries according to local regulations. Recycle
when possible. Do not dispose as household waste.
Do not dismantle, cut, open, crush, bend, puncture, or shred
cells or batteries. If a battery leaks, do not let battery liquid
touch skin or eyes. If this happens, immediately flush the
affected areas with water, or seek medical help.
Do not modify, remanufacture, attempt to insert foreign
objects into the battery, or immerse or expose it to water or
other liquids. Batteries may explode if damaged.
Use the battery and charger for their intended purposes only.
Improper use, or use of unap proved batteries or incompatible
chargers may present a risk of fire, explosion, or other hazard,
and may invalidate any approval or warranty. If you believe
the battery or charger is damaged, take it to a service centre
for inspection before continuing to use it. Never use a
damaged battery or charger. Only use the charger indoors.
Additional safety information
Make an emergency call
1 Make sure the device is switched on.
2 Check for adequate signal strength. You may also need
to do the following:
• Insert a SIM card.
• Deactivate call restrictions you have activated for
your device, such as call barring, fixed dialling, or
closed user group.
• Make sure the offline or flight profile is not
activated.
3 Press the end key repeatedly, until the home screen is
displayed.
4 Enter the official emergency number for your present
location. Emergency call numbers vary by location.
5Press the call key.
6 Give the necessary information as accurately as
possible. Do not end the call until given permission to
do so.
Important: Activate both cellu lar and internet
calls, if your device supports internet calls. The device may
attempt to make emergency calls both through cellular
networks and through your internet call service provider.
Connections in all conditions cannot be guaranteed. Never
rely solely on any wireless device for essential
communications like medical emergencies.
Small children
Your device and its accessories are not toys. They may contain
small parts. Keep them out of the reach of small children.
Medical devices
Operation of radio transmitting equipment, including
wireless phones, may interfere with the function of
inadequately protected medical devices. Consult a physician
or the manufacturer of the medical device to determine
whether they are adequately shielded from external RF
energy. Switch off your device when regulations posted
instruct you to do so, for example, in hospitals.
Implanted medical devices
Manufacturers of medical devices recommend a minimum
separation of 15.3 centimetres (6 inches) between a wireless
device and an implanted medical device, such as a pacemaker
or implanted cardioverter defibr illator, to avoid potential
interference with the medical device. Persons who have such
devices should:
• Always keep the wirele ss device more than 15.3
centimetres (6 inches) from the medical device.
• Not carry the wireless device in a breast pocket.
• Hold the wireless device to the ear opposite the medical
device.
• Turn the wireless device off if there is any reason to
suspect that interference is taking place.
• Follow the manufacturer directions for the implanted
medical device.
If you have any questions about using your wireless device
with an implanted medical device, consult your health care
provider.
www.nokia.com/support
Cyan
Magenta
Yellow
Black
Page 52
52 Product and safety information
Cyan
Magenta
Yellow
Black
Hearing
Warning:
When you use the headset, your ability to hear outside
sounds may be affected. Do not use the headset where it can
endanger your safety.
Some wireless devices may interfere with some hearing aids.
Operating environment
This device meets RF exposure guidelines in the normal use
position at the ear or at least 1.5 centimetres (5/8 inch) away
from the body. Any carry ca se, belt clip, or holde r for bodyworn operation should not contain metal and should position
the device the above-stated distance from your body.
To send data files or messages requires a quality connection
to the network. Data files or messages may be delayed until
such a connection is available. Follow the separation distance
instructions until the transmission is completed.
Vehicles
Radio signals may af fect improperly installed or inadequately
shielded electronic systems in motor vehicles such as
electronic fuel injection, electronic antilock braking,
electronic speed control, and air bag systems. For more
information, check with the manufacturer of your vehicle or
its equipment.
Only qualified personnel should install the device in a vehicle.
Faulty installation or service may be dangerous and may
invalidate your warranty. Check regularly that all wireless
device equipment in your vehicle is mounted and operating
properly. Do not store or carry flammable liquids, gases, or
explosive materials in the same compartment as the device,
its parts, or accessories. Remember that air bags inflate with
great force. Do not place your device or accessories in the air
bag deployment area.
Switch off your device before boarding an aircraft. The use of
wireless devices in an aircraft may be dangerous to the
operation of the aircraft and may be illegal.
Potentially explosive environments
Switch off your device in any area with a potentially explosive
atmosphere. Obey all posted instructions. Sparks in such
areas could cause an explosion or fire resulting in bodily
injury or death. Switch off the device at refuelling points such
as near gas pumps at service stations. Observe restrictions in
fuel depots, storag e, and distribution areas; chemical pl ants;
or where blasting operations are in progress. Areas with a
potentially explosive atmosphere are often, but not always,
clearly marked. They includ e areas where you would be
advised to turn off your vehicle engine, below deck on boats,
chemical transfer or storage facilities and where the air
contains chemicals or particles such as grain, dust, or metal
powders. You should check with the manufacturers of
vehicles using liquefied petroleum gas (such as propane or
butane) to determine if this device can be safely used in their
vicinity.
Certification information (SAR)
This mobile device meets guidelines for exposure to
radio waves.
Your mobile device is a radi o transmitter and receiver . It is
designed not to exceed the limits for exposure to radio waves
recommended by international guidelines. These guidelines
were developed by the indepe ndent scientific organisation
ICNIRP and include safety margins designed to assure the
protection of all persons, regardless of age and health.
The exposure guidelines for mobile devices employ a unit of
measurement known as the Specific Absorption Rate or SAR.
The SAR limit stated in the ICNIRP guidelines is 2.0 watts/
kilogram (W/kg) averaged over 10 grams of tissue. Tests for
SAR are conducted using standard operating positions with
the device transmitting at its highest certified power level in
all tested frequency bands. The actual SAR level of an
operating device can be below the maximum value because
the device is designed to use only the power required to reach
the network. That amount changes depending on a number
of factors such as how close you are to a network base station.
The highest SAR value under the ICNIRP guidelines for use of
the device at the ear is 1.34 W/kg.
Use of device accessories may result in different SAR values.
SAR values may vary depending on national reporting and
testing requirements an d the network band. Additi onal SAR
information may be provided under product information at
www.nokia.com.
Your mobile device is also designed to meet the requirements
for exposure to radio waves established by the Federal
Communications Commission (USA) and Industry Canada.
These requirements set a SAR limit of 1.6 W/kg averaged over
one gram of tissue. The highest SAR value reported under this
standard during product certification for use at the ear is 1.16
W/kg and when properly worn on the body is 0.86 W/kg.
Cyan
Magenta
Yellow
www.nokia.com/support
Black
Page 53
53
Cyan
Magenta
Yellow
Black
DECLARATION OF CONFORMITY
0434
Hereby, NOKIA CORPORATION declares that this RM-745
product is in complianc e with the essential requirements and
other relevant provisions of Directive 1999/5/EC. A copy of the
Declaration of Conformity can be found at www.nokia.com/
phones/declaration_of_conformity/.
© 2011 Nokia. All rights reserved.
Nokia, Nokia Connecting People, Cseries, Nokia Original
Accessories logo, and Ovi are trademarks or registered
trademarks of Nokia Corporation. Nokia tune is a sound mark
of Nokia Corporation. Other product and company names
mentioned herein may be trademarks or tradenames of their
respective owners.
Reproduction, transfer, distribution, or storage of part or all
of the contents in th is document in any form witho ut the prior
written permission of Nokia is prohibited. Nokia operates a
policy of continuous development. Nokia reserves the right
to make changes and im provements to any of the p roducts
described in this docume nt without prior notice.
Java and all Java-based marks are trademarks or registered
trademarks of Sun Microsystems, Inc.
The Bluetooth word mark and logos are owned by the
Bluetooth SIG, Inc. and any use of such marks by Nokia is
under license.
This product is licensed under the MPEG-4 Visual Patent
Portfolio License (i) for personal and noncommercial use in
connection with information which has been encoded in
compliance with t he MPEG-4 Visual Stand ard by a consumer
engaged in a personal and noncommercial activity and (ii) for
use in connection with MPEG-4 video provided by a licensed
video provider. No licen se is granted or shall be imp lied for
any other use. Additional information, including that related
to promotional, internal, and commercial uses, may be
obtained from MPEG LA, LLC. See http://www.mpegla.com.
To the maximum extent permitted by applicable law, under
no circumstances s hall Nokia or any of i ts licensors be
responsible for any loss of data or income or any special,
incidental, consequential or indirect damages howsoever
caused.
The contents of this document are provided "as is". Except as
required by applicable law, no warranties of any kind, either
express or implied, including, but not limited to, the i mplied
warranties of merchantability and fitness for a particular
purpose, are made in relat ion to the accuracy, reliabil ity or
contents of this document. Nokia reserves the right to revise
this document or withdraw it at any time without prior
notice.
The availability of products, features, applications and
services may vary by region. For more information, contact
your Nokia dealer or your service provider. This device may
contain commodities, technology or software subject to
export laws and regulations from the US and other countries.
Diversion contrary to law is prohibited.
All intellectual property and other rights in and to the songs
belong and are expressly reserved to third party licensors,
such as the relevant record label or artist, author, composer,
or publisher. You will only be entitled to use music
downloaded from Ovi Music in accordance with the
restrictions on use that apply to that particular piece of music
as set out under "Rights" on the product pages of Ovi Music.
Music that you purchased from other sources must be used
in accordance with the terms of such purchase. You are
responsible for your compliance with the applicable
intellectual property and other rights in the music you use.
Nokia does not provi de a warranty for or take any
responsibility for the functionality, content, or end-user
support of third-party applications provided with your
device. By using an application, you acknowledge that the
application is provided as is. Nokia does not make any
representations, provide a warranty, or take any
responsibility for the functionality, content, or end-user
support of third-party applications provided with your
device.
The availabilit y of Ovi services may vary by regi on.
FCC/INDUSTRY CANAD A NOTICE
Your device may cause TV or radio interference (for example,
when using a telephone in close proximity to receivi ng
equipment). The FCC or Industry Canada can require you to
stop using your telephone if such interference cannot be
eliminated. If you require assistance, contact your local
service facility. This device complies with part 15 of the FCC
rules. Operation is subject to the following two conditions:
(1) This device may not cause harmful interference, and (2)
this device must accept any interference received, including
interference that may cause undesired operation. Any
Cyan
Magenta
Yellow
Black
Page 54
54
Cyan
Magenta
Yellow
Black
changes or modifications not expressly approved by Nokia
could void the user's authority to operate this equipment.
Some operations and features are SIM card and/or network
dependent, MMS dependent, or dependent on the
compatibility of devices and the content formats supported.
Some services are subject to a separate charge.
TARKISTA/Issue 1 EN
Cyan
Magenta
Yellow
Black
 Loading...