

Page 1

Nokia T7–00 User Guide
Issue 1
Page 2

2Contents
Contents
Safety 5
Get started 6
Is my device authentic? 6
Keys and parts 6
Antenna locations 7
Attach the wrist strap 7
Headset 7
Change the volume of a call, song, or
video 8
Lock or unlock the keys and screen 8
Insert or remove the SIM card 8
Insert or remove the memory card 10
Charging 11
Switch the device on or off 12
If your device stops responding 12
Nokia account and Nokia's Ovi
services 12
Copy contacts or pictures from your old
device 12
Device set-up 13
Use the in-device user guide 13
Install Nokia Ovi Suite on your PC 13
Basic use 14
Touch screen actions 14
Interactive home screen elements 16
Switch between open applications 17
Write text 17
Display indicators 21
Set the notification light to blink for
missed calls or messages 23
Search in your device and on the
internet 23
Use your device offline 23
Prolong battery life 24
Personalisation 25
Profiles 25
Change your theme 26
Home screen 26
Organise your applications 28
Telephone 28
Call a phone number 28
Call a contact 28
Make a video call 28
Make a conference call 29
Use speed dial 30
Use your voice to call a contact 30
Make calls over the internet 31
Call the last dialled number 31
Record a phone conversation 31
Turn to silence 31
View your missed calls 32
Call your voice mailbox 32
Divert calls to your voice mailbox or
another phone number 32
Prevent making or receiving calls 33
Allow calls only to certain numbers 33
Video sharing 34
Contacts 35
About Contacts 35
Save phone numbers and mail
addresses 35
Save a number from a received call or
message 35
Contact your most important people
quickly 36
Set a ringing tone for a specific
contact 36
Send your contact information using
My Card 36
Create a contact group 36
Send a message to a group of people 37
Contacts stored on the SIM card 37
© 2011 Nokia. All rights reserved.
Page 3

Contents 3
Phonebook manager 37
Messaging 37
About Messaging 37
Send a message 38
Send an audio message 38
Receive messages 38
View a conversation 39
Listen to a text message 39
Change language 40
Mail 40
Mail 40
Open mail from the home screen 41
Internet 42
About Web 42
Browse the web 42
Add a bookmark 42
Subscribe to a web feed 42
China Mobile services 43
10086 Portal 43
Camera 43
About Camera 43
Take a picture 43
Save location information to your
pictures and videos 44
Take a picture in the dark 44
Picture and video tips 44
Record a video 45
Send a picture 45
Your pictures and videos 45
About Photos 45
View pictures and videos 46
Edit the pictures you have taken 46
Video editor 46
Print a picture you have taken 47
Videos and TV 48
Videos 48
CMMB 48
Music and audio 49
Music player 49
Protected content 51
Record sounds 51
Play music through a radio 52
FM radio 52
Time management 54
Clock 54
Calendar 55
Office 57
Quickoffice 57
Read PDF documents 58
Make a calculation 58
Write notes 58
Dictionary 58
Translate words from one language to
another 59
Open or create zip files 59
Connectivity 59
Connectivity security 59
Internet connections 60
Wireless LAN 60
Bluetooth 61
USB data cable 63
Close a network connection 64
Store your files on a remote drive 64
Allow use of positioning server when
abroad 65
Device management 65
© 2011 Nokia. All rights reserved.
Page 4

4Contents
Keep your device software and
applications up to date 65
Manage files 66
Increase available memory for more
content 67
Manage applications 67
Synchronise content 68
Copy contacts or pictures between
devices 69
Protect your device 69
Find more help 70
Support 70
Access codes 70
Nokia original accessories 71
Practical rules about accessories 72
Why use original accessories? 72
Battery 73
Protect the environment 73
Save energy 73
Recycle 73
e100 74
Product and safety information 74
Index 87
© 2011 Nokia. All rights reserved.
Page 5

Safety 5
Safety
Read these simple guidelines. Not
following them may be dangerous or
illegal. Read the complete user guide for
further information.
SWITCH OFF IN RESTRICTED AREAS
Switch the device off when
mobile phone use is not
allowed or when it may cause
interference or danger, for
example, in aircraft, near
medical equipment, fuel,
chemicals, or blasting areas.
ROAD SAFETY COMES FIRST
Obey all local laws. Always keep
your hands free to operate the
vehicle while driving. Your first
consideration while driving
should be road safety.
INTERFERENCE
All wireless devices may be
susceptible to interference,
which could affect
performance.
QUALIFIED SERVICE
Only qualified personnel may
install or repair this product.
GLASS PARTS
The front cover of the device is
made of glass. This glass can
break if the device is dropped
on a hard surface or receives a
substantial impact. If the glass
breaks, do not touch the glass
parts of the device or attempt
to remove the broken glass
from the device. Stop using the
device until the glass is
replaced by qualified service
personnel.
PROTECT YOUR HEARING
Listen to a headset at a
moderate level, and do not hold
the device near your ear when
the loudspeaker is in use.
CHARGERS AND OTHER ACCESSORIES
Use only chargers and other
accessories approved by Nokia
for use with this device. Do not
connect incompatible
products.
© 2011 Nokia. All rights reserved.
Page 6

6Get started
Get started
Is my device authentic?
To check if you have an authentic Nokia
product, look for a blue sticker on the
protective foil at the back of your device.
Keep the blue sticker, in case you later
need to prove the authenticity of your
device.
Keys and parts
Top
1 Power key
2 Micro USB connector/China Mobile
Multimedia Broadcast (CMMB)
headset connector
3 Charging indicator light
4 Nokia AV connector (3.5 mm)
Front
1 Earpiece
2 Menu key
3 Microphone
4 Secondary camera lens
Back
1 Camera flash
2 Camera lens
3 Loudspeaker
4 Microphone
Sides
© 2011 Nokia. All rights reserved.
Page 7

1 Memory card slot
2 SIM card slot
3 Wrist strap
4 Volume/Zoom key
5 Lock switch
6 Camera key
Bottom
1 Charging connector
Touch screen
To control your device, lightly touch the
screen with your fingertips. The screen
does not respond when you use your
fingernails.
If your fingertips are cold, the screen may
not respond to your touch.
Important: Use only a stylus approved
by Nokia for use with this device. Using
any other stylus may invalidate any
warranty applying to the device and may
damage the touch screen. Avoid
scratching the touch screen. Never use an
actual pen, pencil, or other sharp object on
the touch screen.
Antenna locations
Avoid touching the antenna area
unnecessarily while the antenna is
transmitting or receiving. Contact with
antennas affects the communication
quality and may cause a higher power
level during operation and may reduce the
battery life.
Get started 7
Attach the wrist strap
Thread the wrist strap as shown, and
tighten it.
Headset
You can connect a compatible headset or
compatible headphones to your device.
© 2011 Nokia. All rights reserved.
Page 8

8Get started
Slide the key lock switch.
You can connect the CMMB headset to the
Micro USB connector.
Change the volume of a call, song, or video
Use the volume keys.
You can adjust the volume during a call or
when an application is active.
The built-in loudspeaker allows you to
speak and listen from a short distance
without having to hold the device to your
ear.
Activate or deactivate the loudspeaker
during a call
Select
or .
Lock or unlock the keys and screen
To avoid accidentally making a call when
your device is in your pocket or bag, lock
the keys and screen of your device.
Tip: If the key lock switch is out of reach,
to unlock the device, press the menu key,
and select Unlock.
Set the keys and screen to lock
automatically
1 Select Menu > Settings and Phone >
Display > Screen/keylock time-
out.
2 Define the length of time after which
the keys and screen are locked
automatically.
Insert or remove the SIM card
Do not attach any stickers to your SIM card.
Important: Do not use a mini-UICC SIM
card, also known as a micro-SIM card, a
micro-SIM card with an adapter, or a SIM
card that has a mini-UICC cutout (see
figure) in this device. A micro SIM card is
smaller than the standard SIM card. This
device does not support the use of microSIM cards and use of incompatible SIM
cards may damage the card or the device,
and may corrupt data stored on the card.
© 2011 Nokia. All rights reserved.
Page 9

Get started 9
1 Memory card slot cover
2 SIM card slot cover
Insert the SIM card
1 Switch the device off.
2 Use your fingernail to open the cover
of the memory card slot.
3 Open the cover of the SIM card slot.
4 Insert the SIM card. Push the card in,
until you hear a click.
Make sure the contact area of the card
is facing down.
Remove the SIM card
1 Switch the device off.
2 Use your fingernail to open the cover
of the memory card slot.
3 Open the cover of the SIM card slot,
and push the card in, until you hear a
click.
4 Pull the card out.
© 2011 Nokia. All rights reserved.
Page 10

10 Get started
Insert or remove the memory card
Do not attach any stickers to your memory
card.
Use only compatible memory cards
approved by Nokia for use with this
device. Incompatible cards may damage
the card and the device and corrupt data
stored on the card.
You can record high-definition videos. If
recording to a memory card, for best
performance, use a fast, high-quality
microSD card from a well‑known
manufacturer. The recommended
microSD card class is 4 (32 Mbit/s (4 MB/s))
or higher.
Insert the memory card
1 Use your fingernail to open the cover
of the memory card slot.
2 Make sure the contact area of the
memory card is facing down.
Push the card in, until it locks into
place.
Remove the memory card
1If the device is switched on, press the
power key briefly, and select Remove
memory card.
2 Use your fingernail to open the cover
of the memory card slot.
3 Push the card in, until it is released.
4 Pull the card out.
© 2011 Nokia. All rights reserved.
Page 11

Charging
About the battery
Your device has an internal,
nonremovable, rechargeable battery. Use
only Nokia approved chargers designated
for this device. You can also use a
compatible USB data cable to charge your
device.
Do not attempt to remove the battery
from the device. Take the device to the
nearest authorised service facility for
replacement of the battery.
Important: Only qualified personnel
or an authorised service facility should
replace the battery. Unauthorised battery
replacement may invalidate your
warranty.
When your dev ice i s low o n pow er, i t goes
into power save mode. To deactivate
power save mode, press
, and select
Deactivate power saving. When power
save mode is activated, you may not be
able to modify the settings of certain
applications.
Charge the battery
Your battery has been partially charged at
the factory, but you may need to recharge
it before you can switch on your device for
the first time.
If the device indicates a low charge, do the
following:
1
Get started 11
2
You do not need to charge the battery for
a specific length of time, and you can use
the device while it is charging.
If the battery is completely discharged, it
may take several minutes before the
charging indicator appears on the display
or before any calls can be made.
If the battery has not been used for a long
time, to begin charging, you may need to
connect the charger, then disconnect and
reconnect it.
Tip: You can also use a compatible USB
charger to charge your battery.
Charge the battery over USB
Battery low, but you don't have a charger
with you? You can use a compatible USB
cable to connect to a compatible device,
such as a computer.
To avoid breaking the charger connector,
be careful when connecting or
disconnecting the charger cable.
© 2011 Nokia. All rights reserved.
Page 12

12 Get started
If connected to a computer, you can
synchronise your device while charging.
Charging over USB can take longer to start,
and may not work if you connect through
a non-powered USB hub. Your device
charges more quickly when connected to
a wall outlet.
When the battery is charging, the
charging indicator light next to the USB
connector is lit. When the battery charge
is low, the charging indicator light flashes.
It may take a while for charging to start.
Switch the device on or off
Press and hold
.
If your device stops responding
Reboot your device. Press and hold
for
about 8 seconds. The device vibrates three
times and switches off. To switch your
device on again, press
.
No content, such as contacts or messages,
is deleted.
Nokia account and Nokia's Ovi services
When you switch on your device for the
first time, you can create a Nokia account,
so you can access Nokia's Ovi services.
With your Nokia account, you can
download games, applications, videos,
pictures, themes, and ringtones from MMOvi Store.
To learn more about Ovi, go to
www.ovi.com.
To create a Nokia account later, use your
device to access an Ovi service, and you are
prompted to create an account.
Copy contacts or pictures from your old device
Want to copy important information from
your previous compatible Nokia device
and start using your new device quickly?
Use the Phone switch application to copy,
for example, contacts, calendar entries,
and pictures to your new device, free of
charge.
Select Menu > Applications > Tools >
Phone setup and Data transfer.
© 2011 Nokia. All rights reserved.
Page 13

Install Nokia Ovi Suite on your PC 13
With Phone setup, you can do the
following:
Copy contacts, pictures, and other
•
content from your previous Nokia
device
•
Personalise your device, by
changing the ringtone and visual
theme
•
Set up mail
•
Update your device software
Use the in-device user guide
If your old Nokia device does not have the
Phone switch application, your new
device sends it in a message. Open the
message in the old device, and follow the
instructions.
1 Select the device you want to connect
to, and pair the devices. Bluetooth
needs to be activated.
2 If the other device requires a
passcode, enter the passcode. The
passcode, which you can define
yourself, must be entered in both
devices. The passcode in some devices
is fixed. For details, see the user guide
of the device.
The passcode is valid only for the
current connection.
3 Select the content and OK.
Device set-up
To define some basic settings for your
device, select Menu > Applications >
Tools > Phone setup.
© 2011 Nokia. All rights reserved.
Select Menu > Applications > User
guide.
Open the user guide from an
application
Select Options > User guide. This is not
available for every application.
Search the user guide
When the user guide is open, select
Options > Search, and enter a letter or a
word in the search field.
Switch between the user guide and an
application
Press and hold the menu key, swipe left or
right, and select the desired application.
indicates a link to a web page. Links to
related topics may be at the end of
instructions.
Install Nokia Ovi Suite on your PC
With the Nokia Ovi Suite PC application,
you can manage content on your device,
Page 14

14 Basic use
and keep it in sync with your computer.
You can also update your device with the
latest software, and download maps.
Download the latest version of Nokia Ovi
Suite from www.ovi.com/suite to your
computer.
If your computer can't connect to the
internet, to install Nokia Ovi Suite from
your device memory:
1 Use a compatible USB data cable to
connect your device to your
computer.
If you are using Windows XP or
Windows Vista on your computer, set
the USB mode of your device to Mass
storage. To set the USB mode on your
device, select the notification area in
the top right corner, and select
USB > Mass storage.
Your memory card appears as a
removable disk on your PC.
2 On your computer, select Install
Nokia Ovi Suite.
If the installation window does not
open automatically, open the
installation file manually. Select Open
folder to view files, and double-click
Install_Nokia_Ovi_Suite.exe.
>
3 Follow the displayed instructions.
4 When the installation is complete, if
you are using Windows XP or
Windows Vista on your computer,
check that the USB mode of your
device is set to Nokia Ovi Suite.
To learn more about Nokia Ovi Suite, go to
www.ovi.com/suite.
To check which operating systems Nokia
Ovi Suite supports, go to www.nokia.com/
support.
Basic use
Touch screen actions
To interact with the user interface, tap or
tap and hold the touch screen.
© 2011 Nokia. All rights reserved.
Page 15

Open an application or other screen
element
Tap the application or element.
Access functions quickly
Tap and hold the item. A pop-up menu
with available options opens. For
example, to send an image or delete an
alarm, tap and hold the image or alarm,
and from the pop-up menu, select the
appropriate option.
Basic use 15
Drag an item
Tap and hold the item, and slide your
finger across the screen. The item follows
your finger.
You can drag items in the home screen or
the main menu, when you have activated
editing mode.
Swipe
If you tap and hold the home screen,
editing mode is activated.
© 2011 Nokia. All rights reserved.
Place a finger on the screen, and steadily
slide your finger in the desired direction.
Page 16

16 Basic use
For example, when you are viewing a
picture, to view the next picture, swipe
left.
Scroll in a list or menu
Place your finger on the screen, slide it
quickly up or down the screen, then lift
your finger. The content of the screen
scrolls with the speed and direction it had
at the moment of release. To select an
item from a scrolling list and to stop the
movement, tap the item.
Zoom in
Place two fingers on an item, such as a
picture or web page, and slide your fingers
apart.
Zoom out
Place two fingers on the item, and slide
your fingers together.
Tip: You can also tap the item twice to
zoom in or out.
Interactive home screen elements
The home screen elements are interactive.
For example, you can change the date and
time, set alarms, write calendar entries, or
edit the profiles directly in the home
screen.
Set an alarm
Select the clock (1).
Activate or edit profiles
Select the profile (2).
View or edit your schedule
Select the date (3).
View missed calls and received
messages
Select the notification area (4).
View available WLANs or manage
Bluetooth connectivity
Select the notification area (4).
Modify the connectivity settings
Select the notification area (4) and
.
In most other views, you can select the
notification area (4), and do the following:
• Modify the connectivity settings.
© 2011 Nokia. All rights reserved.
Page 17

• Open the Clock application, and set an
alarm.
• View the battery status, and activate
power saving mode.
• View notifications of missed calls or
received messages.
• Open the WLAN wizard, and connect
to a WLAN.
• Manage Bluetooth connectivity.
Basic use 17
Switch between open applications
You can see which applications and tasks
are open in the background, and switch
between them.
Press and hold the menu key, swipe left or
right, and select the desired application.
Applications running in the background
increase the demand on battery power
and use memory. To close an application
that you are not using, select
.
Write text
Enter text with the virtual keyboard
Use the virtual keyboard
Select a text input field, and turn your
device so it is horizontal.
© 2011 Nokia. All rights reserved.
1 Virtual keyboard
2 Close key - Close the virtual keyboard.
3 Shift and caps lock key - To enter an
upper case character when writing in
lower case, or vice versa, select the
key before entering the character. To
activate caps lock mode, select the key
twice. A line under the key indicates
that caps lock mode is activated.
4 Character range - Select the desired
character range, such as numbers, or
special or accented characters.
5 Arrows keys - Move the cursor left or
right.
6 Space bar - Insert a space.
7 Input menu - Activate predictive text
input or change the writing language.
8 Enter key - Move the cursor to the next
row or text input field. Additional
functions are based on the current
context. For example, in the web
address field of the web browser, it
acts as the Go icon.
9 Backspace key - Delete a character.
Use the virtual keyboard
Select a text input field, and turn your
device so it is horizontal.
Page 18

18 Basic use
Set the default text input mode
Select Menu > Settings and Phone >
Touch input > Chinese keyboard
input.
1 Virtual keyboard
2 Close - Close the virtual keyboard.
3 Shift and caps lock key - To enter an
upper case character when writing in
lower case, or vice versa, select the
key before entering the character. To
activate caps lock mode, select the key
twice. A line under the key indicates
that caps lock mode is activated.
4 Character range - Select the desired
character range, such as numbers, or
special or accented characters.
5 Arrows keys - Move the cursor left or
right.
6 Space bar - Insert a space.
7 Input menu - Activate predictive text
input or change the writing language.
8 Enter - Move the cursor to the next row
or text input field. Additional
functions are based on the current
context. For example, in the web
address field of the web browser, it
acts as the Go icon.
9 Backspace - Delete a character.
Activate predictive text input with the virtual keyboard
Predictive text input may not be available
in all languages.
1 Select
Activate prediction.
> Input options >
is
displayed.
2 Start writing a word. Your device
suggests possible words as you write.
When the correct word is displayed,
select the word.
3 If the word is not in the dictionary, the
device suggests an alternative word
from the dictionary. To add the new
word to the dictionary, select the
word you have written.
Deactivate predictive text input mode
Select
> Input options > Deactivate
prediction.
Modify the text input settings
Select
> Input options > Settings.
Chinese handwriting recognition
To use Chinese handwriting recognition,
the writing language must be Chinese.
Select the writing language
Select
> Writing language.
Activate handwriting mode
Select
> Handwriting.
© 2011 Nokia. All rights reserved.
Page 19

Basic use 19
Enter a character
Write the character upright on the input
area, and select from the displayed
candidates.
Enter a special character
Select
and the desired character. Or,
write the character as you would normally
write it, and select from the displayed
candidates.
Change the character range
Select the current character range icon,
and select the desired character range
from the drop-down list.
Tip: All Chinese and English characters can
be found in the default character range
). To enter only English letters or
(
numbers, select
or .
Use handwriting gestures
Draw gesture 1 for backspace, gesture 2
for space, or gesture 3 for enter.
Enter text with virtual keypad
Activate the virtual keypad
You can use the virtual keypad to enter
characters as you would with a traditional
keypad.
1 Turn your phone so it is vertical.
2 If handwriting mode is activated,
select
> Alphanumeric keypad.
The current text input mode is indicated
above the number keys.
Switch between text input modes
Select the text input mode indicator and
the desired text input mode.
The available input methods depend on
where the phone is sold.
Pinyin input method
Pinyin symbols are mapped to the number
keys. Select each key once, regardless of
the position of the symbol on the number
key. The phone makes logical
combinations of the pinyin symbols.
Enter a character
1 For each pinyin symbol that you want
to enter, select the relevant key once.
Use v for ü.
2 To insert a tone mark, select 声调
repeatedly, until the desired tone
mark is displayed.
3 If necessary, select the desired pinyin
combination.
4 Select the desired character.
Enter a phrase
1 To enter a pinyin syllable or the initial
of the first character, select the
relevant keys. Use v for ü.
2 To insert a tone mark, select 声调
repeatedly, until the desired tone
mark is displayed.
3 To insert a separator, select 0.
© 2011 Nokia. All rights reserved.
Page 20

20 Basic use
4 To enter a pinyin syllable or the initial
of the next character, select the
relevant keys.
5 If necessary, repeat the steps.
6 Select the desired pinyin
combination.
7 Select the desired phrase.
Stroke input method
The strokes constituting Chinese
characters have been divided into five
categories: horizontal, vertical, leftfalling, dot, and turning. Each category
corresponds to a number key from 1 to 5,
respectively.
The strokes are classified as follows:
Enter a character
1 To enter the strokes, select the
relevant keys in the standard stroke
order.
If you are not sure which stroke to use
or which category it belongs to, select
6 to substitute that stroke, then
continue with the subsequent
strokes. A question mark in the input
area represents that stroke.
2 Select the desired character.
Enter a phrase
1 To enter the first strokes of the first
character, select the relevant keys.
2 To insert a separator, select 0.
3 To enter the first strokes of the next
character, select the relevant keys.
4 If necessary, repeat the steps.
5 Select the desired phrase.
Activate traditional text input with the virtual keypad
Quickly select # twice.
Enter a character
1 Select a number key (1-9) repeatedly,
until the desired character is
displayed. There are more characters
available than are visible on the key.
2 If the next letter is located on the
same key, wait until the cursor is
displayed or move the cursor forward,
and select the key again.
Insert a space
Select 0.
© 2011 Nokia. All rights reserved.
Page 21

Basic use 21
Move the cursor to the next line
Quickly select 0 three times.
Activate predictive text input with the virtual keypad
Predictive text input is based on a built-in
dictionary to which you can add new
words. Predictive text input is not
available for all languages.
1 Select
> Activate predictive
text.
2 To write the desired word, use the
keys 2-9. Select each key once for each
letter. For example, to write Nokia
when the English dictionary is
selected, select 6 for N, 6 for o, 5 for
k, 4 for i, and 2 for a.
The word suggestion changes after
each key selection.
3 If the word is not correct, select *
repeatedly, until the correct match is
displayed.
If ? is displayed after the word, the
word is not in the dictionary. To add a
word to the dictionary, select *, enter
the word using traditional text input
mode, and select OK.
4 To insert a space, select 0. To insert a
common punctuation mark, select 1,
and then select * repeatedly, until the
correct punctuation mark is
displayed.
5 Start writing the next word.
Deactivate predictive text input
Quickly select # twice.
Define the writing language
Select Menu > Settings and Phone >
Touch input > Writing language.
Change the language when writing
Select
language or
> Input options > Writing
> Writing language.
Adjust the speed at which handwriting
is recognised
Select Writing speed.
The available options may vary.
Display indicators
General indicators
The touch screen and keys are
locked.
The device alerts silently for
incoming calls.
You have set a clock alarm.
A timed profile is activated.
You have a missed calendar
event.
Call indicators
Someone has tried to call you.
You are using your second phone
line (network service).
You have set your device to
divert incoming calls to another
number (network service). If you
have two phone lines, a number
indicates the active line.
© 2011 Nokia. All rights reserved.
Page 22

22 Basic use
Your device is ready for an
internet call.
You have an ongoing data call
(network service).
Messaging indicators
You have unread messages. If
the indicator is blinking, the SIM
card memory for messages may
be full.
You have received new mail.
You have messages waiting to
be sent in the Outbox folder.
Network indicators
Your device is
connected to a GSM
network (network
service).
Your device is
connected to a TD–
SCDMA 3G network
(network service).
You have a GPRS
packet data
connection
(network service).
indicates that the
connection is on
hold and
connection is being
established.
You have an EGPRS
packet data
connection
that a
(network service).
indicates that the
connection is on
hold and
connection is being
established.
You have a 3G packet
data connection
(network service).
indicates that the
connection is
suspended and
that a connection is
being established.
You have an HSDPA
packet data
connection
(network service).
indicates that the
connection is
suspended and
that a connection is
being established.
A WLAN connection
is available
(network service).
the connection is
encrypted and
that the connection
is not encrypted.
Connectivity indicators
Bluetooth is active. indicates
that your device is sending data.
If the indicator is blinking, your
that a
indicates that
© 2011 Nokia. All rights reserved.
Page 23

Basic use 23
device is trying to connect to
another device.
You have connected a USB cable
to your device.
GPS is active.
The device is synchronising.
The FM transmitter is active, but
it is not transmitting.
indicates that the FM transmitter
is transmitting.
You have connected a
compatible headset to the
device.
You have connected a
compatible TV-out cable to the
device.
You have connected a
compatible text phone to the
device.
Set the notification light to blink for missed calls or messages
When the phone notification light blinks,
you have missed a call or a message has
arrived.
Select Menu > Settings and Phone >
Notification lights > Notification light.
Search in your device and on the internet
With the Search application, you can
find any item in your device.
1 Select Menu > Applications >
Search.
2 Enter a search word in the search field,
or browse the content categories.
Tip: You can add a search widget to the
home screen. With the search widget, you
can also search the internet. Tap and hold
the home screen, and select
and the
search widget from the list.
Use your device offline
In radio sensitive environments, where
you are not allowed to make or receive
calls, you may still be allowed to access
your calendar, contacts list, and offline
games if you activate the offline profile.
In the home screen, select the profile and
Offline.
When the offline profile is activated, your
connection to the cellular network is
closed. All radio frequency signals
between the device and the cellular
network are prevented. If you try to send
a message, it is placed in the Outbox
folder, and is sent only when another
profile is activated.
You can also use your device without a SIM
card. If you remove the SIM card, the
offline profile is activated.
Important: In the offline profile you
cannot make or receive any calls, or use
other features that require cellular
network coverage.To make calls, you
must first change to another profile.
When you use the offline profile, you can
still use WLAN, for example, to read your
mail or browse the internet. You can also
use Bluetooth connectivity. Remember to
comply with any applicable safety
© 2011 Nokia. All rights reserved.
Page 24

24 Basic use
requirements when you establish and use
WLAN or Bluetooth connections.
Prolong battery life
If it seems you're always looking for a
charger, there are steps you can take to
reduce the power consumption of your
device.
• Always charge the battery fully.
• When power saving mode is
activated, device settings, such as
Network mode and the screen saver,
are optimised.
Activate power saving mode
Press the power key
, and select
Activate power saving. To deactivate
power saving mode, press the power key
, and select Deactivate power
saving.
Close the applications you are not
using
Press and hold the menu key, swipe until
the desired application is displayed, and
select
.
Sounds, themes, and effects
• Mute unnecessary tones, such as key
tones.
• Use wired headphones, rather than
the loudspeaker.
• Change the length of the time-out
period after which the device display
switches off.
Set the length of the time-out period
Select Menu > Settings and Phone >
Display > Light time-out.
Activate a dark theme and wallpaper
Select Menu > Settings and Themes >
General. To change the wallpaper, on the
home screen, select Options > Change
wallpaper.
Deactivate background animation
effects
Select Menu > Settings and Themes >
General > Options > Theme effects >
Off.
Decrease the brightness of the display
In the display settings, select Brightness.
Deactivate the Big clock screen saver
Select Menu > Settings and Themes >
Screen saver > None.
Network use
• If you are listening to music or
otherwise using your device, but do
not want to make or receive calls,
activate the offline profile.
• Set your device to check for new mail
less frequently.
• Use a WLAN connection to connect to
the internet, rather than a packet data
(GPRS or 3G) connection.
Deactivate Bluetooth when not
needed
Select Menu > Settings and
Connectivity > Bluetooth >
Bluetooth > Off.
© 2011 Nokia. All rights reserved.
Page 25

Personalisation 25
Stop your device scanning for available
WLANs
Select Menu > Settings and
Connectivity > WLAN > Options >
Settings > Show WLAN availability >
Never.
Establish a packet data (3G or GPRS)
connection only when needed
Select Menu > Settings and
Connectivity > Admin. settings >
Packet data > Packet data
connection > When needed.
Personalisation
Profiles
About profiles
Select Menu > Settings and Profiles.
Waiting for a call but can't let your phone
ring? Your device has various settings
groups called profiles, which you can
personalise for different events and
environments. You can also create your
own profiles.
You can personalise the profiles in the
following ways:
• Change the ringing and message alert
tones.
• Adjust the volume of ringing and key
tones.
• Mute key tones and warning tones.
• Activate vibrating alerts.
• Set the device to say the name of the
contact who is calling.
Personalise your tones
You can personalise the ringtones, and
key and warning tones for each profile.
Select Menu > Settings > Profiles.
1 Select the desired profile.
2 Select Personalise and the desired
option.
Tip: Download ringtones from MM-Ovi
Store.
Silence your phone
When the silent profile is activated, all
ringtones and alert tones are muted.
Activate this profile when you are at the
cinema or in a meeting.
On the home screen, select the profile and
Silent.
Change your profile for meetings or outdoor use
When the meeting profile is activated,
your phone discreetly beeps once instead
of ringing. When the outdoor profile is
activated, the ringing tone is louder, so
you won't miss a call in a noisy
environment.
On the home screen, select the profile and
Meeting or Outdoor.
Create a new profile
How can you make your phone meet your
needs at work or college or home? You can
create new profiles for different
situations, and give them appropriate
names.
© 2011 Nokia. All rights reserved.
Page 26

26 Personalisation
1 Select Menu > Settings > Profiles
and Options > Create new.
2 Define your profile settings, and select
Profile name.
3 Enter a name for the profile.
Change your theme
With themes, you can change the
colours and look of your display.
Select Menu > Settings > Themes.
Select General and a theme.
Some themes include background
animation effects. To save battery power,
select General > Options > Theme
effects > Off.
Tip: Download themes from MM-Ovi Store.
Home screen
About the home screen
In the home screen, yo u can quickly access
your most frequently used applications
and create shortcuts for different
features. You can view your favourite
contacts, and quickly call, start
conversations, or send messages to them.
You can also control applications, such as
Music.
You can have more than one home screen
page, for example, separate home screens
for work and private life.
The home screen elements are interactive.
For example, if you select the clock, the
Clock application opens.
Switch between home screens
You can have more than one home screen.
For example, create separate home
screens for work and private life, and
personalise them to have different
content.
To switch to another home screen, swipe
left or right.
indicates which home screen
you are in.
Personalise the home screen
Want to see your favourite landscape or
pictures of your family in the home screen
background? You can change this
wallpaper, and rearrange items on the
home screen, to personalise it to your
liking.
Rearrange items on the home screen
1 Tap and hold the home screen.
2 Drag and drop items to a new
location.
© 2011 Nokia. All rights reserved.
Page 27

Change the wallpaper
1 Tap and hold the home screen.
2 Select Options > Change wallpaper.
3 Select the desired picture.
Tip: Download more background images
from MM-Ovi Store.
Add items to the home screen
Want to open your favourite applications
directly from the home screen? You can
create shortcuts to your most used
features. You can also add miniapplications (widgets), that display
helpful information, such as the current
weather conditions.
Add a shortcut to the home screen
You can add shortcuts to applications,
web bookmarks, or actions, such as
writing a message.
1 Tap and hold the home screen.
2 Select the shortcut widget and
Settings.
3 Select the shortcut you want to
define, and select Application or
Bookmark and the desired item.
4 Select Exit > Done.
Personalisation 27
Tip: To remove a shortcut, replace it with
another one.
Add a widget to the home screen
1 Tap and hold the home screen.
2 Select
and the desired widget from
the list.
3 Select Done.
Tip: Download more widgets from MM-Ovi
Store.
Using the service or downloading content
may cause transfer of large amounts of
data, which may result in data traffic
costs.
Some home screen widgets may connect
to the internet automatically. To prevent
this, select Options > Widgets to offline
mode.
Remove a widget from the home
screen
1 Tap and hold the home screen.
2 Select the widget, and from the pop-
up menu, select Remove.
3 Select Done.
Add your important contacts to the home screen
Add your most important contacts to the
home screen, so you can quickly call or
send messages to them.
1 In the Favourite contacts widget,
select
.
2 To mark the contacts to add to the
home screen, select the desired
contacts. You can add up to 20
contacts to the widget.
© 2011 Nokia. All rights reserved.
Page 28

28 Telephone
Call or send a message to a contact
In the widget, select the contact.
Remove a contact from the home
screen
In the widget, select
remove. The contact is deleted from the
widget, but remains in your contacts list.
Organise your applications
Want to open your most used applications
more quickly? In the main menu, you can
organise your applications and hide less
used applications in folders.
Press the menu key, and select Options >
Edit.
Create a new folder
Select Options > New folder.
Move an application to a folder
Select and hold the application, and from
the pop-up menu, select Move to folder
and the new folder.
Tip: You can also drag and drop
applications and folders.
and the contact to
Telephone
Call a phone number
1 In the home screen , select Call to open
the dialler, and enter the phone
number.
To enter the + character, used for
international calls, select * twice.
2 To make the call, select
3 To end the call, select
.
.
Call a contact
Select Menu > Applications > Contacts.
1 To search for a contact, enter the first
letters or characters of the first or
second name in the search field.
2 Select the contact.
3 In the contact card, select Voice call.
4 If the contact has more than one
phone number, select and hold Voice
call, and select the desired number.
Make a video call
Do you have friends or family that you
don't see in person very often? For a faceto-face chat, why not make a video call to
them?
Video calls are a network service, and to
make a video call, you need to be in a 3G
network.
For information on availability and costs,
contact your service provider.
© 2011 Nokia. All rights reserved.
Page 29
Video calls can only be made between two
parties. Video calls cannot be made while
another voice, video, or data call is active.
1 Select Menu > Applications >
Contacts, and search for a contact.
2 Select the contact, and in the contact
card, select Video call.
The camera on the front of your device
is used by default for video calls.
Starting a video call may take a while.
If the call is not successful (for
example, video calls are not
supported by the network, or the
receiving device is not compatible),
you are asked if you want to make a
normal call or send a message
instead.
The video call is active when you see
two videos, and hear the sound
through the loudspeaker. The call
recipient may deny video sending,
and you only hear the voice of the
caller, and may see an image or a grey
screen.
3
Send an image rather than live video
Select Menu > Settings and Calling >
Call > Image in video call.
If you do not send live video, the call is still
charged as a video call.
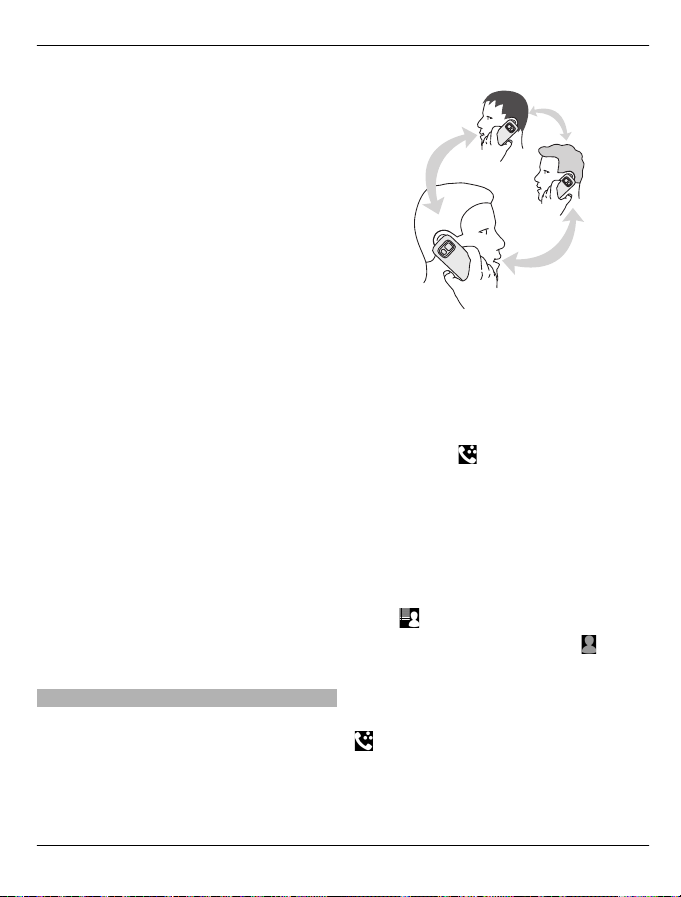
Make a conference call
Your device supports conference calls
between a maximum of six participants,
including yourself. Video conference calls
are not supported.
Telephone 29
1 Make a call to the first participant.
2 To make a call to another participant,
select Options > New call. The first
call is put on hold.
3 When the new call is answered, to add
the first participant to the conference
call, select
.
Add a new participant to a conference
call
Make a call to another participant, and add
the new call to the conference call.
Have a private conversation with a
conference call participant
Select
Go to the participant, and select
.
. The
conference call is put on hold on your
device. The other participants continue
the conference call.
To return to the conference call, select
. If there are more than three
participants in the conference call, select
Options > Add to conference to finish
the private conversation.
© 2011 Nokia. All rights reserved.
Page 30
30 Telephone
Drop a participant from a conference
call
Select
, go to the participant, and select
.
End an active conference call
Select
.
Use speed dial
You can quickly call your friends and
family when you assign your most-used
phone numbers to the number keys of
your device.
Select Menu > Settings and Calling >
Speed dialling.
Assign a phone number to a number
key
1 Select the number key to which you
want to assign the phone number.
1 is reserved for the voice mailbox.
2 Select the phone number from your
contacts list.
Remove or change a phone number
assigned to a number key
Select and hold the assigned key, and from
the pop-up menu, select Remove or
Change.
Make a call
In the home screen, select Call to open the
dialler, and select and hold the assigned
number key.
Use your voice to call a contact
With the Voice commands application you
can use your voice to make calls or control
your phone.
Voice commands are not dependent on
the speaker’s voice. Commands are
automatically created by your phone.
Note: Using voice tags may be difficult
in a noisy environment or during an
emergency, so you should not rely solely
upon voice dialling in all circumstances.
When you use voice dialling, the
loudspeaker is in use. Hold the phone at a
short distance away when you say the
voice command.
1 In the home screen, select and hold
Call. If a compatible headset with the
headset key is attached, press and
hold the headset key.
2 A short tone sounds, and Speak now
is displayed. Say clearly the name that
is saved for the contact.
3 The phone plays a synthesised voice
command for the recognised contact
in the selected phone language, and
displays the name and number. To
cancel the voice dialling, select Quit.
Listen to a voice command for a contact
1 Select a contact and Options > Voice
tag details.
2 Select a contact detail.
If several numbers are saved for a name,
you can say also the name and the number
type, such as mobile or telephone.
© 2011 Nokia. All rights reserved.
Page 31
Telephone 31
Make calls over the internet
About internet calls
With the internet call network service, you
can make and receive calls over the
internet. Internet call services may
support calls between computers,
between mobile phones, and between a
VoIP device and a traditional telephone.
Some internet call service providers allow
free internet calls. For availability and
connectivity costs, contact your internet
call service provider.
To make or receive an internet call, you
must be in the service area of a WLAN or
have a packet data (GPRS) connection in a
3G network, and be signed in to an
internet call service.
Make an internet call
When you are signed into a internet call
service, you can make a call from the
friends list or the contacts list.
Select Menu > Applications > Contacts.
Call a contact in the friends list
1 Open the internet call service tab, and
sign in to a internet call service.
2 Select a contact from the friends list,
and select Internet call.
Make an internet call to a phone
number or SIP address
1 In the home screen, select Call to open
the dialler, and enter the number.
2 Select Options > Call > Internet
call.
Call the last dialled number
Trying to call someone, but they are not
answering? It is easy to call them again. In
the call log, you can see information about
the calls you have made and received.
In the home screen, select Call to open the
dialler, and select
. To call the last
dialled number, select the number from
the list.
Tip: To view the last dialled numbers
quickly, in the home screen, select
.
Record a phone conversation
With the Recorder application, you can
record phone conversations.
1 During an active voice call, select
Menu > Applications > Office >
Recorder.
2 To start recording, select
3 To stop recording, select
.
. The
sound clip is automatically saved to
the Sound files folder in the File
manager application.
Both parties hear a tone at regular
intervals during the recording.
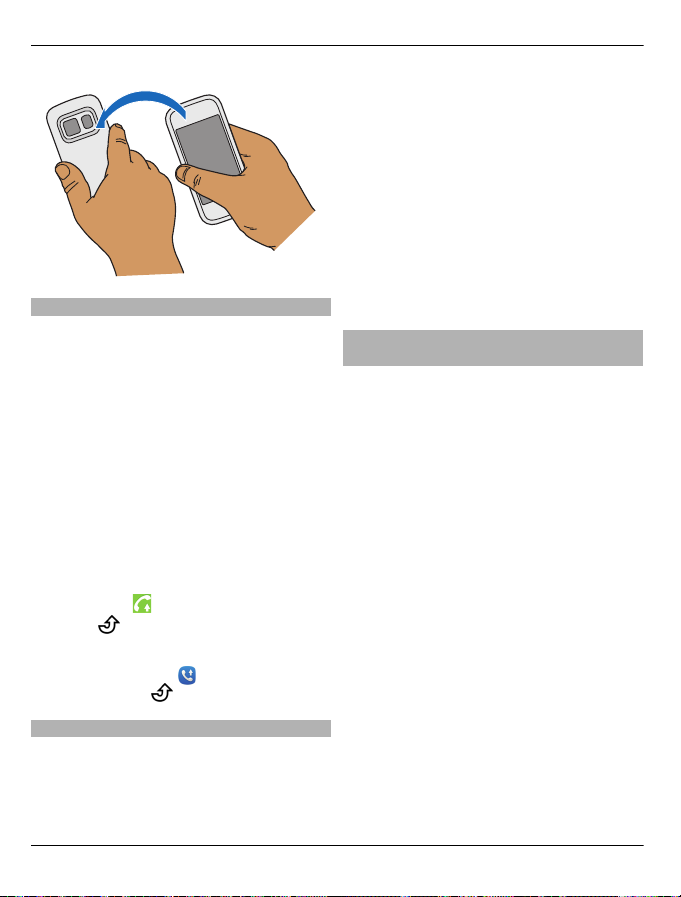
Turn to silence
If your phone rings in a situation where
you do not want to be disturbed, you can
turn the phone to silence the ringtone.
Activate the turn to silence feature
Select Menu > Settings and Phone >
Sensor settings > Silence calls > On.
© 2011 Nokia. All rights reserved.
When your phone rings, turn your phone
face down.
Page 32
32 Telephone
View your missed calls
In the home screen, you can see when you
have missed calls. To view the phone
number, select Show. The caller's name is
displayed if stored in the contacts list.
Missed and received calls are logged only
if supported by the network, and the
device is switched on and within the
network service area.
Call back the contact or number
Select the contact or number.
To view the missed calls list later, in the
home screen, select Call to open the
dialler, select
calls tab
, and open the missed
.
Tip: To view missed calls quickly, in the
home screen, select
missed calls tab
, and open the
.
Call your voice mailbox
You can divert your incoming calls to your
voice mailbox (network service). People
can leave you a message, for example,
when you have not answered the call.
In the home screen, select Call to open the
dialler, and select and hold 1.
Change the phone number of your
voice mailbox
1 Select Menu > Settings and
Calling > Call mailbox.
2 Select and hold a mailbox, and from
the pop-up menu, select Options >
Change number.
3 Enter the number (obtained from your
network service provider), and select
OK.
Divert calls to your voice mailbox or another phone number
If you cannot answer your calls, you can
divert incoming calls to your voice
mailbox or another phone number.
Select Menu > Settings and Calling >
Call divert > Voice calls.
Call divert is a network service. For details,
contact your service provider.
Divert all voice calls to your voice
mailbox
Select All voice calls > Activate > To
voice mailbox.
Divert all voice calls to another phone
number
1 Select All voice calls > Activate > To
other number.
2 Enter the number, or select Find to
use a number saved in your contacts
list.
© 2011 Nokia. All rights reserved.
Page 33
Telephone 33
Several diverting options, such as If busy
and If not answered can be active at the
same time.
In the home screen,
indicates that
all calls are diverted.
Call barring and call diverting cannot be
active at the same time.
Prevent making or receiving calls
Sometimes you may want to restrict the
calls that can be made or received with
your device. With call barring (network
service), you can, for example, restrict all
outgoing international calls or incoming
calls when you are abroad.
Select Menu > Settings and Calling >
Call barring.
To modify the settings, you need the
barring password from your service
provider.
Prevent making calls
1 If an internet call service is installed,
select Mobile call barring.
2 To prevent making any calls or
international calls, select Outgoing
calls or International calls. To
prevent making international calls,
but allow calls to your home country,
select International calls except to
home country.
3 Select Activate. Call barring affects all
calls, including data calls.
Prevent receiving calls
1 If an internet call service is installed,
select Mobile call barring.
2 To prevent receiving any calls or
international calls when you are
abroad, select Incoming calls or
Incoming calls when roaming.
3 Select Activate.
Prevent anonymous internet calls
Select Internet call barring >
Anonymous call barring > On.
Allow calls only to certain numbers
With the fixed dialling service, you can
restrict calls, and only allow calls to certain
phone numbers. For example, you can
allow your children to call only family
members or other key numbers.
Select Menu > Applications > Contacts
and Options > SIM numbers > Fixed
dial contacts.
Not all SIM cards support the fixed dialling
service. You need your PIN2 code from
your service provider.
Activate fixed dialling
Select Options > Activate fixed
dialling. Enter the PIN2 code.
Select the people to whom calls are
allowed
1 Select Options > New SIM contact.
2 Enter the PIN2 code.
3 Enter the contact name and phone
number to which calls are allowed,
and select Done. To add a contact
from the contacts list to the fixed
dialling list, select Add from Contacts
and a contact.
© 2011 Nokia. All rights reserved.
Page 34
34 Telephone
To send a text message to a SIM contact
while the fixed dialling service is active,
you need to add the text message centre
number to the fixed dialling list.
Video sharing
About video sharing
With video sharing (network service), you
can share live or recorded video from your
device to another compatible device,
during a voice call.
When you activate video sharing, the
loudspeaker is automatically activated. If
you do not want to use the loudspeaker,
you can use a compatible headset.
Video sharing requirements
To share video, both you and the recipient
must:
• Be in a 3G network. If either of you
move outside the 3G network, the
voice call continues.
• Have the video sharing feature
activated.
• Have person-to-person connections
set up.
For more information on the service, 3G
network availability, and fees associated
with using this service, contact your
service provider.
Set up video sharing
To set up video sharing, you need personto-person and 3G connection settings.
A person-to-person connection is also
known as a Session Initiation Protocol
(SIP) connection. The SIP profile settings
must be configured in your device before
you can use video sharing. Contact your
service provider for the SIP profile
settings, and save them to your device.
Your service provider may send you the
settings in a configuration message or
give you a list of the needed parameters.
Set up a person-to-person connection
Select Menu > Settings and
Connectivity > Admin. settings > SIP
settings.
Use a 3G connection
For details about networks, contact your
service provider.
Add a SIP address to a contact
1 Select Menu > Applications >
Contacts.
2 Select a contact or create a new
contact.
3 Select Options > Edit.
4 Select Options > Add detail > Share
video.
5 Enter the SIP address in the format
username@domainname (you can
use an IP address instead of a domain
name).
If you do not know the SIP address for
the contact, you can use the phone
number of the recipient, including the
country code, to share video (if
supported by the network service
provider).
Share live or recorded video
During an active voice call, select
Options > Share video.
1 To share live video, select Live video.
© 2011 Nokia. All rights reserved.
Page 35
Contacts 35
To share a video, select Video clip and
the desired video. Your device checks
if the video must be converted. If
needed, the video is automatically
converted.
2 Select the desired SIP address or
phone number that is stored in the
contact card for the recipient. If the
SIP address or phone number is not
available, manually enter the details,
and select OK. If entering a phone
number, you need to enter the
country code. The invitation is sent to
the SIP address.
If you access another application while
sharing a video, the sharing is paused.
Continue sharing
In the home screen, select Options >
Resume video sharing.
Stop sharing video
Select Stop. To end the voice call, select
. When you end the call, video
sharing also ends.
Save the live video you shared
Select Yes when prompted.
Accept a video sharing invitation
Select Yes. Video sharing begins
automatically.
Contacts
About Contacts
Select Menu > Applications >
Contacts.
With Contacts, you can save and organise
your friends' phone numbers, addresses,
and other contact information.
Save phone numbers and mail addresses
You can save your friends' phone
numbers, mail addresses, and other
information to your contacts list.
Select Menu > Applications > Contacts.
Add a contact to the contacts list
1 Select Options > New contact.
2 Select a field, and enter the details. To
close the text input, select
Edit contact information
1 Select a contact.
2 Open the contact card tab
3 Select a contact detail.
Add details about a contact
Select a contact and Options > Edit >
Options > Add detail.
Save a number from a received call or message
Have you received a call or a message from
a person whose phone number is not yet
saved in the contacts list? You can easily
save the number in a new or existing
contact list entry.
Save a number from a received call
1 Select Menu > Applications > Log.
2 Select Received calls.
.
.
© 2011 Nokia. All rights reserved.
Page 36

36 Contacts
3 Select and hold a phone number, and
from the pop-up menu, select Save to
Contacts.
4 Select whether you want to create a
new contact list entry or update an
existing one.
Save a number from a received
message
1 Select Menu > Messaging.
2 Select Inbox and a message.
3 Select the phone number and Save to
Contacts.
4 Select whether you want to create a
new contact list entry or update an
existing one.
Contact your most important people quickly
You can set your most important contacts
as favourites. Your favourites are at the
top of the contacts list, so you can contact
them quickly.
Select Menu > Applications > Contacts.
Set a contact as a favourite
Select and hold a contact, and from the
pop-up menu, select Add to favourites.
Remove a contact from favourites
Select and hold a contact, and from the
pop-up menu, select Remove from
favourites. The contact is not deleted
from your standard contacts list.
Select Menu > Applications > Contacts.
Set a ringing tone for a contact
1 Select a contact and Options > Edit.
2 Select the Ringtone field and a ringing
tone.
Set a ringing tone for a contact group
1 Open the Groups tab.
2 Select and hold the title of a group,
and from the pop-up menu, select
Ringtone.
3 Select a ringing tone from the list.
The ringing tone only applies to the
members of the group at the time that the
ringing tone is set.
Send your contact information using My Card
My card is your electronic business card.
With My card, you can send your contact
information to others.
Select Menu > Applications > Contacts.
Send your contact information as a
business card
Select and hold My card, and from the
pop-up menu, select Send as business
card.
Edit your contact information in My
Card
Select My card, and the detail to edit.
Set a ringing tone for a specific contact
Want to be able to hear that a particular
person is calling you? You can set a ringing
tone specifically for that person.
Create a contact group
When you have created contact groups,
you can send a message to several people
at the same time. For example, you can
© 2011 Nokia. All rights reserved.
Page 37
Phonebook manager 37
assign the members of your family to one
group.
Select Menu > Applications > Contacts.
1 Open the Groups tab.
2 Select Options > New group.
3 Enter a name for the group, and select
OK.
4 Select the group and Options > Add
members.
5 To mark the contacts you want to add
to the group, select them.
Send a message to a group of people
Would you like to send a message to all
your family members quickly? If you have
assigned them to a group, you can send a
message to all of them at the same time.
Select Menu > Applications > Contacts.
1 Open the Groups tab.
2 Select and hold a group title, and from
the pop-up menu, select Create
message.
Contacts stored on the SIM card
If you have contacts stored on your SIM
card, you can copy them to your device.
You can add more details to contacts that
are stored on your device.
Select Menu > Applications > Contacts.
View contacts stored on your SIM card
Select Options > Settings > Contacts to
display > SIM memory.
Contacts stored on a SIM card are indicated
.
with
If you copy the contacts to your device,
you can add further details to the entries,
such as alternative phone numbers,
addresses, or a picture.
Copy all SIM contacts to your device
Select Options > SIM numbers > Copy
all to phone.
Phonebook manager
Phonebook manager is a service provided
by China Mobile. You can back up or
restore your phonebook entries online.
For the availability of this service, pricing,
and detailed instructions, contact your
service provider.
Phonebook manager uses general packet
radio service (GPRS). For information on
the pricing of GPRS, contact your service
provider.
To subscribe to or unsubscribe from the
Phonebook manager service, or to back
up, restore, and search for phonebook
entries online, select Menu > Phone
Book > Phonebook Manager.
Messaging
About Messaging
Select Menu > Messaging.
You can send and receive various kinds of
messages:
• Text messages
• Audio messages
• Multimedia messages that contain
pictures and videos
© 2011 Nokia. All rights reserved.
Page 38
38 Messaging
• Group messages
Messaging requires network support.
You can send text messages that are
longer than the character limit for a single
message. Longer messages are sent as
two or more messages. Your service
provider may charge accordingly.
Characters with accents, other marks, or
some language options, take more space,
and limit the number of characters that
can be sent in a single message.
Send a message
With text and multimedia messages, you
can quickly contact your friends and
family. In a multimedia message, you can
attach pictures, videos, and sound clips
that you want to share.
Select Menu > Messaging.
1 Select New message.
2 To select recipients from the contacts
list, select the To title. To enter the
recipient’s phone number manually,
enter the number in the To field.
3 To add an attachment, select
4 Select
.
.
Sending a message with an attachment
may be more expensive than sending a
normal text message. For more
information, contact your service
provider.
If the item you inserted in a multimedia
message is too large for the network, the
device may automatically reduce the size.
Only compatible devices can receive and
display multimedia messages. Messages
may look different in different devices.
Send an audio message
You can record a sound clip, such as a
birthday song, and send it to your friend
as an audio message.
Select Menu > Messaging.
1 Select Options > Create message >
Audio message.
2 To record the message, select
.
3 To select the recipient from the
contacts list, select the To title. To
enter the recipient's phone number
manually, enter the number in the To
field.
4 Select
.
Receive messages
When you receive a message, you can
open it directly from the home screen.
Later, you can find the message in the
Conversations folder or in the Inbox folder
in Messaging.
Select Menu > Messaging.
When you receive a message,
and 1
new message are displayed in the home
screen. To open the message, select
Show. By default, the message is opened
in the Conversations view.
© 2011 Nokia. All rights reserved.
Page 39
Messaging 39
Reply to a received message in the
Conversations view
Select the text input field at the bottom of
the display, write a message, and select
.
Open a message in the Inbox folder
Select Inbox and a message.
Reply to a received message in the
Inbox view
Open a message, and select
.
Forward a message in the Inbox view
Open a message, and select
.
Save a received multimedia item
Select and hold the item, and from the
pop-up menu, select Save. The item can
be viewed in the corresponding
application. For example, to view saved
pictures, open Photos.
View a conversation
You can see the messages you have sent
to and received from a particular contact
from a single view, and continue the
conversation from that view.
Select Menu > Messaging.
Select Conversations and a contact. All
messages sent to and received from that
contact are displayed.
Reply to a message in a conversation
1 Open the conversation.
2 Select the text input field at the
bottom of the display, and write a
message.
3 To add attachments or more
recipients, select
4 To send the message, select
or .
.
When you send a new message, it is added
to the current conversation. If no
conversation exists, a new conversation is
started.
When you open a received message from
the home screen, by default, the message
opens in the Conversations view. If you
want messages to open in the Inbox view,
select Options > Message view >
Inbox.
Listen to a text message
You can set your phone to read your text
messages aloud.
1 Select Menu > Messaging.
2 Select Inbox.
3 Select and hold a message, and from
the pop-up menu, select Listen.
Select Menu > Applications > Office >
Msg. reader.
Change the language
Select Language and a language.
Download an additional language
Select Options > Download languages.
Change the voice
Select
. To preview a voice, select and
hold the voice, and select Play voice.
© 2011 Nokia. All rights reserved.
Page 40
40 Mail
Change language
You can change the phone language and
the language in which you write your
messages and mails. You can also activate
predictive text input.
Select Menu > Settings and Phone >
Language.
Change the phone language
Select Phone language.
Change the writing language
Select Writing language.
Activate predictive text input
Select Predictive text.
Mail
About Mail
Select Menu > Applications > Mail.
With Mail, you can add several mailboxes
and access them directly from your home
screen. In the main mail view, you can
switch from one mailbox to another.
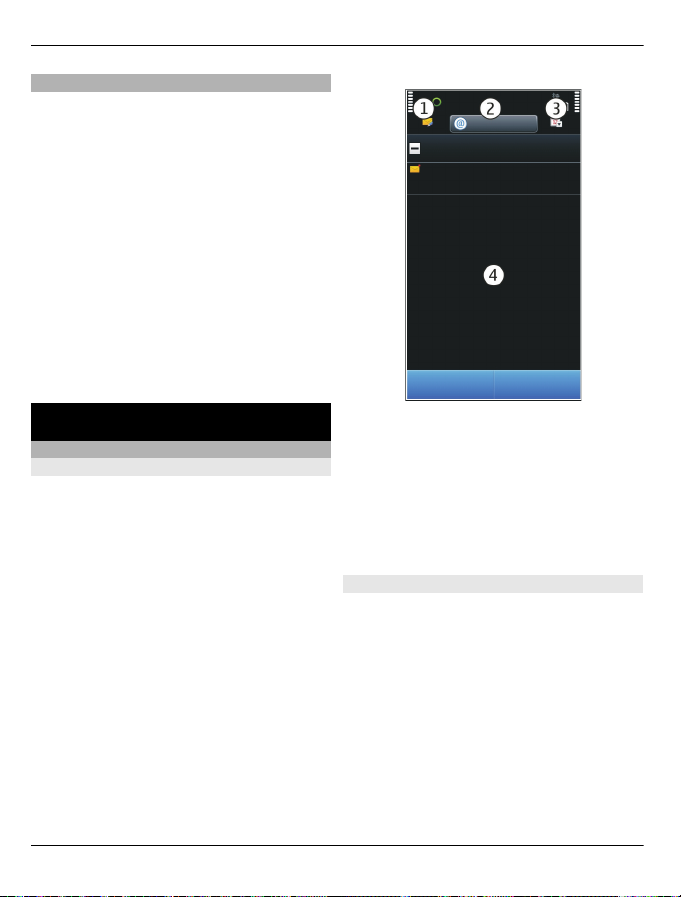
1 Write a mail.
2 Switch between your mailboxes.
3 Sort your mail by, for example, date.
4 Mail in current mailbox.
Mail contains interactive elements. Select
and hold, for example, a mail to view a
pop-up menu.
Add a mailbox
You can add several mailboxes to your
device.
Select Menu > Applications > Mail.
Add a mailbox
Select New mailbox, and follow the
instructions.
Add a mail widget to the home screen
In the home screen, tap and hold an empty
area.
© 2011 Nokia. All rights reserved.
Page 41
Mail 41
Select and the desired widget from the
list.
Delete a mailbox
Select Options > Delete mailbox and the
mailbox.
Read mail
You can use your device to read and reply
to mail.
Select Menu > Applications > Mail.
Read a mail
Select the mail.
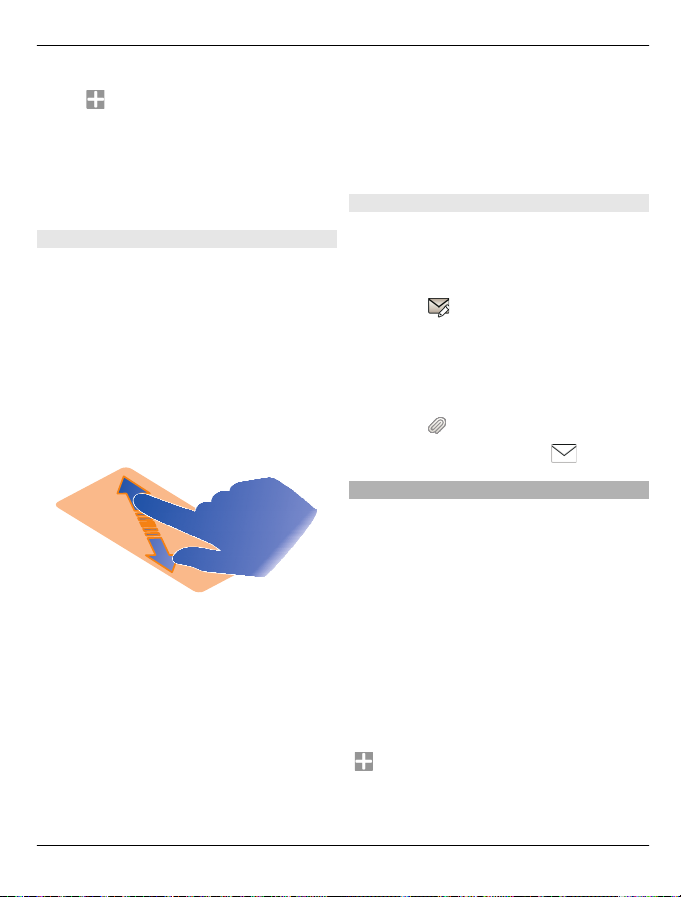
Tip: To zoom in or out, place two fingers
on the screen, and slide them together or
apart.
Open or save an attachment
Select the attachment and the
appropriate option. If there is more than
one attachment, you can save them all at
once.
Reply to a mail
Select Options > Reply.
Forward a mail
Select Options > Forward.
Tip: If there is a web address in a mail and
you would like to open the address in the
device browser, select the address.
Tip: To open the next or previous mail, use
the arrow icons.
Send a mail
You can use your device to write and send
mail, and attach files to your mail.
Select Menu > Applications > Mail.
1 Select
.
2 To add a recipient from your contacts
list, select the To, Cc, or Bcc icon. To
enter a mail address manually, select
the To, Cc, or Bcc field.
3 To add an attachment to the mail,
select
4 To send the mail, select
.
.
Open mail from the home screen
You can have several mail widgets on the
home screen, depending on your phone.
Each mail widget contains one mailbox. In
the widget, you can see if you have
received new mail and the number of
unread mails.
Add a mail widget to the home screen
On the home screen, select New
mailbox, and follow the instructions.
Add another mail widget to the home
screen
Tap and hold the home screen, and select
and the desired widget from the list.
© 2011 Nokia. All rights reserved.
Page 42
42 Internet
Open a mail
Select the mail widget.
Internet
About Web
Select Menu > Applications >
Web.
With the Web application, you can view
web pages on the internet.
The XHTML browser in this device supports
the Unicode encoding format.
To browse the web, you must have an
internet access point configured in your
device and be connected to a network.
Browse the web
Select Menu > Applications > Web.
Tip: If you do not have a flat-rate data plan
from your service provider, to save data
costs in your phone bill, you can use a
WLAN to connect to the internet.
Go to a website
Select the web address bar, enter a web
address, and select
Tip: To search the internet, select the web
address bar, enter the search word, and
select the link below the web address bar.
Zoom in or out
Place two fingers on the screen, and slide
your fingers together or apart.
.
A cache is a memory location that is used
to store data temporarily. If you have, or
have tried to, access confidential
information or a secure service, requiring
passwords, clear the cache after each use.
Empty the cache
Select
data > Cache.
Add a bookmark
If you visit the same websites all the time,
add them to your Bookmarks view, so you
can easily access them.
Select Menu > Applications > Web.
While browsing, select
Go to a bookmarked website while
browsing
Select
Subscribe to a web feed
You don't have to visit your favourite
websites regularly to keep up with what's
new on them. You can subscribe to web
feeds and get links to latest content
automatically.
Select Menu > Applications > Web.
Web feeds on web pages are usually
indicated with
share, for example, the latest news
headlines or blog entries.
> > Privacy > Clear privacy
> .
> and a bookmark.
. They are used to
© 2011 Nokia. All rights reserved.
Page 43
China Mobile services 43
Subscribe to a feed
Go to a blog or web page that contains a
web feed, and select Options > Add
feed.
Manually update a feed
In the Web feeds view, select the feed.
Set a feed to automatically update
In the Web feeds view, select and hold the
feed, and from the pop-up menu, select
Edit > Automatic updates.
China Mobile services
China Mobile services provide you highquality customer support and enriched
online contents, such as music, games,
weather forecast, and other services.
The services may use general packet radio
service (GPRS). For information on the
pricing of GPRS and China Mobile services,
contact your network service provider.
Contact customer support
Select Menu > Customer Services.
The online contents and services may vary
depending on your device and your
network service provider.
10086 Portal
10086 Portal allows you to access China
Mobile services using your device web
browser.
For information on the pricing of GPRS and
China Mobile services, contact your service
provider.
Access 10086
Select Menu > 10086.cn.
Camera
About Camera
Select Menu > Applications >
Camera.
Why carry a separate camera if your device
has all you need for capturing memories?
With the Camera application, you can
easily take pictures or record videos. You
can later use your device to view or edit
the pictures and videos, share them on the
internet, or send them to compatible
devices.
Take a picture
Press and hold
Your device camera has the full focus
feature. With this feature, you can take
pictures where objects both in the
foreground and background are in focus.
1 To activate the face tracking feature,
select
face tracker detects and draws white
rectangles around faces, even when
they are moving.
2Press
before the picture is saved and the
final picture displayed.
Pictures and videos are saved to the
memory card by default.
.
> Face detect.. The
. Do not move the device
© 2011 Nokia. All rights reserved.
Page 44
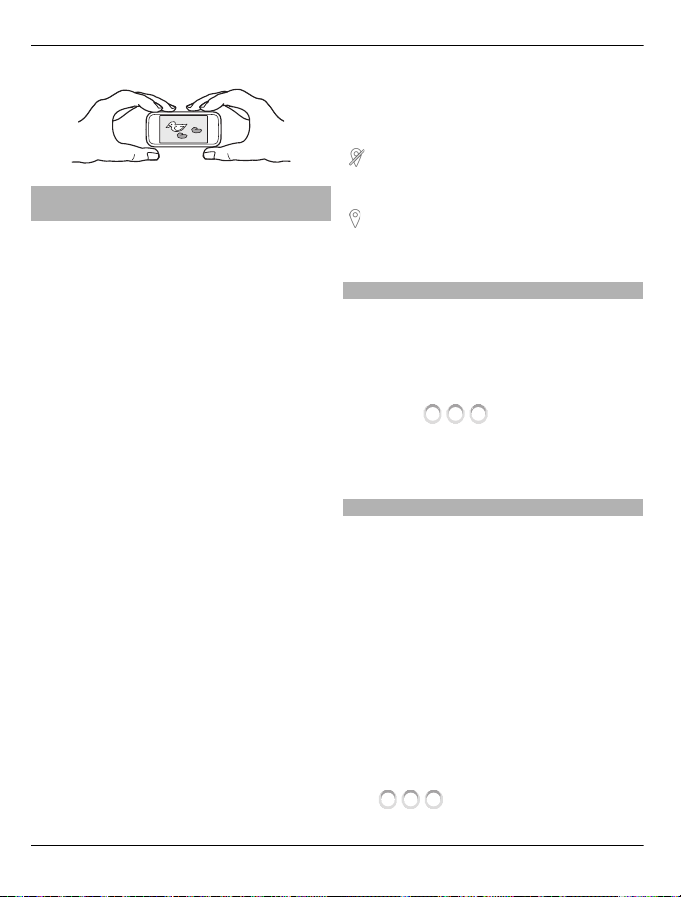
44 Camera
Save location information to your pictures and videos
If you sometimes struggle to remember
exactly where you were when you took a
particular picture or video while hiking or
travelling, you can set your device to
automatically record the location. Later,
you can view the locations on a map.
Location information can be attached to
an image or a video clip if location
coordinates can be determined via
network and GPS. If you share an image or
a video clip which has location
information attached, the location
information may be visible to others that
view the image or the video clip. You can
deactivate geotagging in the camera
settings.
Select Menu > Applications > Camera.
Activate the location recording feature
Select Options > Settings > Save
location info > Yes. The location
information is available only for pictures
taken with the main camera.
It may take several minutes to obtain the
coordinates of your location. The
availability and quality of GPS signals may
be affected by your location, buildings,
natural obstacles, and weather
conditions. If you share a file that includes
location information, also the location
information is shared, and your location
may be visible to third parties viewing the
file. This feature requires network service.
Location information indicators:
— Location information is unavailable.
Location information may not be saved to
pictures or videos.
— Location information is available.
Location information is saved to pictures
or videos.
Take a picture in the dark
To take pictures even when light levels are
low, activate night mode.
Press and hold the camera key.
Activate night mode
1 Select
> Scene mode.
2 To use the flash, select Night
portrait. If you do not want to use the
flash, select Night.
Picture and video tips
Press and hold the camera key.
When taking a picture:
• Use both hands to keep the camera
steady.
• When you zoom in, the image quality
may decrease.
• The camera activates battery saving
mode after about a minute of
inactivity. To activate the camera
again, press the camera key briefly.
• You can set the user defined scene to
be used as the default scene every
time you open the camera. Select
> Scene mode > User
defined > Edit. Modify the settings,
© 2011 Nokia. All rights reserved.
Page 45
Your pictures and videos 45
and select Set as default scene
mode > Yes.
Keep a safe distance when using the flash.
Do not use the flash on people or animals
at close range. Do not cover the flash while
taking a picture.
When recording a video:
• For best results, close any open
applications before recording.
• If recording videos to a memory card,
for best performance, use a
compatible, fast, high-quality
microSD card. The recommended
microSD card class is 4 (32 Mbit/s (4
MB/s)) or higher.
Before first use, back up any
important data on the card, and use
the device to format the card, even if
the card has previously been
formatted or used in a Nokia device.
Formatting deletes all data on the
card.
If the performance of the memory
card degrades over time, back up any
important data on the card, and use
the device to format the card.
Record a video
Besides taking pictures with your device,
you can also capture your special
moments as videos.
Press and hold
1 To switch from image mode to video
mode, if necessary, select
2 To start recording, press
record icon is displayed.
.
.
. A red
3 To pause recording, select Pause. If
you pause recording and do not press
any key within five minutes, the
recording stops.
To zoom in or out, use the volume
keys.
4 To stop recording, press
video is automatically saved in
Photos.
You can record high-definition videos
with your device. If recording videos to a
memory card, for best performance, use a
fast, high-quality microSD card from a
well-known manufacturer. The
recommended microSD card class is 4 (32
Mbit/s (4 MB/s)) or higher.
Tip: You can send your video in a
multimedia message. To limit the video
clip size for sending, before recording,
select Options > Settings > Video
quality, and drag the slider to Basic.
Send a picture
You can send pictures to your friends as a
multimedia or mail message, or through
Bluetooth connectivity.
1 Take a picture.
2 Select Options > Send.
3 Select the desired sending method.
. The
Your pictures and videos
About Photos
Select Menu > My Favorites >
Photos.
The Photos application is the place from
where you can view all pictures and videos
© 2011 Nokia. All rights reserved.
Page 46
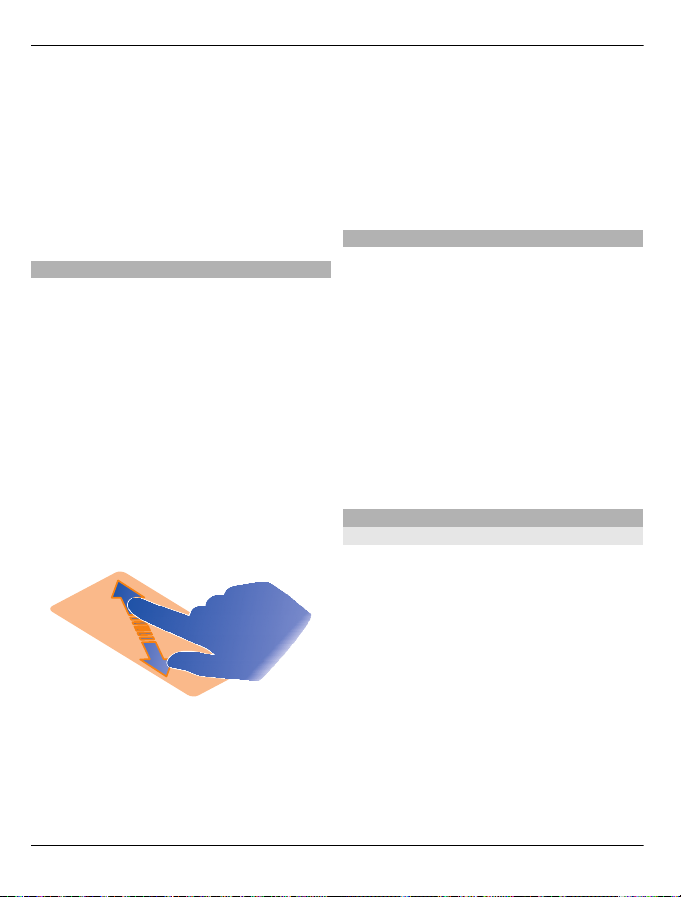
46 Your pictures and videos
on your device. You can easily watch
videos, or browse through pictures, and
print out the best shots.
You can also view the pictures and videos
on a compatible TV.
To manage your media files more
effectively, add tags to the files, or
organise them in categories.
View pictures and videos
Select Menu > My Favorites > Photos.
Browse the pictures and videos
Select a folder, and swipe up or down.
View a picture in full screen mode
Select the picture, and turn your device to
landscape mode.
To browse pictures in full screen mode,
swipe left or right.
To view the zoom slider, tap the picture.
Alternatively, place two fingers on the
screen, and to zoom in, slide your fingers
apart. To zoom out, slide your fingers
together.
View your pictures as a slide show
Select a picture and Options > Slide
show > Play. The slide show starts from
the selected picture.
Play a video
Select a folder and a video.
Pictures and videos can also be sent to you
from a compatible device. To be able to
view a received picture or video in Photos,
you must first save it.
Edit the pictures you have taken
With Photo editor, you can add effects,
text, clip art, or frames to your pictures.
Select Menu > Applications > Photo
editor and a picture.
1 To insert effects, select the desired
option from the extended toolbar.
2 To save the edited picture, select
Options > Save. The edited picture
does not replace the original picture.
To later view your edited pictures, select
Menu > My Favorites > Photos.
Video editor
About Video Editor
Select Menu > Applications > Video
Editor.
You can combine pictures and videos with
sounds, effects, and text, and easily turn
them into short movies or slideshows.
The following file formats are supported:
MPEG4, H263, H263 BL, WMV, JPEG, PNG,
BMP, GIF, MP3, AAC/AAC+eAAC+, WAV, and
AMR-NB/AMR-WB.
Save the sound files that you want to use
in a movie to the Sound files folder on your
device.
© 2011 Nokia. All rights reserved.
Page 47
Your pictures and videos 47
You cannot add a DRM protected sound file
to a movie.
Create a movie
You can create short movies from your
pictures and videos to share with your
friends and family.
Select Menu > Applications > Video
Editor and
.
1 To add videos and pictures to your
movie, select
. To view the files you
have selected, swipe left or right.
2 To add transitions between videos
and pictures, select +.
3 To add sounds to play in the
background, select
.
4 To add text or subtitles to your movie,
select
5 To edit your movie, select
.
. In
editing mode, you can cut the length
of the video or define how long a
picture is displayed.
6 Save your movie.
To later view your movie, select Menu >
My Favorites > Videos & TV.
Create a slide show
Want to turn your holiday pictures into a
stylish slide show? With templates for
different moods and events, you can
create slide shows for anniversaries,
parties, or holidays.
Select Menu > Applications > Video
Editor.
2 Select a template to use for the slide
show. When you select a template, a
preview is displayed.
3 To add pictures to your slide show,
select
.
4 To add sounds to play in the
background, select
5 To add a title, select
.
.
6 Preview and save your slide show.
To later view your slide show, select
Menu > My Favorites > Videos & TV.
Print a picture you have taken
You can print your pictures directly using
a compatible printer.
1 Use a compatible USB data cable to
connect your device to a printer in
Media transfer mode.
2 Select the picture to print.
3 Select Options > Print.
4 To use the USB connection to print,
select Print > Via USB.
5 To print the picture, select Options >
Print.
Tip: You can also use a Bluetooth printer.
Select Print > Via Bluetooth. Change the
selected printer to Bluetooth, and follow
the instructions on the display.
Tip: When the USB cable is connected, you
can change the USB mode. In the top right
corner of the browsing view, select
>
USB.
1 Select
© 2011 Nokia. All rights reserved.
.
Page 48
48 Videos and TV
Videos and TV
Videos
About the video player
Select Menu > My Favorites >
Videos & TV.
You can watch videos on your device when
out and about.
Tip: Get new videos from MM-Ovi Store.
Using a packet data access point to
download a video may involve the
transmission of large amounts of data
through your service provider's network.
For information about data transmission
charges, contact your service provider.
Play a video
Select Menu > My Favorites > Videos &
TV.
Select the video.
Use the video player controls
Tap the screen.
Copy a video between your device and PC
Do you have videos on your computer that
you want to watch on your device? Or do
you want to copy videos that you have
downloaded or recorded on your device to
your computer? Use a USB data cable to
copy videos between your computer and
your device.
1 Use a compatible USB data cable to
connect your device to your
computer. If you are copying to a
memory card, make sure the memory
card is inserted.
2 Open Nokia Ovi Suite on your
computer, and follow the displayed
instructions.
In your device, videos that are in a
supported format are displayed in
Videos.
CMMB
About China Mobile Multimedia
Broadcast
Select Menu > cmtv.
With China Mobile Multimedia Broadcast
(CMMB), you can catch your favourite TV
shows on the go! You can watch and listen
to digital TV programmes.
To watch CMMB programmes, connect a
compatible USB TV headset to your device.
It is needed as a TV receiver.
CMMB is a network service.
CMMB is only available in China. Service
providers may provide free content or
charge a fee. For availability and costs,
contact your service provider.
Get started with CMMB
Select Menu > cmtv.
1 Connect a compatible USB TV headset
to your device. It is needed as a TV
receiver. CMMB automatically
searches for available channels. The
initial search may take a while.
2 Select the desired channel.
© 2011 Nokia. All rights reserved.
Page 49
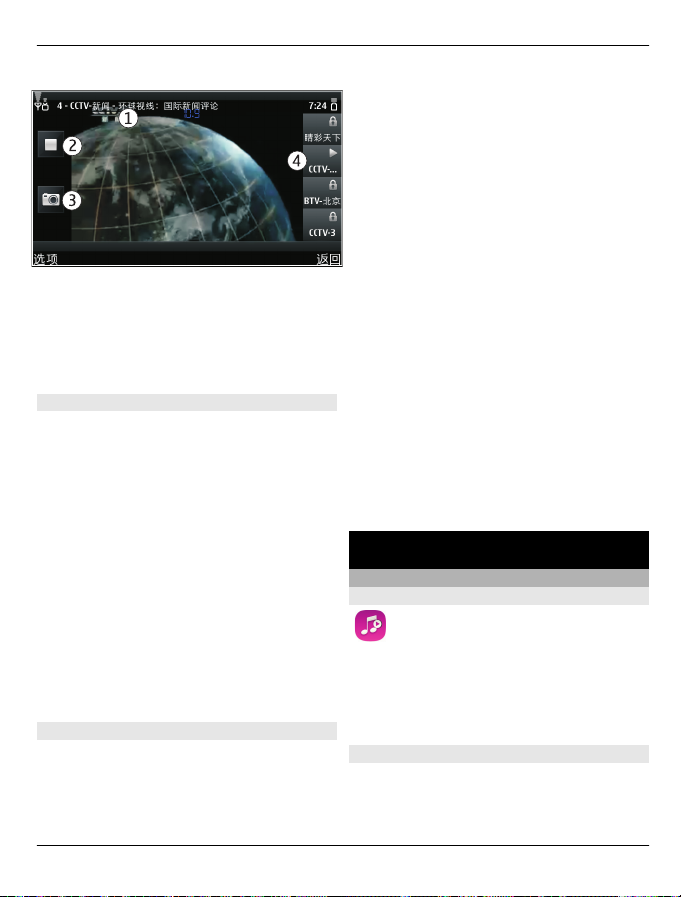
1 Channel and programme names
2 Play/Stop
3 Screen shot — Take a screen shot from
the broadcasting program.
4 Channel list
Watch CMMB programmes
With China Mobile Multimedia Broadcast
(CMMB), you can easily surf TV channels
and watch programmes on your device.
Select Menu > cmtv.
Select a channel
Select the desired channel from the
channel list.
Display the toolbar when watching TV
Tap the touch screen.
Tip: To view an emergency broadcast,
select Options > Emergency broadcast
and the desired emergency broadcast.
Find CMMB programmes
You can check the upcoming programmes
from the programme guide and search for
a programme.
Music and audio 49
Select Menu > cmtv.
View the programme guide
Select Options > Program guide.
Search for a programme
Select Options > Search program, and
enter search words.
To narrow down the search result, you can
select one or more categories, such as
Channel:, Date:, or Type:.
Subscribe to a channel or programme
Select Options > Subscribe
Management, the desired item, and
Subscribe.
When the subscription process is
complete, a notification is displayed. The
price of the subscription is charged to your
phone bill.
Tip: You can add the current channel to
your favourites. Select Options > Set to
favorite channel.
Music and audio
Music player
About Music player
Select Menu > Music > Music
player.
With the Music player application, you can
listen to music and podcasts while on the
move.
Play music
Select Menu > Music > Music player.
© 2011 Nokia. All rights reserved.
Page 50
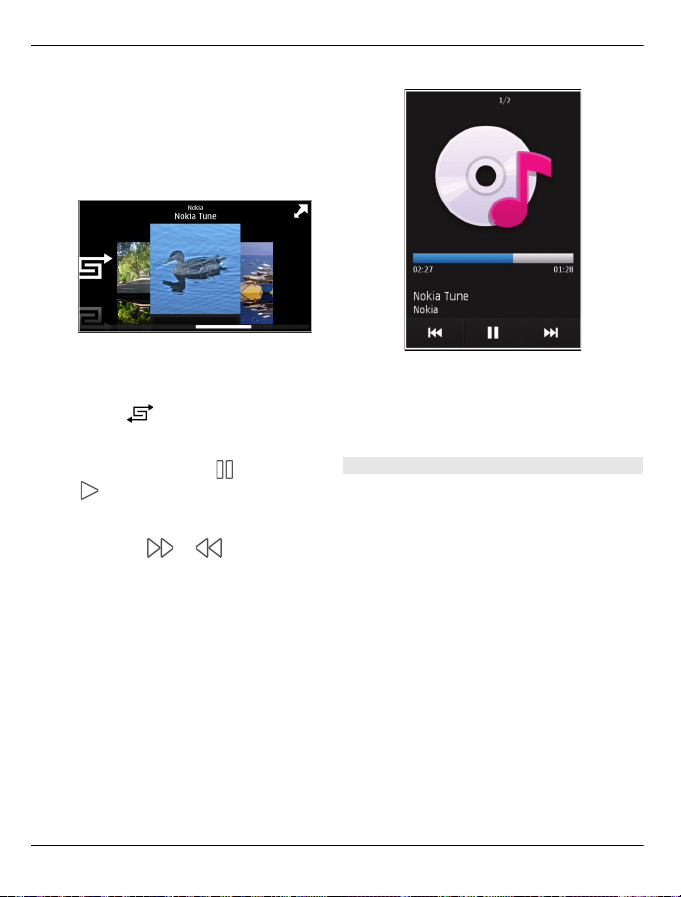
50 Music and audio
1 Select Options and the desired view.
You can browse songs by song or
album.
In the album view, to browse the
album covers, turn your device so it is
horizontal, and swipe left or right.
2 Select a song or album.
Tip: To listen to the songs in a random
order, select
.
Pause and resume playback
To pause playback, select
select
.
; to resume,
Fast-forward or rewind a song
Select and hold
or .
Tip: When listening to music, you can
return to the home screen, leaving Music
player application playing in the
background.
Create a playlist
Want to listen to different music for
different moods? With playlists, you can
create selections of songs to play in a
specific order.
Select Menu > Music > Music player.
1 Select Options > Playlists.
2 Select Options > New playlist.
3 Enter a name for the playlist, and
select OK.
4 Select the songs to add to the playlist,
in the order you want them to play.
If a compatible memory card is inserted,
the playlist is saved to the memory card.
© 2011 Nokia. All rights reserved.
Page 51
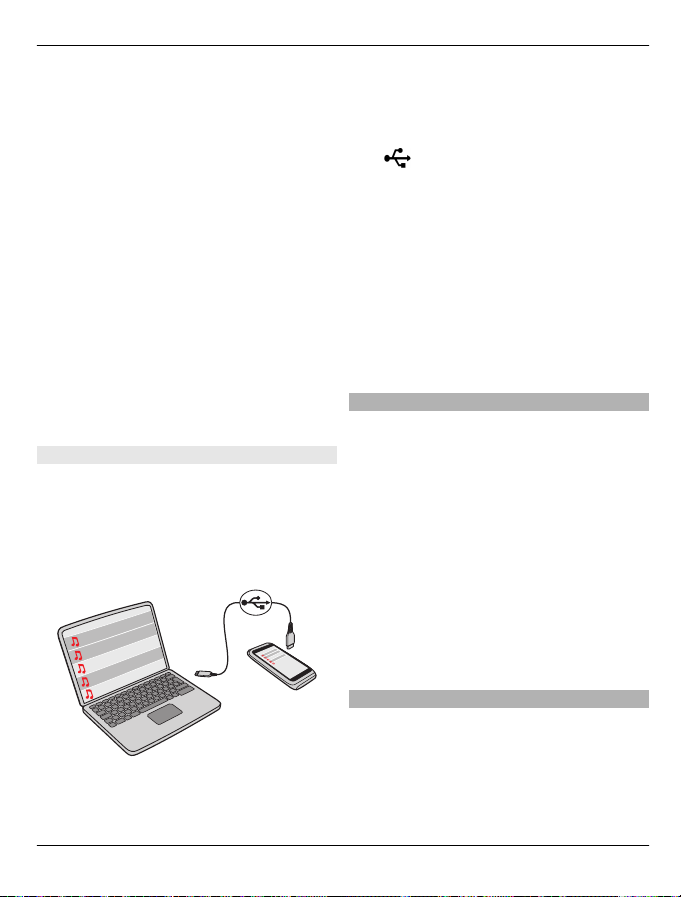
Music and audio 51
Add a song to a playlist
Select and hold the song, and from the
pop-up menu, select Add to playlist.
Remove a song from playlist
In the playlist view, select and hold the
song, and from the pop-up menu, select
Remove.
This does not delete the song from the
device; it only removes it from the playlist.
Play a playlist
Select Options > Playlists and the
playlist.
Tip: Music player automatically creates a
playlist for the most played songs,
recently played songs, and recently added
songs.
Copy music from your PC
Do you have music on your PC that you
want to listen on your device? Nokia Ovi
Suite is the fastest way to transfer music
on your device, and you can use it to
manage and synchronise your music
collection.
memory card is inserted in your
device.
2 On your device, select the notification
area in the top right corner, and select
> USB > Media transfer.
3 Open Nokia Ovi Suite on your
computer, and follow the displayed
instructions. For more information,
see the Nokia Ovi Suite help.
Download the latest version of Nokia Ovi
Suite from www.ovi.com.
Some music files can be protected by
digital rights management (DRM) and
cannot be played on more than one
device.
Protected content
Digital rights management (DRM)
protected content, such as pictures,
videos, or music, comes with an
associated licence that defines your rights
to use the content.
You can view the details and status of the
licences, and reactivate and remove
licences.
Manage digital rights licences
Select Menu > Settings > Phone >
Phone management > Security
settings > Protected content.
1 Use a compatible USB data cable to
connect your device to your
computer. Make sure a compatible
© 2011 Nokia. All rights reserved.
Record sounds
You can use Recorder to record sounds
from nature, such as bird singing, as well
as voice memos. You can send the
recorded sound clips to your friends.
Page 52
52 Music and audio
Select Menu > Applications > Office >
Recorder.
Record a sound clip
Select
.
Stop recording
Select
. The sound clip is automatically
saved to the Sound files folder in the File
manager application.
Send a recorded sound clip as an audio
message
Select Options > Send.
Play music through a radio
About the FM transmitter
Select Menu >
Music > Play via Radio.
With the FM transmitter, you can play
songs stored in your device through any
compatible FM radio, such as a car radio or
a home stereo system.
The operating distance of the FM
transmitter is approximately 2 metres (6
feet). Obstructions, such as walls, other
electronic devices, or public radio stations
may cause interference to the
transmission. The operating frequency of
the FM transmitter varies by region.
FM transmitter may cause interference to
nearby FM radios operating on the same
frequency. To avoid interference, always
search for a free FM frequency on the
receiving radio before activating the FM
transmitter.
The FM transmitter cannot be used at the
same time as the FM radio of your device.
Play music through a radio
Do you want to listen to music at a higher
volume, or through better quality hi-fi
stereo speakers? You can play music
through an FM radio.
1 Tune the receiving radio to a free
frequency.
2 Select Menu > Music > Music
player.
3 Select a song or a playlist to be played.
4 Go to Now playing view, and select
Options > Play via Radio.
5 To activate the FM transmitter, select
Play via Radio > On.
6 Enter the frequency to which you
tuned the receiving radio.
Example: If the frequency 107.8 MHz is
free in your area and you tune your FM
radio to that frequency, also tune the FM
transmitter to 107.8 MHz.
To adjust the volume, use the volume
function in the receiving radio. Make sure
your device volume is not muted.
FM radio
About FM radio
Select Menu > Music > Radio.
© 2011 Nokia. All rights reserved.
Page 53
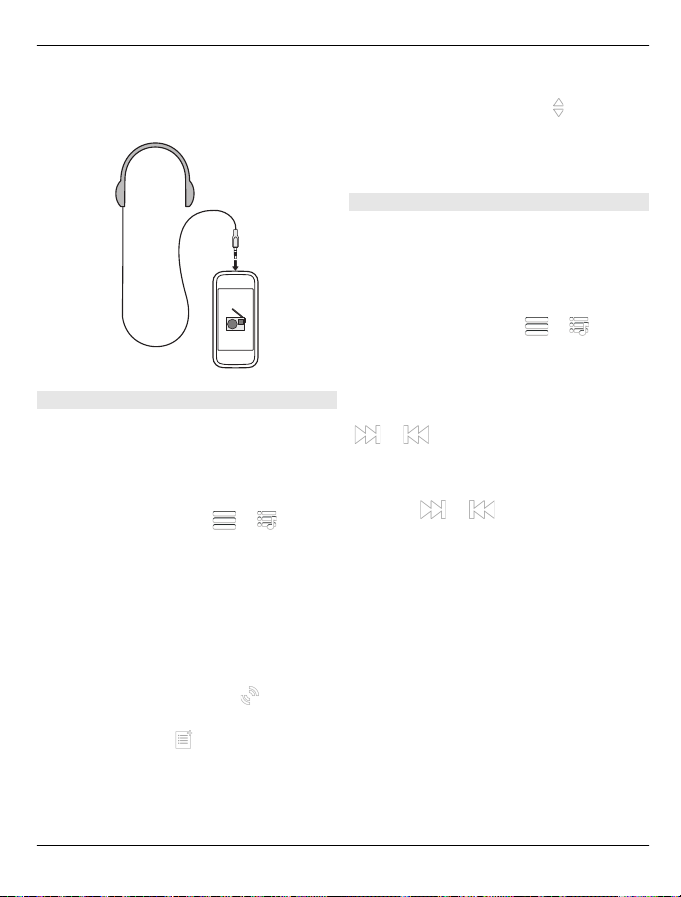
Music and audio 53
You can listen to FM radio stations using
your device - just plug in a headset, and
select a station!
Find and save radio stations
Search for your favourite radio stations,
and save them, so you can easily listen to
them later.
Select Menu > Music > Radio.
From the toolbar, select
> .
To find radio stations, you can use the
automatic scanning, or you can set a
frequency manually. The first time you
open the FM radio, the application
automatically searches for radio stations
audible at your location.
Scan for all available stations
1 From the toolbar, select
.
2 To save all found stations, from the
toolbar, select
. To save a single
station, select and hold the station
title, and from the pop-up menu,
select Save.
Set a frequency manually
1 From the toolbar, select
Tune
manually.
2 Use the up and down arrow icons to
enter a frequency.
Listen to the radio
You can enjoy your favourite FM radio
stations on the go.
Select Menu > Music > Radio.
Listen to a saved station
From the toolbar, select
> , and
select a station from the list.
Go to the next or previous saved
station
Swipe right or left. Alternatively, select
or .
Scan for another available station
Swipe up or down. Alternatively, select
and hold
or .
Listen to the radio using the
loudspeaker
Select Options > Activate loudspeaker.
You still need to have a headset attached.
You can make or answer a call while
listening to the radio. The radio is
automatically muted during an active call.
The quality of the radio broadcast
depends on the coverage of the radio
station in the area.
© 2011 Nokia. All rights reserved.
Page 54
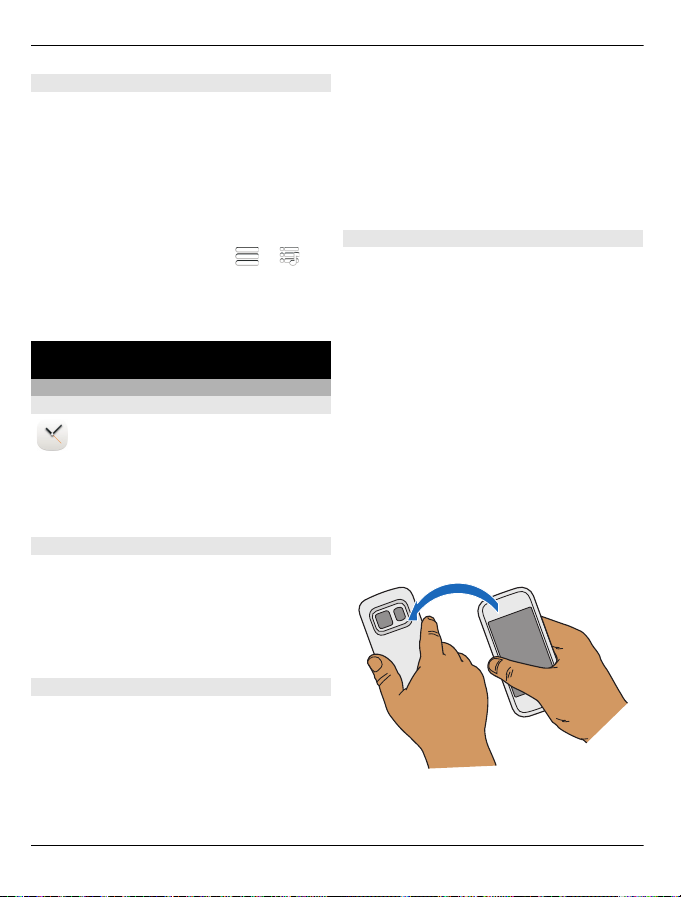
54 Time management
Reorder the list of saved stations
You can reorder the list of saved stations,
so that your favourites are at the top.
Select Menu > Music > Radio.
The stations you have saved are listed in
the Station list view.
Move a station on the list
1 From the toolbar, select
2 Select and hold the station title, and
from the pop-up menu, select Move.
3 Select the new place on the list.
> .
Time management
Clock
About the clock
Select Menu > Applications >
Clock.
Set and manage alarms, and check local
times in different countries and cities.
Set the time and date
In the home screen, select the clock and
Options > Settings > Time or Date.
Tip: To view the time and date when the
screen and keys are locked, press and hold
the menu key.
3 To set the alarm to sound, for
example, at the same time every day,
select Repeat.
Remove an alarm
Select and hold the alarm, and from the
pop-up menu, select Delete alarm.
Snooze an alarm
When an alarm sounds, you can snooze
the alarm. This pauses the alarm for a
defined length of time.
When the alarm sounds, select Snooze.
Set the length of the snooze time
1 On the home screen, select the clock.
2 Select Options > Settings > Alarm
snooze time, and set the length of
time.
Activate turning control for snoozing
Select Menu > Settings and Phone >
Sensor settings > Silence alarms.
Tip: You can snooze alarms also by
turning your device display down.
Set an alarm
You can use your device as an alarm clock.
In the home screen, select the clock.
1 Select New alarm.
2 Set the alarm time, and enter a
description.
© 2011 Nokia. All rights reserved.
Page 55
Time management 55
Update the time and date automatically
You can set your device to update the
time, date, and time zone automatically.
In the home screen, select the clock and
Options > Settings > Automatic time
update > On.
Automatic update is a network service.
Change the time zone when travelling
You can set the clock to the local time
when travelling abroad.
In the home screen, select the clock, and
open the world clock tab.
Add a location
Select Options > Add location and a
location.
Set your current location
Select and hold a location, and from the
pop-up menu, select Set as current
location.
The time in your device is changed
according to the selected location. Make
sure the time is correct.
Check the time in different cities
To view the time in different locations,
add them to your world clock tab. You can
also add pictures for the locations, for
example, a picture of your friend who lives
in the city in question, or a view from your
favourite tourist attraction.
In the home screen, select the clock, and
open the world clock tab.
Add a location
Select Options > Add location and a
location. You can add up to 15 locations.
Add a picture for a location
Select and hold a location, and from the
pop-up menu, select Change image and
a picture.
Calendar
About the calendar
Select Menu > Calendar.
With your device calendar, you can do the
following:
• Keep your schedules organised
• Add reminders for anniversaries and
other important dates
• Keep your to-do list up to date
You can have separate calendars for free
time and work.
View your schedule for the week
You can browse your calendar entries in
different views. To easily check all the
entries for a particular week, use the week
view.
Select Menu > Calendar.
Select the number of the desired week.
Tip: To increase or decrease the size of the
viewable area, place two fingers on the
screen, and slide them apart or together.
© 2011 Nokia. All rights reserved.
Page 56
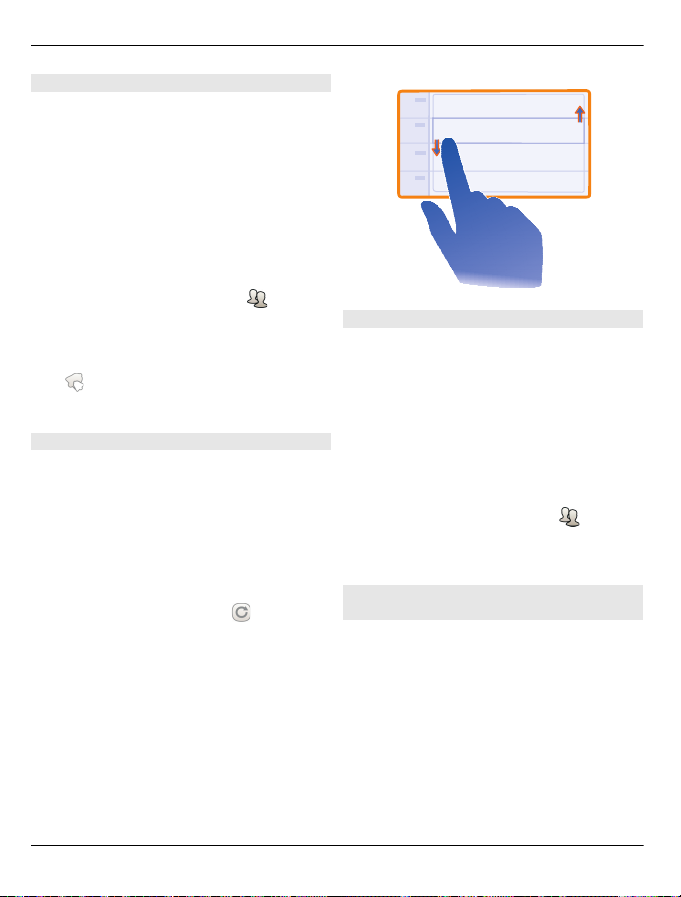
56 Time management
Add a task to your to-do list
Do you have important tasks to handle at
work, library books to return, or maybe an
event you want to attend? You can add
tasks (to-do notes) to your calendar. If you
have a particular deadline, set a reminder.
Select Menu > Calendar.
1 Select (Tap to create entry), or if
there are existing entries, tap the area
below an entry.
2 Select the entry type field
, and
select To-do note as the entry type.
3 Fill in the fields.
4 To add a reminder for the task, select
.
5 Select Done.
Add a calendar entry
Select Menu > Calendar.
1 Select (Tap to create entry), or if
there are existing entries, tap the area
below an entry. The calendar entry
type is meeting by default.
2 Fill in the fields.
3 To repeat the calendar entry at
regular intervals, select
and the
time interval. Select Repeat until,
and enter the end date.
4 Select Done.
Tip: You can also add a calendar entry in
the day view. Select and hold the starting
time, and drag the arrows to set the
duration.
Remember a birthday
You can add a reminder for birthdays and
other special dates. The reminders are
repeated annually.
Select Menu > Calendar.
1 Go to the desired date, and select (Tap
to create entry), or if there are
existing entries, tap the area below an
entry.
2 Select the entry type field
, and
select Anniversary as the entry type.
3 Fill in the fields, and select Done.
Use separate calendars for work and free time
You can have more than one calendar.
Create one for work and another for your
free time.
Select Menu > Calendar.
Create a new calendar
1 Select Options > Manage calendars.
2 Select Options > Create new
calendar.
© 2011 Nokia. All rights reserved.
Page 57
Office 57
3 Enter a name, and set a colour code
for the calendar.
4 Define the visibility for the calendar.
When a calendar is hidden, the
calendar entries and reminders are
not displayed in different calendar
views.
5 Select Done.
Modify the settings for a calendar
1 In the Manage calendars view, select
the desired calendar.
2 Change the name, colour, and
visibility.
3 Select Done.
Add an entry to a particular calendar
1 When adding a calendar entry, select
and the calendar.
2 Select Done.
Colour codes indicate which calendar an
entry belongs to.
Use the lunar calendar
Select Menu > Calendar.
The lunar calendar feature may not be
available in all languages. The feature is
available when the device language is
Chinese.
Activate the lunar calendar feature
Select Options > Settings > Lunar
calendar > On.
View detailed lunar information of a
date
Go to the date, and select Options > View
lunar data.
Office
Quickoffice
About Quickoffice
Select Menu > Applications >
Office > Quickoffice.
Quickoffice consists of the following:
• Quickword for viewing Microsoft
Word documents
• Quicksheet for viewing Microsoft Excel
worksheets
• Quickpoint for viewing Microsoft
PowerPoint presentations
Not all file formats or features are
supported.
To purchase the editor version of
Quickoffice, select Updates and
upgrades.
Read Microsoft Word, Excel, and PowerPoint documents
With Quickoffice, you can view Microsoft
Office documents, such as Word
documents, Excel worksheets, or
PowerPoint presentations.
Select Menu > Applications > Office >
Quickoffice.
Open a file
Select the memory where the file is stored,
browse to the correct folder, and select
the file.
Sort files
Select Options > Sort by.
© 2011 Nokia. All rights reserved.
Page 58
58 Office
Send files to a compatible device
Select
and the sending method.
Read PDF documents
With Adobe Reader, you can read PDF
documents.
Select Menu > Applications > Office >
Adobe PDF.
Open a file
Select the memory where the file is stored,
browse to the correct folder, and select
the file.
Make a calculation
Select Menu > Applications >
Office > Calculator.
1 Enter the first number of the
calculation.
2 Select a function, such as add or
subtract.
3 Enter the second number of the
calculation.
4 Select =.
Save or retrieve the result of a
calculation
Select Options > Memory > Save or
Recall.
Write notes
About Notes
Select Menu > Applications >
Office > Notes.
You can write notes, such as meeting
memos, and save received plain text files
(TXT files) to the Notes application.
Make a shopping list
Shopping lists on paper are easy to lose.
Instead of writing them on paper, you can
make your shopping lists with Notes. This
way, you always have the list with you!
You can also send the list to, for example,
a family member.
Select Menu > Applications > Office >
Notes.
1 Select Options > New note.
2 Enter text in the note field.
Send the list
Open the note, and select Options > Send
and the sending method.
Dictionary
With the Dictionary application, you can
look up the English translation of a
Chinese word, and vice versa.
Select Menu > Applications > Office >
Dictionary.
The dictionary database may be preset in
the memory card. If you remove the
memory card, or use a memory card that
does not contain a dictionary database,
you cannot use the Dictionary application.
1 In the input field, select the input
mode and input method if necessary.
2 Enter the Chinese or English word.
© 2011 Nokia. All rights reserved.
Page 59
Connectivity 59
3 To view the translation, select the
desired word from the displayed list
of words.
Translate words from one language to another
You can translate words from one
language to another. Not all languages
may be supported.
Select Menu > Applications > Office >
Dictionary.
1 Enter text in the search field.
Suggestions of words to translate are
displayed.
2 Select the word from the list.
Change the source or target language
Select Options > Languages > Source
or Target.
Download more languages from the
internet
Select Options > Languages >
Download languages.
English is preinstalled, and you can add
two additional languages.
Open or create zip files
You can open and extract files from
zip files. You can also create new zip files,
to store and compress files.
Select Menu > Applications > Office >
Zip.
You can save the zip files in the phone
memory or on a memory card.
Connectivity
Connectivity security
Nokia understands how important it is
that your mobile phone or device operates
reliably and that your personal content is
saved safely.
Any information from an unknown or
unreliable source, for example, via
Bluetooth connectivity, multimedia
message, or cable, may harm your PC,
mobile phone, or device. You may protect
your mobile phone or device from damage
and keep it secured by following simple
measures:
• Always keep Bluetooth connectivity
closed unless you want your phone or
device to be visible to others, when
your phone or device supports
Bluetooth.
• Always be alert when receiving
information, like Bluetooth file or
multimedia message, from an
unknown or untrustworthy source.
• Do not download or install any
applications that may include
software harmful to your phone or
device.
• Always download and install
applications or content, like ringing
tone or game, from trusted or wellknown sources, such as MM–Ovi Store,
where good protection is provided
against viruses and other harmful
software.
This is a friendly reminder, the mentioned
function may vary from different device
model.
© 2011 Nokia. All rights reserved.
Page 60
60 Connectivity
Internet connections
Define how your device connects to the
internet
Your device automatically checks for and
connects to an available known network
when a network connection is needed.
Selection is based on the connection
settings, unless there are applicationspecific settings applied.
Select Menu > Settings and
Connectivity > Settings.
Automatically switch to a known
wireless local area network (WLAN)
connection when available
Select Switch to WLAN > Known WLANs
only .
You can also connect to WLANs manually
using the WLAN wizard application.
Only use a WLAN connection
For WLAN connections when in your home
network, select Data use in home
country > WLAN only. For WLAN
connections when outside your home
network, select Data use when abroad >
WLAN only.
Automatically use a packet data
connection when in your home
network
Select Data use in home country >
Automatic.
To set the device to request confirmation
before connecting, select Data use in
home country > Always ask.
Request confirmation before using a
packet data connection when outside
your home network
Select Data use when abroad > Always
ask.
To set the device to automatically
connect, select Data use when abroad >
Automatic. Opening connections when
abroad can raise data transfer costs
substantially.
Wireless LAN
About WLAN connections
Select Menu > Settings and
Connectivity > WLAN.
The WLAN wizard application helps you
connect to a wireless local area network
(WLAN) and manage your WLAN
connections.
Important: Use encryption to
increase the security of your WLAN
connection. Using encryption reduces the
risk of others accessing your data.
Note: Using WLAN may be restricted in
some countries. For example, in France,
you are only allowed to use WLAN indoors.
For more information, contact your local
authorities.
This device supports IEEE 802.11b/g and
WAPI standard.
Connect to a WLAN at home
To help save data costs, connect to your
home WLAN when you are at home and
want to browse the web on your device.
© 2011 Nokia. All rights reserved.
Page 61
1 Select Menu > Settings and
Connectivity > WLAN.
2 Select and hold your home WLAN, and
from the pop-up menu, select Start
web browsing.
If your home WLAN is secured, enter
the passcode. If your home WLAN is
hidden, select Other (hidden netw.),
and enter the network name (service
set identifier, SSID).
Close the WLAN connection
Select and hold the connection, and from
the pop-up menu, select Disconnect
WLAN.
Connectivity 61
Bluetooth
About Bluetooth connectivity
Select Menu > Settings and
Connectivity > Bluetooth.
With Bluetooth connectivity, you can
make a wireless connection to other
compatible devices, such as mobile
devices, computers, headsets, and car kits.
You can use the connection to send items
from your device, transfer files from your
compatible PC, and print files with a
compatible printer.
Since devices with Bluetooth wireless
technology communicate using radio
waves, they do not need to be in direct
line-of-sight. However, they must be
within 10 metres (33 feet) of each other,
although the connection may be subject
to interference from obstructions such as
walls or from other electronic devices.
Connect to a WLAN on the move
Connecting to a WLAN is a handy way of
accessing the internet when not at home.
Connect to public WLANs in public places,
such as a library or internet café.
1 Select Menu > Settings and
Connectivity > WLAN.
2 Select and hold the desired WLAN
connection, and from the pop-up
menu, select Start web browsing.
© 2011 Nokia. All rights reserved.
Page 62

62 Connectivity
When the device is locked, only
connections to authorised devices are
possible.
Connect to a wireless headset
With a wireless headset you can answer a
call even if your device is not directly at
hand, and you can have your hands free,
for example, to continue working at your
computer during a call.
1 Select Menu > Settings and
Connectivity > Bluetooth > On.
2 Switch the headset on.
3 To pair your device and the headset,
open the Paired devices tab.
4 Select the headset.
If the headset is not displayed in the
list, to search for it, select Options >
New paired device.
5 You may need to enter a passcode. For
details, see the user guide of the
headset.
Send a picture or other content to another device
You can use Bluetooth to send pictures,
videos, business cards, calendar entries,
and other content to your friend's
compatible devices and to your computer.
You can have several Bluetooth
connections active at a time. For example,
if you are connected to a compatible
headset, you can also send files to another
compatible device at the same time.
1 Select and hold the item, for example,
a picture. From the pop-up menu,
select Send > Via Bluetooth.
2 Select the device to connect to. If the
desired device is not displayed, to
search for it, select More devices.
When searching, Bluetooth devices
within range are displayed.
3 If the other device requires a
passcode, enter the passcode. The
passcode, which you can define
yourself, must be entered in both
devices. The passcode in some devices
is fixed. For details, see the user guide
of the device.
The passcode is valid only for the
current connection.
4 If you connect to a device frequently,
to set it as authorised, accept the
authorisation query Authorise
device to make connections
automatically? when pairing. When
a device is authorised, you do not
have to enter the passcode every
time.
Protect your device
When Bluetooth is activated in your
device, you can control who can find and
connect to your device.
Select Menu > Settings and
Connectivity > Bluetooth.
Prevent others from detecting your
device
Select My phone's visibility > Hidden.
When your device is hidden, others cannot
detect it. However, paired devices can still
connect to your device.
Deactivate Bluetooth
Select Bluetooth > Off.
© 2011 Nokia. All rights reserved.
Page 63
Connectivity 63
Do not pair with or accept connection
requests from an unknown device. This
helps to protect your device from harmful
content.
USB data cable
Copy a picture or other content
between your device and a computer
You can use a USB data cable to copy
pictures, videos, music, and other content
between your device and a computer.
1 To make sure that Media transfer is set
as the USB mode, select Menu >
Settings and Connectivity > USB >
Media transfer.
2Use a compatible USB
data cable
to connect your device to a computer.
The device is displayed as a portable
device on your computer. If Media
transfer mode does not work on your
computer, use Mass storage mode
instead.
3 Use the file manager of the computer
to copy the content.
Change the USB mode
For best results when copying content or
synchronising your device with your
computer, activate the appropriate USB
mode when using a USB data cable to
connect to various devices.
Select Menu > Settings and
Connectivity > USB and from the
following:
Nokia Ovi Suite — Connect your
device to a compatible computer that has
Nokia Ovi Suite installed. In this mode, you
can synchronise your device with Ovi Suite
and use other Ovi Suite features.
This mode is activated automatically
when you open the Ovi Suite application.
Mass storage — Connect your device
to a compatible computer that does not
have Ovi Suite installed. Your device is
recognised as a USB flash memory. You
can also connect your device to other
devices, such as a home or car stereo, to
which you can connect a USB drive.
While connected to a computer in this
mode, you may not be able to use some of
the device applications.
The memory card in your device cannot be
accessed by the other device.
Media transfer — Connect your
device to a compatible computer that
does not have Ovi Suite installed. Music
protected by digital rights management
(DRM) must be transferred in this mode.
Some home entertainment systems and
printers can also be used in this mode.
Conn. PC to net — Connect your
device to a compatible computer, and use
the device as a wireless modem. The
computer connects to the internet
automatically.
Tip: When the USB cable is connected, you
can change the USB mode in most views.
In the top right corner, select
> USB.
Connect a USB mass storage device
With the USB On-The-Go (OTG) adapter,
you can connect your device to a
compatible USB memory stick or hard
drive.
© 2011 Nokia. All rights reserved.
Page 64
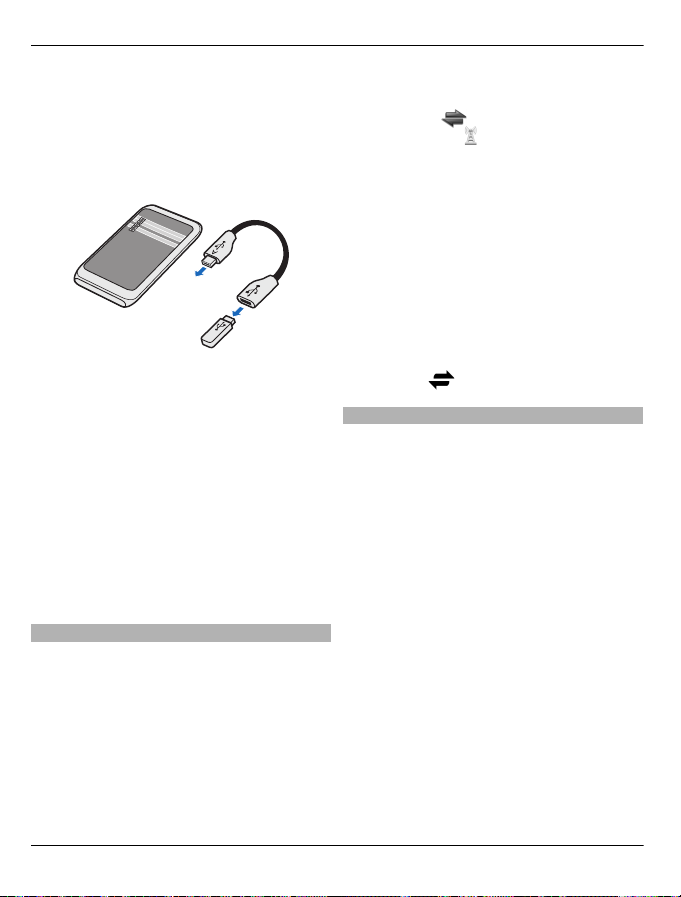
64 Connectivity
Connect a memory stick
1 Connect the micro USB end of the USB
OTG adapter to the USB port in your
device.
2 Connect a memory stick to the USB
OTG adapter.
The File manager application opens, and
the memory stick is displayed as a mass
memory.
Copy or move a file
In File mgr., select and hold the file you
want to copy or move, and from the popup menu, select the desired option and
the target folder.
If you connect a hard drive that requires
more than 200 mA of power, use an
external power source for the hard drive.
Close a network connection
If several applications are using an
internet connection, you can use the
Connection manager application to close
some or all network connections.
Select Menu > Settings and
Connectivity > Connection manager.
Select and hold the connection, and from
the pop-up menu, select Disconnect.
In the active data connections view, you
can see your current network
connections.
connection, and
indicates a packet data
indicates a wireless
local area network (WLAN) connection.
View details for a connection
Select and hold the connection, and from
the pop-up menu, select Details.
Details, such as the amount of transferred
data and connection duration, are
displayed.
Tip: In most views, to open the
Connection manager application, select
the notification area in the top right
corner and
> Connection manager.
Store your files on a remote drive
If you want to back up your data or save
space on your device, you can use a
remote drive for storing and managing
your files.
Select Menu > Settings and
Connectivity > Remote drives.
You may receive the remote drive settings
as a configuration message from your
service provider. Open the message, and
save the settings.
The service may be chargeable. For
information on availability and possible
costs, contact your service provider.
Connect to a remote drive
Select and hold the remote drive, and from
the pop-up menu, select Connect.
© 2011 Nokia. All rights reserved.
Page 65
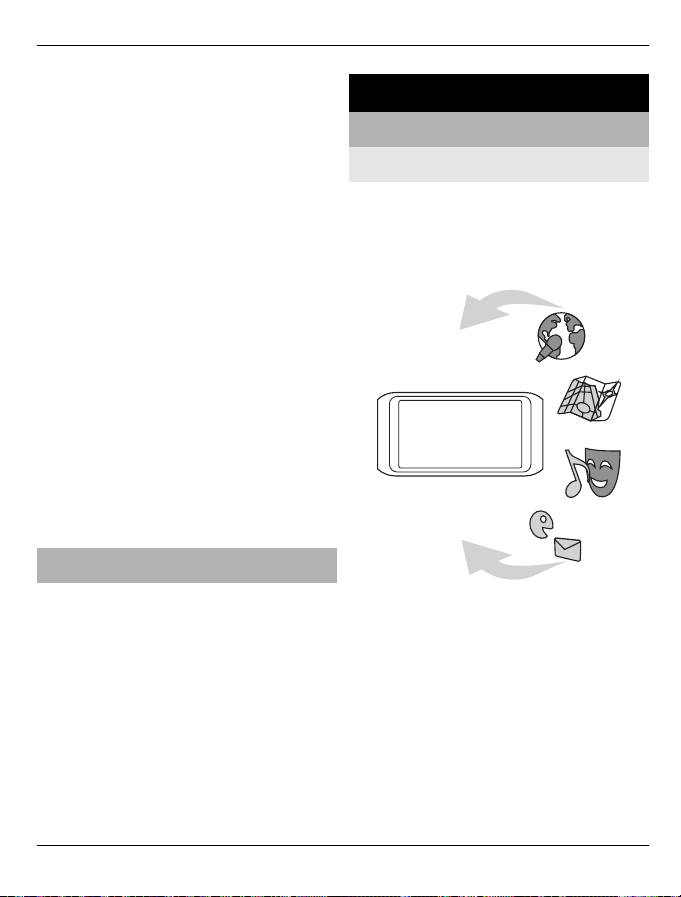
Device management 65
Add a new remote drive
1 Select Options > New drive.
2 Enter the name of the remote drive.
3 Enter the web address of the remote
drive, including the port number.
4 To select the access point to use to
connect to the remote drive, select
Access point > User defined. If you
select Always ask, you are prompted
for the destination or access point
every time the application connects to
the network.
5 Enter your user name and password,
if required by the remote drive
service.
Modify the settings of an existing
remote drive
Select Remote drives and the desired
drive.
Use the File manager application to access
your remote drives and manage stored
files.
Allow use of positioning server when abroad
Select Menu > Settings > Application
settings > Positioning > Positioning
server > Server settings and
supl.nokia.com > Only in home
network > No.
Connecting to the positioning server
when abroad can raise your data transfer
costs substantially.
Device management
Keep your device software and
applications up to date
About device software and application
updates
With device software updates and
application updates, you can get new
features and enhanced functions for your
device. Updating the software may also
improve your device performance.
It is recommended that you back up your
personal data before updating your
device software.
Using the service or downloading content
may cause transfer of large amounts of
data, which may result in data traffic
costs.
After you update your device software or
applications, the instructions in the user
guide may no longer be up to date.
© 2011 Nokia. All rights reserved.
Page 66
66 Device management
Update device software and applications using your device
You can check if there are updates
available for your device software or for
individual applications, and then
download and install them to your device
(network service). You can also set your
device to automatically check for updates
and notify you when important or
recommended updates are available.
Select Menu > Applications > Tools >
SW update.
If there are available updates, select
which updates to download and install,
and select
.
Set your device to automatically check
for updates
Select Options > Settings > Auto-check
for updates.
Update device software using your PC
You can use the Nokia Ovi Suite PC
application to update your device
software. You need a compatible PC, a
high-speed internet connection, and a
compatible USB data cable to connect your
device to the PC.
To get more information and to download
the Nokia Ovi Suite application, go to
www.ovi.com/suite.
Manage files
About File manager
Select Menu > Applications >
Office > File mgr..
With File manager, you can browse,
manage, and open files on your device.
You can also view and manage files on a
compatible inserted memory card.
View the files stored in your device
Select Menu > Applications > Office >
File mgr. and the desired memory.
The folders on the root of the memory are
displayed.
Organise files
You can create new folders, to help
organise your files. This can make it easier
to back up or upload your content. Within
folders, you can copy, move, or delete files
and subfolders.
Select Menu > Applications > Office >
File mgr..
Create a new folder
In the folder where you want to create a
subfolder, select Options > New folder.
Copy or move a file to a folder
Select and hold the file, and from the popup menu, select the appropriate option.
Delete a file from a folder
Select and hold the file, and from the popup menu, select the appropriate option.
Tip: To copy, move, or delete several files
at the same time, select Options > Mark
multiple items.
Back up files
Want to make sure that you will not lose
any important files? You can back up the
© 2011 Nokia. All rights reserved.
Page 67
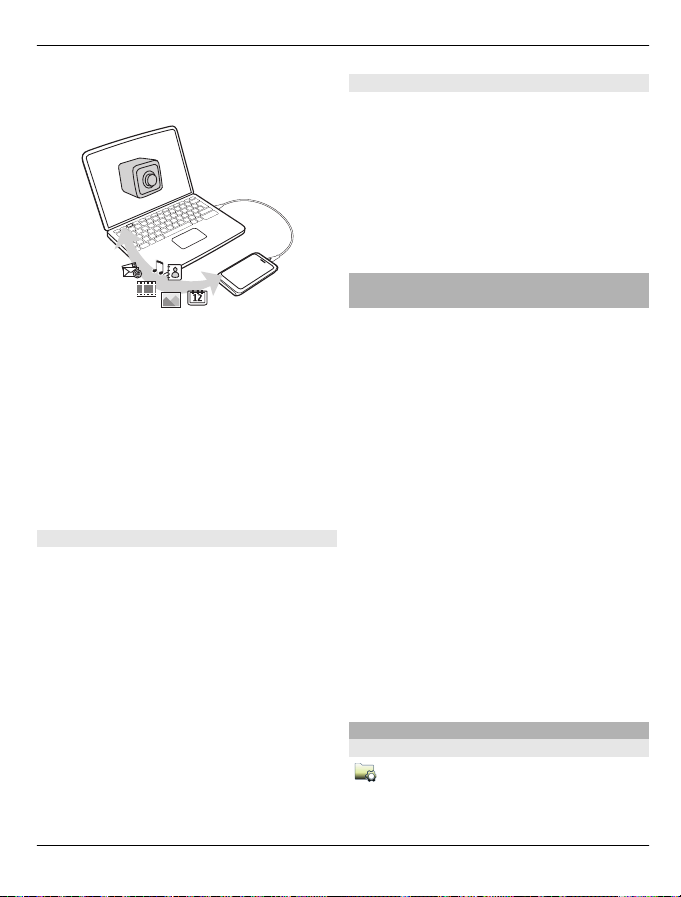
Device management 67
device memory to a compatible computer
or memory card.
Select Menu > Applications > Office >
File mgr. and Backup and restore.
It is recommended that you back up the
device memory regularly to a compatible
computer or memory card.
Tip: If you have DRM-protected content,
use Nokia Ovi Suite to back up both the
licences and the content to your
computer.
Password protect your memory card
Want to protect the memory card against
unauthorised use? You can set a password
to protect the data.
1 Select Menu > Applications >
Office > File mgr..
2 Select and hold the memory card.
3 From the pop-up menu, select Set
password, and enter a password.
Keep the password secret and in a safe
place, separate from the memory
card.
Format a memory card
Want to delete all content from your
memory card? When you format a
memory card, all the data on it is deleted.
1 Select Menu > Applications >
Office > File mgr..
2 Select and hold the memory card, and
from the pop-up menu, select
Format.
Increase available memory for more content
Do you need to increase the available
device memory, so you can install more
applications, and add more content?
Transfer data to a compatible memory
card (if available) or to a compatible
computer.
You can also remove the following if no
longer needed:
• Text, multimedia, and mail messages
• Contact entries and details
• Applications
• Installation files (.sis or .sisx) for
installed applications. Back up the
files to a compatible computer.
• Pictures and videos in Photos. Back up
the files to a compatible computer.
Tip: If expired trial or demo applications
are installed, remove them.
Manage applications
About Application manager
Select Menu > Settings and
Application manager.
© 2011 Nokia. All rights reserved.
Page 68
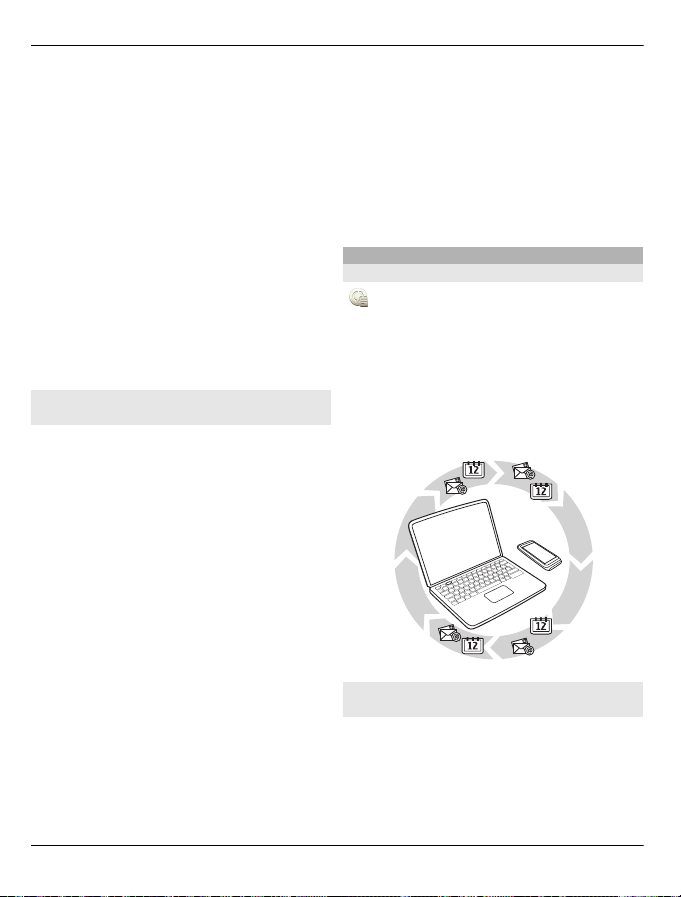
68 Device management
You can view details of installed
applications, remove applications, and
define installation settings.
You can install the following types of
applications:
• Java™ ME applications that have
the .jad or .jar file extension
• Applications, compatible with the
Symbian operating system, that have
the .sis or .sisx file extension
• Widgets that have the .wgz file
extension
Only install applications that are
compatible with your phone.
Remove an application from your device
You can remove installed applications th at
you no longer want to keep or use, to
increase the amount of available memory.
Select Menu > Settings and Application
manager.
1 Select Installed apps..
2 Select and hold the application to
remove, and from the pop-up menu,
select Uninstall.
If you remove an application, you can only
reinstall it, if you have the original
installation file or a full backup of the
removed application. You may not be able
to open files created with a removed
application.
If an installed application depends on a
removed application, the installed
application may stop working. For details,
see the user documentation of the
installed application.
The installation files may use large
amounts of memory and prevent you from
storing other files. Use Nokia Ovi Suite to
back up installation files to a compatible
PC, then file manager to remove the
installation files from the device memory.
Synchronise content
About Sync
Select Menu > Settings and
Connectivity > Data transfer > Sync.
With the Sync application, you can
synchronise your contacts, notes, and
other content between your device and a
remote server. After the synchronisation,
you have a back-up of your important data
on the server.
Synchronise content between your device and a remote server
Would you like to have your calendar,
notes, and other content backed up and at
hand, whether you are sitting by your
computer or on the go with your mobile
device? With the Sync application, you can
© 2011 Nokia. All rights reserved.
Page 69
Device management 69
synchronise the important content
between your device and a remote server.
Select Menu > Settings and
Connectivity > Data transfer > Sync.
You may receive synchronisation settings
as a configuration message from your
service provider. The synchronisation
settings are saved as a synchronisation
profile. When you open the application,
the default or previously used
synchronisation profile is displayed.
Include or exclude content types
Select a content type.
Synchronise data
Select Options > Synchronise.
Copy contacts or pictures between devices
With the Phone switch application, you
can use Bluetooth to synchronise and copy
content between two compatible Nokia
devices, free of charge.
Select Menu > Settings >
Connectivity > Data transfer > Phone
switch.
1 Select from the following:
— Synchronise content between
two devices.
— Copy content from another
device.
— Copy content to another device.
2 Select the device you want to connect
to, and pair the devices. Bluetooth
needs to be activated.
3 If the other device requires a
passcode, enter the passcode. The
passcode, which you can define
yourself, must be entered in both
devices. The passcode in some devices
is fixed. For details, see the user guide
of the device.
The passcode is valid only for the
current connection.
4 Select the content and OK.
Tip: If you save the details, it is easier to
later exchange the same content with the
same device.
Protect your device
Set your device to lock automatically
Want to protect your device against
unauthorised use? Define a lock code, and
set your device to lock itself automatically
when you're not using it.
1 Select Menu > Settings and Phone >
Phone management > Security
settings > Phone and SIM card.
2 Select Lock code, and enter a lock
code. A minimum of 4 characters is
required, and numbers, symbols, and
upper and lower case letters can be
used.
Keep the lock code secret and in a safe
place separate from your device. If
you forget the lock code and your
device is locked, your device will
require service. Additional charges
may apply, and all the personal data
in your device may be deleted. For
more information, contact a Nokia
Care point or your device dealer.
© 2011 Nokia. All rights reserved.
Page 70
70 Find more help
3 Select Phone autolock period, and
define the length of time after which
the device is locked automatically.
Lock your device manually
In the home screen, press
phone, and enter the lock code.
Unlock your device
Slide the key lock switch, enter the lock
code, and select OK.
If the key lock switch is out of reach, press
the menu key, and select Unlock.
Lock your device remotely
Forgot your device at work and want to
lock it to prevent unauthorised use? You
can lock your device remotely using a
predefined text message. You can also
lock the memory card remotely.
Enable remote locking
1 Select Menu > Settings and Phone >
Phone management > Security
settings > Phone and SIM card >
Remote phone locking > Enabled.
2 Enter the text message content. It can
be 5-20 characters, and both upper
and lower case letters can be used.
3 Enter the same text again to verify it.
4 Enter the lock code.
Send the lock message
To lock the device remotely, write the
predefined text, and send it to your device
as a text message.
To unlock your device, you need the lock
code.
, select Lock
Find more help
Support
When you want to learn more about how
to use your product or you are unsure how
your device should function, go to
www.nokia.com/support, or using a
mobile device, nokia.mobi/support. You
can also select Menu > Applications >
User guide in your device.
If this does not resolve your issue, do one
of the following:
• Reboot your device. Press and hold
for about 8 seconds. The device
vibrates three times and switches off.
To switch your device on again, press
.
• Restore the original factory settings.
• Update your device software.
If your issue remains unsolved, contact
Nokia for repair options. Go to
www.nokia.com.cn/repair. Before
sending your device for repair, always
back up the data in your device.
Access codes
PIN code — This code protects your SIM
card against unauthorised use. The PIN
code (4 - 8 digits) is usually supplied with
the SIM card.
PIN2 code — This code (4 - 8 digits) is
supplied with some SIM cards, and is
required to access some functions in your
device.
If you forget an access code, contact the
network service provider whose SIM card
is in your device. After three consecutive
© 2011 Nokia. All rights reserved.
Page 71
Nokia original accessories 71
incorrect PIN or PIN2 code entries, the
code is blocked, and you need the PUK or
PUK2 code to unblock it.
PUK code and PUK2 code — These codes (8
digits) are required to change a blocked
PIN code or PIN2 code, respectively. If the
codes are not supplied with the SIM card,
contact the network service provider
whose SIM card is in your device.
IMEI number — This number (15 digits) is
used to identify valid devices in the GSM
network. Devices that are, for example,
stolen, can be blocked from accessing the
network. To view the IMEI number for your
device, in the home screen, enter *#06#.
Lock code (also known as security
code) — The lock code helps you to protect
your device against unauthorised use. Yo u
can create and change the code, and set
the device to request the code. Keep the
new code secret and in a safe place
separate from your device. If you forget
the code and your device is locked, your
device will require service. Additional
charges may apply, and all the personal
data in your device may be deleted. For
more information, contact a Nokia Care
Centre or your device dealer.
Nokia original accessories
Warning:
Use only batteries, chargers, and
accessories approved by Nokia for use
with this particular model. The use of any
other types may invalidate any approval
or warranty, and may be dangerous. In
particular, use of unapproved chargers or
batteries may present a risk of fire,
explosion, leakage, or other hazard.
For availability of approved accessories,
check with your dealer.
An extensive range of accessories is
available for your device. For more details,
seewww.nokia.com.cn/accessories.
All accessories for Nokia devices are
supplied in an elegant sales package. An
accessory bought without a separate
package is not an original Nokia
accessory.
How to buy Nokia original accessories:
1 Go to an authorised retailer for Nokia
original accessories.
For information on the nearest
authorised retailer for Nokia
accessories, check with a Nokia
original accessory distributor.
© 2011 Nokia. All rights reserved.
Page 72
72 Nokia original accessories
* When you are buying an accessory,
always ask the dealer to issue a
separate invoice listing the price and
model number, which is helpful in
safeguarding your own rights.
2 Visit a Nokia online shop at
www.shop.nokia.com.cn.
Practical rules about accessories
• Keep all accessories out of the reach
of small children.
• When you disconnect the power cord
of any accessory, grasp and pull the
plug, not the cord.
• Check regularly that accessories
installed in a vehicle are mounted and
are operating properly.
• Installation of any complex car
accessories must be made by
qualified personnel only.
Why use original accessories?
As key components of your handset,
batteries and chargers play a critical role
in making sure the handset is operating
properly and safely. As shown by our longterm customer surveys and after-sales
services, handsets fail in many cases by
using unapproved accessories, especially
unapproved batteries and chargers.
Dangers of using unapproved
batteries and chargers
• Short lifetime, with charging and
discharging times noticeably less
than those of original batteries.
• Consequent much shorter lifetime of
the handset, unstable power supply
that prevents the handset circuit from
functioning properly, which causes
lasting damages.
• Poor performance and reliability of
the handset, undermined voice
quality and frequent breakdown.
• Potential burning or explosion that
endangers consumer's safety.
Benefits of using Nokia original
accessories
• Adequate safety.
• High quality after-sales maintenance
and services that are available to
original accessories only.
• Nokia warranty does not apply to
handset failures attributable to the
use of non-original Nokia accessories.
False: Handset battery is a simple product
that combines a group of linked cells
within a single package.
True: A number of high-tech designs and
high quality raw materials are necessary
for a handset battery to provide stable and
lasting performance. A battery
manufactured in a slipshod way differs
from an original product on process,
design, and raw material considerably,
hence dramatic difference in performance
and safety.
False: All accessories with the Nokia
trademark are original ones.
True: Nokia original accessories are
supplied in an elegant sales package
(complying with national package
regulations), and each battery carries a
hologram label. It is recommended that
consumers are aware of counterfeit Nokia
accessories on the market. In particular,
© 2011 Nokia. All rights reserved.
Page 73
Protect the environment 73
some dealers might remove the original
battery from the supplied handset, which
violates our distribution policies and
infringes on consumer's rights.
False: Despite low quality, counterfeit
battery is much cheaper and is
worthwhile even if it requires frequent
replacement.
True: Unapproved batteries and chargers
are not only of short lifetime and poor
performance, but will noticeably
undermine the handset's performance
and reduce its lifetime. It is also deprived
of comprehensive after-sales
maintenance and repair. Most important,
unapproved batteries and chargers pose
safety threats to consumers. Losses in
these regards far exceed the savings on
price. In fact, with inferior raw materials
and irregular designs, some counterfeit
batteries cost less than 1/10 of original
products.
Battery
Type: BL-4D
Talk time:
Up to XXX.
Standby
Up to XXX.
Important: Battery talk and stand-by
times are estimates and only possible
under optimal network conditions. Actual
battery talk and standby times depend on
SIM cards, features used, battery age and
condition, temperatures to which battery
is exposed, network conditions, and many
other factors, and may be significantly
shorter than those specified above.
Ringing tones, hands free call handling,
use in digital mode, and other features
will also consume the battery, and the
amount of time a device is used for calls
will affect its stand-by time. Likewise, the
amount of time that the device is turned
on and in the standby mode will affect its
talk time.
Protect the environment
Save energy
You do not need to charge your battery so
often if you do the following:
• Close applications and data
connections, such as WLAN or
Bluetooth, when not in use.
• Deactivate unnecessary sounds, such
as key tones.
Recycle
When this device has reached the end of
its working life, all of its materials can be
recovered as materials and energy. To
guarantee the correct disposal and reuse,
Nokia co-operates with its partners
through a program called We:recycle. For
information on how to recycle your old
Nokia products and where to find
collection sites, go to www.nokia.com.cn/
werecycle, or using a mobile device,
nokia.mobi/werecycle, or call the Nokia
Contact Center.
© 2011 Nokia. All rights reserved.
Page 74
74 e100
Recycle packaging and user guides at your
local recycling scheme.
For more information on the
environmental attributes of your device,
go to www.nokia.com/ecodeclaration.
e100
e100 is a one-stop self-service provided by
China Mobile, including the following
service channels:
• Online service centre: You can
subscribe to China Mobile services,
check your account balance or user
credit, make online payments, and
access online services. For more
information, go to
www.chinamobile.com.
• 10086 hotline: You can call 10086 to
get information on services,
promotions, your account balance,
service subscriptions, and Monternet.
• Message service centre: You can
send a text message containing
10086 to the service number 10086
to get information on promotions,
account balance, and service
subscriptions.
• WAP service centre: To subscribe or
get information on services, go to the
Monternet homepage, and select
WAP service centre.
• Self-service machine: You can pay
your phone bill, print call logs,
subscribe to services, or get
information on the services.
Product and safety information
Network services and costs
Your device is approved for use on the GSM/EDGE 850, 900,
1800, 1900 MHz networks, and TD-SCDMA 1900, 2000 MHz
networks. To use the device, you need a subscription with a
service provider.
Using network services and downloading content to your
device may result in data traffic costs. Some product features
require support from the network, and you may need to
subscribe to them.
Take care of your device
Handle your device, battery, charger and accessories with
care. The following suggestions help you protect your
warranty coverage.
• Do not use or store the device in dusty or dirty areas.
Moving parts and electronic components can be
damaged.
• Do not store the device in high temperatures. High
temperatures can shorten the life of the device,
damage the battery, and warp or melt plastics.
• Do not store the device in cold temperatures. When the
device warms to its normal temperature, moisture can
form inside the device and damage electronic circuits.
• Do not attempt to open the device other than as
instructed in the user guide.
• Unauthorised modifications may damage the device
and violate regulations governing radio de vices.
• Do not drop, knock, or shake the device. Rough
handling can break internal circuit boards and
mechanics.
• Only use a soft, clean, dry cloth to clean the surface of
the device.
• Do not paint the device. Pai nt can clog the moving parts
and prevent proper operation.
• Keep your device away from magnets or magnetic
fields.
• To keep your important data safe, store it in at least
two separate place s, such as your device, memor y card,
or computer, or write down important information.
During extended operation, the device may feel warm. In
most cases, this condition is normal. If you suspect the device
is not working properly, take it to the nearest authorised
service facility .
© 2011 Nokia. All rights reserved.
Page 75
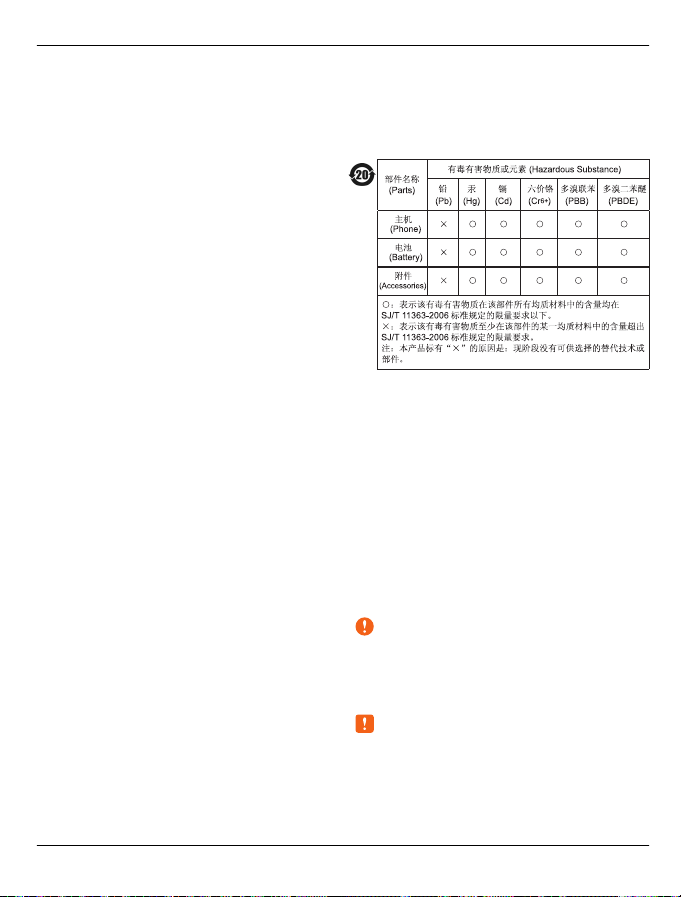
Product and safety information 75
Recycle
Always return your used electronic products, batteries, and
packaging materials to dedicated collection points. This way
you help prevent uncontrolled waste disposal and promote
the recycling of materials. Check product environmental
information and how to recycle your Nokia products at
www.nokia.com.cn/werecycle, or with a mobile dev ice,
nokia.mobi/werecycle.
About Digital Rights Management
When using this device, obey all laws and respect local
customs, privacy and legitimate rights of others, including
copyrights. Copyright protection may prevent you from
copying, modifying, or transferring images, music, and other
content.
Content owners may use different types of digital rights
management (DRM) technologies to protect their intellectual
property, including copyrights. This device uses various types
of DRM software to access DRM-protected content. With this
device you can access content protected with WM DRM and
OMA DRM 2.0. If certain DRM software fails to protect the
content, content owners may ask that such DRM software's
ability to access new DRM-protected content be revoked.
Revocation may also prevent renewal of such DRM-protected
content already in your device. Revocation of such DRM
software does not affect the use of content protected with
other types of DRM or the use of non-DRM-protected content.
Digital rights management (DRM) protected content comes
with an associated licence that defines your rights to use the
content.
If your device has OMA DRM-protected content, to back up
both the licences and the content, use the backup feature of
Nokia Ovi Suite.
Other transfer methods may not transfer the licences which
need to be restored with the content for you to be able to
continue the use of OMA DRM-protected content after the
device memory is formatted. You may also need to restore
the licences in case the files on your device get corrupted.
If your device has WMDRM-protected content, both the
licences and the content will be lost if the device memory is
formatted. You may also lose the licences and the content if
the files on your device get corrupted. Losing the licences or
the content may limit your ability to use the same content on
your device again. For more information, contact your service
provider.
Some licences may be connected to a specific SIM card, and
the protected content can be accessed only if the SIM card is
inserted in the device.
China ROHS Table
Batteries and chargers
Battery and charger information
This device has an internal, nonremovable, rechargeable
battery. Do not attempt to remove the battery from the device
as you may damage the device. Take the device to the nearest
authorised service facility for replacement of the battery.
This device is intended for use when supplied with power
from the following chargers: AC-10C . The exact charger
model number may vary depending on the type of plug. The
plug variant is identified by one of the following: E, X, AR, U,
A, C, K, or B. For example, the model numbers for the charger
can be, among others, AC-10CC, AC-10CU, AC-10CX, etc. The
charger model offered to China mainland is AC-10CC and the
compatible cable is CA-100C.
Important: Talk and standby times are estimates only.
Actual times are affected by, for example, network
conditions, device settings, features being used, battery
condition, and temperature.
Battery safety
Note: The battery in your device is non-removable, so
refer to the battery-related statements as applicable to your
device.
When you unplug a charger or an accessory, hold and pull the
plug, not the cord.
© 2011 Nokia. All rights reserved.
Page 76
76 Product and safety information
When your charger is not in use, unplug it from the electrical
plug and the device. Do not leave a fully charged battery
connected to a charger, as overcharging may shorten the
battery’s lifetime. If left unused, a fully charged battery will
lose its charge over time.
Always keep the battery between 15°C and 25°C (59°F and
77°F). Extreme temperatures reduce the capacity and lifetime
of the battery. A device with a hot or cold battery may not
work temporarily.
Accidental short-circuiting can happen when a metallic object
touches the metal strips on the battery. Short-circuiting may
damage the battery or the connecting object.
Do not dispose of batteries in a fire as they may explode.
Dispose of batteries according to local regulations. Recycle
when possible. Do not dispose as household waste.
Do not dismantle, cut, open, crush, bend, puncture, or shred
cells or batteries. If a bat tery leaks, do not let ba ttery liquid
touch skin or eyes. If this happens, immediately flush the
affected areas with water, or seek medical help.
Do not modify, remanu facture, attempt to insert foreign
objects into the battery, or immerse or expose it to water or
other liquids. Batteries may explode if damaged.
Use the battery and charger fo r their intended purposes only.
Improper use, or use of unapproved batteries or chargers may
present a risk of fire, explosion, or other hazard, and may
invalidate any approval or warranty. If you believe the battery
or charger is damaged, take it to a service centre for
inspection before continuing to use it. Never use a damaged
battery or charger. Only use the charger indoors.
Additional safety information
Emergency calls
Make an emergency call
1 Ensure the device is switched on.
2 Check for adequate signal strength. You may also need
to do the following:
• Insert a SIM card.
• Remove call restrictions you have activated for
your device, such as call barring, fixed dialling, or
closed user group.
• Ensure your device is not in an offline or flight
profile.
• If the device screen and keys are locked, unlock
them.
3 To clear the display, press the menu key as many times
as needed.
4Select Call.
5 Enter the official emergency number for your present
location.
6Select
7 Give the necessary information as accurately as
your device supports internet calls. The device may attempt
to make emergency calls both through cellular networks and
through your internet call service provider. Connections in all
conditions cannot be guaranteed. Never rely sole ly on any
wireless device for essential communications like medical
emergencies.
Small children
Your device and it s accessories are not toys. They may contain
small parts. Keep them out of the reach of small children.
Medical devices
Operation of radio transmitting equipment, including
wireless phones, may interfere with the function of
inadequately protected medical devices. Consult a physician
or the manufacturer of the m edical device to determin e
whether they are adequately shielded from external RF
energy. Switch off your device when regulations posted
instruct you to do so, for example, in hospitals.
Implanted medical devices
Manufacturers of medical devices recommend a minimum
separation of 15.3 centimetres (6 inches) between a wireless
device and an implanted medical device, such as a (cardiac)
pacemaker, implanted cardioverter defibrillator or implanted
cochlea (bionic ear), to avoid potential interference with the
medical device. Persons who have such devices should:
• Always keep the wireless device more than 15.3
• Not carry the wirele ss device in a breast pocket.
• Hold the wireless device to the ear opposite the medical
• Turn the wireless device off if there is any reason to
• Follow the manufacturer directions for the implanted
.
possible. Do not end the call until given permission to
do so.
Important: Activate both cellular and internet calls, if
centimetres (6 inches) from the medical device .
device.
suspect that interference is taking place.
medical device.
© 2011 Nokia. All rights reserved.
Page 77
Product and safety information 77
If you have any questions about using your wireless device
with an implanted medical device, consult your health care
provider.
Hearing
Warning:
When you use the headset, your ability to hear outside
sounds may be affected. Do not use the headset where it can
endanger your safety.
Some wireless devices may interfere with some hearing aids.
Nickel
The surface of this device is nickel-free.
Protect your device from harmful content
Your device may be exposed to viruses and other harmful
content. Take the following precautions:
• Be cautious when opening messages. They may contain
malicious software or otherwise be harmful to your
device or computer.
• Be cautious when accepting connectivity requests,
browsing the internet, or downloading content. Do not
accept Bluetooth connections from sources you do not
trust.
• Only install and use services and software from sources
that you trust and that offer adequate security and
protection.
• Install antivirus and other security software on your
device and any connected computer. Only use one
antivirus application at a time. Using more may affect
performance and operation of the device and/or
computer.
• If you access preinstalled bookmarks and links to third
party internet sites, take the appropriate precautions.
Nokia does not endorse o r assume liability for such
sites.
Operating environment
This device meets RF exposure guidelines in the normal use
position at the ear or at least 1.5 centimetres (5/8 inch) away
from the body. Any carry cas e, belt clip, or holder for bo dyworn operation should not contain metal and should position
the device the above-stated distance from your body.
To send data files or messages requires a quality connection
to the network. Data files or messages may be delayed until
such a connection is available. Follow the separation distance
instructions until the transmission is completed.
Vehicles
Radio signals may affect improperly installed or inadequately
shielded electronic systems in motor vehicles such as
electronic fuel injection, e lectronic antilock braking,
electronic speed control, and air bag systems. For more
information, check with the manufacturer of your vehicle or
its equipment.
Only qualified personnel should install the device in a vehicle.
Faulty installation or service may be dangerous and may
invalidate your warranty. Check regularly that all wireless
device equipment in your vehicle is mounted and operating
properly. Do not store or carry flammable liquids, gases, or
explosive materials in the same compartment as the device,
its parts, or accessories. Remember that air bags inflate with
great force. Do not place your device or accessories in the air
bag deployment area.
Switch off your device before boarding an aircraft. The use of
wireless devices in an aircraft may be dangerous to the
operation of the aircraft and may be illegal.
Potentially explosive environments
Sw itc h o ff you r d evi ce in a ny ar ea w it h a p ot ent ia ll y ex pl osi ve
atmosphere. Obey all posted instructions. Sparks in such
areas could cause an explosion or fire resulting in bodily
inj ury or d eat h. S wit ch o ff t he d evi ce a t re fue lli ng p oin ts s uch
as near gas pumps at service stations. Observe restrictions in
fuel depots, storage, and distribution areas; chemical plants;
or where blasting operations are in progress. Areas with a
potentially explosive atmosphere are often, but not always,
clearly marked. They include areas where you would be
advised to turn off your vehicle engine, below deck on boats,
chemical transfer or storage facilities and where the air
contains chemicals or particles such as grain, dust, or metal
powders. You should check with the manufacturers of
vehicles using liquefied petroleum gas (such as propane or
butane) to determine if this device can be safely used in their
vicinity.
Certification information (SAR)
This mobile device meets guidelines for exposure to
radio waves.
Your mobile device is a radio transmitter and receiver. It is
designed not to exceed the limits for exposure to radio waves
recommended by interna tional guidelines. These guidelines
were developed by the independent scientific organisation
ICNIRP and include safety margins designed to assure the
protection of all persons, regardless of age and health.
© 2011 Nokia. All rights reserved.
Page 78

78 Product and safety information
The exposure guidelines for mobile devices employ a unit of
measurement known as the Specific Absorption Rate or SAR.
The SAR limit stated in the ICNIRP guidelines is 2.0 watts/
kilogram (W/kg) averaged over 10 grams of tissue. Tests for
SAR are conducted using standard operating positions with
the device transmitting at its highest certified power level in
all tested frequency bands. The actual SAR level of an
operating device can be below the maximum value because
the device is designed to use only the power required to reach
the network. That amount changes depending on a number
of factors such as how close you are to a network base station.
The highest SAR value under the ICNIRP guidelines for use of
the device at the ear is 0.97 W/kg.
Use of device accessori es may result in different SAR values .
SAR values may vary depending on national reporting and
testing requirements and the network band. Additional SAR
information may be provided under product information at
www.nokia.com.
Your mobile device is also designed to meet the requirements
for exposure to radio waves established by the Federal
Communications Commission (USA) and Industry Canada.
These requirements set a SAR limit of 1.6 W/kg averaged over
one gram of tissue. The highest SAR value reported under this
standard during product certification for use at the ear is 0.77
W/kg and when properly worn on the body is 0.80 W/kg.
The maximum value of the specific absorption rate (SAR) for
electromagnetic radiation of this product is: 0.97 W/kg,
which is in compliance with the requirement from the
National Standard GB 21288-2007.
Terms of use, OVI SERVICE TERMS a nd privacy policy
Terms of Use
Thank you for choosing Nokia. By starting to use your device
you begin your exciting journey with us.
First use of your device
To access the wide range of Nokia’s Ovi services a Nokia
Account will be automatically created for you when you first
use your device. You then only need to add personal user
information when accessing the services for the first time,
after which you can manage your Nokia Account online.
To help you to get the most out of your device and services,
you will start receiving free personalized text messages from
My Nokia with tips, tricks and support. You may unsubscribe
from these My Nokia messages at any time by following the
information on the welcome message you receive shortly
after activating your device, or by clicking the My Nokia icon
in your device and selecting Unsubscribe.
Upon first use of your device and after you have updated the
Nokia device software an activation text message will be sent
to Nokia.
Software updates
If you update your Nokia device software the information
described above in this notice still applies.
To ensure you have the latest Nokia device software and
applications, your device checks the availability of software
updates from Nokia. If any are available you will be prompted
to approve their installation. You may disable automatic
checking for updates through settings in your device. You
may also install software through available software update
channels.
Other important information
By starting to use the device or when you update the Nokia
device software yo u accept the Ovi Service Term s and Privacy
Policy ("Terms") included in the sales box or as otherwise
made available to you.
To provide you with the services described above your mobile
number, device serial number and mobile subscription
identifiers will be sent to Nokia upon first use of the device.
Some or all of the above information may also be sent to
Nokia in connection with software updates. This info rmation
may be used as further specified in the Privacy Policy.
This notice is not applicable and the welcome screen will not
appear at first device use, if the service is not available in your
country, software version or selected device language.
Normal charges for text messages and transmission of data
will apply.
OVI SERVICE TERMS
1. Acceptance
These Ovi Service Terms together with the Privacy Policy
(collectively “Terms”) govern your use of the application or
website where you accessed these Ovi Service Terms and use
of the related services (collectively “Service”) and the Terms
constitute an agreement between you and Nokia Corporation
defining the rights and responsibilities of you and Nokia
Corporation including its affiliates and suppliers (collectively
“Nokia”) with respect to the Service. There may be additional
conditions applicable to certain parts of the Service. You are
not allowed to use the Service if you do not agree to the
Terms.
2. Eligibility
© 2011 Nokia. All rights reserved.
Page 79

Product and safety information 79
To use the Service, you must be at least thirteen (13) years of
age. If you are at least thirteen (13) years of age but a minor
where you live, you must review the Terms and have your
parent or legal guardian complete the registration on your
behalf for you to use the Service. The person completing the
registration must be legally competent.
3. Registration and Termination
You agree to provide truthful and complete information
when registering for the Service and to keep that information
updated. Providing misleading i nformation about your
identity is forbidden.
When you register, you will create a username and a
password. You (and your parent or legal guardian, if you are
a minor) are personally responsible for any use of the Service
with your username and password. You agree to take due
care in protecting your username and password against
misuse by others and promptly notify Nokia about any
misuse.
You may terminate your registration if you no longer wish to
use the Service. After termination, you will no longer have
access to the Service. Nokia may terminate your registration
or restrict your access to certain parts of the Service if there
is an indication that you have breached the Terms or with a
prior notice if you have not signed into the Service with your
username in the past six (6) months. Except as set forth in
Privacy Policy, Nokia shall not be responsible for any removal
of the information or content you have submitted
(“Material”) from the Service when your registration is
terminated.
After the Material is removed from the Service by either you
or Nokia, some traces of the Material may remain and copies
of the Material may still reside within the Service.
4. Using the Service
You agree to:
• Use the Service only for your private, non-commercial
purposes;
• Comply with appli cable laws, the Terms and good
manners;
• Not submit unlawful, offensive, abusive, pornographic,
harassing, libelous or other inappropriate Material;
• Respect the privacy of others;
• Obtain any consents, per mission or licenses that m ay
be required for you to have the legal right to submit
any Material; and
• Not distribute or post spam, unreasonably large files,
chain letters, pyramid schemes, viruses or any other
technologies that may harm the Service, or the interest
or property of the Service users.
Nokia may but has no obligation to:
• Monitor or moderate any of the Material; and
• Remove any Material from the Service and restrict
access to any part of the Service at any time in its sole
discretion.
5. Allegations of Copyright Infringement
You may notify Nokia of copyright infringement on the
Service by providing notice (a) by email with “C opyright
Notification” in the subject line to copyright.
[email protected], (b) by a document titled “Copyright
Notification” mailed to Nokia, Attn: Copyright Agent, 102
Corporate Park Drive, White Plains, NY 10604, or (c) via the
online form, if available. Your notice must:
(1) Identify the original copyrighted work you claim is
infringed;
(2) Identify the content on the Service that you claim is
infringing the copyrighted work. Please provide enough
detail for Nokia to locate the allegedly infringing content on
the Service;
(3) Provide your contact information, including your full
name, mailing address, telephone number, and email
address, if available ;
(4) Provide a statement that you have a good faith belief that
the use of the content in the manner complained of is not
authorized by the copyri ght owner, its agent, or the law;
(5) Provide this statement: “I swear, under penalty of perjury,
that the information in th is notification and com plaint is
accurate and that I a m the copyright owner, or am authorized
to act on behalf of the copyright owner of an exclusive right
that is infringed.”; and
(6) Provide your signature.
6. Licenses
© 2011 Nokia. All rights reserved.
Page 80

80 Product and safety information
Nokia does not claim ownership in your Material. Your
submission of Material to the Service does not transfer
ownership rights in the Material to Nokia. However, by
submitting Material to the Service you grant Nokia a
worldwide nonexclusive, assignable, fully paid, royalty-free,
perpetual and irrevocable license to use, copy, publicly
perform, display, distribute and modify the Material, and to
prepare derivative works thereof, or incorporate the Material
into other works as well as sublicense the same.
Users of the Service are granted a non-exclusive, nontransferable, revoc able license (revoca ble at the sole
discretion of Nokia at any time) to access and use the Service
strictly in accordance with the Terms. Any further intellectual
property rights in any information or content in the Service
are not granted.
7. Fees
Your use of the Service may be or may become subject to
charges. Any fees charged by Nokia will be announced
separately in connection with the Service.
Use of the Service may involve transmission of data through
your service provider’s network. Your network service
provider may charge for such data transmission.
Nokia assumes no responsibility for the payment of any
charges.
8. Availability
The Service may not be available in some countries and may
be provided only in selected languages. The Service may be
network dependent, contact your network service provider
for more information.
Nokia reserves the right, in its sole discretion, to change,
improve and correct the Service. The Service may not be
available during maintenance breaks and other times.
Nokia may also decide to discontinue the Service or any part
thereof in its sole discretion. In such case you will be provided
a prior notification.
9. Dealings with Others
You may interact with other users on or through the Service.
You agree that any such interactions do not involve Nokia and
are solely between you and the other user(s).
10. Personal Data
The Privacy Policy and additional provisions in these Ov i
Service Terms govern use o f your personal data.
11. Limitation of Liability
The Service is provided on “AS IS” and “AS AVAILABLE” basis.
Nokia does not warrant tha t the Service will be uninterru pted
or error or virus-free. No warranty of any kind, either express
or implied, including but not limited to warranties of title or
non-infringement or implied warranties of merchantability
or fitness for a particular purpose, is made in relation to the
availability, accuracy, reliability, information or content of
the Service. You expressly agree and acknowledge that the
use of the Service is at your sole risk and that you may be
exposed to content from various sources.
Except for liability for death or personal injury caused by gross
negligence or intentional misconduct, Nokia shall not be
liable for any direct, indirect, incidental, punitive or
consequential damages caused by the use or inability to use
the Service.
12. Indemnification
You agree to defend, indemnify and hold harmless Nokia from
and against any and all third party claims and all liabilities,
assessments, losses, costs or damages resulting from or
arising out of i) your breach of the Terms, ii) your
infringement or violation of any intellectual property, other
rights or privacy of a third p arty, iii) misuse of the Service by
a third party where such misuse was made available by your
failure to take reason able measures to protect your username
and password against misuse.
13. Miscellaneous
13.1 Choice of Law and Arbitration
Except where prohibited by applicable law or provided
otherwise herein, the Terms shall be governed by the laws of
Finland without regard to its conflict of law provisions.
© 2011 Nokia. All rights reserved.
Page 81

Product and safety information 81
If you are a US resident the following paragraph shall apply:
The Terms shall be governed by the laws of New York without
regard to its conflicts of law provisions. Any dispute relating
to these Terms or the Service shall be submitted to binding
arbitration in Westchester County, New York within eighteen
(18) months of the date the facts giving rise to the suit were
known, or should have been known, by the complainant,
except that Nokia may seek injunctive or other relief if you
have violated or threatened to violate any intellectual
property rights. All matters relating to arbitration shall be
governed by the Federal Arbitration Act (9 U.S.C . §1 et. seq.).
Arbitration shall be conducted by a single arbitrator under
the then prevailing Wireless Arbitration Rules of the American
Arbitration Association (“AAA”), Each party must submit any
claim which would constitute a compulsory counterclaim in
litigation or such claim shall be barred. No award of
exemplary, special, consequential or punitive damages shall
be permitted. The losing party, as determined by the
arbitrator, shall pay the arbitration fees. The arbitrator’s
award shall be binding and may be entered as a judgment
and enforceable in any court of competent jurisdiction.
Arbitration shall be conducted on an individual, not classwide basis, and no arbitration shall be joined with an
arbitration involving any other pe rson or entity.
13.2 Validity
The Terms shall neither exclude nor limit any of your
mandatory rights in your country of residence. If a provision
of the Terms is found to be invalid, the validity of the
remaining provisions shall not be a ffected and the invalid
provision shall be replaced with a valid prov ision that comes
closest to the result and purpose of the Terms. If there is any
conflict between these Ovi Service Terms and the Privacy
Policy, the provisions of these Ovi Service Terms shall prevail.
The provisions of the Terms that are intended to survive
termination shall remain valid after any termination.
13.3 Changes in Terms
Nokia reserves the ri ght to modify the Terms at any time
without prior notice. If the Terms are changed in a material,
adverse way, Nokia will provide a separate pr ior notice
advising of such change.
You are responsible for r egularly reviewing the Te rms. Your
continued use of the Service shall constitute your consent to
any changes and modifications.
13.4 Links to Third Par ty Sites and Content
For your easy accessibility Nokia may include links to sites on
the Internet that are owned or operated by third parties and
that a re not pa rt of the S ervice. Upon foll owing a l ink to suc h
a third-party site, you shall review and agree to that site’s
rules of use before using such site.
You agree that Nokia has no control over the content of thirdparty sites and cannot assume any responsibility for services
provided or material created or published by such sites. A link
to a third-party site does not imply that Nokia endorses the
site or the products or services referenced in the site.
In addition, users may c reate links within the Se rvice to
content that has not otherwise been submitted to the Service.
You agree that Nokia is neither responsible for nor liable for
any such links.
14. Intellectual Property
The Service and related software are protected under
international copyright laws and you are hereby notified that
copyrights are claimed by Nokia. Subject to the Terms, Nokia
retains all right, title and interest in the Service and in all
Nokia’s products, software and other properties provided to
you or used by you through the Service.
WE CARE ABOUT YOUR PRIVACY
Nokia is committed to protecting your privacy and to comply
with applicable data prote ction and privacy laws. We hope
that this Privacy Policy (“Policy”) helps you understand what
kind of information we collect in connection with our
products and services and how we process such information.
Throughout this Polic y the term “personal data” means
information relating to an identified or identifiable individual
(i.e. a natural person). “ Nokia” refers to Nokia Corporation,
including its affiliates (also referred to as “we”, “us”, or
“our”).
This Policy applies to personal data collected in connection
with products and services offered by Nokia or from other
interactions with us where a link or other reference of
incorporation to this Policy is made, for example, in
connection with our devices and accessories, websites (also
including mobile websites), games, music and other types of
services offered by Nokia typically in electronic form, as well
as other services such as customer care and warranty services
or promotions and campai gns.
We may provide additional or amending privacy information
in connection with a particular Nokia product or service. Such
information prevails over this Policy to the extent of any
conflict. Our products or services may contain links to other
companies’ websites and other third party services that have
privacy policies of their own. We recommend that you read
© 2011 Nokia. All rights reserved.
Page 82

82 Product and safety information
the privacy policies of such services. Nokia is not responsible
for the privacy practices or contents of any such services.
By using this website and/or by submitting personal
data to Nokia, you express your agreement to the
processing of your personal data in the manner provided
in this Policy. If you do not agree with this Policy, please
do not use this website or provide Nokia with your
personal data.
The Data We Collect
We collect your personal data typically when you make a
purchase, use or register into our services, enter into a sales
promotion or a campaign or otherwise interact with us. We
endeavour to collect personal data only with your knowledge
or consent. Below are examples of the categories of data
collected.
• Technical Information For the most part, you may
visit our websites or use our products or services
without having to tell us who you are. However, certain
technical information is normally collected as a
standard part of your use of our services. Such
information includes, for example, your IP-address,
access times, the website you linked from, pages you
visit, the links you use, the adbanners and other
content you viewed, information about your devices
and other such technical information your browser
provides us with or as may be otherwise colle cted in
connection with certain products and services. When
you use our services or otherwise interact with us over
telecommunications networks, certain additional
information, such as your mobile telephone number,
may be transmitted to u s by the telecommunicati ons
operator as a standard part of that communication.
Please also see the section “Use of Cookies and Web
Beacons” below.
• Information you provide us with When you register
for our services, make a purchase, enter a sales
promotion or otherwise interact with us, we may ask
you to provide us with information such as your name,
email address, street address, as well as user names,
passwords and other such credentials that are used to
authenticate users and to validate their actions or that
may be needed to provide you with the products and
services you have requested or to communicate with
you.
We may collect demographic information, for example,
your age, gender, postal code and language
preferences. We may also collect other information you
provide, such as your consents, preferences and
feedback, information relating to your devices and
other such information you provide us with. Please
note that certain non-identifiable information
collected from you may become personally identifiable
when you provide us with your personal data. We may
also obtain, in accordance with applicable law, some
personal data from list-rental companies and other
such publicly available sources. Some of our services
may allow you to submit information about other
people, for example, if you make an order for a product
that you wish us to send directly to another recipient.
• Your transactions with us We collect or ask for
information relating to your purchase and/or use of our
products and/or services and your other interactions
with us. Such information may include, for example,
details of the queries or requests you have made, the
products and services provided (including delivery
details), financial details (including payments made,
credit card details, billing address, credit chec ks and
other such financial information), details of
agreements between you and Nokia, records of
contacts and communications, information and details
relating to the content you have provided us with and
other such transactional information. We may, in
accordance with applicable law, record your
communication with our customer care or with other
such contact points. Certain services may involve the
use of your location data. However, use of your location
data for such services is subject to your consent.
The Purposes for which We Process Your Personal Data
Nokia processes your personal data for the pur poses
described in this Policy and/ or any additional service specific
privacy information. Please note that one or more purposes
may apply simultaneously.
• Provision of products and services We may use your
personal data to fulfill your requests, process your
order or as otherwise may be ne cessary to perform or
enforce the contract between you and Nokia, to ensure
the functionality and security of our products and
services, to identify you and to prevent and investigate
fraud and other misuses.
• Development of products and services We may use
your personal data to deve lop our products and/or
services. However, for the most part we only use
aggregate and statistical information in the
development of our products and services. We may also
use your personal data to personalize our offering and
to provide you with servi ce more relevant to you, fo r
example, to make recommendations and to display
customized content and advertising in our websi tes.
© 2011 Nokia. All rights reserved.
Page 83

Product and safety information 83
We may combine personal data collected in connection
with your use of a particular Nokia product and/or
service with other person al data we may hold about
you, except where such personal data was collected for
a different purpose. We may create aggregate and
statistical information based on your personal data.
• Communicating with you and marketing We may
use your personal data to communicate with you, for
example, to provide information relati ng to our
products and/or services you are using or to contact you
for customer satisfaction queries. We may use your
personal data for marketing or research purposes, for
example, to conduct market research and we may, in
accordance with applicable law, contact you to inform
you of new products, services or promotions we may
offer. Also, some of our products and services may be
used to promote products and services of other
companies. However, Nokia does not disclose your
personal data to such companies or any other company
for marketing purposes with out your prior consent.
Sharing Your Personal Data
Generally, we do not sell, lease, rent or otherwise disclose
your personal data to third parties unless otherwise stated
below.
• Consent We may share your personal data if we have
your consent to do so. Some services may include
sharing your personal data with other users of the
service, for example services where users publish their
own content or Nokia user communities.
• Nokia companies and authorized third partiesWe
may share your personal data with other Nokia
companies or authorized third parties who process
personal data for Nokia for the purposes described in
this Policy. Such parties are not permitted to use your
personal data for other purposes, and we requi re them
to act consistently with this Policy and to use
appropriate security measures to protect your personal
data.
• International transfers Our products and services
may be provided using resources and servers located in
various countries around the world. Therefore your
personal data may be tr ansferred across international
borders outside the country where you use our services,
including to countries outside the European Economic
Area (EEA) that do not have laws providing specific
protection for personal data or that have different legal
rules on data protection, for example, the United States
of America. In such cases we take steps to ensure that
there is a legal basis for such a transfer and that
adequate protection for your personal data is provided
as required by applicable law, for example, by using
standard agreements approved by relevant authorities
(where necessary) and by requiring the use of other
appropriate technical and organizational information
security measures.
• Mandatory disclosures We may be obligated by
mandatory law to disclose your personal data to certain
authorities or other third parties, for example, to law
enforcement agencies in the countries where we or
third parties acting on our behalf operate. We may also
disclose and otherwise process your personal data in
accordance with applicable law to defend Nokia’s
legitimate interests, for example, in civil or crimi nal
legal proceedings.
• Mergers and Acquisitions If we decide to sell, buy,
merge or otherwise reorganise our businesses in
certain countries, this may involve us disclosing
personal data to prospective or actual purchasers and
their advisers, or receiving personal data from sellers
and their advisers.
Collecting the Data of Minors
Nokia does not seek to collect any information from or
engage in any transactions with persons under the age of 13.
Our databases may nevertheless contain personal data of
children under 13 due to the fact that it is not always possible
to determine precisely the age of the user. Ins ofar as we ask
you to provide your age, we block the service from any per son
who is under 13 years of age . We will also make reas onable
efforts to clear our databases of personal data relating to
under age users.
Nokia’s policy is to request that minors (the legal age of
majority and therefore the age of minors is determined by
local law where you reside) do not make purchases or engage
in other legal acts on our products and services without the
consent of a parent or legal guardian, unless otherwise
permitted by applicabl e law.
Data Quality
We take reasonable steps to keep the personal data we
possess accurate and upto- date and to delete out of date or
otherwise incorrect or unnecessary personal data.
As certain Nokia products and services may allow you to
manage your profile, we encourage you to access your
personal data from time to time to ensure that it is correct
an d u p- to -d at e. Pl ea se re me mb er th at it is yo ur re sp o ns ib il it y
to provide us with correct details as well as to update the
© 2011 Nokia. All rights reserved.
Page 84

84 Product and safety information
personal data you have provided us with in case of any
changes.
Security
While there are always risks associated with providing
personal data, whether in person, by phone, via the internet
or otherwise, and no technology is completely safe or
“tamper” or ”hacker” proof, Nokia takes appropriate
technical and organizational information security measures
to prevent and minimize such risks.
Such measures include, where appropriate, the use of
firewalls, secure server facilities, encryption, implementing
proper access rights management systems and processes,
careful selection of processors and other technically and
commercially reasonable measures to provide appropriate
protection for your personal data against unauthorized use
or disclosure. Where appropriate, we may als o take back-up
copies and use other such means to prevent accidential
damage or destruction to your personal data. If a particular
part of a Nokia website supports on-line transactio ns, we will
use an industry standard security measure, such as the one
available through “Secure Sockets Layer” (“SSL”), to protect
the confidentiali ty and security of online transaction s.
Use of Cookies and Web Beacons
From time to time when you visit a Nokia website,
information may be placed on your computer to allow us to
recognize your computer. This information is commonly in
the form of a textfile known as a “cookie”. Cookies are small
pieces of data stored on your computer’s hard drive, rather
than on the website. Typically, they enable collection of
certain information about your computer, including your
internet protocol (IP) addre ss, your computer’s ope rating
system, your browser type and the address of any referring
sites. Our use of cookies is intended to provide benefits to
you, such as eliminating the need for you to enter your
password frequently during a session or the need to re-enter
items you place in a shopping cart if you do not finish a
transaction in a single visit. Cookies are also used for website
traffic analysis and anonymous demographic profiling so that
we may improve our services.
Nokia may use so called web beacons (or “pixel tags”) in
connection with some websites. However, we do not use
them to identify individual users personally. Web beacons are
typically graphic images that are placed on a website and
they are used to count visitors to a website and/or to access
certain cookies. This information is used to improve our
services. Web beacons do not typically collect any other
information than what your browser provides us with as a
standard part of any internet communication. If you turn off
cookies, the web beaco n will no longer be able to track your
specific activity. The web beacon may, however, continue to
collect information of visits from your IP-address, but such
information will no longer be unique.
If you do not wish to receive cookies, or want to be notified
before they are placed, you may set your web browser to do
so, if your browser so permits. Please understand that if
cookies are turned off, you may not be able to view certain
parts of this site that may enhance your visit. Some of our
business partners whose content is linked to or from this site
may also use cookies or web beacons. However, we have no
access to or control over these coo kies.
Your Rights
In case you wish to know what personal data we hold about
you or you wish to replenish, rectify, anonymize or delete any
incomplete, incorrect or out dated personal data, or you wish
us to cease processing your personal data for the purpose of
sending promotional materi als or direct marketing or for the
performance of market research or on other compelling legal
grounds, you may, as appropriate and in accordance with
applicable law, exercise such rights by contacting us through
the contact points referred to below. In some cases, especially
if you wish us to delete or ceas e the processing of you r
personal data, this may also mean that we may not be able
to continue to provide the services to you. We encourage you
to use available profile management tools for the above
purposes as such tools often provide you with direct access
to your personal data and allow you to effectively manage it.
Please note that Nokia may need to identify you and to ask
for additional information in order to be able to fulfill your
above request. Please also note that applicable law may
contain restrictions and other provisions that relate to your
above rights.
The Controller of Your Personal Data and Contact Details
Nokia Corporation of Keilalahdentie 4, 02150 Espoo, Finland
shall be the contro ller of your personal data.
In addition, the Nokia affiliate providing the product or
service may be a controller of your personal data. You may
find the identity of the controller and its contact details by
reviewing the terms and conditions of such a product or
service or by using contact information provided in the
applicable Nokia we bsites. In matters p ertaining to Nokia ’s
privacy practices you may also contact us at:
Nokia Corporation
© 2011 Nokia. All rights reserved.
Page 85
c/o Privacy
Keilalahdentie 4
02150 Espoo
Finland
Changes to This Privacy Policy
Nokia may from time to time change this Privacy Policy or
change, modify or withdraw access to this site at any time
with or without notice. Howev er, if this Privacy Policy is
changed in a material, adverse way, Nokia will post a notice
advising of such change at the beginning of this Policy and
on this site’s home page for 30 days. We recommend that you
re-visit this Privacy Policy from time to time to learn of any
such changes to this Privacy Policy.
Copyright and other notices
DECLARATION OF CONFORMITY
Hereby, NOKIA CORPORATION declares that this RM-679
product is in compliance with the essential requirements and
other relevant provisions of Directive 1999/5/EC. A copy of the
Declaration of Conformity can be found at http://
www.nokia.com/phones/declaration_of_conformity/.
© 2011 Nokia. All rights reserved.
Nokia, Nokia Connecting People, Nokia Original Accessories
logo, and Ovi are trade marks or registered trademarks of
Nokia Corporatio n. Nokia tune is a sound mark of Nokia
Corporation. Other product and company names mentioned
herein may be trademarks or tradenames of their respective
owners.
Reproduction, transfer, distribution, or storage of part or all
of the contents in this document in any form without the prior
written permission of Nokia is prohibited. Nokia operates a
policy of continuous development. Nokia reserves the right
to make changes and improvements to any of the products
described in this document without prior notice.
Copyright and other notices 85
Java and all Java-based marks are trademarks or registered
trademarks of Sun Microsystems, Inc.
This product is licensed under the MPEG-4 Visual Patent
Portfolio License (i) for personal and noncommercial use in
connection with information which has been encoded in
compliance with the MPEG-4 Visual Standard by a consumer
engaged in a personal and noncommercial activity and (ii) for
use in connection with MPEG-4 video provided by a licensed
video provider. No license is granted or sha ll be implied for
any other use. Additional information, including that related
to promotional, internal, and commercial uses, may be
obtained from MPEG LA, LLC. See http ://www.mpegla.com.
To the maximum extent permitted by applicable law, under
no circumstances shall Nokia or any of its licensors be
responsible for any loss of data or income or any special,
incidental, consequential or indirect damages howsoever
caused.
The contents of this document are provided "as is". Except as
required by applicable law, no warranties of any kind, either
express or implied, including, but not limited to, the implied
warranties of merchantability and fitness for a particular
purpose, are made in rela tion to the accuracy, re liability or
contents of this do cument. Nokia reserves the right to revise
this document or with draw it at any time without prior
notice.
For the most current product information, please refer to
www.nokia.com.cn.
Reverse engineering of software in the device is prohibited
to the extent permitted by applicable law. Insofar as this user
guide contains any limitations on Nokia's representations,
warranties, damages and liabilities, such limitations shall
likewise limit any representations, warranties, damages and
liabilities of Nokia's licensors.
The availability of products, features, applications and
services may vary by region. For more information, contact
your Nokia dealer or your service provider. This device may
contain commodities, technology or software subject to
export laws and reg ulations from the US and other countries.
Diversion contrary to law is prohibited.
Nokia does not provide a warranty for or take any
responsibility for the functionality, content, or end-user
support of third-party applications provided with your
© 2011 Nokia. All rights reserved.
Page 86

86 Copyright and other notices
device. By using an application, you acknowledge that the
application is provided as is. Nokia does not make any
representations, provide a warranty, or take any
responsibility for the functionality, content, or end-user
support of third-party applications provided with your
device.
FCC/INDUSTRY CANADA NOTICE
Your device may cause TV or radio interference (for example,
when using a telephone in close proximity to receiving
equipment). The FCC or Industry Canada can require you to
stop using your telephone if such interference cannot be
eliminated. If you require assistance, contact your local
service facility. This device complies with part 15 of the FCC
rules. Operation is subject to the following two condit ions:
(1) This device may not cause harmful interference, and (2)
this device must accept any interference received, including
interference that may cause undesired operation. Any
changes or modifications not expressly approved by Nokia
could void the user's authority to operate this equipment.
Some operations and features are SIM card and/or network
dependent, MMS dependent, or dependent on the
compatibility of devices and the content formats supported.
Some services are subject to a separate charge.
/Issue 1 EN
© 2011 Nokia. All rights reserved.
Page 87
Index 87
Index
Symbols/Numbers
10086 Portal 43
A
access codes 70
alarm clock 54
anniversary entries 56
antennas 7
applications 17, 28, 66, 67, 68
audio messages 37, 38
B
backing up data 66
barring calls 33
battery 11
— charging 11
— saving power 24
birthday entries 56
blogs 42
Bluetooth 61, 62
bookmarks 42
browser
See Internet
business cards 36, 62
C
cable connection 63
cache memory 42
Calculator 58
calendar 55, 56, 57
calls 32
— conference 29
— diverting 32
— internet calls 31
— last dialled 31
— making 28
— restricting 33
— video calls 28
Camera 43
— location information 44
— sending pictures 45
camera
— recording videos 45
— taking pictures 43, 44
charging the battery 11
China Mobile
— customer service 43
— services 43
China Mobile Multimedia Broadcast48, 49
clock 54, 55
CMMB (China Mobile Multimedia
Broadcast) 48, 49
connectivity 64
contacts 35, 37
— adding 35
— copying 12, 69
— editing 35
— favourites 36
— groups 36, 37
— ringing tones 36
— saving 35
— sending 36, 62
— synchronising 68
— widgets 27
copying content 12, 48, 51, 63, 69
copyright protection 51
D
data connections 64
— Bluetooth 61
date and time 55
device
— rebooting 12
— setup 13
— switching on/off 12
© 2011 Nokia. All rights reserved.
Page 88
88 Index
Dictionary 58
dictionary 59
diverting calls 32
downloads
— themes 26
DRM (digital rights management) 51
E
e-mail
See mail
e100 74
F
favourites 36
feeds, news 42
file management 66, 67
FM radio 52, 53, 54
FM transmitter 52
H
handwriting recognition 18
headset 7
help 13
home screen 16, 26, 27, 41
I
icons 21
images
See pictures
inbox, messages 38
indicators 21
installing applications 67
Internet 42
internet calls 31
internet connection 60
J
Java applications 67
K
key lock 8
keyboard 17
keyguard 8
keypad 19
keys and parts 6, 7
L
language settings 40
licences 51
location information 44
lock code 69, 70
locking
— device 69
— keys 8
— remotely 70
— screen 8
Log 32
loudspeaker 8
lunar calendar 57
M
mail 40
— attachments 41
— creating 41
— mailbox 40
— reading and replying to 41
— sending 41
— setup 40
— widgets 41
mailbox
— voice 32
meeting entries 56
memory 66
— clearing 67
memory card 10, 67
menus 28
message reader 39
© 2011 Nokia. All rights reserved.
Page 89
Index 89
messages 37, 38
— audio 38
— conversations 39
— sending 38
MMS (multimedia message service) 38
Mobile TV 48, 49
movies 47
multimedia messages 37, 38
multitasking 17
music 49, 51, 52
— playlists 50
My Card 36
N
news feeds 42
Nokia account 12
Nokia original accessories 71
Nokia original device 6
Nokia Ovi Suite 13
Nokia support information 70
Nokia's Ovi services 12
Notes 58
notification light 23
O
office applications 57, 58
offline profile 23
Ovi account
See Nokia account
Ovi by Nokia 12
Ovi services 12
Ovi Suite
See Nokia Ovi Suite
P
personalising your device 25, 26, 27
Phone switch 12, 69
phonebook
See contacts
Phonebook manager 37
Photo editor 46
photographs
See pictures
pictures
— copying 12, 63, 69
— editing 46
— location information 44
— printing 47
— sending 45, 62
— taking 43, 44
— viewing 45, 46
PIN codes 70
pinyin input 19
playlists 50
positioning server 65
powering device on/off 12
printing 47
profiles 25
— creating 25
— offline 23
— personalising 25
PUK codes 70
Q
Quickoffice 57
R
radio 52, 53, 54
RDS (radio data system) 52, 54
rebooting 12
recording
— calls 31
— sounds 51
— videos 45
recycling 73
remote drives 64
remote lock 69
remote locking 70
© 2011 Nokia. All rights reserved.
Page 90
90 Index
ringing tones 25, 36
ringtones 31
S
searching 23
— radio stations 53
security code 69, 70
sensor settings 31
settings
— access points 60
— language 40
shortcuts 16, 27
silent profile 25
SIM card 37
— inserting 8
— removing 8
slide show 47
SMS (short message service) 38
software 67
software updates 65, 66
speakerphone 8
speed dialling 30
stroke input 20
support 13, 70
switching device on/off 12
synchronisation 68
T
taking pictures
See camera
tasks 56
text input 17, 18, 19, 20, 21
text messages 37, 38
themes 26
time and date 55
tones
— personalising 25
touch screen 7, 14, 17, 19
transferring content 12, 48, 51, 63, 69
turning device on/off 12
TV
— watching programmes 48, 49
U
updates
— applications 65, 66
— device software 65, 66
USB charging 11
USB connection 63
user guide 13
V
video calls 28
videos 48
— copying 12, 48, 63, 69
— editing 46, 47
— location information 44
— playing 48
— recording 44, 45
— sending 62
— sharing 34
— watching 45, 46
virtual keyboard 17
virtual keypad 19
voice calls
See calls
voice commands 30
volume control 8
W
wallpaper 26
web
See Internet
web browser 42
— bookmarks 42
— browsing pages 42
— cache memory 42
web connection 60
© 2011 Nokia. All rights reserved.
Page 91
web feeds 42
widgets 27, 41
WLAN (wireless local area network)60, 61
world clock 55
wrist strap 7
Z
zip files 59
Index 91
© 2011 Nokia. All rights reserved.
 Loading...