

Page 1

923xxxx
DRAFT EN
Nokia XXXX User Guide
Page 2
US Patent No 5818437 and other pending patents. T9 text input software Copyright
(C) 1997-2005. Tegic Communications, Inc. All rights reserved.
MPEG-4
This product is licensed under the MPEG-4 Visual Patent Portfolio License (i) for
personal and non-commercial use in connection with information which has been
encoded in compliance with the MPEG-4 Visual Standard by a consumer engaged
in a personal and non-commercial activity and (ii) for use in connection with
MPEG-4 video provided by a licensed video provider. No license is granted or shall
be implied for any other use. Additional information including that relating to
promotional, internal and commercial uses may be obtained from MPEG LA, LLC.
See <http://www.mpegla.com>.
The information contained in this user guide was written for the Nokia xxxx. Nokia
operates a policy of ongoing development. Nokia reserves the right to make
changes to any of the products described in this document without prior notice.
Under no circumstances shall Nokia be responsible for any loss of data or income
or any special, incidental, consequential or indirect damages howsoever ca used.
The contents of this document are provided ‘as is’. Except as required by applicable
law, no warranties of any kind, either express or implied, including, but not limited
to, the implied warranties of merchantability and fitness for a particular purpose,
are made in relation to the accuracy, r eliability or contents of this document. Nokia
reserves the right to revise this document or withdraw it at any time without prior
notice.
The availability of particular products may vary by region. Please check with the
Nokia dealer nearest to you.
Export Controls
This device may contain commodities, technology or software subject to export
laws and regulations from the US and other countries. D iversion contrary to law is
prohibited.
FCC / INDUSTRY CANADA NOTICE
Your device may cause TV or radio interference (for example, when using a
telephone in close proximity to receiving equipment). The FCC or Industry Canada
can require you to stop using your telephone if such interference cannot be
eliminated. If you require assistance, contact your local service facility. This device
complies with part 15 of the FCC rules. Operation is subject to the condition that
this device does not cause harmful interference.
We, NOKIA CORPORATION declare under our sole
responsibility that the product RM-42 is in conformity
with the provisions of the following Council Directive:
1999/5/EC. A copy of the Declaration of Conformity
can be found at http://www.nokia.com/phones/
declaration_of_conformity/
DECLARATION OF CONFORMITY
Part No. 923xxxx, Issue NO. 1
Copyright © 2005 Nokia. All rights reserved.
Reproduction, transfer, distribution or storage of part or all of the contents in this
document in any form without the prior w ritten permission of Nokia is prohibited.
Nokia, Nokia Connecting People, the Nokia Original Enhancements logos, Nokia
xxxx, and Pop-Port are trademarks or registered trademarks of Nokia Corporat ion.
Other product and company names mentioned herein may be trademarks or
tradenames of their respective owners.
Nokia tune is a sound mark of Nokia Corporation.
This product includes software licensed from Symbian Software Ltd (c) 1998-
2005. Symbian and Symbian OS are trademarks of Symbian Ltd.
Java™ and all Java-based marks are trademarks or registered trademarks of Sun
Microsystems, Inc.
Bluetooth is a registered trademark of Bluetooth SIG, Inc.
Stac ®, LZS ®, ©1996, Stac, Inc., ©1994-1996 Microsoft Corporation. Includes one
or more U.S. Patents: No. 4701745, 5016009, 5126739, 5146221, and 5414425.
Other patents pending.
Hi/fn ®, LZS ®,©1988-98, Hi/fn. Includes one or more U.S. Patents: No. 4701745,
5016009, 5126739, 5146221, and 5414425. Other patents pending.
Part of the software in this product is © Copyright ANT Ltd. 1998. All rights
reserved.
Page 3

3
6047196 6112078 6167248 6229996 6308066 6369635 6429746
6049796 6112099 6167256 6240076 6308084 6370362 6430163
6050415 6115617 6167273 6240079 6314683 6370367 6430189
6052385 6118775 6170073 6243455 6317083 6370389 6430721
6055439 6119002 6171127 6243582 6317588 6370390 6434133
6058317 6119003 6172673 6249584 6320330 6370391 6437711
6060193 6119180 6173301 6253089 6321083 6370591 6438229
6072787 6121846 6173302 6259312 6321257 6374083 6438370
6073001 6122498 6175623 6259323 6324074 6374118 6439905
6075789 6125267 6178535 6259676 6324281 6377803 6441591
6076181 6128322 6184592 6262735 6324389 6377817 6441689
6078570 6128509 6185302 6265928 6327153 6381453 6442386
6081534 6130650 6188909 6266321 6327256 6381468 6445924
6081732 6134439 6192055 6266330 6333716 6385054 6445928
6084868 6137789 6192238 6266516 6341220 6385446 6445932
6084920 6137836 6195338 6269126 6341221 6385451 6449264
6085605 6140966 6198928 6269331 6343131 6392503 6449473
6088342 6141410 6199035 6271794 6347138 6392605 6449480
6088746 6144243 6201818 6274825 6347218 6393008 6452914
6091440 6144660 6201876 6275708 6347945 6393121 6453179
6091955 6144676 6201974 6278688 6350133 6393260 6455188
6094426 6144709 6202109 6282436 6351470 6393518 6456237
6094587 6145095 6202163 6285884 6351647 6396878 6456826
6094661 6148103 6204727 6285888 6351842 6397074 6461193
6097961 6148209 6204830 6285889 6356468 6397081 6463262
6097964 6151485 6205172 6286122 6356759 6400958 6463278
6098194 6151507 6208961 6292669 6356766 6407532 6463502
6105784 6154455 6209050 6295286 6359865 6408063 6465896
6107743 6154457 6209173 6298035 6359904 6415163 6466033
6107986 6163546 6222730 6300887 6363252 6415410 6466585
6108323 6163708 6222924 6301338 6363259 6417817 6469673
6109972 6164547 6223037 6304652 6365854 6418326 6470313
6111944 6167038 6223059 6307512 6366659 6427078 6222924
4868846 5378935 5577024 5726593 5826191 5907796 5970059
4945633 5396653 5581244 5726981 5827082 5912885 5977887
4969192 5400949 5590160 5729534 5832381 5914690 5987137
5012208 5408504 5590415 5729541 5832524 5915440 5987406
5016851 5410733 5594948 5732831 5835858 5917907 5987406
5045973 5416435 5596571 5734683 5835862 5918049 5987639
5059131 5420552 5597102 5737323 5835889 5920619 5991627
5127844 5428602 5598125 5737410 5838672 5920812 5991716
5128965 5430740 5603103 5740129 5839059 5920826 5999523
5168982 5432473 5606548 5748720 5841774 5924026 6005857
5173927 5437056 5613235 5752165 5842141 5924038 6009127
5200997 5444816 5621367 5752172 5845219 5926138 6009328
5218270 5446364 5625274 5754595 5850607 5926147 6011853
5229701 5450487 5633913 5754976 5857151 5930233 6011971
5230091 5471655 5634197 5758278 5859843 5936979 6014113
5241583 5473284 5638034 5760568 5862178 5940790 6014573
5267234 5479476 5640395 5761245 5862489 5941978 6018277
5270666 5479481 5652748 5779115 5870683 5944844 6023740
5271056 5485635 5664004 5786703 5884103 5945952 6026161
5289059 5487084 5664053 5787341 5884176 5946326 6028567
5292259 5490235 5669069 5787357 5884190 5946634 6029128
5293139 5491718 5678192 5793744 5887266 5946651 6031827
5307371 5493255 5678224 5796757 5889770 5953665 6035189
5311179 5493701 5692032 5797102 5890005 5956323 6035194
5313661 5524288 5692105 5802465 5892475 5956332 6035201
5317283 5534878 5697074 5805084 5893060 5956625 6038238
5319525 5537557 5699482 5805301 5895884 5956633 6038695
5331638 5564074 5701392 5806003 5896369 5960354 6041120
5350956 5565821 5706110 5809018 5898775 5960389 6041234
5351235 5566201 5706285 5809115 5898925 5963634 6041235
5357222 5568545 5712845 5812835 5901353 5963901 6043760
5361459 5570369 5715522 5819165 5905235 5966374 6044264
Manufactured or sold under one or more following US Patents.
5365119 5574985 5722074 5821735 5907480 5966378 6047181
Page 4

6473016 6539236 6584314 6643513 6680955 6738370 68136386473594 6542170 6587680 6646841 6681099 6741860 68167196473611 6542606 6587695 6646998 6681253 6744742 68167296473622 6542931 6587817 6647006 6683860 6748076 68168326477151 6546251 6591116 6647248 6687499 6748219 68199236480485 6549773 6593914 6647249 6690307 6751227 68225856480715 6550927 6594472 6650905 6691085 6751472 68341816483051 6553065 6594486 6654589 6693892 6760317 68341846487288 6553107 6597319 6658064 6694135 6763011 RE385396487397 6556550 6597914 6658256 6694141 6763019
6487424 6556824 6597917 6661404 6697347 6763035
6493564 6560458 6600663 6661780 6697604 6766159
6497364 6560460 6603773 6662155 6697624 6771619
6498785 6563801 6606508 6662986 6707428 6771631
6501957 6567389 6606593 6664844 6708028 6771964
6501967 6570596 6611507 6665284 6711211 6775228
6504595 6570860 6611693 6665289 6711689 6775259
6507590 6570909 6614860 6665309 6714091 6778521
6510148 6570933 6614905 6665692 6714784 6778839
6512756 6571095 6615044 6667963 6717925 6782269
6516193 6574336 6615169 6668162 6717928 6788702
6519241 6574473 6621910 6671286 6718179 6788798
6522670 6577204 6622011 6671287 6721304 6788952
6522877 6577619 6625452 6671495 6721374 6788959
6526290 6580920 6625458 6671511 6721700 6791966
6529561 6580932 6628731 6674733 6721867 6792277
6529717 6582147 6629130 6674860 6721871 6792278
6532226 6584089 6633536 6675012 6724892 6801786
6532227 6584161 6633618 6678361 6724944 6801796
6532257 6584164 6633768 6678368 6728241 6807421
6535979 6584314 6636491 6678527 6728548 6810272
6538449 6587680 6639905 6678531 6728555 6813280
6538613 6587695 6639950 6680913 6735249 6813503
4
Page 5

Clock ....................................................................................... 23
Volume and loudspeaker control .................................... 24
File manager .........................................................................24
Memory card tool................................................................ 25
Make calls ................................................27
Voice calls ............................................................................. 27
Contents
For your safety...........................................8
Welcome.................................................. 12
Accessibility solutions........................................................ 12
Register your phone............................................................12
Copyright protection ..........................................................12
Updates ..................................................................................12
Video calls ............................................................................. 29
Video sharing ......................................................................30
Answer or reject a call .......................................................33
Log........................................................................................... 35
Contacts (Phonebook).............................37
Save names and numbers ................................................. 37
Copy contacts....................................................................... 38
Add ringing tones for contacts ....................................... 39
Create contact groups ....................................................... 39
Camera and Gallery .................................41
Camera ................................................................................... 41
Gallery ....................................................................................53
Imaging.....................................................57
Find information about your device...............................13
Contact your service provider ..........................................13
Personalize your phone .......................... 14
Profiles—Set tones...............................................................15
Transfer content from another phone...........................16
Change the look of your phone.......................................16
Active standby mode ..........................................................17
Your phone .............................................. 19
Modes ..................................................................................... 19
Essential indicators .............................................................21
Attach the wrist strap ........................................................22
Configure settings...............................................................22
Nokia support on the Web................................................22
Help .........................................................................................22
Page 6

End a connection ................................................................ 85
Image print ........................................................................... 57
Web settings......................................................................... 85
RealPlayer™........................................................................... 58
Movie Director director ..................................................... 60
Office........................................................87
Calculator.............................................................................. 87
Messaging.................................................63
Converter............................................................................... 87
Write text.............................................................................. 64
To-do ...................................................................................... 88
Write and send messages ................................................. 66
Notes ...................................................................................... 88
Inbox—receive messages................................................... 69
Recorder................................................................................. 89
My folders ............................................................................ 70
Mailbox.................................................................................. 70
My own.....................................................90
Outbox—messages waiting to be sent .......................... 73
Go to—add shortcuts.......................................................... 90
IM—Instant messaging (chat) ........................................ 90
Connectivity .............................................97
Bluetooth connection ........................................................ 97
PC connections ..................................................................100
Connection manager........................................................101
Remote synchronization .................................................102
Device manager .................................................................103
Tools....................................................... 105
Settings................................................................................105
Cover display settings......................................................115
Voice commands ...............................................................115
Application manager........................................................115
Activation keys—handle copyright-protected files .118
View messages on a SIM card......................................... 73
Messaging settings............................................................. 73
Calendar....................................................78
Create calendar entries ..................................................... 78
Calendar views..................................................................... 79
Remove calendar entries................................................... 79
Calendar settings ................................................................ 80
Web...........................................................81
Access the Web ................................................................... 81
Bookmarks view................................................................... 82
Make a connection............................................................. 82
Browse.................................................................................... 83
Download and purchase items........................................ 85
Page 7

7
Troubleshooting .................................... 119
Q&A...................................................................................... 119
Enhancements ....................................... 123
Power ................................................................................... 123
Data...................................................................................... 123
Audio.................................................................................... 124
Accessibility ....................................................................... 124
Car......................................................................................... 124
Imaging and lifestyle....................................................... 124
Battery information.............................. 125
Charging and discharging .............................................. 125
Nokia battery authentication guidelines ................... 125
Care and maintenance ......................... 127
Additional safety information............. 128
Index ...................................................... 133
Page 8
For your safety
USE SENSIBLY Use only in the normal
position as explained in the product
documentation. Do not touch the antenna
unnecessarily.
QUALIFIED SERVICE Only qualified personnel
may install or repair this product.
ENHANCEMENTS AND BATTERIES Use only
approved enhancements and batteries. Do not
connect incompatible products.
WATER-RESISTANCE Your phone is not
water-resistant. Keep it dry.
BACK-UP COPIES Remember to make
back-up copies or keep a written record of all
the phone at a refuelling point. Do not use near
fuel or chemicals.
restrictions. Do not use the phone where
SWITCH OFF WHEN REFUELING Do not use
Read these simple guidelines. Not following them may be
dangerous or illegal. Read the complete user guide for
further information.
blasting is in progress.
SWITCH OFF NEAR BLASTING Follow any
SWITCH ON SAFELY Do not switch the
phone on when wireless phone use is
prohibited or when it may cause interference
or danger.
ROAD SAFETY COMES FIRST Obey all local
laws. Always keep your hands free to operate
the vehicle while driving. Your first
consideration while driving should be road
INTERFERENCE All wireless phones may be
susceptible to interference, which could affect
performance.
SWITCH OFF IN HOSPITALS Follow any
restrictions. Switch the phone off near
safety.
medical equipment.
important information.
SWITCH OFF IN AIRCRAFT Follow any
restrictions. Wireless devices can cause
interference in aircraft.
8
Page 9
9
Do not switch the device on when wireless device use
may cause interference or danger.
Network Services
To use the phone you must have service from a wireless
service provider. Many of the features in this device
depend on features in the wireless network to function.
These network services may not be available on all
networks or you may have to make specific arrangements
with your service provider before you can utilize network
services. Your service provider may need to give you
additional instructions for their use and explain what
charges will apply. Some networks may have limitations
that affect how you can use network services. For
instance, some networks may not support all language-
dependent characters and services. Network features are
designated in this guide by .
Your service provider may have requested that certain
features be disabled or not activated in your device. If so,
they will not appear on your device menu. Your device may
also have been specially configured. This configuration
may include changes in menu names, menu order and
icons. Contact your service provider for more information.
This device supports WAP 2.0 protocols (HTTP and SSL)
that run on TCP/IP protocols. Some features of this device,
such as MMS, browsing, e-mail and content downloading
CONNECTING TO OTHER DEVICES When
connecting to any other device, read its user
guide for detailed safety instructions. Do not
connect incompatible products.
EMERGENCY CALLS Ensure the phone
function of the phone is switched on and in
service. The keypad is active only in the Fold
open mode. Press as many times as
needed to clear the display and return to the
start screen. Enter the emergency number,
then press . Give your location. Do not end
the call until given permission to do so.
Warning: To use any features in this device, other
than the alarm clock, the device must be switched on.
About your device
The wireless device described in this guide is approved for
use on the EGSM 900/1800/1900 and UMTS 2000
networks. Contact your service provider for more
information about networks.
When using the features in this device, obey all laws and
respect privacy and legitimate rights of others.
When taking and using images or video clips, obey all laws
and respect local customs as well as privacy and legitimate
rights of others.
Page 10

Warning: Use only batteries, chargers, and
enhancements approved by Nokia for use with this
particular model. The use of any other types may
invalidate any approval or warranty, and may be
dangerous.
using browser or over MMS, require network support for
these technologies.
For availability and information on using SIM card
services, contact your SIM card vendor. This may be the
service provider, network operator, or other vendor.
Enhancements, batteries, and
chargers
Always switch the device off and disconnect the charger
before removing the battery.
Check the model number of any charger before use with
this device. This device is intended for use when supplied
with power from DC-4, AC-3 and AC-4 chargers, and from
ACP-12 and LCH-12 chargers when used with the
charging adapter CA-44.
The battery intended for use with this device is BL-5B.
For availability of approved enhancements, please check
with your dealer. When you disconnect the power cord of
any enhancement, grasp and pull the plug, not the cord.
10
Page 11

11
Page 12

Register your phone
Make sure to register your phone at
www.warranty.nokiausa.com or 1-888-NOKIA-2U
(1-888-665-4228) so that we can serve your needs better
if you should need to call the center or have your device
repaired.
Copyright protection
Copyright protections may prevent some images, music
(including ringing tones) and other content from being
copied, modified, transferred, or forwarded.
Updates
From time to time, Nokia may update this guide to reflect
changes. The latest version may be available at
www.nokiausa.com. Also, an interactive tutorial may be
available at www.nokiausa.com.
Welcome
Congratulations on your purchase of the Nokia xxxx
mobile device. Your device provides many functions that
Welcome
on page 74.
are practical for daily use, such as a calendar, a clock, an
alarm clock, and messaging.
You can personalize your device with ringing tones and
themes. See "Personalize your phone," page 23.
Other features on your device are:
• Multimedia messaging. See “Messaging” on page 43.
• Instant messages. See “IM—instant messaging (chat)”
“Application manager” on page 98.
• RealPlayer™. See “RealPlayer™” on page 40.
• Bluetooth technology. See “Connectivity” on page 80.
• J2ME™ (Java 2 Platform, Micro Edition). See
• Web browser. See “Web” on page 61.
Accessibility solutions
Nokia is committed to making mobile devices easy to use
for all individuals, including those with disabilities. For
more information, visit www.nokiaaccessibility.com.
12
Page 13

Welcome
13
Find information about your
device
Information about your device is provided on the device
label, which is on the back of the device under the battery.
The label contains the model and serial numbers, as well as
the following:
• Device type (such as RM-58)
• Device model (such as Nokia 6682 device)
• International mobile equipment identity (IMEI)
• FCC ID number
Contact your service provider
In many cases, the service provider will make available
descriptions of its services and instructions for using
features, such as the following:
• Voice mail and voice privacy
• Call waiting, call forwarding, and caller ID
• Messaging
• News and information services
• Selected Internet services
Service providers may differ in their support of features.
Before you sign up with a service provider, make sure that
the service provider supports the features that you need.
Page 14

The scroll key shortcuts are not available if the active
standby is on.
• To change the clock shown in the standby mode, press
Personalize your phone
Your service provider may have requested that certain
features be disabled or not activated in your device. If so,
they will not appear on your device menu. Your device
, and select Clock > Options > Settings > Clock
may also have been specially configured for your network
type > Analog or Digital.
provider. This configuration may include changes in menu
, and select Contacts. See ‘Add ringing tones for
contacts’, p. 39.
key in the standby mode ( is reserved for the voice
mailbox), and press . Select Yes, then select a
contact.
Options > Move, Move to folder, or New folder. You
can move less used applications into folders, and place
applications that you use more often into the main
Clock > Options > Settings > Clock Alarm tone and a
tone.
Calendar > Options > Settings.
press , and select Tools > Settings > Phone >
General > Welcome note or logo.
• To assign an individual ringing tone to a contact, press
• To change the clock alarm tone, press , and select
names, menu order and icons. Contact your service
• To change the calendar alarm tone, press , and select
• To change the welcome note to an image or animation,
most frequently used applications, see ‘Active standby
mode’, p. 17.
mode background image
or what is shown in the
provider for more information.
• To use the standby main display for fast access to your
• To change the standby
• To assign a 1-touch dial to a contact, press a numbered
screen saver, see ‘Change
the look of your phone’,
p. 16, and ‘Cover display
settings’, p. 115.
• To customize the ringing
• To rearrange the main menu, in the main menu, select
tones, see ‘Profiles—Set
tones’, p. 15.
• To change the shortcuts
menu.
assigned for the different
presses of the scroll key and left and right selection
keys in the standby mode, see ‘Standby mode’, p. 105.
Personalize your phone
14
Page 15

Personalize your phone
15
Offline profile
The Offline profile lets you use the phone without
connecting to the wireless network. When you activate
Profiles—Set tones
Warning: In the offline profile you cannot make (or
receive) any calls, except make calls to certain
emergency numbers, or use other features that require
network coverage. To make calls, you must first
the Offline profile, the connection to the wireless network
is turned off, as indicated by in the signal strength
indicator. All wireless phone signals to and from the
device are prevented. If you try to send messages, they are
placed in the outbox to be sent later.
To set and customize the ringing tones, message alert
currently selected profile is other than Normal, the profile
tones, and other tones for different events, environments,
or caller groups, press , and select Tools > Profiles. If the
name is shown at the top of the display in the standby
mode.
To change the profile, press in the standby mode.
Scroll to the profile you want to activate, and select OK.
To modify a profile, press , and select Tools > Profiles.
Warning: Your device must be switched on to use
activate the phone function by changing profiles. If the
device has been locked, enter the lock code.
Offline profile. Do not switch the device on when
wireless device use is prohibited or when it may cause
interference or danger.
To leave the Offline profile, press , and select Tools >
Profiles, select another profile, and select Options >
Activate > Yes. The phone re-enables wireless
transmissions (providing there is sufficient signal
strength). If a Bluetooth connection is activated before
entering the Offline profile, it will be deactivated. A
Bluetooth connection is automatically reactivated after
Tip! When you choose a tone, Tone downloads opens
Scroll to the profile, and select Options > Customize.
Scroll to the setting you want to change, and press to
open the choices. Tones stored on the memory card are
indicated with . You can scroll through the tone list and
listen to each one before you make your selection. Press
any key to stop the sound.
a list of bookmarks. You can select a bookmark and
Tip! For information on how to change the alert tone
start connection to a Web page to download tones.
for the calendar or clock, see ‘Personalize your phone’,
p. 14.
To create a new profile, select Options > Create new.
Page 16

Change the look of your
phone
connectivity. When it has finished the search, select
your other phone from the list.
device. Enter a code (1-16 digits), and select OK. Enter
the same code on the other phone, and select OK.
2 The phone searches for devices with Bluetooth
3 You are asked to enter a code on your Nokia XXXX
Transfer content from
another phone
leaving the Offline profile. See ‘Bluetooth connection
settings’, p. 97.
phone, and follow the instructions on the screen.
a message.
4 The Transfer application is sent to the other phone as
5 Open the message to install Transfer on the other
You can copy contacts, calendar, images, video, and sound
clips using a Bluetooth connection, from a compatible
want to copy from the other phone.
6 From your Nokia XXXX device, select the content you
Content is copied from the memory and memory card of
the other phone to your Nokia XXXX device and memory
card. Copying time depends on the amount of data to be
transferred. You can cancel copying and continue later. The
Transfer application is added to the main menu of the
other phone.
Nokia Series 60 phone.
You can use your Nokia XXXX device without a SIM card.
The offline profile is automatically activated when the
phone is switched on without a SIM card. This allows you
to use the SIM card in another phone.
To avoid duplicate entries, you can transfer the same type
of information, for example, contacts, from the other
phone to your Nokia XXXX only once.
Before starting the transfer, you must activate Bluetooth
connectivity on both phones. On each phone press ,
and select Connect. > Bluetooth. Select Bluetooth > On.
To change the look of your phone displays, such as the
wallpaper and icons, press , and select Tools > Themes.
The active theme is indicated by . In Themes you can
group together elements from other themes or select
images from the Gallery to personalize themes further. The
XXXX device. Follow the instructions on the screen.
1 Press , and select Tools > Transfer on your Nokia
Give a name to each phone.
To transfer content:
Personalize your phone
16
Page 17

Personalize your phone
17
mode > Active standby apps., and press .
Options > Change.
mode > Active standby, and press to switch the active
standby on or off.
The active standby display is
shown with default
applications across the top of
the screen, and calendar,
to-do, and player events
listed below.
Scroll to an application or
event, and press .
The standard scroll key
shortcuts available in the
standby mode cannot be
used when the active standby mode is on.
Active standby mode
Use your standby main display for fast access to your most
frequently used applications. By default, the active
standby mode is on.
Press , select Tools > Settings > Phone > Standby
To change the default applications shortcuts:
1 Press , select Tools > Settings > Phone > Standby
2 Highlight a shortcut to an application, and select
3 Select a new application from the list, and press .
image in the standby mode.
display: date and time, or a text you have written
yourself. See also Screen saver timeout, p. 106.
application.
to change the following options:
• Wallpaper—The image to be shown as a background
Preview.
themes on the memory card are indicated by . The
themes on the memory card are not available if the
memory card is not inserted in the phone. If you want to
use the themes saved in the memory card without the
memory card, save the themes in the phone memory first.
See also ‘Cover display settings’, p. 115.
To open a browser connection and download more themes,
select Theme downloads.
To activate a theme, scroll to it, and select Options >
Apply.
To preview a theme, scroll to it, and select Options >
To edit themes, scroll to a theme, and select Options > Edit
• Screen saver—The screen saver type on the main
• Image in ’Go to’—The background image for the Go to
To restore the selected theme back to its original settings,
select Options > Restore orig. theme when you edit a
theme.
Page 18

Some shortcuts may be fixed, and you are not able to
change them.
Personalize your phone
18
Page 19

Your phone
Fold closed mode
When the fold of the phone is closed, the
main display is deactivated and the cover
19
display lights up. Ongoing calls are
ended, unless the loudspeaker is in use or
a headset is connected. If you are using
the player to listen to a sound clip, it
continues to play.
In the Fold closed mode, the cover display
provides limited functions. On the
standby mode display, the signal strength
and battery indicators, operator logo,
time information, status indicators, and the name of the
currently active profile (if other than Normal) may be
shown. If you are listening to a sound clip, volume bars
and track information are displayed.
If the keypad is not locked, you can use the power key, the
joystick, and the capture key (for enhanced voice
commands). To select commands on the display, such as
Show and Back, move the joystick to highlight the desired
text, and press the joystick.
Calendar and clock alarms and notes for missed calls and
new received messages are also displayed. You can view
Your phone
Modes
Your phone has four mechanical modes that support
different use situations: Fold closed, Fold open for using
the phone, Imaging for recording video and taking
pictures, and Camera for taking pictures. To switch
between the modes, turn the fold and the swing axis
camera. There is a short time-out before a mode is
activated.
Fold open mode
When you open the fold, the Fold
open mode is activated
automatically: the main display
lights up, the keypad is available,
and you can access the menu. You
can scroll in the menu with the
scroll key or the joystick.
The Fold open mode is activated
even if the fold is not fully opened.
The fold opens close to 150
degrees, as shown in the picture.
Do not force the fold to open more.
Page 20

Warning: You cannot make emergency calls in the
camera. In the Imaging mode, the camera unit turns 180
degrees counterclockwise and close to 135 degrees
clockwise. Do not force the camera unit to turn more.
In the Imaging mode, the keypad is not active. You can use
the capture key, joystick, power key, the upper and lower
selection keys next to the main display, and to end an
active call.
Imaging mode, because the keypad is not active. To make
received text messages and the text and image objects of
received multimedia messages on the cover display. To
view other types of messages, open the fold, and view the
message on the main display.
Incoming calls are indicated by their normal tone and a
note. To answer a call and use the handset, open the fold.
To answer a call and use the loudspeaker, select
Answer. If a headset is connected to the phone, press the
answer key on the headset.
an emergency call, activate the Fold open mode.
To make calls or use the menu, open the fold.
Camera mode
In the Camera mode, you
can take pictures quickly.
Imaging mode
In the Imaging mode, you can record videos, take pictures,
edit video clips and images, and send live video during a
You can use the camera
during an active call. See
‘Camera and Gallery’, p.
41.
To activate the Camera
mode, turn the swing axis
camera when the fold of
the phone is closed. The viewfinder appears on the cover
display. The camera unit turns 180 degrees
counterclockwise and close to 135 degrees clockwise. Do
not force the camera unit to turn more.
video call . See ‘Camera and Gallery’, p. 41 and ‘Video
calls’, p. 29.
To activate the Imaging
mode, open the fold up to
90 degrees, hold the
phone sideways, and turn
the fold up so that the
main display faces you.
The camera starts, and you
can see the view to be
captured. You can also
turn the swing axis
Your phone
20
Page 21

Your phone
21
.
indicator for the first line is and for the second
You can use the capture key, joystick, and power key in the
Camera mode.
—A headset is connected to the phone.
—A car kit with Bluetooth is connected to the phone.
—A loopset is connected to the phone.
—The phone is being used in a GSM network.
Essential indicators
—The connection to a headset with Bluetooth has been
(network service)—The phone is being used in a UMTS
lost.
network. See ‘Network’, p. 114.
—A GPRS or EDGE packet data connection is available.
—A GPRS or EDGE packet data connection is active.
—A data call is active.
—You have received one or several messages to the
Inbox folder in Messaging.
—A GPRS or EDGE packet data connection is on hold.
These icons are shown instead of the signal strength
indicator (shown in the top left corner in the standby
—You have missed calls. See ‘Recent calls’, p. 35.
—There are messages waiting to be sent in the Outbox
—Shown if Ringing type is set to Silent and Message
folder. See ‘Outbox—messages waiting to be sent’, p. 73.
—A UMTS packet data connection is available.
—A UMTS packet data connection is active.
—A UMTS packet data connection is on hold.
—You have an active clock alarm. See ‘Clock’, p. 23.
—Bluetooth connectivity is On.
—The second phone line is being used. See ‘Call
settings’, p. 106.
mode). See ‘Packet data connections in GSM and UMTS
networks’, p. 108.
—The phone keypad is locked. See ‘Keypad lock
alert tone, IM alert tone, and E-mail alert tone are set
to Off. See ‘Profiles—Set tones’, p. 15.
(Keyguard)’ in the Quick start guide.
—A USB connection is active.
—Data is being transmitted using a Bluetooth
connection. See ‘Bluetooth connection’, p. 97.
—All calls to the phone are forwarded to another
number. If you have two phone lines, the forwarding
Page 22
Help
Example: To view instructions on how to create a
contact card, start to create a contact card, and select
Options > Help.
Nokia support on the Web
Check www.nokia.com/support or your local Nokia Web
site for the latest version of this guide, additional
information, downloads, and services related to your Nokia
product.
—You have an e-mail that has been read, waiting for
—You have an e-mail that has not been read, waiting
you to retrieve to your phone.
for you to retrieve to your phone.
Attach the wrist strap
Your phone has context-sensitive help. You can access the
help from an application or from the main menu.
When an application is open, to access help for the current
view, select Options > Help.
Thread the strap as shown in the
picture, and tighten it.
Configure settings
To use multimedia messaging, GPRS, Internet, and other
wireless services, you must have the proper configuration
settings on your phone.
You may have settings from your service providers already
When you are reading the instructions, to switch between
help and the application that is open in the background,
press and hold .
To open help from the main menu, select Tools > Help.
Select the desired application to view a list of help topics.
To search for help topics using keywords, select Options >
Search by keyword.
installed in your phone, or you may receive the settings
from the service providers as a special text message. See
‘Data and settings’, p. 69. For more information on the
availability of the settings, contact your network operator,
service provider, nearest authorized Nokia dealer, or visit
the support area on the Nokia website, www.nokia.com/
support.
Your phone
22
Page 23

Your phone
the clock.
To change the clock shown in the standby mode, scroll
Clock settings
To change the clock settings, select Options > Settings in
down, and select Clock type > Analog or Digital.
23
To allow the mobile phone network to update the time,
date, and time zone information to your phone , scroll
down, and select Auto time update. For the Auto time
update setting to take effect, the phone restarts.
To change the alarm tone, scroll down, and select Clock
alarm tone.
To change the daylight-saving time status, scroll down,
and select Daylight-saving. Select On to add one hour to
the My current city time. See ‘World clock’, p. 23. When
the daylight-saving is active, the indicator is shown in
the clock main view.
World clock
Open Clock, and press to open the world clock view.
In the world clock view, you can view the time in different
cities.
To add cities to the list, select Options > Add city. Enter
the first letters of the city name. The search field appears
automatically, and the matching cities are displayed.
Clock
When you are reading a help topic, to view other related
topics, press or .
Press , and select Clock.
indicator is shown.
To set a new alarm, select Options > Set alarm. Enter the
alarm time, and select OK. When the alarm is active, the
for five minutes, after which it resumes. You can do this a
maximum of five times.
If the alarm time is reached while the device is switched
off, the device switches itself on and starts sounding the
alarm tone. If you select Stop, the device asks whether you
To turn off the alarm, select Stop. When the alarm tone
sounds, press any key, or select Snooze to stop the alarm
want to activate the device for calls. Select No to switch
off the device or Yes to make and receive calls. Do not
select Yes when wireless phone use may cause
interference or danger.
To cancel an alarm, select Clock > Options > Remove
alarm.
Page 24
File manager
Folder
Folder that has a subfolder
To turn off the loudspeaker when you have an active call
or are listening to a sound, select Options > Activate
handset.
Many features of the phone use memory to store data.
These features include contacts, messages, images, ringing
tones, calendar and to-do notes, documents, and
downloaded applications. The free memory available
depends on how much data is already saved in the phone
memory. You can use a memory card as extra storage
space. Memory cards are rewritable, so you can delete and
save data on a memory card.
To browse files and folders in the phone memory or on a
memory card (if inserted), press , and select Tools > File
mgr.. The phone memory view ( ) opens. Press to
open the memory card view ( ).
To move or copy files to a folder, press and at the
same time to mark a file, and select Options > Move to
folder or Copy to folder.
Icons in File mgr.:
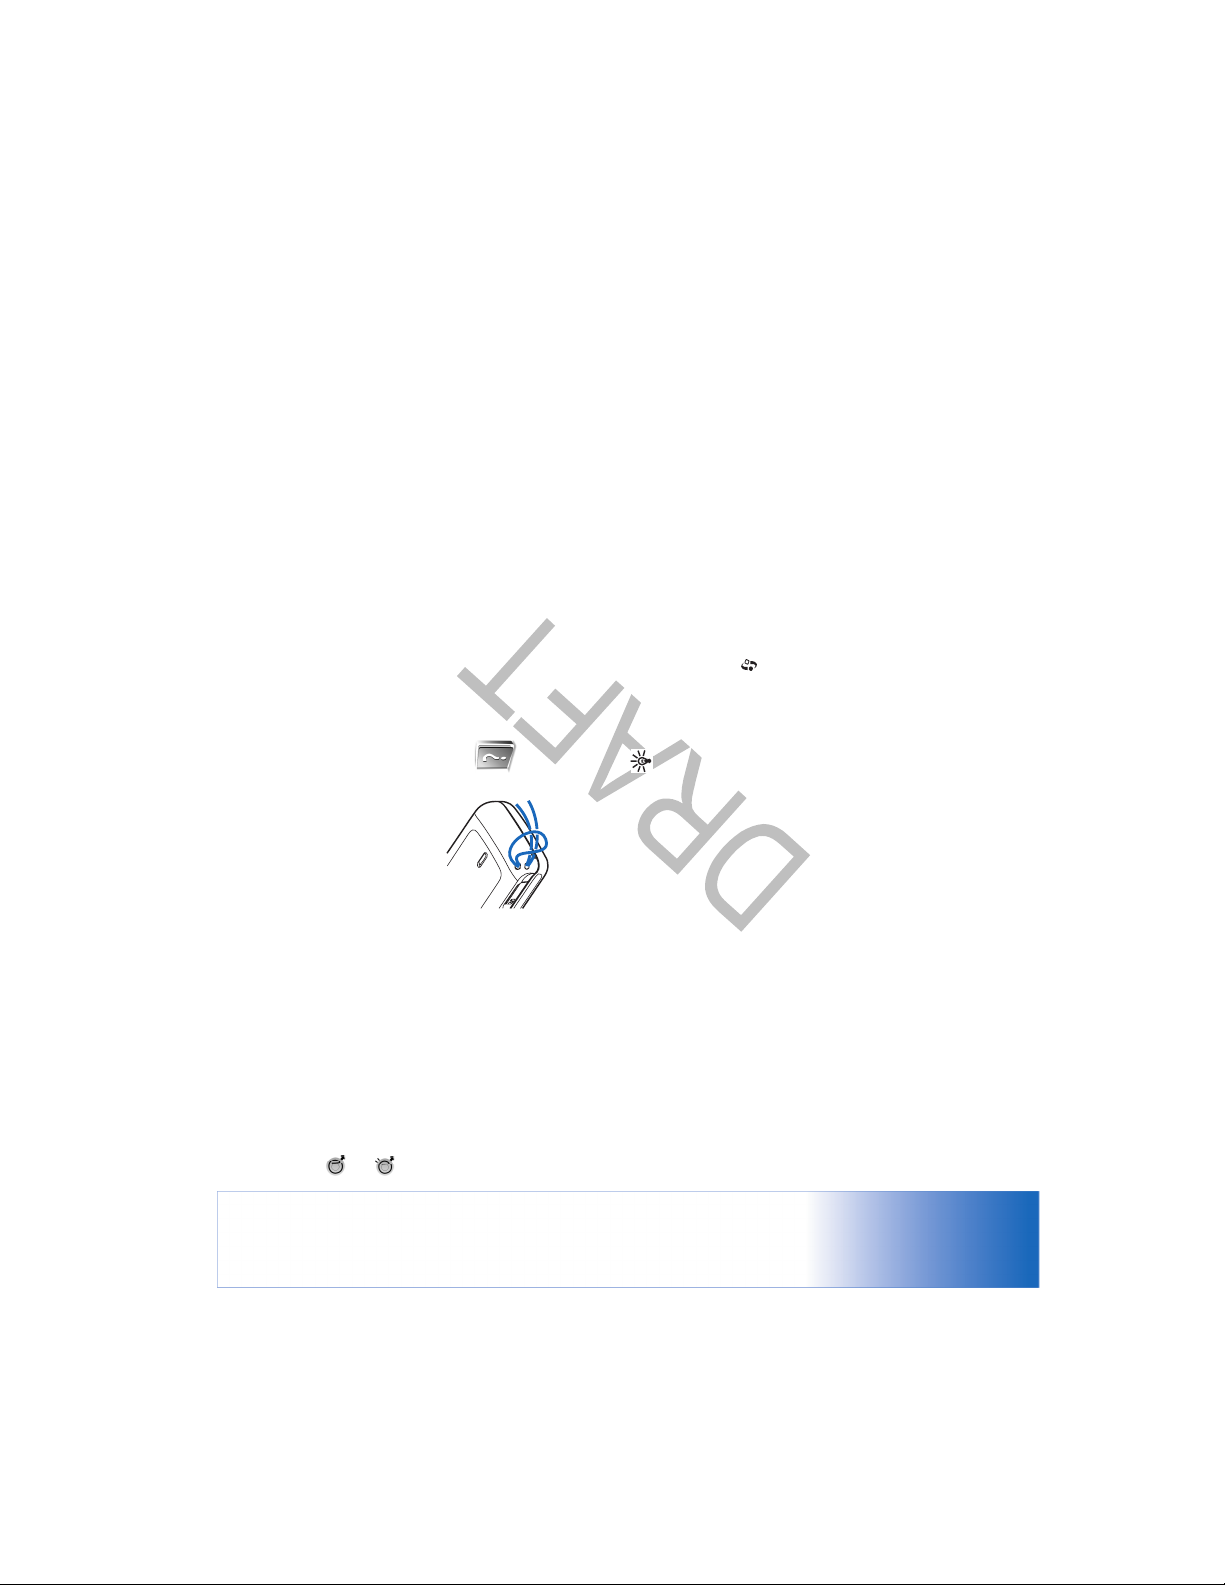
nearby. Sound applications use the loudspeaker by
Warning: Do not hold the device near your ear when
the loudspeaker is in use, because the volume may be
extremely loud.
default.
To locate the loudspeaker, see ‘Keys and parts’ in the
Quick start guide.
To use the loudspeaker during a call, start a call, and select
Options > Activate loudsp..
, respectively, or move the joystick right or left.
Select a city. You can add a maximum of 15 cities to the
list.
To set your current city, scroll to a city, and select
Options > My current city. The city is displayed in the
clock main view, and the time in your phone is changed
according to the city selected. Check that the time is
correct and matches your time zone.
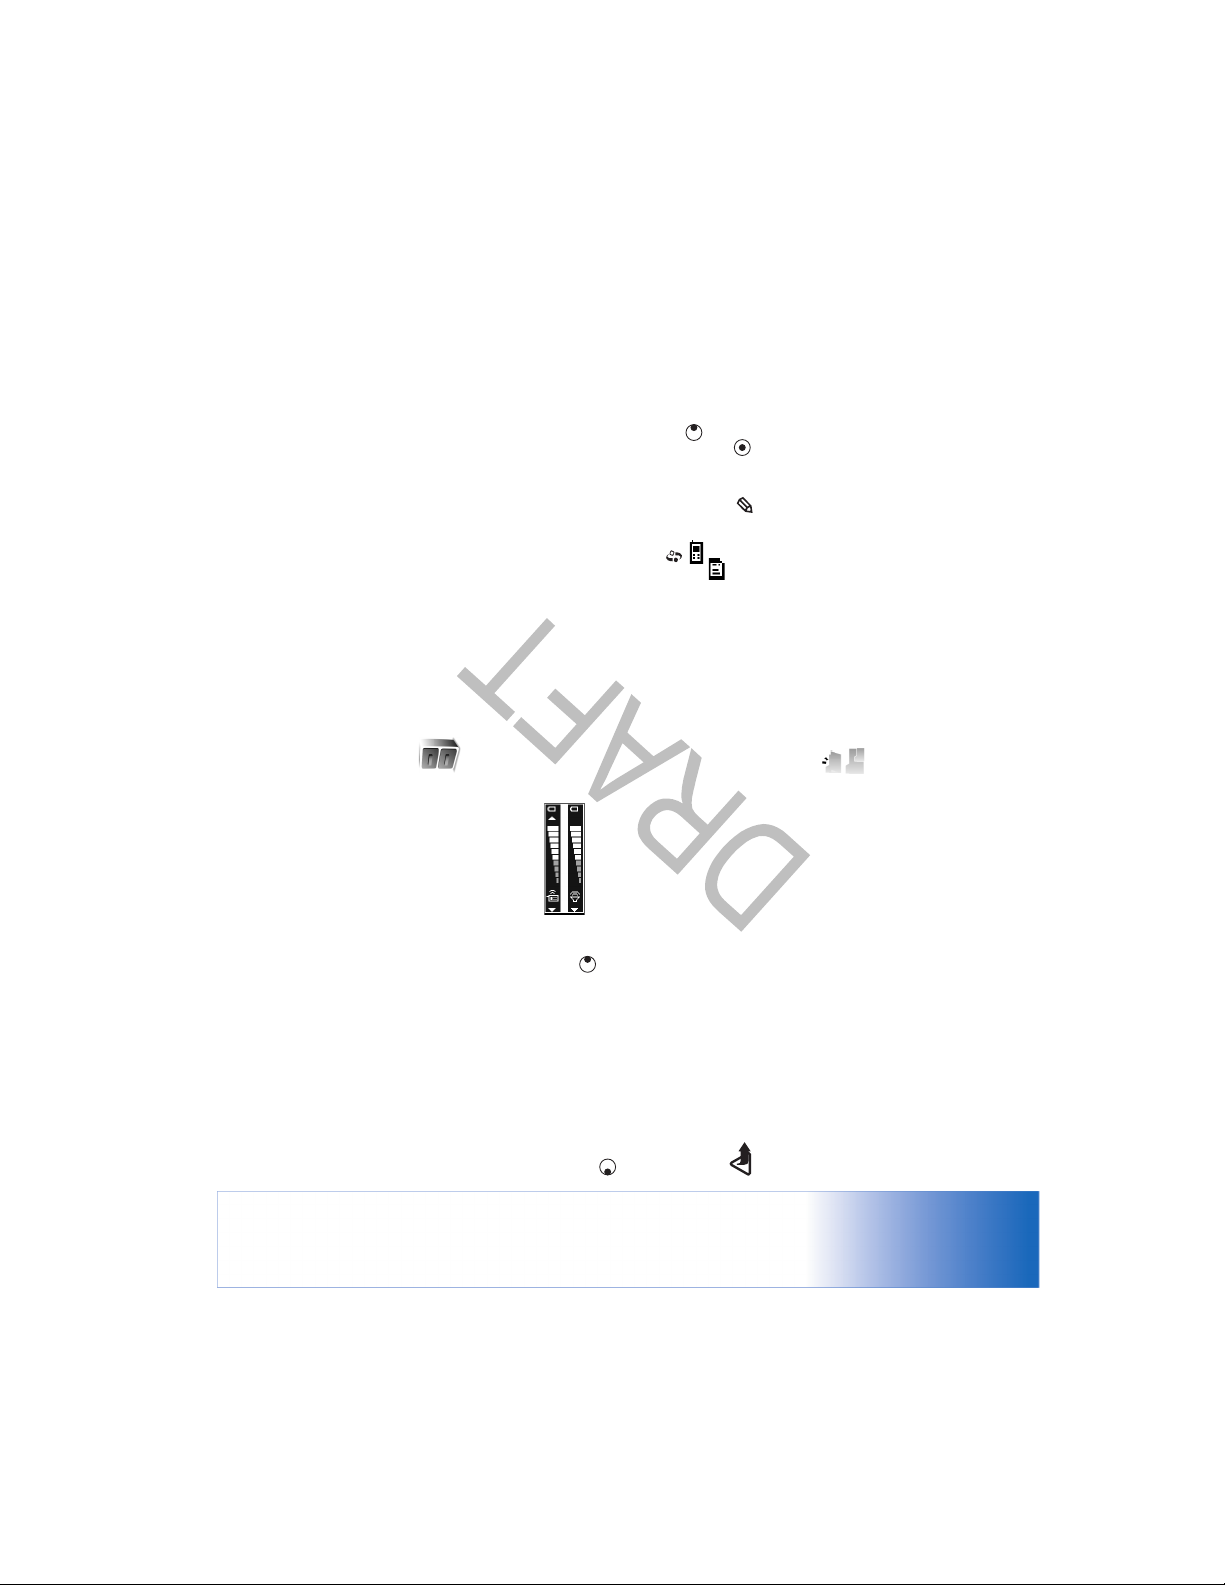
Volume and loudspeaker control
To increase or decrease the volume
level, when you have an active call or
are listening to a sound, press or
The built-in loudspeaker allows you to speak and listen to
the phone from a short distance without having to hold
the phone to your ear, for example, having it on a table
Your phone
24
Page 25
Your phone
25
Memory card tool
Tip! To free memory from the phone or from the
memory card, use Image Store available in Nokia PC
Suite to transfer images and video clips to a
compatible PC. See the CD-ROM supplied in the sales
package.
To free phone memory, transfer data to a memory card in
the file manager. Mark files to be moved, select Move to
folder > Memory card, and a folder.
Tip! You can use Nokia Phone Browser available in
Nokia PC Suite to view the different memories in your
phone. See the CD-ROM supplied in the sales package.
To find a file, select Options > Find and the memory from
which to search, and enter a search text that matches the
file name.
To rem ove data to f ree memo ry, use File mgr., or go to the
respective application. For example, you can remove the
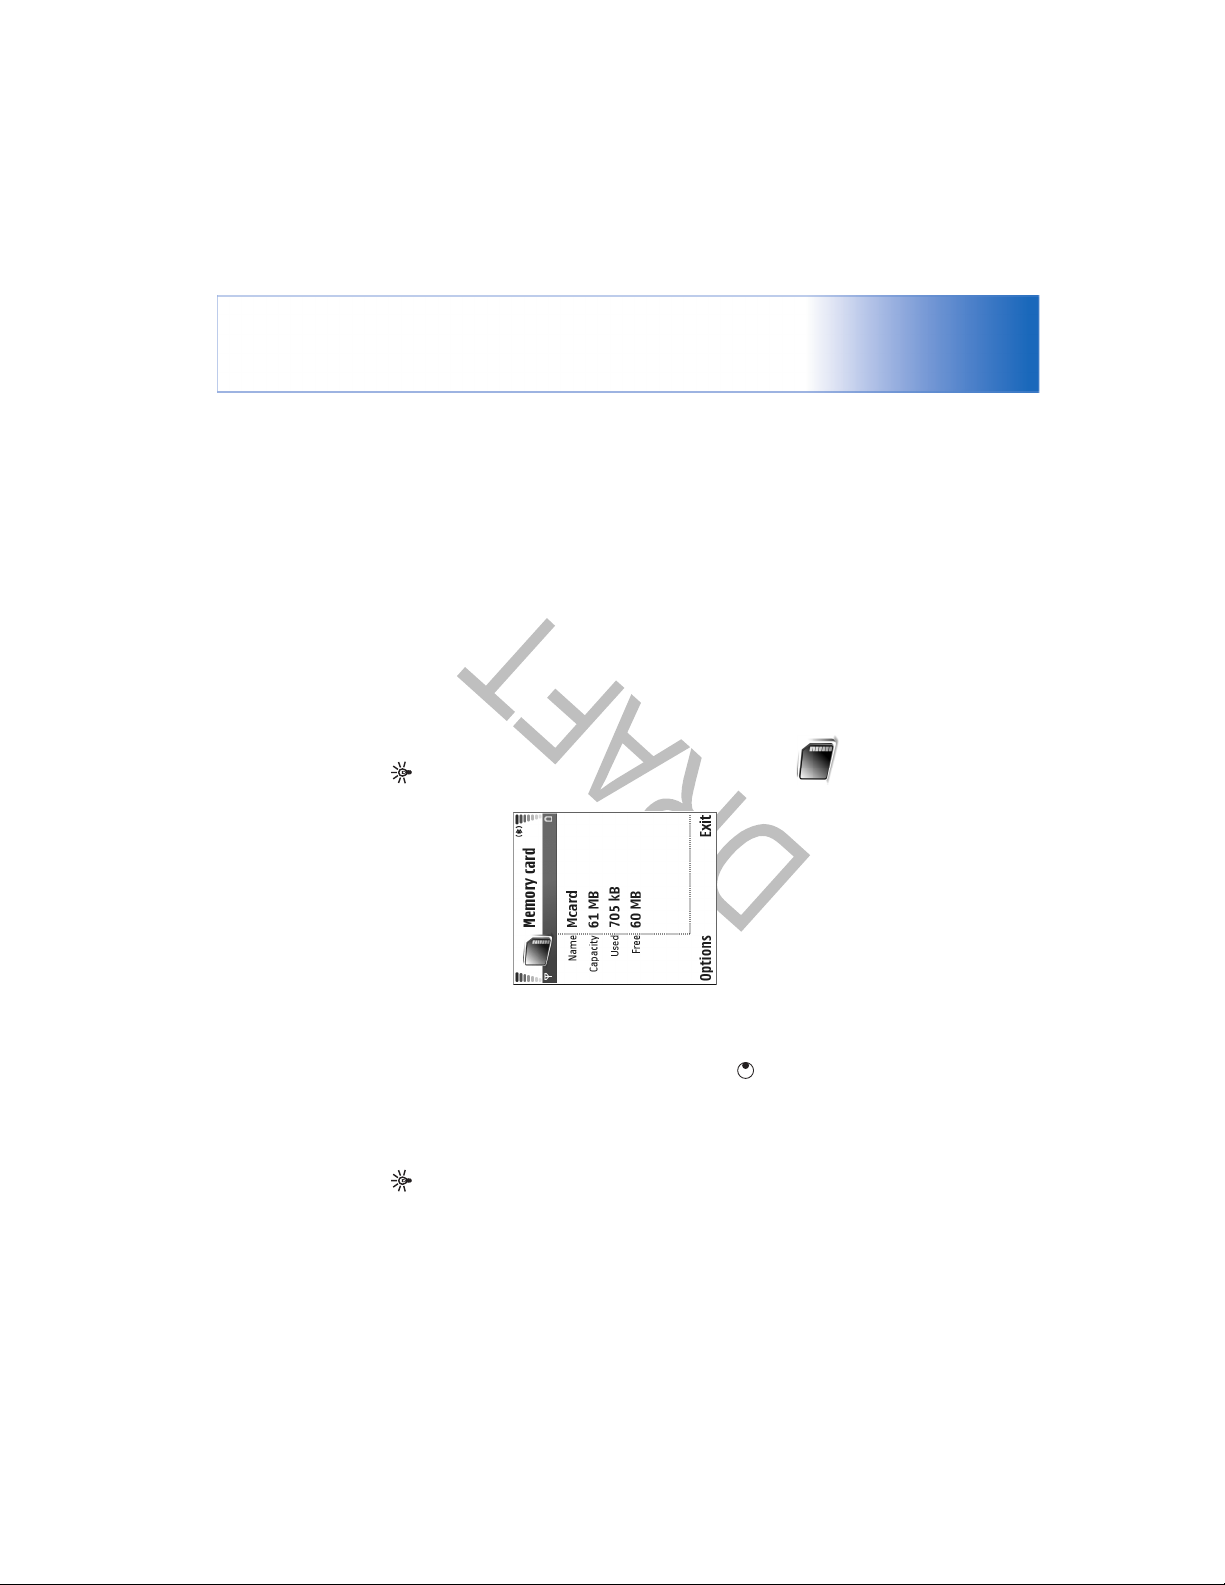
View memory consumption
To view what types of data
you have in the phone and
Messaging
following:
• Messages from Inbox, Drafts, and Sent folders in
• Retrieved e-mail messages from the phone memory
• Saved Web pages
• Saved images, videos, or sound files
details. Scroll down to Free
memory to view the amount
how much memory the
different data types consume,
select Options > Memory
of free memory in the phone.
• Contact information
manager’, p. 115.
• Calendar notes
• Downloaded applications. See also ‘Application
• Any other data that you no longer need
To view the amount of free
memory on the memory card,
if you have a card inserted in
the phone, press to open the memory card view, and
select Options > Memory details.
Memory low—free memory
The phone notifies you if the phone memory or memory
card memory is getting low.
Page 26

Tip! To rename a memory card, select Options >
Memory card name.
Format a memory card
When a memory card is formatted, all data on the card is
permanently lost.
Some memory cards are supplied pre-formatted and others
require formatting. Consult your retailer to find out if you
must format the memory card before you can use it.
To format a memory card, select Options > Format mem.
To back up information from phone memory to a memory
card, select Options > Backup phone mem.
To restore information from the memory card to the phone
memory, select Options > Restore from card.
card. Select Yes to confirm. When formatting is complete,
enter a name for the memory card, and select OK.
Note: This device uses a Reduced Size Dual Voltage
(1.8/3V) MultiMediaCard (MMC). To ensure
interoperability, use only dual voltage MMCs. Check the
compatibility of an MMC with its manufacturer or
provider.
Use only compatible Multimedia cards (MMC) with this
device. Other memory cards, such as Secure Digital (SD)
cards, do not fit in the MMC card slot and are not
compatible with this device. Using an incompatible
memory card may damage the memory card as well as the
device, and data stored on the incompatible card may be
corrupted.
Keep all memory cards out of the reach of small children.
Press , and select Tools > Memory. You can use a
memory card as extra storage space. It is also good to
regularly back up the information in the phone memory to
the memory card. The information can be restored to the
phone later. See ‘Inserting the memory card’ in the Quick
start guide.
Important: Do not remove the MMC card in the
You cannot use the memory card if the door of the
memory card slot is open.
middle of an operation when the card is being accessed.
Removing the card in the middle of an operation may
damage the memory card as well as the device, and data
stored on the card may be corrupted.
Your phone
26
Page 27

Make calls
27
Tip! To change the phone number of your voice
mailbox, press , and select Tools > Voice mail >
Options > Change number. Enter the number
(obtained from your service provider), and select OK.
press to call the number.
including the area code. Press to remove a number.
1 In the standby mode, enter the phone number,
Make a conference call
For international calls, press twice for the +
To call a recently dialed number in the standby mode,
press to access a list of the 20 last numbers you called
or attempted to call. Scroll to the number you want, and
Tip! To increase or decrease the volume during a call,
press or . If you have set the volume to Mute,
you cannot adjust the volume with the scroll key. To
adjust the volume, select Unmute, and then press
or .
Make calls
Voice calls
New call. The first call is automatically put on hold.
participant in the conference call, select Options >
Conference.
1 Make a call to the first participant.
2 To make a call to another participant, select Options >
3 When the new call is answered, to join the first
character (replaces the international access code), and
enter the country code, area code (omit the leading
zero if necessary), and phone number.
2 Press to call the number.
3 Press to end the call (or to cancel the call attempt).
Pressing always ends a call, even if another
The phone supports conference calls between a
maximum of six participants, including yourself.
To have a private conversation with one of the
participants, select Options > Conference > Private.
Select a participant, and select Private. The conference
To add a new person to the call, repeat step 2, and
select Options > Conference > Add to conference.
application is active.
To make a call from Contacts, press , and select
Contacts. Scroll to the desired name; or enter the first
letters of the name to the search field. Matching contacts
call is put on hold on your phone. The other
are listed. Press to call. Select the call type Voice call.
To call your voice mailbox ( ), press and hold in the
standby mode. See also ‘Call forwarding’, p. 113.
Page 28

Note: Using voice tags may be difficult in a noisy
environment or during an emergency, so you should not
rely solely upon voice dialing in all circumstances.
When you use voice dialing, the loudspeaker is in use. Hold
it. The voice recognition in the phone adapts to the main
user’s voice to recognise the voice commands better.
The voice tag for a contact is the name or nickname that is
saved on the contact card. To listen to the synthesised
voice tag, open a contact card, and select Options > Play
voice tag.
Make a call with a voice tag
conference call.
To drop a participant, select Options > Conference>
Drop participant, scroll to the participant, and select
participants can still continue the conference call.
Once you have finished the private conversation,
select Options > Add to conference to return to the
Drop.
4 To end the active conference call, press .
1-touch dial a phone number
the phone at a short distance away when you say the voice
To activate 1-touch dialing, press , and select Tools>
Settings > Call > 1-touch dialing > On.
tag.
To assign a phone number to one of the 1-touch dialing
keys ( — ), press , and select Tools > 1-touch.
key. If you are using a compatible headset with the
headset key, press and hold the headset key to start
voice dialing.
clearly the name or nickname that is saved on the
contact card.
recognised contact in the selected phone language, and
displays the name and number. After a time-out of 1.5
seconds, the phone dials the number.
1 To start voice dialdialing, press and hold the capture
Scroll to the key to which you want to assign the phone
2 A short tone is played, and Speak now is displayed. Say
number, and select Options > Assign. is reserved for
the voice mailbox.
To call in the standby mode, press the 1-touch dial key
and .
3 The phone plays a synthesised voice tag for the
Voice dialing
Your phone supports enhanced voice commands.
Enhanced voice commands are not dependent on the
speaker’s voice, so the user does not record voice tags in
advance. Instead, the phone creates a voice tag for the
entries in contacts, and compares the spoken voice tag to
Make calls
28
Page 29

Make calls
29
.
You are not receiving video (the recipient is not
You have denied video sending from your phone. To
Icons:
sending video or the network is not transmitting it).
send a still image instead, see ‘Call settings’, p. 106
Fold open mode, enter the
phone number in the
standby mode, or select
Contacts, and select a
contact.
1 To start a video call, in the
2 Select Options > Call >
after the call recipient has
answered the call.
Video call.
3 Activate the Imaging mode
Starting a video call may take a while. Waiting for image
is shown. If the call is not successful (for example, video
calls are not supported by the network, or the receiving
device is not compatible) you are asked if you want to try
a normal call or send a message instead.
The video call is active when you see two video images,
and hear the sound through the loudspeaker. The call
recipient may deny video sending ( ), in which case you
hear the sound and may see a still image or a grey
background graphic.
If the recognised contact was not correct, select
#Other to view a list of other matches, or Quit to
cancel voice dialing.
Video calls
When you make a video call, you can see a real-time,
two-way video between you and the recipient of the call.
The live video image, or video image captured by the
camera in your phone is shown to the video call recipient.
To be able to make a video call, you must have a USIM card
and be in the coverage of a UMTS network. For availability
of and subscription to video call services, contact your
network operator or service provider. A video call can only
be made between two parties. The video call can be made
If several numbers are saved under the name, the phone
selects the default number, if it has been set. Otherwise
the phone selects the first available number of the
following: Mobile, Mobile (home), Mobile (work),
Telephone, Tel. (home), and Tel. (work).
to a compatible mobile phone or an ISDN client. Video calls
Warning! You cannot make emergency calls in the
cannot be made while there is another voice, video, or data
call active.
Imaging mode because the keypad is not active. To make
an emergency call, activate the Fold open mode.
Page 30

Video sharing
Use Video sharing to send live video or a video clip from
your mobile device to another compatible mobile device
phone.
Video sharing requirements
during a voice call. Simply invite a recipient to view the live
video, or a video clip you want to share, and activate the
Imaging mode. See ‘Imaging mode’, p. 20. Sharing begins
automatically when the recipient accepts the invitation.
The loudspeaker is active when you activate the Imaging
mode. You can also use a headset to continue your voice
call while you share video. When a voice call is active,
select Options > Video sharing > Live or Clip. Send an
invitation to the recipient, and activate the Imaging mode
to begin sharing.
To stop Video sharing, return to the Fold open mode. Your
voice call continues normally.
Because Video sharing requires a 3G Universal Mobile
Telecommunications System (UMTS) connection, your
ability to use Video sharing depends on 3G network
availability. Contact your service provider for questions
about network availability and fees associated with using
this application. To use Video sharing you must:
• Ensure that Video sharing is installed on your Nokia
Tip! To increase or decrease the volume during a call,
in the Fold open mode, press or , or in the
Imaging mode, move the joystick left or right.
To change between showing video or hearing only sound,
select Enable/Disable > Sending video (Imaging mode
only), Sending audio or Sending audio & video (Imaging
mode only).
To send live video image of yourself, turn the camera unit
so that the lens is facing you.
To zoom your own image, select Zoom in or Zoom out.
The zoom indicator is shown on the top of the display.
To switch the places of the sent video images on the
display, select Change image order.
If you activate the Fold open mode during a video call,
sending your own video image stops because the camera
Note: Even if you have denied video sending during
a video call, the call will still be charged as a video call.
Check the pricing with your network operator or
service provider.
is not active. You can, however, still see the video of the
recipient.
To end the video call, press .
Make calls
30
Page 31

Make calls
31
agreement for you to use the UMTS network.
settings are configured properly. For help, see
‘Connection settings’, p. 107.
Video sharing. Setting up a SIP profile allows you to
establish a live person-to-person connection to another
compatible phone. The SIP profile must also be established
to receive a sharing session.
Ask your network operator or service provider for the SIP
profile settings, and save them in your phone. Your
network operator or service provider may send you the
settings over the air or give you a list of the needed
parameters.
If you know a recipient’s SIP address, you can enter it on
your contact card for that person. Open Contacts from
your phone main menu, and open the contact card (or
start a new card for that person). Select Options >Add
detail > Web address. Enter the SIP address in a format
sip:username@domainname (you can use an IP address
instead of a domain name).
UTMS connection settings
To set up your UMTS connection, do the following:
• Contact your service provider to establish an
• Ensure that your phone UMTS access point connection
connections. See ‘Settings’, p.31.
within UMTS network coverage. See ‘Settings’, p. 31. If
you start the sharing session while you are within
UMTS network coverage and a handover to GSM
occurs, the sharing session is discontinued, but your
voice call continues. If you try to start Video sharing
when you are not within UMTS network coverage (for
example, in a GSM network), a message is displayed
that there is no 3G network coverage (the registration
cannot be made).
registered to the UTMS network. If you invite someone
to a sharing session and that person has his phone
turned off, is not within UMTS network coverage, or
their registration mode is When needed and they have
not started Video sharing, they do not know that you
are sending an invitation. However, you receive an error
message that the recipient cannot accept the
invitation.
• Ensure that your phone is set up for person-to-person
• Ensure you have an active UMTS connection and are
• Ensure that both the sender and recipient are
Settings
Person-to-person connection settings
A person-to-person connection is also known as a Session
Initiation Protocol (SIP) connection. The SIP profile settings
must be configured in your phone before you can use
Page 32

mode. To end the voice call, press the End key.
5 To end the sharing session, return to the Fold open
Share live video
To receive a sharing session, the recipient must install
Video sharing and configure the required settings on
Accept an invitation
invitation message.
sharing session.
sender receives a message that you rejected the
invitation. You can also press the End key to decline the
sharing session and disconnect the voice call.
When someone sends you a share invitation, an invitation
message is displayed showing the sender’s name or SIP
address. If your phone is not set to Silent, it rings when you
receive an invitation.
If someone sends you a share invitation and your phone is
turned off, you are not within UMTS network coverage, or
your registration mode is When needed and you have not
started Video sharing, you will not know that you received
an invitation.
When you receive an invitation, you can select:
• Mute to stop any audible alerts triggered by the
• Accept, and activate the Imaging mode to begin the
• Mute and then Reject to decline the invitation. The
If you selected Clip, a list of video clips opens. Select a
video clip you want to share, and select Options >
Send invitation.
until Registered to service is displayed.
The Invitation window opens.
their mobile device. You and the recipient must both be
registered to the service before you can start sharing. You
can see the registration status in the Video sharing main
view.
To receive share invitations even when Video sharing is
closed, set the registration mode for the SIP settings to
Always on. If the registration mode is When needed, you
must start Video sharing before you can receive an
invitation.
1 Select Options > Video sharing > Live or Clip. Wait
want to send the invitation from the contacts list.
2 Select the SIP address of the recipient to which you
To disconnect the session, return to the Fold open mode.
Sharing ended is displayed.
If the SIP address of the recipient is not available,
enter a SIP address.
automatically when the recipient accepts the
invitation, and you activate the Imaging mode.
Continue to resume sharing.
3 Select OK to send the invitation. Sharing begins
4 Select Pause to pause the sharing session. Select
Make calls
32
Page 33

Make calls
33
Tip! You can assign a ringing tone for video calls.
Press and select Profiles.
In the Fold open mode, press to answer the video call.
To start sending video, activate the Imaging mode, and a
live video image, recorded video clip, or the image being
captured by the camera in your phone is shown to the
caller. If you want to send a live video image, turn the
camera unit to the direction from which you want to send
the video image. If you do not activate the Imaging mode,
video sending is not activated, and you hear a sound. A
grey screen is shown in place of the video. To replace the
Tip! If a compatible headset is connected to the
phone, to answer and end a call, press the headset key.
Answer or reject a call
To answer the call in the Fold open mode, press . In the
Fold closed mode, open the fold, and the call starts
automatically. To answer a call, and use the loudspeaker in
the Fold closed mode, select Answer ().
To mute the ringing tone when a call comes in, select
Silence.
If you do not want to answer a call, press to reject it.
Tip! To send video of yourself, in the Imaging mode
turn the camera unit so that the lens is facing you.
grey screen with a still image, see ‘Call settings’, Image in
video call, p. 106.
The caller hears a line busy tone. If you have activated the
Call forward settings > If busy function to forward calls,
If you activate the Fold open mode during a video call,
sending your own video image stops because the camera
rejecting an incoming call also forwards the call. See ‘Call
forwarding’, p. 113.
When you reject an incoming call, you can also send a text
message to the caller informing why you cannot answer
Note: Even if you have denied video sending during
a video call, the call will still be charged as a video call.
Check the pricing with your network operator or
service provider.
is not active. You can, however, still see the video of the
recipient.
the call. Select Options > Send text message. You can edit
the text before sending it. See also Reject call with SMS,
p. 106.
If you answer a voice call during a video call, the video call
To end the video call, in the Imaging mode or in the Fold
open mode, press .
Answer or reject a video call
is dropped. Call waiting is not available during a video call.
When a video call arrives, is displayed.
Page 34

Replace—To end an active call and replace it by answering
the waiting call.
Call waiting
Tip! You can add DTMF tones to the Phone number
or Touch tones fields in a contact card.
Send MMS (in UMTS networks only)—To send an image or
a video in a multimedia message to the other participant
of the call. You can edit the message and change the
recipient before sending. Press to send the file to a
compatible device ( ).
Send touch tones—To send DTMF tone strings, for
example, a password. Enter the DTMF string or search for
it in Contacts. To enter a wait character (w) or a pause
character (p), press repeatedly. Select OK to send the
tone.
Tip! To change the phone tones for different
environments and events, for example, when you want
your phone to be silent, see ‘Profiles—Set tones’, p. 15.
You can answer a call while you have another call in
progress if you have activated Call waiting in Tools >
Settings > Call > Call waiting.
To answer the waiting call, press . The first call is put
on hold.
To switch between the two calls, select Swap. Select
Options > Transfer to connect an incoming call or a call
on hold with an active call and to disconnect yourself
Options during a video call
Select Options during a video call for the following
options: Hold or Disable (audio in the Fold open mode;
video, audio, or both in the Imaging mode), Activate
handset (if a headset with Bluetooth connectivity is
attached), Activate loudsp., or Activate handsfree (Fold
open mode only, and if a headset with Bluetooth
connectivity is attached), End active call, Change image
order, Zoom in/Zoom out (Imaging mode only), and Help.
Activate loudsp., or Activate handsfree (if a compatible
headset with Bluetooth connectivity is attached), End
Options during a voice call
Many of the options that you can use during a voice call
are network services. Select Options during a call for
from the calls. To end the active call, press . To end
both calls, select Options > End all calls.
some of the following options: Mute or Unmute, Answer,
active call or End all calls, New call, Conference, and
Decline, Swap, Hold or Unhold, Activate handset,
Transfer. Select from the following:
Make calls
34
Page 35

Make calls
35
Note: The actual time invoiced for calls by your
Log
Incoming
Outgoing
service provider may vary, depending on network
features, rounding off for billing, and so forth.
To clear call duration timers, select Options > Clear
timers. For this you need the lock code, see ‘Security’,
‘Phone and SIM’, p. 110.
Packet data
To check the amount of data sent and received during
packet data connections, press , and select My own >
Log > Packet data. For example, you may be charged for
your packet data connections by the amount of data sent
and received.
Monitor all communication events
.
Tip! When you see a note in the standby mode about
calls. To call back, scroll to a name or number, and press
missed calls, select Show to access the list of missed
Recent calls
To monitor the phone numbers of missed, received, and
dialed calls, press , and select My own > Log > Recent
calls. The phone registers missed and received calls only if
the network supports these functions, the phone is
switched on, and within the network service area.
To clear all recent call lists, select Options > Clear recent
calls in the recent calls main view. To clear one of the call
Missed communication events
Icons in Log:
Call timers
To monitor the approximate duration of your incoming and
outgoing calls, press , and select My own > Log > Call
registers, open the register you want to erase, and select
Options > Clear list. To clear an individual event, open a
register, scroll to the event, and press .
timers.
Page 36

Tip! In the details view you can copy a phone number
to the clipboard, and paste it to a text message, for
example. Select Options > Copy Number.
To erase the contents of the log, recent calls register, and
messaging delivery reports permanently, select Options>
Clear log. Select Yes to confirm.
To set the Log duration, select Options > Settings > Log
duration. The log events remain in the phone memory for
a set number of days after which they are automatically
erased to free memory. If you select No log, all the log
contents, recent calls register, and messaging delivery
reports are permanently deleted.
To view the details of a communication event, in the
general log view scroll to an event, and press the scroll key.
Packet data counter and connection timer: To view how
much data, measured in kilobytes, is transferred and how
long a certain packet data connection lasts, scroll to an
incoming or outgoing event indicated by Pack., and select
Options > View details.
Tip! If you want to see the duration of a voice call on
To monitor all voice and video
calls, text messages, or data
connections registered by the
phone, press , select My
own > Log, and press the scroll
key to the right to open the
general log. For each
communication event, you can
see the sender or recipient
name, phone number, name of
the service provider, or access
point. You can filter the general log to view just one type
of event and create new contact cards based on the log
information.
Tip! To view a list of sent messages, press , and
the main display during an active call, select Options
> Settings > Show call duration > Yes.
select Messaging > Sent.
Sub events, such as a text message sent in more than one
part and packet data connections, are logged as one
communication event. Connections to your mailbox,
multimedia messaging centre, or Web pages are shown as
packet data connections.
To filter the log, select Options > Filter and a filter.
Make calls
36
Page 37

Contacts (Phonebook)
37
Tip! If you use video sharing with a contact,
save the contact’s session initiation protocol (SIP)
address to the Web address field of the contact
card. Enter the SIP address in the format
sip:username@domainname (you can use an IP
address instead of a domain name).
Save names and numbers
1 Select Options > New contact.
2 Fill in the fields that you want, and select Done.
To edit contact cards in Contacts, scroll to the contact
card you want to edit, and select Options > Edit.
To delete a contact card in Contacts, select a card, and
press . To delete several contact cards at the same time,
Tip! To add and edit contact cards, use Nokia
Contacts Editor available in Nokia PC Suite. See the
CD-ROM supplied with your phone.
press and to mark the contacts, and press to
delete.
To attach a small thumbnail image to a contact card, open
the contact card, and select Options > Edit > Options >
Add thumbnail. The thumbnail image is shown when the
contact calls.
Contacts (Phonebook)
Press , and select Contacts. In Contacts you can add a
Tip! Regularly back up the phone information to the
memory card. You can restore the information, such as
contacts, to the phone later. See ‘Memory card tool’, p.
25. You can also use Nokia PC Suite to back up your
personal ringing tone or a thumbnail image to a contact
card. You can also create contact groups, which allow you
to send text messages or e-mail to many recipients at the
same time. You can add received contact information
(business cards) to contacts. See ‘Data and settings’, p. 69.
Contact information can only be sent to or received from
compatible devices.
Options in Contacts are Open, Call, Create
contacts to a compatible PC. See the CD-ROM supplied
with your phone.
message, New contact, Open conversation, Edit,
Delete, Duplicate, Add to group, Belongs to groups,
Mark/Unmark, Copy/Copy to SIM direct., SIM
contacts, Go to web address, Send, Memory details,
Settings, Help, and Exit.
Page 38

Copy contacts
To copy names and numbers from a SIM card to your
phone, press , and select Contacts > Options > SIM
contacts > SIM directory. Select the names you want to
copy and Options > Copy to Contacts.
To copy contacts to your SIM card, press , and select
Contacts. Select the names you want to copy and
Tip! You can synchronize your contacts to a
compatible PC with Nokia PC Suite. See the CD-ROM
supplied with your phone.
SIM directory. Only the contact card fields supported by
your SIM card are copied.
Options > Copy to SIM direct., or Options > Copy > To
SIM directory and other SIM services
For availability and information on using SIM card services,
contact your SIM card vendor. This may be the service
provider, network operator, or other vendor.
Press , and select Contacts > Options > SIM
contacts > SIM directory to see the names and numbers
stored on the SIM card. In the SIM directory you can add,
edit, or copy numbers to contacts, and you can make calls.
Tip! 1-touch dialing is a quick way to call frequently
used numbers. You can assign 1-touch dialing keys to
Tip! To send contact information, select the card you
‘Messaging’, p. 63 and ‘Send data using a Bluetooth
eight phone numbers. See ‘1-touch dial a phone
number’, p. 28.
want to send. Select Options > Send > Via text
message, Via multimedia, or Via Bluetooth. See
connection’, p. 98.
Default numbers and addresses
You can assign default numbers or addresses to a contact
card. In this way if a contact has several numbers or
addresses, you can easily call or send a message to the
contact to a certain number or address. The default
number is also used in voice dialing.
an address, and select Assign.
default.
The default number or address is underlined in the contact
1 In contacts, select a contact, and press .
2 Select Options > Defaults.
3 Select a default to which you want to add a number or
4 Select a number or an address you want to set as a
card.
Contacts (Phonebook)
38
Page 39

Contacts (Phonebook)
39
3 Select the ringing tone you wish to use for the
To view the list of fixed dialing numbers, select Options >
individual contact or the selected group.
SIM contacts > Fixed dialing contacts. This setting is
Options in the groups list view are Open, New group,
Delete, Rename, Ringing tone, Memory details,
Settings, Help, and Exit.
To remove the ringing tone, select Default tone from the
only shown if supported by your SIM card.
Create contact groups
list of ringing tones.
To restrict calls from your phone to selected phone
numbers, select Options > Activ. fixed dialing. To add
new numbers to the fixed dialing list, select Options >
New SIM contact. You need the PIN2 code for these
functions.
When you use Fixed dialing, packet data connections are
not possible, except when sending text messages over a
packet data connection. In this case, the message centre
Group %N, and select OK.
multiple members at a time, repeat this action on all
the contacts you want to add.
1 In Contacts, press to open the groups list.
2 Select Options > New group.
3 Write a name for the group or use the default name
4 Open the group, and select Options > Add members.
5 Scroll to a contact, and press to mark it. To add
number and the recipient’s phone number must be
included on the fixed dialing list.
When fixed dialing is activated, calls still may be possible
to the official emergency number programmed into your
6 Select OK to add the contacts to the group.
To rename a group, select Options > Rename, enter the
device.
Add ringing tones for contacts
When a contact or group member calls you, the phone
Remove members from a group
new name, and select OK.
plays the chosen ringing tone (if the caller’s telephone
number is sent with the call and your phone recognizes it).
1 Press to open a contact card, or go to the groups
from group.
1 In the groups list, open the group you want to modify.
2 Scroll to the contact, and select Options > Remove
list, and select a contact group.
opens.
2 Select Options > Ringing tone. A list of ringing tones
Page 40

3 Select Yes to remove the contact from the group.
Tip! To check to which groups a contact belongs,
groups.
scroll to the contact, and select Options > Belongs to
Contacts (Phonebook)
40
Page 41

Camera and Gallery
41
Options before taking a picture are Video mode, Go
to Gallery, Image setup, Sequence mode/Normal
mode, Self-timer, Settings, and Help.
See ‘Scenes’, p. 45.
Your phone also has a swing axis camera, which makes
capturing views in different situations easier. You can turn
the camera unit clockwise and counterclockwise. See
White balance, Exposure value, or Color tone. See ‘Setup
settings—Adjust color and lighting’, p. 44.
Take pictures in the Imaging mode
To make lighting and color adjustments before taking a
picture, select Options > Image setup > Scene, Flash,
To select a scene, select Options> Image setup > Scene.
‘Camera mode’, p. 20.
To lock the focus on an object, press the capture key
halfway down. The green locked focus indicator appears
on the display. If the focus was not locked, the red locked
focus indicator appears. Release the capture key, and press
it again halfway down. You can, however, take the picture
without locking the focus.
To take a picture, press the capture key. Do not move the
phone before the image is saved. The image is saved
Camera and Gallery
Camera
The Nokia XXXX device supports an image capture
resolution of 1600 x 1200 pixels. The image resolution in
these materials may appear different.
Warning! You
To activate the camera,
activate the Imaging mode.
See ‘Imaging mode’, p.20.
The camera starts, and you
can see the view to be
captured.
cannot make emergency
calls in the Imaging mode
because the keypad is not
active. To make an
emergency call, activate the Fold open mode.
If the camera is in Video mode, open the image mode by
selecting Options > Image mode.
The images are automatically saved in the gallery in .jpeg
format. You can send images in a multimedia message as
an e-mail attachment or using a Bluetooth connection.
Page 42

sequence mode is active. See ‘Take pictures in a
sequence’, p. 43.
• The sequence mode indicator (7) shows that the
out. The zoom indicator, which appears on the side
pane, shows the zoom level.
See ‘Setup settings—Adjust color and lighting’, p. 44.
Shortcuts are as follows:
• Press the joystick up and down to zoom in and zoom
• Press the joystick to enter the Image setup settings.
• Press the joystick left or right to change the flash mode.
Saving the captured image may take longer if you change
the zoom, lighting, or color settings.
camera still.
environments, use the proper scene for each
environment. See ‘Scenes’, p. 45.
picture, select Options > Image setup > Scene, Flash,
White balance, Exposure value, or Color tone. See
‘Setup settings—Adjust color and lighting’, p. 44.
non zoomed picture.
When taking a picture, note the following:
• It is recommended to use both hands to keep the
• To take images or record video in different
• To make lighting and color adjustments before taking a
• The quality of a zoomed picture is lower than that of a
Tip! You can also take pictures conveniently in the
Camera mode. See ‘Take pictures in the Camera mode’,
p. 46.
automatically in the Images & videofolder of Gallery. See
‘Gallery’, p. 53.
Imaging mode camera indicators show the following:
indicators (1) show where images are saved.
depending on the selected image quality, can fit in the
remaining memory of your phone or the memory card.
‘Scenes’,p. 45.
shows if the flash is set to
Automatic (), Red
eye redu. (), On
(), or Off ().
(5) is displayed when the
focus point is locked by
the viewfinder.
(6) shows that the
self-timer is activated.
See ‘You in the picture—self-timer’, p. 43.
• The phone memory ( ) and memory card ( )
• The images indicator (2) estimates how many images,
• The scene indicator (3) shows the active scene. See
• The flash indicator (4)
• The green focus indicator
• The self-timer indicator
Camera and Gallery
42
Page 43

Camera and Gallery
43
Take pictures in a sequence
Select Options > Sequence
mode to set the camera to
take six pictures in a
sequence. You can also use
the sequence mode with the
Self-timer. See ‘You in the
picture—self-timer’, p. 43.
The pictures are
automatically saved in
Gallery.
After taking the pictures,
they are shown in a grid on the main display. To view a
picture, press the joystick to open it.
To return to the sequence mode viewfinder, press the
capture key halfway down.
You in the picture—self-timer
Use the self-timer to delay the taking of a picture so that
you can include yourself in the picture. To set the
self-timer delay, select Options > Self-timer > 2 seconds
or 10 seconds. To activate the self-timer, select Activate.
The self-timer indicator ( ) blinks and the phone beeps
when the timer is running. The camera takes the picture
after the selected delay has elapsed. You can also use the
Self-timer in the sequence mode. See ‘Take pictures in a
sequence’, p. 43.
information, see ‘Messaging’, p. 63 and ‘Bluetooth
connection’, p. 97. This option is not available during an
active call.
call, select Options > Send to caller.
images’, p. 48.
no key presses in a while. To continue taking pictures,
press the capture key.
• The camera goes into battery saving mode if there are
After the image is taken, note the following:
• If you do not want to keep the image, select Options >
the capture key halfway down.
Delete.
• To return to the viewfinder to take a new picture, press
Bluetooth, select Options > Send. For more
• To send an image to the other party during an active
•To send the image Via multimedia, Via e-mail, or Via
• To edit the picture, select Options > Edit. See ‘Edit
print’, p. 57.
• To print the picture, select Options > Print. See ‘Image
Page 44

redu., On, or Off. See ‘Flashlight’, p. 44.
White balance—Select the current lighting condition from
the list. This allows the camera to reproduce colors more
accurately.
Exposure value (images only)—Adjust the exposure time of
the camera.
Color tone—Select a color effect from the list.
The screen display changes to match any settings made,
Setup settings—Adjust color and lighting
To enable the camera to
reproduce colors and lighting
more accurately, or to add
effects to your pictures or
videos, select Options >
Image setup or Video setup,
and select from the following
options:
Scene—Select a proper scene
for the environment in which
you are taking pictures. See
‘Scenes’, p. 45. Every scene uses its own lighting settings
that have been adjusted according to a certain kind of
environment.
Flash (images only)—Set the flash to Automatic, Red eye
showing you how the change affects the pictures or videos.
The camera has an LED flashlight for low light conditions.
, Red eye redu. (), On (), and Off ().
The following flashlight modes are available: Automatic
()
Select Options > Image setup > Flash > On to use the
flashlight.
If the flashlight is set to Off or Automatic during bright
conditions, the flashlight still emits a low light when an
image is captured. This allows the subject of the picture
to see when the picture is taken. There is no flashlight
effect on the resultant picture.
If the flashlight is set to Red eye redu., it decreases the
redness of the eyes in the picture.
Tip! Select Options > Self-timer > 2 seconds to
keep your hand steady when taking a picture.
Flashlight
Keep a safe distance when using the flash. Do not use the
flash on people or animals at close range. Do not cover the
flash while taking a picture.
Camera and Gallery
44
Page 45

Camera and Gallery
45
Portrait—Use this scene to take portrait pictures, such as
head shots and sitting poses.
Landscape—Use this scene
when you take pictures of
objects that are further
away.
Night—Use this scene in low
light conditions. The night
mode is indicated with .
Sports—Use this scene to
take pictures of fast moving
objects. Note that when you use this scene, the resolution
of the images is reduced from 1600x1200 to 800x600. See
Image quality, 46.
When taking pictures, the default scene is Automatic. If
you, however, select the User defined scene, it is set as
the default scene.
To make your own scene suitable for a certain
environment, select User defined scene. In the user scene
you can adjust Based on scene, Flash, White balance,
Exposure value, Color tone, and Reset user scene
options. To copy the settings of another scene, select
Based on scene and the desired scene.
The settings return to the default settings when you close
the camera. If you select a new scene, the settings are
replaced by the settings of the selected scene. See ‘Scenes’,
p. 45. If you, however, need to change the setup settings,
you can change them after selecting a scene.
Scenes
A scene helps you to find the right color and lighting
settings for the current environment. Select a proper scene
for taking pictures or recording video clips from a scenes
list. The settings of each scene have been set according to
a certain style, or environment in which the pictures are
taken. Select Options > Image setup/Video setup >
Scene:
Video scenes
Normal (default)—Use this scene in all conditions.
Night—Use this scene in low light conditions. The night
mode is indicated with .
Image scenes
Automatic (default)—Use this scene in all conditions.
User defined—Use this scene to create a personalized
scene with your own flash, white balance, exposure value,
and color tone settings.
Close-up mode—Use this scene for close up photography.
Page 46

Camera mode, turn
the camera unit in the
Fold closed mode. See
‘Fold closed mode’, p.
19. The active keypad
lock is deactivated,
and the viewfinder
appears on the cover
display.
To zoom in or zoom out, move the joystick to the right
or to the left.
halfway down. The green locked focus indicator
appears on the display. If the focus was not locked, the
red locked focus indicator appears. Release the capture
key, and press it again halfway down. You can,
however, take the picture without locking the focus.
down. The picture is automatically saved in the gallery.
See ‘Gallery’, p. 53.
Memory in use—Select where to store your images.
Take pictures in the Camera mode
The camera in the Camera mode can be activated and used
also during an active call.
1 To activate the
settings—Adjust color and lighting’, p. 44. The setup
settings return to the default settings after you close the
camera, but the main settings remain the same until you
change them again. To change the main settings, select
Options > Settings and from the following:
Image quality—High-Print (resolution 1600x1200),
Med.-Email (resolution 800x600), or Low-Multimedia
(resolution 640x480). The better the image quality, the
more memory the image consumes. The quality of a
zoomed picture is lower than that of a non zoomed
Adjust still image camera settings
settings. To adjust Image setup settings, see ‘Setup
There are two kinds of settings for the still image camera
in the Imaging mode: Image setup settings and main
picture. If you want to print the image, select High-Print.
2 To lock the focus on an object, press the capture key
If you want to send it through e-mail, select Med.-Email.
To send the image through MMS, select Low-Multimedia.
Add to album—Select whether you want to save the
image to a certain album in the gallery. If you select Yes,
a list of available albums opens.
3 To take the picture, press the capture key all the way
Show focus point (image only)—Select Yes if you want
the focus point to be visible on the main display when
captured image after it is taken, or No if you want to
taking a picture.
continue taking pictures immediately.
Show captured image—Select Yes if you want to see the
Camera and Gallery
46
Page 47

Camera and Gallery
47
joystick left and right to zoom in and zoom out.
Options menu is available. Press the joystick to open
the Options menu.
• The zoom indicator (7) shows the zoom level. Move the
• The joystick indicator ( ) (8) indicates that the
To close the camera in the Camera mode, return to the
Fold closed mode by turning the camera unit. See ‘Fold
closed mode’, p. 19.
Camera mode options
To adjust the image settings, press the joystick, and select
from the following options:
Set scene—To select a proper scene for the image
capturing environment. See ‘Scenes’, p. 45.
Flip view—To flip the picture 180 degrees. You need this
option when you take a picture, for example, of yourself;
wh en y ou t urn the came ra unit s o th at i t is fac ing you , the
viewfinder is upside down.
Self-timer—To activate the self-timer. Select 2 seconds
or 10 seconds.
Exposure value—To adjust the brightness of the picture.
Settings—To adjust the Image quality, Memory in use,
and Show captured img. settings. See ‘Adjust still image
camera settings’, p. 46.
, Red eye redu. (), On (), or Off
shows the active scene.
See ‘Scenes’, p. 45.
and memory card ( )
indicators (2) show where
images are saved.
estimates how many
images, depending on the
selected image quality,
can fit in the remaining
memory of your phone or the memory card.
focus point is locked by the viewfinder.
activated. See ‘You in the picture—self-timer’, p. 43.
Automatic ()
( ). Select between the flash modes by moving the
joystick up or down. You can see the flash mode in the
pop-up window on the display.
To keep the image on the display after taking it, hold the
capture key down. To return to the viewfinder, release the
capture key.
Camera mode indicators show the following:
• The mode indicator (1)
• The phone memory ( )
• The images indicator (3)
• The green focus indicator (4) is displayed when the
• The self-timer indicator (5) shows that the self-timer is
• The flash indicator (6) shows if the flash is set to
Page 48

the list, and press the joystick. To move, rotate, and change
the size of the item, select Options > Move, Resize, or
Rotate.
To add text to an image, select Options > Apply effect >
Text. Enter the text, and select OK. To edit the text, select
Gallery application in the Imaging mode or in the Fold
Edit images
open mode.
To edit the pictures after taking them, or the ones already
saved in Gallery, select Options > Edit. You can open the
the normal view, press again.
press and .
Options > Move, Resize, Rotate, or Colour.
Shortcuts in the image editor:
• To view an image in full screen, press . To return to
• To rotate an image clockwise or counterclockwise,
• To zoom in or zoom out, press and .
Tips on taking good photographs
By turning the swing axis camera, capturing the views in
demanding situations is easier. You can turn the camera
unit clockwise or counterclockwise. See ‘Camera mode’, p.
20.
Picture quality
Use the appropriate picture quality. The camera has
three picture quality modes (High-Print, Med.-Email, and
Low-MMS). Use the High-Print setting to make sure that
the camera produces the best picture quality available.
Note however, that better picture quality requires more
storage space. For MMS and e-mail attachments it may be
,
Options in the edit main view are Apply effect,
Undo,Send, Full screen/Normal screen, Zoom in/
Zoom out, Save, Print,Help, and Close edit.
A cross appears on the upper left corner of the image. To
move the cross, and select the area to be cropped, move
and resolution; and add effects, text, clip art, or a frame
to the picture.
Select Apply effect to, for example, crop and rotate the
image; adjust the brightness, color, contrast, compression
the joystick. Select Set. Another cross appears on the
To crop an image, select Options > Apply effect > Crop.
lower right corner. Select again the area to be cropped,
and select Crop. The selected areas form cropped image.
cross onto the eye, and press the joystick. A loop appears
on the display. To resize the loop to fit the size of the eye,
move the joystick. Press the joystick to reduce the redness.
To add clip art to an image, select Options > Apply
To reduce redness of the eyes in an image, select
Options > Apply effect > Red eye reduction. Move the
effect > Clip art. Select the item you want to add from
Camera and Gallery
48
Page 49

Camera and Gallery
49
also use the flashlight to add more lighting to
shadows. See ‘Flashlight’, p. 44.
effect but may be too harsh, resulting in too much
contrast.
may cause the subjects to squint their eyes. The
contrast may also be too high.
plenty of diffused, soft light available, for example, on
a bright, partially cloudy day or on a sunny day in the
shadow of trees.
view by selecting Options > Video mode.
To make lighting and colour adjustments before recording
a video, select Options > Video setup > Scene, White
balance, or Colour tone. See ‘Setup settings—Adjust color
and lighting’, p. 44.
To select a scene, select Options > Video setup > Scene.
• Sidelit subject. Strong side light gives a dramatic
• Light source in front of the subject. Harsh sunlight
• Optimal lighting is found in situations where there is
Record videos
To activate the camera and the viewfinder on the main
display, activate the Imaging mode. See ‘Take pictures in
the Imaging mode’, p. 41. The camera starts, and you can
see the view to be captured.
If the camera is in Image mode, open the video recorder
See ‘Scenes’, p. 45.
subject in front of a strong light source. If the light
source is behind the subject or visible in the display, the
resulting picture may have weak contrast, may be too
dark, and may contain unwanted light effects. You can
necessary to use the Med.-Email or Low-MMS setting. To
define the quality in the image mode in the camera, select
Options > Settings.
Background
Use a simple background. For portraits and other pictures
with people, avoid having your subject in front of a
cluttered, complex background that may distract attention
from the subject. Move the camera, or the subject, when
these conditions cannot be met. Move the camera closer to
the object to take clearer portraits.
Depth
When shooting landscapes and sceneries, add depth to
your pictures by placing objects into the foreground. Note
however, that if the foreground object is too close to
camera, it may be blurred.
Lighting conditions
Changing the source, amount, and direction of light can
change photographs dramatically. Here are some typical
lighting conditions:
• Light source behind the subject. Avoid placing your
Page 50

microphone is muted.
video clip.
• The microphone indicator (4) shows that the
• The file format indicator (5) indicates the format of the
The zoom indicator, which appears on the side pane,
shows the zoom level.
‘Setup settings—Adjust color and lighting’, p. 44.
Shortcuts are as follows:
• Press the joystick up or down to zoom in or zoom out.
• Press the joystick to enter the Video setup settings. See
select Options > Play.
Delete.
After a video clip is recorded:
• To immediately play the video clip you just recorded,
• If you do not want to keep the video, select Options >
• To return to the viewfinder to record a new video, press
information, see ‘Messaging’, p. 63 and ‘Bluetooth
connection’, p. 97. This option is not available during an
active call.
call, select Options > Send to caller.
the capture key.
Bluetooth, select Options > Send. For more
• To send the video Via multimedia, Via e-mail, or Via
clips’, p. 51.
• To send a video clip to the other party during an active
• To edit the video, select Options > Edit. See ‘Edit video
Options before recording video are Image mode, Go
icon is shown. The LED flash is lit, and a tone
sounds, indicating to the subject that video is being
recorded. There is no flash effect on the resultant
video.
pause icon blinks on the display. Video recording
automatically stops if recording is set to pause and
there are no key presses within a minute.
The video clip is automatically saved to the Images &
to Gallery, Video setup, Settings, and Help.
1 Press the capture key to start recording. The record
2 To pause recording at any time, select Pause. The
3 Select Continue to resume recording.
videofolder of Gallery. See ‘Gallery’, p. 53.
4 Select Stop, or press the capture key to stop recording.
Video recorder indicators
and memory card ( )
indicators (1) show
where the video is saved.
indicator (2) shows
elapsed time and time
remaining.
shows the active mode. See ‘Scenes’, p. 45.
show the following:
• The phone memory ( )
• The current video length
• The mode indicator (3)
Camera and Gallery
50
Page 51

Camera and Gallery
51
conveniently sent as a multimedia message to a
compatible device. Some networks, however, may only
support sending of multimedia messages with a maximum
size of 100 kB. Contact your service provider for more
information.
Add to album—Select whether you want to save the
recorded video clip to a certain album in Gallery. Selecting
Yes opens a list of available albums.
Show captured video—Select whether you want the
recorded video clip to play automatically after the
recording stops.
Memory in use—Define the default memory store: phone
memory or memory card.
Edit video clips
You can edit video clips in Gallery in the Fold open mode
or in the Imaging mode. See ‘Take pictures in the Imaging
mode’, p. 41, and ‘Gallery’, p. 53.
To edit video clips and create custom video clips, scroll to
a video clip, and select Options >Edit. You can create
custom video clips by combining and trimming video clips,
and adding images, sound clips, transitions, and effects.
Transitions are visual effects that you can add in the
beginning and end of the video or between the video clips.
Video settings
There are two kinds of settings for the video recorder in the
Imaging mode: Video setup settings and main settings. To
adjust Video setup settings, see ‘Setup settings—Adjust
color and lighting’, p. 44. The setup settings return to the
default settings after you close the camera, but the main
settings remain the same until you change them again. To
change the main settings, select Options > Settings and
from the following:
Audio recording—Select On if you want to record both
image and sound.
Video quality—Set the quality of the video clip to High,
Normal, or Sharing. The quality is indicated with one of
video recording is restricted by the available space on your
memory card, and up to 1 hour per clip. If you want to view
the video on a TV or PC, select High video quality, which
has CIF resolution (352x288) and file format .mp4. You
cannot send video clips saved in the .mp4 format in a
multimedia message. If you want to view the clip in mobile
phones, select Normal, which has QCIF resolution
(176x144) and file format .3gp. To send the video clip
through MMS, or send it through video sharing, select
Sharing (QCIF resolution, file format .3gp). See ‘Video
sharing’, p. 30. The video clip is limited to 300 kB
the following icons: (High), (Normal), or
(Sharing). If you select High or Normal, the length of the
(approximately 20 seconds in duration) so that it can be
Page 52

Duplicate—Makes a copy of the selected video clip or
sound clip.
In the video editor you can see two time-lines: video clip
timeline and sound clip timeline. If you add images, text,
Edit text (shown only if you have added text)—To move,
remove or duplicate text; change the colour and style of
the text; define how long it stays on the screen; and add
effects to the text.
Edit image (shown only if you have added an image)—To
move, remove or duplicate an image; define how long it
stays on the screen; and set a background or a colour
effect to the image.
Edit sound clip:
Cut—Trims the sound clip in the Cut sound clip view.
Move—Moves the sound clip to the selected location.
Remove—Removes the sound clip from the video.
Duplicate—Makes a copy of
the selected video clip or
sound clip.
Change duration—Changes
the length of the sound clip.
Edit transition—There are
three types of transitions: at
the start of a video, at the
end of a video, and
transitions between video
or transitions to a video clip, they are shown on the video
clip timeline. To move on the timelines, scroll left or right.
To switch between the timelines, scroll up or down.
Edit video, sound, image, text, and transitions
To create custom video clips, mark and select one or more
video clips, and select Options > Edit.
In the Edit video view, you can insert video clips to make
a custom video clip, and edit the clips by trimming and
adding effects. You can add images and sound clips and
change their duration, and also add text and transitions to
the clip.
To modify the video, select from the following options:
Edit video clip:
Cut—Trims the video clip in the Cut video clip view.
Add color effect—Inserts a colour effect on the video clip.
Use slow motion—Slows the speed of the video clip.
Mute sound/Unmute sound—Mutes or unmutes the
original video clip sound.
Move—Moves the video clip to the selected location.
Remove—Removes the video clip from the video.
Camera and Gallery
52
Page 53

Camera and Gallery
53
Gallery
Tip! In the Settings view, you can define Default
video name, Default sc. shot name, Save quality, and
Memory in use.
To save your video, select Options > Movie > Save. To
define the Memory in use, select Options > Settings. The
default is the phone memory.
Select Send > Via multimedia, Via e-mail, or Via
Bluetooth if you want to send the video. Contact your
service provider for details of the maximum multimedia
message size that you can send. If your video is too large
Tip! If you want to send a video clip that is over the
to be sent in a multimedia message, the symbol
appears.
maximum multimedia message size allowed by your
service provider, you can send the clip using Bluetooth.
See ‘Send data using a Bluetooth connection’, p. 98. You
can also transfer your videos using Bluetooth into your
Bluetooth-enabled personal computer, or by using a
memory card reader (enhancement).
, and select Gallery. To open the gallery in the Imaging
To store and organize your images, video clips, sound clips,
playlists, and streaming links, in the Fold open mode, press
Tip! To take a snapshot of a video clip, select
Options > Take snapshot in the thumbnail Preview
view or in the Cut video view.
clips. A start transition can be selected when the first
transition of the video is active.
Insert:
Video clip—Inserts the selected video clip. A thumbnail of
the video clip is shown in the main view. A thumbnail
consists of the first non-black view of the video clip. The
name and length of the selected video clip is also shown.
Image—Inserts the selected image. A thumbnail of the
image is shown in the main view.
Text—Inserts text to the video clip. You can insert a title,
subtitle, or credits.
Sound clip—Inserts the selected sound clip. The name and
length of the selected sound clip is shown in the main
view.
New sound clip—Records a new sound clip to the selected
location.
Movie—To preview the movie in full screen or as a
thumbnail, save or send the movie, or cut the movie to a
proper size for sending it in a multimedia message.
Page 54

Graphic downls. or Video
card are indicated with .
To download files into Gallery in one of the main folders
using the browser, select ( )
downlds., Track downlds., or Sound downlds.. The
browser opens, and you can select a bookmark from which
memory card/Move to memory card or Copy to phone
mem./Move to phone mem.. Files stored on the memory
To copy or move files to the memory card or to phone
memory, select a file and Options > Organize> Copy to
the site can download.
View images and video clips
Pictures taken and video clips recorded with the camera
are stored in the Images & video folder in Gallery. The
quality of a video clip is indicated with one of the
following icons: (High), (Normal), and (Sharing).
Images and video clips can also be sent to you in a
multimedia message, as an e-mail attachment, or through
a Bluetooth connection. To be able to view a received
image or video clip in the gallery or in the media player,
you must save it in the phone memory or on a memory
card.
Open the Images & video folder in Gallery. The images and
video clip files are in a loop, and ordered by date. The
number of files can be seen on the display. To browse the
Tip! To switch from
Gallery to the camera in
the Imaging mode, select
Camera.
mode, select Options > Go to Gallery. In the Imaging
mode, only the Images & video folder is available.
, Links , or All files
Select Images & video ,
Tracks , Sound clips
, and press to open
it.
You can browse and open
folders; and mark, copy, and
move items to folders. Sound clips, video clips, .ram files,
and streaming links are opened and played in the
RealPlayer application. See ‘RealPlayer™’, p. 58. You can
Tip! You can transfer images from your phone to a
compatible PC with Nokia Phone Browser available in
Nokia PC Suite. See the CD-ROM supplied with your
phone.
also create albums; and mark, copy, and add items to
albums. See ‘Albums’, p. 55.
Press to open a file. Videos, music, and sound clips
open in RealPlayer. See ‘View images and video clips’, p.
54.
Camera and Gallery
54
Page 55

Camera and Gallery
55
Zoom out.
To print your images on a printer connected to your phone,
or to store them on your MMC for printing, select
Options > Print. See ‘Image print’, p. 57.
To zoom an image, select Options > Zoom in or
The zooming ratio is at the top of the display. The zooming
ratio is not stored permanently.
To delete an image or a video clip, press .
Albums
With albums you can conveniently manage your images
and video clips. To view the albums list, in the Images &
video folder, select Options > Albums. The albums are
ordered alphabetically. To view the content of an album,
press the scroll key.
To add a picture or a video clip to an album in the gallery,
To create a new album, select Options > New album.
scroll to a picture or video clip, and select Options > Add
Enter a name for the album, and select OK.
to album. A list of albums opens. Select the album to
which you want to add the picture or video clip, and press
the scroll key.
To remove a file from an album, press . The file is not
deleted from the Images & video folder in Gallery.
Zoom
Options in the Images & video main view are
Tip! To navigate and open files in the Imaging mode,
use the joystick.
files, scroll up or down. Press and hold the scroll key up or
down to browse the files in a continuous loop.
Camera, Add to Album, Albums, Print (images only),
Open(images only), Play(videos only), Send, Go to
Edit, Delete, Organize, Mark/Unmark, Help, and Exit.
To change all the files that are displayed, scroll left or right.
To edit a photo or a video clip, select Options > Edit. An
image editor or a video editor opens.
Options when playing a video clip are Play, Send,
Add to album, Edit, Delete, Rename, View details,
Add to ’Go to’, Help, and Exit.
To add an image or a video clip to an album in the gallery,
select Options > Add to Album. See ‘Albums’, p. 55.
To create custom video clips, select a video clip, or several
Options when viewing an image are Zoom in/
contact, Print, Edit, Delete, Rename, View details,
Add to ’Go to’, Help, and Exit.
out, Send, Add to album, Set as wallpaper, Assign to
clips, in the gallery, and select Options > Edit. See ‘Edit
video clips’, p. 51.
Page 56

Camera and Gallery
56
Page 57

Imaging
If you have connected a PictBridge-compliant USB printer
using the CA-53 cable supplied with the phone, the printer
is automatically displayed.
57
Options in print preview are Print, Print settings,
Help, and Exit.
If the default printer is not available, a list of available
printing devices is displayed again.
To change the default printer, select Options > Print
settings > Default printer.
Print preview
The print preview view opens only when you start printing
an image in the gallery or the active standby mode.
The images that you selected are displayed using
predefined layouts. To change the layout, scroll left and
right through the available layouts for the selected
printer. If the images do not fit on a single page, scroll up
or down to display the additional pages.
Print settings
The available settings options vary, depending on the
capabilities of the printing device you selected.
Imaging
Image print
You can print images with Image print by selecting the
print option in the gallery, camera, image editor, image
Note: To print to a PictBridge-compliant printer,
select the print option before you connect the USB
cable.
available printers is displayed after you select the image.
Select a printer you want to use. The printer is set as the
viewer, or the active standby mode.
Use Image print to print your images using a data cable, a
Bluetooth connection, or your memory card.
You can only print images which are in .jpg format. The
pictures taken with the camera are automatically saved in
.jpg format.
Select the image you want to print and Options > Print.
Printer selection
When you use Image print for the first time, a list of
default printer.
Page 58

Options in RealPlayer when a clip is selected are
Play, Play in full screen/Continue, Continue in full
scr.; Stop, Mute/Unmute, Clip details, Send, Settings,
Help, and Exit.
Play video or sound clips
1 To play a media file stored in phone memory, or on the
Saved clip—To play a file saved in Gallery. See ‘Gallery’,
memory card, select Options > Open and select:
Most recent clips—To play one of the last six files
played in RealPlayer.
Tip! To view a video clip in full screen mode, press
p. 53.
2 Scroll to a file, and press to play the file.
. Press again to change back to normal screen mode.
— Repeat and random; and —Loudspeaker muted.
Icons in RealPlayer: —Repeat; —Random;
Create a track list
music tracks.
To create a track list of the music tracks on your phone
memory, or on the memory card:
1 Select Options > New track list.
2 Select the memory from which you want to select the
3 Enter a name for the track list.
RealPlayer™
Tip! You can transfer music files from your phone to
your memory card with Nokia Audio Manager available
in Nokia PC Suite. See the CD-ROM supplied with your
phone.
To set a default printer, select Options > Default printer.
paper from the list, and OK. Select Cancel to return to the
previous view.
To select the paper size, select Paper size, the size of
Press , and select RealPlayer. With RealPlayer, you
can play video clips, sound clips, and playlists, or stream
media files over the air. You can activate a streaming link
when you browse Web pages, or store it in the phone
memory or memory card. You can use RealPlayer also in
the Imaging mode with limited key functions. See ‘Take
pictures in the Imaging mode’, p. 41.
RealPlayer supports files with extensions such as .aac,
.awb, .m4a, .mid, .mp3, and .wav. However, RealPlayer
does not necessarily support all file formats or all the
variations of file formats. For example, RealPlayer will
attempt to open all .mp4 files, but some .mp4 files may
include content that is not compliant with 3GPP
standards and, therefore, is not supported by this phone.
Imaging
58
Page 59

Imaging
59
—To select whether to use a proxy server,
—To select if you want to repeat playing of track
To stream content over the air, select a streaming link
saved in Gallery, on a Web page, or received in a text
message or multimedia message. Before live content
begins streaming, your phone connects to the site and
starts loading the content. The content is not saved in the
phone.
Receive RealPlayer settings
You may receive RealPlayer settings in a special text
message from the network operator or service provider.
See ‘Data and settings’, p. 69. For more information,
contact your network operator or service provider.
Change the RealPlayer settings
Select Options > Settings and from the following:
Video—To adjust the contrast of the video, and to have
RealPlayer automatically repeat video clips after they
finish playing.
Audio
change the default access point, and set the port range
used when connecting. Contact your service provider for
the correct settings.
Proxy settings:
lists and play sound clips on a track list in random order.
Connection
• Use proxy—To use a proxy server, select Yes.
4 Select the music tracks you want to include in the track
Tip! To leave the application open and music playing
list.
in the background, press twice to return to the
standby mode. To return to the application, press ,
and select RealPlayer.
5 Select Back. The track list automatically starts to play.
Shortcuts during play:
• To fast forward, press and hold .
indicator is displayed. To turn on the sound, press and
hold until you see the indicator.
Stream content over the air
Many service providers require you to use an Internet
access point (IAP) for your default access point. Other
service providers allow you to use a WAP access point.
• To rewind through the media file, press and hold .
• To mute the sound, press and hold until the
The access points may be configured when you first start
Note: In RealPlayer, you can only open an rtsp:// URL
address. However, RealPlayer will recognize an http link
to a .ram file.
your phone.
Contact your service provider for more information.
Page 60

Movie Director director
To create muvees, press , and select Imaging > Movie.
proxy server.
proxy server.
• Proxy serv. address—Enter the IP address of the
• Proxy port number—Enter the port number of the
and views. You can also return to the main
muvees are short, edited video clips that can contain video,
images, music, and text. Quick muvee is created
automatically by Movie director after you select the style
for the muvee. Movie director uses the default music and
text associated with the chosen style. Every style has its
own font style, color, music, and pace. In a Custom
muveeyou can select your own video and music clips,
images and style, and add opening and closing message.
You can send muvees with MMS.
Open Movie, and press or to move between the
view from the view by selecting Done.
The view contains a list of video clips that you can
Play, Send, Rename, andDelete.
Create a quick muvee
the servers port range. The minimum value is 6970.
want to use to connect to the Internet, and press .
disconnect from the network when you have paused a
media clip playing through a network link, select User
media servers and their users. Some service providers
use them to provide additional security or speed up
access to browser pages that contain sound or video
clips.
Glossary: Proxy servers are intermediate servers between
Network settings:
• Default access point—Scroll to the access point you
defined, and press . Enter the time, and select OK.
• Online time—Set the time for RealPlayer to
the servers port range. The maximum value is 32000.
• Lowest UDP port—Enter the lowest port number of
• Highest UDP port—Enter the highest port number of
created muvee is saved in Movie director muvee list.
The muvee is played automatically after saving.
1 In the Movie main view, select Quick muvee.
2 Select a style for the muvee from the style list. The
Select Options > Advanced settings to edit the
bandwidth values for different networks.
Imaging
60
Page 61

Imaging
61
To let Movie director randomly include or exclude a part
of the video clip, scroll to the part, and select Options >
Neutralize.
which parts of the video clip you want to include or
exclude in the muvee. A slider below the video screen
indicates the included, excluded, and neutralized parts
with colors: green is for included, red is for excluded, and
grey is for neutral parts.
To include a part of the video clip in the muvee, scroll to
the part, and select Options > Highlight.
To exclude a part from the video clip, scroll to the part, and
Select content
After you select images and video clips for your muvee,
you can edit the selected video clips. Select Options >
To preview the custom muvee before saving it, in the
Preview muvee view, select Options > Play.
To create a new custom muvee by using the same style
settings, select Options > Recreate.
Tip! To download new styles to your phone, select
Style downlds. ( ) from the Movie director main
view.
Create a custom muvee
Advance > Options > Select contents. You can select
Video, Image, Style, or Music.
After you have selected video clips and images, to
define the order in which the files are played in the
muvee, select Options > Advance. Select the file you
want to move by pressing the scroll key. Then scroll to
the file below which you want to place the marked file,
and press the scroll key.
To cut the video clips, select Options> Select contents.
1 In the Movie main view, select Custom muvee.
2 Select the clips you want to include in your muvee in
select Options > Exclude.
See ‘Select content’, p. 61.
Multimedia message—to optimize the length of the
In Message you can add an opening and closing text to
a muvee.
3 Select Create muvee. and from the following:
To exclude a shot from the video clip, select Options >
muvee for MMS sending.
Auto-select—to include all the selected pictures and
video clips in the muvee.
of the video clip, select Options > Neutralize all.
Exclude shot.
To let Movie director randomly include or exclude parts
Same as music—to set the muvee duration to be the
same as the chosen music clip.
User defined—to define the length of the muvee.
4 Select Options > Save.
Page 62

Settings
Select Settings to edit the following options:
Memory in use—Select where to store your muvees.
Resolution—Select the resolution of your muvees.
Default muvee name—Set a default name for the
muvees.
Imaging
62
Page 63

Messaging
63
Drafts—Stores draft messages that have not been
Messaging
Press , and select Messaging. In Messaging, you can
Sent—Stores the last 20 messages that have been
sent.
sent excluding messages sent using a Bluetooth
create, send, receive, view, edit, and organize text
messages, multimedia messages, e-mail messages, and
special text messages containing data. You can also
Outbox—A temporary storage place for messages
Reports ( )—You can request the network to send
connection. To change the number of messages to be
saved, see ‘Other settings’, p. 77.
waiting to be sent.
you a delivery report of the text messages and multimedia
messages you have sent. Receiving a delivery report of a
multimedia message that has been sent to an e-mail
address might not be possible.
Note: Only devices that have compatible features
can receive and display multimedia messages. The
appearance of a message may vary depending on the
receiving device.
receive messages and data through a Bluetooth
connection, receive Web service messages, cell broadcast
messages, and send service commands.
When you open Messaging, you can see the New message
function and a list of folders:
or .
Tip! When you have opened any of the default
folders, you can switch between the folders by pressing
To enter and send service requests (also known as USSD
commands), such as activation commands for network
services, to your service provider, select Options > Service
command in the main view of Messaging.
Cell broadcast allows you to receive messages on
various topics, such as weather or traffic conditions from
Inbox—Contains received messages except e-mail and
cell broadcast messages. E-mail messages are stored in the
Mailbox.
Mailbox—In Mailbox you can connect to your remote
My folders—For organizing your messages into
folders.
mailbox to retrieve your new e-mail messages or view your
previously retrieved e-mail messages offline. See ‘E-mail’,
p. 75.
Page 64

.
desired character appears. There are more characters
available for a number key than are printed on the key.
• Press a number key ( — ) repeatedly until the
• To insert a number, press and hold the number key.
hold .
• To switch between letter and number mode, press and
present one, wait until the cursor appears (or press
to end the time-out period), and enter the letter.
clear more than one character.
under . Press repeatedly to reach the desired
punctuation mark.
Press to open a list of special characters. Use
to move through the list, and press Select to select a
character.
next line, press three times.
• If the next letter is located on the same key as the
• To erase a character, press . Press and hold to
• The most common punctuation marks are available
• To insert a space, press . To move the cursor to the
• To switch between the different character modes, press
Predictive text input—Predictive text
You can enter any letter with a single key press. Predictive
text input is based on a built-in dictionary to which you
can also add new words. When the dictionary becomes full,
the latest added word replaces the oldest.
Options in Cell broadcast are Open, Subscribe/
Unsubscribe, Hotmark/Remove hotmark, Topic,
Settings, Help, and Exit.
your service provider. For available topics and relevant
topic numbers, contact your service provider. In the main
view of Messaging, select Options > Cell broadcast. In
the main view you can see the status of a topic, a topic
number, name, and whether it has been flagged ( ) for
follow-up.
Cell broadcast messages cannot be received in UMTS
networks. A packet data connection may prevent cell
Write text
broadcast reception.
and indicate the selected case.
Traditional text input
means that the first letter of the word is written in
uppercase, and all other letters are automatically written
in lowercase. indicates number mode.
The indicator is shown on the top right of the
display when you are writing text using traditional text
input.
Messaging
64
Page 65

Messaging
65
Tip! To set predictive text input on or off, press
4 Start writing the next word.
input, press , and
select Predictive text on.
twice quickly.
This activates predictive
Tips on predictive text input
To erase a character, press . Press and hold to clear
more than one character.
To change between the different character modes, press
text input for all editors in
the phone. is
shown on the top right of
the display when you
write text using predictive
1 To activate predictive text
Tip! Predictive text input tries to guess which
. If you press quickly twice, predictive text input
text input.
commonly used punctuation mark (.,?!‘) is needed. The
order and availability of the punctuation marks depend
on the language of the dictionary.
is turned off.
Press each key only once for one letter. For example, to
write ‘Nokia’ when the English dictionary is selected,
2 To write the desired word, press the keys — .
To insert a number in letter mode, press and hold the
desired number key.
To switch between letter and number mode, press and
press for N, for o, for k, for i, and
for a.
The word suggestion changes after each key press.
confirm it, press , or press to add a space.
If the word is not correct, press repeatedly to view
3 When you finish writing the word and it is correct, to
hold .
The most common punctuation marks are available under
the matching words the dictionary has found one by
one, or press , and select Predictive text >
. Press and then repeatedly to search for the
desired punctuation mark.
Press and hold to open a list of special characters.
Press repeatedly to view the matching words the
dictionary has found one by one.
Matches.
If the ? character is shown after the word, the word you
intended to write is not in the dictionary. To add a word
to the dictionary, select Spell, enter the word using
traditional text input, and select OK. The word is added
to the dictionary. When the dictionary becomes full, a
new word replaces the oldest added word.
Page 66

, select Copy.
same time, press or . As the selection moves,
text is highlighted.
Copy text to clipboard
1 To select letters and words, press and hold . At the
Press , select Predictive text, and press to select
one of the following options:
Matches—To view a list of words that correspond to your
key presses.
2 To copy the text to the clipboard, while still holding
Insert word—To add a word to the dictionary by using
and select Paste, or press once, and select Paste.
To select lines of text, press and hold . At the same
3 To insert the text into a document, press and hold ,
traditional text input. When the dictionary becomes full,
a new word replaces the oldest added word.
Edit word—To edit the word using traditional text input.
.
time press or .
To remove the selected text from the document, press
Write and send messages
The appearance of a multimedia message may vary,
depending on the receiving device.
Copyright protections may prevent some images, music
Tip! When you press , the following options
appear (depending on the editing mode): Predictive
text (predictive text input), Alpha mode (traditional
text input), Number mode, Cut (if text has been
text has been cut or copied first), Insert number,
Insert symbol, and Writing language: (changes the
selected), Copy (if text has been selected), Paste (when
This is available if the word is active (underlined).
input language for all editors in the phone).
Tip! You can start to create a message from any
(image or text) to be added to the message, and select
Options > Send.
application that has the option Send. Select a file
Before you can create a multimedia message or write an e-
(including ringing tones), and other content from being
copied, modified, transferred or forwarded.
Write compound words
Write the first half of a compound word; to confirm it,
press . Write the last part of the compound word. To
complete the compound word, press to add a space.
Turn predictive text input off
mail, you must have the correct connection settings in
Press , and select Predictive text > Off to turn
predictive text input off for all editors in the phone.
Messaging
66
Page 67

Messaging
67
Tip! To send files other than sounds and notes as
attachments, open the appropriate application, and
in which recorded videos are saved, see ‘Video
settings’, p. 51.
Image, Sound clip, or
record sound or video for
a multimedia message,
select Insert new >
Video clip. To insert a
6 To take a new picture or
Text message—to send a text message.
place. See ‘Receive MMS and e-mail settings’, p. 68 and ‘E-
mail’, p. 75.
The wireless network may limit the size of MMS messages.
If the inserted picture exceeds this limit, the device may
make it smaller so that it can be sent by MMS.
1 Select New message. A list of message options opens.
Select Options > Preview
to see what the
multimedia message
new slide to the message,
select Slide.
looks like.
Insert > Image, Sound clip, Video clip or Note. E-mail
attachments are indicated by in the navigation bar.
7 To add an attachment to an e-mail, select Options >
Tip! Scroll to a contact, and press to mark it.
You can mark several recipients at a time.
or enter the recipient’s phone number or e-mail
address. Press to add a semicolon (;) that separates
the recipients. You can also copy and paste the number
Multimedia message—to send a multimedia message
(MMS).
E-mail—to send an e-mail. If you have not set up your
e-mail account, you are prompted to do so.
or address from the clipboard.
2 Press to select recipients or groups from contacts,
.
select Send > Via e-mail, if available.
8 To send the message, select Options > Send, or press
Your device supports the sending of text messages beyond
the character limit for a single message. Longer messages
will be sent as a series of two or more messages. Your
service provider may charge accordingly. Characters that
use accents or other marks, and characters from some
Options > Insert object > Image, Sound clip, or Video
clip. When sound is added, the icon is shown in the
navigation bar.
You cannot send video clips that are saved in the .mp4
format in a multimedia message. To change the format
3 Press to move to the message field.
4 Write the message.
5 To add a media object to a multimedia message, select
Page 68

Receive MMS and e-mail settings
You may receive the settings in a text message from your
network operator or service provider. See ‘Data and
message > Access point in use and the access point
and define the settings for a multimedia messaging
access point. See ‘Connection settings’, p. 107.
you created to be used as the preferred connection. See
also ‘Multimedia messages’, p. 74.
settings’, p. 69.
For availability of and subscription to data services,
contact your network operator or service provider. Follow
the instructions given by your service provider.
Enter the MMS settings manually:
1 Select Tools > Settings > Connection > Access points,
2 Select Messaging > Options > Settings > Multimedia
Before you can send, receive, retrieve, reply to, and forward
‘Connection settings’, p. 107.
75. You need to have a separate e-mail account. Follow
the instructions given by your remote mailbox and
Internet service provider (ISP).
e-mail, you must do the following:
• Configure an Internet access point (IAP) correctly. See
• Define your e-mail settings correctly. See ‘E-mail’, p.
Note: E-mail messages are automatically placed in
language options like Chinese, take up more space
limiting the number of characters that can be sent in a
single message. In the navigation bar, you can see the
message length indicator counting backwards. For
example, 10 (2) means that you can still add 10 characters
for the text to be sent as two messages.
Tip! In Messaging you can also create presentations
Outbox before sending. If sending does not succeed,
the e-mail is left in the Outbox with the Failed status.
and send them in a multimedia message. In the
multimedia message editor view, select Options >
Create presentation (shown only if MMS creation
mode is set to Guided or Free). See ‘Multimedia
messages’, p. 74.
Tip! When you send a multimedia message to an
e-mail address or a device that supports the receiving
of large images, use the larger image size. If you are
not sure of the receiving device, or the network does
not support sending large files, it is recommended that
you use a smaller image size or a sound clip that is no
size in the Messaging main view.
longer than 15 seconds. To change the setting, select
Options > Settings > Multimedia message > Image
Messaging
68
Page 69

Messaging
69
Data and settings
Your phone can receive many kinds of text messages that
contain data ( ), also called over-the-air (OTA)
messages:
Configuration message—You may receive a text message
service number, voice mailbox number, Internet access
point settings, access point login script settings, or e-mail
settings from your network operator, service provider, or
company information management department in a
configuration message. To save the settings, select
Options > Save all.
Business card—To save the information to Contacts,
select Options > Save business card. Certificates or sound
To see what kinds of media objects have been included in
the multimedia message, open the message, and select
Options > Objects. You can choose to save a multimedia
object file in your phone or send it, for example, through
a Bluetooth connection to another compatible device.
To view received multimedia presentations, select
Options > Play presentation.
Copyright protections may prevent some images, music
(including ringing tones), and other content from being
copied, modified, transferred or forwarded.
files attached to the business card are not saved.
Inbox—receive messages
Important: Exercise caution when opening
Multimedia messages
messages. Multimedia message objects may contain
malicious software or otherwise be harmful to your device
or PC.
You may receive a notification that you have received a
multimedia message that is saved in the multimedia
message centre. To start a packet data connection to
retrieve the message to your phone, select Options >
Retrieve.
When you open a multimedia message ( ), you may see
an image and a message, and simultaneously listen to a
sound through the loudspeaker ( is shown if sound is
included). Click the arrow in the icon to listen to the sound.
Inbox icons: —unread messages in Inbox; —
—data received through a Bluetooth connection.
unread text message; —unread multimedia message;
When you receive a message, and the text 1 new
open the message. To open a message in Inbox, scroll to it,
and press .
message are shown in the standby mode. Select Show to
Page 70

Ringing tone—To save the ringing tone, select Options >
My folders
Mailbox
Tip! You can use texts in the templates folder to avoid
rewriting messages that you send often.
In My folders, you can organize your messages into
folders, create new folders, and rename and delete folders.
Calendar entry—To save the invitation, select Options >
Save to Calendar.
Web message—To save the bookmark to the bookmarks
Save.
Operator logo—For the logo to be shown in the standby
mode instead of the network operator’s own
identification, select Options > Save.
list in Web, select Options > Add to bookmarks. If the
message contains both access point settings and
bookmarks, to save the data, select Options > Save all.
If you select Mailbox and have not set up your e-mail
account, you are prompted to do so. See ‘E-mail’, p. 75.
When you create a new mailbox, the name you give to the
mailbox replaces Mailbox in the Messaging main view.
E-mail notification—Tells you how many new e-mails
you have in your remote mailbox. An extended
notification may list more detailed information.
Open the mailbox
When you open the mailbox, you can choose whether you
want to view the previously retrieved e-mail messages and
e-mail headings offline or connect to the e-mail server.
When you scroll to your mailbox, and press , the phone
You can have up to six mailboxes.
Tip! If you receive a vCard file that has a picture
attached, the picture is saved to contacts.
Web service messages
Web service messages ( ) are notifications (for
asks you if you want to Connect to mailbox?.
example, news headlines) and may contain a text message
or a link. For availability and subscription, contact your
service provider.
Messaging
70
Page 71

Messaging
71
New e-mail (offline or online mode): the content
All—to retrieve all messages from the mailbox.
To stop retrieving messages, select Cancel.
continue viewing them online, or select Options >
Disconnect to close the connection and view the
e-mail messages offline.
E-mail status icons:
has not been retrieved to your phone.
2 After you have retrieved the e-mail messages, you can
Select Yes to connect to your
mailbox, and retrieve new e-
mail headings or messages.
When you view messages
online, you are continuously
connected to a remote
mailbox using a packet data
connection. See also
‘Connection settings’, p. 107.
The e-mail message has been read.
New e-mail: the content has been retrieved to
The e-mail heading that has been read and the
message content has been deleted from the phone.
your phone.
Select No to view previously
retrieved e-mail messages
offline. When you view e-mail messages offline, your
phone is not connected to the remote mailbox.
message has not been retrieved (arrow in the icon is
3 To open an e-mail message, press . If the e-mail
Retrieve e-mail messages
pointing outwards) and you are offline, you are asked
if you want to retrieve this message from the mailbox.
To view e-mail attachments, open a message that has the
attachment indicator , and select Options >
Attachments. If the attachment has a dimmed indicator,
it has not been retrieved to the phone; select Options >
Retrieve. In the Attachments view, you can retrieve,
If you are offline, select Options > Connect to start a
connection to a remote mailbox.
Important: Exercise caution when opening
messages. E-mail messages may contain malicious
software or otherwise be harmful to your device or PC.
1 When you have an open connection to a remote
Tip! If your mailbox uses the IMAP4 protocol, you can
define how many messages to retrieve, and whether to
open, save, or remove attachments. You can also send
attachments using a Bluetooth connection.
New—to retrieve all new e-mail messages to your
phone.
Selected—to retrieve only the e-mail messages that
mailbox, select Options > Retrieve e-mail.
have been marked.
Page 72

Tip! You can also leave your mailbox connection open
and the new e-mails (Headers only as default) will be
retrieved from the remote mailbox to your phone
automatically (only if the IMAP IDLE function is
supported by your server). To leave the messaging
application open in the background, press twice.
Leaving the connection open may increase your call
costs due to the data traffic.
deleted are removed only after you have closed the
connection to the remote mailbox.
To cancel deleting an e-mail from the phone and server,
scroll to an e-mail that has been marked to be deleted
during the next connection ( ), and select Options >
Undelete.
Disconnect from the mailbox
When you are online, select Options > Disconnect to end
the packet data connection to the remote mailbox.
retrieve the attachments. With the POP3 protocol, the
options are Headers only, Partially (kB), or Msgs. &
attachs..
only.
The phone mirrors the e-mail headings in the remote
mailbox. Although you delete the message content, the
e-mail heading stays in your phone. If you want to remove
the heading as well, you must first delete the e-mail
message from your remote mailbox, and then make a
connection from your phone to the remote mailbox again
Delete e-mail messages
To delete the contents of an e-mail message from the
phone while still retaining it in the remote mailbox, select
Options > Delete. In Delete msg. from:, select Phone
to update the status.
View e-mail messages when offline
When you open Mailbox the next time and you want to
view and read the e-mail messages offline, answer No to
the Connect to mailbox? query. You can read the
previously retrieved e-mail headings, the retrieved e-mail
messages, or both. You can also write new, reply to, or
forward e-mail to be sent the next time you connect to the
mailbox.
Tip! To copy an e-mail from the remote mailbox to a
folder under My folders, select Options > Copy to
folder, a folder from the list, and OK.
select Phone and server.
If you are offline, the e-mail is deleted first from your
phone. During the next connection to the remote mailbox,
it is automatically deleted from the remote mailbox. If you
To delete an e-mail from the phone and the remote
mailbox, select Options > Delete. In Delete msg. from:,
are using the POP3 protocol, messages marked to be
Messaging
72
Page 73

View messages on a SIM card
Before you can view SIM messages, you need to copy them
to a folder in your phone.
Messaging
messages.
mark messages.
1 In the Messaging main view, select Options > SIM
2 Select Options > Mark/Unmark > Mark or Mark all to
3 Select Options > Copy. A list of folders opens.
73
folder to view the messages.
4 Select a folder and OK to start copying. Open the
Messaging settings
Text messages
Select Messaging > Options > Settings > Text message.
Message centers—Lists all the text message centres that
have been defined.
Msg. center in use—Select which message centre is used
for delivering text messages.
Receive report ( )—To request the network to send
delivery reports on your messages. When set to No, only
the Sent status is shown in the log. See ‘Log’, p. 35.
Message validity—If the recipient of a message cannot be
reached within the validity period, the message is removed
Outbox—messages waiting
to be sent
Example: Messages are placed in the outbox, for
Outbox is a temporary storage place for messages waiting
to be sent.
Status of the messages in Outbox are:
Sending—A connection is being made and the message is
being sent.
Waiting/Queued—The message will be sent when previous
messages of a similar type have been sent.
Resend at %U (time)—The phone will try to send the
message again after a time-out period. Select Send to
restart the sending immediately.
Deferred—You can set documents to be on hold while they
Failed—The maximum number of sending attempts has
been reached. Sending has failed. If you were trying to
send a text message, open the message, and check that the
Sending options are correct.
example, when your phone is outside network coverage.
You can also schedule e-mail messages to be sent the next
are in Outbox. Scroll to a message that is being sent, and
select Options > Defer sending.
time you connect to your remote mailbox.
Page 74

Multimedia messages
Select Messaging > Options > Settings > Multimedia
message.
Image size—Define the size of the image in a multimedia
message. The options are Original (shown only when the
MMS creation mode is set to Guided or Free), Small, and
Large. Select Original to increase the size of the
multimedia message.
MMS creation mode —If you select Guided, the phone
time allowed by the network.
Message sent as—Change this option only if you are sure
that your message centre is able to convert text messages
into these other formats. Contact your network operator.
Preferred connection—You can send text messages
through the normal GSM network or through packet data,
from the text message centre. The network must support
this feature. Maximum time is the maximum amount of
if supported by the network. See ‘Connection settings’,
informs you if you try to send a message that may not be
supported by the recipient. Select Restricted; the phone
prevents you from sending messages that are not
supported.
Access point in use (Must be defined)—Select which
access point is used as the preferred connection for the
multimedia message centre.
Multimedia retrieval—Select how you want to receive
multimedia messages. To receive multimedia messages
automatically in your home network, select Aut. in home
network. Outside your home network, you receive a
notification that you have received a multimedia message
that is saved in the multimedia message centre. You can
select if you want to retrieve the message to your phone.
When you are outside your home network, sending and
receiving multimedia messages may cost you more.
select OK.
message centre. You receive the number from your
center.
p. 107.
Reply via same ctr. ( )—Choose Yes, if you want the
reply message to be sent using the same text message
centre number.
Add a new text message centre
1 Select Message centers > Options > New msg.
2 Press , write a name for the message centre, and
service provider.
3 Press and , and write the number of the text
Scroll to Msg. center in use, and select the new
message centre.
4 Select OK.
5 To use the new settings, go back to the settings view.
Messaging
74
Page 75

E-mail
Select Messaging > Options > Settings > E-mail, or in
Messaging
the mailbox main view, select Options > E-mail settings,
and select from the following:
Mailbox in use—Select which mailbox you want to use for
75
address or host name of the mail server that sends your
e-mail. You may only be able to use the outgoing server of
your network operator. Contact your service provider for
sending e-mail.
Mailboxes—Opens a list of mailboxes that have been
defined. If no mailboxes have been defined, you are
prompted to do so. Select a mailbox to change the
following settings: Mailbox settings, User settings, and
Automatic retrieval.
Mailbox settings:
Mailbox name—Enter a descriptive name for the mailbox.
Access point in use (Must be defined)—Choose an
Internet access point (IAP) for the mailbox. See
‘Connection settings’, p. 107.
My e-mail address (Must be defined)—Enter the e-mail
address given to you by your service provider. Replies to
your messages are sent to this address.
Outgoing mail server (Must be defined)—Enter the IP
more information.
Tip! You may also obtain the multimedia and e-mail
settings from your service provider through a
configuration message. Contact your service provider
for more information. See ‘Data and settings’, p. 69.
If you select Multimedia retrieval > Always automatic,
your phone automatically makes an active packet data
connection to retrieve the message both in and outside
your home network.
Allow anon. messages—Select No if you want to reject
messages from an anonymous sender.
Receive ads—Define whether you want to receive
multimedia message advertisements.
Receive report ()—Select Yes if you want the status of
the sent message to be shown in the log. Receiving a
delivery report of a multimedia message that has been sent
to an e-mail address might not be possible.
Deny report sending—Select Yes if you do not want your
phone to send delivery reports of received multimedia
messages.
Message validity—If the recipient of a message cannot be
reached within the validity period, the message is removed
from the multimedia messaging centre. The network must
support this feature. Maximum time is the maximum
amount of time allowed by the network.
Page 76

phone. Select Immediately for the device to connect to the
mailbox when you select Send message. If you select
When conn. avail., e-mail is sent when the connection to
the remote mailbox is available.
E-mails to retrieve (not shown if the e-mail protocol is set
to POP3)—Define how many new e-mails are retrieved to
the mailbox.
Retrieve (not shown if the e-mail protocol is set to
IMAP4)—Define which parts of the e-mails are retrieved:
Headers only, Partially (kB), or Msgs. & attachs.
Retrieve attachments (not shown if the e-mail protocol is
set to POP3)—Choose whether you want to retrieve e-mail
with or without attachments.
Subscribed folders (not shown if the e-mail protocol is set
to POP3)—You can subscribe to other folders in the remote
mailbox and retrieve content from those folders.
Send copy to self—Select Yes to save a copy of the e-mail
to your remote mailbox and to the address defined in My
e-mail address.
Include signature—Select Yes if you want to attach a
signature to your e-mail messages.
My name—Enter your own name here. Your name replaces
your e-mail address in the recipient’s phone when the
recipient’s phone supports this function.
Automatic retrieval:
User name—Enter your user name, given to you by your
service provider.
Password:—Enter your password. If you leave this field
blank, you are prompted for the password when you try to
connect to your remote mailbox.
Incoming mail server (Must be defined)—Enter the IP
address or host name of the mail server that receives your
e-mail.
Mailbox type:—Defines the e-mail protocol that your
remote mailbox service provider recommends. The options
are POP3 and IMAP4. This setting can be selected only
once and cannot be changed if you have saved or exited
from the mailbox settings. If you are using the POP3
protocol, e-mail messages are not updated automatically
in online mode. To see the latest e-mail messages, you
must disconnect and make a new connection to your
mailbox.
Security (ports)—Used with the POP3, IMAP4, and SMTP
protocols to secure the connection to the remote mailbox.
APOP secure login (not shown if IMAP4 is selected for
Mailbox type)—Used with the POP3 protocol to encrypt
the sending of passwords to the remote e-mail server
while connecting to the mailbox.
User settings:
Send message—Define how e-mail is sent from your
Messaging
76
Page 77

Messaging
77
Tip! If Memory card is selected, activate the offline
profile before opening the memory card slot door or
removing the memory card. When the memory card is
not available, messages are saved in the phone
memory.
Topic detection—If you have set Topic detection > On,
the phone automatically searches for new topic numbers,
and saves the new numbers without a name to the topic
list. Select Off if you do not want to save new topic
numbers automatically.
Other settings
Select Messaging > Options > Settings > Other.
Save sent messages—Choose if you want to save a copy
of every text message, multimedia message, or e-mail that
you have sent to the Sent folder.
No. of saved msgs.—Define how many sent messages are
saved to the Sent folder at a time. The default limit is 20
messages. When the limit is reached, the oldest message
is deleted.
Memory in use—Choose the memory where you want to
save your messages: Phone memory or Memory card.
New e-mail alerts—Choose whether you want to receive
the new e-mail indications, a tone or a note, when new
mail is received to the mailbox.
Header retrieval—When this function is on, messages are
retrieved automatically. You can define when, and how
often, the messages are retrieved.
Activating Header retrieval may increase your call costs
due to the data traffic.
Web service messages
Select Messaging > Options > Settings > Service
message. Choose whether you want to receive service
messages. If you want to set the phone to automatically
activate the browser and start a network connection to
retrieve content when the phone receives a service
message, select Download messages > Automatically.
Cell broadcast
Check the available topics and related topic numbers with
your service provider, and select Messaging > Options >
Settings > Cell broadcast to change the settings.
Reception—Choose whether you want to receive cell
broadcast messages.
Language—All allows you to receive cell broadcast
messages in all supported languages. Selected allows you
to choose in which languages you wish to receive cell
broadcast messages. If you cannot find the desired
language, select Other.
Page 78

Alarm (meetings and anniversaries)—Select On, and
press to fill in the Alarm time and Alarm date
fields. in the day view indicates an alarm.
Repeat—Press to change the entry to be repeating
( is shown in the day view).
Repeat until—You can set an end date for the repeated
entry.
Synchronization:
Private—after synchronization the calendar entry can
be seen only by you and it will not be shown to others
with online access to view the calendar.
Public—The calendar entry is shown to others who have
access to view your calendar online.
None—The calendar entry will not be copied to your PC
special dates. Anniversary entries are repeated every
year.
2 Fill in the fields. Use to move between fields.
when you synchronize.
3 To save the entry, select Done.
To stop a calendar alarm, select Silence to turn off the
calendar alarm tone. The reminder text stays on the screen.
Select Stop to end the calendar alarm. Select Snooze to
set the alarm to snooze.
Create calendar entries
Calendar
Shortcut: Press any key ( — ) in any calendar
view. A meeting entry opens, and the characters you
Calendar
Tip! Regularly back up the phone information to the
enter are added to the Subject field.
memory card. You can restore the information, such as
calendar entries, to the phone later. See ‘Memory card
tool’, p. 25.
Calendar > Options >
New entry and from the
following:
Meeting—To remind you
of an appointment that
has a specific date and
time.
Memo—To write a
general entry for a day.
Anniversary—To remind
you of birthdays or
1 Press , and select
78
Page 79

Calendar
79
Memo
Anniversary
In the month view, dates that have calendar entries are
marked with a small triangle at the right bottom corner.
In the week view, memos and anniversaries are placed
before 8 o’clock. Press to switch between the month
view, the week view, and the day view.
Icons in the day and week views:
There is no icon for Meeting.
Press to jump to today.
Remove calendar entries
Removing past entries in Calendar saves space in your
phone memory.
To remove more than one event at a time, go to the month
view, and select Options > Delete entry and one of the
following:
Before date—Deletes all calendar entries that take place
before a certain date you define.
To go to a certain date, select Options > Go to date, write
the date, and select OK.
All entries—Deletes all calendar entries.
Tip! To send a calendar note to a compatible phone,
Tip! You can move calendar and to-do data from
select Options > Send > Via text message, Via
multimedia, or Via Bluetooth.
many different Nokia phones to your phone or
synchronize your calendar and to-do to a compatible
PC using Nokia PC Suite. See the CD-ROM supplied with
the phone.
Set a calendar alarm
You can set an alarm to remind you of meetings and
select Alarm > On.
often you want the alarm to be repeated.
anniversaries.
1 Open an entry in which you want to set an alarm, and
2 Set the Alarm time and Alarm date.
3 Scroll down to Repeat, and press to select how
4 Select Done.
To delete a calendar alarm, open the entry in which you
want to delete an alarm, and select Alarm > Off.
Tip! Select Options > Settings to change the starting
day of the week or the view that is shown when you
open the calendar.
Calendar views
Page 80

starts on, and Week view title, select Options >
Calendar settings
To modify the Calendar alarm tone, Default view, Week
Settings.
Calendar
80
Page 81

Web
81
Receive browser settings
Web
Various service providers maintain pages specifically
designed for mobile devices. To access these pages, press
Tip! Settings may be available on the Web site of a
points, and define the settings for an access point. See
‘Connection settings’, p. 107.
bookmark. Write a name for the bookmark and the
2 Select Web > Options > Bookmark manager > Add
browser settings’, p. 81 or ‘Enter the settings manually’,
address of the page defined for the current access
p. 81.
• Make a connection to the Web. See ‘Make a
network operator or service provider.
Enter the settings manually
Follow the instructions given to you by your service
provider.
You may receive Web service settings in a special text
message from the network operator or service provider
that offers the Web page. See ‘Data and settings’, p. 69.
For more information, contact your network operator or
service provider.
, and select Web. These pages use the wireless markup
language (WML), extensible hypertext markup language
(XHTML), or hypertext markup language (HTML).
Check the availability of services, pricing, and tariffs with
your network operator or service provider. Service
Shortcut: To start a connection, press and hold
in the standby mode.
providers will also give you instructions on how to use their
services.
1 Select Tools > Settings > Connection > Access
page that you want to use. See the sections ‘Receive
Access the Web
• Save the settings that are needed to access the Web
point.
3 To set the created access point as the default access
connection’, p. 82.
• Start browsing the pages. See ‘Browse’, p. 83.
• End the connection to the Web. See ‘End a connection’,
point in Web, select Web > Options > Settings >
Default access point.
p. 85.
Page 82

Add bookmarks manually
manager > Add bookmark.
defined. The default access point is assigned to the
bookmark if no other one is selected. Press to enter
special characters such as /, ., :, and @. Press to
clear characters.
message. Press to send. It is possible to send more
1 In the bookmarks view, select Options > Bookmark
2 Start to fill in the fields. Only the URL address must be
3 Select Options > Save to save the bookmark.
Send bookmarks
Scroll to a bookmark, and select Options > Send > Via text
than one bookmark at the same time.
Make a connection
Once you have stored all the required connection settings,
( ). When you enter the address, matching
bookmarks are shown above the field. Press to
select a matching bookmark.
you can access the pages.
1 Select a bookmark or enter the address in the field
2 Press to start to download the page.
Bookmarks view
Glossary: A bookmark consists of an Internet address
Web
Options in the bookmarks view are Open/
(mandatory), bookmark title, access point, and if the
Web page requires, a user name and password.
Download, Bookmark manager, Mark/Unmark,
Navigation options, Tools, Advanced options, Send,
Find bookmark, Details, Settings, Help, and Exit.
Your device may have some bookmarks loaded for sites
not affiliated with Nokia. Nokia does not warrant or
endorse these sites. If you choose to access them, you
should take the same precautions, for security or content,
The starting page defined for the default access
as you would with any Internet site.
Icons in the bookmark view:
The automatic bookmarks folder contains bookmarks
point. If you use another default access point for
browsing, the starting page is changed accordingly.
( ) that are collected automatically when you browse
pages. The bookmarks in this folder are automatically
Any bookmark showing the title or Internet address of
organized according to domain.
the bookmark.
82
Page 83

Web
83
to the beginning of a page.
Shortcut: Use to jump to the end of a page and
bookmark, Navigation options, Tools, Advanced
options, Show images, Send bookmark, Find, Details,
Settings, Help, and Exit.
On a browser page, new links appear underlined in blue
and previously visited links in purple. Images that act as
.
links have a blue border around them.
To open a link, to check boxes, and make selections, press
To go to the previous page while browsing, select Back. If
Back is not available, select Options > Navigation
options > History to view a chronological list of the pages
you have visited during a browsing session. The history list
is cleared each time a session is closed.
To retrieve the latest content from the server, select
Tip! To access the bookmarks view while browsing,
press and hold down . To return to the browser view
again, select Options > Back to page.
Options > Navigation options > Reload.
To save a bookmark, select Options > Save as bookmark.
To save a page while browsing, select Options >
Advanced options > Save page. You can save pages
either to the phone memory or on a memory card, and
Connection security
If the security indicator is displayed during a
Important: Use only services that you trust and that
connection, the data transmission between the device and
the Internet gateway or server is encrypted.
The security icon does not indicate that the data
transmission between the gateway and the content server
(or place where the requested resource is stored) is secure.
The service provider secures the data transmission
between the gateway and the content server.
Select Options > Details > Security to view details about
the connection, encryptions status, and information about
server and user authentication.
Security features may be required for some services, such
as banking services. For such connections you need
security certificates. For more information, contact your
service provider. See also ‘Certificate management’, p. 112.
Browse
Options when browsing (depending on the page you
are viewing) are Open, Accept, Remove file, Open in
viewer, Service options, Bookmarks, Save as
offer adequate security and protection against harmful
software.
Page 84

completed downloads from the current browsing session
Options in the saved pages view are Open, Back to
page, Reload, Saved pages, Mark/Unmark, Navigation
options, Advanced options, Details, Settings, Help,
and Exit.
when offline. In the saved pages view you can also create
folders to store your saved browser pages.
is displayed. You can also view the list by selecting
Options > Tools > Downloads. In the list, scroll to an
item, and select Options to pause, resume, or cancel
ongoing downloads, or open, save, or delete completed
To open the saved pages view, press in the bookmarks
view. In the saved pages view, press to open a saved
page ( ).
To save a page while browsing, select Options > Advanced
options > Save page.
downloads.
Downloaded items are handled by the respective
applications in your phone, for example, a downloaded
image is saved in Gallery.
Copyright protections may prevent some images, music
(including ringing tones), and other content from being
copied, modified, transferred or forwarded.
Important: Only install and use applications and
browse them when offline. To access the pages later, press
Tip! Your browser collects bookmarks automatically
while you are browsing Web pages. The bookmarks are
stored to the automatic bookmarks folder ( ) and
automatically organized according to domain. See also
‘Web settings’, p. 85.
other software from sources that offer adequate security
and protection against harmful software.
in the bookmarks view to open the Saved pages view.
options > Go to web address.
To open a sublist of commands or actions for the currently
To enter a new URL address, select Options > Navigation
open page, select Options > Service options.
View saved pages
If you regularly browse pages containing information that
does not change very often, you can save and browse them
You can download files that cannot be shown on the
browser page, such as ringing tones, images, operator
logos, themes, and video clips. To download an item, scroll
to the link, and press .
When you start a download, a list of ongoing, paused, and
Web
84
Page 85

End a connection
Web
Select Options > Advanced options > Disconnect to end
85
the connection and view the browser page offline, or
Options > Exit to end the connection and close the
browser.
Empty the cache
The information or services you have accessed are stored
in the cache memory of the phone.
A cache is a memory location that is used to store data
temporarily. If you have tried to access or have accessed
confidential information requiring passwords, empty the
cache after each use. The information or services you have
accessed is stored in the cache. To empty the cache, select
Options > Advanced options > Clear cache.
Web settings
Select Options > Settings and from the following:
Default access point—To change the default access point,
press to open a list of available access points. See
‘Connection settings’, p. 107.
Show images—To select if you want to load images while
browsing or not. If you select No, to load images later
during browsing, select Options > Show images.
Important: Only install and use applications and
To start a connection to the browser service and to
download the latest version of the page, select Options >
Reload. The phone stays online after you reload the page.
Download and purchase items
You can download items such as ringing tones, images,
operator logos, themes, and video clips. These items can be
provided free, or you can purchase them. Downloaded
items are handled by the respective applications in your
phone, for example, a downloaded photo can be saved in
Gallery.
other software from sources that offer adequate security
and protection against harmful software.
example, ’Buy’.
To continue the download, select Accept. To cancel the
download, select Cancel.
1 To download the item, scroll to the link, and press .
2 Select the appropriate option to purchase the item, for
3 Carefully read all the information provided.
Copyright protections may prevent some images, music
(including ringing tones), and other content from being
copied, modified, transferred or forwarded.
Page 86

Glossary: Cookies are a means of content providers to
identify users and their preferences for frequently used
content.
Java/ECMA script—To enable or disable the use of scripts.
Security warnings—To hide or show security notifications.
Confirm touch tones—Choose whether you want to
confirm before the phone sends DTMF tones during a voice
call. See also ‘Options during a voice call’, p. 34.
Font size—To choose the text size.
Default encoding—If text characters are not shown
correctly, you may choose another encoding according to
language.
Automatic bookmarks—To disable automatic bookmark
collecting, select Off. If you want to continue collecting
automatic bookmarks but hide the folder from the
bookmarks view, select Hide folder.
Screen size—To select what is shown when you are
browsing. Select Select. keys only or Full screen.
Homepage—To define the home page.
Search page—To define a Web page that is downloaded
when you select Navigation options > Open search page
in the bookmarks view, or when browsing.
Volume—If you want the browser to play sounds
embedded on Web pages, select a volume level.
Rendering—If you want the page layout shown as
accurately as possible when in Small screen mode, select
By quality. If you do not want external cascading style
sheets to be downloaded, select By speed.
Cookies—To enable or disable the receiving and sending
of cookies.
Web
86
Page 87

Office
87
Converter
Office
Calculator
Options in Converter are Select unit/Change
currency, Conversion type, Currency rates, Help, and
Exit.
To convert measures such as Length from one unit (Yards)
to another (Meters), press , and select Office >
Converter.
Note: This calculator has limited accuracy and is
To add, substract, multiply, divide, calculate square roots
and percentages, press , and select Office >
Calculator.
Note that Converter has limited accuracy, and rounding
designed for simple calculations.
To save a number in the memory (indicated by M), select
Options > Memory > Save. To retrieve a number in
errors may occur.
memory, select Options > Memory > Recall. To clear a
1 Scroll to the Type field, and press to open a list of
number in memory, select Options > Memory > Clear.
measures. Scroll to the measure you want to use, and
select OK.
2 Scroll to the first Unit field, and press . Select the
Calculate percentages
you want to convert. The other Amount field changes
automatically to show the converted value.
3 Scroll to the first Amount field, and enter the value
4 Select .
Press to add a decimal and for the +, - (for
temperature), and E (exponent) symbols.
unit from which you want to convert and OK. Scroll to
the next Unit field, and select the unit to which you
want to convert.
percentage.
1 Enter a number for which you want to calculate a
2 Select , , , or .
3 Enter the percentage.
Page 88

To-do
Create a task list
Notes
Press , and select Office > To-do to write notes and
maintain a task list.
To add a note, press any key to start to write the task in the
Subject field.
To set the due date for the task, scroll to the Due date field,
and enter a date.
To set the priority for the To-do note, scroll to the Priority
field, and press to select the priority. The priority icons
are (High) and (Low). There is no icon for Normal.
To mark a task as completed, scroll to it in the To-do list,
and select Options > Mark as done.
To restore a task, scroll to it in the To-do list, and select
Options > Mark as not done.
Press , and select Office > Notes to write notes. You
can send notes to other compatible devices and save plain
text files (.txt format) that you receive to Notes.
Tip! To change the conversion order, enter the
value in the second Amount field. The result is
shown in the first Amount field.
Set base currency and exchange rates
Before you can make currency conversions, you need to
choose a base currency and add exchange rates. The rate
of the base currency is always 1. The base currency
determines the conversion rates of the other currencies.
1 Select Converter > Options > Currency rates. A list of
Tip! To rename a currency, go to the currency
rates view, scroll to the currency, and select
Options > Rename currency.
and select Options > Set as base curr..
a new rate, that is, how many units of the currency
currencies opens, and you can see the current base
currency at the top.
2 To change the base currency, scroll to the currency,
equal one unit of the base currency you have selected.
3 Add exchange rates. Scroll to the currency, and enter
Note: When you change base currency, you must
enter the new rates because all previously set
exchange rates are set to zero.
After you have inserted all the necessary exchange rates,
you can make currency conversions.
Office
88
Page 89

Office
89
Recorder
Press , and select Office > Recorder to record
telephone conversations and voice memos. If you are
recording a telephone conversation, both parties hear a
tone every 5 seconds during recording.
Page 90

When you remove an application or a document which has
a shortcut in Go to, the shortcut icon of the removed item
is dimmed in the Go to view. The shortcut can be deleted
Go to—add shortcuts
My own
IM—Instant messaging
(chat)
Options in the IM main view are Open, Login/
Logout, Settings, Help, and Exit.
Instant messaging allows you to converse with other
people using instant messages and join discussion forums
(IM groups) with specific topics. Various service providers
maintain IM servers that you can log in to once you have
have this function.
registered to an IM service.
to add a shortcut.
1 Select an item from an application to which you want
2 Select Add to ’Go to’. A shortcut in Go to is
Select Conversations to start or continue a conversation
with an IM user; IM contacts to create, edit, or view the
online status of your IM contacts; IM groups to start or
continue a group conversation with multiple IM users; or
Recorded chats to view a previous instant messaging
session that you have saved.
automatically updated if you move the item to which
it is pointing (for example, from one folder to another).
To change the identifier in the lower left corner of the
shortcut icon, select Options > Shortcut icon.
Delete a shortcut
Select the shortcut, and press . The default shortcuts
Notes, Calendar, and Inbox cannot be deleted.
next time you start Go to.
Opens Inbox
Opens Calendar
Default shortcuts:
Press , and select My own > IM.
Opens Notes
To store shortcuts (links to your favorite images, notes,
bookmarks, and so on), press , and select My own > Go
to. Shortcuts are added only from the individual
applications, for example, Gallery. Not all applications
My own
90
Page 91

My own
3 To log out, select Options > Logout.
Modify your IM settings
Select Options > Settings > IM settings:
Use screen name (shown only if IM groups are supported
by the server)—To enter a nickname, select Yes.
IM presence—To allow others to see if you are online,
select Active for all.
91
Allow messages from—To allow messages from all, select
All.
Allow invitations from—To allow invitations only from
your IM contacts, select IM contacts only. IM invitations
are sent by IM contacts who want you to join their groups.
Msg. scrolling speed—To select the speed at which new
messages are displayed.
Sort IM contacts—To sort your IM contacts
Alphabetically or By online status.
Availability reloading—To choose how to update
information about whether your IM contacts are online or
offline, select Automatic or Manual.
Note: Check the availability of chat services, pricing,
and tariffs with your network operator and/or service
provider. Service providers will also give you
instructions on how to use their services.
Receive IM settings
You must save the settings to access the service that you
want to use. You may receive the settings in a special text
message from the network operator or service provider
that offers the IM service. See ‘Data and settings’, p. 69.
You can also enter the settings manually. See ‘Chat server
settings’, p. 95.
Tip: To log in automatically when you start IM, select
Options > Settings > Server settings > IM login
Connect to an IM server
in use. To change the IM server in use and save new IM
servers, see ‘Chat server settings’, p. 95.
in. You obtain the user ID and password for the IM
server from your service provider.
You can select Cancel to stay offline; to log in to the
IM server later, select Options > Login. You cannot
type > On app. start-up.
1 Open IM to have your phone connect to the IM server
2 Enter your user ID and password, and press to log
send or receive messages while you are offline.
Page 92

Leave IM group, Group, Record convers./Stop
recording, Help, and Exit.
To send a message, write the message in the message
editor field, and press .
To send a private message to a participant, select
Options > Send private msg., select the recipient, write
the message, and press .
To reply to a private message sent to you, select the
message, and select Options > Reply.
To invite IM contacts who are online to join the IM group,
select Options > Send invitation, select the contacts you
want to invite, write the invitation message, and press .
Search for IM groups and users
To search for groups, in the IM groups view, select
Options > Search. You can search by Group name, Topic,
and Members (user ID).
To search for users, in the IM contacts view, select
Options > New IM contact > Search from server. You
can search by User’s name, User ID, Phone number, and
Join and leave an IM group
E-mail address.
To join an IM group that you have saved, scroll to the
following:
Add to blocked list—To block messages from the currently
selected participant.
Add ID to list manually—To enter the user ID of the
participant. Enter the ID, and press .
View blocked list—To see the participants whose
messages are being blocked.
Unblock—To select the user that you w ant to remove from
To prevent receiving messages from certain participants,
select Options > Blocking options, and select from the
group, and press .
To join an IM group not on the list, but for which you
know the group ID, select Options > Join new group.
Enter the group ID, and press .
To leave the IM group, select Options > Leave IM group.
Chat
Once you have joined an IM group, you can view the
messages that are exchanged there, and send your own
the blocked list. Press .
Options while chatting are Send, Send private
msg., Reply, Forward, Insert smiley, Send invitation,
messages.
My own
92
Page 93

To continue the conversation, write your message, and
press .
To return to the conversations list without closing the
My own
conversation, select Back.
To close the conversation, select Options > End
conversation. Ongoing conversations are automatically
93
Glossary: The user ID is provided by the service
provider to those who register to this service.
conversation:
Select recipient—To see a list of your chat contacts that
are currently online. Scroll to the contact that you want to
closed when you exit IM.
To start a new conversation, select Options > New
start a conversation with, and press .
Enter user ID—To enter the user ID of the user you want
to start a conversation with, and press .
To save a conversation participant to your IM contacts,
scroll to the participant, and select Options > Add to IM
contacts.
To send automatic replies to incoming messages, select
Options > Set auto reply on. Enter the text, and select
Done. You can still receive messages.
Options in the recorded chats view are Open,
Delete, Send, Mark/Unmark, Login/Logout, Settings,
Help, and Exit.
Record chats
To record to a file the messages that are exchanged during
a conversation or while you are joined in a IM group, select
Options > Record convers., enter a name for the
conversation file, and press . To stop recording, select
Options > Stop recording.
The recorded conversation files are automatically saved in
Recorded chats.
To view the recorded chats, in the main view, select
Recorded chats, select the conversation, and press .
View and start conversations
Go to the Conversations view to see a list of the individual
conversation participants that you have an ongoing
conversation with.
Options when viewing a conversation are Send, Add
.
to IM contacts, Insert smiley, Forward, Record
convers./Stop recording, Blocking options, End
conversation, Help, and Exit.
To view a conversation, scroll to a participant, and press
Page 94

Belongs to groups—To see which groups the chat contact
has joined.
Reload user availab.—To update information about
whether the contact is online or offline. The online status
is shown by an indicator next to the contact name. This
IM contacts
Go to the IM contacts to retrieve chat contact lists from
the server, or to add a new chat contact to a contact list.
When you log in to the server, the previously used chat
contact list is retrieved from the server automatically.
Options in the IM groups view are Open, Join new
group, Create new group, Leave IM group, Group,
Search, Login/ Logout, Settings, Help, and Exit.
reloading to Automatic in IM settings.
Options in the IM contacts view are Open
conversation, Contact details, Change contact list,
Reload user availab., Belongs to groups, New IM
Manage IM groups
contact, Move to other list, Edit, Delete, Switch
tracking on, Blocking options, Login/Logout,
option is not available if you have set the Availability
Go to the IM groups view to see a list of the IM groups that
you have either saved or are currently joined to.
Scroll to a group, select Options > Group and one of the
following:
Save—To save an unsaved group that you are currently
joined to.
Delete—To delete a saved or created group that you are
currently not joined to.
View participants—To see who are currently joined to the
group.
Details—To see the group ID, topic, participants,
administrators of the group (shown only if you have the
Settings, Help, and Exit.
other list.
To change the chat contact list, select Options > Change
contact list.
Select from the following options:
Open conversation—To start a new conversation or
continue an ongoing conversation with the contact.
Switch tracking on—To have the phone notify you every
To create a new contact, select Options > New IM
contact > Enter manually. Fill in the Nickname and User
ID fields, and select Done.
To move a contact from a list on the server to the retrieved
list, select Options > New IM contact > Move from
time the chat contact goes online or offline.
My own
94
Page 95

My own
95
Add and remove group members
Banned list—Enter the participants that are not allowed
to join the IM group.
Allow private msgs.—To allow messaging between
selected participants only.
Group ID—The group ID is created automatically and
To add members to a group, select IM groups, scroll to an
cannot be changed.
IM group, and select Options > Group > Settings > Group
members > Selected only or All.
members, select Options > Remove all.
Chat server settings
Select Options > Settings > Server settings. You may
receive the settings in a special text message from the
network operator or service provider that offers the chat
service. You obtain the user ID and password from your
service provider when you register to the service. If you do
not know your user ID or password, contact your service
provider.
To change the IM server to which you wish to connect,
To remove a member from the IM group, scroll to the
member, and select Options > Remove. To remove all
select Default server.
editing rights), the list of blocked participants (shown only
if you have the editing rights), and whether private
conversations are allowed in the group.
Settings—To view and edit the chat group settings. See
‘Create a new IM group’, p. 95.
Administrate an IM group
Create a new IM group
Select IM groups > Options > Create new group. Enter
the settings for the group.
You can edit the settings for an IM group if you have
administrator rights to the group. The user who creates a
group is automatically given administrator rights to it.
Group name, Group topic, and Welcome note—To add
details that the participants see when they join the group.
Group size—To define the maximum number of members
allowed to join the group.
Allow search—To define if others can find the chat group
by searching.
Editing rights—To define the chat group participants to
whom you want to give rights to invite contacts to join the
IM group and edit the group settings.
Group members—See ‘Add and remove group members’, p.
95.
Page 96

To add a new server to your list of IM servers, select
Servers > Options > New server. Enter the following
settings:
Server name—Enter the name for the chat server.
Access point in use—Select the access point you want to
use for the server.
Web address—Enter the URL address of the IM server.
User ID—Enter your user ID.
Password—Enter your login password.
My own
96
Page 97

Connectivity
97
Glossary: A profile corresponds to a service or a
function, and defines how different devices connect.
For example the Handsfree Profile is used between the
handsfree device and the phone. For devices to be
compatible, they must support the same profiles.
interoperability between other devices supporting
Bluetooth technology, use Nokia approved enhancements
for this model. Check with the manufacturers of other
devices to determine their compatibility with this device.
There may be restrictions on using Bluetooth technology
in some locations. Check with your local authorities or
service provider.
Features using Bluetooth technology, or allowing such
features to run in the background while using other
features, increase the demand on battery power and
reduces the battery life.
When the device is locked, you cannot use the Bluetooth
connection. See ‘Security’, p. 110 for more information on
locking the device.
Bluetooth connection settings
Press , and select Connect. > Bluetooth.
Bluetooth connection
Connectivity
You can connect wirelessly to other compatible devices
with Bluetooth technology. Compatible devices may
include mobile phones, computers, and enhancements
such as headsets and car kits. You can use Bluetooth
technology to send images, video clips, music and sound
clips, and notes; to connect wirelessly to your compatible
PC to, for example, transfer files; or to connect to a
compatible printer to print images with Image print. See
‘Image print’, p. 57.
Since devices with Bluetooth technology communicate
using radio waves, your phone and the other device do not
need to be in direct line-of-sight. The two devices only
need to be within 10 metres of each other, although the
connection may be subject to interference from
obstructions such as walls or from other electronic devices.
This device is compliant with Bluetooth Specification 1.2
supporting the following profiles: Basic Printing Profile,
Generic Access Profile, Serial Port Profile, Dial-up
Networking Profile, Headset Profile, Handsfree Profile,
Generic Object Exchange Profile, Object Push Profile, File
Transfer Profile, and Basic Imaging Profile. To ensure
Page 98

Tip! If you have searched for devices earlier, a list
of the devices that were found previously is shown
Send data using a Bluetooth
connection
first. To start a new search, select More devices. If
• When is shown continuously, the Bluetooth
My phone’s visibility—To allow your phone to be found by
Tip! To send text using a Bluetooth connection
connection is active.
(instead of text messages), open Notes, write the text,
is stored. For example, to send an image to another
and select Options > Send > Via Bluetooth.
1 Open an application where the item you want to send
other devices with Bluetooth technology, select Shown to
all. To hide it from other devices, select Hidden.
My phone’s name—Define a name for your phone. After
you have set a Bluetooth connection and changed My
phone’s visibility to Shown to all, your phone and this
name can be seen by other users with devices using
Bluetooth technology.
connection is active.
to the other device.
Bluetooth connection indicators
• When is shown in the standby mode, a Bluetooth
• When is blinking, your phone is trying to connect
Select from the following:
Bluetooth—Set to On or Off. To connect wirelessly to
another compatible device, first set Bluetooth On, and
then establish a connection.
for devices within range. Devices with Bluetooth
technology that are within range start to appear on the
display one by one. You can see a device icon, the name
compatible device, open Gallery.
Options > Send > Via Bluetooth. The phone searches
of the device, the device type, or a short name.
2 Select the item, for example an image, and select
Security tips
When you are not using Bluetooth, set Bluetooth Off, or
select My phone’s visibility > Hidden.
Do not pair with an unknown device.
—Computer; —Phone; —Audio or video; —
you switch off the phone, the list is cleared.
Device icons:
Headset; —Other.
There can be several active Bluetooth connections at a
time. For example, if you are connected to a headset, you
can also transfer files to another compatible device at the
same time.
Connectivity
98
Page 99

Connectivity
99
Tip! To define a short name (nickname or alias) for a
paired device, scroll to the device, and select Options >
Assign short name in the paired devices view. This
name helps you to recognize a certain device during
device search or when a device requests a connection.
To pair with a device, select Options > New paired device.
The phone starts a device search. Select the device. Enter
the passcode. The same passcode must be entered on the
other device as well. After pairing, the device is saved to
the paired devices view.
Paired devices are indicated by in the device search.
To set a device to be authorized or unauthorized, scroll to
a device, and select from the following options:
Set as authorized—Connections between your phone and
this device can be made without your knowledge. No
separate acceptance or authorization is needed. Use this
status for your own devices, such as your compatible
headset or PC, or devices that belong to someone you
trust. indicates authorized devices in the paired
devices view.
Set as unauthorized—Connection requests from this
device must be accepted separately every time.
To cancel a pairing, scroll to the device, and select
Options > Delete. If you want to cancel all pairings, select
Options > Delete all.
To interrupt the search, press Stop. The device list
freezes.
transmitted, a tone sounds, and you are asked to enter
a passcode. See ‘Pair devices’, p. 99.
data is shown.
3 Select the device with which you want to connect.
4 If the other device requires pairing before data can be
5 When the connection has been established, Sending
Tip! When searching for devices, some devices may
show only the unique addresses (device addresses). To
find the unique address of your phone, enter the code
*#2820# in the standby mode.
The Sent folder in Messaging does not store messages sent
using a Bluetooth connection.
two devices with Bluetooth technology should agree on
a common passcode, and use the same passcode for
both devices in order to pair them. Devices that do not
have a user interface have a factory-set passcode.
Pair devices
Glossary: Pairing means authentication. The users of the
In the Bluetooth main view, press to open the paired
devices view ( ).
Before pairing, create your own passcode (1—16 digits),
and agree with the owner of the other device to use the
same code. The passcode is used only once.
Page 100

Tip! When using Nokia PC Suite for the first time, to
connect your phone to a compatible PC and to use
Nokia PC Suite, use the Get Connected wizard available
in Nokia PC Suite. See the CD-ROM supplied in the sales
package.
Nokia PC Suite and the Nokia PC Suite help in the ‘Install’
section on the CD-ROM.
CD-ROM
The CD-ROM should launch after you have inserted it into
the CD-ROM drive of a compatible PC. If not, proceed as
follows: Open Windows Explorer, right-click the CD-ROM
drive where you inserted the CD-ROM, and select
Autoplay.
Your phone as a modem
You can use your phone as a modem to send and receive
e-mail, or to connect to the Internet with a compatible PC
by using a Bluetooth connection or a data cable. Detailed
installation instructions can be found in the User Guide for
Nokia PC Suite in Modem options on the CD-ROM.
Tip! If you are currently connected to a device and
delete the pairing with that device, pairing is removed
immediately and the connection will be switched off.
Receive data using a Bluetooth
connection
When you receive data using a Bluetooth connection, a
tone sounds, and you are asked if you want to accept the
message. If you accept, is shown, and the item is
. See ‘Inbox—receive messages’, p. 69.
placed in the Inbox folder in Messaging. Messages
received using a Bluetooth connection are indicated by
Switch off Bluetooth connectivity
To switch off Bluetooth connectivity, select Bluetooth >
Off.
PC connections
You can use your phone with a variety of PC connectivity
and data communications applications. With Nokia PC
Suite you can, for example, synchronize contacts,
calendar and To-do notes, and transfer images between
your phone and a compatible PC. For further information
on how to install Nokia PC Suite (compatible with
Windows 2000 and Windows XP), see the User Guide for
Connectivity
100
 Loading...