

Page 1

Supervisor’s Guide: Using Supervisor over
the Web
Supervisor 6. 5
Windows and UNIX
Page 2

2 Supervisor’s Guide: Using Supervisor over the Web
Copyright
Trademarks
Use restrictions
Patents
Copyright © 2004 Business Objects. All rights reserved.
Printed in France.
Business Objects, the Business Objects logo, Crystal Reports, and Crystal Enterprise are
trademarks or registered trademarks of Business Objects S.A. or its affiliated companies in the
United States and other countries. All other names mentioned herein may be trademarks of their
respective owners.
Contains IBM Runtime Environment for AIX(R), Java(TM) 2 Technology Edition Runtime
Modules (c) Copyright IBM Corporation 1999, 2000. All Rights Reserved.
This product includes code licensed from RSA Security, Inc. Some portions licensed from IBM
are available at http://oss.software.ibm.com/icu4j.
Contains ICU libraries (c) 1995-2003 International Business Machines Corporation and others.
All rights reserved.
This software and documentation is commercial computer software under Federal Acquisition
regulations, and is provided only under the Restricted Rights of the Federal Acquisition
Regulations applicable to commercial computer software provided at private expense. The use,
duplication, or disclosure by the U.S. Government is subject to restrictions set forth in
subdivision (c)(1)(ii) of the Rights in Technical Data and Computer Software clause at 252.227-
7013.
Business Objects owns the following U.S. patents, which may cover products that are offered
and sold by Business Objects: 5,555,403, 6,247,008 B1, 6,578,027 B2, 6,490,593, and
6,289,352.
Page 3

Supervisor’s Guide: Using Supervisor over the Web 3
Contents
Preface Maximizing Your Information Resources 5
Information resources . . . . . . . . . . . . . . . . . . . . . . . . . . . . . . . . . . . . . . . . . . 7
Services . . . . . . . . . . . . . . . . . . . . . . . . . . . . . . . . . . . . . . . . . . . . . . . . . . . . . 9
Useful addresses at a glance . . . . . . . . . . . . . . . . . . . . . . . . . . . . . . . . . . . . 10
About this guide . . . . . . . . . . . . . . . . . . . . . . . . . . . . . . . . . . . . . . . . . . . . . . 12
Chapter 1 Getting Started 13
What is Supervisor over the Web? . . . . . . . . . . . . . . . . . . . . . . . . . . . . . . . . 15
Installing and configuring Supervisor over the Web . . . . . . . . . . . . . . . . . . . 18
Running Supervisor over the Web . . . . . . . . . . . . . . . . . . . . . . . . . . . . . . . .20
Logging out of Supervisor over the Web . . . . . . . . . . . . . . . . . . . . . . . . . . . 22
Using the online help . . . . . . . . . . . . . . . . . . . . . . . . . . . . . . . . . . . . . . . . . . 23
Chapter 2 Managing Groups 25
Using the Group Management pane . . . . . . . . . . . . . . . . . . . . . . . . . . . . . . 27
Adding a user . . . . . . . . . . . . . . . . . . . . . . . . . . . . . . . . . . . . . . . . . . . . . . . . 31
Creating a new group . . . . . . . . . . . . . . . . . . . . . . . . . . . . . . . . . . . . . . . . . . 32
Renaming a group . . . . . . . . . . . . . . . . . . . . . . . . . . . . . . . . . . . . . . . . . . . . 33
Moving a group . . . . . . . . . . . . . . . . . . . . . . . . . . . . . . . . . . . . . . . . . . . . . . 34
Deleting a group . . . . . . . . . . . . . . . . . . . . . . . . . . . . . . . . . . . . . . . . . . . . . . 35
Contents
Page 4

4 Supervisor’s Guide: Using Supervisor over the Web
Chapter 3 Managing Users 37
Using the User Management pane . . . . . . . . . . . . . . . . . . . . . . . . . . . . . . . 39
Understanding user profiles . . . . . . . . . . . . . . . . . . . . . . . . . . . . . . . . . . . . 41
Creating a new user . . . . . . . . . . . . . . . . . . . . . . . . . . . . . . . . . . . . . . . . . . 43
Adding to a group . . . . . . . . . . . . . . . . . . . . . . . . . . . . . . . . . . . . . . . . . . . . 45
Editing user properties . . . . . . . . . . . . . . . . . . . . . . . . . . . . . . . . . . . . . . . . 46
Changing a password . . . . . . . . . . . . . . . . . . . . . . . . . . . . . . . . . . . . . . . . . 52
Renaming a user . . . . . . . . . . . . . . . . . . . . . . . . . . . . . . . . . . . . . . . . . . . . . 53
Deleting a user . . . . . . . . . . . . . . . . . . . . . . . . . . . . . . . . . . . . . . . . . . . . . . 54
Removing a user from a group . . . . . . . . . . . . . . . . . . . . . . . . . . . . . . . . . . 55
Chapter 4 Managing Multiple Users 57
Selecting users . . . . . . . . . . . . . . . . . . . . . . . . . . . . . . . . . . . . . . . . . . . . . . 59
Editing multiple user properties . . . . . . . . . . . . . . . . . . . . . . . . . . . . . . . . . . 61
Adding multiple users to a group . . . . . . . . . . . . . . . . . . . . . . . . . . . . . . . . . 63
Removing multiple users from a group . . . . . . . . . . . . . . . . . . . . . . . . . . . . 64
Deleting multiple users . . . . . . . . . . . . . . . . . . . . . . . . . . . . . . . . . . . . . . . . 65
Using the search options . . . . . . . . . . . . . . . . . . . . . . . . . . . . . . . . . . . . . . . 66
Contents
Index 69
Page 5

Maximizing Your Information Resources
preface
Page 6

6 Supervisor’s Guide: Using Supervisor over the Web
Overview
Information, services, and solutions
The Business Objects business intelligence solution is supported by thousands
of pages of documentation, available from the products, on the Internet, on CD,
and by extensive online help systems and multimedia.
Packed with in-depth technical information, business examples, and advice on
troubleshooting and best practices, this comprehensive documentation set
provides concrete solutions to your business problems.
Business Objects also offers a complete range of support and services to help
maximize the return on your business intelligence investment. See in the
following sections how Business Objects can help you plan for and successfull y
meet your specific technical support, education, and consulting requirements.
Maximizing Your Information Resources
Page 7

Information resources
Whatever your Business Objects profile, we can help you quickly access the
documentation and other information you need.
Where do I start?
Below are a few suggested starting points; there is a summary of useful web
addresses on page 10.
!
!
Documentation Roadm ap
! !
The Documentation Roadmap references all Business Objects guides and
multimedia, and lets you see at a glance what information is available, from
where, and in what format.
View or download the Business Objects Documentation Roadmap at
www.businessobjects.com/services/documentation.htm
!
!
Documentation from the products
! !
You can access electronic documentation at any time from the product you are
using. Online help, multimedia, and guides in Adobe PDF format are available
from the product Help menus.
Supervisor’s Guide: Using Supervisor over the Web 7
!
!
Documentation on the web
! !
The full electronic documentation set is available to customers with a valid
maintenance agreement on the Online Customer Support (OCS) website at
www.businessobjects.com/services/support.htm
!
!
Buy printed documentation
! !
You can order printed documentation through your local sales office, or from the
online Business Objects Documentation Supply Store at
www.businessobjects.com/services/documentation.htm
!
!
Search the Docume ntation CD
! !
Search across the entire documentation set on the Business Objects
Documentation CD shipped with our products. This CD brings together the full set
of documentation, plus tips, tricks, multimedia tutorials, and demo materials.
Order the Documentation CD online, from the Business Objects Documentation
Supply Store, or from your local sales office.
Information resources
Page 8

8 Supervisor’s Guide: Using Supervisor over the Web
!
!
Multimedia
! !
Are you new to Business Objects? Are you upgrading from a previous release or
expanding, for example, from our desktop to our web solution? Try one of our
multimedia quick tours or Getting Started tutorials. All are available via the Online
Customer Support (OCS) website or on the Documentation CD.
How can I get the most recent documentation?
You can get our most up-to-date documentation via the web. Regularly check the
sites listed below for the latest documentation, samples, and tips.
!
!
Tips & Tricks
! !
Open to everyone, this is a regularly updated source of creative solutions to any
number of business questions. You can even contribute by sending us your own
tips.
www.businessobjects.com/forms/tipsandtricks_login.asp
!
!
Product documentation
! !
We regularly update and expand our documentation and multimedia offerings.
With a valid maintenance agreement, you can get the latest documentation – in
seven languages – on the Online Customer Support (OCS) website.
!
!
Developer Suite Online
! !
Developer Suite Online provides documentation, samples, and tips to those
customers with a valid maintenance agreement and a Developer Suite license
via the Online Customer Support (OCS) website.
Send us your feedback
Do you have a suggestion on how we can improve our documentation? Is there
something you particularly like or have found useful? Drop us a line, and we wil l
do our best to ensure that your suggestion is included in the next release of our
documentation: documentation@businessobjects.com
NOTE
If your issue concerns a Business Objects product and not the documentation,
please contact our Customer Support experts. For information about Customer
Support visit: www.businessobjects.com/services/support.htm
Maximizing Your Information Resources
Page 9

Services
A global network of Business Objects technology experts provides customer
support, education, and consulting to ensure maximum business intelligence
benefit to your business.
How we can support you?
Business Objects offers customer support plans to best suit the size and
requirements of your deployment. We operate three global customer support
centers:
• Americas: San Jose, California and Atlanta, Georgia
• Europe: Maidenhead, United Kingdom
• Asia: Tokyo, Japan and Sydney, Australia
!
!
Online Customer Support
! !
Our Customer Support website is open to all direct customers with a current
maintenance agreement, and provides the most up-to-date Business Objects
product and technical information. You can log, update, and track cases from this
site using the Business Objects Knowledge Base.
Having an issue with the product?
Have you exhausted the troubleshooting resources at your disposal and still not
found a solution to a specific issue?
For support in deploying Business Objects products, contact Worldwide
Customer Support at: www.businessobjects.com/services/support.htm
Supervisor’s Guide: Using Supervisor over the Web 9
Looking for the best deployment solution for your company?
Business Objects consultants can accompany you from the initial analysis stage
to the delivery of your deployment project. Expertise is available in relational and
multidimensional databases, in connectivities, database design tools,
customized embedding technology, and more.
For more information, contact your local sales office, or contact us at:
www. businessobjects.com/services/consulting.htm
Looking for training options?
From traditional classroom learning to targeted e-learning seminars, we can offer
a training package to suit your learning needs and preferred learning style. Find
more information on the Business Objects Education website:
www.businessobjects.com/services/education.htm
Services
Page 10

10 Supervisor’s Guide: Using Supervisor over the Web
Useful addresses at a glance
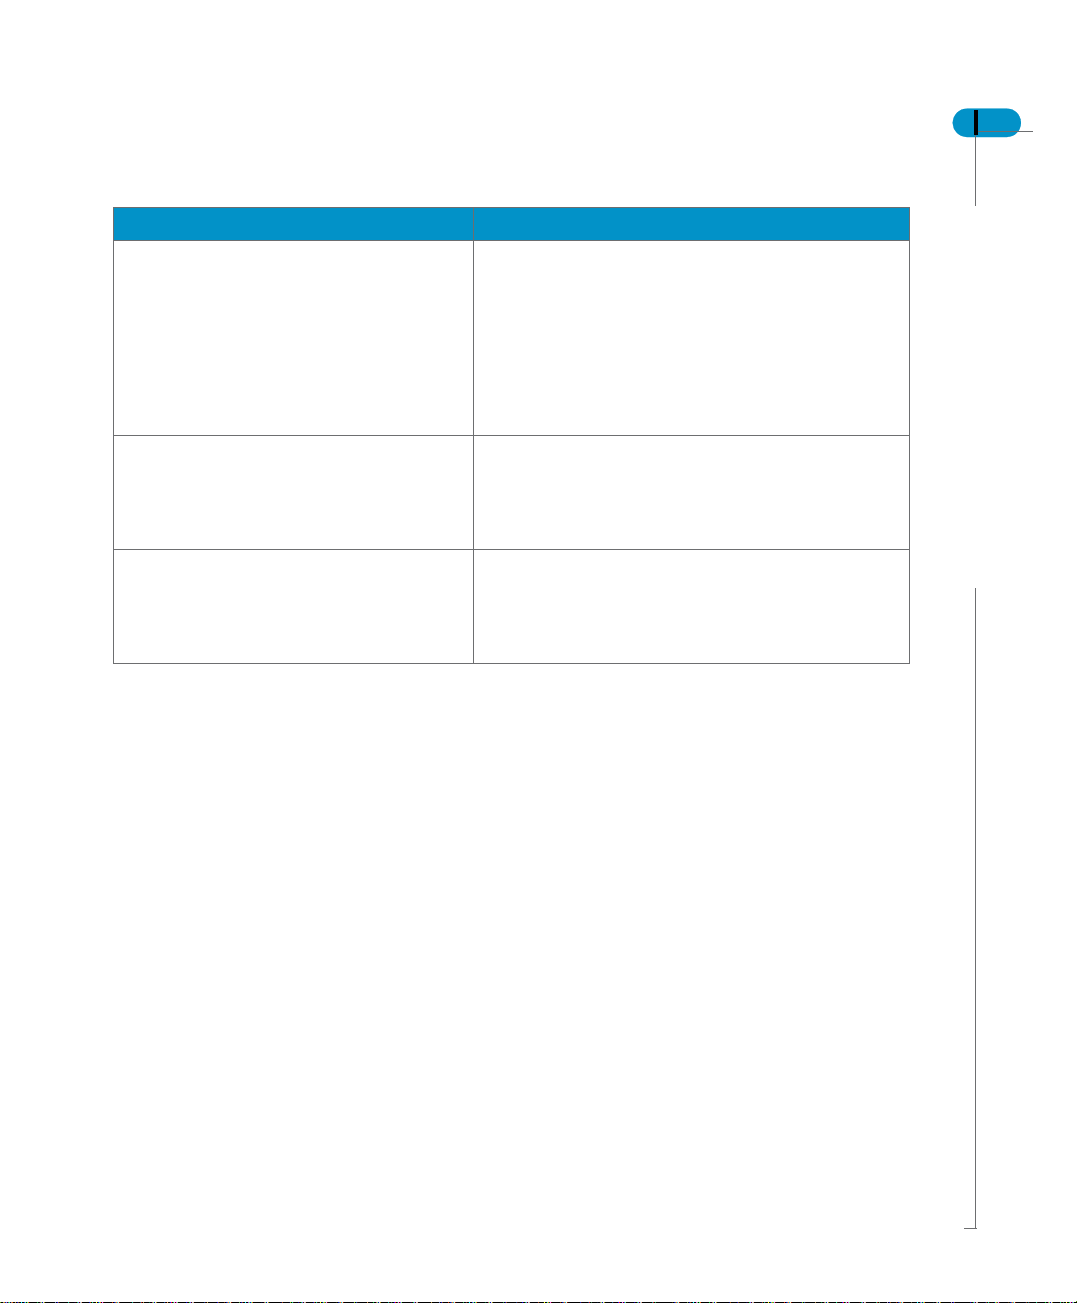
Address Content
Business Objects Documentation
www.businessobjects.com/services/
documentation.htm
Business Objects Documentation
mailbox
documentation@businessobjects.com
Product documentation
www.businessobjects.com/services/
support.htm
Business Objects product information
Overview of Business Objects documentation. Links
to Online Customer Support, Documentation Supply
Store, Documentation Roadmap, Tips & Tricks,
Documentation mailbox.
Feedback or questions about documentation.
The latest Business Objects product
documentation, to download or view online.
Information about the full range of Business
Objects products.
www.businessobjects.com
Developer Suite Online
www.techsupport.businessobjects.com
Knowledge Base (KB)
www.techsupport.businessobjects.com
Tips & Tricks
www.businessobjects.com/forms/
tipsandtricks_login.asp
Maximizing Your Information Resources
Available to customers with a valid maintenance
agreement and a Developer Suite license via the
Online Customer Support (OCS) website. Provides
all the documentation, latest samples, kits and tips.
Technical articles, documents, case resolutions.
Also, use the Knowledge Exchange to learn what
challenges other users – both customers and
employees – face and what strategies they find to
address complex issues. From the Knowledge
Base, click the Knowledge Exchange link.
Practical business-focused examples.
Page 11
Address Content
Online Customer Support
Supervisor’s Guide: Using Supervisor over the Web 11
www.techsupport.businessobjects.com
www.businessobjects.com/services
Business Objects Education Services
www.businessobjects.com/services/
education.htm
Business Objects Consulting Services
www.businessobjects.com/services/
consulting.htm
Starting point for answering questions, resolving
issues.
Information about registering with Worldwide
Customer Support.
The range of Business Objects training options and
modules.
Information on how Business Objects can help
maximize your business intelligence investment.
Useful addresses at a glance
Page 12

12 Supervisor’s Guide: Using Supervisor over the Web
About this guide
This guide describes how to use Supervisor over the Web.
Audience
This guide is intended for administrators who manage user and group accounts.
Conventions used in this guide
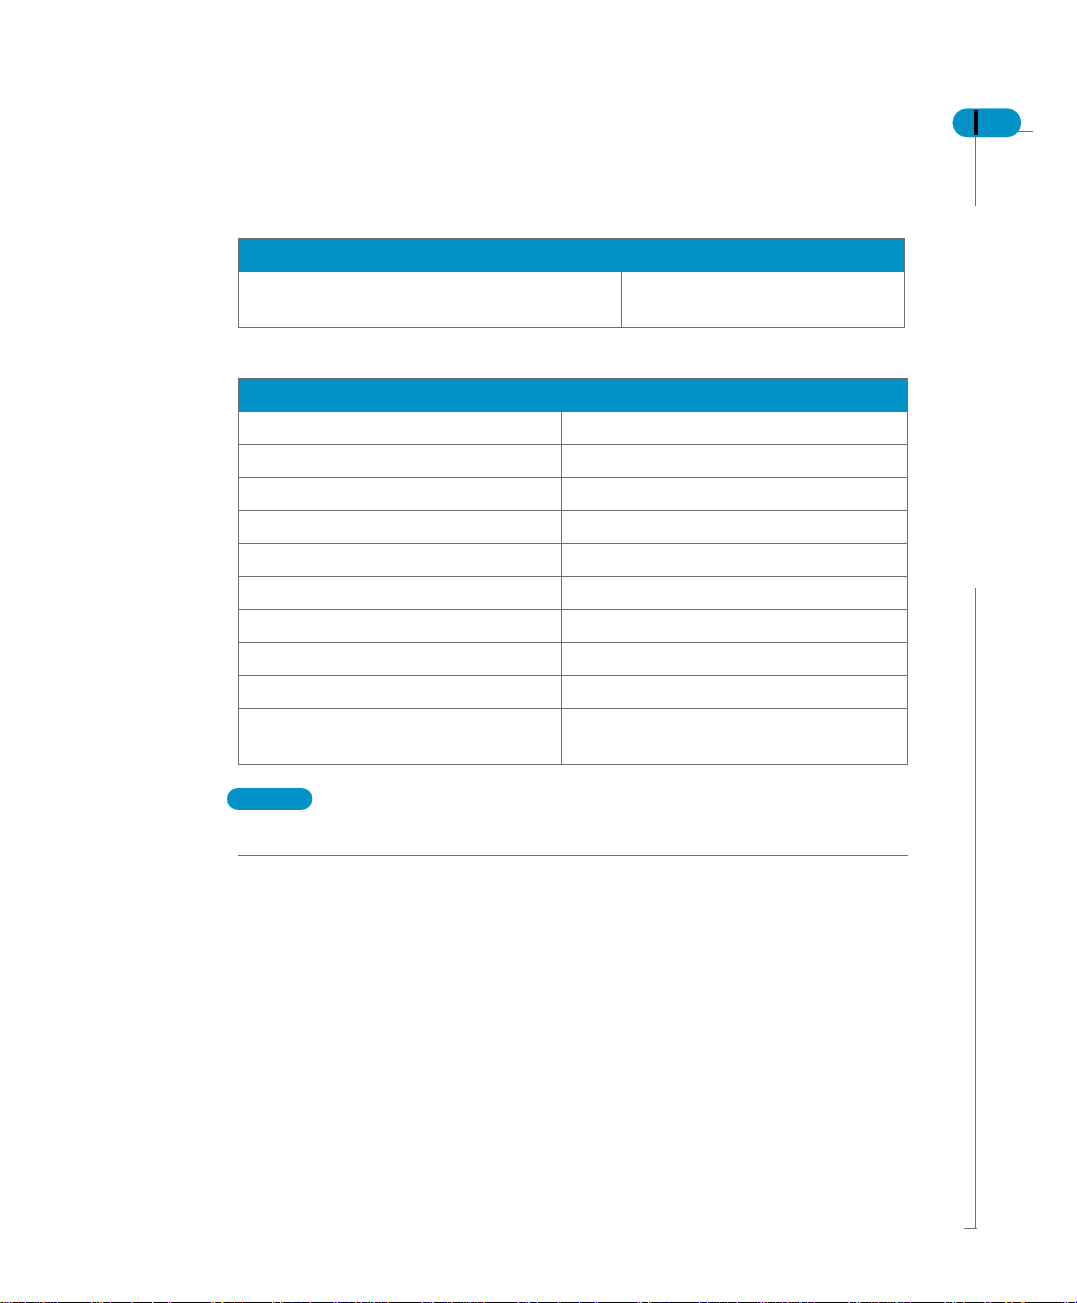
The conventions used in this guide are described in the table below.
Convention Indicates
This font Code, SQL syntax, computer programs. For
Some code #
more code
$DIRECTORYPATHNAME The path to a directory in the Business Objects
example: @Select(Country\Country Id).
This font is also used for all paths, directories,
scripts, commands and files for UNIX.
Placed at the end of a line of code, the s ymbol (#)
indicates that the next line should be entered
continuously with no carriage return.
installation/configuration directory structure. For
example:
• $INSTALLDIR refers to the Business Objects
installation directory.
• $LOCDATADIR refers to a subdirectory of the
BusinessObjects installation directory called
locData.
Maximizing Your Information Resources
Page 13

Getting Started
1
chapter
Page 14

14 Supervisor’s Guide: Using Supervisor over the Web
Overview
This chapter contains the following sections:
• What is Supervisor over the Web?
• Installing and configuring Supervisor over the Web
• Running Supervisor over the Web
• Logging out of Supervisor over the Web
• Using the online help
Getting Started
Page 15

Supervisor’s Guide: Using Supervisor over the Web 15
What is Supervisor over the Web?
Supervisor over the Web allows you to manage users and groups via a web
browser. You create a Business Objects repository using Supervisor. Then you
use either Supervisor or Supervisor over the Web to define users and user
groups, assign profiles to users, and edit their properties in the security domain.
Supervisor over the Web runs on 3-tier architecture in a JSP environment. It
requires an application server and a Business Objects server with a connection
to the relational database that hosts the repository. Supervisor over the Web
relies on the Administration Server module that keeps a cache of the security
domain.
NOTE
More than one supervisor working on the same repository resources at the same
time from different desks can interfere with one another’s work without this being
immediately noticeable. Coordinate your work with other Business Objects
supervisors so that you do not work on the same resources at the same time.
What can you do with Supervisor over the Web?
Supervisor over the Web offers the following abilities:
• managing groups
You can create, move, delete, and rename groups
• managing users
You can create, rename, and delete users, assign and remove them from
groups, change passwords, and edit user properties
• managing many users at the same time
You can edit user properties, add users, remove, and delete multiple users in
groups.
All changes performed in the Supervisor over the Web are immediately taken into
account in the repository and in the Administration Server cache.
What is Supervisor over the Web?
Page 16

16 Supervisor’s Guide: Using Supervisor over the Web
What you cannot do with Supervisor over the Web
You cannot do the following with Supervisor over the Web:
• create repositories
• manage resources, categories, Broadcast Agents, and security commands
• perform scan, compact, and repair operations
• import or export users or groups
You must use Supervisor to perform these operations.
Who can use Supervisor over the Web?
Any user authorized to access Supervisor can access Supervisor over the Web.
This includes users with the following profiles:
• General supervisor
• Supervisor
• Supervisor-designer
• Versatile with supervisor rights
Security commands for Supervisor over the Web
Security commands control the actions performed using Supervisor and
Supervisor over the Web. A general supervisor can allow supervisors to perform
some tasks but not others, for example, a supervisor that can create users but
not delete them.
You need to use Supervisor to manage security command settings, as they are
not available via Supervisor over the Web.
To use Supervisor over the Web, users must have certain Supervisor security
commands enabled. These commands are described below.
Getting Started
!
!
Security command family: configuration
! !
I want the supervisor to... I enable Security Command...
Change a existing user’s profile or assigning
the profile of a new user
Change Profile
Page 17
Supervisor’s Guide: Using Supervisor over the Web 17
!
!
Security command family: tools
! !
I want the supervisor to... I enable Security Command...
Change his or her own password, and those
Change Password
of the users managed
!
!
Security command family: user and group
! !
I want the supervisor to... I enable Security Command(s)...
Add an instance of a user to a group Add to Group
Create a new group Create Group
Create a new user Create User
Delete a group Delete Group
Delete a user Delete User
Disable or enable a user Disable/Enable User
Edit the properties of a user or group Edit User/Group Properties
Remove user instances from groups Remove User from Group
Rename a user or group Rename User/Group
Move a group Add to Group and Remove User from
Group
NOTE
These security commands are enabled for general supervisors by default.
For more information about security commands, refer to the
What is Supervisor over the Web?
Supervisor’s Guide.
Page 18

18 Supervisor’s Guide: Using Supervisor over the Web
Installing and configuring Supervisor over the Web
You need to have a licence for Supervisor to be able to install and run Supervisor
over the Web.
Supervisor over the Web is supported in a JSP environment and requires an
application server and a Business Objects server.
NOTE
You should have the following guides close by for reference:
Installation and Configuration for UNIX
•
or
Installation and Configuration for Windows
• Supervisor’s Guide
• the installation and configuration documentation for the application server
• the readme for Business Objects product suite
• for deployment information, see, depending on your platform,
Business Objects Deployment under UNIX
Objects Deployment under Windows.
Setting Up Your
or Setting Up Your 3-tier Business
Getting Started
To install and configure the Supervisor over the Web files you need to com plete
the following steps:
1. Install the application and web servers.
You can find an up-to-date list of the application and web server versions
supported by Business Objects in the Products Availability Report (PAR) at
www.techsupport.businessobjects.com. To install the servers refer to the
installation documentation that accompanies them.
2. Install Supervisor over the Web with the Business Objects product suite.
Refer to the
Configuration Guide f or Windo ws, depending on your platform, for instructions.
3. Using Supervisor, create the Business Objects repository, if this has not
already been done.
You must use Supervisor because you cannot create a repository using
Supervisor over the Web.
Installation and Confi guration G uide for UNIX or the Installation and
Page 19

Supervisor’s Guide: Using Supervisor over the Web 19
4. Configure the appl ication and web servers for Supervisor over the Web using
the Configuration Tool.
5. Set the virtual directory that allows you to access Supervisor over the Web
through a browser.
For example, if you keep the default virtual directory proposed by the
Configuration Tool (wsupervisor), you'll access the Supervisor over the Web
through the URL:
http://<hostname>:<portnumber>/wsupervisor
or
https://<hostname>:<portnumber>/wsupervisor (only if you use
an SSL web server)
When configuration is complete, this link provides access to Supervisor over
the Web.
For complete configuration instructions, see the
Guide for UNIX or the Installation and Configuration Guide for Windows,
Installation and Configuration
depending on your platform.
Installing and configuring Supervisor over the Web
Page 20
20 Supervisor’s Guide: Using Supervisor over the Web
Running Supervisor over the Web
Once you have installed and configured Supervisor over the Web, you need to
do the following to access Supervisor over the Web
1. Start the application and web servers.
For information on configuring and starting the application server, see the
Installation and Configuration Guide for UNIX or the Installation and
Configuration Guide for Windows, depending on your platform.
2. Start the Business Objects server.
3. If this is the first time you are running Supervisor over the Web, use the
Business Objects Administration Console to enable t he following modu les in
your cluster:
- Administration Server
- Login Server
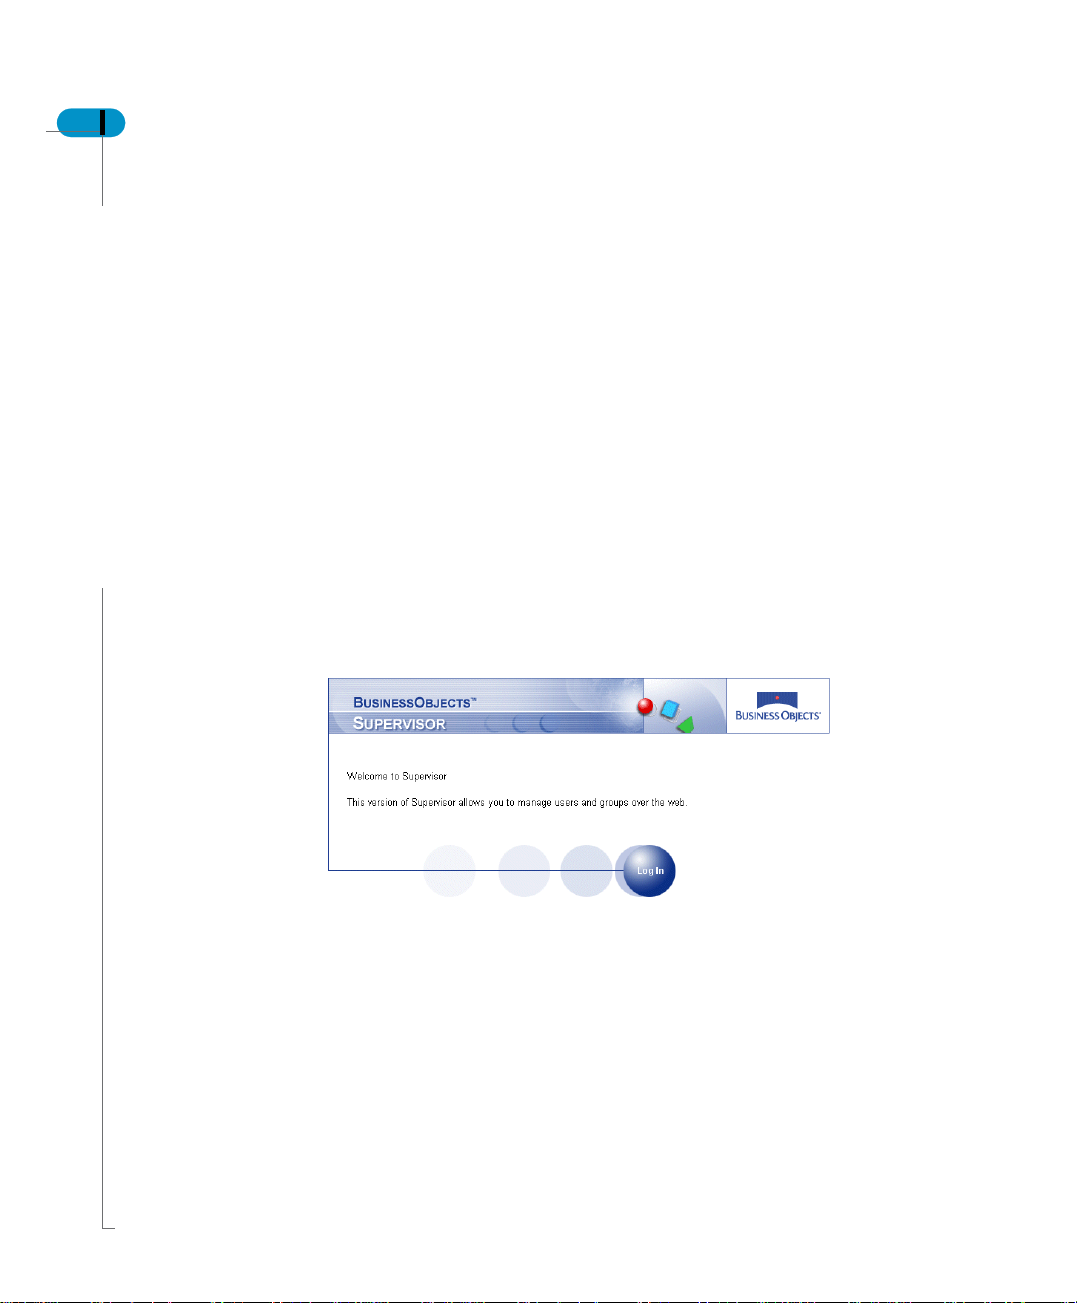
4. In a browser, go to the Supervisor over the Web virtual directory created using
the Configuration Tool. It should have the following format:
http://<hostname>:<portnumber>/wsupervisor
The login page for Supervisor over the Web appears.
Getting Started
Page 21
Supervisor’s Guide: Using Supervisor over the Web 21
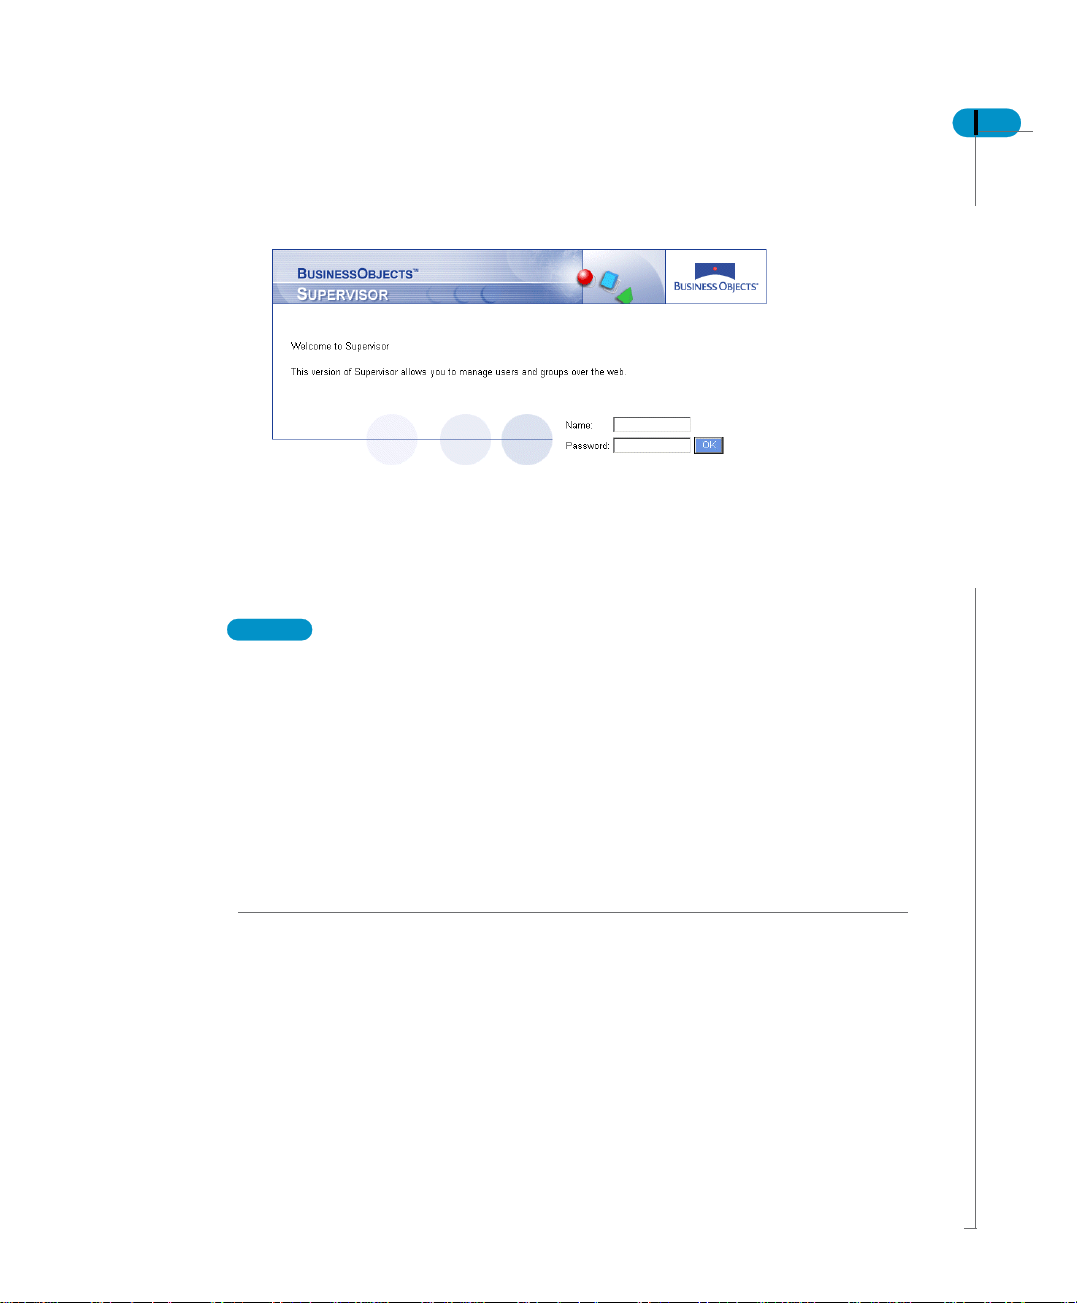
5. Click Log In.
6. Enter your user name and password.
If you have the supervisor profile, only the groups to which you belong as a
supervisor, and their subgroups, appear in the subgroup tree. General
supervisors belong to the repository root group and can therefore see all
groups and users.
NOTE
If your login fails, remember that:
• If the Change password at first login option is activated in your user
properties, you need to go first to another tool, for example BusinessObjects
or Supervisor, to change your password.
• If a timestamp is applied to you or your group, you cannot log in to Supervisor
over the Web outside the timestamp period(s).
• If the amount of your incorrect password entries exceeds the maximum tries
authorized, your password is disabled. You need to contact another general
supervisor to get your password enabled.
For information on starting the Business Objects server or enabling modu les, refer
System Administ r ator’s Guide for UNIX or System Administrat or’s Guide for
to the
Windows, depending on your platform.
Running Supervisor over the Web
Page 22
22 Supervisor’s Guide: Using Supervisor over the Web
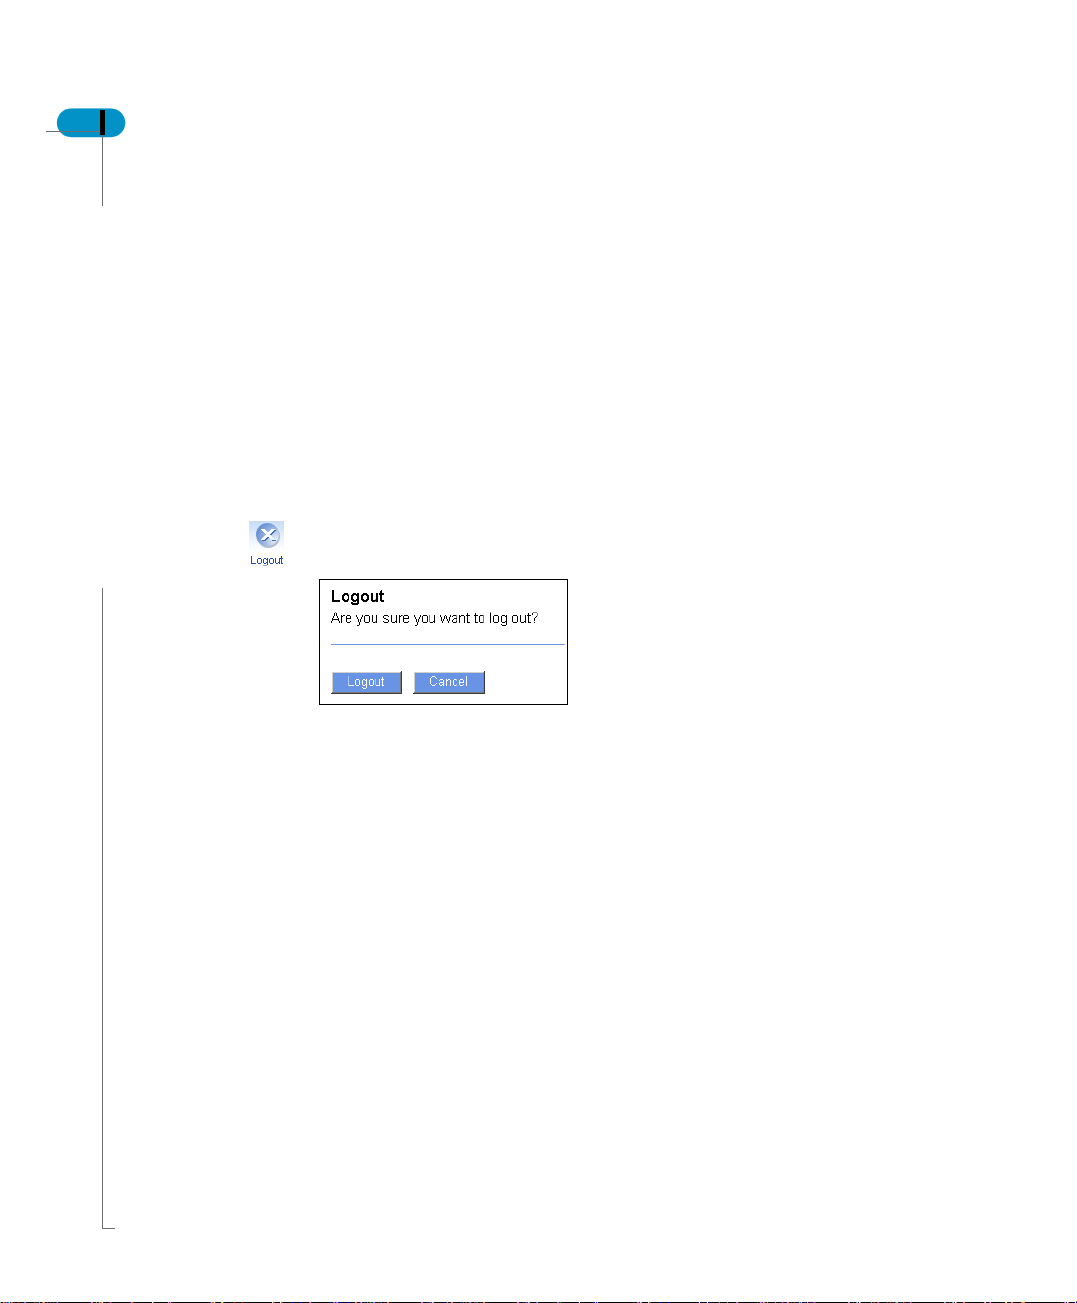
Logging out of Supervisor over the Web
When you have finished using Supervisor over the Web, log out of the product
instead of just closing your browser. This enables the Login Server to be
refreshed with the changes that you performed.
You log out of Supervisor over the Web by clicking the Logout button in the
Supervisor over the Web toolbar.
If you leave Supervisor over the Web inactive longer than the maximum time
period defined by the Administration Server’s Client Session Timeout parameter,
your session is closed automatically, and you must log in again. This parameter
can only be modified in the Administrative Console.
To log out:
1. Click Logout in the Supervisor over the Web toolbar.
A confirmation window appears.
Getting Started
2. Click Logout.
The Login page appears. You have logged out.
If you decide not to log out, click Cancel.
Page 23

Using the online help
The Supervisor over the Web online help provides you with a description of
Supervisor over the Web and complete instructions for using the product.
To access the Supervisor over the Web online help, click Help on the Supervisor
over the Web toolbar. The Supervisor over the Web Online Help page appears.
The navigation frame is resizable, and consists of:
• an expandable and collapsible table of contents
• a multi-level index with keyword search
• a search facility
Click individual help topics in the navigation frame to display their contents.
Where relevant, it also contains links to related help topics and to online guides
in PDF format.
Supervisor’s Guide: Using Supervisor over the Web 23
Using the online help
Page 24

24 Supervisor’s Guide: Using Supervisor over the Web
Getting Started
Page 25

Managing Groups
2
chapter
Page 26

26 Supervisor’s Guide: Using Supervisor over the Web
Overview
Supervisor over the Web allows you to manage groups by:
• Using the Group Management pane
• Adding a user
• Creating a new group
• Renaming a group
• Moving a group
• Deleting a group
Managing Groups
Page 27

Supervisor’s Guide: Using Supervisor over the Web 27
Using the Group Management pane
When you log in to Supervisor over the Web, the Group Management pane's
subgroup tree shows the groups to which you belong as a supervisor and their
subgroups. If you are a general supervisor, it shows the repository root group as
the current group. When you select a subgroup, that group appears as the
current group.
up icon
current group level
current group
section
users in group
section
search options link
list sort bar
subgroup tree
The Group Management pane contains the following:
• up icon - takes you to the parent of the current group
• subgroup tree - contains links to the groups within the current group to which
you have access
• current group level - indicates the complete path of the current group in the
group hierarchy
• current group section - contains the actions that you can perform on the
current group
• users in group section - contains the actions that you can perform on one or
more users in the current group and its subgroups, the search options, and
the list of users in the group and its subgroups with a list sort bar. For more
information on the user profiles go to Understanding user profiles on page 41.
• search options link - allows you to show the search options.
• list sort bar - allows you to sort the users by user name, group name, user
profile, and select or unselect all users.
Using the Group Management pane
Page 28

28 Supervisor’s Guide: Using Supervisor over the Web
NOTE
You are not allowed to perform actions on:
• your own user instances. When your user instance appears in a user list, the
check box is not displayed.
• a general supervisor instance if you are not logged in as a general supervisor.
• a link that is inactive for one of the following reasons:
- the security commands that allow this action are disabled for your profile
- this action is not possible by design
Navigating in the subgroup tree
You can navigate in the subgroup tree by doing the following:
• To display a subgroup in the Group Management Pane, c lick its name. It then
becomes the current group.
• To return to the root group, click the root group name in the current group
level.
• To display the parent group of the current group, click the up icon.
Sorting users in the group management pane
To sort the list of users in the Users in group section of the Group Management
pane use the list sort bar.
sort by user
profile
Managing Groups
sort by user
name
current sort arrow
sort by user
group
list sort bar
Page 29

Supervisor’s Guide: Using Supervisor over the Web 29
!
!
Sorting user list by profile
! !
For information on profiles, refer to Understanding user profiles on page 41.
To sort users by profile:
1. Click the profile icon in the list sort bar.
A small, blue arrow appears next to the profile icon. This indicates that the list
of users is now sorted by user profile. The arrow points downward to indicate
that the sort order is descending.
The profile column is sorted in the following order:
- General supervisor
- Supervisor
- Designer
- Supervisor-designer
-User
-Versatile
Within each profile the list is sorted by user name, then group.
2. To sort the list in ascending order, click the arrow.
The list reappears with the arrow pointing upward to indicate that the sort
order is ascending.
!
!
Sorting user list by name
! !
To sort users by user name:
1. Click Users in the list sort bar.
The list is sorted in descending order. A small, blue arrow appears next to
Users. This indicates that the user list is now sorted by user name. The arrow
points downwards to indicate that the sort order is descending.
If a user has more than one user instance, they are sorted according to profile,
then group.
2. To sort the list in ascending order, click the blue arrow.
The list reappears with the arrow pointing upwards to indicate that the sort
order is ascending.
Using the Group Management pane
Page 30

30 Supervisor’s Guide: Using Supervisor over the Web
!
!
Sorting user list by group
! !
To sort users by group name:
1. Click Groups in the list sort bar.
The list is sorted in descending order. A small, blue arrow appears next to
Groups. This indicates that the user list is now sorted by group name. The
arrow points downwards to indicate that the sort order is descending.
Within each group, the list is sorted by profile, then user name.
2. To sort the list in ascending order, click the blue arrow.
The list reappears with the arrow pointing upwards to indicate that the sort
order is ascending.
Managing Groups
Page 31

Adding a user
A user can belong to more than one group. Each occurrence of the same user in
different groups is an "instance." Using Supervisor over the Web, you can add an
instance of an existing user to a group. A user added to a group inherits the rights
of that group.
To add an existing user to a group:
1. In the Current group section click Add user.
The Add user in group “<group name>” pane appears.
2. In the Enter user name box, type the name of an existing user that you want
to add to the group.
3. Select a profile from the Select profile list.
The profile selected for this user does not affect the user’s profile in other
groups.
4. Click OK to confirm, or Close to cancel the operation and return to the Group
Management pane.
5. To add more users the group, repeat steps 2 through 4.
6. To return to the Group Management pane after adding the new user(s), click
Close.
Supervisor’s Guide: Using Supervisor over the Web 31
NOTE
You cannot:
• select the General Supervisor profile using the Add user function
• add users from groups to which you do not have Supervisor rights
• if the Set Profile security command is disabled for your profile, select other
than the User profile
Adding a user
Page 32

32 Supervisor’s Guide: Using Supervisor over the Web
Creating a new group
The root group, which is created in the repository, represents your organization.
All other groups you create are subgroups of the root group.
To create a new group in a selected group:
1. In the Current group section click New group.
The Create new group in group “<group name>” pane appears.
2. In the Enter new group name box, type a name for the new group.
Group names are unique within a repository. No two groups may have the
same name.
3. Click OK to confirm, or Close to cancel the operation and return to the Group
Management pane.
4. To create more new groups, repeat steps 2 and 3.
5. To return to the Group Management pane click Close.
Managing Groups
Page 33

Renaming a group
To rename the current group:
1. In the Current group section click Rename.
The Rename group “<group name>” pane appears.
2. In the Enter new group name box, type the new name of the group.
Group names are unique within a repository. No two groups may have the
same name.
3. Click OK to confirm and return to the Group Management pane, or Close to
cancel the operation and return to the Group Management pane.
Supervisor’s Guide: Using Supervisor over the Web 33
Renaming a group
Page 34

34 Supervisor’s Guide: Using Supervisor over the Web
Moving a group
Using Supervisor over the Web, you can move a group if:
• it is not the root group
• you are a General Supervisor or the group is within your scope
To move a selected group:
1. In the Current group section click Move.
The Move group “<group name>” pane appears.
2. From the Se lect a new parent group list select the group to which you want
to move the current group.
3. Click OK to confirm and return to the Group Management pane, or Close to
cancel the operation and return to the Group Management pane.
Managing Groups
Page 35

Deleting a g rou p
Using Supervisor over the Web, you can delete a group if:
• it is not the root group
• you are a General Supervisor or the group is within your scope
• the group does not have a Broadcast Agent assigned to it
Broadcast Agents are assigned to groups as part of group properties, which
can only be managed with Supervisor, not Supervisor over the Web. Use
Supervisor to remove a Broadcast Agent from a group before deleting the
group.
To delete the current group:
1. In the Current group section click Delete.
The Delete group “<group name>” pane appears listing the number of users
that will be deleted or removed from the group.
Supervisor’s Guide: Using Supervisor over the Web 35
NOTE
If there is at least one other instance of a user in another group, the instance in
the deleted group is removed, but the user is not deleted from the repository. If
the user belongs only to the deleted group, then the user is deleted from the
repository.
2. Click OK to confirm and return to the Group Management pane, or Close to
cancel the operation and return to the Group Management pane.
Deleting a group
Page 36

36 Supervisor’s Guide: Using Supervisor over the Web
Managing Groups
Page 37

Managing Users
3
chapter
Page 38

38 Supervisor’s Guide: Using Supervisor over the Web
Overview
Supervisor over the Web allows you to manage user accounts by:
• Using the User Management pane
• Creating a new user
• Adding to a group
• Editing user properties
• Renaming a user
• Deleting a user
• Removing a user from a group
Managing Users
Page 39

Supervisor’s Guide: Using Supervisor over the Web 39
Using the User Management pane
When you select a user in the Group Management pane, the User Management
pane appears.
The User Management pane contains the following sections:
• location of current user
Indicates the complete path of the current group in which the user instance is
located
• current user actions
This section contains actions that can be performed on the current user
instance
• groups
This section lists the groups to which the user belongs, and the user’s profile
in each group
• password & security
This section contains the properties for the user password and other access
security options
location of current
user
current user actions
the groups to which
the user belongs
the user’s
password and
security properties
Using the User Management pane
Page 40

40 Supervisor’s Guide: Using Supervisor over the Web
NOTE
• The User Management pane is available only for users within your scope.
• If the User Management pane is for your own instance:
- the OK button is not displayed
- the Rename, Add to Group, Remove, and Delete links are not active
- the properties displayed cannot be changed
• If you need to edit your own general supervisor user instance, you need to log
in as a different general supervisor, although some parameters are
automatically set for a general supervisor instance and cannot be changed.
• You are not allowed to perform an action for a link that is not active for one of
the following reasons:
- the security commands that allow this action are disabled for your profile
- this action is not possible by design
- it is your own user instance
Managing Users
Page 41

Understanding user profiles
Supervisor and Supervisor over the Web offer several user profiles. The user
profile determines what products a user can use:
• General supervisor (all products)
• Supervisor (all products but Designer)
• Designer (all products but Supervisor and Supervisor over the Web)
• Supervisor-designer (all products)
• User (all products but Designer, Supervisor, and Supervisor over the Web)
• Versatile (configurable)
You assign these profiles in Supervisor and Supervisor over the Web to reflect
the needs of the users. The profiles are described below.
!
!
General supervisor
! !
The general supervisor is the primary system administrator. A general supervisor
has all permissions in its security domain.
A general supervisor can:
• create user groups and any type of user, including other general supervisors
• manage user accounts and privileges, and resources in the entire repository
• use any feature in Business Objects products
Supervisor’s Guide: Using Supervisor over the Web 41
!
!
Supervisor
! !
The supervisor is responsible for user administration within its groups and
subgroups. A supervisor can:
• create users with any profile except general supervisor
• create user groups
• administer user accounts and privileges
• manage resources in its groups
By default, the supervisor can use any feature of all Business Objects products
except Designer, but a general supervisor or supervisor can limit a supervisor’s
rights to user or resource management features.
!
!
Designer
! !
The universe designer uses Designer to create and maintain universes for a
particular group of users. A universe designer can distribute a universe as a file
through the file system, or by exporting it to a repository.
Understanding user profiles
Page 42

42 Supervisor’s Guide: Using Supervisor over the Web
!
!
Supervisor-Designer
! !
This user has all the rights of the supervisor and the universe designer combined.
!
!
User
! !
Users use the Business Objects end-user products to view, query, report and
analyze data. They may also use the optional Reporter and Explorer modules for
multidimensional analysis. End users can produce documents containing data
from one or more data sources. Users with this profile do not have access to
Designer, Supervisor, or Supervisor over the Web.
!
!
Versatile
! !
You can configure the rights of a versatile user who can, for example, have
access to WebIntelligence, but not BusinessObjects. This user can be given
access to any combination of Business Objects products.
NOTE
The profile icon of all of a user’s instances appear with a red X when a user:
• is disabled either by another user with the right to disable users.
• has a failed login after a number of unsuccessful password entries higher than
the maximal authorized.
Managing Users
Page 43

Creating a new user
A user can belong to more than one group. Each occurrence of the same user in
different groups is an ‘instance’.
When the first instance is created for a user, it has the following default
parameters:
Parameter Setting
Password <username>
Disable login Off
Enable offline login On
Enable password modification On
Object security le vel Private
Change password at first login Off
Password validity Off
Identification strategy Full Checking
To edit these parameters after creating a user, click on the user instance link. The
User Management pane for that instance opens.
Supervisor’s Guide: Using Supervisor over the Web 43
Creating a new user
Page 44

44 Supervisor’s Guide: Using Supervisor over the Web
To create a new user:
1. Usi ng the subgroup tree, navigate to the group in which you want to create a
user.
For information about the Group Management pane, refer to Using the Group
Management pane on page 27.
2. Click New user in the Current group section.
The Create new user in group “<group name>” pane appears.
3. In the Enter user name box, type the name of the new user.
User names are unique within the repository. No two users may have the
same name. If you type the name of an existing user, an error message
appears. In this case, enter a different name for the user and click OK. If you
meant to add an existing user with this name to the group, you can use Add
user in the Group Management pane or Add to group in the User
Management pane.
4. Select a profile from the Select profile list.
If the Set Profile security command is disabled for your profile, you can only
assign the User profile.
You cannot assign the general supervisor profile unless:
- you are logged in as a general supervisor
- the new user is created in the repository root group
5. Click OK to create the new user, or Close to return to the Group Management
pane.
6. To create other users, repeat steps 2 through 4, or click Close to ret urn to the
Group Management pane.
Managing Users
Page 45

Adding to a group
Using Supervisor over the Web, you can use Add to group to add a user to a
group if:
• the group or user is within your scope
• the instance is not your own
• you are trying to add a user that is not a General Supervisor
For information on adding more than one user from a group at a time, refer to
Adding multiple users to a group on page 63.
To add a user to a group:
1. In the User Management pane for the current user, click Add to group.
The Add user “<user name>” to group pane appears.
Supervisor’s Guide: Using Supervisor over the Web 45
2. From the Select a group list, select the group to which you want to add the
user.
3. Select a profile from the Select profile list.
If the Set Profile security command is disabled for your profile, you can only
assign the User profile.
The General Supervisor profile is not available for this action. This profile can
only be assigned to a user who has only one instance and is at the repository
root level.
4. Click OK to add the user to the group and return to the User Management
pane, or Close to cancel the operation and return to the User Management
pane.
Adding to a group
Page 46

46 Supervisor’s Guide: Using Supervisor over the Web
Editing user properties
Using Supervisor over the Web you can perform the following actions on user
properties:
• Changing a user profile
• Changing login properties
• Setting the object security level
• Setting the identification strategy
• Changing password settings
NOTE
You cannot change:
• properties for your own instance.
• the following parameters for general supervisor instances:
- Disable Login (you can only set it to Off)
- Enable Offline Login
- Enable Password Modification
- Object Security Level
Managing Users
Page 47

Changing a user profile
To change the profile of a user:
1. Select the user instance in the Group Management pane.
The User Management pane appears for that user.
2. In the Groups section, select the profile that you want to assign to that user
instance in the correct group.
If the Set Profile security command is disabled for your profile, you can only
assign the User profile.
You cannot assign the general supervisor profile unless:
- you are logged in as a general supervisor
- the user has only one instance and this instance is located in the repository
root group
3. Click OK to confirm.
The Group Management pane reappears.
NOTE
When you set a profile to general supervisor, the following parameters are
automatically changed:
• Disable Login is set to Off
• Enable Offline Login is set to On
• Enable Password Modification is set to On
• Object Security Level is set to Private
Supervisor’s Guide: Using Supervisor over the Web 47
Editing user properties
Page 48

48 Supervisor’s Guide: Using Supervisor over the Web
Changing login properties
The Disable logi n and Enable offline login options are in the Password & Securi ty
section of the User Management pane.
!
!
Enabling and disabling login
! !
The Disable login property grants or denies permission to a user to log in.
1. Select the user instance in the Group Management pane.
The User Management pane appears for that user.
2. In the Password & Security section, click On or Off for Disable login.
3. Click OK to confirm.
If you disabled the login, user’s profile icon in the Group Management pane
appears with a red X. If you enabled the user’s profile icon, the red X
disappears.
!
!
Enabling and disabling offline login
! !
The Enable offline login property grants or denies permission to a user to log in
without a connection to the repository.
1. Select the user instance in the Group Management pane.
The User Management pane appears for that user.
2. In the Password & Security section, click On or Off for Enable offline login.
3. Click OK to confirm.
Managing Users
Page 49

Setting the object security level
Objects are components in Business Objects universes that make data
accessible to users. Their security level is defined by the designers who create
them. By default, their security level is Public, meaning any user can work with
them. If they are given a higher security level, only users granted the
corresponding Object Security level have access to them. The levels are, from
highest to lowest:
• private
• confidential
• restricted
• controlled
• public
For more information on object security levels, refer to the
To set the object security level for a user:
1. Select the user instance in the Group Management pane.
The User Management pane appears for that user.
2. In the Password & Security section, select a level from the Object security
level list.
3. Click OK to confirm.
Supervisor’s Guide: Using Supervisor over the Web 49
Designer’s Guide.
Changing password settings
Supervisor over the Web allows you to edit the password settings for a user.
!
!
Allowing users to modify their password
! !
To allow users to modify their password:
1. Select the user instance in the Group Management pane.
The User Management pane appears for that user.
2. In the Password & Security section, click On or Off for Enable password
modification.
3. Click OK to confirm.
Editing user properties
Page 50

50 Supervisor’s Guide: Using Supervisor over the Web
!
!
Forcing users to change their password at the first login
! !
To force users to change their password at their first login:
1. Select the user instance in the Group Management pane.
The User Management pane appears for that user.
2. In the Password & Security section, click On or Off for Change password at
first login.
3. Click OK to confirm.
!
!
Forcing users to change their password at set periods
! !
If you want to force users to change their password after a specified number of
days has elapsed:
1. Select the user instance in the Group Management pane.
The User Management pane appears for that user.
2. In the Password & Security section, click On for Password validity.
The Password validity box and the Periodic action options appear.
3. In the Password validity box, type the desired number of days.
The password becomes invalid after the number of days has elapsed.
4. To activate Periodic action, click On.
With this option selected, the password validity period you entered is
applicable each time the user changes the password. When Password
validity is On and Periodic action is Off, the password validity period only
applies once.
5. Click OK to confirm.
Managing Users
Page 51

Setting the identification strategy
Supervisor over the Web allows you to set the identification, or password
checking, strategy for a user.
To control the password checking strategy associated with a user:
1. Select the user instance in the Group Management pane.
The User Management pane appears for that user.
2. In the Password & Security section, select an option from the Identification
Strategy list.
Option Description
Full Checking The default option. The Business Objects repository
always checks the validity of the user password.
No Password
Checking
3. Click OK to confirm.
Removes all password controls for this user as long as
the option is selected.
Supervisor’s Guide: Using Supervisor over the Web 51
Editing user properties
Page 52

52 Supervisor’s Guide: Using Supervisor over the Web
Changing a password
To change a password:
1. Select the user instance in the Group Management pane.
The User Management pane appears for that user.
2. Click Change password.
The Change password for user “<user name>” pane appears.
3. In the Enter new password box, type the new password.
4. In the Confirm new password box, type the new password again.
5. Click OK to confirm and return to the User Management pane, or Close to
cancel the operation and return to the User Management pane.
Managing Users
Page 53

Renaming a user
To rename a user:
1. Select the user instance in the Group Management pane.
The User Management pane appears for that user.
1. Click Rename.
The Rename user “<user name>” pane appears.
2. In the Enter new user name box, type a new name for the user. This name
must not already exist in the repository.
3. Click OK to confirm and return to the User Management pane, or Close to
cancel the operation and return to the User Management pane.
NOTE
You cannot rename your own instances.
Supervisor’s Guide: Using Supervisor over the Web 53
Renaming a user
Page 54

54 Supervisor’s Guide: Using Supervisor over the Web
Deleting a user
You can delete the user permanently from the repository, which removes all
instances of the user in all groups, and also deletes from the repository any
documents that have been sent only to that user.
For information on deleting more than one user at a time, refer to Deleting
multiple users on page 65.
To delete all instances of a user:
1. In the User Management pane for the user you want to delete, click Delete.
The Delete user “<user name>” pane appears indicating the number of
instances of the user that will be deleted.
2. Click OK to confirm and return to the Group Management pane, or Close to
cancel the operation and return to the User Management pane.
Managing Users
NOTE
You cannot delete your own instances.
Page 55

Supervisor’s Guide: Using Supervisor over the Web 55
Removing a user from a group
When a user belongs to more than one group, the instance of the user in any one
group can be removed without permanently deleting the user from the repository.
You cannot remove the last instance of a user using Remove. You need to delete
the user using the process Deleting a user on page 54.
For information on removing more than one user from a group at a time, refer to
Removing multiple users from a group on page 64.
To remove a user from a group:
1. In the Group Maintenance pane for the group from which the user is to be
removed, click on the user instance.
The User Management pane for the user appears.
NOTE
It is important to access users through the group from which they need to be
removed. The Remove action is tied to the location of the user instance.
2. Click Remove.
The Remove user “<user name>” from group “<group name>” pane appears.
3. Click OK to confirm and return to the Group Management pane, or Close to
cancel the operation and return to the User Management pane.
NOTE
You cannot remove your own instance from a group.
Removing a user from a group
Page 56

56 Supervisor’s Guide: Using Supervisor over the Web
Managing Users
Page 57

Managing Multiple Users
4
chapter
Page 58

58 Supervisor’s Guide: Using Supervisor over the Web
Overview
Supervisor over the Web allows you to change the settings for more than one
user in a group at a time. The actions you can perform on multiple users in a
group include:
• Selecting users
• Editing multiple user properties
• Adding multiple users to a group
• Removing multiple users from a group
• Deleting multiple users
• Using the search options
Managing Multiple Users
Page 59

Selecting users
The Users in group section in the Group Management pane displays the user
instances in the current group and its subgroup.
To perform actions on users, you need to select their instances. Click the
checkbox next to the instances in the Users in group section.
To select or unselect all instances, click the checkbox in the list sort bar.
TIP
• To narrow the list of users within a large group and its subgroup(s) in the
Users in group section of the Group Management pane, use the search
options. For example, you may want to find all disabled users within a group
and its subgroups. To do a search, refer to Using the search options on
page 66.
• To organize a list to find specific users whose properties you want to edit, for
example all of the users with a Supervisor profile within a group, you can use
the list sort option on the profiles column. For information on the list sort
options, refer to Sorting users in the group management pane on page 28.
Supervisor’s Guide: Using Supervisor over the Web 59
Once you have selected the users, you can perform any of the operations
described in the following sections.
Selecting users
Page 60

60 Supervisor’s Guide: Using Supervisor over the Web
NOTE
You cannot:
• select your own instance.
• select a general supervisor instance if you are not logged in as a general
supervisor.
• perform an action if the security commands that allow this action are disabled
for your profile.
Managing Multiple Users
Page 61

Supervisor’s Guide: Using Supervisor over the Web 61
Editing multiple user properties
After selecting multiple users in the Users in group section of the Group
Management pane, you can edit their properties.
1. In the Users in group section of the Group Management pane, select the
users whose properties you want to edit.
For information on selecting users, see Selecting users on page 59.
2. Click Edit.
The Edit selected users pane appears with a list of the selected users at the
top. By default, the settings are set to <Unchanged>. Descriptions of the
Password & Security settings are available in Editing user properties on
page 46. You need to leave the status as <Unchanged> for any parameters
that you do not want to change.
3. Select the actions that you want to perform on the selected users:
- To change the profile, select a profile that will be applied to the selected
users in the current group from the Profile list.
If the Set Profile security command is disabled for your profile , you can only
assign the User profile.
You cannot assign the General Supervisor profile unless you are logged in
as a General Supervisor and the users are in the repository root group.
Editing multiple user properties
Page 62

62 Supervisor’s Guide: Using Supervisor over the Web
- To disable login, select On from the Disable login list. To enable the login,
select Off from the list.
- To enable offline mode, select On from the Enable offline login list. To
disable this option, select Off from the list.
- To enable password modification, select On from the Enable password
modification list. To disable this option, select Off from the list.
- To set the object security level, select a level from the Object security level
list.
For information on object security levels, see Setting the object security level
on page 49.
- To force the selected users to change their passwords at the first login,
select On from the Change password at first login list. To disable this option,
select Off from the list.
- To activate the password validity option that forces the selected users to
change their passwords at least once, select On from the Password validity
list. To disable this option, select Off from the list.
- If you activated the password validity option, you m ust set the period of time
that must pass before the selected users are required to change their
passwords. In the Password validity box type a number of days.
- To require a password change each time the password validity period
recurs, select On from the Periodic action list. To disable this option, select
Off from the list.
- To change the identification strategy, select an option from the
Identification strategy list.
4. Click OK to confirm and return to the Group Management pane, or Close to
cancel the operation and return to the Group Management pane.
Managing Multiple Users
Page 63

Supervisor’s Guide: Using Supervisor over the Web 63
Adding multiple users to a group
To add multiple users to a group:
1. In the Users in group section of the Group Management pane, select the
users that you want to add to a group.
For information on selecting users, see Selecting users on page 59.
2. Click Add to group.
The Add selected users to group pane appears, showing the list of selected
users.
3. Select a group from the Select a group list.
4. Select a profile from the Select profile list.
NOTE
You cannot assign the General Supervisor profile using the Add to group action.
If the Set Profile security command is disabled for your profile, you can only
assign the User profile.
5. Click OK to confirm and return to the Group Management pane, or Close to
cancel the operation and return to the Group Management pane.
Adding multiple users to a group
Page 64

64 Supervisor’s Guide: Using Supervisor over the Web
Removing multiple users from a group
To remove more than one user from a group:
1. Navigate to the group that contains the user instances you want to remove.
2. In the Users in group section of the Group Management pane, select the user
instances to be removed.
For information on selecting users, see Selecting users on page 59.
3. Click Remove.
The Remove selected users from group pane appears with a list of selected
instances that you want to remove.
4. Click OK to confirm and return to the Group Management pane, or Close to
cancel the operation and return to the Group Management pane.
Managing Multiple Users
Page 65

Deleting m ulti ple u se rs
This operation deletes ALL instances of the selected users in the repository. If
you are unsure of the affiliations of any of the users, remove them from the
current group instead. See Removing a user from a group on page 55.
To delete more than one user:
1. In the Users in group section of the Group Management pane, select the
users you want to delete.
For information on selecting users, see Selecting users on page 59.
2. Click Delete.
The Delete selected users pane appears with a list of the selected users.
Supervisor’s Guide: Using Supervisor over the Web 65
3. Click OK to confirm and return to the Group Management pane, or Close to
cancel the operation and return to the Group Management pane.
Deleting multiple users
Page 66

66 Supervisor’s Guide: Using Supervisor over the Web
Using the search options
By default, the Group Management pane displays users in the current group. Use
the search options to narrow this list or search for a user in the current group and
its subgroups.
To use these options, click Show search options in the Users in group section
of the Group Management pane. Search options are displayed and the Show
search options link toggles to Hide search options.
To hide the search options, click Hide search options.
Searching by name or wildcard
To search for users by name or wildcard:
1. In the box next to the Search button do one of the following:
- to search by name, type the name
- to use a wildcard, use the following formats:
2. Click Search.
Managing Multiple Users
To search for... Use...
Any name that contains a letter or list of
letters in the current group
Any name that begins with a letter or list of
letters in the current group
Any name that ends with a letter or list of
letters in the current group
All names in the current group *
The list is refreshed to display only those users that match the criteria of your
search.
*<letter or list of letters>*
<letter or list of letters>*
*<letter or list of letters>
Page 67

Searching by subgroup
To search for users in the parent group as well as the subgroups:
1. In the search options, select Include subgroups.
2. In the box next to the Search button, type a name or wildcard. For more
information about this type of search refer to Searching by name or wildcard
on page 66
3. Click Search.
The list is refreshed to display users in the current group and its subgroups.
Searching for disabled users
To search for disabled users in the parent group:
1. In the search options, select Disabled only.
2. In the box next to the Search button, type a name or wildcard. For more
information about this type of search refer to Searching by name or wildcard
on page 66
3. Click Search.
The list is refreshed to display only disabled users.
NOTE
You can combine search options. For example, you can search for disabled
users across subgroups, or for disabled users with a user name beginning with C.
Supervisor’s Guide: Using Supervisor over the Web 67
Using the search options
Page 68

68 Supervisor’s Guide: Using Supervisor over the Web
Managing Multiple Users
Page 69

Index
Supervisor’s Guide: Using Supervisor over the Web 69
A
adding a user to a group 31, 45
B
Business Objects
consulting services 9, 11
documentation 8
Documentation Supply St or e 7
support services 9
training services 9, 11
C
changing password 52
configuring
supervisor over the web 18
consultants
Business Objects 9
creating
group 32
user 43
customer support 9
D
deleting
group 35
multiple users 65
user 54
demo
materials 7
designer profile 41
Developer Suite 8, 10
disabled users
searching for 67
disabling
login 48
offline login mode 48
documentation
CD 7
feedback on 8
on the web 7
printed, ordering 7
roadmap 7
search 7
Documentation Supply St or e 7
E
editing
login properties 48
password settings 49
user properties 46
education see training
enabling
login 48
offline l ogin mode 48
F
feedback
on documentation 8
G
general supervisor
profile 41
group
adding a user to 31
adding multiple users 63
creatin g 32
deleting 35
moving 34
removing a user 55
removing multiple users 64
renaming 33
Index
Page 70

70 Supervisor’s Guide: Using Supervisor over the Web
group manage m ent pane
descript i on 27
using the list sort bar 28
H
help
online 23
I
identification strat egy 51
index
online 23
installing supervisor over the web 18
K
Knowledge Base 10
L
logging in 20
logging out 22
login
disablin g 48
enabling 48
login properties
changing 48
M
moving a group 34
multimedia
quick tours 8
multiple users
adding to a group 63
deleting 65
editing properties 61
removing from a group 64
selecting 59
O
object level secu rity 49
offline login mode
disabling 48
enabling 48
Online Customer Supp or t 9
P
password
changing 52
settings 49
periodic action 50
periodic validity 50
properties
editing for multiple users 61
login 48
user 46
R
removing
multip le users 6 4
renaming
groups 33
users 53
running Supervisor over th e Web 20
S
search
documentation 7
search options 66
searching
by name 66
by subgroup 67
by wildcard 66
for disabled users 67
security command s required 16
setting
identification strategy 51
object level security 49
sorting
using the list sort bar 28
subgroup
searching by 67
Index
Page 71

Supervisor’s Guide: Using Supervisor over the Web 71
supervisor
description 15
profile 41
restrictions 41
supervisor over the we b
configuring 18
installing 18
supervisor-designer profile 42
support
customer 9
T
Tips & Tricks 8
training
on Business Objects products 9
U
user
adding to a group 31, 45
creating 43
deleting 54
properties 46
removing from group 55
renaming 53
searching for 66
user profiles
designer 41
end user 42
general supervisor 41
supervisor 41
supervisor-design er 42
user 42
user properties
editing 46
using search options 66
W
web
customer support 9
getting documentation via 7
useful addresses 10
wildcard search 66
V
versatile user profile 42
Index
Page 72

72 Supervisor’s Guide: Using Supervisor over the Web
Index
 Loading...