

Page 1
Quick Start Guide
Microsoft Outlook 2013 looks different from previous versions, so we created
this guide to help you minimize the learning curve.
Make it yours
Customize Outlook. Choose different color schemes and different
backgrounds, and synchronize them with your other computers.
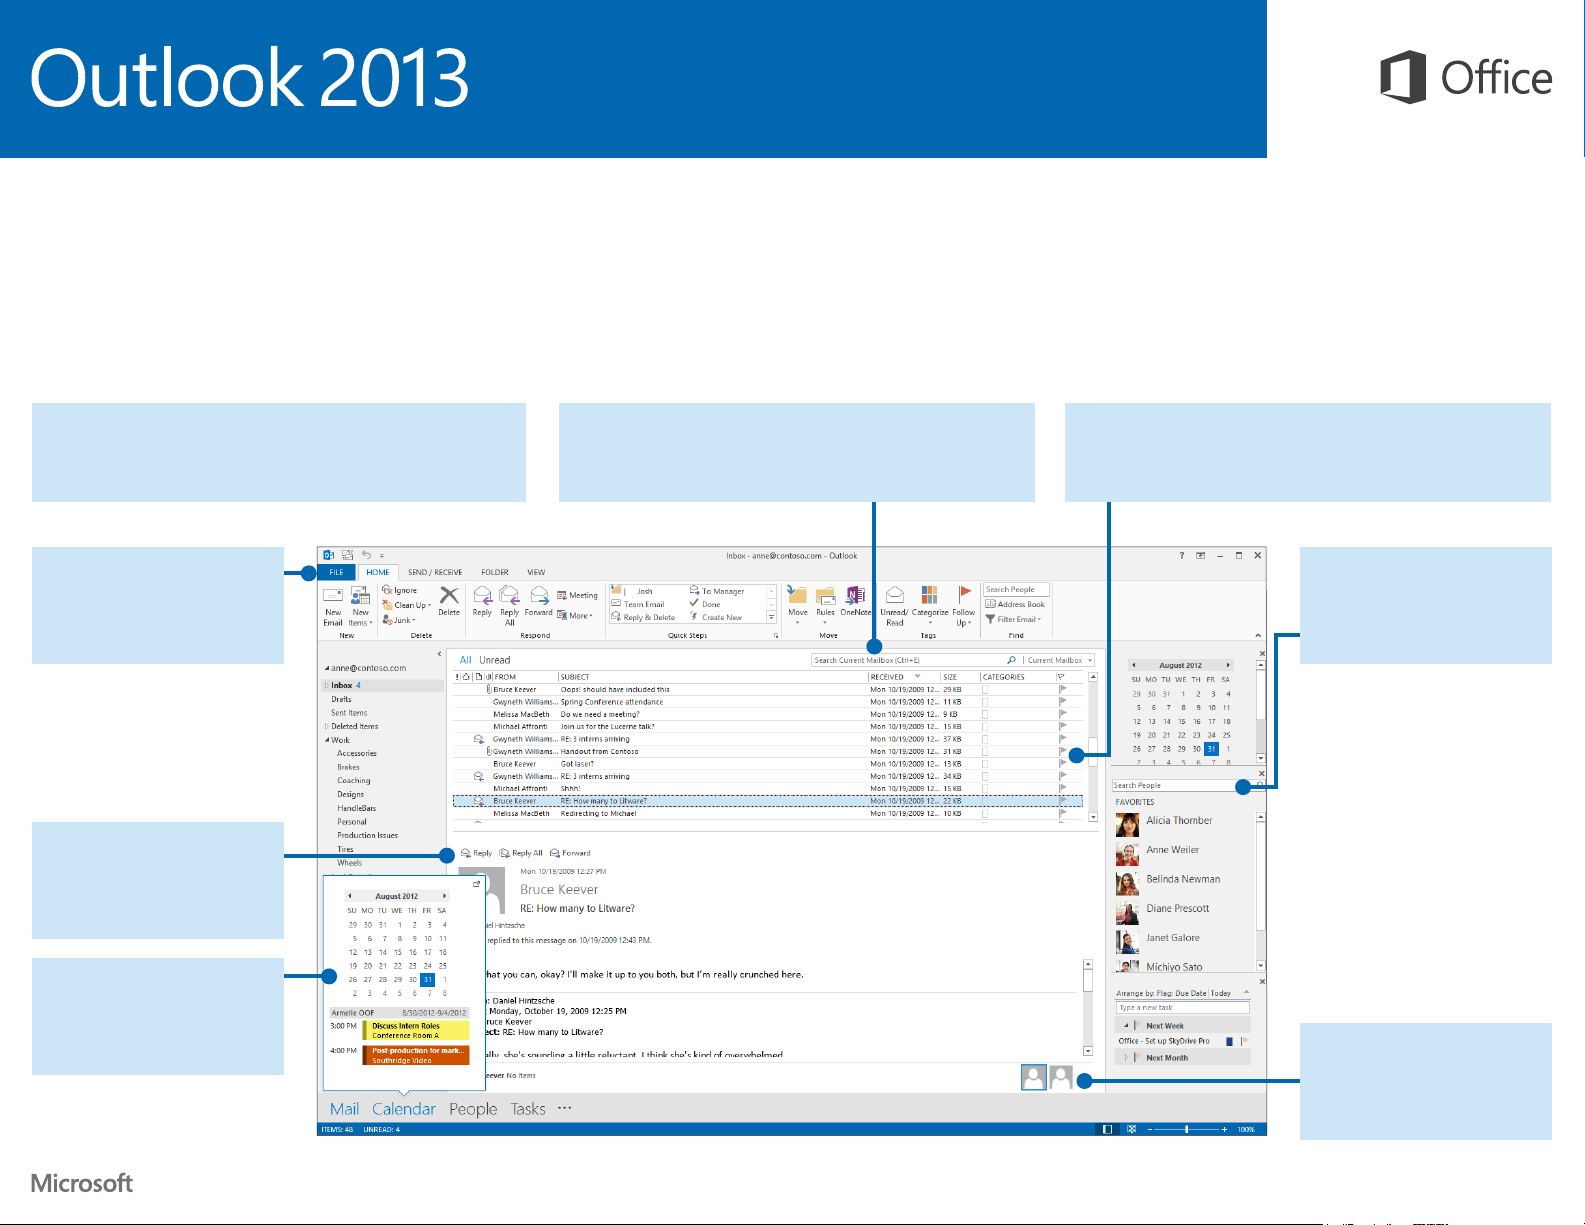
Backstage view
Click the File tab to open the
Backstage view, where you add
account and change settings.
Reply from the reading pane
Reply and Forward right from
the reading pane. Write a reply
in the reading pane, too.
Peek
See a quick view of your Calendar, People, and Tasks. Even see
upcoming appointments.
Search
You can search a folder, subfolders, even other mailboxes.
Manage message tasks in the Message List
Categorize, Flag, or Delete messages right where they live—in the
Message List.
Do more in the To-Do Bar
The To-Do Bar displays the date
navigator, your appointments,
people, and your task list.
People pane
See details about everyone in
the To, From, or Cc lines for
each message.
Page 2
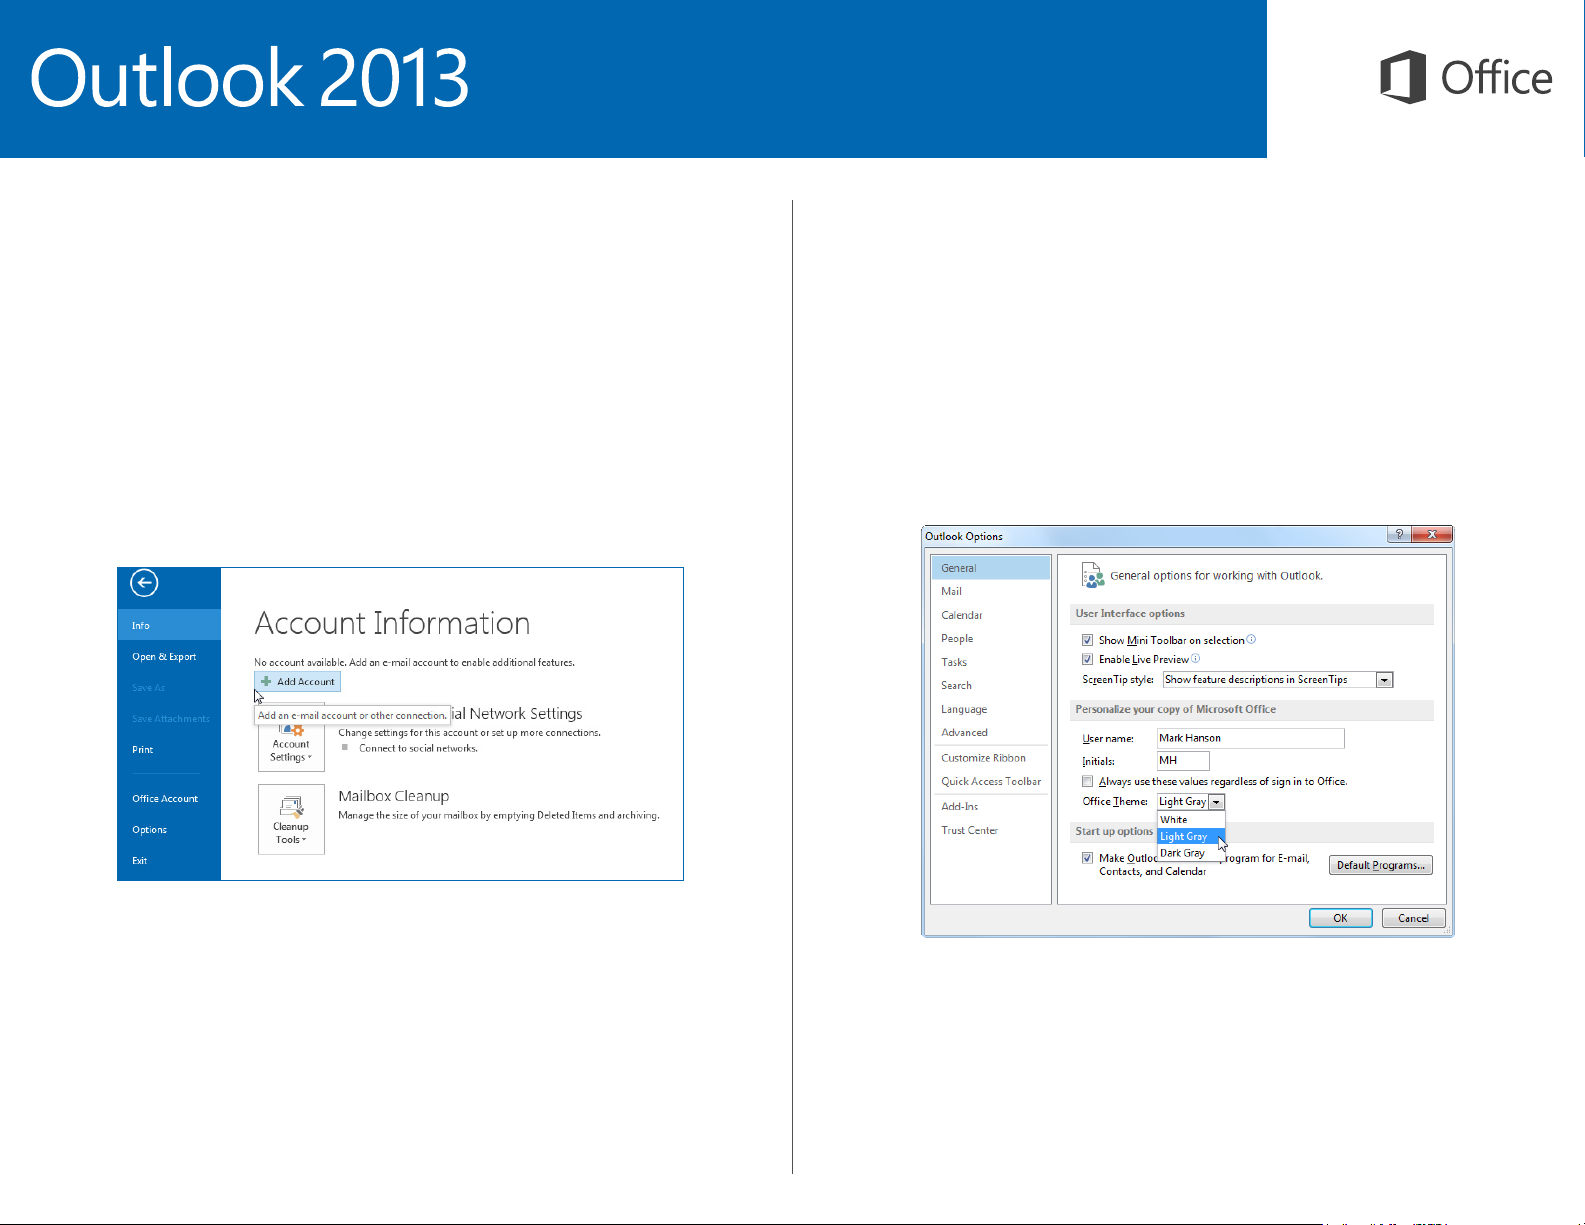
First things rst:
Change the Ofce Theme
Add your account
Before you can send or receive messages, you have to connect your email account.
If your company uses Microsoft Exchange, Outlook 2013 will attempt to set up your
email account for you.
If you use Internet-based email (such as Hotmail, Gmail, or Yahoo!), enter your name,
email address, and password to set up your account.
We’ve redesigned Ofce 2013 to provide a clean, uncluttered experience — like
a blank piece of paper. If you want to see the different areas of Outlook more
distinctly, you can change the Ofce Theme.
Use your File > Ofce Account settings to change the Ofce 2013 color scheme
for all of your computers, or use the Outlook Options to change the color scheme
on just this computer. You can choose from White, Light Gray, or Dark Gray.
Page 3

Things you might be looking for
Use the list below to nd some of the more common tools and commands in Outlook 2013.
To... Click... And then look in the...
Apply stationery or backgrounds to a message File Click File > Options > Mail > Stationery and Fonts. On the Personal
Stationery tab, click Theme.
Send automatic replies when you’re out of the ofce File Under Account Information, click Automatic Replies > Send
automatic replies, and then choose your options (this feature requires
a Microsoft Exchange Server account).
Insert a picture or clip art Insert From a new mail message, click Illustrations, and then click one of
the following: Pictures, Online Picture, Shapes, Smart Art, Chart,
or Screenshot.
Manage email messages by assigning rules Home In Mail view, click Move > Rules.
Insert a symbol or special character Insert From a new mail message, click Symbols > Symbol.
Add holidays to your calendar File Click Options > Calendar. Under Calendar options, click Add Holidays.
Share a calendar Home From the Calendar view, in the Share group, click E-mail Calendar >
Share Calendar (this feature requires a Microsoft Exchange Server
account), or Publish Online.
Page 4

Mail isn’t the half of it
Communication is important, but your time is important, too. Outlook 2013 has
updated how you manage your time, your people, and your tasks.
Schedule a Lync Meeting
Meet face-to-face or save yourself a trip by meeting online
with Lync 2013.
View other people’s calendars
Quickly see the best times to
schedule a meeting with others.
Plan for the weather
Glance at the forecast for your city and up to four others. When you
plan an out-of-town meeting, you’ll know what to pack.
Peek
Mouse over a meeting or an
appointment to see its details.
Page 5

Create an email signature
Automatically add a signature
To create a new email signature, do the following:
1. Click File > Options > Mail. Under Compose messages, click Signatures.
2. In the E-mail Signature tab, click New, and then type a name for the signature.
3. In the Edit signature box, type the text that you want to include in the signature,
then use the built-in tools to format it.
to messages
To automatically add a signature to new email messages, do the following:
1. From any view, click File > Options > Mail. Under Compose messages,
click Signatures.
2. Under Choose default signature, choose the signature to add to New
Messages. If you want, choose a different signature for Replies/forwards.
3. To manually add a signature to a new message, from a new message, on the
Message tab, in the Include group, click Signature, and then click the signature
that you want.
If you’ve already created a signature, you can copy it from one of your sent
messages and then paste it here.
 Loading...