

Page 1

Microsoft Outlook 2003
Basic Guide
Page 2

Table of Contents
Introduction ....................................................................................................... 2
Getting Help.................................................................................................... 2
loring Outlook ............................................................................................... 3
Exp
Drop-Down Menus............................................................................................ 3
Navigation Pane...............................................................................................
Folder Pane..................................................................................................... 7
Reading Pane .................................................................................................. 7
Toolbars ......................................................................................................... 8
Outlook Today ................................................................................................. 8
ng Email......................................................................................................... 9
Usi
Reading Email ................................................................................................. 9
Sending Email ................................................................................................. 11
Responding to Email......................................................................................... 13
Saving Email ................................................................................................... 13
Deleting Email ................................................................................................. 14
Managing Sent Email ........................................................................................ 14
Printing Email.................................................................................................. 14
ng Calendar.................................................................................................... 15
Usi
Calendar Views................................................................................................ 15
Understanding Calendar Items........................................................................... 16
Scheduling Calendar Items................................................................................ 16
Editing Calendar Items ..................................................................................... 18
Deleting Calendar Items.................................................................................... 18
Adding Holidays............................................................................................... 18
4
ng Contacts.................................................................................................... 19
Usi
Contacts View.................................................................................................. 19
Creating Contacts ............................................................................................ 19
Deleting a List or Contact .................................................................................. 21
Us
ing Tasks......................................................................................................... 22
Tasks View...................................................................................................... 22
Creating Tasks................................................................................................. 23
ing Journal...................................................................................................... 24
Us
Journal Views .................................................................................................. 24
Recording Journal Entries.................................................................................. 24
ing Notes ........................................................................................................ 26
Us
Appendix A: Symbols .......................................................................................... 27
Appendix B: Archives .......................................................................................... 30
1
Page 3
Microsoft Outlook is a desktop program in the Office suite. It is designed to assist you in manag ing
your ema
and share information.
This guide focuses on components of Outlook: Inbox, Calendar, Contacts, Tasks, Journal,
and Notes.
Getting Help
If you experience problems using Outlook
Office Assistant
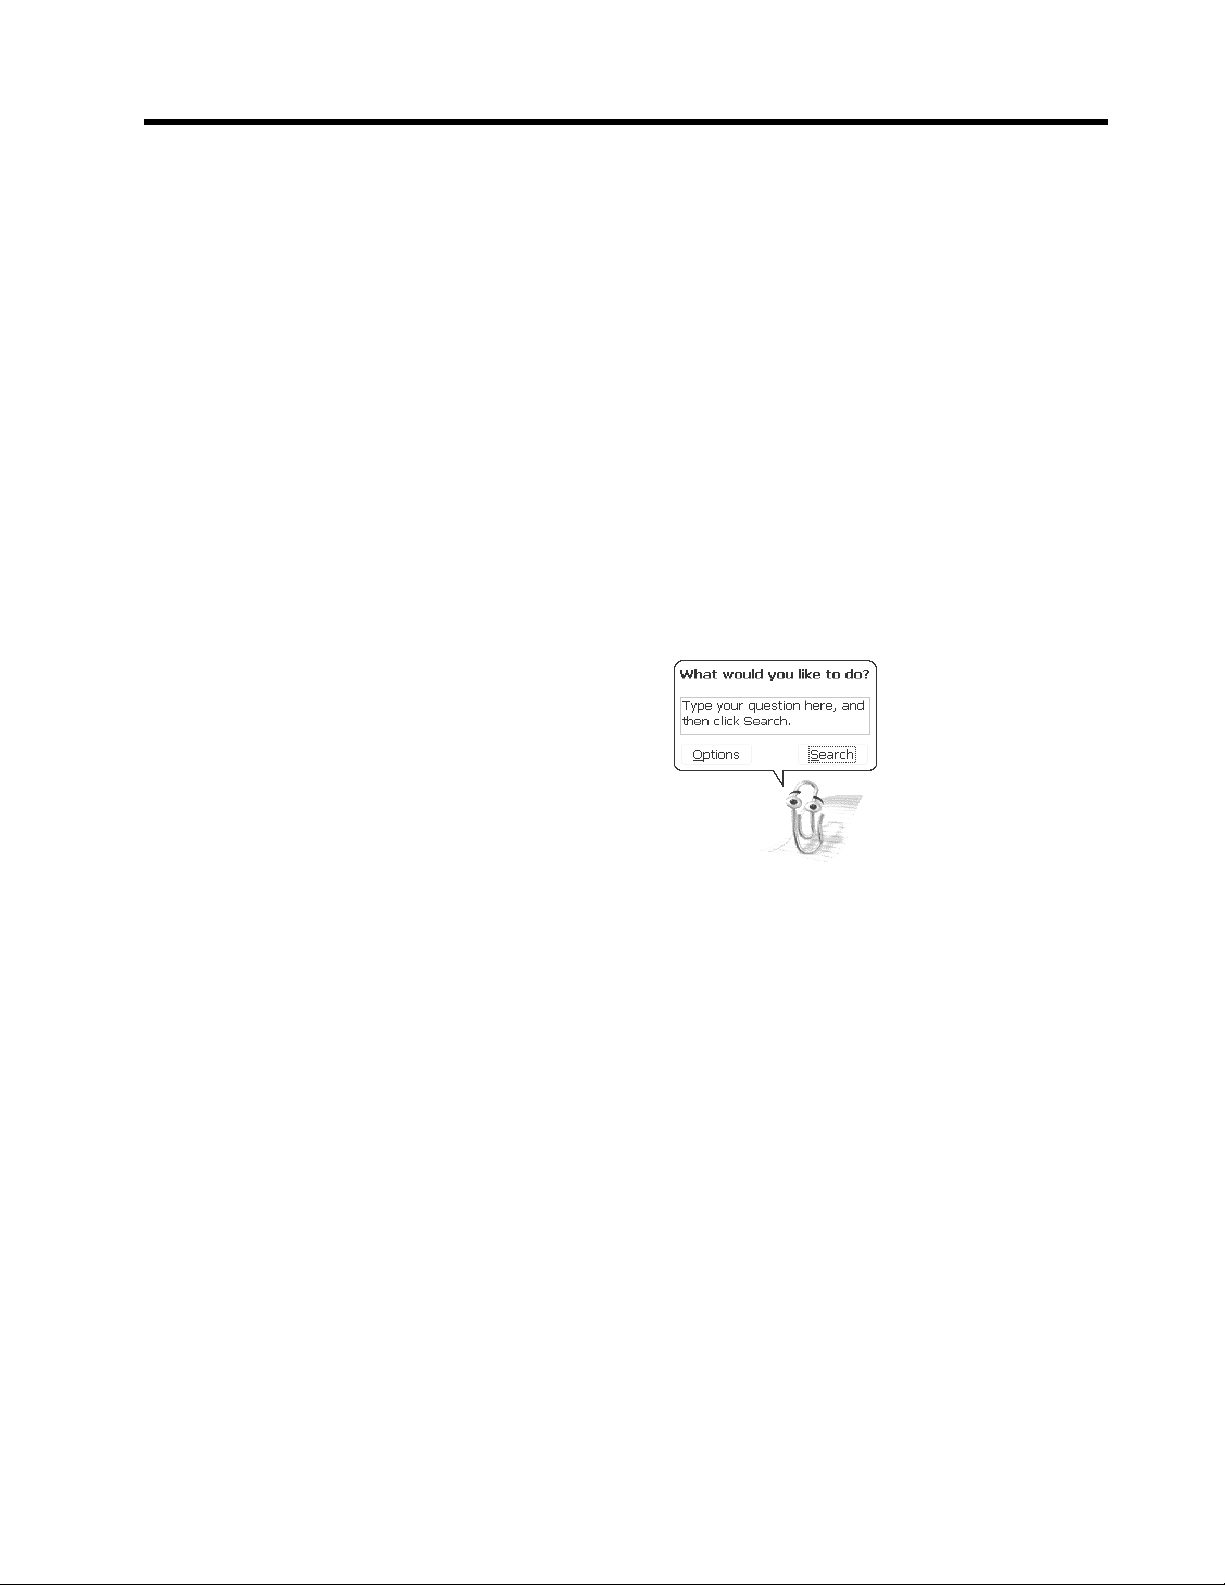
When you need to ask a question, you can ask the Office Assistant. You can also set the Office
Assist
with
To
Ass
Office
Introduction
il, appointments, contacts, and tasks, as well as track activities, open and view documents,
, you can obtain help from several online sources:
? Office Assistant
? Help Contents and Index
? Microsoft
ant to automatically provide tips and help while you work. The Office Assistant works
all the Office programs, and can be customized to meet your work style.
access the Office Assistant, click Help and then Show the Office Assistant. The Office
istant appears and allows you to type your question. You can also access the options of the
Assistant.
Web Site
Help Contents and Index
The Office Assistant searches the Help Contents and Index of Microsoft Outlook . If you
would like to look for information without using the Office Assistant, you must turn off the
Office
Assistant:
1. Make sure the Office Assistant is showing on your screen. If it’s not, click Help, and
then click Show the Office Assistant .
2. Click the Office Assistant.
A help dialog box appears.
3. Click the Options button.
The Office As
4. Unmark the option to Use the Office Assistant and then click OK .
The Office As
Now when you want to look for a general topic or browse through Help’s table of contents, you
can use Help
menu
Microsoft® Web Site
Microsoft maintains a section of their web site for Outlook users. The web pages contain tips,
tools,
patches, and articles. Access the Microsoft
http://support.microsoft.com/default.aspx?scid=fh;EN-US;out2003
Contents and Index. To access Help Contents and Index, click the Help pull down
and click Microsoft Outlook Help.
sistant options appear.
sistant disappears.
Outlook web site:
2
Page 4
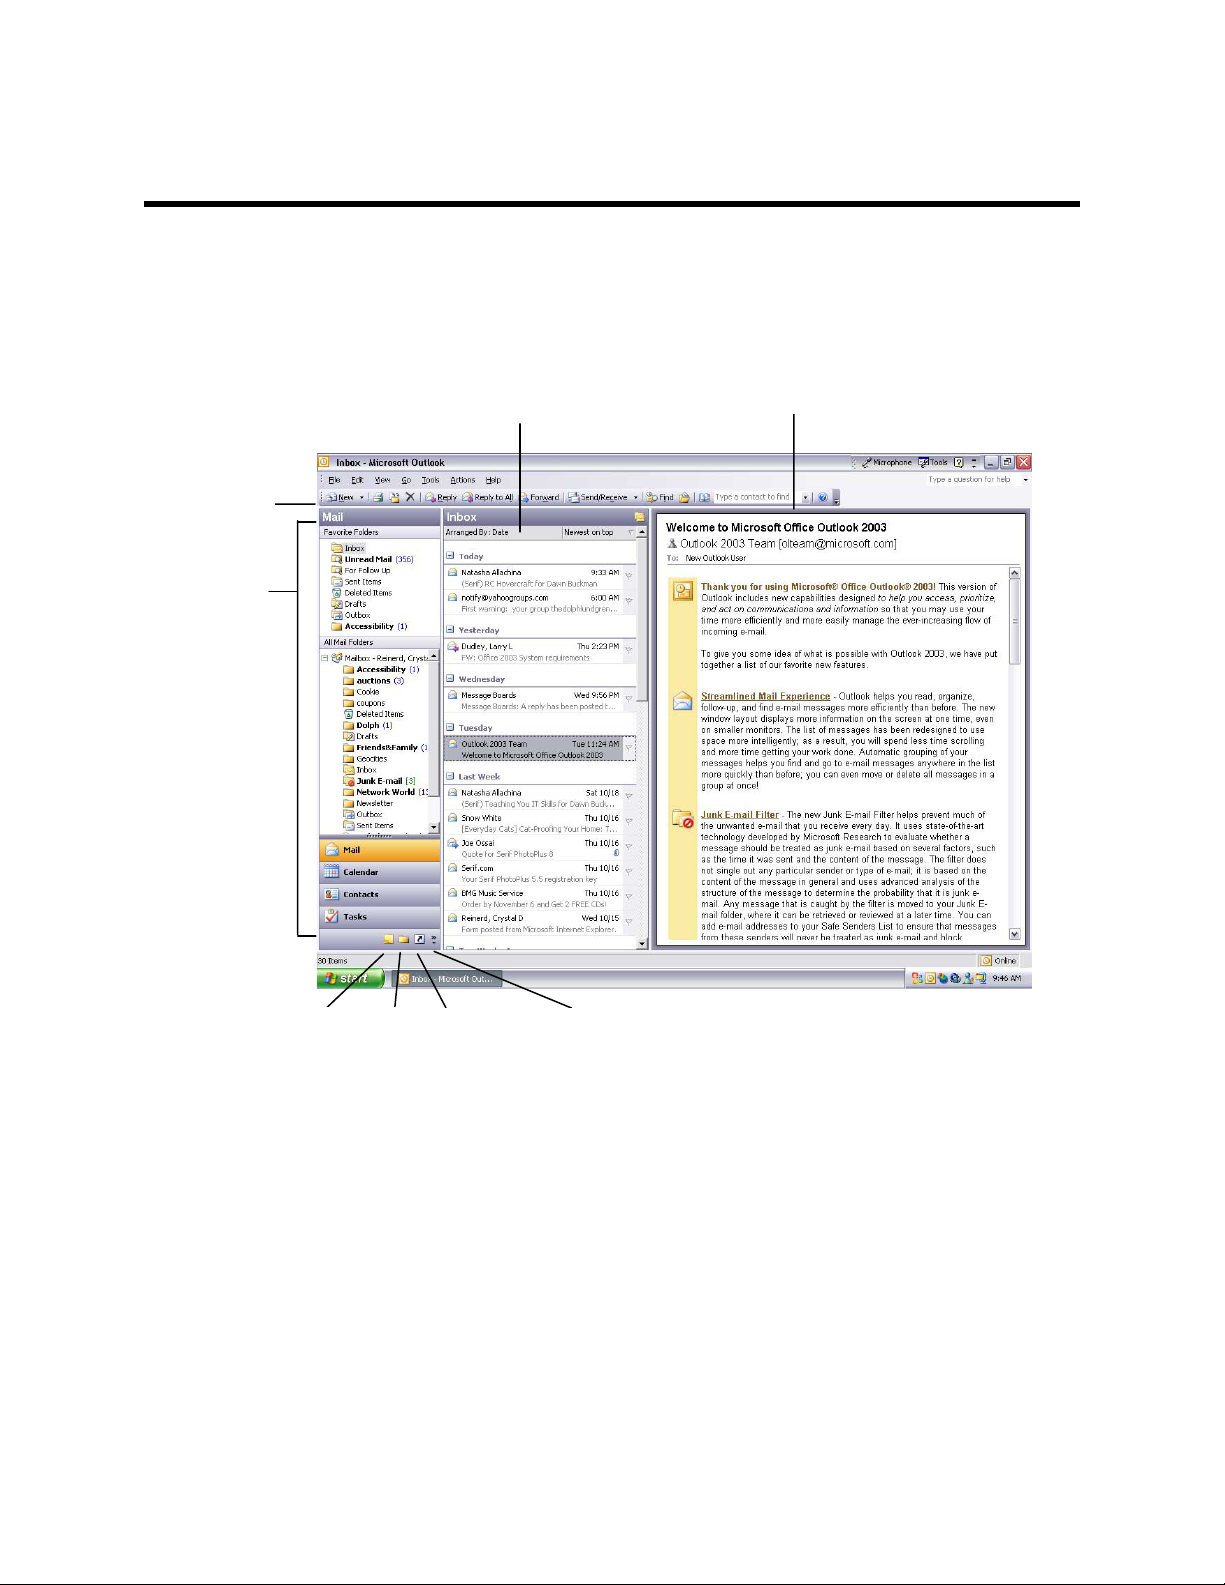
Standard
Toolbar
Navigation
Pane
Exploring Outlook®
The Outlook
Outlook
contain a standard toolbar, located beneath the title bar. This toolbar contains most of your basic
functions, and can be customized to contain any button combinations you setup.
When you start outlook, a screen similar to the following appears:
environment is the screens and layout you use to work. You can work with the
default environment or customize it to suit your needs. All sections of Outlook
Reading Pane
Folder Pane
Notes
Folder
List
Shortcuts
Configure
buttons
Drop-down Menus
Outlook
drop-down menu items you use and how often you use them.
The most commonly used drop-down menu items are listed in the initial view of that menu. If
you do not use a command for an extended time, it will be removed from that particular menu
(but can be accessed via small arrows at the bottom of the drop-down menu).
Drop-Down Menu Arrows
Arrows are used to indicate that there are more options than currently displayed. To view items
missing from a drop-down menu, click the arrow or simply hold the cursor over the arrow for a
few seconds and the menu will automatically expand to show all of the commands available:
3
offers drop-down menus that help you perform tasks. Outlook keeps track of which
Page 5
Click the arrow or
hold down the cursor
over the arrows to
expand the view.
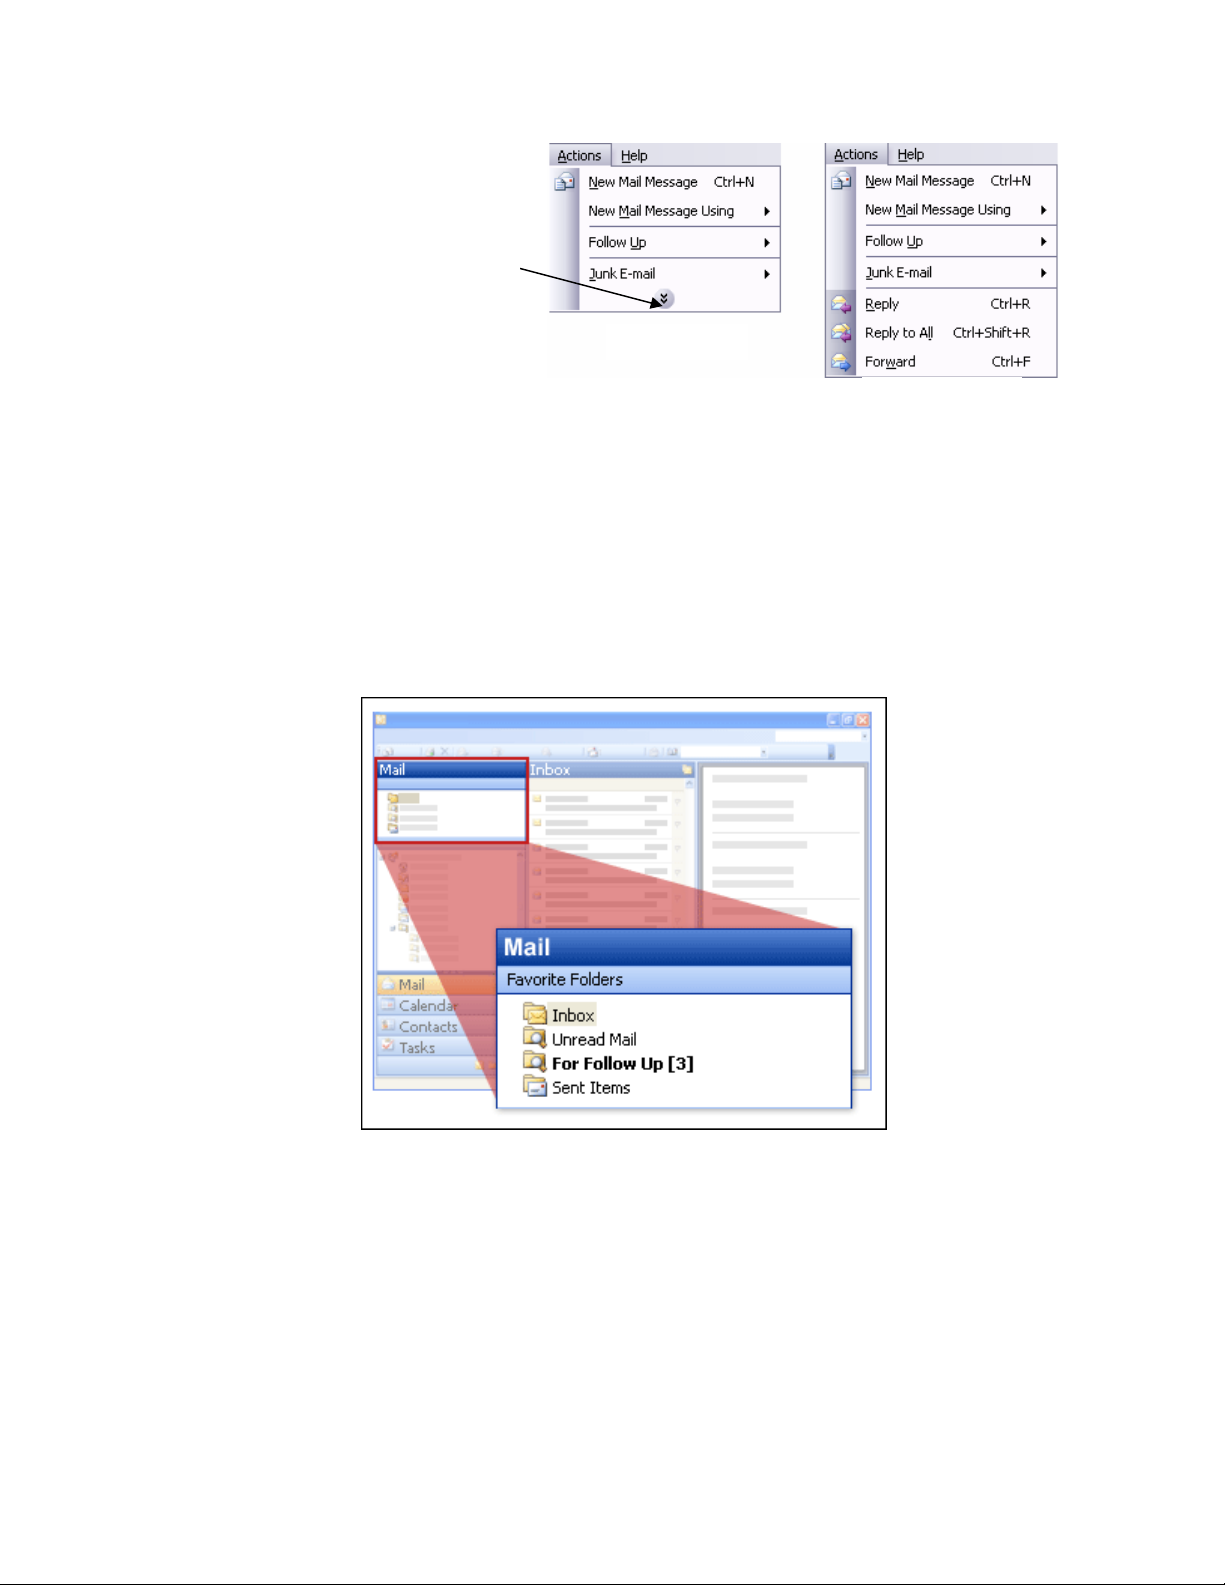
Navigation Pane
The new Navigation Pane in Outlook allows you easy access to your Mail, Calendar, Contacts,
Tasks, Notes, Folder List, Shortcuts and Journal with large buttons that you click to open each
folder. Favorite Folders and Search Folders are displayed at the top of the Navigation Pane.
You can customize your Shortcuts by adding groups and shortcuts to folders. Groups (for
example Outlook Shortcuts) hold folders, while folders (for example, Inbox) hold items like an
email message. Not all of the large buttons are shown by default. You can show more or less
buttons in the button tray by using the menu after clicking Configure buttons.
Initial View
Expanded View
Mail inside the Navigation view
4
Page 6
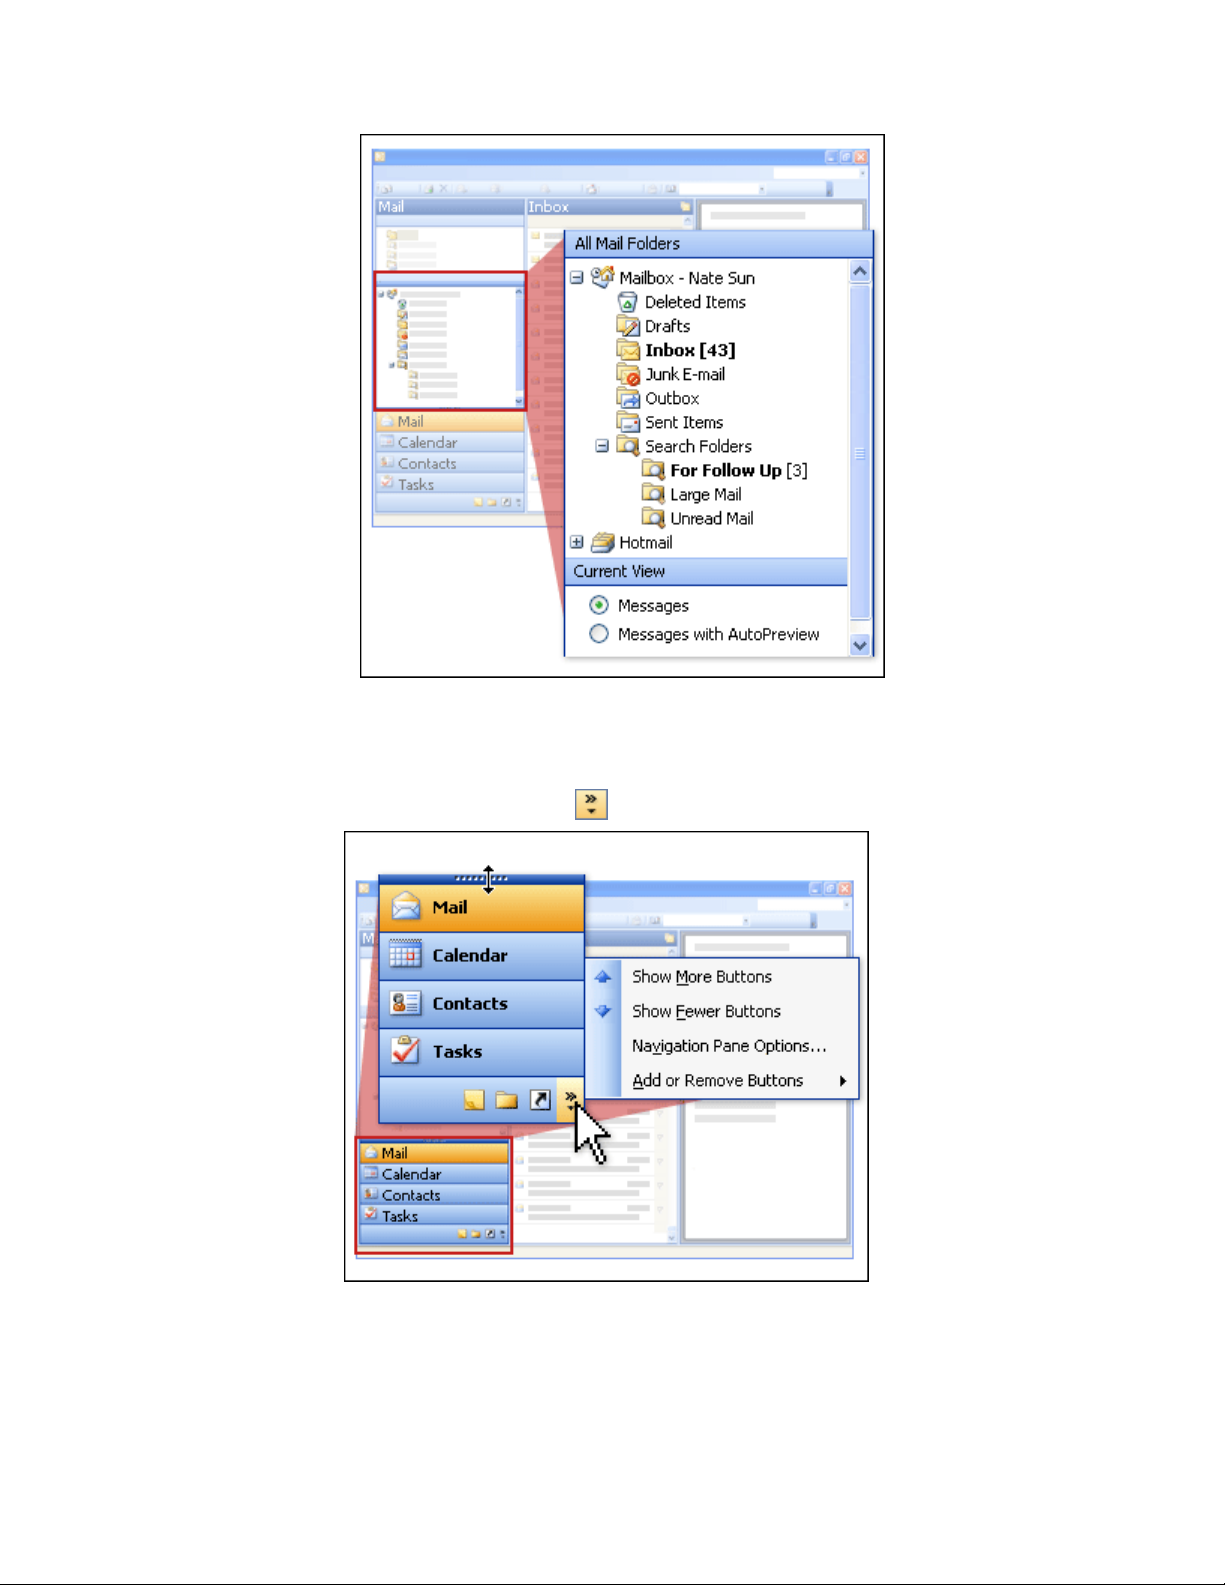
All Mail Folders close-up
To Add or Remove a Button:
To add a button to the Shortcut buttons in the Navigation Pane:
1. Click the Configure button.
A shortcut menu appears.
Configure button pop up list
2. Click Show More Buttons to display the other buttons or click Show Fewer Buttons
to remove the button. You can also click the Add or Remove Buttons option to
remove or add a specific button in a list.
5
Page 7

Add or Remove a Group from the Shortcut buttons
To remove a group from Shortcut buttons:
1. Click the shortcut button in the Navigation Pane. A list of your Shortcuts appears.
2. Click Add New Group.
A New Group window appears, highlight the text to rename it.
3. To remove a group, right-click the group and choose Remove Group.
4. A prompt appears asking you if you want to remove the group, click Yes.
The group disappears from the Navigation Pane.
Folders on the Navigation Pane are shortcuts to folders that already exist in Outlook
example, to add a new folder for messages to your Navigation Pane, you first need to create the
folder in Outlook
®
or My Computer. Then you add a shortcut to that folder on your Outlook
®
. For
Bar.
Adding a Mail Folder to Favorite Folders
When you add a folder to Favorite Folders in the Mail pane, within the Navigation Pane, the
folder stays in its original location but also adds the folder in the Favorite Folders which
provides quick and easy access to the folder. Only mail folders can be added to Favorite
Folders.
To add a mail folder to Favorite Folders:
1. From the Mail Pane, click and drag whichever folder into the Favorite Folders.
2. The folder appears in Favorite Folders, move it to another location within Favorite
Folders by dragging.
Add a Shortcut to a Folder
To add a shortcut to a folder:
1. Click the shortcut button of the Navigation Pane. Click the group that will contain the
new folder. The shortcuts display.
2. Right-click the group, a shortcut menu appears. Click Add New Shortcut. The Add to
Navigation window appears.
3. Select a folder to add as a shortcut in your group by clicking it. Click OK. The shortcut
appears in the Outlook Shortcuts view.
Add a Web Page Shortcut to the Navigation Pane
To add a web page shortcut to the Navigation Pane:
1. If the web page is not already a shortcut in your Favorites Folder, go to the web page in
Internet Explore and choose Add to Favorites from the Favorites menu.
2. Open My computer, double click Drive C:, and then open \Documents and
Settings\user\Favorites, where user is your logon account name.
3. In the Navigation Pane, open the shortcut group where you want to add the new shortcut.
4. Drag the shortcut’s icon from the Favorites folder or the desktop to the Navigation Pane.
Drop it on the name of the shortcut group where you want it placed.
5. If you want to rename the shortcut, right-click it and choose Rename Shortcut from the
Pop-up menu. You can click the new shortcut to open a web page in the Outlook
window.
6
Page 8
Remove a Shortcut to a Folder
To remove a shortcut to a folder:
Folder Pane
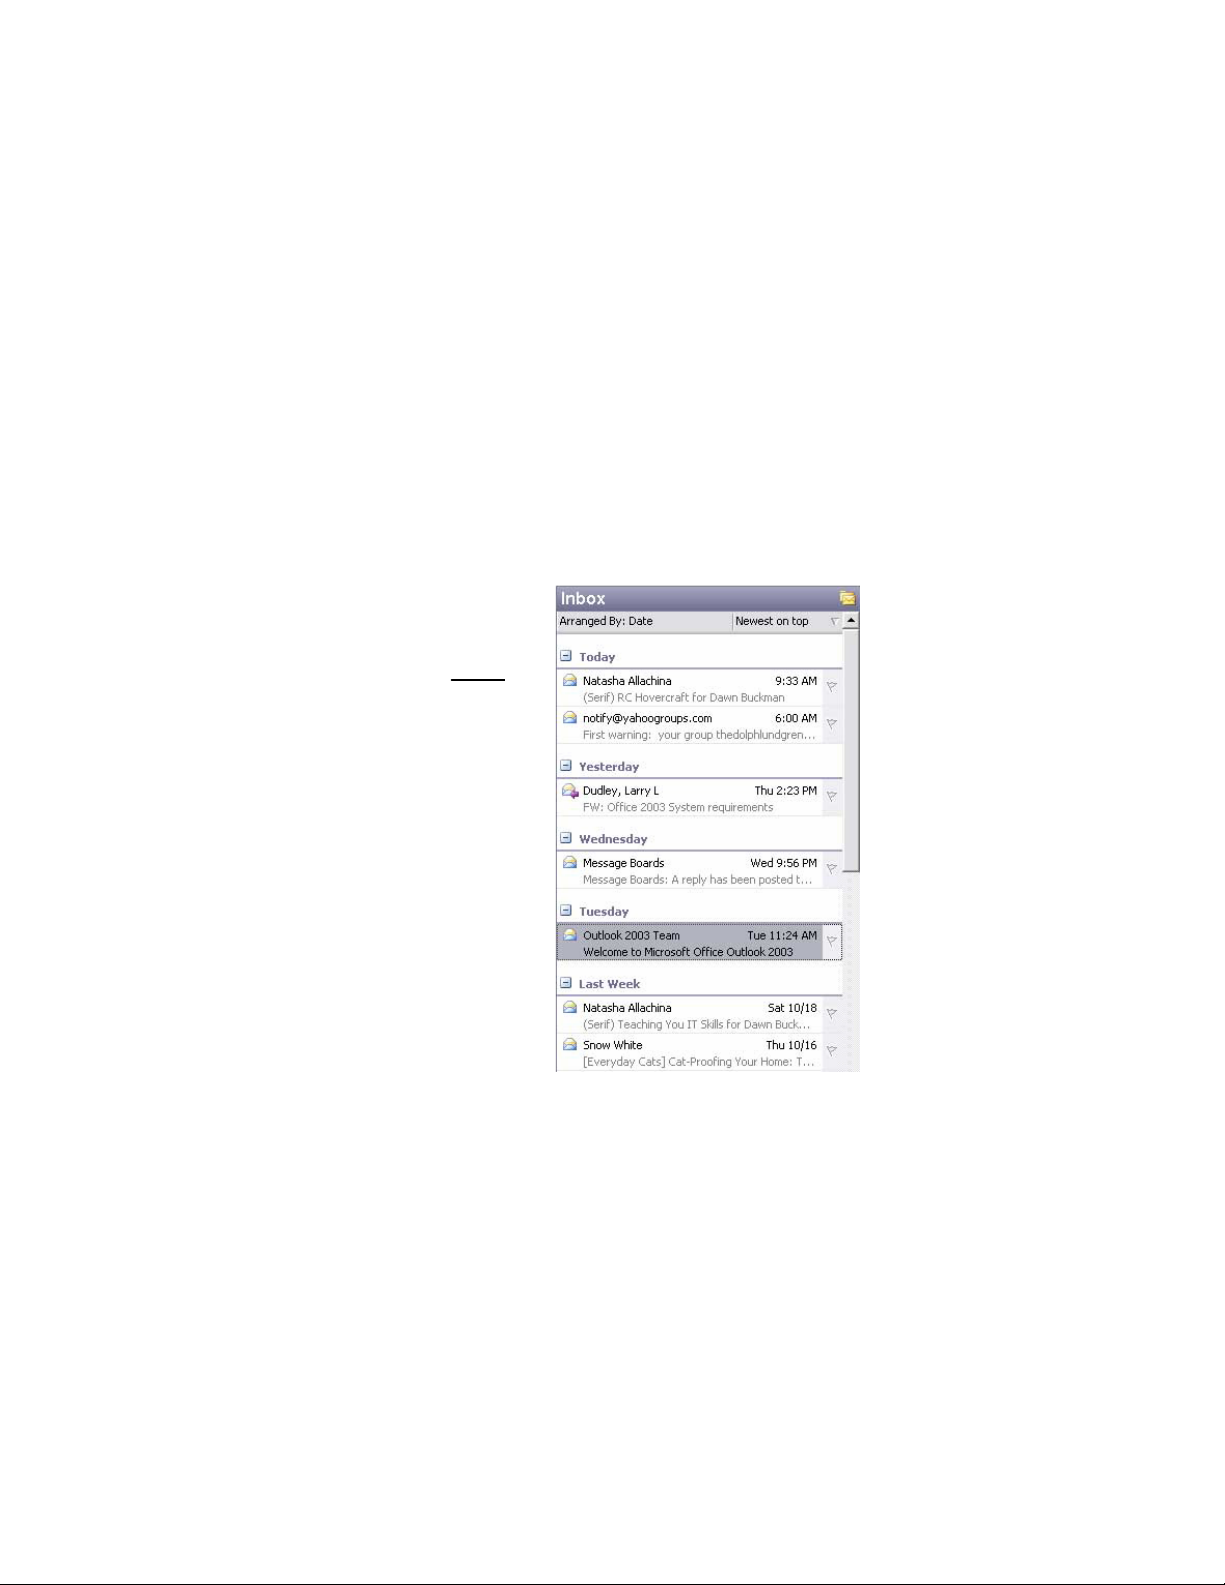
The Folder Pane displays the contents of the opened folder. When the Inbox folder is open, it
displays mail from that day at the top, followed by the previous days, weeks, month, and then
anything else under the description Older. The Inbox displays a multi-line layout showing your
messages in the format with four fields (From, Subject, Date, and Icon) and are normally
displayed in a vertical column.
1. Right-click the folder you want to remove.
A shortcut menu appears.
2. Click Delete Shortcut.
3. Click Yes.
The shortcut to the folder disappears from the Navigation Pane.
Inbox shown in
the Folder Pane
Reading Pane
The Reading Pane replaces the Preview Pane in past versions of Outlook and will allow you to
read the entire contents of an email without opening the email. With any view you can display
the Reading Pane. To display the Reading Pane, go to the View menu and select Reading
Pane and choose Right, Bottom or Off.
7
Page 9
Toolbars
The standard Outlook
®
toolbar allows quick access to many Outlook® features. The folder you
are viewing determines which buttons are on the toolbar. If you are viewing the Inbox, you will
see the email buttons, but if you are in the Calendar, you will see the appointment buttons. The
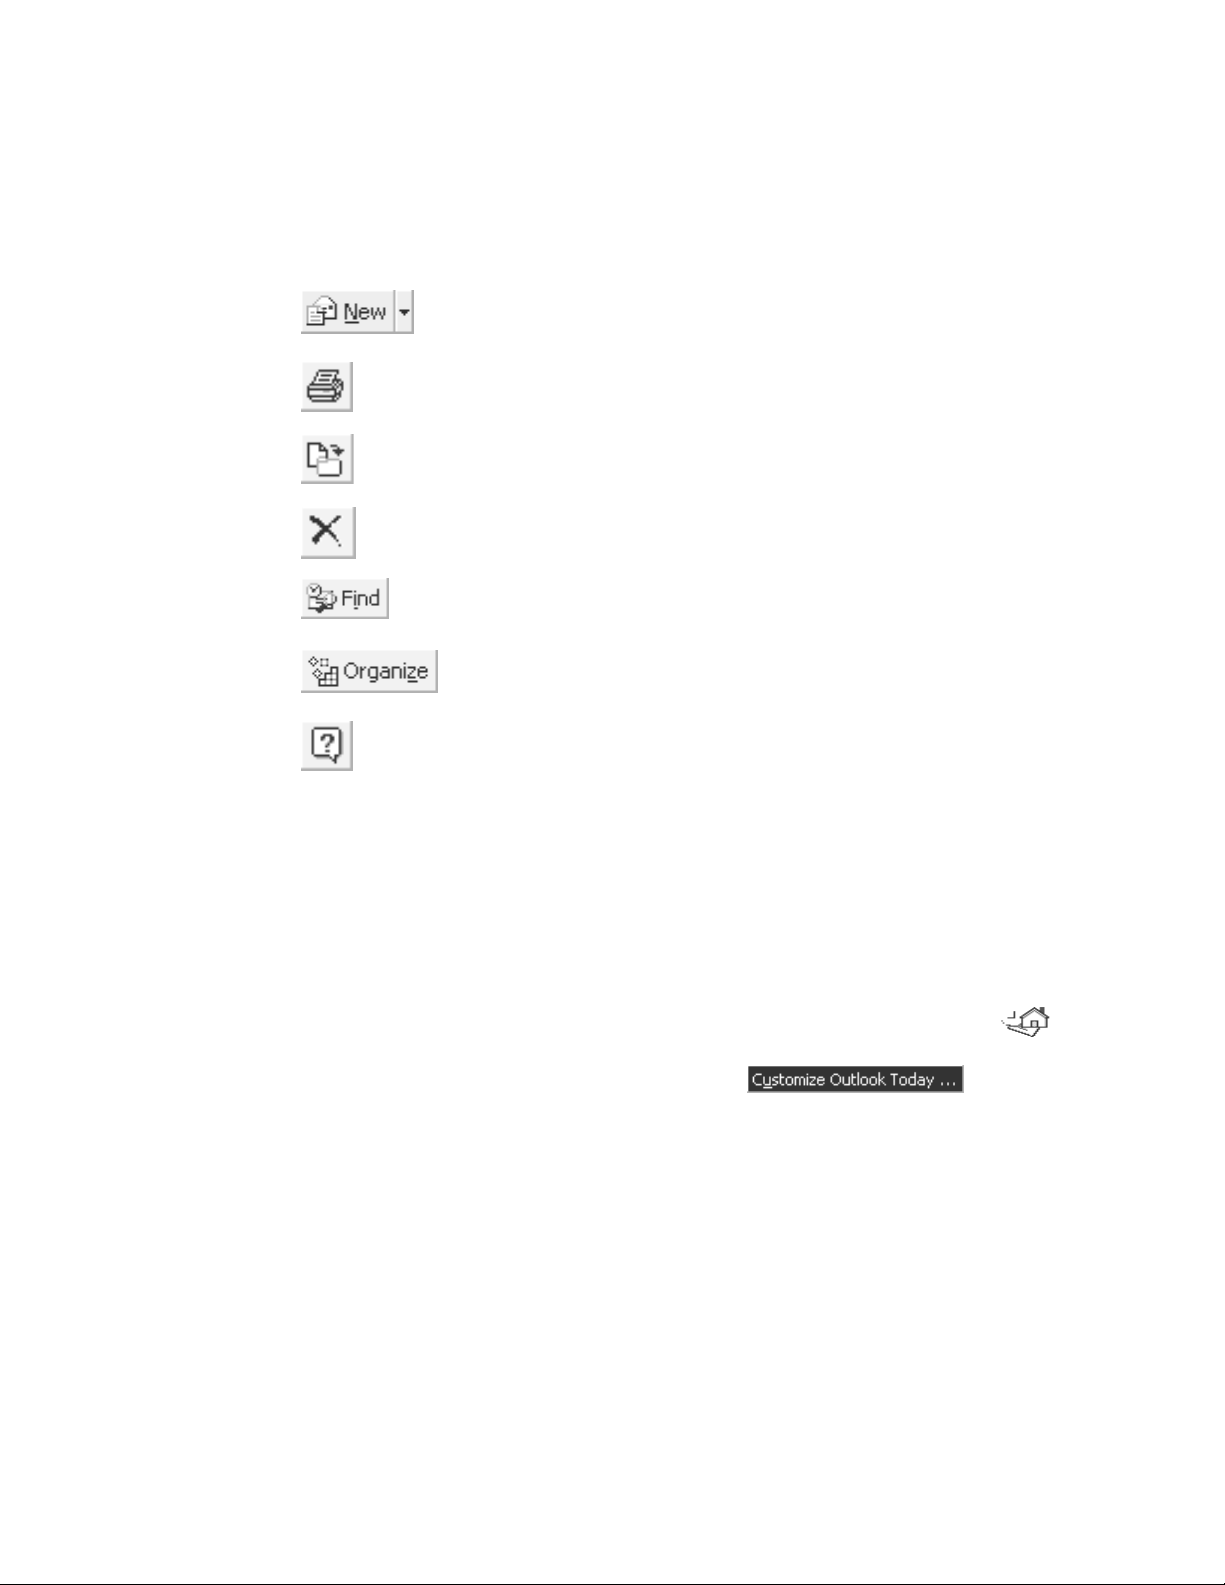
following table describes the buttons that are always present on the toolbar:
New Item Creates a new item, such as
an email message or appointment.
Print Prints the current item.
Move to Folder Displays a drop-down list of places to
move the selected items.
Delete Sends the selected item to the
Deleted Items folder.
Find Searches for an Outlook
keyword.
®
item by
Organize Allows you to choose different
options for displaying items.
Microsoft Displays the Office Assistant or Help
Outlook Help
Toolbar buttons do not automatically change with use; instead, they must be manually
configures if customization is desired.
Outlook Today
The Outlook Today page shows a preview of your appointments, a list of your tasks, and how
many new email messages you have for the current day. You can also quickly find a contact by
using the Find Contact box.
You can customize how Outlook Today looks and functions:
1. Click Shortcuts on the Go menu. In the Navigation Pane, click Outlook Today.
2. Click the Customize Outlook Today . . . button
3. Select the options you would like to use in Outlook Today and then click Save
The Outlook Today page appears.
The Customize Outlook Today page appears.
Changes to save your changes or Cancel to exit without saving
The Outlook Today page reappears.
8
Page 10
One Outlook
You can also send, forward, and reply to email; use the Address Book; and print your email.
To access your email, you can either use the Inbox in the Navigation Pane, or you can use the
My Shortcuts bar. The Inbox folder on both bars accesses the same information, but the My
Shortcuts bar has access to other items, such as Sent Items.
Reading Email
In Outlook
Inbox folder in the Navigation Pane. Your email is displayed to the right in the Inbox section of
the Reader Pane. Then double-click the header of the email message you would like to read.
The email text will open in a separate window.
New Mail Arrival
New email automatically appears in your Inbox when it arrives, but if you feel you need to
check for new messages, you can click Send and Receive
receive mail, you will also get a New Mail/Desktop Alert display from the system tray in the
lower right corner. It will fade in and fade out. If you click it, it will automatically open that email.
When Outlook
messages. To select a notification option, follow these instructions:
1. Click Tools, and then click Options.
Using Email
®
feature is sending and receiving email. You can easily read email in many views.
®
, your incoming email is stored in your Inbox. To access your email, click the
. When you
®
is running, it can notify you of new incoming mail through sound and visual
The E-Mail Options screen appears.
2. Click the E-mail Options button.
The options for email appear.
3. Customize the options in the Message handling section to fit your needs. Also click the
Advanced E-mail Options button to specify more options
Click OK to close all the windows.
Outlook
Reading Attachments
®
will now notify you according to your specifications.
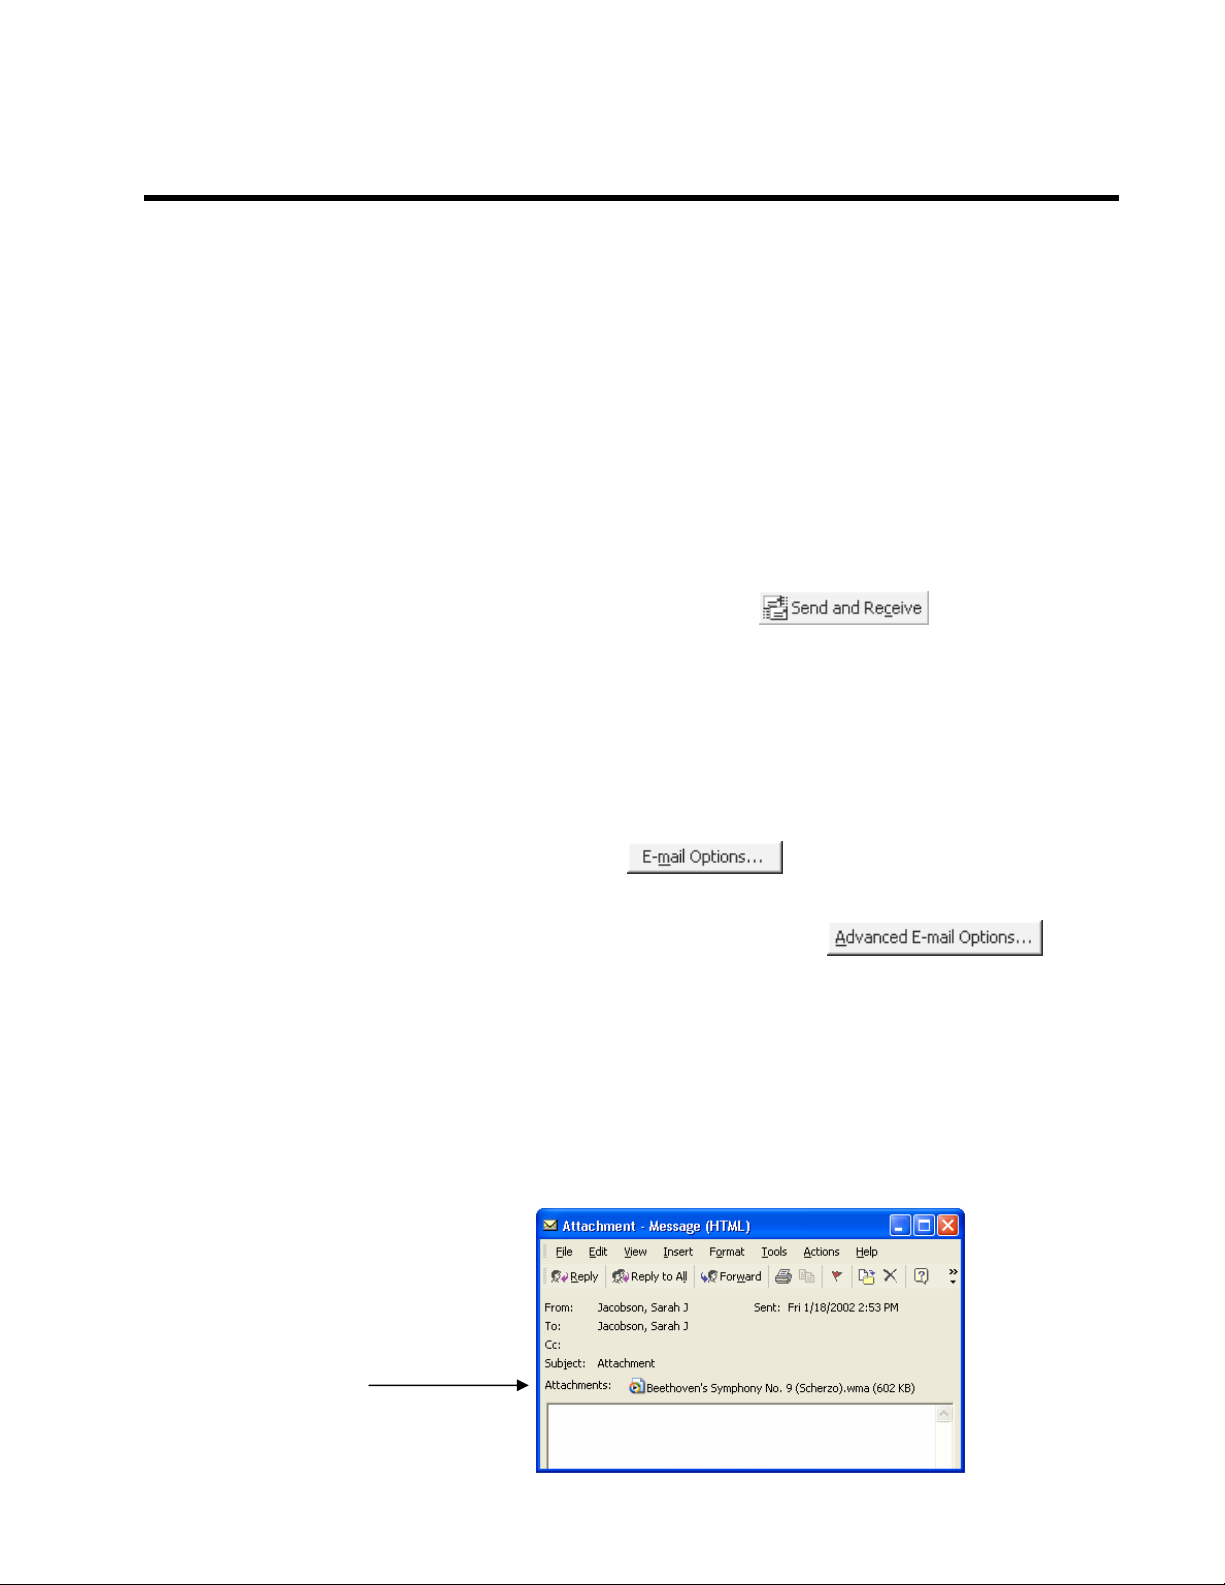
Attachments are files sent with email messages. If your email header includes a paper clip
symbol, double-click the message header to open the email. The attached message appears
below the subject line. Double-click the file; it opens in the associated program. An example of
attached files is given below:
Attached file
.
9
Page 11

Organizing Email
Outlook has several options for organizing your email. Click the Organize button then use one
of the following options:
To move messages to a particular folder. Or set up a rule to
automatically move all future messages that you receive
from someone into a folder.
To color-code messages that meet criteria you specify. For
example, you can set up a rule so that all messages you
receive from your friends appear in maroon text.
To change the way you view your messages. A view in
Outlook
gives you a way to change how information is
organized and formatted. You can choose from the
following views:
Views To See Messages
Messages In a list.
Messages with Auto Preview In a list with the first three lines of the message text displayed.
By Follow-up Flag In a list grouped by message flag.
Last Seven Days That arrived during the last seven days, in a list.
Unread Messages In a list that displays only unread messages.
Sent To
Message Timeline Represented by icons arranged in chronological order by date
Junk Email
In a list that displays the recipients of the message.
sent, on a timeline.
Outlook now has several options for dealing with your junk email. Filter out commercial and
other unwanted junk email so it doesn't clutter your Inbox. You can move the junk email to
another folder to view later, move it to your Deleted Items Folder, or you can color-code the
junk email so it's easy to identif y. You can create lists of email addresses and domains to block
unwanted email.
10
Page 12

To Add a Sender to your Junk Email list:
1. Right-click the message that is junk email and select Add to Blocked Senders List from the
2. The sender’s email address is added to your blocked senders list and is deleted from your
To Add a Domain name to your Junk Email Blocked List:
1. Click on Tools on the menu bar and select Options from the drop down list. The
2. Click the Preferences tab and click the Junk Email… button. The Junk Email Options
3. Click the Blocked Senders tab and click the Add button. The Add Address or Domain
4. Type in the domain in the text box, for example, @hotmail.com. Click OK.
Receiving Contact Cards or vCards
A vCard is a contact from an Outlook contact list that has been sent to someone as a .vcf file.
When you receive an email that has a contact card or vCard attached, you can add that person to
your contact list:
1. Double-click the attached vCard or contact.
2. Click Open it, and click OK.
3. Click Save and Close.
Sending Email
Outlook
describe how to create and send an email message.
Junk E-mail options.
inbox.
Note: You can also add users to a Safe Recipient list, so their email is not mistaken by
Outlook as junk e-mail.
Options window appears.
window appears.
window appears.
The contact opens.
®
Outlook
®
saves this contact with your other contacts.
can help you send email to anyone with an email address. The following sections
Create a New Message
To create a new message:
1. Click the Inbox folder.
Your email messages are displayed in the Reading Pane.
2. Click the New Mail Message button
A blank message appears. Your screen should look similar to the following illustration:
11
.
Page 13

Blank Message
Address an Email Message
Once you have created an email message, you can address the message in the following ways:
• Type the Email Address
Type the email address (such as
johndoe@miami.edu
) in the To… field of the message.
• Type the Email Recipient’s Name
If people are included in your Contacts folder, you can type their names into the To…
field of a message. Outlook
®
will underline their name, showing that it knows their email
address.
• Address Book
The address book contains many email addresses in different categories, such as the
Global Address List and Contacts. The Global Address List contains the email address of
everyone at the University of Miami. You can use your Contacts Folder to store other email
addresses. When you email people, you do not need to know their email addresses, only their
names or nicknames and in which address book their addresses are located.
Note
: for information on creating address book entries, see the chapter Using Contacts.
To use the address book when sending an email message:
1. Click the To . . . button.
The Select Names window appears.
2. Select an option from the Show Names from the: drop-down list. By default it is
set to Global Contacts, you can change it to show your Contacts by scrolling up on
the drop-down menu.
3. Select the name of the person you wish to email in the list on the left and then
click the To button.
The name appears on the list on the right.
4. Click OK.
The Select Names window closes and the name appears in the To field of your
message.
Complete the Message
Type the subject for the email message into the Subject field. Then type the text for the email
message in the lower portion of the window. You can use the formatting tools to customize the
color, size, and other characteristics of the text.
12
Page 14

Attach a File
Once you have created an email message, you can attach a file. Attaching a file sends a file with
your email to the recipients. When the recipients receive the email, they can open the attached
file with the software on their computer. To attach a file, follow these steps:
1. Click the Insert File button
The Insert File dialog box appears.
2. Find and highlight the file you want to send via email.
3. Click Insert
The chosen field is added to the email.
Send the Email
Once you have the email message written and addressed, click the Send button to deliver the
message. The message is automatically sent to the recipient and a copy is placed in your Sent
Items folder.
Responding to Email
When you receive email messages, you may need to send a response (reply) or send the
message to someone else (forward). You can do this by selecting or opening a message and
using the toolbar to direct your response.
.
Forward a Message
To forward a message:
Reply to the Author of a Message
To reply to the author of a message:
Reply to the Author and Recipients of a Message
To reply to the author and recipients of a message:
Saving Email
Sometimes you may want save your email messages into folders, either in Outlook
hard drive. An easy way to save email messages is to drag them to a folder in your Navigation
Pane or folder list.
1. Select or open the email message to forward.
2. Click the Forward button.
A new mail message appears.
3. Address the message, and click Send.
The message is forwarded
1. Select or open the email message to which you are replying.
2. Click the Reply button.
A new mail message appears.
3. Type your response, and click Send.
The message is sent to the author of the original message.
1. Select or open the email message to which you are replying.
2. Click the Reply to All button.
A new mail message appears.
3. Type your response, and click Send.
The message is sent to the author and all recipients of the original message.
®
or on your
13
Page 15

Save an Email Message to a Folder
To save an email message to a folder:
1. Make sure your Reader Pane shows the message you want to save.
2. If using the Navigation Pane, click the shortcut bar that contains the folder where you
3. Click the email message, and drag the message to the folder.
Save Email Message Text
To save text from an email message to use in a word processor or other program, you need to
sav
e the message text in another format. Follow the steps below to accomplish this task:
1. From the Folder Pane, double-click the email message header.
2. Click File , and then click Save As… from the drop-down menus.
3. Name the file, and click Save.
Deleting Email
When you no longer want to keep an email message, you should highlight the message and
ss the Delete key. This moves the message to your Deleted Items folder. At this point, you
pre
co
uld go to your Deleted Items folder and recover the message. If you would like to
permanently remove the item, you must highlight the item in the Deleted Items folder, and press
the Delete key. Or you can remove everything in the Deleted Items folder by right-clicking the
folder and selecting Empty “Deleted Items” Folder.
nt to save the message.
wa
using the folder list, make sure you can see the folder where you want to save the
If
message.
The email message copies to the folder.
email message opens.
The
The Save As window appears.
The file is saved in Text Format, which maintains the format of the text and can be
opened in word processors and other programs.
Managing Sent Email
Sometimes you may want to read or forward a message you’ve already sent. To access your
Items, click the My Shortcuts bar in the Navigation Pane.
Sent
Sent Items
The Sent Items folder contains all of the items, email, appointments, meeting requests, etc., you
ve sent to other people. To view items you have sent, click the Sent Items folder. The items
ha
list
to the right in the Folder Pane.
Outbox
The Outbox folder contains all of the items that are pending, but have not been sent yet. This
featur
e only works when you are using Outlook in an offline mode. On Campus, Outlook
configured so that all messages are sent imme diately; therefore, no messages will be listed in
is
the Outbox.
Drafts
The Drafts folder contains the messages you started to compose but have not sent yet. To
complete an unfinished message, click the Drafts folder. Then open, complete, and send the
message.
Printing Email
You may want to keep a paper copy of an email message rather than saving the message to a
fo
lder. To print an email message, highlight the message header or open the email message.
Then click the Print button.
14
Page 16

Date Navigator
Place cursor in these
areas for a doublesided arrow to appear
My Calendars
Using Calendar
The Calendar in Outlook
events. Outlook
®
can even remind you of upcoming items.
To access your calendar, click Calendar on the Navigation Pane shortcut. The Calendar
appears in the Navigation Pane:
®
can help you manage your time through appointments, meetings, and
TaskPad
Shared Calendars
Calendar Views
As with the Inbox, you can view the Calendar in many ways. Each view, except
Day/Week/Month, shows attachments, subject, start and end times, recurrence information,
location, and categories. You can expand the view of the Date Navigator by placing the cursor
over the line separating the Date Navigator and Expanded Calendar or between the date
navigator and the My Calendars bar (see illustration above). You will get a double-sided arrow
and you can now click and drag to expand the Date Navigator view.
To change your view, go to the Tools menu and click Organize. A new screen section appears.
Click Using Views. In the Change your view box, select one of the following views:
Click this View To See
Day/Week/Month Appointments, events, and meetings for one or more days or
weeks or for a month. Also includes a list of tasks. This view
looks like a paper calendar or planner.
15
Page 17

Day/Week/Month with Same as the Day/Week/Month view, except the
AutoPreview first lines of the text appear in items.
Active Appointments A list of all appointments and meetings beginning today and
Events A list of all events and details about them.
Annual Events A list of events that happen once a year and details about
Recurring Appointments A list of recurring appointments and details about them.
By Category A list of all Calendar items grouped by category and details
To change the Day/Week/Month calendar display, click one of the buttons described below:
Displays one day of the calendar and the Navigation
Bar with Date Navigator.
Displays one work week (Mon-Fri) and the Navigation
Bar with Date Navigator.
Displays one week of the calendar and and the
Navigation Bar with Date Navigator.
Understanding Calendar Items
You can schedule three types of activities into your calendar: appointments, meetings, and
events.
going into the future and details about them.
them.
about them.
Appointment
An appointment is an activity that you block time for in your calendar that does not involve
inviting other people. Appointments can have reminders attached to them. You can schedule
recurring appointments.
Meeting
A meeting is an appointment to which you invite other people. When you create a meeting, you
identify the people to invite and pick a meeting time. Responses to your meeting request appear
in your Inbox. You can also add people to an existing meeting, reschedule a meeting, or
schedule a recurring meeting. To create an online meeting, such as a NetMeeting, check the
This is an Online Meeting check box on the Appointment tab of your meeting request.
Event
An event is an activity that lasts 24 hours or longer. Examples include a trade show, the
Olympics, a vacation, or a seminar. An annual event, such as a birthday or anniversary, occurs
yearly on a specific date, while an event occurs once and can last for one day or several days.
Events and annual events do not occupy blocks of time in Calendar; instead, they appear in
banners. An all-day appointment shows time as busy, while an event or annual event shows
time as free when viewed by others.
Scheduling Calendar Items
There are many ways to schedule a calendar item. Follow the instructions below to create your
calendar item:
Schedule an Appointment
To schedule an appointment:
16
Page 18

1. Click the New Appointment button.
2. In the Subject box, type a description.
3. In the Location box, type the location.
4. Type start and end times. When you select start and end times, you can take advantage of
Autodate functionality and type text such as "next Tuesday" or "noon" instead of typing
a date or time.
5. Select other options you want.
6. Click Save and Close.
The appointment appears on the calendar.
Note: In Calendar, you can also create an appointment by selecting a block of time,
5.
right-clicking, and then clicking New Appointment on the shortcut menu.
Schedule a Recurring Appointment
To schedule a recurring appointment:
1. Make sure you are in the calendar.
2. From the Actions menu, click New Recurring Appointment.
3. Type start and end times.
4. Click the recurrence pattern (Daily, Weekly, Monthly, or Yearly) at which the
appointment recurs, and then select options for the recurrence pattern.
5. Click OK.
A new window appears.
6. In the Subject box, type a description.
7. In the Location box, type the location.
8. Select other options you want, and type information in the open space.
9. Click Save and Close.
The appointment appears on the calendar.
Schedule a Meeting
When you schedule a meeting, Outlook® sends the people on your list an email message asking
if they can come.
1. Make sure you are in the calendar.
2. Click Actions and then click Plan a Meeting.
3. To invite attendees and resources, click Add Others. Select a name from the list. If you
need to invite people not listed, click New . . . to add them. For each name typed, click
Required, Optional, or Resources. Click OK.
4. Choose the start and end times for the meeting.
5. Click Make Meeting.
6. In the Subject box, type a description.
7. If you do not schedule a room, type the location in the Location box.
8. Select other options you want.
9. If the meeting is recurring, click the Actions menu and then click Recurrence. Select the
recurrence pattern and range of recurrence options you want. Click OK.
10. Click Send.
The appointment appears on the calendar and Outlook ® sends an email invitation to
each person.
17
Page 19

Schedule an Event
To schedule an event:
1. Make sure you are in the calendar.
2. On the Actions menu, click New All Day Event.
3. In the Subject box, type a description.
4. In the Location box, type the location.
5. Select other options you want.
6. Click Save and Close.
The event appears on your calendar
Editing Calendar Items
After you create a calendar item, you may want to change the item. An easy way to change an
appointment is to double-click the appointment in the calendar. The item opens for you to make
changes.
Outlook
to a new day, click the appointment in your calendar, hold down the mouse button to drag it to a
new day, and release the mouse button. The appointment moves to the new day. Experiment
dragging items in the calendar when you need to make changes.
®
allows you to drag items around the calendar. For example, to move an appointment
Deleting Calendar Items
When you no longer want to keep a calendar item, you should highlight the item then click the
Delete button. This moves the item to your Deleted Items folder. At this point, you could go to
your Deleted Items folder and recover the item. If you would like to permanently remove the
item, you must highlight the item in the Deleted Items folder, and click the Delete button. Or
you can remove everything in the Deleted Items folder by right-clicking the folder and clicking
Empty “Deleted Items” Folder.
Adding Holidays
You can automatically add the holidays for a particular country to your calendar. These
holidays are set up as recurring events in your calendar.
Use the following steps to add holidays to your Calendar:
1. On the Tools menu, click Options, and then click the Calendar Options button.
2. Click Add Holidays.
3. Check the check box next to the country with the holidays you want to add to your
Calendar, and click OK.
The holidays appear on your calendar.
18
Page 20

A contact is a person or organization you correspond with. You can store information about
contacts such as job titles, phone numbers, addresses, email addresses, and notes. Each contact
is like a business card that you keep in a file. To access the contact list, click Contacts on the
Navigation Pane.
The contact list works with other areas so that you can easily access it any time you need
information about your contacts. For example, you can look up names and addresses in your
contact list or merge contacts with a form letter in Word.
Contacts Views
To change your contacts view, from the menu bar click Tools and then choose Organize from
the drop-down list. A new screen section appears. Click Using Views. In the Change your view
box, select one of the following views:
Click this View To See Contacts
Address Cards On individual cards with one mailing address and business
Detailed Address Cards On individual cards with business and home addresses, phone
Phone List In a list with company name, business phone number,
By Category In a list grouped by categories and sorted by the names the
By Company In a list grouped by company with job title, company name,
By Location In a list grouped by country with company name, state,
By Follow-up Flag In a list grouped by flag. Also shows the due date for follow-
up action for the flag.
Creating Contacts
When you create a contact, you type all new information or start with a copy of information
from an existing contact from the same company.
Using Contacts
and home phone numbers.
numbers, and additional details.
business fax number, and home phone number.
contacts are filed under within each category.
department, business phone number, and business fax
number.
country, and phone numbers.
Create a Contact with New Information
To create a contact with new information, follow these steps:
1. Click Contacts on the Navigation Pane.
2. Click the New Contact button.
A blank contact form appears that looks similar to the following:
19
Page 21

3. In the Full Name box, type a name for the contact.
4. Type the information you want to include for the contact. To select an email address,
use the Address button.
5. Click Save and Close.
Outlook
®
saves the new contact
Create a Contact by opening and right-clicking an e-mail address
To create a contact from the same company as another contact:
1. Open the e-mail by double-clicking it.
2. Right click the name of the sender in the e-mail. A shortcut list appears.
3. Choose the option Add to Outlook Contacts. A Contact listing appears for that person.
4. Type the information you want to include for the contact.
5. Click Save and Close.
Outlook
®
saves the new contact.
Create a Contact from the Same Company as Another Contact
To create a contact from the same company as another contact:
6. Select an existing contact from the same company as the contact you want to create.
7. From the Actions menu, click New Contact from Same Company.
8. In the Full Name box, type a name for the contact.
9. Type the information you want to include for the contact.
10. Click Save and Close.
Outlook
®
saves the new contact.
Create a List
To create a list for a group of people:
1. While viewing your contacts folder, from the File menu, click New, and then click
Distribution List.
The Untitled-Distribution List window appears.
20
Page 22

2. In the Name text box, type the name for the list of people.
3. Click the Select Members button.
The Select Members window appears.
4. Select a person you would like to include in your list. Then click the Members button.
The person adds to the box on the right of the window.
5. Repeat step 4 until everyone you need is on the list.
6. Click OK .
The Select Members Window appears.
7. Click Save and Close .
The distribution list appears in your Contacts.
Deleting a List or Contact
To remove a list or contact:
1. In your Contacts Folder, highlight the contact you wish to delete by clicking it once.
2. Click the Delete button.
The item is deleted from your Contacts Folder
21
Page 23

Using Tasks
Outlook
your tasks, set priorities, and due dates. To access your task list, click Tasks in the Navigation
Pane. The following is a sample task list:
®
Tasks can help you manage your various duties and projects. You can use it to record
Tasks Views
Once you have many tasks in Outlook
change your view, click Organize
Views
Click this View To See Tasks
Simple List In a list with only a few details so you can see at a glance the
Detailed List In a list that shows many details about each task, including
Active Tasks In a list that shows only incomplete tasks (including ones that
Next Seven Days In a list that shows only the tasks that are due in the next
Overdue Tasks In a list that shows only the tasks that are overdue.
By Category In a list, grouped by category and sorted by due date within
Assignment In a list that shows only the tasks that have been assigned to
By Person Responsible In a list, grouped by task owner and sorted by due date for
Completed Tasks In a list that shows only the tasks that have been marked
Task Timeline Represented by icons arranged in chronological order by start
date on a timeline. Tasks without start dates are arranged by
due date.
®,
you may want to see them in a special format. To
. A new screen section appears. Click Using
. In the Change your view box, select one of the following views:
tasks that are complete.
priority and percentage complete.
are overdue).
seven days.
each category.
others, sorted by task owner and due date.
each task owner.
complete.
22
Page 24

Creating Tasks
To create a simple task, type task information into the space labeled Click here to add a new
Task and press Enter. You can also drag an appointment or message onto Tasks in the
Navigation Pane to create a task. Or, you can follow these steps:
1. Click Tasks on the Outlook Bar.
2. Click the New Task button
an empty task appears.
3. Type a task name in the Subject box.
4. Select the options you want.
.
5. If the new task is recurring, click the Recurrence button
.
A new window appears. Select the options you want and click OK.
6. Click Save and Close.
Outlook
®
adds the new task to your task list.
23
Page 25

Using Journal
Outlook® Journal can keep track of all you do in a day’s work. Journal can record all Outlook®
items, including email you send and receive, and keep track of how long you work in other
Office programs.
To start Journal, click Journal in the Navigation Pane. The journal opens in the Outlook
Navigation Pane.
Journal Views
To use any of the views below, from the Tools menu, click Organize. A new screen section
appears. Click Using Views. In the Change your view box, select one of the following views.
Each view shows journal entries arranged in order of start date (from earliest to latest on a
timeline or from latest to earliest in a list).
Click this View To See
By Type All journal entries represented by icons on a timeline grouped
By Contact All journal entries represented by icons on a timeline grouped
By Category All journal entries represented by icons on a timeline grouped
Entry List All journal entries in a list.
Last Seven Days Journal entries created during the last seven days in a list.
Phone Calls Journal entries that are phone calls in a list.
Recording Journal Entries
Journal can record some items automatically, but other items must be added manually. For
example, Journal can track email messages automatically, but you must add appointments
manually.
by type of item.
by contact name.
by category.
®
Record an Item in the Journal Automatically
To record an item in the journal automatically:
1. Click Tools, and then click Options from the menus.
The Options window appears.
2. Click the Journal Options button in the Contacts subsection.
A screen similar to the following appears:
24
Page 26

3. Mark the items you would like Journal to track automatically.
4. Click OK.
Journal begins tracking the items you selected
Record an Item in the Journal Manually
To record an item in the journal manually:
1. Click Journal in the Navigation Pane.
Journal opens in the Reading Pane.
2. Click the New Journal Entry button.
A new journal entry form appears.
3. In the Subject box, type the name of the journal entry.
4. Select the options that you want.
5. Click Save and Close.
The entry is added to your journal
25
Page 27

Using Notes
Outlook
Notes folder.
Create a Note
To create a note:
You may want to keep a note open on your desktop. Double-click the note you want. Even
when you close or minimize Outlook
Delete a Note
To delete a note:
®
can create electronic versions of sticky notes. All notes are conveniently kept in your
1. Click Notes in the Navigation Pane.
The Notes screen opens in the Reading Pane.
2. Click the New Note button.
A blank note appears with your cursor waiting for information.
3. Type the information for the note. This information is saved automatically.
4. Click the Close button.
Outlook
®
saves the note in your notes folder.
®,
the note will stay open until you close it.
1. Click Notes in the Navigation Pane.
The Notes screen opens in the Reading Pane.
2. Click the note you wish to delete.
The note is highlighted.
3. Press the Delete key.
The note disappears from the Notes folder.
26
Page 28

Symbols in Inbox
Symbol Description
Appendix A: Symbols
27
Page 29

Symbols in Calendar
Symbol Description
Symbols in Tasks
Symbol Description
28
Page 30

Symbols in Contacts
Symbol Description
Symbols in Journal
Symbol Description
29
Page 31

Your Outlook
desk. In the paper-based world, you can occasionally shuffle through all your documents and
put in storage those that are important but not frequently used. Documents that are less
important, such as newspapers and magazines, you discard based on their age.
In Outlook
File menu, or you can have old items automatically transferred by using AutoArchive. Items are
considered old when they reach the age you specify. With AutoArchive, you can either delete or
move old items. Outlook
AutoArchive
AutoArchive is a two-step process. First, you turn on AutoArchive on the AutoArchive tab in
the Options dialog box under the Tools menu. Second, you set the AutoArchive properties for
each folder that you want archived. What and when items are AutoArchived is determined at
the folder level. You can automatically archive individual folders, groups of folders, or all
Outlook
by date, and old items are moved to your archive file. By default your archive file is stored at
C:\WINDOWS\Application Data\Microsoft\Outlook\archive.pst and is a personal folder file.
Items in the Deleted Items folder are deleted.
Note: The archive folder is not created until the first time Outlook successfully archives items.
Note: At install several folders have AutoArchive turned on. These folders and their default
aging periods are Calendar (6 months), Tasks (6 months), Journal (6 months), Sent Items (2 months),
and Deleted Items (2 months). Inbox, Notes, and Contacts do not have AutoArchive activated
automatically.
When you archive, your existing folder structure is maintained in your new archive file. If there
is a folder above what you choose to archive, that folder is created in the archive file. However,
any additional items within the upper folder are not archived in the archive file. In this way, an
identical folder structure exists between the archive file and your mailbox.
Appendix B: Archive
®
mailbox grows as items are created in the same way that papers pile up on your
®
, you can manually transfer old items to a storage file by clicking Archive on the
®
can archive all items and files that are stored in a mail folder.
®
folders. When you start Outlook®, AutoArchive properties of each folder are checked
Change General AutoArchive Options
Follow these steps to change the general AutoArchive options for all folders in Outlook®:
1. On the Tools menu, click Options, and then click the Other tab. Click the
AutoArchive button.
2. Note the AutoArchive every X days check box. This determines how often
AutoArchive tries to archive your items.
3. If you want to store your archived items in a location other than the default location,
type the path and file name for the location you want items archived in the Default
archive file box.
4. Click OK twice to accept the AutoArchive changes.
The next time Outlook
®
successfully archives items, Outlook® uses the archive file to
hold any archived items.
30
Page 32

Change Folder AutoArchive Options
Follow these steps to set when items will be archived per folder:
1. Right-click the folder on which you want to set the AutoArchive preferences, and click
Properties.
2. Click the AutoArchive tab, set your archive options, and click OK.
The new AutoArchive options work with the specified folder.
Retrieving Archived Items
Since the archive file is a file with a .pst extension, you can view archived items by opening the
file. Follow these steps:
Retrieve Archived Items
1. Click File, Open, and then Outlook Data File.
2. In the File Name box, type the location of your archive
3. file, and click OK.
A new Outlook
®
4. In the Folder List, open Archive Folders to access your archived items
Note: The default location is normally C:\My Documents\Archive.pst
window appears.
31
 Loading...