

Page 1

Nokia 8260
User Guide
V ersion 0.06
8260 User Gui de version v. 0.06 [ i ] 3/6/00
Page 2

Copyri ght informa tion
Part No. 9352523, Issue 1, nn.nnnn
2000 Nokia Mobile Phones. All rights reserved.
©
Printed i n Canada nn/2000.
Nokia, Nokia C onnecting P eople, and the Original Access ories logos are
trademarks of Nokia Corporation and/or its affiliates.
FCC/Industry Canada Notice
Your phone may cause TV or ra dio interference (for example, when u sing
a telephone in close proximity to receiving equipment). The FCC or
Industry Canada can require you to stop using your telephone if such
interference can not be eliminated . If you r equire assi stance, co ntact your
local service facility.
This device complies with part 15 of the FCC rules. Operati on is subject to
the condition that this device does not cause harmful interference.
8260 User Guide version v. 0.06 [ ii ] 3/6/00
Page 3

Contents
1. For your safety. . . . . . . . . . . . . . . . . . . . . . . . . . . . . . . .1
2. Welcome . . . . . . . . . . . . . . . . . . . . . . . . . . . . . . . . . . . .3
Before you begin. . . . . . . . . . . . . . . . . . . . . . . . . . . . . . 3
Contacting Nokia . . . . . . . . . . . . . . . . . . . . . . . . . . . . .4
When you need to contact your service provider. . . .4
3. Prepare your phone for use . . . . . . . . . . . . . . . . . . . . .5
Install the battery . . . . . . . . . . . . . . . . . . . . . . . . . . . . .5
First, remove the back cover . . . . . . . . . . . . . . . . .5
Next, insert the battery . . . . . . . . . . . . . . . . . . . . .5
Last, replace the back cover. . . . . . . . . . . . . . . . . .5
Charge the battery . . . . . . . . . . . . . . . . . . . . . . . . .6
When you need to remove the battery . . . . . . . . . . . .6
4. Get to know your phone. . . . . . . . . . . . . . . . . . . . . . . .7
Keys and screen. . . . . . . . . . . . . . . . . . . . . . . . . . . . . . .7
Navigation keys. . . . . . . . . . . . . . . . . . . . . . . . . . . . . .10
Indicators and icons . . . . . . . . . . . . . . . . . . . . . . . . . .11
5. Make and answer calls . . . . . . . . . . . . . . . . . . . . . . . .14
Make a call . . . . . . . . . . . . . . . . . . . . . . . . . . . . . .14
Answer a call. . . . . . . . . . . . . . . . . . . . . . . . . . . . .14
Adjust the earpiece volume. . . . . . . . . . . . . . . . .15
8260 User Guide version v. 0.06 [ iii ] 3/6/00
Page 4

Redial the last-dialed number . . . . . . . . . . . . . . 15
Use caller ID. . . . . . . . . . . . . . . . . . . . . . . . . . . . . 15
Keep calls private. . . . . . . . . . . . . . . . . . . . . . . . . 16
6. Use phone menus. . . . . . . . . . . . . . . . . . . . . . . . . . . .17
Navigate menus . . . . . . . . . . . . . . . . . . . . . . . . . . . . . 17
Scroll through menus . . . . . . . . . . . . . . . . . . . . .17
Use a shortcut . . . . . . . . . . . . . . . . . . . . . . . . . . . 17
Change menu levels. . . . . . . . . . . . . . . . . . . . . . . 18
Get help . . . . . . . . . . . . . . . . . . . . . . . . . . . . . . . .18
List of shortcuts . . . . . . . . . . . . . . . . . . . . . . . . . . . . .18
7. Enter letters and numbers. . . . . . . . . . . . . . . . . . . . . 22
Enter letters . . . . . . . . . . . . . . . . . . . . . . . . . . . . . . . .22
Edit names . . . . . . . . . . . . . . . . . . . . . . . . . . . . . .23
Change fr om capital ( u ppercase) letters . . . . . . 23
Use punctuation and special characters . . . . . . 23
Enter numbers. . . . . . . . . . . . . . . . . . . . . . . . . . . . . . . 24
Use special characters in numbers. . . . . . . . . . .24
List of special characters . . . . . . . . . . . . . . . . . . . 24
8. Use the phone book . . . . . . . . . . . . . . . . . . . . . . . . . . 25
About the phone book. . . . . . . . . . . . . . . . . . . . . . . .25
Use phone book menus . . . . . . . . . . . . . . . . . . . . . . .25
Change views . . . . . . . . . . . . . . . . . . . . . . . . . . . . . . . 26
Add names and numbers . . . . . . . . . . . . . . . . . . . . . . 27
Change a stored telephone number . . . . . . . . . . . . . 27
8260 User Guide version v. 0.06 [ iv ] 3/6/00
Page 5

Recall and redial numbers . . . . . . . . . . . . . . . . . . . . .28
Erase stored names and numbers . . . . . . . . . . . . . . .29
Erase the entire phone book. . . . . . . . . . . . . . . . . . . .30
Check memory status . . . . . . . . . . . . . . . . . . . . . . . . .30
9. Use voice mail. . . . . . . . . . . . . . . . . . . . . . . . . . . . . . .31
When you have a message. . . . . . . . . . . . . . . . . . . . .31
Set up your voice mailbox . . . . . . . . . . . . . . . . . . . . .31
Set greetings and passwords . . . . . . . . . . . . . . . . . . .32
Listen to your voice messages . . . . . . . . . . . . . . . . . .32
10. Work with the call log . . . . . . . . . . . . . . . . . . . . . . . .33
Check the call log . . . . . . . . . . . . . . . . . . . . . . . . . . . .33
Check missed calls . . . . . . . . . . . . . . . . . . . . . . . .34
Check previously dialed calls. . . . . . . . . . . . . . . .35
Check received calls . . . . . . . . . . . . . . . . . . . . . . .35
Clear call lists . . . . . . . . . . . . . . . . . . . . . . . . . . . .35
Check call timers. . . . . . . . . . . . . . . . . . . . . . . . . . . . .36
Turn on a current call timer. . . . . . . . . . . . . . . . .37
Clear call timers . . . . . . . . . . . . . . . . . . . . . . . . . .37
11. Use advanced calling features . . . . . . . . . . . . . . . . . .38
Set in-call options. . . . . . . . . . . . . . . . . . . . . . . . . . . .38
Use call waiting . . . . . . . . . . . . . . . . . . . . . . . . . . . . . .39
Store the call waiting feature code. . . . . . . . . . .39
Manage calls. . . . . . . . . . . . . . . . . . . . . . . . . . . . .40
Make a conference call . . . . . . . . . . . . . . . . . . . .40
8260 User Gui de version v. 0.06 [ v ] 3/6/00
Page 6

Use call forwarding . . . . . . . . . . . . . . . . . . . . . . . . . . 41
Store the call forwarding feature code . . . . . . . 41
Activate call forwarding . . . . . . . . . . . . . . . . . . . 42
Redial automatically . . . . . . . . . . . . . . . . . . . . . . . . . 43
Use a calling card. . . . . . . . . . . . . . . . . . . . . . . . . . . .43
Save calling card information (step 1). . . . . . . . 43
Save calling card information (step 2). . . . . . . . 44
Choose a calling card to use. . . . . . . . . . . . . . . . 45
Make a calling card call . . . . . . . . . . . . . . . . . . . 46
Send your own number in caller ID. . . . . . . . . . . . . . 46
Store the Send Own Number feature code . . . .46
Select a phone system (NAM). . . . . . . . . . . . . . . . . . 47
Select the NAM for your phone . . . . . . . . . . . . .48
Select digital or analog. . . . . . . . . . . . . . . . . . . . 48
Set touch tones. . . . . . . . . . . . . . . . . . . . . . . . . . . . . . 49
Set manual touch tones . . . . . . . . . . . . . . . . . . .49
Set touch tone length . . . . . . . . . . . . . . . . . . . . . 49
Store touch tone sequences (strings). . . . . . . . . 50
12. Customize your phone. . . . . . . . . . . . . . . . . . . . . . . . 51
What are profiles? . . . . . . . . . . . . . . . . . . . . . . . . . . . 51
Select a different profile . . . . . . . . . . . . . . . . . . . . . . 51
Customize a profile . . . . . . . . . . . . . . . . . . . . . . . . . . 52
Set ringing options. . . . . . . . . . . . . . . . . . . . . . . .53
Set the ringing volume . . . . . . . . . . . . . . . . . . . . 54
Set the ringing tone. . . . . . . . . . . . . . . . . . . . . . . 54
8260 User Guide version v. 0.06 [ vi ] 3/6/00
Page 7

Set a vibrating alert . . . . . . . . . . . . . . . . . . . . . . .55
Set keypad tones. . . . . . . . . . . . . . . . . . . . . . . . . .55
Set warning and game tones. . . . . . . . . . . . . . . .56
Set the message alert tone . . . . . . . . . . . . . . . . .56
Set your phone to answer automatically . . . . . .57
Set the lights (car kit only) . . . . . . . . . . . . . . . . . 57
Rename profiles. . . . . . . . . . . . . . . . . . . . . . . . . . . . . .58
Restore factory settings . . . . . . . . . . . . . . . . . . . . . . .58
Set the display language . . . . . . . . . . . . . . . . . . . . . .59
Set and display the clock . . . . . . . . . . . . . . . . . . . . . .59
Set the clock. . . . . . . . . . . . . . . . . . . . . . . . . . . . .59
Display the clock. . . . . . . . . . . . . . . . . . . . . . . . . .60
Select the time format. . . . . . . . . . . . . . . . . . . . .60
Add a welcome note. . . . . . . . . . . . . . . . . . . . . . . . . . 60
Use 1-touch dialing . . . . . . . . . . . . . . . . . . . . . . . . . .61
Assign a name or number to a 1-touch
dial key . . . . . . . . . . . . . . . . . . . . . . . . . . . . . . . . .61
Change 1-touch dialing numbers . . . . . . . . . . . . 62
Erase 1-touch dialing numbers . . . . . . . . . . . . . .62
Use emergency key 9 . . . . . . . . . . . . . . . . . . . . . . . . .62
Activate the emergency key 9. . . . . . . . . . . . . . .63
Make an emergency call . . . . . . . . . . . . . . . . . . .63
Use caller groups. . . . . . . . . . . . . . . . . . . . . . . . . . . . .63
Add names to a caller group . . . . . . . . . . . . . . . .63
Assign a ringing tone to a caller group. . . . . . . .64
Rename a caller group. . . . . . . . . . . . . . . . . . . . .64
8260 User Gui de version v. 0.06 [ vii ] 3/6/00
Page 8

Remove names from a caller group . . . . . . . . . . 65
Display caller group graphics . . . . . . . . . . . . . . . 65
13. Security. . . . . . . . . . . . . . . . . . . . . . . . . . . . . . . . . . . .66
Change your security code. . . . . . . . . . . . . . . . . . . . .66
Protect your phone with the lock code. . . . . . . . . . . 67
Turn on the phone lock . . . . . . . . . . . . . . . . . . . . 67
Store an unlocked phone number. . . . . . . . . . . . 68
Call an unlocked phone number. . . . . . . . . . . . .68
Answer a call while using a lock code. . . . . . . . 68
Change your lock code . . . . . . . . . . . . . . . . . . . .68
Turn off the lock code . . . . . . . . . . . . . . . . . . . . .69
Lock the keypad . . . . . . . . . . . . . . . . . . . . . . . . . . . . . 70
Activate keyguard . . . . . . . . . . . . . . . . . . . . . . . . 70
Deactivate keyguard . . . . . . . . . . . . . . . . . . . . . . 70
Answer a call while keyguard is active . . . . . . . 71
Restrict calls. . . . . . . . . . . . . . . . . . . . . . . . . . . . . . . . 71
Restrict outgoing calls. . . . . . . . . . . . . . . . . . . . . 71
Restrict incoming calls . . . . . . . . . . . . . . . . . . . .72
14. Set network services features . . . . . . . . . . . . . . . . . . 73
Set up how your phone selects a system. . . . . . . . . 74
Select a public system. . . . . . . . . . . . . . . . . . . . . 75
Switch from private to public system . . . . . . . .76
Roaming . . . . . . . . . . . . . . . . . . . . . . . . . . . . . . . . . . .76
8260 User Guide version v. 0.06 [ viii ] 3/6/00
Page 9

15. Send and receive text messages . . . . . . . . . . . . . . . .77
Write a message . . . . . . . . . . . . . . . . . . . . . . . . . . . . .77
About standard text input. . . . . . . . . . . . . . . . . .77
About predictive text input. . . . . . . . . . . . . . . . .78
Turn on predictive text input. . . . . . . . . . . . . . . .78
Keys and tools for predictive text input . . . . . . .79
Turn off predictive text input. . . . . . . . . . . . . . . .79
Notes about predictive text input. . . . . . . . . . . .80
Send a text message. . . . . . . . . . . . . . . . . . . . . . . . . .81
Save a message in the outbox. . . . . . . . . . . . . . . 82
Resend a message from the outbox . . . . . . . . . .82
Receive a text message. . . . . . . . . . . . . . . . . . . . . . . .83
Read a text message. . . . . . . . . . . . . . . . . . . . . . .83
Choose options for a message. . . . . . . . . . . . . . .84
When your phone’s memory is full . . . . . . . . . . .84
Erase a message . . . . . . . . . . . . . . . . . . . . . . . . . . . . .85
Reply to a message. . . . . . . . . . . . . . . . . . . . . . . . . . .85
Forward a message . . . . . . . . . . . . . . . . . . . . . . . . . . .85
Retrieve a number. . . . . . . . . . . . . . . . . . . . . . . . . . . .85
16. Use your personal assistant . . . . . . . . . . . . . . . . . . . .87
Use the calendar . . . . . . . . . . . . . . . . . . . . . . . . . . . . .87
View the calendar. . . . . . . . . . . . . . . . . . . . . . . . .87
Move from day to day . . . . . . . . . . . . . . . . . . . . .88
Create a calendar note. . . . . . . . . . . . . . . . . . . . .88
View the day’s notes. . . . . . . . . . . . . . . . . . . . . . .92
8260 User Gui de version v. 0.06 [ ix ] 3/6/00
Page 10

Erase notes. . . . . . . . . . . . . . . . . . . . . . . . . . . . . . 93
When a calendar alarm goes off. . . . . . . . . . . . . 93
Send or receive calendar notes. . . . . . . . . . . . . . 94
Send and receive business cards. . . . . . . . . . . . . . . . 95
Send a business card . . . . . . . . . . . . . . . . . . . . . . 95
View a received business card. . . . . . . . . . . . . . . 95
Save a viewed business card. . . . . . . . . . . . . . . .95
Delete a viewed business card . . . . . . . . . . . . . .96
Download ringing tones. . . . . . . . . . . . . . . . . . . . . . .96
Notification of received ringing tone. . . . . . . . . 96
Listen to received ringing tones . . . . . . . . . . . . . 96
Save received ringing tones . . . . . . . . . . . . . . . .96
Alarm clock. . . . . . . . . . . . . . . . . . . . . . . . . . . . . . . . .97
Set the alarm clock . . . . . . . . . . . . . . . . . . . . . . . 97
Turn off the alarm clock when it rings. . . . . . . .97
Turn off the alarm clock altogether . . . . . . . . . . 98
Calculator . . . . . . . . . . . . . . . . . . . . . . . . . . . . . . . . . . 98
Use the calculator . . . . . . . . . . . . . . . . . . . . . . . .98
Convert currency . . . . . . . . . . . . . . . . . . . . . . . . .99
17. Games . . . . . . . . . . . . . . . . . . . . . . . . . . . . . . . . . . . . 101
Memory. . . . . . . . . . . . . . . . . . . . . . . . . . . . . . . . . . . 101
Snake. . . . . . . . . . . . . . . . . . . . . . . . . . . . . . . . . . . . .102
Logic . . . . . . . . . . . . . . . . . . . . . . . . . . . . . . . . . . . . . 102
Rotation . . . . . . . . . . . . . . . . . . . . . . . . . . . . . . . . . .103
8260 User Guide version v. 0.06 [ x ] 3/6/00
Page 11

18. Reference information . . . . . . . . . . . . . . . . . . . . . . .104
Batteries, chargers, and accessories . . . . . . . . . . . .104
Important safety information . . . . . . . . . . . . . . . . . .106
Traffic safety. . . . . . . . . . . . . . . . . . . . . . . . . . . .106
Operating environment . . . . . . . . . . . . . . . . . . .106
Electronic devices. . . . . . . . . . . . . . . . . . . . . . . .107
Potentially explosive atmospheres . . . . . . . . . .108
Vehicles . . . . . . . . . . . . . . . . . . . . . . . . . . . . . . . .109
Emergency calls. . . . . . . . . . . . . . . . . . . . . . . . . . . . .110
Make an emergency call . . . . . . . . . . . . . . . . . .110
Radio frequency (RF) signals . . . . . . . . . . . . . . .111
Care and maintenance. . . . . . . . . . . . . . . . . . . . 111
Accessories. . . . . . . . . . . . . . . . . . . . . . . . . . . . . . . . .113
Battery . . . . . . . . . . . . . . . . . . . . . . . . . . . . . . . . . . . .114
Chargers and other accessories . . . . . . . . . . . . . . . .115
Troubleshooting . . . . . . . . . . . . . . . . . . . . . . . . . . . . .117
19. Frequently asked questions (FAQ) . . . . . . . . . . . . . .119
20. Glossary of terms. . . . . . . . . . . . . . . . . . . . . . . . . . . .123
21. Technical information. . . . . . . . . . . . . . . . . . . . . . . .128
Index. . . . . . . . . . . . . . . . . . . . . . . . . . . . . . . . . . . . . . . . .133
8260 User Gui de version v. 0.06 [ xi ] 3/6/00
Page 12

8260 User Guide version v. 0.06 [ xii ] 3/6/00
Page 13
For your safety
1. For your safety
This section provides various safety guidelines. Read this information
before using your mobile phone (called phone throug ho ut t his gu ide ).
Failure to comply with these guid elines could prove eit her dangerous or
illegal.
For more detailed safety information, see “Important safety information”
on page 106.
Road safety comes first
Don’t use a phone while driving. Park the vehicle first.
Switch off in hospitals
Switch off your phone when you are in a hospital or when you
are near medi cal equipment. Follow any regulat ions or rules
that are in force.
Switch of f o n aircraft
Do not use phones on airplanes as this can cause interference
with the nav igational equipment. Also, the u s e of phones on
airplanes is illegal.
Switch of f when refueling
Do not use your phone at a refue lin g po int or ne ar f ue ls or
chemicals of any kind.
Switch off near blasting
Do not use th e phone where blas ting is in progress. Observe
restrictions and follow any regulations or rules that are in force.
8260 User Gui de version v. 0.06 [ 1 ] 3/6/00
Page 14
Interference
All phones are susceptible to interference, which could affect
performance. This could impede the making of an emergency
call.
Use sensibly
Use only in the normal position (to ear). Avoid unnecessary
contact with the antenna when phone is on.
Qualified service
Only qualified service personnel can install or repair cellular
phone equipment.
Accessorie s and b at te r i es
Use only appr oved accessorie s and batteries.
Do not connect incompatible products.
Calling
Make sure the phone is switched on and in service. Enter the
phone numbe r , includin g the area code , then pres s . To end
a call press . To answer a cal l press .
Emergency calls
Make sure the phone is switched o n and in service. Press and
hold at any time to clear the screen. Enter the emergency
number, then press . Give your location. Do not end the call
until told to do so.
Note: You can also press and hold the 9 key to make an
emergency call.
8260 User Guide version v. 0.06 [ 2 ] 3/6/00
Page 15

2. Welcome
• Before you begin
This section pr ovides information that you nee d to know befor e you begin
using your phone.
This guide describes the Nokia 8260 phone, which is approved for use in
the 800/1900 MHz TDMA/AMPS networks.
Understand network services
A number of feat ures known as network servi ce s are described in t his
guide. These are spe cial services yo u arrange throu gh your wireless servic e
provider .
Before you can take advantage of t hese network ser v ices features, you
must subscribe to them through your service provider. Your service
provider will give you instructions on how to uses these network services.
This guide will instruct you on when you need to contact your service
provider for more step-by-step information.
Note: Some networks may not support all language-dependent
characters and/or services.
Welcome
Visit Nokia on the Web
The latest version of this manual may be avail able on N okia’s W orl d Wide
Web site at:
www.nokia.com.
8260 User Gui de version v. 0.06 [ 3 ] 3/6/00
Page 16

• Contacting Nokia
Customer Service, USA
Nokia Mobile Phones
7725 Woodland Center Boulevard, Suite 150
Tampa, FL 33614
Tel:1- 888-NOKIA2U (1 -888-665-4228)
or (1) 813-288-3800
Fax: (1) 813-249-9619
TTY:1-800 -24NOKIA (1-800-2 46-6542)
Customer Service, Canada
Nokia Products Ltd.
575 Westney Rd. Sout h
Ajax, Ontario L1S 4N7
Tel:(1) 905-427-6654
• When you need to contact your
service provider
Some service providers enable you to contact them by pressing and
holding the 2 key on your phone. This feature can be helpful if you’ re
having trouble dialing a number, especially when traveling outside your
home area.
If your service provider deems your problem to be Nokia related, the
service provider will let you know.
Note: This one-key feature might not be available on all systems.
Contact your service provider for availability.
8260 User Guide version v. 0.06 [ 4 ] 3/6/00
Page 17

Prepare your phone for use
3. Prepare your phone
for use
• Install the battery
First, remove the b ack cover
To attach and remove the battery , you need to
first remove the phone’s back cover.
1 Press down on the tab on the bottom of
the cover.
1 Slide th e cover do wn and lift it off.
Next, inser t th e battery
Before you can use your phone, you must insert the battery.
2 Place the top of the battery on the phone, with the gold contacts
toward the top of the phone.
3 Press down on the bottom of the battery until it is fully down.
Last, replace the back cover
1 Place the cover on top of the battery so that none of the battery is
showing.
2 Slide the cover up until it clicks into place.
8260 User Gui de version v. 0.06 [ 5 ] 3/6/00
Page 18

Charge the battery
Before you us e your ph one, and w hen th e batter y runs do wn, you need to
charge it.
1 Connect the lead from the charger to the bottom of the phone.
2 Connect the charger to an AC wall outlet.
The messages Charger connected and then Charging app ear . Th en the
battery power indicator bar starts to flash up and down (scroll).
• You can use the phone while the battery is charging.
• Important: Disconnect your phone from the charger if the phone
becomes hot while you’re making a call.
• If the battery is totally empty, it might take a few minutes before the
charging indicator appears on the screen.
• The time it takes to charge the b attery depends on the charger you use.
The battery is fully charged when the battery indicator bar stops
scrolling and the Battery full message appears (if the phone is on).
3 Disconnect the charger from the AC outlet and the phone.
• When you need to remove
the battery
Later on, you may need to remove the battery.
1 Make sure the phone is off.
2 Remove the phone’s back cover, grasp
the ridge at the end of the battery with
a fingernail, and lift the battery out.
8260 User Guide version v. 0.06 [ 6 ] 3/6/00
Page 19
Get to know your phone
4. Get to know your phone
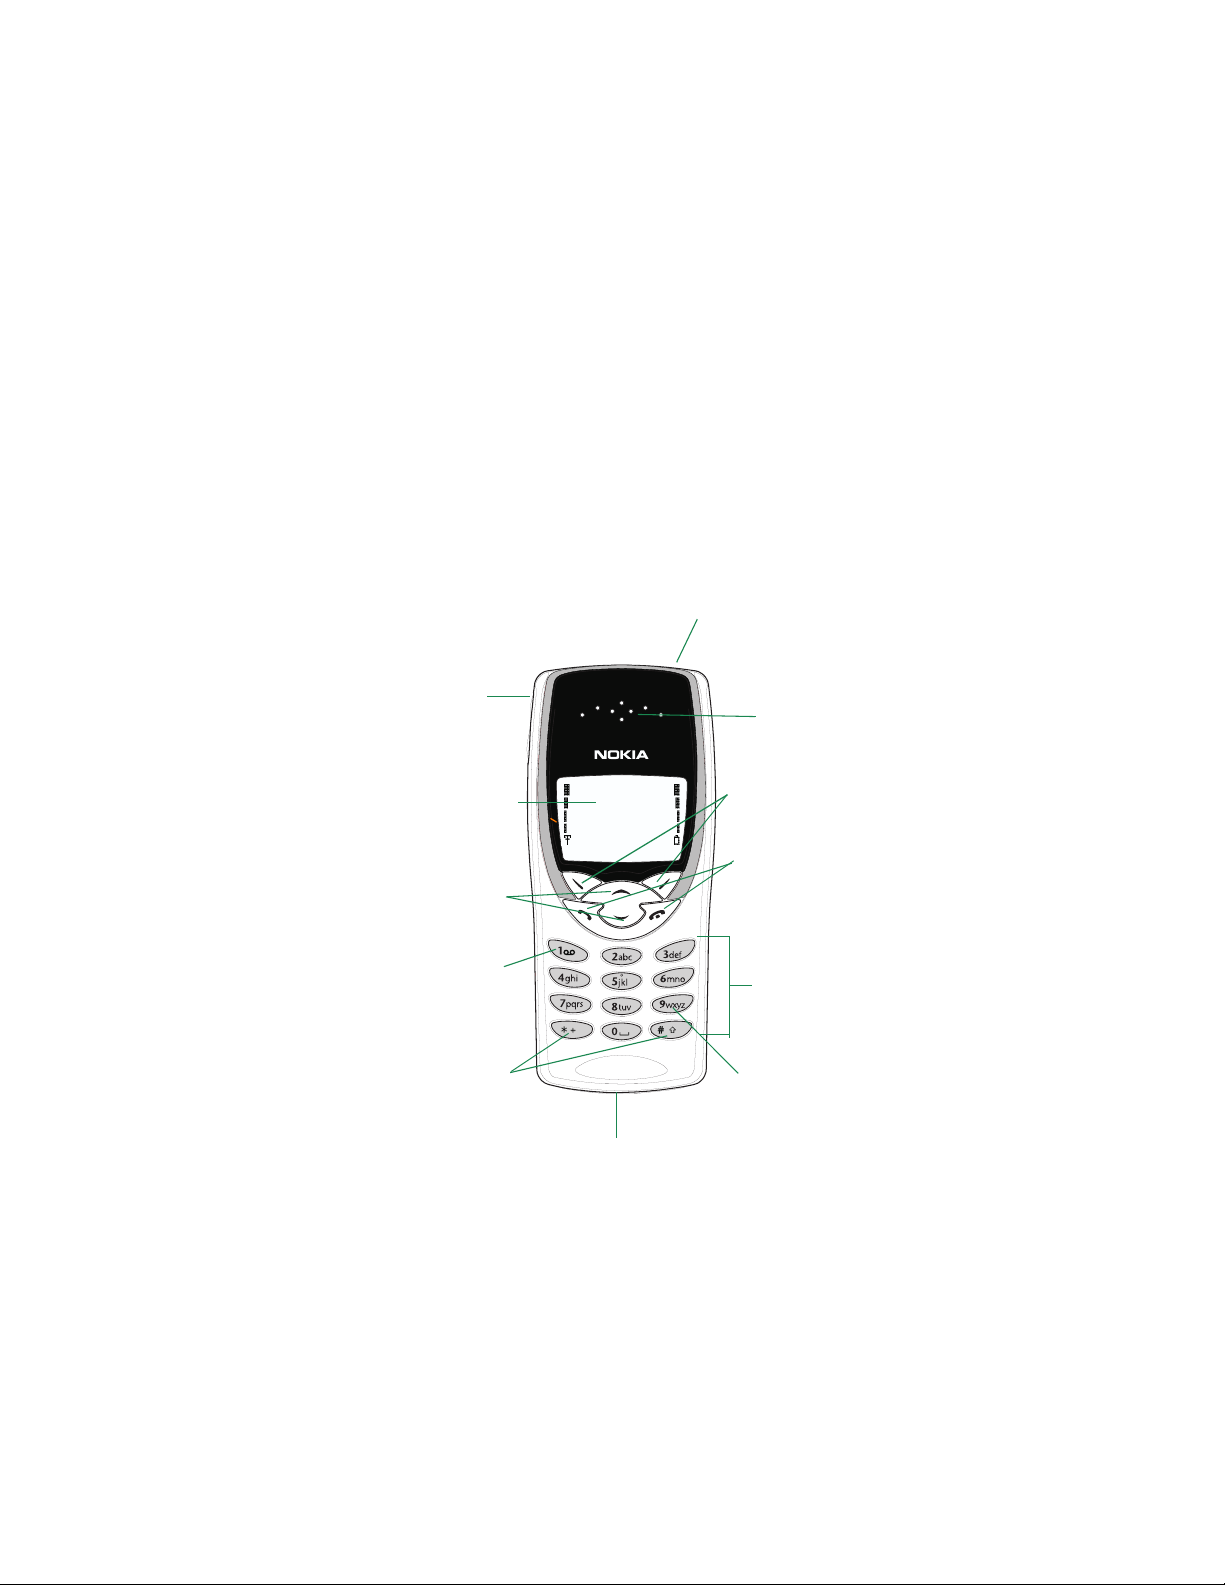
• Keys and screen
On/Off key
see page 9
Volume keys
see page 8
Screen—which always
first appears as the
Start screen.
see page 9
Scroll keys
see page 10
Voice mail key
see page 31
Earpiece
see page 15
Selection keys
see page 8
Talk and End ke ys
see page 8
Number keys
see page 8
Special character keys
see page 8
Microphone
8260 User Gui de version v. 0.06 [ 7 ] 3/6/00
Emergency key 9
see page 63
Page 20
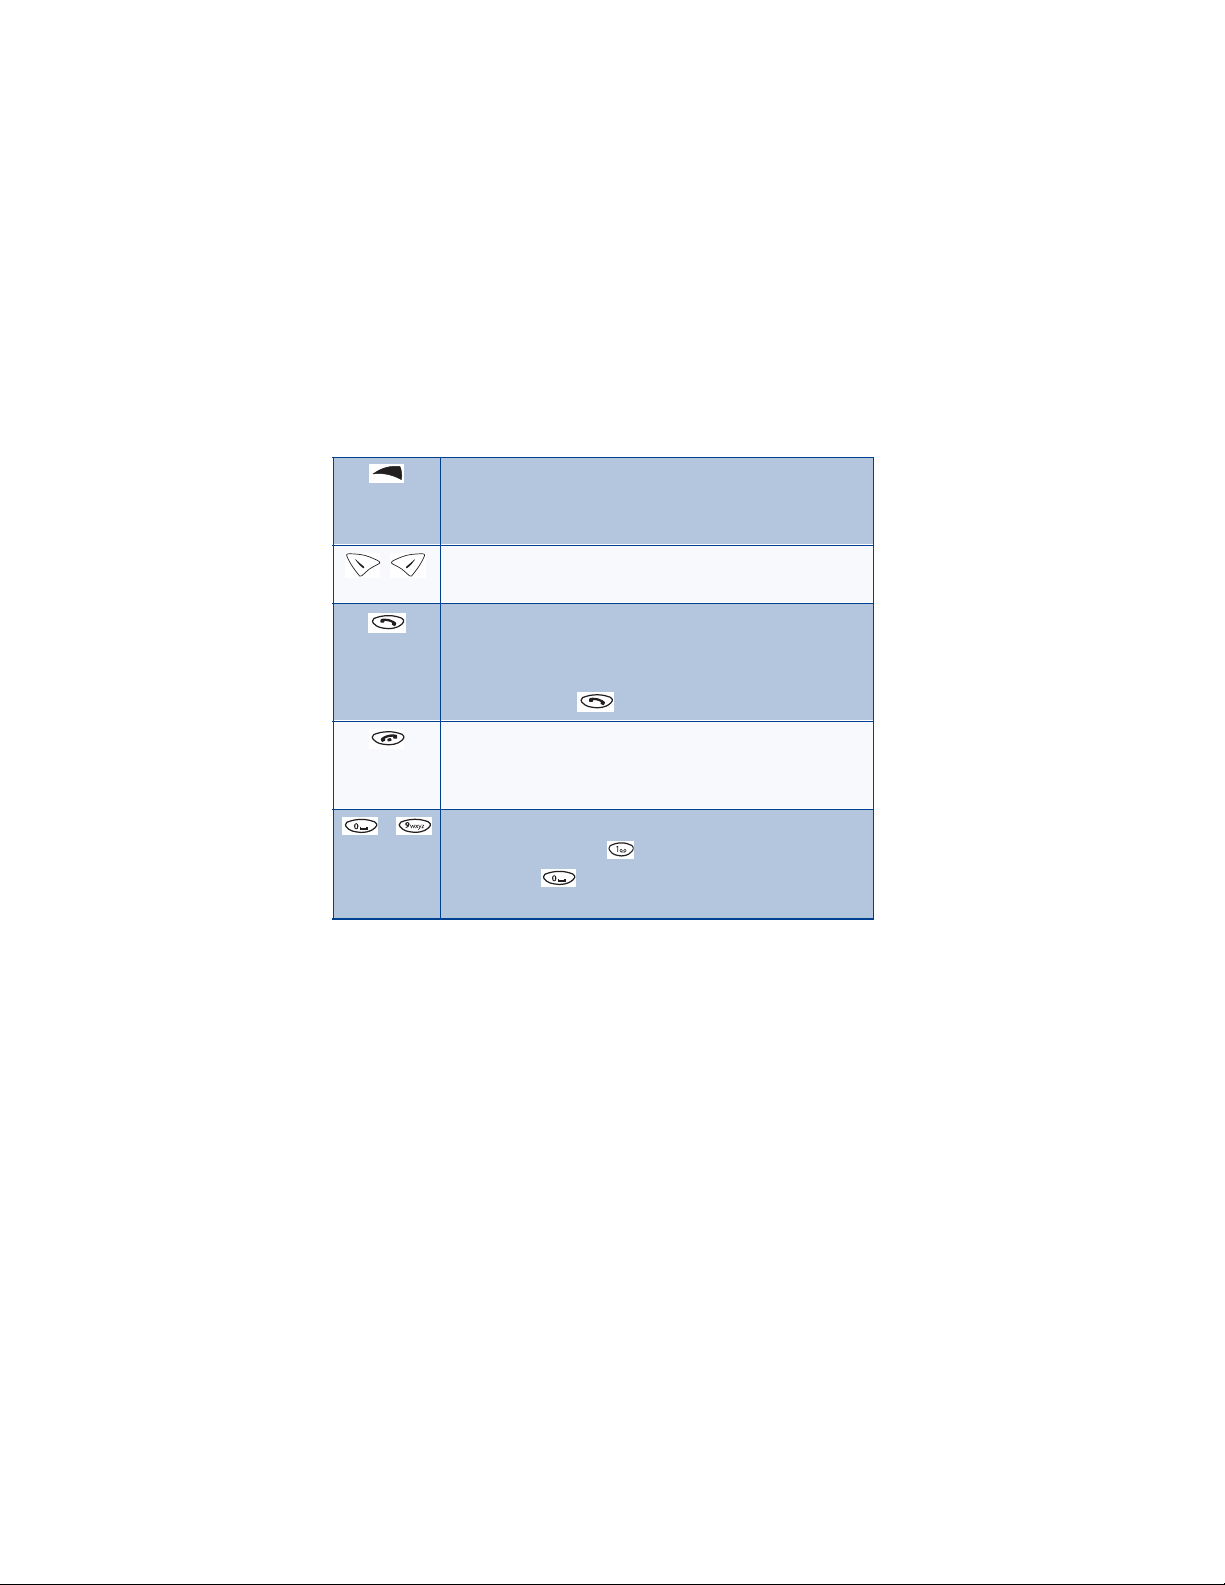
Keys
On/off key: Press and hold the key to switch the phone on
or off.
Note: This key is on the top of the phone.
Selection keys: Press to perform the function indicated by
the text on the screen above the key.
Talk key: Press to make or answer a call.
Tip: Press once to display a list that shows the last-dialed
numbers.
Tip: Press 9, then to make an emergency call.
End key: Pre ss t o end a call or silence the ringing for an
incoming call.
Tip: Press this key once to return to the Start screen.
- Number keys: Use keys 2 through 9 to enter numbers and
letters. Press and hold to call your voice mailbox.
Note: Press if you want to i n sert a bl ank sp ace whil e
entering text.
8260 User Guide version v. 0.06 [ 8 ] 3/6/00
Page 21
Get to know your phone
Special character keys: Use to enter special
characters.
For example: Pressing while you are in alpha mode
changes the letter case.
Scroll keys: Press to move through your phone’s menu or
phone book.
Power key
• Press and hold the P owe r key, which is located on the upper-right, to p
portion of the phone.
Warning: Do not switch on th e pho ne wher e wirel ess ph one use
is prohibited, or where the use of a phone might cause
interference or could be a danger.
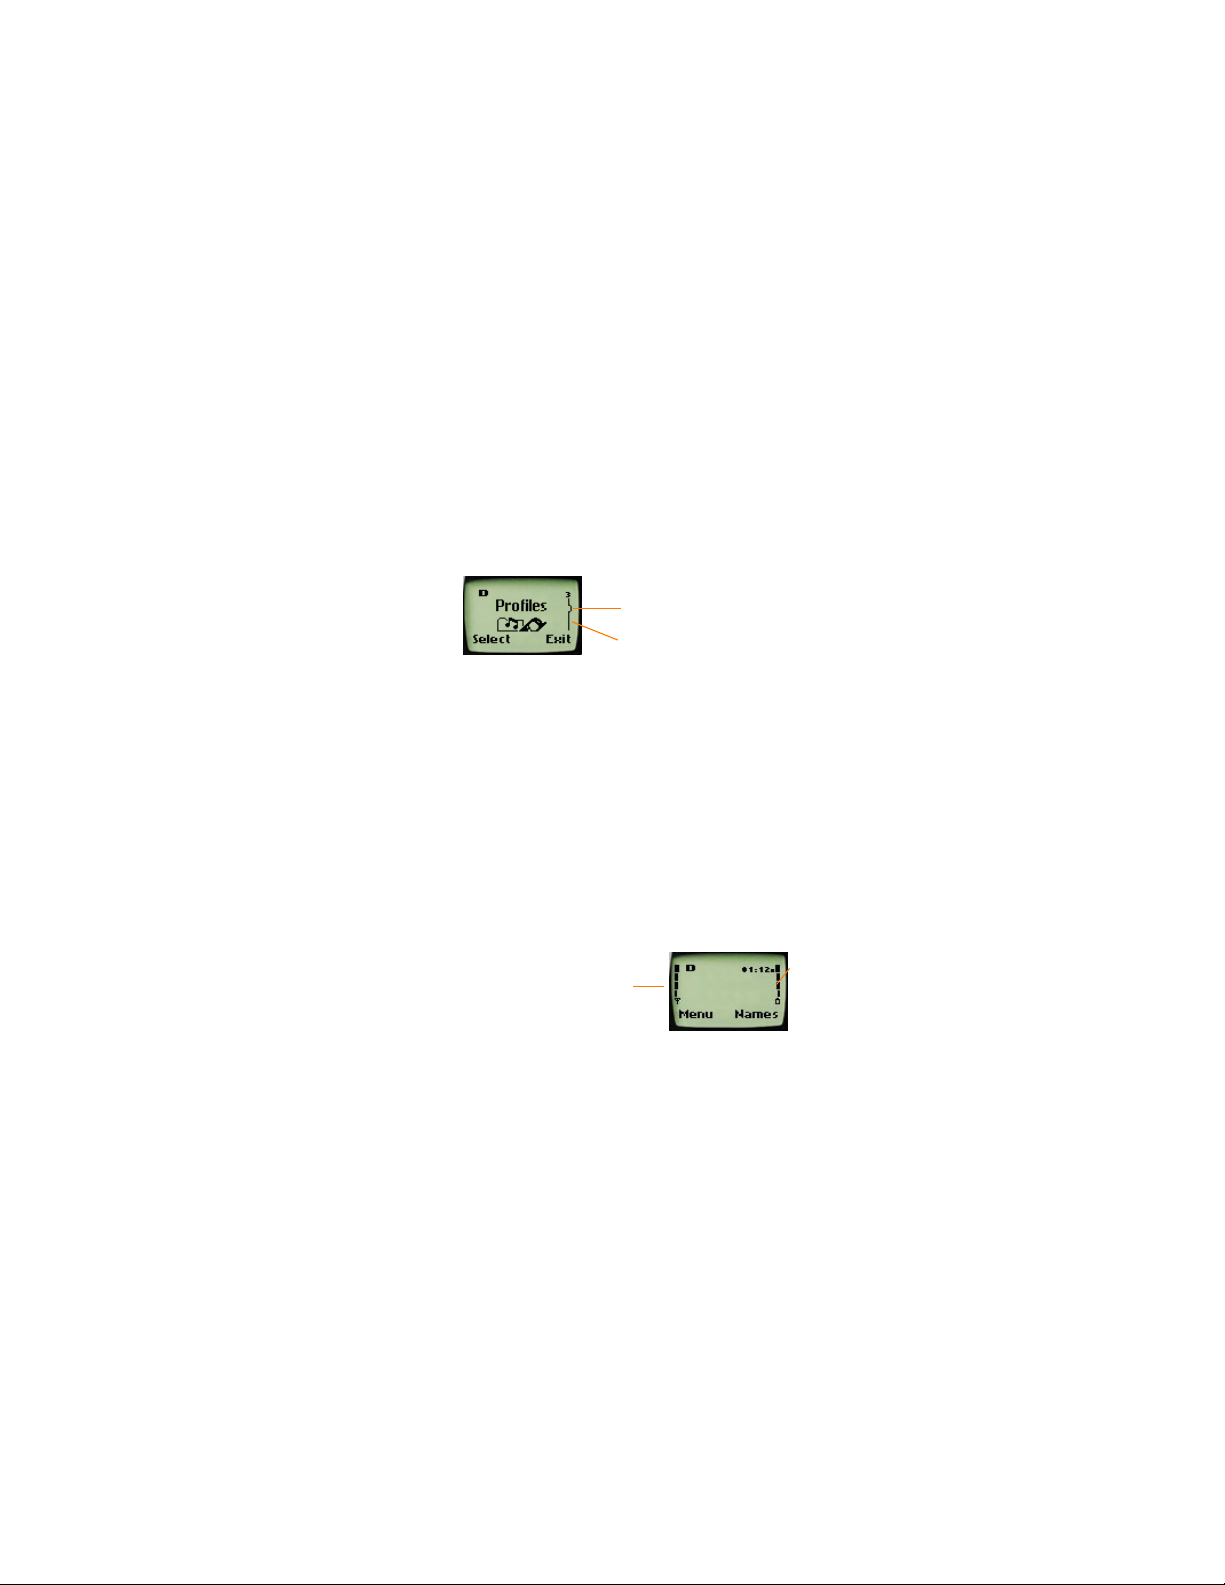
Start screen
When you turn on your phone, a Nokia welcome
appears, and then you see is the Start screen. The
Start screen is the “home base" for your phone.
If you have already made a feature choice and are no
longer at the Start screen but wish to return to this
screen:
• Press .
8260 User Gui de version v. 0.06 [ 9 ] 3/6/00
Page 22

• Navigation keys
Selection ke ys
Use the selection keys to navigate through and select the phone’s many
options.
At the Start screen, two options appear: Menu and Names.
The selection key s ( and ) are just below these options.
• The left selection key appears under Menu.
• The right selection key appears under Names..
When you press the left selection key , the
first menu item, Messages, appears. The text
above the left selection key becomes Select and
the text above the right selection key becomes
Exit.
When you press the right selection key , the six options for the Names
feature appear, along with the same Select and Exit options that appear
when you select
This guide refers to the selection keys by the names that appear above
them. Example: "Press
word Menu.
Menu.
Menu" means to press the selection key below the
Scroll key
Your phone has a scroll key wi th an up and a down arr ow.
This guide refers to these arrows as if they were two separate keys:
( and ).
Left
Right
8260 User Guide version v. 0.06 [ 10 ] 3/6/00
Page 23
Get to know your phone
a
Scroll bar
When you press Menu, a scroll bar appears on the far right side of the
screen. This bar appears as a straight line with one tab, and it indicates
your location in the menu.
As you progress through the menu, the tab mo ves lower on the s croll bar.
If you move backward through the menu, the tab moves up.
Tab
Scroll bar: This view shows the scroll b
three tab positions from the beginning
menu list. A numbe r 3 appears above th
bar, showing the tab position.
Indica to r s a nd icons
On your phone, you have two types of identifiers: indicators and icons.
Icons are graphical representat ions of a specific item or situation. For
example, an ico n appears when you ha ve a voice message wait ing to be
heard.
Indicators show the status of something. The phone uses three types of
indicators:
• Signal strengt h
indicator
• Battery power
indicator
• Handset volume indicator
Signal strength: This indicator shows the signal strength of the wireless
network at your current location. The higher the bar, the stronger the
signal.
Signal
strength
indicator
Battery
power
indicator
8260 User Gui de version v. 0.06 [ 11 ] 3/6/00
Page 24
Battery power: This indicator shows the battery charge level. The higher
the bar, the more power in the battery.
Handset volume: This indicator appears o nl y du ring calls. It shows how
loud (or not) the volume is during the phone call.
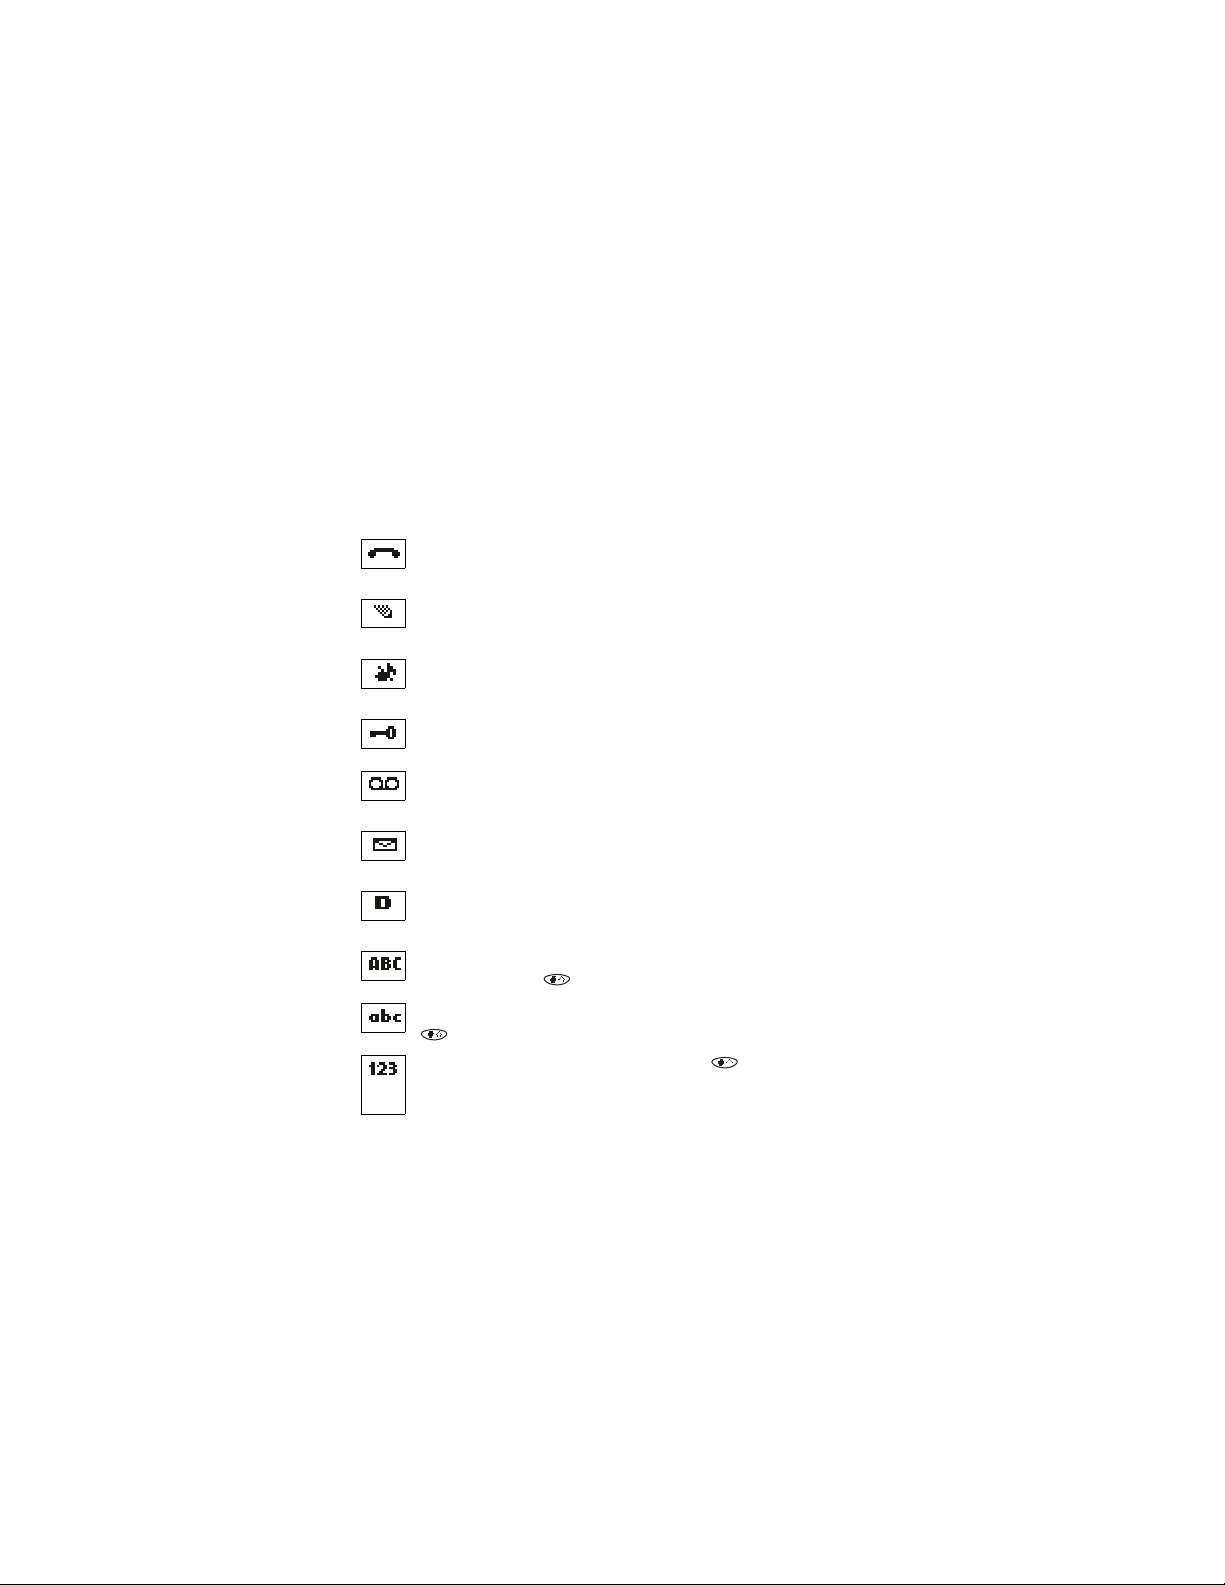
The list below shows what each icon means.
You have an active call.
The phone is waiting for you to enter a response.
.You have selected Silent as the current profile.
The keyguard has been activated to prevent an y accidental key
presses.
You have one or more voice messages waiting.
You have one or more unread text messages waiting.
Digital service is available.
Any alpha characters that you enter will be uppercase (capita l
letters). Press the key to switch to lowercase.
Any alpha characters that you en ter will be lowercase. Press the
key to switch to uppercase.
This appea rs when you pres s and hold the ke y while storin g
names. After switching to this numbers mode, you cannot enter
any alpha characte r s. You ca n onl y enter numbe r s .
8260 User Guide version v. 0.06 [ 12 ] 3/6/00
Page 25

Get to know your phone
This appears when you pre s s the ∗ key while storing names. You
are in special charac ter mode, and yo u can select a special
charact e r by pressing Insert.
The alarm clock is set.
You have a reminder in your Calendar to do something.
You have a reminder in your Calendar that it’s someone’s birthday.
You have a reminder in your Calendar to call someone.
You ha ve a reminder in your Calendar of a meeting.
8260 User Gui de version v. 0.06 [ 13 ] 3/6/00
Page 26

5. Make and answer calls
Make a call
1 Hold the phone as you would any other
telephone, with the earpiece over your ear
and the microphone near your mouth.
2 Deactivate the keyguard, if it is on.
Nokia recommends that you use the keygu ar d,
so you need to check to see if it is on and deactivate it before you make
a call.
3 Enter the phone number—including the area code—and press .
Note: Your phon e has a built-in antenna. As with any other radio-
transmitting device, do not touch the antenna unnecessarily
while the phone is on. Contact with the antenna affects call
quality and could cause the phone to operate at a hi gher power
level than otherwis e need ed.
4 Press to end the call or to cancel the call attempt.
Note: It is normal for your phone to become hot during use. If the phone
becomes too hot, it automatically drops the current call and
returns to the Start screen. Until the phone cools, you will be
unable to receive or make calls.
Answer a call
To answer a ph on e call:
1 Press any key to answer the call.
2 Press to end the call.
Tip: You can mute the r inging of an incoming call by pressing .
8260 User Guide version v. 0.06 [ 14 ] 3/6/00
Page 27

Make and answer cal ls
Adjust the earpiece v olume
You can adjust the earpiece volume (while in a call or at any time) by
pressing th e volume keys on the upper left side of th e phone.
• Press the key up to increase the volume.
• Press down to decrease the volume.
Redial the last-dialed number
To redial the last-dialed number on your phone:
1 If not there, return to the Start screen by pressing
Otherwise, proceed to step 2.
2 Press two times.
Clear or .
Use caller ID
Caller ID is a network service that identifies incoming calls. Contact your
service provider to find out how to get this feature.
When Caller ID is active, your phone shows the caller’s phone number
during an incoming call, as long as this number is a part of your service
provider’ s wireless network.
If the wireless network doesn’t rec ognize the calling number, one of the
following two messages appears: Call ID unavailable or Caller ID
unavailable.
If the callin g party has bloc ked the Cal ler ID f eatur e, one of the foll owin g
two messages appears: Call ID blocked or Caller ID Blocked.
If you have stored the name and number of the calling party in your phone
book and that number is supported by the wireless network, the cal ler’s
name might also appear.
8260 User Gui de version v. 0.06 [ 15 ] 3/6/00
Page 28

Keep calls private
The Voice Privacy feature encrypts the voice channel so that people
cannot eavesdrop on your phone conversations.
Voice Privacy is a network service, so you must contact your se rvice
provider to obtain access to the feature.
To turn on Voice Priv acy:
1 Press
2 Scroll to On and press
During a call, V oice Pri vacy bec ome s active an d notifi es you with a beep.
The message Voice privacy active also appears on the screen.
To turn off Voice Privacy:
• Repeat th e steps above except, in ste p 2, scroll to Off.
Note: If you turn this feature on and Voice Privacy becomes inactive for
Menu 4 > 5 > 1 (Settings > Network services > Voice
privacy).
OK.
any reason , your phone displays the message Voice privacy not
active and beeps.
8260 User Guide version v. 0.06 [ 16 ] 3/6/00
Page 29

Use phon e m enus
6. Use phone menus
• Navigate menus
A menu is a list of cho i ces you ca n make. Y ou r p hone ha s 11 main menus.
Each main menu contains numerous submenus that allow you to use the
phone book, change the ringing tone, and so on. You can use menus and
submenus two ways: by scrolling or by using shortcuts.
Scroll through menus
1 From the Start sc reen , pres s Menu, and then scroll through the menus
using the <<up>> and <<d ow n >> key s .
2 Press Options or OK, using the selection keys, at the option you want.
3 Use the scroll and selection keys to navigate the submenus and to
return to the Start screen.
Use a shortcut
To get to options directly, without scrolling through lists, you can use a
shortcut.
Example
Suppose you want to customize a ringing option.
1 From the Start sc reen, pr ess Menu, and then press the number of the
menu item you want.
2 For this example, press Menu 3 > 1 > 2 > 1 (the same as pre s s ing
Menu > Profiles > Customize > Ringin g Options).
3 When the ringing options appear, scroll through them, select the one
you want, and pr ess OK.
8260 User Gui de version v. 0.06 [ 17 ] 3/6/00
Page 30

Note: Don’t pause too long between numbers. The phone remembers
the last key pressed for on ly a bout 2 se conds. F or example, if you
press Me nu 3 > 4, and pause too long between 3 and 4, the result
is the same as pressing only Menu 3.
Change menu levels
• To return to the previous menu level, press Back or Exit.
• To return to the Start screen, press .
No menu setting changes are saved.
Get help
For most of the menu items in your phone, a brief help text is provided.
To view the help text of a menu item, scroll to an item and wait 5 seconds.
• List of shortcuts
Your phone’s menu may differ from the following list, depending on the
network services to which you have subscribed and the accessories you
are using. If you have any questions, call your service provider.
1Messages
1 Text messages (1 > 1 )
1Inbox
2Saved
3 Write new
4Outbox
5Erase all
1 All read
2 All in inbox
3 All saved
4 All in outbox
2 Voice messages
1 Listen to voice messages
2 Voice mailbox number
3 Welcome Note
8260 User Guide version v. 0.06 [ 18 ] 3/6/00
Page 31

2 Call log
1 Missed calls
2 Dialed calls
3Received calls
4 Clear call lists
5 Call time rs
3Profiles
1Normal
1 Select (not available for Headset or Car Kit)
2 Customize (the following submenus appear in all profiles)
1 Ringing options
2 Ringing volume
3 Ringing tone
4 Vibrating alert
5 Keypad tones
6 Warning and game tones
7 Message alert tone
8 Lights (available only with Car Kit)
9 Automatic answer (available only with Headset or Plug ’n
Play hands-free accessory, part of the Car Kit)
3 Rename a profile (not available for Headset or Car)
2Silent
3 Meeting
4 Outdoor
5Pager
6 Car (available only with Car Kit)
7 Head set (a v a ila b le only with He a dse t)
4Settings
1 Call settings
1 Emergency key 9
2 Automatic redial
3 Calling card
2 Phone settings
1Clock
2Alarm clock
3 Touch tones
1 Manual touch tones
2 Touch tone length
Use phon e m enus
8260 User Gui de version v. 0.06 [ 19 ] 3/6/00
Page 32

4 Restore factory settings
5Language
1English
2French
3 Spanish
4 Portuguese
5 Russian
6Hebrew
7 Traditional Chinese
3 Security settings
1 Restrict calls
1 Restrict outgoing calls
2 Restrict incoming calls
2 Access codes
1Phone lock
2 Unlocked ph one number
3 Change loc k co de
4Change security code
5 Hidden voice mailbox password
4 Au t o upd a t e of da te and time
1On
2 Confirm first
3Off
5 Network services
1 Voice privacy (must be added manually)
2 Call forwarding (must be added manually)
3 Ca ll waiting (must be adde d man ua ll y )
4 Send own number (must be added manually)
5 Network feature setting
6 NAM selection
7 Public system selection (might not be available; see your
service provider)
8 Digital/a nalog selection (mi g ht not be av ailable; see your
service provider)
5System
1Automatic
2Manual
3New search
6Games
1Memory
8260 User Guide version v. 0.06 [ 20 ] 3/6/00
Page 33

2Snake
3Logic
4Rotation
7Calculator
8Calendar
1View day
2Make note
3 Erase notes
4View all
5 Go to date
6 Set the date
9Keyguard
Use phon e m enus
8260 User Gui de version v. 0.06 [ 21 ] 3/6/00
Page 34

7. Enter lett ers and
numbers
You use the phone’s keys to enter letters and numbers into your phone.
Note: For text messages and calendar notes, you can use predictive text
input, which sounds complex but is actually simple and fast. This
method is covered in “About predictive text input” on page 78.
• Enter letters
When you wa nt to a dd ne w na mes or w hen you vi ew
names in the phone book, your phone automatically
switches to the ABC mode. In ABC mode, your phone
displays the icon.
• Press a key once or several times to enter the letter(s) you want.
For example, press the 2 key three times to enter the letter C.
Key Characters Key Characters
1 .,’?!-1 7 PQRS7
2 ABC2 8 TUV8
3 DEF3 9 WXYZ9
4 GHI4 0 Enters an empty space or 0
5 JKL5 * Special characters
8260 User Guide version v. 0.06 [ 22 ] 3/6/00
Page 35

Enter letters and numbers
Key Characters Key Characters
6 MNO6 # Changes letter case; long
press toggles between ABC/
abc and 123 mode
Edit names
To edit a name in the phone book:
• Use the scroll key to move the cursor to the left.
• Use the scroll key to move the cursor to the right.
• Press
Clear to correct any mistakes.
Change from capital (uppercase) letters
To switch between capital letters (uppercase) and lowercase letters:
• Press the key.
The icon switches to , indicating that you are using
lowercase.
• To switch back to uppercase, press the key again.
Use punctuation and special characters
When in ABC mode, you can enter special characters. To do so, press the
key . The following special characters appear:
. , ? ! : ; - + # * ( ) ‘ “ _ @ & $ £ % / < > ¿ ¡ § = ¤ j E ¥
• Press or to move to the character that you want to use and
press
Insert.
• Press # to move quickly up and down between rows of characters.
Tip: If you want to access a special character that appears toward the
end of this list, press for quicker access.
8260 User Gui de version v. 0.06 [ 23 ] 3/6/00
Page 36

• Enter numbers
You use the 123 mode to enter numbers.
• If you are in mode, press and hold the key for about 2
seconds.
The icon appears, enabling you to enter only numbers.
• To return to ABC mode, press the key again for a couple of
seconds.
Use special characters in numbers
To insert special characters in the 123 mode:
• Press the key until the special character that you want to insert
appears.
These characters can be stored within the number sequence, and you
can add as many special characters as you need.
List of sp ecial chara c te r s
* Use as bypass key.
+ Use t o precede an international telephone number.
p Use to create a pause that will occur when a
number is dialed. The numbers you enter after
this special character are automatically sent as
touch tones after a 2.5-second pause.
w Use to create a “wait” when a number is dialed.
This means that when your phone waits for you to press before
it sends the number as touch tones.
8260 User Guide version v. 0.06 [ 24 ] 3/6/00
Page 37

Use the phone book
8. Use the phone book
• About the phone book
Your phone includes a p hone book that can store up to 250 names and
associated phone numbers. Stored numbers can be up to 32 digits long;
stored name s can be up to 26 char acters long.
Make entries unique
You cannot store identical names into your phone.
Example: You can’t have one entry for John Jones with a home number
and another entry for John Jones with a work number. You need to
store the names as, for example, John Jones Work and John Jones
Home.
If you enter a name that’s already in your phone book, the message
Replace? appears, followed by the currently stored name.
• Press
• Use phone book menus
The phone book has several menus from which you can choose. These
menus appear when you press
menu you want to use.
Exit to end this input.
Names. Use the scroll keys to move to the
Search Enables you to search for a specific name.
Add new Enables you to enter new names and numbers.
Options Enables you to choose your scrolling view and to
show the memory status.
8260 User Gui de version v. 0.06 [ 25 ] 3/6/00
Page 38

1-touch dialin g Enables you to assign up to seven 1-touch dial
locations.
Caller groups Enables you to rename or change the ringing tone for
a caller group.
Erase all Enables you to erase all names and numbers in the
phone book. To erase on ly one name and number at
a time, press
name in the phone book.
Details, then Options while viewing a
Change views
You ca n view your phone bo ok in three different ways, liste d below.
Name list Displays all the names that are stored in your phone
book. Three names appear on the screen at a time.
Name+number Displays individual names an d numbers. Only one
name appears on t he screen at a time, with its
corresponding phone number. Name + number is the
default setting.
Name only Displays individual names only. You can view the
correspon ding phone number by pressi ng
then scrolling up or down.
Details and
In all views, you can use the scroll keys to move up and down through the
list of names.
Select a scrolling view
1 Press Names.
2 Scroll to Options, then press
8260 User Guide version v. 0.06 [ 26 ] 3/6/00
Select.
Page 39
Use the phone book
3 At Scrolling view, press
4 Scroll to the view that you want and press
Select.
OK.
• Add names and numbers
1 Press Names.
2 Scroll to Add new and press
3 Using the keypad, enter the name. Use the
key to switch between upper and lowercase
letters.
4 Press
5 Enter the phone number and press
OK.
Select.
OK.
Shortcut
You can also enter numbers by using a shortcut from the Start screen.
1 Enter a phone number and press
2 Enter a name at Name.
Note: Step 2 is optional.
3 Press
OK.
Save.
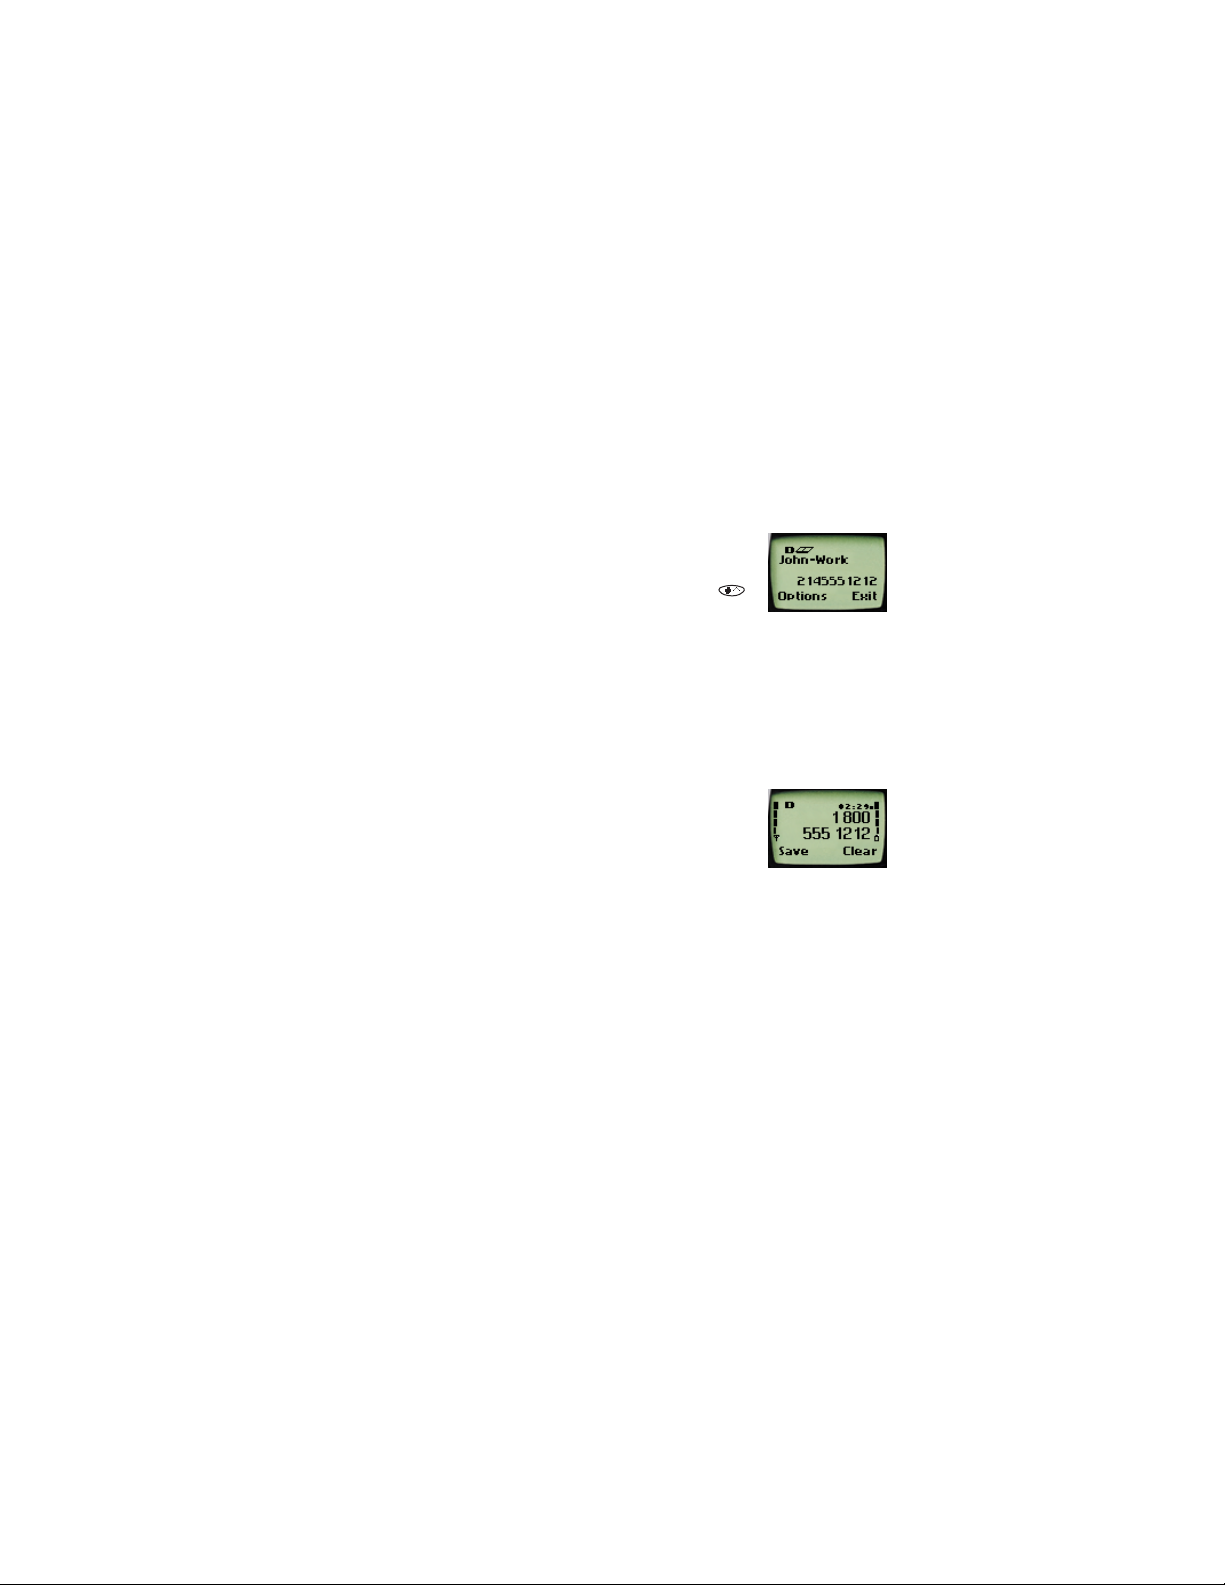
• Change a stored telephone number
You can change a number without changing its associated name.
1 Press
2 At Search, press
3 Enter the first few letters of the first name of the person for whom
4 Press
Names.
Select.
you are searching and press
If you chose Name only as your scrolling view, continue to step 4. If
you chose Name+number as your scrolling view, proceed to step 5.
Details to view the number.
OK.
8260 User Gui de version v. 0.06 [ 27 ] 3/6/00
Page 40

5 Press
6 If Edit is not highlighted, scroll to it and press Select.
7 Press
8 Press an d ho ld
9 Enter the new number.
10 Press
Options
OK.
The associated number appears.
Clear to erase on e number at a time.
Use the and keys move within the digits in the number.
OK to save the new number.
• Recall and redial numbers
You ca n recall and dial numbers using one of three methods.
To recall and dia l a nu mb e r :
1 At the Start screen, press or to display the names and
associated numbers that are stored in your phone book.
2 Scroll to the approp riate n ame an d press to dial the associated
number .
8260 User Guide version v. 0.06 [ 28 ] 3/6/00
Page 41

Use the phone book
OR
1 At the Start screen, press
2 Begin entering the first few digits of the number that you want to
call.
3 When the appropriate name/number appears on the screen,
press to dial this number.
OR
1 At the Start screen, press
2 At Search, press
3 Enter the name of the person that you want to call and press
4 When the appropriate name/number appears on the screen, press
to dial this number.
Select.
Names.
Names.
• Erase stored names and numbers
Note: You cannot undo Erase functions, so be care ful!
1 Using one of the methods described in “Recal l and redial numbers”
on page 28, recall the stored name and its associated number.
If you chose Name only as your scrolling view, continue to step 2. If
you chose Name+number as your scrolling view, proceed to step 3.
2 Press
3 Press
4 Scroll to Erase, then pr ess
5 Press
Details.
Options.
Select.
The Erase? message appears.
OK to erase this name and associated number.
OK.
8260 User Gui de version v. 0.06 [ 29 ] 3/6/00
Page 42

• Erase the entire phone book
You can erase the contents of your phone book. Note that this action
cannot be reversed! Once you have performed this procedure, all the
stored information in your p hone book is erased.
To erase all the contents of yo ur phone book:
1 Press
2 Scroll to Erase all and press
3 If you truly want to erase the entire contents of your phone book,
4 Enter your security code and press
Names.
Select.
The mess a ge Are you sure? appears.
press
OK.
The Security code field appears.
OK.
• Check memory status
You can check to see how many free and in-use memory locations are in
your directory.
1 Press
2 Press
3 Scroll to Memory status and press
Names and scroll to Options.
Select.
Select again.
A message appears that says Phone: xx free, xx in use, where xx
indicates the number of memory locations (phone entries) available
and in use.
8260 User Guide version v. 0.06 [ 30 ] 3/6/00
Page 43

Use voice mail
9. Use voice mail
Voice mail is a network servi ces feature. This feature enables those w ho
call you to leave a voice message that you can retrie ve later.
• When you have a message
• Your phone beeps when you receive a voice message. Also, the message
New voice message appears on your phone’s screen, along with the
icon.
• If you have received more than one voice mail message, your phone
displays the number of messa ges that you have received.
Note: To use voice mail, you need to learn the voice mail system’s
various gre eti ng s, pa ssw ord s, an d pro mpt s. Yo u r se rvi ce pro vid er
can provide this inf orm a tio n.
• Set up your voice mailbox
As part of your network’s voice mail feature, your service provider gives
you a voice mailbox phone number. Save this number in your phone to
make getting your voi ce messages quick and convenient.
1 Press
2 Enter your voice mailbox phone number.
3 Press
4 If you selected Yes, enter your security code.
Menu 1 > 2 > 2 (M essages > V oice messages > V oice mailbox
number).
OK.
• Press
• Press No if you don’t .
Yes if you want to save your voice mailbox password in your
phone.
8260 User Gui de version v. 0.06 [ 31 ] 3/6/00
Page 44

4 Press OK.
5 Enter your voice mailbox password and press OK.
Your voice mailbox number can be up to 32 digits long and is used unti l
it’s changed. Therefore, if your phone number changes, you may need to
change your vo ice mailbox number along with it.
• Set greetings and passwords
These may vary in different wireless systems. If you need information
about how to record your greeting or how to store your password, contact
your service provider.
Note: If you store your voice mailbox password in your phone, the
phone immediately sends the password after you dial your voice
mailbox number. If you want the phone to wait before sending
the password, enter a "wait" character as the first character of
your password.
• Listen to your voice messages
1 When your phon e alerts you to new voice message s, press Lis ten an d
follow the prompts.
2 If you’d rather listen to your messages later, press
3 To listen to your voice messages at a later time:
Press and hold the 1 key.
OR
Press
Menu 1 > 2 > 1 (Messages > Vo ice me ssag es > Li sten to v oice
messages).
The message Calling voice mailbox appears on the screen. Follow the
prompts to access your messages.
Exit.
8260 User Guide version v. 0.06 [ 32 ] 3/6/00
Page 45

Work with the call log
10.Work with the call log
The call log keeps track of the f ollowing inf ormation:
•Missed calls
• Numbers you’ve dia l e d
• Numbers from which you’ve received calls
• The amount of time you’ve spent on call s
• Check the call log
Press Menu 2 to access Call log, then press Select.
The following submenus are available:
•Missed calls
• Dialed calls
• Received calls
• Clear call lists
• Call times
To select any of these options, press th e
displayed on the screen. The Missed calls, Dialed calls, and Received calls
menus include the following options (available when you press the
Options key):
Select key while the option is
Call ti me Shows the date and time during which the call was
connected—if the clock has been set .
Edit number Enables you to edit the displayed number.
Save Enables you to save the displayed number into your
phone book.
8260 User Gui de version v. 0.06 [ 33 ] 3/6/00
Page 46

Erase Enables yo u to erase th e displ ayed numb er from th e call
log.
View number Enables you to view a number when an associated name
appears on the screen.
Note: This option works only if you have stored the
associated number in the phon e book.
Tip: You can dial any number s that appear on your phone’s screen by
pressing .
Check missed calls
Your phone stores up to the last 10 numbers associated with calls you
have missed. When you miss a call(s), the message Missed calls appears
on your phone’s screen, along with the number of calls missed.
You are notified of missed calls only if your phone was turned on in the
service area fro m which the missed call origina ted.
To check missed calls:
1 Press
2 Either scroll through the list using the or
If you pref e r, you can pre s s
scroll through the list of numbers.
Note: If you chose the Forward if not answered option in the Call
List.
The phone shows the numbers of the calls you missed.
keys until you
reach a numb er t h at yo u w ant to dial an d press , or press
to return to the Start screen.
Menu 2 > 1 (Call log > Missed calls), then
Forwarding, then your phone treats these forwarded calls as
missed calls.
Back
8260 User Guide version v. 0.06 [ 34 ] 3/6/00
Page 47

Work with the call log
Check previously dialed calls
Your phone stores up to the last 10 numbers associated
with calls that you have dialed. To check this list of
numbers:
1 Press
2 Use or
You can also access previously dialed numbers by pressing , then
quickly pressing or to scroll through the list.
Menu 2 > 2 (Call log - Dialed calls).
to scroll through the dialed numbers list and when
you reach the number that you want to dial, press .
Check received calls
Your phone stores up to the last 10 numbers associate d with calls that you
have answered. To check this list of numbers:
1 Press
2 Use or
Menu 2 > 3 (Call log > Received calls).
to scroll through the dialed numbers list and when
you reach the number that you want to dial, press .
Clear call lists
You ca n erase some or all of the numbers that appear in your phone’s call
log. You can erase dialed number s, received call numbers, or missed call
numbers.
Warning: You cannot undo this operation.
8260 User Gui de version v. 0.06 [ 35 ] 3/6/00
Page 48

To erase some or all of the numbers listed in your call logs:
1 Press
2 Use or
3 Stop at the appropriate option and press
Note: The All option clears every number i n every list, whereas t he other
Menu 2 > 4 (Call log > Clear call lists).
to scroll through the options list, which includes
the following options: All, Missed, Dialed, and Received.
OK.
options clear only the numbers associated with that option. For
example, the Dialed option clears only the numbers associated
with calls you prev io us ly dialed.
• Check call timers
Your phone tracks the amount of time you spend on
each call. To obta in information about tim e spent on
phone calls:
1 Press
2 Use or
Last call Displays the call duration of the last made call.
Dialed calls D isplays the duration of all outgo ing calls since you
All calls Displays the call duration of all calls that have been
Menu 2 > 5 (Call log > Call timers).
to scroll through the options described in the
following list:
reset the timers.
made since you reset the timers.
Life timer Displays the duration of all calls for the life of your
phone. This option cannot be reset.
8260 User Guide version v. 0.06 [ 36 ] 3/6/00
Page 49

Work with the call log
Clear timers Clears all call timers for the currently selected Number
Assignme n t Mod ule ( NAM ) . Your phone includ es
separate timers for each NAM used, with the exception
of the Life timer.
Warning: If you select the Clear timers option, the action cannot be
undone. If you use the call timers to log or track the amount
of time you are using your phone, you might want to record
the call timers before you erase them.
Turn on a current call timer
You can set your phone to display the running elapsed time while a call i s
active. To do so:
1 Press
2 Press
3 Press
4 Use or
5 Press
From this point on, each call you make or receive will be timed. After a
call has ended, pr ess any key on your phone to clear the screen.
Menu 2 > 5 (Call log > Call timers).
Details.
The message Current call timer appears.
Select.
to scroll to On.
OK.
Clear call timers
1 Press Menu 2 > 5 > 5 (Call log > Call timers > Clear timers). The
Security code field appears.
2 Enter your security code and press
8260 User Gui de version v. 0.06 [ 37 ] 3/6/00
OK.
Page 50

11. Use advanced calling
features
• Set in-call options
Your phone allows you to use a number of features
during a call. These features are known as in-call
options.
Note: Many in-call options are network services features. To use these
options, you must contact your service provider.
You cannot use all these options at all times. This section tells you when
you can use a certain option.
1 To access an option d uri ng a call, press
2 Choose from some or all of the fo llowing optio ns :
Lock keys This option appe ars fi rst onl y if yo ur phon e is co nnected
to a headset. Otherwise, the Mute option (see next)
appears first.
Mute Mutes the phone’s microphone.
If, somehow, your ph one’s m icro phone has alread y been
muted, End mute appears instead of Mute.
Press
Select to choose either of t hese options.
Note: These options can affect the microphones o f any
accessories connected to the phone.
Options.
Touch tones Enables you to manually enter a touch tone string or
search for a string in your phone.
8260 User Guide version v. 0.06 [ 38 ] 3/6/00
Page 51

Use advanced calling features
New call Enables you to con feren ce in an oth er call while you ar e
in the midst of a call.
Menu Enables you to access the Menu.
Names Enables you to access the phone book.
• Use call waiting
If you have call waiting, your phone beeps during a call to let you know
that some on e else is callin g you.
Depending on your caller ID setup, the phone might also di splay the
number of the incoming call.
Note: Call waiting may not be available in all wireless systems. Contact
your service provider for details and availability.
Before you can use call waiting, you must first store its feature code. Then
you must activate the call waiting feature.
Store t he call waiting feature code
1 Press Menu 4 > 5 > 5 (Settings > Network services > Network
feature setting).
The Feature code box appe a r s.
2 Enter the feature code your service provider gave to you and
press
OK.
3 Make sure that Activate is highlighted and press
OK.
Activate call waiting
1 Press Menu 4 > 5 > 3 (Settings > Network services > Call waiting).
2 Use or
8260 User Gui de version v. 0.06 [ 39 ] 3/6/00
to scroll to Activate and press OK.
Page 52

Your phone calls the network to confirm the feature code you entered.
After the network confirms the feature code, call waiting is activated.
Manage calls
Call waiting works with both local and long distance calls.
• To answer an incoming call, press .
• To switch from one call to another, press .
• To end both calls, press .
Make a conference call
While in a call, you can call another number and conference in a third
party.
1 While in a call, you can either dial the number that you want to
conference in and press .
OR
You can press
number, and press OK again.
If you don’t remember the number of the party you want to include in
the conference, and you know that this number is in your phone book,
you can recall the number.
2 When the thi rd party answers, press to connect all three
parties.
Note: To place one of the parties on hold, press again. If you press
and the second party is placed on hold. Once you place one of the
parties on hold, you are unable to rejoin all three parties.
3 To drop all parties, press .
Options, scroll to New call, press OK, enter the phon e
a third time, the party you placed on hold rejoins the call,
8260 User Guide version v. 0.06 [ 40 ] 3/6/00
Page 53

Use advanced calling features
Recall a number from the phone book during a
conference call
If you don’t remember a number that you need to call while in another
call, and you kn ow tha t th is nu mbe r i s in yo ur ph one b oo k, yo u c an rec all
the number without having to quit your current call. To do so:
1 During the call, press
2 Scroll to Names and press
3 Press
4 Enter na m e an d pr e s s
5 Press .
Select at Search.
Options.
OK.
OK, or scroll through the phone book.
• Use call forwarding
With call forwardi ng , you can for ward incomi ng calls t o anothe r numb er .
This way, if you are unable to receive calls on your phone, all calls going
to that phone can be forwarded to another phone. You’ll never have to
miss an important call.
Note: The call forwarding feature might not be available in all wireless
systems. Contact your service provider for details and ava ilability .
Before you can use call forwarding, you must first store its feature code.
Then you must activate the call forwarding feature.
You can us e the call forwarding feature code manually as opposed to
storing it. Each time you need to forward phone calls, you must enter the
feature code before the phone number (for example, *72 555 1212).
Store the call forwarding feature code
1 Press Menu 4 > 5 > 5 (Settings > Network services > Network
feature setting).
The Feature code field appears.
2 Enter the feature code your service provider gave you and press
8260 User Gui de version v. 0.06 [ 41 ] 3/6/00
OK.
Page 54

3 Use or
to scroll to Call forwarding and press Select.
Activate ca ll forwarding
1 Press Menu 4 > 5 > 2 (Settings > Network services > Call
forwarding).
2 Scroll to t he de sired call f orwa rding optio n, a s de scribe d in the t able
below, and press
Forward all calls Forwards all incoming calls.
Forward if busy Forwards calls only when you’re on your
Select.
phone and do not have voice mail.
Forward if n ot
answered
Forward if out of reach Forwards calls if you are out of the serving
Cancel call forwarding Cancels all forwarding opt ions that are
3 Highlight Activate and press
4 At the Number field, either enter the number to which you want
your calls forwarded or press
book (if the number is indeed in your phone book).
8260 User Guide version v. 0.06 [ 42 ] 3/6/00
Forwards calls if you don’t answer. This
option is handy if you want to give your
phone to som e one fo r a sho rt pe ri od of time ,
but you don’t want them to answer the
phone.
For example, yo u cou ld u se this opti on i f yo u
give your child the p hone to take out, in case
of an emerg ency , bu t you st ill wa nt to rec eive
any incoming calls made to this phone.
wireless network.
currently active.
OK.
Search to find this number in the phone
Page 55

Use advanced calling features
5 Press
Your phone calls the network to confirm the feature code that you
entered in Menu 4 > 5 > 5. After the network confirms the feature code,
call forwarding is activated.
OK.
• Redial automatically
Automatic redial enables your phone to c on tinue trying to call a number
that was busy due to wireless network problems .
When you call a number and get a busy signal because of network
problems, your phone redials this number up to 10 times. If you want to
stop this process prior to the tenth attempt, press . This stops the
automatic redialing.
Before you can use the Automatic Redial feature, you must activate it.
1 Press
2 Use or
3 Press
Menu 4 > 1 > 2 (Se tti ng s > Call settings > Automatic redial).
to scroll to On.
OK.
• Use a calling card
You can use a calling card when you dial long distance calls. First you
must first store your calling card information in the phone. Your phone
can store information about a maximum of four calling cards.
Save calling card information (step 1)
To save your calling card(s) information:
1 Press
2 Scroll to the A, B, C, or D calling card and press
3 Scroll to Edit and press
8260 User Gui de version v. 0.06 [ 43 ] 3/6/00
Menu 4 > 1 > 3 (Settings > Call settings > Calling card).
Options.
OK.
The Security code field appears.
Page 56

4 Enter your security code and press
OK.
The Dialing sequence field appears.
5 Press
6 Use or
Select.
to scroll through the list of dialing sequences, as
describe d in the ta bl e be lo w.
Dialing sequence Use for cards that require you to: Associated cards
Access no.
+ phone no.
+ card no.
Access no.
+ card no.
+ phone no.
Prefix
+ phone no.
+ card no.
Dial 1-800 acc ess nu mb e r, then
phone number, then c ard number
(+ PIN if required).
Dial 1-800 acc ess nu mb e r, then
card number (+ PIN if required),
then phone num be r.
Dial the prefix (any numbers that
must precede the phone number)
and phone number you want to
dial, then card number (+ PIN, if
MCI, AT&T True
Choice, Sprint
Canada, Unitel
networkMCI,
WorldPhone MCI
GTE, PacBell, AT&T,
Stentor
required).
* The calling cards listed in this column are frequently used with the
dialing sequences listed in the first column. However, this information
might vary and it is subject to change at the phone companies’
discretion.
7 Press
Select.
Save calling card info r ma tion (step 2)
The order of the following s teps may vary, depending on which dialing
sequen c e yo ur ca r d use s .
1 Enter the number and, when prompted for the calling card’s access
number, enter the number and press OK.
8260 User Guide version v. 0.06 [ 44 ] 3/6/00
Page 57

Use advanced calling features
This number is usually the 1-800 number that is listed on the back of
the calling card.
You can also retrieve the access number from your phone book if
you’ve stored it. Simply press
Search, then use or to find the
number.
2 When prompted to enter a calling card (usually shown on the front
of the callin g card) and PI N numbe r , en ter the number, and pr ess OK.
3 Press
4 Use or
OK again when the Save changes? message appears.
to scroll to Card name, press Select, and enter the
card name us in g your phone’s ke yp a d.
5 Press
OK.
Choose a calling card to use
If you have more than one calling card, you’ll need to choose one before
making a call.
1 Press
2 Scroll to the desired card and press
3 Press or to highlight Select and press
4 Enter your security code and press
Menu 4 > 1 > 3 (Settings > Call settings > Calling card).
Options.
OK.
The Security code field appear s .
OK.
The message Card ready for use appears.
8260 User Gui de version v. 0.06 [ 45 ] 3/6/00
Page 58

Make a calling card call
To make a calling card call:
1 Enter the phone number, including any prefix (such as 0 or 1) your
calling card might require when you make a calling card call. See
your calling card for in structions.
2 Press and ho ld until your phone disp lays th e message Card call,
wait for the message Wait for the tone, and pr ess
3 When you hear the tone from your calling card service, press OK.
Note: This procedure might not apply to all of the calling card
options that are programmed i nto your phone. Pl ease look
on the back of your calling card for more information, or
contact your long distance company.
OK.
• Send your own number in caller ID
You can determine, for each call you make, whether your tele phone
number appears on another phone’s caller ID.
In most service areas, when you call others, your name is presented to
their caller ID (if they subscribe). With Send Own Number, you can block
(or not) the display of your number to others’ caller ID when you call them.
Note: Send Own Number might not be available in all wireless systems.
Contact your service provider for details and availability. Also
note that this feature is effective only when you call a number
that is equipped with caller ID.
Before you can use Send Own Number, you m us t first store its feature
code. Otherwise, this feature might not appear on your phone’s menu.
Store the Send Own Number feature code
1 Press Menu 4 > 5 > 5 (Settings > Network services > Network
feature setting).
8260 User Guide version v. 0.06 [ 46 ] 3/6/00
Page 59

Use advanced calling features
The Feature code field appears.
2 Enter the feature code your service provider gave you and press
3 Use or
Your phone calls the network to confirm the feature code that you
entered in Menu 4 > 5 > 5. After the network confirms the feature code,
Send Own Number is activated.
to scroll to Send own number and press Select.
Set whether your number will appear (or not)
1 Press Menu 4 > 5 > 4 (Settings > Network services > Send own
number).
2 Scroll to Yes (to show your number) or No (not to show it ).
3 Press
4 Enter the number you wish to call (or press
OK.
number from th e phone book), and press
Search to retrieve the
OK.
• Select a phone system (NAM)
Your service provider programs, into yo ur phone’s memory, its phone
number and syste m information when you first activate your ph one. The
number assigned to your phone is called a Number Assignment Module
(NAM). This NAM provides service for only one service area.
However, your phone can be activated in up to three different service
areas. For example, your phone could be activated in Dallas, Chicago, and
New York. Each service area would assign a different phone number or
account to your phone.
You must sele ct a NAM for yo ur home system , and if you travel outs ide of
your home system, yo u can choose another NA M.
Only one NAM can be active at a time.
OK.
8260 User Gui de version v. 0.06 [ 47 ] 3/6/00
Page 60

Note: It might not be necessary to have up to three NAMs for your
phone if your service provider has service or roaming agreements
for each are a i n wh ic h yo u wi sh to us e yo ur ph on e. Co nta ct you r
service provider for details.
Select the NAM for your phone
1 Press Menu 4 > 5 > 6 (Settings > Network services > NAM
selection).
2 Scroll to the phone number you wa nt to use and press
Note: The first phone number on this list is the currently selected
number. You need at least one active number to make calls. You
cannot change from one NAM to another during a call.
OK.
Select digital or an a log
Your phone can work in both digital and analog modes. The default mode
is digital and analog, which appears on your phone as Digit. & analog
when you press Menu 4 > 4 > 8 (Settings > Network services > Digital/
analog selection).
Note: This feature is available only for certain phones. Contact your
service provider for more information.
This mode means that your phone w orks in both digi tal and analog
networks. The phone always tries to find a digital network first, but if a
digital n e twork is not available, the phone looks for an analog network.
After pres si ng Menu 4 > 4 > 8 (Settings > Network services > Digital/
analog sele ction), you can also choose to use one of the other two modes:
Analog Forces the phone to use only AMPS analog networks.
Digital Forces the phone to use only TDMA digital networks.
8260 User Guide version v. 0.06 [ 48 ] 3/6/00
Page 61

Use advanced calling features
• Set touch tones
Touch tones are sounds that are produced when you
press the keys on your phone’s keypad. Sometimes,
touch tones are called DTMF tones, but this guide
calls them touch tones.
You can us e touch tones for m any automated ov er-the-phone services
such as checking bank balances and airline schedules and using your voice
mailbox. Touch tones can be sent only whe n a call is active.
Set manual touch tones
1 Press Menu 4 > 2 > 3 > 1 (Settings > Phone settings > Touch to nes
> Manual touch tones).
2 Select one of the following options, then press
Continuous The tone sounds for as long as you press and hold a key.
Fixed Sets the tone length to 0.1 second, regardless of how
long you press a key.
Off Turns off the tones. No tones are sent when you press a
key .
OK:
Set touch tone length
You can also set the length of each touch tone. To do this:
1 Press
2 Use or
3 Press
8260 User Gui de version v. 0.06 [ 49 ] 3/6/00
Menu 4 2 3 2 (Settings - Phone settings - Touch tones - Touch
tone length).
to scroll to Short or Long. Short sets the tone
length to .1 second; Long sets the tone length to .5 second.
OK.
Page 62

Store touch tone sequences (strings)
You store touch tone strings the same way that you store names and
numbers in your phone book. You can store an entire digit sequence and
send it as touch tones for frequently used strings of numbers.
Store touch tone strings with phone numbers
1 Enter the phone number that you want associated with a touch tone.
2 Press
w (wait): When you dial this phone number, your
phone first dials the number, then wait s (because
of the w character) for you to press
you press
p (pause): If you include a p character instead of a w, your phone
pauses for 2.5 seconds, then automatically sends your password as a
touch tone.
3 Enter the touch tone string.
4 Store the number as you normally would.
Send a touch tone string
1 Press Menu 4 > 2 > 3 > 1 (Settings > Phone settings > Touch tones
> Manual touch tones).
2 Make sure that the setting is not set to Off.
If it is, use or
OK.
3 Then, duri ng your call, press
OK.
4 Enter the touch tone string or recall the string from the phone book,
and press
Warning: If you send touch tones while in the analog mode, be careful
(p) or
∗∗∗
Send, the phone s en ds yo ur pa s s wor d .
OK.
not to send confidential information.
(w).
∗∗∗∗
Send. When
to scroll to one of the other options and press
Options, scroll to Touch tone s and press
8260 User Guide version v. 0.06 [ 50 ] 3/6/00
Page 63

Customize your phone
12.Customize your phone
• What are profiles?
Profiles enable you to customize the following phonerelated items:
Ringing options
Ringing volume
Ringing tone
Vibrating alert
Keypad tones
Warning & game tones
Message alert
Your phone comes with seven profiles:
Normal (default setting)
Silent
Meeting
Outdoor
Pager
Car
Headset
You can customize any of the profiles. If at any time you want to return
to the original settings, you can do so.
• Select a different profile
1 Quickly press the Power key.
2 Quickly press the Power key again to scroll through each choice (or
you can use th e sc roll keys).
8260 User Gui de version v. 0.06 [ 51 ] 3/6/00
Page 64

3 Press and hold the power key for a second (or you can press
select the highlighted profile.
Note: To select a different profile, your phone cannot be connected to
a car kit or a headset, and your phone must be at the Start screen.
• Customize a profile
1 Press Menu 3 (Profiles).
2 Use or
in the list.
Note: The Car and Headset profiles do not appear unless your phone is
connected to these accessories. If you connect your phone to a
car kit or to a headset, these pro files remain in the menu, unless
you choose to restore your phone’s factory set tings.
3 Press
4 Select one of the followin g options, then press
Select Activates the currently highlighted profile.
Customize Enables you to customize a profile by changing the
Rename Enables you to rename the profile.
Options to view the options for the selected profile.
to scroll to the desired profile
OK.
current settings.
• Press
This option does not appear in the Normal, Headset, or
Car kit profiles.
OK to choose from several lists.
OK) to
Note: When you change a setting in the current profile, it affects only
that profile. Your phone’s normal settings do not change.
8260 User Guide version v. 0.06 [ 52 ] 3/6/00
Page 65

Customize your phone
Set ringing options
You can choose the tone that your phone uses to notify you of an
incoming call. Thi s setting does not affect any incoming text message
alert tones.
1 Press
2 Use or
3 Highlight Customize and press
4 Scroll to Ringing options and press
5 Scroll to one of the ri nging o ptions, as descr ibed be low , and pr ess
Ring The phone rings until it is answered.
Ascending Ringing volume increases (gets louder) if the phone is
Ring once The phone rings once to indi cate an incoming call.
Beep once The phone beeps once to indicate an incoming call.
Caller groups Sets the ring to a silent ring , unless a call comes from a
Menu 3 (Profiles).
Your phone lists each profile.
to scroll to the desired profile in the list for which
you want to set the ringing op tions, and press
OK.
Select.
not answered.
number within a caller group.
Options.
OK.
Silent The phone makes no sound.
6 Use or
Mark to select or Unmark to deselect them.
to scroll to the desired caller group(s), then press
8260 User Gui de version v. 0.06 [ 53 ] 3/6/00
Page 66

Set the ringing volume
You can set the default ringing volume for incoming
voice calls and message alert tones.
1 Press
2 Use or
3 Highlight Customize and press
4 Scroll to Ringing volume and press
Menu 3 (Profiles).
to scroll to the profile for which
you want to set the ringing volume, and press
OK.
Select.
Options.
5 Scroll through the options. When you hear the volume leve l you wish
to use, press
OK.
The ringing volume setting is stored individually for the handsfree car kit
and the headset.
Set the ringing tone
You ca n set your phone’s ringing tone to a specific sound—or tune—for
incoming voice calls.
Note: If you have already chosen a ringing option of either Silent or
Beep once (“Set ringing options” on page 53), the ringing tones
are already tur ned off.
1 Press
2 Use or
3 Press
4 Highlight Customize and press
5 Scroll to Ringing tone and press
6 Scroll through the options, and, when you hear the tone you want to
Menu 3 (Profiles).
Your phone lists each profile.
to scroll to the profile for which you want to set
the ringing tones.
Options.
use, press
OK.
OK.
Select.
8260 User Guide version v. 0.06 [ 54 ] 3/6/00
Page 67

Customize your phone
Set a vibrating alert
Instead of choosing to have your phone ring, you can have it vibrate to
indicate an incoming call.
Note: If you have alread y chose n a rin ging opti on of ei ther Silent (“Set
ringing options” on page 53), the phone does not vibrate.
1 Press
2 Use or
3 Highlight Customize and press
4 Scroll to Vibrating alert and press
5 Use or
Menu 3 (Profiles).
to scroll to the profile for which you want to set
the vibrating alert, and press
to scroll to On and pre s s OK.
Options.
OK.
Select again.
The phone does not vibrate when it is connected to or placed in any
charging device.
Set keypad tones
Keypad tones set the volume of the tone you hear when you press your
phone’s keys.
1 Press
2 Use or
3 Highlight Customize and press
4 Scroll to Keypad tones and press
5 Use or
If you chose the Silent profile in step 2, the keypad tones are turned off.
Menu 3 (Profiles).
to scroll to the profile for which you want to set
the keypad tones, and press
to scroll to one of the levels and press OK. (If you
Options.
OK.
Select ag ain.
choose Off, no keypad tones are made.)
8260 User Gui de version v. 0.06 [ 55 ] 3/6/00
Page 68

Set warning and game tones
You can set warning tones and the tones used for the games in your
phone.
Warning tones include the s ounds your phone makes during error
condition s, durin g confi rmati ons, when you swi tch the phon e on, wh en a
battery is low, and when you need to recharge the battery.
1 Press
2 Use or
3 Highlight Customize and press
4 Scroll to Warning and game ton e s, then press
5 Scroll to On and press
Menu 3 (Profiles).
to scroll to the profile for which you want to set
the warning tones, and press
OK.
Options.
OK.
Select.
If you do not want to use warning or game tones, you can turn them off
by scrolling to Off and pressing
OK.
Set the message alert tone
You can set your pho ne to use a certain tone to i ndicate an incoming tex t
message.
1 Press
2 Use or
3 Highlight Customize and press
4 Scroll to Message alert tone, then press
5 Use or
6 When you find the tone you want, press
Menu 3 (Profiles).
to scroll to the profile for which you want to set
the message alert tone, and press
to scroll through your choices .
Options.
OK.
Select.
The phone plays samples of each choice as you scroll to it.
OK.
8260 User Guide version v. 0.06 [ 56 ] 3/6/00
Page 69

Customize your phone
Set your phone to answer automatically
You can set you r phone to ans wer incoming vo ice calls after on e ring. This
feature can be used only when your phone is connected to a headset or
to an approved handsfree car kit that is equipped with the ignition sense
option, with the ignition on.
1 Press
2 Use or
Menu 3 (Profiles ).
Options.
press
to scroll to either the Car or Headset pr o file an d
Note: Car and Headset do not appear unl ess your phone has
already been connected to a car kit or headset at least one
time.
3 Highlight Customize and press
4 Scroll to Automatic answer and press
5 Scroll to On and press
OK.
OK.
Select ag ain.
Set the lights (car kit only)
While your phone is connected to a car kit, you can set the phone’s lights
two ways. Y ou can eit her hav e the ligh ts on on ly when you us e the phone
or have them on the whole time the phone is connected to the car kit.
This feature works only when your phone is connected to a car kit.
1 Press
2 Use or
3 Highlight Customize and press
4 Use or
Menu 3 (Profiles).
to scroll to Car and press Options.
Note: Car does not appe ar in t he list unless t he phone is connect ed
to a car kit.
OK.
to scroll to Lights and press Select.
8260 User Gui de version v. 0.06 [ 57 ] 3/6/00
Page 70

5 Scroll through your choices, which are listed and descri bed in the
table belo w, and pres s
Automatic Instructs the phone to turn off the lights within 15
seconds if no keys are pressed.
On Instructs the phone to leave the lights on the entire time
that your phone is connected to the car kit.
OK.
• Rename profiles
1 Press Menu 3 (Profiles).
2 Use or
3 Scroll to Rename and press
4 Enter the new name and press
Note: You cannot rename the Normal, Headset, and Car kit
profiles.
to scroll to the desired profile and pres s Options.
OK.
OK again.
• Restore factory settings
As was described in “Customize your phone” on page 51, you can change
the defaults that come with your phone. These defaults are known as
factory settings.
However, just as yo u ca n ch ange some of the s e de f a ult s , you can al s o
return them back to their original settings.
Note: The memory, timers, language selection, security code, and lock
codes are not reset. However, a ny profiles you have modified are
reset when you restore your settings.
1 Press
2 Enter your security code and press
Menu 4 2 4 (Setti ngs - Phone settings - Restore factory
settings)
OK.
8260 User Guide version v. 0.06 [ 58 ] 3/6/00
Page 71

Customize your phone
• Set the display language
You can set your phone to displa y a certain language.
To do this:.
1 Press
2 Use or
You can choose from English, French, Spanish, Portuguese, Russian,
Hebrew, and Chinese Traditional.
Menu 4 > 2 > 5 (Settings > Phon e Setting s
> Language).
to scroll to the language you want to use and press
OK.
• Set and display the clock
Your phone has an internal clock that you can set to
appear on the phone’s screen.
The clock is connected to an alarm clock. Refer to
“Alarm clock” on page 97 for more information.
Set the clock
To set the clock to the appropriate time:
1 Press
2 Use or
3 Enter the time using an xx:xx format an d press OK.
Menu 4 > 2 > 1 (Settings > Phone settings > Clock).
to scroll to Adjust time and press Select.
The Time field appears.
For example, to set your clock to 9:3 0, enter 09:30. If yo u set the time
format for 24-hour time, enter the number the same way: 09:30 or
23:12.
• If you set time format to am/pm, use or
or pm and press
OK.
to scroll to am
8260 User Gui de version v. 0.06 [ 59 ] 3/6/00
Page 72

• If you set the time format to 24-hour, the time is set as soon as
you press OK after adjusting the time.
Display the cloc k
1 Press Menu 4 > 2 > 1 (Setti ngs > Phone settings > Clock).
You see the clock on the screen.
2 If you decide not to display the clock, press
then Select.
Only one of these options appears at a time.
Select, then Hide clock,
Select the time format
You can change the way your clock shows the time, whether in am/pm
format or using a 24-hour clock.
1 Press
2 Use or
3 Use or
Menu 4 > 2 > 1 (Settings > Phone settings > Clock).
to scroll to Time format and press Select.
to scroll to either am/pm or 24-hour an d pres s OK.
• A dd a welcome note
You ca n s et your phone to dis play a welcome note
each time you switch on your phone . Th is note co uld
say, for example: Hello. It could include your name, a
reminder, or more. The maximum length of this note is 36 characters.
1 Press
2 Enter the text of the welcome note.
3 Press
Menu 1 > 3 (Messages > Welcome note).
As you enter characters, they appear to the left of the cursor. Press
to delete characters to the left of the cursor. Press or to move
the cursor right or left.
Options.
Clear
8260 User Guide version v. 0.06 [ 60 ] 3/6/00
Page 73

Customize your phone
4 Use or
If you ever want to delete (erase) the welcome note, press
3 (Options > Erase > OK).
to scroll to Save and press OK.
Menu 1 >
• Use 1-touch dialing
You must store names and numbers in your phone book before you can
use 1-touch dialing.
You can assign a name from the phone book to a 1-touch dial location,
using your phone’s keys 2 through 8. When you press the key, the
associated number is automatical ly dialed.
• Keys 1 and 9: The 1 ke y is use d excl us ively to di al you r vo ice mai lbo x.
The 9 key is used exclusively to make calls to the eme rgency number
that is programmed into your pho ne.
• Key 2: You can use the 2 key to dial a customer care operator (refer to
“When you need to contact your service provider” on page 4). You can
overwrite this feature and assign a 1-touch dial location to the 2 key.
Assign a name or number to a 1-touch
dial key
1 Press Names and scroll to 1-touch dia ling.
2 Press
3 Use or
4 Use or
5 To call a number using 1-touch dialing, press and hold the
Select.
to scroll to the first number that includes the
message (empty) and press
to scroll to the name and number to which you
want to assign this key and press
Repeat these steps as many times as necessary.
appropriate key for a few seconds.
Assign.
Select.
8260 User Gui de version v. 0.06 [ 61 ] 3/6/00
Page 74

The phone dials the num be r.
Change 1-touch dialing num bers
After you have assigned 1-touch dialing numbers to a key, you can change
key and number associations at any time.
1 Press
2 Use or to scroll to 1-touch dialing and press Select.
3 Use or
4 Use or
5 Use or
6 When you reach t he new number, press
Names.
to scroll to the key you want to change and press
Options.
to scroll to Change and press Select.
to scroll to through phone book.
Select.
Erase 1-touch dialing numbers
You can erase 1-touch di aling key assignments at any time.
1 Press
2 Use or to scroll to 1-touch dialing and press Select.
3 Use or
4 Use or
5 Press
Names
to scroll to the key you want to erase and press
Options.
to scroll to Erase and press Select.
OK.
• Use emergency key 9
When the emergency key feature is turned on, the phone attempts to
make an emergency call when you press 9 and . The phone dials the
emergency numb er preprogrammed int o your phone.
8260 User Guide version v. 0.06 [ 62 ] 3/6/00
Page 75

Customize your phone
Note: You can also dial an emergency call by pressing and holding 9
until the phone indicates it is attempting to make an emergency
call. This method do es not work, however , when Keyguard is active
or when the phone is connected to a modem.
Activate the emergency key 9
Before you can use the emer genc y key fea tur e, you must first ac tiv ate it.
1 Press
2 Use or
3 If you ever want to deactivate this feature, press
Warning: Official emergen cy numbers vary by location. Only one
Menu 4 > 1 > 1 (Settings > Call settings > Emergency key 9).
to scroll to On and pre s s OK.
Menu 4 > 1 > 1
and scroll to Off.
emergency number is programmed into your phone, and this
is the number that is dialed when you pr ess key 9. However,
this might not be the proper number in all circumstances.
Make an emergency call
• Press 9 and .
• Use caller groups
You can create groups of names in your phone book and give each group
a different ringing tone. This allows you to recognize who is calling you
by the way your phone rings.
To use the caller group feature, you must also have access to caller ID.
Caller ID is a net work services feature (see you service provider).
Add names to a caller group
Before you can create a caller group, you must include the names that will
make up a caller group in your phone book.
8260 User Gui de version v. 0.06 [ 63 ] 3/6/00
Page 76

1 At the Start screen, press until you see the name or number you
want to assign to a caller group.
2 Press
3 Use or
4 Use or
5 Use or
Details, if shown; if not, press Options.
to scroll to Caller groups and press Select.
to scroll to the name/number that you want to add
to the calle r group and press
to scroll to the caller group to which you want to
add this name and press
Select.
Select.
Assign a ringing tone to a caller grou p
After you have created a caller group, you can assign a specific ringing
tone to this group. This way, when someone from that group calls you,
you’ll be able to identify whether they’re a friend, a family member, or
otherwise from the ringing tone.
1 At the Start screen, press
2 Use or
3 Use or
4 Use or
5 Use or
press
OK.
to scroll to Caller groups and press Select.
to scroll to the group you want and press Select.
to scroll to Group ring i n g tone, and press Select.
to scroll to the tone that you want to assign and
Tip: You can set your phone to ring only when people from certain caller
groups call you.Otherwise, the phone is silent.
Names.
Rename a caller group
1 At the Start screen, press Names.
2 Use or
3 Use or
4 Use or
5 Enter the group name and press
8260 User Guide version v. 0.06 [ 64 ] 3/6/00
to scroll to Caller groups and press Select.
to scroll to the group you want and press Select.
to scroll to Rename group and press Select.
OK.
Page 77

Customize your phone
Remove names from a caller g roup
1 In the phone book, scroll to select the name you want to remove, and
press Options.
2 Use or
3 Use or
to scroll to Caller groups and press Select.
to scroll to No group and press Select.
The name is removed from the group.
Display caller group graphics
When some one calls you fro m a particular caller group , yo ur phone can
display a graphic to identify that person’s caller group.
1 Press
2 Use or to scroll to Caller groups and press Select.
3 Use or
4 Use or
5 Use or
Names.
to scroll to the caller group for which you want to
display a graphic and press
to scroll to Group grap hic and press Select.
to scroll to On. The graphic associated wi th that
Select.
caller group is now set to display.
8260 User Gui de version v. 0.06 [ 65 ] 3/6/00
Page 78

13.Security
Your ph one is equi pped w ith a versati le secur ity system that prev ents th e
unauthorized use of the phone.
You cannot activate or use certain phone features without having first
successfully entered your phone’s security code.
• The default security code is 12345.
• Nokia highly recommends that you immediately change this code.
Then, wr it e down and store the ne w cod e in a sa f e pla ce , aw a y from
your phon e.
When entering your security code, a * appears on the screen each time you
press a number key. This pr events others from seeing your code.
If you incorrectly enter a security code five times in a row, your phone
won’t accept any entries for the next 5 minutes. However, if you realize
that you’ve entered the code incorrectly before pressing
Clear to erase the code, digit by digit, beginning with the last digit.
When this guide describes an action that requires the entry of your
security code, each step necessary to this action is provided.
• Change your security code
1 Press Menu 4 > 3 > 2 > 4 (Settings > Security settings > Access
codes > Change security code).
The Security code fi el d ap pears.
2 Enter the default security code and press
3 At the message Enter new security code, enter your new security
code and press
4 At the message Verify new security code, enter your new security
code again and press
OK.
OK.
OK.
OK, you can us e
8260 User Guide version v. 0.06 [ 66 ] 3/6/00
Page 79

The message Security code changed appears.
If you have changed yo ur security code and don’ t remember the new code,
contact your serv ice prov id er. Once y ou h ave c hange d your secu rity co de,
the default setting is no longer valid.
• Protect your phone with the
lock code
The lock code enables you to activate and deactivate your phone. When
the lock code is on, you cannot access most of your phone’s memory or
menu features. Also, you cannot make phone calls without first entering
the lock code.
When you switch on the lock code, your phone locks after you switch it
off. Then, e ach time you switch your phone on, it prompts yo u for a lock
code when you press either
Note: If you enter an incorrect lock code five times in a row, your phone
prompts yo u f or t he se curity code .
The default lock code is 1234. However, Nokia recommends that you
change this code immediately.
Turn on the phone lock
1 Press Menu 4 > 3 > 2 > 1 (Settings > Security settings > Access
codes > Phone lock).
2 Enter the lock code and press
3 Scroll to On and press
When your phone is locked, it might be possible to place a c all to the
emergency numb er programmed into your phone, such as 911 or any other
official emergency number. You can either dial this emergency number or
press the emergency key 9 (if you have activated the 9 key to act as an
emergency key).
Names or Menu.
OK.
OK again.
Security
8260 User Gui de version v. 0.06 [ 67 ] 3/6/00
Page 80

You ca n also stor e a number in the Unlocked phone numbe r location. Thi s
allows you to call the number even though your phone is locked.
Store an unlocked phone number
1 Press Menu 4 > 3 > 2 > 2 (Settings > Security settings > Access
codes > Unlocked phone num ber).
2 Enter the lock code and press
The Number field appears.
3 Enter a phone n umber or pres s Se arch and scroll through the phone
book until the number you want to store appears.
4 Press
OK.
OK.
Call an unlocked phone num b e r
• Press or once, then .
OR
• Manually enter the phone number and press .
Answer a call while using a lock code
• To answer a ca ll while using a lock code, p ress any key exce pt and
.
Change your lock code
1 Press Menu 4 > 3 > 2 > 3 ( Settings > Security
settings > Access codes > Change lock code).
The message Enter lock co de appears.
2 Enter the lock code and press
Only numeric characters are accepted.
3 Enter the new lock code and press
8260 User Guide version v. 0.06 [ 68 ] 3/6/00
OK.
OK.
Page 81

Security
4 Verify the new lock code, and press
When you chang e your lock code, mak e sure you store it in a safe place,
away from your phone. Avoid entering access codes similar to
emergency numbers to prevent accidental emergency calls.
OK.
Turn off the lock code
1 Press Menu 4 > 3 > 2 > 1 (Settings > Security settings > Access
codes > Phone lock).
2 Enter the lock code and press
3 Scroll to Off and press
With the lock code fe ature turned off, you can use your phone without
having to enter the lock code each time you turn your phone on.
OK.
OK again.
8260 User Gui de version v. 0.06 [ 69 ] 3/6/00
Page 82

• Lock the keypad
When you lock the keypad, you prevent accidental key presses—for
example, when
keyguard.
Activa te keyguard
There are three different ways to activate the
keyguard:
At the Start screen:
• Press and hold .
• Press
• Press
When Keyguard is turned on, you might be able to make calls to the
emergency nu mber that is progra mmed into yo ur phone . For exa mple, you
could dial 9 11 and press . When keyguard is on, ho wev er , yo u cann ot
use the emergency key 9.
Note: Keyguard is automatically turned off when the phone is
Deactivate keyguar d
1 Press Unlock.
2 Press
OR
• Press and hold until the message Unlock k eys? appears.
• Press
your phone is in a pocket or purse. This feature is called
Menu
Menu 9 (Keyguard).
connected to a car kit.
OK.
OK.
.
8260 User Guide version v. 0.06 [ 70 ] 3/6/00
Page 83

Answer a call whi l e ke yguard is active
During an incomi ng call, the keypad automa tically unlocks.
• Press any key to answer the call.
After you end the call, keyguard automatically becomes active again.
• Press the Power key to quickly switch the lights on for 15 seconds.
• Restrict calls
You can restrict incoming and outgoing calls. To restrict outgoing calls,
you create a list of res t rictions and apply the appropriate restriction.
Before you define restrictions for outgoing calls, only one restriction
option is available:
• Add restriction, which enables you to create your own list of outgoing
call restrictions. The maximum nu mber of call restrictions that y ou can
define is ten.
After you have used the Add restriction option to add at least one
restriction, the following options are then available:
• Select: Allows you to select call restrictions from the outgoing calls
list.
• Edit: Al lo w s you to edit an exist i ng outgo in g call rest rict io n.
• Erase: Erases any existing outgoing call restrictions.
When calls are restricted, you might be able to make calls to the
emergency numbe r that is programmed into your pho ne. For example, you
could dial 911 and press ). However, emergency key 9 might not work,
depending on the type of restriction you choose.
Security
Restrict outgoing calls
1 Press Menu 4 > 3 > 1 (Settings > Security settings > Restrict calls).
2 Press
8260 User Gui de version v. 0.06 [ 71 ] 3/6/00
Select.
Page 84

3 Enter your security code and press
4 Scroll to Add restriction and press
5 Enter the number that you want to restrict and press
OK.
OK.
OK.
For example: If you want to restrict all calls that begin with 1, enter 1.
This will restrict al l ou tgoin g long di stance ph one ca lls. If you wa nt to
restrict al l calls that beg in with 972, enter 972, and so forth.
After you perform step 5, the Name field appears.
• If you want to add a name for the call restriction, enter the name
using your phone’s keypad and press
• If you don’t want to add a name, just press
OK.
OK.
Restrict incoming calls
To restrict incoming calls:
1 Press
2 Use or
3 Enter your security code and press
4 Scroll to All calls an d pr e s s
5 Press
6 Press
Menu 4 > 3 > 1 (Settings > Security settings > Restrict calls).
to scroll to Restrict incoming calls and press Sele ct.
OK.
Mark.
Press Unmark to remove an already-set restriction.
Back. The Save changes? message appears.
Yes.
Press
No if you do not want to save the changes.
8260 User Guide version v. 0.06 [ 72 ] 3/6/00
Page 85

Set network services features
14.Set network services
features
The following network services can be obtained from your service
provider:
•Voice privacy
• Call waiting
• Call forwardi ng
• Sending own number
When you subscribe to any of these services, your service provider gives
you a feature code that activates each service. Deactivation codes are
used to deactivate each service.
After you store the appropriate code in your phone, the code is sent to the
network to verify that you’re using the correct feature code. The voice
privacy feature does not require you to store a feature code before using
it.
More than on e number? If your phone has more than one phone number
(or NAM) assigned to it, any stored feature codes apply only to your
primary phone number (or NAM 1).
After you store a feature code, the respective service appears as a menu
option on your phone’s screen. You can use t hese menus to activate and
deactivate the network services.
8260 User Gui de version v. 0.06 [ 73 ] 3/6/00
Page 86

• Set up how your phone selects a
system
Your phone is capable of working in residential, private, and public
systems (such as your home system) . You can choose how your phone
selects a network to use.
Set up the way your phone selects a network
1 Press
2 Use or
If you have two phone numbers (or NAMs), the Manual and New search
features are used only with your primary phone number (NAM 1).
Menu 5.
You see the following three opt ions:
• Automatic: Your phon e aut om a ti c a lly searches for av a ila bl e
networks and chooses the appropriate one. Every time you turn
on your phone, it resets to Automatic.
• Manual: The phone searches for networks and then displays a
listing of all of the possible networks on your phone’s screen.
Next to each network, one of the following appears: Available: or
Not available:. If a network is designated as Not available, you
cannot use it.
• New Search: Your phone be gins a new sear ch for both pri vate and
residential systems. When it find s the best system avail able, your
phone displays it on its screen. You can then select this system,
or start anot her search by pressing
to scroll through the choices, and press OK when
you see the one you w ant.
Next.
8260 User Guide version v. 0.06 [ 74 ] 3/6/00
Page 87

Set network services features
Select a public system
When you take your phone outside its home system, the phone is said to
be "roaming. " The phone can search fo r home-type s ystems—system s that
are the same type as your home system. Or , the phone can se arch for nonhome-type systems.
Note: The options desc ribed here may not be available for your phone.
See your service provider for information.
Your s ervice provider prog rams a list of prefer red sys tems into your pho ne.
These are systems with which your service provider has roaming
agreements. Y our phone looks fo r these systems when you’re r oaming.
1 Press Menu 4 > 4 > 7 to tell your phone how to choose a public
system (network). Your selection remains active until you change it.
• Any system: When service is not available in your home system,
the phone searches for a preferre d system of either type, then
your phone search es for a home-typ e system, then it sear ches for
a non-home-type system. The search continues until your phone
finds a system that can be used.
• Home type: When service is not available in your home s y stem,
the phone searches for a home-type syst em first. However, if a
non-home-type system is found, then your phone will use this
system.
• Nonhome type: The p hone searche s for a non-hom e-type system
only; the home-type system is not used).
• Home only: The phone uses only its home system. It will not
roam.
2 Scroll to the option you want and press OK.
8260 User Gui de version v. 0.06 [ 75 ] 3/6/00
Page 88

Switch from a private system to a public
system
1 Press and hold Menu while you are not in a call.
Your phone displa y s the me ssa g e Search public systems?
2 Press
OK and your phone us es the public syst em for the next (and
only the ne xt) outgoing call.
After you complete this call, your phone returns to the Automatic
system selection.
• Roaming
The term roaming is used to indicate when your phone is not in its home
area. Calls made or received while you are roaming are usually more
expensive than calls made in your home area.
While roaming in some system s outsi de yo ur home are a, yo ur phone may
not be recognized by the host system, which is the system in which you’re
travelling. You may not be able to place a call.
Contact your service provider for more specific information on how
roaming works with your phone and for information about coverage
limitations.
Roaming indicators
When your ph on e beg i ns roa m ing :
• The phone beeps once and may display the word ROAM on your
phone’s scr e en, depending on how roaming works with your phone.
Contact your service provider for more details. If your phone is not
roaming, it either displays the word HOME or the name of your service
provider.
8260 User Guide version v. 0.06 [ 76 ] 3/6/00
Page 89

Send and receive text messages
15.Send and receive text
messages
With the text message network service, you can send and receive short
text messages. Y ou can also send and receive messages that contain a
person’s name and/or number (a "business card") .
To get your messages, other phones must have text message capability. Or,
you can ask the service provider to conv ert the message to other formats
such as e-mail and fa x.
The maximum length of a received text message is 160 chara cters. Your
phone has space for up to 80 text messages, dependin g on the length of
each message.
Note: Note: The maximum length of a text message differs, depending
on the capabilities of the network from which it originated. Also,
the text messages may appear different at different times. This
happens because messages can originate in networks other than
your own.
Contact your service provider for more information about this feature.
• Write a message
You can write a message two ways: using standard (ABC) text input or
using predictive text input.
About standard text input
Standard text input is the default mode for text entry. The ABC icon
<<ABC>> appears as visual confirmation.
1 Find the key that is below the letter you want to enter.
8260 User Gui de version v. 0.06 [ 77 ] 3/6/00
Page 90

2 Press it as many times as needed for the letter to appear on the
screen.
For example, to enter the name John:
Press J
Press O
Press H
Press N
About predi c ti ve te xt input
This method of text entry works differently than the way phone book
entries work. With predictive text input, you only need to press each
number key once for each letter.
For exam pl e , t o wr i te Nokia with the English dictionary selected:
(for N) (for o) (for k) (for i) (for a)
Since the displaye d wor d changes after each key stroke, try to disregard
the word until you have keyed in all the characters.
Turn on predictive text input
1 Press Menu, then Select.
2 When Text messages appears, press Select.
3 Scroll to Write new and press Select .
4 Press Options and scroll to the dictionary you want (f or example,
English).
5 Press OK.
T9 dictionary activated appears. This means you can use predictive
text input to enter messages. In the text message window where you
write, the predictive text icon appears.
8260 User Guide version v. 0.06 [ 78 ] 3/6/00
Page 91

Send and receive text messages
Keys and tools for predictive text input
Key Purpose
- Use for word entry. Press each key only once for each
letter.
Press to view the next matching word if the underlined
word is not the word you intended.
Spell If the dictionary sees a word it doesn’t recognize, you see
Spell above the left selection key. Press Spell, enter the
word you want to enter, and press OK.
Press once to accept a word and add a space.
Press once quickly to change the character case.
indicates uppercase. indicates lowercase.
Press and hold to enter a number. indicates 123
mode. Press and hold again to write text letters.
Clear Press once to delete the character to the left of the
cursor.
Press once to add a punctuat ion mark. To change the
underlined symbol, press repeatedly until the
symbol you want appears.
160
Maximum number of characters available. The character
counter appears in the top right corner of the display
and counts down for each character added.
Turn off predictive te x t input
• To switch from predictive text input to standard text input, repeat
steps 1 throug h 4 ab ov e
8260 User Gui de version v. 0.06 [ 79 ] 3/6/00
Page 92

• Scroll to Dictionary off and pre ss OK.
Notes about p r ed i c ti ve te xt input
• To insert a symbol, press and hold
. The symbol screen appears.
Select the desired symbol and press
Insert.
• When you’ve finished writing, make
sure the underlined word is the word
you intended to write.
If the word is correct
• Insert a punctuati on mark, if needed.
• Press to confirm the change and enter a space.
• Start writing the next word.
If the word is not correct
• Press repeatedly until the desired word appears, then press
to confirm it.
OR
• Press
• Start writing the next word.
When you enter a pe riod to e nd a sentence , the phon e switches to
mode so the that the first letter in the n ext word will be uppercase (a
capital letter).
Options, scroll to Matches, then press OK.
Scroll to the correct word and press Use.
Symbol scre en
Add a desired word to the match list
If the ? character appears after a word, the word you intended to write i s
not in the dictionary. You can add the word to the dictionary.
1 Press repeatedly until
8260 User Guide version v. 0.06 [ 80 ] 3/6/00
Spell appears in place of Options.
Page 93

Send and receive text messages
2 Press
3 Press
Spell and enter the word(s) using standard text input.
OK to save the word(s).
Insert numbers
1 To add a number to the message, press and hold until
appears.
2 Enter the desired numbers, then pr ess
ABC mode.
and hold to return to
Insert symbols
1 To put a symbol in the message, press Options and scroll to Insert
symbol.
2 Select the des ired symbol and press
Insert.
Write compound words
1 Write the first part of the word and press to accept it. Then
Clear once to remove the space.
press
2 Write the last part of the compound word and press to enter
the word in memory .
• Send a text message
1 Press Menu 1 > 1 > 3 (Messages > Text me ssages > Write new).
The message screen appears.
2 Enter a message of up to 160 characters.
3 When you’ve finished writin g, press
OK.
press
4 Enter or recall the recipient’s phone number, then press
Sending message appears
5 When the message is successfully sent, Message sent appears.
Options, scroll to Send, then
OK.
8260 User Gui de version v. 0.06 [ 81 ] 3/6/00
Page 94

If you need to exit while writing the message, press at any time.
Later, pres s
If you turn off the phone without saving the message, the message will
be lost.
Menu 1 > 1 > 3 to return and finish writing the message.
Save a message in the outbox
When writing a text message, it’s a good idea to save it in the outbox.
Then if there is a message delivery problem, you can easily resend the
message.
1 While writing the message, press
2 Scroll to Save, then press
Options.
OK.
Resend a messag e fro m the outbox
Messages in the outbox have one of two icons in front of them.
• The icon in front of a message heading shows that you have
attempted to send the message to the text message center.
• The icon shows that you have not yet tried to send the
message.
1 Scroll to the message, then press
2 Press Options.
Send is selected.
3 Press
4 Enter or find the number where you want to send the message, then
press
OK.
OK.
Read.
8260 User Guide version v. 0.06 [ 82 ] 3/6/00
Page 95

Send and receive text messages
• Receive a text message
When you rece ive a t ext messa ge, th e phone so unds a message alert t one
and the text me ssag e ic on appears, alon g wi th on e o f the fol low ing
messages:
• Message received: I ndicates that you have a n unread message or page.
If you have more than one message or page, the appropriate number is
listed before this message.
When you receive the above message along with another message
Call, followed by a name and/or number, the Call message is a page.
Only the names of people who are stored in your phone book appear.
• New emergency message: Means that an emergency message or page
was sent by someone vi a the service provider . Emergency messag es are
sent only in situations where life and/or property are in immediate
danger. Emergency messages are listed first and override all other
messages.
• Urgent: Means the message has a high priority.
Read a text message
1 Press Read.
This takes you to the Inbox, with the new message selected.
2 Press
3 Press Options for a list of choices you have while reading the
4 Press Select when the option you want is highlighted.
Read again to read the message.
message ( see the list following this section).
In your inbox, text messages are shown in the order in which they were
received, unless one is an em ergency mess age. A n emerg ency m essage
overrides any order and appears first.
8260 User Gui de version v. 0.06 [ 83 ] 3/6/00
Page 96

Choose options for a message
When you press Options while reading a message, the following choices
are available.
Read next Enables you to read the next message.
Erase Erases the current message.
Write
message
Save Saves this message to the Saved folder.
Call back Calls the person who sent you the text message, if their
Forward Forwards the call to another person. That person must
Reply Provides a screen where you can write a reply.
Provides a space for you to create and send a message.
phone number is included in the message.
You can also press <<ta lk>> while the message is
displayed to dial the number.
If more than one number is on the screen, the numbers
appear in a list. Scroll to the phone number you want to
call and press <<talk>>.
have the appropriate message service.
• When your phone’s memory is full
When your ph one’s me ssage m emory is fu ll, o ne or more me ssag es of the
lowest priority are automatically deleted. These messages are usually
deleted from your phone’s inbox. An incoming emergency message could
force a deleti on from your phon e’s Saved folder.
If after deleting messages the memory is still full, your phone shows the
message No space: message wai t ing.
8260 User Guide version v. 0.06 [ 84 ] 3/6/00
Page 97

Send and receive text messages
• Clear the notification by pressing OK.
• Erase a message
1 While reading a message, press Options.
2 Scroll to Erase, then pr ess
Your phone asks you to confirm that you want to erase the message.
3 Press
OK.
OK.
• Reply to a message
1 Press Options.
2 Scroll to Reply, then press
3 Enter your message, then press
4 Scroll to Send, then press
The phone displays the return number.
5 Edit the number if needed, then press
Select.
Options.
OK.
OK.
• Forward a message
1 Press Options.
2 Scroll to Forward, then press
3 Enter or find the recipient’s phone number, then press
Select.
OK.
• Retrieve a number
You can s ave or dial a phone number that is included in a message.
1 Press
2 Scroll to Get number, then press
8260 User Gui de version v. 0.06 [ 85 ] 3/6/00
Options.
OK.
Page 98

3 If more than one number is shown, scroll to the one you want, then
OK.
press
The phone di spla ys th e n umber on t he scr een. You can d ial it or save i t as
if you had ent e red it yo urself.
8260 User Guide version v. 0.06 [ 86 ] 3/6/00
Page 99

Use your personal assistant
16.Use your personal
assistant
Your phone can be your personal assistant. It can wake you up in the
morning and remind you of m eeting s, bir thdays, and ta sks. You can ch eck
the current time, calculate a tip at dinner, and convert currencies.
With a calendar, clock, alar m clock, an d phon e book, you ha ve everyth ing
at hand to use y our phone effecti v ely.
• Use the calendar
The calendar keeps track of birthdays, meetings,
reminders, and call yo u need to make. I t can even sound
an alarm when it’s time for you to make a call or go to
a meeting.
Remember! Y our phone mu st be sw itch ed on fo r the cal endar t o work. Do
not switch on the phone, however, where wireless phone use is prohibited
or where the use of the phone could cause interference or danger.
Alarm cloc k: Y o u p hone m ust rem ai n on f or yo u to use the c al end ar’ s
alarm. If the phone is off, the alarm does not sound at the scheduled
time.
View the calendar
1 Press Menu > 8 (Calendar).
If you haven’t already set the date, the phone prompts you to do so. To
set the date, proceed to step 2. Otherwise, proceed to step 3.
2 Set the date using the mm/dd/yyyy format.
8260 User Gui de version v. 0.06 [ 87 ] 3/6/00
Page 100

For example: If the date is 04 May 2001, type 04052001. The numbers
you enter overwrite existing numbers.
3 Press OK.
Today’s day and date appear.
Move from day to day
After you set the date, whenever you press Menu 8, your phone displays
the current date and day.
1 To move forw ard or ba ckward th rough t he cale ndar, use <<do wn>>
or <<up>>.
2 When you reach the date you want, press Options and scroll to
highlight the option you want.
Create a calendar note
This option enables you to create a note and associate it with one of the
following categories: Reminder, Call, Meeting, or Birthday. You can also
set an alarm for an y calendar note.
1 Go to the day you want, scroll to Make note, and press Select.
The list of categories appears.
8260 User Guide version v. 0.06 [ 88 ] 3/6/00
 Loading...