

Page 1

User Guide Draft for
Nokia 3595 Phone
What information is
needed?
My number Wireless service provider
Voice mail number Wireless service provider
Wireless provider’s number Wireless service provider
Provider’s customer care Wireless service provider
Model number
Phone type
Electronic serial number
(ESN)
Numbers Where is the number?
Label on back of phone
3595
NPM-10 Label on back of phone
(under battery). See
“Remove the battery” on
page 16.
(under battery).
Label on back of phone
(under battery).
[ i ]
Page 2
The wireless phone described in this guide is approved for use in GSM networks.
LEGAL INFORMATION
Part No. 9355727, Issue No. 1
Copyright ©2003 Nokia. All rights reserved.
Nokia, Nokia Connecting People, Airglider, Bowling, Backgammon, Skydiver, Nokia 3595,
Xpress-On, and the Nokia Original Accessories logos are trademarks or registered trademarks
of Nokia Corporation.
trademarks or tradenames of their respective owners.
Printed in Canada 03/2003
US Patent No 5818437 and other pending patents.
T9 text input software Copyright ©1999-2002. Tegic Communications, Inc. All rights reserved.
Includes RSA BSAFE cryptographic or security protocol software from RSA Security.
The information in this user guide was written for the Nokia 3595 phone. Nokia operates a
policy of ongoing development. Nokia reserves the right to make changes and improvements
to any of the products described in this document without prior notice.
UNDER NO CIRCUMSTANCES SHALL NOKIA BE RESPONSIBLE FOR ANY LOSS OF DATA OR
INCOME OR ANY SPECIAL, INCIDENTAL, AND CONSEQUENTIAL OR INDIRECT DAMAGES
HOWSOEVER CAUSED.
THE CONTENTS OF THIS DOCUMENT ARE PROVIDED “AS IS.” EXCEPT AS REQUIRED BY
APPLICABLE LAW, NO WARRANTIES OF ANY KIND, EITHER EXPRESS OR IMPLIED, INCLUDING,
BUT NOT LIMITED TO, THE IMPLIED WARRANTIES OF MERCHANTABILITY AND FITNESS FOR A
PARTICULAR PURPOSE, ARE MADE IN RELATION TO THE ACCURACY AND RELIABILITY OR
CONTENTS OF THIS DOCUMENT. NOKIA RESERVES THE RIGHT TO REVISE THIS DOCUMENT OR
WITHDRAW IT AT ANY TIME WITHOUT PRIOR NOTICE.
All other product and company names mentioned herein may be
Java is a trademark of Sun Microsystems, Inc.
EXPORT CONTROLS
This product contains commodities, technology or software exported from the United States in
accordance with the Export Administration regulations. Diversion contrary to U.S. law is
prohibited.
FCC/INDUSTRY CANADA NOTICE
Your phone may cause TV or radio interference (for example, when using a telephone in close
proximity to receiving equipment). The FCC or Industry Canada can require you to stop using
your telephone if such interference cannot be eliminated. If you require assistance, contact
your local service facility. This device complies with part 15 of the FCC rules. Operation is
subject to the condition that this device does not cause harmful interference.
The term “IC:” before the certification/registration number only signifies that Industry Canada
technical specifications were met.
[ ii ]
Page 3

For your safety . . . . . . . . . .1
Welcome and quick guide . .5
Get the most out of this
guide . . . . . . . . . . . . . . . . . . . . 5
Get started with the
Quick Guide . . . . . . . . . . . . . . 7
Menu shortcuts . . . . . . . . . . . . 8
Understand wireless network
services . . . . . . . . . . . . . . . . . . 9
Learn about accessibility
solutions . . . . . . . . . . . . . . . . . 9
Shared memory . . . . . . . . . . . . 11
Contact Nokia . . . . . . . . . . . . . 11
Register your phone . . . . . . . . 12
E-newsletters . . . . . . . . . . . . .12
Before you begin . . . . . . . . 13
Install the SIM card . . . . . . . .13
Install the battery . . . . . . . . . .14
Charge the battery . . . . . . . . . 15
Battery notes . . . . . . . . . . . . . 15
Remove the battery . . . . . . . . 16
Set up your headset . . . . . . . . 16
Remove the SIM card . . . . . . . 17
About your phone . . . . . . . 18
Switch on your phone . . . . . . 18
About the antenna . . . . . . . . .19
About the Start screen . . . . . . 19
About indicators and icons . . 20
Make and answer calls . . .23
Make a call . . . . . . . . . . . . . . . 23
End a call . . . . . . . . . . . . . . . . . 24
Answer a call . . . . . . . . . . . . . 24
Reject a call . . . . . . . . . . . . . . 24
Silence an incoming call . . . . 25
Redial the last-dialed number 25
The menu . . . . . . . . . . . . .26
Scroll bar . . . . . . . . . . . . . . . . . 26
About menu shortcuts . . . . . . 26
List of menu shortcuts . . . . . . 27
Phone book menu . . . . . . . . . .33
Enter letters and numbers .34
ABC mode . . . . . . . . . . . . . . . .34
Predictive text input . . . . . . . .36
Use the phone book . . . . . .39
Save names, numbers and e-mail
addresses . . . . . . . . . . . . . . . .39
Edit names . . . . . . . . . . . . . . . .40
Edit numbers . . . . . . . . . . . . . .41
Add text entries . . . . . . . . . . . .41
Find names in the phone
book . . . . . . . . . . . . . . . . . . . .41
Phone memory . . . . . . . . . . . . .42
Delete names and numbers . .43
Check call history . . . . . . .45
Check missed, received, or dialed
calls . . . . . . . . . . . . . . . . . . . .45
Choose options in call lists . . .46
Clear call lists . . . . . . . . . . . . .46
Use call timers . . . . . . . . . . . . .47
Manage call costs . . . . . . . . . .48
Check data calls . . . . . . . . . . .48
Advanced calling features .50
Use in-call options . . . . . . . . .50
Make an international call . . .51
Use automatic redial . . . . . . . .51
Use 1-touch dialing . . . . . . . .52
Use anykey answer . . . . . . . . .53
Use network services . . . . . . . .53
Use voice features . . . . . . .59
About voice mail . . . . . . . . . . .59
Use voice dialing . . . . . . . . . . .60
Use voice commands . . . . . . . .62
Audible alerts . . . . . . . . . . . . . .64
Personalize your phone . . .65
Profiles . . . . . . . . . . . . . . . . . . .65
Accessory settings . . . . . . . . . .67
Nokia 3595 User Guide Copyright © Nokia 2003
Page 4

Draft
Polyphonic sound (MIDI) . . . . 71
Download ringing tones . . . . . 71
Choose the display language . 72
Add a welcome note . . . . . . . .72
Activate help text . . . . . . . . . .73
Set up the time and date . . . .73
Display settings . . . . . . . . . . . .75
Use caller groups . . . . . . . . . .76
Restore factory settings . . . . .79
Change Xpress-on™ color
covers . . . . . . . . . . . . . . . . . . .80
Manage phone security . . 83
Lock the keypad (Keyguard) . .83
About security codes . . . . . . .84
PIN codes . . . . . . . . . . . . . . . . .84
PUK codes . . . . . . . . . . . . . . . .85
Security code . . . . . . . . . . . . . .86
Use fixed dialing . . . . . . . . . . .86
Restrict calls . . . . . . . . . . . . . .87
Set up a closed user group . . .88
Communicate with mobile
messages . . . . . . . . . . . . . 89
Message settings . . . . . . . . . .89
Send and receive text
messages . . . . . . . . . . . . . . . . .92
Communicate with e-mail . . .95
Store messages . . . . . . . . . . . .97
Erase messages . . . . . . . . . . . .99
Send and receive picture
messages . . . . . . . . . . . . . . .100
Receive multimedia messages
(MMS) . . . . . . . . . . . . . . . . .102
Use Instant messaging . . . . .105
Use the info message
service . . . . . . . . . . . . . . . . . 107
Use the service command
editor . . . . . . . . . . . . . . . . . .107
Your WAP browser . . . . . 108
Notes on mobile Internet
access . . . . . . . . . . . . . . . . . 108
Set up for browsing . . . . . . . 109
Sign on to the mobile
Internet . . . . . . . . . . . . . . . 109
Use browser options . . . . . . .110
Navigate the mobile
Internet . . . . . . . . . . . . . . . .110
Use bookmarks . . . . . . . . . . . .111
Disconnect from the mobile
Internet . . . . . . . . . . . . . . . .112
Security issues . . . . . . . . . . . .112
Notes about GPRS . . . . . . . . .113
Your personal digital
assistant . . . . . . . . . . . . . 116
Use the calendar . . . . . . . . . .116
Use the alarm clock . . . . . . . .119
Share business cards . . . . . . 120
Use the calculator . . . . . . . . 121
Make a to-do list . . . . . . . . . 122
Use the stopwatch . . . . . . . . 123
Online purchases . . . . . . . . . 125
Use the wallet . . . . . . . . . . . 126
Synchronizing data . . . . . . . 130
Fun and games . . . . . . . . 133
Game rules . . . . . . . . . . . . . . 133
Customize your phone with
TM
Java
Applications . . . . . 134
Reference information . . 137
Batteries, chargers, and
accessories . . . . . . . . . . . . . 137
Important safety
information . . . . . . . . . . . . 138
Emergency calls . . . . . . . . . . 141
Certification information
(SAR) . . . . . . . . . . . . . . . . . . 142
Care and maintenance . . . . 144
Copyright © Nokia 2003
Page 5

Accessories . . . . . . . . . . . . . .145
Battery information . . . . . . . 145
Chargers and other
accessories . . . . . . . . . . . . .146
Technical information . . .153
Troubleshooting . . . . . . .1 54
Nokia One-Year Limited
Warranty . . . . . . . . . . . .155
Appendix A
Message from the CTIA
. . . . . . . . . . . . . . . . . . . . . . . .161
Appendix B
Message from the FDA . . . .165
Nokia 3595 User Guide Copyright © Nokia 2003
Page 6

Draft
NOTES
Copyright © Nokia 2003
Page 7
1 For your safety
Read these simple guidelines. Breaking the rules may be dangerous or illegal.
Further detailed information is given in this manual.
SWITCH OFF WHERE PROHIBITED
Do not switch on the phone when wireless phone use is prohibited or
when it may cause interference or danger.
ROAD SAFETY COMES FIRST
Don't use a hand-held phone while driving
INTERFERENCE
All wireless phones may get interference, which could affect
performance.
SWITCH OFF IN HOSPITALS
Follow any regulations or rules. Switch the phone off near medical
equipment.
SWITCH OFF IN AIRCRAFT
Wireless devices can cause interference in aircraft.
SWITCH OFF WHEN REFUELING
Don’t use the phone at a refueling point. Don’t use near fuel or
chemicals.
SWITCH OFF NEAR BLASTING
Don’t use the phone where blasting is in progress. Observe restrictions,
and follow any regulations or rules.
USE SENSIBLY
Use only in the normal position. Don't touch the antenna unnecessarily.
QUALIFIED SERVICE
Only qualified personnel may install or repair phone equipment.
ACCESSORIES AND BATTERIES
Use only approved accessories and batteries. Do not connect
incompatible products.
Nokia 3595 User Guide þ Copyright © Nokia 2003
Page 8
For your safety
DRAFT
WATER-RESISTANCE
Your wireless phone is not water-resistant. Keep it dry.
CALLING
Ensure the phone is switched on and in service. Enter the phone number,
including the area code, then press the Talk key. To end a call, press the
End key. To answer a call, press the Talk key.
EMERGENCY CALLS
Ensure the phone is switched on and in service. Press the End key as
many times as needed (for example, to exit a call, to exit a menu) to clear
the display. Enter the emergency number, then press the Talk key. Give
your location. Do not end the call until told to do so.
2 Copyright © Nokia 2003
Page 9

NOTES
Nokia 3595 User Guide þ Copyright © Nokia 2003
Page 10

For your safety
DRAFT
Nokia 3595 phone at a glance
Power key
Earpiece
3595 Phone
Graphic
Display screen
Scroll up key
Left
selection key
Talk key
Scroll down
key
Star key
Connection port
Goes Here
Right
selectionkey
End key
Number keys
Pound key
Microphone
4 Copyright © Nokia 2003
Page 11

2 Welcome and quick guide
You will find that your Nokia 3595 mobile phone has many useful features for
everyday use, such as a calendar, text messaging, and alarm clock.
•GET THE MOST OUT OF THIS GUIDE
The diagram to the left illustrates the various components of your phone.
Familiarize yourself with the diagram to help you better understand the
instructions that follow.
Understand the terms
This guide uses certain terms for the steps that you are asked to perform.
• Press means to briefly press, then release a key. For example, press 7 means
press the key on the keypad that is labeled with the number 7 and the letters,
“p, q, r, s.”
• Press and hold means to press and hold a key for two to three seconds
(depending on the feature being used), then release the key.
• Highlighted options on the
screen are enclosed within a
dark bar. The selection keys are
used to act on the highlighted
option.
• Selection keys are used to
select a menu option, press the
selection key below the menu
item on the phone’s screen. In
the example to the right, to
select Details, you would press
the left selection key. To exit the
phonebook, press Back (the
right selection key).
• Scroll keys are used to move up
and down in the menus. For
example, if instructed to scroll
to another phonebook entry, this
means to press Scroll up or
Scroll down key.
• Talk and End keys: Press the Talk key to place a call or to answer an incoming
call. Press the End key to end a call or press and hold to return to the idle
screen.
Left
Selection
Talk
Scroll up
3595 Phone Keys
Graphic Goes Here
Scroll up
Right
Selection
End
Nokia 3595 User Guide þ Copyright © Nokia 2003
Page 12
Welcome and quick guide
DRAFT
Notice text clues
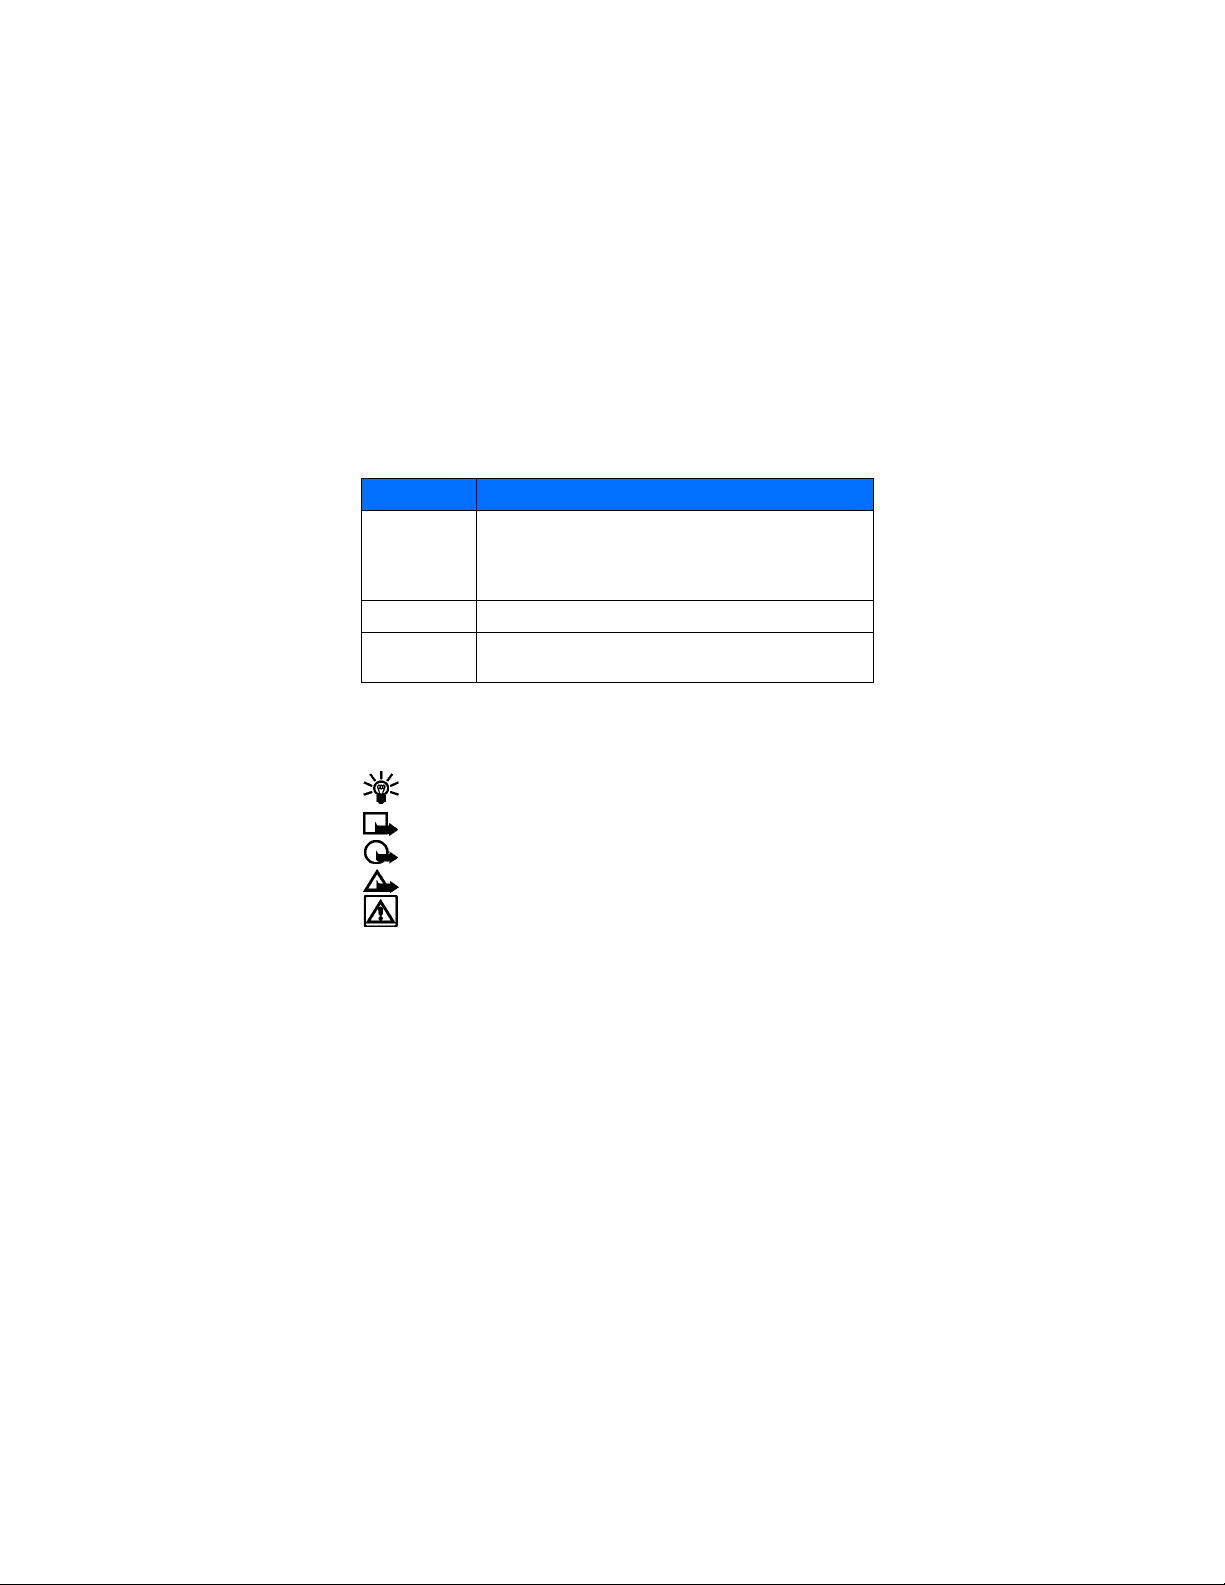
This user guide provides text clues to make instructions clear and easy to follow.
Clue What it means
Indicates one of the following items:
bold
bold and blue Indicates the text is an address on the World Wide Web.
italic Italics indicate emphasis. Pay close attention to any information in
• The word or phrase appears on the phone’s screen.
• Special text, such as Notes and Warnings.
• The name of one of the phone keys.
italics.
Follow graphic clues
This guide uses icons (graphic clues) to alert you to important information.
Tip: Information about a shortcut or an alternate method of doing
something.
Note: Explanation about a feature or an important concept.
Important: Critical information about a feature.
Caution: Help to avoid information loss.
Warning: Help to avoid personal injury, damage to the phone, or property
damage.
Look for updates
From time to time, Nokia updates this user guide to reflect changes or corrections.
The latest version will be available at www.nokia.com/us.
Also, an interactive tutorial will be available at www.nokiahowto.com.
6 Copyright © Nokia 2003
Page 13

•GET STARTED WITH THE QUICK GUIDE
Make a call Enter a phone number, press the Send key.
Answer a call Press the Talk key.
Answer with call waiting Press Options, then select Answer call.
End a call Press the End key.
Reject a call Press the End key
Redial Press the Talk key twice.
Adjust call volume During a call, press the Scroll up or Scroll down key.
Use the in-call menu During a call, press Options.
Save a name and number Enter a number, press Options, select Save, enter a name,
Recall a name/number Press the Scroll up or Scroll down key to scroll to the
Recall a name/number
during a call
Add e-mail address Recall the name, press Details, press Options, scroll to
Add multiple numbers Recall the name, press Details, press Options, scroll to
Send a text message Press Menu 01-1-1, enter message, press Options, select
Send a picture message Press Menu 01-1-1, press Options, select Insert picture.
Use browser Press and hold 0 OR press Menu 10, scroll to Home, then
and press OK.
name.
Press Options, select Phone book, select Find, scroll to
the name/number.
Add detail, press Select, select E-mail, enter e-mail
address, and press OK.
Add number, press Select. Select one of the number
types: General, Mobile, Home, Work, or Fax. Add a
number, press OK.
Send, enter a phone number, and press OK.
Scroll to a picture you like, press View, press Insert, enter
a text message, press Options, select Send, enter a phone
number, and press OK.
press Select. Note: Internet content/services designed for
mobile devices requires subscription to service.
.
Nokia 3595 User Guide þ Copyright © Nokia 2003
Page 14

Welcome and quick guide
DRAFT
•MENU SHORTCUTS
Press Menu followed by the menu numbers.
Note:Menu items may vary depending on network and accessories used.
1 MESSAGES
Text messages. . . . . . . . . . . . . .01-1
Multimedia messages . . . . . . .01-2
Instant messaging . . . . . . . . . .01-3
Voice messages. . . . . . . . . . . . .01-4
Info messages . . . . . . . . . . . . . .01-5
Message settings . . . . . . . . . . .01-6
Service command editor . . . . .01-7
Chat . . . . . . . . . . . . . . . . . . . . . . 01-8
2CALL LOG
Missed calls. . . . . . . . . . . . . . . . .2-1
Received calls
Dialed numbers . . . . . . . . . . . . 2-3
Delete recent call lists. . . . . . . 2-4
Call timers . . . . . . . . . . . . . . . . 2-5
GPRS connection timer . . . . . . 2-6
GPRS data counter. . . . . . . . . . 2-7
GPRS connection timer . . . . . . 2-8
Message Counter . . . . . . . . . . . .2-9
3 PROFILES
Normal. . . . . . . . . . . . . . . . . . . . .3-1
Silent . . . . . . . . . . . . . . . . . . . . . .3-2
Loud . . . . . . . . . . . . . . . . . . . . . . .3-3
Outdoor . . . . . . . . . . . . . . . . . . . .3-4
My profile 1 . . . . . . . . . . . . . . . .3-5
My profile 2 . . . . . . . . . . . . . . . .3-6
4 SETTINGS
Time and date settings . . . . . . .4-1
Call settings . . . . . . . . . . . . . . . .4-2
Phone settings . . . . . . . . . . . . . .4-3
Display settings . . . . . . . . . . . . .4-4
Tone settings. . . . . . . . . . . . . . . .4-5
Network services . . . . . . . . . . . .4-6
Accessory settings . . . . . . . . . . .4-7
Security settings. . . . . . . . . . . . .4-8
Restore factory settings . . . . . .4-9
. . . . . . . . . . . . . . 2-2
5 GALLERY
View folders. . . . . . . . . . . . . . . . .5-1
Add folder . . . . . . . . . . . . . . . . . .5-2
Delete folder . . . . . . . . . . . . . . . .5-3
Rename folder. . . . . . . . . . . . . . .5-4
Gallery downl.. . . . . . . . . . . . . . .5-5
6 ORGANIZER
Alarm clock . . . . . . . . . . . . . . . . .6-1
Calendar. . . . . . . . . . . . . . . . . . . .6-2
To-do list. . . . . . . . . . . . . . . . . . .6-3
Wallet. . . . . . . . . . . . . . . . . . . . . .6-4
Synchronize . . . . . . . . . . . . . . . . .6-5
7 GAMES
Select game. . . . . . . . . . . . . . . . .7-1
Game downlds. . . . . . . . . . . . . . .7-2
Memory . . . . . . . . . . . . . . . . . . . .7-3
Settings . . . . . . . . . . . . . . . . . . . .7-4
8 APPLICATIONS
Select app.. . . . . . . . . . . . . . . . . .8-1
App. downloads
Memory. . . . . . . . . . . . . . . . . . .8-3
9 EXTRAS
Calculator . . . . . . . . . . . . . . . . . .9-1
Stopwatch . . . . . . . . . . . . . . . . . .9-2
10 CONNECTIVITY
11 SERVICES
12 SIM SERVICES
13 NET MONITOR
. . . . . . . . . . . .8-2
8 Copyright © Nokia 2003
Page 15

•UNDERSTAND WIRELESS NETWORK
SERVICES
A number of features included in this guide are called Network Services. These are
special services that you arrange through your wireless service provider. Before you
can take advantage of any of these Network Services, you must subscribe to them
through your service provider and obtain instructions for their use from your
service provider.
Network services for the Nokia 3595 phone include:
Voice mail
Call waiting, call forwarding, and caller ID
Text and picture messages
Info Message Service
Notifications on SIM update
Cell info display
Service command editor
Selected Internet access services
GPRS services
Note: Some networks may not support all language-dependent
characters and/or services.
•LEARN ABOUT ACCESSIBILITY SOLUTIONS
Nokia is committed to making mobile phones easy to use for all individuals,
including those with disabilities. Accessibility solutions are offered through
alternate user guide formats and mobile phone accessories.
Accessible features
The Nokia 3595 phone has many accessible features, including:
Ability to send and receive short text messages
Convenience of one-touch dialing
Ability to define ring tones for different caller groups
Large easy-to-read display with adjustable font size
Vibrating alert for incoming calls
Voice dialing and commands for handsfree operation
Audible alerts indicating battery and signal strengths
Access alternate formats
This user guide is available in alternate formats. Contact Nokia at
www.nokiaaccessibility.com or call 1-888-665-4228 for more information.
Nokia 3595 User Guide þ Copyright © Nokia 2003
Page 16
Welcome and quick guide
DRAFT
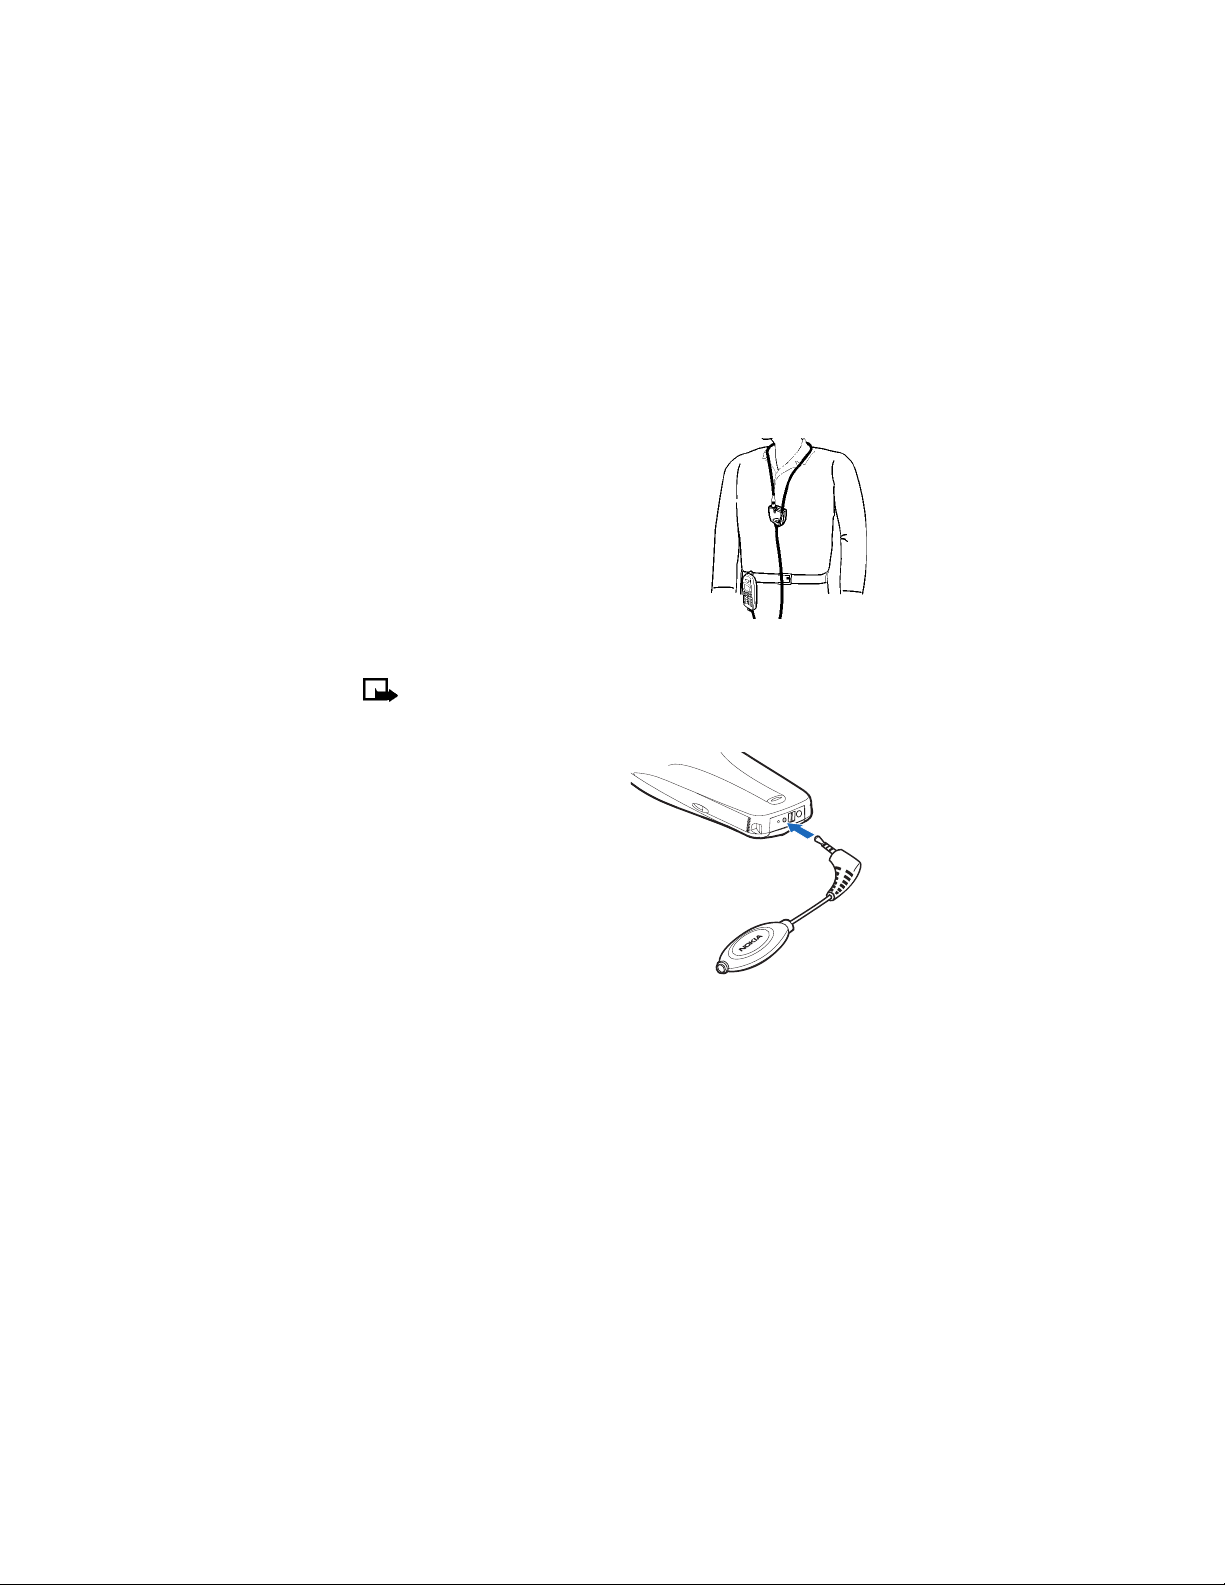
LPS-3 Mobile Inductive Loopset
The LPS-3 Mobile Loopset gives people with
T-coil equipped hearing aids the ability to make and
receive calls without noise interference.
Also compatible with the Nokia 3300, 3500, 8200,
8300 and 8800 series digital phones, the loopset
gives hearing-impaired users clear access to digital
telephony.
The loopset is easy to use. You wear the loopset
around your neck, connect it to your phone, and spea k
directly toward the microphone. For more
information see “Set up the loopset profile” on
page 69.
Note: The loopset can be purchased separately as an accessory. For
operating instructions, refer to the booklet that comes with the LPS-3.
TTY/TDD Adapter (HDA-9)
The TTY/TDD Adapter is a Nokia accessory
that allows you to connect your mobile
phone to a Telecommunications Device
for the Deaf (TTY/TDD) to make a call in
digital mode.
WHAT YOU WILL NEED
In addition to the Nokia 3595 phone,
you’ll need the following for TTY/TDD
communication.
• A TTY/TDD device that is “cellular
ready” or “cellular compatible”
• A cable for connecting the TTY/TDD
to your phone, usually supplied by
the manufacturer of the TTY/TDD device
• The TTY/TDD Adapter (HDA-9), which can be purchased separately as an
accessory at www.nokia.com/us
For information on choosing a profile so that the phone recognizes the TTY/TDD
device, see “Set up the TTY/TDD profile” on page 69.
TTY/TDD
Adapter
10 Copyright © Nokia 2003
Page 17

•SHARED MEMORY
The following features in this phone may share memory: ringing tones, pictures,
screen savers, and Java games and applications. Using any of these features may
reduce the memory available for any features sharing memory. This is especially
true with heavy use of any of the features (although some of the features may have
a certain amount of memory specially allotted to them, in addition to the amount
of memory shared with other features). For example, saving many games may take
all of the shared memory and your phone may display a message that the memory
is full. In this case, delete some of the information or entries stored in the shared
memory features before continuing.
•CONTACT NOKIA
If you ever need to call Nokia Customer Care or your service provider, you will need
to provide specific information about your phone.
This information is provided on the phone label. The label is on the back of the
phone (under the battery). It shows the following:
• Phone type
• Phone model
•IMEI
Important: Do not remove or deface the label.
Tip: See “Remove the battery” on page 16 for instructions on how to
access the phone label.
Nokia 3595 User Guide þþ Copyright © Nokia 2003
Page 18
Welcome and quick guide
DRAFT
Have the phone or accessory available
Whether you are calling about your phone or an accessory, have the equipment with
you when you call. For example, if you are calling about a headset, please have it
available. If a Nokia representative asks a specific question about the accessory,
you will have it available for quick reference.
Nokia Customer Care Center, USA Customer Care Centre, Canada
Nokia Mobile Phones
7725 Woodland Center Boulevard, Suite #150
Tampa, Florida 33614
Tel:1-888-NOKIA-2U
(1-888-665-4228)
Fax: 1-813-249-9619
For TTY users: 1-800-24-NOKIA
(1-800-246-6542)
Nokia Products Ltd.
601 Westney Rd. South
Ajax, Ontario L1S 4N7
Tel:1-905-427-1373
1-888-22-NOKIA
(1-888-226-6542)
Fax:1-905-427-1070
Web site: www.nokia.ca
•REGISTER YOUR PHONE
Make sure to register your phone at www.warranty.nokiausa.com or
1-888-NOKIA-2U (1-888-665-4228) so that we can serve your needs bett er if you
should need to call the center or have your phone repaired.
•E-NEWSLETTERS
When you register your phone, you can sign up for Nokia's e-newsletter Nokia
Connections
accessory information, and special offers.
if you would like. You will receive tips and tricks on using your phone,
12 Copyright © Nokia 2003
Page 19

3 Before you begin
Before you begin, you need to prepare your phone by installing the SIM card, and
charging the battery. This chapter covers these topics as well as instructions on
how to attach the optional headset.
Note: Your service provider supplies the SIM card and headset.
•INSTALL THE SIM CARD
Important: Switch off the phone before installing the SIM card. Press and
hold the power key for about two seconds to turn your phone off.
1 With the back of the phone body facing you, locate the SIM card slot.
2 Install the SIM card by sliding it gently into the slot: beveled corner on the
right, gold contact area face down.
SIM card
SIM card directional icon on type label
Notes about SIM cards
• Keep all miniature SIM cards out of the reach of small children.
• The SIM card and its contacts are easily damaged by scratches or bending, so
be careful when handling, inserting, or removing the card.
beveled
cornerSIM card installed
Nokia 3595 User Guide ýþ Copyright © Nokia 2003
Page 20
Before you begin
DRAFT
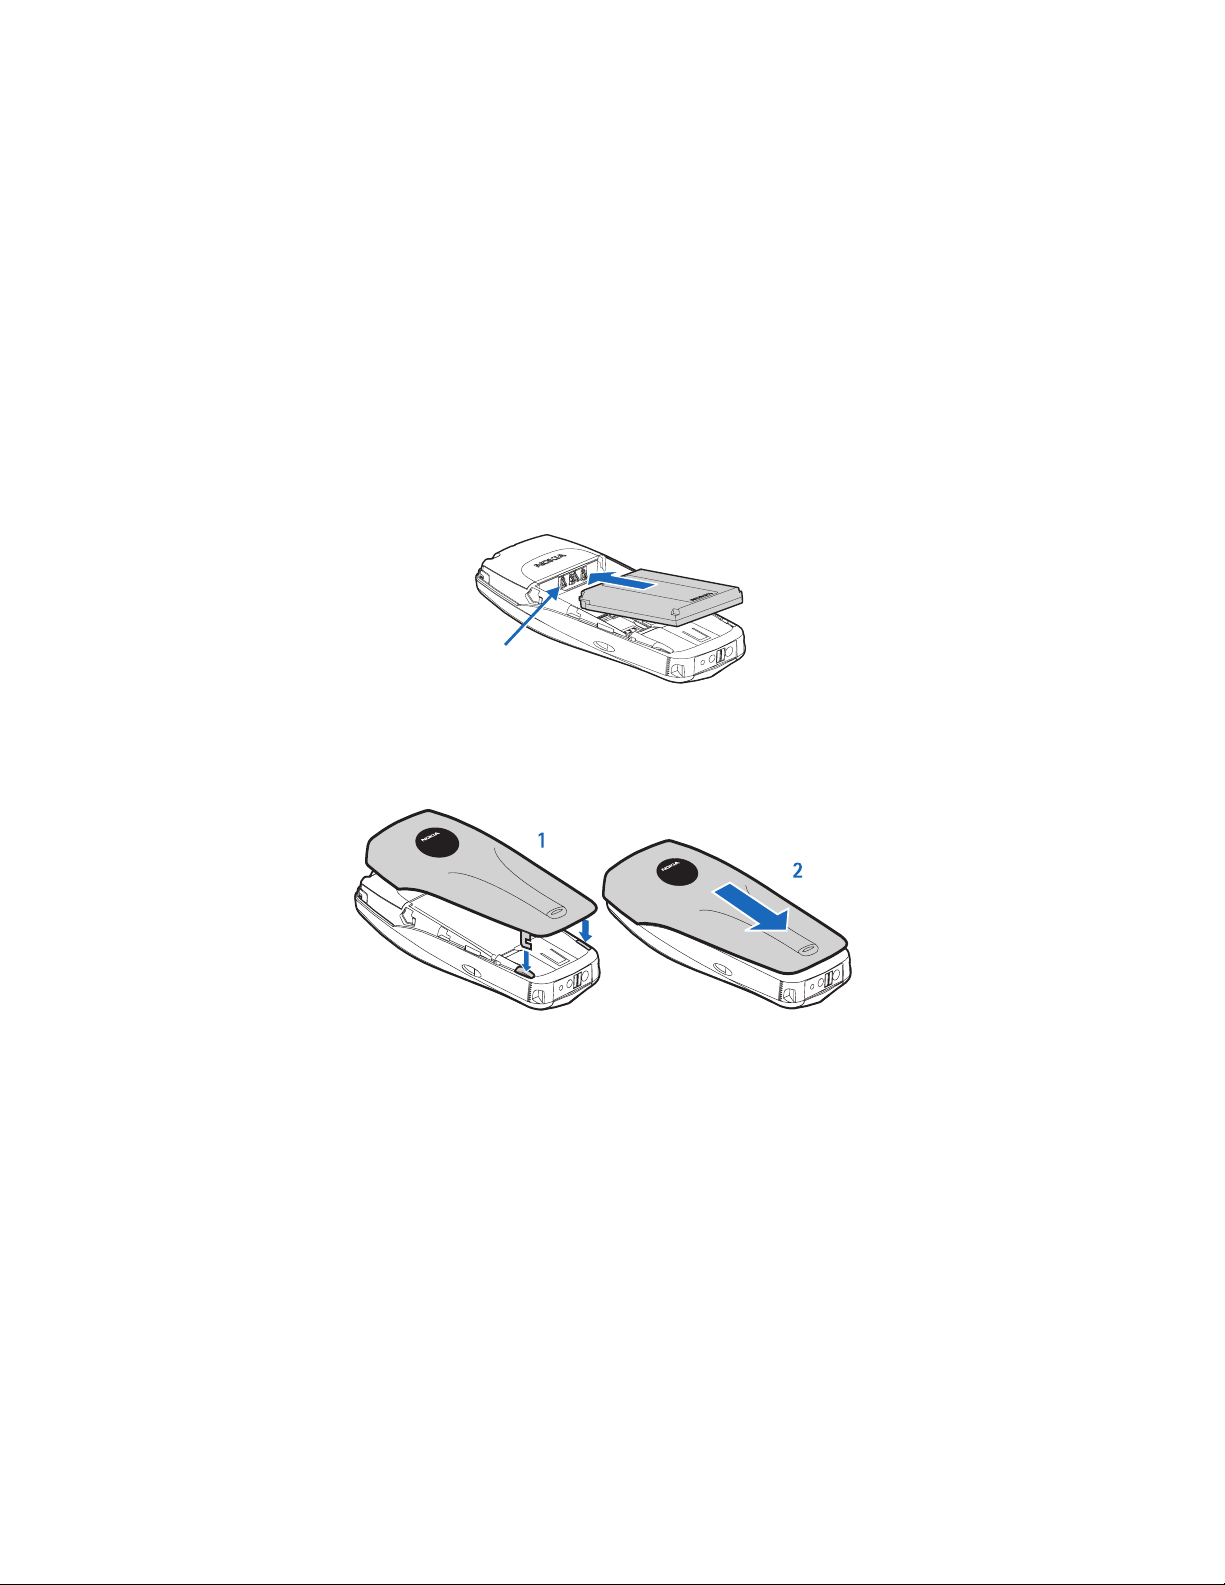
•INSTALL THE BATTERY
1 Place the battery in the compartment with the label side facing up and the
golden contact area of the battery aligned with the contact prongs inside the
phone.
2 Slide the battery until it snaps into place.
gold contacts
Replace the back cover
1 Direct the back cover towards the locking catches on the phone.
2 Slide the back cover until it locks into place.
locking catches
14 Copyright © Nokia 2003
Page 21
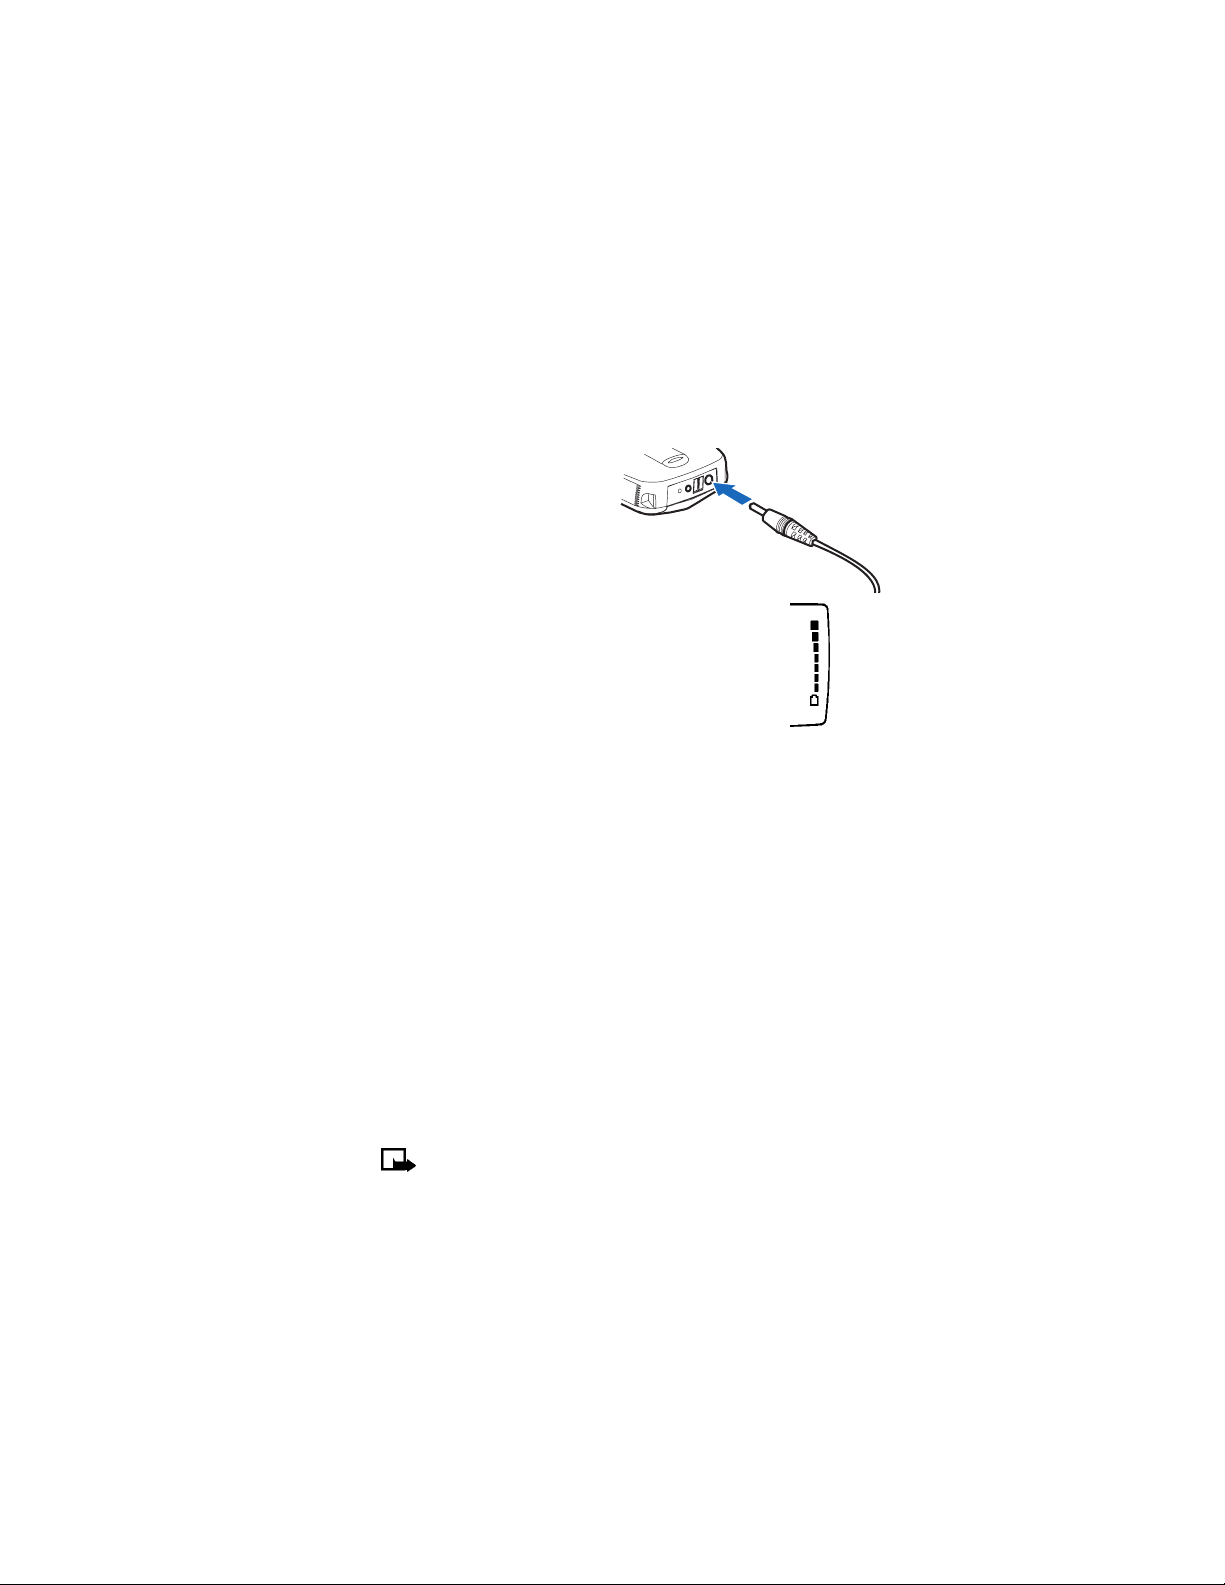
•CHARGE THE BATTERY
1 Connect the charger to a
standard wall outlet.
2 Connect the lead from the
charger to the bottom of the
phone.
3 The battery power indicator
(or battery bar) appears on the screen and starts
scrolling. If the phone is on, Charging appears
briefly on the screen.
4 When the battery bar stops scrolling, the battery
charge is complete. Battery full appears also, if
the phone is on.
5 Disconnect the charger from the phone.
Charger
•BATTERY NOTES
Use the following guidelines to obtain the best performance from your battery:
• Recharge your battery only with a charger approved by Nokia.
• With your phone turned off, charge your new battery for three hours before
its first use. Use the battery until it is fully discharged. Repeat this procedure
twice for a total of three charging cycles.
• Battery operation time may be less than the estimated times during the first
charges. This condition is normal.
• When the battery is fully discharged, the scrolling bars may not appear
immediately.
• After the first charge, you can make and receive calls during the charging
cycle, but the calls interrupt the charge. When the phone call ends, the charge
will resume.
• The bars on the screen stop scrolling and remain constant when the phone is
charged. If you leave the phone connected to the charger, the battery receives
an additional charge.
• If the battery is completely empty, it may take a few minutes before you can
make or receive calls.
• The charging time depends on the charger and battery that you use.
Note: The battery will accept a "trickle charge" for an additional two
hours. For more details, see “Battery information” on page 145.
Nokia 3595 User Guide ýþ Copyright © Nokia 2003
Page 22

Before you begin
DRAFT
•REMOVE THE BATTERY
If you purchase a new battery or need to access information on the phone label,
you may need to remove the battery.
Important: Switch off the phone before removing the battery. Do not
puncture or burn the battery. Please recycle or dispose of properly.
1 With the back of the phone facing you, press and hold the back cover release
button.
2 Slide the cover up, then lift it off the phone.
3 Lift out the battery.
2
1
•SET UP YOUR HEADSET
Your phone may come with a headset you can
use while talking on your phone. The headset
provides convenient handsfree use of the
phone.
Connect the headset
1 Insert the headset plug into the bottom
of your phone.
2 Put the round ear plug into one ear.
16 Copyright © Nokia 2003
3
Headset
Page 23
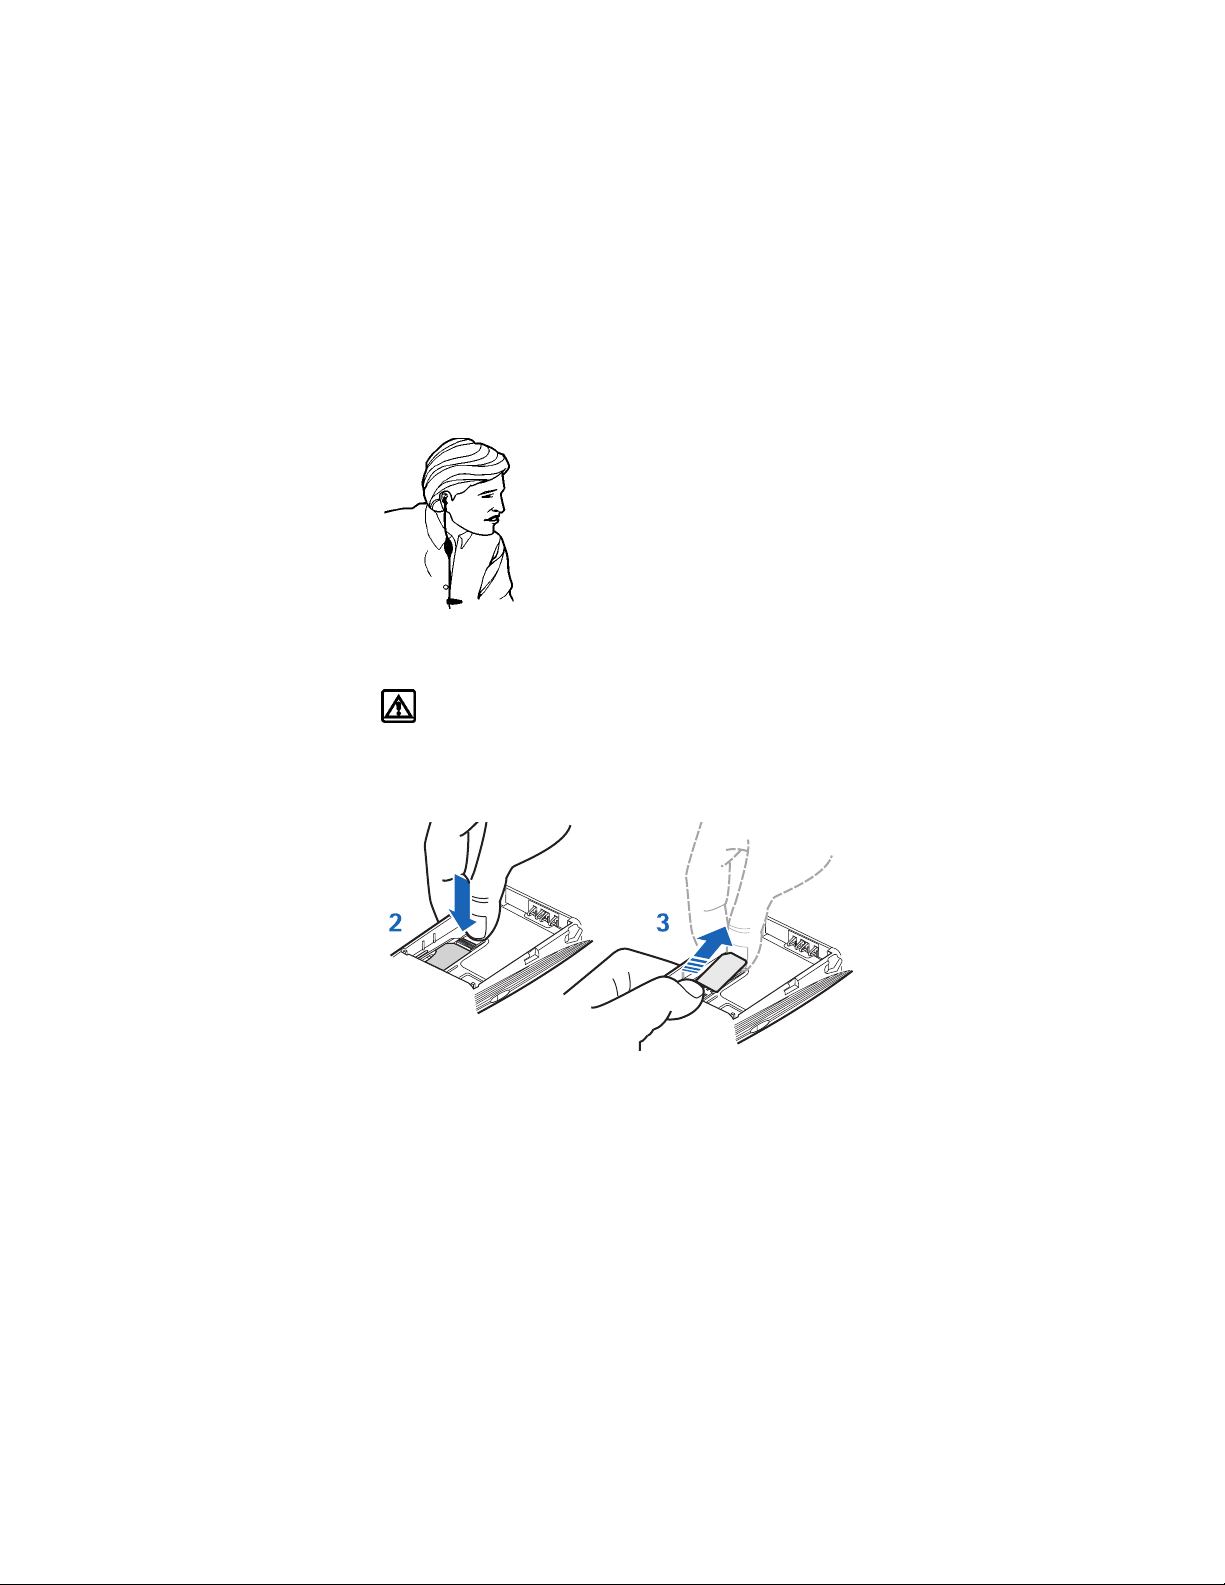
Use the headset
With the headset connected, you can make and answer
calls as usual, using the keypad to press the Talk key and
the End key or to enter numbers to call.
The microphone for the headset hangs at the side of your
head. Although the microphone may seem far from your
mouth, you can speak at a normal volume.
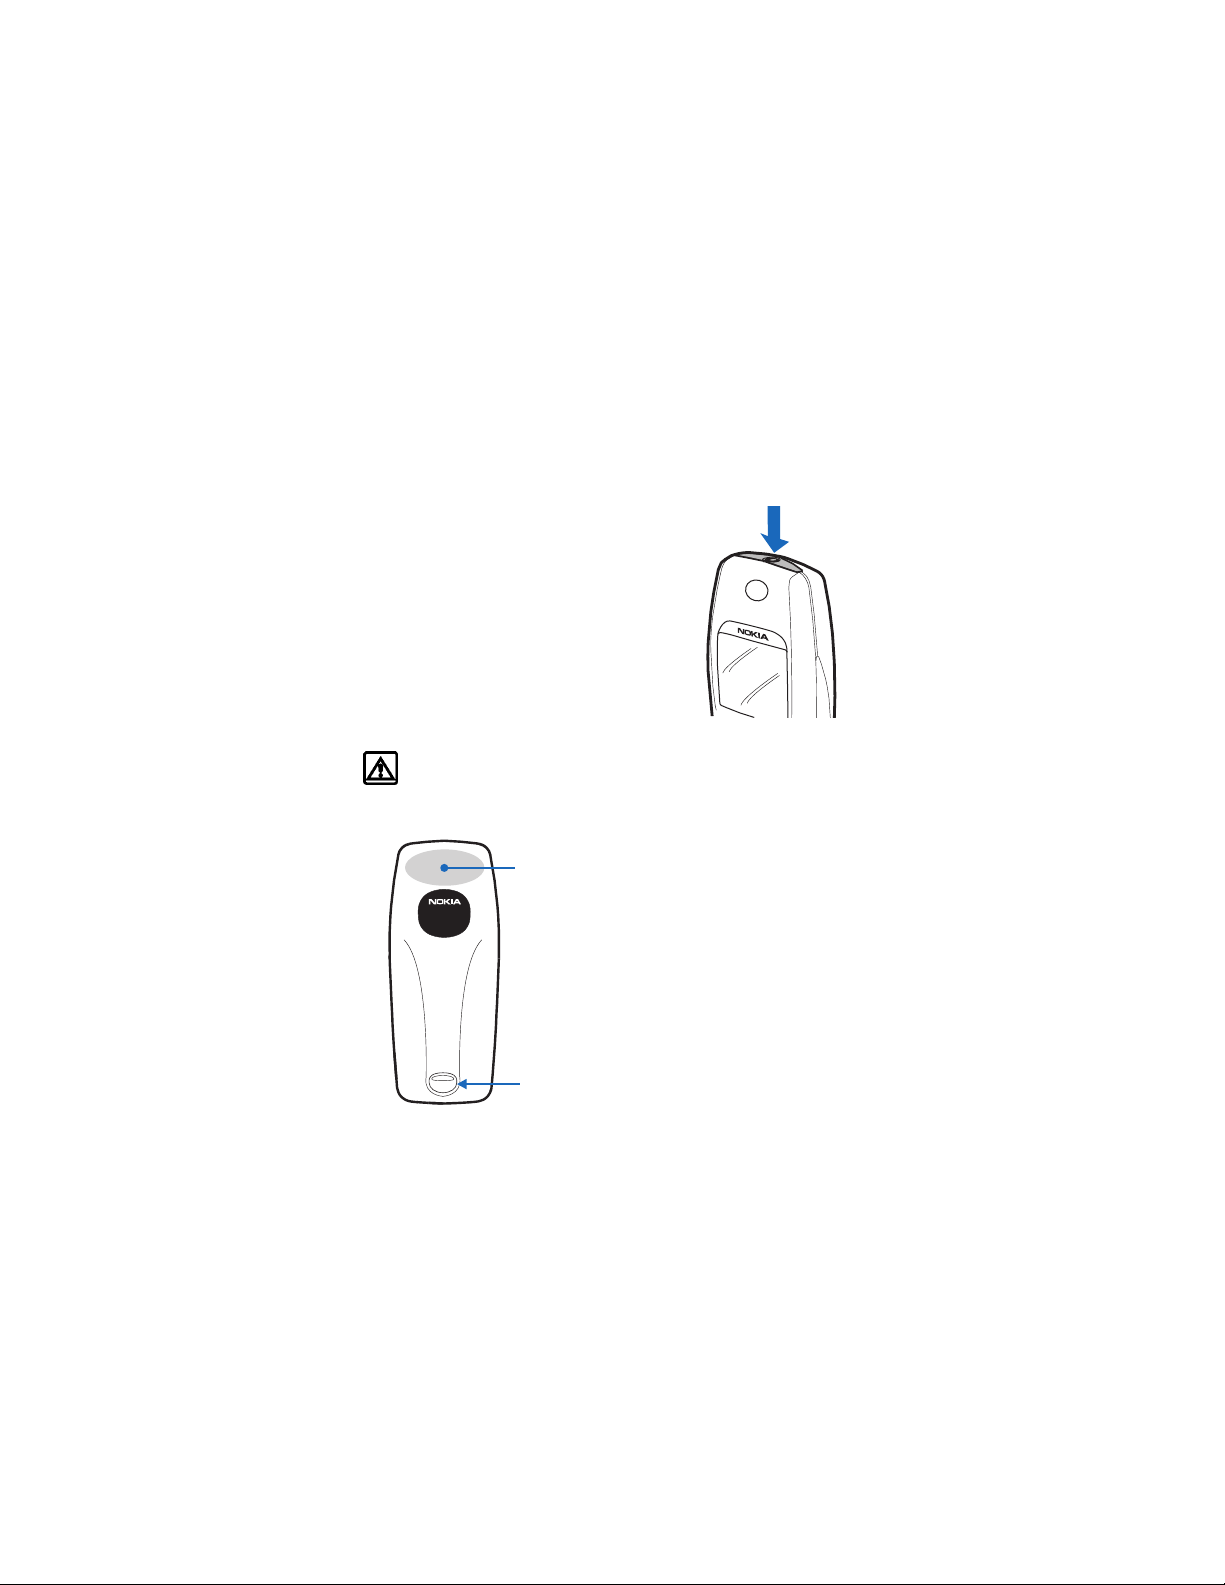
•REMOVE THE SIM CARD
If you ever need to take the SIM card out of the phone, follow these steps.
Warning: Keep all miniature SIM cards out of the reach of small children.
1 Remove the back cover and battery. See “Remove the battery” on page 16.
2 Press the plastic tab of the SIM card holder down.
3 Gently push the SIM card towards the top of the phone.
Nokia 3595 User Guide þý Copyright © Nokia 2003
Page 24
About your phone
DRAFT
4 About your phone
•SWITCH ON YOUR PHONE
• Press and hold the power key for about 2
seconds. After your phone is on, when any
key is pressed, the keypad and display lights
stay on for up to 15 seconds.
The phone may ask for a Personal
Identification Number (PIN) or a security
code. Your service provider supplies the PIN
code. See “About security codes” on
page 84 for more information.
Warning: Do not switch the phone on when wireless phone use is
prohibited or when it may cause interference or danger.
Back cover
Antenna area
On the back of your phone,
you will find the back cover
release button and an internal
antenna.
Back cover
release
18 Copyright © Nokia 2003
Page 25
•ABOUT THE ANTENNA
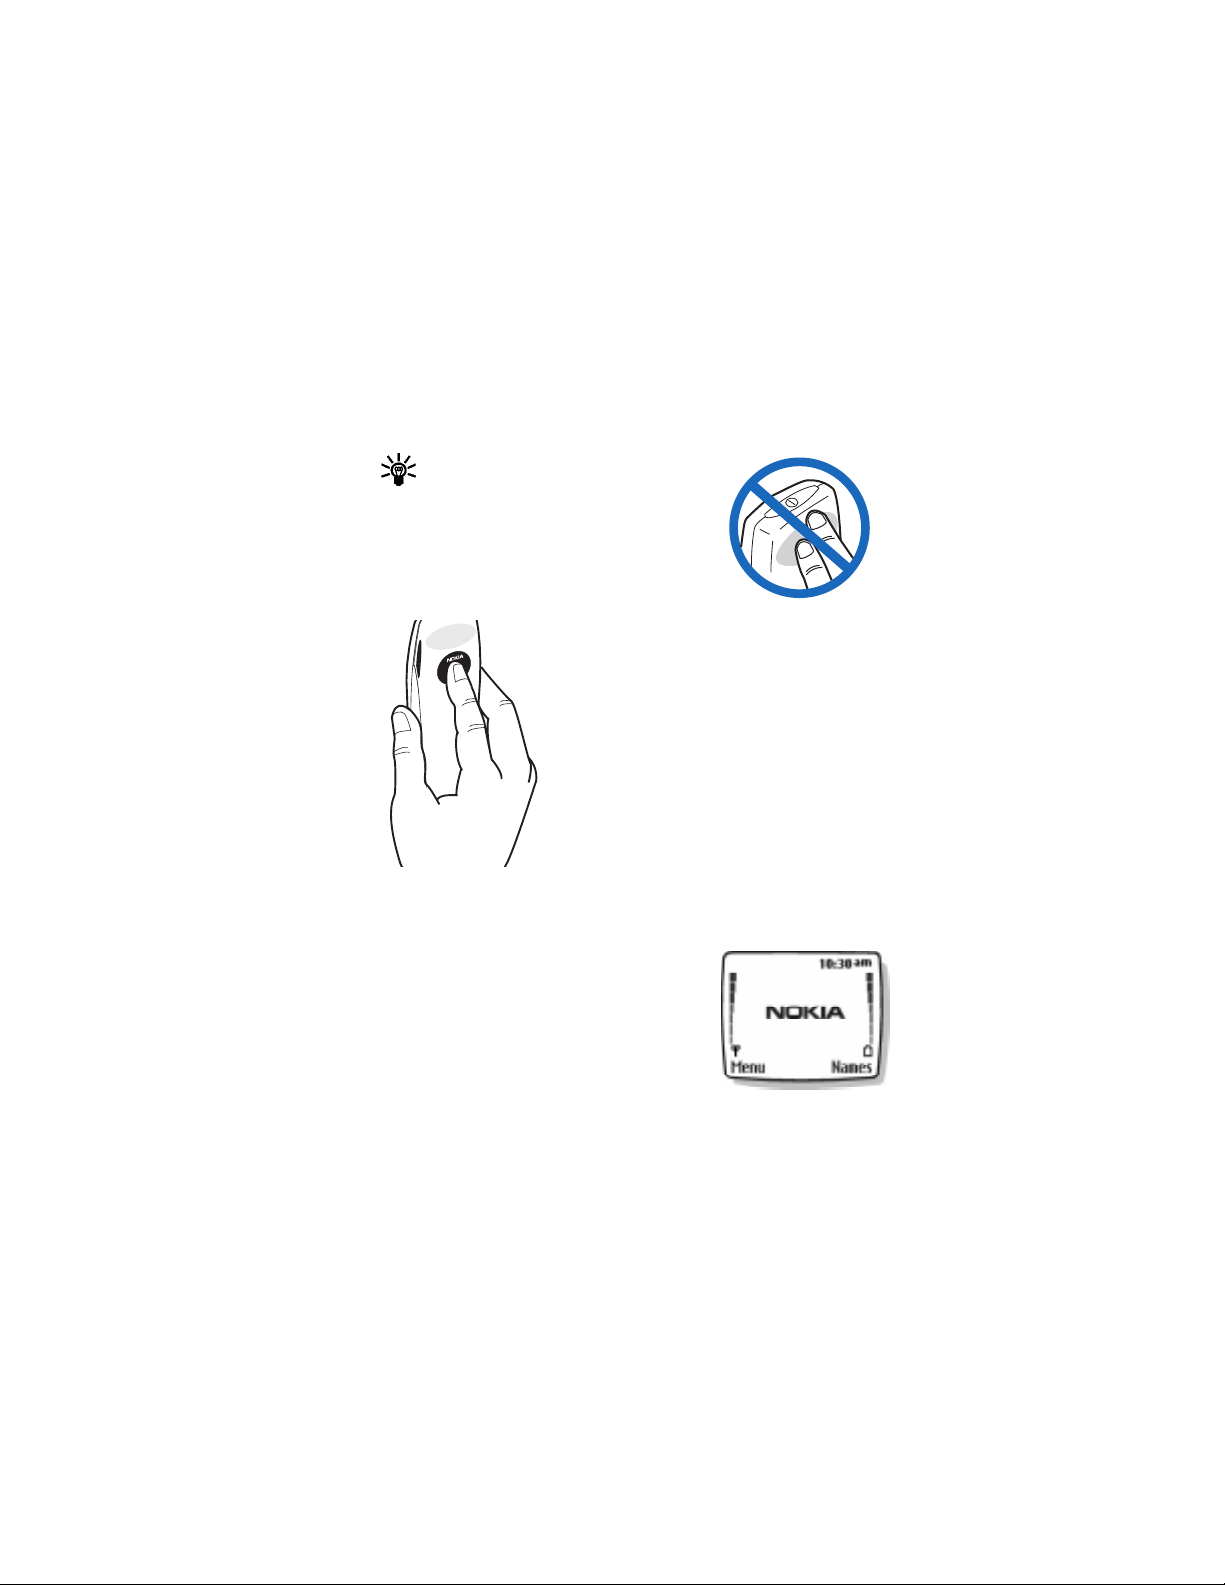
Tip: Your phone has a built-in antenna. As
with any other radio transmitting device, do
not touch the antenna unnecessarily when
the phone is switched on.
Contact with the antenna affects call quality
and may cause the phone to operate at a
higher power level than otherwise needed.
Not touching the
antenna during a call optimizes the antenna
performance and the talk-time of your phone. Hold
the phone as you would any other telephone, with the
antenna area pointed up and over your shoulder.
•ABOUT THE START SCREEN
When you turn on your phone, the first screen that
appears is the Start screen. In the middle of the Start
screen, you may see information indicating which
wireless network your phone uses. This information
can vary between phones. Other indicators and icons
appear on this Start screen and are described in the
next section.
Nokia 3595 User Guide þý Copyright © Nokia 2003
Page 26
About your phone
DRAFT
•ABOUT INDICATORS AND ICONS
On your phone, you have two types of identifiers: indicators and icons.
Indicators
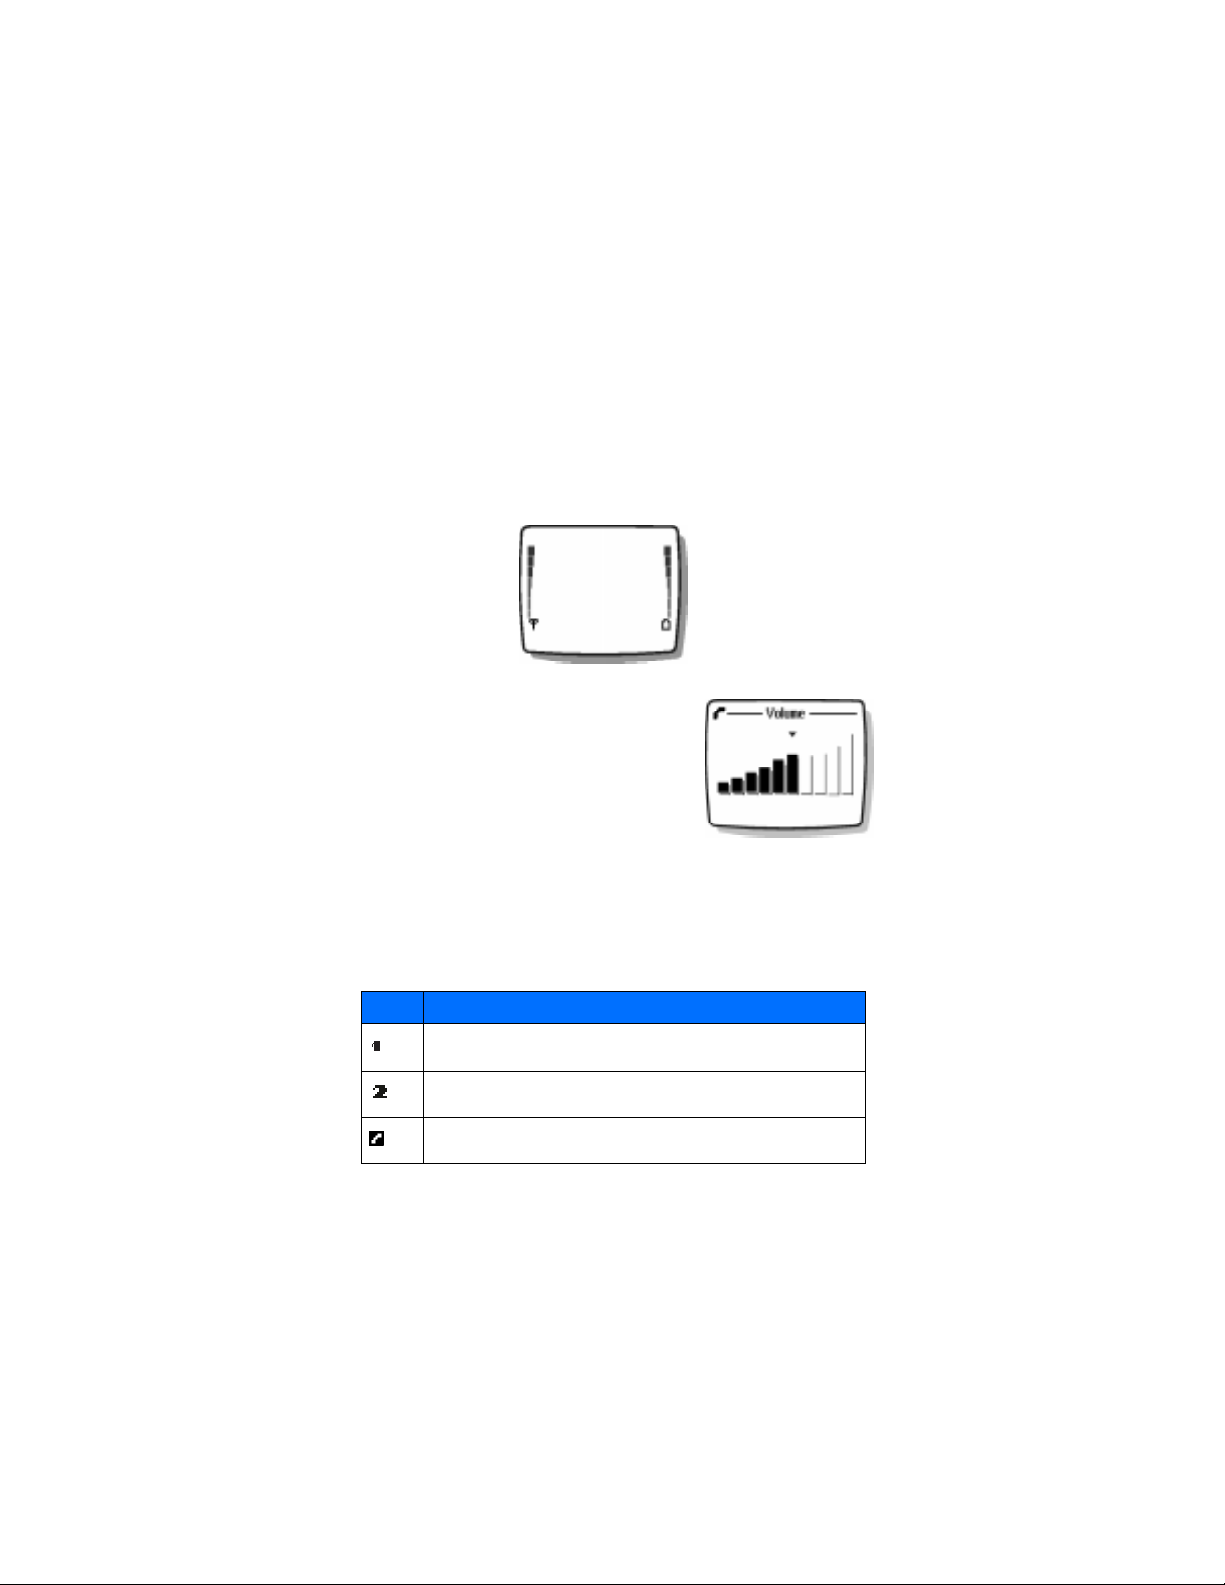
Indicators show the status of the phone. The phone uses three types of indicators:
Signal
Strength
Indicator
• The signal strength indicator: shows the strength of the signal to your phone.
• The battery strength indicator: shows how much
power is left in your phone’s battery.
• The volume indicator: shows the earpiece volume
level. See “Adjust the earpiece volume during a
call” on page 24 for details.
• The audible signal and battery indicator:
indicates by a series of beeps that either the
signal or battery strength is running low on your
phone. You need to set up this feature on your
phone through the voice command function
before it will operate. See “Use Voice commands” on page 62 and “Audible
alerts” on page 64for more information.
Battery
Strength
Indicator
Icons
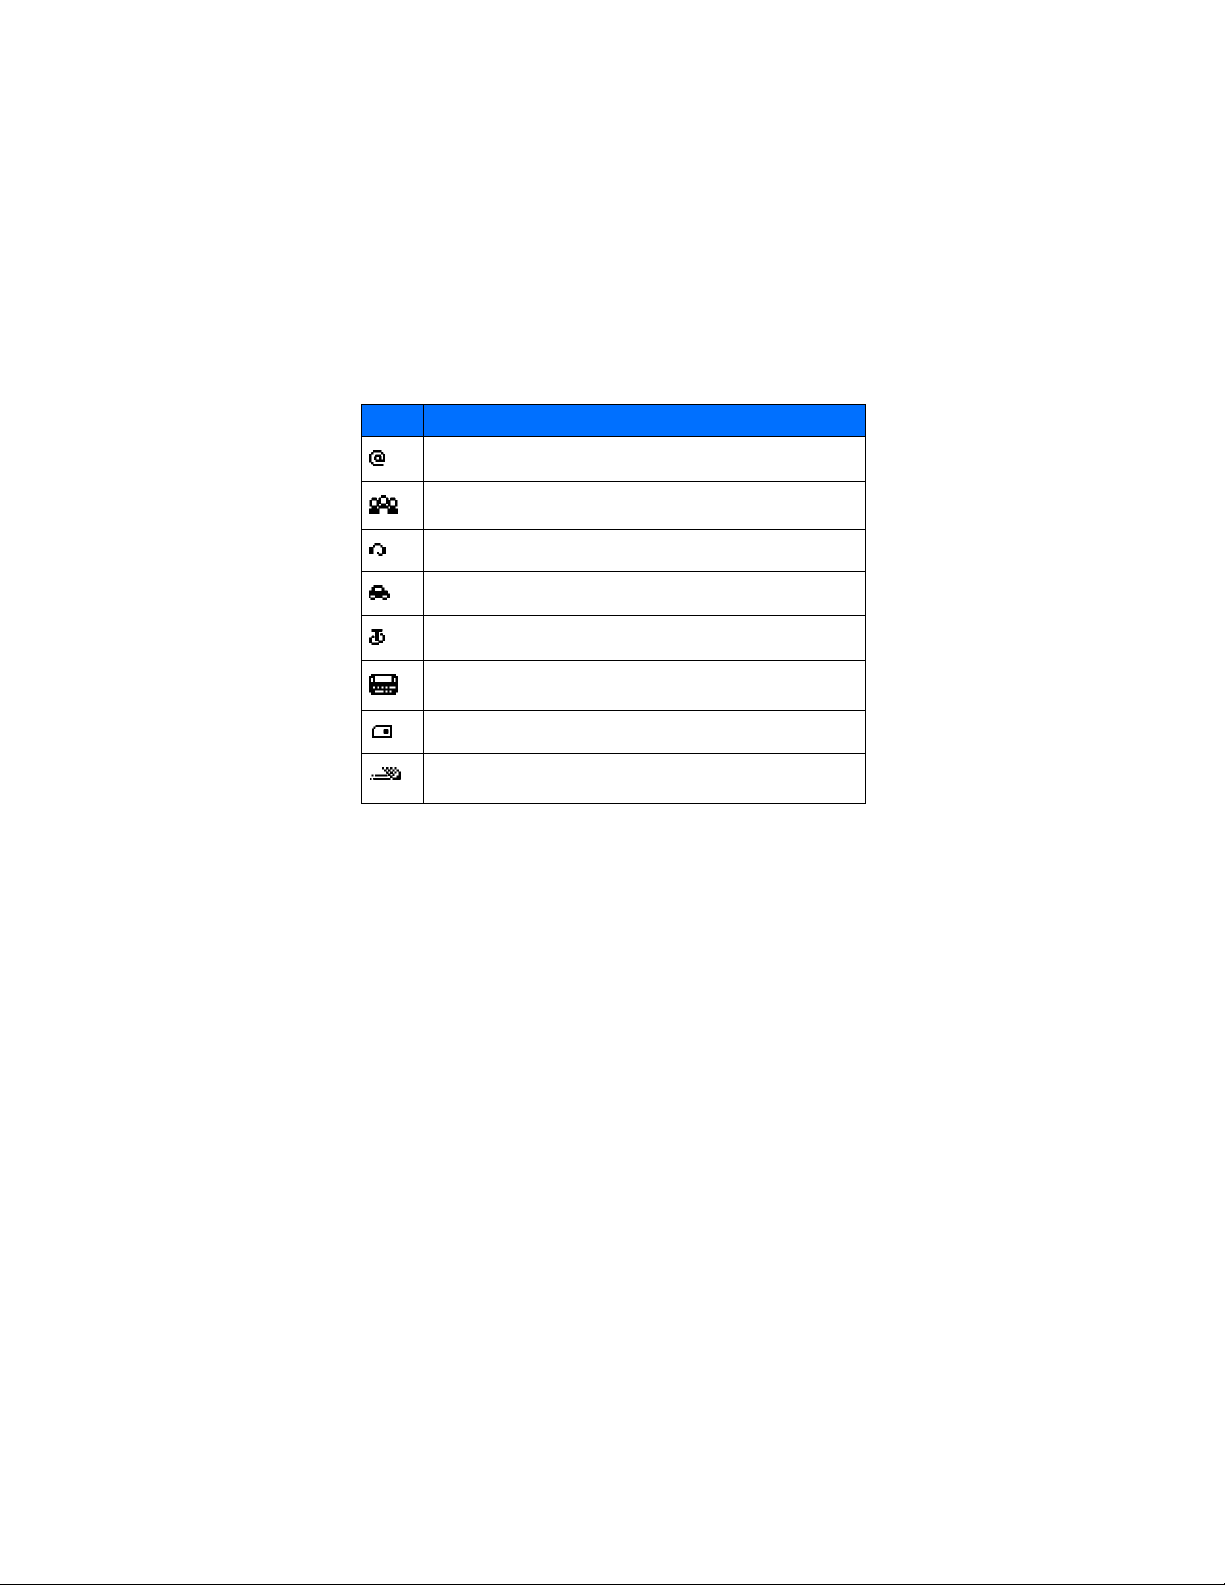
Icons are graphical representations of a specific item or situation. The following
table shows examples and tells you what each icon means.
Icon What it means
Line 1 is selected for outgoing calls.
Line 2 is selected for outgoing calls.
You have an active call.
20 Copyright © Nokia 2003
Page 27

Icon What it means
You have a call on hold.
You have one or more new voice mail messages.
You have a new voice mail message on line 1.
You have new voice mail messages on line 1 and line 2.
You have a new voice mail message on line 2.
You have one or more new text messages. If the icon blinks, text message
memory is full.
Keyguard is on. Your phone will not accept any key presses.
The alarm clock is set.
The call alert and text message alert tones are turned off.
The
Timed profile is selected.
Incoming voice calls are being forwarded to another number.
You have forwarded all voice calls received on line 1.
You have forwarded all voice calls received on line 2.
You have forwarded all voice calls received on lines 1 and 2.
The phone is ready for you to enter a response.
There is a voice tag attached to a name in your phone book.
Nokia 3595 User Guide ýþ Copyright © Nokia 2003
Page 28
About your phone
Icon What it means
Indicates an e-mail address in your phone book.
You have assigned the name and number to a caller group.
The headset is attached to your phone.
The car kit is attached to your phone.
The loopset is attached to your phone.
A Telecommunications Device for the Deaf (TTY/TDD) is attached to your phone.
The phone book entry is stored on the SIM card.
You are using predictive text input. Your phone uses a built-in dictionary to
predict or guess the word entered.
DRAFT
22 Copyright © Nokia 2003
Page 29

5 Make and answer calls
This chapter tells you how to make and receive calls and how to adjust certain
options.
•MAKE A CALL
Check the signal strength
The signal indicator on the left side of your phone screen
shows the strength of the network radio signal. The
indicator scrolls as the signal strength increases and
decreases. To get the strongest signal, try moving your
phone slightly. If you are inside a building, move toward a
window.
Use the keypad
1 Enter the area code (if required in your local calling
area) and phone number.
2 Press the Talk key.
Warning: Do not switch the phone on when
wireless phone use is prohibited or when it may cause interference or
danger.
Use the phone book
1 From the Start screen, press the Scroll up key or the down scroll key and s c roll
to the number you want.
Tip: To skip ahead quickly in the list, press the number key that matches
the first letter of the name.
2 Press the Talk key to make the call.
Signal
Strength
Nokia 3595 User Guide ýþ Copyright © Nokia 2003
Page 30

Make and answer calls
DRAFT
Adjust the earpiece volume during a call
• To increase the volume of a call, press the Scroll
up key and watch the volume indicator go up.
• To decrease the volume, press the bottom scroll
key and watch the volume indicator go down.
If an accessory with its own loudspeaker is connected
to your phone, the volume keys adjust the volume for
that accessory.
•END A CALL
Press the End key.
•ANSWER A CALL
When someone calls you, the phone alerts you and Calling flashes on the display.
To answer, press
OR
Press Options, scroll to Answer call, then press Select.
Caller ID
When Caller ID is active, your phone may display the caller’s phone number. The
caller’s name may also appear, if his/her name and number are stored in the phone
book. See “Use the phone book” on page 39.
the Talk key.
Note: This feature may not be available in all wireless systems. Contact
your service provider for details and availability.
•REJECT A CALL
Press the End key.
OR
Press Options, scroll to Decline call, then press Select.
24 Copyright © Nokia 2003
Page 31

•SILENCE AN INCOMING CALL
You can stop the ring for an incoming call by pressing Silence.
Then, answer or decline the call.
•REDIAL THE LAST-DIALED NUMBER
Press the Talk key twice.
Dial any of the twenty last-dialed numbers
1 Press the Talk key.
2 Scroll to the number you want to redial.
3 Press the Talk key again.
Nokia 3595 User Guide ýþ Copyright © Nokia 2003
Page 32
The menu
DRAFT
6 The menu
Your phone offers many functions that are grouped in menus and submenus. Access
these menus with the selection keys and scroll keys or by entering the appropriate
shortcut number. See “Nokia 3595 phone at a glance” on page4 and “Understand
the terms” on page 5 for more information about the selection keys and scroll keys
and their functions.
•SCROLL BAR
While using phone menus, a scroll bar appears at the far
right of the screen. This bar indicates where you are in the
menu. Each numbered “tab” on the bar represents a different
menu item.
For example, press Menu once. The scroll bar appears with
the first (top) tab displayed. A different tab appears each time you press the Scroll
up or Scroll down key.
•ABOUT MENU SHORTCUTS
You can use a series of numbers, or shortcuts, to access frequently used features. For
example, if you use the phone alarm clock each morning, you may want to learn the
menu shortcut for quick access.
To use a shortcut, press Menu, then the numbers that correspond to the feature.
Tip: Be sure to press the numbers quickly in sequence.
For example, to set your Alarm clock, press Menu 6 -1 (Organizer > Alarm clock).
For complete instructions on using this feature, see “Use the alarm clock” on
page 119.
26 Copyright © Nokia 2003
Page 33

•LIST OF MENU SHORTCUTS
Here is an abbreviated list of menu items and their shortcuts. Later chapters tell
you how to work with the menus, explaining their functions.
Note: Some items may not appear due to the SIM card configuration and
network service availability.
For quick access to the Messages menu, press Menu, then 0, then the menu
numbers.
For example, to access your Messages Inbox, press Menu 01-2.
1 Messages
1 Text messages
1 Create message
2 Inbox
3 Create e-mail
4 Sent items
5 Archive
6 Templates
7 My folders
8 Distribution lists
9 Delete messages
2 Multimedia messages
1 Create message
2 Inbox
3 Outbox
4 Sent items
5 Saved items
6 Delete messages
3 Instant messaging
4 Voice messages
1 Listen to voice messages
2 Voice mailbox number
5 Info messages
6 Message settings
1 Text messages
2 Multimedia msg.
Other settings
3
7 Service command editor
Nokia 3595 User Guide ýþ Copyright © Nokia 2003
Page 34

The menu
2 Call log
1 Missed calls
2 Received calls
3 Dialed numbers
Delete recent call lists
4
All
1
2 Missed
3 Received
4 Dialed
5 Call timers
Duration of last call
1
2 Duration of received calls
3 Duration of dialed calls
4 Duration of all calls
5 Life timer
6 Clear timers
6 Call costs (Depends on network availability)
Last call units
1
2 All calls units
3 Call cost settings
7 GPRS data counter
1 Data sent in last session
2 Data received in last session
3 All sent data
4 All received data
5 Clear counters
8 GPRS connection timer
1 Duration of last session
2 Duration of all sessions
3 Clear timers
9 Message Counter
1 Sent messages
2 Received messages
3 Clear counters
DRAFT
28 Copyright © Nokia 2003
Page 35

3 Profiles
1 Normal
Select
1
Customize
2
1 Ringing options
2 Ringing tone
3 Ringing volume
4 Vibrating alert
5 Message alert tone
6 Keypad tones
7 Warning tones
8 Alert for
Profile name (Appears under Silent, Quiet, Loud, My profile 1 and My
9
profile 2
Timed
3
2 Silent
3 Quiet
Loud
4
Outdoor
5
My profile 1
6
7 My profile 2
4 Settings
1 Tone settings
1 Ringing options
2 Ringing tone
3 Ringing volume
4 Vibrating alert
5 Message alert tone
6 Keypad tones
7 Warning tones
8 Alert for
2 Time and date settings
Clock
1
Date
2
Auto-update of date & time
3
Call settings
3
1 Automatic redial
2 1-touch dialing
3 Summary after call
4 Anykey answer
)
Nokia 3595 User Guide ýþ Copyright © Nokia 2003
Page 36

The menu
4 Phone settings
1 Language
2 Automatic keyguard
3 Cell info display
4 Welcome note
5 Help text activation
6 Start-up tone
Memory status
7
5 Display settings
1 Wallpaper
2 Color schemes
3 Operator logo
4 Screen saver timeout
5 Display brightness
Network services
6
Call forwarding
1
2 Call waiting
3 Send own caller ID when calling
4 System selection
5 Confirm SIM service actions
7 Accessory settings
1 Headset
2 Handsfree (Only shows up when phone is connected to Car Kit)
Loopset
3
4 TTY/TDD
Security settings
8
PIN code request
1
2 Call restrictions
3 Fixed dialing
4 Closed user group
5 Security level
6 Change access codes
9 Restore factory settings
DRAFT
5 Gallery
1 View folders
2 Add folder
3 Delete folder
4 Rename folder
5 Gallery downl.
30 Copyright © Nokia 2003
Page 37

6 Organizer
1 Alarm clock
2 Calendar
3 To-do list
4 Wallet
5 Synchronize
7 Games
1 Select game
1 Airglider
2 Bowling
Backgammon
3
4 Skydiver
Game downlds. (depends on network availability)
2
Memory
3
4 Settings
1 Game sounds
2 Game lights
3 Shakes
4 Game controls
5 Club Nokia ID (depends on network availability)
8
Applications
1
Select app.
2 App. downloads
3 Memory
9 Extras
1 Calculator
2 Stopwatch
3 Voice commands
10 Connectivity
1 SynchronizeS
2 GPRS connection
11 Services
THE FOLLOWING MENU ITEMS MAY VARY; CONTACT YOUR SERVICE
PROVIDER.
Home
1
2 Bookmarks
Nokia 3595 User Guide þý Copyright © Nokia 2003
Page 38

The menu
DRAFT
3 Service inbox
4 Settings
1 Active service settings
2 Edit active service settings
Settings’ name
Homepage
Session mode
Connection security
Data bearer
3 Appearance settings
4 Cookie settings
5 Certificates
6 Security module settings
Service inbox settings
7
5 Go to address
6 Clear the cache
12 SIM services
FOR AVAILABILITY, RATES AND INFORMATION ON USING SIM
SERVICES, CONTACT YOUR SIM CARD VENDOR, E.G. NETWORK
OPERATOR, SERVICE PROVIDER, OR OTHER VENDOR.
Net monitor
13
32 Copyright © Nokia 2003
Page 39

•PHONE BOOK MENU
1 For access to the phone book, press the End key to return to the Start screen.
2 Press Names.
These options may be available, depending on your SIM card:
1Find
2Add contact
3
Edit name
4 Delete
5
Copy
6 Add number
7 Settings
1 Memory in use
2 Phone book view
3 Memory status
8 1-touch dialing
9 Voi ce tags
10 Caller groups
1 Family
2 VIP
3 Friends
4 Business
5 Other
11 Info numbers (ONLY SHOWS UP IF YOU HAVE INFO MESSAGE
SERVICE INCLUDED ON SIM CARD)
12
Service nos.
13 Own numbers
Nokia 3595 User Guide þþ Copyright © Nokia 2003
Page 40
Enter letters and numbers
DRAFT
7 Enter letters and numbers
You can enter letters and numbers into your phone for a person’s name and phone
number, writing a text message, etc. There are two ways to do this:
• ABC mode, for making entries in the phone book and renaming caller
groups.
• Predictive text input, for writing text messages, adding notes to a picture
message, entering calendar notes, and entering a web address using WAP
services.
•ABC MODE
You can use the ABC mode to enter information into the phone book.
Add letters
1 From the Start screen, press Names, then scroll to Add entry and press Select.
2 Find the key that has the letter you want to enter.
3 Press the key repeatedly until the letter appears on the screen.
Tip: The phone automatically switches to lower case after you enter the
first letter.
Depending on the selected display language, the following characters may be
available.
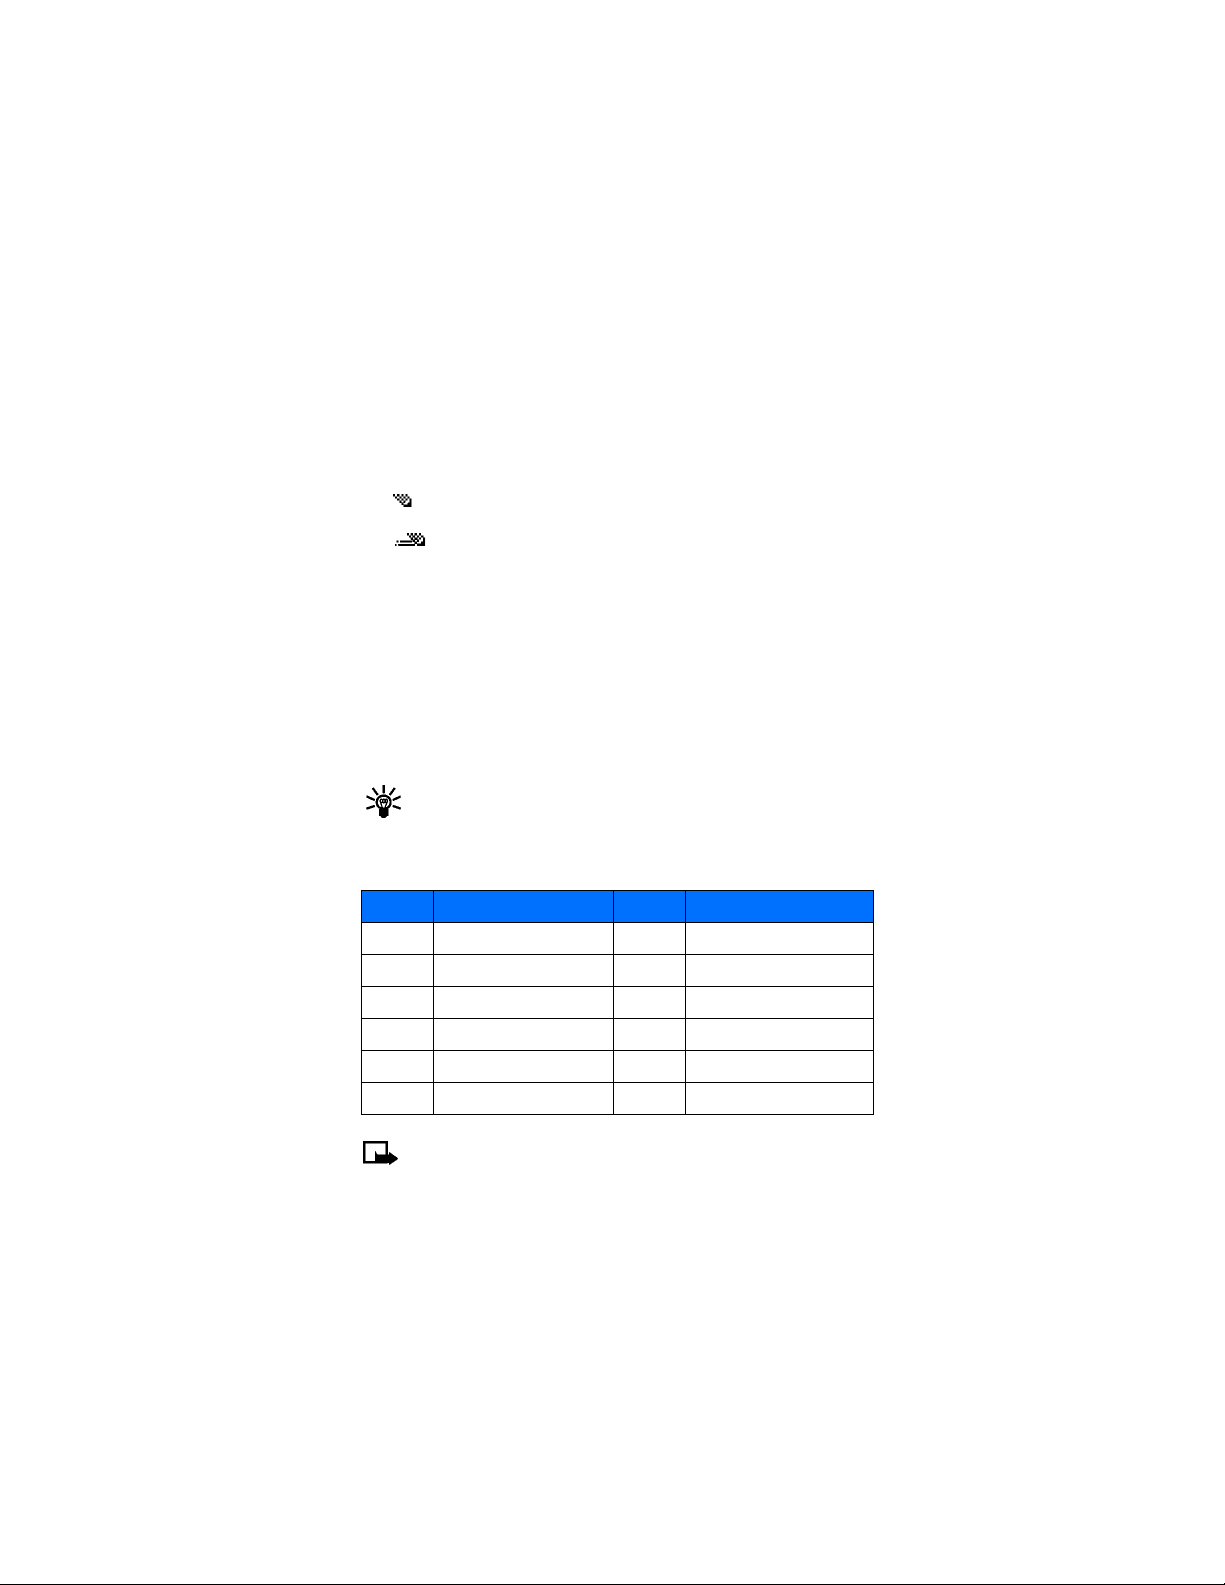
Key Characters Key Characters
1 . ,’ ? ! “ 1 - ( ) @ / : _ 7 PQRS7
2 ABC2 8 TUV8
3 DEF3 9 WXYZ9
4 GHI4 0 space, 0
5 JKL5 * (See page 35 for details.)
6 MNO6 # Changes letter case
Note: Some networks may not support all language-dependent characters.
34 Copyright © Nokia 2003
Page 41

Enter spaces and punctuation
ÿ
• To enter a space, press 0 once.
• To enter punctuation, press 1 repeatedly until the character you want appears.
Erase mistakes
If you make a mistake:
•Press Clear to erase each character.
• Press and hold Clear
to erase the entire field of characters.
Change letter case
To switch between uppercase and lowercase letters, press #.
The ABC icon switches to abc, showing you are using lowercase letters.
Enter numbers
To enter numbers:
• Press and hold # to switch to 123 mode. Press the appropriate number key to
enter a number.
OR
• While in ABC mode, press and hold the corresponding number key until the
number appears.
If you make a mistake:
•Press Clear to erase the number.
• To switch back to the ABC mode, press and hold # again.
Use special characters
IN ABC MODE
1 Press #. A screen appears with the following special characters:
. , ‘ ? ! “ - ( ) @ / : _ ; + & % * = < > £ $ ¥ ¤ [ ] { } \ ~ ˆ ¡ ¿ §
2 Use scroll keys to select the character you want, then press Insert.
Nokia 3595 User Guide þý Copyright © Nokia 2003
Page 42
Enter letters and numbers
DRAFT
IN 123 MODE
You can access the following special characters only in 123 mode. There are two
places you can use these characters:
• At the Start screen, when you dial a phone number
• At the number prompt, when you add a new entry to the phone book
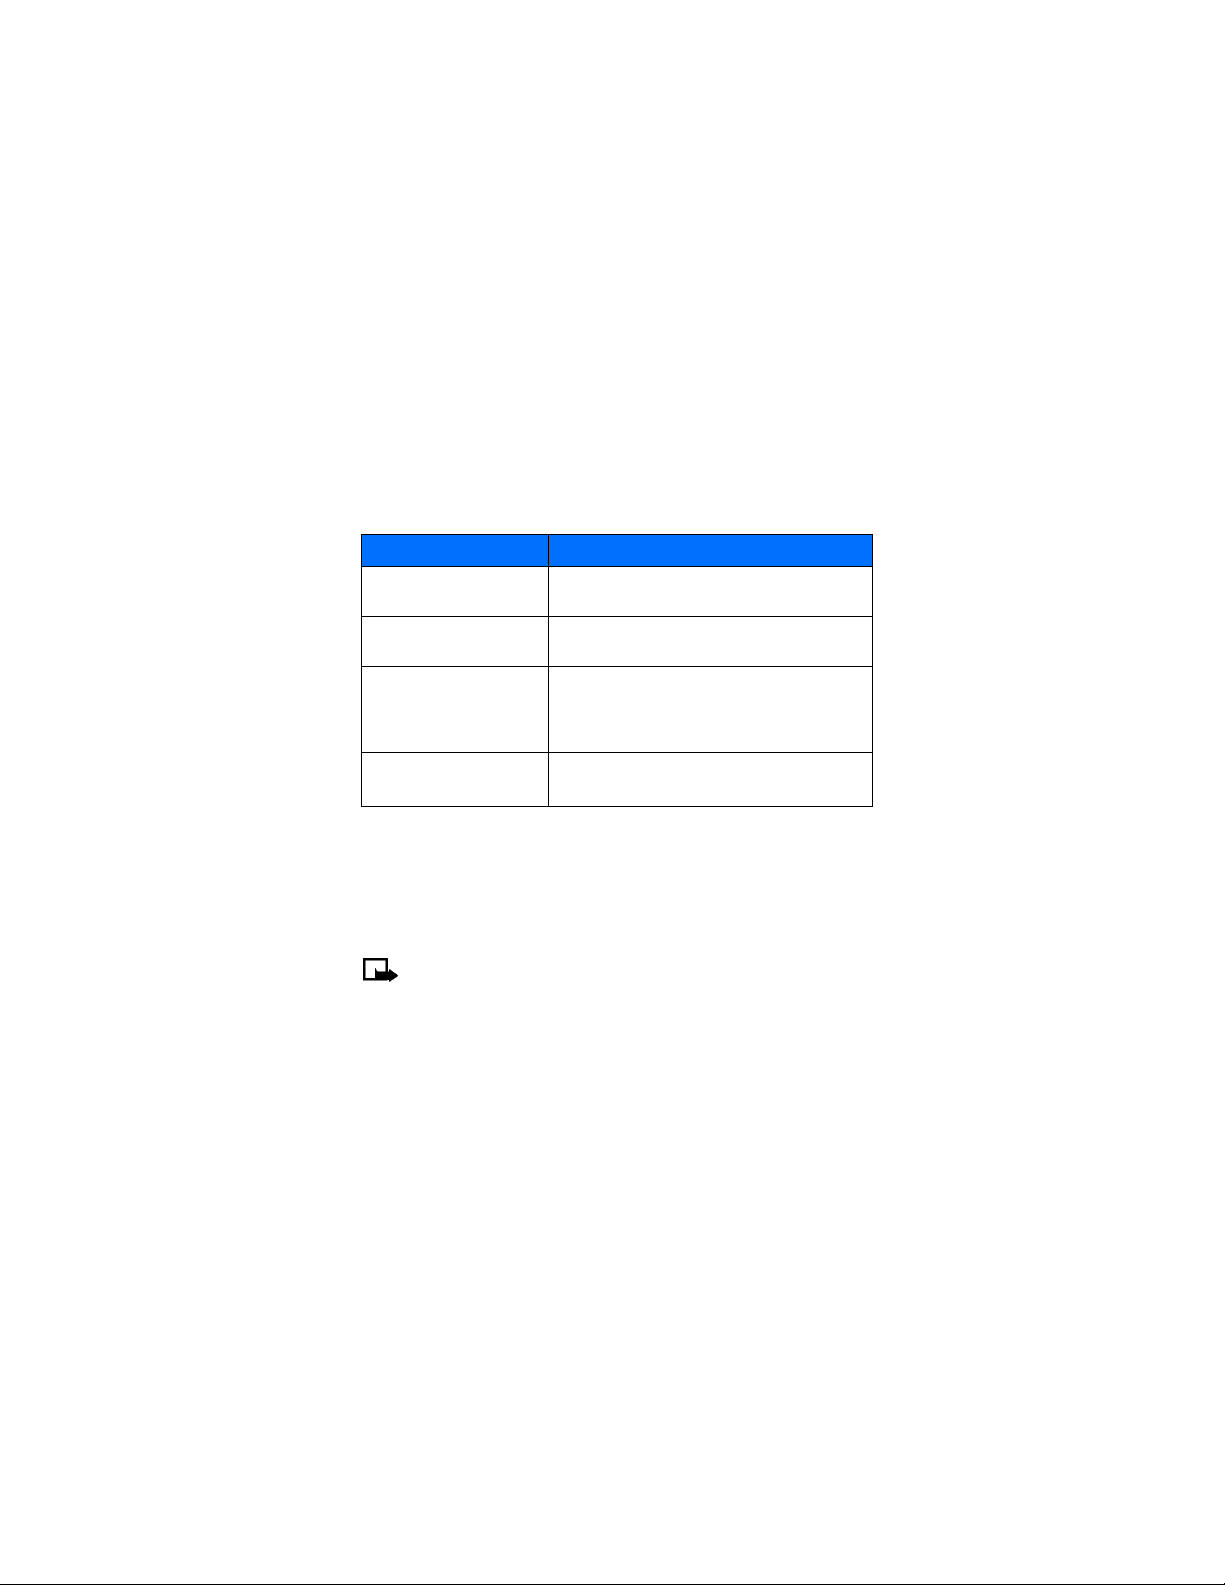
Action Character’s Function
Press * to enter *. * - Use this character to send command strings to the
Press * twice to enter +.
Press * three times to enter
Press * four times to enter
network. Contact your service provider for details.
+ - Use this character as a prefix for dialing international
numbers.
p. p - Use this character to create a pause that occurs when
dialing a number. Numbers entered to the right of this
special character are automatically sent as touch tones
after a 2.5-second pause.
w. w - Use this character to create a wait; digits to the right
of the
w are not sent until you press the Talk key.
•PREDICTIVE TEXT INPUT
Predictive text input allows you to write messages much faster than the ABC mode.
With predictive text input, you only need to press each number key once for each
letter. Your phone uses a built-in dictionary to predict or guess what you are
writing. You can also add new words to the dictionary.
Note: Predictive text input may not be available for all languages. It is not
available for adding names to the phone book.
Select a language and turn on predictive text
1 Press Menu 01-1-1 (Messages > Text messages > Create message).
2 Press Options,
3 Scroll to the language you want, then press Select.
T9 prediction on appears.
scroll up to Predictive text, then press Select.
36 Copyright © Nokia 2003
Page 43
Turn off predictive text
• To switch from predictive text input to ABC mode, repeat steps 1 through 3
above, then select Prediction off.
OR
• While writing the message, quickly press # twice to switch between predictive
text input and ABC mode.
Tip: Your key presses must be quick! Press # twice in about 1.5 seconds.
Write words using predictive text
• Press the number key that corresponds to the letter you want to enter.
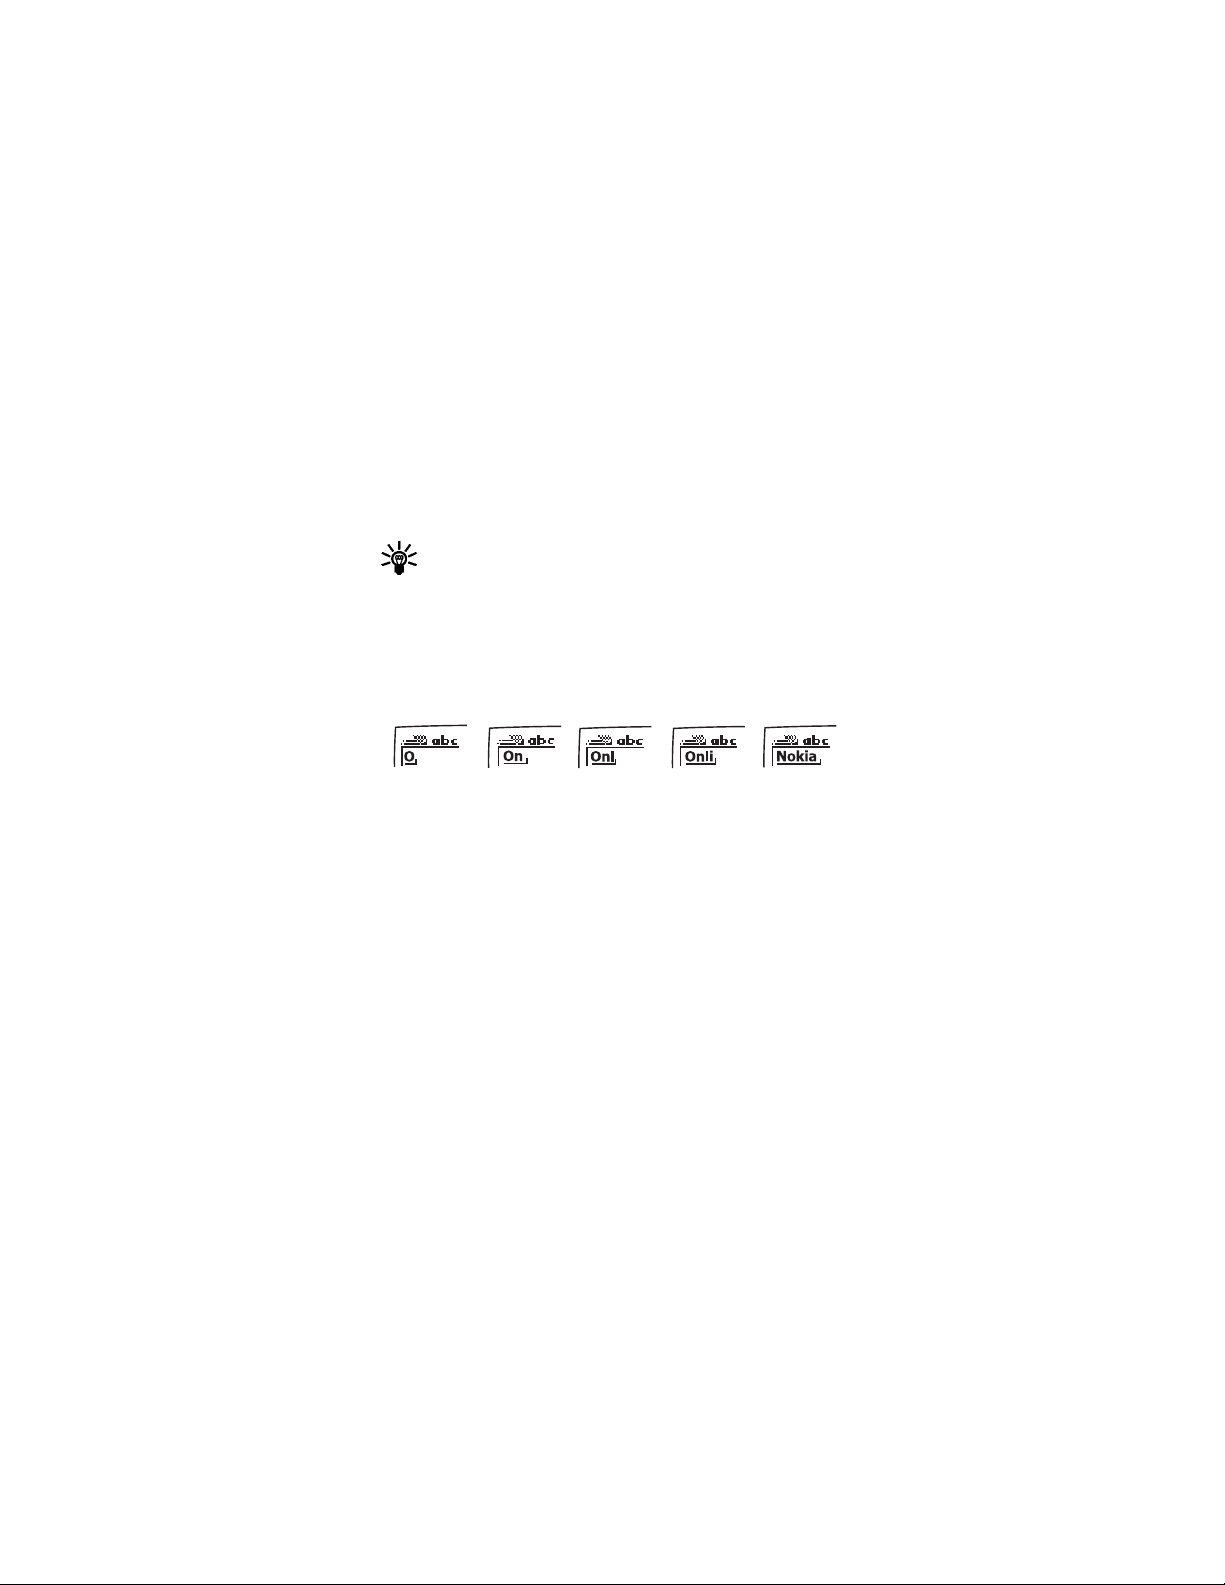
For example, to write “Nokia” with the English dictionary selected, press the
following keys:
6 (for N) 6 (for o) 5 (for k) 4 (for i) 2 (for a)
The display shows the above words for each key pressed.
Since the displayed word changes after each key stroke, disregard the word
until you have keyed in all the characters.
• If the displayed word is correct, press 0 to accept the word and add a space.
• If the displayed word is not correct, press * to see the other possible matches.
• If the word you are trying to write is not in the dictionary, a question mark
appears.
• To check the number of available characters, refer to the counter in the upper
right corner of the screen.
Add a new word to the dictionary
If the word you are trying to enter does not show up as a possible match, you can
add the word to the dictionary.
1 Press * repeatedly until Spell
2 Press Spell, then enter the word, using ABC mode.
3 Press Save to add the word to the dictionary.
appears in place of Options.
Nokia 3595 User Guide þý Copyright © Nokia 2003
Page 44
Enter letters and numbers
DRAFT
Use predictive text shortcuts
You can use predictive text shortcuts to write messages. Press Menu 01-1-1
(Messages > Text messages > Create message) and use the following shortcuts:
•Press * to view the next matching word if the underlined word is not the word
you intended.
•Press Spell
•Press 0 to accept a word and add a space.
• Press and hold # to enter a number.
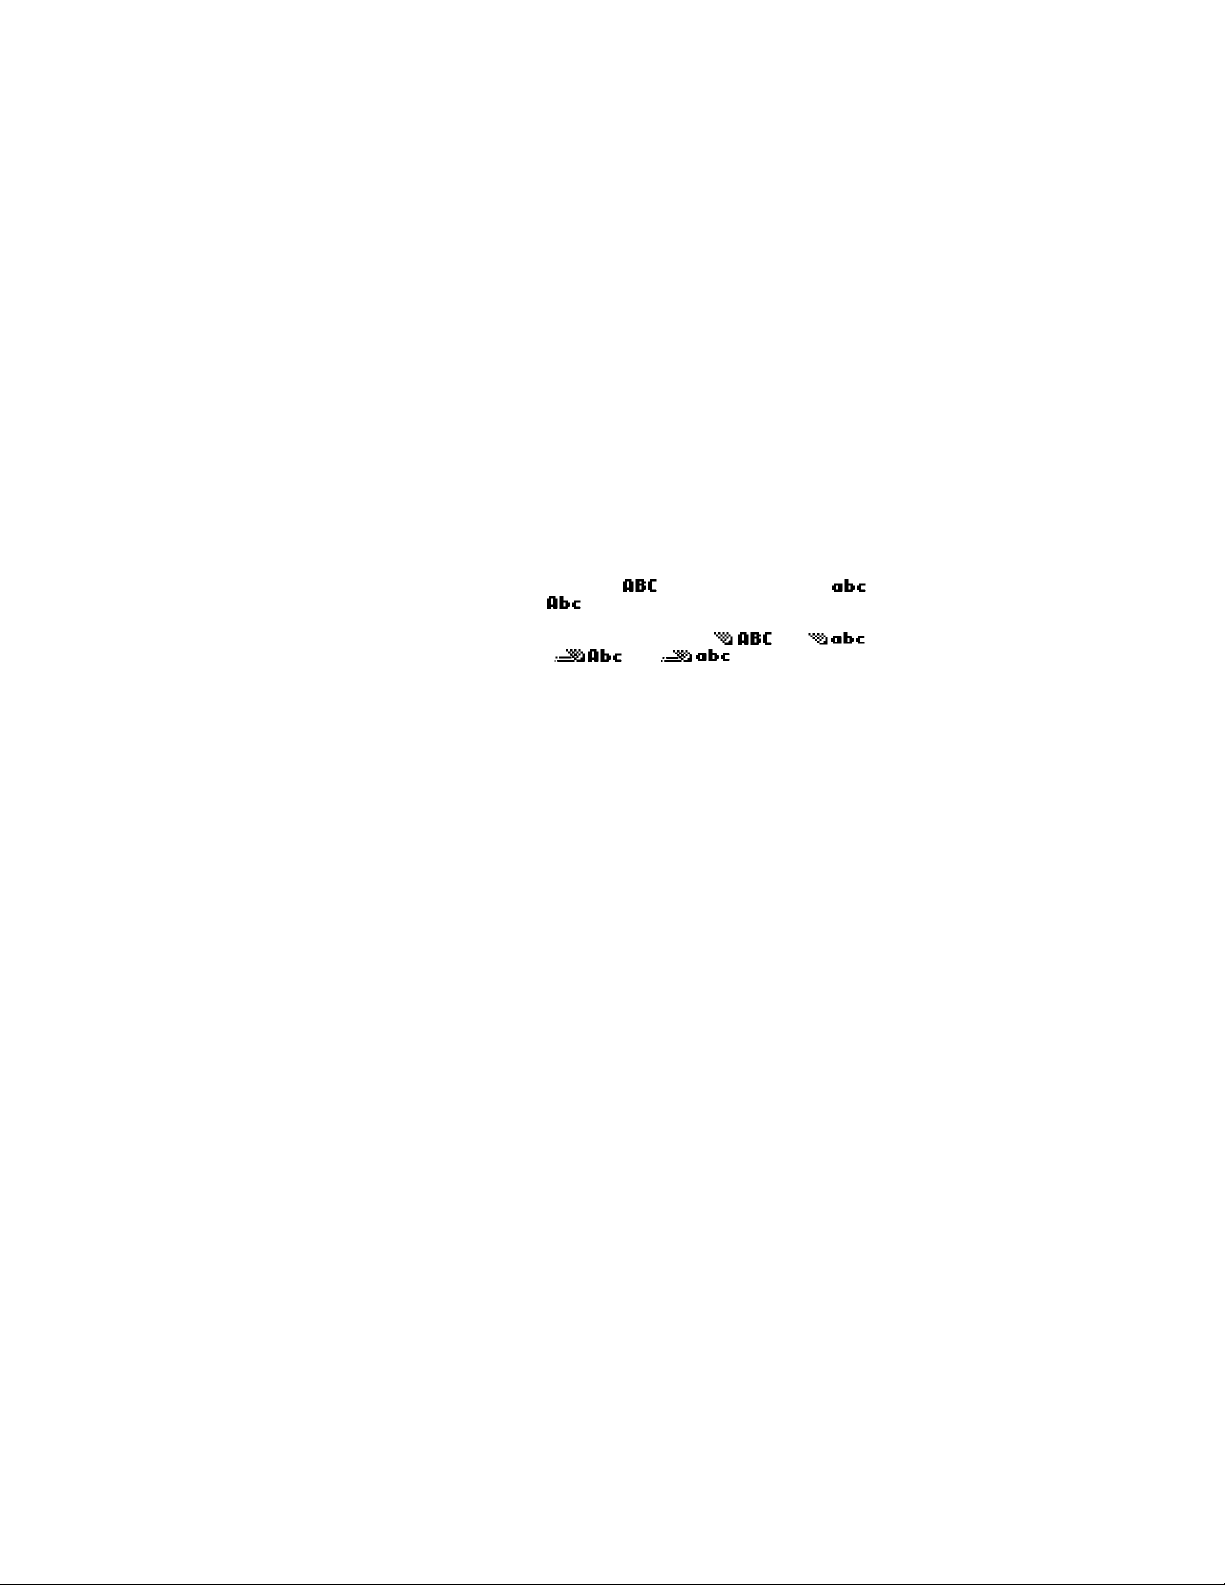
•Press # to change the character case. indicates uppercase, while
indicates lowercase, and is the default for entering names in the phone
book.
• Press twice to select predictive input or ABC mode. and
indicate ABC mode, while and indicate predictive
text input.
•Press Clear to delete the character to the left of the cursor.
•Press 1 to add a punctuation mark. To change the underlined symbol, press 1
repeatedly until the desired symbol appears.
to add a new word to the dictionary.
Insert symbols
1 Press and hold * until the symbol screen appears.
2 Scroll to the desired symbol and press Insert.
Insert numbers
1 To add a number to the message, press and hold #.
2 Key in the desired numbers, then press
and hold # to return to ABC mode.
Write compound words
1 Write the first part of the word and press the down scroll key to accept it.
2 Write the last part of the compound word and press 0 to enter the word in
memory.
38 Copyright © Nokia 2003
Page 45

8 Use the phone book
You can keep track of names and numbers in your phone book.
• Names are saved in the phone book memory and/or SIM memory.
• For each name in the phone memory, you can add up to five phone numbers,
including the following categories:
General Mobile Home Work Fax
• For each name in the phone memory, you can also store an e-mail address, a
web address and a street address.
• For more details about the phone’s memory and SIM memory, see “Phone
memory” on page 42.
•SAVE NAMES, NUMBERS AND E-MAIL
ADDRESSES
Quick Save
Here is a quick and easy way to save a name and number into the phone book.
1 Make sure your phone is at the Start screen.
2 Enter the number you want to save, then press Options.
3 Scroll to Save, then press Select.
4 Enter the name and press OK.
Save a number only
1 Enter the phone number.
2 Press and hold Options.
3 Scroll to Save, press Select, and press OK.
Nokia 3595 User Guide þý Copyright © Nokia 2003
Page 46

Use the phone book
DRAFT
Save a name and number while in a call
1 Press Options.
2 Scroll to Phone book, then press Select.
3 Scroll to Add entry, then press Select.
4 Enter the name, then press OK.
5 Enter the phone number, then press OK.
Save an e-mail address
You can save an e-mail address for a name in your phone book.
Tip: All phone book entries that contain e-mail addresses must be stored
in the phone memory. See “Phone memory and SIM memory” on page42.
1 At the Start screen, press the Scroll up or the Scroll down key to scroll
through the list until you find the name you want.
2 Press Details, then press Options.
3 Scroll to Add detail, then press Select.
If the name has been saved to the SIM card, the phone prompts you to move
it to the phone memory. Press Yes.
4 Scroll to E-mail and press Select.
5 Enter the e-mail address, then press OK.
Tip: To switch between letters and numbers, press and hold the # key. To
enter @ in the e-mail address, press the * key, scroll to @, then press
Insert.
•EDIT NAMES
1 At the Start screen, press the Scroll up or Scroll down key to scroll through
the list until you find the name you want to change.
2 Press Details, then press Options.
3 Scroll to Edit name, then press Select.
4 Edit the name, then press OK.
40 Copyright © Nokia 2003
Page 47

•EDIT NUMBERS
1 At the Start screen, press the Scroll up or Scroll down key to scroll through
the list until you find the entry you want to change.
2 Press Details, then press Options.
3 Scroll to Edit number, then press Select.
4 Edit the number, then press OK.
•ADD TEXT ENTRIES
You can add a web address, street address, or note for each name.
1 At the Start screen, press the Scroll up or the Scroll down key to scroll
through the list until you find the name.
2 Press Details, then press Options.
3 Scroll to Add detail, then press Select.
If the name has been saved to the SIM card, the phone prompts you to move
it to the phone memory. Press Yes.
4 Scroll to Web address, Street addr. or Note, then press Select.
5 Enter your information, then press OK.
•FIND NAMES IN THE PHONE BOOK
1 At the Start screen, press Names.
2 With Find highlighted, press Select.
3 Scroll through the list until you find the name.
4 Press Details to show the phone number.
5 To call the number, press the Talk key.
Use scroll keys to find a name
At the Start screen, press the Scroll up or the Scroll down key to scroll through
the list until you find the name.
Nokia 3595 User Guide ýþ Copyright © Nokia 2003
Page 48
Use the phone book
•PHONE MEMORY
DRAFT
You can save names and numbers in the internal memory of the phone, SIM card
memory, or in a combination of the two. The SIM icon
appears when the phone
book entry is saved in SIM memory.
Note: Phone memory is dynamic. The shorter the names and numbers, the
more entries you can store in the phone book. The phone’s memory can
hold from 125 to 500 names, depending on the number of characters used
for each name, number, or text entry.
Phone memory and SIM memory
The following table summarizes the differences between the three types of memory
you can choose.
Phone feature Phone memory SIM memory
Names capacity Up to 500
Phone numbers Up to 5 numbers
E-mail, Web address,
Street Address and Note
Caller groups? Yes Yes Yes
Transfer names/numbers
to another phone?
Voice tags? Yes Yes Yes
(depending on
length of entries)
per name
Up to 3 text
entries per name
No Yes, contact your
Up to 250 names
(Depends on your SIM
card; check with your
service provider)
1 number (Depends
on your SIM card;
check with your
service provider)
Not available Up to 3 text
service provider for
details.
Phone and SIM
memory
Up to 750 names
(both SIM and
phone entries are
displayed)
Up to 5 numbers
per name (stored
in phone memory)
entries per name
(stored in phone
memory)
Only numbers
stored to SIM can
be transferred
42 Copyright © Nokia 2003
Page 49

Switch between memory types
The default memory type is Phone and SIM.
1 At the Start screen, press Names.
2 Scroll to Settings, then press Select.
3 Scroll to Memory in use, then press Select.
4 Scroll to Phone and SIM, Phone, or SIM card then press Select.
If you choose to keep Phone and SIM as the memory type:
• Names and numbers can be recalled from both the phone and SIM card
• Phone book entries are displayed in a combined list
• New entries are saved to the phone memory.
Check phone book memory status
Check available storage space left in the phone memory or SIM card memory.
1 From the Start screen, press Names.
2 Scroll to Settings, then press Select.
3 Scroll to Memory status, then press Select.
4 Scroll to Phone or SIM card, then press Select.
Phone book is full
If your phone book is full, you can save the phone number to another memory or
replace an existing entry.
•DELETE NAMES AND NUMBERS
Caution: You cannot undo delete functions, so delete carefully!
Delete a stored number
1 At the Start screen, press the Scroll up or the Scroll down key to scroll
through the list until you find the entry you want to delete.
2 Press Details, then press Options
3 Scroll to Delete number, then press Select, then OK.
.
Nokia 3595 User Guide ýþ Copyright © Nokia 2003
Page 50

Use the phone book
DRAFT
Delete a stored name
1 At the Start screen, press the Scroll up key or the down scroll key to scroll
through the list until you find the entry you want to delete.
2 Press Details, then press Options
3 Scroll to Delete, then press Select, then OK.
.
Delete entire phone book content
Caution: This feature deletes the entire content of the phone book and
cannot be undone!
Warning: If you submit your phone for service, your phone book entries
may be erased.
1 Press Names.
2 Scroll to Delete and press Select.
3 Scroll to Delete all and press Select.
4 Scroll to the memory (Phone or SIM card) you want to delete, then press
Delete.
5 Press OK to confirm. Enter your security code and press OK. See “Security
code” on page 86 for the default code.
44 Copyright © Nokia 2003
Page 51
9 Check call history
Your phone registers information about each call you make and receive. The call
log keeps track of the following:
• Missed calls
• Received calls
• Dialed calls
• GPRS data sent and received.
• Time spent online for GPRS data transfers
•CHECK MISSED, RECEIVED, OR DIALED
CALLS
Your phone saves the last 20 numbers you have missed, received or dialed.
Note: The call log saves the phone numbers of missed or received calls only
if the caller’s number is available and has not been blocked.
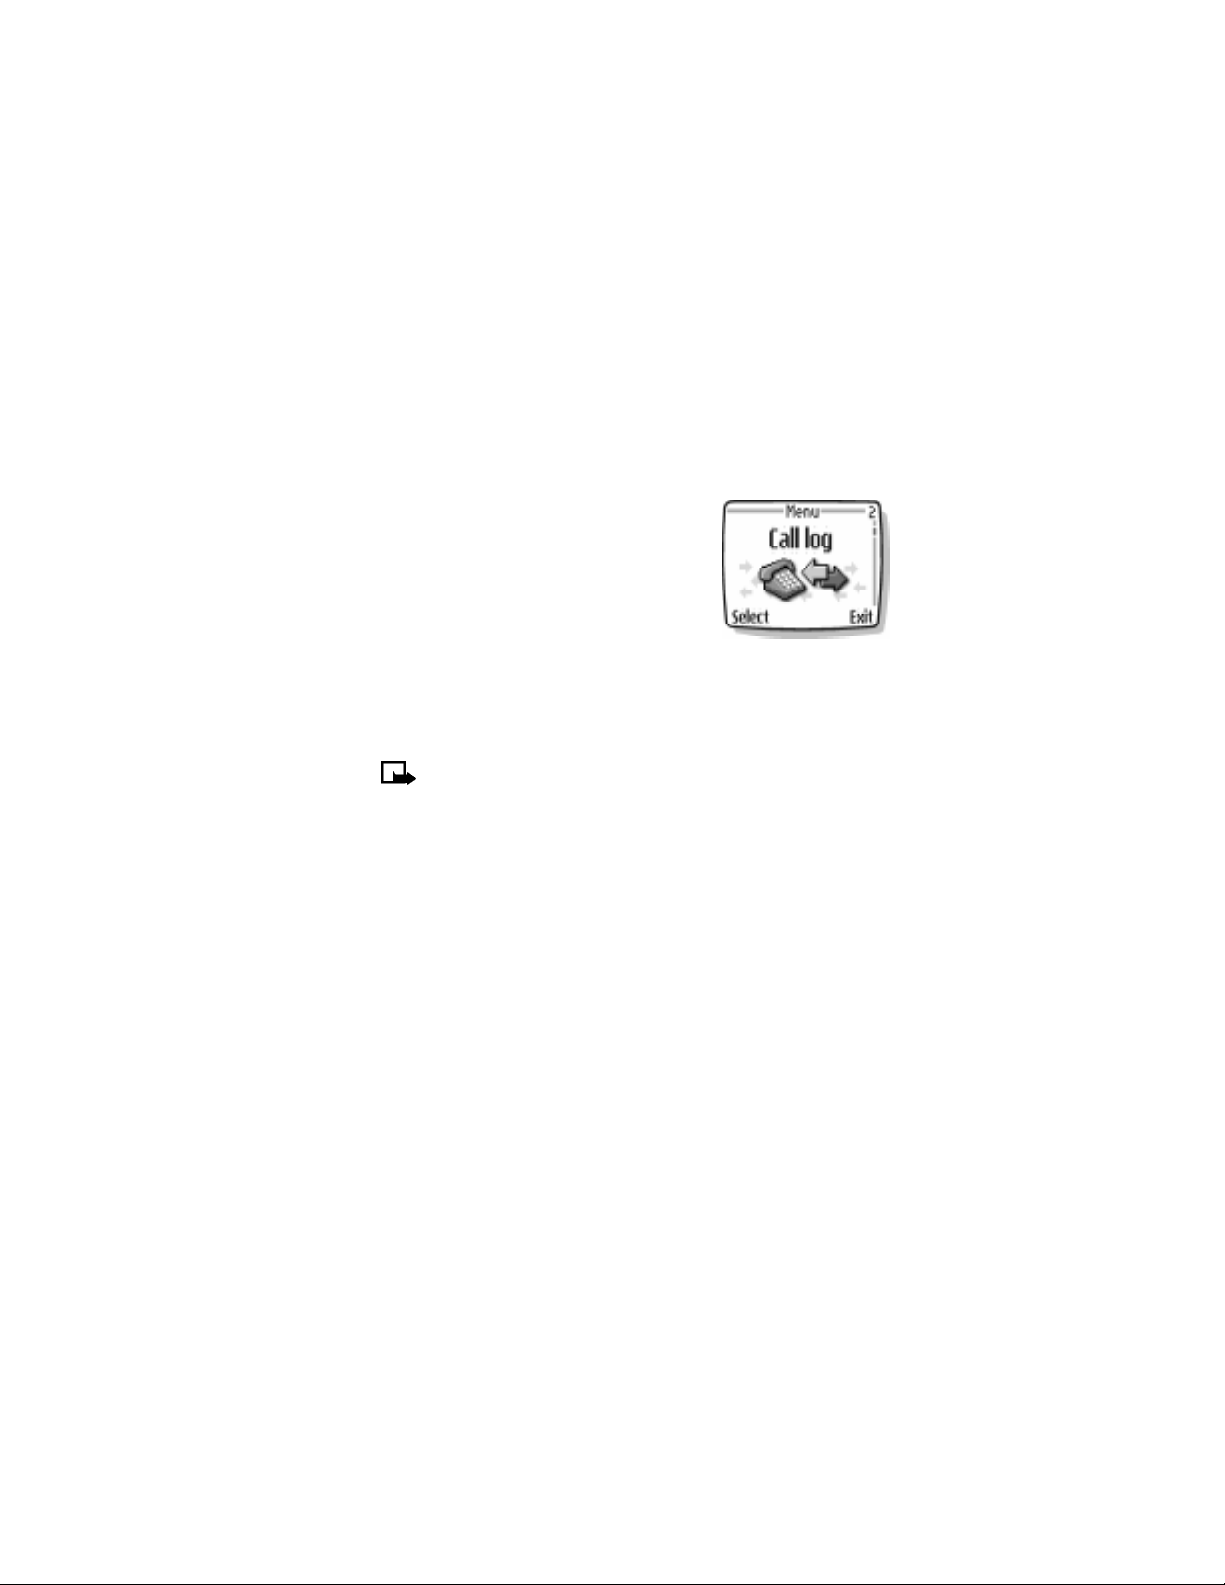
1 Press Menu 2 (Call log), then scroll to Missed calls, Received calls or Dialed
numbers.
2 Press Select, then scroll to the number you want to see.
3 To dial the number, press the Talk key.
4 Press Options to find more information or to add a number to your phone
book.
5 Use the scroll keys to display each of the options listed in the following table.
Once you find the option you want, press Select.
Nokia 3595 User Guide ýþ Copyright © Nokia 2003
Page 52
Check call history
DRAFT
•CHOOSE OPTIONS IN CALL LISTS
When you view the missed calls, received calls, or dialed calls list and press
Options, the following choices may appear.
Note: Not all options will appear each time. Also, the order of options may
vary.
Choice What it does
Call time
Send message Allows you to write a short text message to the person who called you.
View number
Edit number
Save
Delete Allows you to delete the number from the call list.
Call Dials the number from the call log.
Shows the date and time of the last call. Use the scroll keys to view up
to five recent call dates/time for the displayed phone number.
Displays the phone number if the caller’s name is stored in the phone
book.
Allows you to edit the displayed number and save it with a name to
your phone book.
Allows you to enter a name for the number and save both to your phone
book.
•CLEAR CALL LISTS
This feature clears all the missed, received, and dialed call lists.
Caution: You cannot undo this operation.
1 Press Menu 2-4 (Call log > Delete recent call lists).
2 Scroll to All, Missed, Received, or Dialed then press Select.
Caution: Missed, received, and dialed calls lists are also deleted when you
change the phone security setting or if you use a SIM card that is not one
of the five most recent cards used with the phone.
46 Copyright © Nokia 2003
Page 53

•USE CALL TIMERS
Two phone lines
If you subscribe to a second phone line (see “Work with two phone lines” on page
60), call timers are separate for each phone line. When you view call timers, the
call timers that are shown are for the currently selected outgoing line. However, if
you view call timers while you are in a call, the call timers that are shown are for
the line you are using at that moment.
View the call duration
1 Press Menu 2-5 (Call log > Call timers).
2 Scroll to Duration of last call, Duration of received c alls, Duration of dial ed
calls, or Duration of all calls.
3 Press Back after viewing the selected call timer.
View the Life timer
Your phone keeps track of the total call time (all calls made and received). The life
timer is displayed in hhhh:mm format.
1 Press Menu 2-5-5 (Call log > Call timers > Life timer).
2 Press Back after viewing the Life timer.
Reset call timers to zero
Note: The life timer cannot be reset.
1 Press Menu 2-5 (Call log > Call timers).
2 Scroll to Clear timers, then press Select.
3 Enter your security code, then press OK.
Show call timer during a call
1 While in a call, press Options.
2 Scroll to Menu, then press Select.
3 Scroll to Call log, then press Select.
4 Scroll to Call timers, then press Select.
The time for the active call is shown on the display.
Note: The actual time invoiced for calls by your service provider may vary,
depending on network features, billing round-off, etc.
Nokia 3595 User Guide ýþ Copyright © Nokia 2003
Page 54

Check call history
DRAFT
Show call timer after call
Your phone can display the time spent on a call after you end the call. This feature
is called Summary after call.
TURN ON SUMMARY AFTER CALL
1 Press Menu 4-3-3 (Settings > Call settings > Summary after call).
2 Scroll to On, then press Select.
After you end a call, the total time for that call appears on the display.
TURN OFF SUMMARY AFTER CALL
1 Press Menu 4-3-3 (Settings > Call settings > Summary after call).
2 Scroll to Off, then press Select.
•MANAGE CALL COSTS
This network service allows you to check call costs. You can view the last call cost,
or the total cost of all calls made or received since the counters were reset.
Contact your service provider for availability and instructions.
Note: The actual invoice for calls and services from your service provider
may vary, depending upon network features, billing round-off, taxes, etc.
•CHECK DATA CALLS
In addition to keeping track of voice calls, the phone’s call log records informat i o n
about data calls. You can check the amount of GPRS data transferred over the
network. You can also keep track of how much time you spend online.
Note: Text messages sent over GPRS are not counted and therefore not
included in the data counter or connection timer. For details on pricing and
availability, contact your service provider. The actual invoice for calls and
services from your service provider may vary, depending upon network
features, billing round-off, taxes, etc.
48 Copyright © Nokia 2003
Page 55

Check the data counter
All data counters are displayed in bytes (B).
1 Press Menu 2-7 (Call log > GPRS data counter).
2 Scroll to the information you are interested in viewing. Your options include
the following:
Data sent in last session
Data received in last session
All sent data
All received data
Clear the data counter
1 Press Menu 2-7 (Call log > GPRS data counter).
2 Scroll to Clear counters, then press Select.
3 Enter your security code, then press OK.
Check the connection timer
The time is displayed in hh:mm:ss format.
Note: The actual time invoiced for calls by your service provider may vary,
depending upon network features, billing round-off, etc.
1 Press Menu 2-8 (Call log > GPRS connection timer).
2 Scroll to the information you are interested in viewing.
• Duration of last session
• Duration of all sessions
Clear the connection timer
1 Press Menu 2-8 (Call log > GPRS connection timer).
2 Scroll to Clear timers and press Select.
3 Enter your security code, then press OK.
Nokia 3595 User Guide ýþ Copyright © Nokia 2003
Page 56
Advanced calling features
DRAFT
1 0 Advanced calling features
This chapter covers advanced calling features, including:
• In-call options and swapping between calls
• Call settings that you control such as anykey answer
• Network services such as call forwarding
Not all features that are described are available in all wireless networks. Contact
your service provider for availability of network services.
•USE IN-CALL OPTIONS
During a call, press Options to see the in-call menu.
Note: Not all options will appear each time. The order of options may vary.
Choice What it does
Lock Keypad Allows you to lock your phone keypad.
End call Ends current call.
New call Allows you to place a new call.
Sends touch tones. Touch tones are the sounds generated when
Touch tones
Phone book
Menu Allows you to access your phone menu.
Mute
Hold Holds or releases a call.
you press a key; touch tones can be used for automated, overthe-phone services such as checking airline arrival/departure
times.
Switches you to the phone book so that you can look up a name,
number, or address.
Disables the microphone so that the other party cannot hear you
speak. Mute also affects the microphone of any external
accessories connected to your phone.
50 Copyright © Nokia 2003
Page 57

Make a new call
1 Enter the second phone number or recall it from the phone book.
2 Press the Talk key.
OR
1 Press Options.
2 Scroll to New call, then press Select.
3 Enter the second phone number or recall it from the phone book.
4 Press Call.
With either method, the first call is automatically put on hold.
SWITCH BETWEEN TWO CALLS IN PROGRESS
Press the Talk key or Swap.
The icon represents the active call and the icon represents the call on hold.
END THE ACTIVE CALL
Press the End key.
The call on hold becomes the active call.
• MAKE AN INTERNATIONAL CALL
1 Press * twice to enter the international dialing prefix (+).
2 Enter the country code, area code, and phone number, and press the Talk key.
•USE AUTOMATIC REDIAL
Activate automatic redial
1 Press Menu 4-3-1 (Settings > Call settings > Automatic redial).
2 Scroll to On, then press Select.
If the number you dial is busy, your phone immediately redials the number. If it is
still busy, your phone will redial the number up to nine more times.
Note: Automatic redial will not work while you make or answer another
call.
Nokia 3595 User Guide þý Copyright © Nokia 2003
Page 58

Advanced calling features
DRAFT
•USE 1-TOUCH DIALING
Assign a name and number to a 1-touch dialing location so that when you press
this key, the phone automatically dials the associated number.
Key 1 is used to access your voice mail. See “Listen to your voice messages” on
page 60 for details on voice mail.
Assign a number to a 1-touch dialing key
1 Press Names, scroll to 1-touch dialing, then press Select.
2 Scroll to a dialing location, then press Assign.
3 Enter a phone number, press OK. Enter a name, press OK.
OR
Press Find. Scroll to the phone book entry you want, then press Select twice.
Activate 1-touch dialing
1 Press Menu 4-3-2 (Settings > Call settings > 1-touch dialing).
2 Scroll to On, then press Select.
Call a 1-touch dial number
From the Start screen, press and hold the appropriate key, or press the key, then
press the Talk key.
The phone dials the number.
Change 1-touch dialing numbers
1 Press Names.
2 Scroll to 1-touch dialing and press Select.
3 Scroll to the key that you want to change and press Options.
4 Scroll to Change and press Select.
5 Enter a phone number, then press OK.
6 Enter a name, then press OK.
Delete 1-touch dialing numbers
1 Press Names, scroll to 1-touch dialing and press Select.
2 Scroll to a key that you want to erase and press Options.
3 Scroll to Delete and press Select.
4 Press OK to confirm.
52 Copyright © Nokia 2003
Page 59

•USE ANYKEY ANSWER
This feature allows you to press any key to answer an incoming call.
Note: Anykey answer does not work with the power button, the End key,
or the left and right selection keys.
Turn on Anykey answer
1 Press Menu 4-3-4 (Settings > Call settings > Anykey answer).
2 Scroll to On and press Select.
Turn off Anykey answer
1 Press Menu 4-3-4 (Settings > Call settings > Anykey answer).
2 Scroll to Off and press Select.
•USE NETWORK SERVICES
Network services include call forwarding, call waiting, caller ID, multiple lines for
outgoing calls, and system selection. For availability, pricing, and subscription to
network services, contact your service provider.
Choose an outgoing line
Tip: Your service provider must have this feature activated before you can
select line 2.
1 Press Menu 4-6-6 (Settings > Network services > Confirm SIM service
actions).
2 Scroll to Line 1 or Line 2, then press Select.
Send your own number in caller ID
You can deter mine, f or eac h call you ma ke, whe ther yo ur tel ephon e numb er appears
on another’s phone caller ID.
In most service areas, when you call others, your name is presented to their caller
ID (if they subscribe to this service). With Send own caller ID when calling, you
can block or send the display of your number when you make a call.
Note: This feature may not be available in all wireless systems. Contact
your service provider for details and availability. Also note that this feature
is effective only when you call a number that is equipped with caller ID.
Nokia 3595 User Guide ýþ Copyright © Nokia 2003
Page 60

Advanced calling features
1 Press Menu 4-6-3 (Settings > Network services > Send own caller ID when
calling).
2 Scroll to one of the following options, then press Select:
Default: your phone number is sent according to the network.
Yes: your phone number is sent to the other person’s caller ID.
No: your phone number is not sent to the other person’s caller ID.
DRAFT
Forward your calls
This network service lets you forward your incoming calls to another phone
number. Contact your service provider to sign up for call forwarding.
Note: Call forwarding options may vary, depending on the SIM card
configuration. Contact your service provider for details. If you subscribe to
a second phone line, call forwarding works separately for each line. Make
sure you have selected the line you want before you set up any call
forwarding.
ACTIVATE CALL FORWARDING
1 Press Menu 4-6-1 (Settings > Network services > Call forwarding).
2 Scroll to one of the call forwarding options, then press Select:
Tip: If you want to forward your calls to another number when your phone
is turned off, select Forward when not able to take calls.
Forward all voice calls
Forward if busy
Forward if not answered
Forward if out of reach
Forward when not able to take calls
Cancel all call forwarding
3 Scroll to Activate, then press Select.
4 Scroll to either To voice mailb. or To other no. If you choose To other no.,
enter the phone number, then press OK.
The following icons appear on your phone’s screen:
Incoming voice calls are being forwarded to another number.
You have forwarded all voice calls that are received on line 1
You have forwarded all voice calls that are received on line 2.
You have forwarded all voice calls that are received on lines 1 and 2.
.
54 Copyright © Nokia 2003
Page 61

CANCEL CALL FORWARDING
1 Press Menu 4-6-1 (Settings > Network services > Call forwarding).
2 Scroll to the call forwarding option you want , then press Select.
3 Scroll to Cancel, then press Select.
Note: Canceling all call forwarding may also cancel any automatic
forwarding of calls to voice mail that your service provider has activated
for you. Also, this option may cancel your call forwarding service. Contact
your service provider for details.
CHECK CALL FORWARDING STATUS
1 Press Menu 4-6-1 (Settings > Network services > Call forwarding).
2 Scroll to the call forwarding option you want to check, press Select.
3 Scroll to Check status, then press Select.
Note: Status is not available for Forward when not able to take calls.
To see the phone number where the calls are being forwarded, press Number.
Select a system
You can select how your phone chooses a wireless network, as there may be more
than one available. The selection you make stays active until you change it or
change the SIM card.
1 Press Menu 4-6-5 (Settings > Network services > System selection).
2 Scroll to Automatic or Manual, then press Select.
Automatic: The phone automatically selects one of the available systems.
Manual: The phone search es for av ailabl e system s and th en list s them. Scroll to
the one you want, then press Select. The phone looks for a network and
displays the result. If you lose connection while in Manual mode, the phone
asks you to select a network again.
Use call waiting
This network service lets you receive an incoming call when you are already in a
call. The phone beeps to let you know of the incoming call. Contact your service
provider to sign up for call waiting.
ACTIVATE/CANCEL CALL WAITING
1 Press Menu 4-6-2 (Settings > Network services > Call waiting).
2 Scroll to Activate or Cancel, then press Select.
Nokia 3595 User Guide þþ Copyright © Nokia 2003
Page 62

Advanced calling features
DRAFT
CONFIRM CALL WAITING STATUS
1 Press Menu 4-6-2 (Settings > Network services > Call waiting).
2 Scroll to Check status and press Select.
ANSWER A WAITING CALL
1 Your phone signals when you have a call waiting.
2 Press the Talk key to put the current call on hold and answer the waiting call
OR
Press Answer.
REJECT A WAITING CALL
You can just let the phone ring or perform the following steps.
1 Press Options and scroll to Decline call.
2 Press Select.
SWITCH BETWEEN CALLS
Press the Talk key or Swap.
The icon represents the active call and the icon represents the call on hold.
END THE ACTIVE CALL
Press the End key.
The call on hold becomes active.
OR
Press Options, scroll to End call, then press Select.
THIRD CALL WAITING
If you have both an active and a call on hold and a third call is waiting, you can
answer the third call and end the other calls.
1 Press Options.
2 Scroll to End all calls, then press Select.
3 Press the Talk key to answer the third call.
56 Copyright © Nokia 2003
Page 63

Make a conference call
This network service, if available from your service provider, allows you to make
conference calls with your phone. Check with your service provider for availability
and details for use.
1 Place a call to the first person.
2 Press Options and scroll to New call.
3 Press Select, enter the number of the next party you want to include, then
press Call.
4 After the other party answers, press Options.
5 Scroll to Conference, then press Select.
6 To add other parties to the call, repeat steps 2 through 5.
7 To end the conference call, press the End key.
TALK PRIVATELY WITH A PARTICIPANT
1 While in a conference call, press Options.
2 Scroll to Private call, then press Select.
A list of the participants appears.
3 Scroll to the person you want to speak with, then press OK.
The other participants can continue talking with each other.
4 To rejoin the conference call, press Options.
5 Scroll to Conference, then press Select.
DROP A PARTICIPANT FROM THE CONFERENCE CALL
1 While in a conference call, press Options.
2 Scroll to Private call, then press Select.
A list of the participants appears.
3 Scroll to the person you want to drop, then press OK.
The other participants can continue talking with each other.
4 Press Options.
5 Scroll to End call, then press Select.
Nokia 3595 User Guide þý Copyright © Nokia 2003
Page 64

Advanced calling features
DRAFT
Transfer a call
When you have one active and one call on hold, you can connect the two calls and
disconnect yourself from the call.
Note: Your network must support this feature. Contact your service
provider for availability.
During a call, press
Options, scroll to Transfer calls, then press Select.
Use Memory Status
You can find out the current memory consumption of your phone by using this
feature. Memory information is gathered fromthe following functions:
• Phone book,
• SMS messages
• MMS messages
• Gallery
You can also check the phone book’s memory status while you are in the phone
book function. See “Check phone book memory status” on page 43
1 Press Menu 4-4-7 (Settings > Phone settings > Memory status).
The phone displays the total size of both free and used memory.
2 Press Back.
58 Copyright © Nokia 2003
Page 65

11 Use voice features
The voice features in your phone make communication more convenient. You can
check messages from friends or business associates, record a voice tag for contacts
in the phone book, and use voice dialing for handsfree operation.
•ABOUT VOICE MAIL
Voice mail is a network feature that allows callers to leave a voice message for you
when you are not able to take the call. To use voice mail, you must have:
• A voice mail subscription
• A voice mailbox number
• A temporary password
These items are assigned by your service provider. Your service provider should also
tell you how to record a greeting for your voice mailbox and how to change the
temporary password.
Note: If you have difficulty using the voice mail feature, contact your
service provider.
Save the voice mailbox number
If your service provider has not already set up the voice mailbox number, follow
these steps to set up the voice mailbox number.
1 Press Menu, then press Select.
2 Scroll to Voice messages, then press Select.
3 Scroll to Voice mailbox number, then press Select.
4 Enter your voice mailbox number, then press OK.
The voice mailbox number must be longer than 2 characters and emergency
numbers, such as 911, are not allowed.
Nokia 3595 User Guide þý Copyright © Nokia 2003
Page 66

Use voice features
DRAFT
Work with two phone lines
If your particular SIM card supports it, your phone can have two phone lines. Your
service provider can tell you if your SIM card allows the use of this feature and can
give you access to two phone lines.
If you decide to use two phone lines, you can select one of the two lines for
outgoing calls, but you can still answer calls on both lines.
If you use two phone lines, you will be given a voice mailbox number for each line.
You need to save the voice mailbox number for each phone line separately.
To do this, first select the outgoing line and save its voice mailbox number. Then,
select the other line and save its number.
Voice mail indicators
When you receive a voice message, your phone beeps and either displays an icon
on the screen or shows a text message. The method of notification depends
upon your carrier.
If you subscribe to two different phone numbers, the message icon shows which
line is receiving the voice mail message
Voice mail message on line 1.
Voice mail message on line 2.
Voice mail message on line 1 and on line 2.
Listen to your voice messages
If there is a notification message on your screen, you can get your voice messages
using one of the following methods:
• If you have saved your voice mailbox number in your phone, press and hold 1
to call your voice mailbox.
• Call your voice mailbox number as you would any other telephone number,
then follow the directions provided.
To check your voice messages anytime, press Menu 01-4-1 (Messages > Voice
messages > Listen to voice messages).
•USE VOICE DIALING
The phone voice dialing feature allows handsfree operation while you place a call.
Before using this feature, you need to create entries in the phone book so you can
associate a voice tag with a name and number. You can create up to 14 voice tags
in your phone. To create entries in the phone book, see page 39.
60 Copyright © Nokia 2003
Page 67

Using voice tags
Before using voice dialing, note that:
• Voice tags are not language dependent. They are dependent on the speaker’s
voice.
• Voice tags are sensitive to background noise. Record them and make calls in a
quiet environment.
• When recording a voice tag or making a call by speaking a voice tag, hold the
phone in the normal position near to your ear.
• Very short names are not accepted. Use long names and avoid similar names
for different numbers.
• You cannot use the voice tag or voice dialing feature if you are actively sending
or receiving data using a GPRS connection.
Note: You must say the name exactly as you said it when you recorded it.
This may be difficult in, for example, a noisy environment or during an
emergency, so you should not rely soley upon voice dialing in all
circumstances.
Add a voice tag to a phone book entry
1 At the Start screen, scroll to the name to which you want to assign a voice tag.
2 Press Details, then Options, and scroll to Add voice tag. Press Select.
3 Press Start. Speak the name clearly into the microphone.
Important: Do not press Quit unless you want to cancel the recording. The
phone automatically stops recording, then replays and saves the voice tag.
Make a call using voice recognition
1 At the Start screen, press and hold Names. When you hear several beeps and
Please speak now appears, release the button.
2 Pronounce the voice tag clearly into the microphone.
Your phone automatically dials the number.
Listen to a voice tag
1 Press Names, scroll to Voice tags, then press Select.
2 Scroll to the name with the voice tag you want to hear.
3 Press Options, scroll to Playback, and press Select.
Nokia 3595 User Guide ýþ Copyright © Nokia 2003
Page 68

Use voice features
DRAFT
Change a voice tag
1 Press Names, scroll to Voice tags, then press Select.
2 Scroll to the name with the voice tag you want to change.
3 Press Options, scroll to Change, and press Select.
4 Press Start, then speak the new name.
The phone repeats and saves your new voice tag.
Delete a voice tag
1 Press Names, scroll to Voice tags, then press Select.
2 Scroll to the name with the voice tag you want to erase.
3 Press Options, scroll to Delete and press Select.
4 Press OK to erase the voice tag.
•USE VOICE COMMANDS
The voice command feature allows access to handsfree operation for certain phone
functions. Voice commands work similar to voice dialing. Before using voice
commands, you must first associate a voice tag to the phone function you want to
use.
Add a voice tag for a command
1 Press Menu 9-3 (Extras > Voice commands ).
Audible alerts appears.
2 Press Select and scroll to the following function you want to tag:
Audible signal bar
Audible battery bar
3 Press Options, then select Add command.
4 Press Start, then speak the voice tag clearly into the microphone.
Note: A message will appear if the voice command is either too short or
long. You are given the option to try again.
Caution: Do not press Quit unless you want to cancel the recording.
The phone replays and then saves the recorded tag. The icon appears next
to commands which have voice tags assigned.
62 Copyright © Nokia 2003
Page 69

Work with an existing voice command tag
After you have associated a voice tag to a command, you can either play back,
change or delete the tag.
PLAY BACK VOICE COMMAND TAGS
1 Press Menu 9-3 (Extras > Voice commands ).
Audible alerts appears.
2 Press Select and scroll to the voice command tag you want to play back.
3 Press Options, then select Playback.
CHANGE VOICE COMMAND TAGS
1 Press Menu 9-3 (Extras > Voice commands ).
Audible alerts appears.
2 Press Select and scroll to the voice command tag you want to delete.
3 Press Options, then select Change.
4 Press Start, then speak the voice tag clearly into the microphone.
Voice command changed appears.
DELETE VOICE COMMAND TAGS
1 Press Menu 9-3 (Extras > Voice commands ).
Audible alerts appears.
2 Press Select and scroll to the voice command tag you want to delete.
3 Press Options, then select Delete.
Delete voice command? appears.
4 Press OK.
Voice command deleted appears.
Nokia 3595 User Guide ýþ Copyright © Nokia 2003
Page 70
Use voice features
DRAFT
•AUDIBLE ALERTS
Audible alerts provide you with the current signal bar or battery bar strength of
your phone. In order to obtain audible alerts, the alerts must first be set up as voice
commands. To set up voice commands, see “Add a voice tag for a command” on
page 62.
Set up audible alerts
1 Press and hold Names.
Please speak now appears.
2 Pronounce the voice tag clearly into the microphone.
When the phone finds the tag, confirmation appears and the phone plays the
recognized voice tag from the phone memory through the earpiece. The phone then
beeps.
Audible Alert One Beep Two Beeps Three Beeps Four Beeps
Battery Bar
Strength
Signal Bar
Strength
Low Half full Almost full Full
Weak Somewhat
strong
Almost strong Strong
64 Copyright © Nokia 2003
Page 71
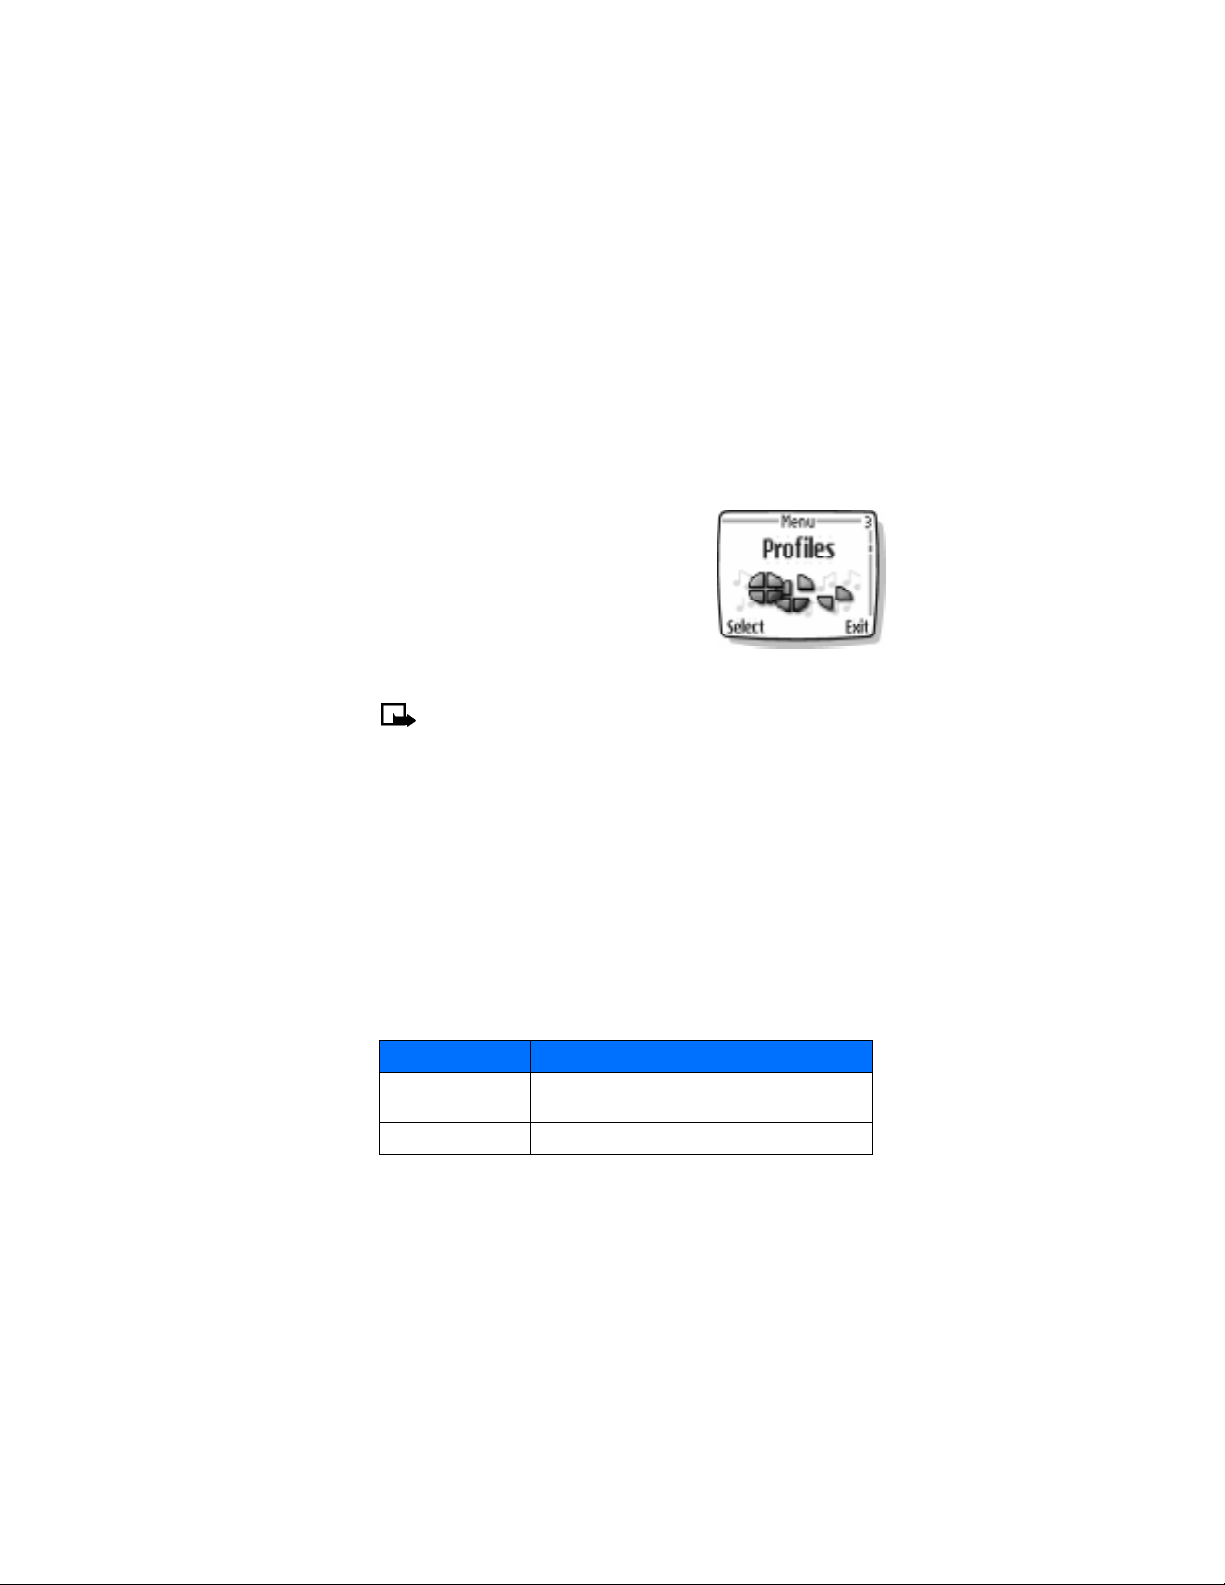
12 Personalize your phone
•PROFILES
Profiles let you select the sound settings that match
your e nviro nment , whe ther it is a meeting or a soccer
game. Each profile contains settings for the ringi n g
option, ringing tone, ringing volume, vibrating alert,
mess age alert tone, keypad tones, and warning
tones. Just pick the profile that suits your current
environment: Normal, Silent, Outdoor, or Loud.
Your phone also has profile settings for Nokia
accessories such as a headset, car kit, loopset, and
TTY adapter.
Note: The accessory profiles do not appear until you attach these
accessories for the first time.
Select a profile
1 Press Menu 3 (Profiles).
2 Scroll to the profile you want to use, then press Select.
3 Scroll to Select, then press
Customize a profile
1 Press Menu 3 (Profiles).
2 Scroll to the profile you want to customize, then press Select.
3 Scroll to Customize, then press Select.
4 Use the scroll keys to display each of the options listed in the following table.
Once you find the option you want to customize, press Select.
Select.
Option What it does
Ringing options
Ringing tone Allows you to choose from 35 preprogrammed tones.
Nokia 3595 User Guide ýþ Copyright © Nokia 2003
Allows you to choose a ringing style. Your choices include
Silent, Ring, Ascending, Ring once, and Beep once.
Page 72
Personalize your phone
Option What it does
Ringing volume Allows you to set the volume for incoming calls.
Vibrating alert
Message alert tone
Keypad tones Allows you to set the volume for keypad tones.
Warning tones Allows you to turn warning and confirmation tones on or off.
Alert for
Tone Downloads
Profile name
DRAFT
Allows you to turn the vibrating alert on or off. Note: your
phone has an internal vibrating mechanism so you do not
need a special battery to use this feature. In some profiles,
the vibrating alert default is Off, so the lights may not flash
unless you change the default.
Allows you to choose an alert style. Your choices include No
tone, Standard, Special, Beep once, Ascending, and Ringing
Tone.
You can choose to have your phone sound an audible alert
only when a member of a selected caller group is calling. For
more information about Caller groups, see “Use caller groups”
on page 76.
Allows you download ringing tones over the Internet. See
“Download ringing tones” on page 71 for more information.
Allows you to give a new name to the following profiles:
Silent, Quiet, or Loud.
66 Copyright © Nokia 2003
Page 73

Set a timed profile
Timed profiles can prevent missed calls. For example, if you attend an event that
requires you to set your phone to the Silent profile, you may forget to return the
phone to the Normal profile after the event is over. You may not notice incoming
calls. With the timed profile, you can have the phone automatically return to the
Normal profile at a time you specify.
1 Press Menu 3 (Profiles).
2 Scroll to the profile you wish to activate, then press Select.
3 Scroll to Timed, then press Select.
4 Enter the time for the profile to expire and press OK.
5 If you are using a 12-hour time format, scroll to am or pm
The profile you have set for expiration becomes active and appears in the Start
screen along with a small clock icon.
, then press Select.
•ACCESSORY SETTINGS
You can use your phone with these Nokia accessories:
• Headset (HDC-5, HDE-2, HDB-5, or HDC-10)
• Car kit (CARK125 or CARK 134)
• Loopset (LPS-3)
• TTY adapter (HDA-9)
The accessory settings do not appear in the phone menu until you connect the
headset, car kit, loopset, or TTY/TDD adapter.
You can adjust settings related to the accessory, such as ring tone.
Set the default profile
When you use the headset, car kit, or loopset, you have the option of choosing a
profile. You can use the currently selected profile (for example, Normal) or you can
choose from the list.
1 Press Menu 4-7 (Settings > Accessory settings).
2 Scroll to Headset, Handsfree, or Loopset, then press Select.
3 Scroll to Default profile, then press Select.
4 Scroll to the profile you want, then press Select.
Nokia 3595 User Guide ýþ Copyright © Nokia 2003
Page 74

Personalize your phone
DRAFT
Set up the car profile
You can connect your phone to an approved Nokia car kit for convenient handsfree
operation. For descriptions and illustrations, see “Express Car Kit (CARK 125)” on
page 151 and “Full Car Kit (CARK 134)” on page 152.
The car kit contains a microphone and a speaker , so you can conduct a conversation
without holding the phone to your ear. The setting used with the car kit is called
Handsfree.
SET UP AUTOMATIC ANSWER
This profile lets your phone answer incoming calls after just one ring.
1 Place the phone into the car kit holder. When the phone recognizes the
accessory, the car kit icon appears.
2 Press Menu 4-7-2 (Settings > Accessory settings > Handsfree).
3 Scroll to Automatic answer, then press Select.
4 Scroll to On, then press Select.
SET UP LIGHTS
If you are using your phone with an approved Nokia car kit, you can set lights to
On (display and keypad lights stay on) or Automatic (after 15 seconds, lights turn
off until the next key is pressed or the phone rings).
1 Place the phone into the car kit holder.
When the phone recognizes the accessory, the car kit icon appears.
2 Press Menu 4-7-2 (Settings > Accessory settings > Handsfree).
3 Scroll to Lights, then press Select.
4 Scroll to On or Automatic, then press Select.
Note: Connecting your phone to a car kit automatically disables Keyguard.
68 Copyright © Nokia 2003
Page 75
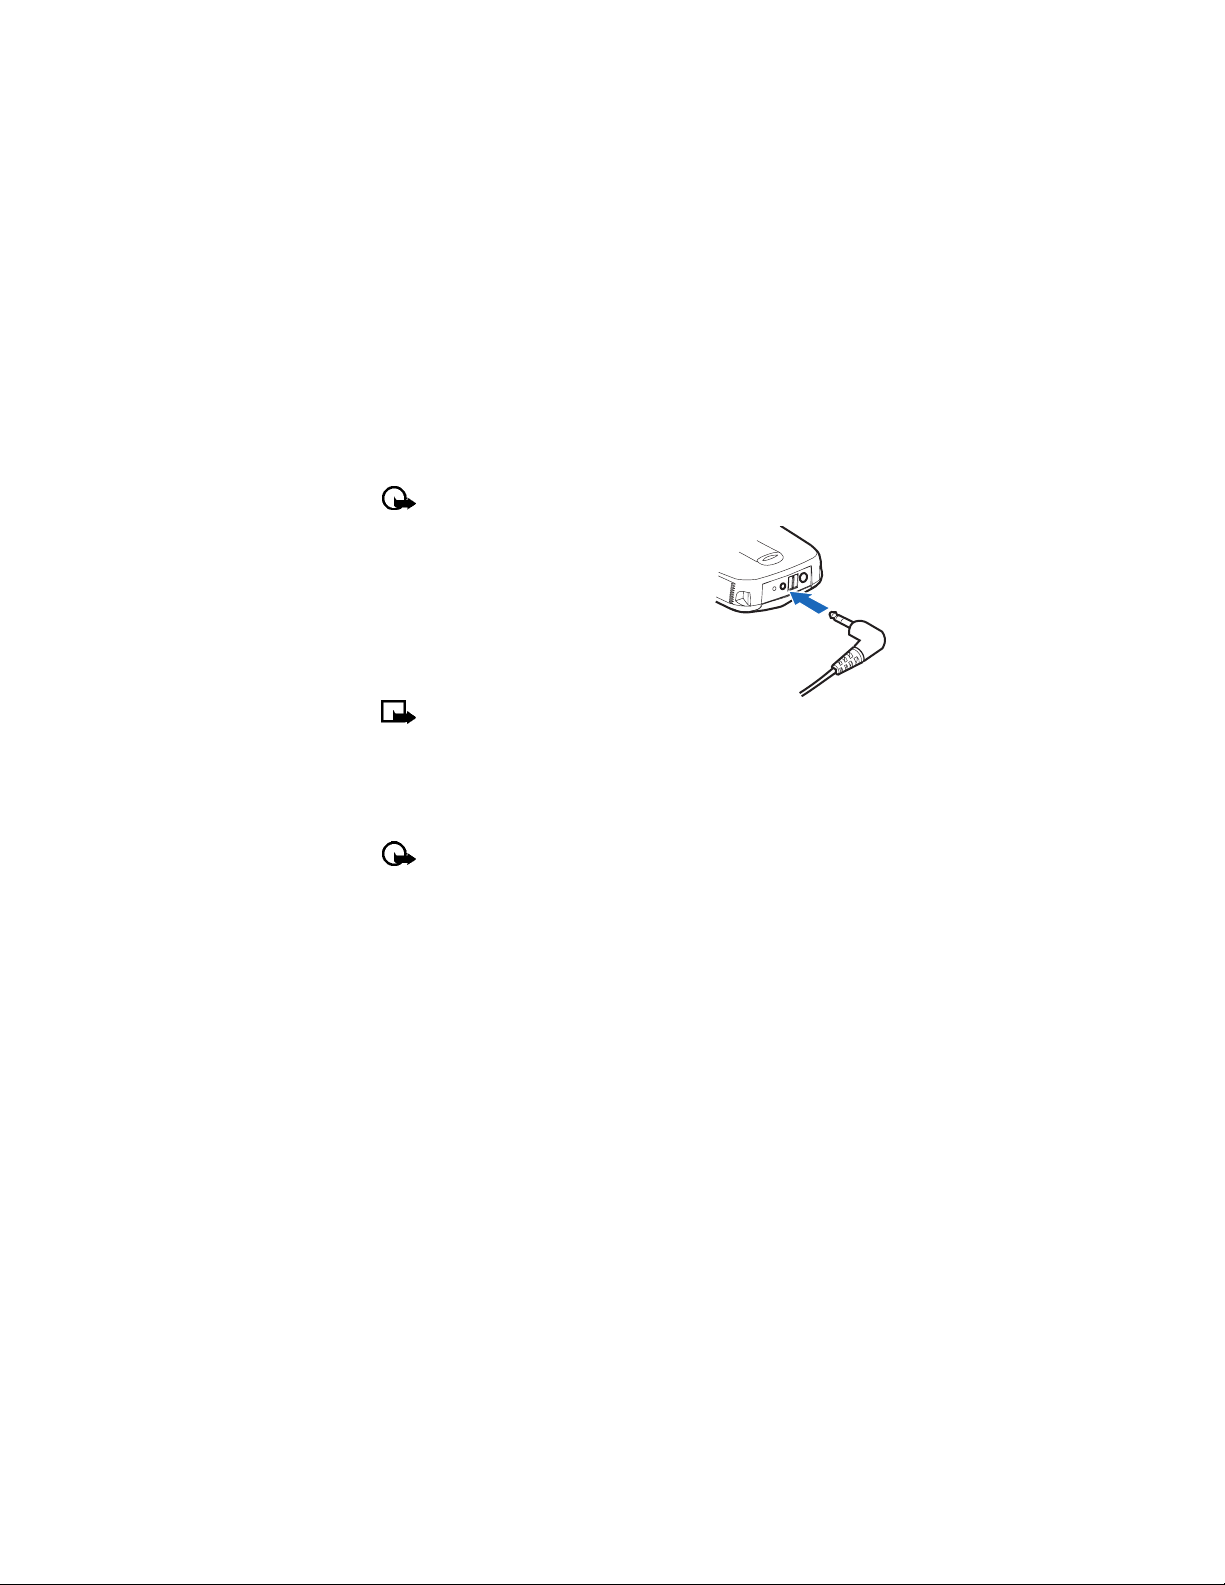
Set up the loopset profile
The LPS-3 loopset gives people with T-coil equipped hearing aids the ability to
make and receive calls without noise interference.
Important: Refer to the booklet that comes with the LPS-3 for complete
instructions and safety information.
1 Plug the loopset plug into the bottom of your
phone, as shown in the illustration.
2 Press Menu 4-7-3 (Settings > Accessory
settings > Loopset).
3 Scroll to Use loopset, then press Select.
4 Scroll to Yes, then press Select.
Note: If you want to use the headset or TTY,
you perform steps 2-3, then select No to deactivate the loopset profile.
Set up the TTY/TDD profile
You can connect your phone to a TTY/TDD using the Nokia TTY/TDD Adapter (HDA-
9). In order for your phone to recognize the TTY/TDD, you’ll need to set up the TTY/
TDD profile, under Accessory settings.
Important: Some manufacturers of TTY/TDD devices suggest that the
phone be least 18 inches from the TTY/TDD device. Remember that when
connecting to any other device, read its user guide or contact its
manufacturer for detailed instructions and safety information.
Nokia 3595 User Guide ýþ Copyright © Nokia 2003
Page 76
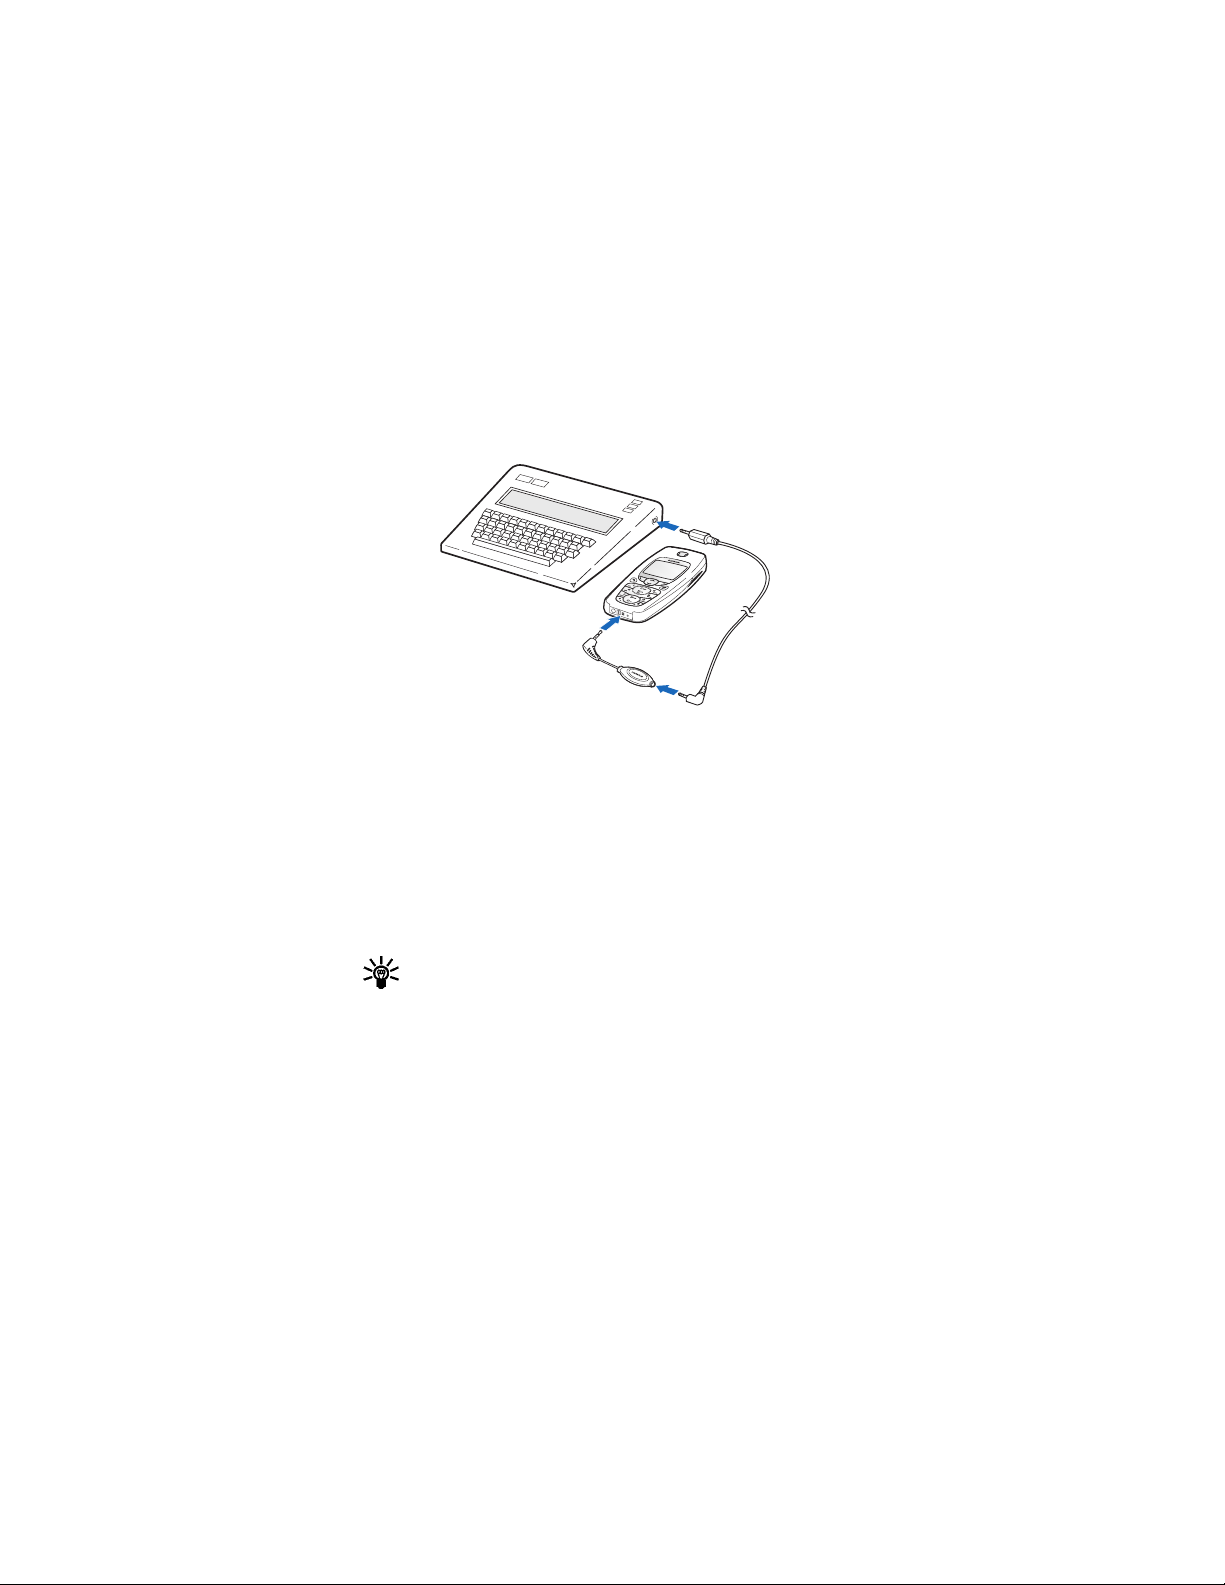
Personalize your phone
1 First, connect the TTY/TDD by a cable to the HDA-9 adapter. Next, plug the
HDA-9 adapter into the connector on the bottom of your phone, as shown in
the illustration.
2 Press Menu 4-7-4 (Settings > Accessory settings > TTY/TDD > Use TTY), then
press Select.
3 Scroll to Yes, then press Select.
DRAFT
NOTES ABOUT TTY/TDD CALLS
• The Nokia TTY/TDD Adapter (HDA-9) is for use with compatible TTY/TDD
devices only. Check with the manufacturer of the TTY/TDD device to ensure
that the connection is compatible.
• Check with the manufacturer of the TTY/TDD device for the connecting cable.
• TTY/TDD communications depend on network availability. Check with your
service provider for availability and description of services.
MAKE A TTY/TDD CALL
Tip: Before making a TTY/TDD call with your Nokia phone, check the signal
strength. See page 23 for more details.
1 From the Start screen, enter the number and press the Talk key.
2 When the receiving party answers, begin typing your conversation on the TTY/
TDD.
70 Copyright © Nokia 2003
Page 77

RECEIVE A TTY/TDD CALL
Tip: You may find it helpful to use the vibrating alert under the Profiles
menu. See “Customize a profile” on page 65 for details.
1 Make sure the TTY/TDD device is connected to your phone.
2 Press the Talk key to answer the call, then type your responses on the TTY/TDD.
END A TTY/TDD CALL
Press the End key.
•POLYPHONIC SOUND (MIDI)
Your phone is equipped with a polyphonic tone generator capable of playing up to
four different voices simultaneously. The generator can reproduce over 40 different
instrument tones, including drums, guitar, saxophone, flute, etc. The polyphonic
sounds bring a new richness and quality to ringing tones, message alert tones,
background music, and sound effects used in gaming.
Your Nokia 3595 phone supports Mobile MIDI (GMX) format messages and ringing
tones. Your phone can receive polyphonic ringing tones in two ways:
• Through the multimedia message service (MMS). See “Receive multimedia
messages (MMS)” on page 102 for more information.
• Through the WAP browser. See “Sign on to the mobile Internet” on page 109
for more information.
•DOWNLOAD RINGING TONES
You can download ringing tones over the Internet or have them sent to your phone
via SMS (short message service) or MMS. MIDI ring tones can be downloaded via
MMS or WAP. Traditional ringing tones can be downloaded via SMS, WAP, and
MMS.
Your phone has memory space for several traditional ringing tones or MIDI ringing
tones. The number of tones you can save depends on the size of each tone. MIDI
tones take up more storage space in the memory than traditional ringing tones.
Note: Methods for downloading ringing tones vary. Some wireless
providers allow you to send ringing tones to your phone via the Internet,
but may charge for this service. For details about downloading ringing
tones, contact your wireless service provider.
Nokia 3595 User Guide ýþ Copyright © Nokia 2003
Page 78
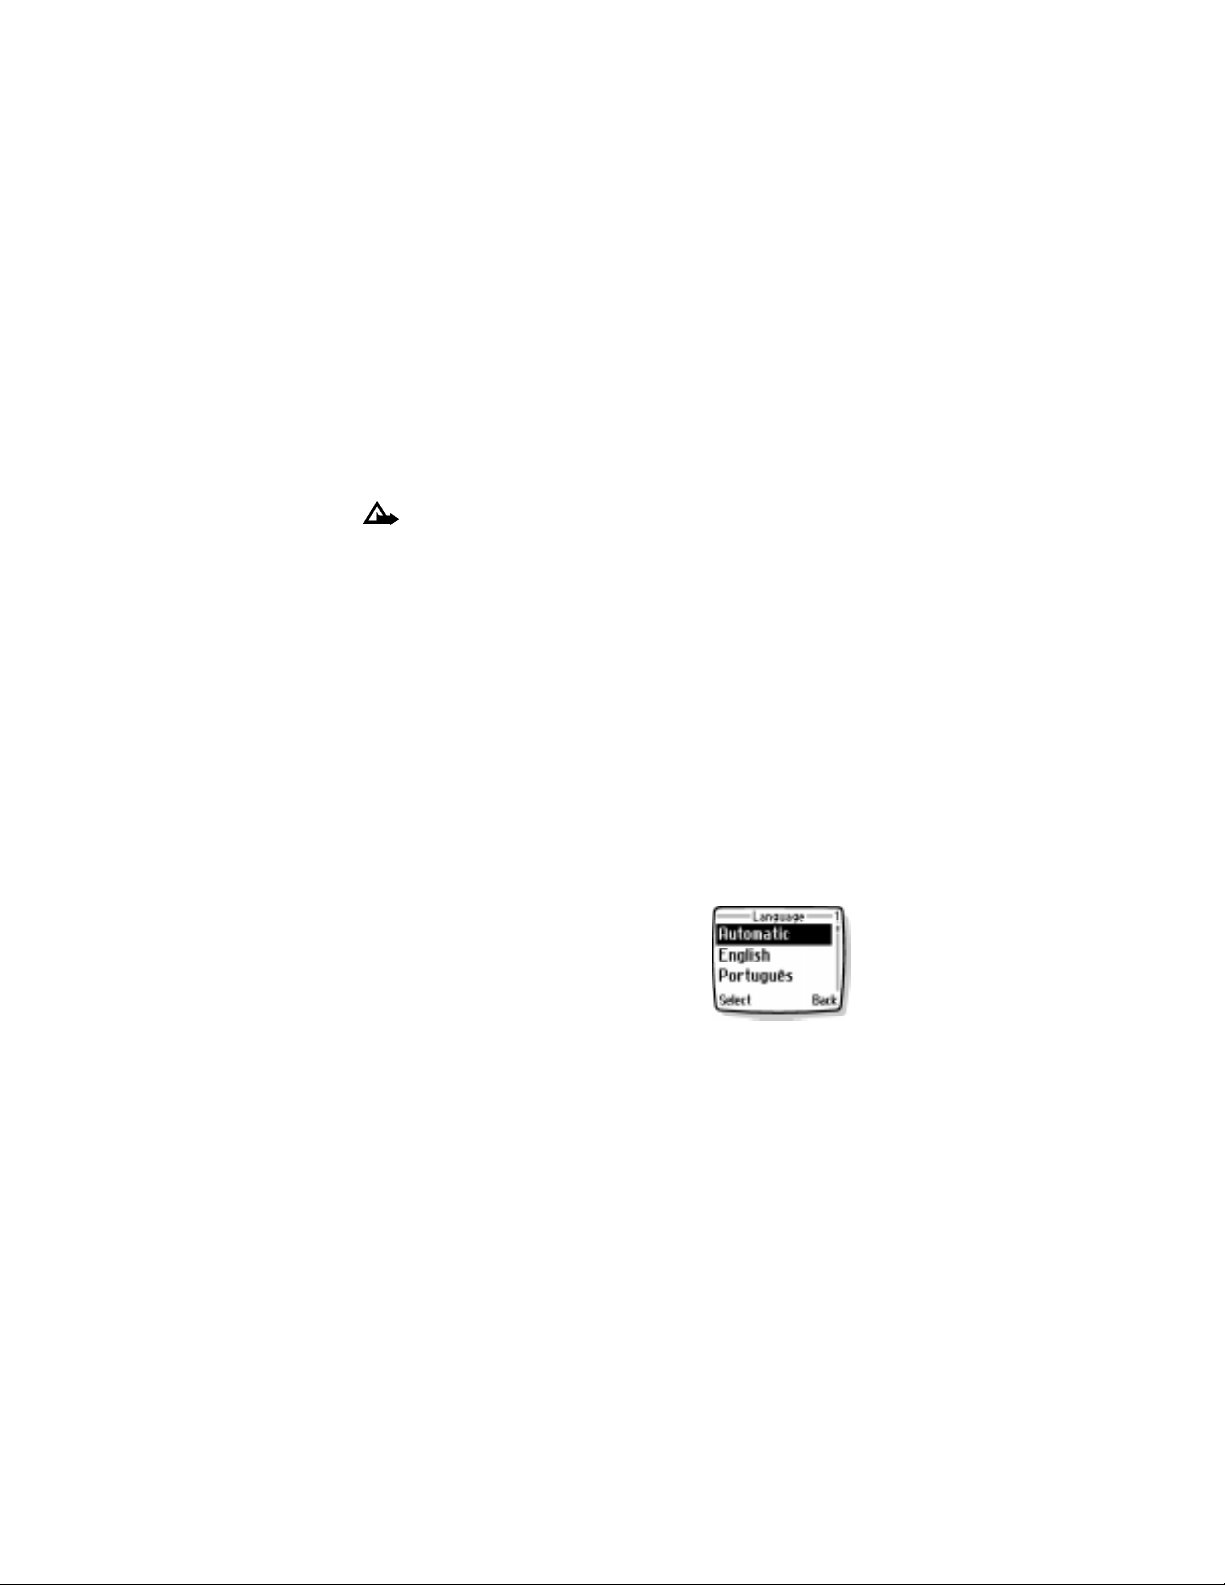
Personalize your phone
DRAFT
Notification of received ringing tone
When your phone receives a ringing tone, it displays Ringing tone received.
Listen to received ringing tones
Caution: If you press Exit at any time before saving the ringing tone, the
ringing tone will be deleted.
1 When your phone displays Ringing tone received, press Options.
2 Scroll to Playback, then press Select.
Save received ringing tones
1 Press Options.
2 Scroll to Save tone, then press Select.
The tone is saved to your list of ringing tones.
If the memory is full, the phone prompts you to replace an existing tone.
Replace tone? appears. Press Select.
Discard received ringing tones
If you don’t want to save the ringing tone, press Exit, then press OK to confirm.
OR
Press Options, scroll to Discard, then press Select. Confirm with OK.
•CHOOSE THE DISPLAY LANGUAGE
You can choose the phone display language.
1 Press Menu 4-4-1 (Settings > Phone settings
> Language).
2 Scroll to the language you want, then press
Select.
•ADD A WELCOME NOTE
You can add a welcome note that is displayed briefly each time you turn on the
phone.
1 Press Menu 4-4-4 (Settings > Phone settings > Welcome note).
2 Enter a note, then press Options.
3 Scroll to Save, then press Select.
72 Copyright © Nokia 2003
Page 79

Delete a welcome note
1 Press Menu 4-4-4 (Settings > Phone settings > Welcome note).
2 Press Options.
3 Scroll to Delete, then press Select.
•ACTIVATE HELP TEXT
Many menu items have brief explanations associated with them. To view the help
text, scroll to the menu item and wait for about 30 seconds. Press More to see the
next page of the text or Back to exit.
1 Press Menu 4-4-5 (Settings > Phone settings > Help text activation).
2 Scroll to On, then press Select.
To turn off help texts, scroll to Off, then press Select.
•SET UP THE TIME AND DATE
Your phone has an internal clock that can be displayed on the Start screen. It also
features an alarm clock
Note: The time and date has to be reset each time the phone’s battery is
taken out and replaced.
(see “Use the alarm clock” on page 119).
Select the time format
1 Press Menu 4-2-1-3 (Settings > Time and date settings > Clock > Time
format).
2 Scroll to 24-hour or am/pm.
3 Press Select.
Set the time
1 Press Menu 4-2-1 (Settings > Time and date settings > Clock).
2 Scroll to Set the time, then press Select.
3 Enter the current time, using two digits for both hours and minutes.
4 Press OK, then select am or pm and press Select.
Note: If you entered the time in the 24-hour format, am and pm do not
appear.
Nokia 3595 User Guide ýþ Copyright © Nokia 2003
Page 80

Personalize your phone
If this is the first time you have set the clock, the phone asks you to enter the date.
Enter the date in mm:dd:yyyy format and press OK.
DRAFT
Set the date format
1 Press Menu 4-2-2 (Settings > Time and date settings > Date).
2 Scroll to Date format, then press Select
3 Choose one of the following formats, then press Select.
DD MM YYYY
MM DD YYYY
YYYY MM DD
Set the date
1 Press Menu 4-2-2 (Settings > Time and date settings > Date).
1 Scroll to Set the date, then press Select.
2 Enter the date in mm:dd:yyyy format, then press OK.
Display the clock
This feature lets you continuously display the time on the Start screen.
1 Press Menu 4-2-1 (Settings > Time and date settings > Clock).
2 Scroll to Hide clock or Show clock.
Only one choice appears, depending on the current setting.
3 Press Select.
Set automatic update of date and time
If this feature is supported by your wireless service provider, it automatically updates
the clock in your phone in accordance with the current time zone. This may be
helpful if you are traveling from New York to California, for example, and want to
receive the local time from the wireless network.
1 Press Menu 4-2-3 (Settings > Time and date settings > Auto-update of
date & time).
2 Scroll to one of the following options, then press Select:
On: Updates the date and time automatically.
Confirm first: Requires you to confirm that you want the update.
Off: Prevents the date and time from being automatically updated.
74 Copyright © Nokia 2003
Page 81

•DISPLAY SETTINGS
Wallpaper
You can set your phone to display a background picture (wallpaper) on the Start
screen. Some pictures are pre-saved in the Gallery menu. You can download
pictures via SMS, WAP, and MMS and then save them in the Gallery. Your phone
supports JPEG, GIF, BMP, PNG, and WBMP formats.
SELECT WALLPAPER
1 Press Menu 4-5-1 (Settings > Display settings > Wallpaper).
2 Scroll to Change image, then press Select to browse the gallery.
3 Select Graphics, press Open and scroll to the image you want.
4 Press Select, then press Set as wallpaper.
Replace existing wallpaper? appears on the screen.
5 Press OK.
A confirmation note appears on the screen.
Note: If the wallpaper feature is off when an image is set as a wallpaper,
it is switched to be On. You do not need to activate the wallpaper
separately.
ACTIVATE/DEACTIVATE WALLPAPER
1 Press Menu 4-5-1 (Settings > Display settings > Wallpaper).
2 Scroll to On or Off and press Select.
Color schemes
You can change the color of some display components in your phone, such as
indicators and signal bars.
1 At the Start screen, press Menu 4-5-2 (Settings > Display settings > Color
schemes).
2 Scroll to the color scheme you want and press Select.
A confirmation note appears on the screen.
Nokia 3595 User Guide ýþ Copyright © Nokia 2003
Page 82

Personalize your phone
DRAFT
Screen saver
You can set your phone to display a screen saver after a preset time or after a
custom time (up to 60 minutes). The screen saver is activated when no function of
the phone is used after a preset period of time. Press any key to deactivate the
screen saver. The screen saver is also deactivated when the phone is out of the
network coverage area.
SCREEN SAVER TIMEOUT
1 At the Start screen, press Menu 4-5-4 (Settings > Display settings > Screen
saver timeout).
2 Scroll to either 2 minutes or 5 minutes and press Select.
3 If you want to set a custom time (up to 60 minutes), scroll to Other and press
Select.
4 Enter the custom time and press OK.
A confirmation note appears on the screen.
Display brightness
You can change the brightness of the phone display.
1 Press Menu 4-5-5 (Settings > Display settings > Display brightness).
A bar chart indicating the current brightness level appears on the screen.
2 Use the Scroll up or Scroll down key to adjust the contrast level to your
preference.
3 Press OK to accept your settings.
•USE CALLER GROUPS
You can create groups of names in your phone bo ok and give each group a different
ringing tone. When someone from that group calls, you’ll know because of the
ringing tone.
Add names to a caller group
The name you add to a caller group must first be stored in the phone book.
1 From the Start screen, scroll to the name or number you want.
2 Press Details
3 Scroll to Caller groups and press Select.
4 Choose Family, VIP, Friends, Business or Other, then press
, then press Options.
Select.
76 Copyright © Nokia 2003
Page 83

Remove names from a caller group
1 Follow steps 1 through 3 above.
2 Scroll to No group and press Select.
Nokia 3595 User Guide þþ Copyright © Nokia 2003
Page 84

Personalize your phone
DRAFT
Assign a ringing tone to a caller group
1 From the Start screen, press Names.
2 Scroll to Caller groups and press Select.
3 Scroll to the group you want and press Select.
4 Scroll to Group ringing tone and press Select.
5 Scroll to the tone you want to hear for this caller group and press Select.
Tip: You can set your phone to ring
groups call you, and to be silent for all other call groups.
only when people from certain caller
Rename a caller group
You can rename any call group with a name of your own.
1 Follow steps 1 through 3 above.
2 Scroll to Rename group and press Select.
3 Enter the group name, then press OK.
Assign group graphic
Each caller group has a picture associated with it. When you get a call from
someone in a caller group, the graphic flashes on the screen.
To turn the graphic on for a caller group:
1 Press Names, scroll to Caller groups, and press Select.
2 Scroll to the name of the group and press Select.
3 Scroll to Group logo and press Select.
Note: To see the group graphic before you select it, scroll to View and press
Select. Press Back to return to the menu.
4 Scroll to On and press Select.
To turn the graphic off, follow the steps above, but scroll to Off in the last step.
78 Copyright © Nokia 2003
Page 85

VIEW A RECEIVED GRAPHIC
1 When you receive a graphic from someone else, Group logo received appears.
2 To view the graphic, press Show.
3 After viewing the graphic, press Options and then choose:
Save to save it (you must choose which caller group gets the new graphic)
Discard to delete it
4 Press Select.
•RESTORE FACTORY SETTINGS
You can use Menu 4 8 (Settings > Restore factory settings) to reset some of the
phone settings to their original values.
Caution: Restoring factory settings does not erase your phone book.
However, it does erase all customized settings you may have entered.
1 Press Menu 4-8 (Settings > Restore factory settings).
2 Enter the Security code, then press OK.
For the default code, see “Security code” on page 86.
Nokia 3595 User Guide þý Copyright © Nokia 2003
Page 86
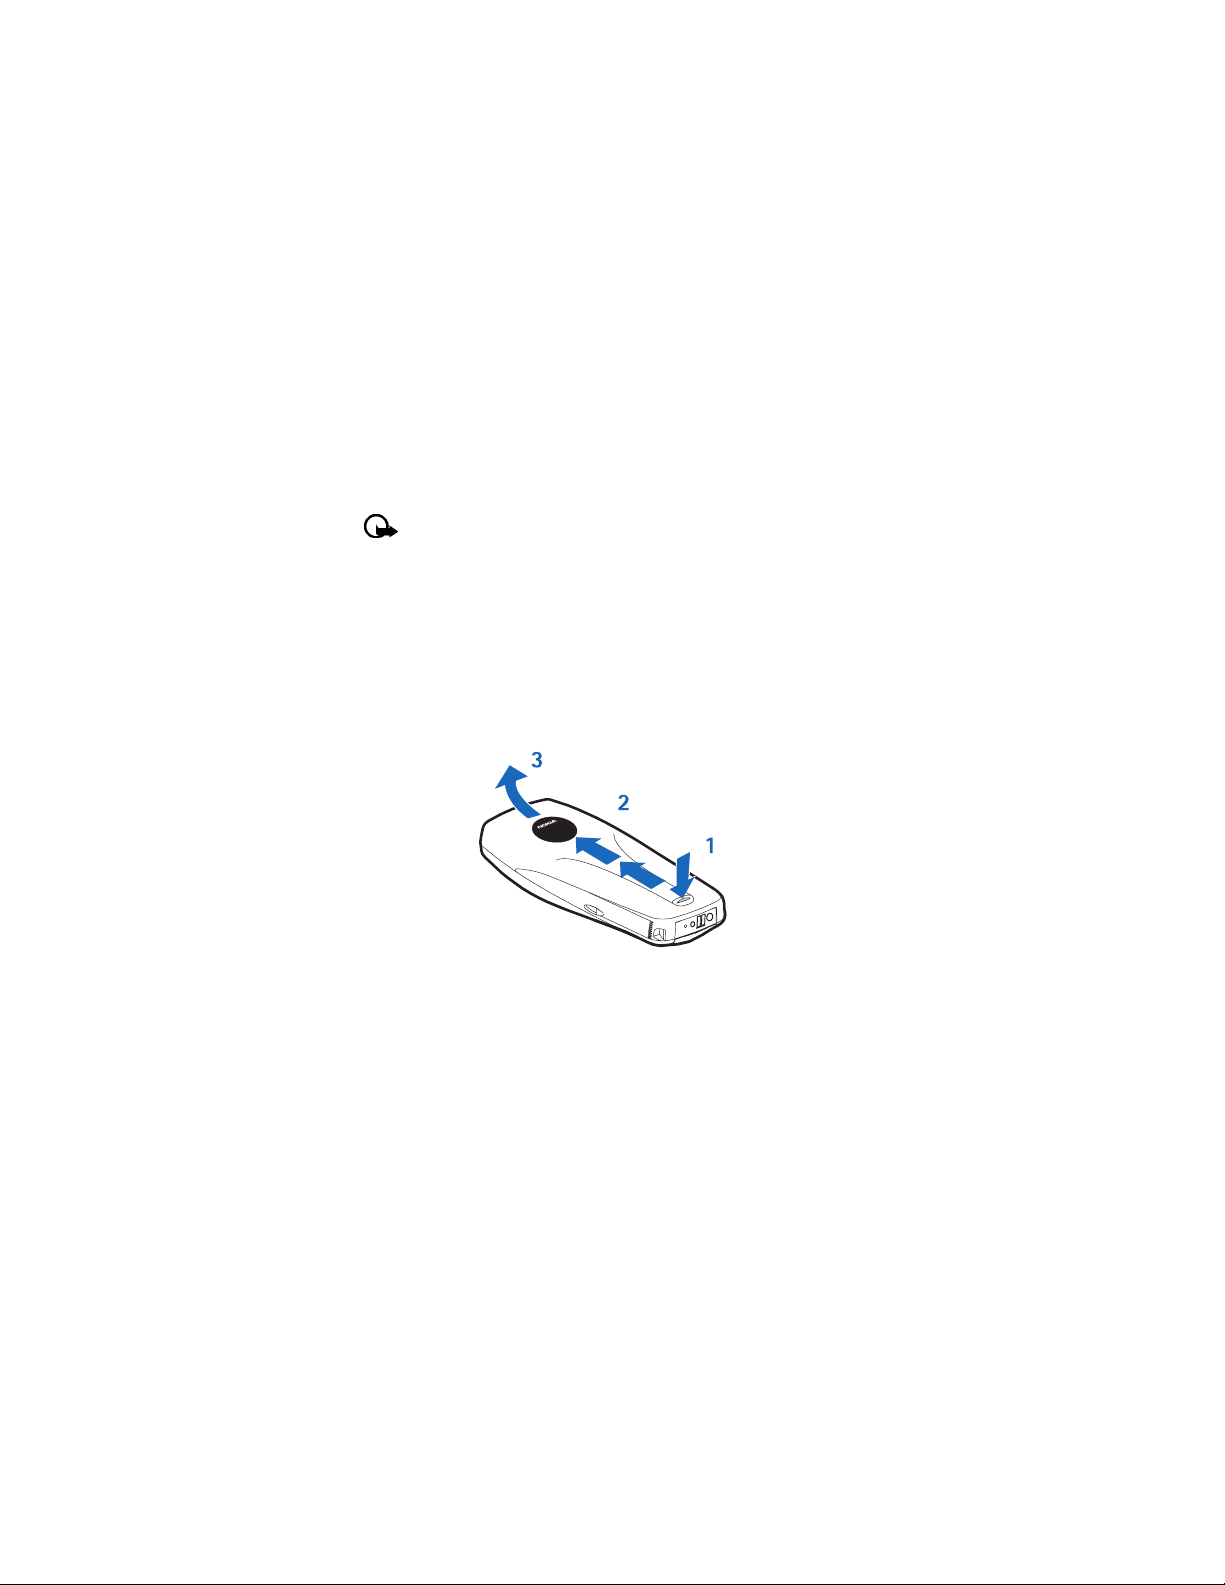
Personalize your phone
DRAFT
•CHANGE XPRESS-ON™ COLOR COVERS
To personalize your Nokia 3595 phone, you can change the front and back covers.
Nokia Xpress-on
and gaming covers may be purchased from your authorized Nokia dealer.
TM
color covers, reactive covers (glow-in-the-dark), active covers,
Important: Before changing the cover, always switch off the power and
disconnect the phone from the charger or any other device. Always store
the phone with the covers attached. When changing covers, remove the
back cover first, then the front cover. When replacing covers, place the
front cover on first, then the back cover.
Remove the back cover
1 With the back of the phone facing you, press and hold the back cover release
button.
2 Slide the cover up.
3 Lift the cover off of the phone.
80 Copyright © Nokia 2003
Page 87
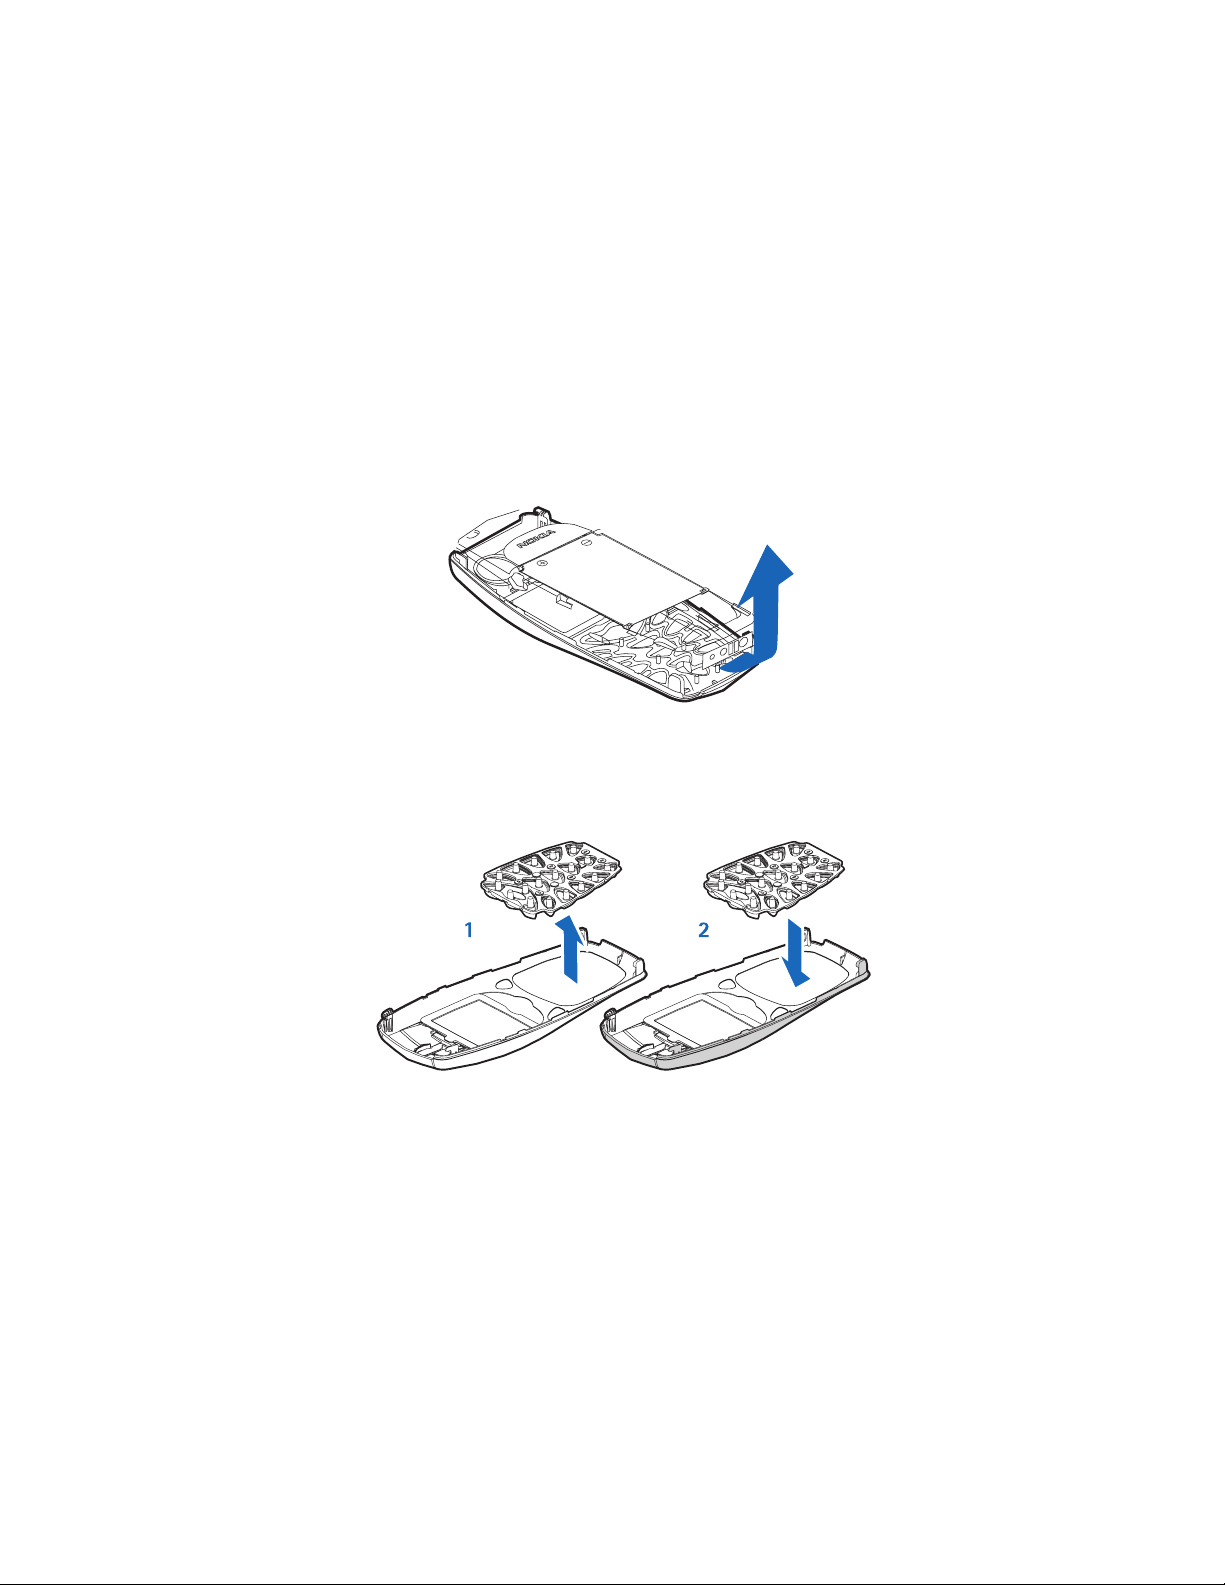
Remove the phone from the front cover
With the back of the phone facing you, gently separate the cover from the
phone, starting at the bottom.
Change the keypad
1 Lift the keypad from inside the old front cover.
2 Place the keypad into the new front cover.
New front cover
Nokia 3595 User Guide ýþ Copyright © Nokia 2003
Page 88
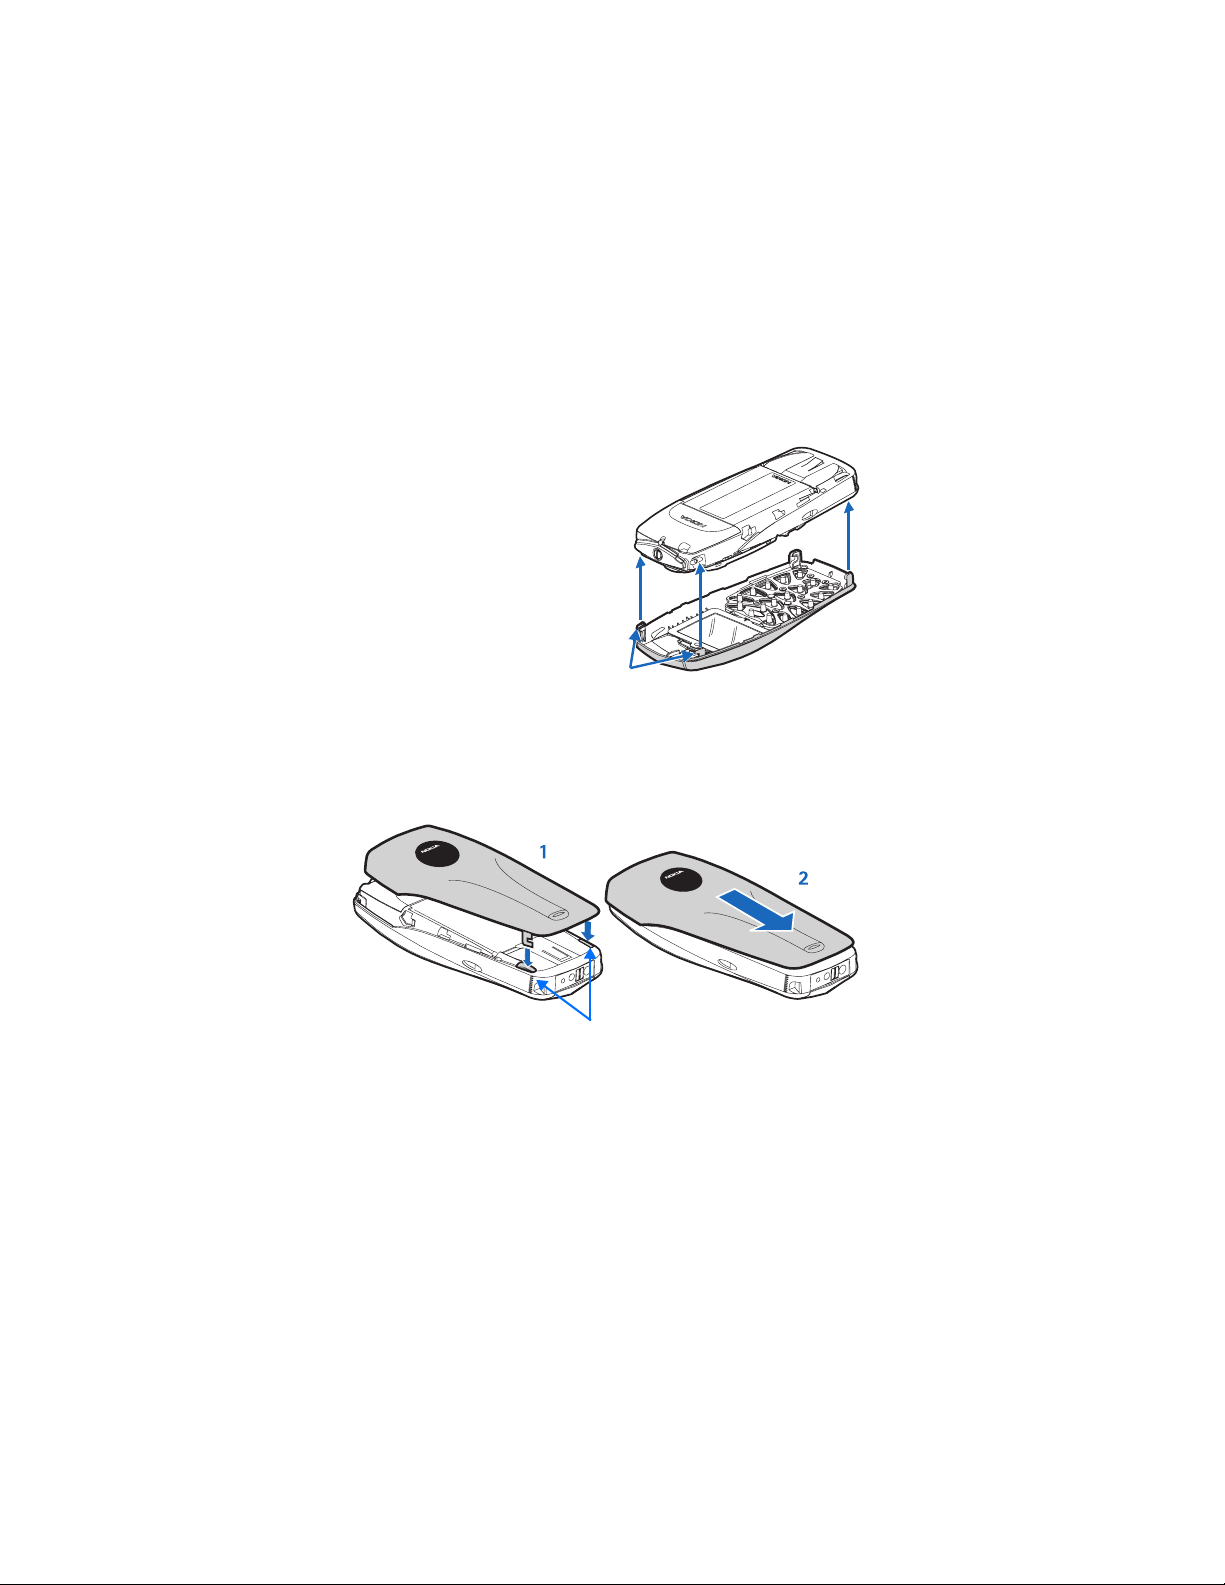
Personalize your phone
DRAFT
Replace the new front cover
1 To replace the front cover, align
the top of the phone with the top
of the front cover.
Make sure both sets of plastic
tabs line up with their slots, as
shown at right.
2 Align the cover and snap it shut
all the way around the edge of
the phone.
Tabs
Replace the back cover
1 Direct the back cover towards the locking catches on the phone.
2 Slide the back cover until it locks into place.
locking catches
82 Copyright © Nokia 2003
Page 89

13 Manage phone security
Your phone is equipped with different security features that allow you to do the
following:
• Avoid making accidental calls,
• Prevent unauthorized use of your phone, and
• Restrict outgoing or incoming calls.
•LOCK THE KEYPAD
(KEYGUARD)
Keyguard disables your keypad to prevent accidental key
presses (f or e xample , when your phone is in your pocket
or purse).
• To lock the keys, press Menu
• To unlock the keys, press Unlock
Automatic Keyguard
You can have your phone automatically lock the keys after a time you specify.
1 Press Menu 4-4-2 (Settings > Phone settings > Automatic keyguard).
2 Scroll to On, then press Select.
3 Set the delay time, then press OK.
Note: When Keyguard is on, calls may be possible to emergency numbers
(for example, 911 or other official emergency number). Key in the
emergency number and press the Talk key. The number is displayed only
after you have keyed in its last digit. Keyguard does not prevent
unauthorized use of your phone.
, then *.
, then *.
3595 Phone
Graphic
Goes
Here
Nokia 3595 User Guide ýþ Copyright © Nokia 2003
Page 90
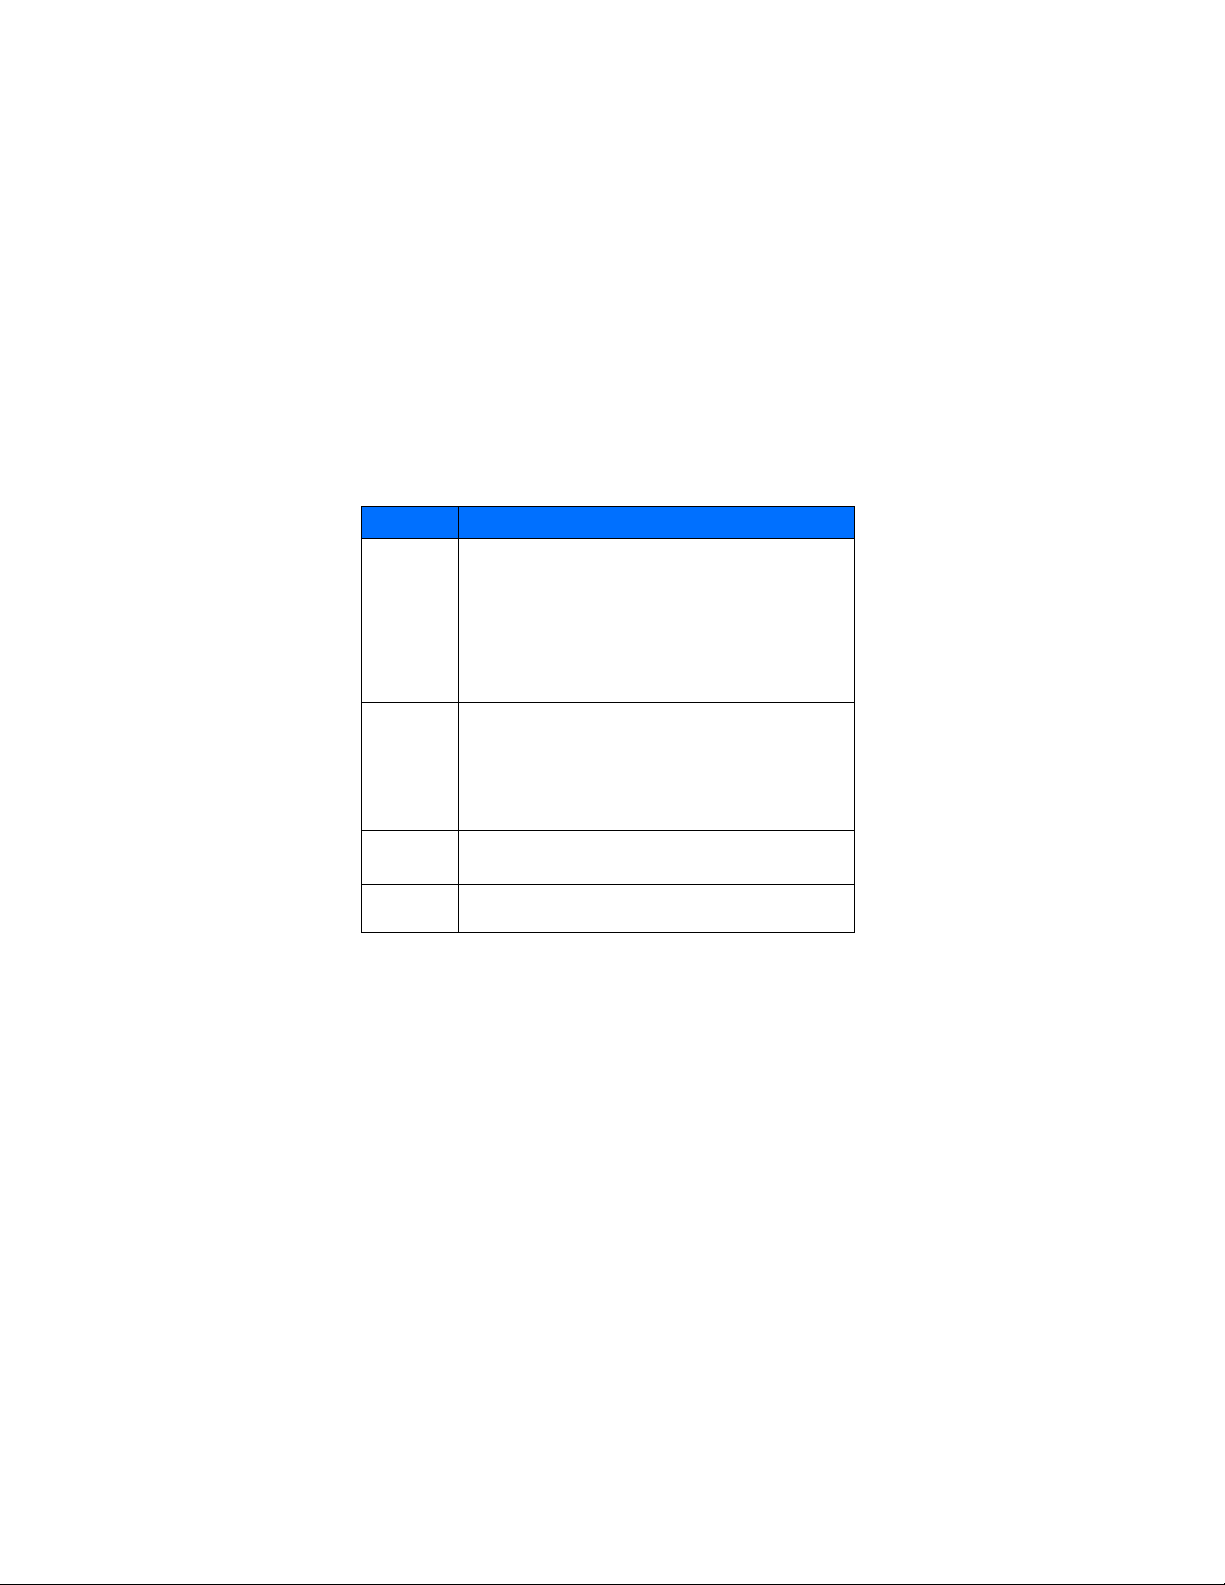
Manage phone security
DRAFT
•ABOUT SECURITY CODES
The following table summarizes how different types of security codes are used in
your phone.
Code Purpose
Use the security code for the following procedures:
• Reset call timers (page 47)
• Clear the data counter (page 49)
Security
code
PIN code
PIN2 code
Restriction
password
• Clear the connection timer (page 49)
• Restore factory settings (page 79)
• Erase your entire phone book (page 44)
If phone security is on, the phone requests the security code the first
time you use it after installing a new SIM card.
You can use the PIN code to protect against unauthorized calls if the
following conditions are met:
• The PIN code request is turned on
• The phone is powered off
The next time the phone is turned on, you must enter the correct PIN
code to make calls or use the menus.
Enter the PIN2 code for the following procedure:
Use fixed dialing (page 86)
Required by the restrict calls feature.
•PIN CODES
The PIN (Personal Identity Number) and PIN2 codes are 4- to 8-digit numbers that
usually come from your service provider along with the SIM card. Use the PIN code
to protect your phone and SIM card against unauthorized use. Th e PIN2 cod e
activates so me of y ou r p hon e’ s f un ct io ns , such as Call cost limit. See “Manage call
costs” on page 48.
When the phone requires the PIN or PIN2 code, it displays Enter PIN code: or Enter
PIN2 code:.
Enter the code, then press OK.
84 Copyright © Nokia 2003
Page 91

Set PIN code request
You can activate the PIN code request to prevent unauthorized use of your phone.
If you set the PIN code request to On, your phone will ask for the code each time
you turn the phone on.
Note: When the phone is locked, calls may be possible to the emergency
number programmed into your phone (for example, 911 or other official
emergency number).
1 Press Menu 4-7-1 (Settings > Security settings> PIN code request).
2 Enter the PIN code supplied by your service provider, and press OK.
3 Scroll to On and press OK.
To turn off this feature, repeat steps 1 through 3 above, but select Off in step 3.
Change your PIN or PIN2 code
You can change your PIN or PIN2 code to any 4- to 8-digit number.
Tip: Activate the PIN code request first.
1 Press Menu 4-7-6 (Settings > Security settings > Change access codes).
2 Scroll to Change PIN code, then press Select.
3 Enter the current PIN code and press OK.
4 Enter the new PIN code and press OK
5 Enter the new PIN code again to verify, and press OK.
Note: If you make a mistake while entering the code, Code Error appears.
Start again at step 2 and be careful to enter the correct code. If you enter
the wrong code three times in a row, the PIN code is blocked. T o unblock the
PIN code, you need a Personal Unblocking Key (PUK) from your service
provider.
.
•PUK CODES
The PUK and PUK2 codes are 4-digit to 8-digit codes that usually come from your
service provider along with the SIM card. The PUK code unblocks a blocked PIN
code, and the PUK2 code unblocks a blocked PIN2 code.
If you block your phone, contact your service provider. When you enter the PUK
code given by your service provider, the phone prompts you to enter and then
confirm a new PIN code.
Nokia 3595 User Guide ýþ Copyright © Nokia 2003
Page 92

Manage phone security
DRAFT
•SECURITY CODE
The default security code is 12345. Nokia recommends that you change the default
code immediately.
You need the security code to access certain phone features. When the phone
requires the security code, it displays Security code:
Enter the code, then press OK.
If you enter an incorrect security code five times in a row, the phone will not accept
the correct code for 5 minutes.
Change the security code
1 Press Menu 4-7-6 (Settings > Security settings > Change access codes).
2 Scroll to Change security code and press Select.
3 Enter the current security code, then press OK.
4 Enter the new security code, then press OK.
5 Enter the security code again to verify, then press OK.
Important: Keep the code secret and in a safe place, separate from the
phone.
•USE FIXED DIALING
If supported by your SIM card, this feature lets you restrict your outgoing calls to
phone numbers included in the fixed dialing list or beginning with the same digit(s)
as an entry in the list.
Note: When fixed dialing is set on, calls may be possible to certain emergency
numbers in some networks (for example, 911 or other official emergency
numbers).
Turn fixed dialing on or off
1 Press Menu 4-7-3 (Settings > Security settings > Fixed dialin g ).
2 Scroll to On or Off, then press Select.
3 Enter your PIN2 code, then press OK.
86 Copyright © Nokia 2003
Page 93

Add numbers to the fixed dialing list
1 Press Menu 4-7-3 (Settings > Security settings > Fixed dialing).
2 Scroll to Number list, then press Select.
3 Scroll to Add, then press Select.
4 Enter your PIN2 code and press OK.
5 Enter a name to go with the restricted phone number , then press OK.
6 Enter the phone number you want to restrict, then press OK.
Repeat steps 3 through 6 for each number you want to add to the list.
•RESTRICT CALLS
This network service, if available from your service provider, lets you restrict the
calls your phone can make and receive. Check with your service provider for details.
Note: When calls are restricted, calls may be possible to certain emergency
numbers in some networks (such as 911 or other official emergency
number).
About the restriction password
Contact your service provider for the restriction password.
Turn on call restrictions
1 Press Menu 4-7-2 (Settings > Security settings > Call restrictions).
2 Scroll through the types of calls you can restrict, and press
see the one you want.
Outgoing calls: Calls cannot be made.
International calls: Calls cannot be made to foreign countries.
International except to home country: When abroad, calls can be made only
within the current country and to your home country (that is, the country
where your home network operator is located).
Incoming calls: Calls cannot be received.
Incoming calls if roaming: Calls cannot be received outside your home area.
Cancel all call restrictions: Turns off all call restrictions. Calls can be made
and received in the usual way.
Note: If you selected Cancel all call restrictions, the following steps are
not available. Also, you can cancel call restrictions on each option,
allowing restrictions on other options to stay in force.
Nokia 3595 User Guide ýþ Copyright © Nokia 2003
Select when you
Page 94

Manage phone security
3 Scroll to one of the following options, then press Select:
Activate: Enter the restriction password and press OK.
Cancel: Enter the restriction password and press OK.
Check Status: The phone lists the call types with call restriction active.
DRAFT
Change your restriction password
1 Press Menu 4-7-6 (Settings > Security settings > Change access codes).
2 Scroll to Change restriction password, then press Select.
3 Enter your current password, then press OK.
4 Enter your new password, then press OK.
5 Verify the new password, then press OK.
•SET UP A CLOSED USER GROUP
This network service, if available from your service provider, specifies the group of
people to whom you can call and who can call you. Default resets the phone to use
a user group that the SIM card owner has agreed upon with the service provider.
Note: When calls are limited to Closed User Groups, calls may be possible
to certain emergency numbers in some networks (for example, 911 or other
official emergency number).
Turn closed user group on/off
1 Press Menu 4-7-4 (Settings >Security settings > Closed user group).
2 Scroll to On or Off, then press Select.
3 Enter the group number, then press OK.
88 Copyright © Nokia 2003
Page 95
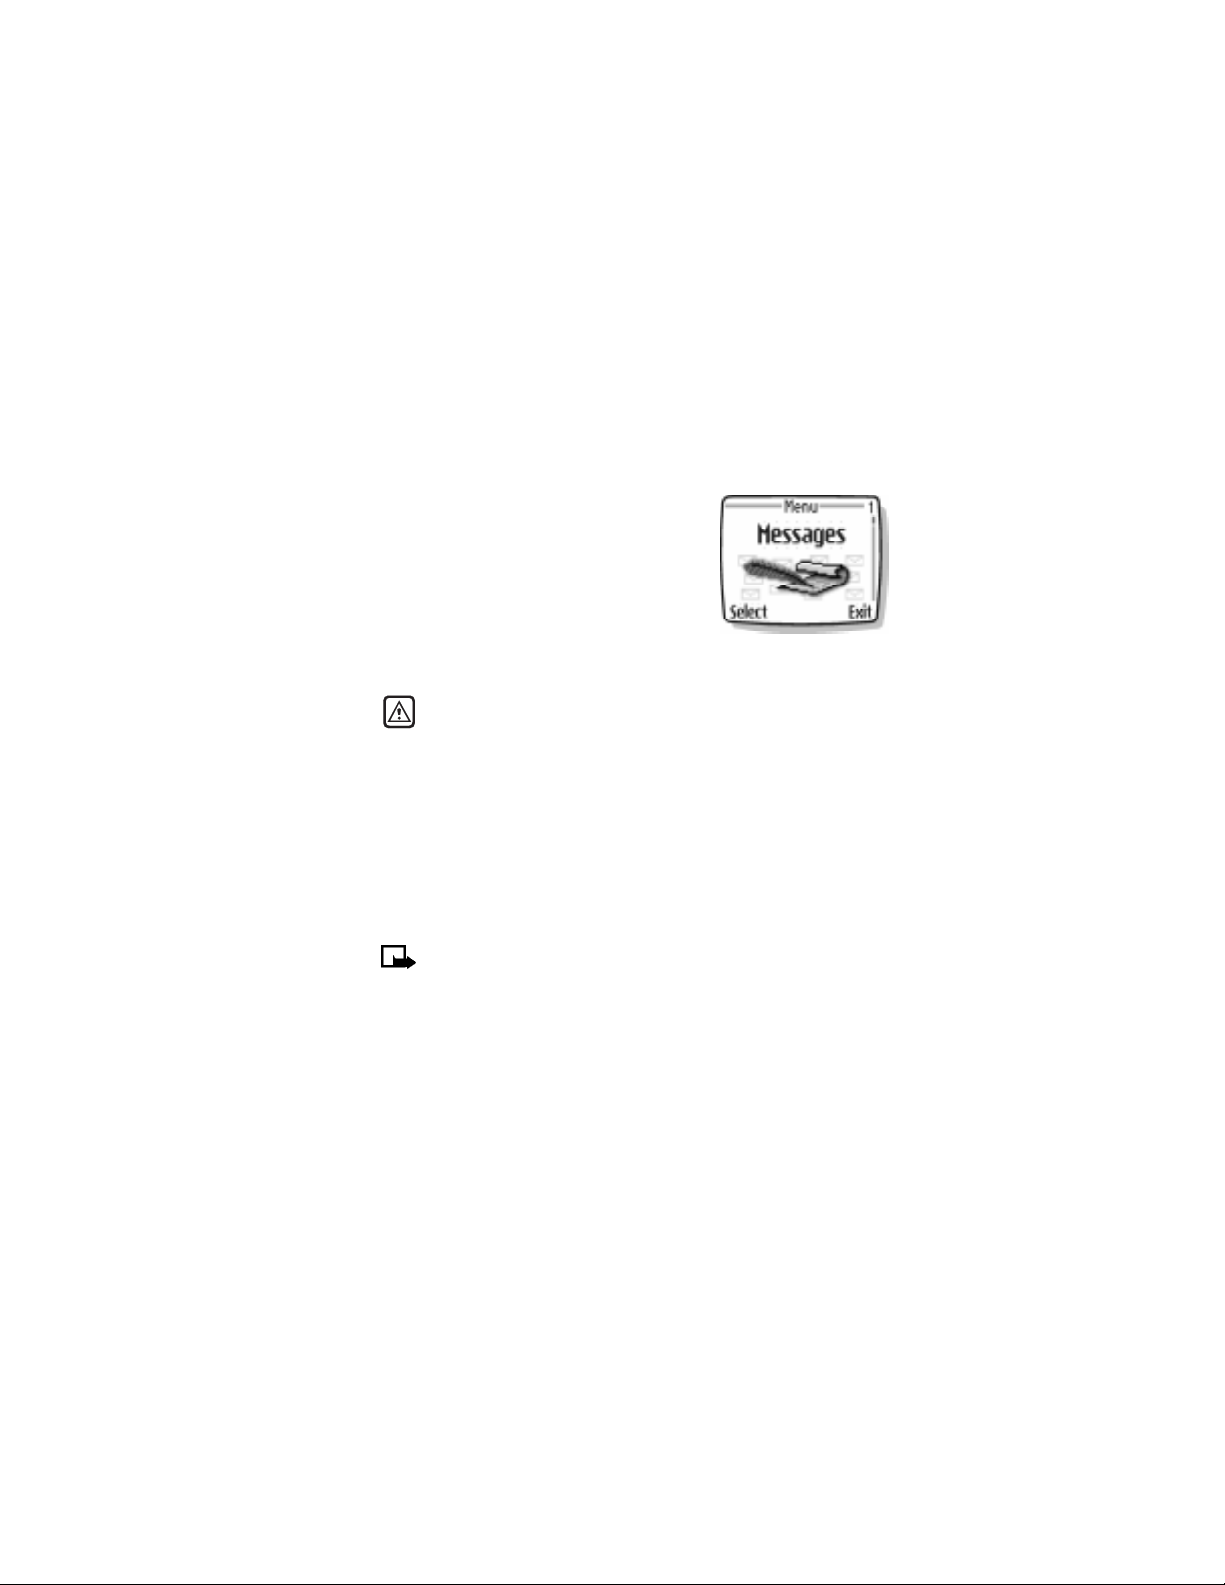
14 Communicate with mobile
messages
You can use mobile messages to keep in touch with
friends, family, and business associates. Your Nokia
3595 phone allows you to do the following:
• Send and receive text messages
• Communicate with e-mail
• Communicate online with other phone users
• Receive and view multimedia messages (MMS)
• Send and receive picture messages
Not all messaging features are available in all wireless networks. Contact your
service provider for availability and subscription information.
Warning: Do not switch on the phone when wireless phone use is
prohibited or when it may cause interference or danger.
•MESSAGE SETTINGS
Before you can send and receive messages you must:
• Have a text messaging subscription through your service provider.
• Contact your service provider for the message center number.
• Save your message center number in your phone.
• Set up other message settings, such as GPRS.
Save your message center number
Note: Your service provider supplies the message center number.
1 Press Menu, then press Select.
2 Scroll up to Message settings, then press Select.
3 Scroll to Text messages, then press Select.
4 Scroll to Sending profile, then press Select.
If your SIM supports more than one message profile, choose a profile, then
press Select.
5 Scroll to Message center number, then press Select.
6 Enter your message center number, then press OK.
Nokia 3595 User Guide ýþ Copyright © Nokia 2003
Page 96

Communicate with mobile messages
DRAFT
Set the message mode
You can choose the type of message sent by your phone. The message modes
include Text, E-mail, Fax and Page.
Note: This features appears only if your SIM card supports multiple
message types.
1 Press Menu, then press Select.
2 Scroll up to Message settings, then press Select.
3 Scroll to Text messages, then press Select.
4 Scroll to Sending profile, then press Select.
If your SIM supports more than one message profile, choose a profile, then
press Select.
5 Scroll to Messages sent as, then press Select.
6 Scroll to Text, E-mail, Page, or Fax, then press Select.
Note: In order to receive a converted message, the recipient needs to have
the appropriate terminal device, such as a pager or fax machine. E-mail
messages can be sent to a mobile phone or personal computer.
Adjust font size
You can modify the font size for message displays. The font size you choose appears
in messages when you are reading or editing and in message lists.
1 Press Menu, then press Select.
2 Scroll up to Message settings, then press Select.
3 Scroll to Text messages, then press Select.
4 Scroll to Font size, then press Select.
5 Scroll to Small font or Large font, then press Select.
90 Copyright © Nokia 2003
Page 97
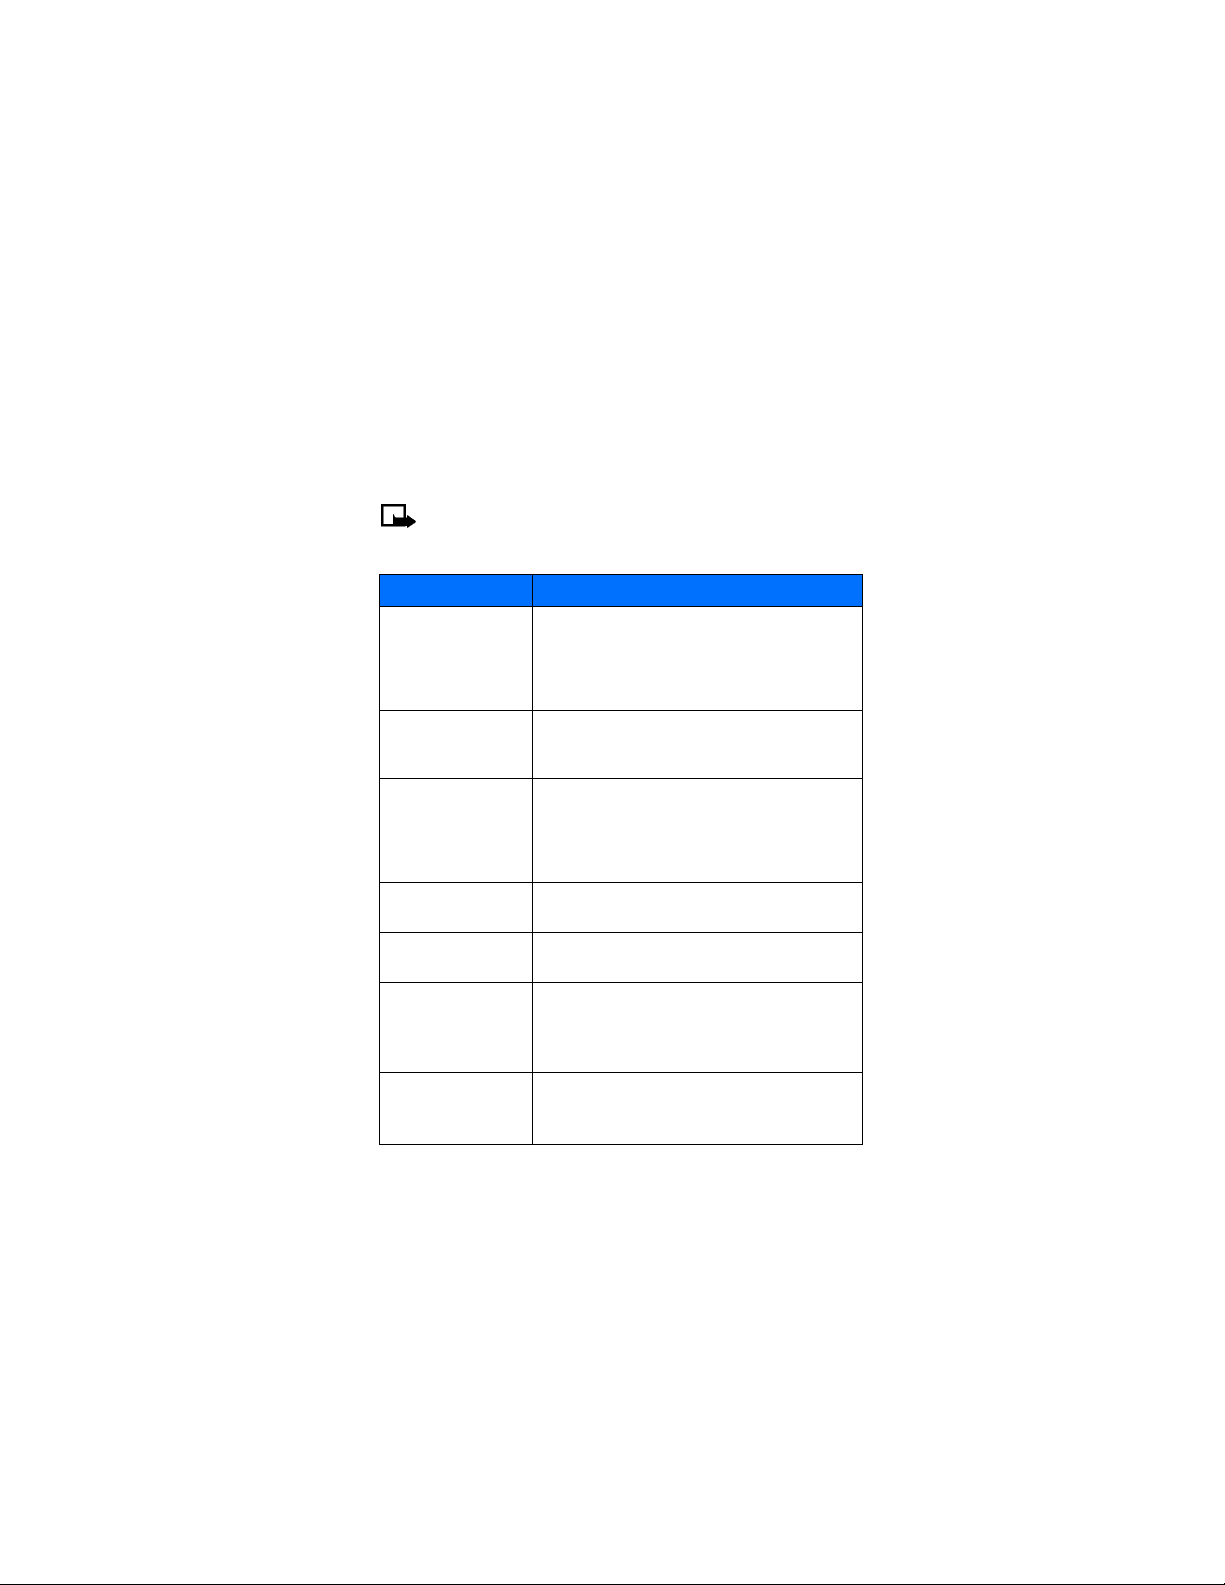
Choose other message settings
You can modify the following message settings, under Messages > Message
settings > Text messages > Sending profile. For menu locations, see “List of menu
shortcuts” on page 27
Note: The following list is dynamic. The order and number of items may
vary, depending on the SIM card. Check with your service provider for more
information.
Choice What it does
Allows you to select the length of time that the message
Message validity
Default recipient
number
E-mail server
Delivery reports
Use GPRS
Reply via same center
Rename sending profile
center will try to deliver a message. You can choose a time
from one hour to one week. If the message center cannot
deliver the message within this time, the message is
deleted.
Allows you to specify a single recipient for all your
messages. This option is not available when you choose
“Messages sent as e-mail.”
Allows you to store e-mail server information in your
phone so that you do not have to enter the number each
time you compose a new e-mail message. This option only
shows up if you have set the message mode to
Contact your service provider for the server number.
Allows you to ask the network for a report about message
delivery.
Allows you to send your messages via the General Packet
Radio System (GPRS).
Choose this when you want your recipient to reply through
the same message center.
E-mail.
Note: Do not choose Yes unless you know the recipient
has the same service provider.
Allows you to name the profile. This option depends on SIM
card.
Note: This option is not available for the default profile.
Nokia 3595 User Guide ýþ Copyright © Nokia 2003
Page 98

Communicate with mobile messages
DRAFT
•SEND AND RECEIVE TEXT MESSAGES
You can use the text message feature to compose and send a short text message
to another phone.
Tip: Review ABC mode and predictive text input from “Enter letters and
numbers” on page 34 before reading this section.
Send text messages
1 Press Menu 01-1 (Messages > Create message).
2 Enter a message.
You can compose one long message made up of several linked parts. Each part
can be up to 160 characters. The counter in the upper right corner shows the
number of available characters. For example, 100/2 refers to 100 characters
available in the second part of the message.
Contact your service provider for information on pricing.
3 Once you have finished writing, press Options, scroll to Send, then press
Select.
4 Enter or recall the recipient’s phone number, then press OK .
Note: When sending messages via the SMS network service, your phone
may display the words Message Sent. This is an indication that the
message has been sent by your phone to the message center number
programmed into your phone. This is not an indication that the message
has been received at the intended destination. For more details about
SMS services, check with your service provider.
Caution: If you need to exit while writing the message, press the End key
anytime. Later , press Menu 01-1 to return and finish writing the message.
If you turn off the phone without saving the message, the message will
be lost.
92 Copyright © Nokia 2003
Page 99

Send messages to multiple recipients
You can send the same message to more than one recipient.
Tip: Before using this feature, the names of your recipients must be
entered into the phone book. See “Save names, numbers and e-mail
addresses” on page 39 for instructions.
1 From the message screen press Options.
2 Scroll to Sending options, then press Select.
3 Scroll to Send to many, then press Select.
4 Scroll to the person’s name, then press Send.
Note:After you press Send, your phone may display the words Message
Sent and then you return to the previous screen. To add other names to
the message, repeat step 4 above.
Save messages in the outbox
When you write a text message, it’s a good idea to save it in the outbox. Then if
there is a message delivery problem, you can easily resend the message.
1 While writing the message, press Options.
2 Scroll to Save message, then press Select.
3 Scroll to Sent items, then press Select.
Resend a message from the outbox
1 Press Menu, then press Select.
2 Scroll to Sent items, then press Select.
3 Scroll to the message you want to resend, then press Select.
The message appears on the screen.
4 Press Options and scroll to Send, then press Select.
5 Scroll to As text msg. or As e-mail, then press Select.
6 Enter the number or e-mail address and press OK to send the message.
Read a new text message
When you receive a text message, the phone beeps and displays Message received
and the indicator in the upper left corner of the screen.
To read the message now, press Show.
Nokia 3595 User Guide ýþ Copyright © Nokia 2003
Page 100
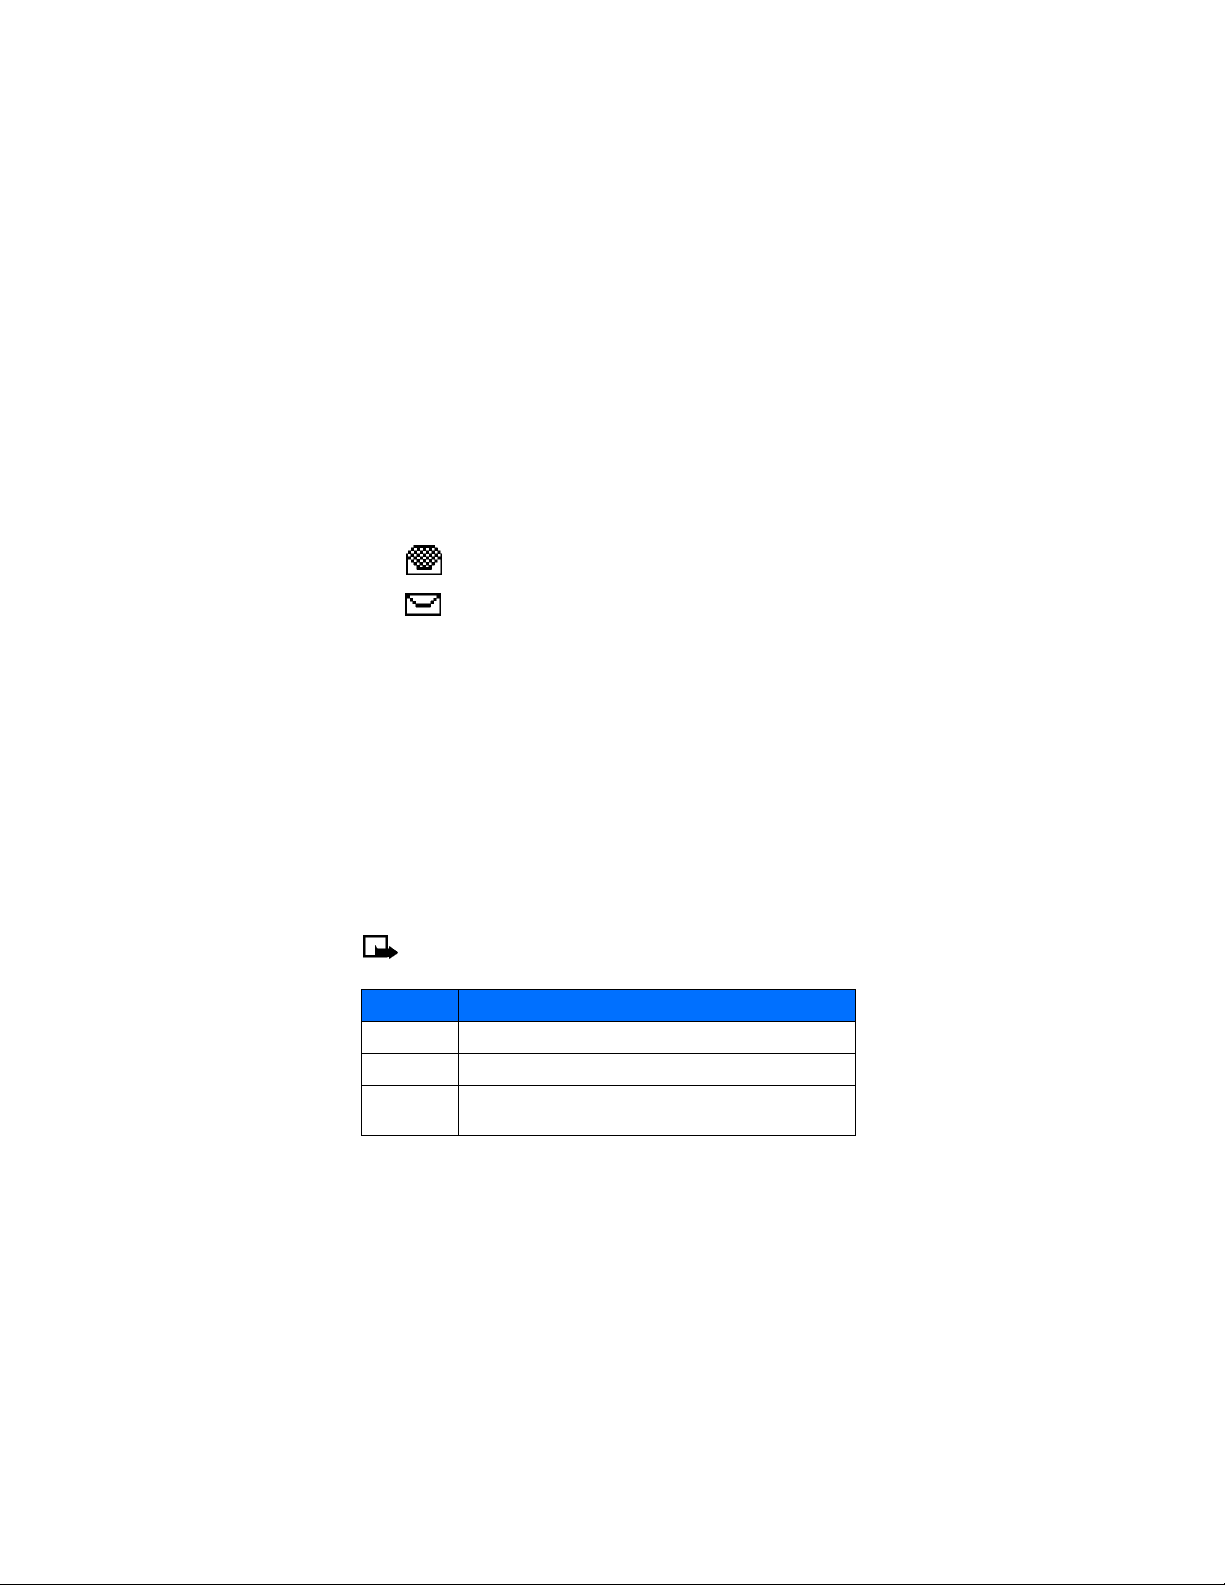
Communicate with mobile messages
DRAFT
Read a new text message later
1 When you receive a text message, press Exit.
2 Later when you want to read the mess age, press Menu, then press Select.
3 Scroll to Inbox, then press Select.
A list of message headers is displayed.
Indicates that a text message has been read.
Indicates that a text message has
4 Scroll to the message you want, then press Select.
5 If the message is long, use the scroll keys to scroll through the message.
not been read.
Read linked messages
Your phone can receive one long message (up to 459 characters) in sequences. You
can start reading the first part before the phone has received the entire message.
While viewing the message, you may see *some text missing* on the display. This
is normal, and the message content will be updated as soon as the missing
sequence arrives.
If the memory is full, you may have to delete a message from your inbox or outbox
before your phone can update the missing text.
Choose text message options
While reading or viewing a message, you can choose one of the following options.
Note: The following list is dynamic. The order and number of options may
vary.
Choice What it does
Erase Allows you to delete the message.
Send Allows you to send the message.
Reply
Allows you to start your reply with an empty screen, a template or with
standard replies like “Yes,” “No,” “Thank you,” or “I love you too.”
94 Copyright © Nokia 2003
 Loading...