

Page 1
EN1220.2_Sept_02.book Page 1 Friday, September 6, 2002 2:19 PM
Nokia 1220
User Guide Draft
Phone notes
Notes Where to get information
My number Wireless service provider
Voice mail number
Wireless service
provider’s customer
care
Model number 1220
Phone type NKC-1, NKC-1X
ESN (Electronic
serial number)
Type label. Located under
the battery.
Page 2
EN1220.2_Sept_02.book Page 2 Friday, September 6, 2002 2:19 PM
The wireless phone described in this guide is approved for use on the TDMA and
AMPS networks.
LEGAL INFORMATION
Part No. 9355365, Issue No. 2
Copyright ©2002 Nokia. All rights reserved.
Nokia, Nokia Connecting People, the Nokia Original Accessories logos, Nokia 1220,
Space Impact and Snake II are trademarks or registered trademarks of Nokia.
Printed in Canada 9/2002
US Patent No 5818437 and other pending patents.
T9 text input software Copyright ©1999-2002. Tegic Communications, Inc. All
rights reserved.
Includes RSA BSAFE cryptographic or security protocol software from
RSA Security.
The information contained in this user guide was written for the Nokia 1220 phone.
Nokia operates a policy of continuous development. Nokia reserves the right to
make changes and improvements to any of the products described in this
document without prior notice
UNDER NO CIRCUMSTANCES SHALL NOKIA BE RESPONSIBLE FOR ANY LOSS OF
DATA OR INCOME OR ANY SPECIAL, INCIDENTAL, AND CONSEQUENTIAL OR
INDIRECT DAMAGES HOWSOEVER CAUSED.
THE CONTENTS OF THIS DOCUMENT ARE PROVIDED “AS IS.” EXCEPT AS REQUIRED
BY APPLICABLE LAW, NO WARRANTIES OF ANY KIND, EITHER EXPRESS OR
IMPLIED, INCLUDING, BUT NOT LIMITED TO, THE IMPLIED WARRANTIES OF
MERCHANTABILITY AND FITNESS FOR A PARTICULAR PURPOSE, ARE MADE IN
RELATION TO THE ACCURACY AND RELIABILITY OR CONTENTS OF THIS DOCUMENT.
NOKIA RESERVES THE RIGHT TO REVISE THIS DOCUMENT OR WITHDRAW IT AT ANY
TIME WITHOUT PRIOR NOTICE.
EXPORT CONTROLS
This product contains commodities, technology or software exported from the
United States in accordance with the Export Administration regulations. Diversion
contrary to U.S. law is prohibited.
FCC/INDUSTRY CANADA NOTICE
Your phone may cause TV or radio interference (for example, when using a
telephone in close proximity to receiving equipment). The FCC or Industry Canada
can require you to stop using your telephone if such interference cannot be
eliminated. If you require assistance, contact your local service facility. This device
complies with part 15 of the FCC rules. Operation is subject to the condition that
this device does not cause harmful interference.
Page 3

EN1220.2_Sept_02.book Page i Friday, September 6, 2002 2:19 PM
Contents
1 Safety first . . . . . . . . . . . . . . . . . . . . . . . . . . . . . . . . . . . . 1
2 Welcome and quick guide . . . . . . . . . . . . . . . . . . . . . . . . . 3
Get the most out of this guide . . . . . . . . . . . . . . . . . . . . . . . . . . . 3
Understand wireless network services . . . . . . . . . . . . . . . . . . . . . 6
Register your phone . . . . . . . . . . . . . . . . . . . . . . . . . . . . . . . . . . . . 6
E-newsletters . . . . . . . . . . . . . . . . . . . . . . . . . . . . . . . . . . . . . . . . . 6
Understand your phone . . . . . . . . . . . . . . . . . . . . . . . . . . . . . . . . . 7
Set up your headset . . . . . . . . . . . . . . . . . . . . . . . . . . . . . . . . . . 12
Get started with the quick guide. . . . . . . . . . . . . . . . . . . . . . . . 13
Get help . . . . . . . . . . . . . . . . . . . . . . . . . . . . . . . . . . . . . . . . . . . . 14
3 Basic operations . . . . . . . . . . . . . . . . . . . . . . . . . . . . . . . 18
Switch your phone ON or OFF . . . . . . . . . . . . . . . . . . . . . . . . . . 18
Make and answer calls. . . . . . . . . . . . . . . . . . . . . . . . . . . . . . . . 18
Check the Start screen. . . . . . . . . . . . . . . . . . . . . . . . . . . . . . . . 20
Use the selection keys . . . . . . . . . . . . . . . . . . . . . . . . . . . . . . . . 23
Scroll keys . . . . . . . . . . . . . . . . . . . . . . . . . . . . . . . . . . . . . . . . . . 23
Check in-phone help . . . . . . . . . . . . . . . . . . . . . . . . . . . . . . . . . 23
Browse phone menus. . . . . . . . . . . . . . . . . . . . . . . . . . . . . . . . . 24
Phone book menu. . . . . . . . . . . . . . . . . . . . . . . . . . . . . . . . . . . . 29
4 Text entry . . . . . . . . . . . . . . . . . . . . . . . . . . . . . . . . . . . . 30
Standard text input . . . . . . . . . . . . . . . . . . . . . . . . . . . . . . . . . . 30
Enter spaces, punctuation and special characters. . . . . . . . . . 32
Write with predictive text . . . . . . . . . . . . . . . . . . . . . . . . . . . . . 34
5 Phone book. . . . . . . . . . . . . . . . . . . . . . . . . . . . . . . . . . . 37
Use phone book menus . . . . . . . . . . . . . . . . . . . . . . . . . . . . . . . 37
Save names, numbers and e-mail addresses . . . . . . . . . . . . . . 38
Recall names and numbers . . . . . . . . . . . . . . . . . . . . . . . . . . . . 39
Edit a name or number. . . . . . . . . . . . . . . . . . . . . . . . . . . . . . . . 39
[ i ]
Page 4

EN1220.2_Sept_02.book Page ii Friday, September 6, 2002 2:19 PM
Erase names and numbers . . . . . . . . . . . . . . . . . . . . . . . . . . . . . .40
Customize your phone book view . . . . . . . . . . . . . . . . . . . . . . . .40
Check memory status . . . . . . . . . . . . . . . . . . . . . . . . . . . . . . . . . .41
6 Call log. . . . . . . . . . . . . . . . . . . . . . . . . . . . . . . . . . . . . . .42
Call log options . . . . . . . . . . . . . . . . . . . . . . . . . . . . . . . . . . . . . . . 42
Check missed calls . . . . . . . . . . . . . . . . . . . . . . . . . . . . . . . . . . . .43
Check received calls . . . . . . . . . . . . . . . . . . . . . . . . . . . . . . . . . . .43
Check dialed calls . . . . . . . . . . . . . . . . . . . . . . . . . . . . . . . . . . . . . 44
Use call timers . . . . . . . . . . . . . . . . . . . . . . . . . . . . . . . . . . . . . . .45
7 Messages . . . . . . . . . . . . . . . . . . . . . . . . . . . . . . . . . . . . .47
Voice mail . . . . . . . . . . . . . . . . . . . . . . . . . . . . . . . . . . . . . . . . . . .47
Text, e-mail and picture messages . . . . . . . . . . . . . . . . . . . . . . .49
Text messages. . . . . . . . . . . . . . . . . . . . . . . . . . . . . . . . . . . . . . . .51
Picture messages . . . . . . . . . . . . . . . . . . . . . . . . . . . . . . . . . . . . .54
E-mail messages. . . . . . . . . . . . . . . . . . . . . . . . . . . . . . . . . . . . . .56
8 Personalization. . . . . . . . . . . . . . . . . . . . . . . . . . . . . . . . .59
Profiles. . . . . . . . . . . . . . . . . . . . . . . . . . . . . . . . . . . . . . . . . . . . . .59
9 Advanced calling features. . . . . . . . . . . . . . . . . . . . . . . . .68
Understand active-call options. . . . . . . . . . . . . . . . . . . . . . . . . .68
Use voice privacy . . . . . . . . . . . . . . . . . . . . . . . . . . . . . . . . . . . . . 71
Use call forwarding . . . . . . . . . . . . . . . . . . . . . . . . . . . . . . . . . . .71
Use call waiting . . . . . . . . . . . . . . . . . . . . . . . . . . . . . . . . . . . . . .73
Use send own caller ID. . . . . . . . . . . . . . . . . . . . . . . . . . . . . . . . .74
Select a phone number . . . . . . . . . . . . . . . . . . . . . . . . . . . . . . . .75
Use automatic redial . . . . . . . . . . . . . . . . . . . . . . . . . . . . . . . . . .76
Use 1-touch dialing . . . . . . . . . . . . . . . . . . . . . . . . . . . . . . . . . . . 76
Set touch tone strings . . . . . . . . . . . . . . . . . . . . . . . . . . . . . . . . .77
Select a system. . . . . . . . . . . . . . . . . . . . . . . . . . . . . . . . . . . . . . .79
[ ii ]
Page 5

EN1220.2_Sept_02.book Page iii Friday, September 6, 2002 2:19 PM
10 Security . . . . . . . . . . . . . . . . . . . . . . . . . . . . . . . . . . . . . 82
Use Keyguard . . . . . . . . . . . . . . . . . . . . . . . . . . . . . . . . . . . . . . . 82
Understand the security code . . . . . . . . . . . . . . . . . . . . . . . . . . 83
Restrict calls . . . . . . . . . . . . . . . . . . . . . . . . . . . . . . . . . . . . . . . . 84
11 Special features . . . . . . . . . . . . . . . . . . . . . . . . . . . . . . . 86
Use the alarm clock . . . . . . . . . . . . . . . . . . . . . . . . . . . . . . . . . . 86
Send and receive business cards. . . . . . . . . . . . . . . . . . . . . . . . 87
Download a ringing tone . . . . . . . . . . . . . . . . . . . . . . . . . . . . . . 88
12 Prepaid services. . . . . . . . . . . . . . . . . . . . . . . . . . . . . . . . 90
Manage prepaid service . . . . . . . . . . . . . . . . . . . . . . . . . . . . . . . 90
Check your prepaid balance . . . . . . . . . . . . . . . . . . . . . . . . . . . . 91
Add money to your account. . . . . . . . . . . . . . . . . . . . . . . . . . . . 91
Call customer service . . . . . . . . . . . . . . . . . . . . . . . . . . . . . . . . . 92
Save your access numbers . . . . . . . . . . . . . . . . . . . . . . . . . . . . . 92
Expiration date . . . . . . . . . . . . . . . . . . . . . . . . . . . . . . . . . . . . . . 93
13 Games . . . . . . . . . . . . . . . . . . . . . . . . . . . . . . . . . . . . . . . 94
Start a new game . . . . . . . . . . . . . . . . . . . . . . . . . . . . . . . . . . . . 94
Snake II . . . . . . . . . . . . . . . . . . . . . . . . . . . . . . . . . . . . . . . . . . . . 95
Space impact. . . . . . . . . . . . . . . . . . . . . . . . . . . . . . . . . . . . . . . . 95
Pairs II . . . . . . . . . . . . . . . . . . . . . . . . . . . . . . . . . . . . . . . . . . . . . 96
14 Reference information . . . . . . . . . . . . . . . . . . . . . . . . . . 97
Battery statements . . . . . . . . . . . . . . . . . . . . . . . . . . . . . . . . . . . 97
Proper care and maintenance . . . . . . . . . . . . . . . . . . . . . . . . . . 98
Important safety information . . . . . . . . . . . . . . . . . . . . . . . . . . 99
Make emergency calls . . . . . . . . . . . . . . . . . . . . . . . . . . . . . . . 103
Certification information (SAR). . . . . . . . . . . . . . . . . . . . . . . . 104
Accessory safety . . . . . . . . . . . . . . . . . . . . . . . . . . . . . . . . . . . . 106
Accessories . . . . . . . . . . . . . . . . . . . . . . . . . . . . . . . . . . . . . . . . 109
[ iii ]
Page 6

EN1220.2_Sept_02.book Page iv Friday, September 6, 2002 2:19 PM
Frequently Asked Questions . . . . . . . . . . . . . . . . . . . . . . . . . . . 116
Glossary . . . . . . . . . . . . . . . . . . . . . . . . . . . . . . . . . . . . . . . . . . . 119
Technical information . . . . . . . . . . . . . . . . . . . . . . . . . . . . . . . 121
Troubleshooting . . . . . . . . . . . . . . . . . . . . . . . . . . . . . . . . . . . . 122
Warranty information . . . . . . . . . . . . . . . . . . . . . . . . . . . . . . . 123
Appendix A
Message from the CTIA to all users of mobile phones . . . . . 129
Appendix B
Message from the FDA to all users of mobile phones. . . . . . . 133
Index . . . . . . . . . . . . . . . . . . . . . . . . . . . . . . . . . . . . . . . . . . . . . 139
[ iv ]
Page 7

EN1220.2_Sept_02.book Page 1 Friday, September 6, 2002 2:19 PM
1 Safety first
Read these simple guidelines before you use your phone. Failure to comply
with these guidelines may be dangerous or illegal. See “Important safety
information” on page99 for detailed information.
Switch off where prohibited
Do not switch on the phone when wireless phone use is
prohibited or when it may cause interference or danger.
Road safety comes first
Don't use a hand-held phone while driving.
Interference
All wireless phones may get interference, which could affect
performance.
Switch off in hospitals
Follow any regulations or rules. Switch the phone off near
medical equipment.
Safety first
Switch off in aircraft
Wireless devices can cause interference in aircraft.
Switch off when refueling
Don't use the phone at a refueling point. Don't use near fuel or
chemicals.
Switch off near blasting
Don't use the phone where blasting is in progress. Observe
restrictions, and follow any regulations or rules.
[ 1 ]
Page 8
EN1220.2_Sept_02.book Page 2 Friday, September 6, 2002 2:19 PM
Use sensibly
Use only in the normal position. Don't touch the antenna
unnecessarily.
Qualified service
Only qualified personnel may install or repair phone equipment.
Accessories and batteries
Use only approved accessories and batteries. Do not connect
incompatible products.
Water-resistance
Your wireless phone is not water-resistant. Keep it dry.
Calling
Ensure the phone is switched on and in service. Enter the phone
number, including the area code, then press . To end a call,
press . To answer a call, press .
Emergency calls
Ensure the phone is switched on and in service. Press as
many times as needed (for example, to exit a call, to exit a
menu) to clear the display. Enter the emergency number, then
press . Give your location. Do not end the call until told to
do so.
[ 2 ]
Page 9
EN1220.2_Sept_02.book Page 3 Friday, September 6, 2002 2:19 PM
2 Welcome and quick guide
Congratulations on your purchase of a Nokia
mobile phone, a new tool for the mobile
information society.
Before you begin, you need to prepare your
phone by charging the battery and learning how
to maintain it. This chapter tells you how to set
up your phone. You will also find useful information about:
• How to use this guide
• How to understand network services
• How to contact Nokia
• GET THE MOST OUT OF THIS GUIDE
The tips that follow can help you get the most from this guide as you learn
to use your phone.
Understand the terms
This guide provides instructions for certain actions.
• Press means to briefly press and release a key. For example,
press means press the zero key for 1 second and release.
• Press and hold means to press and hold a key for 1 to 3 seconds
(depending on the feature being used), then release the key.
• Press Menu means to press (the selection key), located below
the word Menu on the phone’s screen.
• Highlighted means that an option on the screen is enclosed in a black
box. When an option is highlighted, it can be activated by pressing
.
Welcome and quick guide
[ 3 ]
Page 10
EN1220.2_Sept_02.book Page 4 Friday, September 6, 2002 2:19 PM
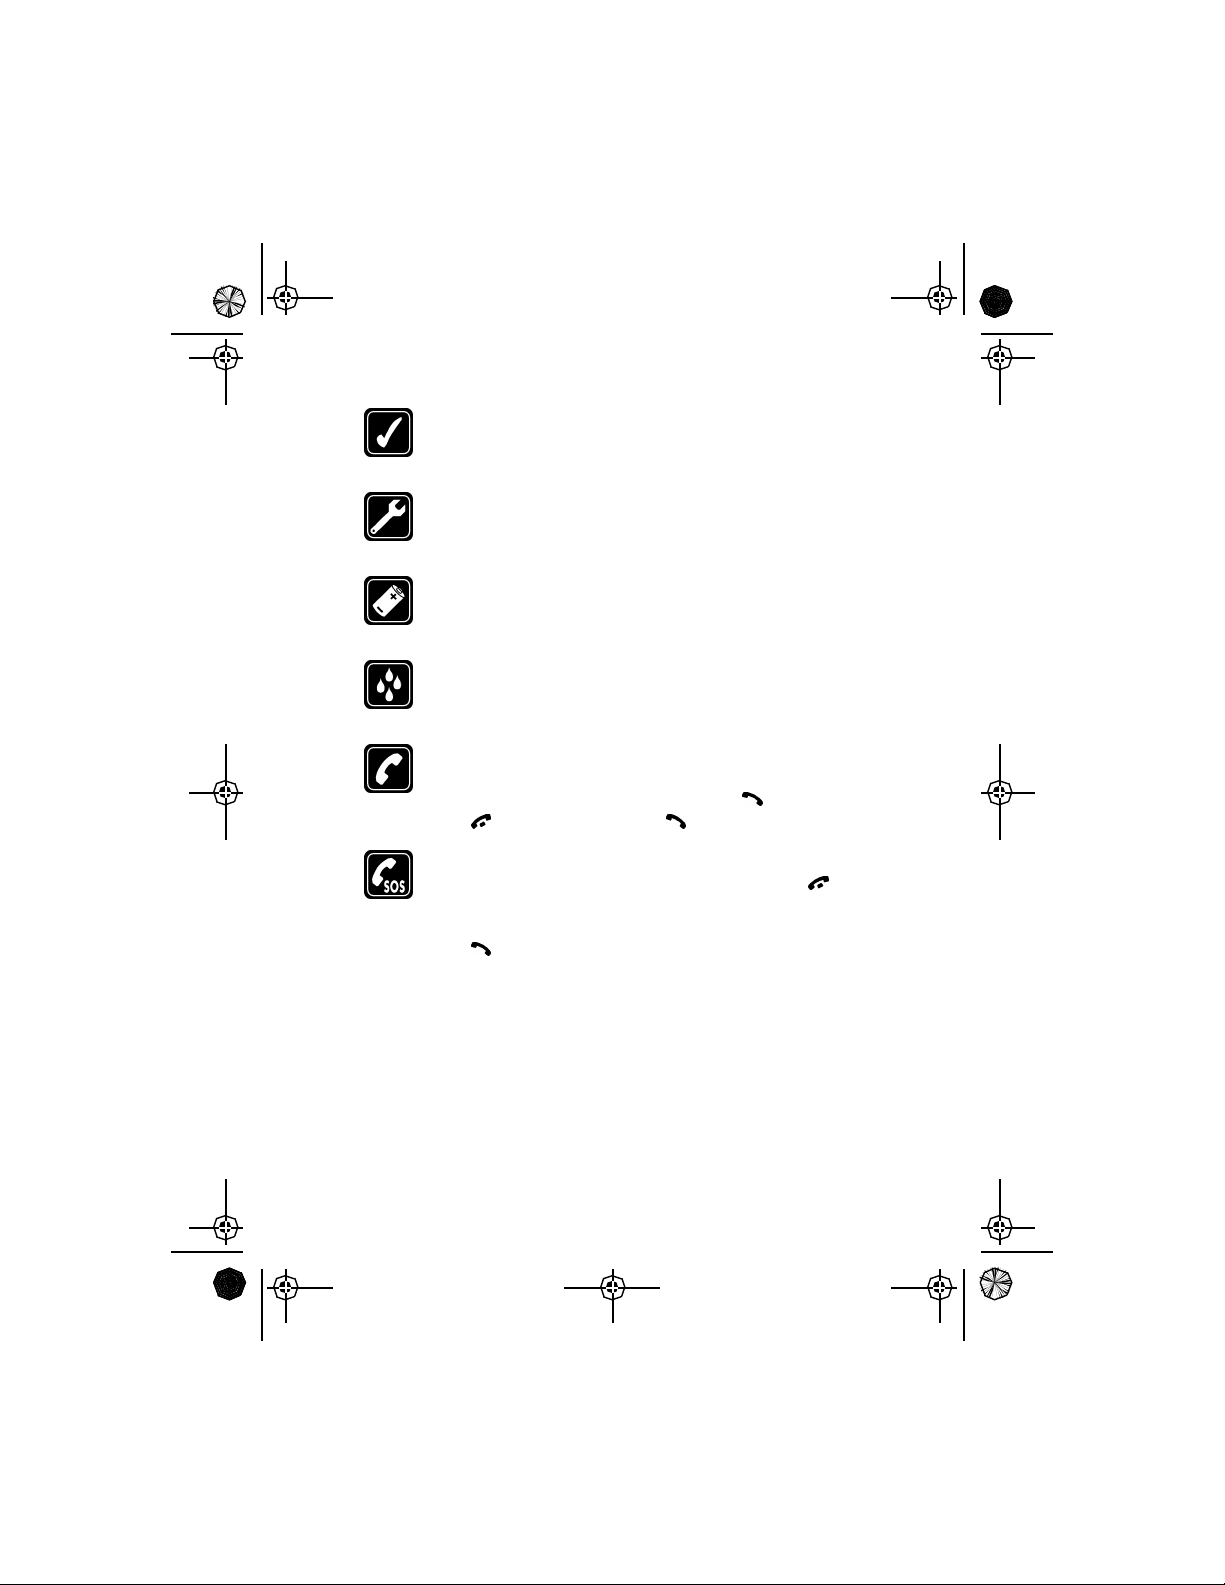
Follow graphic clues
This guide uses the following icons to alert you to important information.
Tip: Provides information about a quick way or an alternate
method for performing an action.
Note: Explains a feature or points out an important concept.
Important: Alerts you to information critical to using a feature
correctly.
Caution: Warns you when you may lose information.
Warning: Helps you avoid personal injury, damage to the phone,
or property damage.
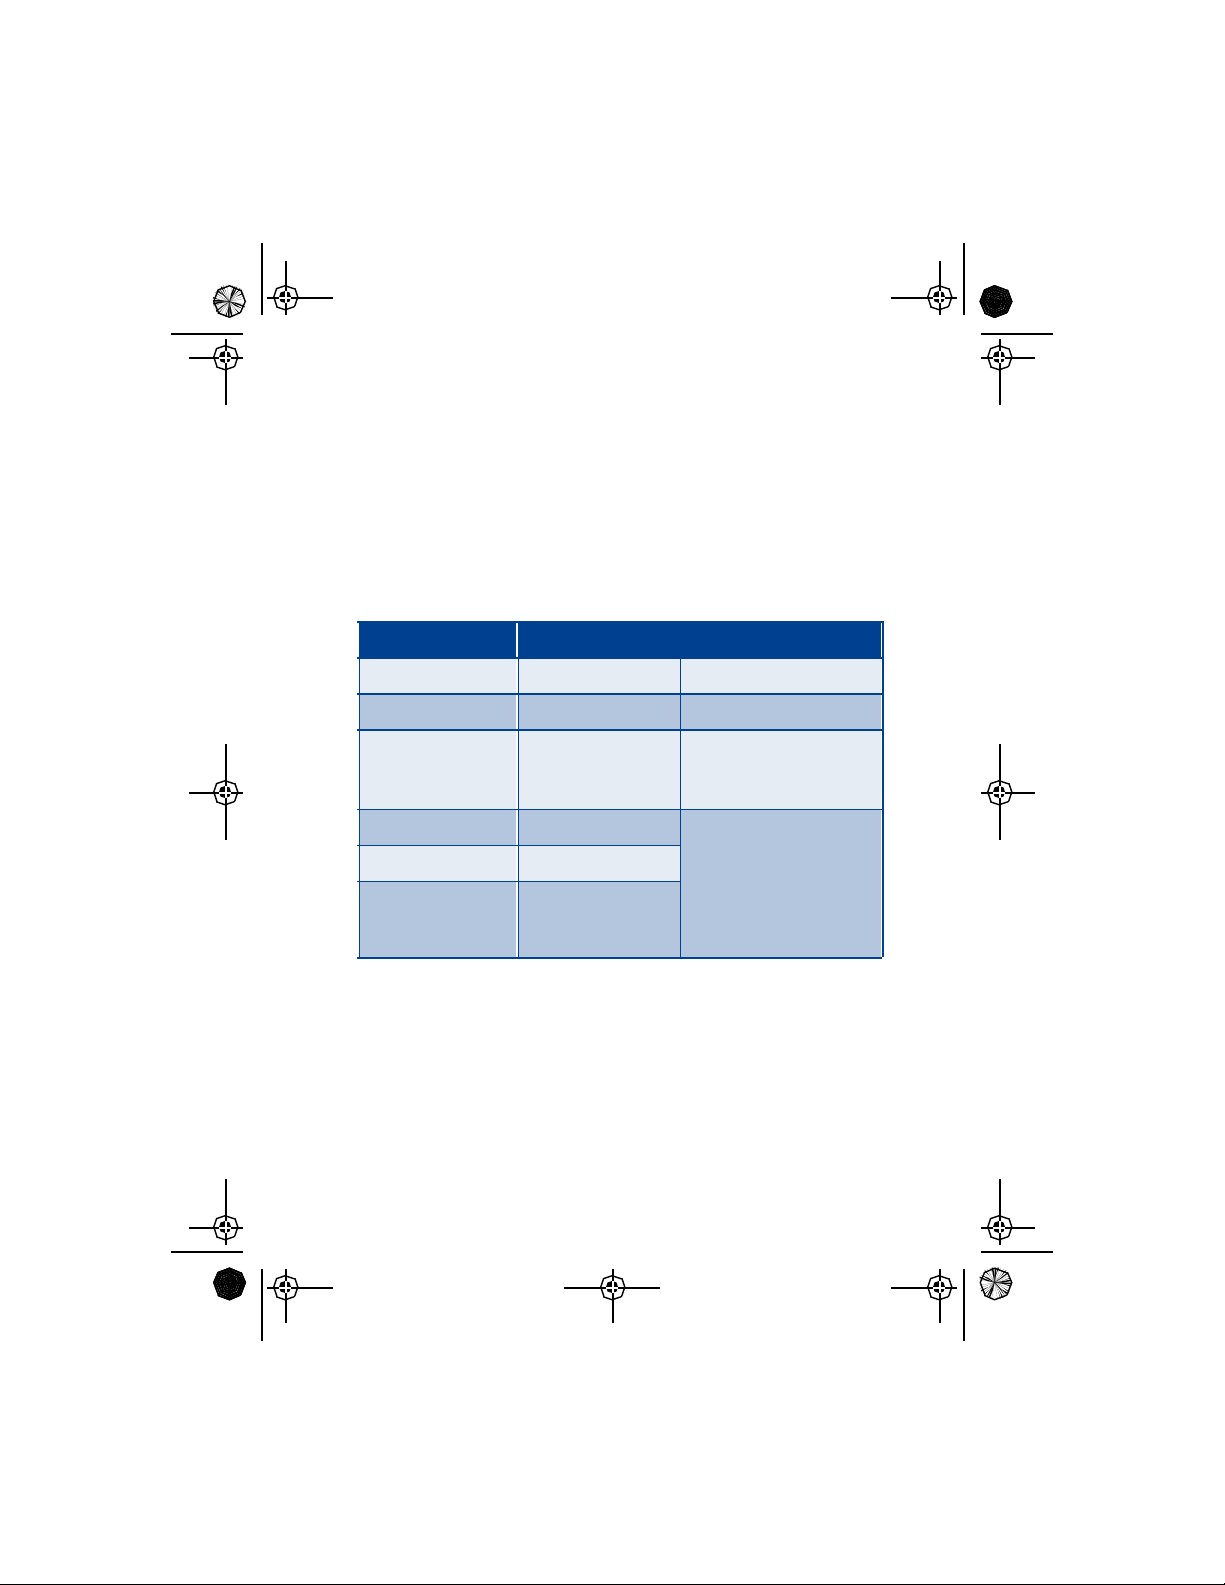
Learn text conventions
This user guide provides text clues to help make instructions clear and
easy to follow. These clues are called conventions.
Convention What it means
bold Indicates one of the following items:
• The word or phrase appears on the phone’s
screen.
• Special text such as Notes and Warnings.
bold and blue Indicates one of the following items:
• The word is an address on the World Wide
Web.
• A definition for the word or phrase appears
in the glossary.
italic Italics indicate emphasis. Pay close attention to any
information in italics.
[ 4 ]
Page 11
EN1220.2_Sept_02.book Page 5 Friday, September 6, 2002 2:19 PM
Access alternate formats
To request a user guide in one of the following alternate formats, call the
Nokia Customer Care Center:
• Braille
• Large print
• Audiocassette
• E-text (3.5-inch disk in Microsoft Word or WordPerfect)
Nokia Customer Care Center, USA TTY/TDD Users Only
Welcome and quick guide
Tel: 1-888-NOKIA-2U
(1-888-665-4228)
Fax: 1-813-249-9619
Note: Alternate format user guides are available in English.
Tel: 1-800-24-NOKIA
(1-888-246-6542)
Look for updates
From time to time, Nokia may update this user guide to reflect changes
or corrections. The latest version may be available at the Nokia site on the
internet at
www.nokia.com
An interactive user guide that provides step-by-step instructions for any
of your phone features is available at
www.nokiahowto.com
[ 5 ]
Page 12
EN1220.2_Sept_02.book Page 6 Friday, September 6, 2002 2:19 PM
• UNDERSTAND WIRELESS NETWORK SERVICES
A number of features included in this guide are called Network Services.
These are special services you arrange through your wireless service
provider. Before you can take advantage of any of these Network Services,
you must subscribe to them through your service provider and obtain
instructions for their use from your service provider.
Note: Some networks may not support all language-dependent
characters and/or services.
Network services for your Nokia phone include:
• Voice mail and voice privacy
• Call waiting, call forwarding and caller ID
• Text and picture messages
• Ability to send your own number
Sign up with a service provider
Before you can use any network services, you must sign up with a wireless
service provider. Your service provider will supply descriptions of special
features and instructions for using their services.
• REGISTER YOUR PHONE
Make sure to register your phone at www.warranty.nokiausa.com or
1-888-NOKIA-2U (1-888-665-4228) so that we can serve your needs
better if you should need to call the center or have your phone repaired.
• E-NEWSLETTERS
When you register your phone, you can sign up for Nokia's e-newsletter
Nokia Connections if you would like. You will receive tips and tricks on
using your phone, accessory information, and special offers.
[ 6 ]
Page 13
EN1220.2_Sept_02.book Page 7 Friday, September 6, 2002 2:19 PM
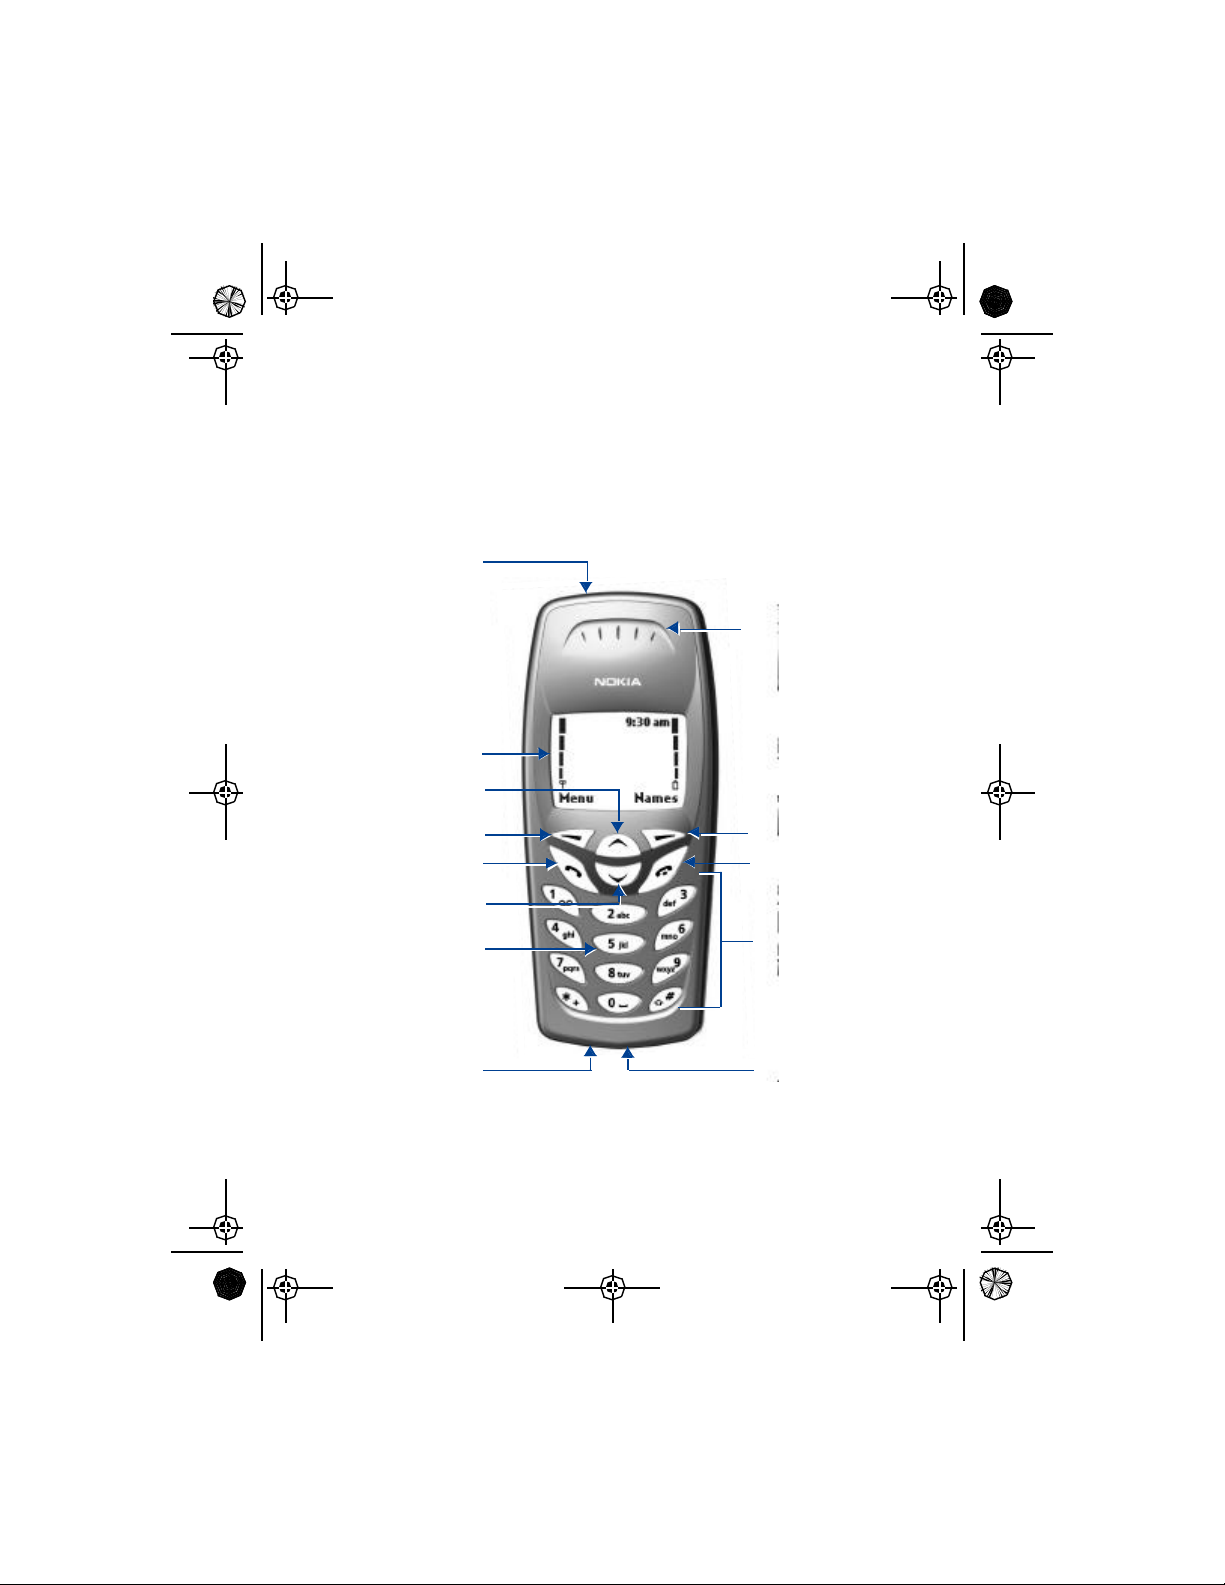
• UNDERSTAND YOUR PHONE
This section offers an illustrated view of your phone to help familiarize
you with its keypad, connection port and power key.
Power key
Screen
Up scroll key
Welcome and quick guide
Earpiece
Left selection key
Talk key
Down scroll key
Nibs key
Connection port
Right selectionkey
End key
Keypad
Microphone
[ 7 ]
Page 14
2
EN1220.2_Sept_02.book Page 8 Friday, September 6, 2002 2:19 PM
Use the antenna
Tip: Your phone has a built-in antenna. As
with any other radio transmitting device,
do not touch the antenna unnecessarily
when the phone is switched on.
Contact with the antenna
affects call quality and may cause the phone to
operate at a higher power level than otherwise
needed.
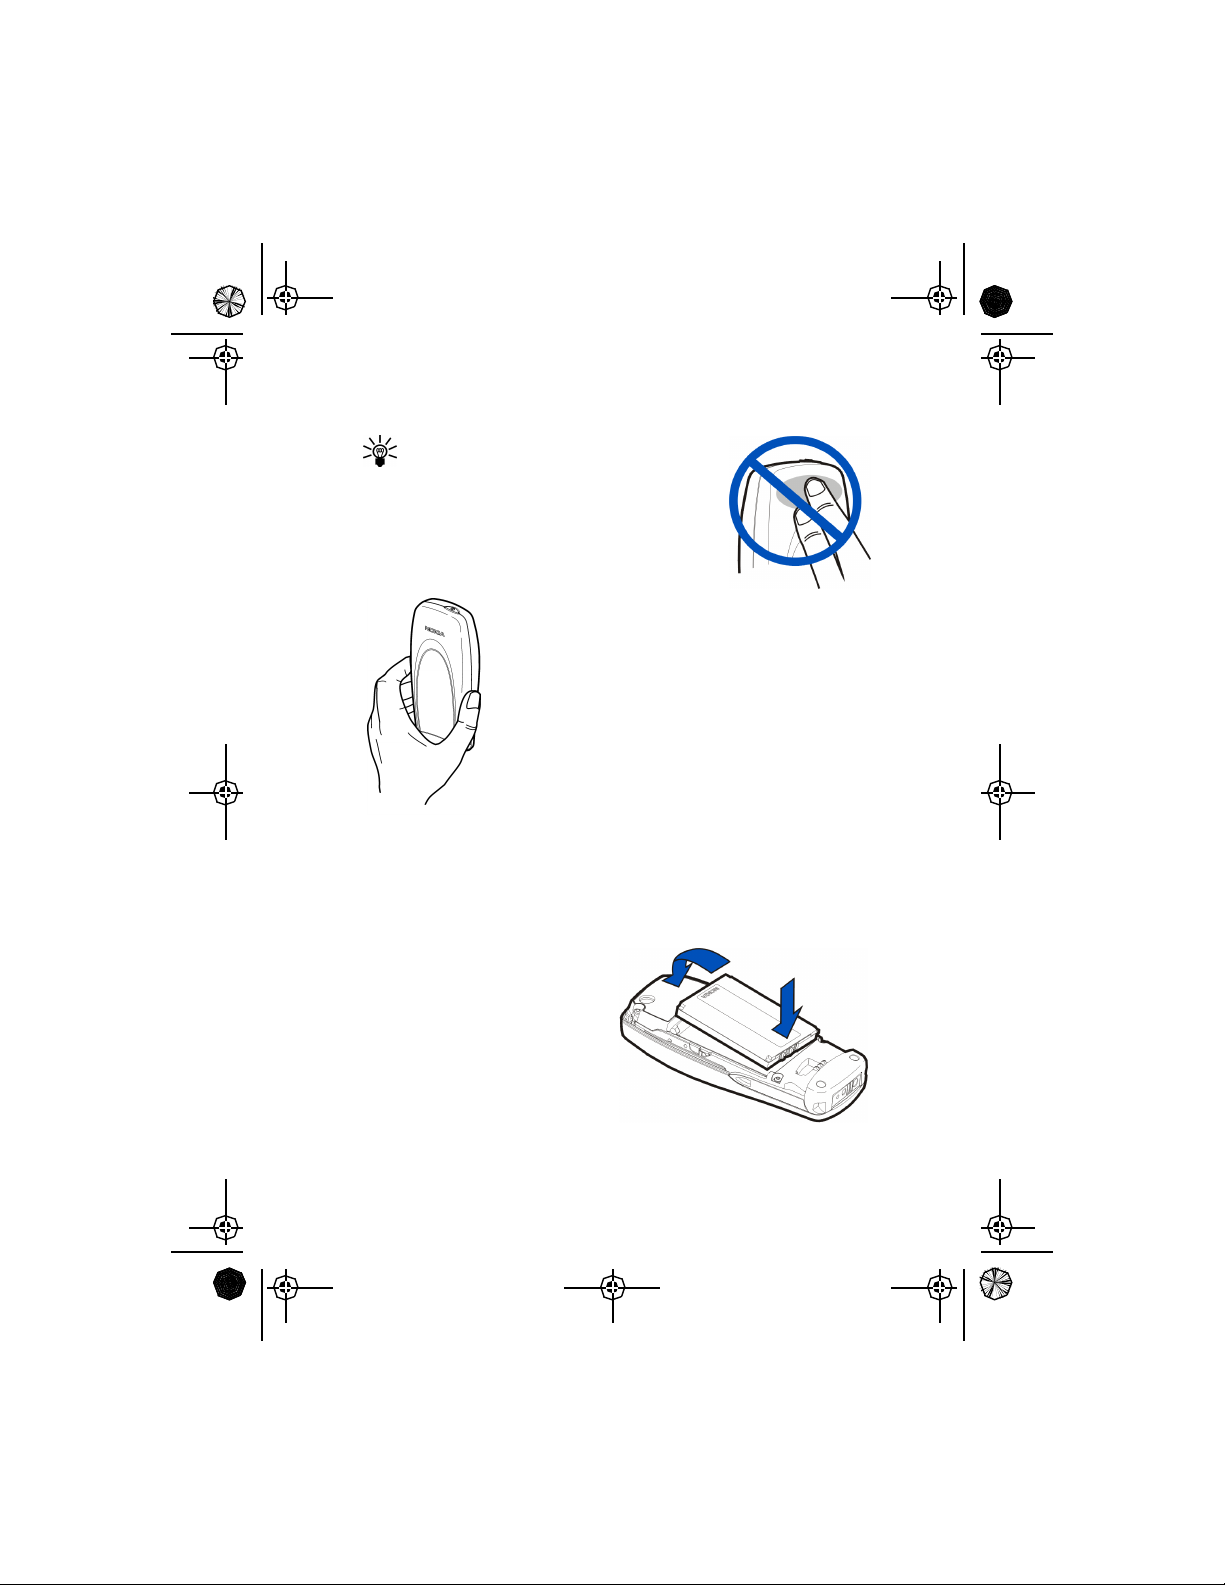
Not touching the antenna area during a phone call
optimizes the antenna performance and the talk-time
of your phone. Normal position: Hold the phone as you
would any other telephone with the antenna pointed
up and over your shoulder.
Install and remove the battery
This section tells you how to install and remove the battery. You will need
to remove the battery when replacing it, or to view the phone’s label
(located under the battery).
INSTALL THE BATTERY
1 Place the battery in the
compartment with the label
side facing up and the golden
contact area of the battery
aligned with the contact
prongs inside the phone.
2 Press down on the battery
until it snaps into place.
1
[ 8 ]
Page 15
EN1220.2_Sept_02.book Page 9 Friday, September 6, 2002 2:19 PM
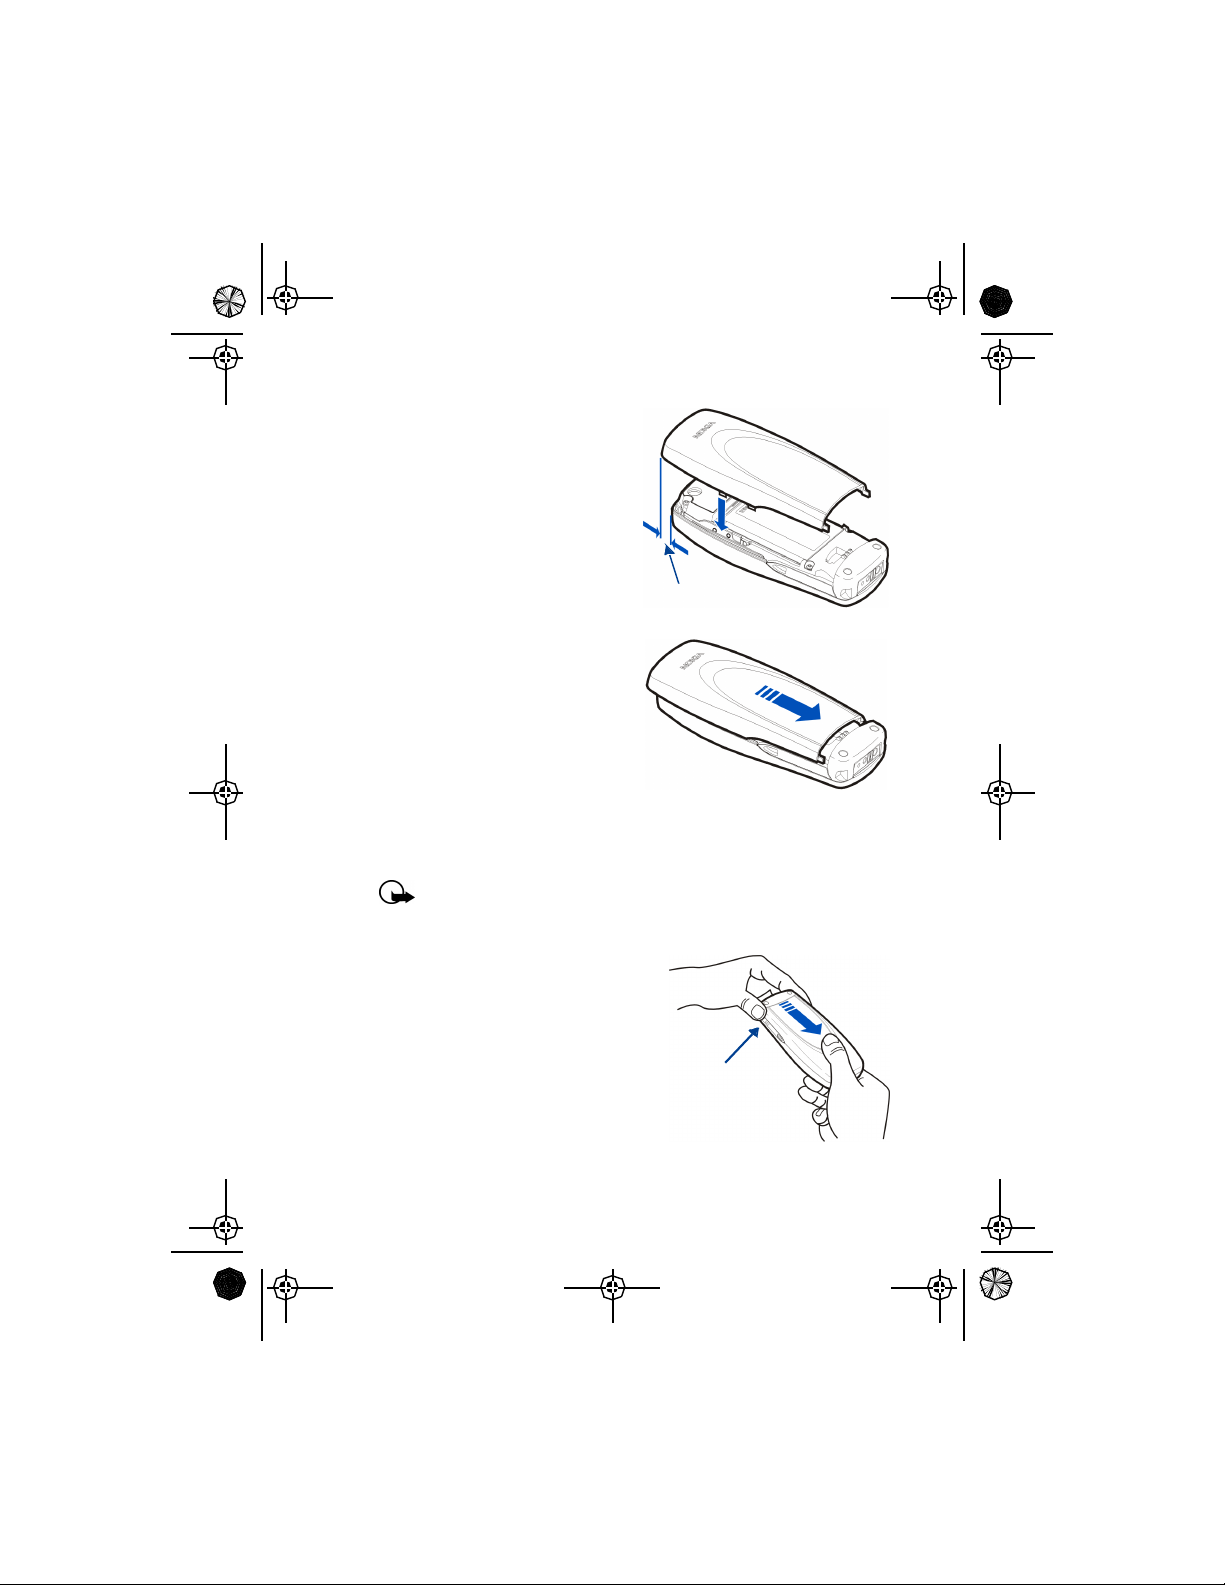
3 Align the cover over the back
of the phone, placing the end
of the cover approximately 1/4
inch past the end of the phone.
Lower the back cover onto the
phone.
1/4 inch
4 Press down slightly and slide
the cover until it locks into
place.
REMOVE THE BATTERY
If you purchase a new battery or need to access information on the
phone’s label, you may need to remove the battery.
Important: Dispose of batteries according to applicable local
regulations (for example, recycling). Do not dispose as household
waste.
1 Hold the phone with the back
facing you. At the bottom corners
of the phone, press the battery
cover with your thumb and
forefinger.
2 Place the thumb of your other
hand in the grove, approximately 1
inch from the top of the phone.
Apply pressure with the thumb
and slide the back cover toward you to release it, then remove it.
Welcome and quick guide
[ 9 ]
Page 16
EN1220.2_Sept_02.book Page 10 Friday, September 6, 2002 2:19 PM
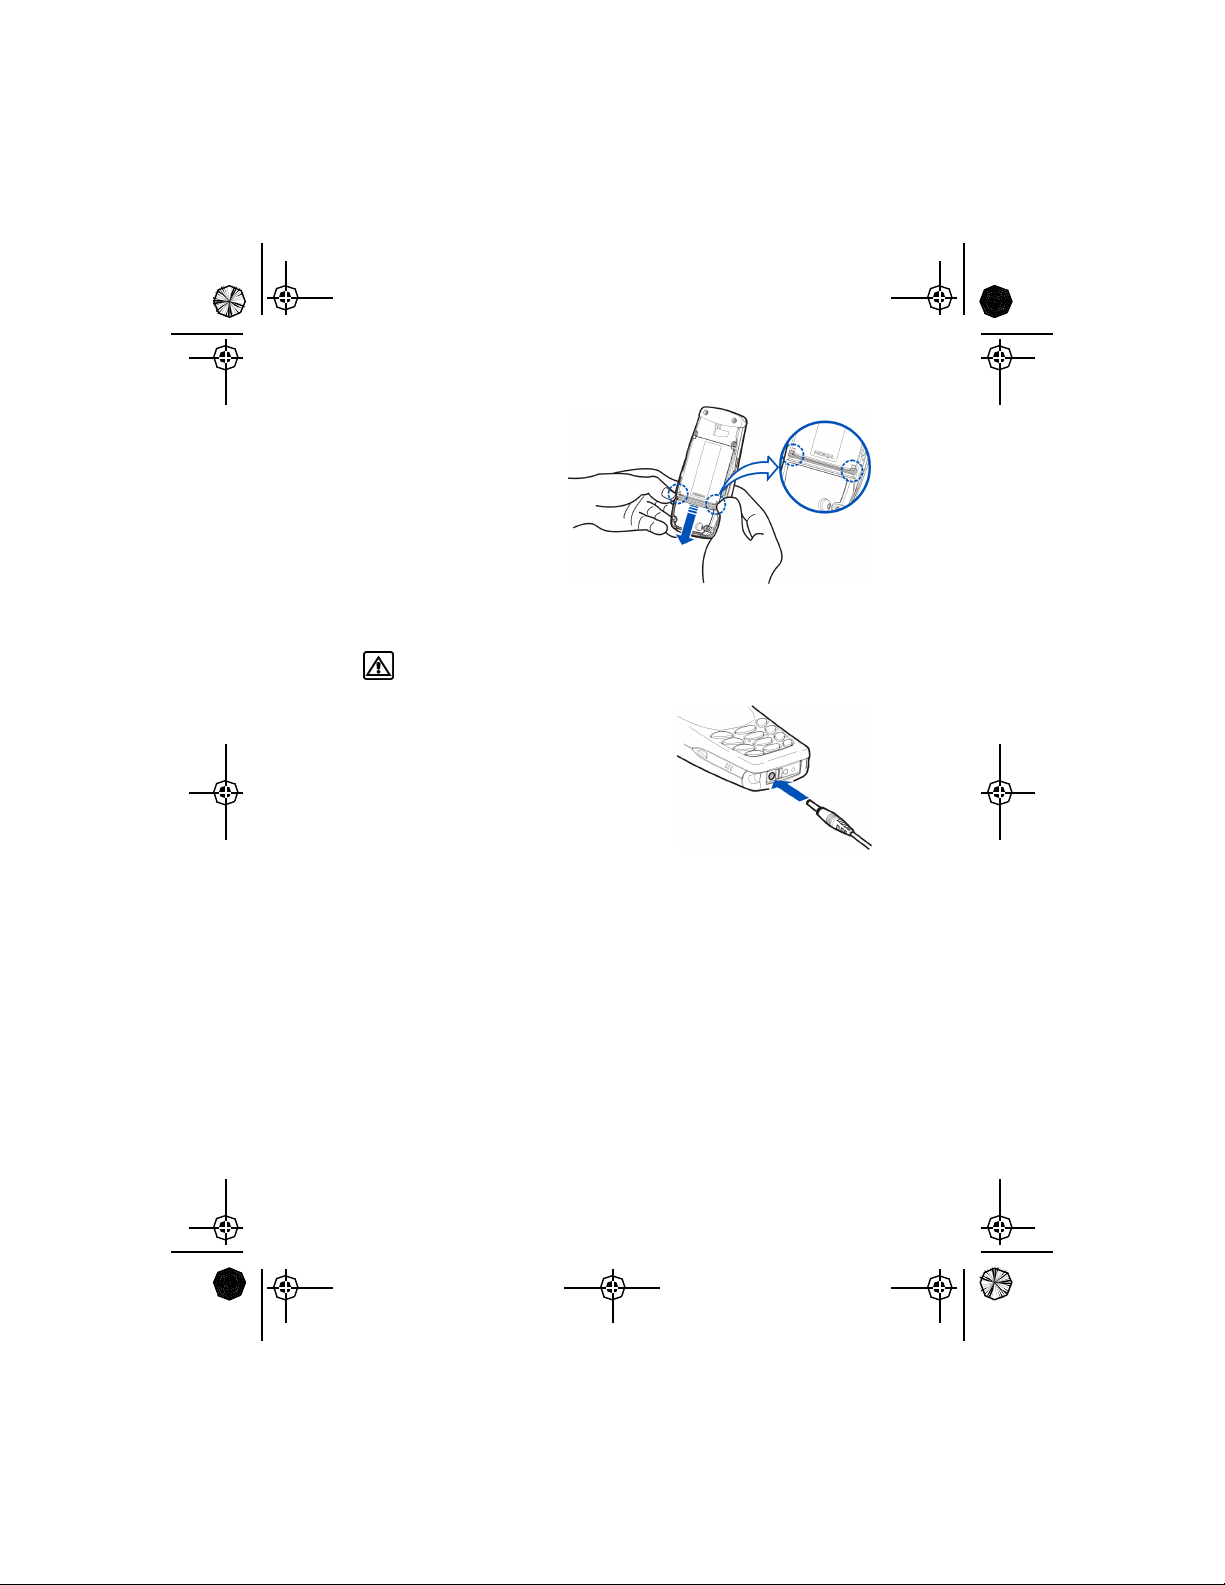
3 Look for the battery latch
that runs along the end of
the battery nearest the
top of the phone.
4 Place your thumbs on the
corners of the latch and
press away from the
battery.
5 Once the battery is released from the latch, it will lift slightly so that
it can be removed from the phone.
Warning: Use only your hands to remove the battery. Do not use
any objects that may damage the phone or the battery.
Charge the battery
Before you begin, you need to prepare your
phone by charging the battery.
1 Plug the charger into a standard wall
outlet, then connect the lead from the
charger to the bottom of the phone.
2 The battery power indicator (or battery
bar) appears on the screen and starts scrolling. If the phone is on,
Charging appears also.
3 When the battery bar stops scrolling, the battery charge is complete.
Battery full appears also, if the phone is on.
4 Disconnect the charger from the phone.
[ 10 ]
Page 17
EN1220.2_Sept_02.book Page 11 Friday, September 6, 2002 2:19 PM
IMPORTANT BATTERY INFORMATION
Use the following guidelines to obtain the best performance from your
battery:
• With your phone turned off, charge your new battery for three hours
before its first use. Use the battery until it is fully discharged. Repeat
this procedure twice for a total of three charging cycles.
• Battery operation time may be less than the estimated times during
the first charges. This condition is normal.
• If the battery is fully discharged, the scrolling bars may not appear
immediately when charging.
• After the first charge, you can make and receive calls during the
charging cycle, but the calls interrupt the charge. When the phone
call ends, the charge will resume.
• The bars on the screen stop scrolling and remain constant when the
phone is charged. If you leave the phone connected to the charger,
the battery receives an additional charge.
Note: The battery will accept a “trickle charge” for an additional
two hours. See “Reference information” on page97 for more
information on batteries.
• Charging time depends on the charger and battery used. See “Batteries”
on page107 for charging, talk, and standby times.
Welcome and quick guide
PROLONG BATTERY LIFE
For good operation times with NiMH batteries, discharge the battery from
time to time by leaving your phone switched on until it turns itself off.
Ignore any messages to recharge your battery and let the battery
completely discharge.
Important: Do not attempt to discharge the battery by any other
means.
[ 11 ]
Page 18
EN1220.2_Sept_02.book Page 12 Friday, September 6, 2002 2:19 PM
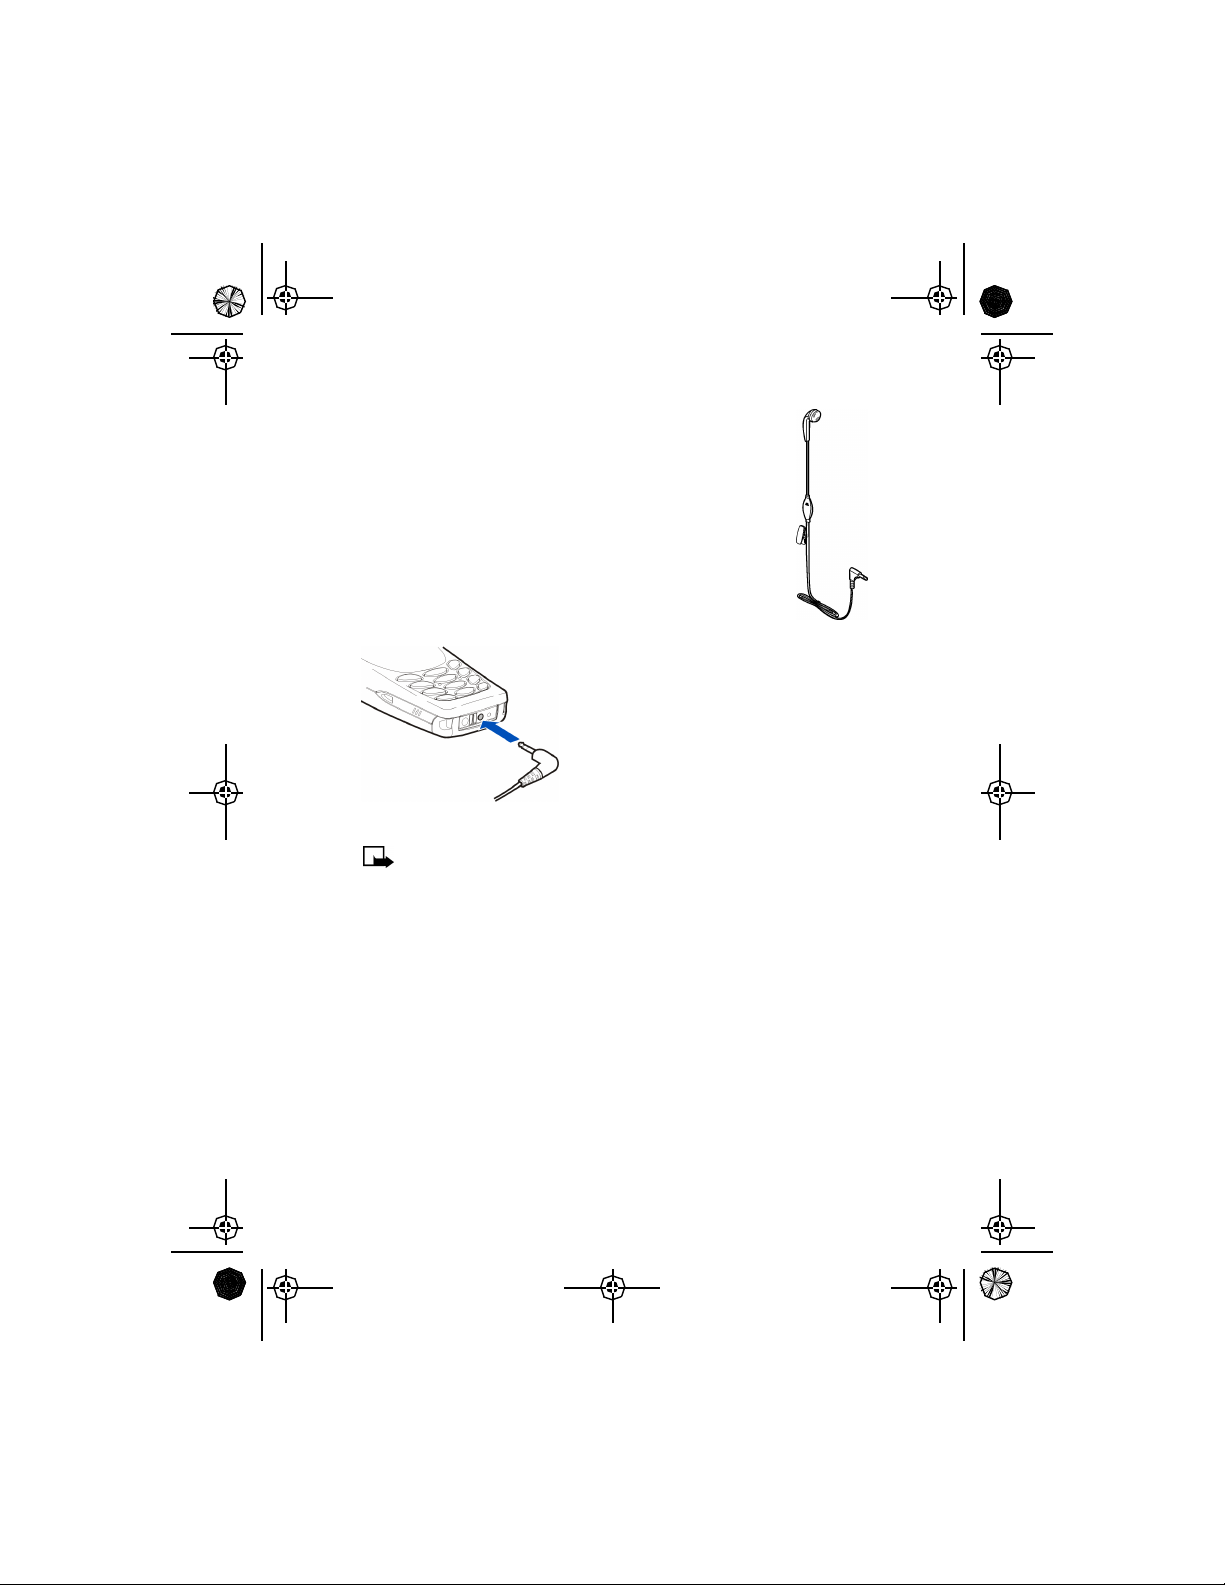
• SET UP YOUR HEADSET
Your phone is compatible with the HDC-5, HDE-2 and HDB5 headsets. The headset provides convenient handsfree use of
the phone.
Connect the headset
1 Plug the headset jack into the bottom of your phone.
2 Put the round ear plug into one ear.
Use the headset
With the headset connected, you can make
and answer calls as usual.
The microphone for the headset hangs at
the side of your head. Although the
microphone may seem far from your
mouth, you can speak at a normal volume.
Note: You can set your phone to answer automatically when the
headset is connected. See “Automatic answer” on page64 for more
information.
[ 12 ]
Page 19
EN1220.2_Sept_02.book Page 13 Friday, September 6, 2002 2:19 PM
Welcome and quick guide
• GET STARTED WITH THE QUICK GUIDE
Make a call Enter phone number, press .
Answer a call Press or Answer.
Answer with call waiting Press .
End a call Press .
Silence a call Press .
Redial Press twice.
Adjust call volume During a call, press for louder
Use the in-call menu In a call, press Options.
Use 1-touch dialing Press and hold one of keys 2 through 9.
Save a name and number Enter a number, press Save, then enter a name and press
Retrieve a name/number Press Names, select Find .
Retrieve a name/number
during a call
Check voice mail Press and hold or call your voice mailbox number.
Send a text message Press Menu 1-1. Write the message. Press Options (Send
Send an e-mail message Press Menu 1-2. Enter the recipient’s address, press OK,
Read new message Press Read . If you have more than one message, scroll to
Reply to a message Press Options, scroll to Reply, then press Select .
Reply to an E-mail
message
Send a business card Retrieve a name from the phone book, press Options,
or for softer.
OK .
Press Options, scroll New call, press Select, press Find,
enter first letter of the name.
will be the first option), then press Select,
enter the recipient’s number, press Send.
enter the subject, press OK, write the message, press
Options, scroll to Send then press Select. (You may need
to enter the gateway number your service provider gave
you.)
the one you want, then press Read again.
When reading the message, press Options, scroll to Reply,
then press Select.
select Send bus. card, enter the recipient’s number, press
Send.
[ 13 ]
Page 20
EN1220.2_Sept_02.book Page 14 Friday, September 6, 2002 2:19 PM
• GET HELP
Find your phone’s label
When you call Nokia Customer Care Center or your service provider, you
will need to provide specific information about your phone. This
information is recorded on the phone’s type label. The type label is located
under the battery inside the phone’s back cover. It contains the model and
serial numbers as well as other important information about your phone.
Please do not remove or deface the label.
Contact Nokia
If you have a question and have already checked the Troubleshooting
section (see page122), we recommend that you have the following
information available before contacting the Nokia Customer Care Center
or the service provider:
• Your phone’s model number
• ESN (Electronic serial number – located on the label under the
battery)
• Your billing address ZIP code
• The phone or accessory in question
Nokia Customer Care Center, USA
Nokia Mobile Phones
7725 Woodland Center Blvd.
Suite #150
Tampa, Florida 33614
Tel:1-888-NOKIA-2U
(1-888-665-4228)
Fax: 1-813-249-9619
For TTY users: 1-800-24-NOKIA
(1-800-246-6542)
[ 14 ]
Customer Interaction Centre,
Canada
Nokia Products Ltd.
601 Westney Road South
Ajax, Ontario L1S 4N7
Tel: 1-888-22-NOKIA
(1-888-226-6542)
Fax: 1-905-427-1070
Web site: www.nokia.ca
Page 21
EN1220.2_Sept_02.book Page 15 Friday, September 6, 2002 2:19 PM
Contact your service provider
You may want to save your service provider’s customer support telephone
number into your phone. This will let you easily contact your provider if
you have questions or issues with your phone service.
Receive accessibility information
Nokia is committed to making mobile phones easy to use for all
individuals, including those with disabilities. Nokia maintains an internet
site that is dedicated to accessibility solutions. For more information
about phone features, accessories and other Nokia products designed
with your needs in mind, visit the web site at
www.nokiaaccessibility.com
ACCESSIBLE FEATURES
This Nokia phone has many accessible features, including:
• Nibs under the five key for quick reference to the keypad
• Tactile feedback when you press a key
• Ability to send and receive short text and e-mail messages
• Convenience of 1-touch dialing
• Customizable ring tones
LPS-3 MOBILE INDUCTIVE LOOPSET
The LPS-3 Loopset is a Nokia accessory designed to make the phone more
accessible to hearing-aid users. The loopset gives hearing-impaired users
clear access to digital telephony for the first time. It allows people with
T-coil equipped hearing aids to make and receive calls without noise
interference.
To activate the Loopset, see “Accessory settings” on page63.
Note: The Loopset is sold as an accessory to the phone.
Welcome and quick guide
[ 15 ]
Page 22
EN1220.2_Sept_02.book Page 16 Friday, September 6, 2002 2:19 PM
HOW THE LOOPSET WORKS
The LPS-3 Loopset uses inductive technology
to transmit sound to a hearing aid equipped
with a T-coil. The sound from the phone is
amplified more efficiently and background
noise is eliminated.
The loopset is easy to use. You wear the
loopset around your neck, connect it to your
phone, and speak directly toward the
microphone. For detailed instructions on
using the loopset, refer to the booklet that
comes with the LPS-3.
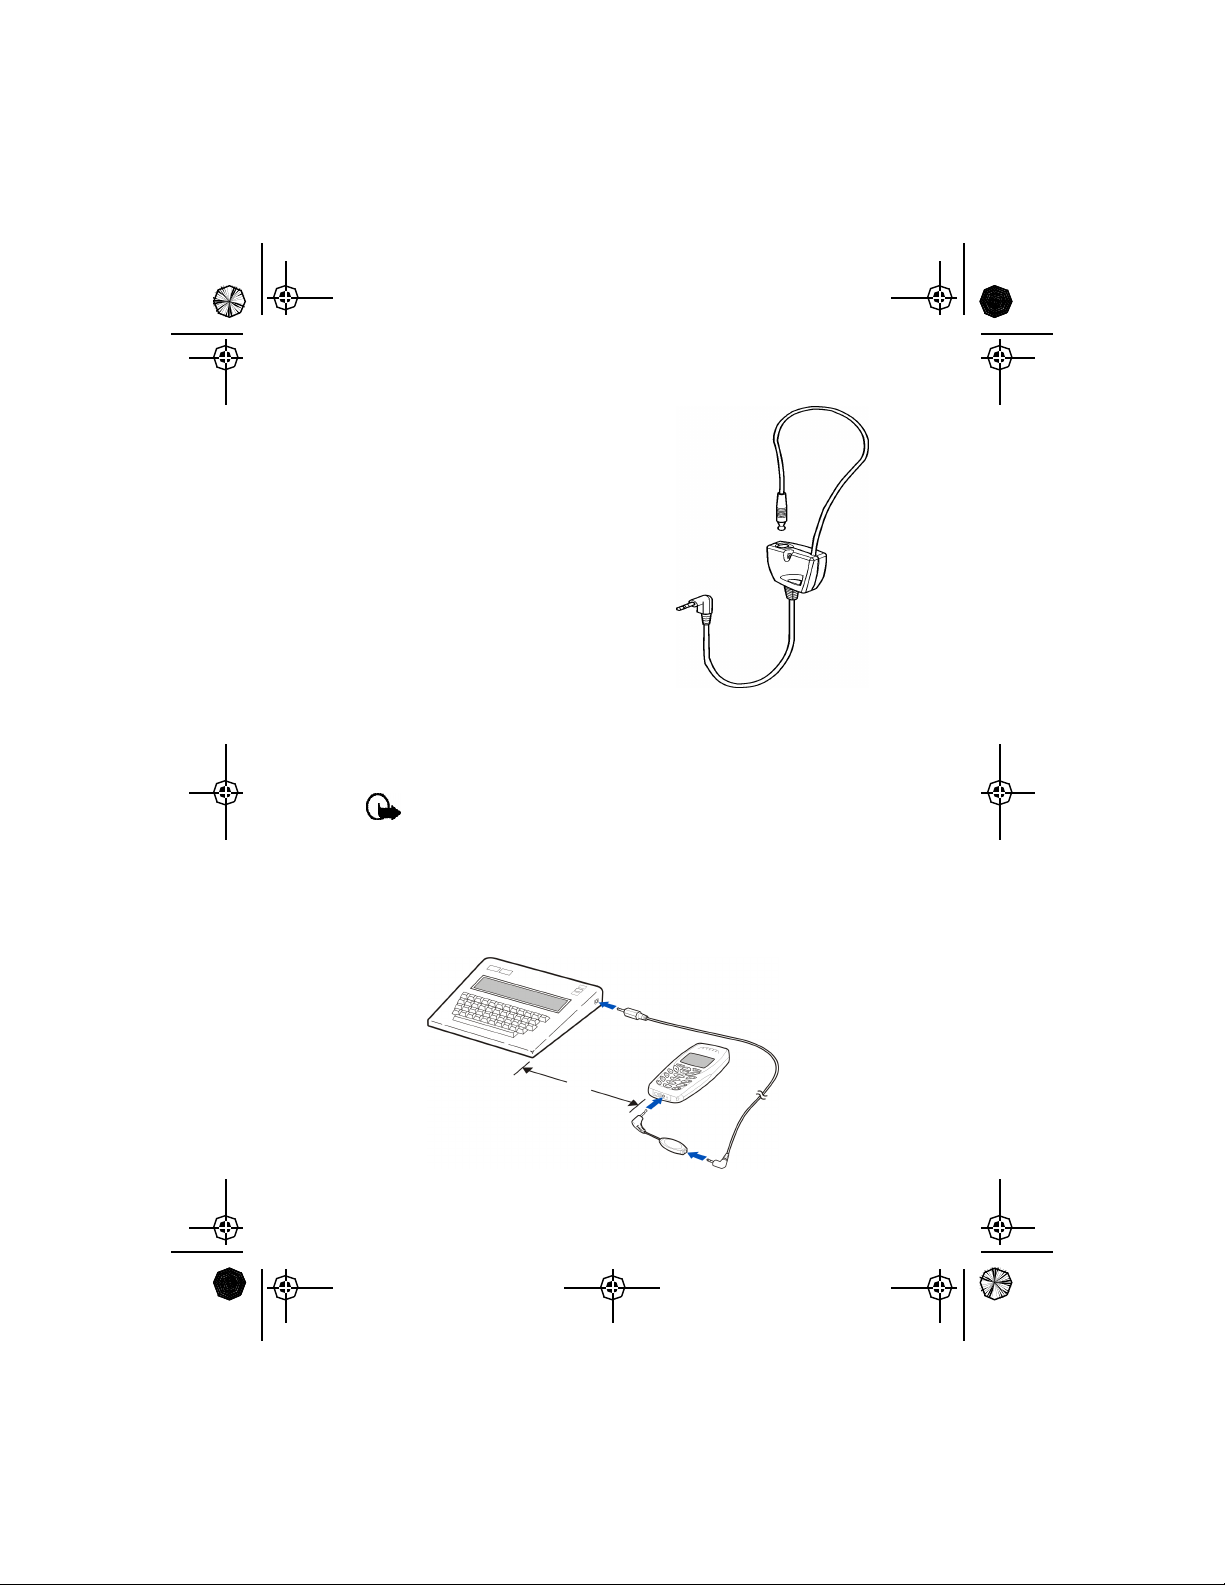
Set up the TTY/TDD profile
You can connect your phone to a TTY/TDD using the Nokia TTY/TDD
Adapter (HDA-9). In order for your phone to recognize the TTY/TDD, you’ll
need to connect the adapter to your phone..
Important: Some manufacturers of TTY/TDD devices suggest that
the phone be least 18 inches from the TTY/TDD device. When
connecting to any other device, read its user guide or contact its
manufacturer for detailed instructions and safety information.
1 Connect the TTY/TDD via cable to the HDA-9 adapter.
2 Plug the HDA-9 adapter into the connector on the bottom of your
phone, as shown in the illustration.
18”
[ 16 ]
Page 23

EN1220.2_Sept_02.book Page 17 Friday, September 6, 2002 2:19 PM
3 Press Menu 4-4-4-1 (Settings > Accessory settings > TTY/TDD >
Use TTY).
4 Scroll to Yes, then press Select.
NOTES ABOUT TTY/TDD CALLS
• The Nokia TTY/TDD Adapter (HDA-9) is for use with compatible
TTY/TDD devices only. Check with the manufacturer of the TTY/TDD
device to ensure that the connection is compatible.
• Check with the manufacturer of the TTY/TDD device for the
connecting cable.
• TTY/TDD communications depend on network availability. Check with
your service provider for availability and description of services.
MAKE A TTY/TDD CALL
Tip: Before making a TTY/TDD call with your Nokia phone, check the
signal strength. See “Understand indicators and icons” on page21
for details.
1 From the Start screen, enter the number and press .
2 When the receiving party answers, begin typing your conversation on
the TTY/TDD.
RECEIVE A TTY/TDD CALL
1 Make sure the TTY/TDD device is connected to your phone.
2 Press to answer the call, then type your responses on the
TTY\TDD.
Welcome and quick guide
END A TTY/TDD CALL
Press .
[ 17 ]
Page 24
EN1220.2_Sept_02.book Page 18 Friday, September 6, 2002 2:19 PM
3 Basic operations
This section gives a brief introduction to the phone and shows quick steps
for:
• Making and answering calls
• Adjusting the earpiece volume
• Navigating through menus
• Using menu shortcuts
You will also find information about the phone’s icons and how to use in-
phone help. The rest of this guide provides complete details on phone use.
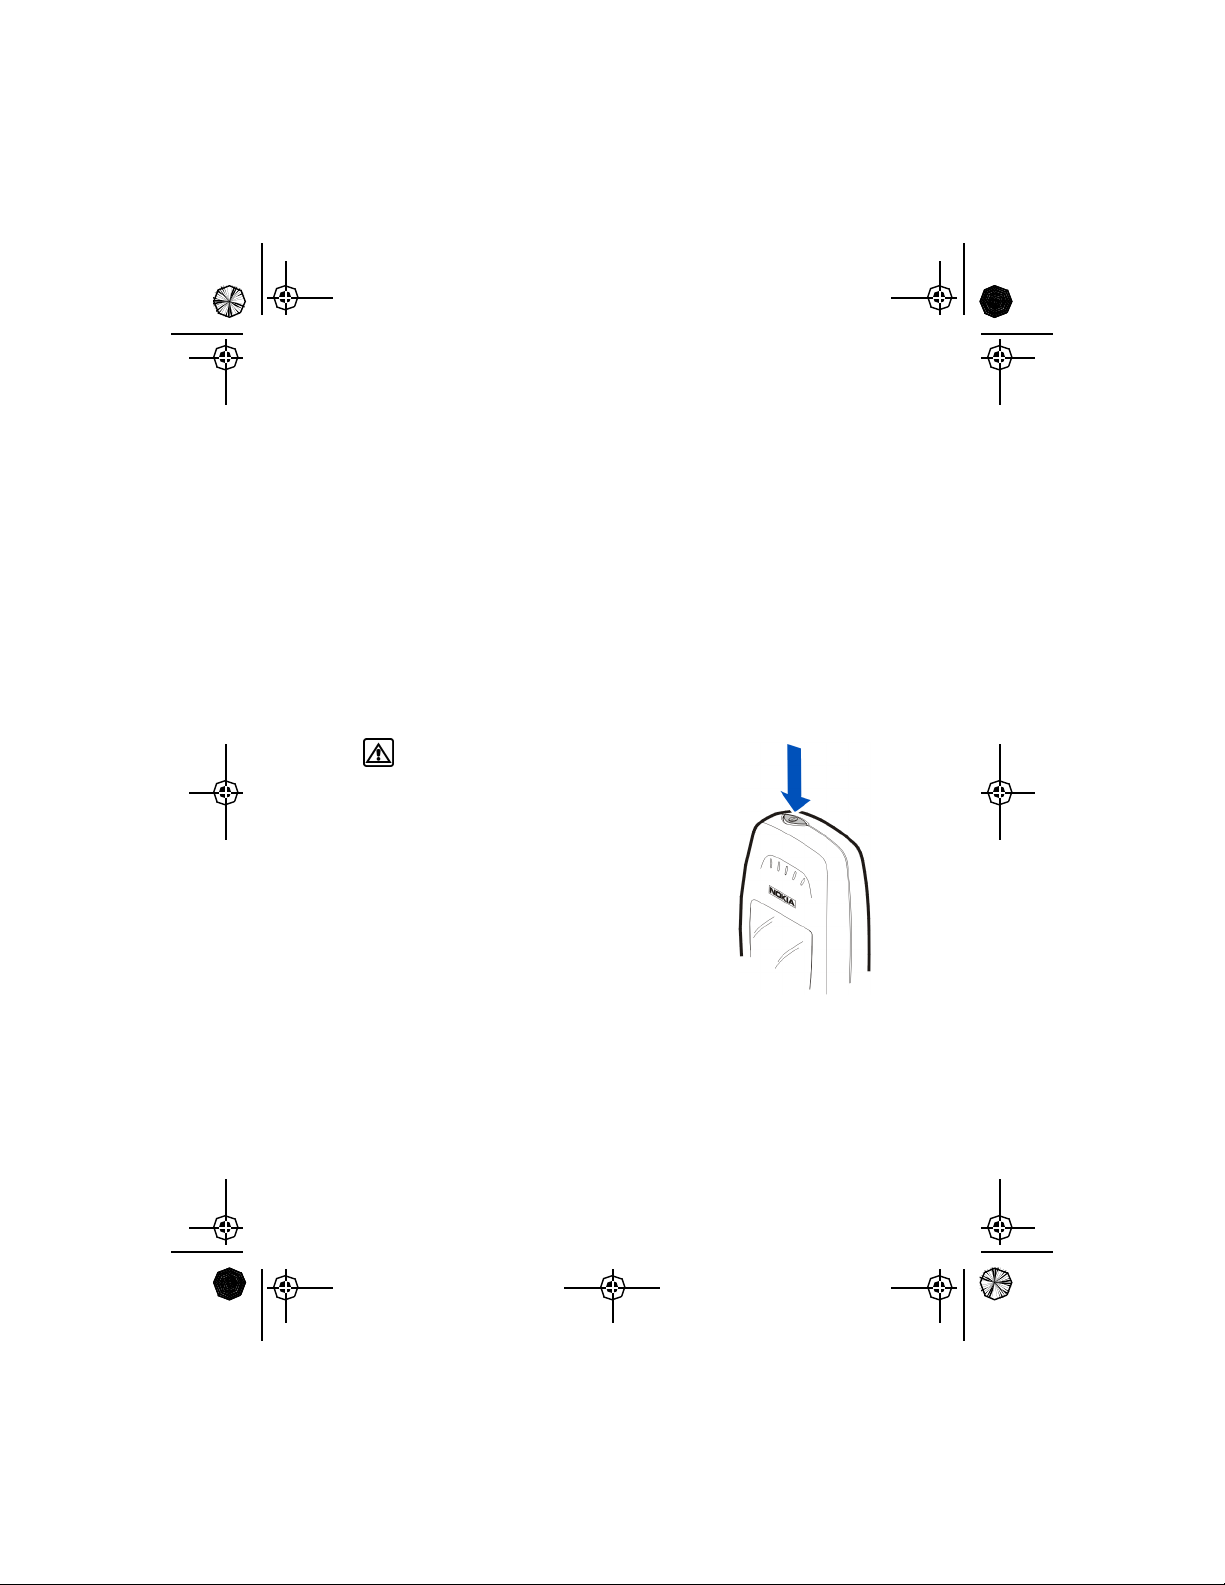
• SWITCH YOUR PHONE ON OR OFF
Warning: Do not switch on the phone when
wireless phone use is prohibited or when it
may cause interference or danger.
Switch ON your phone
Press and hold the power key for 2 seconds.
Power
key
Switch OFF your phone
Press and hold the power key.
Or, press the power key quickly. When Switch off!
is highlighted on the screen, press Select.
• MAKE AND ANSWER CALLS
There are several ways to make and answer calls on your phone. Once
learning about the basic methods, you will discover other tips throughout
this guide when reading about the phone’s features.
[ 18 ]
Page 25
EN1220.2_Sept_02.book Page 19 Friday, September 6, 2002 2:19 PM
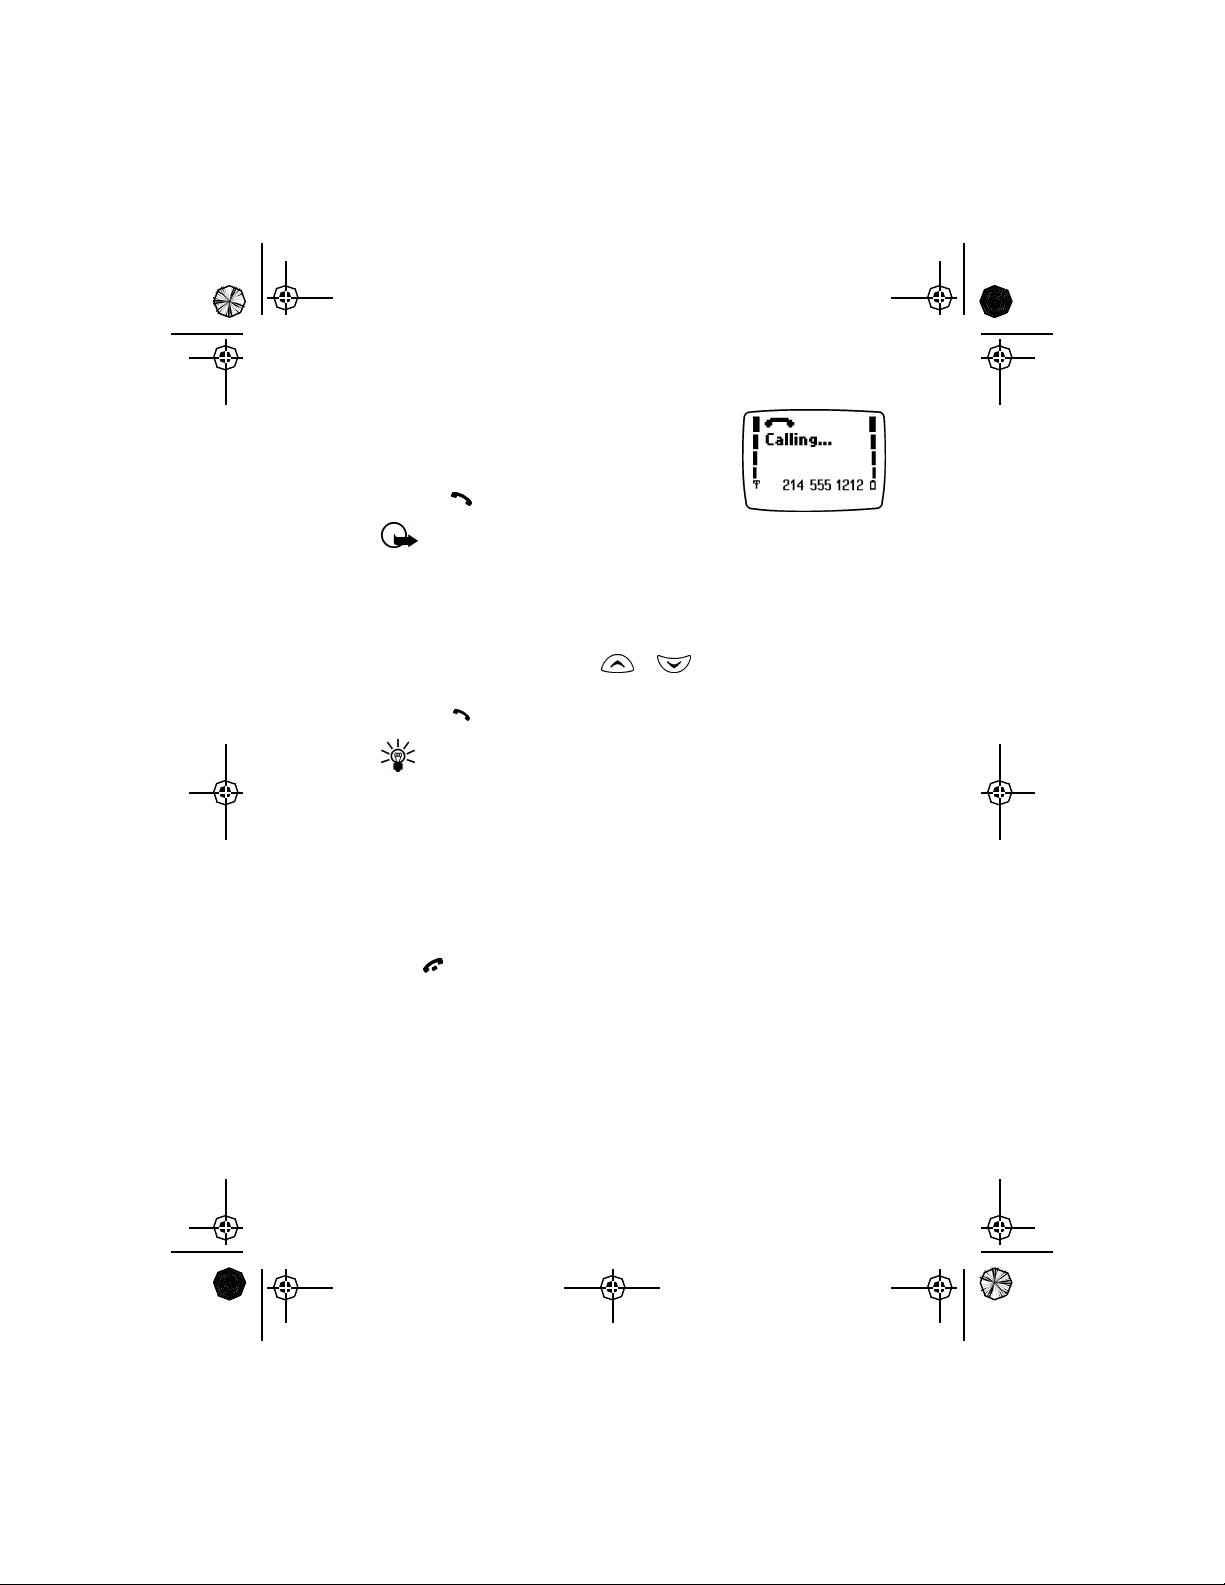
Use the keypad
1 Enter the phone number, including area code
if needed.
2 Press .
Important: Do not touch the antenna
when the phone is switched on. Contact with the antenna affects
call quality and may cause the phone to operate at a higher power
level than otherwise needed.
Use the phone book
1 From the Start screen, press or and scroll to the number you
want.
2 Press to make the call.
Tip: To skip ahead quickly in the list, press the number key that has
the first letter of the name. You may have to press the key more
than once to get to the correct letter.
Make a 1-touch dial call
Press and hold the key assigned to the number you wish to call.
To learn how to store a number for use with 1-touch dialing see “Assign
a key to 1-touch dialing” on page76.
Basic operations
End a call
Press to end the call or cancel the call attempt.
[ 19 ]
Page 26
EN1220.2_Sept_02.book Page 20 Friday, September 6, 2002 2:19 PM
Answer a call
When your phone rings, press . You can press any key to answer a call
except the power key, end key, or the scroll keys.
Note: If Keyguard is active, the keypad will unlock when you have
an incoming call.
Silence an incoming call
Press or Silent to mute the ringing of an incoming call.
Redial the last-dialed number
Press two times.
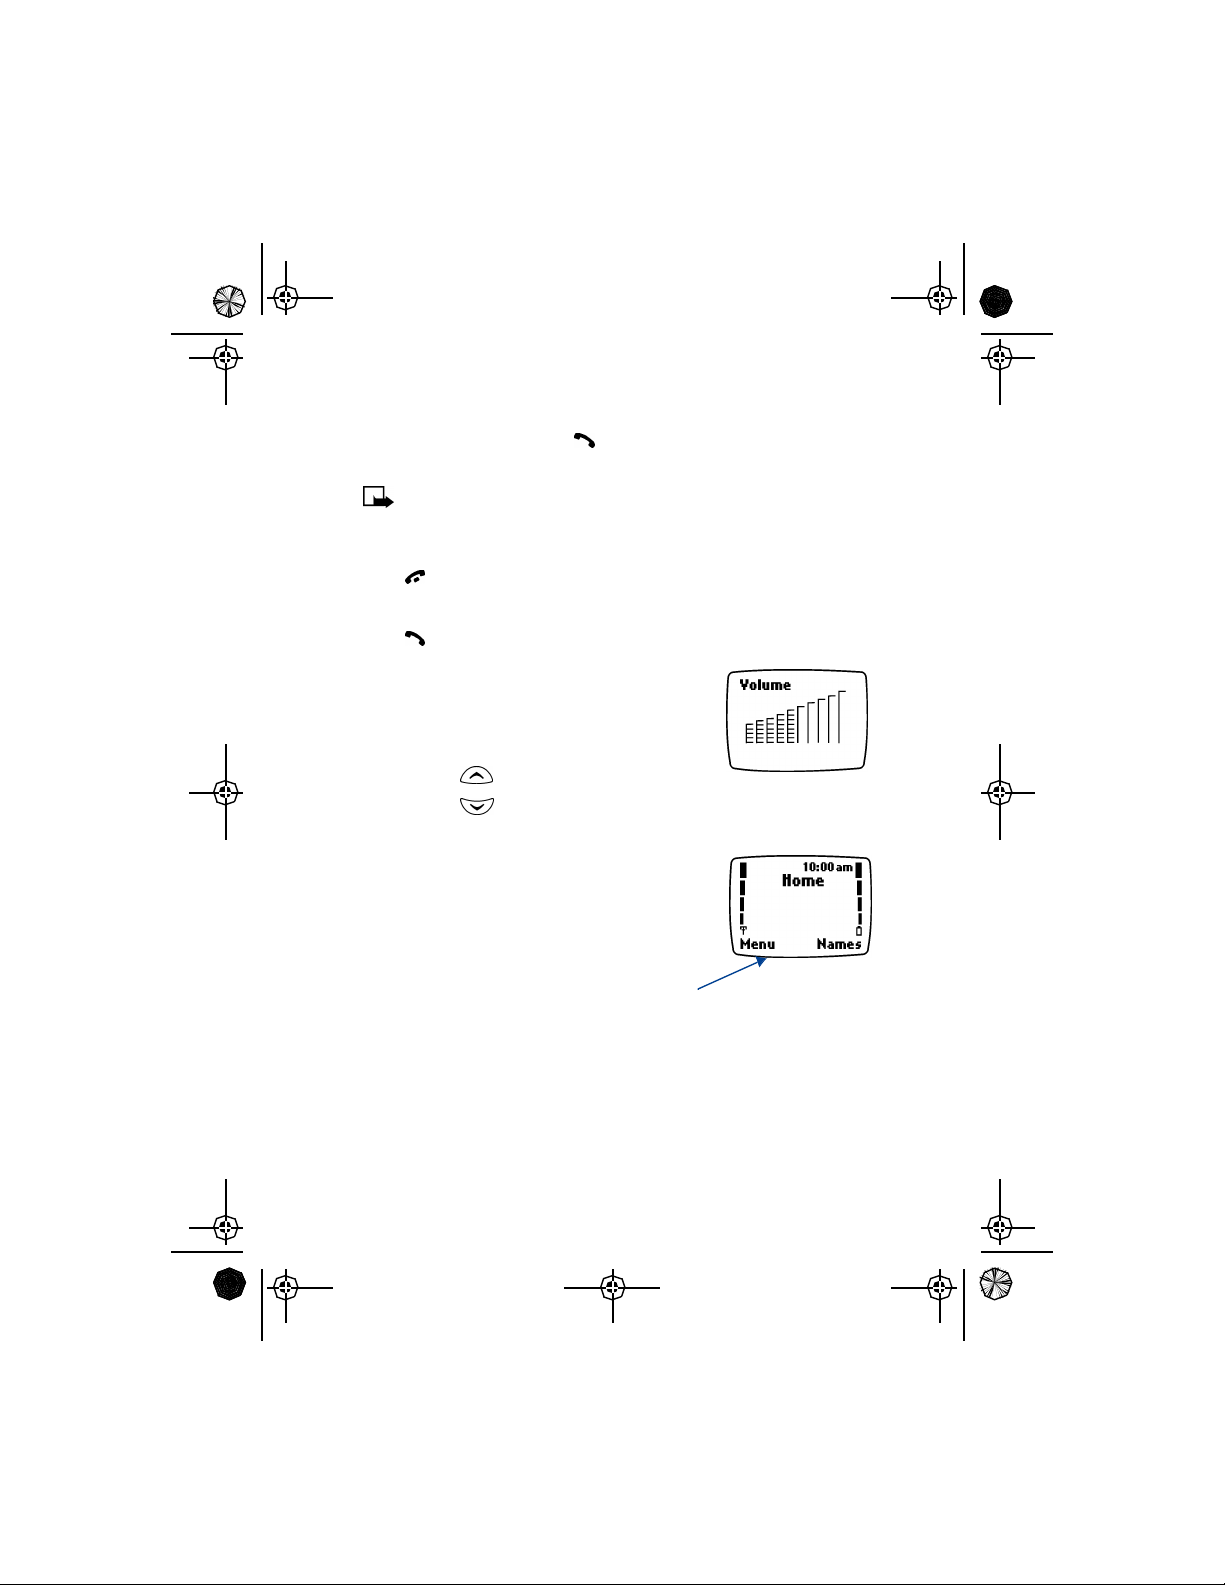
Adjust the earpiece volume
You can adjust the earpiece volume during a call
by pressing the scroll keys located just below the
screen.
• Press the key to increase the volume.
• Press the key to decrease the volume.
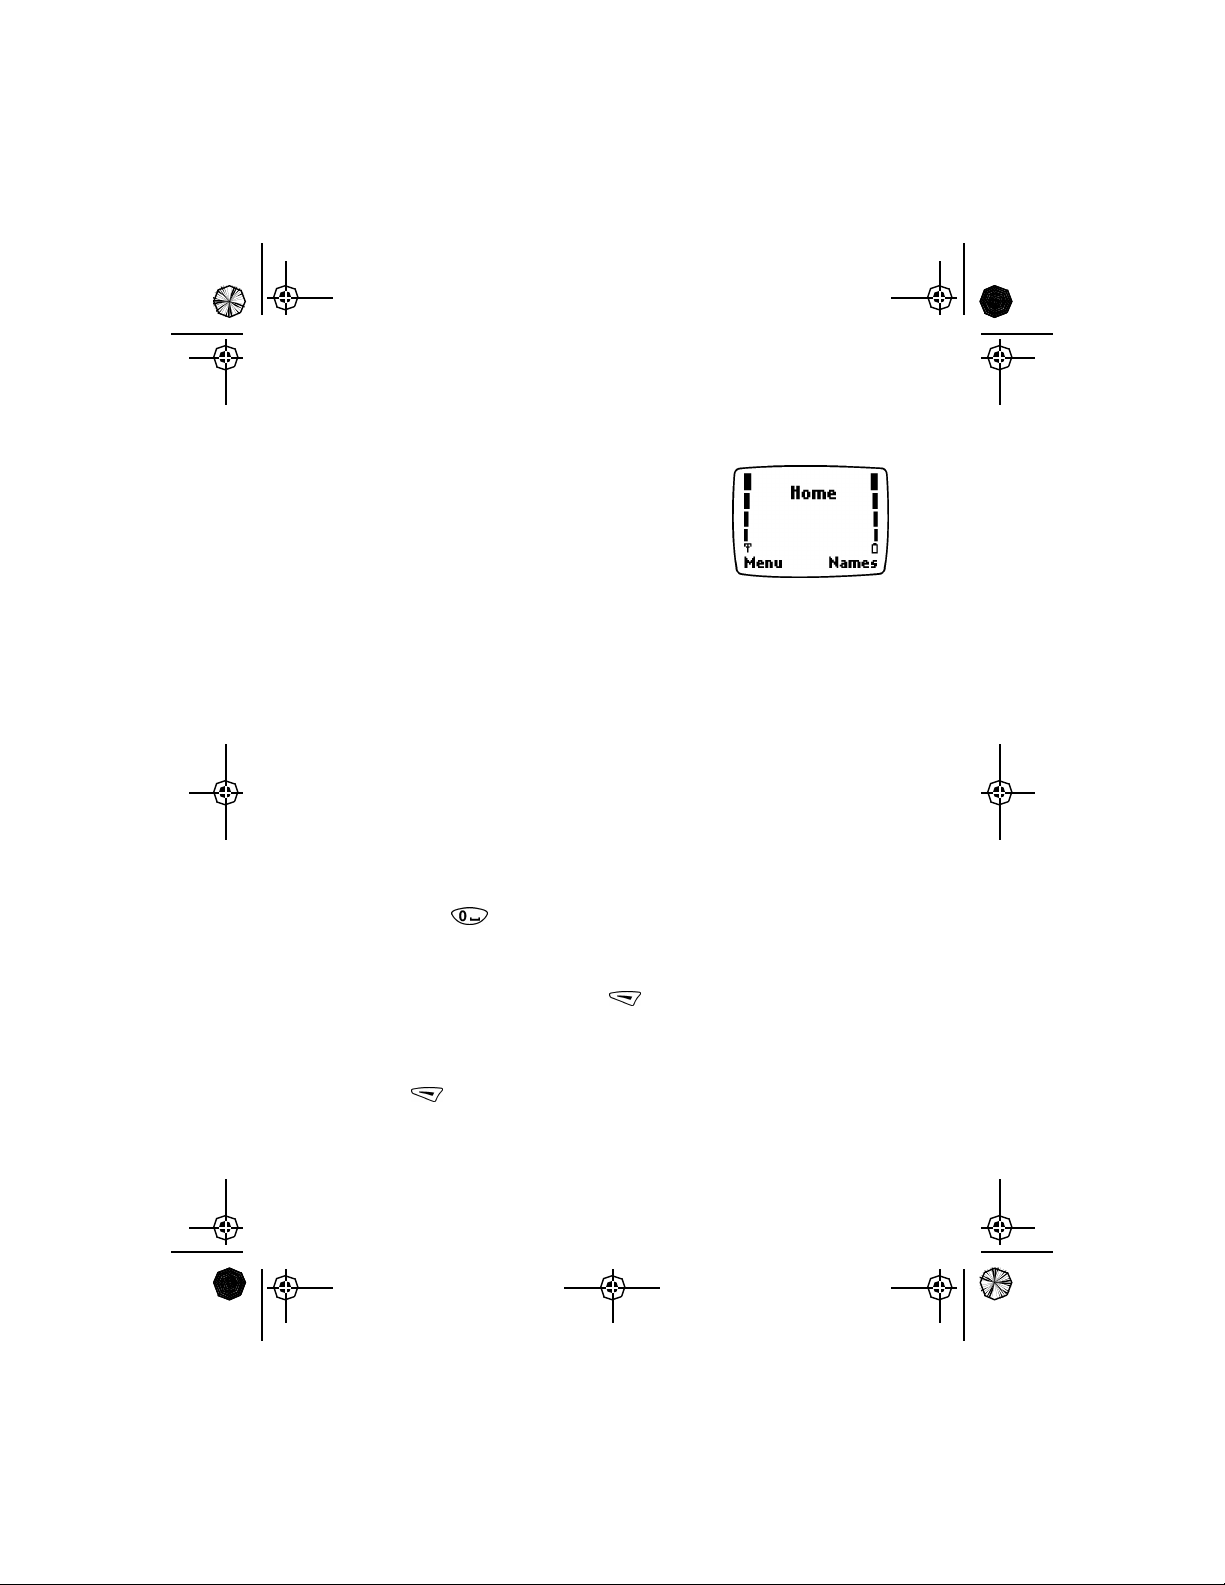
• CHECK THE START SCREEN
When you switch on your phone, a
welcome appears, then you see the
Start screen.
The Start screen appears when the
phone is idling or standing by.
Start screen
[ 20 ]
Page 27
EN1220.2_Sept_02.book Page 21 Friday, September 6, 2002 2:19 PM
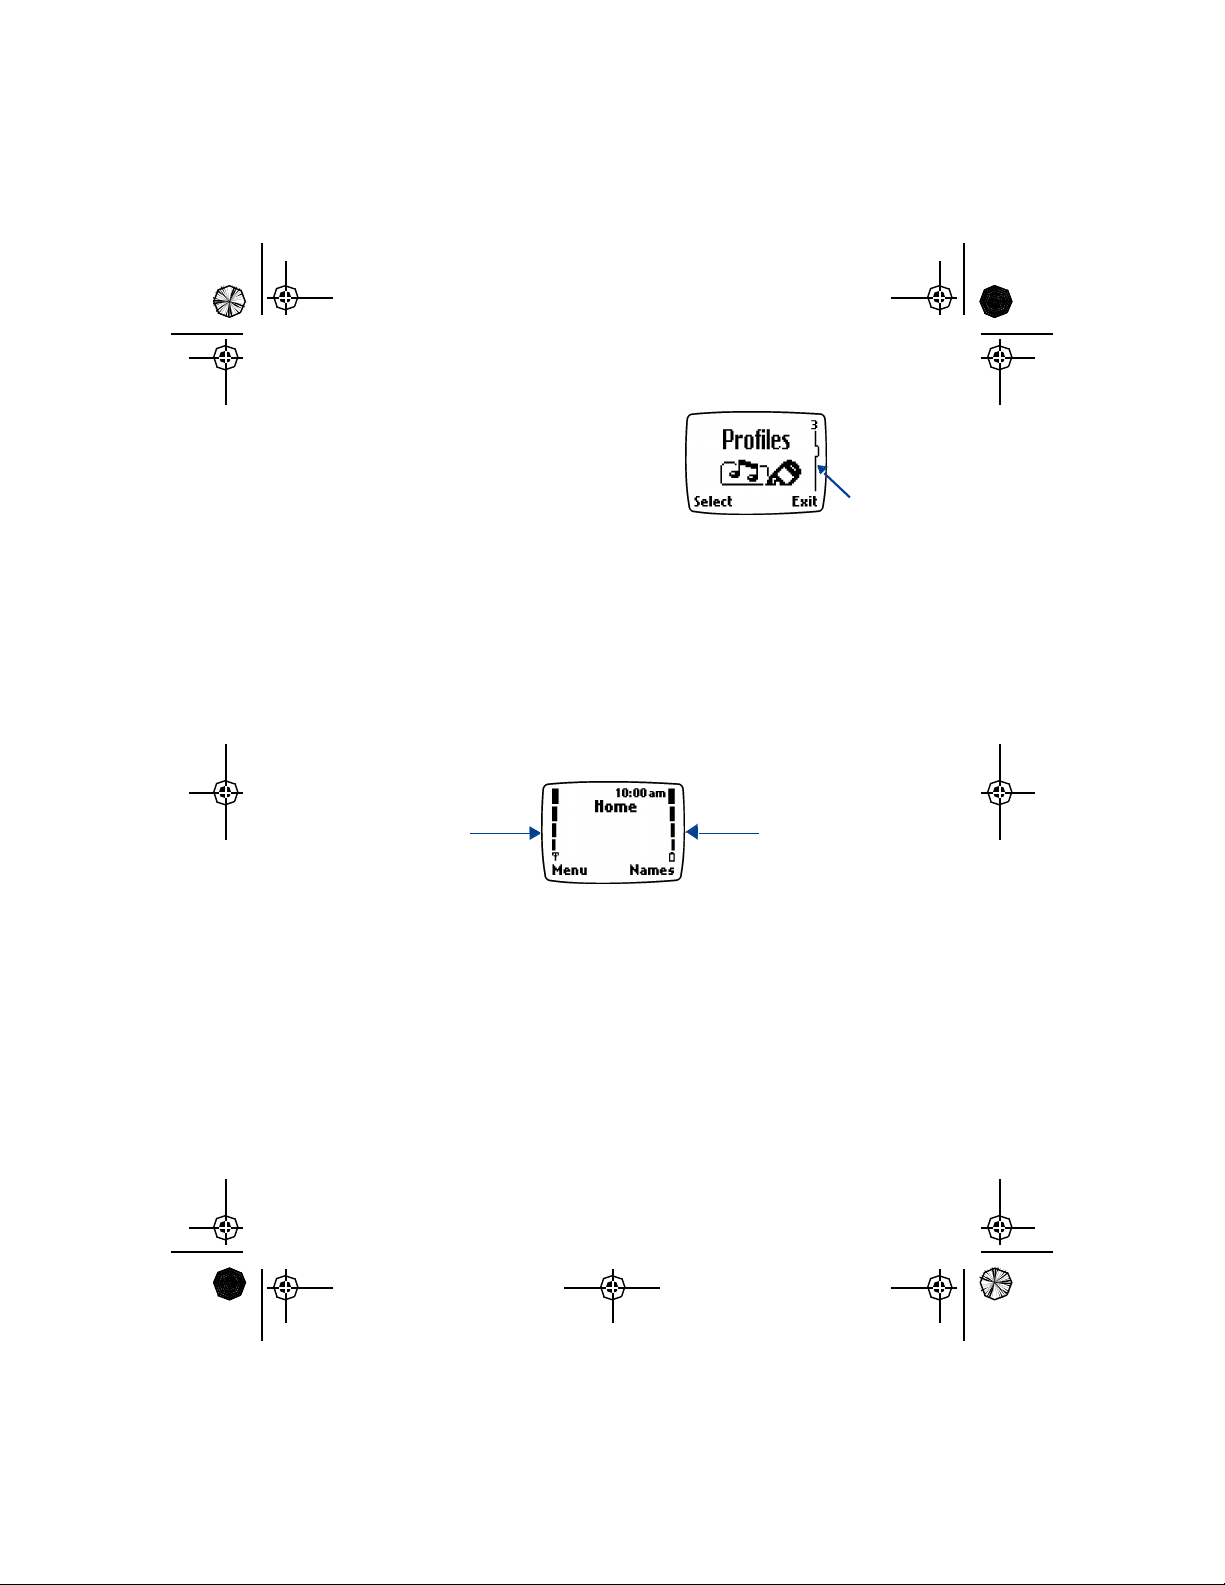
Understand the Scroll Bar
When you press Menu, a vertical
scroll bar appears on the right side of
the screen. This scroll bar has a tab
which moves up or down to indicate
your location in the menu.
Understand indicators and icons
You have two types of identifiers on your phone: icons and indicators.
Indicators show the status of something. The phone uses three types of
indicators: signal strength, battery power and handset volume.
Icons are graphical representations of a specific item or situation. For
example, an icon appears when you have a voice message in your mailbox.
Indicators
Basic operations
Scroll
bar
Signal
strength
indicator
1 Signal strength – shows the signal strength of the wireless network
at your current location. The higher the bar, the stronger the signal.
2 Battery power – shows the battery charge level. The higher the bar,
the more power in the battery.
[ 21 ]
Battery
power
indicator
Page 28
EN1220.2_Sept_02.book Page 22 Friday, September 6, 2002 2:19 PM
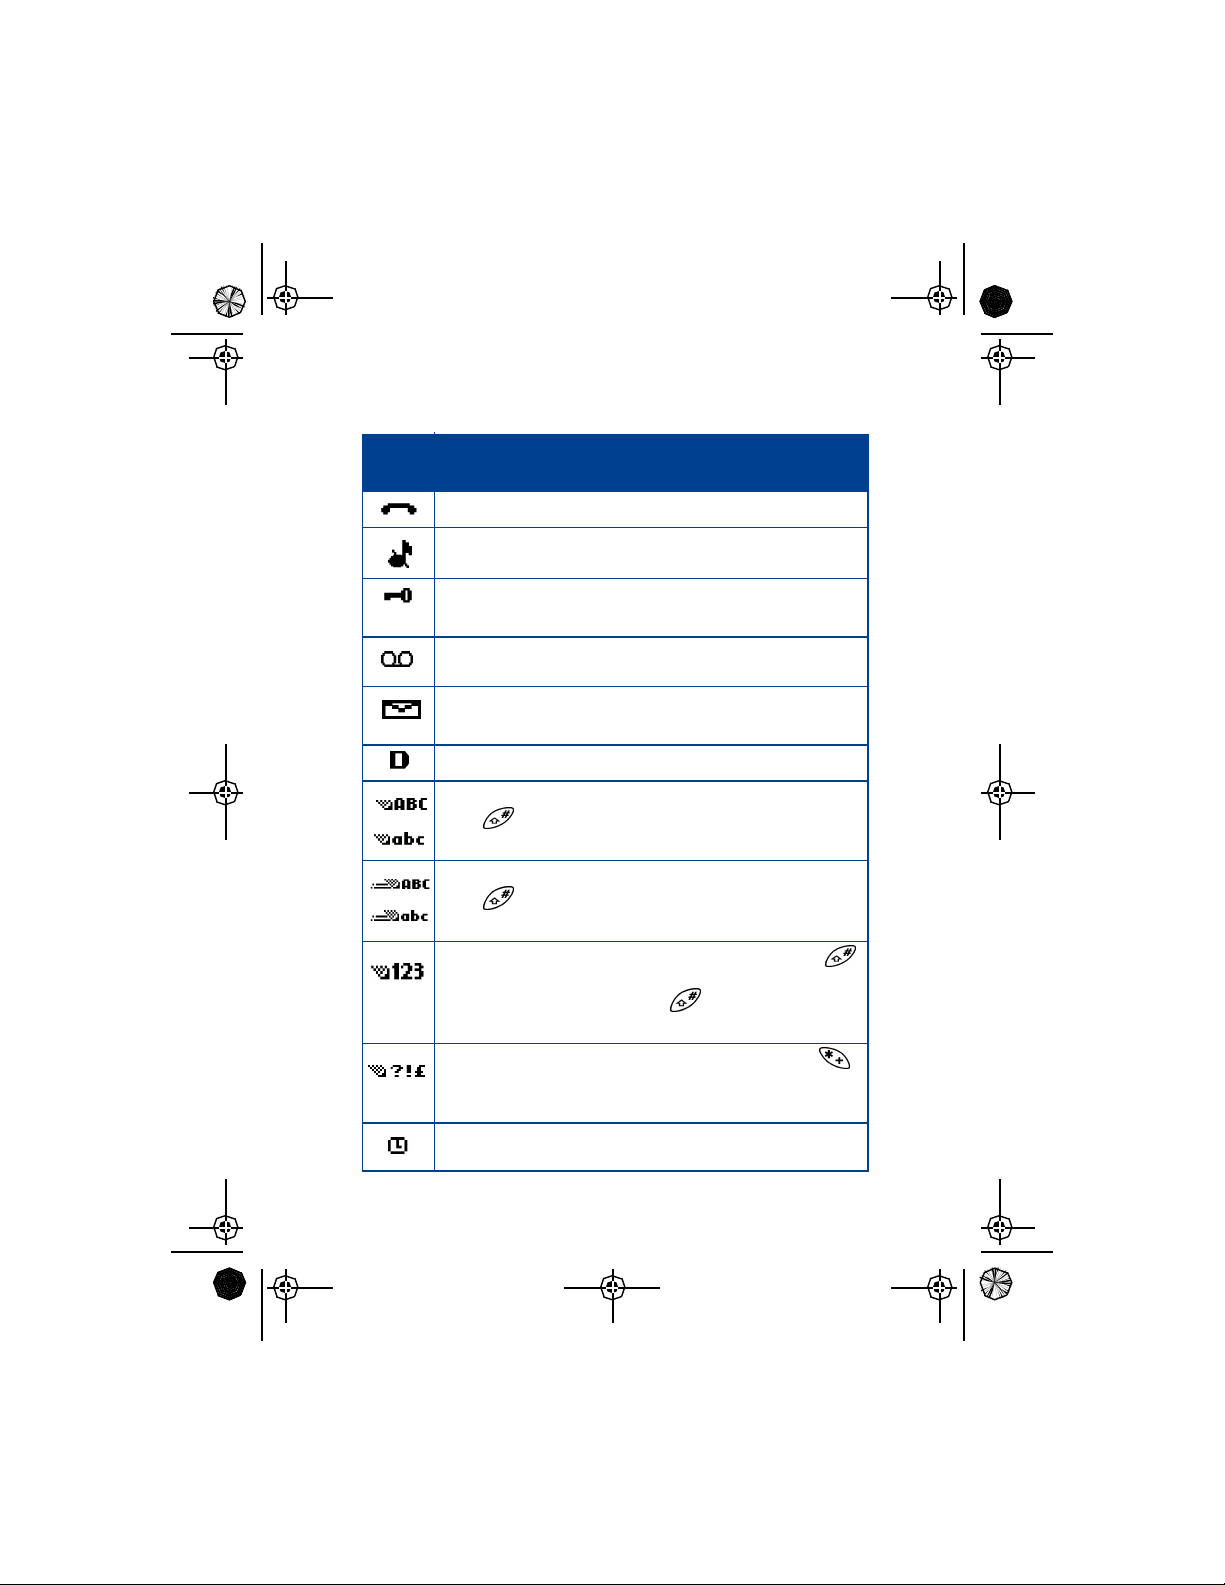
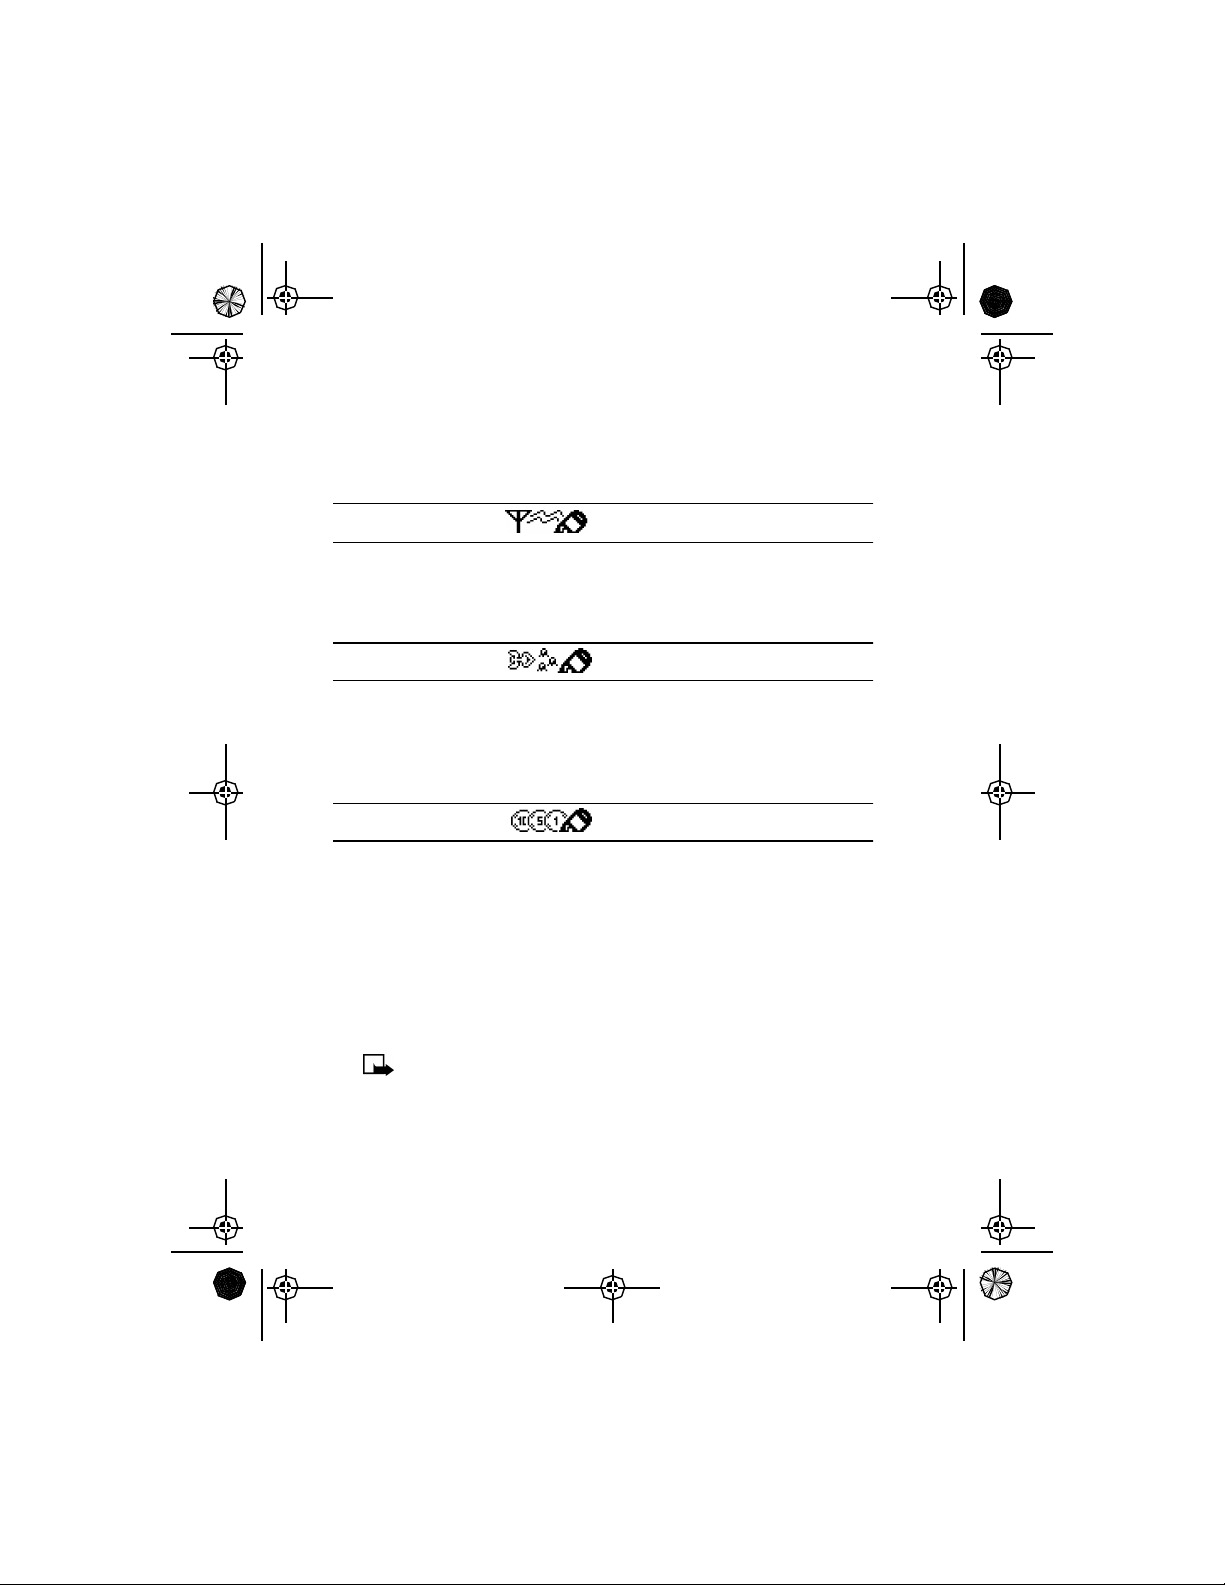
Icons
Screen
Icon
Active call in progress.
Silent has been selected as the current profile.
The phone’s keypad is locked to prevent any accidental key
presses.
One (or more) new voice messages waiting.
One or more new text messages waiting.
(If blinking, the text message memory is full.)
Digital service is available.
Standard text input mode for entering alpha characters.
Press to switch between uppercase and lowercase
input.
Predictive text mode for quickly entering text messages.
Press to switch between uppercase and lowercase
input.
What it means
123 mode. This icon appears when you press and hold
while entering text. You can now enter only numbers (not
alpha characters). Press and hold again to return to text
entry mode.
Special character mode. This appears when you press
while entering text. Once the characters appear, you can
select a special character by selecting Insert.
Alarm clock is set.
[ 22 ]
Page 29
EN1220.2_Sept_02.book Page 23 Friday, September 6, 2002 2:19 PM
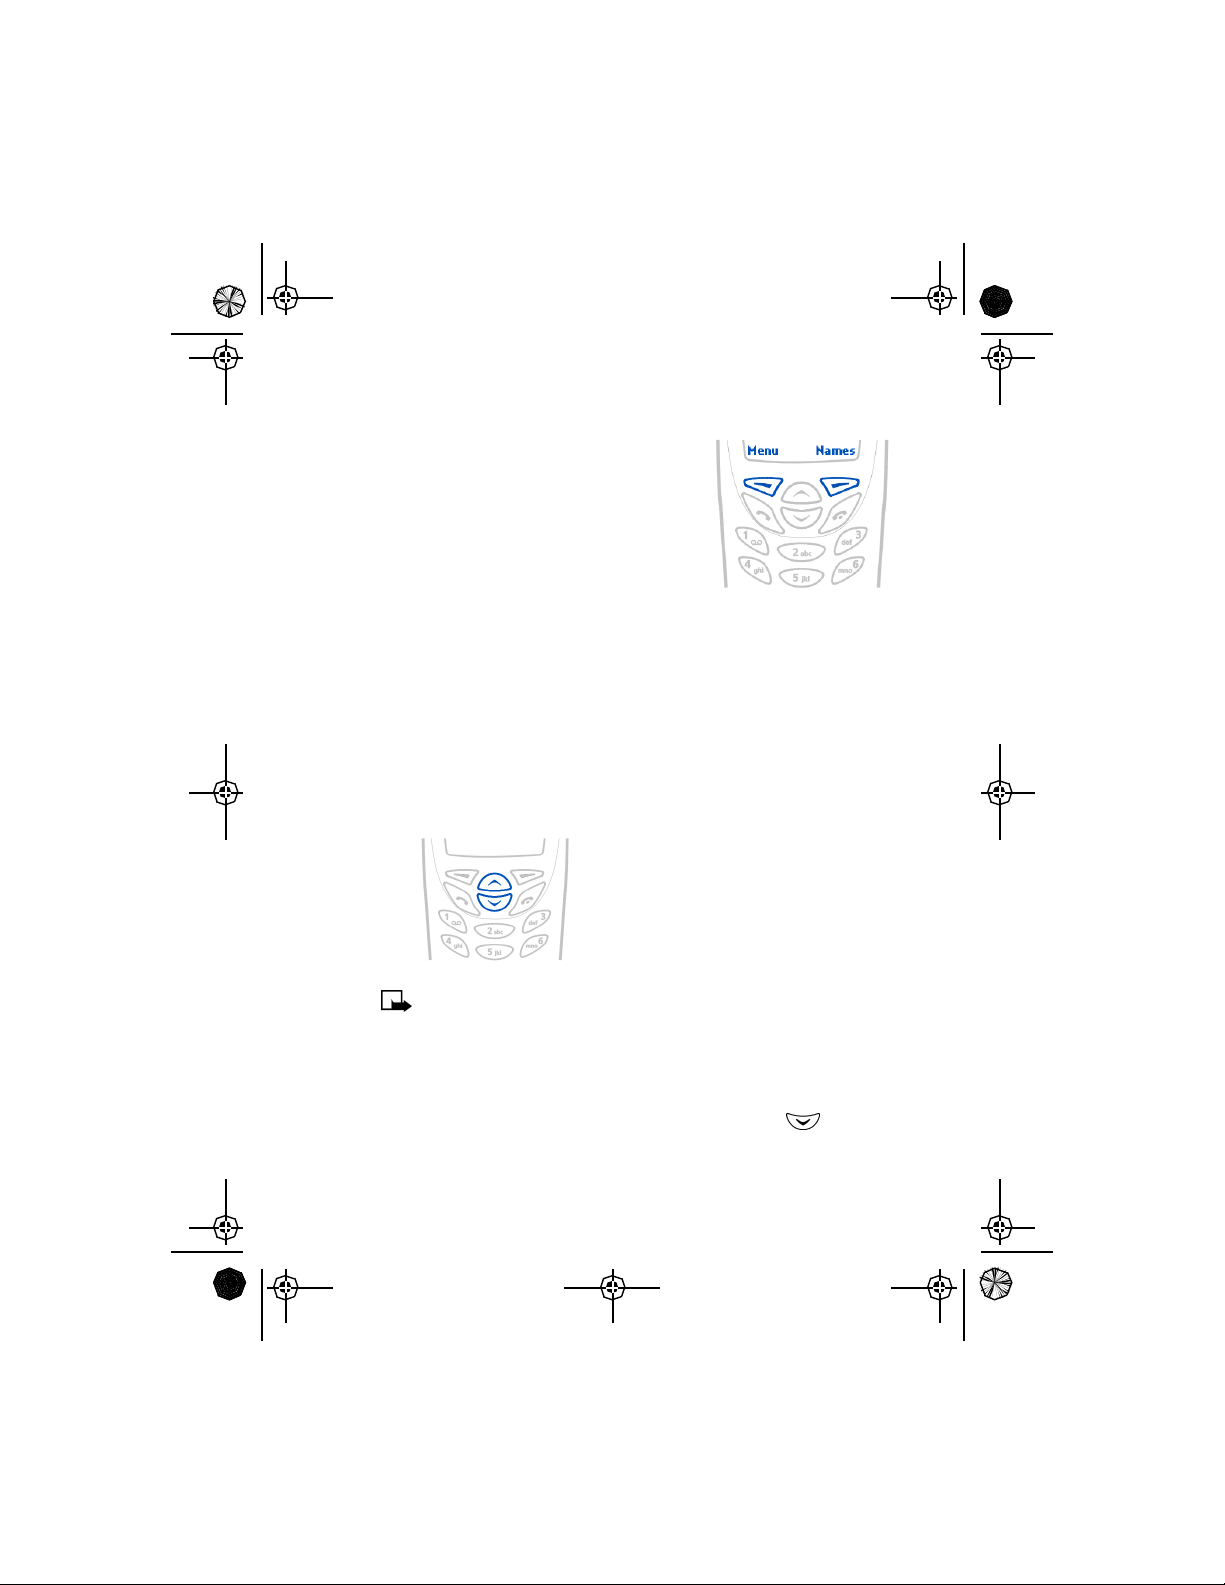
• USE THE SELECTION KEYS
The selection key allows you to select various
phone options.
At the bottom of the Start screen, two options
appear: Menu and Names. The selection keys
are located just below these options.
The left selection key is located under Menu.
The right selection key is located under
Names.
When you press the left selection key at the Start screen, the menu item
Messages appears. The text above the left selection key changes to Select
and the text above the right selection key changes to Exit.
When you press the right selection key at the Start screen, options for the
Names feature appear. The text above the left selection key changes to
Select and the text above the right selection key changes to Exit.
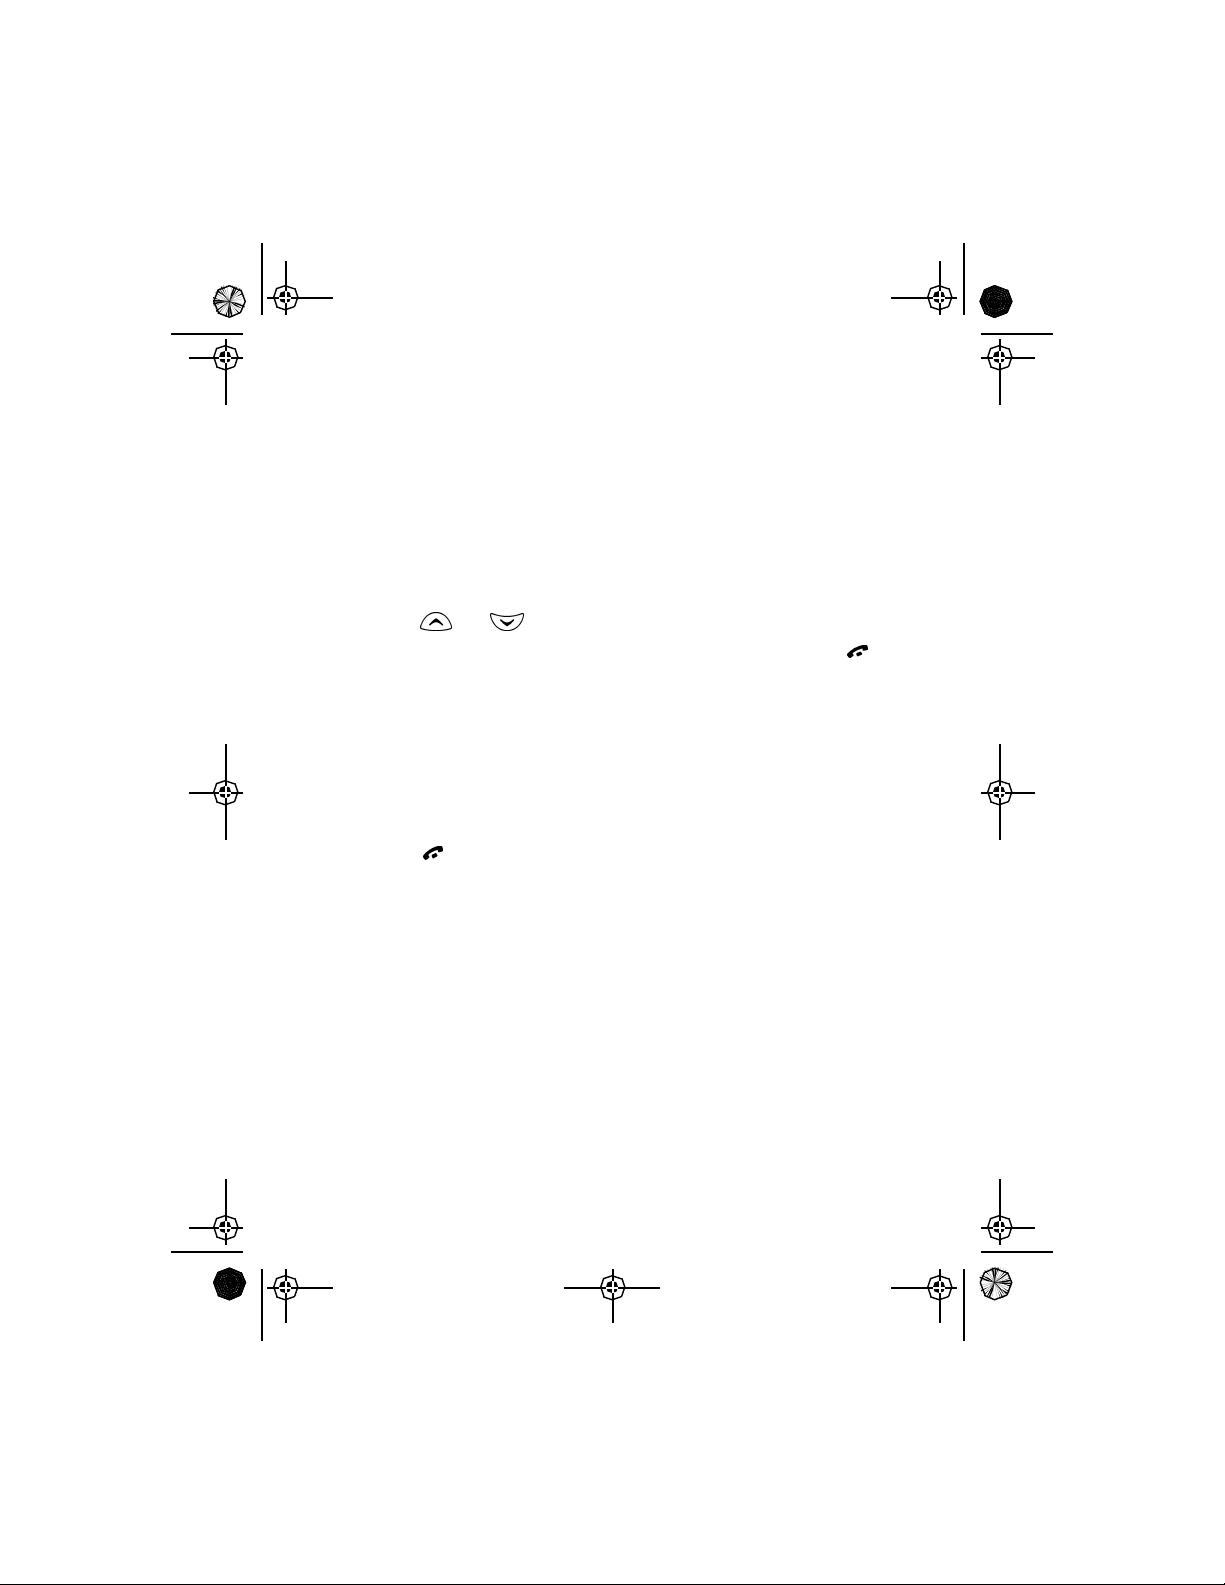
• SCROLL KEYS
Use the scroll keys, located just below the
screen, to scroll through your phone’s
menus and phone book.
Basic operations
Note: The Accessory settings menu will not appear until after an
accessory has been connected to the phone.
• CHECK IN-PHONE HELP
Many menu items have brief help text. To view the help text, scroll to the
menu item and wait for about 15 seconds. Press More or to
continue reading the text. Press Back to exit, or wait a few seconds to
return to the current menu.
[ 23 ]
Page 30
EN1220.2_Sept_02.book Page 24 Friday, September 6, 2002 2:19 PM
• BROWSE PHONE MENUS
A menu is a list of choices you can make to change settings on your phone
or use various phone features. Each menu can contain several levels of
submenus. You can use menus and submenus two ways: by scrolling or by
using a shortcut. This guide uses the shortcut method when describing
how to use the phone’s features.
Scroll through menus
1 At the Start screen, press Menu, then scroll through the menus using
the and keys.
2 Use the scroll and selection keys to navigate the submenus; press
to return to the Start screen.
For example, when you see (Menu > Profiles > Silent) the scrolling
method is: press Menu, scroll to Profiles and press Select, scroll to Silent
and press Options.
Return to the previous menu level
You can return to the previous menu level by pressing the selection key
labeled Exit or Back. You can return to the Start screen from any menu
level by .
Use shortcuts
Menus and options are numbered so that you can quickly find your way to
an option. The numbers appear in the top right corner of the screen and
show your location in the menu.
1 Press Menu.
2 Within 3 seconds, enter the first number of the menu function you
want to access. Repeat until you have entered all the numbers.
For example, to select the Silent profile, press Menu 3-2-1.
[ 24 ]
Page 31

EN1220.2_Sept_02.book Page 25 Friday, September 6, 2002 2:19 PM
MENU TIPS
• You can scroll upward to quickly access the last option in a menu list.
• You can return to the previous menu level by pressing Back.
• To exit a menu and return to the Start screen, press . If you
leave a menu by pressing , you cancel any changes you made .
• Some menus may not appear. Ask your service provider for details.
Menu shortcuts
1 MESSAGES
Write message. . . . . . . . . . . . . . . . . . . . . . . 1-1
Write e-mail . . . . . . . . . . . . . . . . . . . . . . . . 1-2
Inbox . . . . . . . . . . . . . . . . . . . . . . . . . . . . . . 1-3
Outbox . . . . . . . . . . . . . . . . . . . . . . . . . . . . . 1-4
Archive . . . . . . . . . . . . . . . . . . . . . . . . . . . . . 1-5
Erase all. . . . . . . . . . . . . . . . . . . . . . . . . . . . 1-6
Picture messages . . . . . . . . . . . . . . . . . . . . . 1-7
Voice messages . . . . . . . . . . . . . . . . . . . . . . 1-8
Listen to voice messages . . . . . . . . . 1-8-1
Voice mailbox number . . . . . . . . . . . 1-8-2
Basic operations
2 CALL LOG
Missed calls. . . . . . . . . . . . . . . . . . . . . . . . . 2-1
Received calls . . . . . . . . . . . . . . . . . . . . . . . 2-2
Dialed calls . . . . . . . . . . . . . . . . . . . . . . . . . 2-3
Clear call lists . . . . . . . . . . . . . . . . . . . . . . . 2-4
All . . . . . . . . . . . . . . . . . . . . . . . . . . . 2-4-1
Missed . . . . . . . . . . . . . . . . . . . . . . . . 2-4-2
[ 25 ]
Page 32

EN1220.2_Sept_02.book Page 26 Friday, September 6, 2002 2:19 PM
Received . . . . . . . . . . . . . . . . . . . . . . .2-4-3
Dialed . . . . . . . . . . . . . . . . . . . . . . . . . 2-4-4
Call timers . . . . . . . . . . . . . . . . . . . . . . . . . . 2-5
Duration of last call. . . . . . . . . . . . . . 2-5-1
Duration of all calls. . . . . . . . . . . . . . 2-5-2
Clear timers . . . . . . . . . . . . . . . . . . . . 2-5-3
3 PROFILES
Normal . . . . . . . . . . . . . . . . . . . . . . . . . . . . .3-1
Select . . . . . . . . . . . . . . . . . . . . . . . . . 3-1-1
Customize. . . . . . . . . . . . . . . . . . . . . . 3-1-2
Ringing options . . . . . . . . . . . . 3-1-2-1
Ringing tone . . . . . . . . . . . . . . . 3-1-2-2
Ringing volume . . . . . . . . . . . . 3-1-2-3
Message alert tone . . . . . . . . .3-1-2-4
Keypad tones . . . . . . . . . . . . . . 3-1-2-5
Warning tones . . . . . . . . . . . . . 3-1-2-6
Profile name
Silent . . . . . . . . . . . . . . . . . . . . . . . . . . . . . . 3-2
Select . . . . . . . . . . . . . . . . . . . . . . . . . 3-2-1
Customize. . . . . . . . . . . . . . . . . . . . . . 3-2-2
Meeting . . . . . . . . . . . . . . . . . . . . . . . . . . . . 3-3
Select . . . . . . . . . . . . . . . . . . . . . . . . . 3-3-1
Customize. . . . . . . . . . . . . . . . . . . . . . 3-3-2
Outdoor . . . . . . . . . . . . . . . . . . . . . . . . . . . . 3-4
Select . . . . . . . . . . . . . . . . . . . . . . . . . 3-4-1
Customize. . . . . . . . . . . . . . . . . . . . . . 3-4-2
Pager. . . . . . . . . . . . . . . . . . . . . . . . . . . . . . . 3-5
Select . . . . . . . . . . . . . . . . . . . . . . . . . 3-5-1
Customize. . . . . . . . . . . . . . . . . . . . . . 3-5-2
1
1 The Profile name option is available for Silent, Meeting, Outdoor and
Pager. The Normal profile cannot be renamed.
[ 26 ]
Page 33

EN1220.2_Sept_02.book Page 27 Friday, September 6, 2002 2:19 PM
4 SETTINGS
Time settings . . . . . . . . . . . . . . . . . . . . . . . . 4-1
Alarm clock . . . . . . . . . . . . . . . . . . . . 4-1-1
On. . . . . . . . . . . . . . . . . . . . . . . 4-1-1-1
Off. . . . . . . . . . . . . . . . . . . . . . . 4-1-1-2
Clock . . . . . . . . . . . . . . . . . . . . . . . . . 4-1-2
Show/Hide clock. . . . . . . . . . 4-1-2-1
Set the time . . . . . . . . . . . . . 4-1-2-2
Time format . . . . . . . . . . . . . 4-1-2-3
Auto update of time . . . . . . . . . . . . . 4-1-3
Call settings. . . . . . . . . . . . . . . . . . . . . . . . . 4-2
Automatic redial . . . . . . . . . . . . . . 4-2-1
Current call timer . . . . . . . . . . . . . . . 4-2-2
Phone settings. . . . . . . . . . . . . . . . . . . . . . . 4-3
Language . . . . . . . . . . . . . . . . . . . . . . 4-3-1
Touch tones. . . . . . . . . . . . . . . . . . . . 4-3-2
Manual touch tones . . . . . . . . 4-3-2-1
Touch tone length. . . . . . . . . . 4-3-2-2
Welcome note . . . . . . . . . . . . . . . . . . 4-3-3
Restore factory settings . . . . . . . . . . 4-3-4
Accessory settings1. . . . . . . . . . . . . . . . . . . 4-4
Headset . . . . . . . . . . . . . . . . . . . . . . . 4-4-1
Handsfree . . . . . . . . . . . . . . . . . . . . . 4-4-2
Loopset. . . . . . . . . . . . . . . . . . . . . . . . 4-4-3
Security settings . . . . . . . . . . . . . . . . . . . . . 4-5
Call restrictions . . . . . . . . . . . . . . . . . 4-5-1
Change security code. . . . . . . . . . . . 4-5-2
Network services. . . . . . . . . . . . . . . . . . . . . 4-6
Voice privacy. . . . . . . . . . . . . . . . . . . 4-6-1
Call forwarding . . . . . . . . . . . . . . . . . 4-6-2
Call waiting . . . . . . . . . . . . . . . . . . . . 4-6-3
Send own caller ID . . . . . . . . . . . . . . 4-6-4
1 The Accessory settings menu will not appear until after an accessory
has been connected to the phone.
Basic operations
[ 27 ]
Page 34
EN1220.2_Sept_02.book Page 28 Friday, September 6, 2002 2:19 PM
Network feature setting . . . . . . . . . . 4-6-5
Own number selection . . . . . . . . . . .4-6-6
Public selection . . . . . . . . . . . . . . . . . 4-6-7
Digital/analog selection . . . . . . . . . . 4-6-8
5 SYSTEM
Automatic. . . . . . . . . . . . . . . . . . . . . . . . . . . 5-1
Manual . . . . . . . . . . . . . . . . . . . . . . . . . . . . .5-2
New search. . . . . . . . . . . . . . . . . . . . . . . . . . 5-3
6 GAMES
Snake II . . . . . . . . . . . . . . . . . . . . . . . . . . . . . 6-1
Space Impact . . . . . . . . . . . . . . . . . . . . . . . . 6-2
Pairs II. . . . . . . . . . . . . . . . . . . . . . . . . . . . . . 6-3
Settings . . . . . . . . . . . . . . . . . . . . . . . . . . . . 6-4
7 PREPAID
Check account balance . . . . . . . . . . . . . . . . 7-1
Add money to account . . . . . . . . . . . . . . . . 7-2
Call customer service . . . . . . . . . . . . . . . . .7-3
Save access phone numbers . . . . . . . . . . . . 7-4
Balance phone number. . . . . . . . . . .7-4-1
Replenish phone number . . . . . . . . . 7-4-2
Customer service phone number . . . 7-4-3
Expiration date. . . . . . . . . . . . . . . . . . . . . . . 7-5
Note: The Prepaid menu is visible only when Prepaid service is
available in your network and/or activated on your account. Please
contact your service provider for more information on Prepaid
services.
[ 28 ]
Page 35

EN1220.2_Sept_02.book Page 29 Friday, September 6, 2002 2:19 PM
• PHONE BOOK MENU
For access to the phone book and its menus:
• Switch back to the Start screen.
• Press Names.
These options are available:
Find
Add new
Erase all
Options
Phone book view
Name list
Name+number
Name only
Memory status
1-touch dialing
Basic operations
[ 29 ]
Page 36
EN1220.2_Sept_02.book Page 30 Friday, September 6, 2002 2:19 PM
4 Text entry
There are two ways to enter letters
and numbers into your phone:
• Standard text input - for
making entries in the phone book.
• Predictive text input - for writing text messages, picture messages,
and e-mails. For more detail, see “Write with predictive text” on
page34.
Current
entry
method
• STANDARD TEXT INPUT
Standard text input is used when entering text into information prompts.
You can use this method for all text entry, but predictive text input is the
faster method for writing messages.
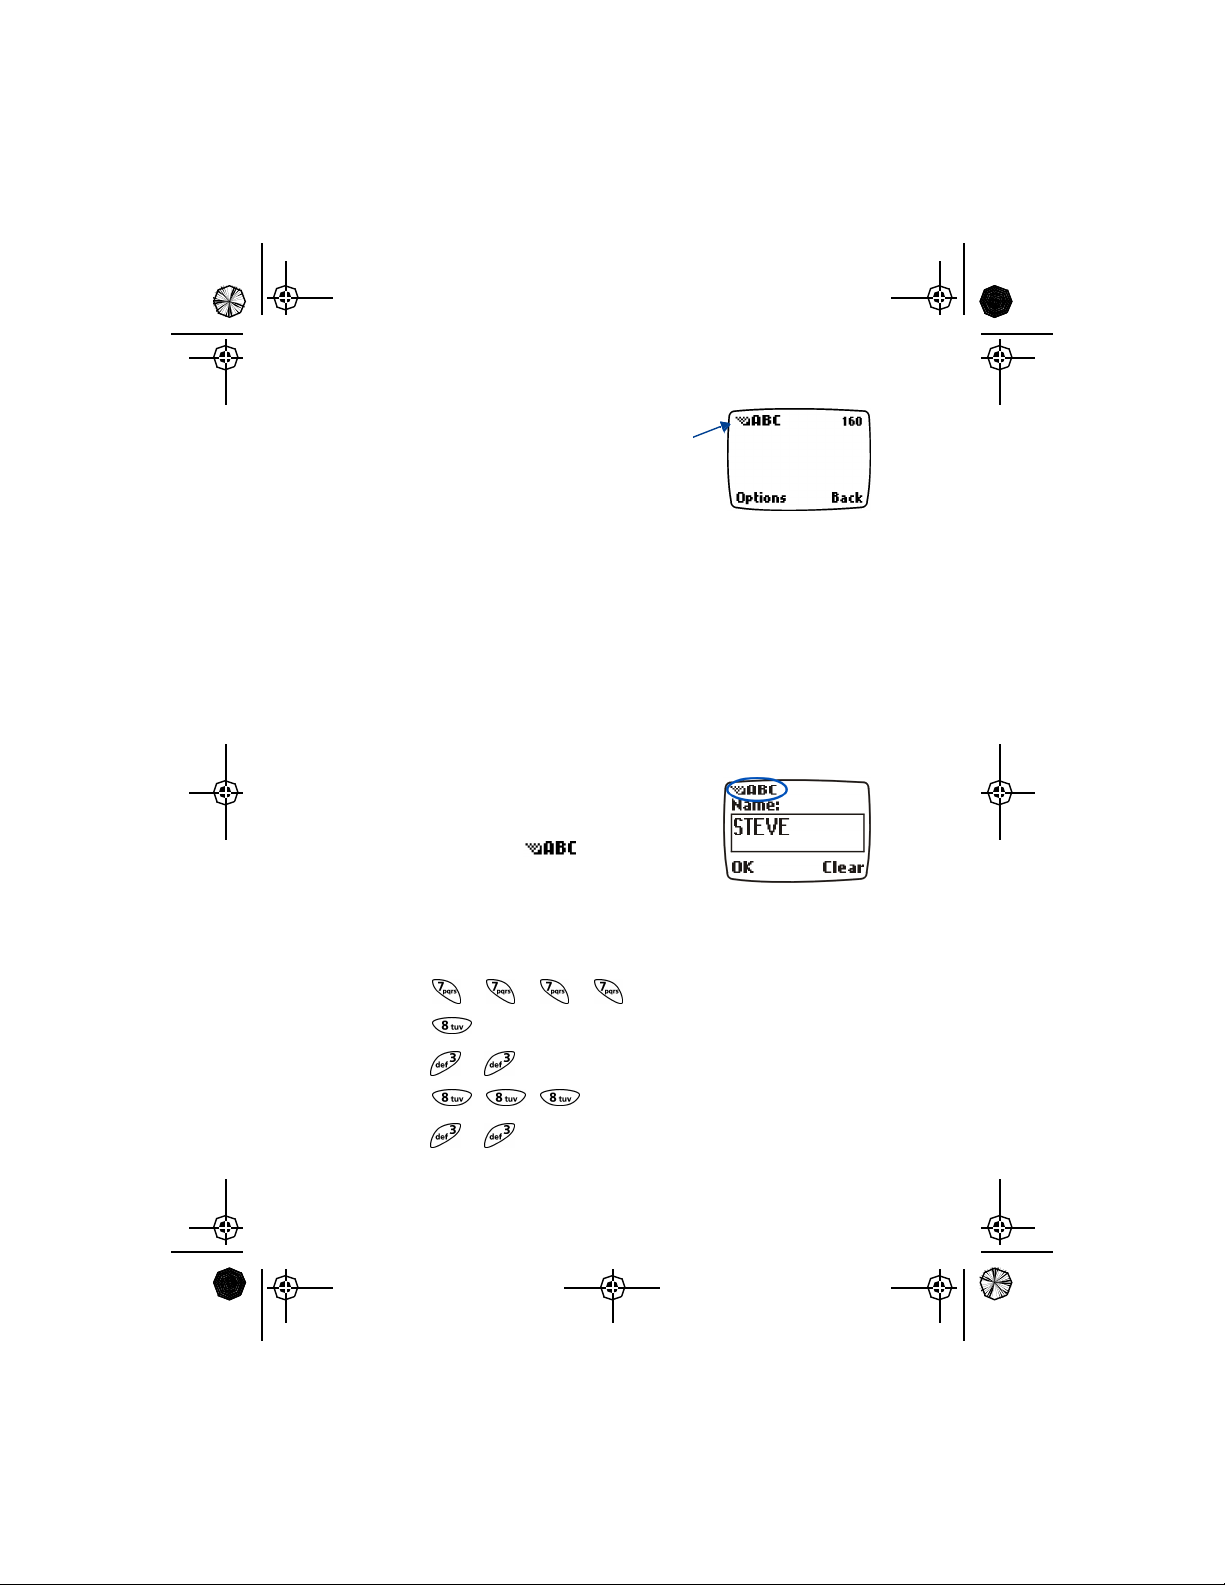
Enter letters (ABC mode)
When you add new names to the phone book,
your phone automatically switches to the ABC
mode and displays the icon.
1 Find the key that has the letter you want to
enter.
2 Press the key as many times as needed for the letter to appear on the
screen. For example, to enter the name STEVE:
Press S
Press T
Press E
Press V
Press E
[ 30 ]
Page 37
EN1220.2_Sept_02.book Page 31 Friday, September 6, 2002 2:19 PM
Enter numbers (123 mode)
To enter numbers:
1 Press and hold to switch to 123 mode. Press the appropriate
number key to enter a number.
OR
While in ABC mode, press and hold the corresponding number key
until the number appears.
If you make a mistake, press (Clear) to erase that character.
2 To return to the mode, press and hold again for two
seconds.
ERASE MISTAKES
If you make a mistake, press Clear as needed to erase one or more
characters. Press and hold Clear to erase the entire field of characters.
CHANGE FROM CAPITAL (UPPERCASE) LETTERS
To switch between capital (uppercase) and lowercase letters, press .
The icon in the upper left corner of the screen switches to
, indicating that you can now enter lowercase letters.
To switch back to capital letters again, press .
Text entry
[ 31 ]
Page 38
EN1220.2_Sept_02.book Page 32 Friday, September 6, 2002 2:19 PM
• ENTER SPACES, PUNCTUATION AND SPECIAL
CHARACTERS
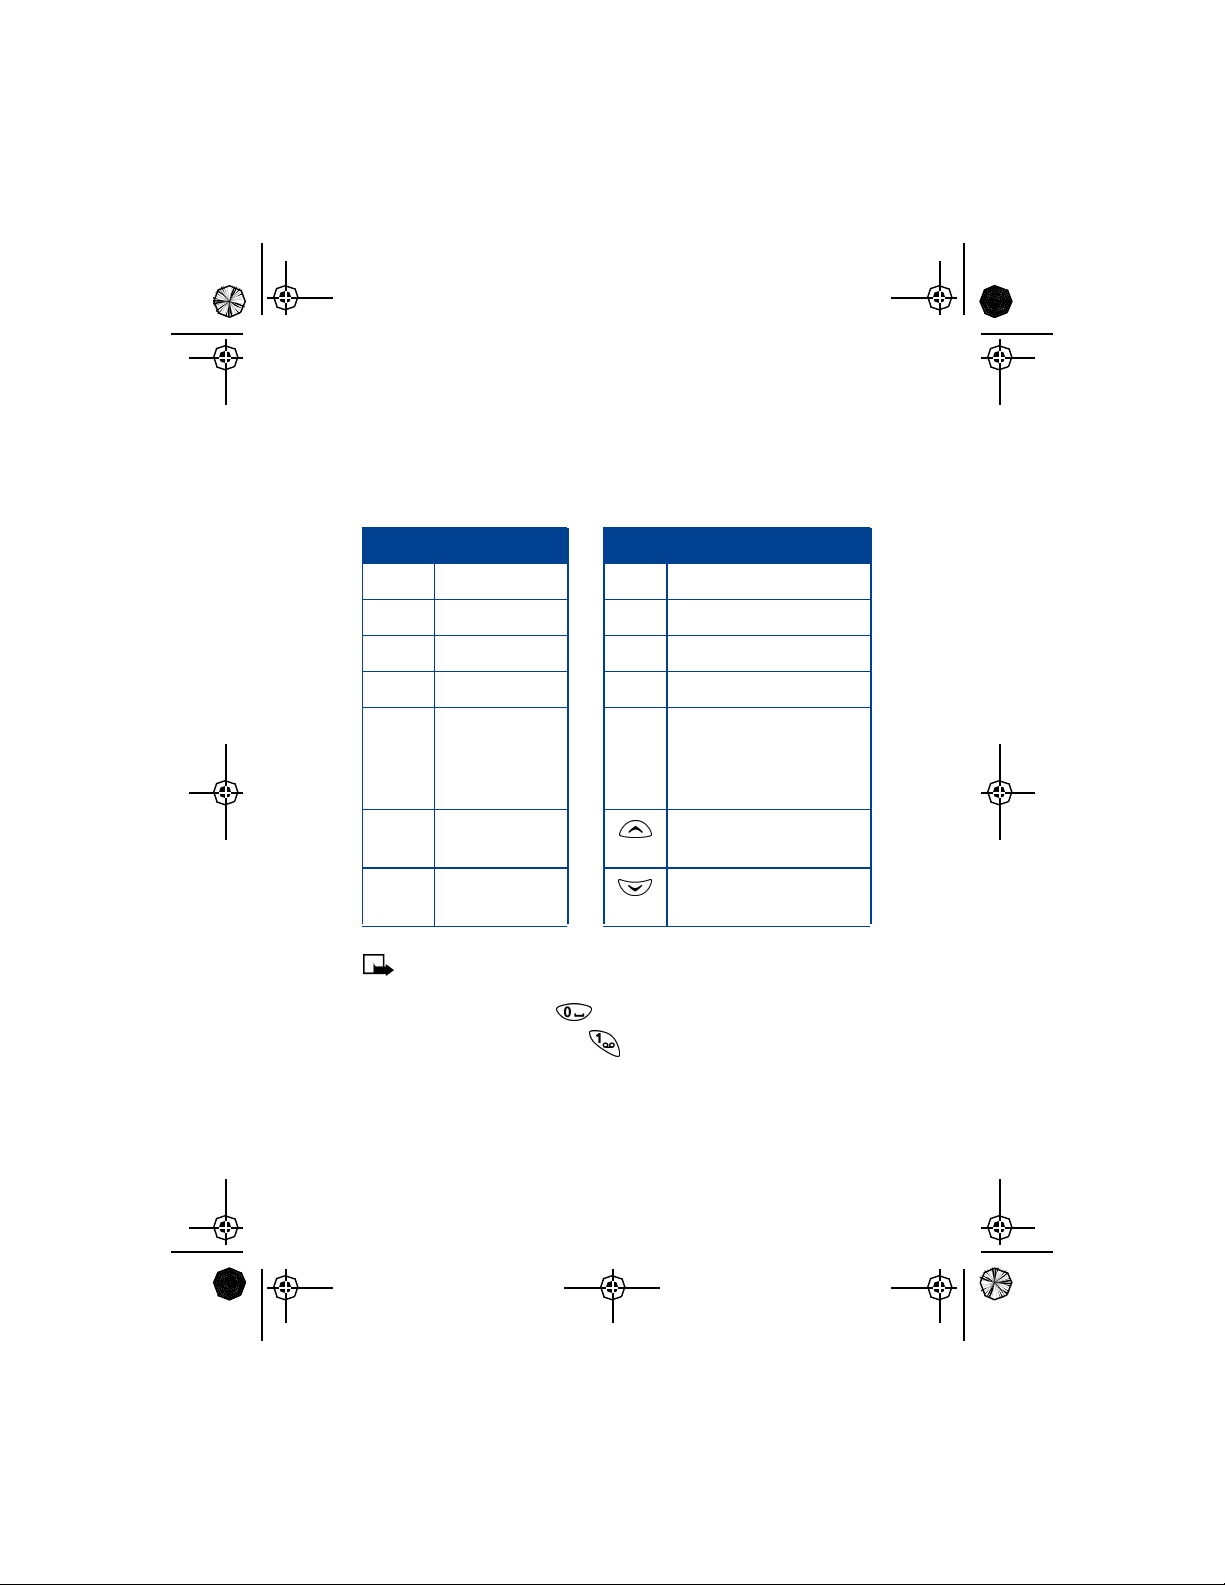
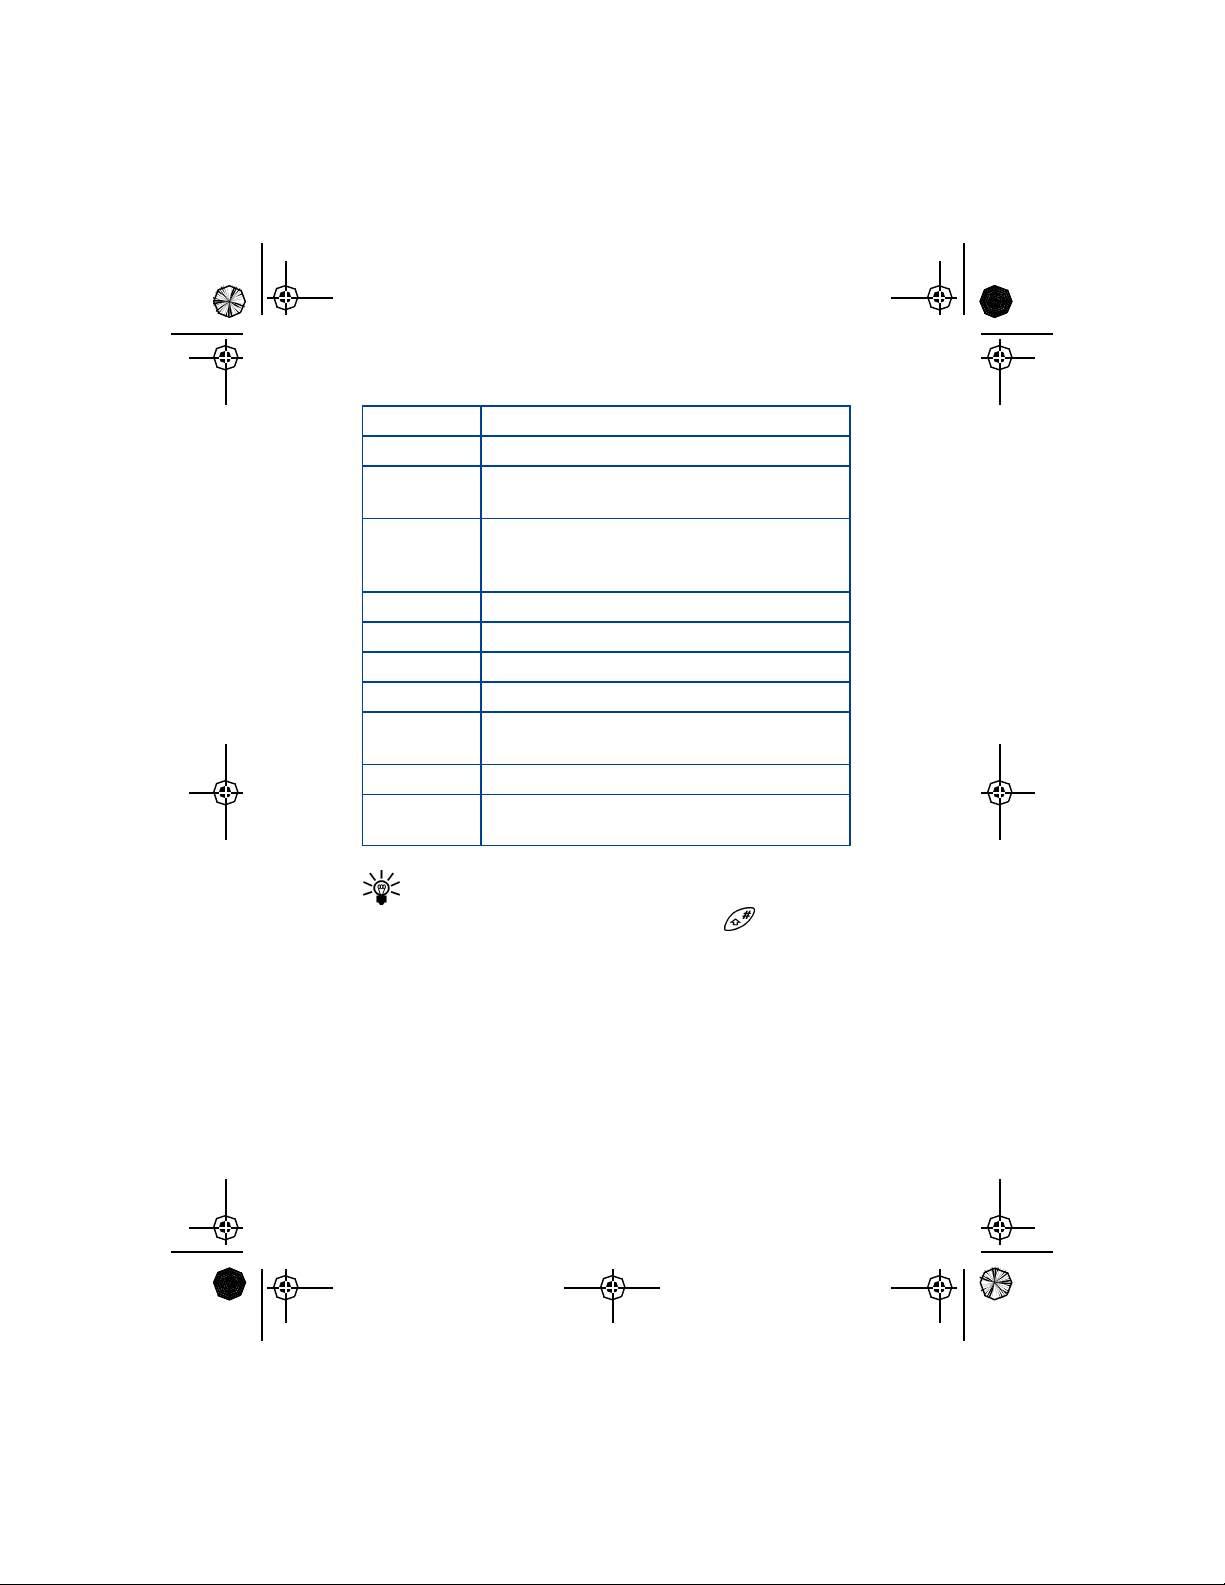
Depending on the selected display language, the following characters
may be available when entering characters from the keypad:
Key Characters Key Characters
. , ’ ? ! @ ~ / “ - 1
1
2 A B C 2 9 W X Y Z 9
3 D E F 3 0 Enters an empty space or 0.
4 G H I 4 * Special characters
5 J K L 5 # Changes letter case; long
6 M N O 6 Moves cursor to the left of
8 T U V 8
press toggles between text
input mode and number
input mode
character.
7 P Q R S 7 Moves cursor to the right of
character.
Note: Some networks may not support all language-dependent
characters and/or services.
• To enter a space, press once.
• To enter punctuation, press repeatedly until the character you
want appears.
[ 32 ]
Page 39

EN1220.2_Sept_02.book Page 33 Friday, September 6, 2002 2:19 PM
Use special characters
While entering text, press (or press and hold, if
predictive text is on) to display special
characters. Press again to cycle through all
characters:
Text entry
. ? ! @
‘
- _ (
) , : ; & / ~ \
% * # + < = > “
£ $ ¥ ¤ § ¡ ¿
Use scroll keys to select the character you want, then press Insert.
Note: The order and availability of special characters may vary
depending on your service provider.
Use four-way scrolling
Navigate special
characters using the 2,
4, 6, and 8 keys much
as you would a joystick.
Once a character is
highlighted press
to insert the character
into your message.
Scroll up
Scroll rightScroll left
Insert
character
Scroll down
Use symbols in names and numbers
• To enter a symbol while adding a name to the phone book, press .
• To add a special character for creating a number string in the number
box, press . See “Set touch tone strings” on page77.
[ 33 ]
Page 40
EN1220.2_Sept_02.book Page 34 Friday, September 6, 2002 2:19 PM
• WRITE WITH PREDICTIVE TEXT
Predictive text input allows you to write messages much faster than the
standard text method. With predictive text input, you only need to press
each number key once for each letter. Your phone uses a built-in
dictionary to predict or guess what you are writing. You can also add new
words to the dictionary.
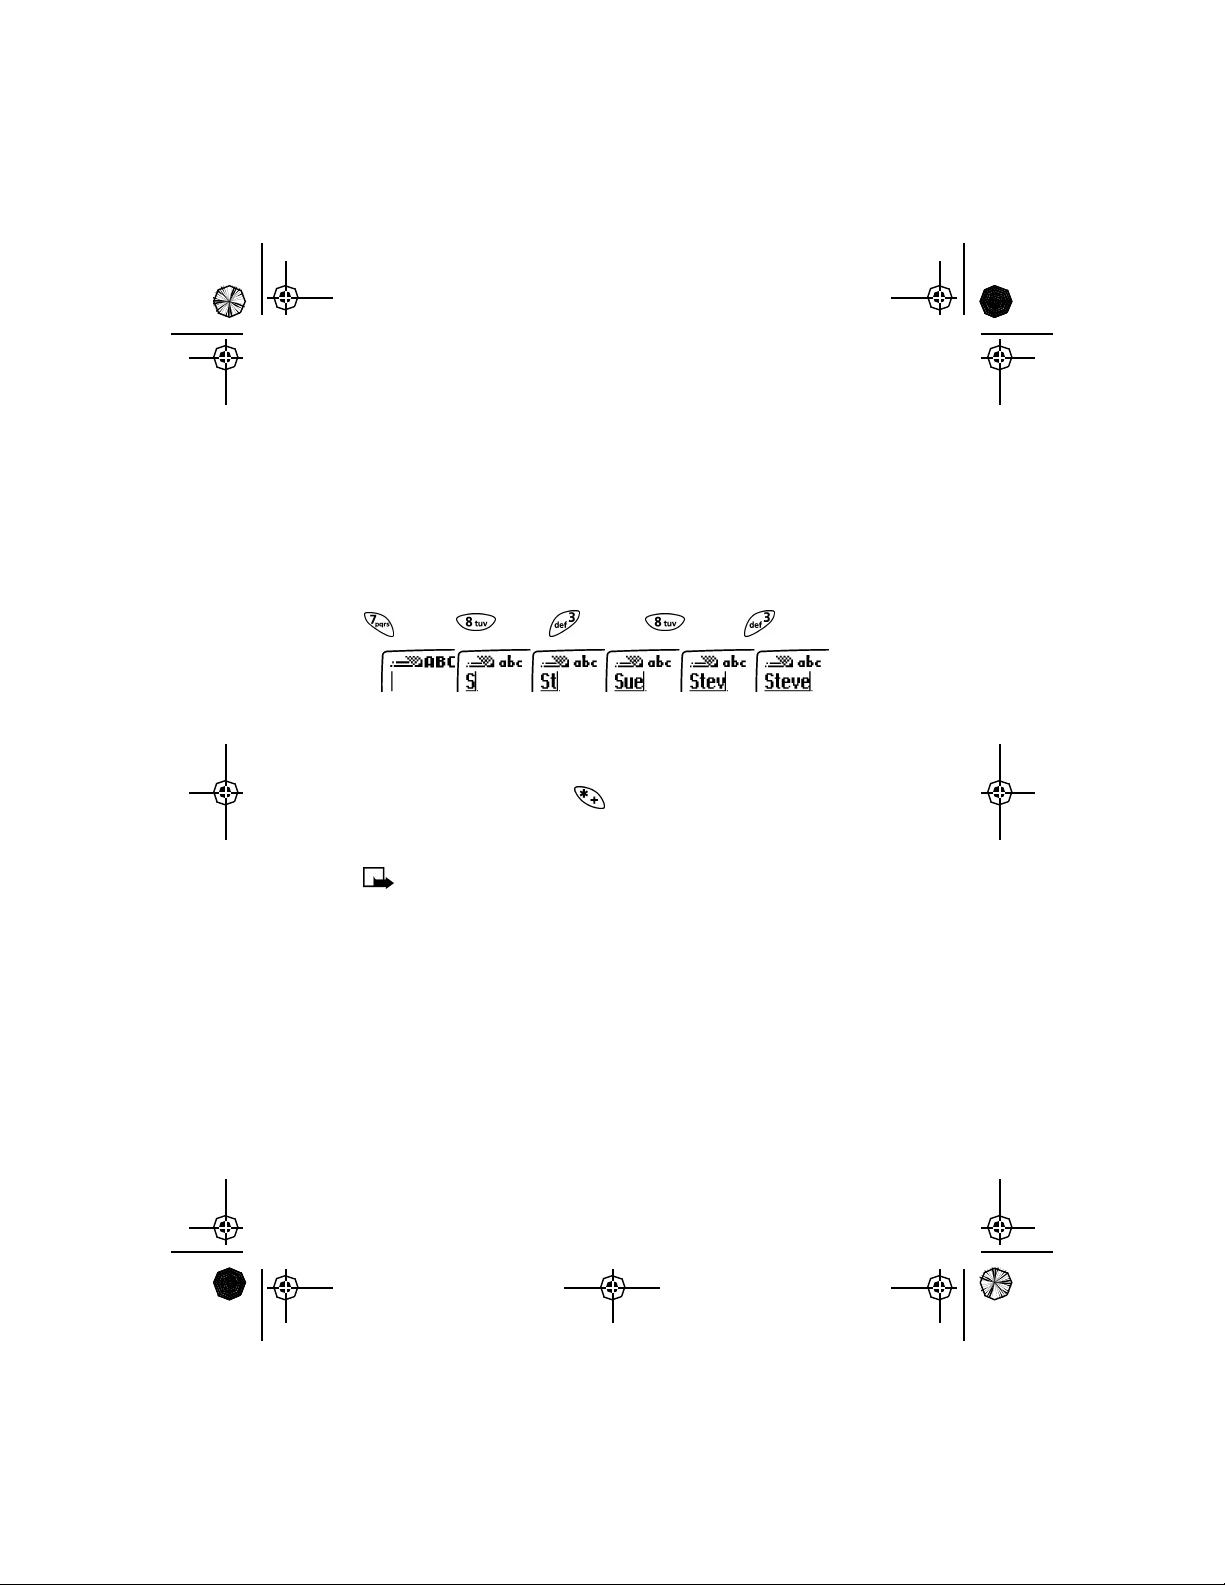
Understand predictive text input
To write Steve with the English dictionary selected, press:
(for S) (for t) (for e) (for v) (for e)
The display shows the above words for each key pressed.
Since the displayed word changes after each key stroke, disregard the
word until you have keyed in all the characters. If the finished word is not
the one you wanted, press the key until your word appears. If it does
not appear you will have an option to spell your word using standard text
input.
Note: Predictive text input may not be available for all languages.
Turn on predictive text input
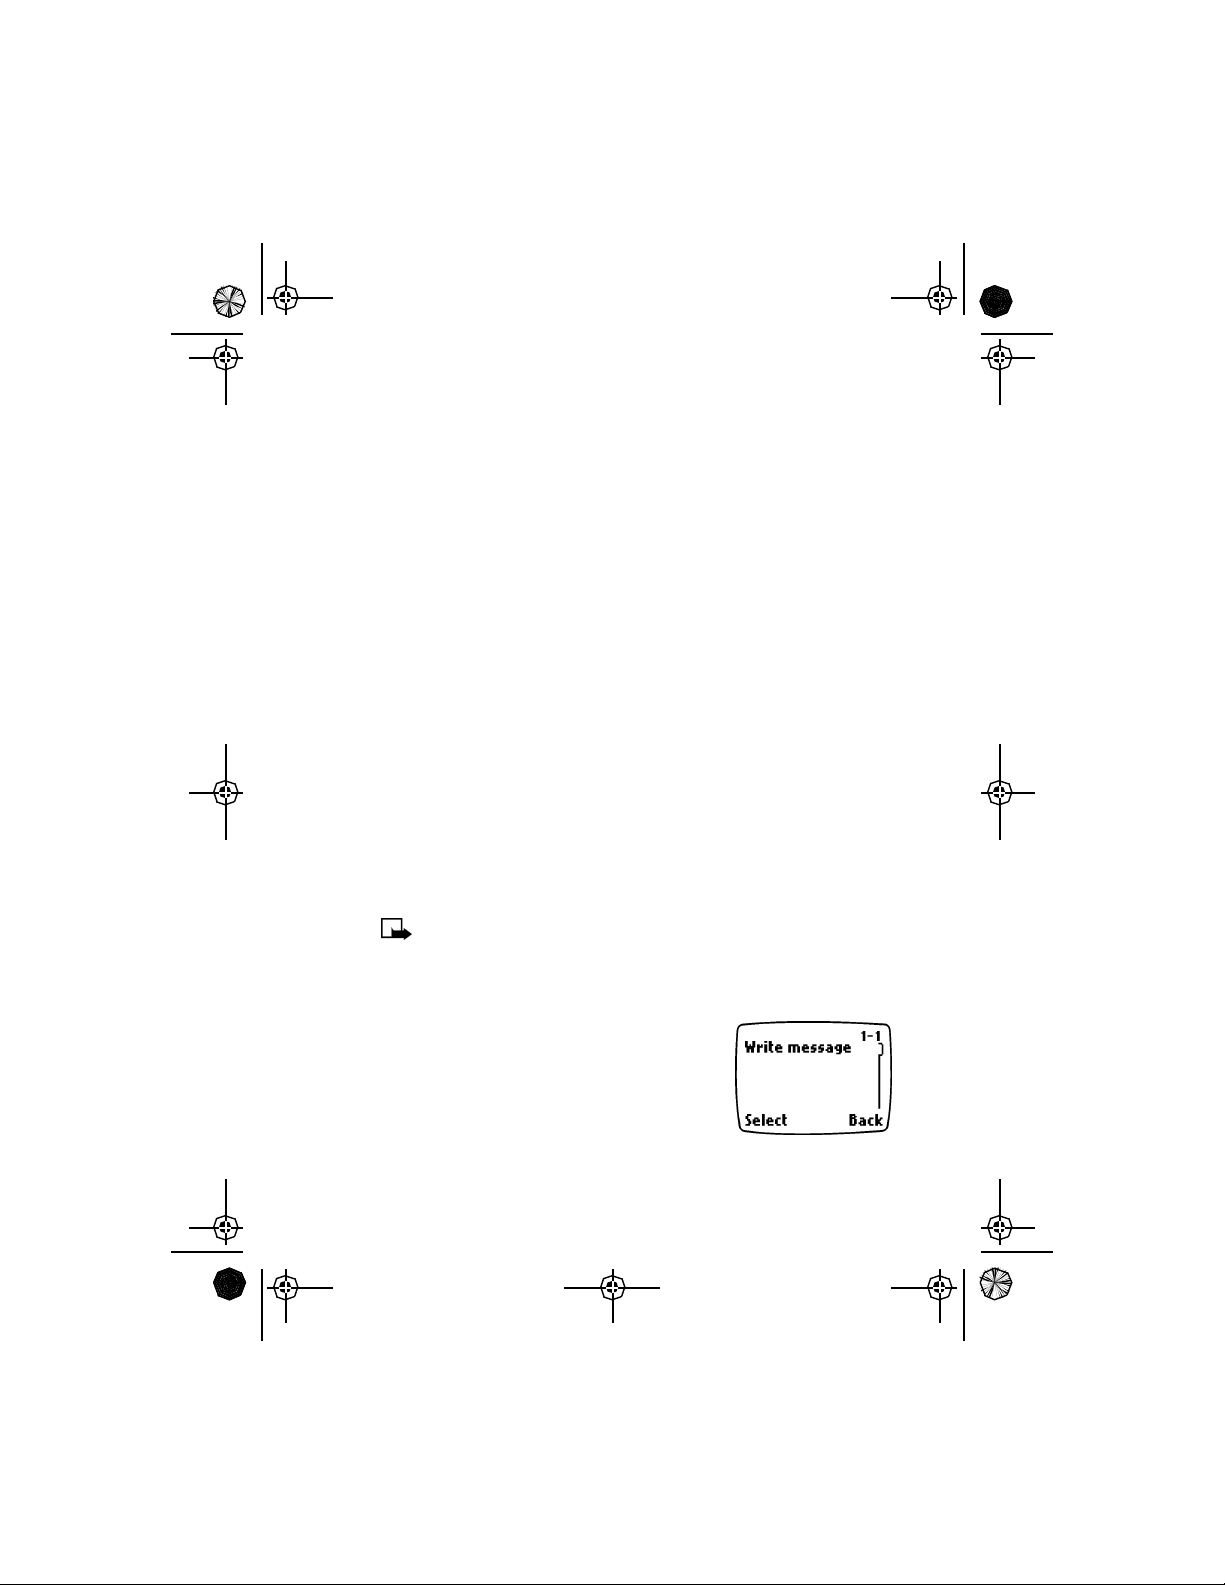
1 Press Menu, then press Select.
2 Scroll to Write message, then press Select.
3 Press Options, scroll to Predictive text , then press Select.
4 Scroll to the language you want, then press Select.
T9 prediction on appears.
[ 34 ]
Page 41

EN1220.2_Sept_02.book Page 35 Friday, September 6, 2002 2:19 PM
Turn off predictive text input
1 While writing a text message, press Options.
2 Scroll to Predictive text , then press Select.
3 Scroll to Prediction off, then press Select.
T9 prediction off appears.
Tip: Press to turn predictive text on and off.
Save a word in the dictionary
If the word Options changes to Spell, the word you intended to write is
not in the dictionary. You can add the word to predictive text.
1 Press Spell and enter the word(s) using standard text entry.
2 Press OK to save the word(s).
Enter numbers
1 To add a number to the message, press and hold until
appears on the screen.
2 Enter the numbers you want, then press and hold to return to
the method.
Note: You can also enter numbers from the Options menu (Insert
number), or by a long press of the number key.
Text entry
Enter punctuation and special characters
There are two ways to enter punctuation when using predictive text.
Press and hold to access the special characters list. See “Use special
characters” on page33 for more information.
You can also enter symbols from the Options menu:
1 From the message screen, press Options.
2 Scroll to Insert symbol and press Select.
3 Scroll to the symbol you want and press Insert.
[ 35 ]
Page 42

EN1220.2_Sept_02.book Page 36 Friday, September 6, 2002 2:19 PM
Change the case
Predictive text uses sentence case, but you can manually change between
upper and lower case by pressing .
Tip: You can switch between uppercase and lowercase standard
text input and uppercase and lowercase predictive text input by
repeatedly pressing .
Write compound words
1 Write the first part of the word and press
to accept it.
2 Write the last part of the compound word
and press to enter the word and a
space.
Clear the screen
To clear the text screen, press and hold (Clear). You can also use the
Options menu by selecting the Clear text option.
Delete information
To delete information when using predictive text, press (Clear). Press
and hold the clear key to delete text more quickly.
[ 36 ]
Page 43

EN1220.2_Sept_02.book Page 37 Friday, September 6, 2002 2:19 PM
5 Phone book
Your phone includes a phone book that
can store a maximum of 200 entries
(names and associated phone
numbers). In addition, the phone book
can store an e-mail address for a
name.
• An entry in the phone book can
consist of a number only or a name and a number.
• You cannot enter the same name twice. If you try to save a name that
is already in the phone book, the phone asks if you want to replace
the existing name.
• USE PHONE BOOK MENUS
The phone book has several menus from which you can choose. These menus
appear when you press Names. Use the scroll keys to move to the menu
you want to use.
Find Allows you to search for a specific entry.
Phone book
Phone book
Add new Allows you to add a new contact to your phone
book.
Erase all Allows you to erase names and numbers one by one
or all at once.
Options Takes you to a new menu list which includes the
phone book’s memory status and scrolling view.
1-touch dialing Allows you to assign up to eight keys for speed
dialing.
[ 37 ]
Page 44

EN1220.2_Sept_02.book Page 38 Friday, September 6, 2002 2:19 PM
• SAVE NAMES, NUMBERS AND E-MAIL ADDRESSES
For information on entering text, see “Standard text input” on page30.
Quickly save a name and number
This method is called quick save.
1 Enter the phone number using the keypad.
2 Press Save.
3 Enter a name and press OK.
Save an entry using the phone book menu
1 Press Names to enter the phone book.
2 Scroll to Add new and press Select.
3 Enter a name and press OK.
4 Enter a number and press OK.
Save an e-mail address
Once you have added a contact to your phone book, you can add an email address to that contact.
Note: E-mail addresses can only be added to existing contacts.
For instance, you cannot enter an e-mail address until you
have selected a name or number.
1 Find the name to which you want to add an e-mail address.
2 Press Details, then press Options.
3 Scroll to E-mail address, then press Select.
4 Enter the e-mail address, and press OK.
Important:If you have selected the Name+number phone book
view, you will not need to press Details.
[ 38 ]
Page 45

EN1220.2_Sept_02.book Page 39 Friday, September 6, 2002 2:19 PM
• RECALL NAMES AND NUMBERS
1 At the Start screen, press Names.
2 Select Find and enter one or two letters of name you want to recall.
3 Press OK, then press to dial the number.
You may have to scroll to the appropriate entry in a list if you have
stored names that are similar to each other.
Recall information with shortcuts
You may want to use some of these shortcuts, or alternate methods for
recalling a number.
• Press Names, enter the first letter of the name, scroll to the name, and
press to dial the number.
• At the Start screen, press the scroll keys to enter your list of names,
scroll to the name you want to dial, and press .
• Press to access a list of your last ten dialed calls, scroll to the one
you want to dial, then press again.
• EDIT A NAME OR NUMBER
You can edit a name, a number, or both.
1 Recall the name or number you wish to edit.
2 Press Details, then press Options.
3 Scroll to Edit and press Select.
4 Edit the name or number and press OK.
Important: If you have selected the Name+number phone book
view, you will not need to press Details.
Phone book
[ 39 ]
Page 46

EN1220.2_Sept_02.book Page 40 Friday, September 6, 2002 2:19 PM
• ERASE NAMES AND NUMBERS
Erasing stored names and numbers removes them from your phone.
Once you erase an item, you can restore it only by re-entering it.
Individual entries
1 Recall the phone book entry you want to erase.
2 Press Details, then press Options.
3 Scroll to Erase, and press Select.
The message Erase? appears.
4 Press OK.
Important: If you have selected the Name+number phone book
view, you will not need to press Details.
Entire contents
1 Press Names, scroll to Erase all, and press Select.
2 Scroll to Erase all and press Select.
3 When you see the message Are you sure?, press OK.
4 Enter your security code and press OK.
For information on your security code, see “Understand the
security code” on page83.
• CUSTOMIZE YOUR PHONE BOOK VIEW
You can change how the information in your phone book looks on your
screen. There are three different ways to view your phone book. In all
views, you can use the scroll keys to move up and down through the list
of names.
[ 40 ]
Page 47

EN1220.2_Sept_02.book Page 41 Friday, September 6, 2002 2:19 PM
Choice What it does
Name list Displays three names on the screen at a time.
Name+number Only one name and its corresponding number appears
on the screen at a time.
Name only Displays individual names only. You can view the
corresponding phone number by pressing Details and
then scrolling up or down.
Select your scrolling view
To change the way you view names and numbers in your phone book:
1 Press Names.
2 Scroll to Options and press Select.
3 At Phone book view, press Select.
4 Scroll to the view you want and press Select.
Important: If you have selected the Name+number phone book
view, you will not need to press Details when working with phone
book options.
Phone book
• CHECK MEMORY STATUS
You can check how much of your phone book’s memory is free and how
much has been used.
1 Press Names and scroll to Options.
2 Press Select.
3 Scroll to Memory status and press Select.
[ 41 ]
Page 48

EN1220.2_Sept_02.book Page 42 Friday, September 6, 2002 2:19 PM
6 Call log
Your phone provides a call log that registers
information about calls you make and receive.
The call log keeps track of the following:
• Missed calls
• Received calls
• Dialed calls
Note: This function only works in digital networks and only when
caller ID is enabled.
• CALL LOG OPTIONS
When you view the missed calls, received calls, or dialed calls list and
press Options, the following choices may appear.
Note: Not all options will appear each time. Also, the order of
options may vary.
Choice What it does
Call time
Send message
Edit number
Save
Erase Allows you to delete the number from the call list.
Shows the time when the call was connected. (You
must first set the phone’s clock)
Allows you to write a short text message to the
person who called you or to whom you called.
Allows you to edit the displayed number and save it
with a name to your phone book.
Allows you to enter a name for the number and save
both to your phone book.
[ 42 ]
Page 49
EN1220.2_Sept_02.book Page 43 Friday, September 6, 2002 2:19 PM
Choice What it does
View number Allows you to view the number.
Call Dials the number from the call log.
• CHECK MISSED CALLS
If you do not answer a call, the message Missed calls appears on your
phone’s screen, along with the number of calls missed. Your phone stores
the last ten numbers associated with calls you have missed.
To check missed calls:
1 Press Menu 2-1 (Menu > Call log > Missed calls).
2 The phone displays a list of the numbers of the calls you missed.
3 Press or to scroll through the list.
4 Press if you want to dial the number.
• CHECK RECEIVED CALLS
Your phone stores the last ten numbers associated with calls that you
have answered. To check this list of numbers:
1 Press Menu 2-2 (Menu > Call log > Received calls ).
2 Scroll through the list of received numbers and highlight your
selection.
3 Press if you want to dial the number.
Call log
[ 43 ]
Page 50

EN1220.2_Sept_02.book Page 44 Friday, September 6, 2002 2:19 PM
• CHECK DIALED CALLS
Your phone stores the last ten numbers associated with calls that you
have dialed. To check this list of numbers:
1 Press Menu 2-3 (Menu > Call log > Dialed calls ).
2 Scroll through the list of dialed numbers and highlight your selection.
3 Press if you want to dial the number.
Clear call lists
Your phone uses call lists to track numbers for incoming, outgoing, and
missed calls. You can erase some or all of the numbers that appear in the
call log.
Caution: You cannot undo this operation.
1 Press Menu 2-4 (Menu > Call log > Clear call lists).
2 Use or to scroll through the options list.
The list includes: All, Missed, Received, and Dialed.
3 Stop at the appropriate option and press Select.
The All option clears every number in every list, whereas the other
options clear only the numbers associated with that option. For example,
the Dialed option clears only the numbers associated with calls you
previously dialed.
[ 44 ]
Page 51

EN1220.2_Sept_02.book Page 45 Friday, September 6, 2002 2:19 PM
• USE CALL TIMERS
Your phone tracks the amount of time you spend
on each call. To obtain information about time
spent on phone calls:
1 Press Menu 2-5 (Menu > Call log > Call
timers).
2 Scroll through the options described below:
Option What it does
Call log
Duration of
last call
Duration of
all calls
Clear timers Clears all call timers for the currently selected phone
Note: The actual time invoiced for calls by your service provider
may vary, depending upon network features, rounding-off for
billing, and so forth.
Caution: If you select the Clear timers option, the action cannot
be undone. If you use the call timers to log the amount of time
spent on calls, you may want to record the information in the call
timers before you clear them.
Shows the call duration of the last call.
Shows the call duration of all calls that have been
made and received since you reset the timers.
number. Your phone includes separate timers for each
number used.
[ 45 ]
Page 52

EN1220.2_Sept_02.book Page 46 Friday, September 6, 2002 2:19 PM
Clear call timers
1 Press Menu 2-5-3 (Menu > Call log > Call timers > Clear timers).
The Security code box appears.
2 Enter your security code and press OK.
For information on your security code, see “Understand the
security code” on page83.
Turn on a current call timer
You can set your phone to show the running elapsed time while a call
is active.
1 Press Menu 4-2-2 (Menu > Settings > Call settings > Current
call timer ).
2 Scroll to On and press Select.
From this point on, the timer is active during each call you make or
receive. The time appears on the phone’s screen.
3 After a call has ended, press any key on the phone’s keypad to clear
the current call time from the screen.
[ 46 ]
Page 53
EN1220.2_Sept_02.book Page 47 Friday, September 6, 2002 2:19 PM
7 Messages
You can use mobile messages to keep in touch
with friends, family and business associates.
Your phone allows you to do the following:
• Voice mail
• Send and receive text messages
• Send and receive picture messages
• Communicate with e-mail
Not all messaging features are available in all wireless networks. Contact
your service provider for availability and subscription information.
• VOICE MAIL
Voice mail provides a way for callers who miss
you to leave a message that you can retrieve
later. To use voice mail, you must sign up for the
feature with your wireless service provider.
Check for messages
Your phone beeps when you receive a voice
message. Also, the message New voice message appears on your phone’s
screen, along with the icon.
If you receive more than one voice mail message, your phone may show the
number of messages that you have received. The wireless network
provider determines the type of indication you will receive.
Note: To use voice mail, you need to learn the voice mail system’s
various greetings, passwords, and prompts. Your service provider
can provide instructions.
Messages
[ 47 ]
Page 54

EN1220.2_Sept_02.book Page 48 Friday, September 6, 2002 2:19 PM
Save the voice mailbox number
As part of your network’s voice mail feature, your service provider gives
you a voice mailbox phone number. Save this number in your phone to
make getting your voice messages quick and convenient.
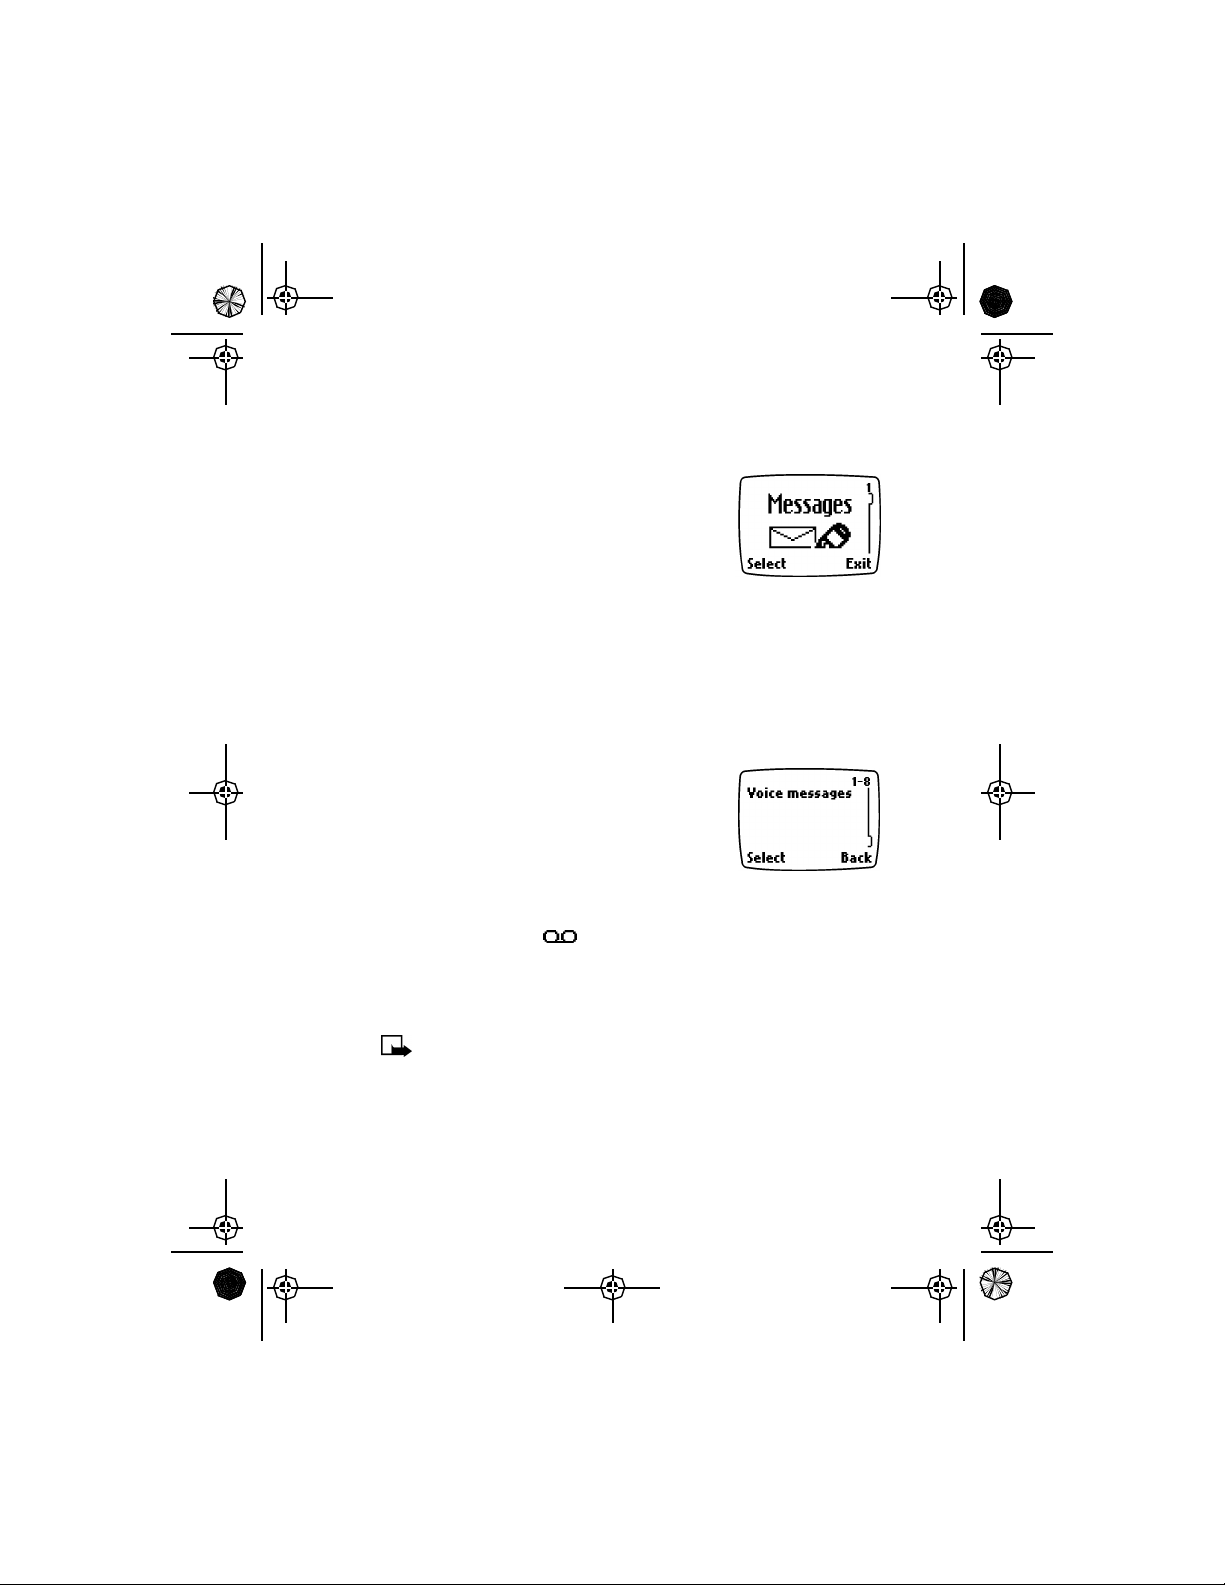
1 Press Menu 1-8-2 (Menu > Messages > Voice messages > Voice
mailbox number ).
2 Enter your voice mailbox phone number.
3 Press OK.
Your voice mailbox number can be up to 32 digits long and is used until
you change it. Therefore, if your phone number changes, the voice mail
number will probably change also. For further information, contact your
service provider.
Listen to your voice messages
The way you listen to your voice messages depends on your service provider.
Call your service provider if you have any questions.
1 When your phone alerts you to new voice messages, press Listen and
follow the instructions given on the phone.
2 If you’d rather listen to your messages later, press Exit.
3 To listen to your voice messages:
Press and hold .
OR
Press Menu 1-8-1 (Menu > Messages > Voice messages > Listen to
voice messages).
Follow the prompts to review your messages.
[ 48 ]
Page 55

EN1220.2_Sept_02.book Page 49 Friday, September 6, 2002 2:19 PM
• TEXT, E-MAIL AND PICTURE MESSAGES
Your phone is capable of a variety of messaging services including text
messages (SMS or Short Message Service), picture messages, and e-mail
messages. Messaging services are network dependent features. Consult
your service provider for information.
Understand messaging
Message recipients: The phone to which you send a text message must
support text messages. The recipient may not receive the SMS text message
you send if the recipient’s account is with a different service provider or
of a different protocol.
Message length: The maximum length of a sent or received message is
160 characters. Your phone has space for several messages, depending on
the length of each message. The maximum length of a message also may
depend on the capabilities of the network from which the message
originated.
Options when working with messages
There are several options available when working with text, picture and
e-mail messages. The order and availability of options may vary
depending on the messaging function and your service provider.
Messages
Option Description
Send Attempts to send the text message to the recipient.
Settings Allows you to set Urgent, Read receipt, Reply req.,
and Callback no. options for the message.
Save Saves the message in the archive folder.
Clear text Clears the text in the message editor.
Exit editor Takes you back to the Write message menu.
Predictive text Allows you to turn predictive text on and off.
Insert word If predictive text (T9) is activated, you can manually
spell a word and insert it into your message.
[ 49 ]
Page 56
EN1220.2_Sept_02.book Page 50 Friday, September 6, 2002 2:19 PM
Insert number Allows you to insert numbers into the message.
Insert symbol Allows you to access the list of special characters.
Matches Lists alternative word choices while using
predictive text.
Details Available when viewing a picture message. This
option allows you to view the name and number of
the sender.
Preview Previews your picture message before sending.
Edit text Allows you to add text to a picture message.
Erase Allows you to erase a picture message.
Forward Allows you to forward a picture message.
Use number Allows you to use the number associated with a
picture message.
Edit recipient Allows you to edit the e-mail address.
Edit subject Allows you to edit the subject of an e-mail
message.
Tip: When writing messages, you can switch between uppercase
and lowercase standard text input and uppercase and lowercase
predictive text input by repeatedly pressing .
Organize messages using folders
Your phone has folders for managing text messages. Text message folders
are located under the Messages menu.
THE INBOX FOLDER
The inbox stores messages you receive. Messages remain in the inbox until
you delete them or save them in the archive folder. You can forward or
reply to messages in your inbox.
[ 50 ]
Page 57
EN1220.2_Sept_02.book Page 51 Friday, September 6, 2002 2:19 PM
THE OUTBOX FOLDER
The outbox stores messages you have written, sent, edited and forwarded.
Messages in the outbox are not saved messages. As you send new
messages, old messages will automatically be removed from the outbox.
If you want to save a message you have sent, read the message while it is
in the outbox and use the options menu to save it to the archive folder.
THE ARCHIVE FOLDER
The archive folder stores messages you have saved. You can save
messages to the archive folder from the inbox and the outbox. You can
reply to or forward saved messages.
ERASE MESSAGES FROM FOLDERS
You can erase all messages located within a specific folder.
1 Press Menu 1-6 (Menu > Messages > Erase all).
2 Scroll to one of the following options, then press Select.
All read
Inbox
Archive
Outbox
3 Enter your security code, then press OK.
Note: For information on your security code, see “Understand the
security code” on page83.
Messages
• TEXT MESSAGES
You can use your phone to send and receive
short text messages if your service provider
offers the message feature and if you subscribe to
the service.
[ 51 ]
Page 58

EN1220.2_Sept_02.book Page 52 Friday, September 6, 2002 2:19 PM
Write and send a text message
When writing text messages, use the predictive text method for faster
text entry. For details, see “Write with predictive text” on page34.
1 Press Menu, select Messages, then select Write message.
The message screen appears.
2 Enter a message of up to 160 characters.
A counter in the upper right corner of the screen shows the number
of characters remaining.
3 When you’ve finished writing the message, press Options, scroll to
Send, then press Select.
4 Enter or recall the recipient’s phone number, then press Send.
Sending message appears.
Note: When sending messages via the SMS network service, your
phone may display the words “Message Sent ”. This is an indication
that the message has been sent by your phone to the message
center number programmed into your phone. This is not an
indication that the message has been received at the intended
destination. For more details about SMS services, check with your
service provider.
Read a text message
When you receive a text message, the phone beeps and displays Message
received and the indicator in the upper left corner of the screen.
1 Press Read to view the message.
2 Use the scroll keys to view the whole message, if necessary.
3 Once you’ve finished, press to return to the Start screen, or press
Options for other choices, such as Reply or Forward.
When the phone displays Message received, pressing Exit moves the new
message to the inbox, and returns you to the Start screen. To read the
message later, press Menu 1-3 (Menu > Messages > Inbox ). If you have
[ 52 ]
Page 59

EN1220.2_Sept_02.book Page 53 Friday, September 6, 2002 2:19 PM
more than one new message, scroll to the message you want to view.
Messages in the inbox are listed in the order they are received, with the
most recent message listed first. Unread messages are indicated by .
Respond to a text message
There are many options available for working with text messages. For a
list of options and their descriptions, see “Options when working with
messages” on page49.
REPLY TO THE MESSAGE
1 When reading the message, press Options.
2 Scroll to Reply, then press Select.
3 Choose to reply As message or As e-mail, then press Select.
When replying as e-mail, see “Send an e-mail message” on page56.
When replying as message, see “Write and send a text message” on
page52.
FORWARD THE MESSAGE
1 When reading the message, press Options.
2 Scroll to Forward, then press Select.
3 Choose to forward As message or As e-mail, then press Select.
When forwarding as e-mail, see “Send an e-mail message” on
page56. When forwarding as message, see “Write and send a text
message” on page52.
Messages
SAVE A MESSAGE
1 When reading the message, press Options.
2 Scroll to Save, then press Select.
The message will be moved to the archive folder.
[ 53 ]
Page 60

EN1220.2_Sept_02.book Page 54 Friday, September 6, 2002 2:19 PM
ERASE A MESSAGE
1 When reading the message, press Options.
2 Scroll to Erase, the press Select.
3 Erase message? appears, press OK.
WHEN YOUR MEMORY IS FULL
When your phone’s message memory is full, one or more messages of the
lowest priority are automatically deleted. When you receive an emergency
message, messages may be deleted from any of your message folders.
If you have more messages waiting at the network, blinks on the
Start screen. You can erase old messages to create space for new
messages.
• PICTURE MESSAGES
Your phone offers five picture messages that
you can use to send pictures and text to your
friends and family. You can also save a new
picture by replacing an existing picture. For
possible message options, see “Options when
working with messages” on page49.
Each picture message is made up of several text messages. Therefore,
sending one picture message may cost more than sending one text
message. Contact your service provider for pricing information.
Note: This function can be used only if it is supported by your
network operator or service provider. Only phones that offer
picture message features can receive and display picture messages.
Note: The actual invoice for calls and services from your service
provider may vary, depending upon network features, rounding-off
for billing, taxes, and so forth.
[ 54 ]
Page 61

EN1220.2_Sept_02.book Page 55 Friday, September 6, 2002 2:19 PM
Send a picture message
1 Press Menu 1-7 (Menu > Messages > Picture Messages).
2 Scroll to the picture you want to send. Press Show.
The picture appears. To choose a different picture, press Back and
scroll to another picture.
3 Press Options and scroll to Edit text. Add a text message to send with
the picture.
After you enter the text, you have several options. To view a list of
possible options, see “Options when working with messages” on
page49.
4 To send the picture and message, press Options.
5 Scroll to Send, then press Select.
6 Enter or recall the recipient’s phone number, then press Send.
Sending message appears.
PREVIEW A PICTURE MESSAGE BEFORE SENDING
After writing text for your picture message, you can preview the message
before sending it.
1 Press Options.
2 Scroll to Preview, then press Select.
3 After viewing the message, press Back.
Messages
Receive a picture message
1 When your phone displays Picture message received, press Show and
the message appears.
2 If the picture has a text message with it, scroll up or down to see the
entire message.
[ 55 ]
Page 62

EN1220.2_Sept_02.book Page 56 Friday, September 6, 2002 2:19 PM
Save a picture message
1 Press Show to view the message.
2 Press Save.
You will have the option to replace a current message.
3 Scroll to the picture you want to erase, then press Replace.
• E-MAIL MESSAGES
You can send e-mail up to 160 characters in
length to anyone with an
e-mail address.
• Messages sent to you by e-mail arrive as
regular text messages. You can use all the
options described earlier to save, reply to, or
forward a message.
• Contact your service provider to get the e-mail address and gateway
number for your phone, and for more information on using e-mail.
Send an e-mail message
1 Press Menu 1-2 (Menu > Messages > Write e-mail).
Note: If you get a prompt asking you to enter your e-mail gateway
number, you must obtain this number from your service provider.
2 At the prompt, enter your recipient’s e-mail address or press Find to
look through and select a saved e-mail address from your phone list.
Press OK.
3 At the prompt, enter a subject for your e-mail message. (You are not
required to enter a subject.) Press OK when you are finished.
Note: Predictive text is not available when entering an e-mail
address or a subject line for your e-mail.
[ 56 ]
Page 63

EN1220.2_Sept_02.book Page 57 Friday, September 6, 2002 2:19 PM
4 A screen will appear allowing you to enter the text of your message.
Your total message, including the address and subject line, can be up
to 160 characters. There is a running total of remaining characters in
the top right corner of the screen.
5 After you finish entering the text of your e-mail, press Options and
scroll to Send, then press Select.
Receive an e-mail message
When you receive an e-mail message, the phone makes a sound and
displays Message received and the indicator in the upper left corner
of the screen.
To read the message, press Read.
When reading a received e-mail message, you can choose other options,
such as Reply and Forward. See “Options when working with messages”
on page49.
Edit an existing e-mail message
You can edit an e-mail message by replying to the message or forwarding
it. You can edit messages from any folder.
Reply to an e-mail message
1 When reading the message, press Options.
2 Scroll to Reply, then press Select.
3 Choose to reply As message or As e-mail, then press Select.
When replying as e-mail, see “Send an e-mail message” on page56. When
replying as message, see “Write and send a text message” on page52.
Messages
[ 57 ]
Page 64

EN1220.2_Sept_02.book Page 58 Friday, September 6, 2002 2:19 PM
Forward an e-mail message
1 When reading the message, press Options.
2 Scroll to Forward, then press Select.
3 Choose to forward As message or As e-mail, then press Select.
When forwarding as e-mail, see “Send an e-mail message” on page56.
When forwarding as a message, see “Write and send a text message” on
page52.
[ 58 ]
Page 65

EN1220.2_Sept_02.book Page 59 Friday, September 6, 2002 2:19 PM
8 Personalization
The Nokia 1200 series can be easily customized to fit your lifestyle. The
display language, ringing tones, audio, and accessory settings (among
others) can all be modified to suit your needs.
Your phone has various profiles which allow you to customize ringing and
alert tones for different environments. Once you modify the profiles, you
can activate the profile that is appropriate for your surroundings. For
example, you can select the Silent profile while at the movies or select
the Outdoor profile when at a sporting event.
• PROFILES
Profiles let you set your phone’s sound settings to
match your environment, whether it’s a meeting or
a soccer game. Just pick the profile that suits your
current environment: Normal, Silent, Meeting,
Outdoor or Pager.
You can customize any of the profiles and set your
own preferences for the following settings:
• Ringing options
• Ringing tone
• Ringing volume
• Message alert tone
• Keypad tones
• Warning tones
• Profile name (not available in the Normal profile)
Important: You can select a default profile for each of these
accessories: Headset, Handsfree and Loopset. To learn more about
accessories, see “Accessory settings” on page63.
Personalization
[ 59 ]
Page 66

EN1220.2_Sept_02.book Page 60 Friday, September 6, 2002 2:19 PM
Select a profile
1 Quickly press and release the Power key.
2 Use and to move to the profile you want to use.
Profile names are highlighted as you scroll through them.
3 Press Select to activate a profile.
Customize a profile
1 Press Menu 3 (Profiles).
2 Scroll to the profile you want to customize, then press Options.
3 Scroll to Customize, then press Select.
4 Use the scroll keys to display each of the profile options. Once you
find the option you’d like to customize, press Select.
SET THE RINGING OPTIONS
You can choose the type of ring your phone uses to notify you of an incoming
call. This setting does not affect any incoming text message alert tones.
1 Press Menu 3 (Menu > Profiles ).
Your phone lists each profile.
2 Use or to scroll to the desired profile in the list for which
you want to set the ringing options, and press Options.
3 Scroll to Customize and press Select.
4 Scroll to Ringing options and press Select.
5 Scroll to one of the ringing options, as described below, and press
Select.
Ring The phone rings normally.
Ascending
Ring once The phone rings once to indicate an incoming call.
Ringing volume increases (gets louder) if the phone
is not answered.
[ 60 ]
Page 67

EN1220.2_Sept_02.book Page 61 Friday, September 6, 2002 2:19 PM
Beep once The phone beeps once to indicate an incoming call.
Silent The phone makes no sound.
SET THE RINGING TONE
The ringing tone is the sound your phone makes when you receive a call.
You can set the ringing tone to a specific sound or tune to personalize how
the phone rings.
1 Press Menu 3 (Menu > Profiles ).
Your phone lists each profile.
2 Use or to scroll to the profile for which you want to set
the ringing tone.
3 Press Options.
4 Scroll to Customize and press Select.
5 Scroll to Ringing tone and press Select.
6 Scroll through the options, and when you hear the tone you want to
use, press Select.
Note: If you have already chosen a ringing option of either Silent
or Beep once , the ringing tones are already turned off. See “Set the
ringing options” on page60 for details.
Note: As you scroll through the ringing tones, you can listen to a
sample of each if your current ringing option is not set to Silent.
Personalization
SET THE RINGING VOLUME
You can set the default ringing volume for incoming voice calls and message
alert tones.
1 Press Menu 3 (Menu > Profiles ).
2 Use or to scroll to the profile you will set, and press
Options.
3 Highlight Customize and press Select.
[ 61 ]
Page 68

EN1220.2_Sept_02.book Page 62 Friday, September 6, 2002 2:19 PM
4 Scroll to Ringing volume and press Select.
5 Scroll through the options. When you hear the right volume level,
press Select.
SET THE MESSAGE ALERT TONE
You can set your phone to use a certain tone to indicate an incoming text
message.
1 Press Menu 3 (Menu > Profiles ).
2 Use or to scroll to the profile for which you want to set
the message alert tone, and press Options.
3 Select Customize and press Select.
4 Scroll to Message alert tone, then press Select.
5 Use or to scroll through your choices.
The phone plays samples of each choice as you scroll to it.
6 When you find the tone you want, press Select.
SET KEYPAD TONES
Keypad tones set the volume of the tone you hear when you press your
phone’s keys.
1 Press Menu 3 (Menu > Profiles ).
2 Use or to scroll to the profile for which you want to set
the keypad tones, and press Options.
3 Select Customize and press Select.
4 Scroll to Keypad tones and press Select.
5 Use or to scroll to one of the levels and press Select.
• If you choose Off, no keypad tones are heard.
• If you chose the Silent profile in step 2, the keypad tones are
turned off.
[ 62 ]
Page 69

EN1220.2_Sept_02.book Page 63 Friday, September 6, 2002 2:19 PM
SET THE WARNING TONES
Warning tones include the sounds your phone makes during error conditions,
during confirmations, when the battery is low, and when you need to
recharge the battery.
1 Press Menu 3 (Menu > Profiles ).
2 Use or to scroll to the profile for which you want to set
the warning tones, and press Options.
3 Select Customize and press Select.
4 Scroll to Warning tones, then press Select.
5 Scroll to On or Off and press Select.
Rename a profile
1 Press Menu 3 (Menu > Profiles ).
2 Use or to scroll to the desired profile and press Options.
3 Scroll to Customize, then press Select.
4 Scroll to Profile name, then press Select.
5 Enter the new name and press OK.
Note: You cannot rename the Normal profile.
Personalization
Accessory settings
You can use your phone with these Nokia accessories:
• Headset (HDC-5, HDE-2, HDB-5)
• Handsfree Car kit (CARK125 and PPH-1)
• Loopset (LPS-3)
• TTY/TDD Adapter (HDA-9)
Note: You can select a default profile that will be associated with
each accessory, such as Normal. However, the Accessory settings
menu will not appear until after an accessory has been connected
to the phone at least once.
[ 63 ]
Page 70

EN1220.2_Sept_02.book Page 64 Friday, September 6, 2002 2:19 PM
SET UP THE LOOPSET
When you want to use the loopset, you will have to activate the accessory
setting.
1 Attach the loopset to the phone.
2 Press Menu 4-4-3 (Settings > Accessory settings > Loopset).
3 Scroll to Use loopset, then press Select.
4 Scroll to Yes, then press Select.
AUTOMATIC ANSWER
This feature lets your phone answer incoming calls after just one ring
when an accessory is connected to the phone.
1 Press Menu 4-4 (Settings > Accessory settings).
2 Scroll to Headset, Handsfree, or Loopset, then press Select.
3 Scroll to Automatic answer, then press Select.
4 Scroll to On and press Select.
SET THE LIGHTS (CAR KIT ONLY)
When your phone is connected to a car kit, you have a choice of having
the phone lights on (a) continuously or (b) only when you use it.
1 Press Menu 4-4-2-3 (Menu > Settings > Accessory settings >
Handsfree > Lights).
2 Choose one of the following options, then press Select:
• On - The lights will remain on while the phone is connected to
the car kit.
• Automatic - The lights will turned on only when the phone is
being used.
[ 64 ]
Page 71
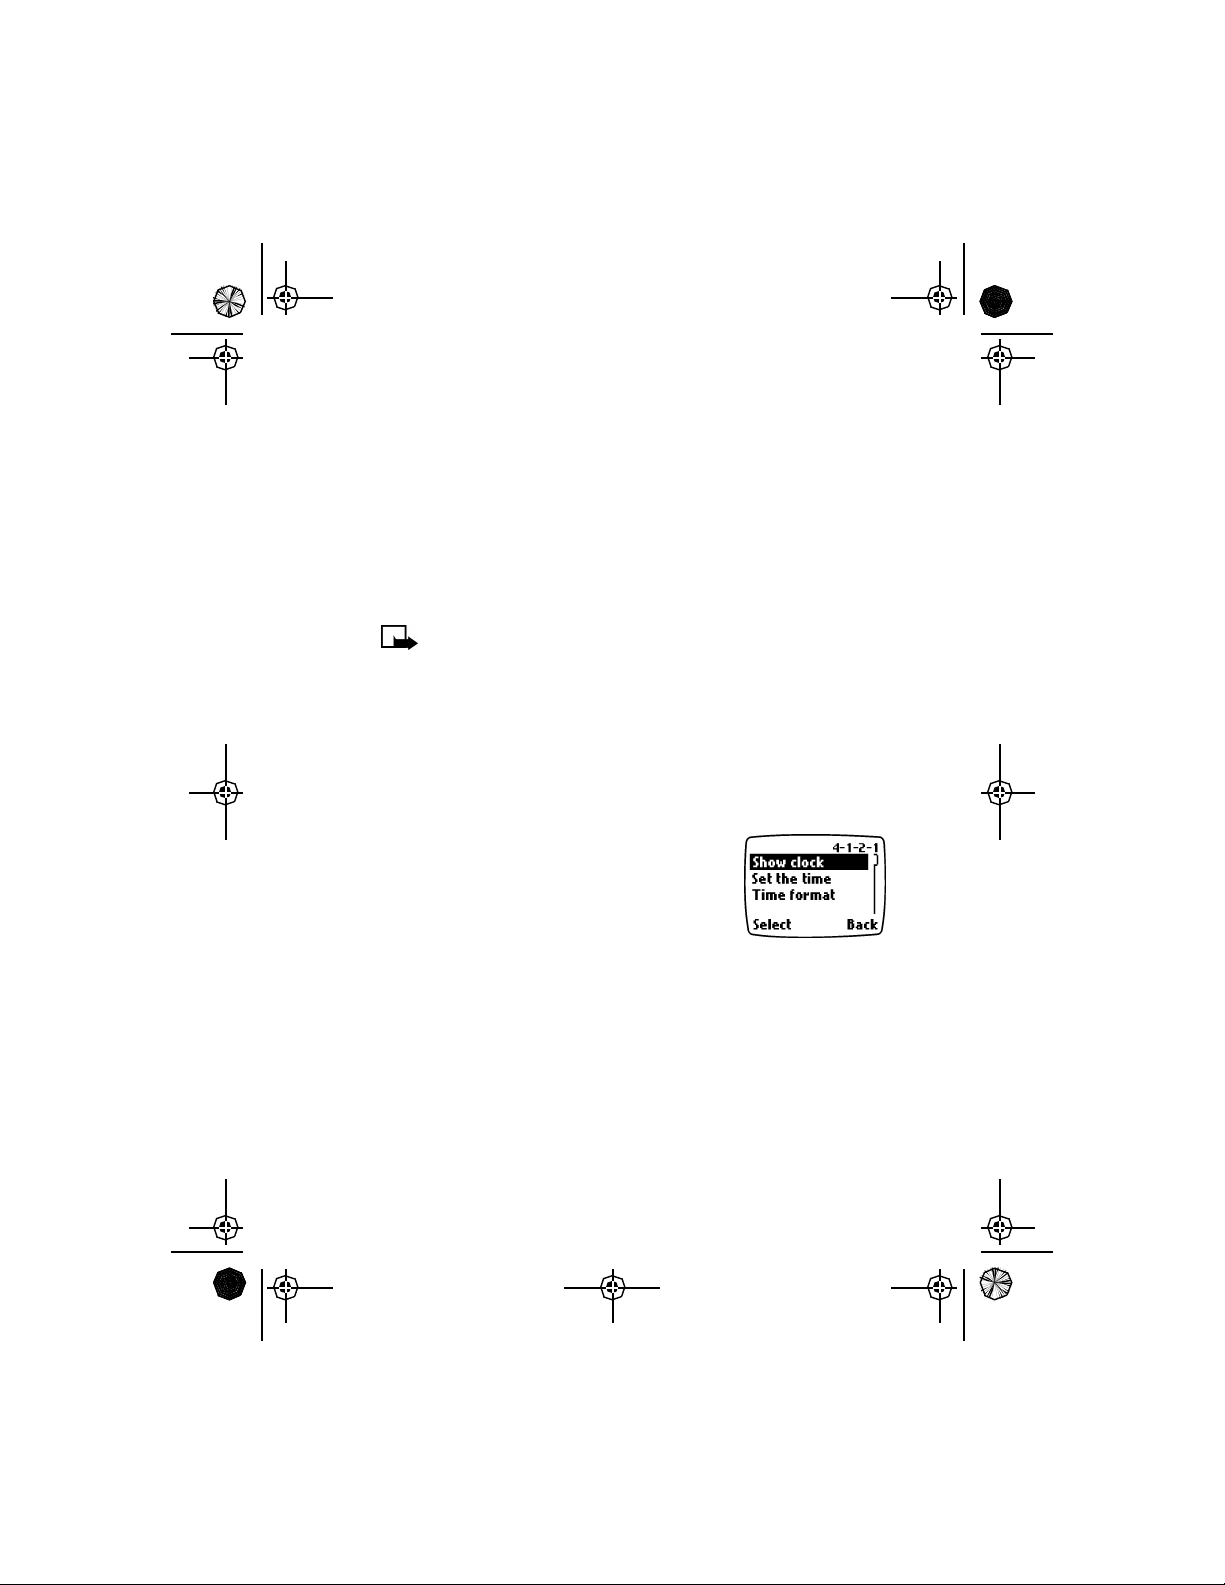
EN1220.2_Sept_02.book Page 65 Friday, September 6, 2002 2:19 PM
SET THE DEFAULT PROFILE
When you use the headset, car kit or loopset, you have the option of
selecting a default profile. You can use the currently selected profile (for
example, Normal) or you can choose from the list.
1 Press Menu 4-4 (Settings > Accessory settings).
2 Scroll to Headset, Handsfree or Loopset, then press Select.
3 Scroll to Default profile, then press Select.
4 Scroll to the profile you want, then press Select.
The Active profile uses the current profile setting you have
selected for your phone.
Set the display language
You can choose your phone’s display language.
1 Press Menu 4-3-1 (Settings > Phone settings > Language).
2 Scroll to the language you want, then press Select.
Set the clock
Your phone contains a real-time clock that can be
set two different ways: the clock can use the time
information provided by the wireless system, or it
can be set manually. Once the time is set, you can
display the clock on the Start screen.
For added convenience, the clock is connected to
an alarm clock. See “Use the alarm clock” on page86 for additional
information.
SELECT THE TIME FORMAT
You can choose whether your clock shows time in an am/pm format or a
24-hour format.
1 Press Menu 4-1-2-3 (Menu > Settings > Time settings > Clock >
Time format ).
2 Scroll to 24-hour or am/pm and press Select.
Personalization
[ 65 ]
Page 72

EN1220.2_Sept_02.book Page 66 Friday, September 6, 2002 2:19 PM
SET THE CLOCK USING AM/PM FORMAT
1 Press Menu 4-1-2-2 (Menu > Settings > Time settings > Clock >
Set the time).
2 Enter the time using an hh:mm format and press OK.
For example, to set your clock to 8:40, enter 08:40.
3 Scroll to am or pm and press OK.
SET THE CLOCK USING 24-HOUR FORMAT
1 Press Menu 4-1-2-2 (Menu > Settings > TIme settings > Clock >
Set the time).
2 Enter the time using an hh:mm format and press OK.
For example, to set your clock to 8:40, enter 08:40 (for am) or 20:40
(for pm).
3 Press OK.
Automatic update of time
You can set your phone to update the time from the network when you
turn the phone on. If the clock in your phone is 30 seconds or more off
the network time, the phone will automatically update to reflect the
network time.
Note: Auto update time is a network dependent feature. Contact
your service provider for details and availability.
1 Press Menu 4-1-3 (Settings > Phone settings > Auto update of
time).
2 Scroll to one of the following options, then press Select.
• On: Updates the time automatically.
• Confirm first : Requires you to confirm that you want the update.
You can accept or decline the update.
• Off: Prevents the time from being automatically updated.
[ 66 ]
Page 73

EN1220.2_Sept_02.book Page 67 Friday, September 6, 2002 2:19 PM
Display the clock
1 Press Menu 4-1-2 (Settings > Time settings > Clock).
2 Scroll to Hide clock or Show clock (only one choice appears,
depending on the current setting).
3 Press Select.
Add a welcome note
You can add a welcome note that your phone displays briefly each time
you turn it on.
1 Press Menu 4-3-3 (Settings > Phone settings > Welcome note ).
2 Enter a note, then press Options.
3 Scroll to Save, then press Select.
To erase the welcome note, follow steps 1-2, scroll to Erase, then
press Select.
Restore factory settings
If you have made changes to your phone’s profiles (settings), you can
restore them to their original or factory settings. The memory, timers,
language selection, and security code are not reset. However, profile and
accessory settings are reset.
1 Press Menu 4-3-4 (Menu > Settings > Phone settings > Restore
factory settings).
2 At the prompt, enter your five-digit security code and press OK.
Personalization
[ 67 ]
Page 74

EN1220.2_Sept_02.book Page 68 Friday, September 6, 2002 2:19 PM
9 Advanced calling features
This chapter covers advanced calling features, including:
• Options available while in an call.
• Managing two calls at the same time.
• Network services such as call forwarding
Not all features that are described are available in all wireless networks.
Contact your service provider for availability of network services.
• UNDERSTAND ACTIVE-CALL OPTIONS
Your phone allows you to use a number of
features during a call; however, you may not be
able to use all options at all times. Also, the order
of in-call options may vary.
Note: Many in-call options are network
dependent features. To use these options, you may need to contact
your service provider.
During a call, press Options to see the in-call menu choices:
Menu
Options
Lock keys Allows you to lock the phone’s keypad during a call.
Mute Mutes the phone’s microphone. This option can affect
the microphones of accessories connected to the
phone.
End all calls Ends all active calls.
Touch tones Sends touch tones.
What it does
[ 68 ]
Page 75

EN1220.2_Sept_02.book Page 69 Friday, September 6, 2002 2:19 PM
Advanced calling features
Menu
Options
New call Allows you to make a call while you have a call in
progress.
Menu Allows you to access the menus.
Names Allows you to access the phone book.
What it does
Access menus
You can access your phone’s menus while in a call.
1 Press Options.
2 Scroll to Menu, then press Select. To exit the menus, press Exit.
Note: Do not press the key to exit the menus or you will end
your call.
Make a new call
To make a new call while already in a call, dial the number, then press .
End all calls
Press the key.
Access the phone book
You can access information in the phone book during a call.
1 Press Options.
2 Scroll to Names, then press Select.
Save a name and/or number
You can save a name and number during a call.
1 Enter the number you want to save.
2 Press Options, scroll to Names, then press Select.
3 Scroll to Add new, then press Select. Add the name and number as
you normally would.
[ 69 ]
Page 76

EN1220.2_Sept_02.book Page 70 Friday, September 6, 2002 2:19 PM
Mute the phone’s microphone
While in a call, you can mute the phone’s microphone.
• Press Options, scroll to Mute, press Select.
OR
• Press (Mute).
Use conference call
While in a call, you can call another number to add a third party to the
call.
Note: Conference calling is a provider dependent feature. Contact
your service provider for availability and details.
CONFERENCE A CALL
1 While in a call, you can either dial the number you want to add and
press .
OR
Press Options, scroll to New call , press Select, enter the phone
number, and press OK.
2 When the third party answers, press to connect all three parties.
DISCONNECT THIRD PARTY
While all three parties are connected, pressing the key disconnects
the third caller, keeping the second party’s call active.
DISCONNECT SECOND PARTY
If you wish to disconnect with the second party and remain connected to
the third party, have the second party terminate the call on his/her end.
RECALL A NUMBER FROM THE PHONE BOOK DURING A CALL
If you don’t remember the number of the second party you want to
include in the conference and the number is in your phone book, you can
recall the number.
[ 70 ]
Page 77

EN1220.2_Sept_02.book Page 71 Friday, September 6, 2002 2:19 PM
1 When prompted to enter the phone number, press Find.
2 Locate the number in your phone book, then press Select. The number
will appear in the number prompt.
3 Press OK to call the number.
END A CONFERENCE CALL
To end all calls, press .
• USE VOICE PRIVACY
The voice privacy feature encrypts the voice channel so that people
cannot eavesdrop on your phone conversations.
Note: Voice privacy is a network dependent feature. Contact your
service provider for more information on this feature.
TURN VOICE PRIVACY ON/OFF
1 Press Menu 4-6-1 (Menu > Settings > Network services > Voice
privacy).
2 Scroll to On or Off and press Select.
During a call, voice privacy becomes active and notifies you with a beep.
A notification message also appears on the screen.
If you turn this feature on and voice privacy becomes inactive, your phone
beeps and displays the message Voice privacy not active .
Note: Use caution when sending confidential information if voice
privacy is not active.
Advanced calling features
• USE CALL FORWARDING
With call forwarding , you can forward incoming calls to another phone
number. Before you can use call forwarding, you must first store the
feature codes. Once call forwarding has been activated, Call forwarding
appears as a menu option.
[ 71 ]
Page 78

EN1220.2_Sept_02.book Page 72 Friday, September 6, 2002 2:19 PM
Note: Call forwarding is a network dependent feature. Some
networks require that call forwarding activation is done manually.
Contact your service provider for availability and full details.
Learn about call forwarding feature codes
Your network requires separate codes for activating and cancelling the
various types of call forwarding. Your carrier can provide you with the
necessary feature codes for these network services.
Once you store these feature codes in your phone, they are sent
automatically to the network when you select one of the call forwarding
options from your phone’s menu.
Your phone can store the following types of feature codes:
Option What it does
Forward all calls Forwards incoming calls to the number you specify.
Forward if busy Forwards incoming calls when you’re in a call.
Forward if not
answered
Forward if out
of reach
Cancel all call
forwarding
Forwards incoming calls to another number when
you are unable to answer.
Forwards incoming calls to another number when the
phone is out of the network or switched off.
Cancels all active call forwarding options.
Store the call forwarding feature code
Before you can activate call forwarding, you must contact your service
provider to obtain the feature codes.
1 Press Menu 4-6-5 (Menu > Settings > Network services). The
Feature code prompt appears.
2 Enter the feature code your service provider gave you. Press OK.
[ 72 ]
Page 79

EN1220.2_Sept_02.book Page 73 Friday, September 6, 2002 2:19 PM
3 Scroll to Call forwarding and press Select.
4 Scroll to the call forwarding option you want and press Select.
5 Scroll to Activate and press Select.
Activate/cancel call forwarding
After you store the correct feature codes, you can activate (or cancel) call
forwarding as follows:
1 Press Menu 4-6-2 (Settings > Network services > Call forwarding).
2 Scroll to the desired call forwarding option, then press Select.
3 Highlight Activate and press Select.
4 Enter the number to which you want your calls forwarded (or press
Find to recall a number from the phone book).
5 Press OK.
Note: When canceling call forwarding follow steps 1-2.
• USE CALL WAITING
During a call, call waiting beeps to let you know that someone else is
calling you. Depending on your caller ID setup, the phone might also
display the number of the incoming call. Once call waiting has been
activated, Call waiting appears as a menu option.
Note: Call waiting is a network dependent feature. In some
networks the call waiting code must be activated manually.
Contact your service provider for availability and full details.
Advanced calling features
Store the call waiting feature code
1 Press Menu 4-6-5 (Menu > Settings > Network services > Network
feature setting). The Feature code prompt appears.
2 Enter the feature code issued by your service provider and press OK.
3 Scroll to Call waiting and press Select.
4 Scroll to Activate and press Select.
[ 73 ]
Page 80
EN1220.2_Sept_02.book Page 74 Friday, September 6, 2002 2:19 PM
Activate call waiting
1 Press Menu 4-6-3 (Menu > Settings > Network services > Call
waiting).
2 Scroll to Activate and press Select.
Manage calls
Call waiting works with both local and long distance calls.
• To answer an incoming call, press .
• To switch from one call to another, press .
• To end both calls, press .
• USE SEND OWN CALLER ID
This feature allows you to block caller ID when you call someone (your
number will not be displayed on their caller ID). This feature is only
effective when calling a number equipped with caller ID.
Note: This feature is available only when supported by the
wireless network and may not function if you are roaming.
Important:This feature works on a call-by-call basis. You must
enable this feature each time you want to block the sending of
your own number to the recipient’s caller ID.
STORE THE FEATURE CODE
Before you can use the Send own caller ID call feature, you must store
the feature codes for activating this feature. Once the code is stored in
your phone, it is sent automatically to the network when you select this
option from your phone’s menu.
1 Press Menu 4-6-5 (Settings > Network services > Network feature
setting). The Feature code prompt appears.
2 Enter the feature code issued by your service provider and press OK.
3 Scroll to Send own caller ID, then press Select.
4 Select Yes.
[ 74 ]
Page 81

EN1220.2_Sept_02.book Page 75 Friday, September 6, 2002 2:19 PM
PLACE A CALL WITHOUT SENDING YOUR NUMBER
1 Press Menu 4-6-4 (Settings > Network services > Send own caller
ID).
2 Scroll to No, then press Select.
3 Enter the desired phone number, then press OK (or press Find to recall
a phone number from the phone book).
The phone automatically inserts the feature code into the dialing string
and dials the phone number. The phone you are calling will not display
your phone number through caller ID.
• SELECT A PHONE NUMBER
Your service provider programs your phone number and system
information into your phone’s memory when your phone is first activated.
Your phone can hold up to three numbers. This means that your phone can
be activated in three different service areas. For example, your phone
could be activated in Dallas, Chicago, and New York. Each service area
would assign a different phone number or account to your phone.
You must select a phone number for your home system. Only one phone
number can be active at a time. If you travel outside your home system,
you can choose another number. One phone number is usually enough if
your service provider has service or roaming agreements for each area in
which you wish to use your phone. Contact your service provider for
details.
Note: Phone number selection is a network dependent feature.
Some networks may not support more than one number. Contact
your service provider for availability and full details.
Advanced calling features
Select the phone number
1 Press Menu 4-6-6 (Menu > Settings > Network services > Own
number selection).
2 Scroll to the phone number you want to use and press Select.
[ 75 ]
Page 82
EN1220.2_Sept_02.book Page 76 Friday, September 6, 2002 2:19 PM
Note: The first phone number on this list is selected. You need at
least one active number to make calls. You cannot change from
one phone number to another during a call.
• USE AUTOMATIC REDIAL
There are times when you may not be able to place a call (example: due
to the high volume of traffic on the wireless network). When the wireless
network is busy or unavailable, Automatic redial instructs your phone to
retry the call.
ACTIVATE AUTOMATIC REDIAL
1 Press Menu 4-2-1 (Settings > Call settings > Automatic redial).
2 Scroll to On and press Select.
If the system is busy, your phone makes three additional call attempts. If
you want to stop the automatic redial process before the last attempt,
press or Quit.
Important: This feature does not automatically retry a number
when the number you are calling is busy.
• USE 1-TOUCH DIALING
You can assign a name from your phone book to a 1-touch dial location,
using your phone’s keys 2 through 9. (The “1” key is used exclusively to
dial your voice mailbox.) Once assigned, the phone number you associate
with that key is dialed automatically when you press and hold the key.
Assign a key to 1-touch dialing
1 Press Names, scroll to 1-touch dialing and press Select.
2 Scroll to a number that has the message (empty) and press Assign.
3 Scroll to the name and number to which you want to assign this key
and press Select. Repeat these steps as many times as necessary.
4 To call a number using 1-touch dialing, press and hold the appropriate
key for a few seconds.
[ 76 ]
Page 83

EN1220.2_Sept_02.book Page 77 Friday, September 6, 2002 2:19 PM
Change 1-touch dialing numbers
You can change the 1-touch dialing key assignments at any time.
1 Press Names, scroll to 1-touch dialing and press Select.
2 Scroll to the key you want to change and press Options.
3 Scroll to Change and press Select.
4 Scroll through the phone book until you reach the new number you
want to select and press Select.
Erase 1-touch dialing numbers
You can erase 1-touch dialing key assignments at any time.
1 Press Names, scroll to 1-touch dialing and press Select.
2 Scroll to the key you want to erase and press Options.
3 Scroll to Erase and press Select.
4 Press OK to confirm.
• SET TOUCH TONE STRINGS
Your phone allows you to create special sets of numbers known as touch
tone strings which will dial a series of digits after a “wait” or a “pause.”
For example, you can program your phone to send your account number
while you are banking by phone.
You must be in the mode to enter these characters. Enter the
numbers as usual. When you want to insert the special characters, press
repeatedly to switch among *, +, p, w characters.
Note: Use caution when sending confidential information if voice
privacy is not active.
p Creates a pause when a number is dialed. The numbers you enter after
this special character are automatically sent as touch tones after a
2.5-second pause.
w Creates a wait when a number is dialed. This means that your phone
waits for you to press before it sends the number as touch tones.
Advanced calling features
[ 77 ]
Page 84

EN1220.2_Sept_02.book Page 78 Friday, September 6, 2002 2:19 PM
* Sends command strings to the network. Contact your service provider
for details.
+ Use this character as a prefix for dialing international numbers.
Set manual touch tones
1 Press Menu 4-3-2-1 (Menu > Settings > Phone settings > Touch
tones > Manual touch tones).
2 Select one of the following options, then press Select:
Continuous Sounds tone for as long as you press and hold a key.
Fixed Sets the tone length to 0.1 second, regardless of how long
you press a key.
Off Turns off the tones. No tones are sent.
Set touch tone length
You can also set the length of each touch tone.
1 Press Menu 4-3-2-2 (Menu > Settings > Phone settings > Touch
tones > Touch tone length ).
2 Use or to scroll to Short or Long. Short sets the tone
length to 0.1 second. Long sets the tone length to 0.5 second.
3 Press Select.
Store touch tone strings
You can store touch tone strings the same way that you store names and
numbers in your phone book. You can store an entire sequence of digits
and send it as touch tones for frequently used strings of numbers.
STORE TOUCH TONE STRINGS WITH PHONE NUMBERS
1 Enter the phone number that you want associated with a touch tone.
2 Enter the touch tone character where needed (p, w, or *).
3 Enter the touch tone string.
4 Store the number as you normally would.
[ 78 ]
Page 85
EN1220.2_Sept_02.book Page 79 Friday, September 6, 2002 2:19 PM
SEND A TOUCH TONE STRING
1 Press Menu 4-3-2-1 (Menu > Settings > Phone settings > Touch
tones > Manual touch tones).
2 Make sure that the setting is not set to Off. If it is, scroll to one of the
other options and press Select.
3 Then, during your call, press Options, scroll to Touch tones and
press Select.
4 Enter the touch tone string or recall the string from the phone book,
and press Tones.
If you send touch tones while in the analog mode, be careful not to send
confidential information.
• SELECT A SYSTEM
Your phone can operate in residential, private, and public systems (such
as your home system). You can choose how your phone selects a network
to use. Your phone may not show the options described here. For
information, contact your service provider.
Search for a network
Press Menu 5 (Menu > System).
You have the following three options.
Advanced calling features
Automatic Your phone automatically searches for available networks
and chooses the appropriate one. Every time you turn on
your phone, it resets to Automatic.
Manual The phone searches for networks and then shows a list
of the ones that are available. If an available network is
found, the word Available: appears on the screen followed
by the name of the network. To choose the network listed,
press OK.
[ 79 ]
Page 86
EN1220.2_Sept_02.book Page 80 Friday, September 6, 2002 2:19 PM
New search Your phone begins a new search for both private and
residential systems. When it finds the best system
available, the phone shows the system name.
If the phone doesn’t find another system, the question
Perform an extended search? will appear. Press OK if
you wish to continue searching.
Select a public system
When you take your phone outside its home system, the phone is said to
be roaming. The phone can search for home-type systems (that is, systems
of the same type as your home system). Or, the phone can search for nonhome-type systems.
Your service provider programs a list of preferred systems into your phone.
These are systems with which your service provider has roaming agreements.
Your phone looks for these systems when you’re roaming.
The options described here may not be available for your phone.
Contact your service provider for information.
1 Press Menu 4-6-7 (Menu > Settings > Network services > Public
system selection ) to tell your phone how to choose a public system
(network).
[ 80 ]
Page 87
EN1220.2_Sept_02.book Page 81 Friday, September 6, 2002 2:19 PM
Your selection remains active until you change it.
Any system When service is not available in your home system, the
phone searches for a preferred system of either type and
then searches for a home-type system. Then it searches
for a nonhome-type system. The search continues until
your phone finds a system that can be used.
Home type When service is not available in your home system, the
phone searches for a home-type system first. However,
if a nonhome-type system is found, your phone will use
that system.
Advanced calling features
Nonhome
type
Home only The phone uses only its home system. It will not roam.
2 Scroll to the option you want and press Select.
The phone searches for a nonhome-type system only.
The home-type system is not used.
Select digital or analog
Your phone can work in both digital and analog modes. The default mode
is both digital and analog, which appears on your phone as Digital & analog
when you press Menu 4-6-8 (Menu > Settings > Network services >
Digital/analog selection ).
The menu options for choosing the mode you prefer are:
• Digit. & analog
• Analog
• Digital
This means that your phone uses both digital and analog voice channels.
The phone always tries to find a digital voice channel first, but if a digital
voice channel is not available, the phone looks for an analog voice channel.
Note: This feature is available only for certain phones. Contact
your service provider for more information.
[ 81 ]
Page 88
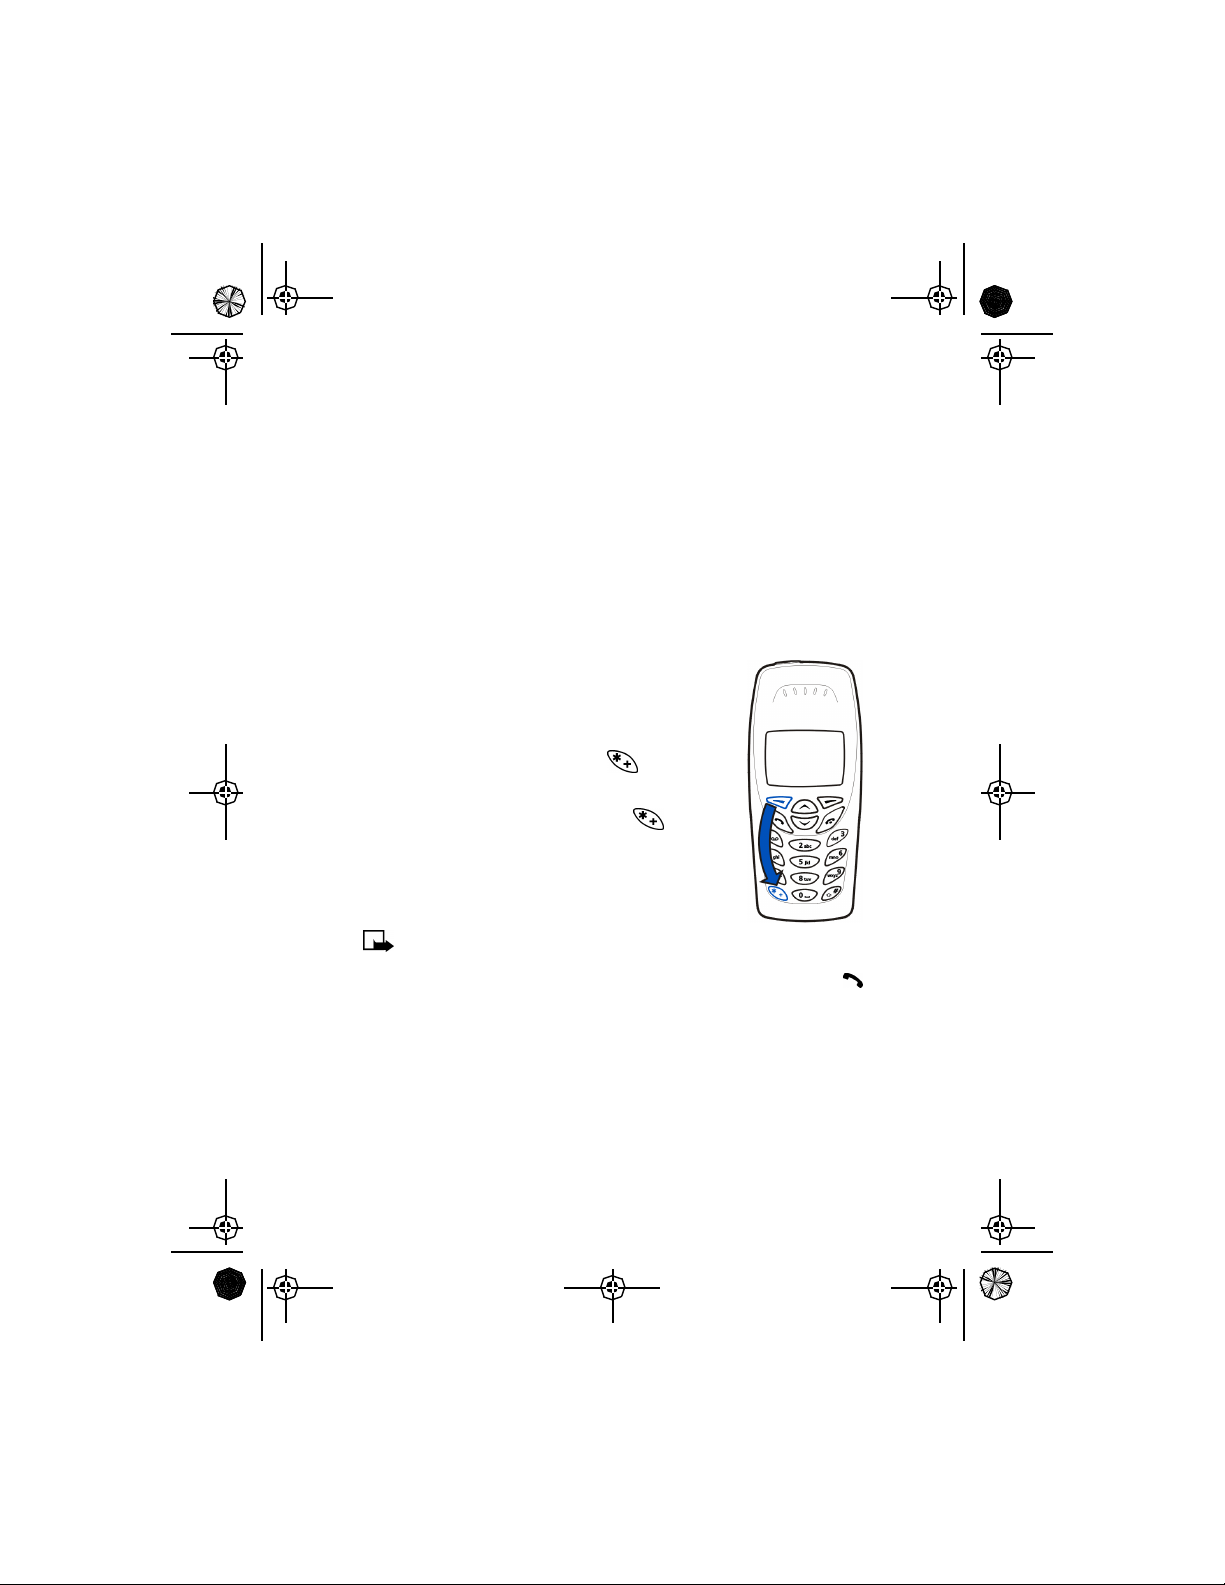
EN1220.2_Sept_02.book Page 82 Friday, September 6, 2002 2:19 PM
10 Security
Your phone is equipped with different security features that allow you to
do the following:
• avoid making accidental calls
• prevent unauthorized users from changing certain feature settings on
your phone
• restrict outgoing or incoming calls
• USE KEYGUARD
Keyguard disables your keypad to prevent accidental
key presses.
LOCK THE KEYPAD
To lock the keys, press Menu then .
UNLOCK THE KEYPAD
To unlock the keys, press Unlock then .
Note: When Keyguard is on, calls may be
possible to emergency numbers (for example, 911 or other official
emergency number). Key in the emergency number and press .
The number is displayed only after you have keyed in its last digit.
[ 82 ]
Page 89

EN1220.2_Sept_02.book Page 83 Friday, September 6, 2002 2:19 PM
Answer a call while Keyguard is active
You can answer calls when Keyguard is activated by pressing Answer or
. If you are connected to a headset or loopset, press and hold to
end the call.
NOTES ABOUT KEYGUARD
• After you end the call, Keyguard automatically becomes active again.
• If you need the phone’s lights while Keyguard is on, press the Power
key to quickly switch the lights on for 15 seconds.
• Connecting your phone to a car kit automatically disables Keyguard.
• UNDERSTAND THE SECURITY CODE
The Security code prevents unauthorized users from changing certain
important feature settings on your phone. When the phone requires this
code, it displays a prompt asking you to enter a Security code. The
five-digit default Security code that comes with your phone is 12345.
Nokia recommends that you change the default code immediately.
Note: If you enter an incorrect security code five times in a row,
the phone will not accept the correct code for 5 minutes.
Security
Change your security code
1 Press Menu 4-5-2 (Menu > Settings > Security settings > Change
security code).
2 At the Security code prompt, enter your five-digit default security
code (12345) or your current security code and press OK.
3 At the Enter new security code prompt, enter your new five-digit
security code and press OK.
4 At the Verify new security code prompt, enter your new security code
again and press OK. The confirmation Security code changed
appears.
[ 83 ]
Page 90

EN1220.2_Sept_02.book Page 84 Friday, September 6, 2002 2:19 PM
Keep your security code secret and stored in a safe place away from your
phone. If you have changed your security code and don’t remember the
new code, contact your service provider.
• RESTRICT CALLS
You can create your own list of restrictions to restrict incoming and
outgoing calls. To restrict the calls, you apply the appropriate restriction
as desired. The maximum number of call restrictions you can define is ten.
Before you define restrictions for outgoing calls, Add restriction is the
only available option. After you use the Add restriction option to add at
least one restriction, the following options become available:
• Select: Allows you to select call restrictions from the outgoing
calls list.
• Add restriction : Allows you to add a new restriction.
• Edit: Allows you to edit an existing call restriction.
• Erase: Allows you to erase an existing call restriction.
Note: When calls are restricted, calls may be possible to the
emergency number programmed into your phone (for example, 911
or other official emergency number). For example, you could dial
911 and press .
Add a number to the call restriction list
1 Press Menu 4-5-1-1 (Menu > Settings > Security settings > Call
restrictions > Restrict outgoing calls).
2 Enter your security code, then press OK.
3 Scroll to Restrict outgoing calls, then press Select.
4 Scroll to Add restriction and press Select.
[ 84 ]
Page 91

EN1220.2_Sept_02.book Page 85 Friday, September 6, 2002 2:19 PM
5 At the number prompt, enter the number you want to restrict, and
press OK.
For example: If you want to restrict all long distance calls that begin
with 1, enter 1. If you want to restrict all calls that begin with 972,
enter 972.
6 Enter a name for the restriction, then press OK.
If you press OK without entering a name, the number will be used.
Restrict outgoing calls
1 Press Menu 4-5-1-1 (Menu > Settings > Security settings > Call
restrictions > Restrict outgoing calls).
2 Enter your security code, then press OK.
3 Scroll to Restrict outgoing calls, then press Select.
4 Scroll to Select to choose from your list of call restrictions.
To deactivate a call restriction, highlight the restriction and press
Unmark.
5 Scroll to the restriction you want to activate and press Mark.
6 Press Back. At Save changes? , press Yes.
To return to the Start screen, press .
Security
Restrict all incoming calls
1 Press Menu 4-5-1-2 (Menu > Settings > Security settings > Call
restrictions > Restrict incoming calls).
2 Enter your security code, then press OK.
3 Scroll to Restrict incoming calls, then press Select.
4 Press Mark to restrict all incoming calls.
[ 85 ]
Page 92

EN1220.2_Sept_02.book Page 86 Friday, September 6, 2002 2:19 PM
11 Special features
This section describes several special features, including transmission of
business cards, downloading ringing tones, and setting the alarm clock.
• USE THE ALARM CLOCK
The alarm clock feature is based on your
phone’s internal clock and sounds an alert at a
time you specify. The alarm clock works even if
you turn your phone off.
Set the alarm clock
1 Press Menu 4-1-1 (Settings > Time settings > Alarm clock).
2 Enter the alarm time in hh:mm format, then press OK.
3 Select either am or pm, then press Select.
Step 3 is necessary only if you have selected am/pm format.
Respond to the alarm
At the time of the alarm, the phone sounds an alert tone. Pressing Stop
or the key stops the alarm from sounding, and returns you to the Start
screen.
SNOOZING
There are several ways you can enable the Snooze feature:
1 Press the Snooze selection key.
2 Press any key except .
3 Allow the alarm to sound for one minute.
Once snooze is enabled, the alarm will sound again in ten minutes. If you
press Stop or the key while snoozing, the alarm will be turned off.
[ 86 ]
Page 93

EN1220.2_Sept_02.book Page 87 Friday, September 6, 2002 2:19 PM
Alarm when phone power is off
If the alarm time is reached while the phone is off, the phone switches
itself on and starts sounding the alarm tone. If you press Stop, the phone
asks whether you want to activate the phone for calls. Press No to switch
off the phone or Yes to make and receive calls.
Note: Do not press Yes when wireless phone use is prohibited or
when it may cause interference or danger.
Turn off the alarm clock
1 Press Menu 4-1-1 (Settings > Time settings > Alarm clock).
2 Scroll to Off and press Select.
• SEND AND RECEIVE BUSINESS CARDS
Your phone can send or receive electronic business cards consisting of a
name, phone number and e-mail. You can save received business cards in
your phone book.
Send a business card
1 Find the name in your phone book.
2 Press Options and scroll to Send bus. card .
3 Press Select.
4 Enter or recall the phone number to which you want to send the
business card and press Send.
Special features
[ 87 ]
Page 94

EN1220.2_Sept_02.book Page 88 Friday, September 6, 2002 2:19 PM
View a received business card
When you receive a business card, the phone displays Business card
received.
1 When your phone displays Business card received, press Options.
2 Show is selected. Press Select.
3 Scroll through the available information.
Save a viewed business card
1 After viewing the business card, press Back, scroll to Save and press
Select.
2 At the Name: prompt, edit the name if desired, then press OK.
3 At the Number: prompt, edit the number if desired, then press OK.
4 At the E-mail address prompt, edit the e-mail address if desired, then
press OK.
Delete a viewed business card
After viewing the business card:
1 Press Back.
2 Scroll to Discard, then press OK.
3 At Discard business card?, press OK.
• DOWNLOAD A RINGING TONE
You can download up to ten ringing tones to replace the personal entries
in your list of ringing tones. For details about this service, please contact
your wireless service provider.
Notification of a received ringing tone
If you have this service and your phone receives a downloaded ringing
tone, your phone displays Ringing tone received.
[ 88 ]
Page 95

EN1220.2_Sept_02.book Page 89 Friday, September 6, 2002 2:19 PM
Listen to received ringing tones
1 When your phone shows Ringing tone received, press Options.
2 Playback is selected. Press OK.
The phone plays the ringing tone.
3 To stop playing the ringing tone, press Quit.
Note: An incoming call or pressing any key stops the ringing tone
from playing.
Save a received ringing tone
1 After listening to the ringing tone, press Quit.
2 Scroll to Save tone. Press OK.
3 Choose which ringing tone you want to replace – either an empty
Personal location, if any are remaining, or a previously downloaded
tone.
Discard a received ringing tone
1 After listening to the ringing tone, press Quit.
2 Scroll to Discard tone. Press OK.
Special features
[ 89 ]
Page 96
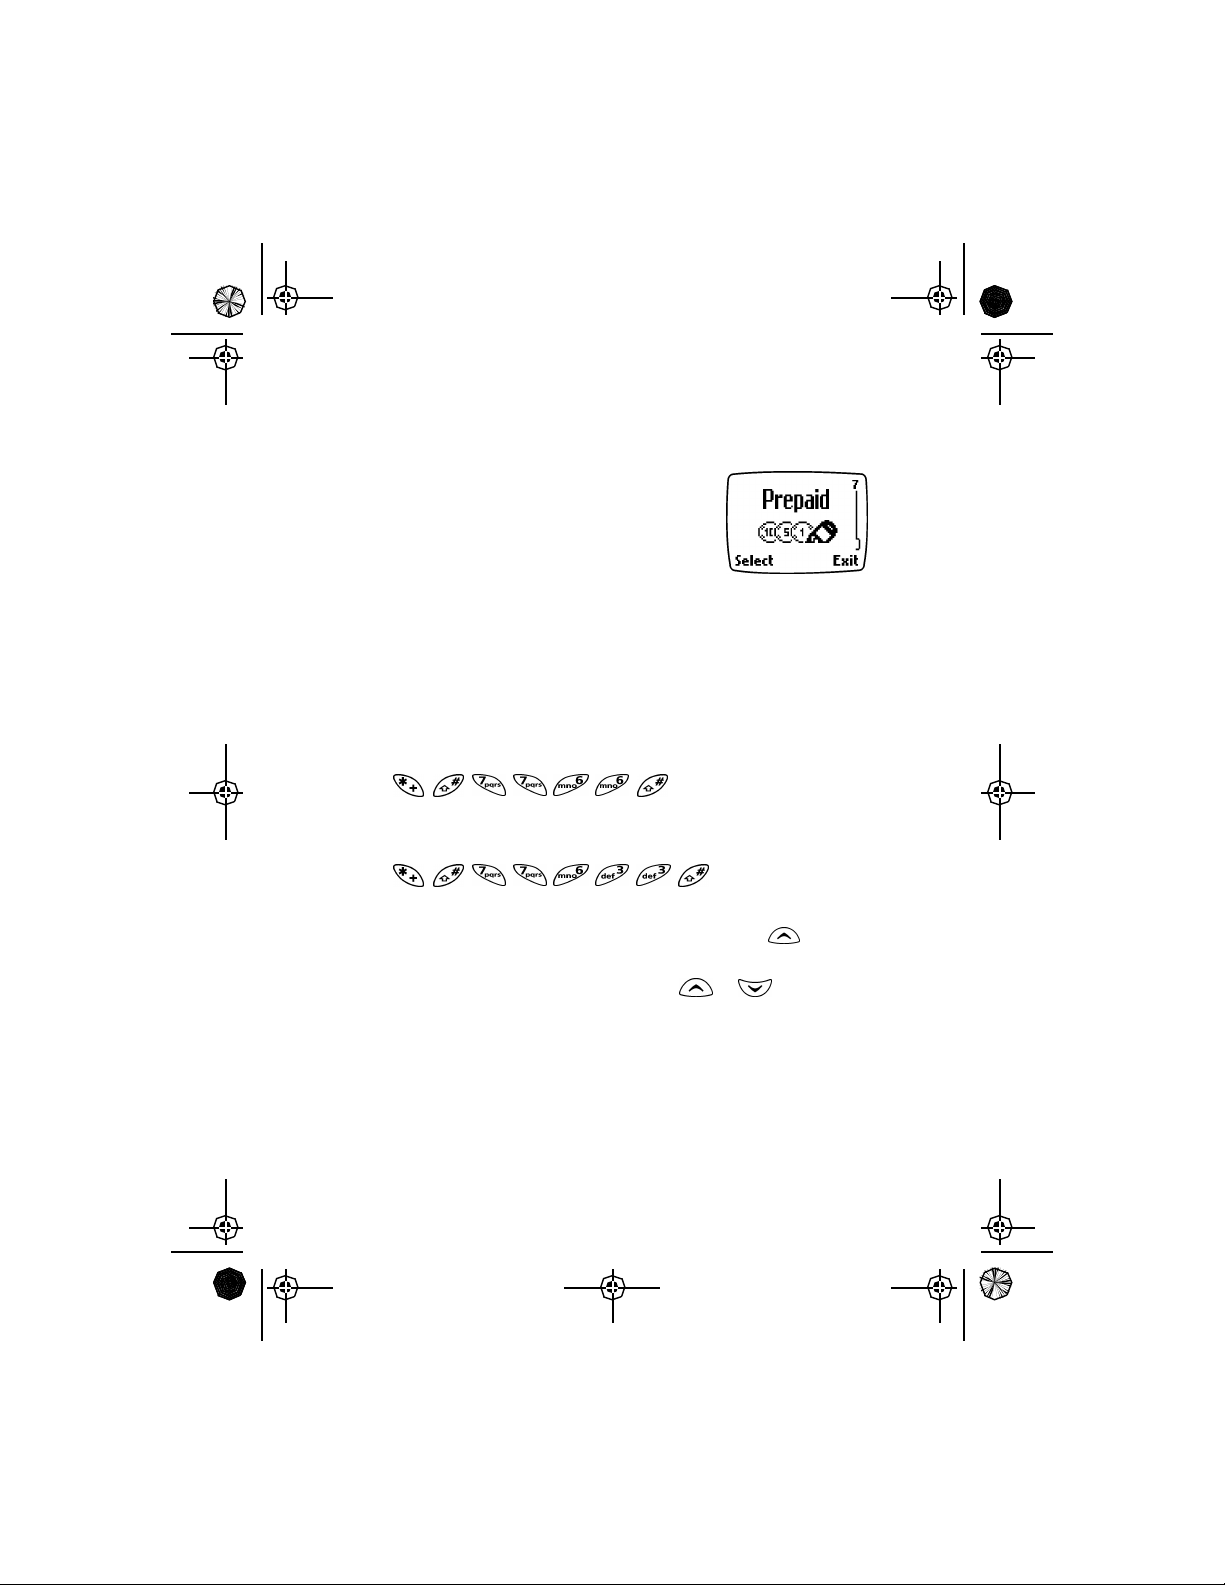
EN1220.2_Sept_02.book Page 90 Friday, September 6, 2002 2:19 PM
12 Prepaid services
With prepaid service, you buy wireless network
services in advance. Your phone works the same
way it did before, with some additional features.
Prepaid service may not be available from your
wireless service provider. Contact your service
provider for details.
• MANAGE PREPAID SERVICE
After you sign up with your service provider for prepaid service, you can
activate the Prepaid menu in your phone. This menu appears on your
screen only if you’ve activated the service.
ACTIVATE PREPAID
To activate prepaid services, enter the following sequence:
(*#7766#)
DEACTIVATE PREPAID
To deactivate prepaid services, enter the following sequence:
(*#77633#)
USE THE MENU
• To use the prepaid menu, press Menu and then press to go
immediately to Prepaid.
• Once you select the prepaid menu, press or to scroll
through prepaid options.
[ 90 ]
Page 97

EN1220.2_Sept_02.book Page 91 Friday, September 6, 2002 2:19 PM
• CHECK YOUR PREPAID BALANCE
You can check the balance remaining in your prepaid account. Contact your
service provider for the access number used to check the balance.
Note: When no more charging units or currency units are left,
calls may only be possible to the emergency number programmed
into your phone (for example, 911 or other official emergency
number).
1 Press Menu 7-1 (Menu > Prepaid > Check account balance ).
2 At Balance number , enter the balance number and press OK.
If you have already saved the balance number under Save access
phone numbers, the phone will initiate a call to the saved number.
3 The phone calls the balance number. Follow the prompts you hear
from the operator.
• ADD MONEY TO YOUR ACCOUNT
Call the access number your service provider gave you to add money to
your account. For convenience, see “Save your access numbers” on
page92.
1 Press Menu 7-2 (Menu > Prepaid > Add money to account).
2 At Replenish no., enter the replenish number and press OK.
If you have already saved the replenish number under Save access
phone numbers, the phone will initiate a call to the saved number.
3 Follow the prompts you hear from the operator.
Prepaid services
[ 91 ]
Page 98

EN1220.2_Sept_02.book Page 92 Friday, September 6, 2002 2:19 PM
• CALL CUSTOMER SERVICE
You can call the customer service number for your prepaid account.
Contact your service provider for the access numbers.
1 Press Menu 7-3 (Menu > Prepaid > Call customer service).
2 Enter the customer service number your service provider gave you,
then press OK.
If you have already saved the customer service number under Save
access phone numbers, the phone will initiate a call to the saved
number.
The phone calls the customer service number. Follow the prompts you
hear from the operator.
• SAVE YOUR ACCESS NUMBERS
You can check your prepaid balance, add money to your account, and call
customer service. To do that, you first need to save the correct access
numbers in your phone. Contact your service provider for the access
numbers.
1 Press Menu 7-4 (Menu > Prepaid > Save access phone numbers).
2 At Save access phone numbers, press Select.
3 Scroll to Replenish phone number, press Select, enter the replenish
number your service provider gave you, then press OK.
4 Scroll to Balance phone number , press Select.
5 Enter the balance number your service provider gave you, then press
OK.
6 Scroll to Customer service phone number, then press Select.
7 Enter the customer service number your service provider gave you,
then press OK.
[ 92 ]
Page 99

EN1220.2_Sept_02.book Page 93 Friday, September 6, 2002 2:19 PM
• EXPIRATION DATE
You can store and edit the expiration date of your prepaid credit each
time you add money to your account. You enter and change this date
manually.
1 Press Menu 7 (Menu > Prepaid).
2 Scroll to Expiration date, then press Select.
3 Enter your expiration date, then press OK.
To simply view the current expiration date that you have entered, press
Menu 7-5.
Prepaid services
[ 93 ]
Page 100

EN1220.2_Sept_02.book Page 94 Friday, September 6, 2002 2:19 PM
13 Games
You can use your phone for communication and
some serious fun. Your phone offers three games:
Snake II, Space impact , and Pairs II.
Note: Your phone must be switched on to
use this function. Do not switch on the phone when wireless phone
use is prohibited or when it may cause interference or danger.
• START A NEW GAME
1 Press Menu 6 (Menu > Games) and press Select.
2 Scroll to the desired game and press Select.
3 Select New game, and press Select.
Additional options under each game include:
Option What it does
Continue Continue a game that was stopped.
New Game Start a new game.
Level
(Snake II and Pairs II only)
Mazes
(Snake II only)
Top score Display the top score.
Instructions Learn how to play the game.
Choose the game’s difficulty level.
Choose among different maze
designs.
[ 94 ]
 Loading...