

Page 1
2 Volume key
The volume key turns the volume up or down on the earpiece, the headset,
and the loudspeaker.
3 Music key
The music key takes you to the Music player and FM radio without going
through the menu. You can also switch the music off with this key.
i) Short press and long press of the music key
The first short press of the music key will take you to the music menu.
j) Once you are in the music menu, a short press switches or scrolls
through the menu choices (Music player, Radio, and Switch music
off). The choices are highlighted as you move or switch from one
menu choice to the next.
k) A long press on a highlighted choice selects and starts the music
player or radio, or switches the music off.
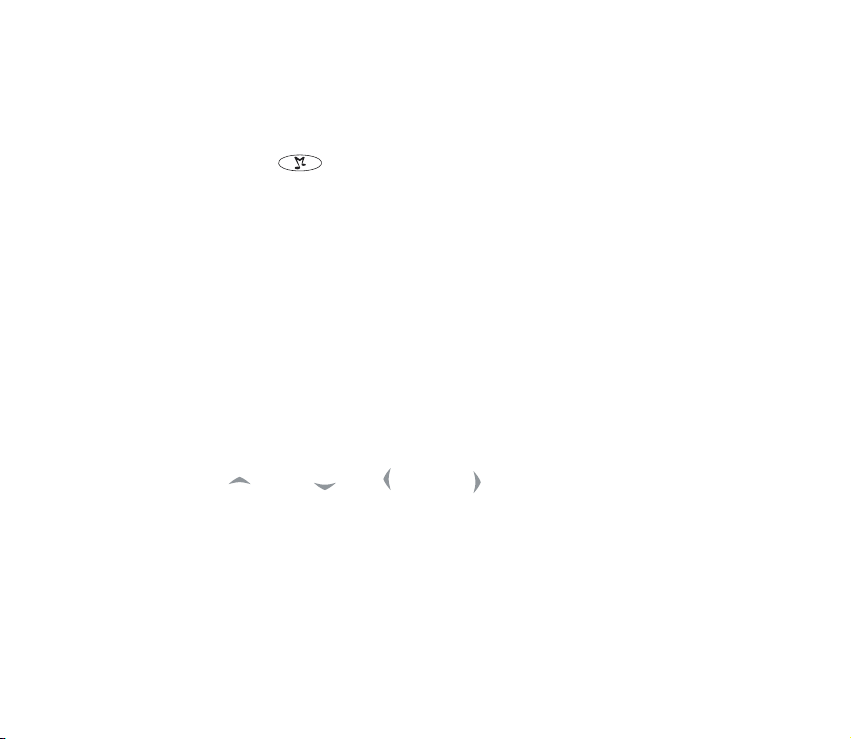
4 Four-way scroll key
Up , down , left and right
Use the scroll key to scroll through contact names, phone numbers,
menus or settings. You can also do a station search in the radio, adjust
the music settings, and access music functions such as play, stop, fast
forward, and rewind.
Copyright
© 2003 Nokia. All rights reserved.
16
Page 2

While listening to the music player or radio, press once to skip back
to the beginning of a song on the music player, or press twice to skip
backwards to the previous recording or previous radio station.
Press to skip forward to the next recording or radio station.
In standby mode, press to go to the first name stored in Contacts.
Press to go to the last name stored in Contacts. Press to go to
Messages to create a new message. Press to go to a calendar of the
current month with the current day highlighted. You can also scroll up
and down to see previous and future months.
5 Selection keys and
In standby mode the selection keys are Menu and Contacts. As you go
through the menus, the selection keys give you different options. For
example, if you press the selection key below Contacts, you will see
Select and Exit.
6 Send and End keys
Press the send key to dial a phone number or answer a call. If you
press this key in standby mode, it shows the last phone number you
dialed.
Press the end key to end a call. This key is also a quick way to exit
from any function.
Copyright
© 2003 Nokia. All rights reserved.
17
Page 3
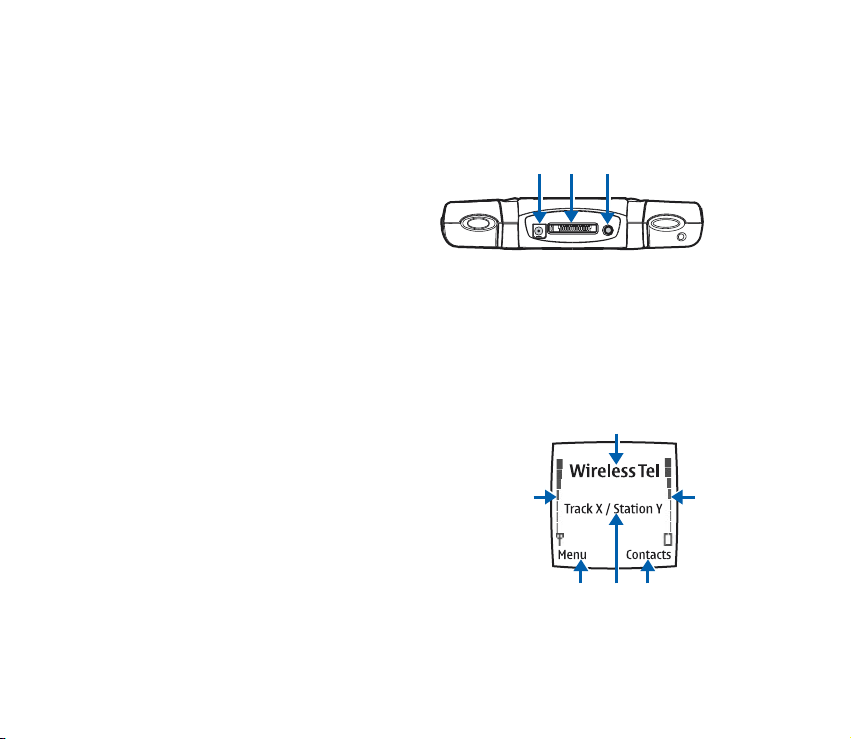
Connectors
1 Charger connector
2 Pop-PortTM connector for
headsets, the USB data cable,
and loopset
3 Audio ADE-2 recording cable
connector to connect the phone
to external audio equipment
such as a CD player or PC
1 2 3
Standby mode
The phone is in standby mode when it is on and ready to use, but you have
not entered any numbers or characters.
1 Indicates the wireless system that is in use.
2 Shows the signal strength of the cellular
system at your current location. The higher
the bar, the stronger the signal.
3 Shows the battery charge level. The higher
the bar, the more power in the battery.
4 The left selection key in standby mode is
Menu.
5 The right selection key in standby mode is
Contacts.
2
1
4 6 5
3
Copyright
© 2003 Nokia. All rights reserved.
18
Page 4

6 When the music player is on, the track title is shown. When the radio is
on, the radio station is shown.
You can show the time and date in standby mode. See Clock and Date for
instructions. Also see Icons in standby mode.
Screen saver
Your phone has an automatic screen saver for saving power in standby mode.
A digital clock is displayed when no phone functions are in use. You can set
the timer to activate the screen saver. See Screen saver timeout. To deactivate
the screen saver, press any key.
If you have not set the time, 00:00 is displayed. To set the time, see Clock.
Wallpaper
You can select and set a wallpaper or background picture to display when the
phone is in standby mode. See
Wallpaper.
Copyright
© 2003 Nokia. All rights reserved.
19
Page 5
Icons in standby mode
The following list shows different icons seen on the screen in standby mode
to let you know you have received messages or which settings are active.
You have received one or more text or picture
messages. See
You have received one or more multimedia
messages. See Read and reply to a multimedia
message.
You have received one or more voice messages.
See Voice messages.
The phone keypad is locked.
See Keypad lock (keyguard).
The phone does not ring at an incoming call or text
message when Incoming call alert is set to Off and
Message alert tone is set to Off. See
The alarm clock is set to On.
See Alarm clock.
The countdown timer is running.
See Countdown timer.
Read and reply to a message.
Tone settings.
Copyright
© 2003 Nokia. All rights reserved.
20
Page 6
The stopwatch timer is running in the background.
Stopwatch.
See
A GPRS connection is established. The indicator is
shown on the top left of the display.
The GPRS connection is on hold, for example, if
there is an incoming or outgoing call during a GPRS
connection.
All your calls are forwarded to another number,
Forward all voice calls. If you have two phone lines,
the forward indicator for the first line is and
for the second line . See Call forwarding.
or
Track name
Radio station
name
If you have two phone lines, indicates the selected
phone line. See
Line for outgoing calls.
The loudspeaker has been activated.
The music player is on.
The radio is on.
Calls are limited to a closed user group.
See Security settings.
Copyright
© 2003 Nokia. All rights reserved.
21
Page 7

The timed profile is selected.
See Profiles (Menu 4).
A headset accessory is connected to the phone.
A loopset accessory is connected to the phone.
Wrist strap
You can attach a wrist strap to your phone. Thread
the strap through the holes behind the music key as
shown in the picture, and pull to tighten.
Headset
Connect
Insert the headset plug into the PopPortTM connector on the top of the
The cable is connected
phone.
correctly when the arrowhead points
toward the display screen and the cord
falls toward the music key on the left
side.
When the headset is connected,
appears on the screen.
Copyright
© 2003 Nokia. All rights reserved.
22
Page 8

Disconnect
Remove the headset cable from the Pop-PortTM connector by grasping the
plug (not the cord) and pulling it out.
Wear the HDS-3H Stereo Headset as shown in
the picture.
The headset cable functions as the radio
antenna, so let it hang freely.
Answer a call with the headset
Press the headset button to answer and end a
call.
Headset button
Press the headset button to change tracks
while listening to the music player, or to
change stations while listening to the radio.
A long press of the headset button activates
voice recognition for voice tags you have saved.
Warning: This headset may affect your ability to hear sounds around
you. Do not use this headset in situations that may endanger your
safety.
Copyright
© 2003 Nokia. All rights reserved.
23
Page 9

Attach and use supplied cables
You can connect your phone to a compatible PC with the supplied DKU-2 USB
data cable (1). The cable is connected correctly when the arrowhead points
toward the display screen and the cord falls toward the music key on the left
side. To record music, you can connect your phone to external audio
equipment with the supplied ADE-2 recording cable (2). See
Recorder.
1
2
Important: Disconnect the USB data cable from the phone
to make a call.
Use the Nokia Audio Manager software to handle your music files and transfer
them from the PC to the memory card in your phone. See
Manager. You can also drag and drop music files from your PC to a folder
created when you first connect the USB data cable. See Disconnect the USB
cable properly before you begin transferring files.
Nokia Audio
Copyright
© 2003 Nokia. All rights reserved.
24
Page 10

Note: Close all applications on the phone and disconnect the audio
line-in cable before connecting your phone to a PC with the USB data
cable.
Important: Do not connect the USB cable to your PC before you have
installed the Nokia Audio Manager PC software from the CD-ROM.
Disconnect the phone from the PC
When you connect your phone to the PC, the Unplug or Eject Hardware icon
appears at the right on the Windows taskbar. This indicates that a USB mass
storage device has been connected to the PC.
To disconnect the phone from the PC:
1 Click on the Unplug or Eject Hardware icon.
2 Choose Stop USB Mass Storage Device - Nokia 3300.
3 When Windows notifies you that it is safe, unplug the connectivity cable.
Important: To ensure that all memory card operations are completed
in a controlled way, do not unplug the connectivity cable until
Windows notifies you that it is safe to do so. Uncontrolled completion
of the memory card operations may cause the memory card and the
information stored on it to become corrupted. A corrupted memory
card may have to be formatted before it can be used again. When a
memory card is formatted, all information on the card is permanently
lost.
Copyright
© 2003 Nokia. All rights reserved.
25
Page 11

4. Getting started
Install the SIM card and battery
The SIM card and the gold contacts on the card can be damaged by scratches
or by bending the card. Be careful when inserting, removing, or handling the
card.
Warning: Keep all miniature SIM cards out of the reach of small
children.
1 Before you install the SIM
card, make sure the phone is
switched off.
2 Remove the back cover of the
phone with the back of the
phone facing you.
3 Press the back cover release
button (1) and slide the cover
forward.
(1)
Cover release button
Copyright
© 2003 Nokia. All rights reserved.
26
Page 12

4 Slide the SIM card holder down (3) and pull up to open (4).
34
5 Insert the SIM card into the SIM card holder (5).
The SIM card is inserted
correctly with the bevelled
corner on the card up. The gold
contact area on the card is
facing the connectors on the
phone.
5
Copyright
© 2003 Nokia. All rights reserved.
27
Page 13

6 Close the SIM card holder (6) and push up to lock (7).
6
7 Insert the battery (8) with the gold contacts on the battery aligned with
the gold contacts in the battery slot.
8 To replace the back cover (9), insert the locking catches on the back cover
in the corresponding slots in the phone, and slide the cover until it locks
into place.
8
Copyright
© 2003 Nokia. All rights reserved.
7
9
28
Page 14

Remove and install the memory card
Your phone comes with a 64MB, pre-installed, ready-to-use memory card.
Note: Do not remove the memory card in the middle of an operation.
Be sure to close all memory card applications before removing the
card.
Important: Keep all memory cards out of the reach of small children.
1 Make sure the phone is switched off.
2 With the back of the phone facing you, slide the cover open and remove
the battery. See step 1 in
3 To remove the memory card, press the memory card release button (1) and
lift the card off (2).
Be careful not to scratch the gold contacts on the card.
Install the SIM card and battery.
12
Copyright
© 2003 Nokia. All rights reserved.
29
Page 15

4 To install the memory card,
gently press the memory card
in place (3) while pressing the
memory card release button
(4). Make sure that the gold
contacts of the card are facing
down.
5 Replace the battery and cover.
Charge the battery
1 Connect the plug from the
charger to the socket on the
top of your phone.
2 Connect the charger to an ac
wall socket.
Charging is displayed briefly
if the phone is switched on. If
the battery is completely
discharged, it may take a few
minutes before the charging
indicator appears on the
display or any calls can be
made.
4
3
Copyright
© 2003 Nokia. All rights reserved.
30
Page 16

You can use your phone while the charger is connected.
Charging time depends on the charger and the battery used. For example,
charging a BLD-3 battery with the ACP-12 charger takes up to one hour and
30 minutes while the phone is in standby mode.
Switch the phone on and off
Warning: Do not switch the phone on when wireless phone use is
prohibited or when it may cause interference or danger.
Press and hold the power key located
on the right side of your phone until the
display lights come on.
If the phone displays Insert SIM card even
though the SIM card is properly inserted,
or SIM card not supported, contact your
service provider. Your phone does not
support 5-V SIM cards and the card may
need to be changed.
• If the phone asks for a PIN code, key in
the PIN code (displayed as ****), and press OK.
See also PIN code request in Security settings and Access Codes.
• If the phone asks for a security code, key in the security code
(displayed as *****), and press OK.
Change the security code, PIN code, PIN2 code or restriction password.
Copyright
© 2003 Nokia. All rights reserved.
31
Page 17

Codes can only include numbers from 0 to 9.
EFFICIENT OPERATION: Your phone has a
built-in antenna. As with any other radio
transmitting device, do not touch the
antenna unnecessarily when the phone is
switched on. Contact with the antenna
affects call quality and may cause the phone
to operate at a higher power level than
otherwise needed. Not touching the antenna
area during a phone call optimizes the
antenna performance and the talktime of
your phone.
Keypad lock (keyguard)
You can lock the keypad to prevent the keys being accidentally pressed when
you are carrying your phone.
Copyright
© 2003 Nokia. All rights reserved.
32
Page 18

Lock the keypad
In standby mode, press the left
selection key under Menu and
then within 1.5 seconds.
Unlock the keypad
Press the left selection key under
Unlock and then
within 1.5
seconds.
If you receive a call while the keypad
is locked, you do not need to unlock
it to answer a call. Press
, and during a call, the phone can be operated
normally. When you end or reject a call, the keypad will automatically remain
locked.
For automatic keypad lock, see Automatic keyguard.
For locking the keypad during a call, see Options during a call.
Note: When keyguard is on, calls may be possible to the emergency
number programmed into your phone (such as 911 or other official
emergency numbers). Key in the emergency number and press
.
The number is displayed only after you have keyed in the last digit.
Copyright
© 2003 Nokia. All rights reserved.
33
Page 19

Change the covers
Note: Before removing the cover, always switch off the power and
disconnect the charger and any other device. Avoid touching electronic
components while changing the covers. Always store and use the
device with the covers attached.
Before changing the cover, always switch off the power and disconnect the
phone from the charger or any other device. Always store and use the phone
with the covers attached.
1 Remove the back cover.
1
Copyright
© 2003 Nokia. All rights reserved.
34
Page 20

2 To remove the front cover,
gently pull the cover on
both sides (1) and
the cover starting from the
top (2).
remove
1
2
1
2
3 Remove the key mat from
the front cover and
replace on the phone (3).
Copyright
© 2003 Nokia. All rights reserved.
3
35
 Loading...