

Page 1
Microsoft® Combat Flight Simulator 3.0
http://www.replacementdocs.com
http://www.replacementdocs.com
Air Force Historical Research Agency Photo
FLIGHT SCHOOL
handbook
Page 2

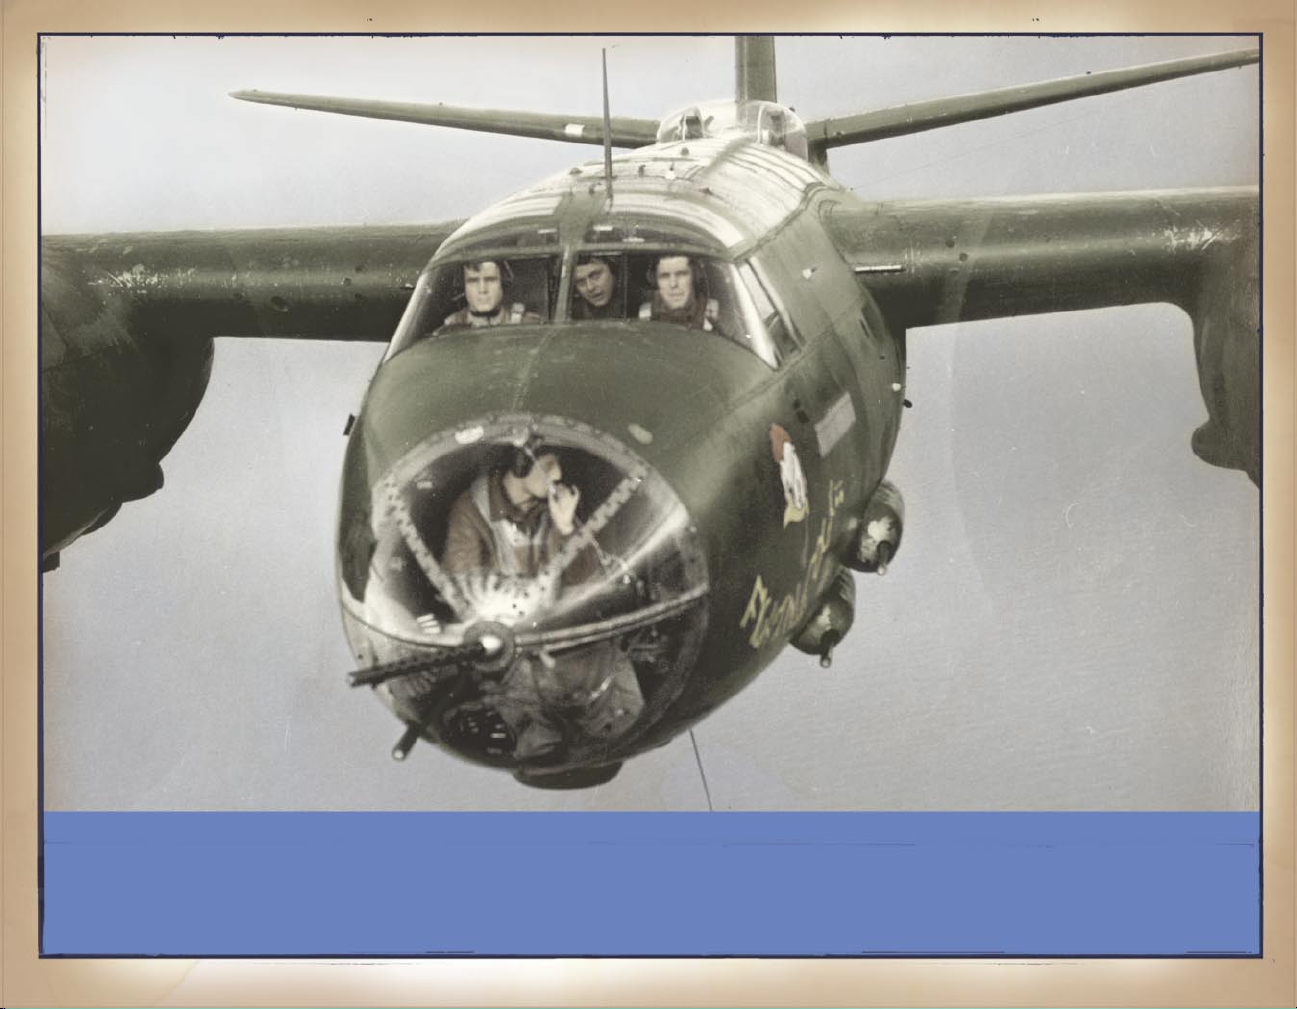
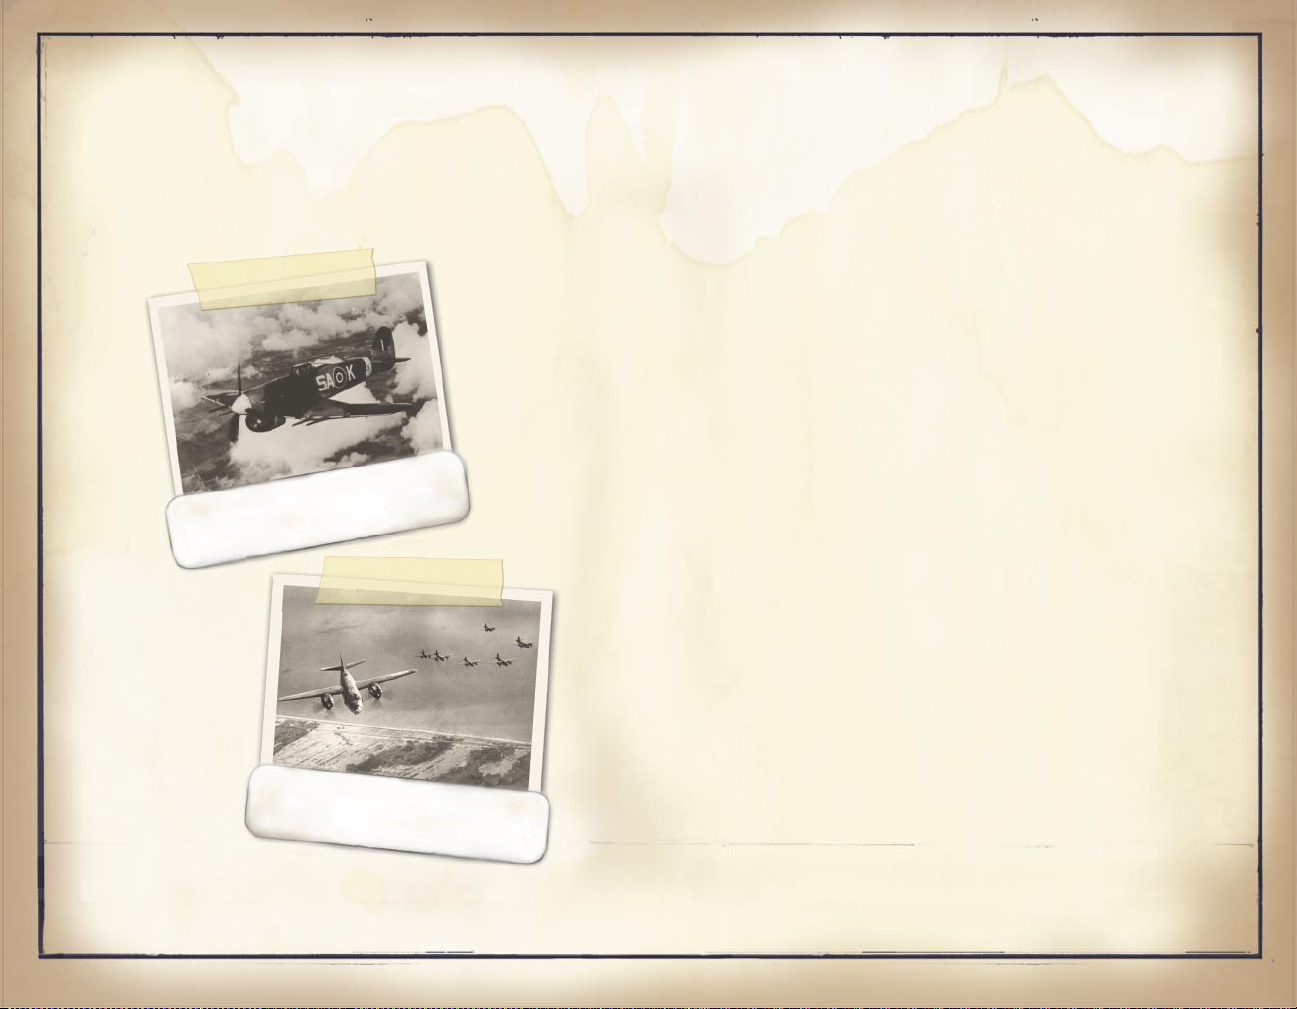
FLYING CLASSROOM: A FOR
MATION OF AT-6 “TEXAN”
TRAINERS.
Basic Flight
If you make assumptions about how
an airplane works you put your machine,
your life, and your country at risk.
Practice and study every aspect of
ight and combat, and when you go to
sleep--dream it.
First Things First................ 3
The Instrument Panel.............. 4
Flight Controls................... 5
Engine Controls................... 8
Getting Up and Back.............. 11
Air Force Historical Research Agency Photo
Basic Flight Maneuvers........... 14
Why it All Works................. 18
Basic Aerobatic Maneuvers........ 22
* * *
Air Combat
Dropping a bomb onto a moving
target–-it seems like you’ll never get
it right. Your troops are depending
on you to clear out the hornets nest
impeding their advance. What can you
-
do? Plenty!
Tools of the Trade............... 26
Ground Attack Philosophy......... 31
Basic Air Combat Maneuvers....... 38
Authorized licensees of this game may print (or have printed at their expense) a single
copy of this manual for their personal home use in conjunction with the play and use of
the game on this CD.
- 1 -
Tactical Air Combat Maneuvers.... 43
A Few Tips....................... 49
Telling Friend from Foe.......... 50
Page 3
Air Force Historical Research Agency Photo
BASIC FLIGHT
- 2 -
Page 4
FIRST THINGS FIRST
You’re about to take on a huge responsibility by
participating in the greatest struggle so far in the 20th
century. Are you up to it? Your country and your squadron
mates are counting on you, so we’re going to get you up
to speed.
You’ve been assigned to the tactical air support
role, which means you’ll be ying low where you’re
vulnerable to enemy antiaircraft guns. Give yourself a
ghting chance by rst going through training. Military
ight training consists of these three steps:
1. First, you’ll read this handbook.
2. Then you’ll watch movies that show several basic
combat maneuvers you need to master.
3. Finally, you’ll practice what you’ve learned by
actually ying.
When you’re done training, you’ll know how to handle
a powerful airplane and how to use it to hit the enemy
hard.
The Flight School handbook
Read this handbook and study the diagrams to learn
the basics of ight, how your plane works and ies, and
how to execute combat maneuvers. If you’re a novice,
begin with the basics of ight; if you’re an experienced
yer, jump right into the air combat training section
so we can use you as soon as possible. If you understand
the material in this handbook, you’ll be a better ghter.
Read it now!
The movies
After you’ve read the handbook, watch the training
movies. (You can access them in the CFS3 Training
Materials section of online Help.) These movies
demonstrate two tactical air combat and two dogghting
maneuvers that can be applied in a variety of situations.
The training missions
Finally, get in the plane and practice tactical air
combat maneuvers, such as dive bombing, strang, and
level bombing. You’ll use these skills to aid the ground
soldiers as they advance. Practice the maneuvers until
they’re second nature so you don’t have to think about
them when you’re in combat. Here are some tips for getting
up to speed quickly:
- Study the Quick Reference Card. Memorize key commands
to help you do things quickly when time is of the
essence.
- Familiarize yourself with the instrument panel. Roll
the cursor over each instrument to see both what it
is and its current reading.
- Use the Free Flight option. (Click the Quick Combat
tab, and then click Free Flight.) Use Free Flight
to practice both basic and combat maneuvers without
getting shot at. You need to master these maneuvers
to stay alive and help us WIN!
- Fly some training missions. (Click the Missions tab,
and then select a mission from the Training tab.) By
ying training missions, you can practice what you’ve
learned, but with the heat turned up a notch.
- Practice your level bombing skills. Level bombing
means you must y level over the target, which can
be difcult when you’re being shot at. You’ll need to
switch between three positions: cockpit, gunner, and
bombardier. You can y your plane from the cockpit,
but you can also jump to a gunner position and
defend, or jump to the bombardier position and drop
your load on the target. Dropping a bomb load while
looking through a bombsight is tougher than it might
seem. Practice!
Time is wasting so get busy. We’ve got an important
mission and we need you!
- 3 -
Page 5
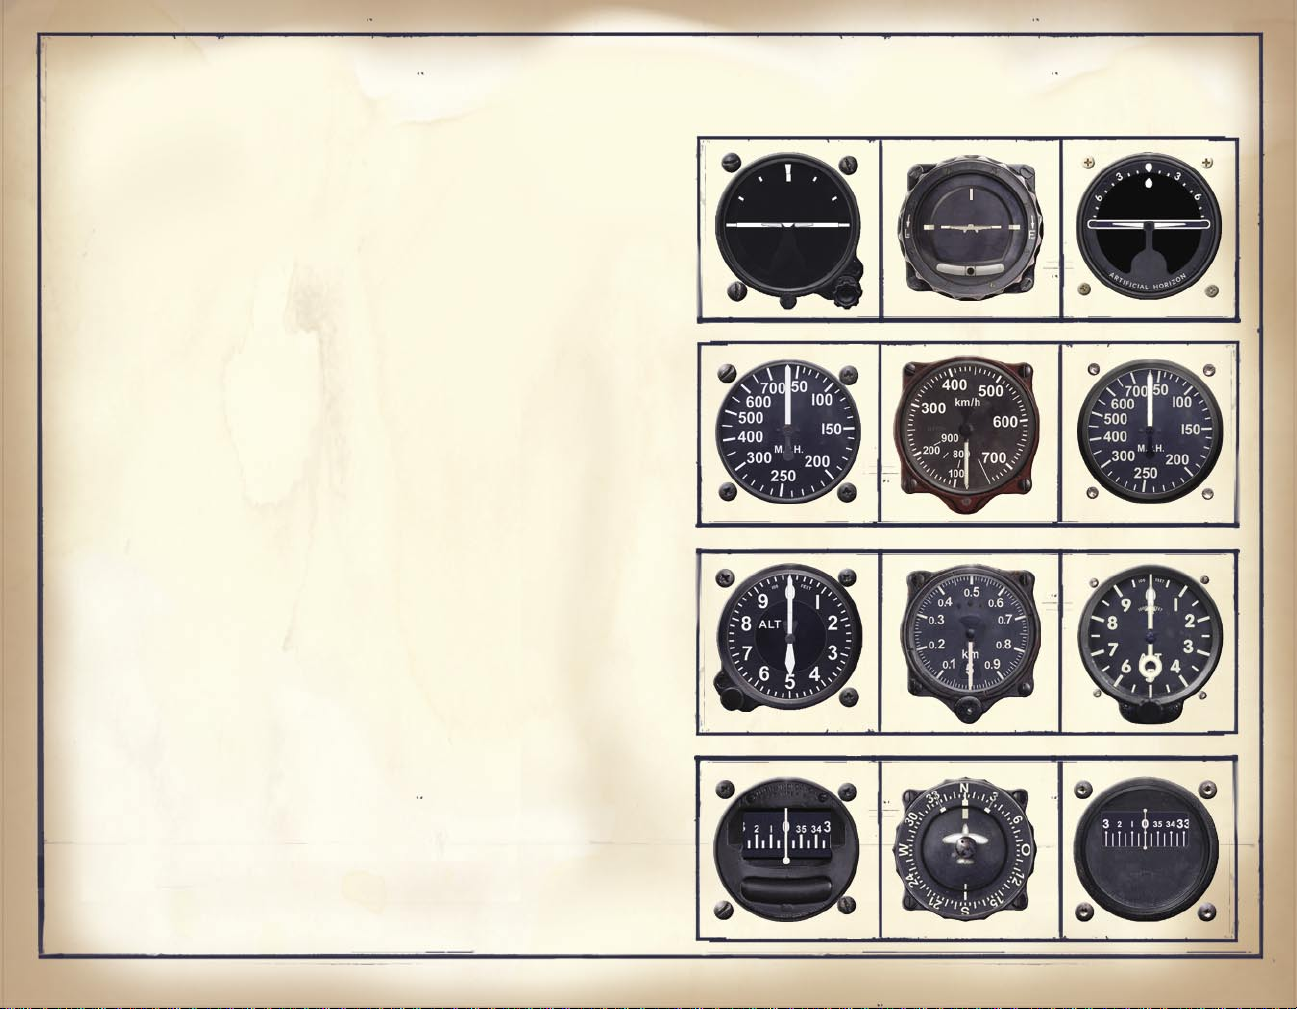
THE INSTRUMENT PANEL
The instrument panel in your aircraft provides key
information about your position and your aircraft’s
health, among other things. It may look confusing and
foreign at rst, but you’ll come to rely on it after you
get used to it. Every aircraft has a different panel,
but for the most part, each panel features the same basic
elements.
- Gauges: Each aircraft has its own set of gauges that
indicate how your aircraft is performing and where
you’re going.
- Mouse rollover Help: While you y, you can nd out an
instrument’s name by pointing to the instrument with
the mouse.
Although there area several aircraft for each
nationality in Microsoft® Combat Flight Simulator 3,
you only need to learn three basic instrument sets. The
accompanying images show the basic set of instruments for
American, German, and British aircraft.
* * *
AMERICAN GERMAN BRITISH
- 4 -
HEADING INDICATOR ALTIMETER AIRSPEED ARTIFICIAL HORIZON
Page 6
- 5 -
FLIGHT CONTROLS
PRIMARY CONTROL SURFACES
Ailerons
Moving the stick left and right moves your plane’s
ailerons. These hinged rectangular surfaces are located
on the trailing edges of the wings near the wing tips,
and they control your plane’s banking (rolling) motion.
The ailerons move in opposite directions. If you move
the stick left, the left aileron moves up, reducing lift
(upward force) on the left wing. At the same time the
right aileron moves down, increasing lift on the right
wing. The result? The airplane banks (rolls) to the left.
When the wings reach the angle of bank you want, center
the stick. Banking with the ailerons is what causes a
plane to turn
.
Note: All keyboard commands noted in this manual are the default
Combat Flight Simulator 3 combat keyboard commands. If you
want to change your settings to your own keyboard commands
or to Microsoft Flight Simulator keyboard commands, click
Control Options on the Options tab and follow the prompts.
KEYBOARD
ACTION JOYSTICK (NUM LOCK ON)
Bank left/ Move joystick left Num Pad
4
Left aileron
Bank right/ Move joystick right Num Pad
6
Right aileron
Stop banking/ Center joystick Num Pad
5
Center ailerons
Aileron
Trim
Rudder
Elevator Flap
You control an airplane’s movement with the stick and
rudder pedals. In Combat Flight Simulator 3 (CFS3), the
stick and rudder are simulated by the joystick and rudder
pedals (both optional), and the keyboard. No matter what
your setup, you’ll use these controls to move control
surfaces that cause the airplane to turn, climb, and
descend.
Page 7

- 6 -
Rudder
Pushing the rudder pedals moves your plane’s rudder.
The rudder is a hinged surface located on the vertical
stabilizer of the tail. It controls your craft’s yawing
(pivoting) motion to the left and right. The rudder is
used to counteract your plane’s tendency to yaw in the
direction opposite a turn, and to counteract your engine’s
torque. (Learn more about the effects of torque in “A few
words about torque” later in this handbook.)
JOYSTICK/RUDDER KEYBOARD
ACTION PEDALS (NUM LOCK OFF)
Yaw left/ Twist joystick left (not Num Pad
0
Left rudder all joysticks twist) or
press left rudder pedal
Yaw right/ Twist joystick right or Num Pad
ENTER
Right rudder press right rudder pedal
Yaw center/ Center joystick or Num Pad
5
Neutralize center rudder pedals
rudder
Elevator
Moving the stick forward and backward moves your
plane’s elevator. This hinged surface is located on
the horizontal stabilizer of the tail and controls your
airplane’s pitch (up and down) motion. Moving the stick
forward decreases pitch attitude (lowers the nose), while
moving it back increases pitch attitude (raises the nose).
The elevator controls pitch attitude, but it doesn’t
necessarily make your plane climb or descend. You’ll learn
why in “Basic Flight Maneuvers” later in this handbook.
KEYBOARD
ACTION JOYSTICK (NUM LOCK OFF)
Pitch up Move joystick back Num Pad
2
Pitch down Move joystick forward Num Pad
8
Page 8

- 7 -
Flaps
Flaps are hinged surfaces on the trailing edges
of the wings, next to the fuselage. They are usually
used during takeoff and landing. When extended, the
aps increase lift by helping the wings de ect more air
downward, which means your plane can ascend more rapidly.
They also increase drag (the resistance of the air),
allowing your aircraft to descend more steeply without
building up speed.
The aps are extended in increments, which vary
depending on the aircraft. As you extend or retract the
aps, be prepared for changes in pitch. The nose will rise
or fall from the resulting change in lift. Add forward- or
back-pressure on the stick to maintain the pitch attitude
you want, and after the airspeed stabilizes, use elevator
trim to relieve that pressure.
ACTION KEYBOARD
Retract aps fully
SHIFT+V
key
Retract aps in increments
V
key
Extend aps fully
SHIFT+F
Extend aps in increments
F
key
SECONDARY CONTROL SURFACES
Trim
Trim tabs are small, hinged surfaces on the elevator,
rudder, and ailerons that help you maintain speci c
control positions without needing to exert pressure
on the controls. Moving a trim tab one way de ects the
elevator, rudder, or aileron the other way. When your
airplane is properly trimmed, you can y “hands off,”
applying only occasional, small control-pressures to
compensate for the occasional bump or minor changes in
heading. (On some aircraft, elevator trim moves the entire
elevator slightly, instead of moving a tab on it.)
Use trim to relieve control pressure, not to y.
If you want to change the airplane’s attitude (position
relative to the horizon), rst move the stick or rudder
and change the power setting if necessary. Then, after
the airplane stabilizes, trim off the pressure.
ACTION KEYBOARD (NUM LOCK OFF)
Aileron trim left
CTRL+
Num Pad
4
Aileron trim right
CTRL+
Num Pad 6
Rudder trim left
CTRL+
Num Pad
0
Rudder trim right
CTRL+
Num Pad
ENTER
Elevator trim up Num Pad
1
Elevator trim down Num Pad
7
Page 9

- 8 -
ENGINE CONTROLS
ACTION COMMAND
Engine auto-start
E
key
Throttle (decrease)
-
(MINUS SIGN)
Throttle (increase)
=
(EQUAL SIGN)
10% throttle Keyboard
1
20% throttle Keyboard
2
30% throttle Keyboard
3
40% throttle Keyboard 4
50% throttle Keyboard
5
60% throttle Keyboard
6
70% throttle Keyboard
7
80% throttle Keyboard 8
90% throttle Keyboard 9
100% throttle Keyboard 0
Prop (decrease rpm)
SHIFT+-
(MINUS SIGN)
Prop (increase rpm)
SHIFT+=
(EQUAL SIGN)
Prop (min pitch)
CTRL+F6
Prop (max pitch)
CTRL+F7
Mixture (lean)
CTRL+-
(MINUS SIGN)
Mixture (enrich)
CTRL+=
(EQUAL SIGN)
Mixture (idle cutoff)
CTRL+SHIFT+F6
Mixture (full rich)
CTRL+SHIFT+F7
Engage War Emergency Power (WEP)
W
key
or Water/Methanol-Water
injection (toggle)
To start the engine automatically, press the E key:
You’ll see the controls move, and then you’ll hear the
engine start. If you’d rather do all the work yourself,
you can start the engine manually. For details, see the
next section in this handbook, “Starting the engine.”
Your aircraft has three basic engine controls:
- Throttle control lever (the control that has the most
direct effect on power)
- Propeller control lever (to adjust the prop’s pitch
angle and thus the prop’s rotation speed)
- Mixture control lever (to adjust the air/fuel mixture
as the airplane climbs and descends)
All three levers can be controlled with the keyboard.
You can also control the throttle with a slider or wheel
on your joystick (optional).
Page 10
Starting the engine
In most missions you’ll start on the runway, all
lined up and ready to go. Start your engine, and follow
your squadron mates into the sky!
To automatically start the engine
- Press the E key.
To manually start the engine
1. Set the prop control lever to the Max. pitch
position (CTRL+F7).
2. Set the mixture control lever to the Full Rich
position (CTRL+SHIFT+F7). If you’re ying a jet,
instead move the fuel valve to On (CTRL+SHIFT+F7).
3. Set the throttle control lever to the Idle
position, and then move it forward just a bit
(MINUS and EQUAL keys).
4. Turn the battery switch to On (CTRL+B).
5. If your aircraft has a magneto, click the Magneto
switch to move it to the Both position (CTRL+M or
SHIFT+M).
6. Engage the starter and then release it (CTRL+S).
Throttle control lever
The throttle regulates the amount of fuel and air
that enters the engine cylinders. When fully open, the
throttle allows the maximum amount of fuel and air to
enter the system to produce maximum power. When the
throttle is closed, only a small amount of fuel and air
can get in, and the engine produces minimum power.
To open the throttle, move the control lever forward.
To close it, pull it backward. The manifold pressure
gauge on the instrument panel shows the pressure of the
air moving into the engine’s cylinders, and it gives
an approximate measurement of engine power. Generally
speaking, the higher the manifold pressure, the more
power you have.
- 9 -
Page 11
- 10 -
Mixture control lever
Because your aircraft’s engine operates over a wide
range of altitudes, you can adjust the air/fuel mixture
for maximum ef ciency as you climb into less dense air or
descend into more dense air. A mixture that is too rich
contains too much fuel for the amount of air available at
that altitude and will cause the engine to run rough and
lose power. The solution is to “lean the mixture.” As you
climb, make the mixture leaner by pulling the mixture
control lever backward. Don’t lean the mixture too much,
though--a mixture that is too lean can cause the engine
to overheat or cause detonation (a sudden, explosive
combustion of fuel within the cylinders).
Note: By default, mixture control is handled automatically in
Combat Flight Simulator. To adjust the mixture manually,
click Realism Options on the Options tab, and in the Aircraft
section clear the Auto mixture check box.
Propeller control lever
Adjusting the propeller in an airplane is a lot like
using gears in a car. In low gear the engine turns fast
to get you moving. Once you’re underway, there’s no need
to use a lot of power, so you shift to a higher gear to
make more ef cient use of less power. In an airplane,
the propeller control lever indirectly changes the
angle at which the propeller blades meet the air, which
affects how fast the engine turns. The tachometer on the
instrument panel shows how fast your engine is turning.
During takeoff, in combat, and during landing (in
case you need to abort and take off again) you’ll need
every bit of power your engine can develop. So during
these three phases of ight, keep the propeller lever
forward: the angle of the blades will be low, slicing
through the air easily so you can get the engine’s full
power (like using a low gear in a car). During cruise,
you can pull the propeller lever backward a bit: the
angle of the blades will increase and take a bigger bite
out of the air, making more ef cient use of the engine’s
power (like using a high gear in a car).
Because your aircraft has a constant-speed propeller,
any time you change the throttle setting a governor
automatically adjusts the angle of the blades to maintain
that speed. This reduces your workload!
Note: The default setting of your airplane’s prop control lever is the
forward (high speed) position. Don’t change this setting if
you don’t need to. As a ghter pilot, you’ll want this setting
most of the time. Leaving the prop control lever forward during
cruising ight means you’ll y less ef ciently and use more
fuel, but it won’t cause any damage.
P-38 LIGHTNING BANKS FOR
BOMB RUN.
Air Force Historical Research Agency Photo
Page 12

GETTING UP AND BACK
TAXIING
When you’re taxiing, remember that if you’re ying
a taildragger (an aircraft with a tailwheel instead of
tricycle landing gear), it’s hard to see over the nose
when you’re on the ground. To get a good view, make gentle
S-turns by using the rudder pedals, and look to either
side. Aircraft with tricycle landing gear are easier to
manage on the ground--you can see over the nose so you
just use the rudder to steer the aircraft.
Note: When auto-rudder is set to On, you can steer by moving
the stick left and right—the ailerons and the rudder are
connected. To turn auto-rudder on or off, click Realism Options
on the Options tab, and in the Aircraft section select or clear
the Auto-rudder check box.
To taxi
1. Hold the stick back to keep the tailwheel on the
ground (with a taildragger).
2. Taxi with the throttle at idle and use the brakes
as little as possible.
3. To turn sharply, brake just on the side you’re
turning toward (press the COMMA for the left brake
or the PERIOD for the right brake).
4. When you reach the runway, stop at a right angle
and scan the sky for any approaching aircraft.
TAKING OFF
Taking off is something even experienced pilots
get excited about. But don’t lose your head during this
critical stage of ight. Every plane performs differently
during takeoff, so use the checklists in online Help for
specic aircraft specs. Here are some general guidelines:
To take off (taildragger)
1. Line up on the runway. LOCK THE TAILWHEEL
(SHIFT+L). This is important as the airplane’s
left turning tendency is exaggerated in a
tailwheel airplane.
2. Incrementally add some aps if appropriate in your
airplane (press the F key).
3. Make sure the prop control lever is in the full
forward position (default setting), and then
smoothly advance the throttle to takeoff power.
See “Engine Controls” earlier in this handbook
for details. Do not jam the throttle forward, or
torque effect may cause loss of control!
4. Maintain back-pressure on the stick to keep the
tailwheel on the ground until your rudder becomes
effective.
5. Slowly ease forward on the stick so the tail
rises.
6. At your aircraft’s takeoff speed, gently pull back
on the stick and y the plane off the runway.
7. Once airborne, retract the landing gear (press the
G key) and aps (press the V key repeatedly until
the aps are fully retracted).
8. Adjust your pitch attitude to climb out at your
plane’s best-climb speed.
- 11 -
Page 13
- 12 -
Air Force Historical
Research Agency Photo
To take off (tricycle landing gear)
1. Line up on the runway.
2. Incrementally add some aps if appropriate in your
airplane (press the F key).
3. Make sure the prop control lever is in the full
forward position (default setting), and then
smoothly advance the throttle to takeoff power.
See “Engine Controls” earlier in this handbook
for details.
4. At your aircraft’s takeoff speed, pull back on
the stick so the nose rises.
5. Once airborne, retract the landing gear (press
the G key) and aps (press the V key repeatedly
until the aps are fully retracted).
6. Adjust your pitch attitude to climb out at your
plane’s best-climb speed.
LANDING
A good landing starts with a good approach,
and that means setting up with the right speed and
con guration. Every plane lands differently, so check
the online Help checklists for best approach speeds, gear
extension speeds, and ap settings. Here are some general
guidelines:
To land (taildragger)
1. Slow your plane down to its maximum gear-extension
speed.
2. Lower the landing gear (press the G key) and start
a shallow 500-foot-per-minute descent toward the
runway. Watch the descent rate by looking at the
runway and occasionally glance at the rate of
climb/descent indicator on the instrument panel.
Note: If your hydraulic system is damaged, you may need to
manually pump the landing gear down (press SHIFT+G key
repeatedly).
3. Incrementally add aps to steepen the approach
(press the F key).
4. Maintain the approach speed recommended for your
aircraft, and use pitch to control airspeed.
To speed up, move the stick forward slightly to
lower the nose. To slow down, gently pull the
stick back.
5. Pick a touchdown point and use the throttle to
control descent rate. If the touchdown point
appears to move down your windscreen, decrease
power: you’re too high. If the touchdown point
seems to move up, add power: you’re too low.
6. As you cross the end of the runway, ease the
throttle back to idle.
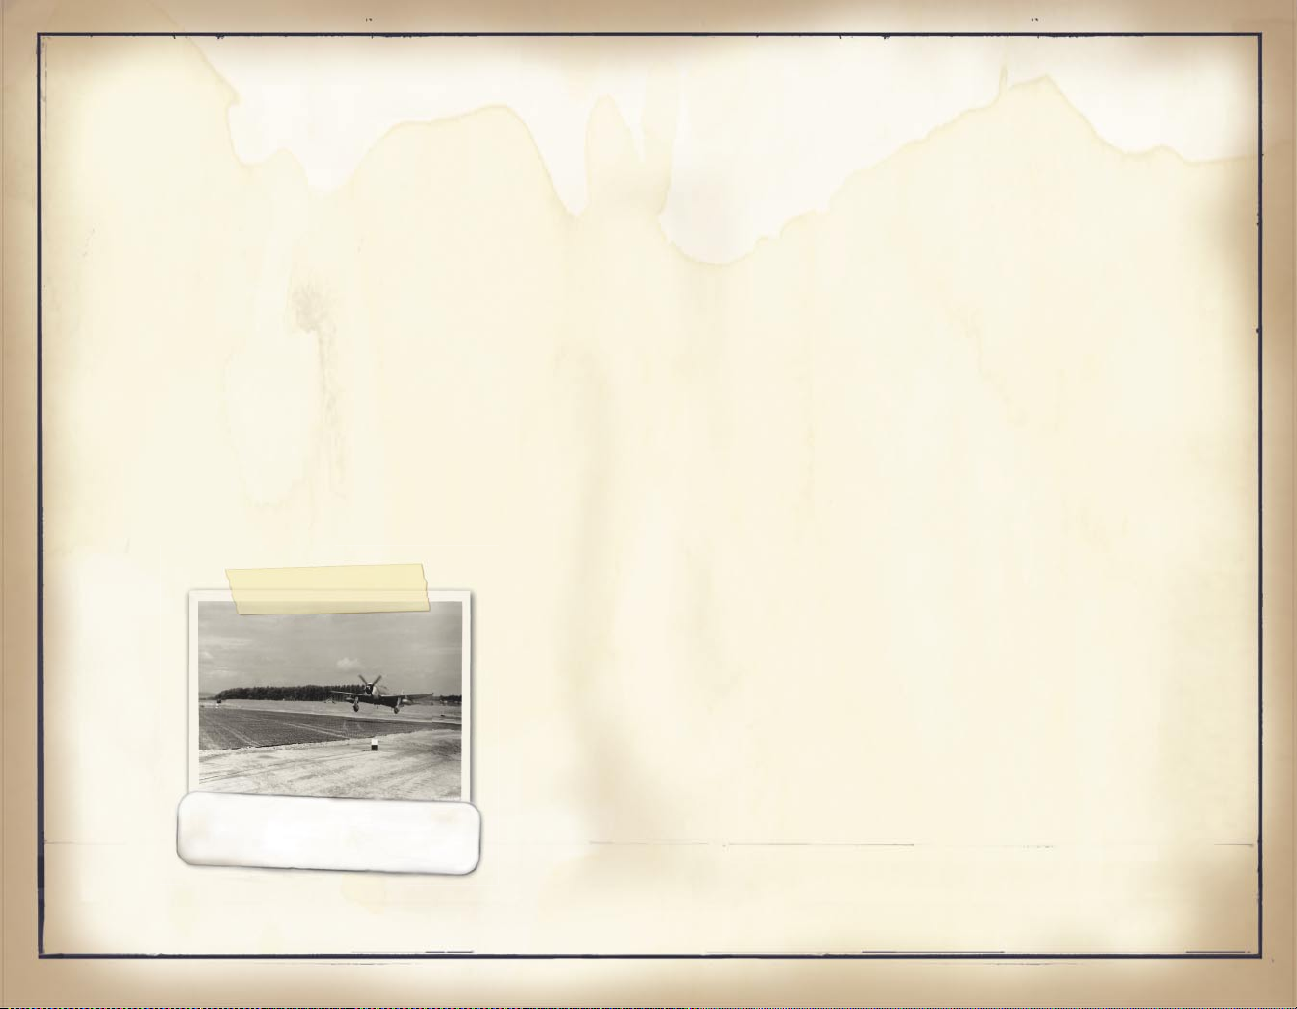
XIX TAC THUNDERBOLT
LANDS ON A NEW AIRSTRIP
IN FRANCE.
Page 14

7. Flare about 20 feet above the runway by pulling
back slowly on the stick to raise the nose
slightly, and touch down in a nose-high, “threepoint” attitude. All three wheels should contact
the ground at the same moment. Hold the stick full
back after you touch down.
8. During and after touchdown, maintain directional
control with the rudder. (If auto-rudder is on,
then move the stick left and right--the ailerons
and the rudder are connected.)
9. After the aircraft has slowed to walking speed,
apply the brakes (press the B key).
10. Unlock the tailwheel to taxi (SHIFT+L).
To land (tricycle landing gear)
1. Slow your plane down to its maximum gear-extension
speed.
2. Lower the landing gear (press the G key) and start
a shallow 500-foot-per-minute descent toward the
runway. Watch the rate of climb/descent indicator
on the instrument panel.
Note: If your hydraulic system is damaged, you may need to
manually pump the landing gear down (press the SHIFT+G
keys).
3. Incrementally add aps to steepen the approach
(press the F key).
4. Maintain the approach speed recommended for your
aircraft, and use pitch to control airspeed.
To speed up, move the stick forward slightly
to lower the nose. To slow down, gently pull
the stick back.
5. Pick a touchdown point and use the throttle to
control descent rate. If the touchdown point
appears to move down your windscreen, decrease
power: you’re too high. If the touchdown point
seems to move up, add power: you’re too low.
6. As you y across the end of the runway, ease the
throttle back to idle.
7. Flare about 20 feet above the runway by pulling
back slowly on the stick to raise the nose
slightly, and touch down on the main landing gear
rst. After you touch down, hold the stick full
back to keep the nose wheel off the ground until
it gently settles as you slow.
Note: With tricycle gear aircraft, you don’t want all three wheels
touching simultaneously—you’ll bounce.
8. During and after touchdown, maintain directional
control with the rudder. (If auto-rudder is on,
then move the stick left and right--the ailerons
and the rudder are connected.)
9. After the aircraft has slowed to walking speed,
apply the brakes (press the B key).
* * *
USING CHECKLISTS
Good pilots don’t rely solely on memory. As you y,
you can view checklists for takeoff, cruise, descent, and
landing to help you with these important phases of ight.
To display the checklist, press F1 to display Help, and
then click the link for the checklist you want to use.
- 13 -
Page 15
- 14 -
Air Force Historical
Research Agency Photo
Air Force Historical
Research Agency Photo
BASIC FLIGHT MANEUVERS
FLYING STRAIGHT-AND-LEVEL
Flying straight-and-level may look simple, but it’s
one of the more dif cult maneuvers to master. Because
hotshot pilots like to be in control, they overdo it most
of the time and interfere with their airplane’s basic
stability. Like a balancing act, straight-and-level ight
requires that you make smooth, small corrections to keep
from wobbling all over the sky. There are two components
to ying straight-and-level: holding a constant altitude
and holding a constant heading
Hold a constant altitude
Keep an eye on the altimeter. If your altitude starts
to change, make small, smooth corrections on the throttle
or the stick. Use the stick to correct deviations of
less than 100 feet. If your altitude has deviated more
than 100 feet, you may want to add or reduce power a bit.
Use elevator trim to keep the pitch attitude where you
want it.
To slow down without losing altitude
- Reduce power and keep the nose from falling by gently
pulling back on the stick.
To speed up without gaining altitude
- Add power and keep the nose from rising by gently
pushing forward on the stick.
Hold a constant heading
Check the heading indicator on the instrument panel
frequently to make sure the nose is pointed in the right
direction. Crosscheck the turn indicator and the wing tips
to hold the wings level and to correct minor deviations.
Pick a point on the horizon and keep ying toward it.
Use aileron trim and rudder trim if available to make the
job easier.
There are four basic maneuvers to master: ying
straight-and-level, turning, climbing, and descending.
Practice these maneuvers in Free Flight so you don’t get
shot down.
HAWKER TYPHOON IN FLIGHT.
B-26S OVER THE COAST OF
FRANCE.
Page 16
TURNING
You might think that the faster you go, the faster
you can turn. But ying fast in a turn means more
centrifugal force, and that means a bigger turn radius.
The result? The turn takes longer! So sometimes to turn
faster you’ll need to y slower. How fast you can turn
(and how much sky you can do it in) depends on your bank
angle and your airspeed. How well you can turn depends
on your ability to simultaneously bank the wings and add
both rudder and up-elevator while you “paint the horizon”
with the nose of the plane.
Bank the wings
Move the stick right or left to manipulate the
ailerons and initiate a bank. Center the stick when you
reach the bank angle you want. By banking the wings, you
deect some of their vertical lift sideways. This part
of the airplane’s total lift is called the “horizontal
component of lift,” and it is this force that pushes
the plane around in a turn.
Add some rudder
Your plane will have a tendency to yaw (pivot)
opposite the turn. So as you bank, apply some rudder
pressure in the same direction as the turn using rudder
pedals, a joystick that supports rudder control, or the
keyboard (press the numeric keypad 0 key for left rudder
or the keypad ENTER key for right rudder). As you bank
left, add a little left rudder, and vice versa. How much
rudder? Just enough to keep the ball/needle in the turn
indicator centered. In theory, you could skid an airplane
through a turn without banking using just the rudder,
but it’s an inefcient and uncomfortable way to change
direction. (In combat, though, you can use skidding to
confuse an enemy on your tail.)
Note: Auto-rudder is automatically set to Off if rudder controls are
detected. Otherwise auto-rudder is automatically set to On.
When auto-rudder is set to On, the rudder moves automatically
to maintain coordinated ight in turns, making your airplane
easier to y. To turn auto-rudder on or off, click Realism
Options on the Options tab, and in the Aircraft section select or
clear the Auto-rudder check box.
Use some up-elevator
Because some of the lift is deected sideways in
a turn, you need to raise the nose slightly to generate
more lift. Add a little back-pressure on the stick as
you roll into a turn. The steeper the turn, the more upelevator pressure you add to maintain altitude. You might
even need to add some power. As you roll out of the turn,
remember to relax the back-pressure on the stick.
“Paint the horizon”
To maintain level ight as you turn (or to turn
while climbing or descending at a constant speed and
rate), “paint the horizon” with the nose--keep the
pitch attitude the same after you’ve started the turn.
In general, if the nose moves up as you’re turning, you
climb. If it moves down, you descend.
* * *
CLIMBING
There are two ways to get your aircraft to go up-by using momentum or by using excess thrust.
Use momentum
Pull back on the stick to create a “hill” and your
airplane will start to climb. You’ll go higher but you’ll
also slow down--just like climbing a hill on a bicycle.
Pulling back on the stick to go up means you trade
airspeed for altitude.
- 15 -
Page 17

Use excess thrust
A sustained climb is made possible by using thrust
to pull your plane up the “hill.” Set the steepness of
the “hill” by pulling back on the stick. Then add power
with the throttle to pull yourself up, just like pedaling
a bike faster. Using excess thrust is a way to gain
altitude without losing airspeed.
Every aircraft has a best-climb speed. With full
power, this is the speed where the airplane gains altitude
fastest in a sustained climb. Adjust your speed by raising
or lowering the nose.
* * *
DESCENDING
There are two ways to get your aircraft to descend-by diving or by reducing power.
Dive
Push forward on the stick to make a steep “hill”
to dive down. As you descend, your speed will increase.
Pushing forward on the stick to go down means you trade
altitude for airspeed. Be careful! If the air traveling
over your wings in a high-speed dive exceeds the speed of
sound, your control surfaces may lose their effectiveness
and you may not be able to pull out of the dive.
Reduce power
To descend more slowly than in a dive, make a
shallow “hill” with the stick (or leave the stick where
it is), and reduce your throttle a bit. When the engine
stops producing enough thrust to maintain level ight,
your plane will start to glide slowly toward the ground.
Descending at low power is a way to lose altitude without
gaining airspeed.
Every aircraft has a best-glide speed. If the engine
quits, this is the speed that lets the airplane glide the
farthest. Adjust your speed by raising or lowering the nose.
DON’T STALL!
A stall has nothing to do with an airplane’s engine
sputtering. You can stall at any airspeed--even when the
plane is in a fast dive!
A stall has to do with the angle of attack--the angle
at which a wing meets the oncoming air (not the angle
of the wing to the ground). If you increase the angle of
attack too much, the wings won’t generate enough lift to
counteract the plane’s weight--so you stall--your plane
starts to fall toward the ground. (See “Why it All Works”
later in this handbook.)
A wing always stalls at the same critical angle of
attack, at any attitude, no matter how fast or slow you’re
ying. More fuel and more ammunition make the plane weigh
more. But so does maneuvering. In a turn, for example,
centrifugal force will push you into your seat, so it’s
as if both you and the airplane are heavier. Then you
need more lift to offset that weight and maintain level
ight. To get the additional lift, you have to increase
the angle of attack--but that puts you closer to the
critical angle of attack--and a stall.
So go easy on the stick when you’re maneuvering. Just
because you’re going fast doesn’t mean you can’t stall!
Warning signs
A stall near the ground can be deadly. But you can
learn to sense one coming and prevent it. As the air
owing over the top of the wings gets turbulent, you’ll
feel a slight shaking or buffeting, and you’ll see a
red stall light illuminate on the instrument panel.
Immediately reduce the angle of your climb or dive.
- 16 -
Page 18

Recover promptly
The only way to recover from or prevent a stall is to
reduce the angle of attack. Apply forward-pressure on the
stick, and add some throttle to compensate for the loss
of altitude. If you continue to pull back on the stick
(the intuitive thing to do, since your nose is dropping!),
your ship will not recover. If one wing drops before the
other, the stall may become a spin.
* * *
DON’T SPIN!
You go into a spin when one wing stalls more than
the other wing. The plane corkscrews toward the ground
at a steep angle of descent and at a low airspeed. Sound
scary? It’s no big deal once you’ve done a few. But
understand that for an airplane to spin it must rst
be stalled. Avoid a stall and you’ll avoid a spin.
Note: When auto-rudder is set to On, it’s unlikely a stall will develop
into a spin. To turn auto-rudder on or off, click Realism Options
on the Options tab, and in the Aircraft section select or clear
the Auto-rudder check box.
You don’t have many options if you get into a
spin close to the ground. Press the O key three times
(that’s the letter O) and bail out! If you think you have
enough altitude to recover (at least 5,000 feet in most
aircraft), here’s what to do.
To maneuver out of a spin
A handy acronym to remember to help you handle spins
is PARE:
P Power off
A Ailerons neutral
R Rudder opposite of the direction of spin
E Elevator forward to brake the stall
1. Reduce the throttle.
2. Center the stick--that neutralizes the ailerons.
3. Apply full rudder opposite the direction of your
spin.
4. Relax the back-pressure on the stick to decrease
the angle of attack and break the stall. (In
some planes you’ll have to “pop” the stick
forward sharply.) As soon as the rotation stops,
neutralize the rudder.
As your airspeed builds after recovery, smoothly pull
back on the stick to recover from the dive. As the pitch
attitude returns to level ight, smoothly add power to
maintain your airspeed.
- 17 -
Page 19

- 18 -
Air Force Historical
Research Agency Photo
WHY IT ALL WORKS
LIFT
Lift is the upward force produced by a wing as it
moves through the air. It’s the force that counteracts
the gravity of an airplane’s weight.
There are four forces that affect an airplane in
ight, and they act in pairs: lift opposes weight, and
thrust opposes drag. To get your crate to behave like
you want it to, you’ve got to manage these four forces.
Understanding them makes it easier.
Thrust
Lift
Drag
Weight
How a wing works
Ask engineers how a wing works and they’ll go on
about circulation theory, the shape of the wing, and
Bernoulli’s Theorem. They’ll talk your ear off, but the
most useful explanation for a combat pilot learning to
y in a hurry is admittedly simplistic: a wing keeps an
airplane up by de ecting the air down
.
The angle that matters most
The angle at which a wing meets the air is called
the angle of attack. This is not the angle between the
airplane’s nose and the horizon. It’s the difference
between where your wing is pointing and where it’s
actually going.
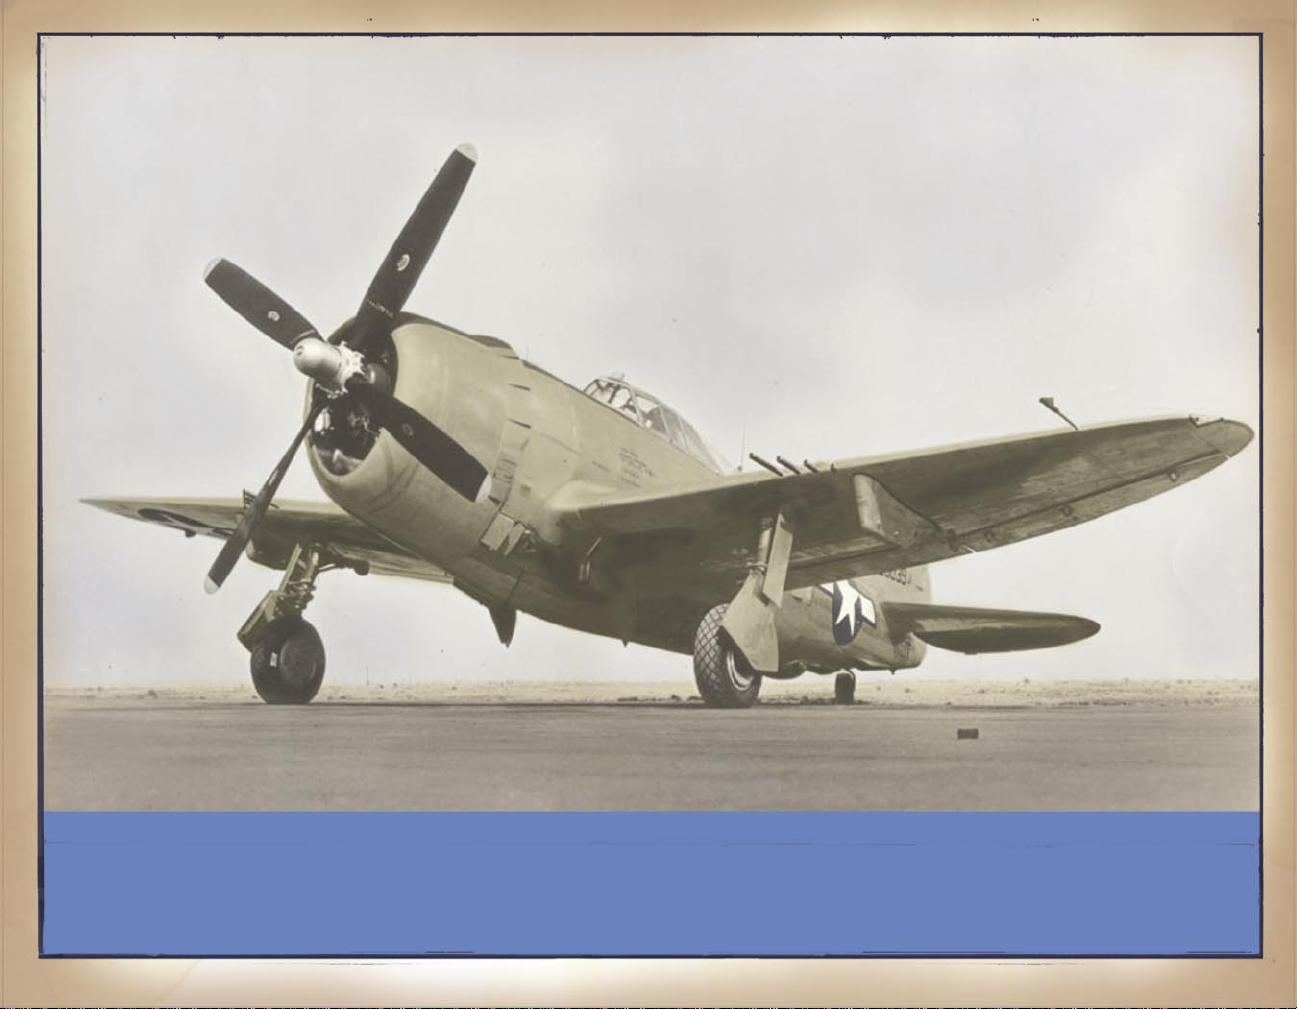
AN EARLY ALLISON-POWERED
MUSTANG SPORTS A CAMO
PAINT JOB.
Page 20

Changing the amount of lift
You can control the amount of lift a wing generates
by adjusting two things: speed and angle of attack. To
produce a certain amount of lift at low speeds, the air
must be deected using a large angle of attack. To produce
the same amount of lift at high speeds, the air must be
deected using a small angle of attack. If the speed is
very low, the angle of attack you’ll need to maintain
lift will be so large at a certain point (the critical
angle of attack) that the air cannot ow smoothly over
the wing, and the wing will stall.
You can also add lift by extending the aps, which
increase the curvature of the wing. With the aps
extended, more air is deected downward, so there is
more lift. Flaps also cause an increase in drag.
Playing with lift
Think about what happens to your hand when you stick
it out the window of a moving automobile, letting it get
bounced around by the wind. If the car speeds up, you
can reduce the angle of your hand relative to the wind
(the angle of attack) to keep it from blowing upward.
If the car slows down, you can increase the angle of your
hand to keep it from falling downward. If you increase
the angle of your hand too much, it will stop generating
lift, and fall (stall).
WEIGHT
Weight opposes lift--it’s the downward force caused
by gravity pulling an airplane toward the center of the
earth.
For your ship to y, the wings must develop enough
lift to counteract its weight. The real weight of your
aircraft changes as fuel and ammunition are used up. But
changes in apparent gravity (measured in G-forces) are
caused by maneuvering. For example, a level turn with
a 60-degree bank puts a 2-G load on the plane and its
pilot. Both seem to weigh twice as much as they do when
in straight-and-level ight--and in a way they do--because
of the increase in apparent gravity.
Compensating for G-forces
During maneuvers, you have to adjust the amount of
lift to compensate for the changes in weight caused by
G-forces. To stay level during a steeply banked turn, for
example, you’ll need to raise the nose slightly (increase
the angle of attack) and add more power (thrust) to
produce more lift to balance you out.
Blackout and redout
Most maneuvers create only slight, brief G-forces.
But combat maneuvers produce strong, rapidly changing Gforces that can be uncomfortable, or even incapacitating.
Positive Gs: Rapid pull-ups and steeply banked,
level turns create positive G-forces that act toward
your feet. As the blood circulation to your brain
decreases, your visual eld narrows and you may experience
blackout: You’ll lose color vision and eventually lose
consciousness.
- 19 -
Page 21

- 20 -
Negative Gs: Rapid pushovers and certain aerobatic
maneuvers create negative G-forces that act toward
your head. As the forces increase, you’ll experience
discomfort, headache, “redout” caused by excessive blood
ow to your eyes, and even unconsciousness. Most pilots
have a harder time handling negative Gs than positive Gs.
To turn the redout and blackout on or off in Combat
Flight Simulator 3, click the
Realism Options on the
Options tab, and then in the Visuals section select or
clear the
G-effects check box.
THRUST
Thrust is the forward force provided by an airplane’s
propeller or a jet engine’s exhaust, and it is opposed
by drag (the resistance of the air as the airplane moves
through it).
An airplane’s propeller creates thrust in the same
way its wings create lift: air is de ected backward,
so the propeller (and the aircraft) move forward. The more
powerful the engine (and the bigger the propeller), the
greater the thrust, and the faster the airplane can y.
Thrust is also the most important factor in determining
a plane’s ability to climb.
* * *
DRAG
Drag is the rearward-pulling force that opposes
thrust, and it has two components: parasite drag and
induced drag.
Parasite drag
Parasite drag is caused by friction between the air
and an airplane’s structure. The more things there are
sticking out into the air ow (antennas, landing gear,
bombs, etc.), the higher the parasite drag. Your plane
is designed to have as little parasite drag as possible,
but the faster you go, the more there will be.
Induced drag
As the angle of attack increases, lift pulls an
airplane upward and backward. The upward component of
lift is called “effective lift”; the backward component
is called “induced drag.” Effective lift counteracts
weight to keep the airplane ying. Induced drag
counteracts thrust and slows the airplane down. The slower
you go (the bigger the angle of attack), the greater the
induced drag. Eventually, you’ll need to add more power
to generate the lift necessary to remain aloft.
Page 22

Playing with induced drag
You can understand how induced drag works by sticking
your hand out the car window again. If you hold your hand
relatively at (at a low angle of attack), your hand gets
pushed upward and slightly backward. As you increase the
angle of attack, you’ll notice an increase in both the
upward force (effective lift) and in the backward force
(induced drag). Increase the angle too much and your hand
will stall.
A few words about torque
“Torque” is a catch-all term used to describe your
plane’s tendency to yaw and bank in either one direction
or the other at certain power settings. A ghter’s
powerful engine and big propeller make this effect very
pronounced, especially when the throttle’s on high but
the airspeed is low (as during takeoff). To counter these
turning tendencies, you’ll need to use the rudder and
ailerons, although torque can be used to your advantage
in a dogght.
What causes torque? Four phenomena--reactive force,
spiraling slipstream, gyroscopic precession, and P factor.
Reactive force
When the powerful engine of a ghter plane turns the
propeller in one direction, there is an equal and opposite
force that makes the plane roll in the other direction.
When your throttle’s high but your airspeed’s low (as
during takeoff), the plane will roll in a direction
opposite to the rotation of the prop. This effect is most
pronounced during acceleration.
Spiraling slipstream
A propeller’s spiraling slipstream (the air mass
that the propeller propels behind it) hits one side of
the tail and causes the nose of the plane to yaw (rotate
left or right around the vertical axis) in the same
direction that the reactive force causes it to roll.
The result? An even stronger tendency to turn.
Gyroscopic precession
Because it’s big and spins rapidly, your plane’s
propeller behaves like a gyroscope. This makes it subject
to the effects of gyroscopic precession. When a force
acts on a gyroscope, the gyroscope behaves as if the
force were applied at a point 90 degrees in the direction
of rotation. If your plane’s propeller turns clockwise
(viewed from the cockpit), then when the tail comes up
on the takeoff run--the nose goes down--and gyroscopic
precession makes the plane swerve to the left.
P factor
A propeller is a bunch of small wings moving around
a crankshaft. Each propeller blade produces a certain
amount of thrust. When an airplane is ying at a high
angle of attack, the downward-moving propeller blades have
higher angles of attack and produce more thrust than the
upward-moving blades. The result is asymmetric propeller
loading--or P factor--which creates a yawing motion.
- 21 -
Page 23

- 22 -
BASIC AEROBATIC MANEUVERS
AILERON ROLL
Purpose
Rarely used on its own in battle, the aileron roll is
worth learning because it’s part of many combat maneuvers.
To perform
Raise the nose slightly. Pick a reference point on
the horizon, then smoothly push the stick all the way
to one side and hold it there. Use the stick to keep the
nose on the reference point, then center the stick as the
wings approach level again. Practice stopping the roll
partway through for a half-roll. That’s an easy way to
get inverted quickly.
There’s ying an airplane, and then there’s ying
an airplane in combat. Get familiar with these basic
aerobatic moves before you learn combat maneuvers and
you’ll have a ghting chance! Practice these maneuvers in
Free Flight so you don’t get shot down.
For information on air combat maneuvers, see “Basic
Air Combat Maneuvers” and “Tactical Air Combat Maneuvers”
later in this handbook.
Page 24

- 23 -
BARREL ROLL
Purpose
This basic aerobatic maneuver can be used in combat
to shake an enemy from your tail. You’ll corkscrew through
the sky and lose airspeed, causing your opponent to y
right by.
To perform
Raise the nose, bank sharply left or right, and
gently pull back on the stick to maintain the roll. Hold
the sideways-pressure on the stick as you roll inverted,
then center it when you return to level ight. During this
move, the stick is essentially in the left- or rightrear position. The nose will draw a circle on the horizon
instead of rotating around a point, as in an aileron
roll. If you do a barrel roll perfectly, you won’t lose
any altitude.
LOOP OVER
Purpose
Commonly referred to as a “loop,” this move is a
way to make a vertical circle in the sky and end up back
where you started. Practicing loops will help you get
accustomed to unusual pitch attitudes, rapidly changing
airspeeds, and the effects of G-forces.
To perform
Make sure you have enough airspeed or you’ll stall
at the top of the loop. Slowly pull back on the stick.
As you climb, you’ll lose airspeed. Once inverted, ease
off on the stick. As you start down the back side, add
a little back-pressure and reduce the throttle.
Tip: Watch your left wingtip to see where in the loop you are.
The wing should draw a circle on the horizon.
Page 25

- 24 -
LOOP UNDER
Purpose
A loop under is basically a reverse loop over, but
it’s more useful in combat since you gain speed early.
Your airspeed has to be high to do a loop over, but your
plane has to be high to do a loop under--or you’ll hit
the ground! Make sure you have enough altitude before you
try this one, and don’t pull too many negative Gs. The
negative G-loads most aircraft can handle are half that
of the positive G-loads
.
To perform
Do a half–aileron roll to get inverted, and then pull
back on the stick smoothly. You’ll gain airspeed, which
will let you start up the other side of the loop. As you
start to climb, keep back-pressure on the stick. You’ll
slow down as you become inverted. Push forward on the
stick slightly to stop the loop, and then nish the
maneuver with another half–aileron roll. You should end
up ying in the same direction and at the same altitude
as when you started.
Page 26

Air Force Historical Research Agency Photo
AIR COMBAT
Page 27

TOOLS OF THE TRADE
USING VIEWS
You can use a joystick or keyboard commands to
see everything you’d see from the cockpit of a real
airplane--and more. Different views serve different
purposes. Experiment with them in Quick Combat to learn
your favorite views for tracking the enemy. For a list
of all of the views and view commands, see the “View
Commands” table on the Quick Reference Card.
Note: All keystrokes referred to in this handbook are the Microsoft®
Combat Flight Simulator 3 combat key commands. If you want
to change your key commands to Flight Simulator settings or
your own customized keystrokes, go to the Control Options screen
(click Control Options from the Options tab).
In combat, you’ll probably use several of the
following views at various times. Press F4 to cycle
through the main views (all of the views except Full
and Padlock views).
Virtual Cockpit view
Virtual Cockpit view is the default view; it puts
you right in the pilot’s seat. (Press F3 to cycle between
Full view and Virtual Cockpit view.)
Spot view
Spot view shows you an outside view of your aircraft.
You can position the view anywhere around your own
aircraft (use the arrow keys on the keyboard or the hat
switch on your joystick).
Chase view
Chase view puts you behind your aircraft (press
CTRL+F4 to toggle on and off). Press the TAB key to cycle
between a chase view of your aircraft and other aircraft.
Float view
Float view puts you outside your aircraft and the
camera seems to oat as the aircraft moves (as opposed
to the xed camera in Spot view).
Flyby view
In yby view your aircraft ies past as though lmed
from a stationary camera.
Player Target view
In Player Target view the camera follows the current
target as seen relative to an external view of your
aircraft. You must press the TAB key to target an object.
Full view
Full view provides the best visibility by hiding
the instrument panel (press F3 to toggle on and off).
When used with the Heads Up Display (HUD), it gives you
most of the important information you need. (Press F5
to display the HUD.)
- 26 -
Page 28

- 27 -
Zooming in and out
Using the zoom commands helps you see distant
targets:
- Press the LEFT BRACKET ([) to zoom out.
- Press the RIGHT BRACKET (]) to zoom in.
GETTING A GOOD LOOK
You can use the controls on a joystick or the numeric
keypad to look around as you y. Experiment with the
numeric keypad view commands--they’re easy to use.
When in Cockpit or Full view
The default view is straight ahead. To look
elsewhere, use your joystick’s hat switch (on top of the
joystick) or the number keys on the numeric keypad. For a
list of all view commands, see the “View Commands” table
on the Quick Reference Card.
In most views, you have two ways to look around:
panning and snap-to. Panning provides you with a smooth
continuous view. Snap-to jumps to a particular view,
such as a 90-degree side view. (Toggle Num Lock to switch
between these two options.)
* * *
USING THE HEADS UP DISPLAY
The Heads Up Display (HUD) gives you important
information without the need to look at the entire
instrument panel. The HUD shows your pitch and bank
status, as well as information about your heading,
altitude, speed, ap and gear positions, available
ammunition (guns, cannon, rockets, bombs), and fuel.
Press
F5 to toggle the HUD on or off.
To move any element of the HUD to any position in
the CFS3 window, drag the element to the location where
you want it. To change the measurement system the HUD
uses (between meters and feet), press the
U key.
Padlock view
Padlock view locks your view onto the currently
selected enemy and puts yellow brackets around the plane
for easy identi cation (press the
ACCENT key to toggle on
and off). The padlocked aircraft also appears as a yellow
dot on the Tactical Display (see “Using the Tactical
Display” later in this section of the handbook). To lock
onto a different target, press the
TAB key. To cycle
backwards through the available targets, press
SHIFT+TAB.
Although it takes some practice to use Padlock view
effectively, it’s a good way to stay on the enemy’s tail
once you’re there. When you exit Padlock view, the last
padlocked target still appears as a yellow dot on the
Tactical Display, and the Enemy Indicator points toward
it (see “Using the Enemy Indicator” later in this section
of the handbook). To cancel the target, press
SHIFT+`
(SHIFT+ACCENT).
Moving eyepoint
The eyepoint is where your eyes are looking from in
the cockpit. Moving the eyepoint around in the virtual
cockpit view is useful to see over the cockpit when
landing or getting a different vantage point on anything
you’re trying to view. Experiment with these commands.
ACTION COMMAND
Move eyepoint up
SHIFT+ENTER
Move eyepoint down
SHIFT+BACKSPACE
Move eyepoint backward
CTRL+ENTER
Move eyepoint forward
CTRL+BACKSPACE
Move eyepoint left
CTRL+SHIFT+BACKSPACE
Move eyepoint right
CTRL+SHIFT+ENTER
Return eyepoint to the
SHIFT+CTRL+SPACE
default forward view
Page 29

- 28 -
USING THE ENEMY INDICATOR
The Enemy Indicator is a cone that points to the
nearest enemy aircraft or to an aircraft you have
“padlocked” in Padlock view (see “Using Views” earlier
in this section of the handbook). To nd the enemy plane,
turn in the direction the Enemy Indicator is pointing.
When the enemy aircraft is visible through the front
windscreen, the Enemy Indicator disappears. The Enemy
Indicator is on by default. Press the
I key to toggle
it on or off. Press
TAB to cycle through the enemy
targets. Press
CTRL+TAB to cycle through friendly targets
to check wingmen positions.
USING THE TACTICAL DISPLAY
The Tactical Display helps you keep track of friendly
and enemy aircraft, ships, vehicles, or other surface
targets. The display appears in the upper-left corner
of the screen, but you can drag it anywhere on the screen.
The Tactical Display is on by default. Press
SHIFT+T to
toggle it on or off. Press
CTRL+SHIFT+T to cycle the
range of the Tactical Display.
With this feature you can see the tactical situations
of these areas: Buildings, Ships, Vehicles, Aircraft,
and All. Press the
T key to cycle through the views.
In the Tactical Display, your aircraft is represented
by an airplane symbol (two intersecting lines), friendly
aircraft by a blue dot in the center of the screen, and
enemy aircraft by a red dot. A padlocked aircraft appears
as a yellow dot (see “Using Views” earlier in this section
of the handbook). If you’re not engaged in combat, the
Tactical Display shows information about waypoints in the
mission.
Aircraft
8 NM
Throttle 1 :79
Gun Rnds :1696
Bombs :0
Rockets :0
Fuel :50%
Flaps :0
Gear :0
Ali Falck - 945
All
4 NM
Herman Geiger - 781
Page 30

- 29 -
DISPLAYING AIRCRAFT LABELS
With aircraft labels turned on, it’s much easier
to spot and keep track of other planes. By watching the
distance change you can tell whether an enemy aircraft
is getting closer to you or farther away and if it’s
within range of your guns.
To display or hide aircraft labels, press
CTRL+SHIFT+L. When labels are displayed, you’ll see
the name of each pilot in your formation, as well as
the type of each enemy aircraft you see. You’ll also
see the distance between you and the other aircraft, in
meters or feet. (Press the
U key to toggle between meters
and feet.)
USING GUNSIGHTS
The aircraft in Combat Flight Simulator 3 feature
a re ector gunsight that consists of a circle with
crosshairs and a center aiming point--all projected
onto a glass screen. To hit the target, take your own
aircraft’s movement and that of the enemy’s into account:
once you’re within range, position the center of the
gunsight where you gure the enemy will be when the
bullets land. Then re!
Aircraft
1 NM
Arno Losigkeit - 332
Jacques Winke - 249
Russ Santodomingo - 524
Page 31

- 30 -
USING WEAPONS
The types of aircraft and missions that you y
determine the variety of weapons at your disposal. To
change the weapons loadout, go to the
Aircraft tab prior
to beginning the mission, select your aircraft, and then
on the Aircraft Information Panel, adjust the loadout.
Note that these weapons aren’t guided. You have to aim
carefully, and it takes a lot of practice to hit the
target.
You can also choose
Unlimited weapons by clicking
Realism Options on the Options tab. This feature is handy
while you’re learning--once you get to be a better shot,
you might want to change this setting to a more realistic
level. You can use four types of weapons to battle the
enemy:
- Guns are used for attacking other aircraft and for
stra ng ground targets, including parked aircraft and
“soft-skinned” vehicles.
- Cannon pack a heavier punch and have less range
than guns, but they are used for the same purposes:
air-to-air combat and stra ng. The weight and
explosive force of a cannon’s projectile makes ships
and armored vehicles, including tanks, vulnerable.
- Rockets are used in air-to-air attacks on bombers,
or against tough ground targets, including structures
and tanks.
- Bombs are used to attack bridges, ships, air elds,
tanks, and other targets.
Here are the commands you need to re your weapons.
ACTION COMMAND
Fire guns
SHIFT+SPACEBAR
Fire cannon
CTRL+SPACEBAR
/Joystick Button
2
Fire guns and cannon
SPACEBAR
/Joystick Button
1
Fire/drop ordnance
ENTER
Cycle ordnance type
BACKSPACE
Page 32

- 31 -
GROUND ATTACK PHILOSOPHY
When you y a ghter-bomber for close air support,
stay in a looser formation. And when you return to
base after escort or ghter-bomber missions, spend your
remaining ammo on trains, convoys, air elds, and other
targets of opportunity. Whenever you’re close to the
ground, watch for small arms re--the ratio of losses
for ground attack compared to aerial combat is about ve
to one.
You need to perfect your ground attack techniques-your ground troops are depending on you! During close air
support missions, you’re often going to be down in the
heat, smoke, and debris that ground forces eat and you’d
better get used to it. Your ability to see targets and
deliver ordnance ahead of your own forces can pave the
way for your advancing ground units. By taking advantage
of “targets of opportunity,” you can set the enemy’s
ghting forces back considerably, and by attacking rail
and shipping, you can disrupt their supply of materiel.
Allied and Axis forces use a number of middle- and
low-level ground attack techniques. When coordinating
with ground troops or tank columns, a controller on the
ground, in a tank, or in a spotter plane directs the
attacking aircraft to their targets. Fighter-bombers or
medium bombers sweep in to knock out the opposition so
the ground units can advance.
Depending on the situation and the resistance
expected, the attacking force assembles in different
formations. At mid-level altitudes, the aircraft in your
squadron should form up close to concentrate their bombs
on the target. Intense antiaircraft re, however, dictates
that you use a loose formation in level ight and then
switch to a tighter formation during the short run over
the target.
Page 33

CAA-NRC COMMITTEE ON SELECTION AND
TRAINING OF AIRCRAFT PILOTS, 1942
Know your airplane
Every aircraft has strengths and weaknesses. Make
sure you know yours and those of the enemy aircraft you’re
most likely to encounter. Knowing you can out climb, out
accelerate, outturn, or outgun your foe changes the way
you y. So does knowing your own plane’s vulnerabilities.
For plane specs, see “Aircraft” in the
handbook.
Keep your head on a swivel
Visualizing the positions and movements of fastmoving objects in a three-dimensional space is difcult.
But it’s what separates ghter pilots from ghter aces.
Being a good shot is a useless skill if you can’t keep
track of the enemy. (In Combat Flight Simulator, you
can use joystick and keyboard commands to scan the sky
rapidly. To learn more, see “Using Views” earlier in this
handbook.)
Use the element of surprise
When you come in from behind or below the enemy
he can’t see you; dropping in from above gives you the
potential for greater speed. While you’re closing in,
use the enemy’s blind spots to your advantage. Come out
of the sun or the clouds with your guns blazing so you
can shoot him down before he even knows you’re there.
Stay one move ahead of the enemy
A good ghter pilot’s actions in the present are
dictated by his prediction of the future. If you merely
react to your opponent’s actions you will be shot down.
If you anticipate his actions and respond intuitively
without hesitation, you will emerge the victor.
Machines of War
Trade altitude and airspeed
Are you ying too fast? Pull back on the stick and
you’ll slow down as you climb. Be careful though: pulling
up to shake the enemy off your tail is a dangerous move!
Your airspeed will drop quickly, and a slow ship under
re is a sitting duck.
Are you ying too slowly? Nose your ship over into a
dive to gain some airspeed. Trading altitude and airspeed
is an essential part of all aerial combat maneuvers.
Fly slower to turn faster
When you ride a bicycle around a corner quickly you
want to go fast, but not too fast--it’s the same with
your aircraft. At fast speeds, centrifugal force causes
the plane’s turn radius to increase and its turn rate
to decrease. Every ship has a speed at which maximumperformance turns are possible. In general, though, a
slower-ying aircraft will outturn a faster-ying one.
Turn into your opponent
Turning into the enemy’s direction of movement
increases the angle between your movement and his guns,
making you harder to hit. Turning away decreases the
angle, making you an easier target--and making it much
easier for him to get on your tail.
Use deection shooting
Attacking an enemy aircraft from in front or behind
is easy. Just aim and shoot when you’re close enough
to hit the target. Attacking from other angles is more
complicated. You must coordinate your shooting with your
speed, and re ahead of the target so that he runs into
your bullets. This difcult skill is called “deection
shooting,” and it is the mark of a good combat pilot.
Learning it is essential to your success.
- 32 -
Page 34

Don’t shoot until he lls your windscreen
Wait until you’re so close that you’re sure you’ll
hit him--you’ll save ammunition. This strategy takes
less concentration than deection shooting, but it isn’t
always practical--especially if you’re meeting the enemy
head on!
Never stop an attack once you’ve initiated it
If you run away when you’re within range of the
enemy, it’s easier for him to get a shot at you. Courage
is not the absence of fear; it’s action in the face of
fear. If you’ve decided to attack, be courageous and
follow through. Cowardice at close range will get you
killed.
THE FIVE STAGES OF AERIAL COMBAT
1. Detecting
Find the enemy before he nds you, so that you
have the advantage of surprise. Most pilots who
are shot down never see their attackers.
2. Closing
Once you’ve detected the enemy, move into a
position close enough to shoot him down--without
being discovered.
3. Attacking
When you’re close enough to shoot the enemy,
commence the attack. If you re too soon you’ll
waste ammunition, and he might see you coming.
Remember: your weapons don’t move. To aim, you
must move your entire plane and use a deection
angle. If you fail to defeat your enemy, you’ll
need to maneuver.
4. Maneuvering
Dogghting is a test of skill in which each
opponent tries to get into a position to re.
Maneuvering means dogghting. Many novice combat
pilots think that dogghting is the way all aerial
combat occurs, but combat veterans will tell you
that dogghting should be avoided if possible.
If you’re successful at detecting, closing in
on, and attacking your enemy, you won’t need to
dogght with him. You should maneuver when any of
the following occurs after the attack:
- Neither side has gained an advantage during
detection.
- The enemy sees and successfully evades during your
closing.
- Your attack fails to down the enemy aircraft.
5. Disengaging
Disengaging means putting space between you and
the enemy so you’re out of the ght. You can
disengage on purpose or by accident. Be careful
though: just because you want to leave doesn’t
mean the ght will end.
- 33 -
Page 35

AIR-TO-AIR COMBAT STRATEGIES
Forget about the old “knights of the air” mythology.
In air-to-air combat, it’s fast, dirty work that is often
over in seconds. The loser has usually lost before they
knew what hit them. You must gain the dominant position
above and behind the enemy through surprise or by the use
of maneuvers.
General tactics
1. In the rst pass, it is usually best to make an
overhead attack from behind. In a situation where
you are able to make an overhead attack from
behind, but instead carry out an overhead attack
from the front, maneuvering for the second pass
will be comparatively difcult and you may end
up in a disadvantageous position. Furthermore,
if your altitude is insufcient, it is best to
pursue from the lower rear rather than head-on.
2. In close combat, achieve mastery of those tactics
which are your own strong points. After gradually
reaching prociency, you will discover your own
characteristics in battle. When you ght with your
favorite tactics, victory will be easy. When you
become aware of these tactics, study and master
them at once. When in battle, it is important
to entice the enemy into your favorite battle
tactics, and make them ght on your terms.
3. When you are suddenly head-on with the enemy, plan
to be resolute in the attack. Never abandon the
line of re too soon to start maneuvering for the
second pass. (In the training period, for safety’s
sake do not execute a head-on attack.)
4. During air combat it is essential to maintain
altitude. However, do not mindlessly concentrate
on the altitude, thereby making essential
maneuvers impossible because your airspeed
has dramatically dropped during a climb. It
is particularly important to pay attention to
selecting the opportune time to make changes of
altitude and speed while approaching the enemy.
5. Air combat is generally easy against an enemy
who is ghting and losing altitude. The enemy
who ghts while maintaining his altitude by skill
in maneuvering at lower speed is formidable.
(In a rough and tumble ght it is essential to
maintain all your speed.) When you advance on a
second enemy or when you go to the aid of an ally,
keep in mind the fact that altitude is better than
a stout heart.
- 34 -
Page 36

Counter-attack
When you have been attacked by the enemy plane,
unless the performance of the enemy plane is inferior
or the pilot’s ability very poor, it is difcult to regain
your position in one counter-attack. However, always try
to regain your position while continuing your counterattacks.
Disrupt the enemy’s ring line as much as you can by
diving. After avoiding their rst pass, maneuver so that
you will be under the enemy.
As soon as the enemy plane starts his run, start a
steep dive immediately and cause the enemy’s ring angle
to be depressed. The enemy will break off the attack
because his speed is excessive and ring is difcult;
as soon as you see him pulling out, turn toward him and
maneuver so that you are in pursuit.
When you nd yourself under attack, use the following
formulas for counter-attack:
- Against the overhead attack from behind. When the
enemy tries to make a run at you, gun your engine and
avoid the line of re by turns or abrupt maneuvers
just before the approaching enemy reaches effective
distance, and strive to regain gradually the
advantage.
- Against the belly attack from behind. Though you
can counter-attack by means of a slanting loop, you
are often a good target for a long period when in a
climbing position, so twist away as soon as possible.
- Against a belly attack from the front. By utilizing
maximum climbing power, seize the dominant position
above the enemy and counter-attack with an overhead
attack from behind.
When you have tried to counter-attack and have been
unsuccessful because of the enemy’s maneuvering skill, or
when as in training, ideal counter-attacks cannot be made
because of their danger, it is important that you hang
on, and strive with your utmost to regain the advantage
while keeping the enemy from attacking, and then make a
sound counter-attack.
- 35 -
Page 37

COMING IN UNDER THE ENEMY
When there is a large altitude difference, make
attack impossible by climbing; take a position beneath
the enemy (almost directly below), and match your ight
pattern with the enemy’s ight. By following the enemy’s
maneuvers you can ordinarily make it impossible for the
enemy to half-roll and attack, and you can recover the
altitude difference gradually. When the enemy turns,
maneuver by ying somewhat to his outside so that
he cannot see you. You can also recover the altitude
difference by heading the same way.
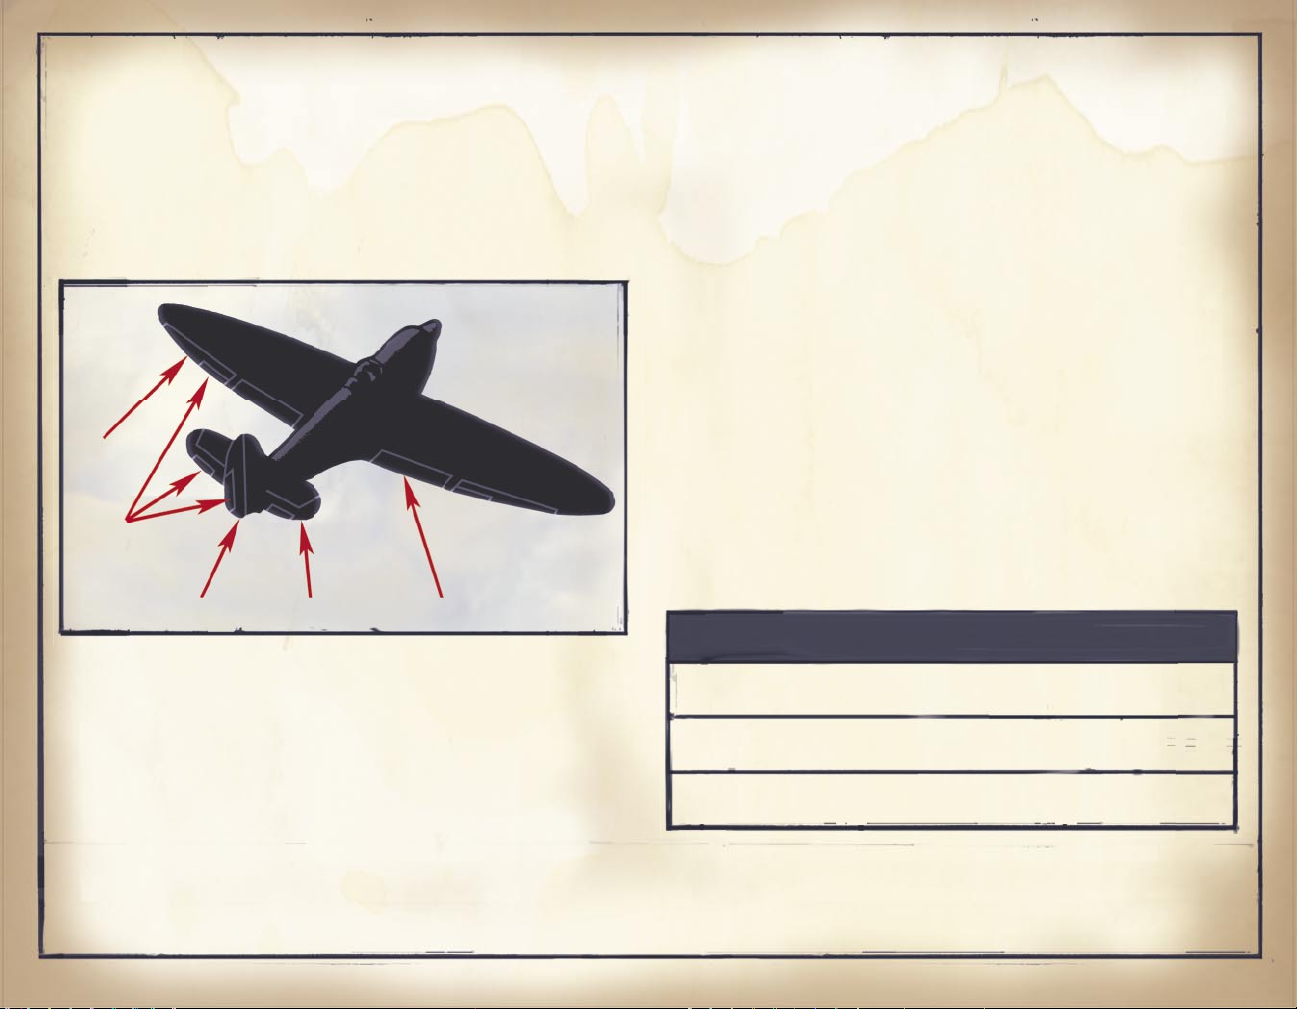
Important: If you’re attacking bombers, be very aware of where their
gunners are. The gunners are positioned to protect the bomber
against attacks from any side.
Measures to take when you are being closely pursued
1. First, always have as your principal object the
avoidance of the line of re, and by the use of
your total capacities and abilities strive to
extend the interval between the planes gradually.
In this situation, straight-line maneuvers should
be absolutely avoided!
2. Ordinary aerobatics will have little effect.
By making particularly good use of the rudder,
maneuver exaggeratedly and confuse the enemy.
3. Even if you gradually extend the interval,
consider the turning radius and do not plan to
pursue until the situation is such that an even
battle can be expected from the start.
4. Remember, if you are getting hit, whatever you
are doing is wrong. Do something radical and do
it fast! It can’t make things worse.
Level dogghting
In this type of battle particularly, incomplete
turning maneuvers have a fatal consequence. The plane,
which must be perfectly controlled while it turns
continuously, will step-by-step close in on the enemy
and nally be able to seize the dominant position. If
you learn the following tips, you can follow through
to success:
- Keep in mind that although you have been pounced
upon from somewhere to the rear, you will never be
red upon when the sights and eyes of the enemy are
not aligned. When an enemy is behind you but to one
side or the other in a level dogght always turn
toward your enemy, even though that brings you in
front of his guns. If you turn toward him, you give
him the most difcult possible shot and increase
the chance he will overshoot. If you turn away from
him, you give him the perfect opportunity to fall
in behind you for an easy shot.
- When you are about to shift to vertical dogghting
from level dogghting, lower the plane’s nose slowly,
accelerate, and maintain your turn. When the enemy
plane follows and starts to dive, still maintain your
turn, climb steeply and make a slanting loop. In case
the turns become very sharp when you are wide open,
there are many situations where you must pull back
on the control column with both hands and increase
the turning speed. In this situation, changing the
angle of inclination of the tail elevator (trim
tabs), that is, putting them at a “down” position,
generally makes piloting easier.
- During turns, aiming and ring are usually difcult,
but when you get an opportunity, shift to aiming and
shoot immediately. When it is difcult to re, shift
your attention to turning maneuvers without letting
the enemy plane escape.
- 36 -
Page 38

- 37 -
Air Force Historical
Research Agency Photo
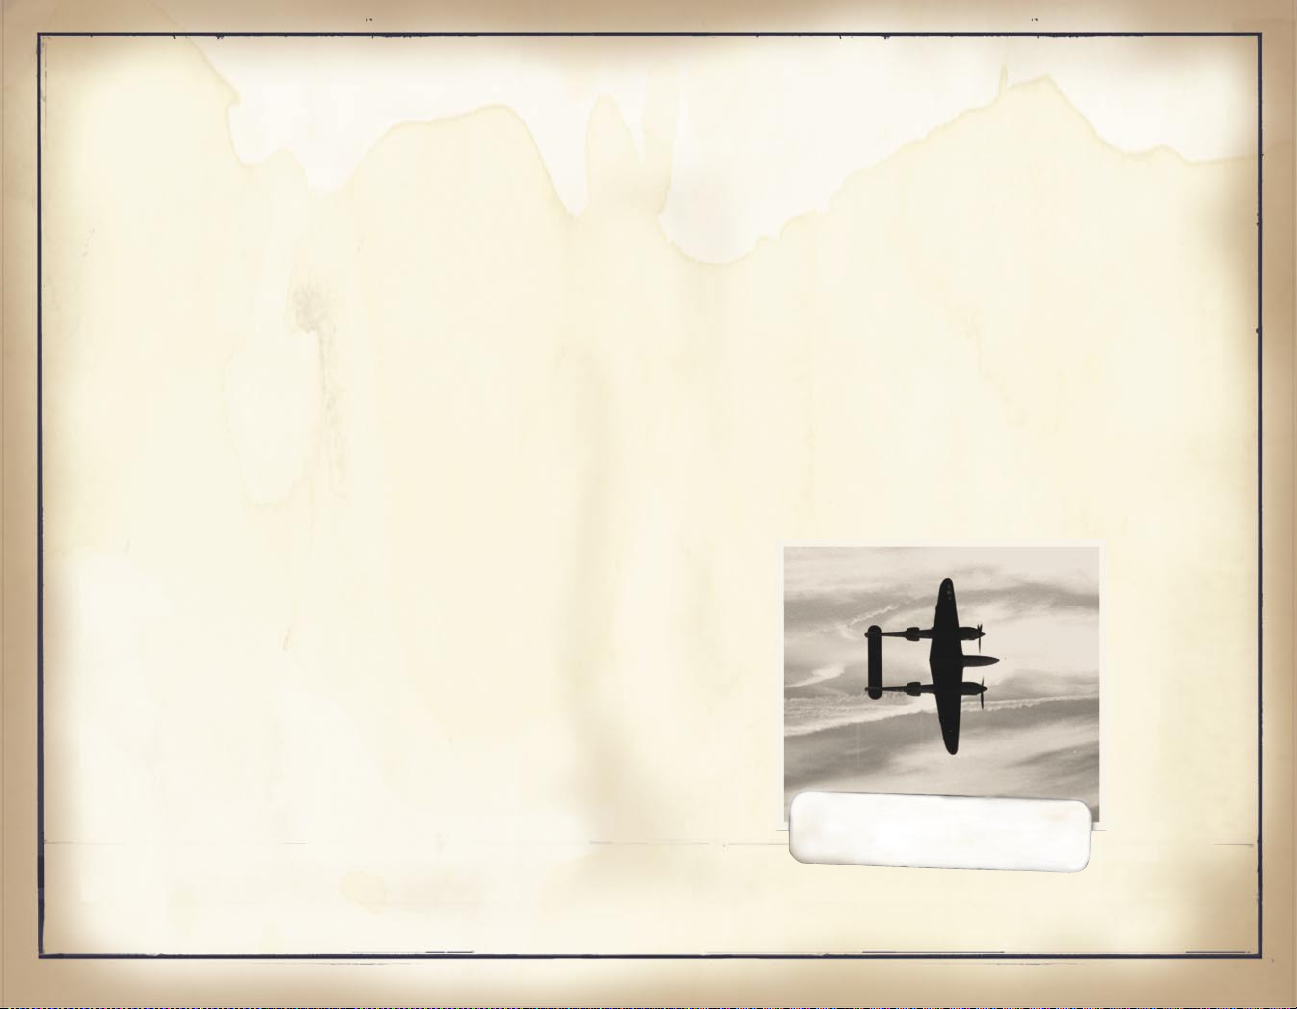
Vertical dog ghting
Your ghting ability will be shown for what it is
in this type of combat. The so-called “ace” is often
made in this type of warfare. It is easy to get into a
disadvantageous position and lose altitude if you maneuver
clumsily and are fooled by the deceptive maneuvers of
the enemy. Keep the advantage by learning the following
strategies well enough to do in your sleep:
- When you try to shoot down the enemy plane with
one pass, do not be anxious to pursue the track of
the enemy plane too strictly. Keep in mind that the
quickest method of shooting down the enemy is to
wait for a ring opportunity by maneuvering little
by little into a superior position.
- Although it is dif cult to size up a situation
instantly, do not yield a foot when coming face
to face with the enemy.
AN UPGRADED TYPHOON WITH
BUBBLE CANOPY, ROCKETS,
AND CANNON.
- Getting out of a bad situation by means of a true
loop is generally dif cult. You should use the
slanting loop. A skillful “twist” in the middle
of a slanting loop is extremely effective. It is
important that you understand it through practice
and experimentation.
- The key to vertical dog ghting lies in closing in
on the enemy’s rear by degrees while deceiving the
enemy with changes of the plane’s fore and aft line,
and banking.
Page 39

- 38 -
BASIC AIR COMBAT MANEUVERS
The following maneuvers have been in use since pilots
started trying to shoot each other down. Study them and
know how to use them automatically. Be aware that some
of these are intended for ight in the ghter-bombers but
not the medium bombers.
Before executing any violent maneuvers in the ghter-
bombers, be sure to drop any external fuel tanks (press
CTRL+SHIFT+D). Put some positive forces on the wings by
turning or climbing slightly while dropping the tanks.
Remember the ultimate maxim of aerial combat: Lose
sight, lose the ght!
Page 40

- 39 -
HIGH SIDE ATTACK
Purpose
This maneuver gets you very close to your target and
forces your opponent to dip his nose to return re, thus
risking a head-on collision.
Drawbacks
You need to have lots of room to execute your dive
and maintain a fast speed so that the enemy won’t get a
shot at you before and after the attack.
To perform
Start your attack from well above and ahead of the
bandit. The dive starts about 1,000 feet to one side of
the target. Get in a steep dive abeam of the target so
that you’re shooting at a 45-degree de ection angle both
in the vertical plane and at the four o’clock or eight
o’clock position ( gure your target’s nose is pointed at
twelve o’clock.) You should be above and to one side of
your target. After ring, make your recovery beneath the
target, using the speed you got from the dive to zoom
back up to get ahead--and in position--for the next run.
Use Quick Combat dog ghting or the Training Missions to
practice this maneuver.
Page 41

- 40 -
OVERHEAD ATTACK
Purpose
The overhead attack gives you the best chance of
hitting your enemy without taking any damage yourself.
This slashing attack requires precision and a proper
setup before you make your run. This attack is the safest
way to attack a bomber and avoid the bomber’s multiple
gunners.
Drawbacks
Getting set up above your enemy is key. A smart
opponent won’t let you do this easily, and he may climb
toward you. Once you make this run, you’ll have a second
or two at most to get your shot off before you get by him.
You need to y this maneuver quickly--a slow or tentative
overhead attack gives an opponent a chance to turn onto
your tail. Also, make sure you don’t dive and pull out
too fast. Your controls can lock up, and you can black out
if you pull up too quickly. If you nd yourself blacking
out or losing control of the aircraft, relax the backpressure, and reduce throttle to reduce your airspeed.
To perform
Climb to at least 2,000 feet above your opponent,
and then roll onto your back before pulling through into
a vertical dive. At about 600 feet, open re, making sure
you lead your target as necessary. Then pull out smoothly
to get back above your target. Don’t pull up so quickly
as to give your opponent a quick shot at you--remember
to get clear of his guns before pulling up. Use Quick
Combat dog ghting or the Training Missions to practice
this maneuver.
Page 42

- 41 -
IMMELMANN
Purpose
The Immelmann maneuver is a good way to gain altitude
over an enemy while turning toward him, and a good move
to pull after performing a high-speed pass.
Drawbacks
Because of the loss of speed toward the top of the
maneuver, avoid using the Immelmann when you are within
an enemy pilot’s gun range--you’ll be a stalling duck
if you’re not careful.
To perform
The Immelmann is basically a half loop with a half
roll on top. After you’ve passed the enemy, pull back
gently on the stick, apply full throttle, and start
climbing straight up. Make sure you have plenty of speed.
Meanwhile, look behind you to see what the bandit is
doing and start planning your turn toward him. Before
you enter a stall, do a half aileron roll toward the enemy
and look for the chance to drop in toward him. If you
time it right, you’ll get in his six o’clock position
(right behind him) or you should be able to get a decent
de ection shot at him.
Watch the movie of this maneuver (see the Training
Movies section of online Help), and then use Quick Combat
dog ghting or the Training Missions to practice.
Page 43

- 42 -
SPLIT-S
Purpose
The Split-S is a vertical break. You roll inverted
and perform a half loop. Dif cult to follow, this maneuver
is a very strong defensive move in a pinch. It’s also
good for jumping an enemy below you who is traveling in
the opposite direction; a classic maneuver that trades
altitude for speed.
Drawbacks
You need altitude to perform the Split-S, and if you
dive too fast, you might damage your control surfaces or
overstress the aircraft as you pull out of the dive.
To perform
If you nd an attacker on your six o’clock, roll
inverted and pull back hard on the stick. To avoid gaining
too much airspeed, throttle back as your plane dives.
As you follow through the half loop and the horizon
appears in front of you, increase power and be ready to
turn back into your attacker. If you nd that you’re still
at a disadvantage, consider performing another Split-S
or, if you have the momentum, use your superior speed to
put distance between you and your attacker. But whatever
you do, don’t y straight-and-level!
Watch the movie of this maneuver (see the Training
Movies section of online Help), and then use Quick Combat
dog ghting or the Training Missions to practice.
Page 44

- 43 -
TACTICAL AIR COMBAT MANEUVERS
Close air support is just that: close. The pilot
has to be at low altitude or down near the ground to
effectively identify and hit his target (as opposed to
strategic bombing done at 20,000–30,000 feet). Getting
away after the pull out can be very tricky, exposing
you to all sorts of hair-raising expressions of enemy
displeasure. When enemy lines are close to allied lines,
it becomes all the more confusing as it requires very
rapid identi cation of the target at high speed and low
altitude in all sorts of weather and lighting conditions.
The type of maneuver required depends on the mission.
Page 45

- 44 -
DIVE-BOMBING (FIGHTER-BOMBER)
Purpose
Dive-bombing is the most accurate way to put ghterbomber ordnance on target as you’re pointing the ordnance
more directly at the target. It may also result in less
exposure to the accuracy of hostile re compared to giving
the enemy a level target moving at a steady speed.
Drawbacks
Fighters can carry bombs, but their performance can
be negatively affected by the additional weight. While on
the bombing run, the aircraft is vulnerable to ground re,
and it’s an easier target to hit. Pilots ying the P-47s
and P-51s describe using them for dive bombing as “by
guess and by God” since the aircrafts’ large noses obscure
the target. Some pilots develop a timing system to gauge
the drop point after the target disappears beneath the
nose, depending on dive angles. While P-51s are used for
dive-bombing, structural failure in sharp pull outs is a
threat, so P-51s mostly use shallow angles of attack or
glide bombing.
To perform
From 10,000 to 15,000 feet, dive at an angle between
45 and 70 degrees towards the target. As you pick up
airspeed, make gentle turns to stay on target, and
throttle back as necessary to avoid excessive speed. At
around 3,000 feet, release the bomb--visualize dropping
it straight onto the target, like a “pickle into a pickle
barrel.” Because you’re not diving straight down, you may
need to compensate by aiming slightly behind the target.
Once you release the bomb, pull back on the stick gently
to pull out of the dive, and ease off the throttle if your
airspeed is high. Be careful--if you pull back too hard
too quickly, you may stall or damage your plane. After you
pull out of the dive, add power and either level out or
climb away from the target. Don’t get careless checking
to see if your bomb hit--enemy ghters or ak could catch
you in this vulnerable moment.
Watch the movie of this maneuver (see the Training
Movies section of online Help), and then use Quick Combat
or the Training Missions to practice.
Page 46

- 45 -
STRAFING
Purpose
Strafe to attack ground targets and avoid ground re.
With so many “targets of opportunity” in the European
theater, you’ll be called on quite often to make stra ng
runs against enemy ground targets.
Drawbacks
Stra ng is very dangerous because you’re so low to
the ground. The margin for error is small--you could get
hit by ground re or miscalculate in a maneuver and crash.
To perform
The key to stra ng is to stay as low as possible,
giving the enemy very little to shoot at. Stay under a
hundred feet if you can, and start ring when your target
comes into range. You may need to pop up slightly before
shooting and momentarily drop the nose to make the guns
bear on the target--but not for long, or you’ll be part
of the landscape! Stay low until you’re clear of ground
re. Fly as fast as your plane will go!
Watch the movie of this maneuver (see the Training
Movies section of online Help), and then use Quick Combat
dog ghting or the Training Missions to practice.
Page 47

- 46 -
GLIDE-BOMBING (FIGHTER-BOMBER)
Purpose
Glide-bombing is used against shipping and rail
targets, as well as bridges and other xed targets where
the pilot wants the bomb to slam into the side of the
target. This technique requires less skill than does
dive-bombing.
Drawbacks
Glide-bombing runs are performed at slower speeds
and a shallower pro le than dive-bombing runs. This
technique requires the pilot to come in very low--100 to
1,000 feet--making the aircraft very vulnerable to ground
re. It’s standard practice to hit any defensive gunnery
before making the bomb run.
To perform
Approach the target at 100 to 1000 feet releasing
just prior to reaching the target. The bomb will glide
in at a gentle angle. Practice this technique to get
a feel for the best timing on the
release. Use Quick Combat or the
Training Missions to practice this
maneuver.
LEVEL BOMBING, LOW ALTITUDE (MEDIUM BOMBER)
Purpose
Low-altitude level bombing with medium-sized aircraft
is used for hitting ships and ground targets. The ability
to go in low increases accuracy and mitigates some
problems caused by weather at mid to upper altitudes.
Drawbacks
At slower airspeeds, medium bombers present a
larger target to ground defenses. Although pilots can
maneuver defensively at their own discretion, the treetop altitudes provide little safety margin to effectively
do so.
To perform
Form up into assigned groups over the takeoff base.
En route, keep the ight at around 50 feet to avoid radar
detection. Approximately ve minutes from the target,
increase speed to combat cruise. Navigate by ded reckoning
and landmarks to the target. (You paid attention during
the brie ng, right?) Remember that your
formation is part of your defense.
Press
F7 to go to the bombardier
seat. You’re still in control of the
aircraft and your view is through the
bombsight. Press
BACKSPACE to select
ordnance, align the crosshairs on the
target, and press
ENTER to drop the
bombs. Stay in formation during and
after the attack. Use Quick Combat or
the Training Missions to practice this
maneuver.
Press the
LEFT BRACKET ([) to
zoom out. Press the
RIGHT BRACKET (])
to zoom in.
VIEW THROUGH THE BOMBSIGHT ON A
LEVEL BOMBING MISSION.
Page 48

LEVEL BOMBING, MEDIUM ALTITUDE (MEDIUM BOMBER)
ATTACKING SURFACE TARGETS WITH ROCKETS
Purpose
Medium-altitude level bombing with medium-sized
aircraft is used primarily for hitting ground targets.
For slower aircraft in formations, this offers a degree
of protection (however marginal) from ground re.
Drawbacks
At slower airspeeds, medium bombers present a larger
target to ground defenses. Flak is always a danger on
these missions.
To perform
Form up into assigned groups over the takeoff
base and climb to the assigned altitude (10,000–14,000
feet). The basic formation element is a three-plane vee,
combining two elements into a ight. Three ights comprise
the standard 18-plane group.
The attack from the IP (initial point) to the target
will usually be a straight path with a right turn after
the drop.
Press F7 to go to the bombardier seat. You’re still
in control of the aircraft and your view is through the
bombsight. Press BACKSPACE to select ordnance, align
the crosshairs on the target, and press ENTER to drop
ordnance. Stay in formation during and after the attack.
Use Quick Combat or the Training Missions to practice
this maneuver.
Purpose
Rockets are used to deliver a small but powerful
tactical punch with, in theory, greater accuracy than
a bomb dropped from altitude. Rockets don’t have internal
guidance and need to be aimed carefully, but they are
useful when the enemy and allied lines are very close
to one another.
Drawbacks
These weapons are of recent development and their
accuracy leaves something to be desired. The rockets are
launched in shallow dives of not more than 30 degrees
at a range of something more than 1,000 feet. The tricky
trajectory of these projectiles makes them very difcult
to aim, and pilots don’t much like their low accuracy-but many call the ve-inch HVAR “Holy Moses” because of
its destructive power.
To perform
Launch the rockets in shallow dives of not more than
30 degrees at a range of slightly more than 1,000 feet.
Use Quick Combat or the Training Missions to practice
this maneuver.
- 47 -
Page 49

AIRFIELD ATTACK PROCEDURES
Purpose
It’s an obvious advantage to damage enemy airelds
and hit their aircraft when they’re most vulnerable--on
the ground. Try this technique with your squadron mates
in Multiplayer.
Drawbacks
Strang airelds is very dangerous for all the
reasons any strang is dangerous. Airelds are also very
well protected, causing the airman’s medical condition
known as “pucker factor.”
To perform
A typical technique is to attack the aireld in
groups of three squadrons. Approach the eld at lowlevel, having descended several miles out from cruising
altitude. Squadron one should pull up about a mile from
the aireld, climbing to an altitude where they can get
the attention of the ground defenses but be out of range
of small arms re. They should continue up to y top cover
for the other squadrons or engage in mock dive bombing
to gauge the enemy’s reaction.
The ground defenses may also open themselves up to
detection by the two other approaching squadrons. Squadron
two should attack gun emplacements and antiaircraft
batteries as it crosses the aireld and then continue
ying low until out of range. Then it should pull up to
y cover as Squadron three comes in to hit parked aircraft
and aireld installations. Finally, Squadron one makes
their run on the aireld with the other two squadrons
ying protection.
- 48 -
Page 50

A FEW TIPS...
Maybe you’ve practiced and tested, and you still
can’t hit the target, even when it’s clearly in your
sights. Not only does the enemy get away, but he clamps
onto your tail to shoot you down.
First, a question: Are you ying missions or just
quick combats? Quick Combat is a good place to practice
before attempting a mission. Here are some tips for
mission success:
- Check your six o’clock--make sure there’s no enemy
behind you! You’ve heard this over and over again,
but you really HAVE to check it--at least every ve
seconds.
- If you’re having trouble with visibility, try ying
in HUD view for a while (press F5). This view
improves not only your lower 12 o’clock position view
(normally blocked by the panel), but also lets you
see behind you much better.
- Have the Tactical Display on (press SHIFT+T to toggle
on and off): that’s another great way to tell if
enemy planes are behind you.
If you have enemy planes in your sights and they seem
to slip away, a few things could be going on. Consider
these factors:
- If you’re not directly behind them, you have to lead
them: shoot a little in front of the plane so your
bullets arrive at the same time the plane does and
meet the target.
- Sometimes, when you’re ying at a steep upward angle
toward a plane above you and concentrating on the
enemy plane, you don’t realize your own plane stalls
and points downward. Remember, your plane is not
a jet or a rocket. You have to y the plane while
you’re ghting.
- Yes, you DO have to get very close before you shoot.
Your wing guns are angled so the bullets converge
at approximately 300 yards, though sometimes you
can still hit targets from two or three times that
range. The convergence point is where they do the
most damage. You can watch the bullet pattern on the
ground as guideline to whether you are close enough.
Not easy, is it? But if you keep these things in mind
and practice in Quick Combat until they become second
nature, you won’t be so frustrated, and you’ll denitely
have more fun.
Note: Since you don’t have the physical feedback a real pilot has, use
the HUD and Tactical Display to help you!
TIPS AND TRICKS FOR SPECIFIC AIRCRAFT
All the planes in Combat Flight Simulator are great
ghter aircraft, but it takes pilot skill and experience
to capitalize on the best traits of each one and to
overcome the strengths or to capitalize on the weaknesses
of enemy aircraft. For more specic information about
each aircraft, see the
Machines of War
handbook.
- 49 -
Page 51

- 50 -
Air Force Historical
Research Agency Photo
TELLING FRIEND FROM FOE
No matter how much you study aircraft recognition
manuals, it’s easy to make mistakes in the heat of battle.
Take a second look at planes you’re about to escort or
attack to make sure you know whether they’re friend or
foe. In the tactical air war, here are some aircraft
similarities to watch for:
Axis pilots
- If you spot a group of what looks like Mustangs and
plan to attack from behind, make sure they’re not
Bf 109s.
American pilots
- If you spot a group of what looks like Bf 109s and
plan to attack from behind, make sure they’re not
Mustangs.
- Don’t mistake the Ju 88 for a British Mosquito. Both
are medium bombers with a bubble nose.
- The Fw 190 can be mistaken for a razorback P-47.
IS THIS HALFTRACK-MOUNTED
AA GUN AN ENEMY ASSET? THINK
TWICE, BUT THINK FAST.
 Loading...