

Page 1
LVS® 95XX Series Barcode Quality
Station Operations Manual
English
M-95XX-4.0.0-A-En-0 P/N 84-9310001-02 Rev A
Page 2

LVS-95XX Series Barcode Quality Station Operations Manual
Copyright ©2016
Microscan Systems, Inc.
Tel: +1.425.226.5700 / 800.762.1149
Fax: +1.425.226.8250
All rights reserved. The information contained herein is proprietary and is provided solely for the purpose of allowing customers
to operate and/or service Microscan manufactured equipment and is not to be released, reproduced, or used for any other
purpose without written permission of Microscan.
Throughout this manual, trademarked names might be used. We state herein that we are using the names to the benefit of the
trademark owner, with no intention of infringement.
GS1 Solution Partner
Disclaimer
The information and specifications described in this manual are subject to change without notice.
Latest Manual Version
For the latest version of this manual, see the Download Center on our web site at:
www.microscan.com.
Technical Support
For technical support, e-mail: helpdesk@microscan.com.
Warranty
For current warranty information, see: www.microscan.com/warranty.
Microscan Systems, Inc.
United States Corporate Headquarters
+1.425.226.5700 / 800.762.1149
United States Northeast Technology Center
+1.603.598.8400 / 800.468.9503
European Headquarters
+31.172.423360
Asia Pacific Headquarters
+65.6846.1214
LVS-95XX Series Barcode Quality Station Operations Manual - English Page 2 of 94
Page 3

LVS-95XX Series Barcode Quality Station Operations Manual
Table of Contents
Product Discontinuation Notice .................................................................................... 7
LVS-9500 Product Discontinuation ............................................................................... 7
LVS-9505 Product Discontinuation ............................................................................... 7
Overview .......................................................................................................................... 8
Installation Assistance ................................................................................................. 10
System Manuals ............................................................................................................ 10
Windows XP Operating Instructions ............................................................................ 11
Windows 7 Operating Instructions .............................................................................. 11
Safety Instructions ........................................................................................................ 12
LVS-95XX Series Software Specifications .................................................................. 13
LVS-9510 and Auxiliary Readhead Hardware Specifications ................................... 15
LVS-9570 Hardware Specifications ............................................................................. 16
LVS-9580 Hardware Specifications ............................................................................. 17
LVS-9500 Hardware Specifications ............................................................................. 18
LVS-9505 Hardware Specifications ............................................................................. 18
Basic Operations ........................................................................................................... 20
To Print the Results ................................................................................................. 22
To View the Report .................................................................................................. 22
Welcome Tab .............................................................................................................. 23
Choice of Language ................................................................................................ 23
Toggling the LVS-95XX Software between Two Languages ...................................... 24
Current Software Version List ..................................................................................... 24
Password Login........................................................................................................... 25
Setup Tab ....................................................................................................................... 26
Camera ....................................................................................................................... 26
Grading Mode ............................................................................................................. 28
Auto-Sector Feature ................................................................................................ 29
Application Standards ................................................................................................. 30
Selecting an Application Standard .......................................................................... 31
Application Standard Shortcut Keys ........................................................................ 32
Default Shortcut Keys .............................................................................................. 32
Override Aperture .................................................................................................... 33
Creating Custom Reports ............................................................................................ 33
Current Information ..................................................................................................... 33
Change the Time Zone: ........................................................................................... 33
LVS-95XX Series Barcode Quality Station Operations Manual - English Page 3 of 94
Page 4

LVS-95XX Series Barcode Quality Station Operations Manual
System Settings .......................................................................................................... 34
Minimum Passing Score .......................................................................................... 34
Days before password expires ................................................................................ 34
Minutes before auto logoff ....................................................................................... 34
Days before calibration needed ............................................................................... 34
Allow Non-ISO blemish to affect grade ................................................................... 34
Metric ....................................................................................................................... 35
Quiet zone processing ............................................................................................. 35
Reference ................................................................................................................ 37
Additional Reference ............................................................................................... 37
Company Name on Reports .................................................................................... 37
Setup Operators ...................................................................................................... 37
Product Lookup ....................................................................................................... 38
Distributor Information ............................................................................................. 39
Optional Features........................................................................................................ 39
List of Options ......................................................................................................... 39
Optional Features Activation ................................................................................... 39
Change Password ....................................................................................................... 39
Calibration Tab .............................................................................................................. 40
Calibrate the System ................................................................................................... 41
Calibrated Conformance Standard Test Card Preventive Maintenance Instructions .. 44
Enter Test Card Parameters for a Replacement Card ............................................ 44
Data Matrix Calibrated Conformance Test Card ......................................................... 45
Grading Tab ................................................................................................................... 46
Section 1: 1D Codes ................................................................................................... 46
1. Overall Grade .......................................................................................................... 47
2. ISO Grading ............................................................................................................ 49
3. View Box ................................................................................................................. 50
OCR (Human Readable Character Check) ............................................................. 51
Zoom ....................................................................................................................... 52
4. Grade Bar Graph..................................................................................................... 53
Bar Height Measurement ........................................................................................ 53
5. ISO/IEC Parameters Section .................................................................................. 54
6. Blemish (Non-ISO Parameter) ................................................................................ 55
Other Grading Screen Tools ....................................................................................... 56
Opacity .................................................................................................................... 56
Color Codes ............................................................................................................ 57
Height and Width Measurement .............................................................................. 57
LVS-95XX Series Barcode Quality Station Operations Manual - English Page 4 of 94
Page 5

LVS-95XX Series Barcode Quality Station Operations Manual
Barcode Too Wide for Field of View (Stitching Feature) ......................................... 58
Section 2: Matrix Codes .............................................................................................. 63
Verify a Matrix Code ................................................................................................ 63
View Section ............................................................................................................ 63
Multi-Rotation Codes ................................................................................................... 66
DataMatrix ............................................................................................................... 66
QR Code ................................................................................................................. 67
Section 3: Two-Dimensional Multi-Row Codes ........................................................... 68
Verify a PDF 417 or Micro PDF 417 Code .................................................................. 68
PDF417 Parameters ................................................................................................ 68
GS1 Databar Composite Verification .......................................................................... 69
Verify a Composite Code ............................................................................................ 70
Zoom Tab ....................................................................................................................... 71
SRP View Tab ................................................................................................................ 72
View Section ............................................................................................................... 74
Full Screen Waveform ............................................................................................. 74
Traditional Bar Growth and Shrinkage .................................................................... 76
Traditional Parameters Button ................................................................................. 77
Dimensional Analysis Button ................................................................................... 78
10-Line Grading Button ........................................................................................... 78
Print Button .............................................................................................................. 78
Structure Tab ................................................................................................................. 79
Printing ........................................................................................................................ 79
Use the Data Structure Analysis ................................................................................. 80
Data Structure Analysis Example ................................................................................ 81
Archive Tab .................................................................................................................... 82
Import Image from File ................................................................................................ 83
Export Image to File .................................................................................................... 85
Recent Reports (Last 30 Days) ................................................................................... 86
Delete Prior to Specific Date ....................................................................................... 86
Software Version History ............................................................................................. 88
Audit Trail Report ........................................................................................................ 88
Calibration Report ....................................................................................................... 88
Reference Report ........................................................................................................ 88
Export Reference Data ................................................................................................ 88
Change SQL Connection ............................................................................................ 89
Create Backup Database ............................................................................................ 91
Browse Backup Database ........................................................................................... 92
LVS-95XX Series Barcode Quality Station Operations Manual - English Page 5 of 94
Page 6

LVS-95XX Series Barcode Quality Station Operations Manual
Print an Archived Report ............................................................................................. 92
Preventive Maintenance Schedule .............................................................................. 93
LVS-9510 .................................................................................................................... 9 3
LVS-9570 .................................................................................................................... 9 3
LVS-9580 .................................................................................................................... 9 4
LVS-9505 .................................................................................................................... 9 4
LVS-9500 .................................................................................................................... 9 4
LVS-95XX Series Barcode Quality Station Operations Manual - English Page 6 of 94
Page 7

LVS-95XX Series Barcode Quality Station Operations Manual
Product Discontinuation Notice
LVS-9500 Product Discontinuation
Microscan is discontinuing the LVS-9500 as of December 31st, 2011; the system will be supported for four
years from December 31
Repair of the LVS-9500 is based on the availability of component parts and is at the discretion of Microscan.
st
, 2011 through December 31st, 2015.
LVS-9505 Product Discontinuation
Microscan is discontinuing the LVS-9505 after introduction of the LVS-9510 to the marketplace. The LVS9505 will be supported for four years until December 31
is based on the availability of component parts and is at the discretion of Microscan.
st
, 2015. After discontinuation, repair of the LVS-9505
LVS-95XX Series Barcode Quality Station Operations Manual - English Page 7 of 94
Page 8
LVS-95XX Series Barcode Quality Station Operations Manual
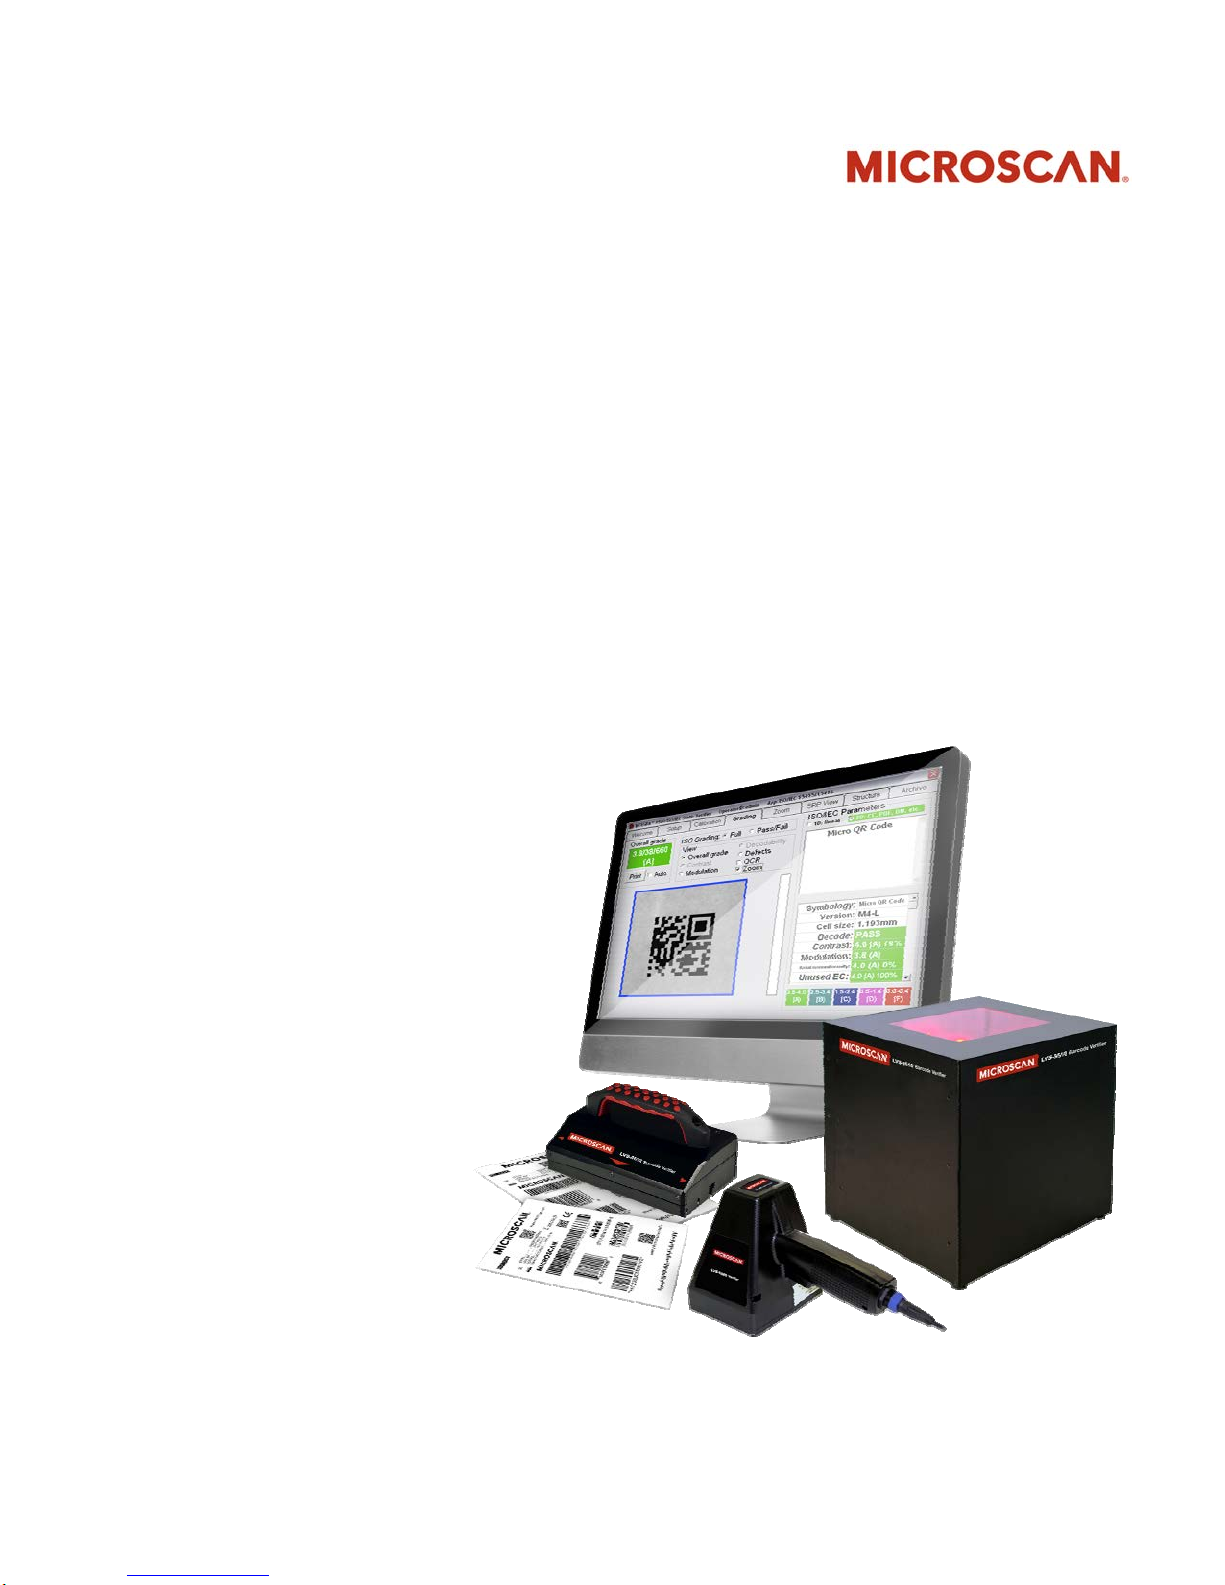
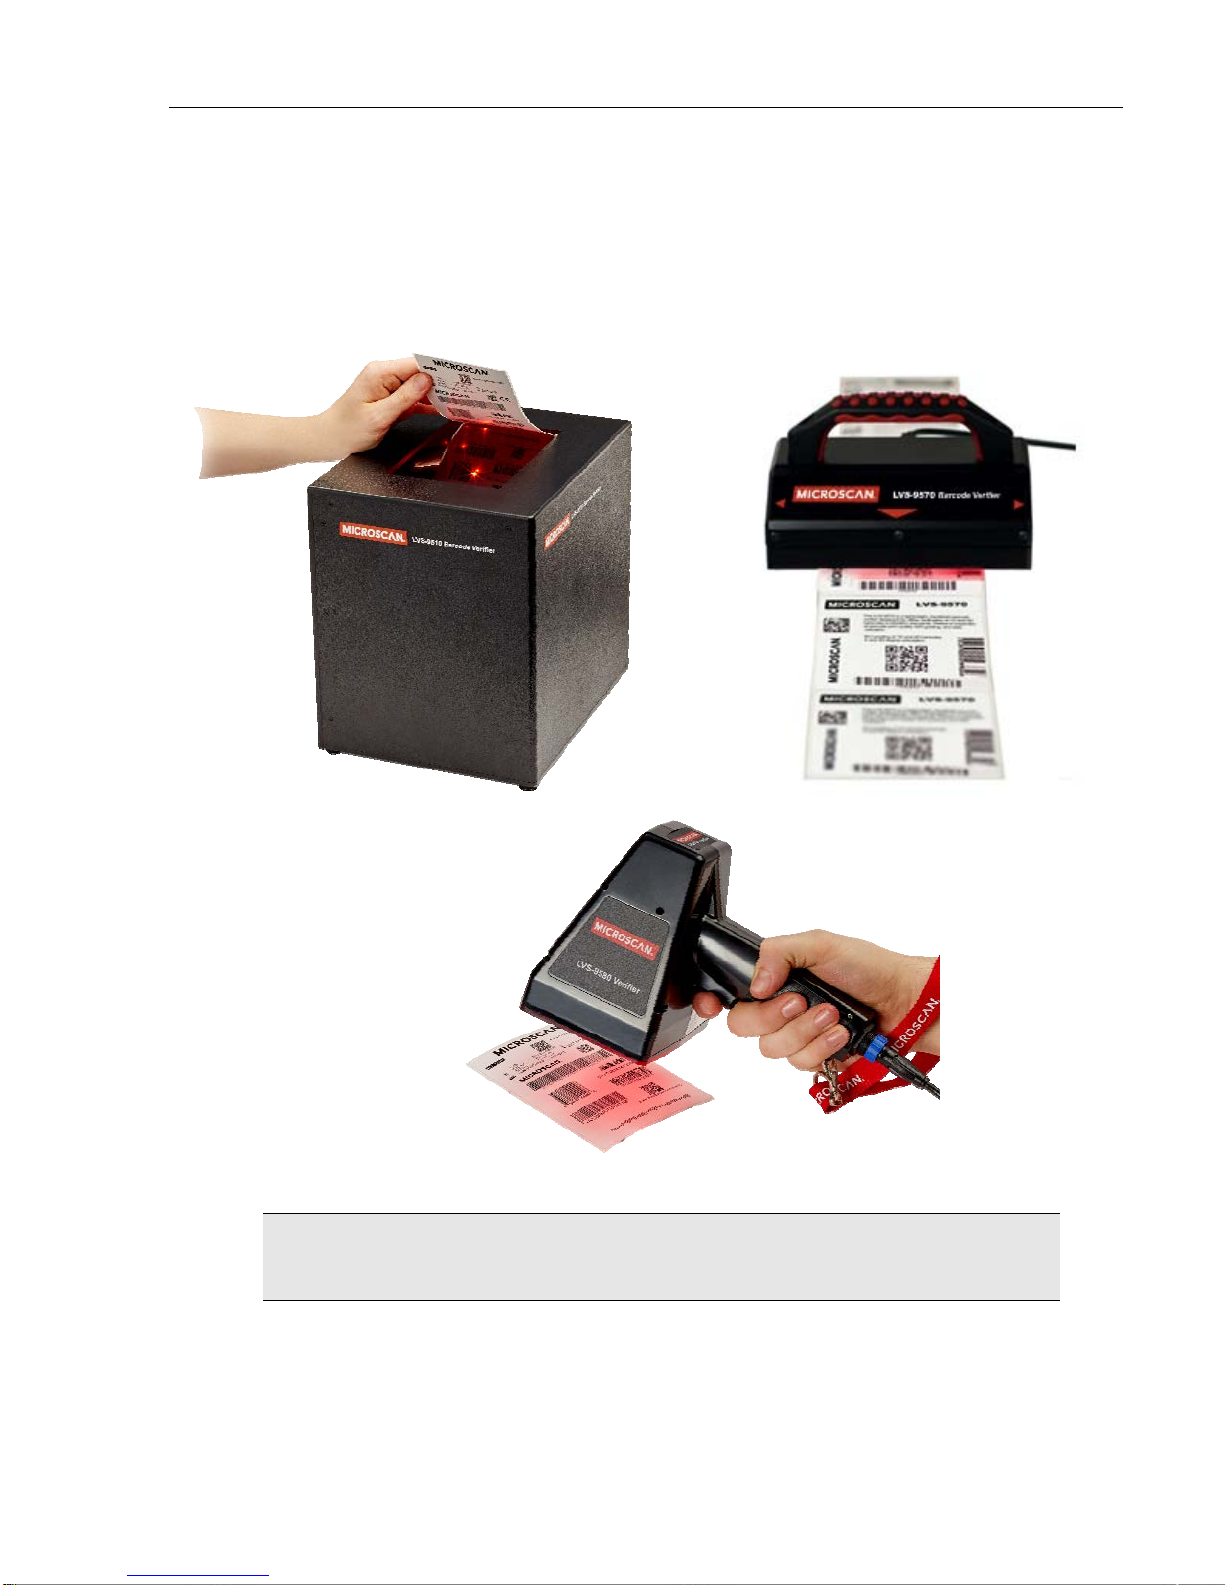
Overview
This manual covers the operating instructions for the LVS-95XX Series Barcode Verification Systems, which
include the LVS-9510, LVS-9570 and LVS-9580.
LVS-9510
IMPORTANT: The user-supplied computer connecting to the 5.0 MP Auxiliary Readhead
must be running LVS-95XX software version 3.0.8 or higher.
LVS-9580
LVS-9570
LVS-95XX Series Barcode Quality Station Operations Manual - English Page 8 of 94
Page 9

LVS-95XX Series Barcode Quality Station Operations Manual
The standard features of the LVS-95XX system are documented in this manual. Special, upgraded features
are documented in “Appendix G: Special Features.” Appendix G includes the following topics:
• Multi-Barcode Verification
• Change Verification Report to One-Column Format
• Change Verification Report Signature Lines
• Change CommPort Settings
• Automatic Login
• Windows® Lockdown
• Export Override
• Custom Reports
• Print “Data Structure Analysis Report” with “Verification Report”
• Exclude “All” (Multi-Sector or Multi-Rotation) on Export
• Account Password Reset
• Application Standard Shortcut Keys
• Decimal Grading
Appendix G is located on the installation flash drive included with your system package.
LVS-95XX Series Barcode Quality Station Operations Manual - English Page 9 of 94
Page 10
LVS-95XX Series Barcode Quality Station Operations Manual
Installation Assist ance
For software installation assistance with any LVS-95XX system, refer to the “LVS-95XX Series Software
Installation Guide”.
The LVS-95XX system arrives to your site packaged in a specially designed shipping carton. DO NOT
discard this shipping carton in case you must ship or store the system for any reason. Failure to use this
carton when returning your product to Microscan will void warranty.
WARNING: All LVS-95XX systems must use the calibration card and installation flash
drive issued with the system. The LVS-95XX system, calibration card and installation
flash drive use the same serial number and must be used in conjunction with each other
to obtain correct calibration results. Failure to use the calibration card and installation
flash drive issued with the system will result in incorrect calibration results.
System Manuals
All LVS-95XX system manuals are stored in the following locations:
Installation flash drive Each system purchase is supplied with an installation flash drive containing
installation software and system manuals. See note below.
Host Computer After successful installation of the LVS-95XX software, the system manuals
are located at the paths below:
Windows 7 (64-bit): C:\Program Files (x86)\I9500\Manuals
Windows 7 (32-bit): C:\Program Files\I9500\Manuals
Windows XP: C:\Program Files\I9500\Manuals
Computer Desktop After installing the LVS-95XX software, an “LVS Manuals” icon is saved to
the computer’s desktop. Double-click the “LVS Manuals” desktop icon to
access the system manuals.
Note: When inserting the installation flash drive into the USB port with Autorun activated,
screens automatically appear prompting you to install the LVS-95XX software. If you
would like to view or print the manuals located on the installation flash drive prior to
installing the LVS-95XX software, follow the steps below:
The steps below vary based on Windows® XP or Windows® 7 operating systems. Follow the instructions
below based on which operating system resides on the computer running the L VS-95XX software.
LVS-95XX Series Barcode Quality Station Operations Manual - English Page 10 of 94
Page 11
LVS-95XX Series Barcode Quality Station Operations Manual
Windows XP Operating Instructions
1. Press and hold down the SHIFT key for 30 seconds while at the same time inserting the installation
flash drive into the USB port; this prevents the system from automatically launching the LVS-95XX
installation files.
WARNING: You must hold down the SHIFT key for 30 seconds. Releasing the SHIFT
key prior to 30 seconds will initiate t he sof tware installation process. If this occurs, eject
and then re-insert the installation flash drive and follow step 1 again.
2. After 30 seconds, release the SHIFT key.
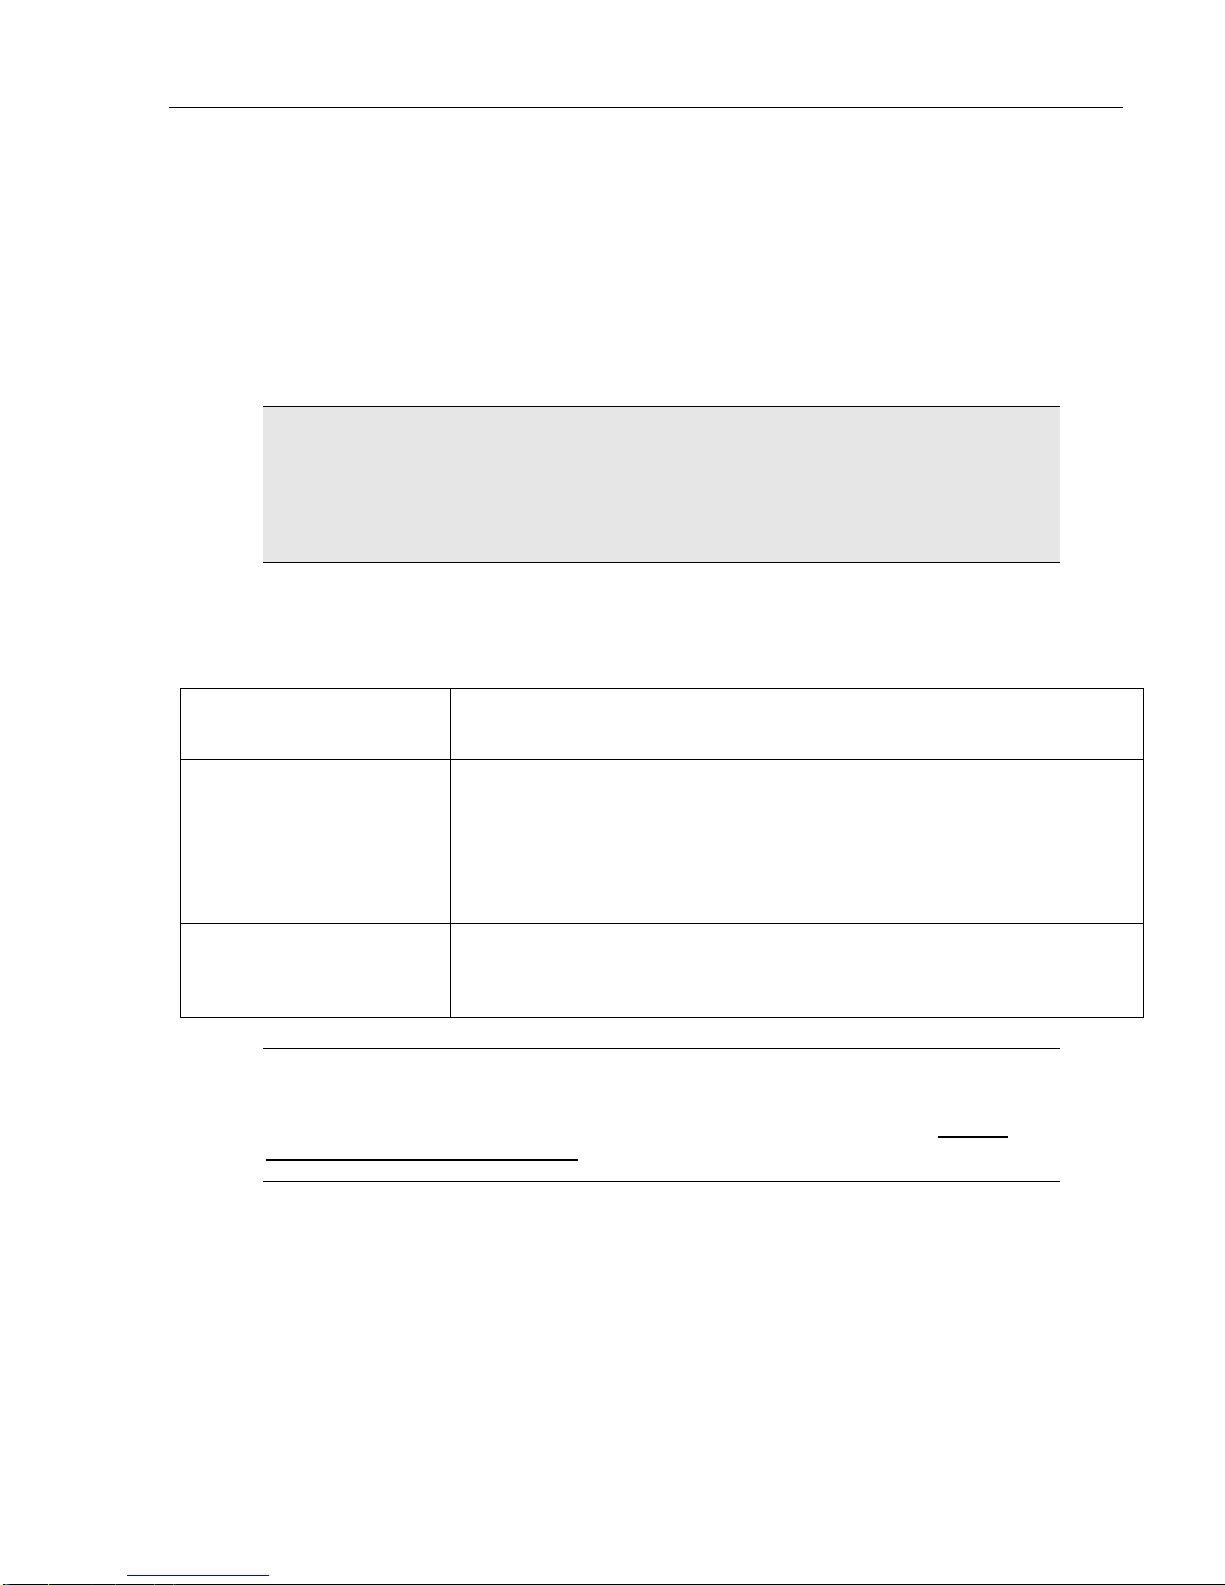
3. Open Windows Explorer and navigate to the LVS-95XX USB drive.
4. Double-click on the “Manuals.bat” file.
5. A window opens containing the manuals located on the installation flash drive.
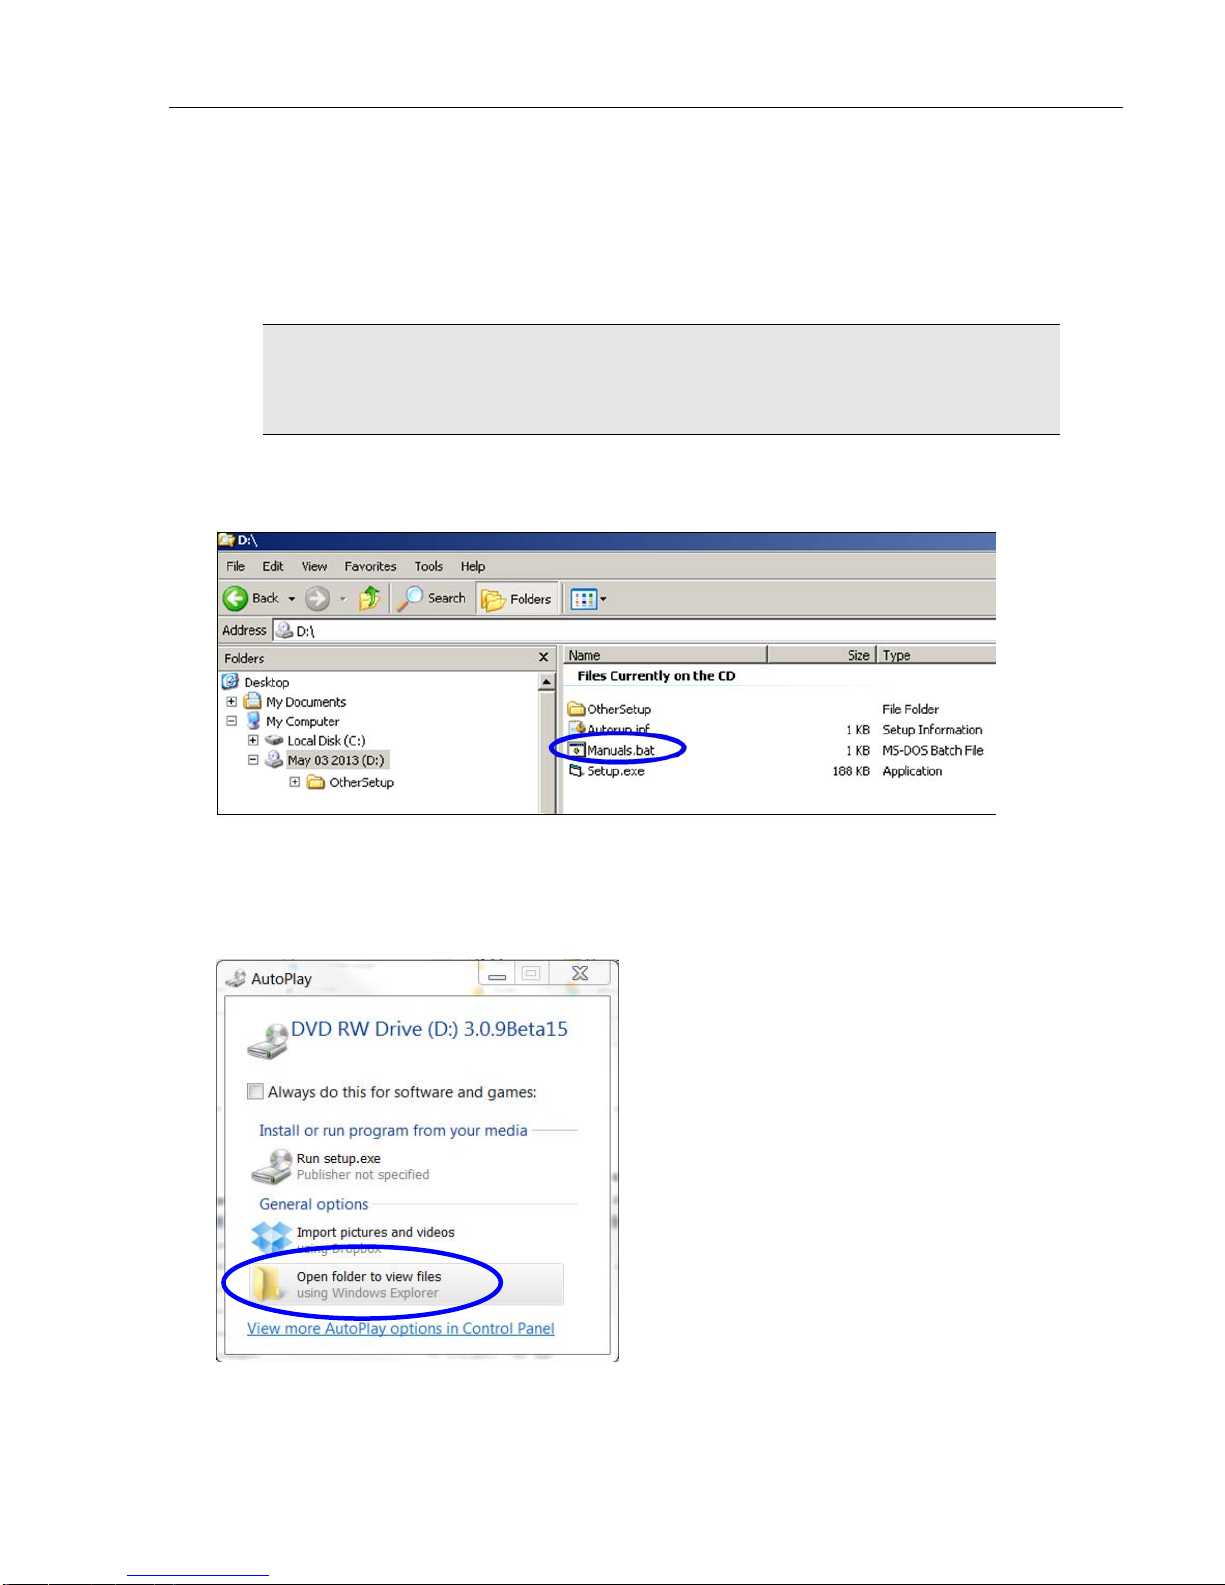
Windows 7 Operating Instructions
1. Insert the installation flash drive into the USB port. The following window appears. Click “Open folder to
view files.”
2. A window opens containing the manuals located on the flash drive.
LVS-95XX Series Barcode Quality Station Operations Manual - English Page 11 of 94
Page 12

LVS-95XX Series Barcode Quality Station Operations Manual
Safety Instructions
This unit has been carefully designed to provide years of safe, reliable performance. However, as with all
electrical equipment, there are some basic precautions that you should follow to avoid personal injury or
damage to the system:
• Before using the system, carefully read all the installation and operating instructions.
• Observe all warning instruction labels on the system.
• To protect your system from overheating, make sure no openings on the system are blocked.
• Never insert anything into the openings of the system.
• Do not use the system near water or spill liquid into it.
• All components used to create your system are UL and CE approved. All circuits were designed to
incorporate maximum safety. However, any equipment using electrical voltages may cause personal
injury if improperly handled.
• Do not attempt to work on the system with the main power lines connected.
• Ensure that the AC power source matches the ratings listed for the system. If unsure, check with your
dealer or local utility provider.
• Do not place the AC power cord where it can be stepped on. If the AC power cord becomes damaged or
frayed, replace it immediately.
• Avoid looking directly into any system lights. If you need to examine the lights, or look at any component
near the lights, be sure to first turn off the lights. If the lights cannot be turned off, then wear polarized
sunglasses while examining the lights.
• To avoid damaging the system, turn off and unplug the system before cleaning.
• If the system ever needs repair, consult Microscan or your Microscan distributor.
LVS-95XX Series Barcode Quality Station Operations Manual - English Page 12 of 94
Page 13
LVS-95XX Series Barcode Quality Station Operations Manual
LVS-95XX Series Software Specifications
Symbology Supported Standard(s)
PPN (Pharmacy Product Number) IFA Coding System / PPN-Code Specification
Code 39 ISO 16388
Interleaved 2 of 5 ISO 16390
ITF-14 ISO 16390 & GS1 General Specifications
Code-128 ISO 15417
GS1-128 ISO 15417 & GS1 General Specifications
GS1-128 with CC-A ISO 15417, ISO 24723 & GS1 General Specifications
GS1-128 with CC-B ISO 15417, ISO 24723 & GS1 General Specifications
GS1-128 with CC-C ISO 15417, ISO 24723 & GS1 General Specifications
Code 93 AIM BC5
Codabar AIM BC3
UPC-A ISO 15420 & GS1 General Specifications
UPC-A with 2 Digit supplemental ISO 15420 & GS1 General Specifications
UPC-A with 5 Digit supplemental ISO 15420 & GS1 General Specifications
UPC-A with CC-A ISO 15420, ISO 24723 & GS1 General Specifications
UPC-A with CC-B ISO 15420, ISO 24723 & GS1 General Specifications
UPC-E ISO 15420 & GS1 General Specifications
UPC-E with 2 Digit supplemental ISO 15420 & GS1 General Specifications
UPC-E with 5 Digit supplemental ISO 15420 & GS1 General Specifications
UPC-E with CC-A ISO 15420, ISO 24723 & GS1 General Specifications
UPC-E with CC-B ISO 15420, ISO 24723 & GS1 General Specifications
EAN-13 ISO 15420 & GS1 General Specifications
EAN-13 with 2 Digit supplemental ISO 15420 & GS1 General Specifications
EAN-13 with 5 Digit supplemental ISO 15420 & GS1 General Specifications
EAN-13 with CC-A ISO 15420, ISO 24723 & GS1 General Specifications
EAN-13 with CC-B ISO 15420, ISO 24723 & GS1 General Specifications
EAN-8 ISO 15420 & GS1 General Specifications
EAN-8 with CC-A ISO 15420, ISO 24723 & GS1 General Specifications
EAN-8 with CC-B ISO 15420, ISO 24723 & GS1 General Specifications
GS1 Databar – 14 ISO 24724 & GS1 General Specifications
GS1 Databar – 14 with CC-A ISO 24724, ISO 24723 & GS1 General Specifications
GS1 Databar – 14 with CC-B ISO 24724, ISO 24723 & GS1 General Specifications
GS1 Databar – 14 Stacked ISO 24724 & GS1 General Specifications
GS1 Databar – 14 Stacked with CC-A ISO 24724, ISO 24723 & GS1 General Specifications
GS1 Databar – 14 Stacked with CC-B ISO 24724, ISO 24723 & GS1 General Specifications
GS1 Databar Limited ISO 24724 & GS1 General Specifications
GS1 Databar Limited with CC-A ISO 24724, ISO 24723 & GS1 General Specifications
GS1 Databar Limited with CC-B ISO 24724, ISO 24723 & GS1 General Specifications
GS1 Databar Expanded ISO 24724 & GS1 General Specifications
GS1 Databar Expanded CC-A ISO 24724, ISO 24723 & GS1 General Specifications
GS1 Databar Expanded CC-B ISO 24724, ISO 24723 & GS1 General Specifications
LVS-95XX Series Barcode Quality Station Operations Manual - English Page 13 of 94
Page 14
LVS-95XX Series Barcode Quality Station Operations Manual
Symbology Supported Standard(s)
GS1 Databar Expanded Stacked ISO 24724 & GS1 General Specifications
GS1 Databar Expanded Stacked CC-A ISO 24724, ISO 24723 & GS1 General Specifications
GS1 Databar Expanded Stacked CC-B ISO 24724, ISO 24723 & GS1 General Specifications
GS1 Data Matrix ISO 16022 & GS1 General Specifications
Data Matrix ISO 16022
PDF-417 ISO 15438
Micro PDF-417 ISO 24728
QR Code 2005 ISO 18004
Micro QR Code 2005 ISO 18004
Aztec ISO 24778
Laetus Pharmacode Laetus
MaxiCode ISO 16023
Han Xin Draft AIM Specification
Additional Notes
• GS1 General Specifications can be obtained by contacting your local GS1 office.
• ISO Symbology Standards can be obtained from this link:
http://www.iso.org/iso/en/CatalogueListPage.CatalogueList?ICS1=35&ICS2=40&ICS3=&scopelist=
• AIM Symbology Standards can be obtained from this link: https://www.aimglobal.org/estore/
In addition to adherence to the symbology specifications, the LVS-95XX systems comply with the
following standards:
• ISO 15415 - Barcode print quality test specification - Two-dimensional symbols
• ISO 15416 - Barcode print quality test specification - Linear symbols
• ISO 15426-1 - Barcode verifier conformance specifications - Part 1: Linear symbols
• ISO 15426-2 - Barcode verifier conformance specification - Part 2: Two-dimensional symbols
LVS-95XX Series Barcode Quality Station Operations Manual - English Page 14 of 94
Page 15

LVS-95XX Series Barcode Quality Station Operations Manual
LVS-9510 and Auxiliary Readhead Hardware
Specifications
Physical Properties
Height 10.5” 266.7 mm
Width 11.125” 282 mm
Depth 9.062” 230 mm
Viewing Window 5” x 7” 127 mm x 177.79 mm
Weight
• Unpackaged weight (standalone LVS-
9510 unit) = 6 pounds (2.72 kg)
• Shipping weight (includes all items
packaged in shipping box, such as
power supply, cables, manuals, etc.) =
13 pounds (5.89 kg)
Video Camera
• Monochrome. 5.0 megapixel
Minimum PC Requirements (PC Supplied by User)
• Windows® XP Professional or Windows® 7 (Windows® Vista is not
supported)
• Intel® Core™ 2 Duo Processor (or equivalent)
• 2 GB RAM
• 800 x 600 Resolution
• One available USB 2.0 port (additional ports required for each
Auxiliary Readhead in use)
• The user-supplied computer connecting to the 5.0 MP Auxiliary
Readhead must be running LVS-95XX software version 3.0.8 or
higher.
Top Cover
• 5.5” x 7.5” (139.7 mm x 190.5 mm)
• Weight = 5.5 oz (162.65 grams)
Operating Temperature
• 10º C (50º F) to 30º C (86º F)
Storage Temperature
• 0º C (32º F) to 40º C (104º F)
Relative Humidity
• 20% to 70% (non-condensing)
Calibration
One of the following:
• EAN/UPC Calibrated Conformance Test Card
• GS1-128 Calibrated Conformance Test Card
Light Source
• White Light
• Red (660 nm) filter. Optional clear window available for purchase.
Inputs / Outputs
• USB 2.0 port
• Power Supply 12 vdc @ 2.5 amps (minimum)
LVS-95XX Series Barcode Quality Station Operations Manual - English Page 15 of 94
Specifications and photos subject to change.
Page 16
LVS-95XX Series Barcode Quality Station Operations Manual
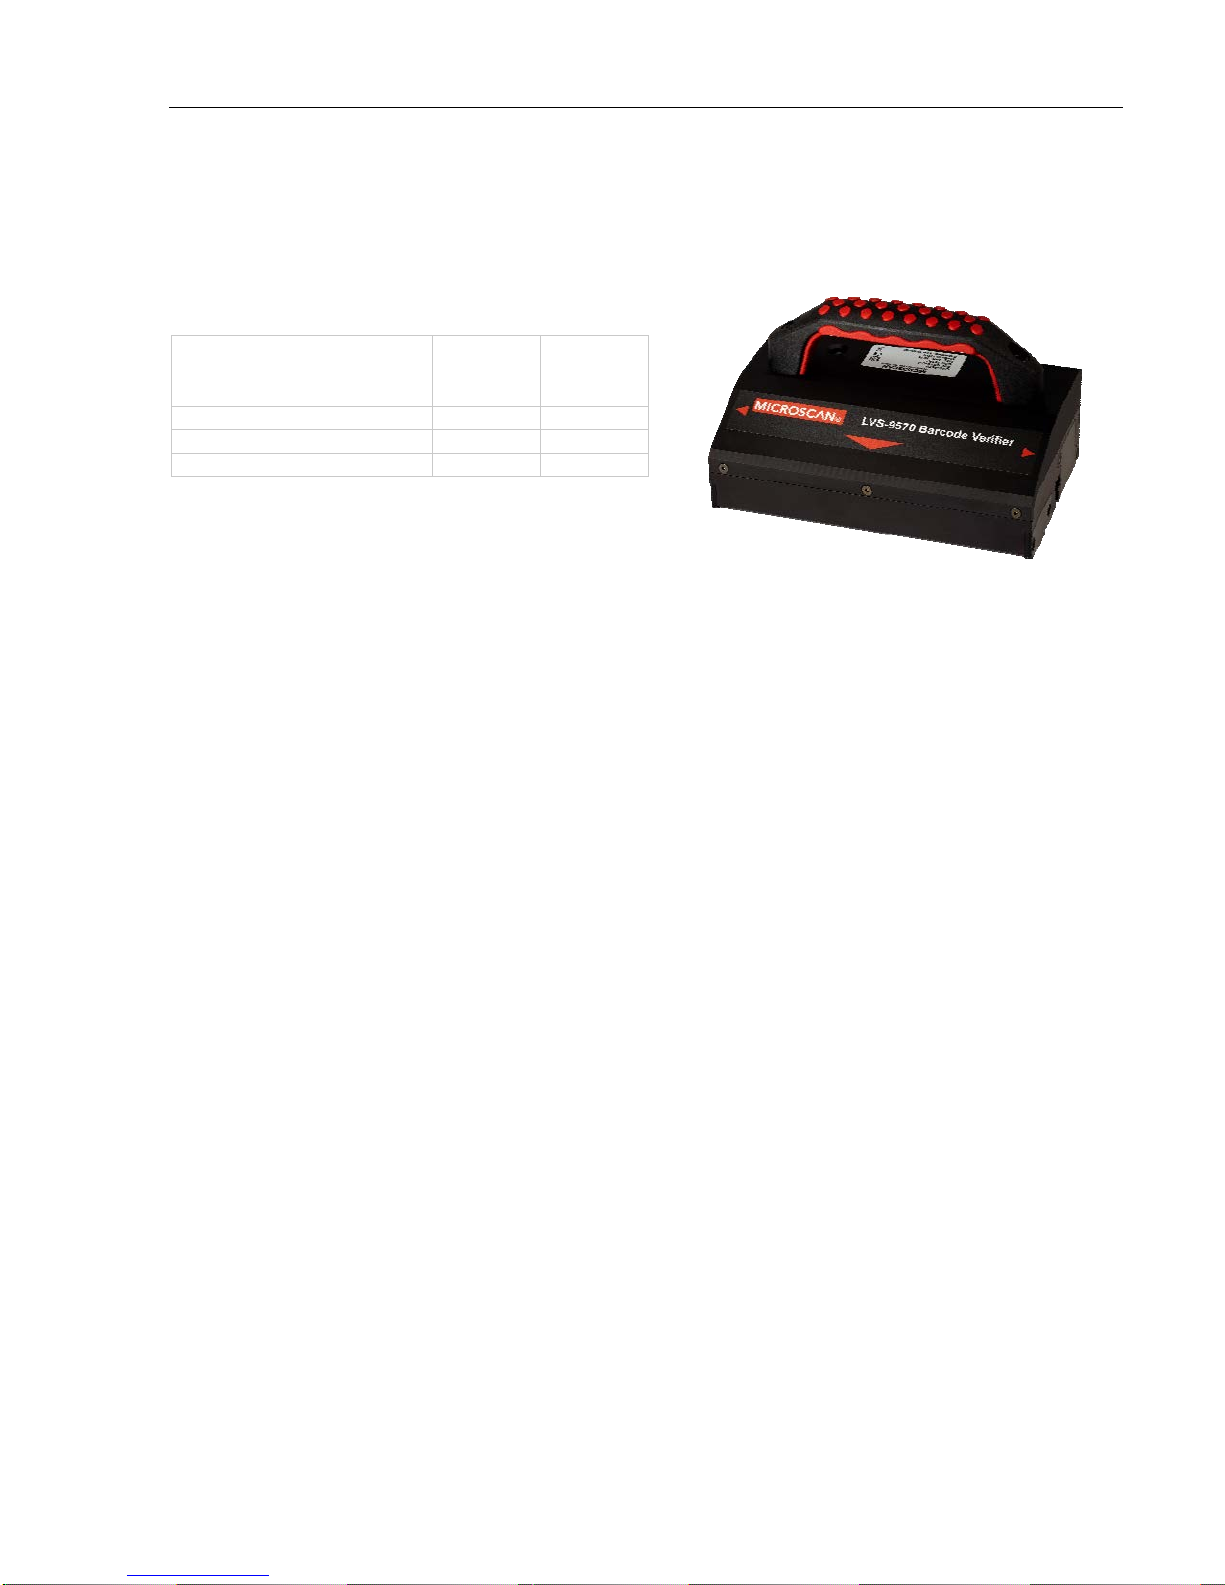
LVS-9570 Hardware Specifications
Physical Properties
Height
• Verifier height
• Total height including handle
Length 3.94” 100.08 mm
Width 6.56” 166.62 mm
Weight 2.3 pounds 1.04 kg
2.13”
4”
54.10 mm
101.6 mm
Line Scan Camera
• 400 DPI
• Floating Sensor Head
Overall Scanning Width
• 5.4” (137.16 mm) in picket fence format
• Up to 12.0” (305 mm) in ladder format
Minimum X-Dimension
• 1D (Narrow Bar Width): 8.8 mils (.0088”) (.223 mm)
• 2D (Cell Size): 12.5 mils (.0125”) (.317 mm)
Verification
• 1D and 2D codes that comply with ISO/IEC standards and GS1 General
Specifications
Minimum PC Requirements (PC Supplied by User)
• Windows® XP Professional or Windows® 7 (Windows® Vista is not
supported)
• Intel® Core™ 2 Duo Processor (or equivalent)
• 2 GB RAM
• 800 x 600 Resolution
• One available USB 2.0 port
Light Source
• Red Light
• 660 nm
Operating Temperature
• 10º C (50º F) to 30º C (86º F)
Storage Temperature
• 0º C (32º F) to 40º C (104º F)
Relative Humidity
• 20% to 70% (non-condensing)
Calibration
• EAN/UPC Calibrated Conformance
Test Card
Inputs / Outputs
• USB 2.0 port
LVS-95XX Series Barcode Quality Station Operations Manual - English Page 16 of 94
Specifications and photos subject to change.
Page 17
LVS-95XX Series Barcode Quality Station Operations Manual
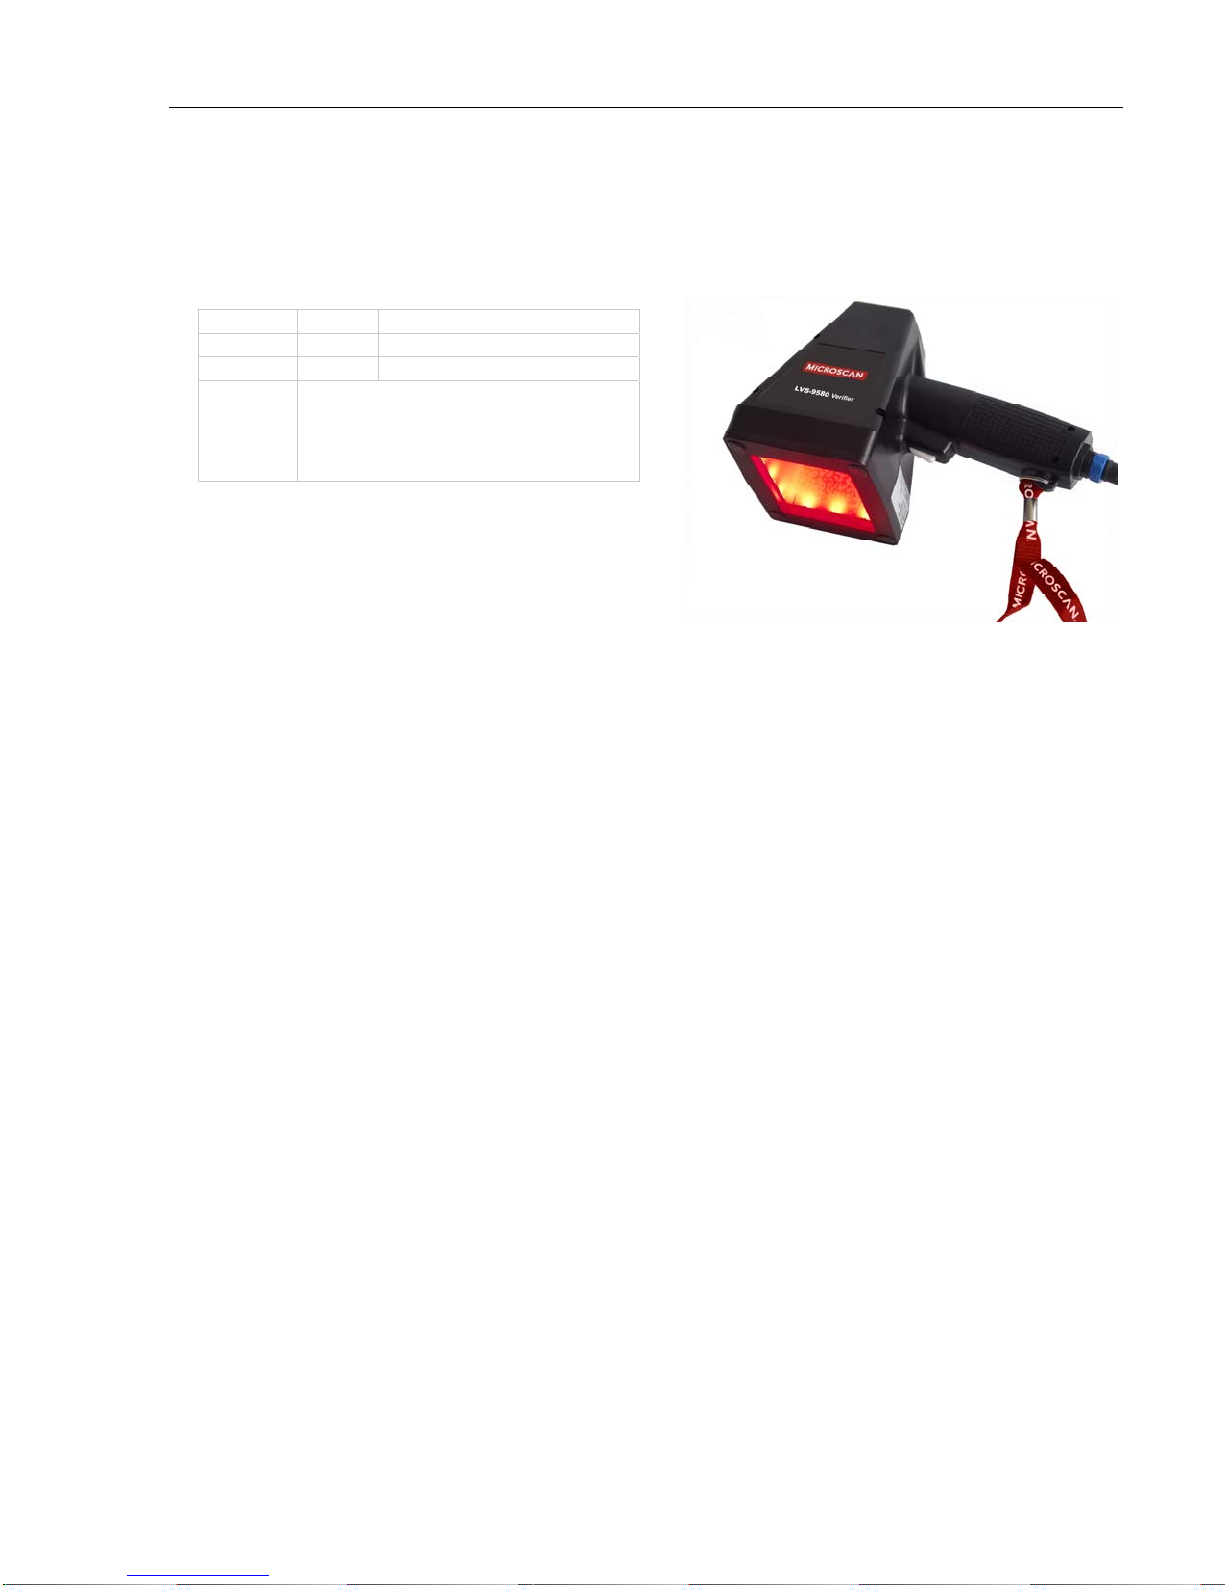
LVS-9580 Hardware Specifications
Physical Properties
Height 8.5” 215.9 mm
Width 4.75” 120.6 mm
Depth 5.5” 139.7 mm
Weight Unpackaged Weight = 15.5 oz (.44 kg)
Shipping weight (includes all items
packaged in shipping box, such as cables,
manuals, etc.) = Approximately 4 pounds
(1.81 kg)
Imaging Device
• 5.0 mp camera
• Object Distance: Contact
Field of View
• 3.0” (76.19 mm) horizontally
• 2.25” (57.15 mm) vertically
Operating and Storage Temperature
• 4º C (40º F) to 46º C (115º F)
Minimum Barcode X Dimension
• 1D = 4.0 mils (0.10 mm)
• 2D = 5.9 mils (0.15 mm)
Minimum PC Requirements (PC Supplied by
Customer)
• Windows® XP Professional or Windows® 7 (Windows®
Vista is not supported)
• Intel® Core™ 2 Duo Processor (or equivalent)
• 2 GB RAM
• 800 x 600 Resolution
• One available USB 2.0 port
Power Requirements
• USB Powered 5VDC @ 180mA
Light Source
• Red 660 nm filter
Communication
• USB 2.0 A/MINI-B cable 10 feet (3048 mm)
Q
Specifications and photos subject to change.
Relative Humidity
• 5% to 95% (non-condensing)
Calibration
• EAN/UPC Calibrated Conformance Test Card
Safety Compliant
• RoHS/WEEE compliant
• CE
LVS-95XX Series Barcode Quality Station Operations Manual - English Page 17 of 94
Page 18
LVS-95XX Series Barcode Quality Station Operations Manual
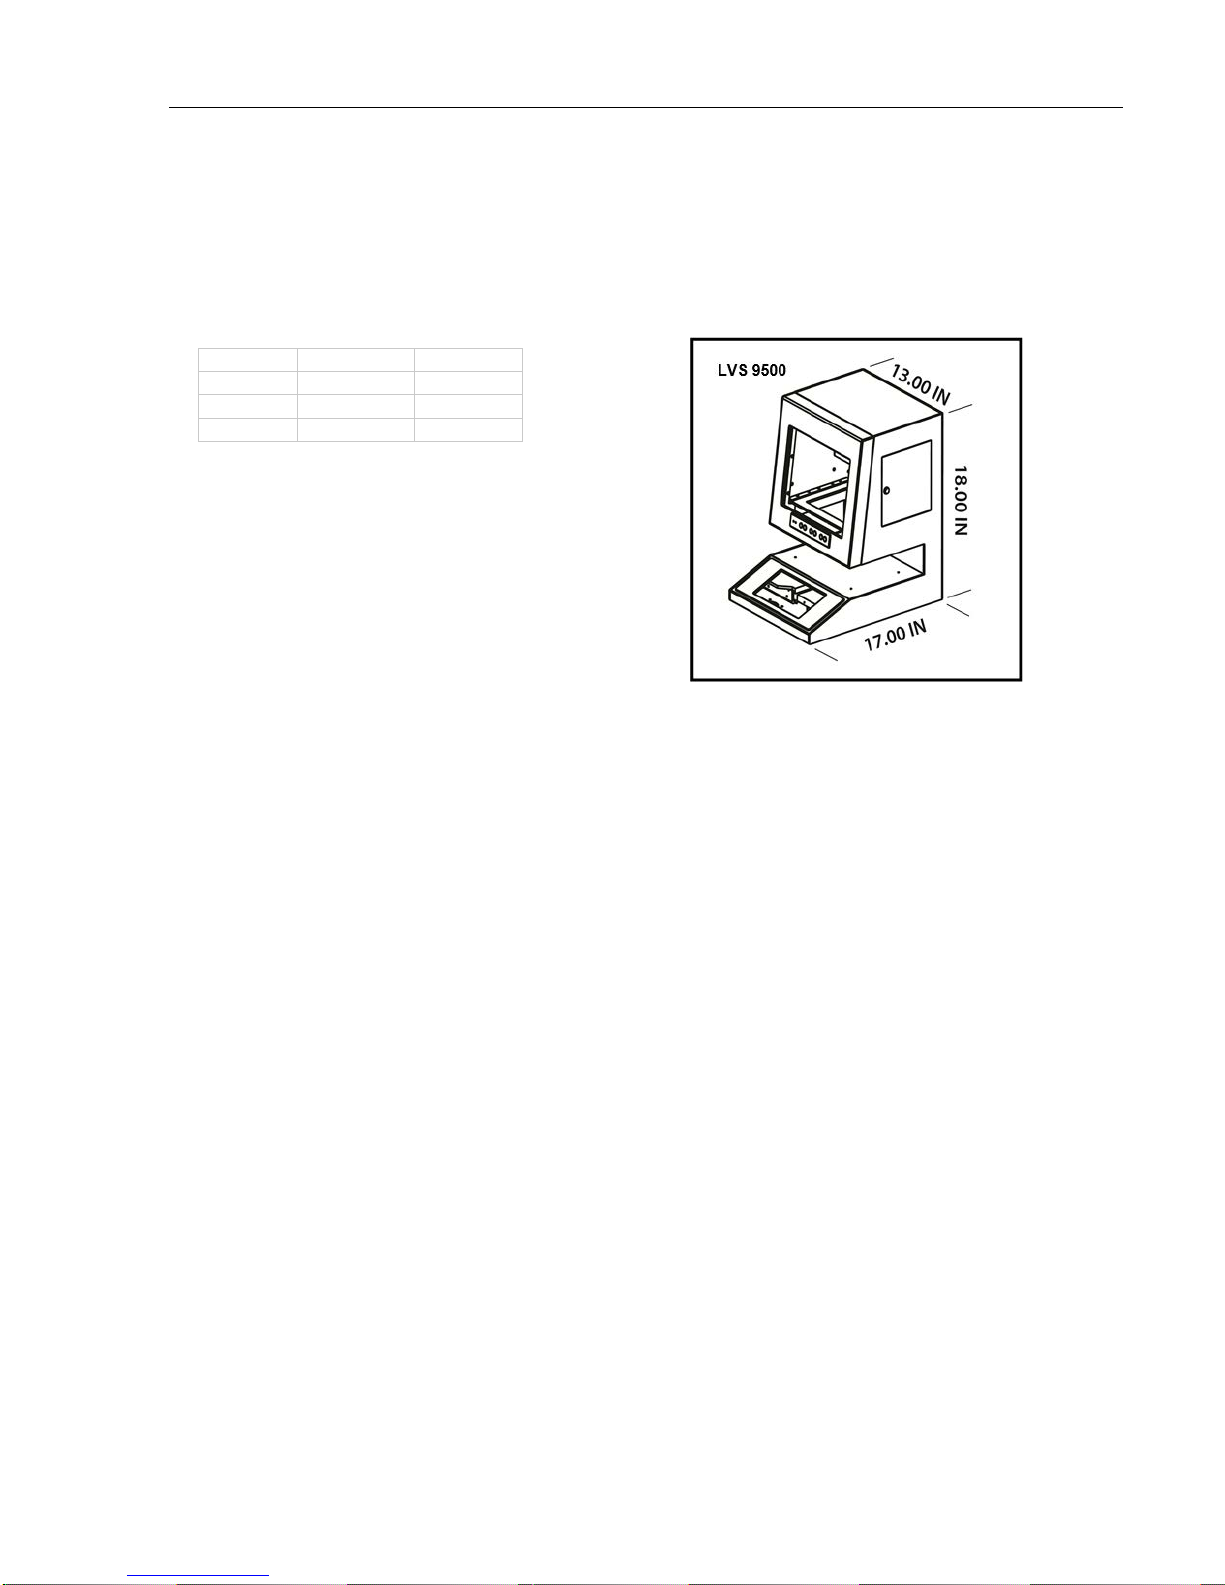
LVS-9500 Hardware Specifications
Physical Properties
Height 18” 18 mm
Width 13” 330 mm
Depth 17” 432 mm
Weight 27.5 pounds 12.5 kg
Light Source
• White Light
• Red Filter
• 660 nm
Inputs / Outputs
• 3 USB ports
• 1 Serial port
• 1 External VGA port
• External USB mouse
• 10/100 LAN (Ethernet)
• 12 vdc @ 1 amp (nominal)
• 5 vdc @ 2.4 amps (nominal)
Main Power Supply
• Internal fuse (5A)
• 350 watt ATX power supply
• 50/60 hz 100 to 240 VAC
Monitor
• Built in, 12.1”
• 800 x 600 LCD Display
Operating and Storage Temperature
• 0ºC (32ºF) to 40ºC (104ºF)
Relative Humidity
• 20% to 70% (non-condensing)
Calibration
One of the following:
• EAN/UPC Test Card
• GS1-128 Test Card
Video Camera
• Monochrome
• 2.1 or 1.3 Mega-pixel
Computer
• Intel-based processor
• 512 MB memory
• 40 GB hard drive (minimum)
• Windows XP Professional
• 12V @ 4.87 A5V @ 12.2 A
• Elastomer keyboard
q
LVS-95XX Series Barcode Quality Station Operations Manual - English Page 18 of 94
Specifications and photos subject to change.
Page 19

LVS-95XX Series Barcode Quality Station Operations Manual
LVS-9505 Hardware Specifications
Light Source
• White Light
• Red Filter
• 660 nm
• 12 vdc @ 1.6 amps
Inputs / Outputs
• USB 2.0 port
• 12 vdc @ 1.10 amps
Video Camera
• Monochrome. 1.3 or 2.1 MP
Operating Temperature
• 10º C (50ºF) to 30º C (86ºF)
Relative Humidity
• 20% to 70% (non-condensing)
Storage Temperature
• 0ºC (32ºF) to 40ºC (104ºF)
Physical Properties
• Depth = 406 mm (16”)
• Width = 330 mm (13”)
• Height = 258 mm (10.14”)
• Weight = 5 kg (11 lbs)
Minimum PC Requirements (PC Not Supplied)
• Windows XP Professional
• Intel Celeron 2.4 Ghz
• 512 MB RAM (1 GIG Recommended)
• 40 GB HDD
• 800 x 600 Resolution
• (2) USB 2.0 ports
Calibration
• EAN/UPC Test Card or GS1-128 Test Card
LVS-95XX Series Barcode Quality Station Operations Manual - English Page 19 of 94
Specifications and photos subject to change.
Page 20

LVS-95XX Series Barcode Quality Station Operations Manual
Basic Operations
The basic operational procedures for the LVS-95XX systems are listed below:
1. Turn on the system and wait two minutes for the lights to stabilize.
2. The system is setup with tabs located across the top of the screen. Each tab is discussed in this guide.
3. Click the Setup tab and choose the desired Application standard. When prompted for an Operator ID and
Password, enter admin for both the Operator ID and Password.
4. Click the Calibration tab and calibrate the system by placing either of the Master Grade barcodes
(located on the supplied Calibration Test Card) into the center of the field of view, ensuring that the blue
line passes through the “PASS” portion of the calibration label. Then, click the Calibrate button.
LVS-95XX Series Barcode Quality Station Operations Manual - English Page 20 of 94
Page 21
LVS-95XX Series Barcode Quality Station Operations Manual
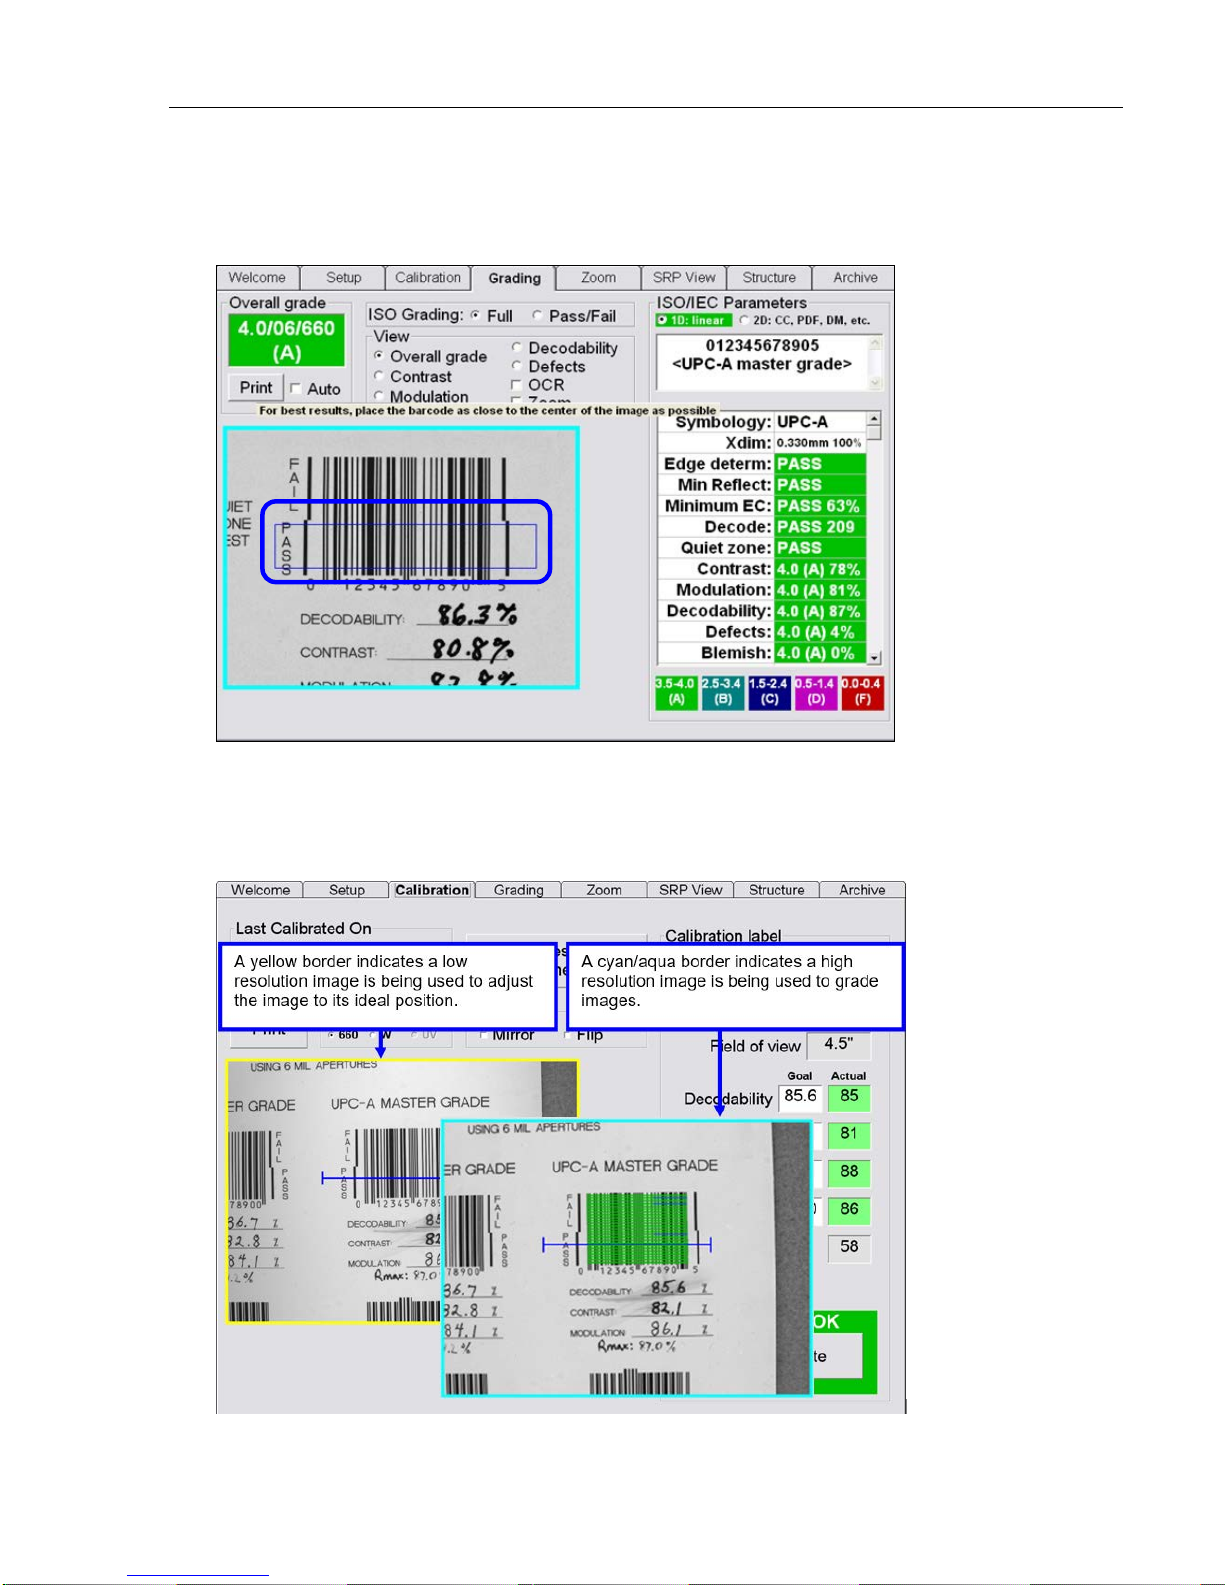
5. Click the Grading tab and place a barcode into the field of view. Draw a box around the PASS portion of
the barcode, ensuring enough space for the quiet zone. Position the barcode as close to the center of
the field of view as possible. The verification results are displayed immediately.
When using the LVS-9510 with a 5.0 megapixel (MP) camera, the border around the image view box
turns yellow when placing an image in the field of view. A yellow border indicates that a lower resolution
image is being used to easily adjust the image to its ideal position. When the ideal position is located,
stop moving the image. When no motion is detected in the field of view, the image view box border turns
cyan/aqua indicating that a higher resolution image is being used for barcode grading.
LVS-95XX Series Barcode Quality Station Operations Manual - English Page 21 of 94
Page 22
LVS-95XX Series Barcode Quality Station Operations Manual
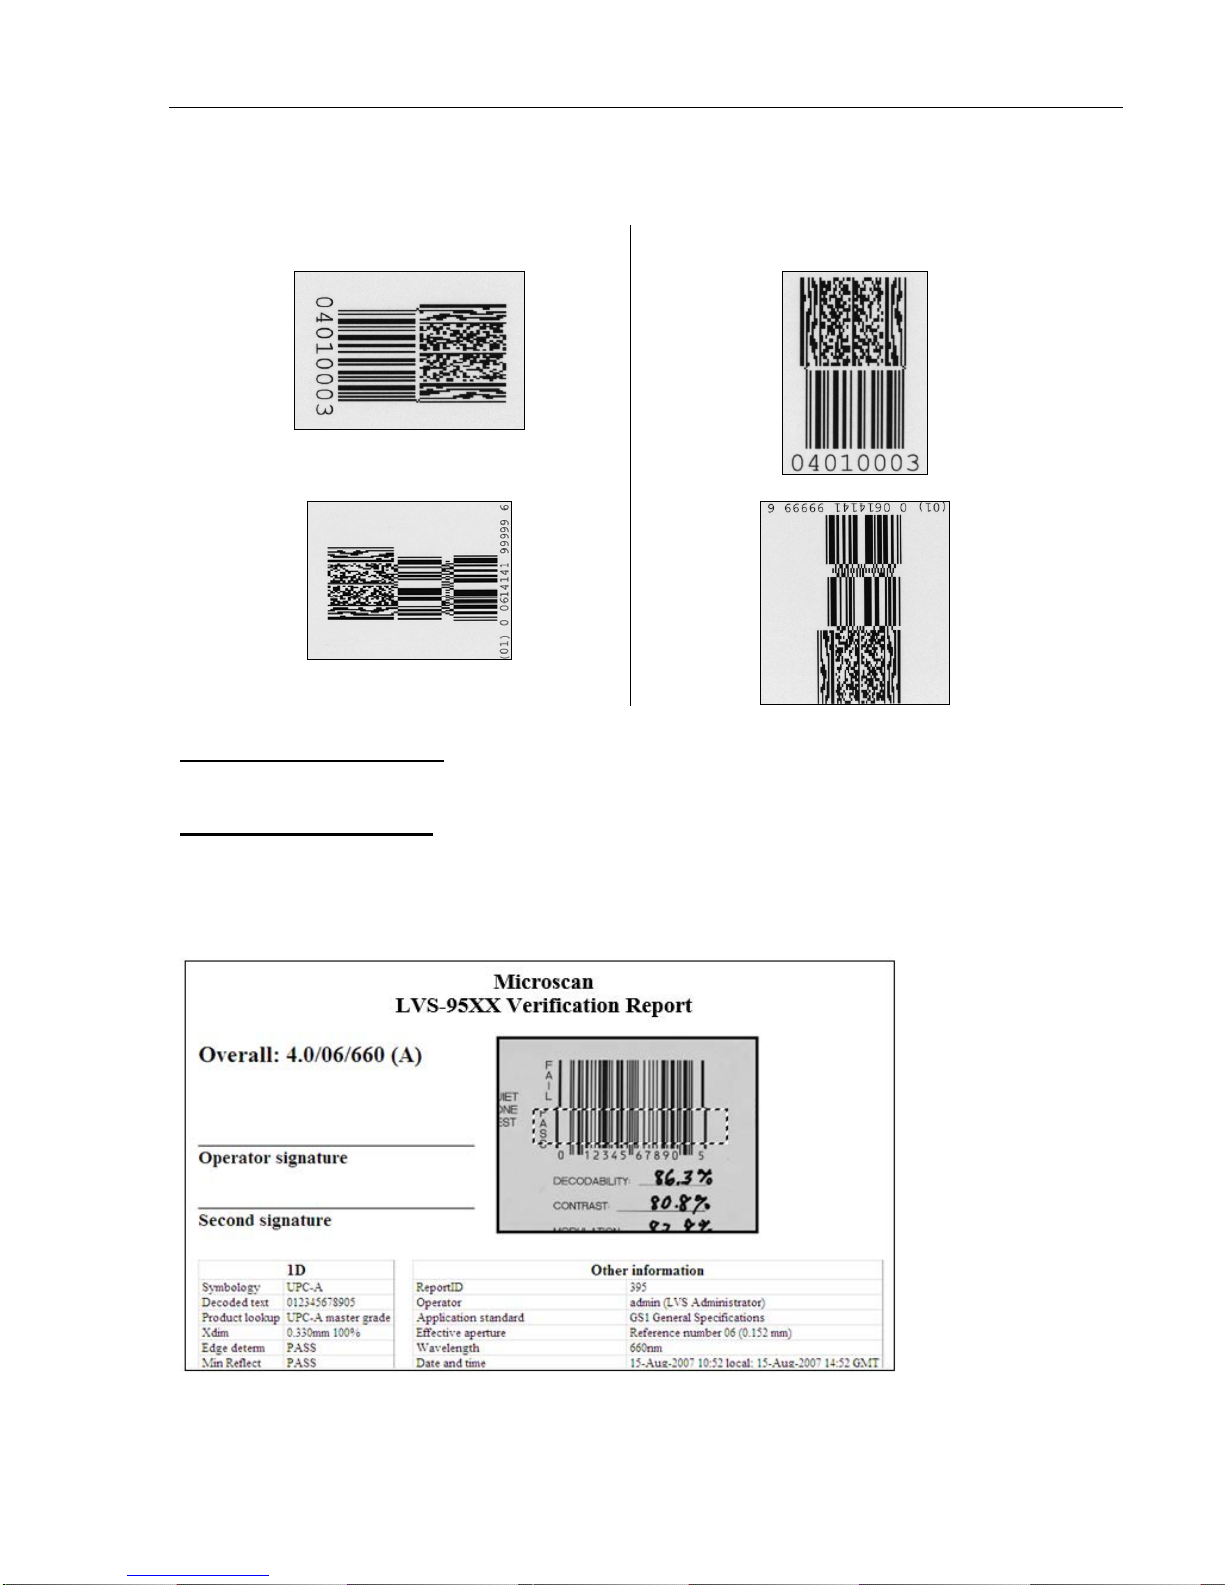
Barcodes can be verified in any orientation, which is an integer multiple of 90 degrees.
Barcodes Verified Horizontally
Barcodes Verified Vertically
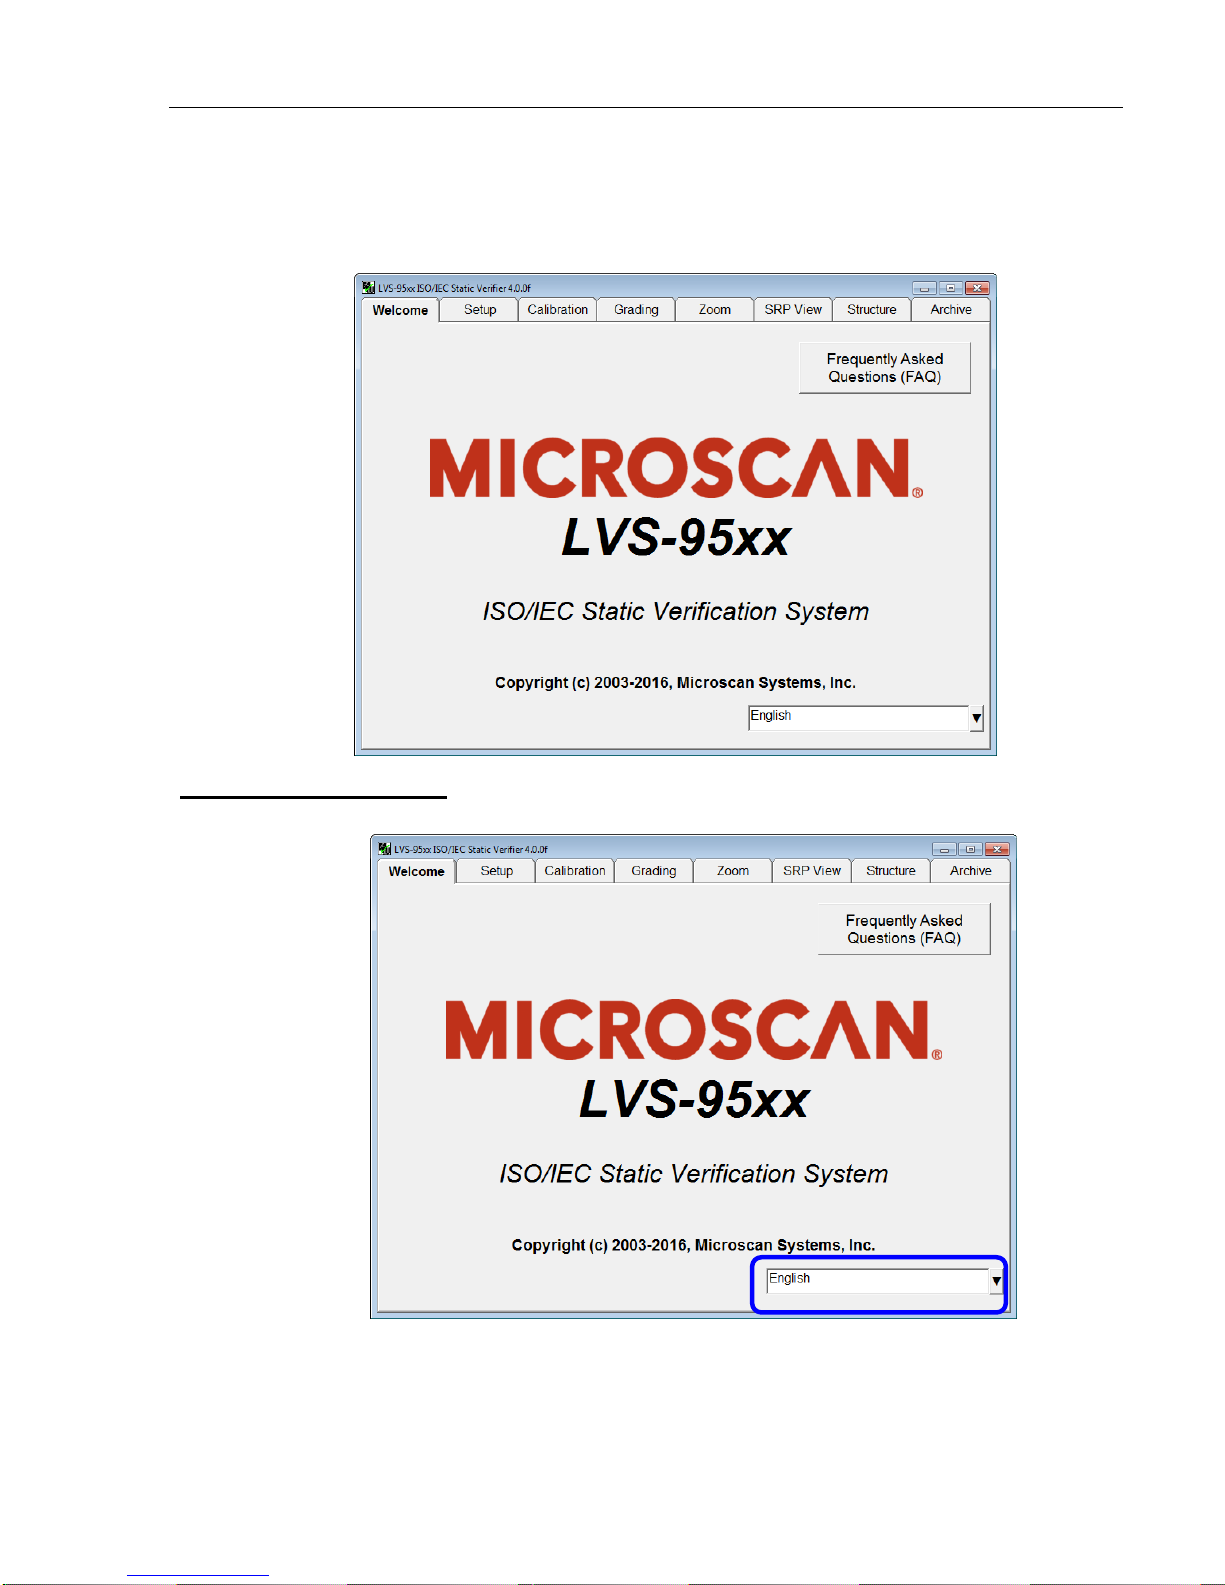
To Print the Results
To print the verification results, click the Print button on the top, left corner of the Grading Tab screen.
To View the Report
To view the report, right-click on the Print button and an HTML document is generated and displayed on the
screen. The HTML version can be saved as a PDF file by downloading free PDF convertor software from the
Internet to the computer. Refer to the “1. Overall Grade” section, within the “Grading Tab” section of this
manual for detailed instructions.
This concludes the basic operations of the LVS-95XX systems. Each tab at the top of the screen is explained
in detail in the following sections.
LVS-95XX Series Barcode Quality Station Operations Manual - English Page 22 of 94
Page 23
LVS-95XX Series Barcode Quality Station Operations Manual
Welcome Tab
The Welcome tab is the first tab to appear when starting the LVS-95XX system.
Choice of Language
1. Click the drop-down box in the lower right section of the screen to change the software la nguage.
LVS-95XX Series Barcode Quality Station Operations Manual - English Page 23 of 94
Page 24
LVS-95XX Series Barcode Quality Station Operations Manual
Toggling the LVS-95XX Software between Two Languages
Pressing Ctrl + F on the keyboard allows the LVS-95XX software to toggle between two different languages.
The default condition of Ctrl + F toggles the LVS-95XX software between the currently active language and
the English language.
To toggle between two languages other than English, independently log into each language then press Ctrl +
F to toggle between the last two active languages. For example, to toggle between Italian (Italiano) and
Spanish (Español), from the Welcome tab, select Italian (Italiano) and log in. Next, click the Welcome tab
and log out. Select Spanish (Español), and log in. Pressing Ctrl + F will now toggle between Italian and
Spanish.
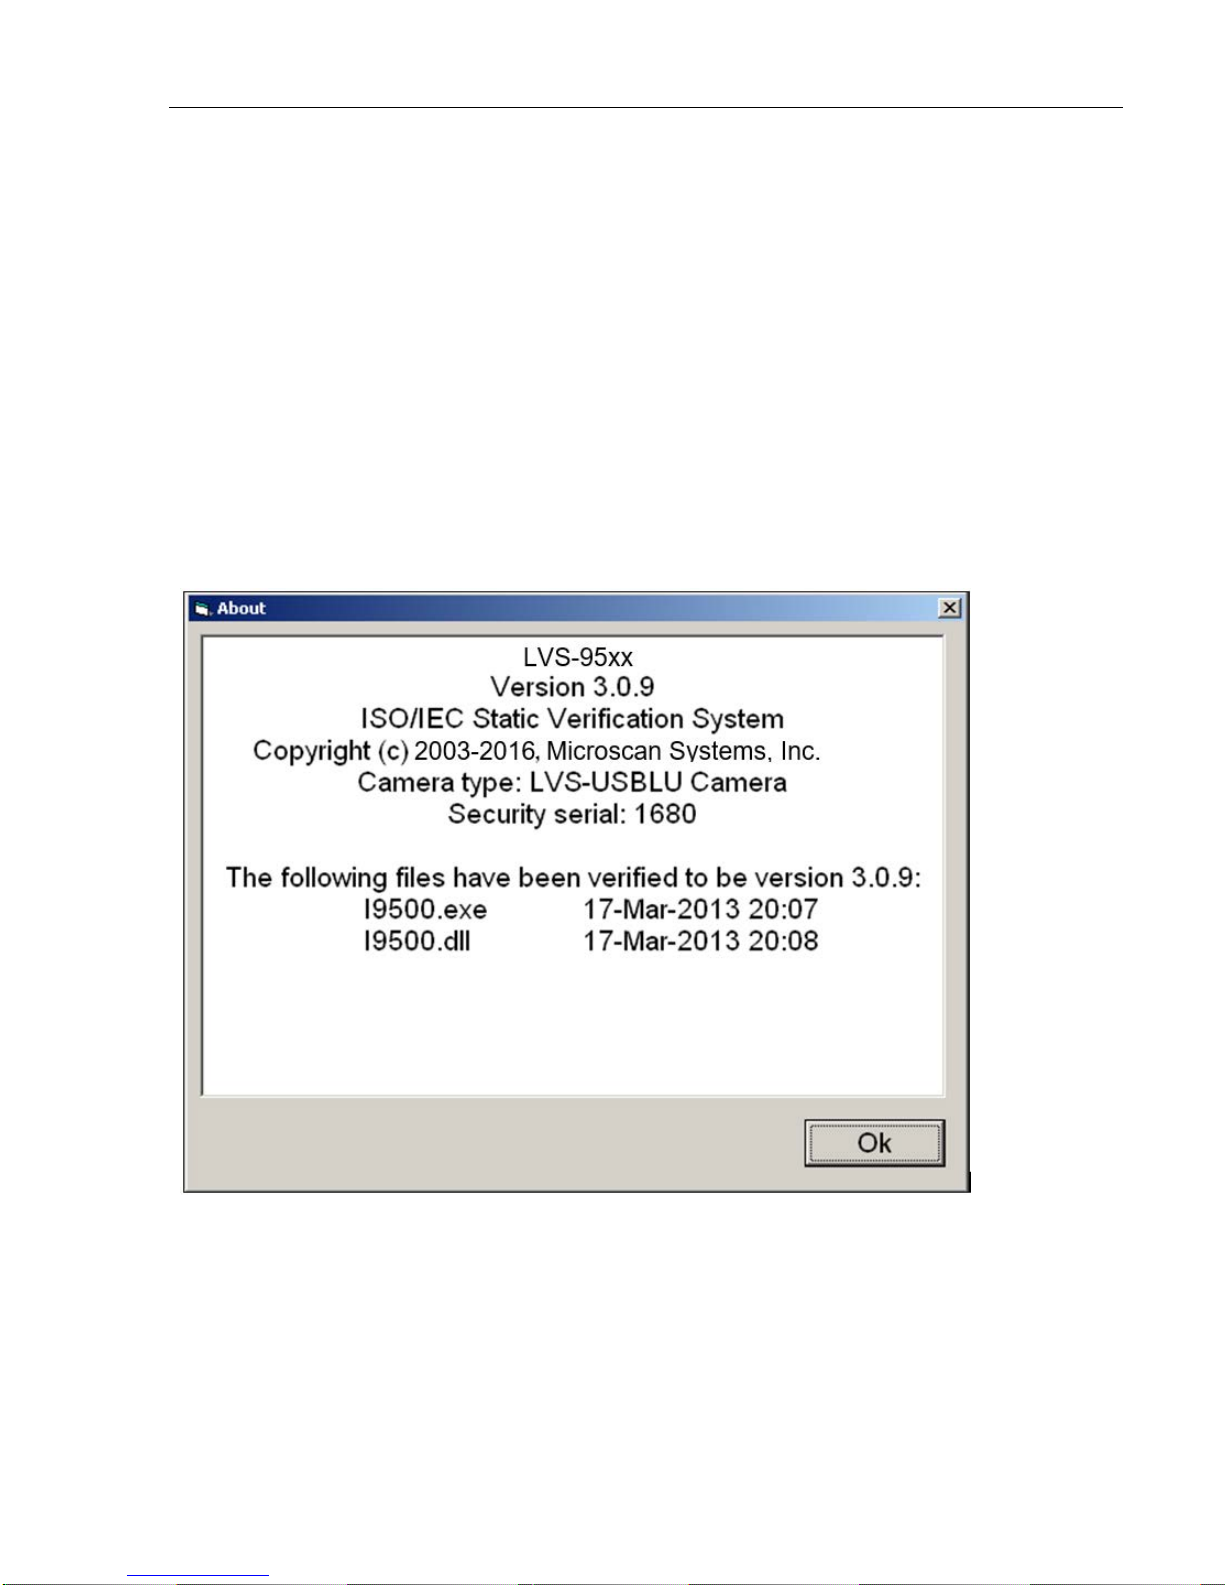
Current Software Version List
Double-clicking on the term Version allows you to view a complete list of the latest software versions. After
double-clicking on this term, the following page appears. This information is important if it is necessary to
contact the Microscan technical helpline.
LVS-95XX Series Barcode Quality Station Operations Manual - English Page 24 of 94
Page 25

LVS-95XX Series Barcode Quality Station Operations Manual
Password Login
The password Login box appears when you click on any of the tabs located at the top of the screen.
Enter the Operator ID and Password. When the system is used for the first time, the Operator ID is admin
and the password is admin. This enables the administrator to gain access to where the software sets up and
maintains all passwords and levels of Permissions for each operator.
The Reference field, which is optional, allows operators to enter a reference number for the work they are
performing. This number can be used to reference a Job Number, Control Number, Purchase Order, etc.
The reference number can also be entered in the Reference field located on the Setup tab screen.
IMPORTANT: The last updated Reference field overrides the seco ndary Reference
field. For example, a user updating the Reference field on the Setup tab screen
overrides the reference number entered in the Login box.
Passwords and permission levels are explained in the next chapter under the Setup Operators section.
LVS-95XX Series Barcode Quality Station Operations Manual - English Page 25 of 94
Page 26
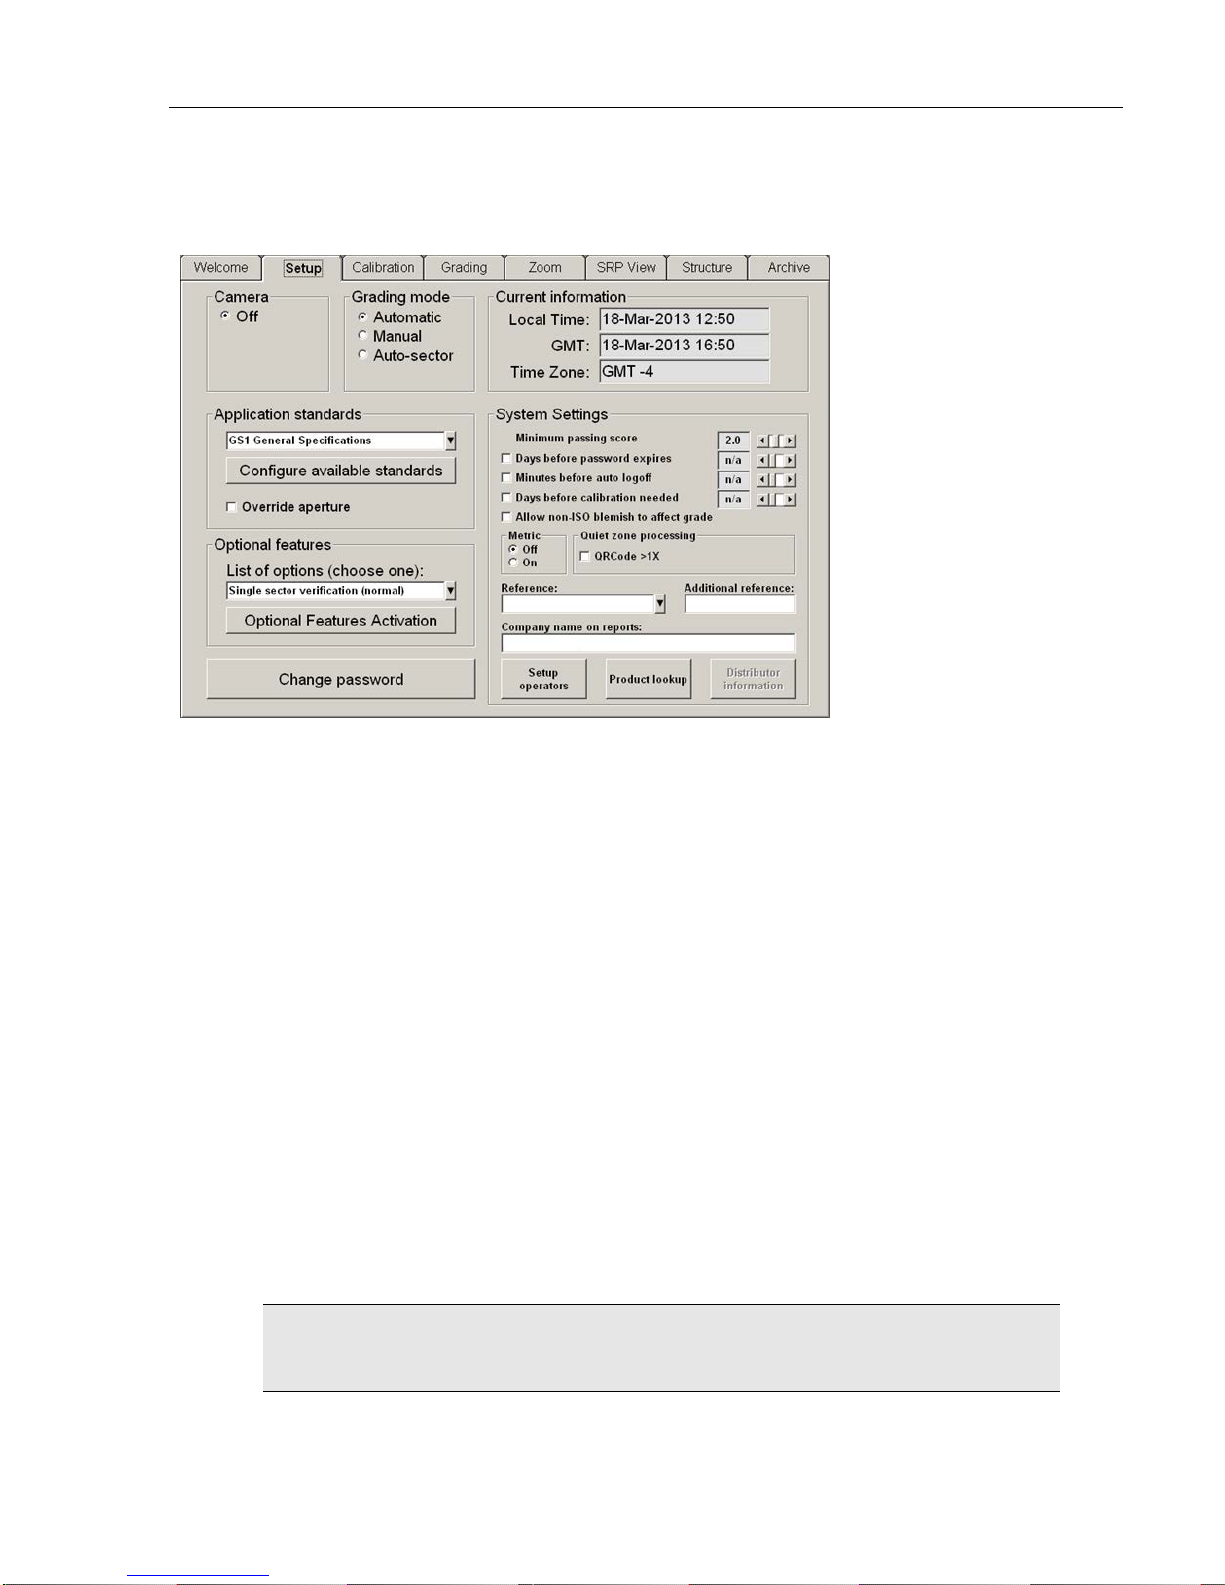
Setup Tab
LVS-95XX Series Barcode Quality Station Operations Manual
The Setup tab contains the following sections:
• Camera
• Grading Mode
• Application Standards
• Current Information
• System Settings
• Optional Features
• Change Password button
Each of the aforementioned sections is listed below:
Camera
Select On to turn on the LVS-95XX system camera. Select Off to turn off the camera.
The camera automatically turns off when the following occurs:
• When an imported image is reviewed (see the Archive Tab section for more information).
• After performing a “stitching” operation (see the Barcode Too Wide for Field of View (Stitching Function)
section for more information).
After you have finished inspecting either of the above images, the camera must be turned back On to
see live images again.
IMPORTANT: The LVS-95XX system recognizes a maximum of three cameras plugged
into a computer at one time.
See the next page for camera examples.
LVS-95XX Series Barcode Quality Station Operations Manual - English Page 26 of 94
Page 27
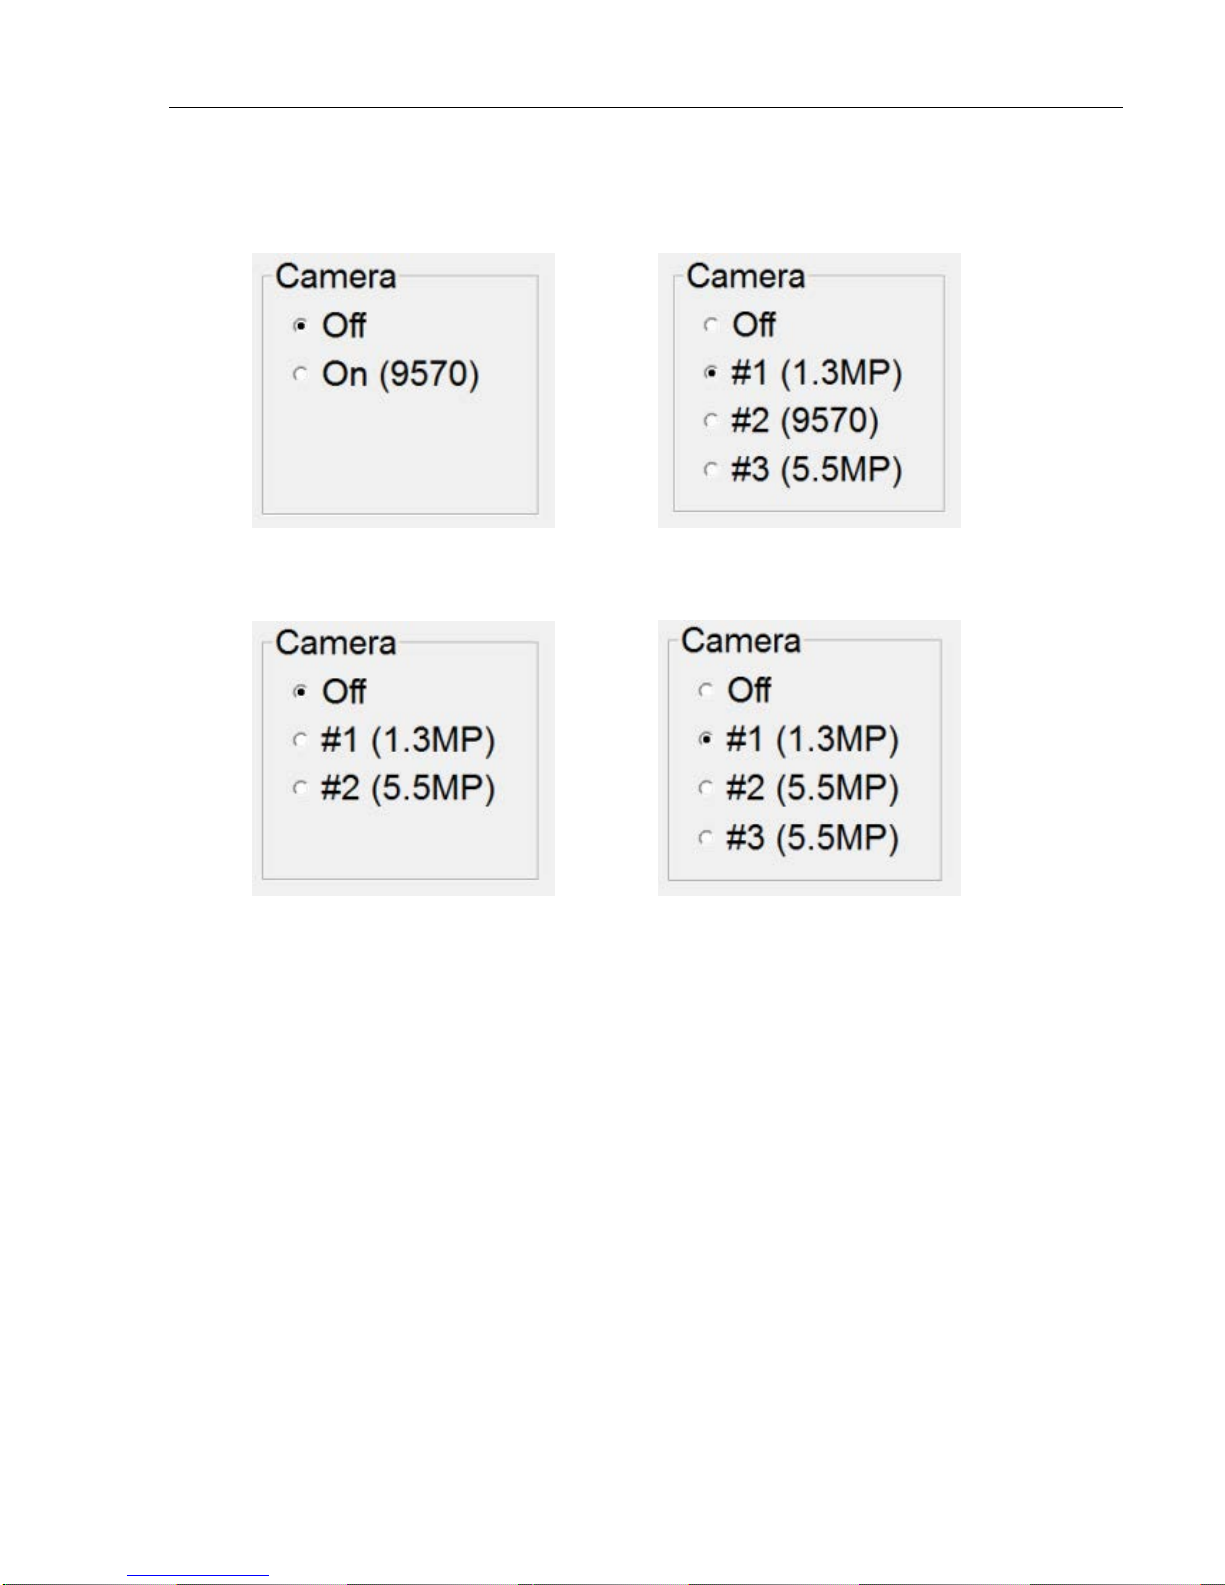
LVS-95XX Series Barcode Quality Station Operations Manual
Options in the Camera section appear differently depending on the LVS-95XX systems and cameras being
used. Examples include:
Camera options with an LVS-9570
Camera options with an LVS-9510 1.3 MP
camera and 5.5 MP camera
Camera options with an LVS-9570 and
LVS-9510 1.3 MP and 5.5 MP cameras
Camera options showing three LVS-9510
systems (one system with a 1.3 mp camera
and two systems with a 5.5 mp camera)
LVS-95XX Series Barcode Quality Station Operations Manual - English Page 27 of 94
Page 28
LVS-95XX Series Barcode Quality Station Operations Manual
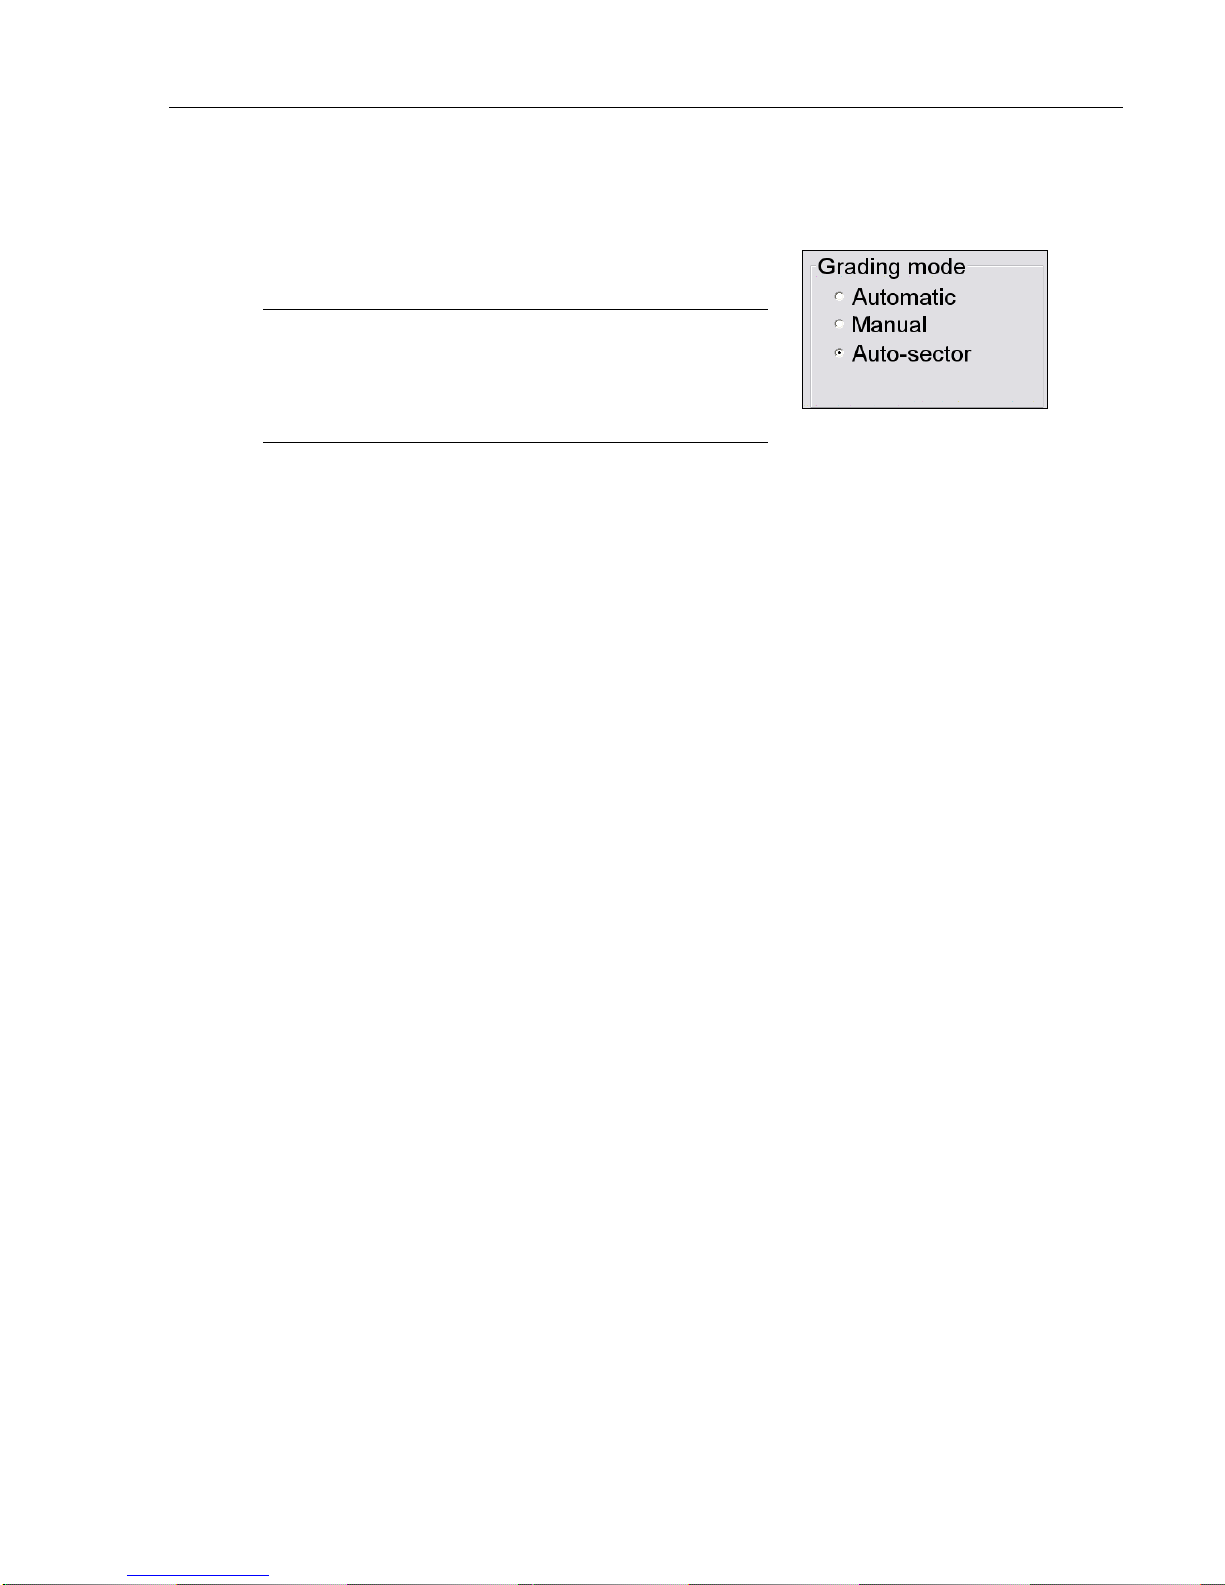
Grading Mode
The “Grading Mode” section allows you to choose
one of the following three ways to grade barcodes:
Note: All grading results, regardless of which
grading mode is selected, are archived and viewable
by clicking the “Archive” tab, and then selecting
“Recent reports (last 30 days).”
• Automatic: Automatic grading mode is selected typically when the user is verifying multiple barcodes of
the similar dimensions. Once a sector (blue box) has been drawn, the software will detect motion and will
“automatically” attempt to grade once motion has ceased. The user does not have to draw a n ew sector
for each new barcode placed in the field of view. The sector must be drawn sufficiently large to include
the required quiet zones and to allow barcodes to be easily placed in the sector but not so large as to
capture unnecessary data within the reading window.
• Manual: After a sector has been established, you can remove the barcode and place anothe r barcode
into the field of view. Motion is detected (same as Automatic mode), however the barcode is graded after
the Click to grade button is pushed or if a new sector is drawn.
• Auto-sector: The LVS-95XX software draws the sector automatically; the user does not have to draw a
sector. The barcode is placed on the green “+” and when motion stops, the software detects the barcode
and draws the appropriate sector around the barcode and grades the barcode. Auto-sector does a nice
job detecting the barcode and drawing a sector including appropriate quiet zones; however, it is not
perfect. If an incorrect sector is drawn, the user can re-draw the sector manually. Follow the steps below
to use the Auto-sector feature.
LVS-95XX Series Barcode Quality Station Operations Manual - English Page 28 of 94
Page 29
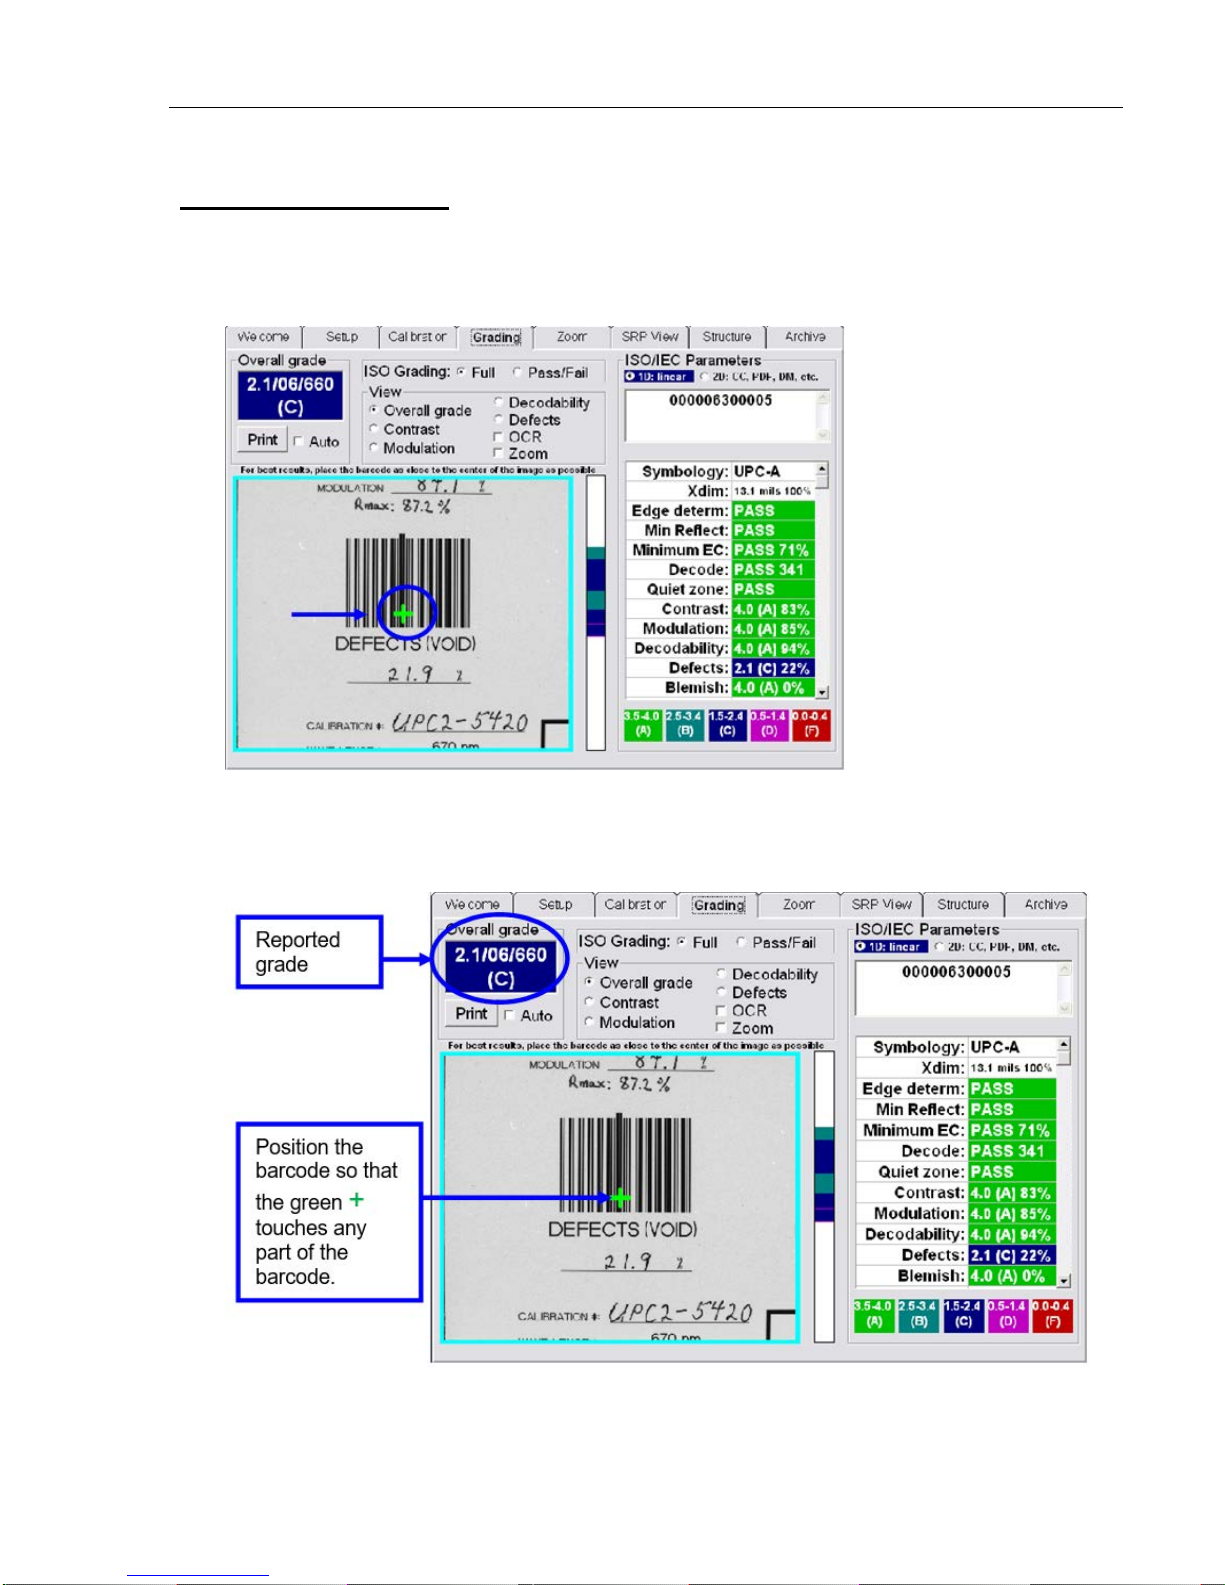
Auto-Sector Feature
To use the Auto-sector feature:
1. Select “Auto-sector” on the Setup tab.
LVS-95XX Series Barcode Quality Station Operations Manual
2. Click the Grading tab and notice the green
3. Position the barcode so that the green
detects the barcode, draws a sector around it, and then reports the grade.
+ appearing in the center of the field of view.
+ touches any part of the barcode. The software automatically
LVS-95XX Series Barcode Quality Station Operations Manual - English Page 29 of 94
Page 30

LVS-95XX Series Barcode Quality Station Operations Manual
Application Standards
An Application standard is a specific protocol established by a group or industry, such as the military,
hospitals, FDA, etc. Currently, the LVS-95XX Series supports the following Application standards:
AIAG / JAMA / JAPIA / ODETTE
ALDI
AS9132-A / AIM DPM Cat 0
Automatic GS1 or ISO (read important note below)
Chinese Sensible (Han Xin) Code
DHL
FPMAJ
French CIP
GS1 Data Matrix including NHRN
GS1 General Specifications
GS1 (NTIN)
GS1 1D Report.doc and
GS1 2D Report.doc (requires the use of Microsoft®
Word).
GS1 1D Report.doc and GS1 2D Report.doc are the
default custom reports. You can create your own
custom report(s) by following the steps outlined in
Appendix G: Special Features (refer to the section
entitled “Custom Reports”).
IMPORTANT: When the “Postal (Intelligent Mail, PostNet, Japan Post)” Application
Standard is selected, the “SRP View” tab name changes to “Bar details” to provide an
analysis report of the postal barcode.
HDMA Guidelines
HIBC
IFAH
ISO/IEC 15415/15416
Italian Pharmacode
Japanese Codabar
Laetus Pharmacode
MIL-STD-130
Miniature Pharmacode
Multi-rotation Data Matrix
Multi-rotation QR Code
Postal (USPS IMB/Code 128, PostNet,
Japan Post)
PPN Code
PZN-big, normal, small (German
Pharmacode)
PZN8
IMPORTANT note about Automatic GS1 or ISO Application standard: When selecting the Automatic
GS1 or ISO standard, the following message appears. You must read the message, enter OK in the text
field, and then click OK.
The above Application standards vary according to specific industry norms. Failure to use the correct
standard causes the final grade to be incorrect. When no Application standard is specified, the ISO/IEC
15415/15416 should be used.
LVS-95XX Series Barcode Quality Station Operations Manual - English Page 30 of 94
Page 31

LVS-95XX Series Barcode Quality Station Operations Manual
Selecting an Application Standard
1. Select an Application standard from the drop-down box, or click the Configure available standards
button to view the entire list of Application standards.
An application standard can be selected at any time by using the application standard shortcut keys. See
the section below entitled “Application Standard Shortcut Keys” for more information on using application
standard shortcut keys.
The Application standards appearing in the drop-down list are the standard s marked Yes in the main
Application standards window; this window appears a fter clicking the Configure available standards
button (see next step for more information about this feature).
2. If you select the Configure available standards button, select the Yes checkbox for each desired
Application standard. Each selected Application standard appears in the Application standards dropdown list.
Clicking the Available column header toggles all Application standards between Yes or No o ptions.
Use the scroll bar to view additional
Application Standards.
Additional Application Standards
3. Click OK to save your changes or Cancel to discard your changes.
LVS-95XX Series Barcode Quality Station Operations Manual - English Page 31 of 94
Page 32

LVS-95XX Series Barcode Quality Station Operations Manual
Application Standard Shortcut Keys
The application standard currently in use is displayed in the title bar (see below). To use a different
application standard, you can click the “Setup” tab and select an application standard from the “Application
Standards” drop-down box, or use the keyboard shortcut keys listed in the table below to change application
standards from any tab or screen. The application standards listed in the table below are the default
assigned shortcut keys. See the “Application Standard Shortcut Keys” section in “Appendix G: Special
Features” for instructions on assigning a shortcut key to an application standard or reassig ning the default
shortcut keys listed below. Appendix G is not included in this manual; it is included on the installation flash
drive that arrives with your LVS-95XX system.
Note: If a sector is drawn on the “Grading” tab and you wish to change application
standards, use the application standard shortcut key to switch application stand ards.
The verification results are automatically updated using the new application standard.
The title bar displays the current application standard. This
example shows “GS1 General Specifications” as the application
standard in use.
Default Shortcut Keys
Shortcut Key Application Standard
SHIFT+A Automatic GS1 or ISO
After pressing SHIFT + A, the “Confirm Automatic GS1 or ISO” message
appears. You must read the message, type “OK” in the text field, and then click
the “OK” button to proceed.
SHIFT+F FPMAJ
SHIFT+G GS1 General Specifications
SHIFT+I ISO/IEC 15415/15416
SHIFT+P Postal (Intelligent Mail, PostNet, Japan Post)
SHIFT+U USPS Code 128
LVS-95XX Series Barcode Quality Station Operations Manual - English Page 32 of 94
Page 33

LVS-95XX Series Barcode Quality Station Operations Manual
Override Aperture
ISO 15415 and ISO 15416 outline rules regarding what aperture should be used based on symbology and
cell size / x-dimension. ISO 15415 and ISO 15416 also state that apertures can be overridden by an
Application Standard and that the Application Standard rules shall take precedence over the ISO standard s .
While the LVS-95XX Series supports a number of common Application Standards, it is conceivable that an
aperture other than those stated either in the ISO standards or the supported Application Standards may be
desired.
If an Application standard other than those specified is desired, you may override the aperture by clicking the
Override aperture checkbox. Enter the diameter of the aperture expressed in one thousandths of an inch
(.0254 mm); use this value even when using metric. If the aperture has been overridden, a clear warning is
displayed on the Grading screen as well as on the Grading Report.
Creating Custom Reports
GS1 1D Report.doc and GS1 2D Report.doc are the default custom reports. You can create your own
custom report(s) by following the steps outlined in Appendix G: Special Features. Refer to the section
entitled “Custom Reports.”
Appendix G is not included in this manual; it is included on the installation flash drive that arrives with your
LVS-95XX system.
Current Information
The top-right of the Setup Tab screen contains a box of information indicating the local time of day, date,
Greenwich Mean Time (GMT), and time zone.
GMT is defined as the local time at the 0 meridian passing through Greenwich, England and is the sa me as
UT (Universal Time). GMT remains the same throughout the year and does not change in the Spring or
Autumn. This information is attached to all Calibration Reports.
Change the Time Zone:
• Minimize the LVS-95XX screen and right click on the time box at the lower right corner of the computer
screen.
• Choose Adjust Date/Time.
• Click the Time Zone tab and change the time zone to the correct time zone.
• Push the Apply button.
LVS-95XX Series Barcode Quality Station Operations Manual - English Page 33 of 94
Page 34

System Settings
LVS-95XX Series Barcode Quality Station Operations Manual
Minimum Passing Score
There is a PASS/FAIL mode of operation used to simplify barcode verification (this is explained in more
detail in the section entitled Pass / Fail ISO Grading in the Grading Tab section). This is where the
minimum passing score is selected.
Days before password expires
Use the arrow keys to select the number of days before the current password expires. As soon as you use
the arrow keys, the checkbox will automatically be enabled.
Minutes before auto logoff
An automatic “Logoff” feature is set by clicking on the box and then choosing a period of time desired to
make the system automatically log off after that period of time. Choosing n/a causes this feature to be turned
off.
Days before calibration needed
It is important to calibrate the system over a period of time. This feature sets up the desired number of days
between system calibration. When the period of time has been reached, the software will not allow you to
continue until calibration has been completed.
Allow Non-ISO blemish to affect grade
If this option is not checked, a barcode where many lines are not decodable will not be penalized since the
ISO standard does not mandate how long decoded lines should be handled.
If this option is checked, non-decoded lines will degrade the overall ISO grade.
LVS-95XX Series Barcode Quality Station Operations Manual - English Page 34 of 94
Page 35

LVS-95XX Series Barcode Quality Station Operations Manual
Metric
The Metric option allows you to choose between measurements being reported in inches o r metric units
(mm/microns).
Quiet zone processing
The Quite Zone for a linear (1D) code is a clear space preceding the start character of a barcode symbol
and a clear space following the stop character. The quite zone for a two-dimensional (2D) code is a clear
region (free of markings or text) surrounding the 2D symbol’s finder patterns (finder patterns allow the
symbol’s location and orientation to be determined). Quiet zones are part of the barcode and the appropriate
quiet zone space is required to verify a barcode.
The QRCode > 1X option toggles the quiet zone processing between 1X (where X is the nominal cell width)
and greater than 1X depending on the QR symbol being graded. The QRCode > 1X option is disabled
(unchecked) by default indicating the quiet zone for a QR code is one cell width around the perimeter of the
finder patterns.
When checked, the LVS-95XX software uses 2X (two cell widths around the perimeter of the finder patterns)
as the quite zone for Micro Code QR symbols and 4X (four cell width) as the quite zone for Q R co de
symbols. ISO/IEC rules state 2X and 4X are the quiet zone requirements for Micro QR Code and QR Code
respectively. Checking the QRCode > 1X option ensures ISO/IEC quiet zone compliance for QR Code and
Micro QR code.
Example Linear (1D) Barcode Quiet Zones
Quiet
Zone
Start
Character
Quiet
Zone
Stop
Character
LVS-95XX Series Barcode Quality Station Operations Manual - English Page 35 of 94
Page 36

LVS-95XX Series Barcode Quality Station Operations Manual
Example Two-Dimensional (2D) Quiet Zones
Finder Patterns
Quiet zone when the
“QRCode > 1X” option is
disabled (unchecked)
indicating the quiet zone
is 1X (one cell width)
around the perimeter of
finder pattern.
the
1X Quiet Zone
When the “QRCode > 1X”
option is enabled (checked),
the quiet zone required is 4X
(four cell widths) for QR Code
symbols.
4X Quiet Zone for QR Code symbol
LVS-95XX Series Barcode Quality Station Operations Manual - English Page 36 of 94
Page 37

LVS-95XX Series Barcode Quality Station Operations Manual
Reference
You can choose to add a reference number to a final verification report by entering a number in this box,
such as a Job Number, Control Number, Purchase Order Number, etc; this allows you to sort results by
reference.
A reference number can also be entered in the Login box when a user logs onto the system. T he last
updated Reference field overrides the secondary Reference field. For example, a user updating the
Reference field in the Login box overrides the reference number entered on the Setup tab screen.
Additional Reference
The Additional Reference field is a place to tag verification events with additional information if desired. The
information entered in this field will print on the report and be available in the database if the grading results
are revisited in the future. An example may be a user who processes multiple rolls for a particular job. In this
example, the user might choose to place the job name in the “Reference” field and the roll number in the
“Additional Reference” field.
Company Name on Reports
This feature gives you the ability to place your company name on all final verification reports. Delete the
default company name from the field and type in your company name.
Setup Operators
Many national and international standards stipulate that the operator of a verification system must be
identified in order for the verification process to be valid. To set this up, push the Setup operators button.
The administrator of the system can now choose to add, delete, or change an operator’s name and
password.
A password must have a minimum number of 8 characters and must contain at least (1) alpha cha ra cter a nd
(1) numeric character.
This is also where the administrator of the system choose s which operators have permission to perform the
listed tasks. Be sure to push the OK button when you are finished entering new users or updating levels of
permissions. Following is a list of permissions and descriptions:
LVS-95XX Series Barcode Quality Station Operations Manual - English Page 37 of 94
Page 38

LVS-95XX Series Barcode Quality Station Operations Manual
Permission Description
Allow Add/Change operator
Allows the administrator to assign Permission levels for all other system
users. All new systems are shipped with the User Name and Password
set to admin.
Allow Calibration Allows the operator to calibrate the system.
Allow Change Setup Options
Allows the operator access to set any of the Setup Tab screen
parameters.
Allow Pass / Fail ISO
On the Grading Tab, there is a section entitled ISO Grading in which you
can choose between Full or Pass/Fail. This permission allows the user to
set different Pass / Fail levels. For more information, refer to the section
entitled Pass / Fail ISO Grading in the Grading Tab section.
Allow Full ISO
On the Grading Tab, there is a section entitled ISO Grading in which you
can choose between Full or Pass/Fail. This permission allows the user to
set different Pass / Fail levels. For more information, refer to the section
entitled Pass / Fail ISO Grading in the Grading Tab section.
Allow Create or Edit App
This feature is enabled only with a purchase upgrade.
Allows the user to create or edit special features, such as allowing the
user to verify multiple barcodes simultaneously within the field of view.
See the Optional Features – Multi-Barcode Verification section for
more information.
Allow Change Archive File
Allows the user to change the backup database file located on the
Archive Tab.
Product Lookup
The Product Lookup button is a product identification feature that allows you to enter a product code and
description into a database table that reports the information each time the software decodes that string of
data.
The Product Identification Data appears below the barcode data on the Grading Tab screen. The software
groups this data within special characters < and >.
The software is setup to accept manual entry of data and the ability to import a CSV (comma separated
values) file. The first field contains the barcode data and the next field contains its description.
LVS-95XX Series Barcode Quality Station Operations Manual - English Page 38 of 94
Page 39

LVS-95XX Series Barcode Quality Station Operations Manual
Distributor Information
The Distributor Information button allows the distributor of this LVS-95XX system to enter his/her name,
address, and phone number so that it appears on the Final Verification Report.
Optional Features
This section allows you to select your preferred verification method and to activate optional features.
List of Options
Select “Single sector verification (normal)” or “Multiple sectors verification” from the drop-do wn list.
• The “Single sector verification (normal)” option is the default option.
• “Multiple sectors verification” allows you to verify multiple barcode images in the field of view at the same
time. This feature is an upgraded feature and is an additional cost to customers. Multiple sectors
verification steps are outlined in “Appendix G: Special Features.” Contact Microscan or a Microscan
distributor for more information.
Optional Features Activation
Click this button to view a list of optional features and the status of each feature:
Available options include:
Feature Function Status
LVS-95XX base product Initial activation of software.
Custom applications (multisector)
Automatic Login
Allows you to draw multiple sectors at one
time on the Grading Tab screen.
Allows you to log on to the LVS-95XX
without entering an Operator ID and
Password. This feature voids 21 CFR Part
11 compliance.
Change Password
Click the “Change Password” box to change a password.
This feature is enabled by
default.
This feature is enabled
only with purchase
upgrade.
This feature is enabled
only with purchase
upgrade.
LVS-95XX Series Barcode Quality Station Operations Manual - English Page 39 of 94
Page 40

LVS-95XX Series Barcode Quality Station Operations Manual
Calibration Tab
The Calibration tab is where the calibration of the system occurs.
One of the following two Calibrated Conformance Standard Test Cards were supplied with your LVS-95XX
system. The test card you receive depends on your field of view.
• GS1-128
• EAN/UPC Symbol Verifiers
The Calibrated Conformance Standard Test Cards are used to certify that the system is calibrated according
to the ISO/IEC 15416:2000(E) and is traceable to NIST standards. It is specially printed to have certain
reflective values. The LVS-95XX system recognizes only these cards for calibration.
The upper left corner of the Calibration Tab screen shows the date/time stamp that is placed on an internal
log designed to archive all calibration activities. It lists a date/time stamp along with the person who
performed the calibration. This report can be viewed or printed. The log is a “read-only” file and cannot be
altered or deleted. To view the calibration log, go to the Archive Tab screen. Clicking the Print button prints
a copy of this screen.
LVS-95XX Series Barcode Quality Station Operations Manual - English Page 40 of 94
Page 41

LVS-95XX Series Barcode Quality Station Operations Manual
Calibrate the System
1. To calibrate the system, click the Calibration tab. A Login pop-up window appears prompting for a user
name and password. Enter your user name and password, and then click the OK button.
If the user has not been granted permission rights to calibrate the system, an error message appears
indicating that the user is not able to access the Calibration tab.
2. Locate the Calibrated Conformance Standard Test Card assigned to your system. Choose o ne of the
Master Grade barcodes and place it so the blue line goes through the middle of the PASS portion of the
barcode. The blue line helps you align the calibration label to the field of view; it does not mean that only
one line is being used to calibrate the system.
3. After placing the calibration card in position, check to be sure the goal values match the values printed
on the calibration card. If they do not match you have the wrong calibration card for the system or you
have to change the goal values. See section “Replacement of Calibrated Conformance Standard Test
Card.”
LVS-95XX Series Barcode Quality Station Operations Manual - English Page 41 of 94
Page 42

LVS-95XX Series Barcode Quality Station Operations Manual
When using the LVS-9510 with a 5.0 megapixel (MP) camera, the border around the image view box
turns yellow when placing an image in the field of view. A yellow border indicates that a lower
resolution image is being used to easily adjust the image to its ideal position. When the ideal position
is located, stop moving the image. When no motion is detected in the field of view, the image view
box border turns cyan/aqua indicating that a higher resolution image is being used for barcode
grading.
LVS-95XX Series Barcode Quality Station Operations Manual - English Page 42 of 94
Page 43

LVS-95XX Series Barcode Quality Station Operations Manual
EAN/UPC Calibrated Conformance Standard Test Card
The Calibration Test Card is used to calibrate the light source to a known level of white and black. There
cannot be any other item in the field of view when calibration takes place. Failure to comply with these
instructions will distort the final verification grade.
GS1-128 Calibrated Conformance Standard Test Card
To correctly calibrate, the Calibration Test Card must be flat. Use magnets or weights, if necessary, to hold
the card down flat. The magnets or weights must not appear in the field of view.
The image may appear too light or too dark; this is to be expected. Please do not attempt to make any
adjustments on the lens assembly; it has already been set at the factory and does not require adjustment.
The software automatically adjusts to the proper brightness level.
4. Press the Calibrate button. The system begins the calibration process. The calibration result could be either
of the following:
• Calibration OK: Calibration is correct and the system is ready to use. You can recalibrate if you like,
but the new values are very close to the existing ones.
• Calibration Failed: The system is too dark or too bright for calibration. When this message is displayed,
try to calibrate again. It may be necessary to recalibrate a couple of times as the software is trying to
adjust to the current ambient light conditions. Be sure there is no direct light shining on the viewing
stage. If the message “Unable to Calibrate” continues to be reported, call Microscan.
LVS-95XX Series Barcode Quality Station Operations Manual - English Page 43 of 94
Page 44

LVS-95XX Series Barcode Quality Station Operations Manual
Calibrated Conformance Standard Test Card Preventive
Maintenance Instructions
Place the Calibration Test Card in a clean place and away from direct sunlight. If the test card is nicked,
soiled, or damaged in any way, it must be replaced. Contact Microscan or your Microscan representative to
obtain a new Calibration Test Card.
Calibration Test Cards are valid for two years from the date entered in the “Date issued” field on the Test
Card. Valid test cards are required to obtain accurate grading results.
Each calibration card has been tested by a NIST traceable test device and the values for Decodability,
Contrast, Modulation and Rmax are recorded on the card.
Enter Test Card Parameters for a Replacement Card
• Click the Enter test card parameters button on the Calibration Tab screen. Click the OK button when
a warning box appears.
• Enter the values for Decodability, Contrast, Modulation and Rmax in the gold fields located under the
column entitled “Actual.”
• Place the new Test Card into the field of view and push the Calibrate button. If calibration fails, push the
Calibrate button again. If calibration fails repeatedly, call Microscan.
LVS-95XX Series Barcode Quality Station Operations Manual - English Page 44 of 94
Page 45

LVS-95XX Series Barcode Quality Station Operations Manual
Data Matrix Calibrated Conformance Test Card
The ISO/IEC Data Matrix and GS1 Data Matrix Calibrated Conformance Test Card was developed as part of
the overall development of the “2D Judge”; IT IS NOT A CALIBRATION CARD. The purpose of the card is
to “verify the verifier” in order to prove that the verifier correlates with the results reported by the “2D Judge”
within the tolerances stated in ISO 15426-2.
The purchase of the Data Matrix Calibrated Conformance Test Card is optional. If you wish to purchase a
card, please contact Microscan or a Microscan representative.
IMPORTANT: Please read the document entitled “Read Me First” included with the Data
Matrix test card as it provides detailed instructions about the test card.
Purchased cards are certified for up to 2 years from the “in service” date and no more than 4 years from the
“date processed”, both of which are shown on the card.
ISO/IEC Data Matrix and GS1 Data Matrix Calibrated Conformance Test Card
LVS-95XX Series Barcode Quality Station Operations Manual - English Page 45 of 94
Page 46

LVS-95XX Series Barcode Quality Station Operations Manual
Grading Tab
Because parameters are different for each of the families of codes, please refer to the separate sections that
follow in this manual.
Section 1: 1D Codes
The Grading tab is divided into the following sections:
1. Overall Grade
2. ISO Grading
3. View
4. Grade bar graph
5. ISO/IEC Parameters
6. Blemish (Blemish is not an ISO grade and is for informational purposes only).
Each section is described in the following pages.
LVS-95XX Series Barcode Quality Station Operations Manual - English Page 46 of 94
Page 47

LVS-95XX Series Barcode Quality Station Operations Manual
1. Overall Grade
The Overall Grade box represents the final results obtained from all the data listed on the screen. Options
include:
• Auto checkbox: Selecting this option automatically sends the Grading report to the default printer each
time a new barcode is graded.
• Print Button: Clicking this button sends the Grading report to the default printer.
Right-click on the Print button to view an HTML version of the Verification report. The HTML version
can be saved as a PDF file by downloading free PDF convertor software from the Internet to the
computer.
If PDF convertor software is downloaded to the computer, follow the steps below:
1. Click File, and then Print from the Verification report.
LVS-95XX Series Barcode Quality Station Operations Manual - English Page 47 of 94
Page 48

LVS-95XX Series Barcode Quality Station Operations Manual
2. Select the PDF generator from the list of printers, and then click Print.
3. In the Save in field, click a location where you want to save the file, and then click Save. The report is
generated and saved as a PDF file.
LVS-95XX Series Barcode Quality Station Operations Manual - English Page 48 of 94
Page 49

LVS-95XX Series Barcode Quality Station Operations Manual
2. ISO Grading
Two ways to verify a barcode include:
• Full – Select this option to analyze a barcode in detail. This option displays the ISO parameters in detail.
• Pass/Fail – Select this option if you are not interested in the detailed analysis of the barcode. This option
indicates whether the barcode meets your company’s minimum ISO grade requirements. In other words,
this option indicates whether the barcode is good or bad.
A PASS and FAIL screen is displayed instead of the ISO parameters.
The minimum passing score for Pass / Fail is set up via the Minimum passing score parameter on the
Setup tab. Changes to the grade can be restricted by unchecking the Allo w Change Setup Options box
under Setup Operators for each operator.
LVS-95XX Series Barcode Quality Station Operations Manual - English Page 49 of 94
Page 50

LVS-95XX Series Barcode Quality Station Operations Manual
3. View Box
To better understand where a print quality problem is located, the software is designed to superimpose a
color mark at the position of the problem. At the bottom right of the Grading Tab screen is a chart indicating
what the different colors indicate.
There are 4 parameters that can be highlighted: Contrast, Modulation, Decodability and Defects. Click on the
desired parameter.
Within the View Box there are two additional features that can be checked: OCR and Zoom (see next pages
for additional information).
LVS-95XX Series Barcode Quality Station Operations Manual - English Page 50 of 94
Page 51

LVS-95XX Series Barcode Quality Station Operations Manual
OCR (Human Readable Character Check)
This system is capable of verifying the Human Readable portion of a barcode. To check the human readable
characters, right-click on the mouse and draw a green box around the human readable characters. If it
matches the decoded barcode information, the software reports a “Match”.
Draw a green box around the
human readable characters. The
green box is used to identify which
OCR characters are to be validated.
The system supports OCR-A, OCR-B, Times New Roman, Arial, Courier, and most Sans-serif fonts. Upper
case only. Special characters are not supported.
If the software cannot read the characters correctly, place the mouse cursor above the words “Human
Readable”, circled in blue in the lower right of the image above, and single-click. A field with the heading
“Human Readable” – also circled in blue in the image above – will appear above the captured image and to
the left of the “Overall grade” area. The “Human Readable” field will show the characters that fall within the
green box you have drawn on the captured image. Since the software was unable to read the characters, it
would have no idea if the characters were alpha or numeric. Thus, the software shows the user both alpha
and numeric data.
The human readable of a barcode can be checked most of the time provided the characters do not touch
each other. The characters must also be large enough to read and in a straight line. The system is limited to
reading up to 24 characters.
The software reports a “match” if the
human readable characters match
the decoded barcode information.
LVS-95XX Series Barcode Quality Station Operations Manual - English Page 51 of 94
Page 52

LVS-95XX Series Barcode Quality Station Operations Manual
Zoom
The Zoom option allows you to view small labels. The screenshots below show labels with the zoom turned
off and on.
Zoom Turned OFF:
Zoom Turned ON:
LVS-95XX Series Barcode Quality Station Operations Manual - English Page 52 of 94
Page 53

LVS-95XX Series Barcode Quality Station Operations Manual
4. Grade Bar Graph
To the right of the barcode image is a graph representing the ISO grade for every scan line. It is called the
Grade Bar Graph and displays whatever ISO parameter is checked in the View section. For 1D symbologies,
there are 4 parameters to choose from: Contrast, Modulation, Decodability, and Defects. This helps you to
identify what parts of the barcode have quality issues. The color refers to the grade in terms of the legend on
the bottom right of the screen.
The Grade Bar Graph displays line-for-line grade information for every line of the bar height. If there is no
color code indicated for a specific line, then the line was not decodable. This would be counted as a blemish.
Grade bar graph
Bar Height Measurement
The method of determining the height of a barcode is based on the number of lines decoded within the
height. The software takes the first decoded line and decodes all lines until the end of the barcode; and,
because we know the size of one pixel, the height of the barcode can be calculated. If some lines either at
the top or bottom of the sector could not be decoded, the height calculation will be incorrect.
LVS-95XX Series Barcode Quality Station Operations Manual - English Page 53 of 94
Page 54

LVS-95XX Series Barcode Quality Station Operations Manual
5. ISO/IEC Parameters Section
This section lists all of the measured parameters individually. These parameters are used to determine why
a barcode has a certain grade. There are numerous parameters listed, dependin g on the symbology. Use
the scroll bar to view the entire list of parameters.
At the top of this section is an information box that displays the decoded data. This data does not contain
any stop, start, or control (non-printable) characters. Check digits may or may not be displayed depending on
the symbology. For example, Code 128 mandates that they not be transmitted. The software always displ ays
the check digit for symbologies that make the transmission of check digits optional. To see special
characters or check digits, refer to the Structure tab chapter covered later in this manual.
Below the encoded barcode data, but still within the information box, is a Product Identification name for all
UPC-A, UPC-E, EAN-8 and EAN-13 barcodes that are contained within the Product Identification data file
(see Setup Tab | System Settings | Product Identification (Lookup) File for more information).
Decoded data
List of
parameters
LVS-95XX Series Barcode Quality Station Operations Manual - English Page 54 of 94
Page 55

LVS-95XX Series Barcode Quality Station Operations Manual
6. Blemish (Non-ISO Parameter)
A blemish error is defined as any mark or artifact that destroys the decode on any part of the barcode
symbol.
Within the ISO/IEC parameters box, there is a Blemish measurement. Although a blemish error is not
considered to be a part of the ISO standards, it is an extremely useful tool when troubleshooting printing
problems. The Blemish parameter is not figured into the Overall grade unless the Allow non-ISO blemish to
affect grade feature is checked on the Setup Tab screen.
A Blemish is also a measurement of bar height consistency. Be sure to position the blue box so that it
represents the actual height of the barcode image.
A blemish can only be measured where there are decodable lines above and be low the offending mark.
Screenshot with the Allow non-ISO blemish to affect grade feature checked:
Warning message that appears when the Allow non-ISO
blemish to affect grade feature is checked.
LVS-95XX Series Barcode Quality Station Operations Manual - English Page 55 of 94
Page 56

LVS-95XX Series Barcode Quality Station Operations Manual
Blemish
Screenshot with the Allow non-ISO blemish to affect grade feature NOT checked:
Other Grading Screen Tools
Warning message that
appears when the
Allow non-ISO
blemish to affect
grade feature is NOT
checked.
Opacity
A barcode must be verified under the same conditions as its final configuration when possible. If the
barcode is printed on a media having low opacity (meaning the substrate is transparent or translu ce nt),
perform the verification with the symbol on a dark surface (if the final configuration will be dark) or a light
surface (if the final configuration will be light). Attempt to match the final configuration as closely as possible.
• For LVS-9500 systems: Place a sheet of paper the color of the final configuration (e.g. white, black,
etc.) on the viewing stage then place barcode on top of the paper. This will simulate the final
configuration and allow the LVS-95XX software to produce verification results that will closely match the
expected final reading conditions.
• For LVS-9505 or 9510 (desktop) systems: Place the barcode on the viewing window then place a
sheet of paper the color of the final configuration (e.g. white, black, etc.) on top of the barcode This will
simulate the final configuration and allow the LVS-95XX software to produce verification results that will
closely match the expected final reading conditions.
• For LVS-9570 (hand-held) systems: Place a sheet of paper the color of the final configuration (e.g.
white, black, etc.) on a flat surface then place barcode on top of the paper. This will simulate the final
configuration and allow the LVS-95XX software to produce verification results that will closely match the
expected final reading conditions.
LVS-95XX Series Barcode Quality Station Operations Manual - English Page 56 of 94
Page 57

LVS-95XX Series Barcode Quality Station Operations Manual
Color Codes
The system reports ISO/IEC grades by a color code. The bottom right of the Grading Tab screen shows a
legend of these color codes which correspond to the ISO/ANSI grading system. This color code is also used
on the SRP View Tab screen.
Height and Width Measurement
Any time the mouse is held down to draw a sector, the bottom of the screen displays the actual
measurement of the sector being drawn. This helps to measure the height and width of the actual barcode.
This measurement is not a measurement of the barcode; it is a measurement of the box being drawn.
Measurement of the box
being drawn.
LVS-95XX Series Barcode Quality Station Operations Manual - English Page 57 of 94
Page 58

LVS-95XX Series Barcode Quality Station Operations Manual
Barcode Too Wide for Field of View (Stitching Feature)
The Stitching feature is used to grade barcode labels that are too wide for the field of view. Follow the
instructions below to use the Stitching feature.
The entire process of stitching a label requires the user to correctly align the images being stitched. Failure
to correctly align the labels results in the barcode being graded poorly. When in doubt, perform the stitching
process again. The stitching feature does not work for all barcodes
1. Activate the Stitching feature by pressing the [Ctrl + S] keyboard buttons at the same time; the screen
changes as shown in the screenshot below.
LVS-95XX Series Barcode Quality Station Operations Manual - English Page 58 of 94
Page 59

LVS-95XX Series Barcode Quality Station Operations Manual
2. Adjust the image so the left edge of the linear barcode is visible and leave enough space for the left quiet
zone.
3. Line up the top of the barcode to the blue line; this can be done by positioning the barcode itself or by
clicking on the blue line with your mouse.
4. Press the “Add” button; the resulting image appears in the top, left corner of the screen.
You will also notice a blue line and a dotted red line; these lines are tools used for barcode alignment
purposes. The goal is to keep the barcode image perfectly straight. Always keep the bars perpendicular
to the blue line and keep the top of the barcode aligned to the same blue line.
LVS-95XX Series Barcode Quality Station Operations Manual - English Page 59 of 94
Page 60

LVS-95XX Series Barcode Quality Station Operations Manual
5. The onscreen instructions prompt you to slide the label so that the same information appears under both
dotted red lines; this is where the label is to be spliced.
Notice in the screenshot below that the “0” (which is part of the human readable characters) is positione d
over the red line on the top image as well as on the bottom image. Also notice that the top of the barcode
is still perfectly aligned to the blue line. When done, click the “Add” button.
6. The stitched image appears at the top of the screen. The red line shifts over to a new position and you
are now prompted to move the label over to its new stitching position.
The screenshot below shows that the new position is located after the number “2” human readable
character.
LVS-95XX Series Barcode Quality Station Operations Manual - English Page 60 of 94
Page 61

LVS-95XX Series Barcode Quality Station Operations Manual
7. In the screenshot below, the label has been moved to its proper stitching position. Notice that the bottom
image is aligned to the red line in the same position as indicated in the stitched image. Also notice that
the bottom image barcode continues to be aligned perfectly to the blue line.
When done, press the “Add” button.
8. In the screenshot below, the right end of the barcode appears along with the appropriate space for a
quiet zone, indicating that no additional stitching is required. Press the “Ok” button.
LVS-95XX Series Barcode Quality Station Operations Manual - English Page 61 of 94
Page 62

LVS-95XX Series Barcode Quality Station Operations Manual
9. The Grading screen appears and the stitched image is graded automatically.
10. When the Stitching feature is complete, the LVS-95XX software automatically turns off the camera;
however, the camera must be turned back on. To turn on the camera, click the “Setup” tab and click “On”
within the “Camera” section.
LVS-95XX Series Barcode Quality Station Operations Manual - English Page 62 of 94
Page 63

LVS-95XX Series Barcode Quality Station Operations Manual
Section 2: Matrix Codes
The LVS-95XX system verifies the following matrix codes:
• Data Matrix ECC 200 (both square and rectangular symbols)
• QR Code
• Micro QR Code
• Aztec Code
• Chinese Sensible (Han Xin) Code
• MaxiCode
Verify a Matrix Code
Place the code into the field of view and draw a blue square around the image by clicking the mouse and
holding it down (see above image). There should not be any other marks or characters within this quiet zone.
The code can be placed at any desired angle.
View Section
At the top center of the Grading Tab screen is the View box. There are 5 features available for Data Matrix:
Overall Grade, Defects, Zoom, OCR, and Modulation.
1. Overall Grade
The system is defaulted to show the Overall Grade.
2. Defects
This feature indicates cells that are the wrong side of the global threshold (i.e. a cell intended to be white is
interpreted as black; a cell intended to be black is interpreted as white. The software also detects cells that
LVS-95XX Series Barcode Quality Station Operations Manual - English Page 63 of 94
Page 64

LVS-95XX Series Barcode Quality Station Operations Manual
are not in the correct spot or have a blemish. When this occurs, error correction is used and causes the
software to highlight the cells in red where error correction was applied.
3. Zoom
Data Codes are often very small. The Zoom feature is used to magnify the image for easier visual inspection.
If the Zoom feature, along with either the Modulation, Defects, or OCR feature, are checked and a
Verification Report is printed, the thumbnail view on the report shows the results in color according to the
legend at the bottom of the screen.
LVS-95XX Series Barcode Quality Station Operations Manual - English Page 64 of 94
Page 65

LVS-95XX Series Barcode Quality Station Operations Manual
4. OCR
To check the human readable characters, right-click on the mouse and draw a box aroun d the human
readable characters; the box appears in green. The software reports a “match” if it matches the decoded
barcode information.
The system supports OCR-A, OCR-B, Times New Roman, Arial, Courier, and most San-serif fonts. Upper
case only. Special characters are not supported.
The human readable of a barcode label can be checked most of the time provided the characters do not
touch each other. The characters must also be large enough to read and in a straight line. The system is
limited to reading up to 24 characters.
5. Modulation
To view a modulation error, click the Modulation option. It is recommended to activate the Zoom button
along with the Modulation button so that the image is large enough to view the details.
When viewing Modulation errors, the software may use a “yellow” mark. A yellow mark indicates that the
Modulation measurement for that cell was less than 20 percent. In fact, what should have been black or
white was actually measured to be the opposite of what it should have been.
LVS-95XX Series Barcode Quality Station Operations Manual - English Page 65 of 94
Page 66

LVS-95XX Series Barcode Quality Station Operations Manual
Multi-Rotation Codes
DataMatrix
If Multi-Rotation Codes is selected as the preferred Application standard on the Setup Tab screen, you are
prompted to rotate the code after drawing the box. Ensure that the box is large enough to accommodate the
symbol at all rotation angels. An overlay will assist you to place the symbol at the desired angle; it consists of
a solid “L” and a dotted “L.”
• The solid portion represents the “L” finder pattern
• The dotted portion represents the opposite clock tracks
IMPORTANT: When using a DataMatrix code, the “SRP View” tab name chan ges to “2D
Analysis;” this is because the “SRP View” tab is for analysis of 1D codes only.
The “2D Analysis” tab displays the “LVS-95XX 2D Analysis Report.”
LVS-95XX Series Barcode Quality Station Operations Manual - English Page 66 of 94
Page 67

LVS-95XX Series Barcode Quality Station Operations Manual
QR Code
For correct placement for QR Code, position the finder patterns on the blue dots.
After grading all five rotations, a report appears showing the average grade of all rotations.
To view the individual details for each angle of rotation, click the Archive tab | Recent reports (last 30
days).
LVS-95XX Series Barcode Quality Station Operations Manual - English Page 67 of 94
Page 68

LVS-95XX Series Barcode Quality Station Operations Manual
Section 3: Two-Dimensional Multi-Row Codes
The family includes:
• PDF 417
• Micro PDF 417
• GS1 Databar CC-A
• GS1 Databar CC-B
• GS1 Databar CC-C
Verify a PDF 417 or Micro PDF 417 Code
Place the symbol into the field of view squarely and with the right and left alignment bars positioned straight
up and down (see above image). The symbol can have no more than a 4-degree tilt. While placing the cursor
on the video image, hold down the mouse and draw a box around the barcode image; the box appears as a
blue box.
The system now reports its grade. There may be a few seconds delay in displaying the verification results
depending on how much data is encoded within the symbol.
PDF417 Parameters
There are a total of eight reported parameters. Use the scroll bar to view all of these parameters.
LVS-95XX Series Barcode Quality Station Operations Manual - English Page 68 of 94
Page 69

LVS-95XX Series Barcode Quality Station Operations Manual
GS1 Databar Composite Verification
The LVS-95XX system supports all GS1 Databar and GS1 Databar Composite codes:
• GS1 Databar Omnidirectional
• GS1 Databar Truncated
• GS1 Databar Stacked
• GS1 Databar Stacked Omnidirectional
• GS1 Databar Limited
• GS1 Databar Expanded
• GS1 Databar Expanded Stacked
• GS1 Databar – CCA, CCB, CCC
LVS-95XX Series Barcode Quality Station Operations Manual - English Page 69 of 94
Page 70

LVS-95XX Series Barcode Quality Station Operations Manual
Verify a Composite Code
A Composite code contains two basic sections: The 1D and 2D parts. Hold down the mous e button and draw
a blue box around the barcode image. Since there are reduced quiet zones for GS1 Databar, make the box
tight. Also, the barcode image must be square to the field of view. The symbol can have no more than a 4degree tilt.
IMPORTANT: Always position the barcode as close to the center of the field of view as
possible.
On the upper right side of the Grading Tab screen there are two boxes marked 1D and 2D. Choose which
section of the code you wish to view.
• The 1D section contains the linear or 1D verification data.
• The 2D section contains the composite portion of the code.
The box at the top of the screen shows the encoded data.
Note: Blemish percentage has been turned off for all GS1 Databar Composite codes.
Note: All Linear codes that require a composite code component require a linkage flag
indicating the requirement, with the exception of EAN-13, UPC-A and UPC-E. The GS1
Databar family of Linear codes have a linkage flag as part of the encodation method.
GS1-128 codes have a linkage flag based on a superfluous code set switch immediately
prior to the eternal, non-transmittable check digit.
LVS-95XX Series Barcode Quality Station Operations Manual - English Page 70 of 94
Page 71

Zoom Tab
LVS-95XX Series Barcode Quality Station Operations Manual
Select the
magnification level.
The position of
magnification
can be changed
by clicking on a
different
position.
To further evaluate the quality of barcode symbols, the Zoom Tab screen allows you to magnify the barcode
image up to four times.
The position of magnification can be changed by clicking to a different position on the image box located on
the upper left corner of the screen.
There are scroll bars located at the side and at the bottom of the screen that allow the user the ability to
change its horizontal and vertical position.
LVS-95XX Series Barcode Quality Station Operations Manual - English Page 71 of 94
Page 72

LVS-95XX Series Barcode Quality Station Operations Manual
SRP View Tab
To further evaluate a barcode error, you may wish to view the Scan Reflectance Profile (SRP). Select the
SRP View tab. The SRP is displayed for the selected area as determined by the blue line overlaying the
image of the barcode on the top left side of the screen.
You can look at the SRP for any part of the barcode by simply clicking on another part of the image in the
box located on the upper left corner of the SRP View Tab screen.
When the “Postal (Intelligent Mail, PostNet, Japan Post)” Application Standard is selected, the “SRP View”
tab name changes to “Bar details” to provide an analysis report of the postal barcode.
LVS-95XX Series Barcode Quality Station Operations Manual - English Page 72 of 94
Page 73

LVS-95XX Series Barcode Quality Station Operations Manual
When using a DataMatrix code, the “SRP View” tab name changes to “2D Analysis;” this is because the
“SRP View” tab is for analysis of 1D codes only. The “2D Analysis” tab displays the “LVS-95XX 2D Analysis
Report.”
LVS-95XX Series Barcode Quality Station Operations Manual - English Page 73 of 94
Page 74

LVS-95XX Series Barcode Quality Station Operations Manual
View Section
Under the View section, you can select what kind of error will be super-imposed onto the SRP graph. Rmax
and Rmin numbers are also displayed.
Options include:
• Element reflectance
• Modulation (EC = Edge Contrast)
If “Modulation” is selected, the modulation for each dark/white transition is displayed. The lowest
modulation for that scan line is displayed in red.
• Decodability (width of each element)
• Defects (inflection to element reflectance)
• Full screen waveform
• Traditional bar growth and shrinkage
The background of the SRP View Tab screen represents the bars and spaces of the actual barcode symbol.
The global threshold is also displayed.
The Up and Down arrows on the keyboard allow you to inspect every scan line. Each scan line is
approximately 0.05 mm (.002”) apart.
Full Screen Waveform
The Full Screen Waveform feature allows you to view the entire Scan Reflectance Profile at one time.
LVS-95XX Series Barcode Quality Station Operations Manual - English Page 74 of 94
Page 75

Click the
viewing box
to locate the
failure.
LVS-95XX Series Barcode Quality Station Operations Manual
Note: If a quiet zone failure occurs, click the viewing box to locate the failure. The SRP
window will show the actual quiet zone and required quiet zone.
Required
Quiet Zone
Actual
Quiet Zone
LVS-95XX Series Barcode Quality Station Operations Manual - English Page 75 of 94
Page 76

LVS-95XX Series Barcode Quality Station Operations Manual
Traditional Bar Growth and Shrinkage
Select this option to view bar growth and shrinkage information.
LVS-95XX Series Barcode Quality Station Operations Manual - English Page 76 of 94
Page 77

LVS-95XX Series Barcode Quality Station Operations Manual
Traditional Parameters Button
Click the Traditional parameters button to view a graphical representation of the barcode. After clicking this
button, the following page appears:
For Databar stacked symbols, this feature works independently for each row in the symbol. Click the row of
interest to view the traditional parameters for that given row.
The barcode size is measured in Mil or Micron units; this is determined by selecting English or Metric on the
Setup tab | System Settings section.
Note:
Mil - thousands of an inch (.001)
Micron (also known as micrometer) – 1 millionth of a meter
Options on this page include:
Option Description
Previous page Click this button to access the previous page.
Next page Click this button to access the next page.
Print Clicking this button prints the barcode parameters.
Save Clicking this button saves your changes. After clicking this button, enter
a file name and click the Save button.
All files are saved as delimited files using the vertical bar (|) as the
record separator.
Exit Clicking this button exits the screen. The SRP View Tab main screen
appears.
LVS-95XX Series Barcode Quality Station Operations Manual - English Page 77 of 94
Page 78

LVS-95XX Series Barcode Quality Station Operations Manual
Dimensional Analysis Button
Click the Dimensional analysis button to view the measurement of each bar and space in the barcode.
10-Line Grading Button
Because the LVS-95XX System uses camera-based technology, Microscan is able to analyze many lines
throughout the height of a code. The software averages all parameters for each line and reports the overall
grade as being the lowest of the averages of all parameters.
The 10-Line Grading button is available to mimic a laser-based or CCD-based verifier where only 10 lines
are assessed. These types of verifiers do not average each parameter; they simply average the overall
grade for each line.
Note: It is possible you may notice differences between the grades using the multiple line
grade (normal mode) and the 10-line grading method.
Print Button
Click the Print button to print the Scan Reflectance Profile (SRP). If a certain View is selected, the printer
creates a color-coded SRP.
LVS-95XX Series Barcode Quality Station Operations Manual - English Page 78 of 94
Page 79

Structure Tab
LVS-95XX Series Barcode Quality Station Operations Manual
Many companies and organizations throughout the world create barcode labels according to a set of rules
used to standardize how barcode data is to be structured in order to easily transfer trade-related information
between two parties. For the most part, these rules were created and governed by an international group
called ISO/IEC. These rules can be found in a publication entitled ISO/IEC 15434 and are commonly called
the syntax or semantics of the data.
Currently, the LVS-95XX system is capable of analyzing the data structure of all barcode symbologies. The
above example is for a GS1-128 barcode symbol.
Printing
• Click the Print button to send the report to a printer.
• To view an HTML image of the final Verification Report, right-click on the Print button. The HTML
version can be saved as a PDF file by downloading free PDF convertor software from the Internet to the
computer. See the “1. Overall Grade” section, within the “Grading Tab” section, for detailed
instructions on saving the HTML version as a PDF file.
LVS-95XX Series Barcode Quality Station Operations Manual - English Page 79 of 94
Page 80

LVS-95XX Series Barcode Quality Station Operations Manual
Use the Data Structure Analysis
1. Go to the Grading Tab screen and grade the target label as you normally would (certain labels have
two parts to their barcode: 1D (the linear part) and 2D (the composite part). The Data Structure
Analysis software analyzes only which part you have selected.
2. After a grade has been established, select the Structure Tab. The analysis will be completed
shortly.
Generally speaking, the Structure Tab screen is used by personnel who are familiar with Application
Identifiers and with data semantics. It is not the intention of this manual nor Microscan to educate an
operator how to translate the meaning of the structure analysis. It is only Microscan’s intention to divide
the information into sections in accordance with industry standards.
LVS-95XX Series Barcode Quality Station Operations Manual - English Page 80 of 94
Example of an EAN/UCC barcode label using an Application Identifier.
Page 81

LVS-95XX Series Barcode Quality Station Operations Manual
Data Structure Analysis Example
The above Figure is a screenshot of the Grading Tab verifying an EAN/UCC barcode label. The transmitted
encoded data is displayed in the upper right box. Clicking on the Structure Tab, the data is divided into its
data structural format.
Structure Tab showing the barcode data divided into its data structure format.
WARNING: The checking of Data Structure is complex and extensive. Microscan is
attempting to define all Data Structures but we may make an occasional error or may not
have a Data Structure defined that you require. If this is the case, please contact
Microscan and we will make the needed changes and/or additions in a future release of
the software. We thank you in advance for your help and cooperation.
LVS-95XX Series Barcode Quality Station Operations Manual - English Page 81 of 94
Page 82

Archive Tab
LVS-95XX Series Barcode Quality Station Operations Manual
The Archive tab allows you to view various reports and files (stored in an SQL-compatible database), and
perform certain database functions. Options include:
• Import Image from file
• Export Image to File
• Recent Reports (last 30 days)
• Delete prior to specific date
• Software Version history files
• Audit Trail Report
• Calibration Report (history)
• Reference Report
• Export reference data
• Change SQL connection
• Create backup database
• Browse Backup database
Each option is described in the sections below.
LVS-95XX Series Barcode Quality Station Operations Manual - English Page 82 of 94
Page 83

LVS-95XX Series Barcode Quality Station Operations Manual
Import Image from File
The “Import Image from File” button allows you to import a .bmp image into the LVS-95XX software for the
purpose of analyzing and troubleshooting the image. This feature is used for remote troubleshooting
assistance when an image needs to be analyzed by a Microscan technician or other employees inte rnal to
your company who also have an LVS-95XX system.
IMPORTANT: Only Bitmap (.bmp) files that have been exported from the LVS-95XX
software can be imported. See the next section entitled “Export Image to File” for more
information on exporting images.
To import an image:
1. Click the “Import image from file” button. The “Open” dialog box appears.
2. In the “Look in” list, click the folder that contains the image you want to import.
3. Click the image, and then click “Open.” The image appears on the “Archive” tab.
LVS-95XX Series Barcode Quality Station Operations Manual - English Page 83 of 94
Page 84

LVS-95XX Series Barcode Quality Station Operations Manual
4. Click the “Grading” tab and grade the barcode. All analysis tools perform the same as if the image was
taken live from the camera. The image below shows the camera switch located on the Setup tab screen.
WARNING: When loading an imported image, the LVS-95XX camera is automatically
turned “Off.” After work is completed with the imported image, the internal camera must
be manually turned back on. Go to the “Setup” tab and turn the camera back “On.”
LVS-95XX Series Barcode Quality Station Operations Manual - English Page 84 of 94
Page 85

LVS-95XX Series Barcode Quality Station Operations Manual
Export Image to File
The “Export Image to file” button is used for remote troubleshooting assistance when an image needs to be
analyzed by a Microscan technician or other employees internal to your company using a n LVS-95XX
system. Click this button to export an image, which can then be imported into another computer housing the
LVS-95XX software for the purpose of analyzing and evaluating the image. Images are exported as Bitmap
(.bmp) files.
To export an image:
1. Click the “Export image to file” button. The “Save As” dialog box appears.
2. In the “Save in” list, click the folder where you want to save the image. Then, click “Save.” The file is
saved to the designated location.
LVS-95XX Series Barcode Quality Station Operations Manual - English Page 85 of 94
Page 86

LVS-95XX Series Barcode Quality Station Operations Manual
Recent Reports (Last 30 Days)
You can recall any report from the archive. When you do, the data is the same as it was when the report wa s
generated with the exception of the current date/time being attached on the bottom of the report.
For reports older than 30 days, you must enter the proper software commands using SQL language into the
“Query” box. For those who may not be accustomed to SQL commands, the software has made it easy to
use. For instance, by choosing “Recent Reports” the Query box might contain the following command:
Select ReportsID.ImageID.LocalTime From Reports Where
LocalTime>=#23-Apr-2005 11:25# Order By ReportID
Use this same command but change the “23-Apr-2005” date to a desired period of time. Then press the
Execute query button. The software remembers the original command string as well as the modified
command string. All of the different files and reports can be altered in the same manner.
Delete Prior to Specific Date
Click the “Delete Prior to Specific Date” button to delete old files. Use the calendar feature to select the
desired date prior to which all data will be deleted, and then click the OK button.
The date will display according to your Regional settings.
LVS-95XX Series Barcode Quality Station Operations Manual - English Page 86 of 94
Page 87

LVS-95XX Series Barcode Quality Station Operations Manual
Only users who are granted the “Allow change Setup Options” permission are able to delete files; this
permission can be found by clicking the “Setup operators” button on the “Setup” tab scree n.
The “Delete prior to specific date” button is disabled for users not granted the “Allow change Setup Options”
permission.
This button is disabled for users not granted the “Allow
change Setup Options” permission.
WARNING: A full database causes the LVS-95XX software to stop functioning. A
warning message, along with further instructions, appears when the database reaches
50% capacity, and every 5% thereafter. For example, at 50% capacity, a warning
message appears and if ignored, the message re-appears at 55% capacity, and then at
60% capacity.
LVS-95XX Series Barcode Quality Station Operations Manual - English Page 87 of 94
Page 88

LVS-95XX Series Barcode Quality Station Operations Manual
Software Version History
This report historically lists all software changes generated by the factory throughout the years. It lists when
the change was performed, the software version number, and a simplified explanation of what was
performed.
Audit Trail Report
This report lists the Operator ID along with the date/time and states what action was being taken. The Audit
trail is updated every time the software detects an administrative change; this includes the following:
• When an operator logs on or off
• When the entire program is started or stopped
• Changes to the configuration of the Setup Tab screen (such as time-outs)
• Database changes
• Calibration time outs
• Changes in permission levels
• Calibration
• Creation or deletion of an operator
Calibration Report
This report lists every time calibration was achieved along with a date/time stamp and who performed it. If
there are any problems or questions, this report allows the operator to view exactly what the calibration
process did and why.
Reference Report
This report contains all verification reports for a given reference. The reference name (free form text) is
entered in the Reference box located on the Setup Screen.
After clicking this button, only the reports for that reference are displayed and can be exported by clicking the
Export reference data button.
Export Reference Data
The Reference report is a text file that can be placed into another database file if desired. Clicking this button
sends the Reference report to another file.
After clicking this button, the Save As window appears. Select the desired file location and name, and then
click the Save button.
Note: Within this report a vertical bar, instead of a comma, is used to separate the data.
LVS-95XX Series Barcode Quality Station Operations Manual - English Page 88 of 94
Page 89

LVS-95XX Series Barcode Quality Station Operations Manual
Change SQL Connection
The default location for all archived databases are stored on the LVS-95XX system hard drive. However,
sometimes a company would like to send these reports to an external drive; to do this, click the “Change
SQL connection” button on the “Archive” tab. The “Setup Connection to SQL Database” screen appears.
1. Change the “Data Source” path to the desired location (see yellow highlight above), but do not change
the I9500.mdb; file name. Changing the “Data Source” path creates a new database in the new location.
2. When changes are complete, click the “Ok” button.
3. The “Confirm Populate Database” message appears. When changing source locations, you must ch oose
to populate the new database with LVS-95XX information to carry over the factory calibration and
operator credentials.
• Click Yes to populate the new database with the LVS-95XX information.
• Click No to NOT populate the new database with the LVS-95XX information. This option is no t
recommended, as it causes the loss of factory calibration requiring Microscan intervention to continue
using the LVS-95XX software.
• Click Cancel to cancel populating the database. No changes are saved.
LVS-95XX Series Barcode Quality Station Operations Manual - English Page 89 of 94
Page 90

LVS-95XX Series Barcode Quality Station Operations Manual
4. If selecting Yes to the message above, the following message appears.
• Click Yes to copy the reports, settings and other information from the old database to the new database.
It is not required to select Yes, but is recommended because reports, settings and other information not
copied to the new database will be lost and some settings require you to contact Microscan for the
password of the day to restore the settings.
• Click No to not copy reports, settings and other information from the old database to the new database.
This action may result in the loss of reports or settings and will require you to contact Microscan for the
password of the day to restore the settings.
• Click Cancel to exit the window. No changes are saved.
5. If the database already exists in the new source location, the following message appears allowing you to
choose one of the following options:
• Click Yes to delete the database in the new source location and populate with the new database.
• Click No to not delete the database in the new source location. The new database will not be copied to
the new source location.
• Click Cancel to exit the process and not save any changes.
LVS-95XX Series Barcode Quality Station Operations Manual - English Page 90 of 94
Page 91

LVS-95XX Series Barcode Quality Station Operations Manual
Create Backup Database
1. To create a backup database, click this button. The Save As window appears.
2. Select the desired location to store the database, then click the Save button.
Note: A default file name appears in the File name field (for example:
I9500_10_Apr_2007.mdb). If desired, change the name of the file name by typing a new
name in the File name field.
LVS-95XX Series Barcode Quality Station Operations Manual - English Page 91 of 94
Page 92

LVS-95XX Series Barcode Quality Station Operations Manual
Browse Backup Database
1. To locate and browse a backup database,
click the Browse Backup Database button.
2. Select the database from the list of
backup databases.
Available options include:
• Recent reports (last 30 days)
• Software version history
• Audit trail report
• Calibration report
• Reference report
• Export reference data
• Cancel browse backup
Print an Archived Report
At the bottom right of the Archive Tab screen is the Generate HMTL file (for printing) option. When this
option is activated, the Archived Report will print.
LVS-95XX Series Barcode Quality Station Operations Manual - English Page 92 of 94
Page 93

LVS-95XX Series Barcode Quality Station Operations Manual
Preventive Maintenance Schedule
LVS-9510
To maintain a clean and clear appearance, clean only the outside of the viewing wind ow with a
commercially available household glass cleaner, such as Windex®, Glassex®, VISS®, and Mr.
Muscle®. Do not use an industrial-strength glass cleaner. Do not clean the inside of the viewing
window.
Replace the Calibrated Conformance Standard Test Card every two years.
The LVS-9510 light tray has LED lights which have a life span of approximately 10,000 hours; thus,
there should be no replacement concerns with the light tray. Contact Microscan or your Microscan
distributor with any questions.
LVS-9570
Sensor Cleaning Instructions:
The sensor window may need to be cleaned daily, depending on use. Debris on the sensor wind ow
may cause the LVS-9570 to not grade accurately.
Locate the following supplies:
• One of the following:
o Commercially available household glass cleaner, such as Windex®, Glassex®,
VISS®, and Mr. Muscle®
o Rubbing alcohol
o Camera lens cleaning solution
• Soft, lint-free, non-abrasive towel or cloth, or tissue paper designed to clean a lens
Dampen the cloth with the cleaning solution and wipe the window. Inspect the window closely,
looking for any label debris that may get stuck on the window. Do not scrape the window with a sharp
object as this may damage the window causing the system to not grade correctly.
Any damage to the sensor window will be detected during the calibration process.
• DO NOT directly spray the sensor glass with glass cleaner; always spray a towel or cloth with
glass cleaner and then gently wipe the sensor glass.
• DO NOT use an industrial-strength glass cleaner.
Rubber Roller Instructions:
The LVS-9570 rubber roller may need cleaning periodically, as it is important to keep the roller free of
debris, adhesive buildup and other surface materials.
Locate the following supplies:
• Dishwashing liquid
• 1 cup of water
• Lint-free cloth
Warning: Use only dishwashing liquid to clean the rubber roller. Do not clean the
roller with alcohol, window cleaner or petroleum-based products, as this causes
the rubber to crack.
Mix a few drops of dishwashing liquid into a cup of water and place a lint-free cloth into the solution
until the cloth is saturated. Ring out the cloth so that no water drips from the cloth. Wipe down the
rubber roller surface, removing any debris. As you wipe, turn the roller to clean the entire surface.
Then, rinse out the cloth and wipe down the rubber surface again to remove any dishwashing liquid
from the roller. Allow the roller to dry before using.
LVS-95XX Series Barcode Quality Station Operations Manual - English Page 93 of 94
Page 94

LVS-95XX Series Barcode Quality Station Operations Manual
Window Scratches:
When the sensor window is scratched, it may cause a streak in the image. This streak may cause the
barcode grade results to be distorted if the streak is located within the barcode image. When a
scratch occurs, you may need to return the system to Microscan (or your Microscan distrib utor) for
sensor replacement. Contact your Microscan representative for more information.
Replace the Calibrated Conformance Standard Test Card every two years.
LVS-9580
Cleaning Instructions:
The LVS-9580 window may need to be cleaned daily, depending on use. Debris on the window may
cause the LVS-9580 to not grade accurately.
Locate the following supplies:
• Commercially available household glass cleaner, such as Windex®, Glassex®, VISS®, or
Mr. Muscle®. DO NOT use an industrial-strength glass cleaner.
• Soft, lint-free, non-abrasive towel or cloth
Dampen the cloth with the household glass cleaner and gently wipe the window. Inspect the window
closely, looking for any label debris that may be stuck on the window. Do not scrape the window with
a sharp object as this may damage the window. Any damage to the window will be detected during
the calibration process.
• DO NOT directly spray the window with glass cleaner; always spray a towel or cloth with
household glass cleaner and then gently wipe the window.
• DO NOT use an industrial-strength glass cleaner.
Replace the Calibrated Conformance Standard Test Card every two years.
LVS-9505
Replace the Calibrated Conformance Standard Test Card every two years.
The LVS-9505 light tray has LED lights which have a life span of approximately 10,000 hours; thus,
there should be no replacement concerns with the light tray. Contact Microscan or your Microscan
distributor with any questions.
LVS-9500
Monthly:
Using 60 to 80 PSI (400-480 kPa) of positive air flow, clean the lens mounted inside the LVS-
9500 housing; this ensures the removal of small particles on the surface of the lens.
Vacuum the two air intake holes located under the main housing; this removes any build-up of
particles trapped in the two filters.
For Systems Using a DC Fluorescent Light Tray: Replace the DC Fluorescent Light Tray every
two years; these special lights diminish in brightness over several years. Replacing the Light Tray
every two years ensures continuous calibration levels.
For Systems Using LED Lights: The LVS-9500 light tray has LED lights which have a life span of
approximately 10,000 hours; thus, there should be no replacement concerns with the light tray.
Contact Microscan or your Microscan distributor with any questions.
Replace the Calibrated Conformance Standard Test Card every two years.
LVS-95XX Series Barcode Quality Station Operations Manual - English Page 94 of 94
 Loading...