


®
r
Operating Manual
MMI-20019472, Rev. AA
April 2011
7951 Signal Converter
(With gas software 1020)
Klippon Connector Model
D-Type Connector Model
Micro Motion
7951 Signal Converte
Introduction
The Micro Motion
used for dual-channel/stream gas applications.
Software Version:
1020 – Gas Applications.
Models Covered
7951MAA0*****
Models Covered
7951MAB0*****
:
®
7951 Signal Converter can be
:
:

IMPORTANT NOTICE
Because we are continuously improving our products, some of the menus which appear on
your instrument’s display may not be exactly as illustrated and described in this manual.
However, because the menus are simple and intuitive, this should not cause any major
problems.
This manual is concurrent with embedded software version 511020, issue 2.11

Static precautions
Some parts of the instrument (such as circuit boards) may be damaged by static electricity. Therefore, when
carrying out any work which involves the risk of static damage to the instrument, the instructions show the
following notice:
CAUTION
At such times you must wear an earthed wrist-strap to protect the instrument.
While carrying out this procedure, you must wear an earthed wrist strap at
all times to protect the instrument against static shock.
Safety information
NOTE: This information applies only to those instruments which are mains-powered.
Electricity is dangerous and you risk injury or death if you do not disconnect the power supplies before
carrying out some of the procedures given in this manual. Whenever there is such a hazard, the instructions
show a notice similar to the following:
WARNING
You must heed any such warnings and make sure that, before you go any further:
Electricity is dangerous and can kill.
Disconnect all power supplies before proceeding.
• All power leads are un-powered.
• All power leads are disconnected from the equipment which you are working on unless the
instructions tell you otherwise.
• You obey any other common-sense precautions which may apply to your situation.
If you obey these sensible precautions, you can work on the equipment in complete safety.
Battery-backed Memory notice
• It is essential that the Lithium Cell used for the battery backup is installed at all times (other than during
replacement). The 7951 Micro Motion
If it is necessary to run the units without batteries for Intrinsic Safety reasons, then the battery should be
replaced with a shorting disk inserted in the battery holder. Please consult the factory for further advice.
• Replace the battery when the "Low Battery" system alarm is indicated. The procedure is in Chapter 14.
®
Signal Converter will not power-up correctly if this battery is missing.

CONTENTS
1. About this manual 1.1
1.1 What this manual tells you 1.1
1.2 Who should use this manual 1.1
1.3 Software versions covered by this manual 1.1
2. Getting started 2.1
2.1 What this chapter tells you 2.1
2.2 What the examples show you 2.1
2.3 If you need help… 2.1
2.4 Example 1: 7951 with a 7812 Gas density transducer 2.2
2.5 Example 2: 7951 with a 3098 Gas specific gravity transducer 2.6
2.6 Example 3: 7951 with a mA-type temperature transmitter 2.9
2.7 Example 4: 7951 with a mA-type pressure transmitter 2.11
2.8 Example 5: 7951 with a RTD-type temperature transmitter 2.14
3. About the Micro Motion® 7951 3.1
3.1 Background 3.1
3.2 What the 7951 Dual Channel Gas Signal Converter does 3.1
3.3 Physical description of the 7951 3.2
3.4 Communications 3.2
3.5 Typical installations 3.3
3.6 Checking your software version 3.3
4. What you can connect to a 7951 4.1
The information in this chapter has been moved to Appendix C
5. Installing the system 5.1
5.1 What this chapter tells you 5.1
5.2 Hazardous and non-hazardous environments 5.1
5.3 Installation procedure 5.1
5.4 Step 1: Drawing up a wiring schedule 5.1
5.5 Step 2: Unpacking the instrument 5.2
5.6 Step 3: Setting DIP-switches 5.3
5.6.1 Analog input DIP-switches 5.3
5.6.2 Turbine voltage selection switch 5.3

5.7 Step 4: Fitting the 7951 5.4
5.8 Step 5: Making the external connections 5.6
5.9 Step 6: Earthing the instrument 5.6
5.10 Step 7: Connecting the power supply 5.8
6. The keyboard, display and indicators 6.1
6.1 What this chapter tells you 6.1
6.2 The layout of the front panel 6.1
6.3 What the display shows 6.2
6.4 How the buttons work 6.2
6.5 Using the buttons to move around the menus 6.2
6.6 Using the buttons to view stored data 6.3
6.7 Using the buttons to edit information 6.4
6.7.1 Text editing 6.4
6.7.2 Multiple-choice option selection 6.5
6.7.3 Numerical editing 6.5
6.7.4 Date and time editing 6.6
6.8 The 7951 character set 6.7
6.9 LED indicators 6.7
6.10 Summary of key functions 6.8
7. The menu system 7.1
7.1 What this chapter tells you 7.1
7.2 What the menu system does 7.1
7.3 How the menu system works 7.1
8. Alarms 8.1
8.1 Alarms 8.1
8.1.1 Alarm types 8.1
8.1.2 Alarm indicators 8.1
8.1.3 How alarms are received and stored 8.2
8.1.4 Examining the Alarm Status Display and Historical Alarm Log 8.2
8.1.5 What the Status Display tells you 8.3
8.1.6 What the entries in the Historical Log tell you 8.3
8.1.7 Clearing all alarms in the Historical Alarm Log 8.4
8.1.8 Alarm messages 8.4
9. Additional facilities 9.1
9.1 What this chapter tells you
9.2 Selecting units and data formats 9.1
9.3 Limits 9.1
9.4 Fallback values and modes 9.2
9.1

9.5 Analogue 0% and 100% values 9.2
9.6 Live and set data 9.2
9.7 Units which the 7951 can display 9.3
10. Configuring the instrument using wizards 10.1
10.1 What this chapter tells you 10.1
10.2 Wizards : Configuring the easy way 10.1
10.3 Wizard Maps : Conventions used 10.1
10.4 Quick-start Guide ( Set-up Wizards ) 10.3
10.5 Set-up wizard selection map 10.4
10.6 Units wizard selection map 10.5
10.7 Density 1 application wizard 10.7
10.8 Density 2 application wizard 10.8
10.9 SG-1 application wizard 10.9
10.10 SG-2 application wizard 10.11
10.11 SG-1&2 application wizard 10.12
10.12 Line density wizard 10.13
10.13 Base density wizard 10.16
10.14 Specific gravity wizard 10.18
10.15 Temperature wizard 10.20
10.16 Pressure wizard 10.22
10.17 Transmitter wizard 10.24
10.18 Special calculation wizard 10.27
10.19 Analogue outputs wizard 10.28
10.20 Alarms wizard 10.29
10.21 Multi-view wizard 10.30
10.22 Full setup wizard 10.31
11. Configuring the 7951 using the menus 11.1
11.1 What does configuration involve? 11.1
11.2 Before you start 11.1
11.3 Recommended sequence for configuration 11.2
11.4 What Sections 11.5 - 11.18 tell you 11.3
11.5 Configuring analogue inputs 11.5
11.6 Configuring transducer details 11.6
11.7 Configuring transmitter detail 11.7
11.8 Configuring line density 11.11
11.9 Configuring base density 11.16
11.10 Configuring specific gravity 11.19
11.11 Configuring energy 11.22
11.12 Configuring custom applications 11.24
11.13 Configuring mA outputs 11.25
11.14 Configuring other parameters
11.15 Configuring Multiview 11.30
11.26
12. Routine operation 12.1
12.1 What this chapter tells you 12.1

12.2 The menu diagrams 12.1
12.3 Security and passwords 12.8
12.4 How you can edit displayed information 12.8
12.5 Making data values Live or Set 12.10
12.6 Changing the units which are displayed 12.11
12.7 Changing fallback values 12.11
12.8 Changing the time and date 12.11
12.9 Checking the performance of the 7951 12.11
12.10 Giving your 7951 a unique identifier 12.12
12.11 Printed reports 12.12
13. Routine maintenance and fault-finding 13.1
13.1 Cleaning the instrument 13.1
13.2 Fault-finding 13.1
14. Removal and replacement of parts 14.1
14.1 Front panel assembly 14.1
14.2 Display 14.1
14.3 Switch panel 14.2
14.4 Processor board 14.2
14.5 Power supply board 14.3
14.6 Connector Board 14.3
14.7 Fuse 14.3
14.8 Back-up battery 14.4
14.9 Rear Panel Assembly 14.5
14.10 Mother Board 14.6
15. Assembly drawing and parts list 15.1
15.1 What the drawing and parts list tells you 15.1
15.2 How to obtain spare parts 15.1
Appendices
Appendix A Glossary A.1
Appendix B Blank wiring schedule B.1
Appendix C Technical data for the 7951 C.1
Appendix D Calculations and theory D.1

1. About this manual
1.1 What this manual tells you
This manual tells you how to install, configure, operate, and service the instrument. In addition, some information
is given to help you identify and correct some of the more common faults which may occur. However, since
repairs are done by changing suspected faulty assemblies, fault-finding to board component level is not covered.
This manual assumes that all devices or peripherals to be connected to the 795x have their own documentatio n
which tells you how to install and configure them. For this reason it is assumed that anything which you want to
link to the 795x is already installed and working correctly in accordance with the manufacturer’s instructions.
Since the instrument can be used for a wide variety of purposes, it is driven by software specially for your application.
This manual gives information about the so ftw are which applie s to y our machine only .
Throughout this manual the term '795x' is used to refe r to al l members of the 795x family (7950 and 7951).
Chapter 1 About this manual
1.2 Who should use this manual
This manual is for anyone who installs, uses, services or repairs the 795x.
1.3 Software version covered by this manual
The software version dealt with in this manual is given on the title page. Chapter 3 tells you about the software is
installed in your instrument.
Page 1.1

Chapter 1 About this manual
Page 1.2

2. Getting started
2.1 What this chapter tells you
If you are new to the Micro Motion® 7951 Signal Converter, the worked examples in this chapter can help you to
become familiar with the installation and configuration procedures. The examples are:
• Example 1: 7951 with a 7810/11/12 (See page 2.2)
• Example 2: 7951 with a 3098 Gas Specific Gravity (See page 2.6)
• Example 3: 7951 with a mA-type temperature transmitter (See page 2.9)
• Example 4: 7951 with a mA-type pressure transmitter (See page 2.12)
• Example 5: 7951 with a RTD-type temperature transmitter (See page 2.14)
Work through whichever one is most like your installation.
2.2 What the examples show you
Chapter 2 Getting started
Each example shows you how to:
• wire up a simple system
• set the DIP switches inside the 7951
• find the menu from which you start configuration
• clear the memory of details of any existing configuration (OPTIONAL)
• select the appropriate wizard to configure the simple system
• work through the wizard and button in information
• view the results of your configuration
The examples do not give full instructions on how to fit and configure installations. They are intended purely to
give you confidence to install and configure your own equipment. Chapter 5 tells you how to make permanent
installations.
2.3 If you need help...
If you get into difficulties...
If you get into difficulties when using the wizards, you can abandon the configuration and start again as follows:
1. From the menu, keep selecting NO (usually by pressing the c-button) or, if that option is not available:
2. Press ENTER until you can start selecting NO.
3. Carry on with (1) and (2) until you return to the wizards menu where you started.
4. Start the worked example again. The configuration you abandoned is clear ed from the instrument’s
memory when you begin again.
If you don’t know where the buttons are...
Chapter 6 shows how to find all the buttons referred to in the worked examples.
Page 2.1

Chapter 2 Getting started
2.4 Example 1: 7951 with a 7812 gas density meter
About this example
This NON-HAZARDOUS (SAFE) AREA ONLY INSTALLATION† example shows you how to connect either a 7812
gas density meter to the 7951, and then uses the “Density 1” wizard to configure the system.
In this example, the “Density 1” wizard is used to configure a connection as follows:
• A single densitometer is connected to Density Input 1.
Work through the example by following the instructions below. If you are not sure where the buttons are, refer to
Chapter 6.
Connect the
meter
1. Wire the meter to the 7951, as in:
Figure 2.1 for a 7812 gas density meter.
Note: Refer to meter documentation for other wiring arrangements.
2. Earth the 7951 to a suitable earth point.
EMC Notes:
To meet the EC Directive for EMC (Electromagnetic Compatibility), it is recommended that
the Flow Computer be connected to transducers using a suitable instrumentation cable
containing individually shielded twisted pairs and an overall screen to cove r all cores.
The instrumentation cables should have individual screen(s), foil or braid over each
twisted pair and an overall screen to cover all cores. Where permissible, and depending
on the earthing scheme employed at the installation, the overall screen should be
connected to the earthed metal work at both ends (360° bonding where possible). This
may have multiple protective earth connections to the pipe work or the building structure
and not connected to the individual screen(s) or Instrumentation or Zener barrier grounds.
The individual inner screen(s) should be connected at one end only, normally the
controller (e.g. Flow Computer) end. These should be connected to the Instrumentation or
Zener barrier ground.
Use suitable cables that meet BS5308 multi-pair Instrumentation Types 1 or 2.
7812
7951
Klippon D-type
1
SIG A
2
3
SIG B
4
+24V Power
Signal +
0V
Power
Signal -
PL5/9
PL5/1
PL5/10
PL5/2
SK6/22
SK6/14
SK6/24
SK6/15
Figure 2.1: Safe area wiring for a 7812 (3-wire arrangement)
Turn on the 3. Turn on the power to the system. The system goes through a Power On Self Test
†
Hazardous area considerations: Refer to meter documentation for details of Intrinsically Safe Barrier/Isolator requirements.
Page 2.2

Chapter 2 Getting started
power (POST) routine which takes less than 30 seconds. When it is finished, ignore any
flashing alarm lights which may appear.
Go to the
wizards menu
Clear existing
configuration
(This is optional)
Select the wizard 12. Press the b-button then the UP-ARROW or DOWN-ARROW button to scroll through
Start of wizard 14. Press the d-button to answer YES to “Edit Gas density A?”
Enter
densitometer
calibration
factors
4. Press the MENU button to go to Page 1 of the Main Menu (if you aren’t there already).
5. Press the DOWN-ARROW button twice (to go to page 3 of the menu).
6. Press the b-button to select “Configure”.
7. Press the a-button twice to go to the wizards menu.
8. Press the b-button then the UP-ARROW or DOWN-ARROW button to scroll through the
option list until “Initialise” is shown.
9. Press the b-button to select “Initialise”.
10. Press the d-button to confirm that you want to lose the current configuration.
11. Wait a few seconds until “initialise” on line 2 of the display changes back to
“Choose option”.
the option list until “Density 1” is shown.
13. Press the b-button to select “Density 1”.
15. Press the b-button, and then input the factor K0 from the Calibration Certificate that
was shipped with the meter.
16. Press the b-button then ENTER to confirm the K0 value.
17. Enter values for factors K1 and K2 in the same way as for K0.
Note: Figure 2.3 on page 2.4 shows where to find the K0, K1 and K2 factors on a
calibration certificate. Always
shipped with the connected meter.
use values from the calibration certificate that was
Enter
temperature
correction
factors
Skip over the
next few
questions
View how you
have configured
Line density
18. Press b-button to start the correction selection process.
19. Use the UP-ARROW button to scroll through the options until “Temp” appears on line 2.
20. Press the b-button and then the ENTER button to confirm that temperature correction is
to be applied.
21. Enter factors K18 and K19 in the same way as for K0, K1 and K2.
22. Press the ENTER button to skip past the “Density offset” prompt
23. Keep pressing the c-button (to answer NO to all questions) until the wizard is exited.
24. Press the MENU button.
25. Press the a-button twice. The display looks similar to that shown in Figure 2.2,
although values and titles shown may vary.
Page 2.3

Chapter 2 Getting started
Figure 2.2: Prime Line density display
C A L I B R A T I O N C E R T I F I C A T E
7812xx GAS DENSITY METER
PRESSURE TESTED TO 375 BAR
DENSITY CALIBRATION FOR NITRIGEN AT 20 DEG C
Based on Pressure-Temperature-Density Data in IUPAC Tables
DENSITY
[ kg/m2]
0
1
2
5
10
15
20
30
40
50
60
70
80
90
TEMPERATURE COEFFICIENT DATA
Dt = DI ( 1 + K18 ( t - 20 ) ) + K19 ( t - 20 ) K18 = -1.36E-05
PERIODIC TIME
[us]
502.190
504.507
506.697
513.168
523.735
534.078
544.202
563.880
582.895
601.307
619.124
636.442
653.310
669.758
A
X
L
E
O
N
G = ------------------------- -- -- --
USER GAS OFFSET DATA
Nitrogen/Methane Gas Mixture Over Density Range 10 to 60 KG/M3
( K3 ( G ) ) K3 = 354
DA = Dt ( 1 + ----------- ( 0.00236 - ----------- ) ) K4 = 57.4
O
( (Dt+K4) ( t+273 ) )
where
F
= Periodic Time (uS)
T
= Actual Density (KG/M3)
DA
= Temperature (DEG. C)
t
= Indicated Density (KG/M3)
DI
= Temp. Corrected Density (KG/M3)
Dt
R
Calibration Date:
DENSITY = K0 +K1.T + K2.T**2
K0 = -1.104252E+02
K1 = -1.882012E-02
K2 = 4.749797E+04
M
Y
K19 = 8.44E-04
Gas Specific Gravity
Ratio of Specific Heats
FINAL TEST &
INSPECTION
Serial No:
Cylinder No:
Amplifier No:
P
L
123456
123456
123456
14JUL97
E
Page 2.4
Ref No: GD04/V1.5
Figure 2.3: Circled areas on an example calibration certificate showing where to find
values for K0, K1, K2, K18 and K19.
DATE14JUL97

View the Multiview display
Chapter 2 Getting started
26. Press the MULTI-VIEW DISPLAY button. The display looks similar to that in Figure
2.4, although values shown may vary.
27. Pressing the DOWN-ARROW button results in the message:
“Invalid Multiview Page”
This appears because it is possible to have more than one Multiview page and it is
simply saying that no more pages exist. In this case, only four items are defined and
they fit on one page.
Pressing the UP-ARROW button makes the previous page to re-appear.
Note that it may be necessary to press the UP-ARROW button several times before the
first Multi-view page appears.
From Multi-view key
End of Worked Example 1
a
b
c
d
a
b
c
d
V
V
Density 0.000
Invalid Multiview
Page
Figure 2.4: Multi-view display
Page 2.5

Chapter 2 Getting started
r
2.5 Example 2: 7951 with a 3098 Gas Specific Gravity Meter
About this example
This example shows you how to connect a 3098 to the 7951 and then use the “SG 1” wizard to configure the
system.
In this example, the “SG 1” wizard is used to configure a connection as follows:
• A single 3098 is connected to Density Input 3.
Work through the example by following the instructions below. If you are not sure where the buttons are, refer to
Chapter 6.
Connect the
meter
1. Wire the meter to the 7951, as in :
Figure 2.6 for a NON-HAZARDOUS (SAFE) AREA OR
Figure 2.7 for a HAZARDOUS AREA
2. Earth the 7951 to a suitable earth point.
EMC Notes:
To meet the EC Directive for EMC (Electromagnetic Compatibility), it is recommended
that the Flow Computer be connected to transducers using a suitable instrumentation
cable containing individually shielded twisted pairs and an overall screen to cover all
cores.
The instrumentation cables should have individual screen(s), foil or braid over each
twisted pair and an overall screen to cover all cores. Where permissible, and depending
on the earthing scheme employed at the installation, the overall screen should be
connected to the earthed metal work at both ends (360° bonding where possible). This
may have multiple protective earth connections to the pipe work or the building structure
and not connected to the individual screen(s) or Instrumentation or Zener barrier grounds.
The individual inner screen(s) should be connected at one end only, normally the
controller (e.g. Flow Computer) end. These should be connected to the Instrumentation or
Zener barrier ground.
Use suitable cables that meet BS5308 multi-pair Instrumentation Types 1 or 2.
Page 2.6
3098 7951
Klippon D-type
ohms
40
1
3
2
+
Sig
Neg
4
(24V) Powe
Signal +
Signal -
(0V) Power -
+
PL5/9
PL5/5
PL5/6
PL5/10
SK 6 / 22
SK 6 / 18
SK 6 / 19
SK 6 / 24
Figure 2.5: Non-hazardous (Safe) area wiring for a 3098

3098
r
r
Barrier as defined in the
latest
specification
3098
Klippon
Chapter 2 Getting started
7951
D-type
1
2
3
+
Sig
Neg
3
4
Intrinsically Safe Earth
1
2
(24v) Powe
Signal +
Signal -
(0v) Powe
+
-
PL5/9
PL5/5
PL5/6
PL5/10
SK 6 /22
SK 6 /18
SK 6 /19
SK 6 /24
Figure 2.6: Hazardous area wiring for a 3098
Turn on the
power
3. Turn on the power to the system. The system goes through a Power On Self Test
(POST) routine which takes less than 30 seconds. When it is finished, ignore any
flashing alarm lights which may appear.
Go to the
wizards menu
4. Press the MENU button to go to Page 1 of the Main Menu (if you aren’t there already).
5. Press the DOWN-ARROW button twice (to go to page 3 of the menu).
6. Press the b-button to select “Configure”.
7. Press the a-button twice to go to the wizards menu.
Clear existing
configuration
(This is optional)
8. Press the b-button then the UP-ARROW or DOWN-ARROW button to scroll through the
option list until “Initialise” is shown.
9. Press the b-button to select “Initialise”.
10. Press the d-button to confirm that you want to lose the current configuration.
11. Wait a few seconds until “initialise” on line 2 of the display changes back to
“Choose option”.
Select the
wizard
12. Press the b-button then the UP-ARROW or DOWN-ARROW button to scroll through
the option list until “SG 1” is shown.
13. Press the b-button to select “SG 1”.
Start of wizard 14. Press the d-button to answer YES to the question “Edit Gravitometer A?”.
Enter
gravitometer
calibration
factors
15. Press the b-button, then input the factor K2 from the Calibration Certificate that was
shipped with the meter.
16. Press the b-button then ENTER to confirm the K2 value.
17. Press the b-button, then input the factor K0 from the Calibration Certificate that was
shipped with the meter.
18. Press the b-button then ENTER to confirm the K0 value.
Skip over other
questions
View how you
have configured
Specific gravity
19. Press the c-button several times (to answer NO to all questions) until the wizard is
exited.
20. Press the MENU button.
21. Press the c-button and then press the a-button. The display looks similar to that
shown in Figure 2.7 although values shown may vary.
Page 2.7

Chapter 2 Getting started
Figure 2.7: Prime Specific Gravity display
View the
Multiview
22. Press the MULTI-VIEW DISPLAY button. The display looks similar to that in
Figure 2.8, although values and titles shown may vary.
display
From Multi-view key
a
b
c
d
a
b
c
d
V
V
Density 0.000
Invalid Multiview
Page
Figure 2.8: Multi-View display
End of Worked Example 2
Page 2.8

Chapter 2 Getting started
2.6 Example 3: 7951 with a mA-type temperature transmitter
About this example
This example shows you how to connect a mA-type temperature transmitter to the 7951, and then use the
“Temperature” wizard to configure the system.
In this example, the “Temperature” wizard is used to configure connections as follows:
• A single temperature transmitter is connected to Analogue Input 3.
Now work through the example by following the instructions below. If you are not sure where the buttons are,
refer to the diagram at the start of this chapter.
Connect the
meter
Set DIP switch 3. Ensure that the DIP-switch, inside the 7951, is set as shown below.
1. Wire the temperature transmitter to the 7951, as in Figure 2.9
2. Earth the 7951 to a suitable earth point.
EMC Notes:
To meet the EC Directive for EMC (Electromagnetic Compatibility), it is recommended
that the Flow Computer be connected to transducers using a suitable instrumentation
cable containing individually shielded twisted pairs and an overall screen to cover all
cores.
The instrumentation cables should have individual screen(s), foil or braid over each
twisted pair and an overall screen to cover all cores. Where permissible, and depending
on the earthing scheme employed at the installation, the overall screen should be
connected to the earthed metal work at both ends (360° bonding where possible). This
may have multiple protective earth connections to the pipe work or the building structure
and not connected to the individual screen(s) or Instrumentation or Zener barrier
grounds.
The individual inner screen(s) should be connected at one end only, normally the
controller (e.g. Flow Computer) end. These should be connected to the Instrumentation
or Zener barrier ground.
Use suitable cables that meet BS5308 multi-pair Instrumentation Types 1 or 2.
Loop-powered
4-20mA
temperature
transmitter
7951
Klippon D-type
+
-
Power +
Signal +
Signal -
Power -
4-20mA
PL9/5
PL8/2
PL8/3
PL9/8
SK8/24
SK8/2
SK8/3
SK8/25
4
3
2
1
D
C
PRT
B
A
Notes:
1. Specified 7951 pins are for Analogue Input 3.
2. DIP-switch position 3 must be set to 4-20mA.
Figure 2.9: DIP-switch and safe area wiring for a m A-type temperature transmitter
Page 2.9

Chapter 2 Getting started
Turn on the
power
4. Turn on the power to the system. The system goes through a Power On Self Test (POST)
routine which takes less than 30 seconds. When it is finished, ignore any flashing al arm
lights which may appear.
Go to the
wizards menu
5. Press the MENU button to go to Page 1 of the Main Menu (if you aren’t there already).
6. Press the DOWN-ARROW button twice to go to Page 3 of the menu.
7. Press the b-button to select “Configure”.
8. Press the a-button twice to go to the wizards menu.
Clear existing
configuration
(This is optional)
9. Press the b-button then the UP-ARROW or DOWN-ARROW button to scroll through the
option list until “Initialise” is shown.
10. Press the b-button to select “Initialise”.
11. Press the d-button to confirm that you want to lose the current configuration.
12. Wait a few seconds until “initialise” on line 2 of the display changes back to
“Choose option”.
Select the
wizard
13. Press the b-button then the UP-ARROW or DOWN-ARROW button to scroll through the
option list until “Temperature” is shown.
14. Press the b-button to select “Temperature”.
Start of wizard 15. Press the d-button to answer YES to the question “Edit Line Temperature?”.
Choose the
Analogue Input
16. Press the b-button
17. Press the UP-ARROW button until “Analogue input 3” appears.
18. Press the b-button and then the ENTER button to confirm selection of
“Analogue input 3”.
Select the type
19. Press the ENTER button to keep the default selection of a 4-20mA type input.
of Analogue
Input
Set Analogue
0% and 100%
20. Press the b-button.
21. Type in a suitable maximum temperature value and then press the ENTER button.
range
22. Press the ENTER button to move on to the next prompt.
23. Press the b-button.
24. Type in a suitable minimum temperature value and then press the ENTER button.
25 Press the ENTER button to move on to the next prompt.
Make the
Analogue Input
“live”
Skip over the
next few
26. Press the d-button.
27. Press the UP-ARROW button so that “Set” changed “Live”.
28. Press the ENTER button once.
29. Press the c-button several times to answer NO to all questions until the wizard is exited.
questions
View how you
have configured
Line temperature
30. Press the MENU button.
31. Press the d-button and then press the a-button. The display looks similar to that shown
in Figure 2.10 although values shown may vary.
Page 2.10

Chapter 2 Getting started
Figure 2.10: Line temperature data display
End of Worked Example 3
Page 2.11

Chapter 2 Getting started
2.7 Example 4: 7951 with a mA-type pressure transmitter
About this example
This example shows you how to connect a mA-type pressure transmitter to the 7951, and then use the
“Pressure” wizard to configure the system.
In this example, the “Pressure” wizard is used to configure a connection as follows:
• A single pressure transmitter is connected to Analogue Input 3.
Work through the example by following the instructions below. If you are not sure where the buttons are, refer to
Chapter 6.
Connect the
meter
1. Wire the transmitter to the 7951, as in Figure 2.11.
2. Earth the 7951 to a suitable earth point.
EMC Notes:
To meet the EC Directive for EMC (Electromagnetic Compatibility), it is recommended
that the Flow Computer be connected to transducers using a suitable instrumentation
cable containing individually shielded twisted pairs and an overall screen to cover all
cores.
The instrumentation cables should have individual screen(s), foil or braid over each
twisted pair and an overall screen to cover all cores. Where permissible, and
depending on the earthing scheme employed at the installation, the overall screen
should be connected to the earthed metal work at both ends (360° bonding where
possible). This may have multiple protective earth connections to the pipe work or the
building structure and not connected to the individual screen(s) or Instrumentation or
Zener barrier grounds.
The individual inner screen(s) should be connected at one end only, normally the
controller (e.g. Flow Computer) end. These should be connected to the Instrumentation
or Zener barrier ground.
Use suitable cables that meet BS5308 multi-pair Instrumentation Types 1 or 2.
Set DIP switch 3. Ensure that the DIP-switch, inside the 7951, is set as shown in Figure 2.11 .
Loop-powered
7951
4-20mA pressure
transmitter
+
Power +
Signal +
-
Signal -
Power -
Klippon D-type
PL9/5
PL8/2
PL8/3
PL9/8
4
4-20mA
3
2
1
SK8/24
SK8/2
SK8/3
SK8/25
D
C
B
A
PRT
Notes:
1. Specified 7951 pins are for Analogue Input 3.
2. DIP-switch position 3 must be set to 4-20mA.
Figure 2.11: DIP-switch and safe area wiring for a m A-type pressure transmitter
Page 2.12

Chapter 2 Getting started
Turn on the
power
4. Turn on the power to the system. The system goes through a Power On Self Test (POST)
routine which takes less than 30 seconds. When it is finished, ignore any flashing al arm
lights which may appear.
Go to the
wizards menu
Clear existing
configuration
(This is optional)
Select the wizard 13. Press the b-button then the UP-ARROW or DOWN-ARROW button to scroll through the
Start of wizard 15. Press the d-button to answer YES to the question “Edit Line Pressure?”.
Choose the
Analogue Input
Set Analogue 0%
and 100% range
23. Type in a suitable minimum pressure value and then press the ENTER button.
5. Press the MENU button to go to Page 1 of the Main Menu (if you aren’t there already).
6. Press the DOWN-ARROW button twice to go to Page 3 of the menu.
7. Press the b-button to select “Configure”.
8. Press the a-button twice to go to the wizards menu.
9. Press the b-button then the UP-ARROW or DOWN-ARROW button to scroll through the
option list until “Initialise” is shown.
10. Press the b-button to select “Initialise”.
11. Press the d-button to confirm that you want to lose the current configuration.
12. Wait a few seconds until “initialise” on line 2 of the display changes back to
“Choose option”.
option list until “Pressure” is shown.
14. Press the b-button to select “Pressure”.
16. Press the b-button
17. Press the UP-ARROW button until “mA input 3” appears.
18. Press the b-button and then the ENTER button to confirm selection of “mA input 3”.
19. Press the b-button.
20. Type in a suitable maximum pressure value and then press the ENTER button.
21. Press the ENTER button to move on to the next prompt
22. Press the b-button
24 Press the ENTER button to move on to the next prompt
Select the type
of Analog Input
Make the
Analogue Input
“live”
Skip over other
questions
View how you
have configured
Line pressure
25. Press the ENTER button to keep the default selection of a 4-20mA type input.
26. Press the d-button
27. Press the UP-ARROW button so that “Set” changed “Live”
28. Press the ENTER button twice
29. Press the c-button several times to answer NO to all questions until the wizard is exited
30. Press the MENU button.
31. Press the DOWN-ARROW button.
32. Press the a-button twice. The display looks similar to that shown in Figure 2.12 although
values shown may vary.
Figure 2.12: Line pressure data display
End of Worked Example 4
Page 2.13

Chapter 2 Getting started
2.8 Example 5: 7951 with a RTD-type temperature transmitter
About this example
This example shows you how to connect a PT100 transmitter to the 7951, and then use the “Temperature”
wizard to configure the system.
In this example, the “Temperature” wizard is used to configure a connection as follows:
• A single PT100 transmitter is connected to Analogue Input 1.
Work through the example by following the instructions below. If you are not sure where the buttons are, refer to
Chapter 6.
Connect the
meter
1. Wire the transmitter to the 7951, as in Figure 2.13.
2. Earth the 7951 to a suitable earth point.
EMC Notes:
To meet the EC Directive for EMC (Electromagnetic Compatibility), it is recommended that
the Flow Computer be connected to transducers using a suitable instrumentation cable
containing individually shielded twisted pairs and an overall screen to cove r all cores.
The instrumentation cables should have individual screen(s), foil or braid over each
twisted pair and an overall screen to cover all cores. Where permissible, and depending on
the earthing scheme employed at the installation, the overall screen should be connected to
the earthed metal work at both ends (360° bonding where possible). This may have multiple
protective earth connections to the pipe work or the building structure and not connected to
the individual screen(s) or Instrumentation or Zener barrier grounds.
The individual inner screen(s) should be connected at one end only, normally the controller
(e.g. Flow Computer) end. These should be connected to the Instrumentation or Zener
barrier ground.
Use suitable cables that meet BS5308 multi-pair Instrumentation Types 1 or 2.
Page 2.14
Set DIP switch 3. Set DIP-switch position 1 to “RTD” (for Analogue input 1).
PT100 on
Analogue
Input 1
7951
Klippon D-type
PRT
Power +
Signal +
Signal -
Power -
PL7/1
PL7/2
PL7/3
PL7/4
4-20mA
SK7/14
SK7/15
SK7/16
SK7/17
4
3
2
1
D
C
B
A
Notes:
1. Specified 7951 pins are for Analogue Input 1.
2. DIP-switch position 1 must be set to PRT.
Figure 2.13: DIP switch and safe area wiring for a RTD-type temperature transmitter
PRT

Turn on the
power
Chapter 2 Getting started
4. Turn on the power to the system. The system goes through a Power On Self Test
(POST) routine which takes less than 30 seconds. When it is finished, ignore any
flashing alarm lights which may appear.
Go to the
wizards menu
Clear existing
configuration
(This is optional)
Select the wizard 13. Press the b-button then the UP-ARROW or DOWN-ARROW button to scroll through
Start of wizard 15. Press the d-button to answer YES to the question “Edit Line Temperature?”.
Choose the
Analogue Input
Choose the type
of Analogue
Input
5. Press the MENU button to go to Page 1 of the Main Menu (if you aren’t there already).
6. Press the DOWN-ARROW button twice to go to Page 3 of the menu.
7. Press the b-button to select “Configure”.
8. Press the a-button twice to go to the wizards menu.
9. Press the b-button then the UP-ARROW or DOWN-ARROW button to scroll through the
option list until “Initialise” is shown.
10. Press the b-button to select “Initialise”.
11. Press the d-button to confirm that you want to lose the current configuration.
12. Wait a few seconds until “initialise” on line 2 of the display changes back to
“Choose option”.
the option list until “Temperature” is shown.
14. Press the b-button to select “Temperature”.
16. Press the b-button.
17. Press the UP-ARROW button until “Analogue input 1” appears.
18. Press the b-button and then the ENTER button to confirm selection of
“Analogue input 1”.
19. Press the b-button.
20. Press the UP-ARROW button until “PT100 input” appears on line 2.
21. Press the ENTER button twice to select this RTD-type input.
Make the
Analogue Input
Channel “live”
Skip over other
questions
View how you
have configured
Line temperature
22. Press the d-button.
23. Press the UP-ARROW button so that “Set” has changed to “Live”.
24. Press the ENTER button twice.
25. Press the c-button several times (to answer NO to all further questions) until the wizard
is exited.
26. Press the MENU button.
27. Press the d-button and then press the a-button. The display looks similar to that
shown in Figure 2.14 although values shown may vary.
Figure 2.14: Line temperature display
End of Worked Example 5
Page 2.15

Chapter 2 Getting started
Page 2.16

3. About the Micro Motion
3.1 Background
The Micro Motion® 7951 is designed to meet the demand for a reliable, versatile, user-friendly and cost-effective
instrument for liquid and gas metering. It has a Motorola 68332 32-bit microprocessor and surface-mounted
circuit board components so that it is powerful, reliable and compact.
Features of the 7951 include:
• Simple access to information.
• Comprehensive interrogation facilities.
• Alarm and alarm history facilities.
• A menu-driven, user-friendly interface.
• NEMA12, IP52 panel mounted case.
• Dc powered.
• Three serial ports (using RS232 or RS485) for
Modbus communications and printing.
Chapter 3 About the Micro Motion® 7951
®
7951
These facilities are described in more detail in the rest of this chapter.
3.2 What the 7951 Dual Channel Gas Signal Converter does
The 7951 Gas Signal Converter is primarily used to convert signal s from one fo rma t to another. There is a need for
this conversion when a system is unable to accept a raw signal from a transducer or, perhaps, some intermediate
signal processing is required.
A common conversion is where a frequency input from a 7812 gas density transducer can be acce pted by a 795x
and then transmitted (by the same 795x) through an analogue output as a 4-20mA signal.
In this application, the 7951 can calculate:
• Line density
• Specific gravity
• Base density
• Energy (Cv/m) (from AGA-5 method or mA-type input)
Note: Dual-channel measurements are available for Items marked w ith a
It can also ob tain:
• Line temperature.
• Densitometer temperature.
• Density pressure.
• Atmospheric pressure.
• Percentage of CO
• Percentage of N
• Compressibility (from S-GERG, NX19, NX19mod or NX19 3h)
• Special equations 1 and 2.
√
(from Transducer, PTZ method or mA-type input)
√
(from Transducer, mA-type input or Base density)
√
(from Specific gravity method, PTZ method or mA-type input)
√
(from a mA-type input)
2
(from a mA-type input)
2
Page 3.1

Chapter 3 About the Micro Motion® 7951
3.3 Physical description of the 7951
The main body of the 7951 is a one-piece aluminium extrusion which provides the best possible EMC protection.
The keyboard and display is attached to the front of the instrument and all electrical and communications
connectors are mounted on the Rear Panel. The 7951 is available with two types of rear Panel - one with
Klippon connectors, the other with D-type connectors.
The case contains four circuit boards. The Processor Board and the Power Supply Board are mounted
horizontally. These are connected by plugs and sockets to the Mother Board which is mounted vertically at the
back of the case. The Connector Board is parallel to the Mother Board to which it is joined.
The Keyboard and Display are wired to the Processor Board. The Connector Board holds the connectors to
which external devices are linked.
Processor
Power
Supply
Board
Board
Two types of
Rear Panel
Either... Klippon connectors
SK1
SK2
SK3
PL3 PL4 PL5 PL6 PL7 PL8 PL9
PL2
PL1
D-type connectors
Or...
SK1
Connector
Board
Mother
Board
SK2
SK3
PL1
SK4 SK5 SK6 SK7 SK8
Keyboard
and display
Figure 3.1: The 7951 and its major assemblies
3.4 Communications
The 7951 can operate as a MODBUS slave. It can:
• Download a configuration from a PC, DCS, etc.
• Upload a configuration.
• Monitor random locations in the 7951.
• Interrogate the alarm and data logger buffers.
• Manipulate the alarm and data logger buffers.
• Set random locations with new data.
• Instigate printed reports.
Page 3.2

3.5 Typical installations
p
The diagram below illustrates a typical installation utilising the 7951.
Part of pipeline
Chapter 3 About the Micro Motion® 7951
PT
DT
TE
4-wire PRT
Transducers and transmitters
Static pressure transducer
PT
DT
Density transmitter
Temperature element (PRT)
TE
7951
Alarm
Frequency
Analogue outputs
4-20mA
Printer
MODBUS communications
to and from host com
uter
Figure 3.2: Typical installation for A Gas Signal Converter system
3.6 Checking your software version
The 7951 is driven by pre-loaded software which differs according to the application for which the instrument is to
be used. To check hardware configuration, see Ordering Information in Appendix C.
PREFIX:
HARDWARE
PLATFORM
50 7950
51 7951
DIGIT 1:
METERED
PRODUCT
1 GAS
2 LIQUID
3 BOTH
4 OTHER
PREFIX DIGIT 1 DIGIT 2 DIGIT 3 DIGIT 4
SOFTWARE VERSION NUMBER
Figure 3.3: Software version number
DIGIT 2:
FLOW
METER
0 NONE
1 OR IF ICE
2 TURBINE/PD
3 VENTURI
4 MASS
5 MULTI
DIGIT 3:
STREAMS/
CHANNELS
1 SINGLE
2 DUAL
3 TRIPLE
4 QUAD
5 1, 2, 3 or 4
DIGIT 4:
SPECIAL
0 – 9
Page 3.3

Chapter 3 About the Micro Motion® 7951
For example, for a 7951 Dual-Channel Gas Signal Converter, the software version number is 511020.
You can find the software version number in two ways:
1. It is printed on a label at the rear panel of the 7951.
2. It is written into the menu structure – see Chapter 12.
Page 3.4

4. What you can connect to a 7951
The information in this chapter has been moved to Appendix C.
Chapter 4 What you can connect to a 7951
Page 4.1

Chapter 4 What you can connect to a 7951
Page 4.2

5. Installing the system
5.1 What this chapter tells you
This chapter gives full instructions for installing the 7951.
It does not go into detail about how to install any peri phe ra l devices (such as transducers, computers or printers) which
are connected to the 7951. For this information you must re fer to the do cumen tation sup plied w ith th ese items.
5.2 Hazardous and non-hazardous environments
Caution:
Always refer to documentation supplied by the manufacturer for details of installing their equipment in
a hazardous area. The 7951 is neither intrinsically safe nor explosion-proof. and can therefore
only be used in a designated non-hazardous (safe) area.
If all or part of an installation is in an area where there is the risk of fire or explosion (which is almost always the
case when gases are involved), then safety barriers or galvanic isolators usually have to be wired into the
circuit. However, some instruments are explosion-proof and barriers are not, therefore, needed.
Chapter 5 Installing the system
5.3 Installation procedure
Briefly, the procedure is:
Step 1: Draw up a wiring schedule.
Step 2: Unpack the 7951.
Step 3: Set the DIP switches.
Step 4: Fit the 7951.
Step 5: Make all external connections.
Step 6: Earth the installation.
Step 7: Connect power supply.
The steps in the procedure are explained in the following sections.
5.4 Step 1: Drawing up a wiring schedule
Before you make any connections, you must draw up a wiring schedule to help you identify wiring colours and
make sure that you do not connect more items of any given type than are allowed. (If you are in doubt, check
the specification in Appendix C.)
A blank copy of a wiring schedule is given in Appendix B.
Page 5.1

Chapter 5 Installing the system
5.5 Step 2: Unpacking the instrument
Remove the instrument from its packing and examine it to see if any items are loose or if it has been damaged in
transit. Check that all items on the shipping list are present. If any items are missing or if the equipment is
damaged, contact your supplier immediately for further advice.
Note: If you have ordered an option card, this is already installed in the 7951.
Table 5.1: What should be supplied with the 7951 (Klippon)
Item Quantity
Mounting Clamp Assembly 1
Captive screws 2
Mounting strap 1
Location moulding 1
Socket identification label 1
9-way D-type plugs 3
9-way connector hoods 3
4-way socket 1
10-way sockets 8
2 Amp glass fuse (this is a spare) 1
Table 4.2: What should be supplied with the 7951 (D-type)
Item Quantity
Mounting Clamp Assembly 1
Captive screws 2
Mounting strap 1
Location moulding 1
9-way D-type plugs 3
9-way D-type connector hoods 3
25-way D-type plugs 5
25-way D-type connector hoods 5
4-way socket 1
2 Amp ceramic fuse (this is a spare) 1
Page 5.2

5.6 Step 3: Setting DIP-switches
Some types of connection may require DIP-switches to be set.
5.6.1 Analogue Input DP-switches
The 7951 has two blocks of DIP-switches on the Processor Board, as shown in Figure 5.1:
• SW1 switches
– select whether each input is 4-20 mA or PRT.
Chapter 5 Installing the system
• SW2 switches
– not used in the current version of 7951.
The setting of each switch in the SW2 block must be the same as the corresponding pair of switches in the
SW1 block. The 7951 may not work correctly otherwise.
The 7951 is supplied with the DIP-switches in these default settings:
• Input 1 PRT
• Inputs 2-4: 4-20mA
SW1
1
A
2
B
4-20mA
C
D
SW2
PRT
3
4
Part of the 7951
Processor Board
Figure 5.1: DIP-switches on the Processor Board
If you want to change the Analog Input switch settings, you must also configure the inputs. This is explained in
chapter 11. After the configuration has been completed, the 7951 should be switched into the 'secure' mode to
prevent unauthorised or accidental tampering with the instrument's configuration.
Note:
• The 7951 is always shipped from the factory with the security lock on the front panel set to the
‘non-secure’ mode.
5.6.2 Turbine Voltage Selection switches
The Turbine Voltage Selection switch is a DIP switch on the PSU Board, which is accessible through removal of
parts (see Chapter 14). Choose between 8 volts dc or 16 volts dc for all flow meters powered by the 7951.
The 7951 is shipped with the switch set for 8 volts dc.
For flow meter connection details, see chapter 2.
Page 5.3

Chapter 5 Installing the system
5.7 Step 4: Fitting the 7951
Caution:
You must not fit the 7951 where it may be subjected to extreme conditions or be liable to damage.
For further information about the environmen tal co nditi ons with in which it can op era te, see Append ix C.
1. Firstly, referring to Figure 5.2, cut out an aperture in the front panel for each instrument which is to be
mounted on it.
29±1mm
96±1mm
Aperture for the
instrument
Aperture for the
instrument
192±1mm
Aperture for the
instrument
Aperture for the
instrument
17.5mm
17±1mm
14.5mm
Figure 5.2: Minimum dimensions for a panel with apertures to fit four 7951’s
2. Each instrument is mounted in a clamp which is fixed to the rear of the front panel, as shown in the two
diagrams that follow.
The 7951 unit
101mm
278.7mm
Location
Moulding
3mm
Panel with
aperture
Mounting
Clamp
Figure 5.3: Before assembly
7.2mm
3mm
Captive
Clamp
Screws (2)
113mm
Mounting
Clamp
Rear Panel
of 7951
Page 5.4
12.5mm
256mm
10mm
Note: Sufficient clearance is required for plugs and cables at the rear of the 7951
221mm
Figure 5.4: After assembly

Chapter 5 Installing the system
p
You can mount the clamp so that it is fixed permanently or can be removed later, if required. If you want the
clamp to be fixed permanently, carry out Steps 3 - 8. If you want to be able to remove the clamp, carry out
Steps 9 - 12.
If the clamp is to be fixed permanently:
1. Make sure that the face of the front panel is in good condition and has no loose or flaking paint. Use a
suitable de-greasing agent to clean the face of the panel.
2. Insert the location moulding through the aperture in the front panel.
3. Peel the protective strip off the adhesive tape on the face of the mounting clamp. Then, working from the
back of the front panel, carefully position the clamp over the location moulding. The clamp and pan el bond
on contact.
4. Press firmly on the area where the clamp is bonded to the front panel to ensure that they are bonded firmly.
Remove the Location Moulding and discard it.
5. Slide the instrument through the front panel. Tighten the two captive screws to secure it into the clamp.
6. Finally, attach all connectors to the back panel.
Note that, if you install more than one instrument, it helps to support them if you use a Mounting Strap to link
each clamp to the next one, as shown in Figure 4.5:
Back of
instrument
Mounting clamp Mounting clamp
Inside of
front panel
Mounting
stra
Back of
instrument
Figure 4.5: Mounting arrangements for more than one instrument
If the clamp is to be removable:
7. Insert the location moulding through the aperture in the front panel.
8. Working from the back of the front panel, carefully position the clamp over the location moulding. Remove the
Location Moulding and discard it.
9. Slide the instrument through the front panel. Tighten the two captive screws to secure it into the clamp.
Note that, if you install more than one instrument, it helps to support them if you use a Mounting Strap to link
each clamp to the next one, as shown in the diagram.
Page 5.5

Chapter 5 Installing the system
5.8 Step 5: Making the external connections
1. Refer to the documentation supplied with the external equipment to see if you have to carry out any special
procedures when connecting them to the 7951. Take special notice of any information about safety
requirements in hazardous areas, and complying with EMC regulations.
2. For each D-type connector, pass the connector hood over the cable and wire up the connector. Secure the
hood and connector body together then connect the earth wire to the hood. Stick an identifying label on to
the connector hood.
3. For each Klippon connector, wire up the connector then stick an identifying label on it.
4. Check the wiring thoroughly against the schedule and wiring diagram.
5. Attach all connectors to the Rear Panel.
Refer to Chapter 2 and Appendix C for examples of field transmitter connections and a full list of the 7951’s pin
identities.
5.9 Step 6: Earthing the instrument
Caution:
Incorrect earthing can cause many problems, so you must earth the chassis and the
electronics correctly. The way in which you do this depends almost entirely on the type of
installation you have and the conditions under which it operates. Therefore, because these
instructions cannot cover every possible situation, the manufacturers recommend that
earthing procedures should only be carried out by personnel who are skilled in such work.
The chassis of the 7951 must be earthed in all cases; both for safety reasons and to ensure that the installation
complies with EMC regulations. Do this by connecting an earth lead from the stud on the rear panel (Figure 4.6)
to a local safety earth such as a cabinet earth or some other suitable metal structure. If there is more than one
7951, see Figure 4.7 for correct and incorrect methods.
In addition to earthing the chassis, you may have to make extra earth connections in some cases, depending on
the installation requirements. Details of internal earthing arrangements are in Appendix C.
Page 5.6
Nut
Earth
lead
Figure 4.6: The 7951’s Earth Stud
Crinkle
washers
Plain
washers
Thumb
nut

Chapter 5 Installing the system
OK
7951 7951
79517951
2
7951 7951
79517951
2
7951
SK3
PL1
1
(1) Earth stud on 7951 rear panel (D-type and Klippon).
(2) Cabinet earth or other suitable metal structure.
Figure 4.7: Multiple 7951 chassis earthing (through studs and earth leads)
Page 5.7

Chapter 5 Installing the system
5.10 Step 7: Connecting the power supply
Plug the dc power connector into plug PL1 and switch on the power. The instrument goes through the
following Power-On-Self-Test (POST) routine:
• The display shows a sequence of characters or patterns to prove that all elements of the display are
working. There is a pause of five seconds between each change of pattern.
• The program ROM is checked against a checksum. The display shows how the test is proceeding.
• Critical data are checked. The display shows the result of this check.
• The coefficients are checked. The display shows the result of this check.
• The battery-backed RAM is checked. The display indicates progress.
• Any saved programs are checked. The display shows the number of programs and their status. Note
that, for a new machine, there are no stored programs.
• If a battery is fitted, its condition is checked and reported.
Note that, when the power is switched on, the alarms may light up. You can ignore these for the moment, as
alarms are explained later in this manual. You can now proceed to configure your 7951 (see Chapters 8-11).
If the POST fails to complete, switch off the power supply and check all connections and the DIP-switch
settings. Then re-connect the power supply. If the POST still fails to complete, switch off again and contact
your supplier.
Page 5.8

Chapter 6 The keyboard, display and indicators
6. The keyboard, display and indicators
6.1 What this chapter tells you
This chapter tells you:
• How the front panel is laid out.
• What the buttons and indicators do.
• What characters you can display.
6.2 The layout of the front panel
Figure 6.1 shows the layout of the keyboard. The diagrams at the end of this chapter give a visual sum mary of
what each of the buttons do.
1. DOWN-ARROW 7. ENTER 13. PRINT MENU
2. UP-ARROW 8. INFORMATION MENU 14. STREAM/RUN SELECT
3. MULTI-VIEW DISPLAY 9. LIMIT ALARM LED 15. F1 (software specific function)
4. LEFT-ARROW 10. INPUT ALARM LED 16. SECURITY LED AND LOCK
5. RIGHT-ARROW 11. SYSTEM ALARM LED
6. BACK 12. MAIN MENU
Figure 6.1: The layout of the front panel
Page 6.1

Chapter 6 The keyboard, display and indicators
6.3 What the display shows
The display can show the following information:
• Numerical data in floating point, exponent or integer formats.
• Text descriptors.
• Units of measurement (if applicable).
• Status of parameters i.e. set, live, failed or fallback (if applicable).
• Alarm and event information.
• Current time and date.
• Identification number (location ID) of parameter.
• Stream (metering-run) identification number (if applicable).
6.4 How the buttons work
The buttons let you:
• Move around the menus.
• View data stored in the 795x – VIEW mode.
• Edit the data – EDIT mode.
Some buttons do different things according to where you are in the menu system. For example:
ENTER button This button does nothing until you get into EDIT mode. After you have
c button When you move through the menu structure this selects any menu
INFORMATION
MENU button
PRINT MENU
button
edited the data of a parameter, pressing ENTER accepts the changes
and puts the 795x back into VIEW mode.
choice shown against the button. However, when in VIEW mode,
pressing
This button does nothing if you are in EDIT mode. At other times, it
takes you to a special menu that provides information on alarms,
events, flow status and 795x operating mode.
This button does nothing if you are in EDIT mode. At other times, it takes
you to a special menu dealing with data archiving and printing of reports.
c lists the display units.
6.5 Using the buttons to move around the menus
A general tour of the menu system is provided in chapter 6. The buttons, which you can use to move around the
menu system, are:
UP-ARROW Moves the display up to the previous page of the menu. If there is no
DOWN-ARROW Moves the display down to the next page of the menu. If there is no
previous page, this button does nothing.
next page, this button does nothing.
Page 6.2
a - d buttons Each of these buttons selects the menu choice next to it. If there is no
:
BACK Returns you to the previ ous step.
menu choice next to a button, that button does nothing.
Chapter 6 The keyboard, display and indicators
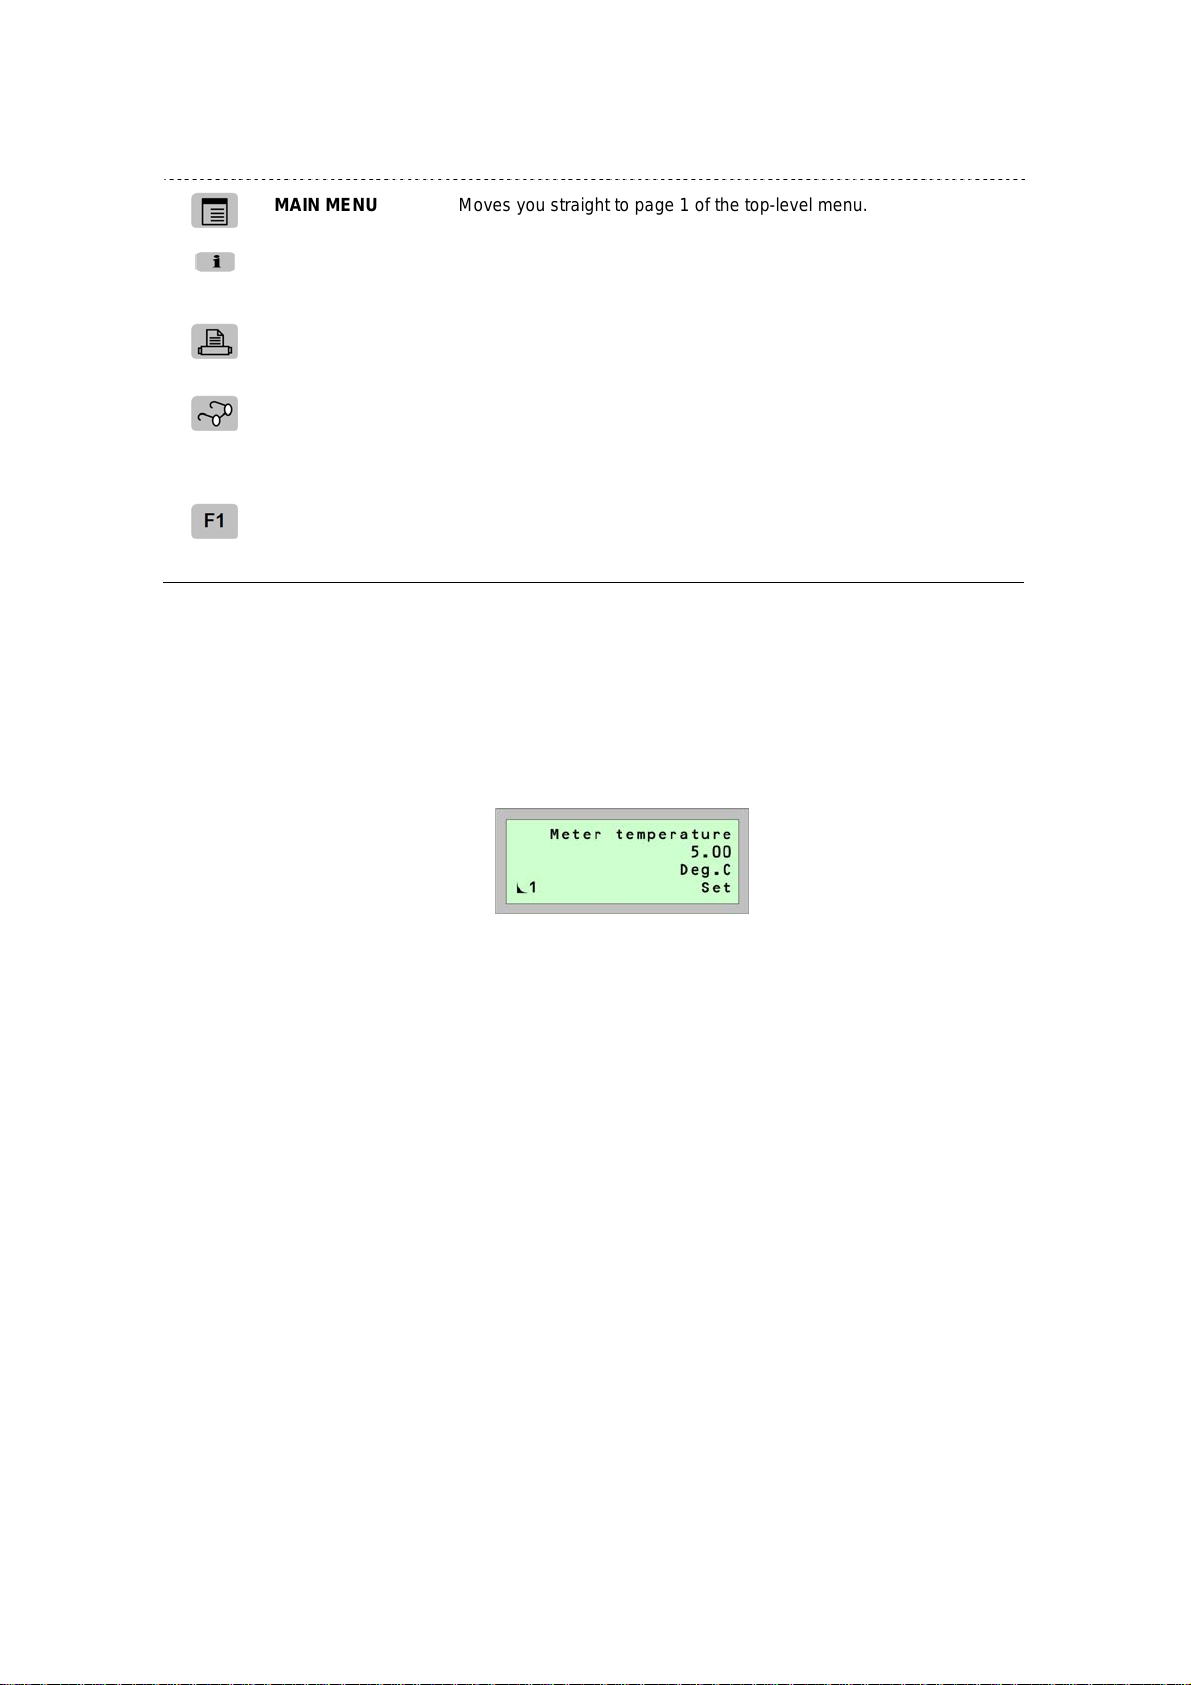
MAIN MENU Moves you straight to page 1 of the top-level menu.
INFORMATION
MENU
PRINT MENU Takes you to a special menu dealing with data archiving and printing
MULTI-VIEW
F1 The use of this button is dependent on the functionality of the
Note: All other buttons have no effect when moving around the menus.
Takes you to a special menu providing information on alarms, events,
flow status and 795x operating mode.
of reports.
You can define one or more display pages, each showing up to four
items of data, lines of descriptive text, or both. Pressing MULTI-
VIEW shows the first display page you have defined. Use the
up/down arrow buttons to page up and page down.
application software. If this button is in use, it will be mentioned in
later chapters.
6.6 Using the buttons to view stored data
When a software parameter screen is viewed, after selection from the menu, the display is in VIEW mode.
Figure 6.2 shows a typical display when you view a software parameter screen. In VIEW mode, all information is
in a right justified format.
Figure 6.2: A typical software parameter screen (in VIEW mode)
What the display shows
Line 1: Shows the parameter description. (Some words are abbreviated.)
Line 2: Shows the present value (or text for indirection type).
Line 3: Shows the measurement units (if any). This line is blank if there are no units.
Line 4: The right-hand side shows LIVE, SET, FB (FALLBACK) or FAIL to indicate the state of the
present value shown in Line 2, where appropriate. These indications mean:
LIVE – The data shown is live data received from the transducer/transmitter connected to
the 795x or calculated by the 7858 rather than a set value.
SET – There is a fixed value for the data; this value does not change unless you enter a
new fixed value or make it live.
FB – A fallback or default value has been used to obtain the value for the data.
FAIL – The live input has failed, most likely due to no transducer/transmitter being
connected or a calculation failed to complete due to incorrect configuration.
An alarm will be raised causing the Input Alarm LED to flash on the front panel. For
troubleshooting this alarm, see chapter 8.
Optionally, Line 4 may also show the parameter’s unique identifica tion number (location ID ), which is required w hen setting
up certain features e.g. Multi-view. You can toggle this in formation on/off by the ‘a’ button.
Page 6.3

Chapter 6 The keyboard, display and indicators
In VIEW mode, the buttons that you can use are:
‘
a’ button On/off toggle for displaying the parameter’s uni que identification number
‘
b’ button Puts the 795x into EDIT mode so that you can edit the data on line 2. The
‘
c’ button Puts the 795x into EDIT mode so that you can select from a list of the units
‘
d’ button Puts the 795x into EDIT mode so that you can select a status (Set or Live).
(location ID). This is displayed to the left of the status indication on line 4.
data being edited is left justified whilst in EDIT mode. (See next section)
in which the data can be displayed. The units are left justified whilst in
EDIT mode. (See next section)
The status is left justified whilst in EDIT mode. (See next section)
STREAM / RUN
SELECT
BACK Returns you to the previous step.
MAIN MENU Takes you straight to page 1 of the top-level menu.
If there is more than one stream (metering-run) and there is a number on
the far left of display line 4, this button will select another stream (meteringrun). The screen will be refreshed with attributes (value, units and status)
for that stream (metering-run).
6.7 Using the buttons to edit information
You can:
• Edit text.
• Select an option from a multiple-choice list.
• Edit numerical information.
• Edit the date and time.
6.7.1 Text editing
Once in EDIT mode (see earlier), the buttons that you use to edit text are:
LEFT-ARROW Moves the cursor to the left, along the line of text you are editing.
Page 6.4
RIGHT-ARROW Moves the cursor to the right, along the line of text you are editing.
UP-ARROW This button changes the character at the current cursor position. It scrolls
DOWN-ARROW Changes the character at the current cursor position. It scrolls
0 - 9 buttons Each button enters a single digit.
:
b’ button If you are satisfied with the changes you have made, press b to accept the
‘
forwards through the alphanumeric character set. Stop when the
character you want is displayed.
backwards through the alphanumeric character set. Stop when the
character you want is displayed.
changes and go back to VIEW mode. (The ENTER button also does this.)

Chapter 6 The keyboard, display and indicators
ENTER If you a re satisfied with the changes you have made, press ENTER to
CLEAR This clears a line of text.
BACK If you do not want to keep the changes you have made, press the BACK
PLUS / MINUS Toggles between lower and upper case letters.
accept the changes and go back to VIEW mode. (The ‘
button to abandon the changes and go back to VIEW mode.
6.7.2 Multiple-choice option selection
Once in EDIT mode (see earlier), the keys that you use to select from a multiple-choice list are:
UP-ARROW Scrolls up through the available options.
DOWN-ARROW Scrolls down through the available options.
‘
b’ button If editing the data (on display line 2) and you are satisfied with the
change you have made, press the ‘
back to VIEW mode. (Note: The ENTER button also does this.)
b’ to accept the change and go
b’ also does this.)
‘
c’ button If editing the measurement unit selection and you are satisfied with the
‘
d’ button If editing the status selection and you are satisfied with the change you
ENTER If you are satisfied with the change you have made, press the ENTER
CLEAR Restore the previous contents.
BACK If you do not want to keep the changes you have made, press the
change you have made, press the ‘
to VIEW mode. (Note: The ENTER button also does this.)
have made, press the ‘
mode. (Note: The ENTER button also does this.)
button to accept the change and go back to VIEW mode.
BACK button to abandon the changes and go back to VIEW mode.
d’ to accept the change and go back to VIEW
6.7.3 Numerical editing
Once in EDIT mode (see earlier), the buttons that you use to edit numerical data are:
LEFT-ARROW Erases the digit to the left of the cursor.
0 - 9 buttons Each button en ters a single digit.
:
c’ to accept the change and go back
PLUS / MINUS This changes the sign of the number. Pressing it will toggle between
Page 6.5
PLUS and MINUS signs.

Chapter 6 The keyboard, display and indicators
DOT Inserts a decimal point.
EXPONENT Use this button if you want to show numbers in exponent form.
‘
b’ button If you want to accept the changes you have made, press the ‘b’. The
ENTER If you want to accept the changes you have made, press the ENTER key.
CLEAR Clears the line you are currently editing.
BACK If you do not want to keep the changes you have made, press the BACK
Numerical entry
When you type in a number the first digit appears at the left of the display and each successive digit is then
positioned to the right of the one just entered. A number being entered over-types any existing number.
Parameter identification number (Location ID) entry
These appear on the display in the same way as for numerical entry. However, when you accept the nu mber (by
pressing ‘
encounter this type of ‘pointer’ (indirection) editing if configuring the Multi-view display (see chapter 11).
b’ or ENTER), the text descriptor of the parameter with that particular number appears on line 2. You will
795x will then revert to VIEW mode. (Note: ENTER also does this.)
The 795x will then revert to VIEW mode. (Note: ‘
button to abandon the changes and go back to VIEW mode.
b’ also does this.)
6.7.4 Date and time editing
The date and time are displayed in the format: dd-mm-yyyy hh:mm:ss. When you edit the date and time, the
cursor moves to the right but skips the ‘:’ and ‘-’ characters.
LEFT-ARROW Moves the cursor to the left.
RIGHT-ARROW Moves the cursor to the right.
0 - 9 buttons Each button enters a single digit.
:
‘b’ button If you want to accept the changes you have made, press ‘b’. The
ENTER If you want to accept the changes you have made, press ENTER.
CLEAR Restore the previous contents.
BACK If you do not want to keep the changes you have made, press the
The new date and time is validated. An invalid date and time is causes the message “Bad date/time” to appear onscreen for a few seconds before the previous content is restored.
795x will then revert to VIEW mode. (Note: ENTER also does this.)
The 795x will then revert to VIEW mode. (Note: ‘
BACK button to abandon the changes and go back to VIEW mode.
b’ also does this.)
Page 6.6

6.8 The 795x character set
You can use any of the 96 characters shown below as part of your display.
Chapter 6 The keyboard, display and indicators
Figure 6.3: The 795x character set
6.9 LED indicators
Security Indicator This LED shows the present security level of the system.
• RED FLASHING – The instrument is at Calibration level.
• RED – Engi neer level: the instrument can be configured.
• ORANGE – Operator level: limits can be changed.
• GREEN – World level: no parameters can be changed.
Note: For more information about these, see Chapter 11.
Security Level LED.
1.
Figure 6.4: Alarm Indicators
Alarm Indicators T hese are the Input, System and Limit alarms. For more information about these,
refer to Chapter 8: “Alarms and Events”.
1.
2.
3.
Figure 6.5: Alarm Indicators
Page 6.7
System alarm LED.
Input alarm LED.
Limit alarm LED.

Chapter 6 The keyboard, display and indicators
6.10 Summary of button functions
The tables here provide a visual summary of the function for each button when in various modes.
Page 6.8
Table 6.1: Summary of what the buttons do (Part 1 of 2)

Chapter 6 The keyboard, display and indicators
Table 6.2: Summary of what the buttons do (Part 2 of 2)
Page 6.9

Chapter 6 The keyboard, display and indicators
Page 6.10

Chapter 7 The menu system
7. The menu system
7.1 What this chapter tells you
Before you can configure and operate the 795x, you should have some understanding of how the menu system
works. The menus are simple and intuitive, so they should present no problems to the average user.
This chapter gives you a general tour, showing how to navigate the menu system to find application parameter
screens and other types of screen such as for entering passwords.
Note:
The menus and parameters will differ between software versions, and can differ between releases of
a software version. Chapter 12 features tables showing the routinely used (operator) parts of the
menu system used in your software.
7.2 What the menu system does
The menu system lets you:
• Configure the 795x.
• Operate it.
• View data and settings stored in the 795x.
• Edit data stored in the 795x.
7.3 How the menu system works
When you power-on the 795x, the menu system appears immediatel y after the routine Power-On-Self-Test (POST)
is completed. If it is the first power-on since the software was installed, a screen appears showing the software
version number and the issue number e.g. 2550 Iss 1.00.00. if this is not the case, the screen will be the last
visited menu location prior to powering off (or a power failure).
Press the MAIN MENU button once and page 1 of the top-level menu will appear (see Figure 7.1).
The menu system is a tree-like structure that repeatedly branches to lower levels until a final screen is reached.
Page 1 of a top-level menu shown in Figure 7.1. It comprises four menu choices – Flow rates, Flow totals, Density
and Viscosity.
Each menu choice has a description e.g. “Flow rates” and a triangular icon e.g.
menu choice. A non-filled, triangular icon (
A filled, triangular icon (
) indicates the menu choice leads to a parameter screen.
) indicates the menu choice leads to a lower-level menu (sub-menu).
alongside to indicate the type of
Note: The menus may be different in your software.
Figure 7.1: page 1 of a top-level menu
Page 7.1

Chapter 7 The menu system
Each menu choice is associated with a lettered button on the front panel on Display Line 1 is associated with the
a button. Similarly, a menu choice on Display Line 2 is associated with the
a, b, c or d. For example, a menu choice
b button, and so on. If there is no menu choice on a display line, the associated letter button will not do anything.
When you do make a menu choice from a menu using the lettered buttons, the display changes to show the
selected lower-level menu or a parameter screen.
Figure 7.2 shows an example where pressing the
the
b button leads to a lower-level menu for “Flow totals”.
Using the BACK button will return you to the previous menu level.
a button will lead to a lower-level menu for “Flow rates”. Similarly,
Note: The menus may be different in your software.
Figure 7.2: Menu Choice Selection
Where a menu has more choices than can fit on to the 4-line display, the menu comprises of t wo or more pages.
Vertical arrow icons appear on the left-hand side of display to indicate there are further pages on the same menu
level. Figure 7.3 shows how you can scroll up or down between the pages by using the UP-ARROW and DOWN-
ARROW buttons. These buttons will do nothing unless there is a page to scroll to.
Note: The menus may be different in your software.
Figure 7.3: Pages of a Main Menu
Page 7.2

Chapter 7 The menu system
At the lowest levels in each branch of the menu system, there are parameter screens. Figure 7.4 shows how to
navigate to the parameter screen for <MeterRun Temperature>. All parameter screens feature a solid, black,
triangular shaped mark in the bottom-left corner of Display Line 4.
Note: Full details about editing parameters can be found in Chapter 6.
Note: The menus may be different in your software.
Figure 7.4: A typical software parameter screen
Page 7.3

Chapter 7 The menu system
y
Returning to the top-level menu again, there are menu choices that are common to all software versions (Figure 7.5).
In addition, you’ll encounter them in subsequent chapters.
All other menu choices on the Main Menu (e.g. “Flow rates”) are for operators to quickly find final measurements
and other calculation results. Chapter 12 has tables showing these menus in more detail.
Leads to menus for viewing interim
results of measurements and other
calculations, Inputs, Outputs, etc.
(See Chapter 12 for a full map)
Leads to menus for editing
measurement tasks for your
installation. (See Chapters 8 - 11).
Leads to a screen for
entering a password to
change security level.
(See Chapter 11).
Leads to a screen detailing
the software version number.
Figure 7.5: Menus common to all software versions
Leads to a screen where
you can view/edit text to
identif
the 795x.
Leads to menus where you can
view/edit the time and date, plus
machine cycle timing.
Page 7.4

Chapter 8 Alarms
8. Alarms
8.1 Alarms
8.1.1 Alarm types
The types of alarms that are detected and recorded are:
System alarms, caused by one or more of:
• Power failure.
• Battery low (if a battery is fitted).
• Watchdog.
• RAM checksum failure.
• ROM checksum failure.
Input alarms, caused by one or more of:
• Failure of analogue inputs.
• Failure of density transducers.
• Incorrect data has been entered.
Limit alarms, caused by one or more of:
• Limits which you have set.
• Limits defined by the system.
These always result in two alarms - one when the change first happens and another when the system returns to its
normal state.
8.1.2 Alarm indicators
The 795x has three LED indicators to show alarm status; one each for Input, System and Limit Alarms.
Each alarm indicator can be in one of three states:
Off The system is working normally.
Flashing An alarm has been received but has not yet been accepted.
On All alarms has been accepted but not yet cleared. The conditions that caused the alarms in the first
place may still exist.
1. System alarm 2. Input Alarm 3. Limit Alarm
Figure 8.1: Alarm indicators on the front panel
Page 8.1

Chapter 8 Alarms
8.1.3 How alarms are received and stored
When a new alarm is received, the appropriate indicator LED on the front panel starts flashing. If the indicator is
already flashing because of a previous alarm, it continues to do so. If the indicator is already ON (steady), it starts
to flash.
Information about alarms is stored in two logs:
• The Alarm Status Display This gives:
(1) a summary of the contents of the Historical Alarm Log
(2) an indication of the current status of the system.
• The Historical Alarm Log This contains an individual entry for every alarm stored in the log.
The Historical Alarm Log can store up to 30 entries. When a new alarm is received, one of two things can happen:
If the Historical Alarm Log is NOT full:
An entry for the new alarm is simply added to the list.
If the Historical Alarm Log is full:
It depends on how the system is set up: Either (1) the oldest entry is deleted and the new one is added to the top of
the list, or (2) the new alarm is discarded. In either case, the Status Display is updated automatically.
8.1.4 Examining the Alarm Status Display and Historical Alarm Log
Press the INFORMATION MENU (i) button if you want to examine the Alarm Status Display or the
Historical Alarm Log.
• To bring up the Alarm Status Display, select the Alarm Summary option.
• To bring up the first entry in the Historical Alarm Log, select the Alarm History option.
• To return to the INFORMATION MENU from the two screens , you can use the BACK button
Page 8.2
Figure 8.2: How to get to the alarm log

Chapter 8 Alarms
8.1.5 What the Alarm Status Display tells you
A typical Alarm Status Display is shown in Figure 8.2. The display lists, for each type of alarm (System, Input or
Limit), the number of alarms that are live and new.
• New alarms are alarms that have been received but not accepted.
• Live alarms are alarms that refer to conditions still active.
An example of a live alarm is when there is a fault in the system. This produces two alarms - one when the fault
first occurs (‘ON’) and the second when it is put right (‘Off’). If only the first alarm of the pair has been received,
the alarm is said to be live because the condition still exists.
The number of live alarms tells you how many faults are still active. If you look at the Historical Alarm Log this tells
you more about these faults.
8.1.6 What the entries in the Historical Alarm Log tell you
Figure 8.3 shows a typical display and the function of the relevant buttons.
Key to figure:
1. Indicates if there are entries BEFORE this one
2. Alarm is either ‘ON’ (fault occurrence) or ‘OFF’ (fault cured).
3. Type of alarm
4. Indicates alarm not accepted
5. Accept this alarm
6. Alarm description and extra identifier to qualify the alarm
7. Clear this alarm entry
8. Date and time that this alarm (message) was raised.
9. Identifies a metering-run/stream - not applicable to single
meter-run/stream software
10. Indicates that there are alarm entries AFTER this one
11. Scroll DOWN through the entries
12. Scroll UP through the alarm entries
13. Clear all alarm entries.
Figure 8.3: A typical entry in the log
Each alarm has its own entry in the Historical Alarm Log that tells you:
• Type of alarm
Whether it is a System alarm, Input alarm or Limit alarm and if the alarm is ‘on’ or ‘off’.
• Extra identifier for the alarm
This is not always shown for every entry but, where it is shown, it could be one of the following:
• A digit This indicates the channel number on which the fault occurred.
• A letter H and L are for high and low Limit alarms, S is for a step alarm.
• Date and time
The date is in the format DD-MM-YY and the time HH:MM:SS. These are entered automatically by the
system when the alarm is received. The time is accurate to within one second.
Page 8.3

Chapter 8 Alarms
• Acceptance indication
This is only shown for those entries that have not been accepted. When the entry is accepted, the indicator
disappears.
• Other entries indication
An up-arrow symbol shows that there are entries before the present one, whilst a down-arrow symbol
shows that there are others after. If the entry currently shown is first in the list, there is no up-arrow. If it is
last, there is no down-arrow.
• Description of the alarm
This is an abbreviated description of the alarm and should be sufficient to help you trace the cause of the
problem. A complete list of alarm messages, and what they mean, is on page 8.3.
8.1.7 Clearing all entries in the Historical Alarm Log
To clear all the alarm entries in the historical log, press the CLR button. This clears all entries in the Historical
Alarm Log, zeroes the entries in the Status Display and sets all LED indicators to OFF.
8.1.8 Alarm Messages
Alarm message Type What it means
AGA8 calculation could not be completed due to a problem.
AGA8 failed Input
AGA8 T.P. range Input
Atmos press limit Limit [H]igh, [L]ow or [S]tep limit for Atmospheric pressure has been exceeded
Bad gas data System Raw gas data is incorrect
Base dens limit Limit [H]igh, [L]ow or [S]tep limit for Base Density has been exceeded
Battery failed System 795x needs a new battery
Battery low System 795x needs a new battery as soon as possible
Comparison limit Limit Either the A or B user alarms are out of limits
Chromat error Limit The Chromatograph has indicated that it has an error of some kind.
Chromat slv fail Limit MODBUS communications with a Chromatograph (acting as a slave) have
Compress. fail Limit Compressibility calculation has not been fully configured.
Database corrupt System
DBM bad chksum. System The memory checksum has failed. The 795x needs to be re-configured.
DBM bad triple System
Additional alarm message letters: ‘C’=Composition, ‘L’=Line, ‘B’=Base
Temperature and pressure are outside the range that can be handled by
AGA-8.
Additional alarm message letters: ‘L’=Line, ‘B’=Base
failed.
Notification that the 795x database has been automatically fixed after
corruption was detected. Check the configuration in case data has been
changed.
Additional character that may be seen:
‘V’=Volatile memory, ‘N’=Non-volatile memory (RAM/FRAM)
Notification that one or more copies of the data were corrupted. This problem
is corrected automatically but the configuration needs to be checked.
Additional character that may be seen:
‘0’=RAM, ‘1’=NVM-copy1, ‘2’= NVM-copy2, ‘3’=padding, ‘!’=beyond repair
Page 8.4

Chapter 8 Alarms
Comparison limit of density ‘A’ and ‘B’ measurements exceeded
Dens comp. limit Limit
Additional alarm message letters:
‘L’=Line density, ‘B’=Base density
Dens temp A limit Limit [H]igh, [L]ow or [S]tep limit for DensityA temperature exceeded
Dens temp B limit Limit [H]igh, [L]ow or [S]tep limit for DensityB temperature exceeded
Density cal fail System
A particular density input has not been calibrated. Additional character seen is
the channel number.
Gas slave fail Limit MODBUS communications with a 795x (configured as a “Gas Slave”) have
failed.
Line dens limit Limit [H]igh, [L]ow or [S]tep limit for line density exceeded
Line temp limit Limit [H]igh, [L]ow or [S]tep limit for Line temperature exceeded
LineTxdr Calcfail Input A line density calculation failed because of incorrect data
Live CO2 limit Limit [H]igh or [L]ow limit for live carbon dioxide exceeded
Live Energy limit Limit [H]igh or [L]ow limit for live energy exceeded
Live N2 limit Limit [H]igh or [L]ow limit for live nitrogen exceeded
mA input failed Input A mA-type analogue input has failed. Additional character seen is the channel
number.
mA input no cal System
A mA-type analogue input is not calibrated. Additional character seen is the
channel number.
mA out cal. fail System
A mA-type analogue output calibration has failed. Additional character seen is
the channel number.
mA output failed System
A mA-type analogue output has failed. Additional character seen is the
channel number.
mA output no cal System
A mA-type analogue output is not calibrated. Additional character seen is the
channel number.
Power fail System Power supply to the 795x has been interrupted
Pressure limit Limit [H]igh, [L]ow or [S]tep limit for Line pressure exceeded
Prt input failed Input A PRT input has failed. Additional character seen is the channel number.
Prt no cal System
A PRT-type analogue input has not been calibrated. Additional character seen
is the channel number.
SG compare limit Limit Limit for comparison of SG ‘A’ and SG ‘B’ value s exceeded
SG limit Limit [H]igh or [L]ow limit for specific gravity exceeded
SpEqu1 calc fail Input Incorrect data caused Special Equation 1 to fail
SpEqu2 calc fail Input Incorrect data caused Special Equation 2 to fail
Timeperiod failed Input A time-period input has failed. Additional character seen is the channel
number.
Timeperiod glitch Input A glitch has occurred on a time-period input.
Timeperiod no cal System A time period input is not calibrated
User alarm Limit User alarm ‘X’ or ‘Y’ activated
Page 8.5

Chapter 8 Alarms
Page 8.6

Chapter 9 Additional facilities
9. Additional facilities
9.1 What this chapter tells you
You can also specify features such as:
• Fallback values and modes to be used if live inputs fail.
• Limits which, if exceeded, trigger alarms.
• The units in which the calculations are performed and are di splayed.
The following sections give more information about these, and other, topics which relate to the way in which data
is processed.
9.2 Selecting units and data formats
You can select the units which the 795x uses for its calcul ation s and in which i t display s the data , as well as the
formats in which the data is display ed.
You can choose the units and formats for:
• Line density.
• Base density.
• Temperature.
• Pressure.
• Energy(Cv/m).
• Time period input.
A full list of the units (metric and imperial) is given at the end of this chapter. Note that, if you change the units, the
values are converted automatically to reflect the change .
9.3 Limits
You can set limits for some paramete rs so tha t an ala rm is genera ted if the limits are exceede d.
There are three types of limit:
• High limit: The highest value which the parameter can have before an alarm is generated.
• Low limit: The lowest value which the parameter can ha ve be fore an alarm is genera ted.
• Step limit: The greatest allowable step between su ccessive values before an al arm is generated.
The parameters, and the types of limit which you can set for them, are:
• Line density: high, low and step
• Base density: high, low and step
• Line temperature: high, low and step
• Density temperature: high, low and step
• Line pressure: high, low and step
• Alarm X and Y: high and low
• Specific gravity: high, low and step
Page 9.1

Chapter 9 Additional facilities
9.4 Fallback values and modes
A fallback value is used as a temporary substitute for a parameter if a live input (i.e., the transducer, transmitter
or wiring), which is normally used to calculate the parameter, should fail.
A fallback must have one of the following modes:
• None The system uses whatever value is available for the parameter regardless
of whether or not the live input has failed.
• Last good value The system uses, for the parameter, the last value prior to failure.
• Fixed value The system uses whatever fixed value you have specified for the fallback.
You can set fallback values for:
• Line density.
• Base density.
• Line temperature.
• Line pressure.
• Specific gravity.
• Density temperature.
• Atmospheric pressure.
• CO
• Energy (Cv/m).
and N2.
2
9.5 Analogue 0% and 100% values
These are values which specify the zero and span of analog ue inputs and outputs.
9.6 Live and set data
What are live and set data?
Stored data can be either live or set. Live data is continually updated by new data received from transducers or
other transmitters. Set data is data that you have entered via the keyboard; it does not change unless you enter
new data.
Why should I want to set data?
You may want to set data for reasons such as:
• You want to test the flow computer’s programming
If you want to test the flow computer’s programming it is much easier if you use known, fixed data.
• You don’t want to monitor a particular parameter constantly or don’t want to monitor it at all.
If a parameter is not likely to change significantly or if it is not important to measure it accurately, you may
not want to connect a transducer or transmitter. In this case, set data may be accurate enough for your
purposes.
• A particular transducer or transmitter is out of action.
You can temporarily set the data to a fixed representative value until the transducer is repaired or
replaced.
Page 9.2

9.7 Units which the 795x can display
The 795x can display data values with many different units, as listed in Table 9.1 below. However, when
communicating with other devices, the data is always sent using the standard units.
In Table 9.1, the following definitions are used:
• Standard units: Units which the 795x displays unless you choose an alternative.
• Other units: Units which you can choose instead of the standard.
Note that many of the abbreviations used in the tables are defined in the glossary.
Table 9.1: Units of measurement
Chapter 9 Additional facilities
Parameter Default
Temperature Deg. C Deg. F Kelvin Ohms
Pressure bar abs Pa abs
Density kg/m3 tonnes/m3 oz/in3 oz/ft3
oz/barrel oz/gallon (UK) oz/gallon (US)
lb/in3 lb/ft3 lb/barrel
lb/gallon (UK) lb/gallon (US) tons/ft3
tons/barrel tons/gallon(UK) tons/gallon (US)
g/cc g/litre g/m3
kg/cc kg/litre
Base density kg/m3
Time
Gas data % PPM Mole fraction
Calorific value MJ/m3
units
μs
Other units available
KPa abs
psia
kPa guage
As for density
sec
day
Energy units / volume units
bar guage
MPa guage
min hour
MPa abs
Pa guage
psig
Page 9.3

Chapter 9 Additional facilities
Page 9.4

Chapter 10 Configuring your instrument by using wizards
10. Configuring your instrument by using wizards
10.1 What this chapter tells you
This chapter features complete maps of all the configuration wizards. Each map shows all the possible routes
through a wizard.
10.2 Wizards: Configuring the easy way
Wizards are configuration tools which are written into the instrument’s software. To configure your instrument,
just select the wizard which fits your requirements most closely, follow the prompts to supply the information it
asks for and then, if necessary, edit the resulting configuration to match your exact needs.
Wizards are easy to use. We recommend that you use them to configure your installation.
From Configure option
on Main Menu
a
b
c
d
V
Transducer details
V
Wizards
Analoge inputs
Line density
Figure 10.1: How to get to the wizards menu
10.3 Wizard Maps: Conventions used
Maps are represented in a form that closely resembles a flow chart. The basic conventions for a wizard map are
shown in Figure 10.2 on the page 10.2.
Setup wizard
a
b
c
d
V
V
Setup wizard
Units wizard
a
b
c
d
a
b
c
d
Page 10.1

Chapter 10 Configuring your instrument by using wizards
Wizard
Heading
"Option n"
"Option 1" "Option 2"
Setup wizard
'b' key
Option 1
Option 2
Option n
Programmable item
Programmable item
Heading
(Selection)
Selection 1
Selection 2
etc.
Selection n
This represents the selection of the wizard. It is the start
point for every wizard.
Pressing the 'b' key or the enter key confirms the
selection.
An arrow indicates where a wizard will continue to. It may
(or may not) have a label to identify a particular path the
wizard is taking
This format indicates a situation where there are two or more
options. Choosing any option here will determine the
subsequent path taken by the wizard.
Note that all of the options are always shown in this box.
However, the 795x splits options into pages.
An item prompt that appears with the name of the item
along with programmable properties - a value, units of
measurement and present status. Edit properties and then
press the enter key for wizard to continue.
An item prompt with a dotted outline will not always
appear. A note alongside states the condition needed for
it to appear.
The shaded areas indicate a situation where there are two
or more options. Choosing an option here may influence
the subsequent path taken by the wizard.
Pressing the 'b' key, when this screen first appears, starts
the selection process. The up / down arrow keys cycle
through available options.
Pressing the enter key confirms the option displayed as
the one chosen. Pressing enter a second time makes the
wizard continue.
Page 10.2
Exit wizard
A1
A1
n=1
The wizard selection screen is always shown
after exiting a wizard
Route will be continued where there is a unique connector
with a matching code. Note that the letter in the code is
unique to a wizard - A is used for the Flow meter wizard
(Orifice route).
Route continues from a connector with a matching code.
The letter in the code is unique to a wizard - A is used for
the Flow meter wizard (Orifice route).
This provides information for a prompt that follows. For
example, in the Line Density wizard, the value of n will be
seen to complete a PTZ descripor. PTZ n will be PTZ 1 when
n=1. PTZ n will be PTZ 2 when n=2.
Figure 10.2: Key to wizard map conventions

Chapter 10 Configuring your instrument by using wizards
10.4 Quick-start Guide ( Set-up Wizards )
Wizard Measurement Task Page
Density 1
Density 2
Density 1 & 2
SG 1
SG 2
SG 1 & 2
Line density
Base density
Specific gravity
Temperature
Pressure • Line pressure 10.22
Transmitters
Special Calc. • Special equations 1 an d 2 10.27
Analogue outputs
Alarms • User defined alarms 10.29
Multi-view • Multi-page multi-view
Full Setup • A collecti on of wizards for configuring a whole system
• Gas density measurement (nominated as density ‘A’) from a
single transducer that is connected to “Density input 1”.
• Gas density measurement (nominated as density ‘B’) from a
single transducer that is connected to “Density input 1”.
• Gas density measurements (nominated as densit y ‘A’ and
density ‘B’) from two transducers that are connected to “Density
input 1” and “Density input 2”.
• Specific gravity measurement (nominated as SG ‘A’) from a
single transducer that is connected to “Density Input 3”.
• Specific gravity measurement (nominated as SG ‘B’) from a
single transducer that is connected to “Density Input 4”.
• Specific gravity measurements (nominated as SG ‘A’ and SG
‘B’) from two transducers that are connected to “Density input 3”
and “Density input 4”
• Density ‘A’
• Density ‘B’
• Base density ‘A’
• Base density ‘B’
• SG ‘A’
• SG ‘B’
• Line temperature
• Density temperature ‘A;
• Density temperature ‘B’
• Live nitrogen measurement from an analogue input
• Live carbon dioxide measurement from an analogue input
• Live energy measurement from an analogue input
•
10.6
10.8
10.10
10.11
10.12
10.13
10.16
10.18
10.20
10.24
10.28
10.30
10.31
Page 10.3

Chapter 10 Configuring your instrument by using wizards
10.5 Set-up Wizard Selection Map
After using the menu to arrive at the wizard sub-menu, as shown earlier in Figure 10.1, a wizard option can be
chosen.
Selection
Procedure
1. Press the b-button to begin the selection process.
2. Use the up/down arrow buttons to cycle through all the availabl e wizard
options.
3. Press either the b-button or the enter button to select the wizard option that
presently appears on the 795x display.
4. Examine and then follow directions provided alongside the prompt of the
selected wizard option,
Setup wizard
(Selection)
Selecting this, with the 'B'-key, starts the wizard selection process.
Use scroll up/down arrow keys to move through the wizard options.
Select option
Choosing this causes configured data to
Initialise
be restored to default values
Multi-view
Alarms
Analogue outputs
Special Calc.
Transmitters
Pressure
Temperature
Specific gravity
Base density
Line density
SG 1 & 2
SG 2
SG 1
Density 1 & 2
Turn to page 10.30
Turn to page 10.29
Turn to page 10.28
Turn to page 10.27
Turn to page 10.24
Turn to page 10.22
Turn to page 10.20
Turn to page 10.18
Turn to page 10.16
Turn to page 10.13
Turn to page 10.12
Turn to page 10.11
Turn to page 10.10
Refer to "Density 1" and "Density 2" wizard maps.
Page 10.4
Density 2
Density 1
Full Setup
Turn to page 10.8
Turn to page 10.6
Turn to page 10.31
Figure 10.3: Set-up Wizard Selection

10.6 Units Wizard Selection Map
After using the menu to arrive at the units wizard sub-menu, as shown earlier in Figure 10.1, a wizard option can
be chosen.
Selection
Procedure
1. Press the b-button to begin the selection process.
2. Use the UP/DOWN ARROW buttons to cycle through all the available unit
wizard options.
3. Press either the b-button or the ENTER button to select the unit wizard option
that presently appears on the 795x display.
Units wizard
(Selection)
Choose option
Chapter 10 Configuring your instrument by using wizards
Selecting this, with the
process. Use the
options and then press the b-key (or the enter key) to
confirm the selection.
b-key
up/down
, starts the units selection
keys to move through the
Metric
Imperial
SI
"Metric"
"Imperial"
Exit wizard
"SI"
Figure 10.4: Units Wizard Selection
Page 10.5

Chapter 10 Configuring your instrument by using wizards
10.7 Density 1 application wizard
Setup wizard
Density 1
'b' key
Edit
Gas density A?
No
Yes
"Yes"
Transducer A K0
Transducer A K1
"No"
Edit
Dens.Temp. A?
Yes
"No"
Edit
Special equations?
Yes
"No"
Edit
Analog outputs?
Yes
"No"
Edit
User Alarms?
Yes
"No"
No
No
No
No
"Yes"
"Yes"
"Yes"
"Yes"
See note 1
See note 2
See note 3
See note 4
Transducer A K2
A1
A2
Edit Density
Limits & Fallback?
"Yes"
Line density hi lmt
Line density lo lmt
Prime dens FB type
(Selection)
Fallback value
Last Good Value
No
Yes
"No"
Exit Wizard
Page 10.6
Edit
Multi view?
See note 5
Prime density FB val
No
Appears for
"Fallback value"
"No"
Yes
"Yes"
Exit Wizard
Exit Wizard
Wizard Map Notes
(1) Route detours to a "Density Temp. A?" sequence (as seen in the "Temperature"
wizard map) before continuing.
(2) Route detours to a "Special Equation" wizard map sequence before continuing.
(3) Route detours to an "Analogue output" wizard map sequence before continuing.
(4) Route detours to a "User Alarm" wizard map sequence before continuing.
(5) Route detours to a "Multiview" wizard map sequence before continuing.
:
“Density 1” Wizard Map - Part 1 of 2
only

Chapter 10 Configuring your instrument by using wizards
Temperature & VOS Correction Sequences
From
"Part 1"
page
A1
Density A corrections
(Selection)
None
Temp and VOS
VOS
Temp
"None"
"Temp"
Transducer A K18
Transducer A K19
Density A offset
Route returns to :
"Edit Density Limits & Fallback " prompt
(on previous page) unless VOS
correction has also been selected.
Line dens A VOS type
(Selection)
P method
SG method
VOS
Density Transducer A
(Selection)
7812 N2 high
7812 N2 low
7811 AR high
7811 N2 high
7811 N2 low
7810 CH4 medium
7810 N2 low
7812 AR high
Line density A gamma
Tranducer A K3
Appears for
"SG method"
only
Transducer A K4
Tranducer A K5
Appears for
"P method"
only
Transducer A K6
Density A offset
Route returns to " Edit Density Limits &
Fallback " prompt (on previous page) unless
temperature correction has also been
selected.
“Density 1” Wizard Map - Part 2 of 2
Page 10.7

Chapter 10 Configuring your instrument by using wizards
10.8 Density 2 application wizard
Setup wizard
Density 2
'b' key
Edit
Gas density B?
No
Yes
"Yes"
Transducer B K0
Transducer B K1
"No"
Edit
Dens.Temp. B?
Yes
"No"
Edit
Special equations?
Yes
"No"
Edit
Analog outputs?
Yes
"No"
Edit
User Alarms?
Yes
"No"
No
No
No
No
"Yes"
"Yes"
"Yes"
"Yes"
See note 1
See note 2
See note 3
See note 4
Transducer B K2
A1
A2
Edit Density
Limits & Fallback?
"Yes"
Line density hi lmt
Line density lo lmt
Prime dens FB type
(Selection)
Fallback value
Last Good Value
No
Yes
"No"
Exit Wizard
Page 10.8
Edit
Multi view?
See note 5
Prime density FB val
No
Appears for
"Fallback value"
"No"
Yes
"Yes"
Exit Wizard
Exit Wizard
Wizard Map Notes
(1) Route detours to a "Density Temp. B?" sequence (as seen in the "Temperature"
wizard map) before continuing.
(2) Route detours to a "Special Equation" wizard map sequence before continuing.
(3) Route detours to an "Analogue output" wizard map sequence before continuing.
(4) Route detours to a "User Alarm" wizard map sequence before continuing.
(5) Route detours to a "Multiview" wizard map sequence before continuing.
:
“Density 2” Wizard Map - Part 1 of 2
only

Chapter 10 Configuring your instrument by using wizards
Temperature & VOS Correction Sequences
From
"Part 1"
page
A1
Density B corrections
None
Temp and VOS
VOS
Temp
"None"
Route returns to :
"Edit Density B Limits & Fallback "
prompt (on previous page) unless VOS
correction has also been selected.
(Selection)
"Temp"
Transducer A K18
Transducer A K19
Calibration Temp
Density A offset
Line dens B VOS type
(Selection)
P method
SG method
VOS
Density Transducer A
(Selection)
7812 N2 high
7812 N2 low
7811 AR high
7811 N2 high
7811 N2 low
7810 CH4 medium
7810 N2 low
7812 AR high
Line density A gamma
Tranducer B K3
Appears for
"SG method"
only
Transducer B K4
Tranducer B K5
Appears for
"P method"
only
Transducer B K6
Density A offset
Route returns to " Edit Density B Limits &
Fallback " prompt (on previous page) unless
temperature correction has also been
selected.
“Density 2” Wizard Map - Part 2 of 2
Page 10.9

Chapter 10 Configuring your instrument by using wizards
10.9 SG-1 Application Wizard
This wizard can be used to configure a system that has a 3096 gas specific gravity transducer connected to “Density
input 3”. Special equations, analogue outputs, user alarms and multi-view can also be configured here.
Setup wizard
SG 1
'b' key
Edit
Gravitometer A?
Yes
"Yes"
SG A K2
SG A K0
Edit SG
Limits & Fallback?
Yes
"Yes"
SG hi limit
SG low limit
Prime SG FB type
(Selection)
Fallback value
Last Good Value
No
No
"No"
"No"
Edit
Special equations?
No
Yes
"No"
Edit
Analog outputs?
No
Yes
"No"
Edit
User Alarms?
No
Yes
"No"
Edit
Multi view?
No
Yes
"No"
Exit Wizard
"Yes"
See note 1
"Yes"
See note 2
"Yes"
See note 3
"Yes"
See note 4
Appears for
"Fallback value"
Page 10.10
Prime SG FB value
only
Wizard Map Notes
(1) Route detours to the "Special Equation" wizard sequence before continuing.
(2) Route detours to the "Analogue output" wizard sequence before continuing.
(3) Route detours to the "User Alarm" wizard sequence before continuing.
(4) Route detours to the "Multiview" wizard sequence before continuing.
:
“SG1” Application Wizard Map

10.10 SG-2 Application Wizard
This wizard can be used to configure a system that has a 3096 gas specific gravity transducer connected to
“Density input 4”. Special equations, analogue outputs, user alarms and multi-view can also be configured here.
Setup wizard
SG 2
'b' key
Chapter 10 Configuring your instrument by using wizards
Edit
Gravitometer B?
Yes
"Yes"
SG B K2
SG B K0
Edit SG
Limits & Fallback?
Yes
"Yes"
SG hi limit
SG low limit
Prime SG FB type
(Selection)
Fallback value
Last Good Value
No
No
"No"
"No"
Edit
Special equations?
No
Yes
"No"
Edit
Analog outputs?
No
Yes
"No"
Edit
User Alarms?
No
Yes
"No"
Edit
Multi view?
No
Yes
"No"
Exit Wizard
"Yes"
See note 1
"Yes"
See note 2
"Yes"
See note 3
"Yes"
See note 4
Prime SG FB value
Appears for
"Fallback value"
only
Wizard Map Notes
(1) Route detours to the "Special Equation" wizard sequence before continuing.
(2) Route detours to the "Analogue output" wizard sequence before continuing.
(3) Route detours to the "User Alarm" wizard sequence before continuing.
(4) Route detours to the "Multiview" wizard sequence before continuing.
:
“SG2” Application Wizard Map
Page 10.11

Chapter 10 Configuring your instrument by using wizards
10.11 SG-1&2 Application Wizard
This wizard can be used to configure a system that has 3096 gas specific gravity transducers connected to
“Density input 3” and “Density input 4”. Special equations, analogue outputs, user alarms and multi-view can
also be configured here.
Setup wizard
SG 1 & 2
'b' key
Edit
Gravitometer A+B?
No
Yes
"Yes"
SG A K2
SG A K0
SG B K2
SG B K0
Edit SG
Limits & Fallback?
No
Yes
"Yes"
SG hi limit
SG low limit
SG comp limit
"No"
"No"
Edit
Special equations?
No
Yes
"No"
Edit
Analog outputs?
No
Yes
"No"
Edit
User Alarms?
No
Yes
"No"
Edit
Multi view?
No
Yes
"No"
"Yes"
See note 1
"Yes"
See note 2
"Yes"
See note 3
"Yes"
See note 4
Appears for
"Fallback value"
Page 10.12
Prime SG FB type
(Selection)
Fallback value
Last Good Value
Prime SG FB value
only
Exit Wizard
Wizard Map Notes
(1) Route detours to the "Special Equation" wizard
sequence before continuing.
(2) Route detours to the "Analogue output" wizard
sequence before continuing.
(3) Route detours to the "User Alarm" wizard
sequence before continuing.
(4) Route detours to the "Multiview" wizard sequence
before continuing.
“SG1&2” Application Wizard Map
:

10.12 Line density wizard
This wizard configures the 795x for getting line density ‘A’ and/or line density ‘B’ data.
Chapter 10 Configuring your instrument by using wizards
A1
Setup wizard
Line Density
'b' key
Line density
prime selection ?
Automatic
"A"
Edit
Line density A calc ?
"Yes"
Transducer A K0
Transducer A K1
Transducer A K2
Density A correction
(Selection)
None
Temp and VOS
VOS
Temp
Transducer A K18
Transducer A K19
"None"
Density A offset
A
B
No
Yes
"Temp"
"B"
"Auto"
"No"
"VOS"
A2
Follow
"A"+"B"
route
A1
"Temp
and
VOS"
Follow "Temp"
route and then
follow "VOS"
route
Line dens A VOS type
(Selection)
P method
SG method
Density Transducer A
(Selection)
7812 N2 high
7812 N2 low
7811 AR high
7811 N2 high
7811 N2 low
7810 CH4 medium
7810 N2 low
7812 AR high
Line density A gamma
Transducer A K5
Transducer A K6
Transducer A K3
Transducer A K4
Edit Density Limits &
Fallback ?
Line density hi lmt
Line density lo lmt
Line density comp lmt
Prime dens FB type
Fallback value
Last Good Value
Prime density FB val
Exit
wizard
Appears for
"Fallback value"
only
Appears for
"P method"
Appears for
"SG method"
"No"
No
Yes
"Yes"
(Selection)
only
only
A1
Density A offset
“Line density” Wizard Map - Part 1 of 3
Page 10.13

Chapter 10 Configuring your instrument by using wizards
Sequence : Line density ‘B’ measurement
A2
Line density B
selection?
Time Period
Analogue input
"Analogue input"
Edit Line density B
analogue input ?
Line den B input chl
mA input 1
mA input 2
mA input 10
Line Dens B @ 100%
Line Dens B @ 0%
Analogue input n type
PT100 input
0 - 20mA input
4 - 20mA input
Input channel n
PTZ1
"Yes"
No
Yes
"Yes"
(Selection)
etc.
(Selection)
"PTZ1"
"Time Period"
"No"
"Part 1"
A3
A1
See
page
This
apppears
only for mA
inputs 1 to 4
Note :
'n' is the
number of
the mA
input
selected
earlier
Edit
Line density B calc ?
Transducer B K0
Transducer B K1
Transducer B K2
Density B correction
(Selection)
None
Temp and VOS
VOS
Temp
"None"
Transducer B K18
Transducer B K19
Density B offset
Yes
"Yes"
"Temp"
A1
No
"SG method"
See
"Part 1"
page
A1
"No"
"VOS"
Appears for
"P method"
only
Appears for
only
Line dens B VOS type
(Selection)
P method
SG method
Density Transducer B
(Selection)
7812 N2 high
7812 N2 low
7811 AR high
7811 N2 high
7811 N2 low
7810 CH4 medium
7810 N2 low
7812 AR high
Line density B gamma
Transducer B K5
Transducer B K6
Transducer B K3
Transducer B K4
Density B offset
Page 10.14
A1
See
"Part 1"
page
Wizard Map Notes
1. The sequence for "Temp and VOS" correction includes the "Temp"
route followed by the "VOS" route.
2. Density B offset appears after all sequences for the selected
corrections have been completed.
:
“Line density” Wizard Map - Part 1 of 3

Sequence : Line density ‘B’ measurement using PTZ1 method
A3
Edit
PTZ1 calculation ?
PTZ1 calc select
From
"Part 1"
page
No
Yes
"Yes"
(Selection)
See
"Part 1"
page
A1
Chapter 10 Configuring your instrument by using wizards
Route 1
Edit
SGERG parameters ?
No
Yes
"Yes"
SGERG selector
(Selection)
Route 3
"No" "No"
Edit
Nx19-3H parameters?
No
Yes
"Yes"
Live CO2 value
Live N2 value
AGA-NX19
SGERG
AGA-NX19-mod3h
AGA-NX19-mod
Base temp value
Base pressure value
Follow one of these routes:
- Route 1 for "SGERG",
- Route 2 for "AGA-NX19-mod",
- Route 3 for "AGA-NX19-mod3h",
- Route 4 for "AGA-NX19"
Appearance of these
prompts depend on
selection for "SGERG
Selector".
N2 CO2 Cv RD H2
N2 CO2 Cv -- H2
N2 CO2 -- RD H2
N2 --- Cv RD H2
-- CO2 Cv RD H2
Live N2 value
Live CO2 value
Energy value
SG Prime value
H2
Route 2
Edit
Nx19mod parameters?
No
Yes
"Yes"
Live CO2 value
Live N2 value
SG Prime value
Methane
Ethane
Propane
Hydrogen
SG Prime value
Energy
Route 4
Edit
NX19 parameters ?
Yes
"Yes"
AGA-NX19 method
N
(Selection)
Standard calc
Curve fit
Live CO2 value
Live N2 value
SG Prime value
N
No
To "Part 1" page
A1
“Line density” Wizard Map - Part 3 of 3
Page 10.15

Chapter 10 Configuring your instrument by using wizards
10.13 Base density wizard
This wizard configures the 795x for getting base density ‘A’ and/or base density ‘B’ data.
Setup wizard
Base density
'b' key
Base density
prime selection ?
A
B
Automatic
"A"
SG Prime value
Base density of Air
"B"
"Auto"
Follow
"A"+"B"
route
Base density B
selection?
Analogue input
"Analogue input"
Edit Line density B
analogue input ?
"No"
PTZ1
"Yes"
"Yes"
No
Yes
"PTZ1"
H2
H1
Appears for
"Fallback value"
Edit Base density
Limits & Fallback ?
No
Yes
"Yes"
Base density hi lmt
Base density lo lmt
Basedensity comp lmt
Base density FB type
(Selection)
Fallback value
Last Good Value
Base density FB val.
Exit
wizard
only
"No"
Base den B input chl
(Selection)
mA input 1
mA input 2
etc.
mA input 10
Base Dens B @ 100%
Base Dens B @ 0%
Analogue input n type
(Selection)
PT100 input
0 - 20mA input
4 - 20mA input
Input channel
“Base density” Wizard Map - Part 1 of 2
This
apppears
only for mA
inputs 1 to 4
Note :
'n' is the
number of
the mA
input
selected
n
earlier
Page 10.16

Sequence : Base density ‘B’ measurement using the PTZ1 method
H2
Edit
PTZ1 calculation ?
PTZ1 calc select
From
"Part 1"
page
No
Yes
"Yes"
(Selection)
To
"Part 1"
page
H1
Chapter 10 Configuring your instrument by using wizards
Route 1
Edit
SGERG parameters ?
No
Yes
"Yes"
SGERG selector
(Selection)
Route 3
"No" "No"
Edit
Nx19-3H parameters?
No
Yes
"Yes"
Live CO2 value
Live N2 value
AGA-NX19
SGERG
AGA-NX19-mod3h
AGA-NX19-mod
Base temp value
Base pressure value
Follow one of these routes:
- Route 1 for "SGERG",
- Route 2 for "AGA-NX19-mod",
- Route 3 for "AGA-NX19-mod3h",
- Route 4 for "AGA-NX19"
Appearance of these
prompts depend on
selection for "SGERG
Selector".
N2 CO2 Cv RD H2
N2 CO2 Cv -- H2
N2 CO2 -- RD H2
N2 --- Cv RD H2
-- CO2 Cv RD H2
Live N2 value
Live CO2 value
Energy value
SG Prime value
H2
Route 2
Edit
Nx19mod parameters?
No
Yes
"Yes"
Live CO2 value
Live N2 value
SG Prime value
Methane
Ethane
Propane
Hydrogen
SG Prime value
Energy
Route 4
Edit
NX19 parameters ?
Yes
"Yes"
AGA-NX19 method
N
(Selection)
Standard calc
Curve fit
Live CO2 value
Live N2 value
SG Prime value
N
No
To "Part 1" page
H1
“Base density” Wizard Map - Part 2 of 2
Page 10.17

Chapter 10 Configuring your instrument by using wizards
10.14 Specific gravity wizard
This wizard configures the 795x for getting specific gravity ‘A’ and/or specific gravity ‘B’ data.
Setup wizard
Specific Gravity
'b' key
Specific Gravity
prime selection ?
Automatic
"A"
Edit SG A calc ?
"Yes"
SG A K2
No
Yes
"Auto"
A
B
"B"
"No"
"A" route
followed by
the "B" route
Edit SG B selection ?
Time Period
Base density
Analogue input
"Time Period"
SG B K2
"Analogue input"
"Base Density"
Prime Base Density
I1
Turn to
"Part 2"
page
SG A K0
SG B K0
Base density of Air
Edit SG Limits &
From
"Part 2"
page
I2
Fallback ?
"Yes"
No
Yes
"No"
SG hi limit
SG low limit
SG comp. limit
Prime SG FB type
(selection)
Fallback value
Last Good Value
Appears for
"Fallback value"
only
Prime density FB val
Exit
wizard
“Base density” Wizard Map - Part 1 of 2
Page 10.18

Chapter 10 Configuring your instrument by using wizards
Sequence : Specific gravity ‘B’ measurement from an analogue input
From
"Part 1"
I1
page
Edit
SG B analogue input ?
No
Yes
"Yes"
SG B mA Src
(Selection)
mA input 1
mA input 2
mA input 10
SG @ 100%
SG @ 0%
Analogue input n type
(Selection)
PT100 input
"No"
I2
Turn to
"Part 1"
page
Note :
'n' is the
number of the
input channel
selected earlier.
“Base density” Wizard Map - Part 2 of 2
0 - 20mA input
4 - 20mA input
Input channel
Turn to
"Part 1"
I2
n
page
Page 10.19

Chapter 10 Configuring your instrument by using wizards
10.15 Temperat ure wizard
This wizard configures the 795x for getting line temperature ‘A’ and/or density temperature ‘A’ and/or density
temperature ‘B’ data.
Note :
'n' is the
number of
the input
channel
selected
earlier
Setup wizard
Temperature
'b' key
Edit Line Temperature ?
No
Yes
"Yes"
Line temp input chl
(Selection)
Analogue input 1
Analogue input 2
etc.
mA input 10
Analogue input n type
(Selection)
PT100 input
0 - 20mA input
4 - 20mA input
Line temp @ 100%
"No"
From
"Part 2"
page
J4
Edit Dens. Temp. A ?
No
Yes
"Yes"
Dens tempA input chl
(Selection)
Analogue input 1
Analogue input 2
etc.
mA input 10
Analogue input n type
(Selection)
PT100 input
0 - 20mA input
4 - 20mA input
Dens tempA @ 100%
"No"
From
"Part 2"
page
J5
Edit Dens. Temp B ?
"Yes"
Dens tempB input chl
Analogue input 1
Analogue input 2
mA input 10
Analogue input n type
(Selection)
PT100 input
0 - 20mA input
4 - 20mA input
Dens tempB @ 100%
Exit wizard
"No"
No
Yes
(Selection)
etc.
Page 10.20
Line temp @ 0%
Turn
J1
"Part 2"
page
Dens tempA @ 0%
Input channel n Input channel nInput channel n
Turn
J2
"Part 2"
page
“Temperature” Wizard Map - Part 1 of 2
Dens tempB @ 0%
Turn
"Part 2"
J3
page

J1
From
"Part 1"
page
Chapter 10 Configuring your instrument by using wizards
J2
From
"Part 1"
page
J3
From
"Part 1"
page
Edit Temperature
Limits & Fallback ?
"Yes"
Line temp high limit
Line temp low limit
Line temp step limit
Line temp FB type
Dens temp B Position
(selection)
(selection)
None
Fallback Value
Last Good Value
Line temp FB value
J4
Turn to
"Part 1"
page
No
Yes
"Fallback value"
"No"
J4
Turn to
"Part 1"
page
Appears for
only
Edit Dens. Temp. A
Limits & Fallback ?
Yes
"Yes"
Dens tempA high lmt
Dens tempA low lmt
Dens tempA step lmt
Dens tempA FB type
Dens temp B Position
(selection)
(selection)
None
Fallback Value
Last Good Value
"No"
No
Turn to
"Part 1"
page
Edit Dens. Temp. B
Limits & Fallback ?
J5
"Yes"
Dens tempB high lmt
Dens tempB low lmt
Dens tempB step lmt
Dens tempB FB type
Dens temp B Position
None
Fallback Value
Last Good Value
Dens tempA FB value Dens tempB FB value
J5
Turn to
"Part 1"
page
Appears for
"Fallback value"
only
Exit wizard
“Temperature” Wizard Map - Part 2 of 2
No
Yes
(selection)
(selection)
"No
"
Page 10.21

Chapter 10 Configuring your instrument by using wizards
10.16 Pressure wizard
This wizard configures the 795x for getting line pressure and/or atmospheric pressure data.
Setup wizard
Pressure
'b' key
Edit Line Pressure ?
No
Yes
"Yes"
Line press input chl
(Selection)
mA input 1
mA input 2
"No"
K1
Edit Line Pressure
Limits & Fallback ?
No
Yes
"Yes"
Line press high lmt
"No"
K1
Turn to
"Part 2"
page
Note
:
'n' is the
number of
the input
channel
selected
earlier
mA input 10
Line press 100%
Line press 0% value
Analogue input n type
(Selection)
PT100 input
0 - 20mA input
4 - 20mA input
Input channel
n
“Pressure” Wizard Map - Part 1 of 2
Line press low lmt
Line press step lmt
Dens temp B Position
Line press FB type
(selection)
(selection)
None
Fallback Value
Last Good Value
Line press FB value
Turn to
"Part 2"
page
K1
Appears for
"Fallback value"
only
Page 10.22

Chapter 10 Configuring your instrument by using wizards
Sequence : Atmospheric pressure from an analogue input
From
"Part 2"
K1
page
Note
:
'n' is the
number of
the input
channel
selected
earlier
Edit Atmos. Pressure ?
No
Yes
"Yes"
Atmosp input chl
(Selection)
mA input 1
mA input 2
mA input 10
Atmosp 100% value
Atmosp 0% value
Analogue input n type
(Selection)
PT100 input
0 - 20mA input
4 - 20mA input
Input channel
n
"No"
Exit wizard
Edit Atmosp. Pressure
Limits & Fallback ?
"Yes"
Atmosp high limit
Atmosp low limit
Atmosp step lmt
Atmosp FB type
Dens temp B Position
(selection)
(selection)
None
Fallback Value
Last Good Value
Atmosp FB value
Exit
wizard
“Pressure” Wizard Map - Part 2 of 2
No
Yes
"No"
Exit wizard
Appears for
"Fallback value"
only
Page 10.23

Chapter 10 Configuring your instrument by using wizards
10.17 Transmitter wizard
This wizard configures the 795x for getting live CO2 and/or live N2 and/or live energy data.
Setup wizard
Transmitter
'b' key
Edit Transmitter ?
CO2
N2
Cv/m
"CO2"
Line CO2 input chl
(Selection)
mA input 1
mA input 2
"Cv/m"
"N2"
L1
Turn to "Part 2" page
Turn to "Part 3" page
L2
Edit Live CO2
Limits & Fallback ?
No
Yes
"Yes"
Live CO2 high limit
"No"
Exit
wizard
Note
:
'n' is the
number of
the input
channel
selected
earlier
mA input 10
Live CO2 @100%
Live CO2 @ 0%
Analogue input n type
(Selection)
PT100 input
0 - 20mA input
4 - 20mA input
Input channel
n
“Transmitter” Wizard Map - Part 1 of 3
Live CO2 low limit
Dens temp B Position
Live CO2 FB type
(selection)
(selection)
None
Fallback Value
Last Good Value
Live CO2 FB value
Exit
wizard
Appears for
"Fallback value"
only
Page 10.24

Chapter 10 Configuring your instrument by using wizards
Sequence : Live N2 from an analogue input
From
L1
"Part 1"
page
Live N2 input chl
(Selection)
mA input 1
mA input 2
mA input 10
Live N2 @100%
Live N2 @ 0%
Edit Live N2
Limits & Fallback ?
Yes
"Yes"
Live N2 high limit
Live N2 low limit
No
"No"
Exit wizard
Note
:
'n' is the
number of
the input
channel
selected
earlier
Analogue input n type
(Selection)
PT100 input
0 - 20mA input
4 - 20mA input
Input channel
n
“Transmitter” Wizard Map - Part 2 of 3
Live N2 FB type
Dens temp B Position
(selection)
(selection)
None
Fallback Value
Last Good Value
Live N2 FB value
Exit
wizard
Appears for
"Fallback value"
only
Page 10.25

Chapter 10 Configuring your instrument by using wizards
Sequence : Live energy value from an analogue input
From
L2
"Part 1"
page
Live energy input
(Selection)
mA input 1
mA input 2
mA input 10
Live energy @100%
Live energy @ 0%
Edit Live Cv/m
Limits & Fallback ?
"Yes"
Live energy high lmt
Live energy low lmt
No
Yes
"No"
Exit wizard
Note
:
'n' is the
number of
the input
channel
selected
earlier
Analogue input n type
(Selection)
PT100 input
0 - 20mA input
4 - 20mA input
Input channel
n
“Transmitter” Wizard Map - Part 3 of 3
Live energy FB type
Dens temp B Position
(selection)
(selection)
None
Fallback Value
Last Good Value
Live energy FB value
Exit
wizard
Appears for
"Fallback value"
only
Page 10.26

10.18 Special Calculation wizard
Setup wizard
Special Calc.
'b' key
Chapter 10 Configuring your instrument by using wizards
Edit
Special equation:
"1"
General equ. const A
General equ. const B
General equ. const X
General equ. const Y
General equ. ptr. a
General equ. ptr. b
General equ. ptr. c
General equ. ptr. d
General equ. ptr. e
General equ. ptr. f
General equation
(Free-form text)
"2"
1
2
General equ2 const A
General equ2 const B
General equ2 const C
General equ2 ptr. t
User sp eq2 text
(Free-form text)
Exit wizard
Exit
Special Calc.
wizard
“Multi-view” Wizard Map
Page 10.27

Chapter 10 Configuring your instrument by using wizards
10.19 Analogue outputs wizard
Setup wizard
Analogue Outputs
'b' key
Edit
Analog output 1?
"Yes"
"No"
No
Yes
Edit
Analog output 2?
"Yes" "Yes"
No
Yes
"No"
etc.
Edit
Analog output 8?
No
Yes
Exit
wizard
n=1
Note
:
'n' is the number of
the mA output being
configured
n=2 n=8
mA output n source
mA n param. val. @100%
mA n param. val. @ 0%
Analogue output n type
(Selection)
0 - 20mA input
4 - 20mA input
mA output n filter
(Selection)
Note
:
This prompt needs
the input of a location
identifier e.g. 0450
Note
:
This sequence is
identical for each
analogue output.
Page 10.28
Normal
Averaging
Oversampling
mA output n value
Return to the next "edit"
prompt OR exit wizard if
there are no more prompts
“Analogue outputs” Wizard Map

10.20 Alarms wizard
Setup wizard
Alarms
'b' key
Edit X
User Alarm: Y
A
B
"X"
User alarm X ptr.
"B"
"A"
"Y"
User alarm Y ptr.
Chapter 10 Configuring your instrument by using wizards
Comp alarm A ptr1
Comp alarm B ptr1
User alarm X low lmt
User alarm X hi lmt
User alarm Y low lmt
User alarm Y hi lmt
“Alarms” Wizard Map
Exit
wizard
Comp alarm A ptr2
Comp alarm A limit
Comp alarm B ptr2
Comp alarm B limit
Page 10.29

Chapter 10 Configuring your instrument by using wizards
10.21 Multi-view wizard
Setup wizard
Multi view
'b' key
Multiview text width
Mv page1 line1 text
Mv page1 line1 ptr
Mv page1 line2 text
Mv page1 line2 ptr
Mv page1 line3 text
Mv page1 line3 ptr
Mv page1 line4 text
Mv page1 line4 ptr
Default value is 10
Default value is "Density"
Default data is Prime Base Density
Default value is "Temp"
Default data is Line temperature
Default value is "Pressure"
Default data is Line pressure
Default value is "Mass rate"
Default data is Mass rate
Page 10.30
Exit Wizard
“Multi-view” Wizard Map

10.22 Full Setup
This wizard consists of multiple wizards.
Chapter 10 Configuring your instrument by using wizards
O1
Setup wizard
Full Setup
'b' key
Edit
Line density ?
No
Yes
"No"
Edit
Base density ?
No
Yes
"No"
Edit
Specific gravity ?
No
Yes
"No"
Edit
Temperature ?
No
Yes
"No"
Edit
Pressure?
No
Yes
"No"
Edit
Energy ?
No
Yes
"No"
Edit
Transmitters ?
No
Yes
"No"
Edit
Special equations ?
No
Yes
"No"
O1
"Yes"
"Yes"
"Yes"
"Yes"
"Yes"
"Yes"
"Yes"
"Yes"
Route detours to the
"Line density" wizard
sequence before
continuing from here.
Route detours to the
"Base density" wizard
sequence before
continuing from here.
Route detours to the
"Specific gravity"
wizard sequence
before continuing
from here.
Route detours to the
"Temperature" wizard
sequence before
continuing from here.
Route detours to the
"Pressure" wizard
sequence before
continuing from here.
Route detours to the
"Transmitter" wizard
sequence before
continuing from here.
Route detours to the
"Special Calc." wizard
sequence before
continuing from here.
Edit
Analog outputs?
Yes
"No"
Edit
User Alarms ?
Yes
"No"
Edit
Multi-view?
Yes
"No"
Exit wizard
Energy selection?
AGA 5
mA input
Live CO2 value
Live N2 value
SG Prime value
No
No
No
"AGA 5"
Note
'n' is the
number
of the
input
channel
selected
earlier
"Yes"
"Yes"
"Yes"
:
Route detours to the
"Analog outputs"
wizard sequence
before continuing
from here.
Route detours to the
"Alarms" wizard
sequence before
continuing from here.
Route detours to the
"Multi-view" wizard
sequence before
continuing from here.
"mA input"
Energy type selector
(Selection)
Mass
Volume
Live energy input
(Selection)
mA input 1
etc.
mA input 10
Live energy @100%
Live energy @ 0%
Analogue input n type
(Selection)
PT100 input
0 - 20mA input
4 - 20mA input
Input channel n
Page 10.31

Chapter 10 Configuring your instrument by using wizards
Page 10.32

11. Configuring by using the menus
The recommended way of configuring the 795x is by using wizards, as e xplained in Chapter 10. But
you should use the methods given here if:
• You want to configure an installation which is very different from the examples sho wn in Chapter 10.
• You want to change only a part of an existing configuration, irrespective of how it was configured in
the first place.
• You are experienced in using the 795x menus.
11.1 What does configuration involve?
After you have installed the instrument and made sure that it is working, you must tell it:
• What inputs the field transmitters are connected to.
• How input data is to be processed.
• How results are to be output.
There is a default configuration which covers a general application. Ho wever, it is usually necess ary to edit this
configuration to suit particular needs.
Chapter 11 Configuring by using the menus
11.2 Before you start
Before you begin configuring you must obtain the calibration certificates for all the field transmitters connected to
the 795x. The diagram on Page 11.4 shows an example of a typical calibration certificate.
If you have followed the installation procedure given in Chapter 5, the instrument is ready to be configured.
Otherwise, you must make sure before continuing that:
• The dip switches for the analogue inputs are set as explained in Ch apter 5.
• All instrumentation has been connected.
• The instrument is powered up.
Page 11.1

Chapter 11 Configuring by using the menus
11.3 Recommended sequence for configuration
It is recommended that you configure items in the following order:
1. Inputs (See Section 11.5).
2. Transducer details (See Section 11.6).
3. Anything else such as Specific Gravity, Energy, Custom Application, Multiview, etc. Do these in the order
in which they appear in this chapter. (See Sections 11.7- 11.18).
Item to be configured Calcu lations involved (if any) See Section
Analogue inputs - 11.5
Transducer details - 11.6
Transmitter details Line temperature
Densitometer temperature
Atmospheric pressure
Live CO2 and N2
Line density Line density
AGA8 density compressibility
Normalisation of gas components
Nx-19 compressibility
Linear interpolation compressibility
SGERG compressibility
Density referral
Base density Base density
Prime base density
Specific gravity Specific gravity
Prime specific gravity
Energy Energy 11.11
Custom application User calculations 1 and 2 11.12
mA outputs mA outputs 11.13
Other parameters - 11.14
Multiview - 11.15
11.7
11.8
11.9
11.10
Page 11.2

11.4 What Sections 11.5- 11.15 tell you
Each section tells you how to configure one parameter. The format of each section is:
• (Where necessary) a statement which tells you what information you must have to configure the
parameter.
• (Where necessary) a block diagram showing how the instrument uses information from the transducers
(“Live Data”) and information you give it (“Fixed Data”) to calculate the value of the parameter.
• A diagram which shows that part of the menu system which you use to configure the parameter.
Sections 11.14 (Configuring other parameters) and 11.15 (Configuring Multiview) have a slightly different format
from the others because of the special nature of the topics they deal with.
The table on page 11.2 lists the items which you can configure and, for each, the calculations (if any) which are
involved in obtaining the value of the item.
In the menu diagrams, where an item is shown in brackets, the actual value or setting appears in the
menu at that point. For example:
(Value)
(Units)
(Live or set)
The display shows the actual value of the parameter.
The display shows the actual units.
The display shows whether the parameter is LIVE or SET.
Chapter 11 Configuring by using the menus
Page 11.3

Chapter 11 Configuring by using the menus
solartron
S
S
78123A GAS DENSITY METER
PRESSURE TESTED TO 375 BAR
DENSITY CALIBRATION FOR NITROGEN AT 20 DEG C
O
(Based on Pressure-Temperature-Density Data in IUPAC tables)
DENSITY
[KG/M3]
n nnn.nnn
nn nnn.nnn
nn nnn.nnn
nn nnn.nnn
nnn nnn.nnn
nnn nnn.nnn
nnn nnn.nnn
nnn nnn.nnn
nnn nnn.nnn
nnn nnn.nnn
PERIODIC TIME
[uS]
DENSITY = K0 + K1.T + K2.T**2
K0 =
K1 =
K2 =
TEMPERATURE COEFFICIENT DATA
Dt = DI(1 + K18(t-20)) + K19(t-20)
USER GAS OFFSET DATA
Argon/Methane gas mixture over density range 60 to 200 KG/M3
SERIAL NO
CYLINDER NO
AMPLIFIER NO
CALIBRATION DATE
-n.nnnnnE+nn
-n.nnnnnE-nn
n.nnnnnE-nn
K18 =
K19 =
-n.nnnE-nn
n.nnnE-nn
: nnnnnn
:
:
:
Page 11.4
DA = Dt (1 + ------- (0.00236 - -----))
(K3( G))
K3 = nnn
K4 = nnn.n
( (Dt+K4) ( t+273))
where
T = Periodic time (uS)
DA = Actual Density (KG/M3)
t = Temperature (DEG.C)
DI = Indicated Density (KG/M3)
Gas Specific Gravity
G = -----------------------
Ratio of Specific Heats
Dt = Temp. Corrected Density (KG/M3)
TESTER
Ref No:- xxnnnn/Vn.n
DATE : xxxxxxx
QC
Figure 11.1 An example of a Calibration Certificate for a 7812 gas density transducer

11.5 Configuring analogue inputs
From Configure option
on Main Menu
Chapter 11 Configuring by using the menus
Transducer details
V
Wizards
Analogue inputs
Flowmeter details
a
b
c
d
V
V
V
Analogue input 1
Analogue input 3
Analogue input 4
Analogue input 5
Analogue input 7
Analogue input 8
Analogue input 9
a
b
c
d
a
b
c
d
a
b
c
d
V
GAS_008.CDR Menu structure for configuringanalogue inputs
Figure 11.2 Menu structure for configuring analogue inputs
Value
Input type
Average
a
b
c
d
Page 11.5
 Loading...