

Installation Instructions: CSI CONTROHEAT JACKETS FOR MICROMOTION METERS- INSTALLATION INSTRUCTIONS | Micro Motion
Table of contents
 Loading...
Micro Motion Installation Instructions: CSI CONTROHEAT JACKETS FOR MICROMOTION METERS- INSTALLATION INSTRUCTIONS | Micro Motion Manuals & Guides

Installation Manual
P/N MMI-20013331, Rev. AA
December 2008
Controls Southeast, Inc. ControHeat
Jackets for Micro Motion
Contents
ControHeat Jacket Overview . . . . . . . . . . . . . . . . . . . . . . . . . . . . . . . . . . . . . . page 1
Step 1: Installing a ControHeat Jacket . . . . . . . . . . . . . . . . . . . . . . . . . . . . . . . page 3
Step 2: Installing the Heating Medium Jumpovers . . . . . . . . . . . . . . . . . . . . . . page 5
Step 3: Attaching a ControCover Insulation Blanket. . . . . . . . . . . . . . . . . . . . . page 7
Removing a ControHeat Jacket . . . . . . . . . . . . . . . . . . . . . . . . . . . . . . . . . . . . page 8
Contacting Controls Southeast, Inc. . . . . . . . . . . . . . . . . . . . . . . . . . . . . . . . . . page 8
ControHeat Jacket Overview
®
Sensors
Product overview
ControHeat jackets are aluminum castings produced for specific models and sizes of Micro Motion sensors
that are installed in processes that operate at elevated temperatures. Although most process lines are insulated,
heat loss can be substantial. A heating device, or jacket, is necessary to compensate for the heat loss. A steel
pressure chamber is cast into each ControHeat jacket. The heating medium flows through this chamber to
rapidly heat the aluminum and transfer the heat to the sensor. The ControHeat jackets snugly fit the sensor and
allow for bolting clearance at the back of the sensor flanges and power/signal connections to the sensor.
Controls Southeast, Inc. ControHeat Jackets for Micro Motion Meters 1
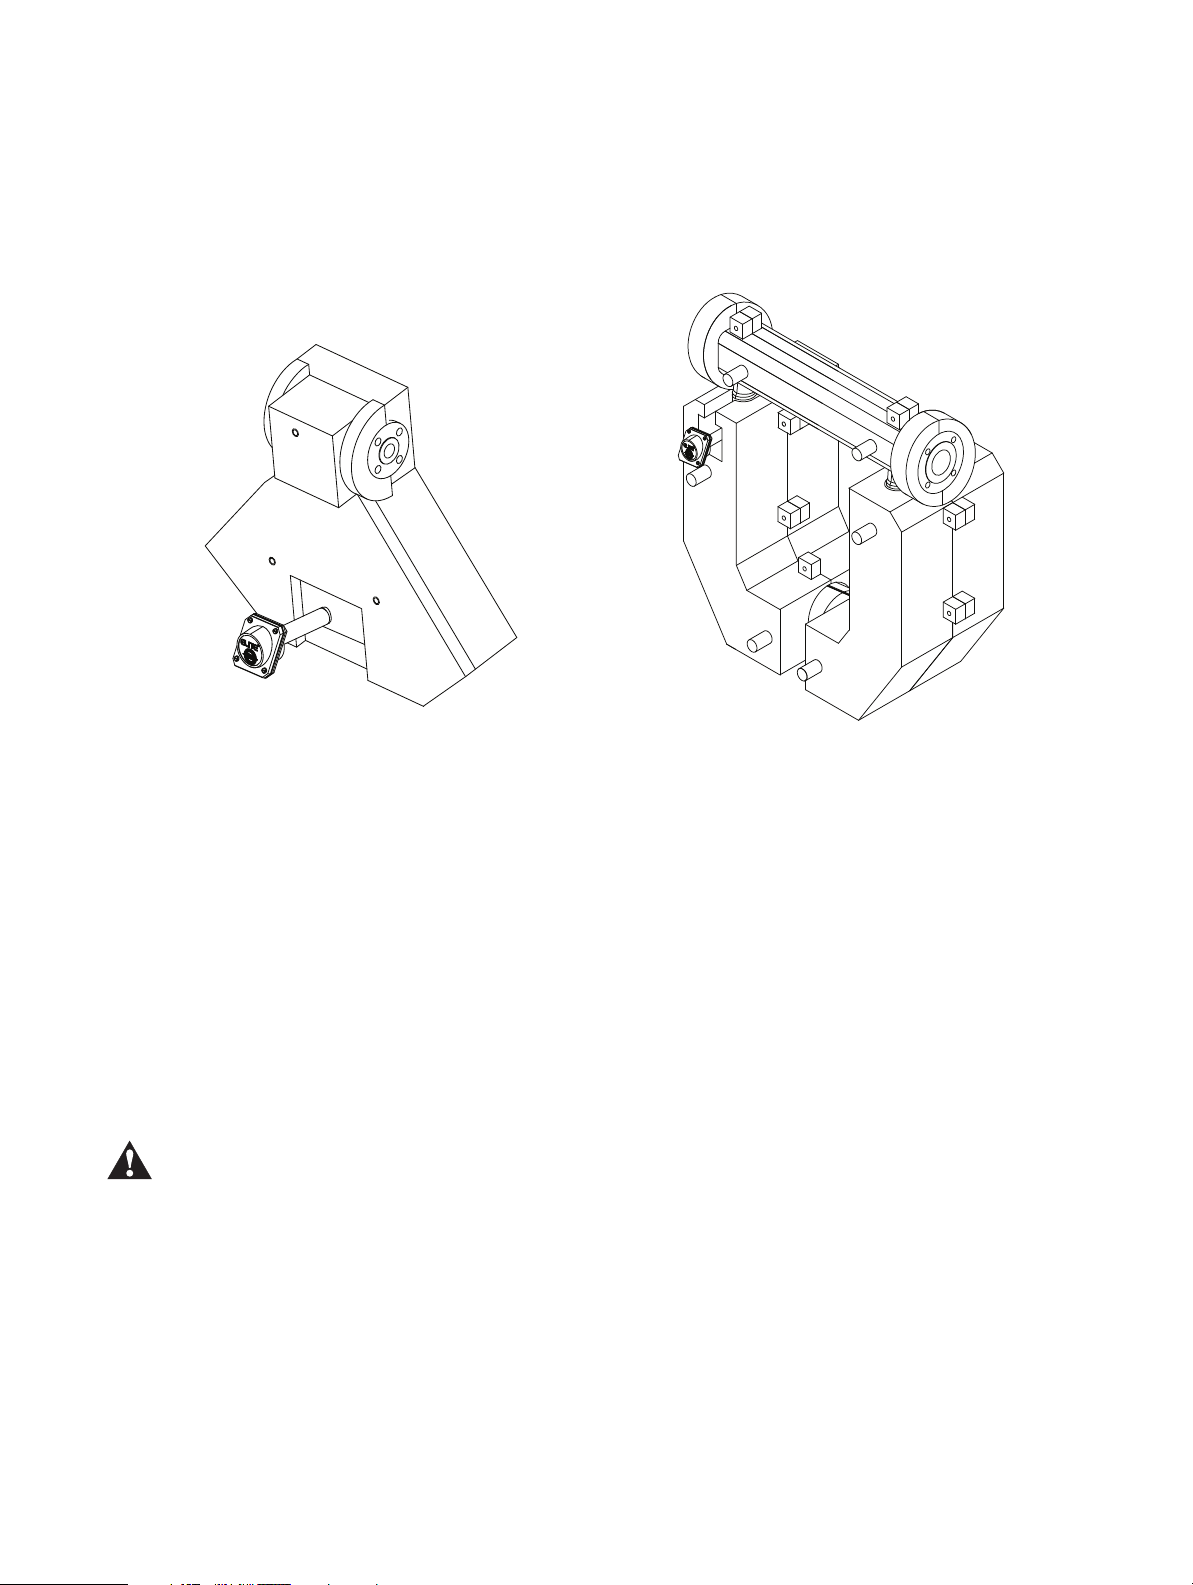
Figure 1 illustrates the different types and sizes of ControHeat jackets. The figure shows an example of a
Two-piece ControHeat jacket for
smaller sensors
Multi-segmented ControHeat jacket
for larger sensors
two-piece ControHeat jacket for smaller sensors and an example of a multi-segmented ControHeat jacket for
larger sensors.
Figure 1 Examples of a ControHeat jacket sized for different Micro Motion sensors
Lifting requirements
Because the ControHeat jackets are sized for specific models and sizes of Micro Motion sensors, some jackets
can be heavy to lift and may require the following:
• Two people to lift and attach the jacket segments to the installed sensor
OR
• A lifting crane to lift and attach the jacket segments to the installed sensor.
To determine the lifting requirements, refer to the shipping information that accompanied the ControHeat
jacket and Micro Motion sensor. Also, refer to the lifting and mounting information in the user manual that
shipped with the Micro Motion sensor.
Some of the larger ControHeat jackets include lifting eyes to transport and mount the jacket to the Micro
Motion sensor after the sensor has been installed in the process line. These lifting eyes are not for hanging or supporting the sensor. You should only use them to assist in lifting and installing the ControHeat
jacket to the Micro Motion sensor.
2 Controls Southeast, Inc. ControHeat Jackets for Micro Motion Meters
Step 1: Installing a ControHeat Jacket
Before you begin
Before you install the ControHeat jacket on the Micro Motion sensor, you must install the Micro Motion
sensor into its proper position in the process line. See the sensor installation manual that shipped with the
Micro Motion sensor. Document the information listed on the sensor tag, such as the serial number and
calibration data, elsewhere and make this information accessible near the sensor. Once you install the heat
jacket, you can no longer access the sensor tag that shows this information.
Always use the extended-mount junction box or the extended-mount electronics option that is available
with the Micro Motion sensor when using a ControHeat jacket. The extended-mount installation ensures
the electronics and wiring connections are outside of the insulated area, so that they do not exceed the
ambient temperature specification of the Micro Motion sensor.
Tools required
You need the following tools to install a ControHeat jacket:
• Two wrenches (open end, adjustable, or socket type)
• Screwdriver
• Heavy-duty aluminum foil (if applicable)
• Heat-transfer cement
• Suitable mason’s trowel
• Damp paper towels or rags
• Lifting crane (if applicable)
Procedure
1. Verify that the Micro Motion sensor has been installed correctly and according to the safety
requirements for the sensor.
2. Verify the appropriate information listed on the sensor tag, such as the serial number and calibration
data, has been documented elsewhere and made accessible near the sensor.
3. Visually inspect the Micro Motion sensor and remove any foreign material – such as debris or
packaging – from the surface of the Micro Motion sensor.
4. Dry fit the jacket segments to the sensor body to verify the ControHeat jacket fits properly to the
sensor. To “dry fit” means to fit the segments to the sensor before applying the heat-transfer cement. To
do this:
a. Using a wrench and/or screwdriver, remove the fasteners that hold the jacket segments together.
b. Place both segments around the sensor.
Note: Normally there is a slight clearance between the inner jacket surface and Micro Motion sensor.
If there is a problem that prevents the jacket segments from mating, contact Micro Motion.
5. Remove the jacket segments from the sensor and lay the segments on a clean, dry work area with the
inner surfaces facing up.
6. If you expect to remove and reinstall the heat jacket to the sensor frequently, line the Micro Motion
sensor with heavy-duty aluminum foil (optional). Mold the foil to the shape of the sensor.
Controls Southeast, Inc. ControHeat Jackets for Micro Motion Meters 3
7. Using the mason’s trowel, coat the inner surfaces of the jacket segments with heat-transfer cement.
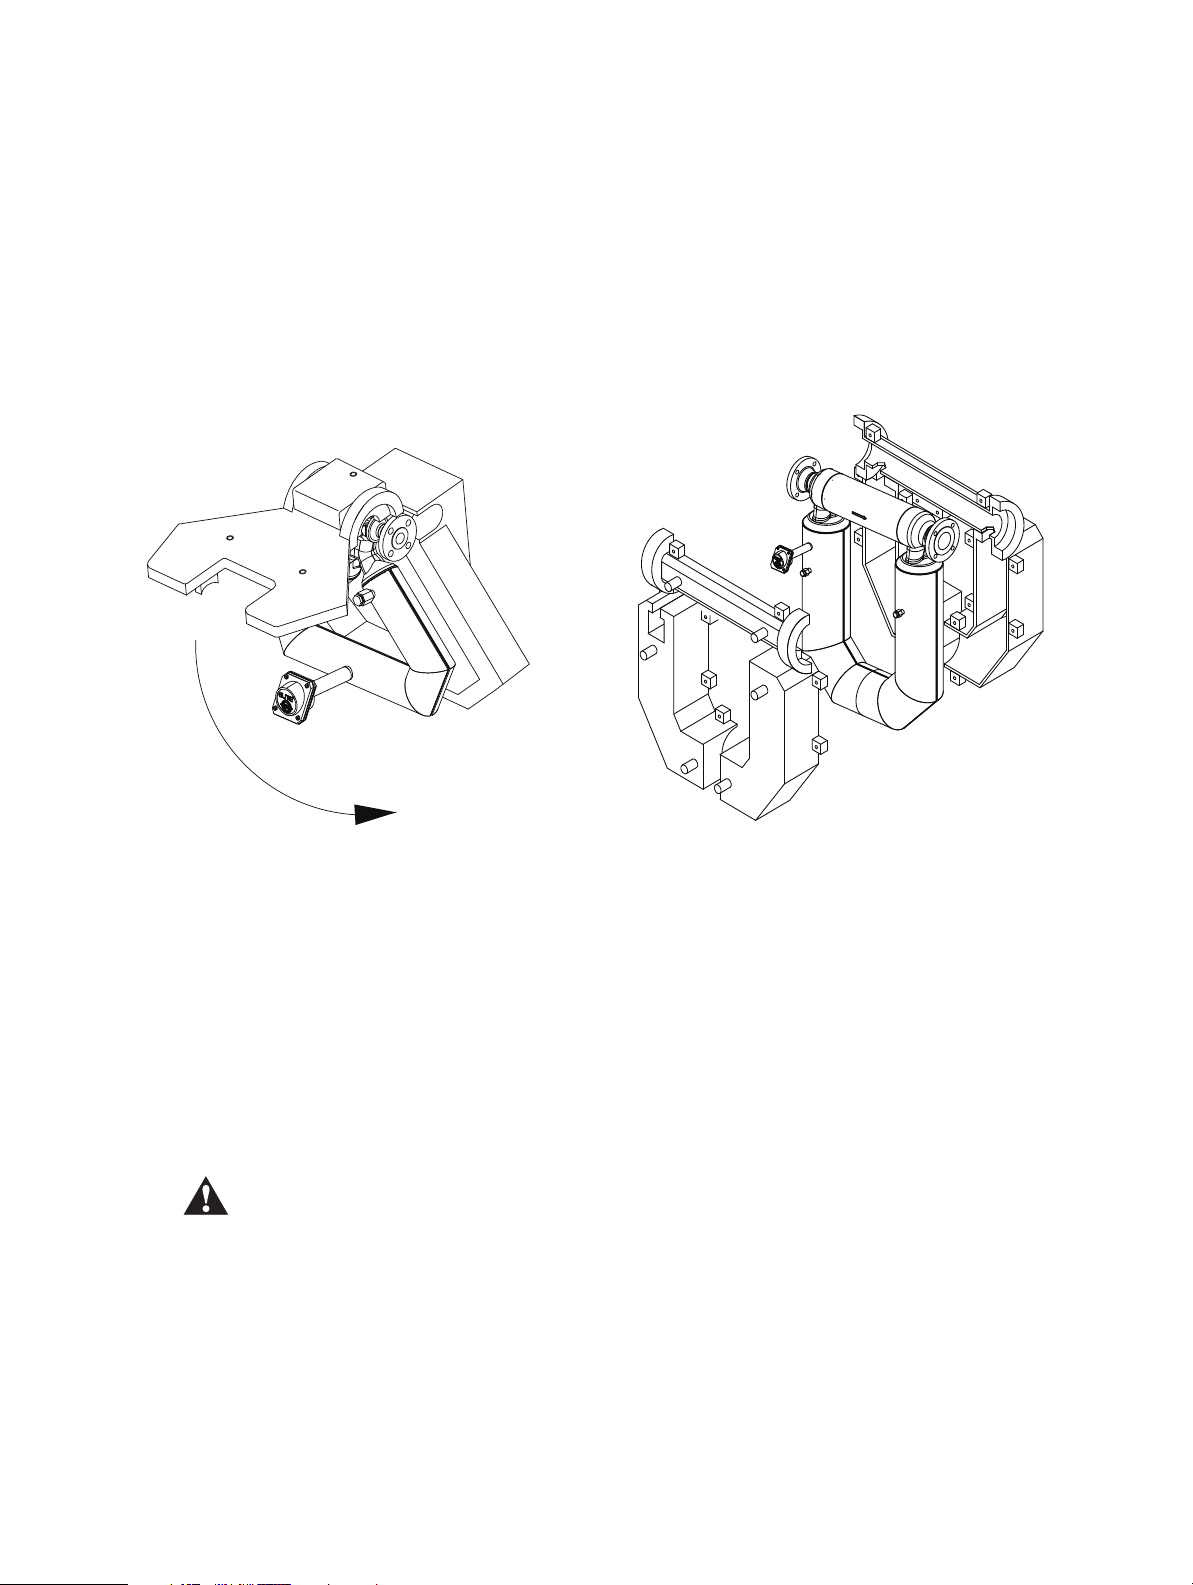
ControHeat jacket for smaller sensors
ControHeat jacket for larger sensors
Also, apply a small amount of heat-transfer cement to the backs of the sensor flanges at three or four
places. The coating should be approximately 3-6 mm thick. The application of heat-transfer cement
ensures that air gaps between the jacket and sensor have been filled.
8. Using the appropriate lifting device, place the coated jacket segments around the Micro Motion sensor
and press firmly into place. If you are installing a multi-segmented jacket, install the jacket segments
from lower elevation to higher elevation.
Figure 2 Placement of a ControHeat jacket sized for smaller or larger Micro Motion sensors
9. Using the wrenches, bolt the jacket pieces together with the fasteners provided.
10. Tighten the fasteners, alternating between the fasteners before fully tightening each. This process
ensures a snug, even seating of the jacket segments on the sensor. Excess heat-transfer cement will
extrude from the jacket edges and the flange interfaces.
11. Remove the excess heat-transfer cement with the trowel. Use damp paper towels or rags to clean any
remaining cement from the installation. Ensure that no heat-transfer cement is on the jacket coupling
threads.
After the installation of the ControHeat jacket, allow the heat-transfer cement to cure at ambient
temperature [above 0 ºC (32 ºF)] for 24 hours before the heating medium is turned on. If you need
to accelerate the curing time, you can apply the heating medium intermittently for short intervals
(5 minutes). You must not exceed a temperature of 100 ºC (212 ºF) during the curing cycle.
4 Controls Southeast, Inc. ControHeat Jackets for Micro Motion Meters
Loading...