

Page 1

MECHANICAL HEADLIGHT KIT
#3KHDLGTM
Drivers and passengers alike need and appreciate the clear view that well maintained headlights
provide. Comfort, enjoyment, but more importantly - SAFETY, are all requirements today! The
smallest of scratches can lead to crazing. By keeping headlights
smooth and optically clear, through
regular maintenance, crazing can be avoided.
A.
B.
1. (2) 120 Grit Wet/Dry Sandpaper 3" Discs 6. (2) 3600 Micro-Mesh 3" Discs
2. (2) 220 Grit Wet/Dry Sandpaper 3" Discs 7. (1) 3” Back-up Pad
3. (2) 400 Grit Wet/Dry Sandpaper 3" Discs 8. (1) TufBuf polishing pad
4. (2) 1500 Micro-Mesh 3" Discs 9. (1) (4 ounce) Micro-Gloss
5. (2) 2400 Micro-Mesh 3" Discs 10. (1) Instructions
C.
TOOLS REQUIRED:
1. (1) Cordless rotary power drill
2. (1) Spray bottle - approximately 10 ounce capacity. (For clean water).
LIST OF CONTENTS:
DETERMINE TYPE AND EXTENT OF DAMAGE AND STARTING POINT
1. If your headlights are extremely hazy, yellowing or seriously damaged you will need to start
with the 120-wet/dry sandpaper. Make sure you remove damage with that first step.
(Note: when finished with the first step it is going to look worse).
2. If you have slight haziness, cloudiness or slightly scratch headlights start with the MicroMesh ®1500 then follow the consecutive larger numbered grades and buff with MicroGloss® and Tufbuf Polishing Pad®.
D. THE PROCESS:
1. Mask off with heavy duct tape. Wet the surface. All sanding is done wet. Use firm even
pressure to control the drill. Start the drill
120-grit wet/dry sandpaper or with the 1500 Micro-Mesh®. Cover the entire surface of
transparency with long, sweeping motions. At regular intervals, change the directions of
sweep to perpendicular of the previous motion. The damage is removed when all that can be
seen is the pattern left by the sandpaper or Micro-Mesh®. Then continue with the next
grades of abrasives until you finish with the 3600. The remaining steps should take 3-5
minutes per square foot for each grade. Remember to wipe debris clear between each step.
2. Attach the TufBuf polishing pad to the drill back-up pad. Wet the surface with water.
Apply approximately 1 tablespoon of Micro-Gloss® and buff for 2-4 minutes. Re-wet the
surface and add more Micro-Gloss®, if necessary.
IMPORTANT NOTICE: Micro-Surface Finishing Products, Inc. (“Micro”) MAKES NO WARRANTIES, EXPRESS OR
IMPLIED, INCLUDING, BUT NOT LIMITED TO, ANY IMPLIED WARRANTIES OF MERCHANTABILITY OR FITNESS FOR
A PARTICULAR PURPOSE. User is responsible for determining whether this product is fit for a particular purpose and
suitable for user’s method of application.
LIMITATION OF REMEDIES AND LIABILITY: If this product is proved to be defective, THE EXCLUSIVE REMEDY, AT
MICRO’S OPTION, SHALL BE TO REFUND THE PURCHASE PRICE OF OR TO REPAIR OR REPLACE THE DEFECTIVE
PRODUCT. Micro shall not otherwise be liable for loss or damages, whether direct, indirect, special, incidental, or
consequential, regardless of the legal theory asserted, including negligence, warranty or strict liability.
For technical support contact Micro-Surface Finishing Products, Inc. 800.225.3006 or www.micro-surface.com
after contact with the surface. Start with the
Page 2

TECHNICAL BULLETIN
RANDOM ORBITAL SANDING WITH MICRO-MESH!
Random orbital sanders (ROS) move in repetitive forward-left-back-right strokes. The
forward left motions often are the most aggressive strokes and may leave semi-circular
"fish hook" scratch patterns. The completed motion leaves an elliptical scratch pattern
often visible as swirl marks or uneven finishes.
MICRO-MESH
on soft "cushioned" backing. The micron-graded crystals recede to a common level and
tend to rotate slightly when pushed against the surface. This action causes a uniform level
planing action on the surface and contributes to long, even abrasive life.
Sanding in a straight-line pattern with MICRO-MESH and a belt sander or sanding block
keeps the abrasive crystals set with a positive rake. When used with a ROS, the abrasive
crystals plane on the forward stroke, are skewed slightly on the right stroke, plane
backward on the back stroke and are skewed slightly again on the left stroke.
Since the abrasive crystals give a more uniform scratch pattern in the forward and
backward stroke, it is better to use a small orbit. The smooth forward and back strokes are
short, the skewed side to side motion is minimized. The speed of the orbital can be
increased to compensate for the small orbit.
Random Orbital Sanders
Rotation speeds vary from 3,000 to 15,000 rpm depending on manufacturer. The orbit
size front and back, left to right also varies with manufacturer and use. Typical orbits are
3/32", 1/16" and 1/4".
An 8,000 to 12,000 rpm ROS machine with a 3/32" orbit generally works well with
MICRO-MESH for most soft surfaces. Using a larger orbit (1/8" to 3/16") with a much
slower orbit speed (3000 to 5000 rpm) has been used successfully for sanding paint
finishes and gel coats. Call 1-800-225-3006 for recommendations regarding your specific
finishing operation.
Common finishing problems
Ripples and swirls are typically caused by sanding with an uneven motion, tilting the
sander, or working in one spot too long. For best results, sand smoothly with even
sweeping motions. On curved surfaces it may be possible to purchase pads that match the
curves to be done.
, a cushioned abrasive, is designed to allow the abrasive crystals to float
Page 3

Micro-Mesh
MICRO-MESH discs and sheets are available in Regular and MX grades (see conversion
chart) with loop or pressure sensitive adhesive (PSA) backing. We strongly recommend
the use of hook & loop systems due to the long useful life of the unique cushioned
abrasive material. MICRO-MESH can be reused; rinse with water between jobs.
In general, the Regular grades produce matte through gloss finishes on plastics, coatings,
woods, solid surface countertops and other soft surfaces. MX grades are constructed with
a slightly stiffer backing, and include several grades coarser than the Regular series. MX
is generally used on harder surfaces such as metals and coatings.
Random orbital sanding wet
Keep the surface misted with water. Occasionally wipe the work surface with a cotton
flannel or terry towel in order to keep the Micro-Mesh from loading up with sanding
particles (swarf).
Random orbital sanding dry
To prevent loading, wipe or blow off swarf from the work piece and MICRO-MESH
frequently. When loop back material is used, MICRO-MESH can be pulled off the R.O.
Sander pad and slapped a few times against a flat surface to clear it. Dry use increases the
chances of trapping hard abraded particles between the sander and the work causing hardto-remove deep random fishhook scratches.
06/01/02
Technical Bulletin-#7
Page 4

DO’S, DON’TS, CAUTIONS
WHEN WORKING WITH MICROMESH®
The polishing of surfaces can be very exacting. Success or failure depends on the technician’s knowledge of,
and his ability to follow, an established sequence.
MICRO-MESH® Can be Used by Hand. Wrap the abrasive around a foam sanding block to give you even,
uniform pressure during your sanding strokes.
MICRO-MESH® Can be Used With an Electric or Pneumatic Random Orbital Sander. Keep sanders to
no more than 3500 rpms. Do not use with high speed die grinders. Ripples and swirls are typically caused by
sanding with an uneven motion, tilting the sander, or working in one spot too long. For best results, sand
smoothly with even, sweeping motions.
Keep Belt Machines at 5500 Rpms or Less. Adjust pressure and tension so that the contact point allows the
abrasive to work without smearing. Typically durometers of 30-40 in rubber are best for a cushioned abrasive
or cotton buffing wheels work well. Do not use lubricants containing solvents, alcohol or ammonia that could
delaminate the MICRO-MESH®.
Pressure Should be Light. Remember the cushioned abrasive cuts with the abrasive crystal tips. The sharp
cutting edges are floating on a resilient matrix. Extreme pressure pushes the tips back into the matrix rendering
them ineffective and resulting in surface smearing, burning, and possible orange peel and distortion. If using
with a belt machine, polish on the slack of the belt on using a soft contact wheel. If using a random orbital
sander, polishing steps may require a soft back up pad between the MICRO-MESH® disc and the sander head.
KEEP EVERYTHING YOU USE CLEAN. This includes equipment, sandpapers, MICRO-MESH®, and all
wiping materials. A minor scratch here or there is not a crisis situation, but picking up a piece of metal or other
contaminate from the top of a work area can be a disaster. Watch where you set things down.
Acceptable Cleaning and Maintenance Materials:
100 % cotton flannel
Genuine chamois, not synthetic or imitation
Biodegradable liquid detergent
MICRO-MESH® Anti-Static Cream
MICRO-GLOSS® polish and cleaner
Unacceptable Cleaning and Maintenance Materials:
Paper towels or other paper products
Shop towels or synthetic fiber fabrics
Commercial window cleaners
Any product containing ammonia or solvents or alcohol
Page 5

Clean the Work Surface between each step, especially in cracks and crevices. Flush surface several times
with clean water to remove dust and dirt before touching it with anything. Clean abraded particles from the
work piece by rinsing and then dry and inspect.
Inspect the Work Piece between steps with a bright light to ensure you are removing the previous scratch
pattern before continuing on.
Keep the Abrasives Clean. Keeping them clean will improve performance and extend life.
To Avoid Scratching the Surface, do not wear watches, rings, or bracelets. Long fingernails should be
covered with gloves.
For Superficial and Light Surface Damage, use MICRO-GLOSS® liquid abrasive following the directions
on the label of the bottle.
For Deep Damage and Crazing, you will be required to remove the damage firstly with sandpaper and then
restore the surface to its original state using MICRO-MESH®. After damage is removed by using sandpaper in
a succession of steps from coarse to fine, ie: 120 grit, 220 grit, 400 grit wet/dry, then begin the MICROMESH® series with MICRO-MESH® 1500 and proceed through the series to 12000 or until the original
surface is matched.
Use a Straight-line Crossing Pattern. Do not use a circular pattern except in the final hand buffing or antistatic operations. When using a random orbital sander, use sweeping motions from left to right for one grit,
then change the pattern to an up and down motion on the next.
Using MICRO-MESH® with Water and a few drops of detergent will generally result in a less effort having
to be used and a slightly better finish. Only use enough water to provide lubricity to the surface, but not so
much that poor contact is made with the work piece.
DO NOT wear out one of the meshes by trying to make it do too much work on your first step. If your
estimated damage is not readily removed, go immediately to the next coarser mesh.
Work an area slightly larger with each step to blend. Working one small area on a highly curved section
could create flat spots or distortion.
DO NOT skip steps in either the sandpaper or the MICRO-MESH® series.
Work in a brightly lit area but not in the sun.
Removing the initial damage with the sandpaper series will take up 85% of the restoral time. The MICROMESH series and the buffing procedures will take as little as 15% of the time.
IMPORTANT NOTICE: Micro-Surface Finishing Products, Inc. (“Micro”) MAKES NO WARRANTIES, EXPRESS OR IMPLIED, INCLUDING, BUT NOT
LIMITED TO, ANY IMPLIED WARRANTIES OF MERCHANTABILITY OR FITNESS FOR A PARTICULAR PURPOSE. User is responsible for
determining whether this product is fit for a particular purpose and suitable for user’s method of application.
LIMITATION OF REMEDIES AND LIABILITY: If this product is proved to be defective, THE EXCLUSIVE REMEDY, AT MICRO’S OPTION, SHALL BE
TO REFUND THE PURCHASE PRICE OF OR TO REPAIR OR REPLACE THE DEFECTIVE PRODUCT. Micro shall not otherwise be liable for loss or
damages, whether direct, indirect, special, incidental, or consequential, regardless of the legal theory asserted, including negligence, warranty or strict
liabilities.
Page 6

HOW TO DETERMINE IF YOU ARE WORKING ON ACRYLIC OR
POLYCARBONATE
REQUIREMENTS:
1. 3-WAY MICRO-MESH BUFFER; GRADES 2400 (PINK); 4000 (WHITE);
12000 (GRAY)
2. SPRAY BOTTLE OF WATER
3. LIGHT SOURCE
PROCEDURE:
Work on an approx. 2" x 2" inconspicuous area of the window
Set a light behind the window so inspection can be easily done
Spray the area with a mist of water
Using the buffing stick - pink 2400, make 6 back and forth, using
horizontal motion.
Now, sanding in a vertical motion, use the 4000 white side of the buffer to cross over and
remove the 2400 scratch pattern you put in the window.
Stop and access your progress. You should notice a white, milky slurry forming from the
sanding action. This is a combination of the water and small abraded particles of acrylic.
Did you remove the 2400 sanding pattern? If so and you have a slurry forming - the
window is acrylic.
If not, the window is most likely polycarbonate. Making sure the repair area is wet,
continue sanding, but this time use the 12000 MICRO-MESH side of the buffer and sand
in a horizontal pattern to try the 4000 sanding pattern.
Using a soft flannel or cotton cloth only, put a dime's worth of MICRO-GLOSS on the
repair area and polish and wipe clean.
If your window is polycarbonate ask about our restoral products for
POLYCARBONATE.
There are many different grades of both acrylic and polycarbonate, so testing is
imperative. In some cases, with polycarbonate, less is best and optical clarity may not be
possible. Polycarbonate is much softer than acrylic and is more difficult to repair. It's
like sanding on rubber.
light strokes. Sand in a
Page 7
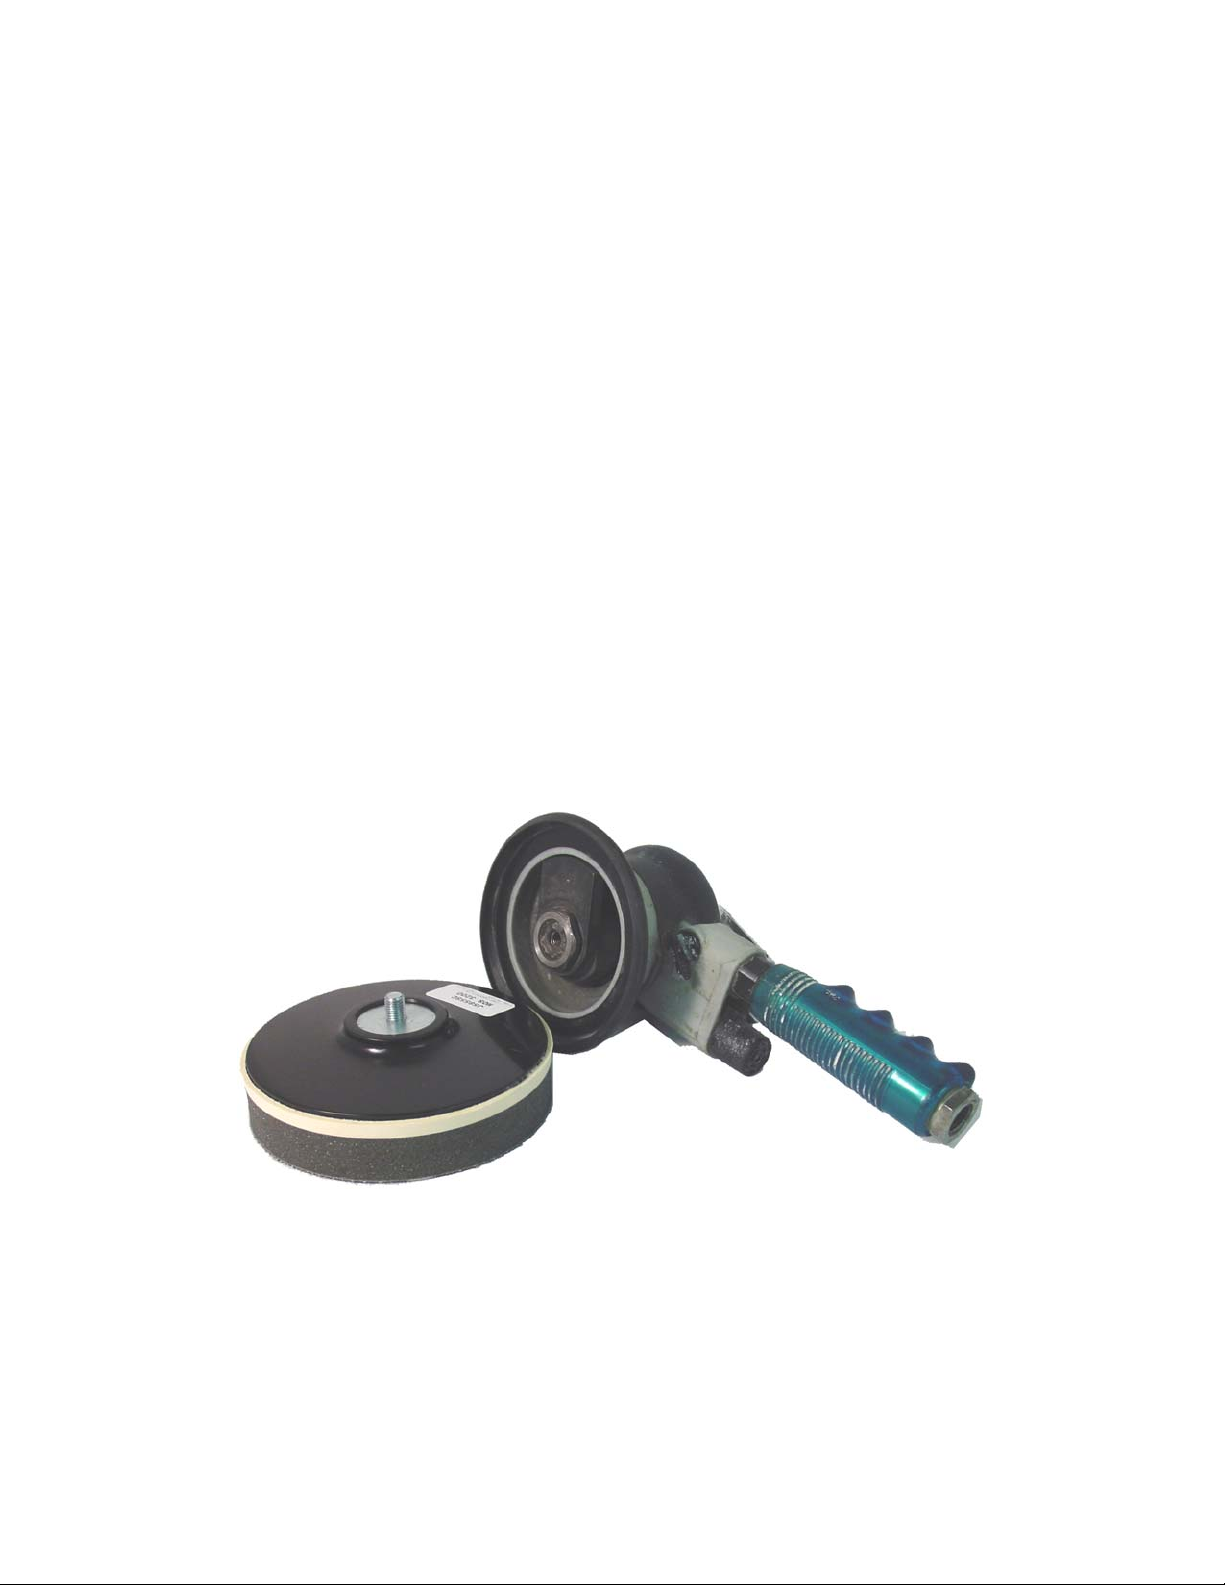
Tools to Use With Our Mechanical Kits
WE DO NOT INCLUDE POWER TOOLS WITH OUR KITS
For our "mechanical" kits: Heavy Damage Removal Kit, Light Damage Removal Kit,
Maintenance Kit, Polycarbonate Kit, Leading Edge Kit, Clearseas Acrylic Kit and Clearseas
Vinyl Kit, you will need power tools that are not sold with our kits. Not including tools allows
us to keep the price of the kits to a minimum.
TOOLS FOR SANDING
For best results, we suggest using a RANDOM ORBITAL sander for the sanding portion of
the process. The exception to this rule is when using our Leading Edge Kit - for this kit, you
will only use a rotary polishing buffer.
RANDOM ORBITAL sanders are also know as DUAL ACTION sanders. The sanding head spins
in a random pattern making blending easier. These are also referred to as "finishing"
sanders.
The random orbital that you choose to use needs to be rated at approximately 10000 RPMs
and needs to have variable speed options. You will actually adjust the sander down in
speed, approximately half way or until you can easily control it with one hand. You will need
the 10000 RPMs for power, but the lower variable speed for control as you work.
TOOLS FOR BUFFING
The buffing portion of the restoral process is performed using a right angle polisher. This is
also known as a rotary buffer. This is the same type of buffer you would use on your
automobile to buff the clear coat paint. The pad spins in a stationary orbit.
Page 8
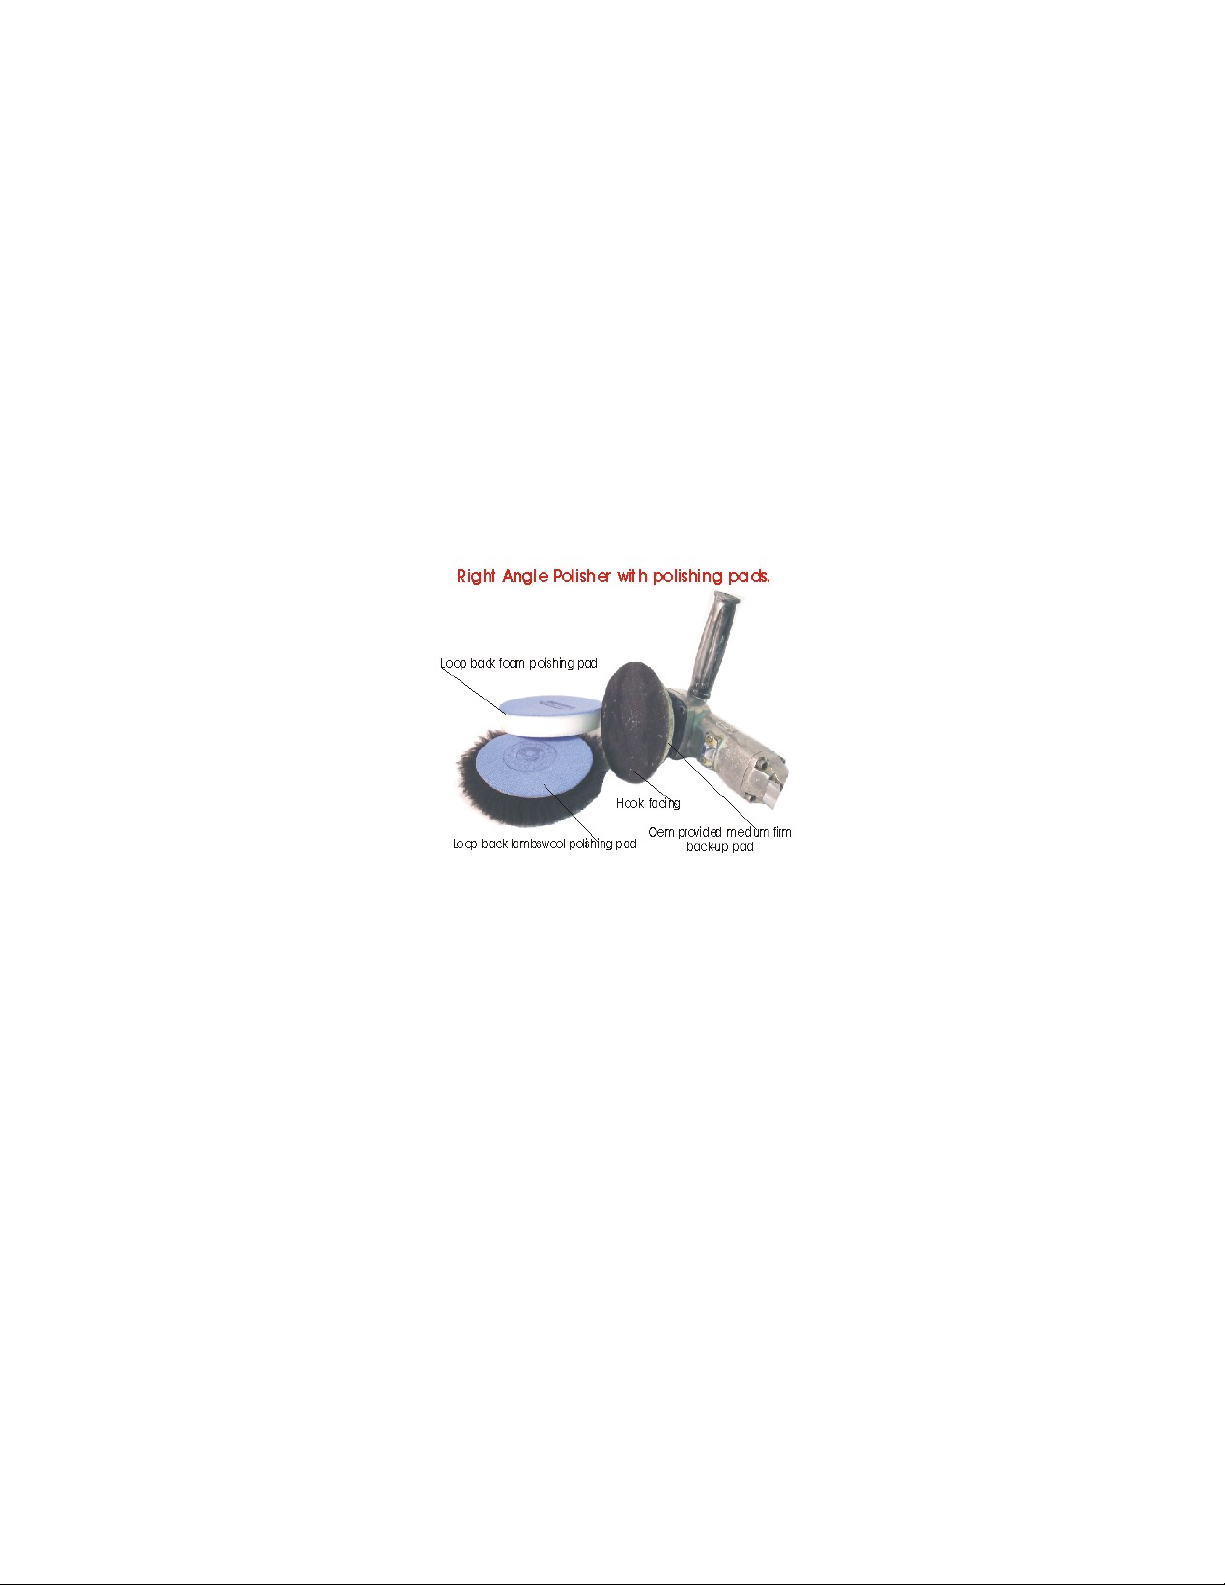
The buffer that you choose to use should be rated at approximately 2500 RPMs. It is
important to keep in this range so that you have enough power to do the job, but not so
high of RPMs that you would generate a great deal of heat. It is easier to generate heat
with a polisher than with a sander. Heat generation can cause distortion, orange peel, and
burning. This is why it is important to always use lubrication, preferably water, when
possible.
Unlike with the sanding portion of the process, for most jobs, the standard back-up pad that
comes with your buffer will be sufficient to do the job. If you're working on a particularly
soft material or are having problems reaching a high gloss finish, then attach an interface
pad onto your standard backup pad to give yourself the necessary added cushioning. Most
industrial supply stores will carry inexpensive, 5" interface pads. Remember to purchase
one that is "Loop to Hook" meaning, the loop on one side of the interface pad connects to
the hook facing of your standard buffer and the hook side of the interface will be what you
attach your loop backed polishing pads to.
All of our kits are supplied with accessories to fit 5" tools. All the Micro- Mesh discs and
polishing pads are supplied with LOOP backing so you can get the most value from each kit.
All discs and pads can be washed and used over and over.
Sanders and buffers are available as both pneumatic (air) and electric.
caution people when using electric tools on wet surfaces.
BACKUP PADS
Your sander and/or buffer come with a standard "backup pad" when you purchase it. This
back-up pad is what you attach the Micro-Mesh sanding disc or polishing pad to. The backup pad is sometimes referred to as a "backing plate" or "sanding pad", depending on who
you speak with. We refer to it as a "backup pad." This pad is made of foam and has either a
"hook" surface or "smooth" surface on which to apply the sanding discs or polishing pads. If
you have a back-up pad with "hook" you will need to attach LOOP backed sanding discs. If
you have a back-up pad with a "smooth" face, you would attach PSA (pressure sensitive
adhesive)backed discs.
The foam in the backup pad on most sanders and buffers that come standard on your tool
are usually medium to hard in density. Our mechanical kits all feature our specially made
extra soft back-up pad. This back-up pad will easily conform to curvatures and allow you to
**We always
Page 9
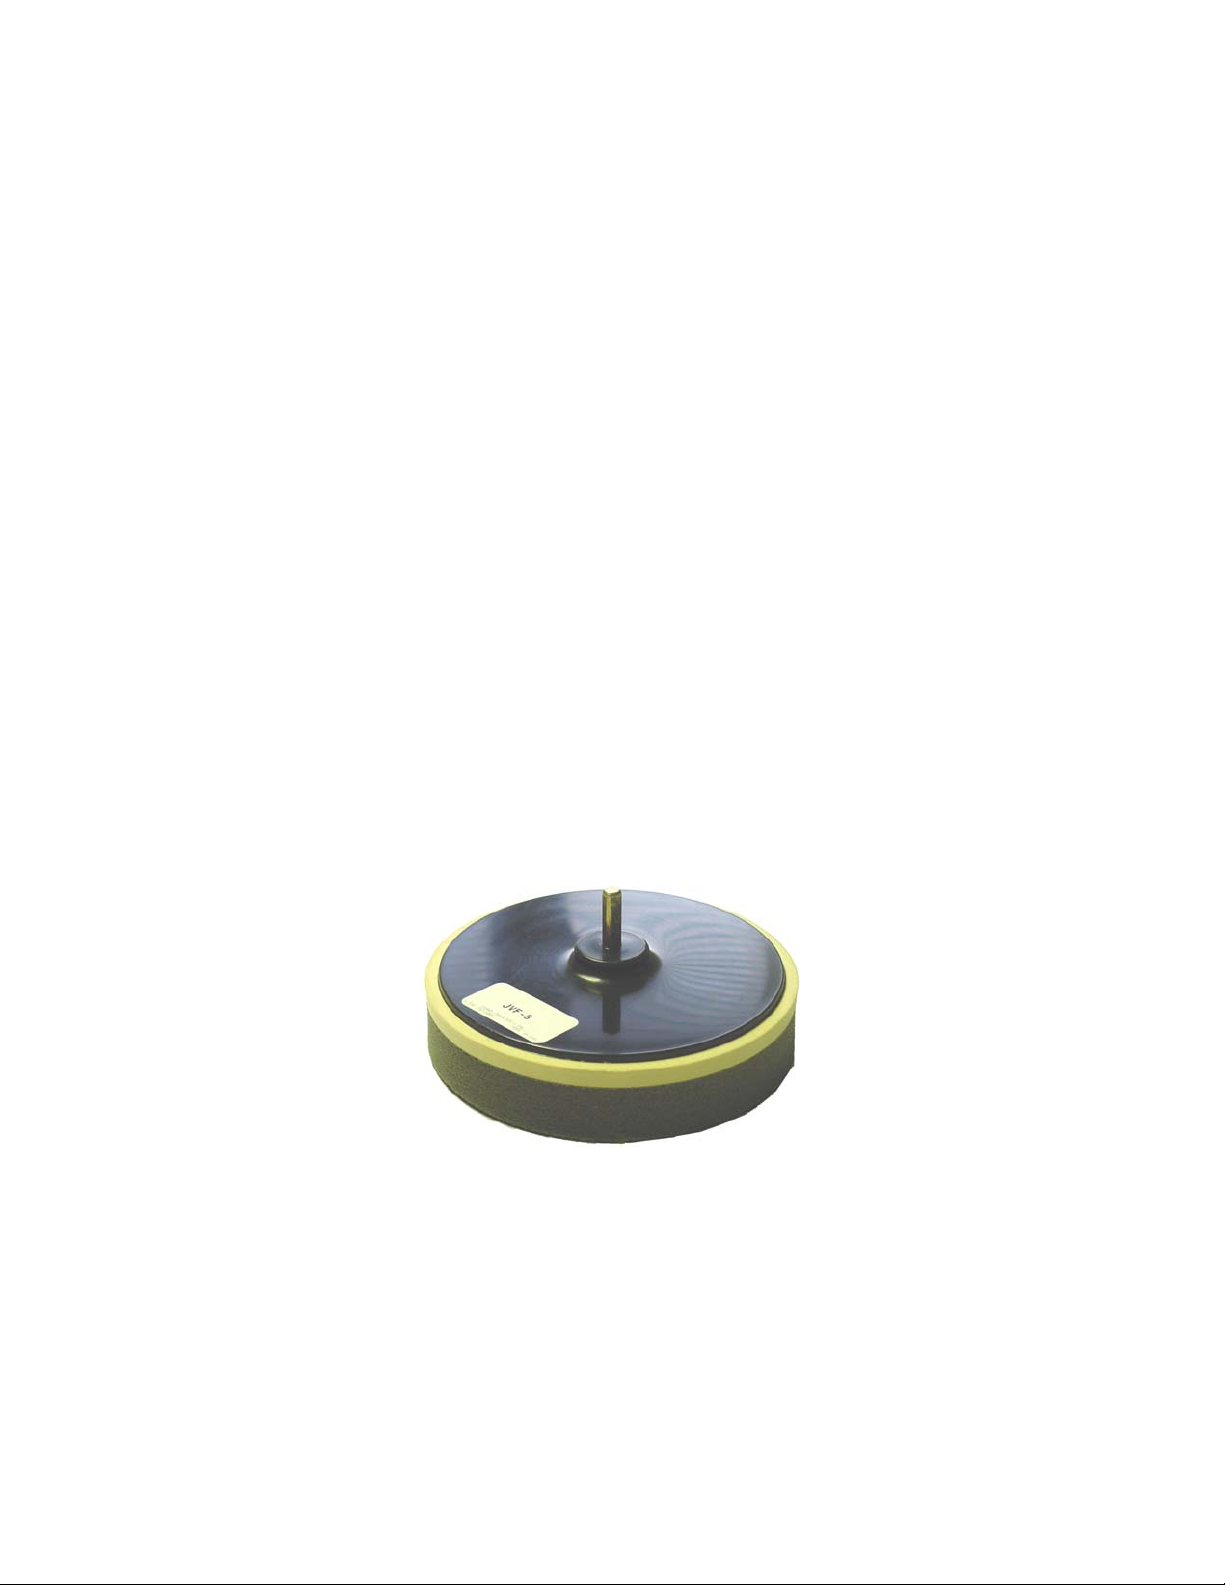
polish your part to a high gloss finish. The harder the backup pad the more in contact you
will be with the part you are finishing and provide a coarser cutting action. This is not what
you need when polishing softer material to a high gloss finish. The softer the back-up pad,
the easier it will polish.
The back-up pad included with our kit has a male shank with a 5/16" x 24 thread count.
There are many good sanders on the market today that will fit this back-up pad. We do not
recommend one sander over another.
When and IF to Use a Cordless Drill
If you're uncomfortable using power tools or do not have access to air or electricity hookup, you can use a cordless drill for both the sanding and buffing portions of our restoral
process, with satisfactory results.
The exception to this rule would be when using our HEAVY DAMAGE REMOVAL KIT. Any
sanding done coarser than with our MICRO-MESH 1500 requires that you use a random
orbital sander. A cordless drill simply does not have the power you need for coarse sanding.
We recommend that you have a cordless drill that is completely charged and an extra
battery set to go prior to beginning your work. We also caution that when in use, keep the
drill parrallel to the workpiece at all times and adjust the speed so that the drill provides a
smooth action. Any "skipping" or "jumping" on the work piece will cause "chatter" marks.
The Light Damage Removal, Maintenace and Clearseas Vinyl and Acrylic kits are available
with a special, extra soft back-up pad that is on a mandrell that will fit into your cordless
drill. This is provided in the kit. You will have to choose the Light Damage Removal DRILL
Kit in order to get this back-up pad. If you order the Light Damage Removal Kit - you will
receive a back-up pad for a random orbital sander. The same is true for the Maintenance
Kit. Make sure and look at the back-up pad in the picture of the kit you are purchasing to
make sure you're getting the correct one.
Â
 Loading...