

Micromega DAC Owner's Manual
wn'wner's
manual
1
U
DAC
Thank you for purchasing a MICROMEGA DAC. You are now the owner of one of the
most advanced digital to analogue converters ever produced.
Dear Customer,
Thank you for purchasing a MICROMEGA digital product. You now possess a product of great evolution. The application of advanced
technology and thinking will give much pleasure as you sit and enjoy your purchase.
Please pay close attention to this instruction manual, and read it fully before attempting to operate DAC. It is designed to ensure that you
maximise your pleasure of DAC and familiarise you with its many unique functions.
UNPACKING
Check that the carton has no damage. Should you have any doubt about its condition, please do not hesitate to contact your dealer. Upon
opening the carton, you should find the following accessories: Mains lead, Mono PhonolPhono digital interconnect cable, stereo PhonolPhono
digital interconnect cable.
Very carefully remove the unit from the box, taking care to preserve all the packing material. It is good practice to put the carton and its
contents into an outer plastic bag and deposit it somewhere safe and dry. In the unlikely event that your unit needs to be sent back to either
your dealer or distributor, it must be sent the original packing material. Failure to observe this will invalidate your warranty.
INSTRUCTIONS FOR USE
Check that the mains voltage as stated on the rear of DAC corresponds to your local power supply. If in doubt, please consult your dealer.
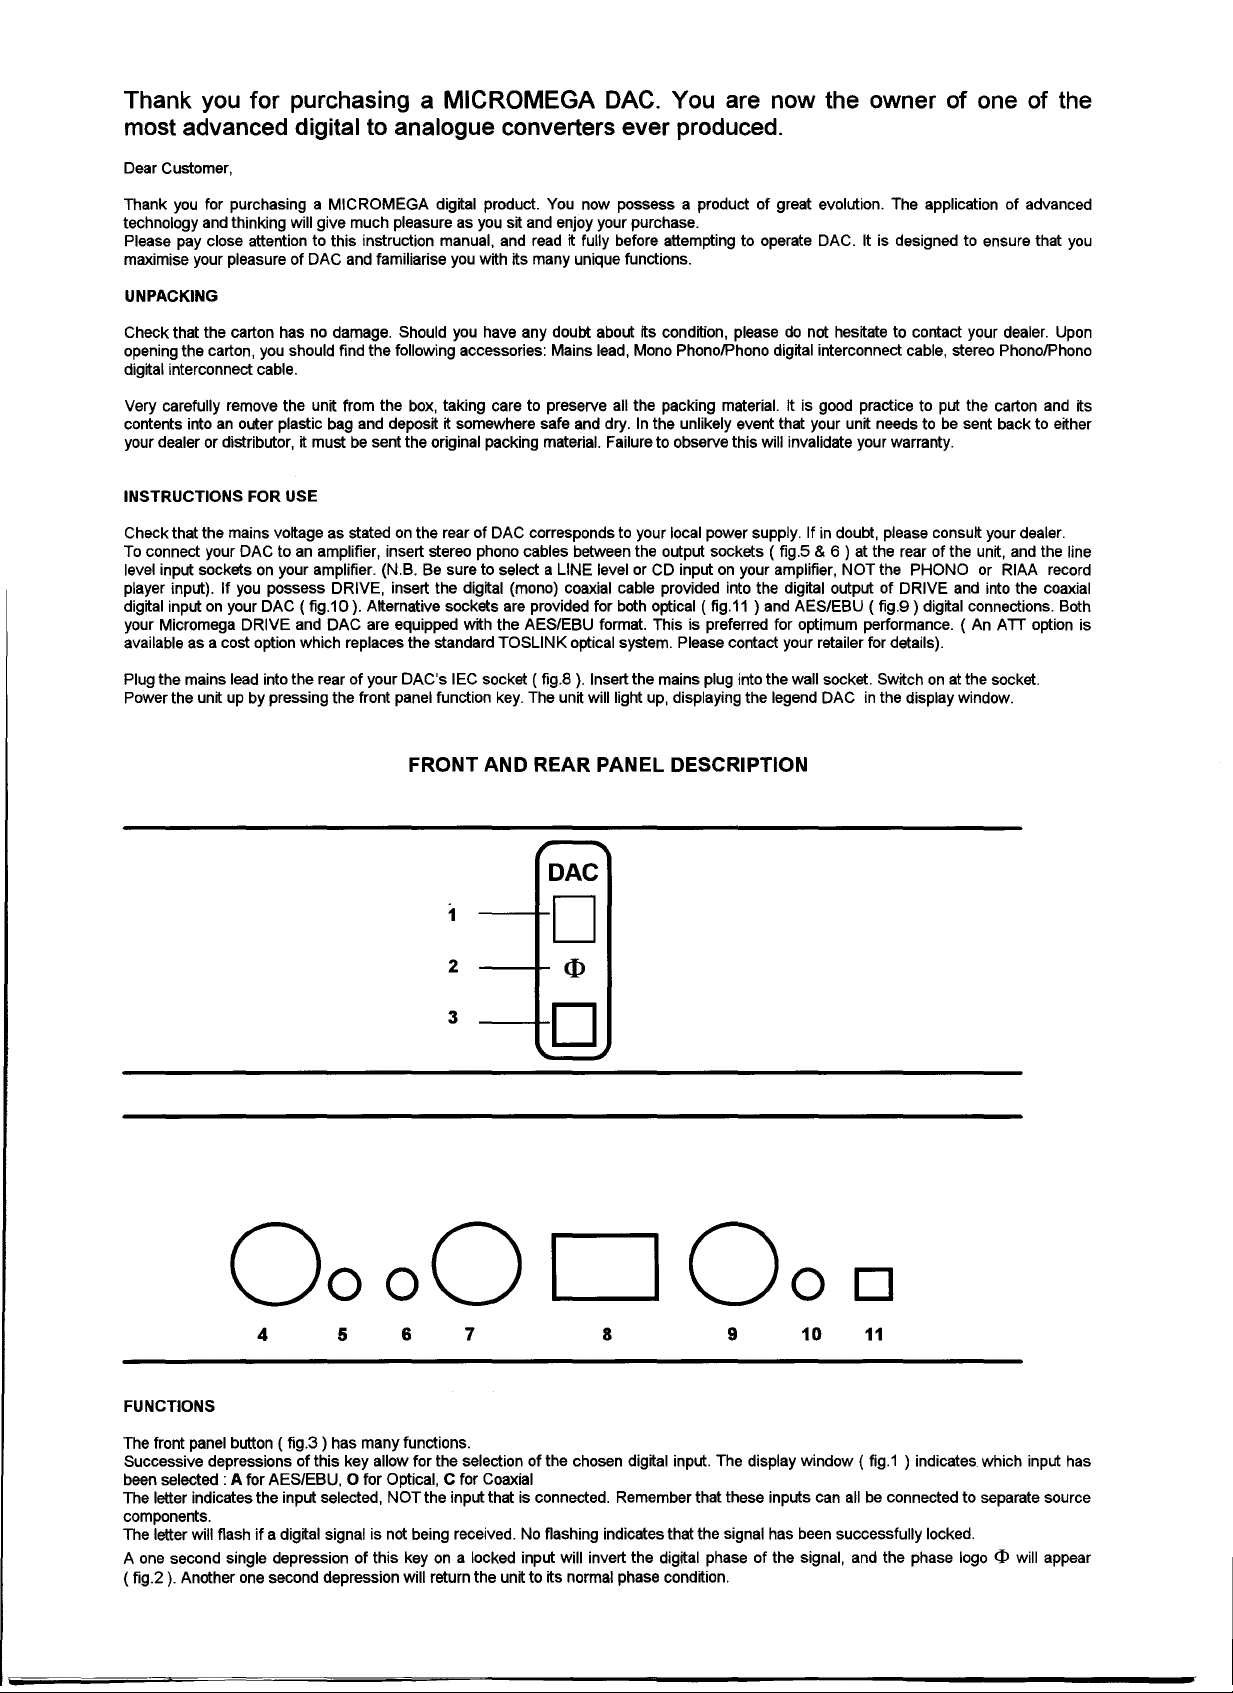
To connect your DAC to an amplifier, insert stereo phono cables between the output sockets ( fig.5 & 6)at the rear of the unit, and the line
level input sockets on your amplifier. (N.B. Be sure to select a LINE level or CD input on your amplifier, NOT the PHONO or RIAA record
player input). If you possess DRIVE, insert the digital (mono) coaxial cable provided into the digital output of DRIVE and into the coaxial
digital input on your DAC (fig.10). Alternative sockets are provided for both optical
your Micromega DRIVE and DAC are equipped with the AES/EBU format. This is preferred for optimum performance. (
available as a cost option which replaces the standard TOSLINK optical system. Please contact your retailer for details).
Plug the mains lead into the rear of your DAC's IEC socket
Power the unit up by pressing the front panel function key. The unit will light up, displaying the legend DAC in the display window.
( fig.S ). Insert the mains plug into the wall socket. Switch on at the socket.
( fig.11 )
and AES/EBU
( fig.9) digital connections. Both
An ATT option is
FRONT AND REAR PANEL DESCRIPTION
DAC
1
2
3
10
1
10
<I>
0000000
4 5
6 7 8 9 10 11
D
FUNCTIONS
( fig.3 )
The front panel button
Successive depressions of this key allow for the selection of the chosen digital input. The display window ( fig.1 ) indicates. which input has
been selected: A for AES/EBU, 0 for Optical, C for Coaxial
The letter indicates the input selected, NOT the input that is connected. Remember that these inputs can all be connected to separate source
components.
The letter will flash if a digital signal is not being received. No flashing indicates that the signal has been successfully locked.
A one second single depression of this key on a locked input will invert the digital phase of the signal, and the phase logo
( fig.2 ). Another one second depression will return the unit to its normal phase condition.
has many functions.
<I> will appear
 Loading...