

Page 1
OPERATIONS MANUAL
Page 2
Pg. 3
Assembling Your
Wine Saver HOME
. . . . . . . . . . . . . . . .
Pg. 4
Charging your Wine Saver HOME
with WSH Argon Gas cylinder
. . . . . . . . . . . . . . . .
Pg. 5
Replacing an Empty Bottle of Wine
. . . . . . . . . . . . . . . .
Pg. 6
Re-Ordering WSH Argon Gas cylinders
. . . . . . . . . . . . . . . .
Helpful Hints
. . . . . . . . . . . . . . . .
Pg. 7
Parts Re-Ordering Guide
. . . . . . . . . . . . . . . .
. . . . . . . . . . . . . . . .
. . . . . . . . . . . . . . . .
Pg. 8
Safety Information
Pg. 9
WSH Troubleshooting Guide
Pg. 10
Warranty Information
. . . . . . . . . . . . . . . .
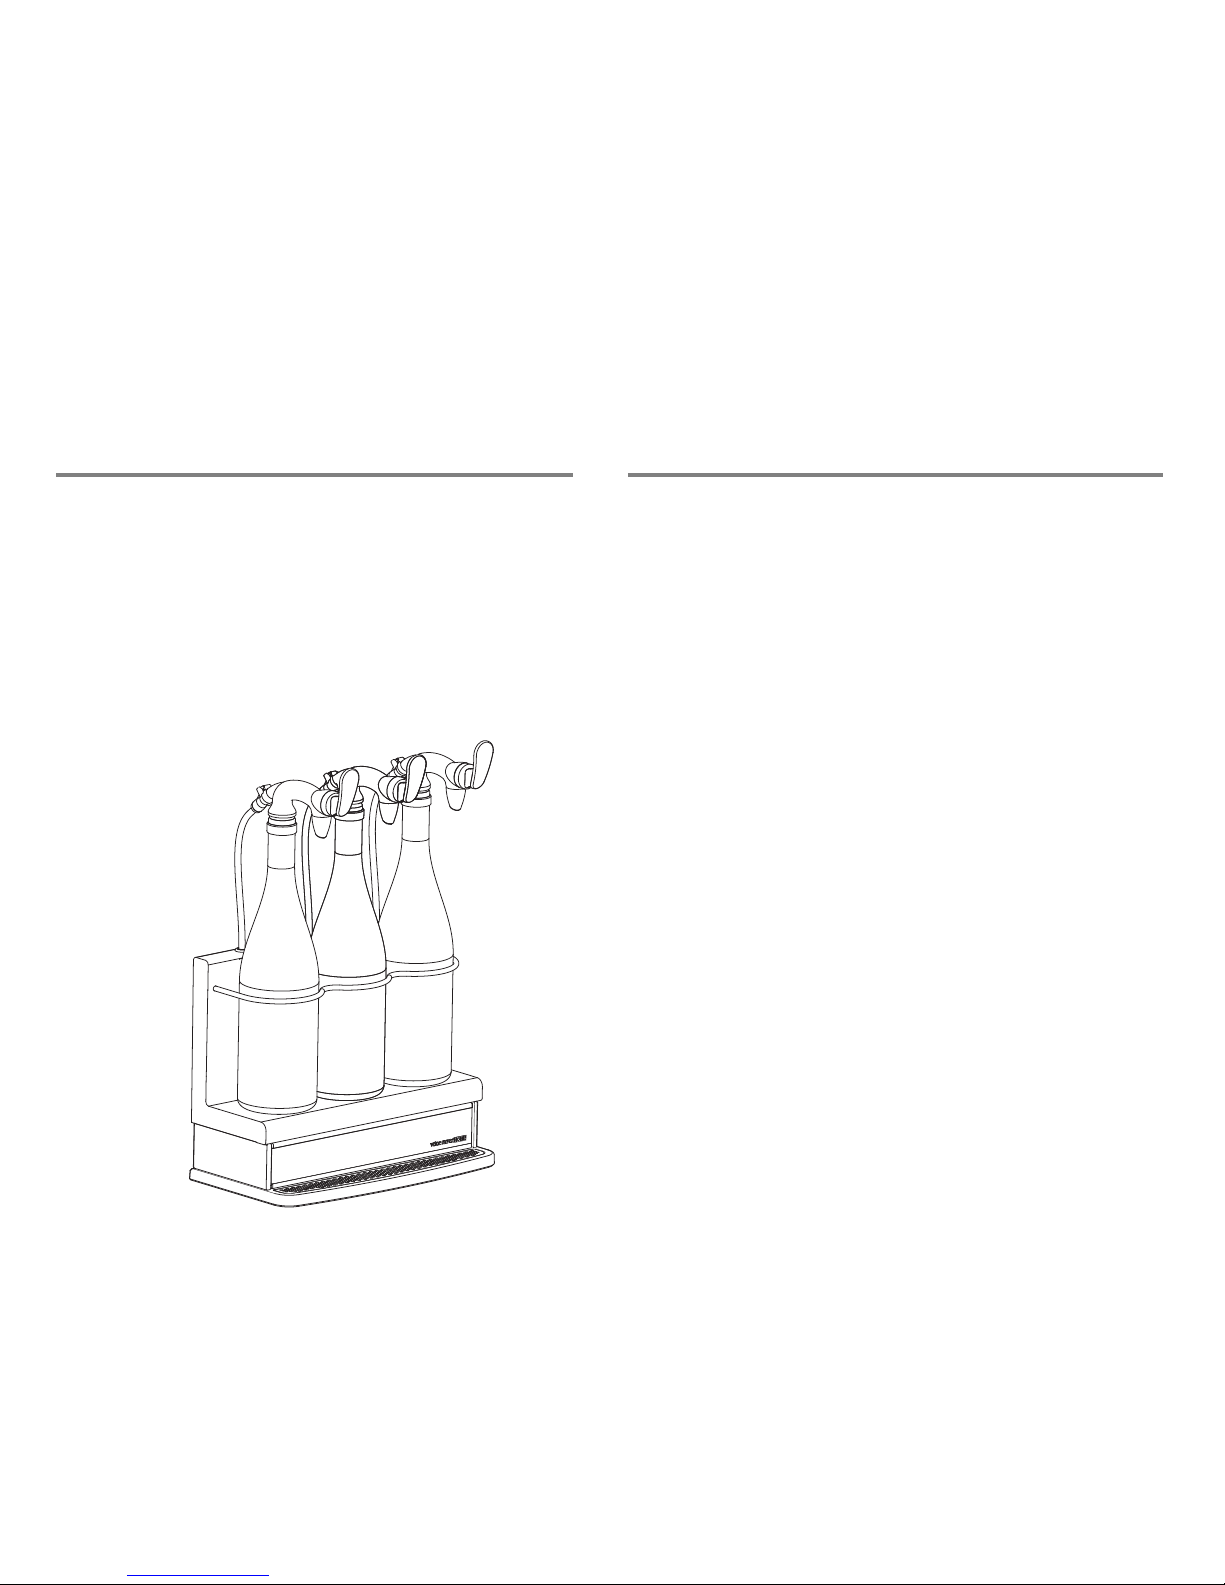
Pg. 2 Getting to Know Your
Wine Saver HOME
. . . . . . . . . . . . . . . .
1
Congratulations on your purchase of Wine Saver HOME.
Wine Saver HOME (WSH) is the first Argon-powered wine
serving and preserving system created with you, the user
in mind.
Wine Saver HOME is designed for simple setup and ease
of operation. By following the easy assembly and operations
instructions in this manual, you will enjoy years of
perfectly preserved wines with your Wine Saver
HOME system.
Let's begin!
INTRODUCTION TABLE OF CONTENTS
Page 3
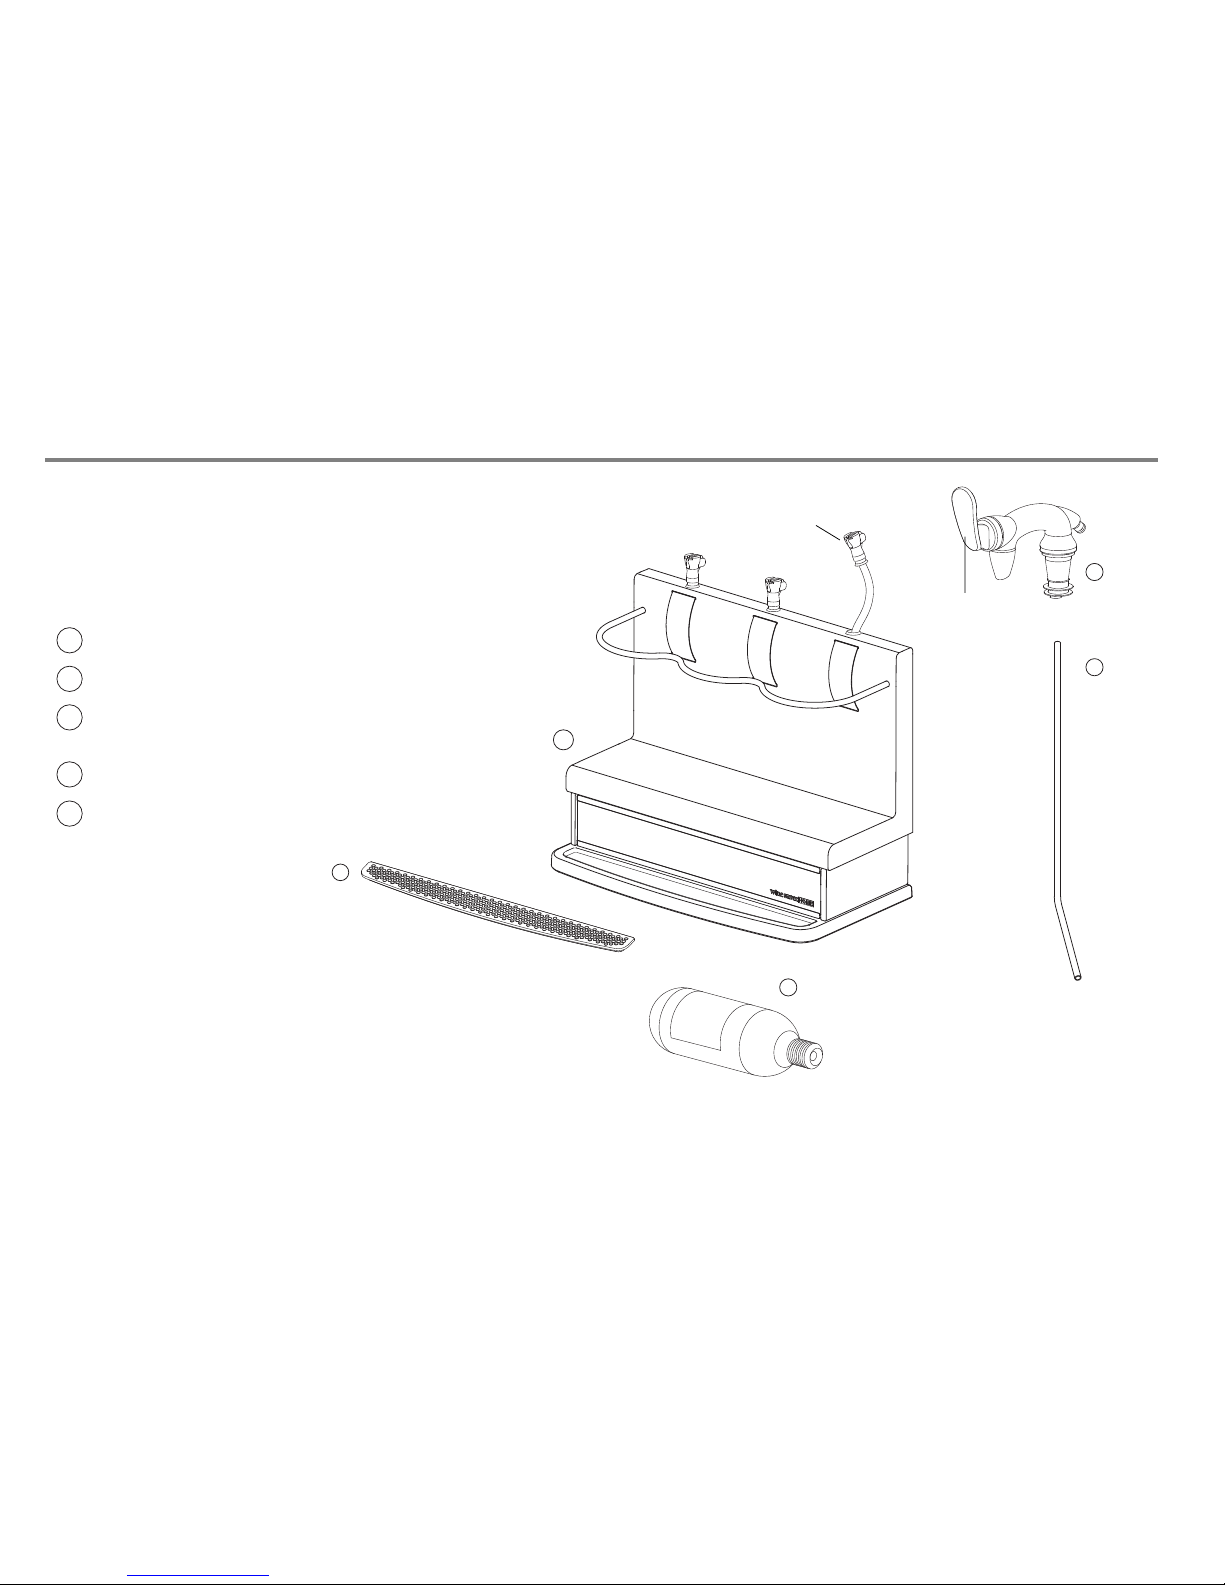
2
B
Your Wine Saver HOME is manufactured using the highest quality
materials and processes to ensure beautiful looks for years of use.
Upon carefully unpacking your Wine Saver HOME you will
find the following parts:
A
One (1) WSH Rack System
B
One (1) WSH Drip Tray Cover
C
Three (3) molded plastic Tap Heads
(Tap Handle must be rotated prior to use)
D
Three (3) stainless steel Tap Head Draw Stems
E
Two (2) WSH Argon Gas Cylinders
Your Wine Saver HOME uses preservation grade Argon gas.
Argon is found naturally in our atmosphere and is packaged
for use in high-end applications, like your Wine Saver HOME.
WSH Argon Gas cylinder
GETTING TO KNOW YOUR WINE SAVER HOME
C
D
E
A
Quick Connect
Coupler
Rotated from
packing position
(Qty: 3)
(Qty: 3)
(Qty: 2)
Page 4

3
1. Rinse Tap Head and Draw Stem in hot water.
Allow all pieces to dry prior to using.
2. Slide the Draw Stem into
the hole in the bottom of the
Tap Head.
3. Adjust the Draw Stem to
fit your specific bottle by
visually aligning the top of
the rubber section of the Tap
Head with the top edge of the
bottle. Adjust the Draw Stem
so it will reach the bottom of
the bottle.
4. Insert Tap Head/Draw
Stem assembly into
bottleneck. Firmly press
down into bottleneck
until tightly seated.
5. Connect Quick Connect coupler
to WSH Tap Head assembly:
A. Grasp Quick Connect coupler from
WSH Rack.
B. Rotate Quick Connect coupler so that
the metal push button is facing up.
C. Depress button while pushing Quick
Connect onto end of Tap Head. Press firmly
until metal push button snaps into place with
a "click". After hearing the "click", releasing the
button will lock the Quick Connect into place.
Repeat these steps for all three bottles.
Note: Draw Stems are
adjustable to reach the
bottom of most 750 ML
bottles.
ASSEMBLING YOUR WINE SAVER HOME
Depress metal
push button
Align
Adjust
metal button
facing up
Page 5

4
1. Push to open the compartment door of the WSH
Rack. The door will release and can be swung open.
2. Thread the WSH Argon Gas cylinder into the WSH regulator
unit. Turn clockwise until you begin to feel slight
resistance. At this time, you will be piercing the seal of
the cylinder to activate the WSH Argon Gas. Continue
threading the cylinder clockwise until it is fully seated.
You are now ready to operate your Wine Saver HOME system.
Place a glass under the Tap Head nozzle and simply press on
the tap lever, while holding the bottle stable. Wine will begin to
flow at a rate of approximately 1 oz per second. Check all Tap Heads
for proper operation and wine flow. You may have decreased flow
during the first seconds of each bottle as the system is primed with
gas. This is by design, to purge your Wine Saver HOME system.
CHARGING YOUR WINE SAVER HOME WITH WSH ARGON GAS CYLINDERS
Note: WSH Argon Gas cylinders are under 2800 lbs/sq. inch of pressure.
Do not remove or unscrew a full or partial WSH Argon Gas cylinder until
it is empty. If you do so, the content will be lost as the gas is released
through a safety relief valve designed to avoid injury.
Push Here
to Open
Page 6

Bottle Seal Fins
(original shape)
5
1. Disconnect Quick Connect coupler and
remove Tap Head / Draw Stem assembly
from bottle.
2. Remove empty wine bottle from Rack.
3. Rinse Tap Head / Draw Stem assembly
in hot water. Spread the bottle seal fins
out to original shape for optimal fit on new
bottle. Allow all pieces to dry, or wipe
dry with a lint free cloth, prior to re-installing.
4. Place Tap Head / Draw Stem assembly
into new bottle. Be sure to adjust the
Draw Stem to the proper height.
(Refer to Page 3)
5. Place next desired bottle into Wine
Saver HOME Rack.
6. Re-connect Quick Connect coupler to
Tap Head.
You can now once again enjoy perfectly
preserved wine from your Wine Saver HOME.
REPLACING AN EMPTY BOTTLE OF WINE
Depress metal
push button
Page 7

6
1. ONLINE
For fastest re-order please visit our website at:
www.winesaverpro.com and go to the
RE-ORDER ARGON GAS page.
2. PHONE
Call our WINE SAVER HOME office at:
610-435-5240
toll free: 877-601-9463 (WINE)
3. FAX
Fax your request to our office at:
610-435-0244
When it is time to re-order argon gas for your Wine Saver HOME
we offer three easy methods to get you the argon you need as
quickly as possible.
WSH ARGON GAS CYLINDER RE-ORDERING
Credit cards accepted for all purchases: MC, Visa, and AMEX
■
Unlike some Nitrogen based systems, WSH Argon Gas cylinders can
be shipped anywhere worldwide via common carriers.
■
TO REORDER WSH ARGON GAS CYLINDERS
Go to our website:
www.winesaverpro.com/WSPARGONreorder
HELPFUL HINTS
You can apply a small
amount of common vegetable
oil to the O-ring on the Tap
Head for easier installation
and optimal seal performance.
(See diagram)
■
When disconnecting the Quick Connect coupler,
you should hear a faint puff of gas being purged
from the lines. This is by design and insures
there is proper WSH Argon Gas in the system.
■
Empty cylinders are safe to dispose of
in your steel recycling, unlike other
cylinders with a valve. If no steel
recycling exists you may discard the
empty cylinder in the regular trash.
■
PLEASE RECYCLE
O-ring
Page 8

7
PARTS RE-ORDERING GUIDE
TO REORDER WSH ARGON GAS CYLINDERS
1. ONLINE
For fastest re-order please visit our website at:
www.winesaverpro.com and go to the
RE-ORDER ARGON GAS page.
3. FAX
Fax your request to our office at:
610-435-0244
2. PHONE
Call our WINE SAVER HOME office at:
610-435-5240
toll free: 877-601-9463
1. Tap Head WSP-N-1PK
Drip Tray Cover
WSH-DTC-3
2. Draw Stem WSP-FT-SS
3.
# NAME PART #
3
1
2
(WINE)
Page 9

8
When using any appliance, basic safety precautions should always be followed.
All of the following safety information is important and should be read prior
to using your Wine Saver HOME.
SAFETY INFORMATION
WARNING
1.Use the Wine Saver HOME only as described in this
manual. Wine Saver HOME is for home use only,
commercial use will void all warranties.
2. Wine Saver HOME is designed specifically for use
with WSH Argon Gas cylinders as its preservative.
Use of any other gas system is not recommended and
will void any manufacturer's warranty or claims.
3. Do not attempt to remove a full or partially full
WSH Argon Gas cylinder from the system. Contents
are under extreme pressure.
4. Never expose your Wine Saver HOME system to
temperatures beyond normal operating range of
32-104O F (0-40O C).
5. Always stop pressure flow to the bottle before
removing its Tap Head by first disconnecting the
Quick Connect coupler.
6. Do not connect the Quick Connect coupler to the
Tap Head if you feel the tap does not have a tight fit
to the bottle. Doing so could result in lost gas.
7. Never operate the Wine Saver HOME system if
it is not working properly or if it has been dropped
or damaged.
■
8. Do not use the Wine Saver HOME system in any
manner that allows contents of gas cylinder to escape.
Argon gas will create an oxygen-deficient atmosphere
and may cause suffocation or injury.
9. Use with non-carbonated beverages only. The system
is not designed for sparkling wines.
CLEANING
1. Tap Head / Draw Stem assembly should be rinsed
with hot water before every new bottle of wine.
Place nozzle fins under hot water to regain original
shape for optimal bottle fit.
2. Wine Saver HOME's stainless steel components
should be cleaned only with stainless steel cleaner.
Minor scratches can be removed with a Scotch Brite
pad or similar product and gently brushed in the direction
of the existing brushed finish. Never use steel wool or
other harsh abrasives as they will permanently scratch
the finish.
■
Page 10

9
Wine Saver HOME has been designed for simple set-up and
ease of operation. If you are having a problem with your
system, the following suggestions will likely guide you to a
solution.
WINE SAVER HOME TROUBLESHOOTING GUIDE
Some taps are flowing wine and others are not:
Simply disconnect the Quick Connect coupler and
reinstall, making sure the coupler is properly seated.
■
Always preserve a full bottle of wine.
Preserving a previously opened bottle of wine that
is not full may result in decreased performance from
your system. Always begin preserving with a full bottle.
■
No wine is flowing from any of the Taps:
Make sure WSH Argon Gas cylinder has been completely
threaded in and is completely seated, or replace WSH Argon
Gas cylinder as it may be empty.
■
You cannot get wine to flow after the above
troubleshooting steps.
Please contact Wine Saver HOME at 610-435-5240 or
toll free at 877-601-9463 for further assistance.
■
Excess wine is remaining at the bottom of the bottle
after service:
Disconnect the Quick Connect coupler, take Tap Head /
Draw Stem assembly out of bottle neck, and adjust the
Draw Stem so that it is sitting on the bottom of the
wine bottle. (Refer to Page 3)
■
After using for some time, you notice you are not
getting 12 to 15 bottles (approximately) of wine per
WSH Argon Gas cylinder:
1. Disconnect all Quick Connect couplers.
2. Remove the Tap Head / Draw Stem assemblies.
3. Soak assemblies in hot water for a few seconds.
Remove one Tap Head at a time and spread out the
bottle seal fins to their original state.
(fins should be perpendicular to body of Tap Head)
4. Replace Tap Head / Draw Stem assemblies and
re-connect Quick Connect couplers.
■
Note: Always disconnect Quick Connect couplers
before changing bottles.
Note: There may be a slight amount of wine remaining in
the Tap Head nozzle after pouring. This is common with all
spigot based systems and is part of normal operation.
Note: Wine Saver HOME is equipped with a patented
regulator assembly with a relief valve designed for safety.
If you attempt to remove a cylinder that still has gas in it,
you will hear a pressure relief puff or whistle.
Warranty Note: Wine Saver HOME is designed specifically
for use with WSH Argon Gas as its preservative, use of any
other preservative will void the manufacturers warranty.
Page 11

10
WARRANTY INFORMATION
Your Wine Saver HOME includes a One Year Limited
warranty against defects in materials, workmanship, or
malfunctions due to normal intended home use.
Wine Saver HOME is distributed by Wine Gadgets LLC.
Your exclusive remedy and Wine Gadgets LLC entire
collective liability in contract, tort or otherwise, is the
repair of the defective system in accordance with this
agreement. If Wine Gadgets LLC is unable to make
such repair, your exclusive remedy, and Wine Gadgets
LLC 's entire liability will be the payment of actual
damages not to exceed the charge paid by you or if no
charge was paid, the then-current published charges
for this agreement. Under no circumstances will Wine
Gadgets LLC be liable to you or any other person for
any damages, including, without limitation, any indirect,
incidental, special, or consequential damages, expenses,
costs, profits, lost savings or earnings, or other liability
arising out of or related to this agreement, or out of the
use of the Wine Saver HOME system.
No action in any form arising out of this warranty shall
be filed more than one (1) year from date of original
purchase.
Wine Saver HOME
Wine Gadgets LLC.
Visit our website: www.winesaverpro.com for
any additional updates to our Operations
Manual and Warranty.
Please log on to www.winesaverpro.com to register
your Wine Saver HOME system and validate your
Manufacturers Warranty Protection Plan. You will need your
products serial code found on the label on the back of the WSH
regulator unit.
Warranty covers parts, labor, and system shipping fees.
■
One year warranty is from date of original purchase.
■
Systems using cylinders other than the WSH Argon Gas cylinder.
Misuse or abuse of system.
Any change or alteration to the purchased unit.
Any products purchased from non-authorized Wine Saver
HOME distributors, dealers, or unauthorized internet sites.
Any use or purpose for which the system was not designed.
Use in a commercial or other non-home use environment.
■
■
■
■
■
■
Wine Saver HOME is for home use only.
This warranty does not cover:
WINE SAVER HOME
WSH-3-SS
APR 2008 HOMVK
serial code
Page 12

phone: 610-435-5240
toll free: 877-601-9463 (WINE)
fax: 610-435-0244
www.winesaverpro.com
Fourth Street Corporate Center
405 West Linden Street
Allentown, PA 18102
Rev 003, 3/10/08
 Loading...