

Page 1
340 Snyder Avenue, Berkeley Heights, NJ 07922
Tech Support: 908-464-1094, weekdays, 1pm to 5 pm ET
www.micromark.com • [email protected]
#85756 VACUUM FORMING MACHINE – STEP-BY-STEP INSTRUCTIONS FOR USE
The basic procedure: A pattern is placed in the vacuum chamber. A sheet of thin plastic is suspended above it in a
metal frame. A heater located above the plastic causes it to soften, at which time the vacuum is turned on and the plastic is
moved downward over the pattern. Vacuum draws the soft plastic around the pattern and makes a copy of the pattern shape.
When the plastic cools, it is removed from the chamber and excess trimmed away.
1
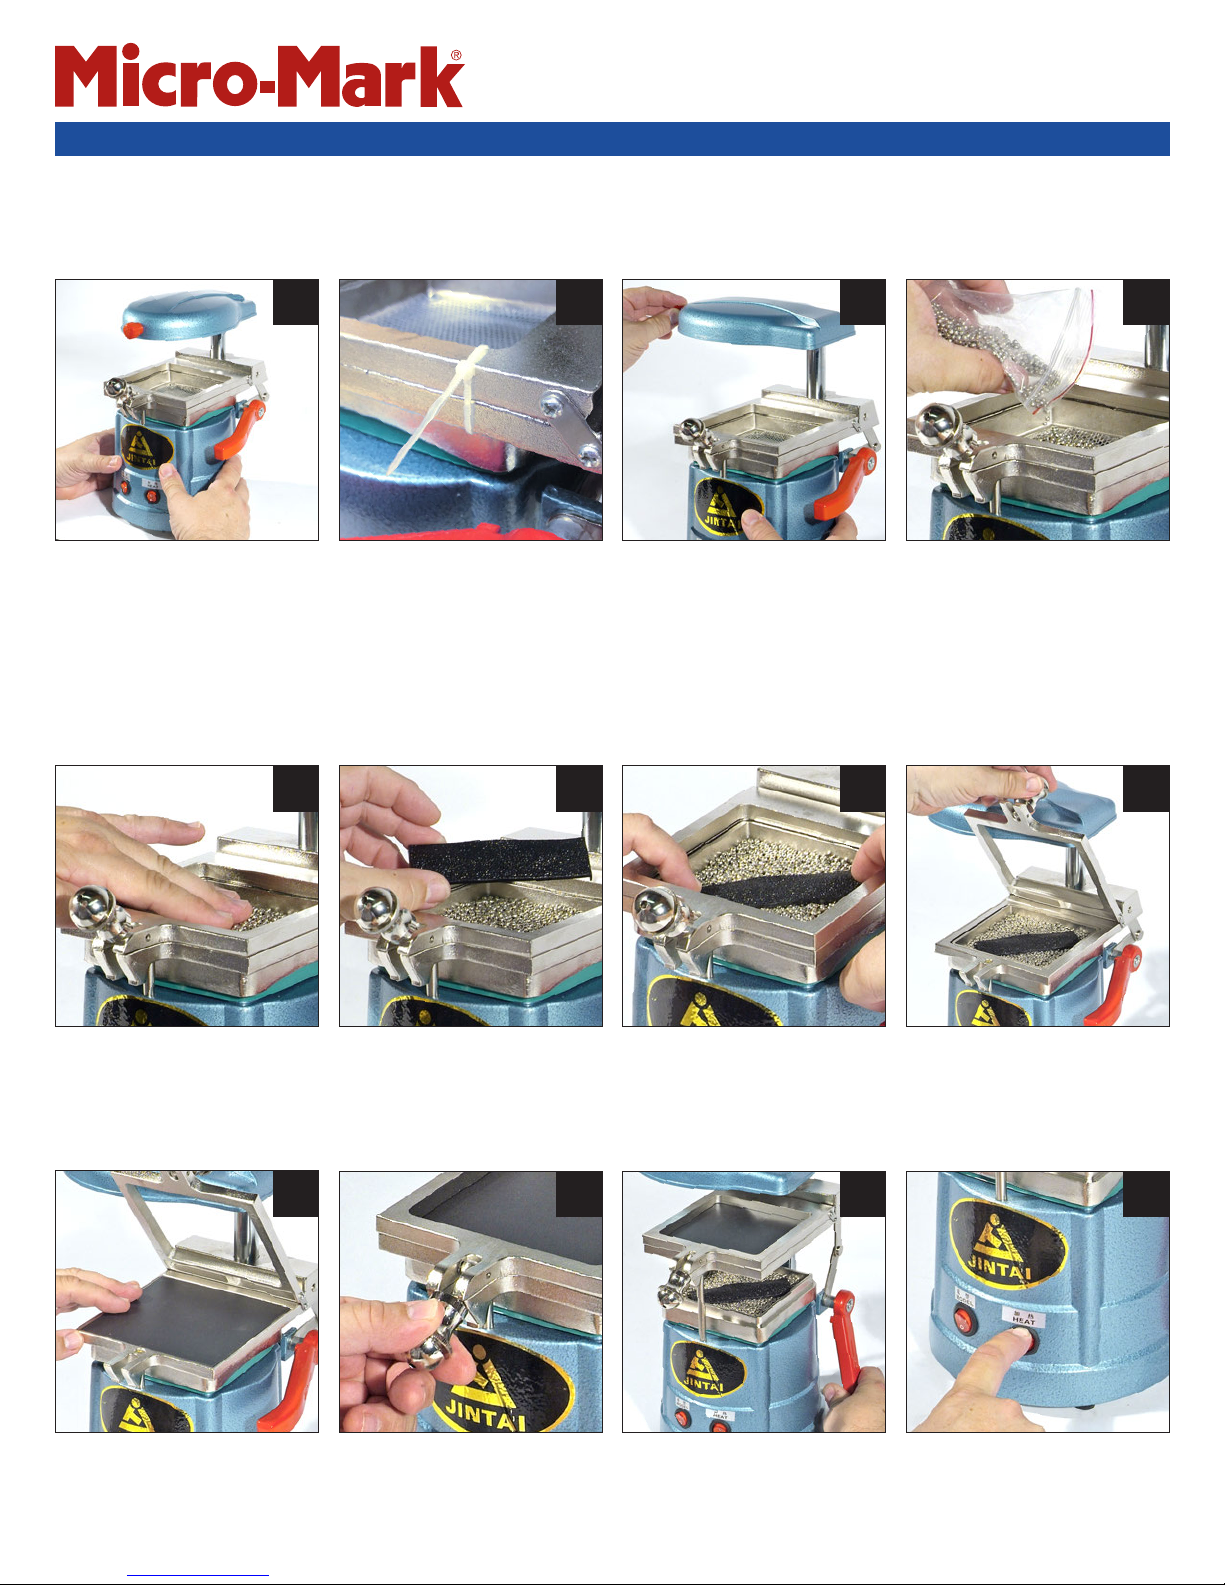
Unpack the machine and place it on
your workbench in the position
shown. Notice that the orange handle
is in the horizontal position and the
two control switches on the front of
the machine are in the OFF position.
Plug the line cord into a wall outlet.
Note: The heater draws a lot of
current, so try to avoid using an
extension cord that could overheat.
5
2
Use diagonal cutters or a knife to
snip the cable tie holding the frame
parts during shipment.
6
Rotate the heater all the way to the
left to get it out of the way for the
next few steps.
3
Optional – Pour the metal beads into
the vacuum chamber. The beads act
as a way to support patterns with
irregular bottoms. If your pattern has
a smooth bottom, you may elect to
skip this step.
7
4
8
Use your fingers to spread out the
metal beads evenly in the vacuum
chamber.
Place your pattern in the chamber.
9
Insert a 5” x 5” sheet of plastic into
the recess in the bottom frame.
Note: Not for use
with polycarbonate.
Swing down the top frame and pull
the latch knob over the tongue to
lock it in place. This will clamp the
two frames together and hold the
plastic ready for heating and forming.
Use your fingers to push the metal
beads around the bottom perimeter
of your pattern. This will keep the
plastic from wrapping around the
pattern, making it difficult to remove
later in the process.
10
Push the orange handle down to
latch the metal frame in the UP
position.
Swing up the top half of the frame.
It should stay in place.
11
Turn on the heater.
12
Page 2
13
14
15
16
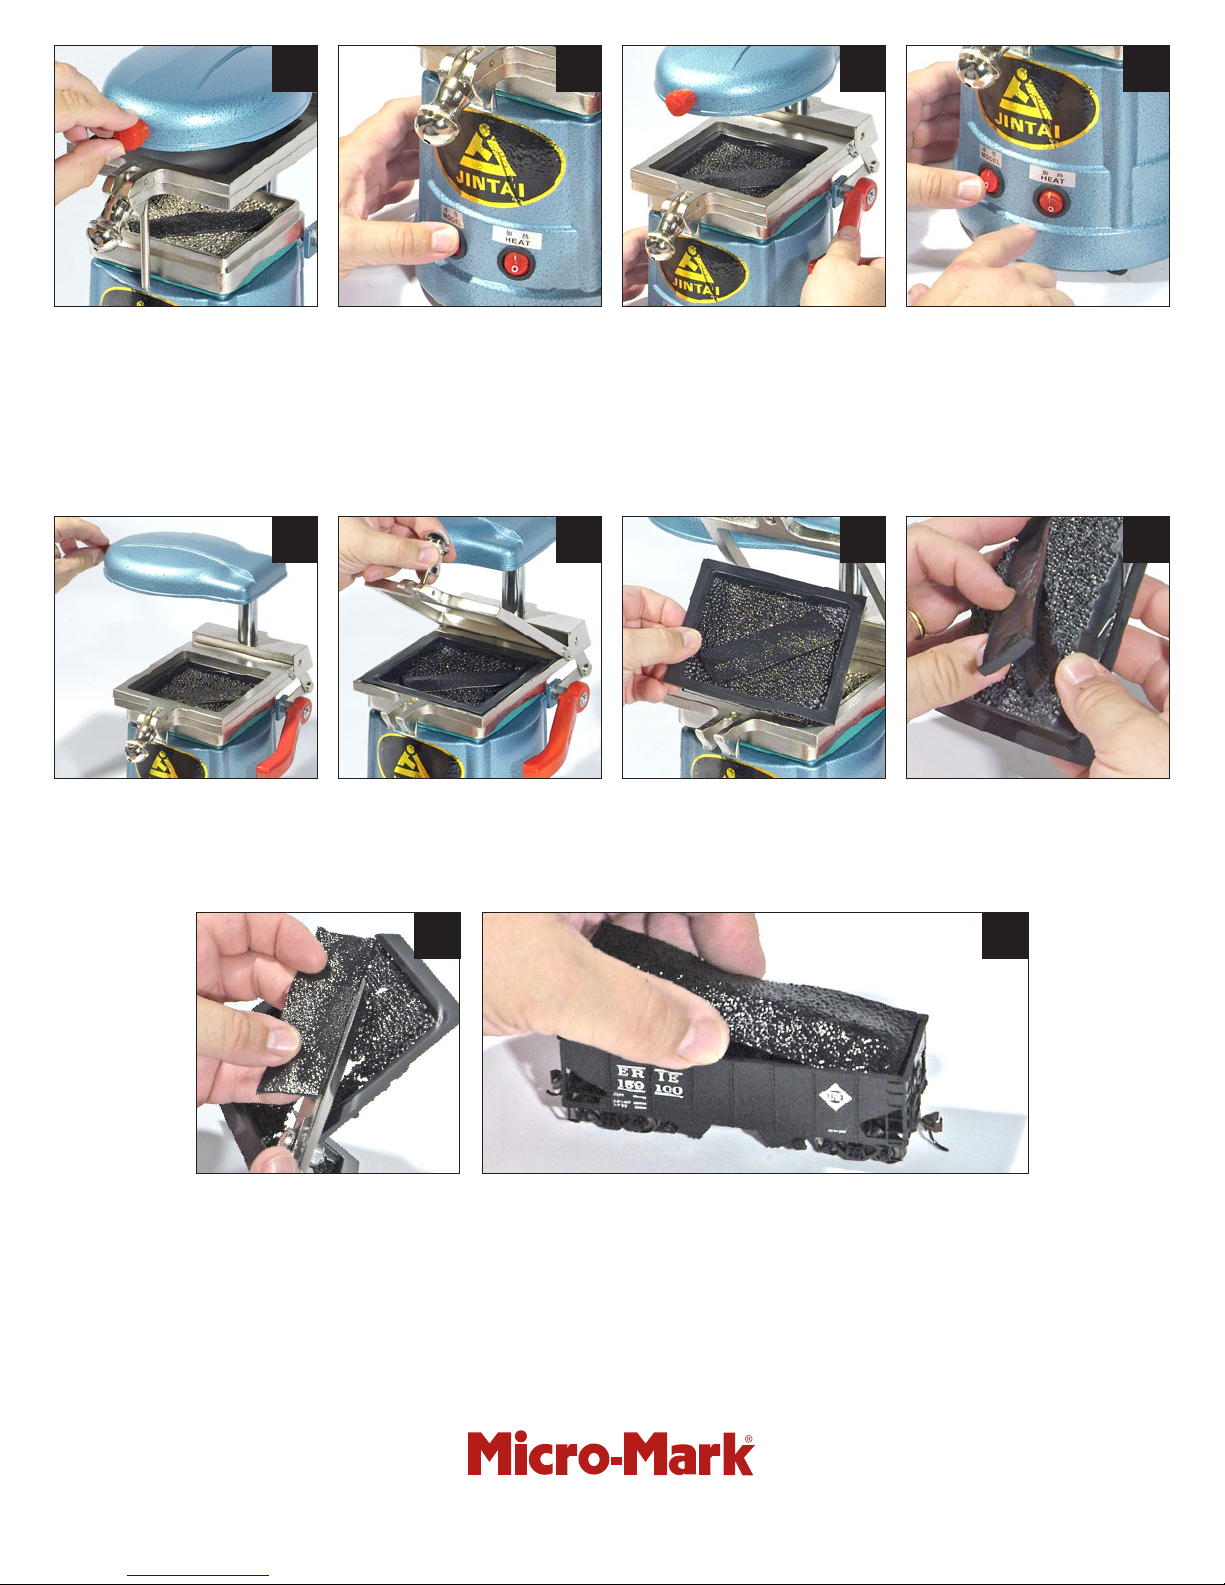
Grab the heater knob (do not touch
the metal part of the machine – it
gets HOT!). Swing the heater over the
center of the plastic sheet and watch
for the plastic to soften and sag down
in the frame about ¾”. Experiment
with different amounts of sag for
different plastics; your experience will
help judge when to do the next step.
17
Swing aside the heater.
Moving quickly, turn off the Heat.
Then, turn on the vacuum using the
“Model” switch, and…
See note below*
18
Unlock the frame and swing up the
top half.
…raise the orange handle to lower
the softened plastic onto the pattern.
19
Remove the plastic sheet from the
vacuum chamber. Watch out for all
the metal beads that may stick to the
plastic. Pop them out over a large
tray or pan to catch them for re-use.
After about 8 seconds (to allow the
plastic to cool), turn off the vacuum.
20
Remove the pattern from the plastic
sheet.
21
Cut excess plastic sheet from the
vacuum formed part.
*Note: If the heater and vacuum are running at the same time, the machine
will draw between 15 and 20 amps and a 15-amp circuit breaker may trip.
www.micromark.com • Tech Support: 908-464-
In this sample, we made a coal load for an HO scale hopper car. It can now
be installed in the car.
T H E S M A L L T O O L S P E C I A L I S T S
340 Snyder Avenue, Berkeley Heights, NJ 07922
1094, weekdays, 1pm to 5 pm ET • [email protected]
22
MM091813
 Loading...