

Page 1
Page 2

1
Deluxe Wrist Blood Pressure Monitor
Instruction Manual
Table of contents
1. Introduction
1.1. Features of the Wrist Blood Pressure Monitor
1.2. Important information about self-measurement
2. Important information about blood pressure and its
measurement
2.1. How does high/low blood pressure arise?
2.2. Which values are normal?
2.3. What can be done, if regular high/low values are obtained?
2.4. Irregular Heartbeat Detection
3. Components of your blood pressure monitor
4. Using your blood pressure monitor for the first time
4.1. Activating the Pre-Installed Batteries
4.2. Setting the time and date
5. Taking a blood pressure measurement
5.1. Before the measurement
5.2. Common sources of error
5.3. Fitting the cuff
5.4. Measuring procedure
5.5. Discontinuing a measurement
5.6. Irregular Heartbeat Detection
5.7. Hypertension Risk Indicator
5.8. Memory – storage and recall of the measurements
5.9. Memory – cancellation of all measurements
Page 3

2
6. Software Functions
6.1. Installation and data transmission
7. Setting the Medication Reminder
8. Battery Charge Indicator
9. Error messages/malfunctions
10. Care and maintenance
11. Warranty
12. Reference to standards
13. Technical specifications
14. How to contact us
Page 4

3
1. Introduction
1.1. Features of the Wrist Blood Pressure Monitor
This blood pressure monitor (with Irregular Heartbeat Detection) is a fully
automatic, digital blood pressure measuring device for use on the wrist.
This monitor enables very fast and reliable measurement of your systolic
and diastolic blood pressure as well as pulse by way of the oscillometric
method of measuring. This device offers a very high and clinically tested
measurement accuracy and is designed for maximum user-friendliness.
Before using it, please read through this instruction manual carefully and
keep it in a safe place. For further questions on the subject of blood pressure and its measurement, please contact your doctor.
Attention!
1.2. Important information about self-measurement
Self-measurement means control, not diagnosis or treatment. Your
values must always be discussed with your physician. You should never
alter the dosages of any medication without direction from your
physician. The pulse display is not suitable for checking the functioning of
heart pacemakers!!
In cases of irregular heartbeat, measurements made with this
instrument should only be evaluated after consultation with your
doctor.
Electromagnetic Interference: This device contains sensitive electronic
components. Avoid strong electrical or electromagnetic fields in the direct
vicinity of the device (e.g. mobile telephones, microwave ovens, etc.). These
can lead to temporary impairment of the monitor’s
measuring accuracy.
2. Important information about blood pressure and its measurement
2.1 How does high/low blood pressure arise?
Your level of blood pressure is determined in the circulatory center of
the brain and adjusts to a variety of situations through feedback from
the nervous system. To adjust blood pressure, the strength and
frequency of the heart (Pulse), as well as the width of circulatory blood
Page 5

4
vessels is altered. Blood vessel width is affected by way of fine muscles in the
blood vessel walls. Your level of arterial blood pressure changes periodically
during heart activity. During the "blood ejection" (Systole), the value is highest
(systolic blood pressure value). At the end of the heart’s "rest period" (Diastole)
pressure is lowest (diastolic blood pressure value). Your blood pressure values
must lie within certain normal ranges in order to prevent particular diseases.
2.2 Which values are normal?
Blood pressure is too high if your diastolic pressure is above 100 mmHg
and/or your systolic blood pressure is over 160 mmHg, while at rest. In this
case, please consult your physician immediately. Long-term values at this level
endanger your health through continual damage to the blood vessels in you
body. Should your systolic blood pressure values lie between 140 mmHg and
159mmHg and/or your diastolic blood pressure values lie between 90 mmHg
and 99mmHg. Consult your physician. Regular self-checks will be necessary. If
you have blood pressure values that are too low, (i.e., systolic values under
105mmHg and/or diastolic values under 60 mmHg), consult your physician.
Even with normal blood pressure values, a regular self-check with your blood
pressure monitor is recommended. You can detect possible changes in your
values early and react appropriately. If you are undergoing medical treatment
to control your blood pressure, keep a record of values along with time of day
and date. Show these values to your physician. Never use the results of
your measurements to independently alter the drug doses prescribed
by your physician. Which values are normal?
The following standards for assessing high blood pressure (without reagard to
age) have been established by the U.S. National Institutes of Health JNC7, 2003.
Category Systolic Diastolic
(mmHg) (mmHg)
Normal <120 and <80
Self-Check
Pre-Hypertension 120 - 139 or 80 - 89
Stage 1 140 - 159 or 90 - 99
Hypertension
Stage 2
≥160 or ≥100
Hypertension
Page 6

5
☞ Further information
• If your values are mostly normal under resting conditions but exceptionally
high under conditions of physical or psychological stress, it is possible that
your are suffering from so-called "labile hypertension." Consult your physician.
• Correctly measured diastolic blood pressure values above 120mmHg
require immediate medical treatment.
* This device is not intended for use on children 12 years of age or
younger.
2.3 What can be done if regular high/low values are obtained?
a) Consult your physician.
b) Increased blood pressure values (various forms of hypertension) are
associated with considerable health risks over time. Arterial blood vessels
in your body are endangered due to constrictions caused by deposits in the
vessel walls (Arteriosclerosis). A deficient supply of blood to important
organs (heart, brain, muscles) can result. Furthermore, the heart will
become structurally damaged with increased blood pressure values.
c) There are many different causes of high blood pressure. We differentiate
between the common primary (essential) hypertension, and secondary
hypertension. Secondary hypertension can be ascribed to specific organ
malfunctions. Please consult your physician for information about the possible origins of your own increased blood pressure values.
d)There are measures you can take to reduce and even prevent high
blood pressure. These measures must be permanent lifestyle changes.
1) Eating habits:
•Strive for a normal weight corresponding to your age. See your doctor
for your ideal weight.
• Avoid excessive consumption of common salt.
• Avoid fatty foods.
Page 7

6
2) Previous illnesses
• Consistently follow all medical instructions for treating illness such as:
diabetes (diabetes mellitus or sugar diabetes), fat metabolism disorder,
and gout.
3) Habits
• Give up smoking completely.
• Drink only moderate amounts of alcohol.
• Restrict your caffeine consumption (coffee, tea and chocolate).
4) Your physical condition
• After a medical examination, and with your doctor’s approval and
direction; exercise.
• Choose sports which require stamina and avoid those which require
strength.
• Avoid reaching the limit of your performance.
• With previous illnesses and/or an age of over 40 years, please
consult your physician before beginning your exercise routine. You
must receive advice regarding the type and extent of exercise that is
appropriate for you.
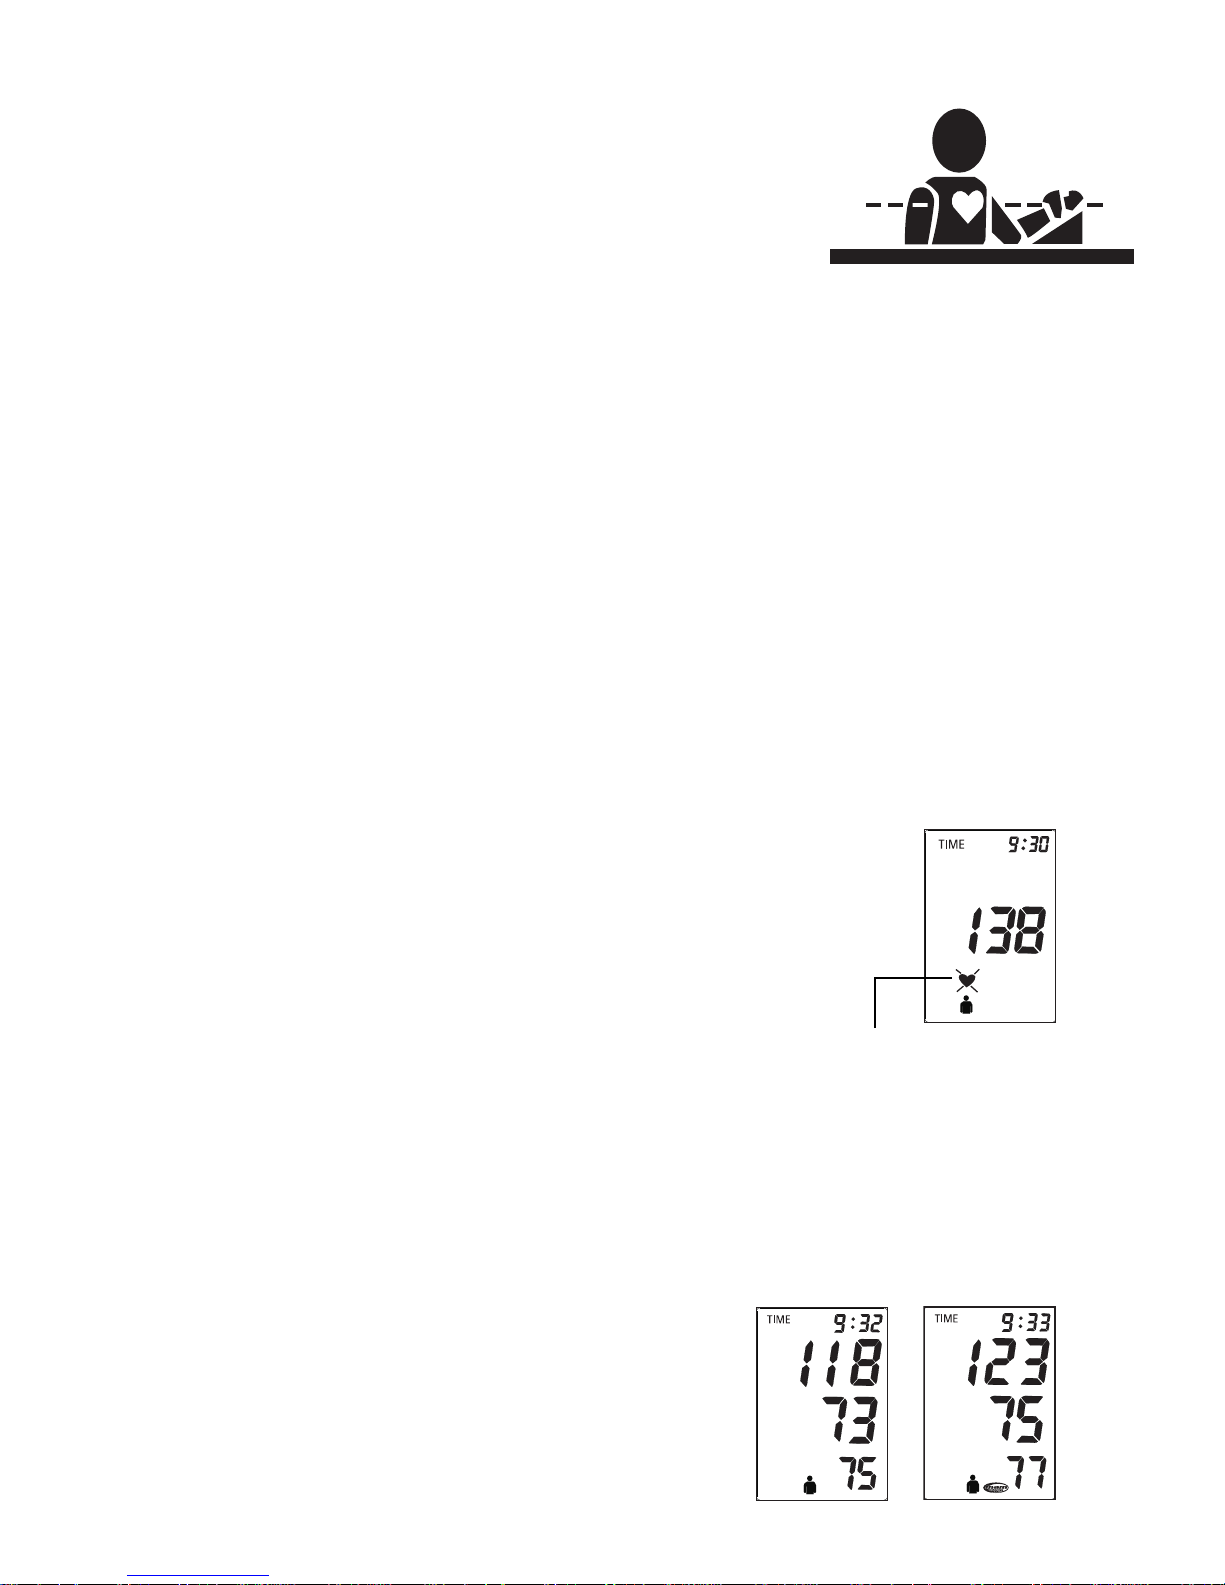
2.4 Irregular Heartbeat Detection
The appearance of the symbol signifies that a certain irregular
heartbeat was detected which could cause cardiovascular disease. This
indicator is only a caution. This blood pressure monitor can detect blood
pressure and pulse rate measurement with specifications even if the
patient is having an irregular heartbeat interval. It is important that you
be relaxed, remain still and do not talk during measurements.
Note: We recommend contacting your physician if you see this
icon frequently.
CAUTION: An irregular heartbeat can be a serious medical condition
requiring medical attention. See your doctor if you have an irregular
heartbeat.
Page 8
7
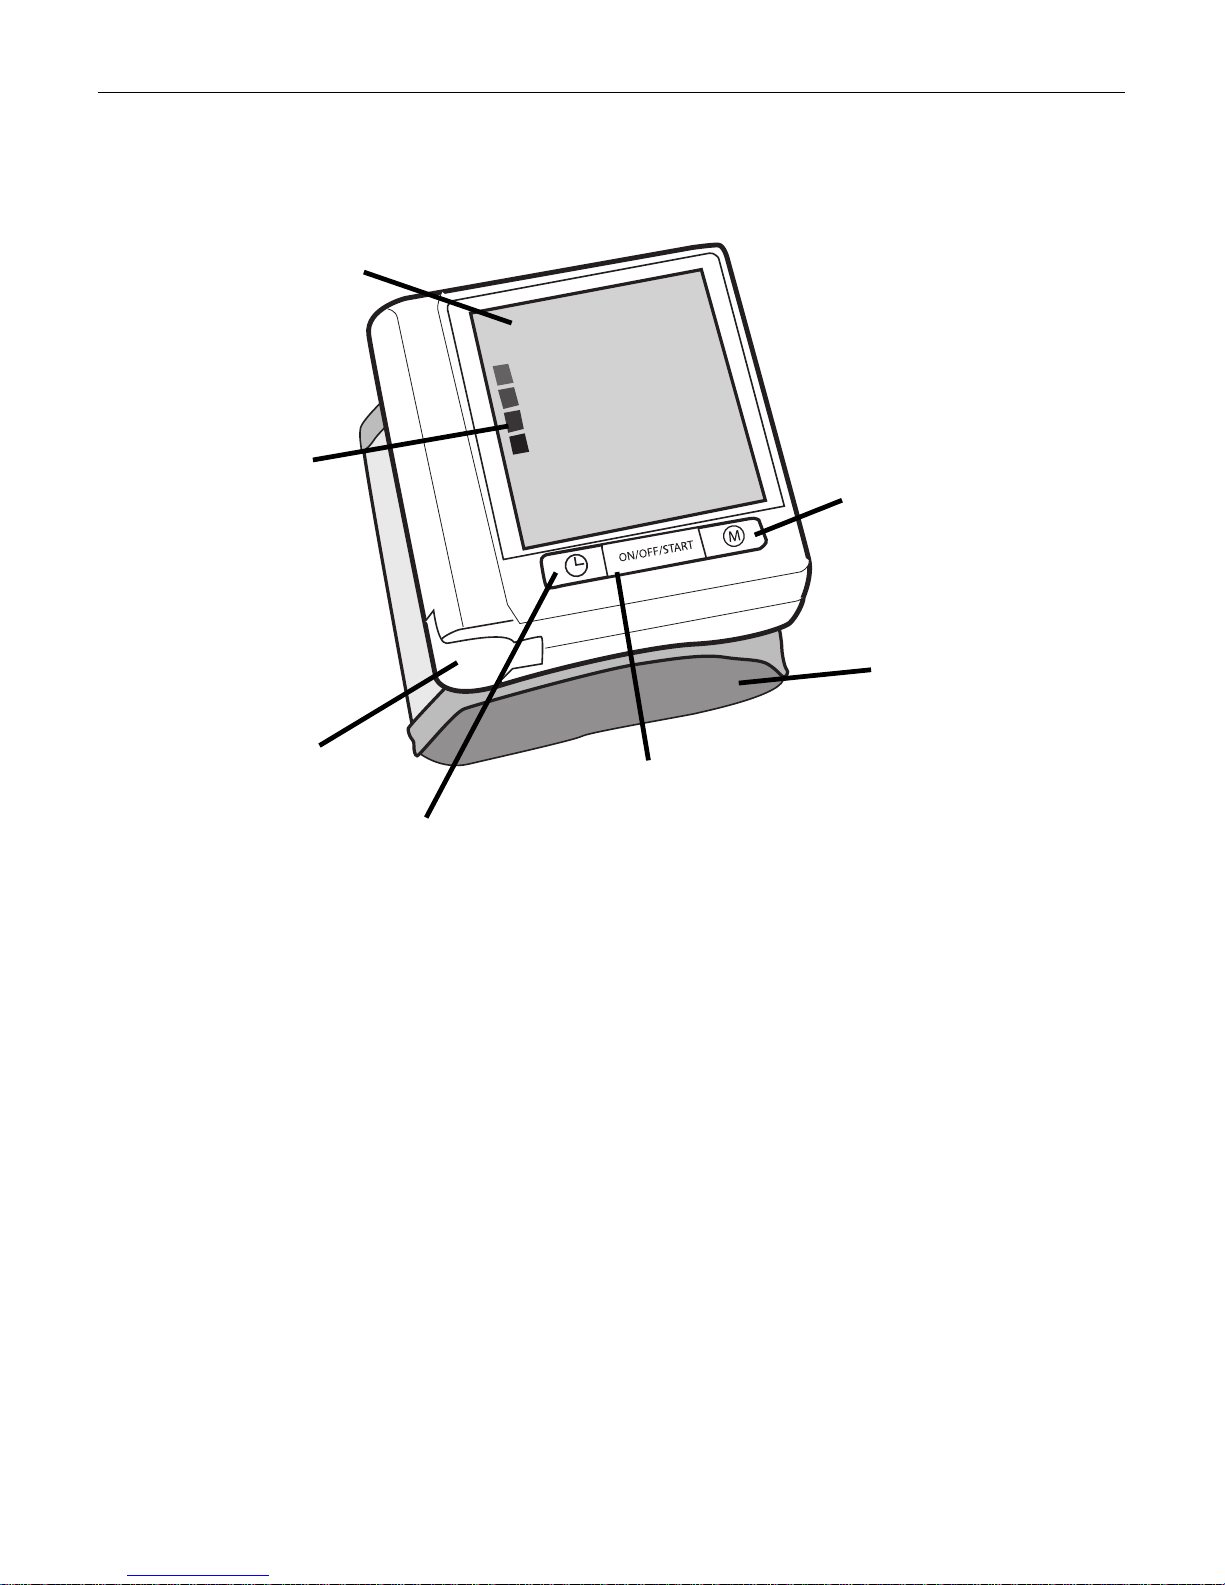
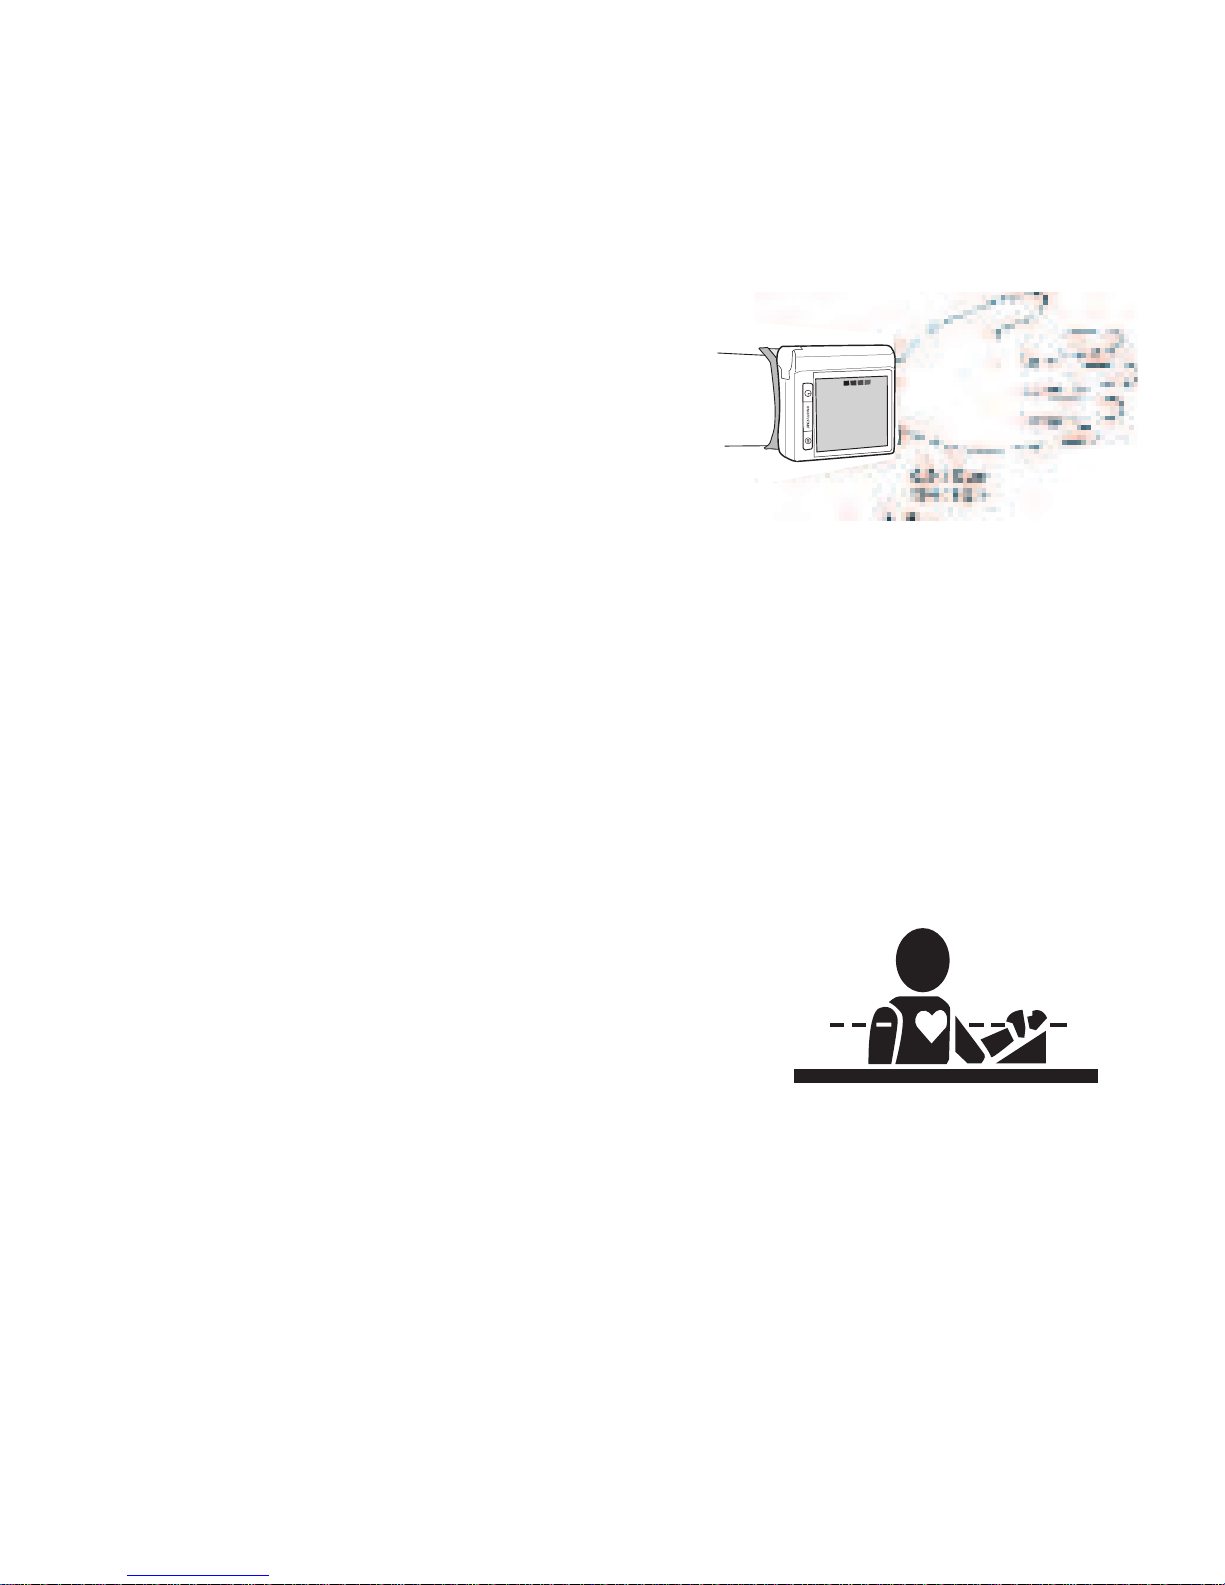
3. Components of your blood pressure monitor
The illustration shows your blood pressure monitor, consisting of:
Fits wrist size 13.5-19.5cm (5.3"-7.7")
Universal Size
Wrist Cuff
Battery Cover
Time/Date Button
Memory Recall
Jumbo, Color LCD
Hyperension
Risk Indicator
ON/OFF/START
Button
Page 9
8
4. Using your Blood Pressure Monitor for the First Time
4.1. Activate the Pre-Installed Batteries
Pull out the protective strip protruding from the battery compartment.
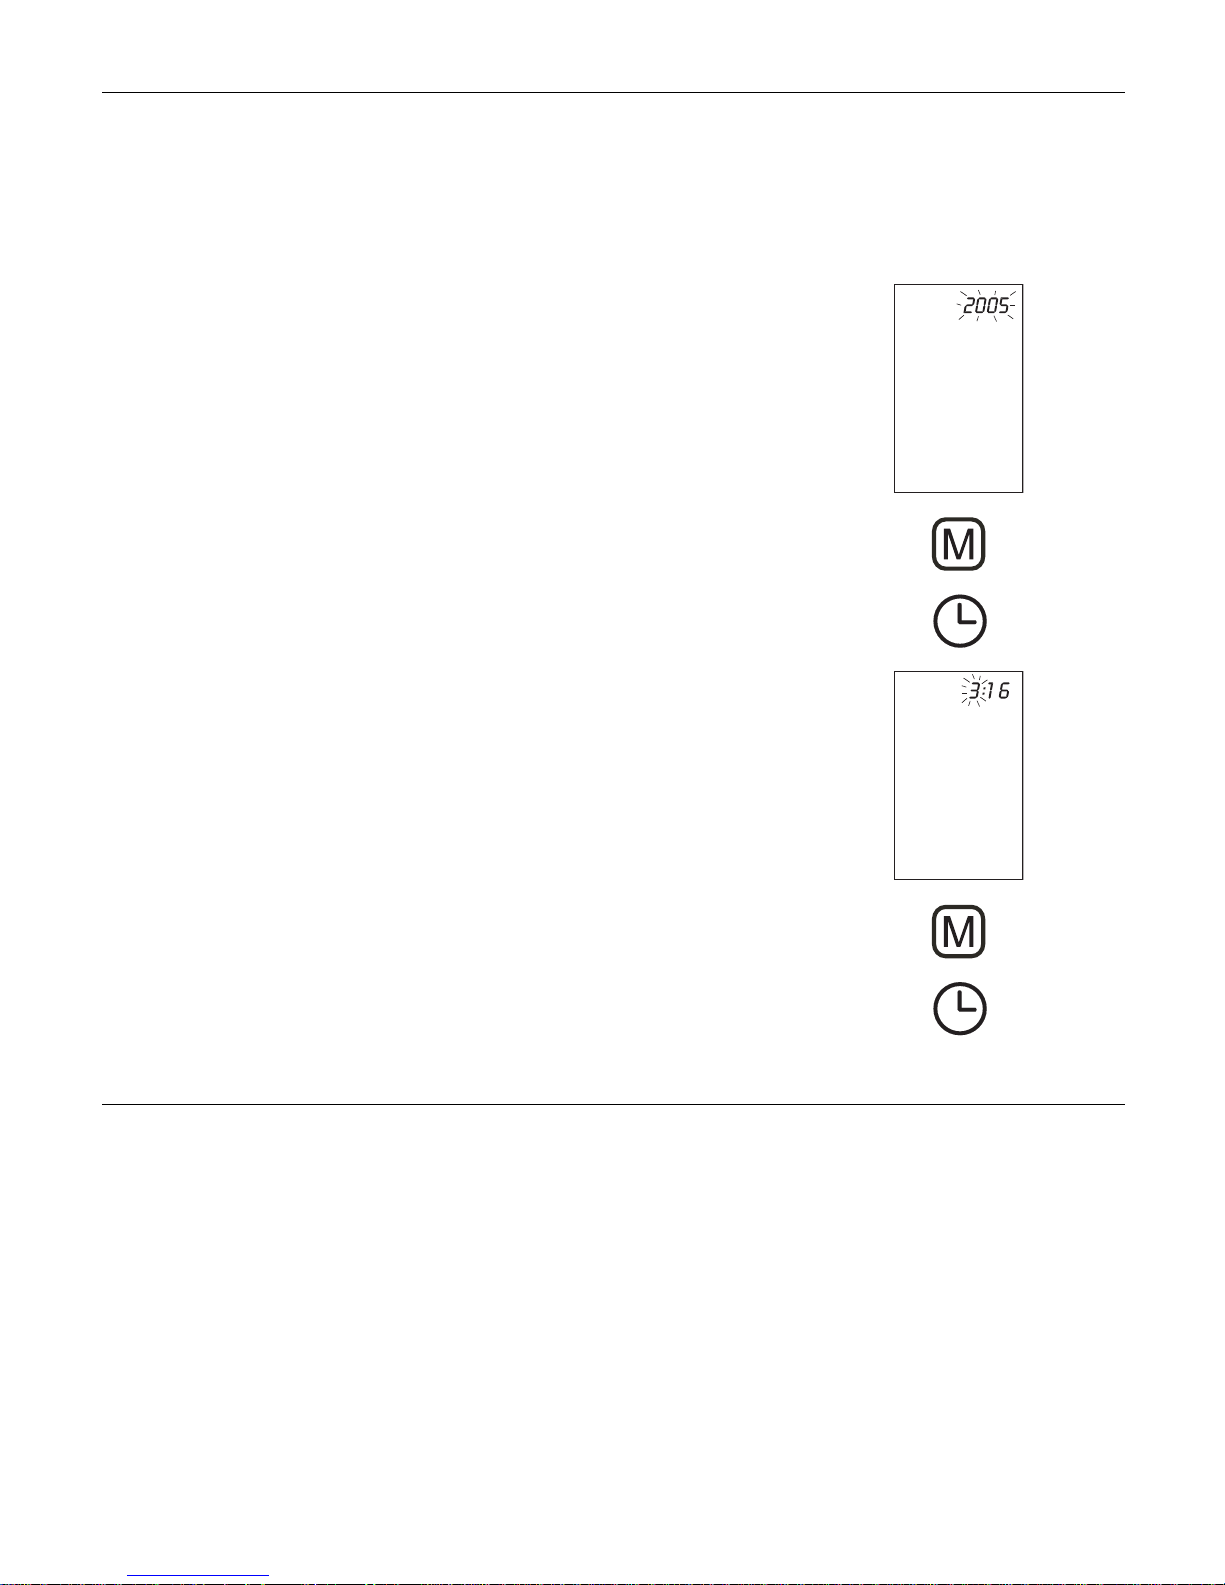
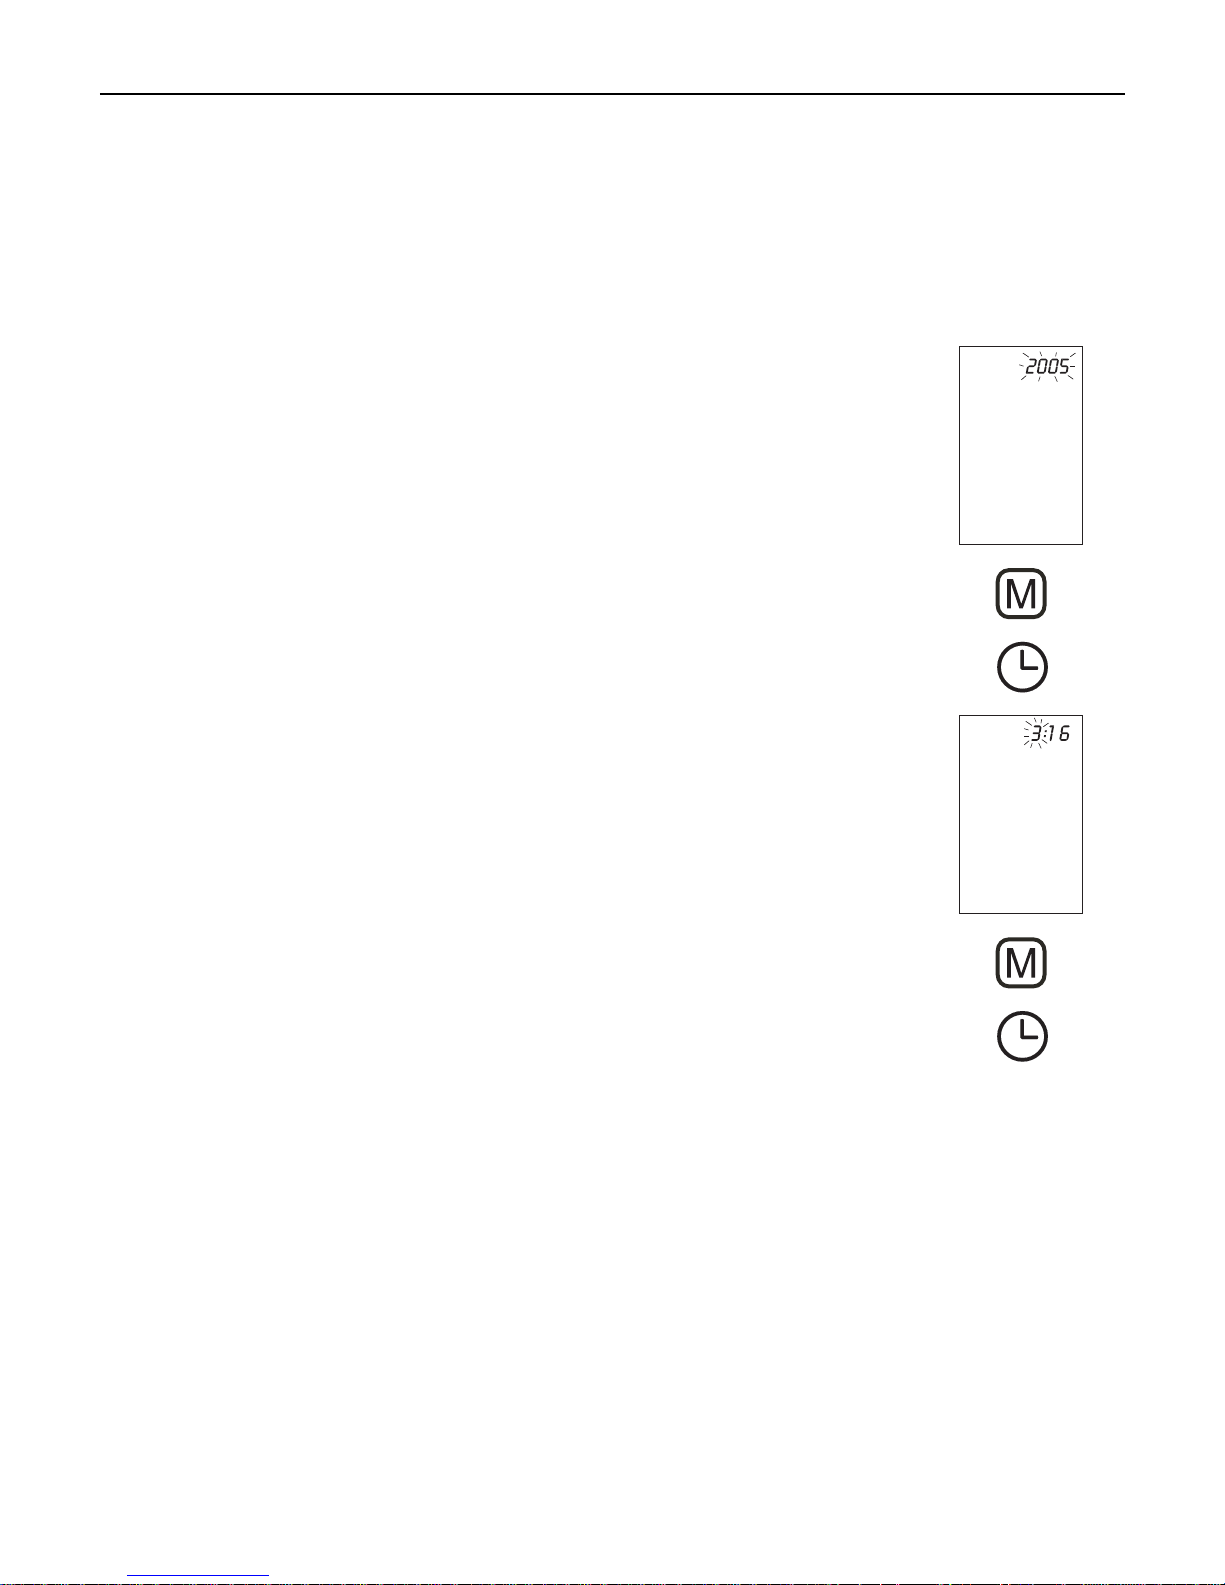
4.2 Setting the date and time
1. After the new batteries are activated, the year num-
ber flashes in the display. You can advance the year
by pressing the "M" button. To confirm and then set
the month, press the time button.
2. You can now set the month using the “M” button. To
confirm and then set the day, press the time button.
3. Please follow the instructions above to set the day,
hour and minutes.
4. Once you have set the last minute and pressed the
time button, the date and time are set and the time
is displayed.
5. If you want to change the date and time, press and
hold the time button down for approx. 3 seconds
until the year number starts to flash. Now you can
enter the new values as described above.
5. Taking a Blood Pressure Measurement
5.1. Before the measurement:
• Avoid eating, smoking as well as all forms of exertion directly before
your measurement. These factors influence the measurement result.
Relax by sitting in an armchair in a quiet atmosphere for about ten
minutes before your measurement.
• Always measure on the same wrist (normally left).
• Compare readings at the same time of day, since your blood pressure
changes during the course of the day.
TIME PM
Memory
Button
Time/Date
Button
Page 10
5.2. Common sources of error:
Note:
Comparable blood pressure measurements always require the same
conditions! These are normally always quiet conditions.
• All efforts by the patient to support the arm can increase blood pressure. Make sure you are in a comfortable, relaxed position and do not
activate any of the muscles in the measurement arm during the measurement. Use a cushion for support if necessary.
• If the wrist artery lies considerably lower (higher) than the heart, an
erroneously higher (lower) blood pressure will be measured! (Each
15cm/6" difference in height results in a measurement error
of10mmHg!)
• A loose cuff causes false measurement values.
• With repeated measurements, blood can accumulate in the respective
arm, which can lead to false results. Correctly executed blood pressure
measurements should therefore first be repeated after a 1 minute
pause or after the arm has been held up in order to allow the accumulated blood to flow away.
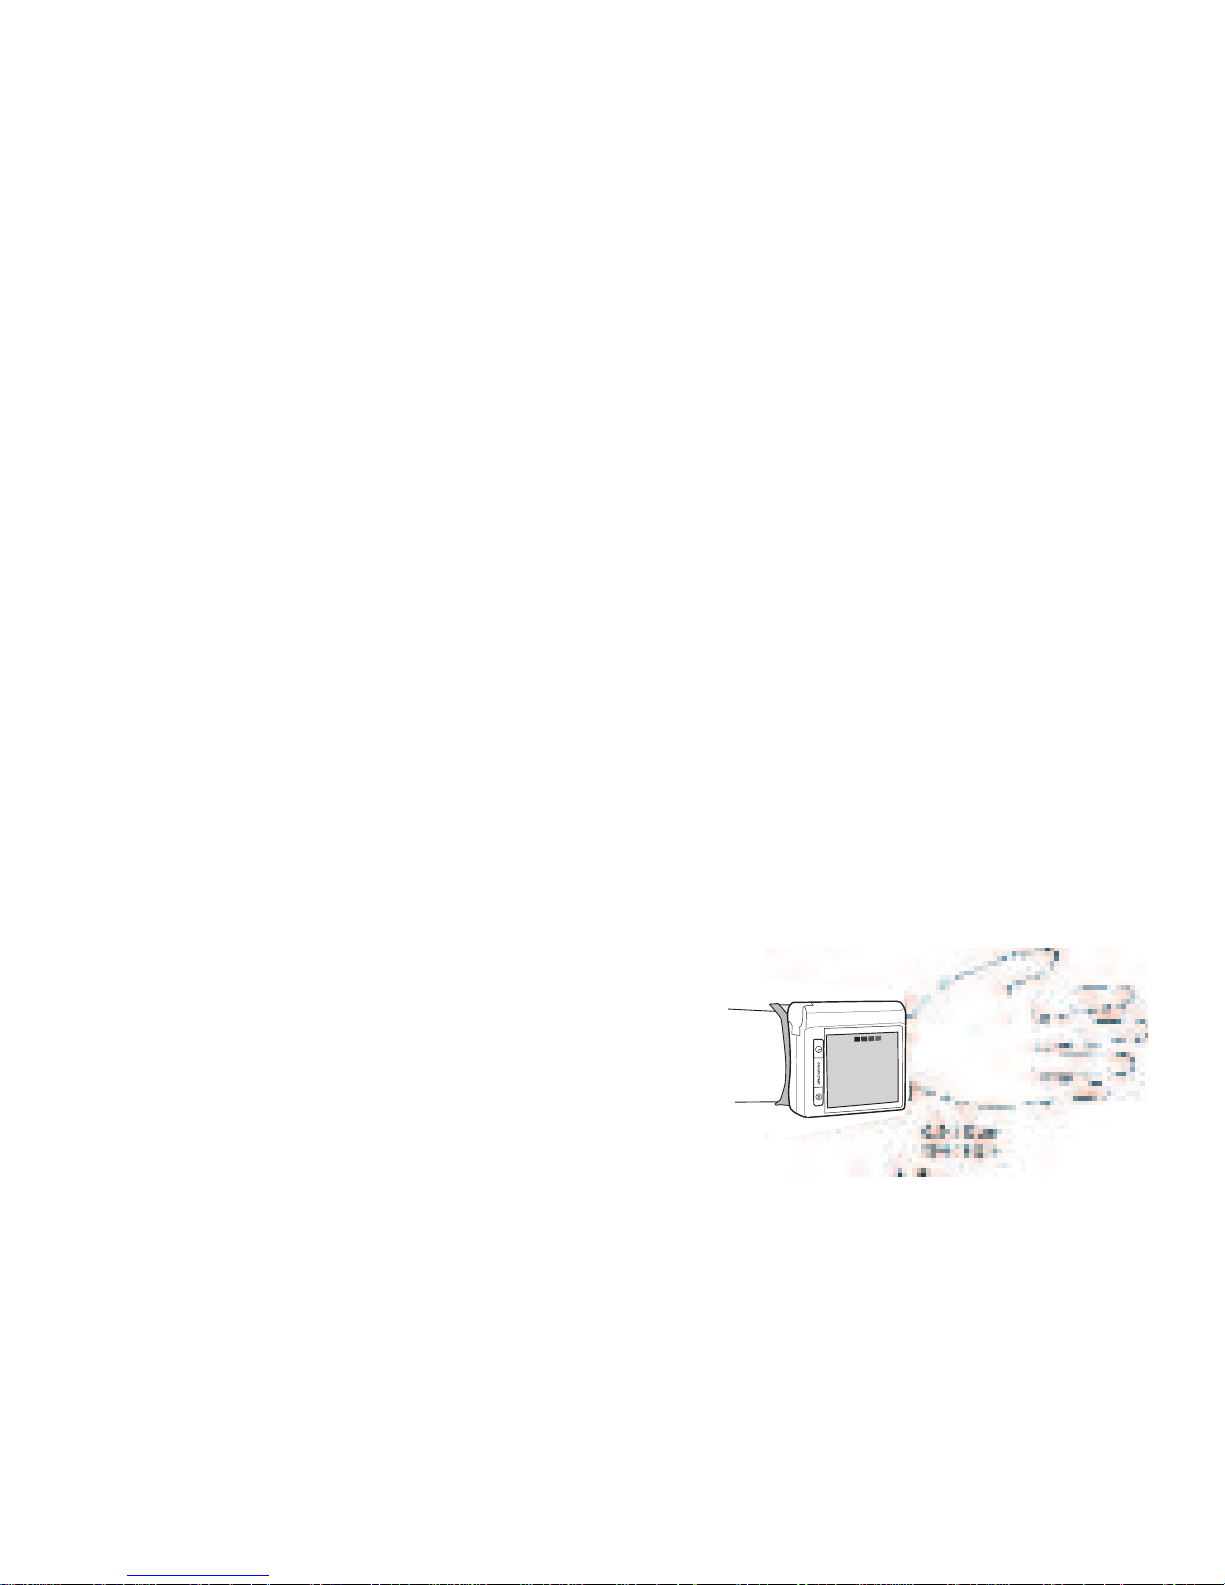
5.3. Fitting the cuff
a) Remove all objects and jewelry (e.g.
wristwatch) from the wrist in use. Put the
cuff over the wrist with the monitor face
on the inside of the wrist.
b) The distance between the cuff and the
hand should be approx. 10 mm (1/2").
c) Secure the cuff with the Velcro fastener,
so that it lies comfortably and not too
tight. No space should remain between
the cuff and the wrist.
9
Page 11
d) Lay your arm on a table, with the palm
upwards.
Support the arm a little with a cushion, so that the
cuff rests at about the same height as the heart.
Remain still for 2 minutes, before beginning the
measurement.
5.4. Measuring procedure
After the cuff has been appropriately positioned, the measurement can
begin:
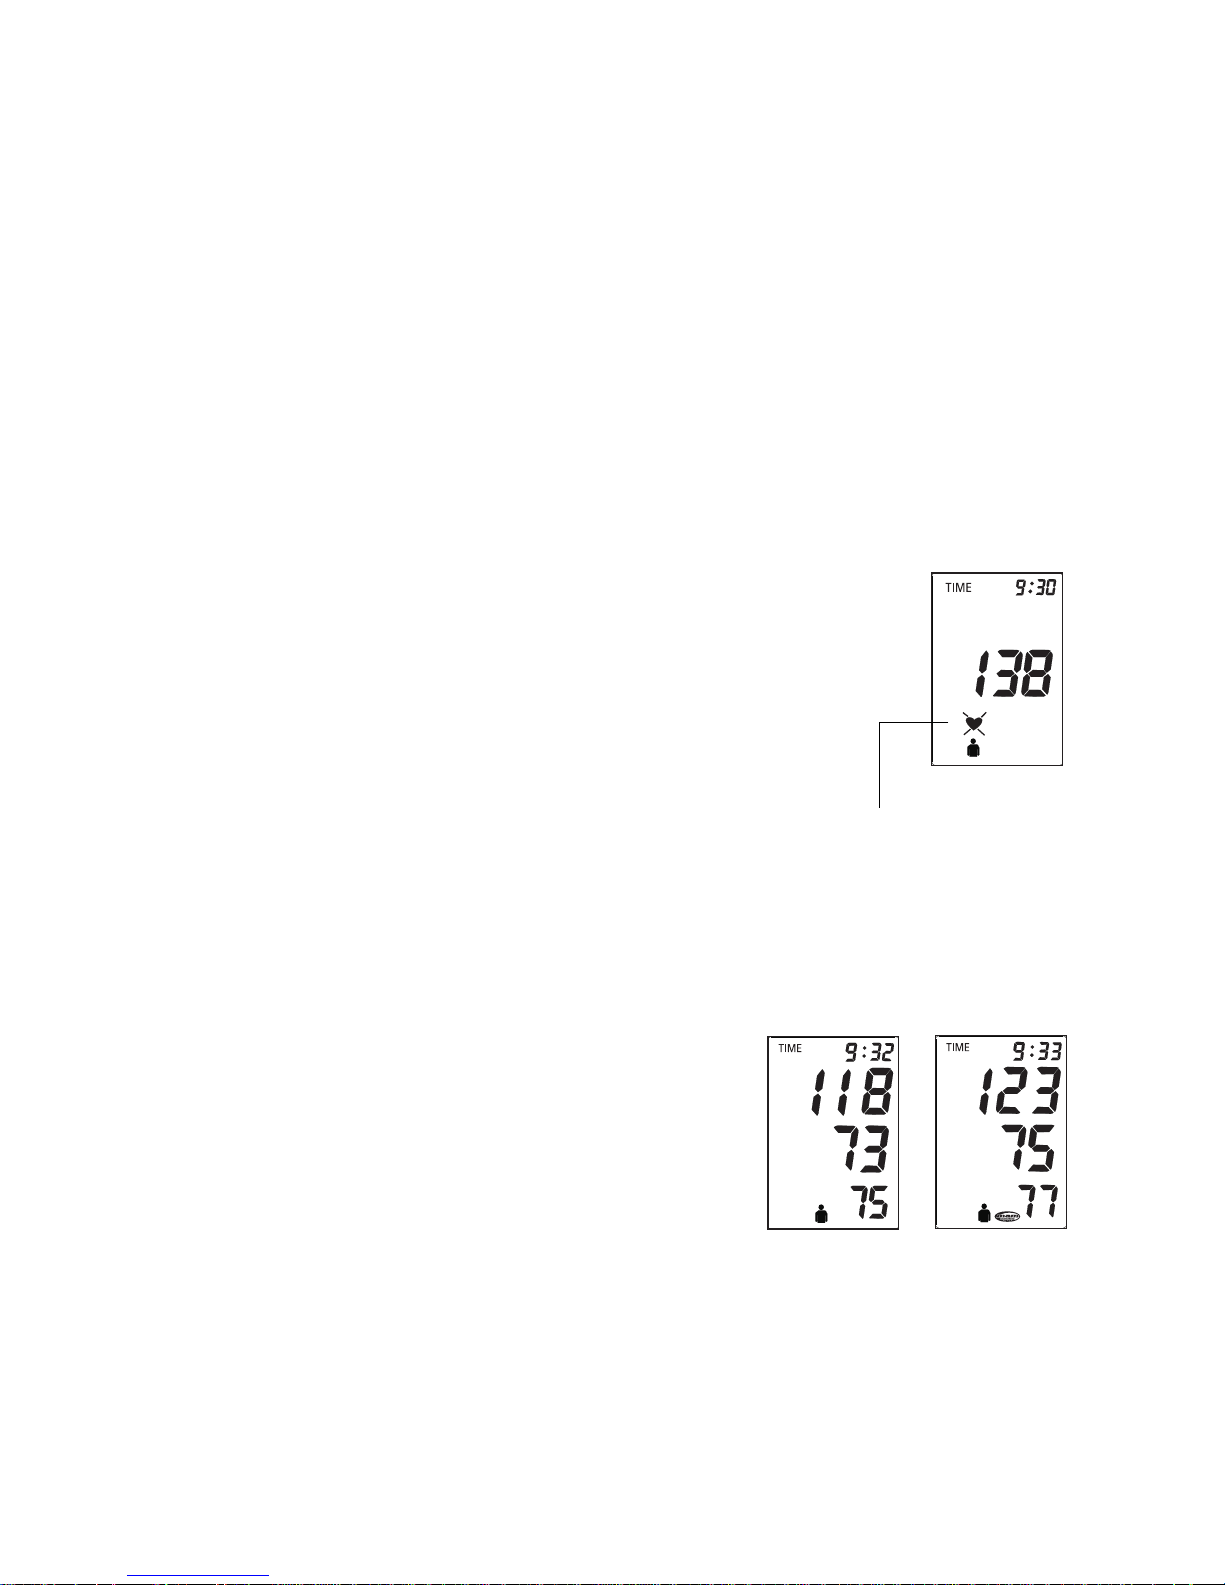
a) Press the ON/OFF button to begin. After
pressing the ON/OFF button the pump
begins to inflate the cuff. In the display,
the increasing cuff-pressure is continually
displayed.
b) After reaching the inflation pressure, the
pump stops and the pressure slowly falls.
The cuff pressure (large characters) is displayed during the measurement. When
the device has detected the pulse, the
heart symbol in the display begins to
blink and a beep tone is audible for every
pulse beat.
c) When the measurement has been concluded, a long beep tone sounds.
The measured systolic and diastolic blood pressure values as well as
the frequency are now displayed.
(Pulse=number of heartbeats each minute)
Example (Fig.): Systolic 118, Diastolic 73,
Pulse 75. The measurement results are displayed until you switch the device off.
10
1
1
mmHg
mmHg
1
mmHg
mmHg
Pulse Detected -
Unit measuring
Page 12
If no button is pressed for 5 minutes, the device switches off automati-
cally to save the batteries.
5.5. Discontinuing a measurement
If it is necessary to interrupt a blood pressure measurement for any
reason (e.g. the patient feels unwell), the ON/OFF button can be
pressed at any time. The device then immediately lowers the cuff pressure automatically and enters into sleep mode.
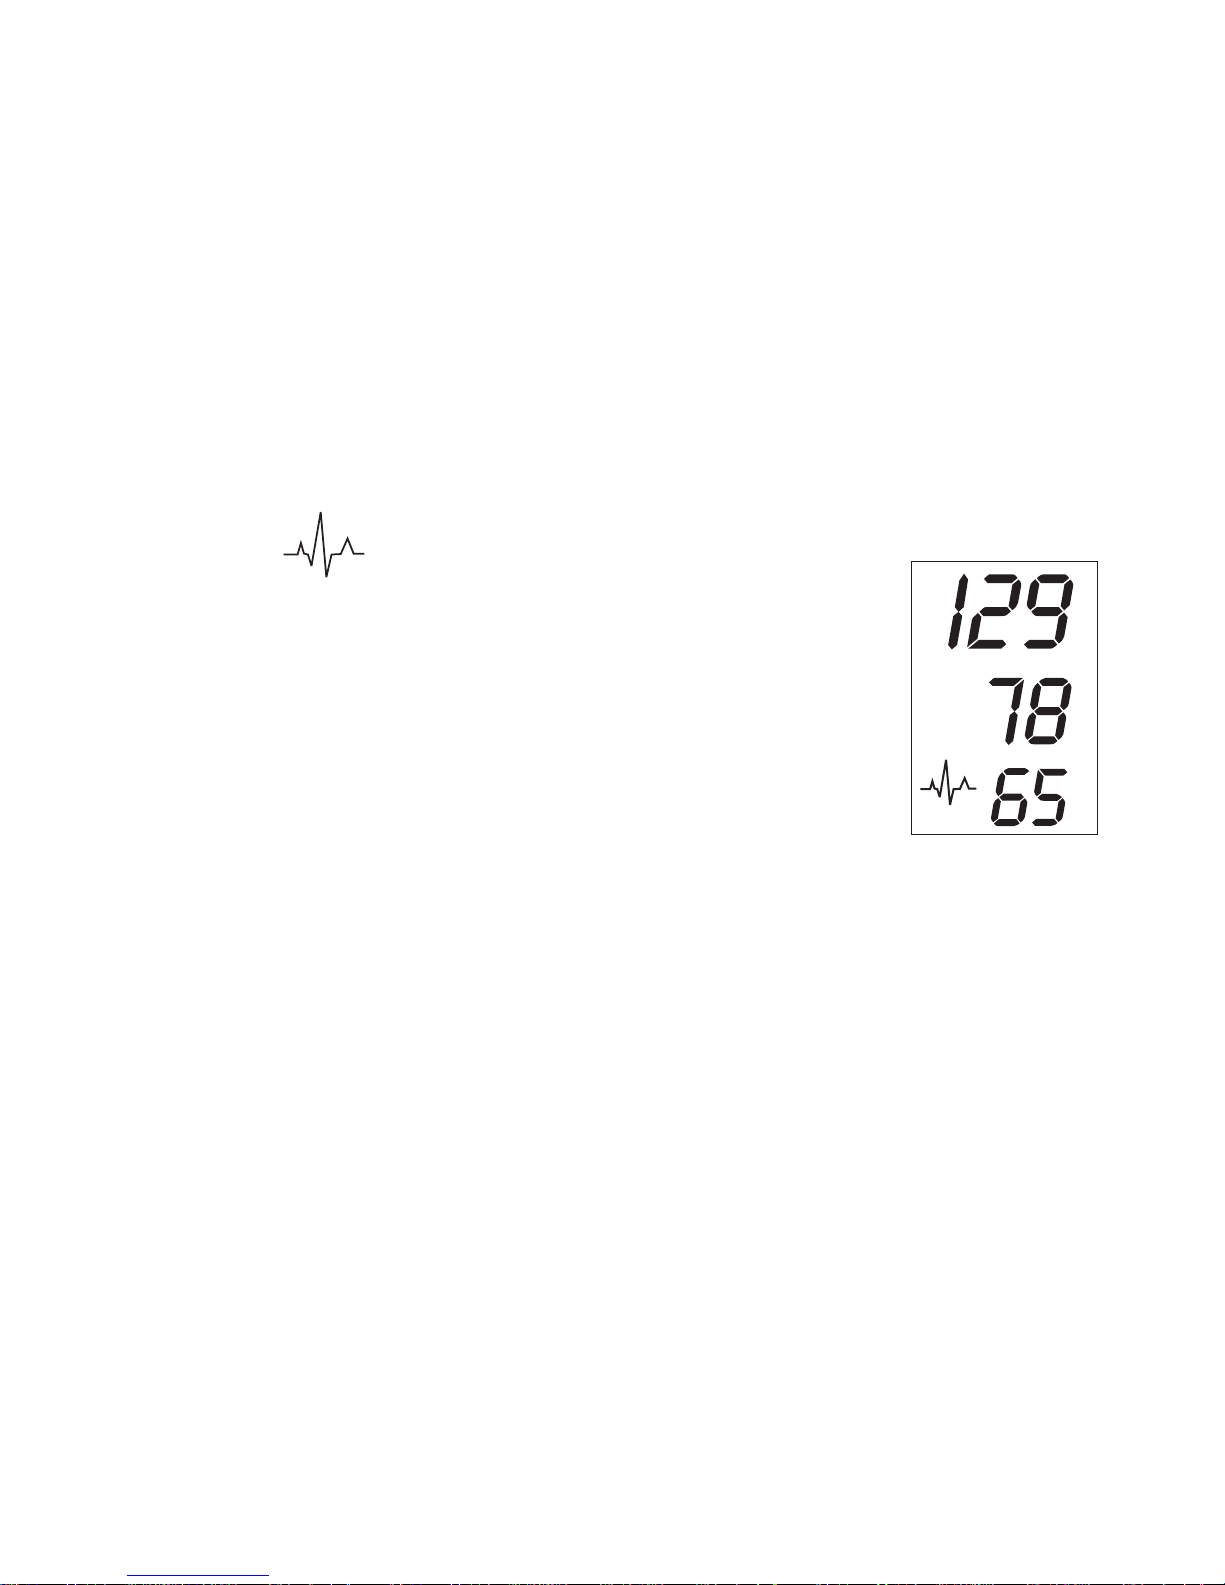
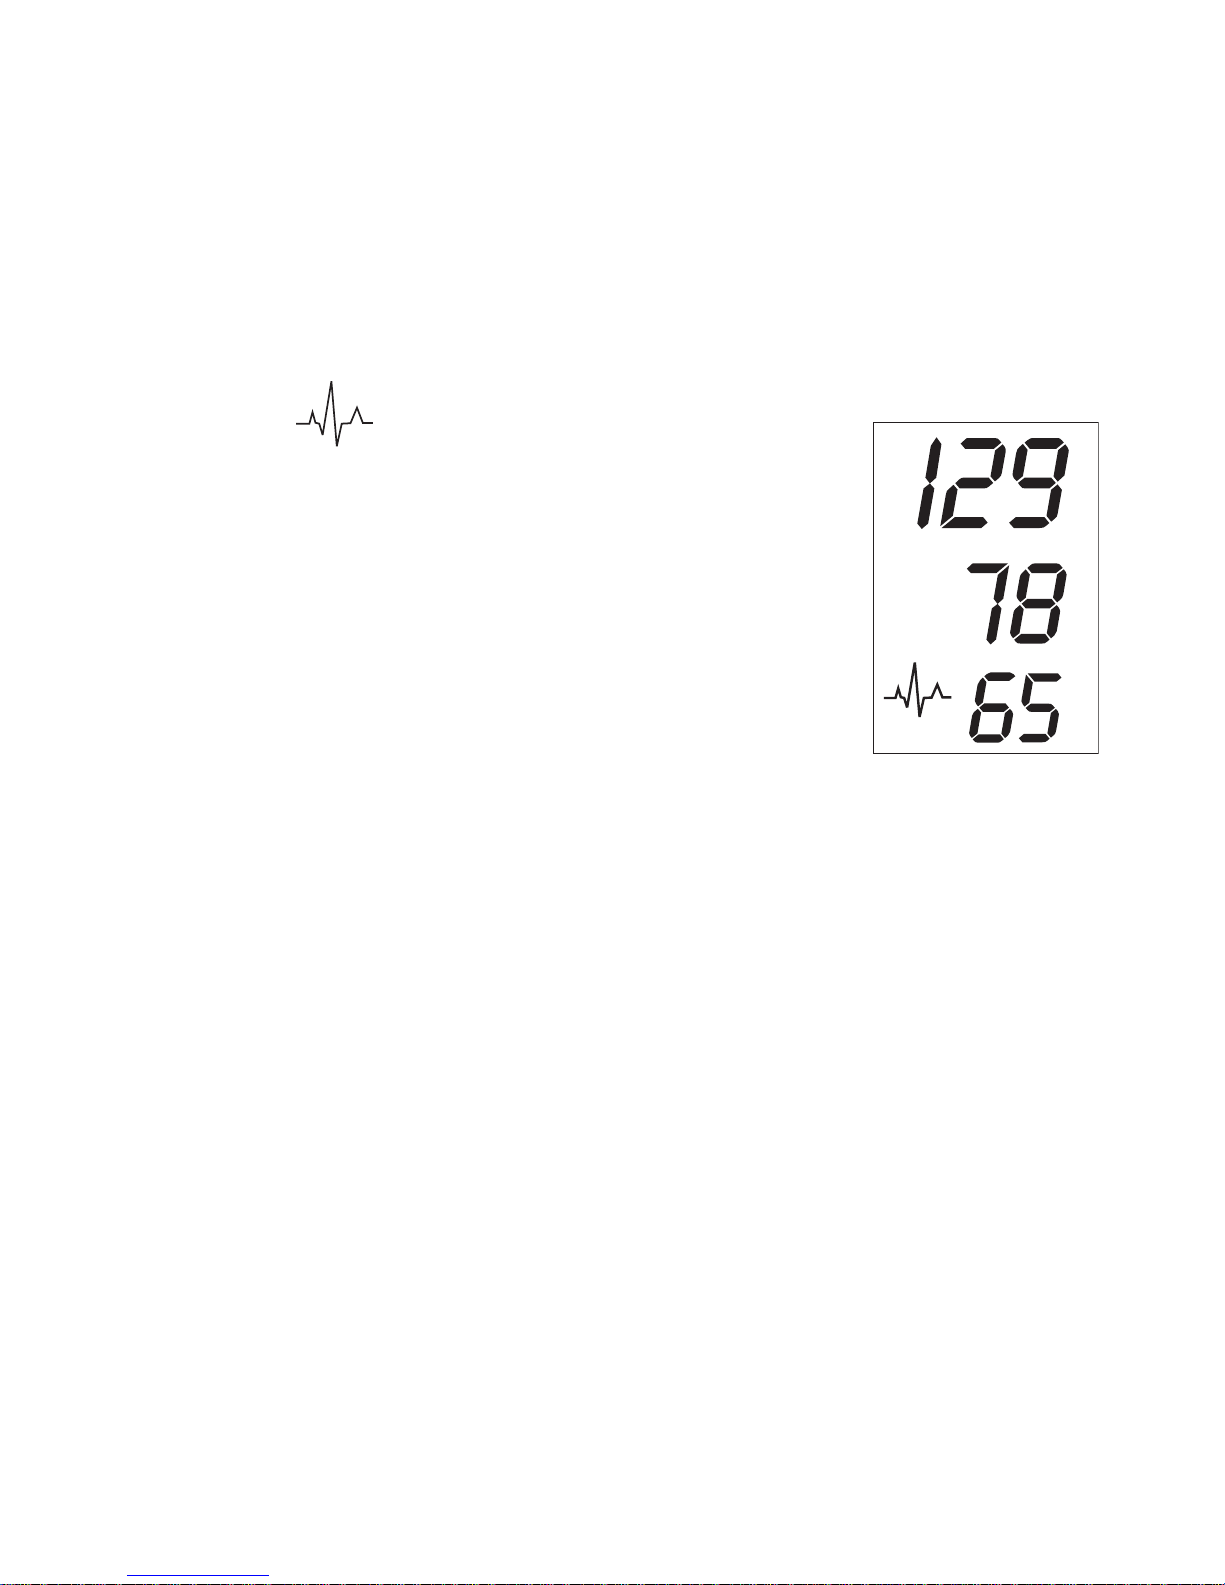
5.6. Irregular Heartbeat Detection
This symbol indicates that certain pulse irregularities were detected during the measurement. In this case, the
result may deviate from your normal basal blood pressure –
repeat the measurement. In most cases, this is no cause for
concern. However, if the symbol appears on a regular basis
(e.g. several times a week with measurements taken daily),
we advise you to tell your doctor. Please show your doctor
the following explanation:
Information for the doctor on frequent appearance of the Irregular Heartbeat Symbol
This instrument is an oscillometric blood pressure monitor device that also
analyzes pulse frequency during measurement. The instrument is clinically
tested.
If pulse irregularities occur during measurement, the irregular heartbeat symbol is displayed after the measurement. If the symbol appears more frequently
(e.g. several times per week on measurements performed daily) or if it suddenly appears more often than usual, we recommend the patient to seek medical
advice.
The instrument does not replace a cardiac examination, but serves to detect
pulse irregularities at an early stage.
11
Page 13

5.7. Hypertension Risk Indicator
The colored bars on the left-hand edge of the LCD show you the range within
which the indicated blood pressure value lies. Depending on the color of the
bar, the readout value is either within the normal (green), borderline (yellow) or
danger (orange, red) range.
The classification is based on standards established by the National Institutes
of Health JNC7, 2003. Refer to the chart in section 2.2 of this instruction manual for details of the classifications.
The traffic light bar illuminates according to your measurement:
• If the green bar lights up, your measurement is “Normal” according to NIH
standards.
• If the yellow bar lights up, it is “Pre-Hypertension” according to NIH standards.
• If the orange bar lights up, it is in the “Stage 1 Hypertension” zone.
• If the red bar lights up, it is in the “Stage 2 Hypertension” zone.
5.8. Memory – storage and recall of the measurements
This blood pressure monitor automatically stores the last 99 measurements values for each user. By pressing the MEMORY button, average of
existing memory readings displayed first with an “A” and (MR) at the
lower left. Press MEMORY button again, the last measurement (MR99) as
well as the previous 98 measurements (MR98, MR97, …..MR1) can be
displayed one after the other.
5.9.Memory– cancellation of all measurements
Attention!
Before proceeding to clear all the memory, make sure that you don’t have
to make reference to the readings in the future.
To delete all stored readings, press the MEMORY
button for at least 7 seconds. The display will show
the symbol "CL" and 3 short beeps will sound to
indicate deletion of stored readings.
12
1
Page 14
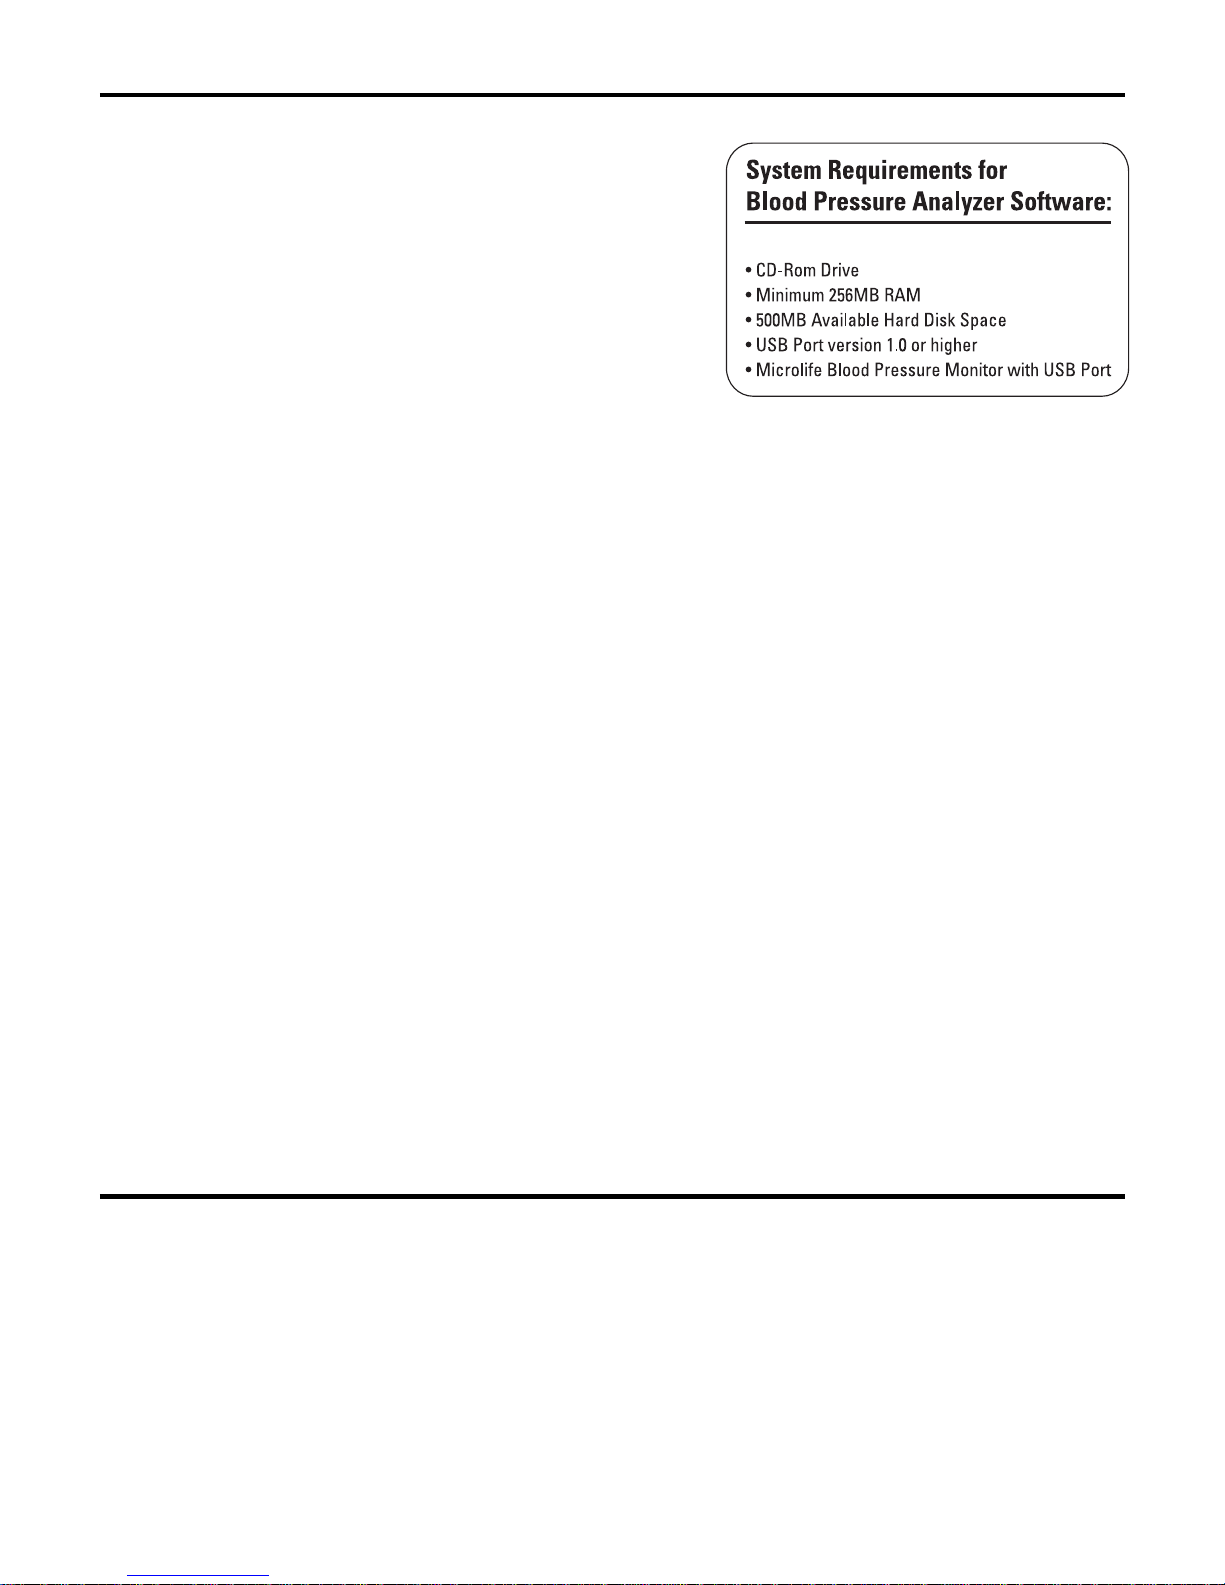
6. Software Functions
This unit can be used in connection with
your personal computer (PC) running the PC
Link Blood Pressure Analyzer software. Your
PC will allow a capacity of monitoring 80
patients, each with 1000 data (note: overuse
will lower system efficiency). The memory
data can be transferred to the PC by connecting the monitor via the
included USB cable with your PC. Note: The software does not work with
Mac computers.
6.1. Installation and Data Transmission
a) Insert CD into CD ROM drive of your PC. The installation will start
automatically. If not, click on SETUP.EXE.
b) Connect the monitor via USB cable with the PC. Three horizontal bars
will appear on the display and last for 3 seconds.
c) The bars will then flash to indicate that the connection between com-
puter and device is successfully made. As long as the cable is plugged,
the bars will keep flashing and the buttons are disabled.
During the connection, the device is completely controlled by the
computer. Please refer to the ‘help’ file in the software for detailed
instructions or call 1-800-568-4147.
7. Setting the Medication Reminder
This instrument allows you to set two alarm times at which an alarm signal
will then be triggered. This can be a useful aid, for instance as a reminder to
take medication or to remind you to take your blood pressure at the same time
each day.
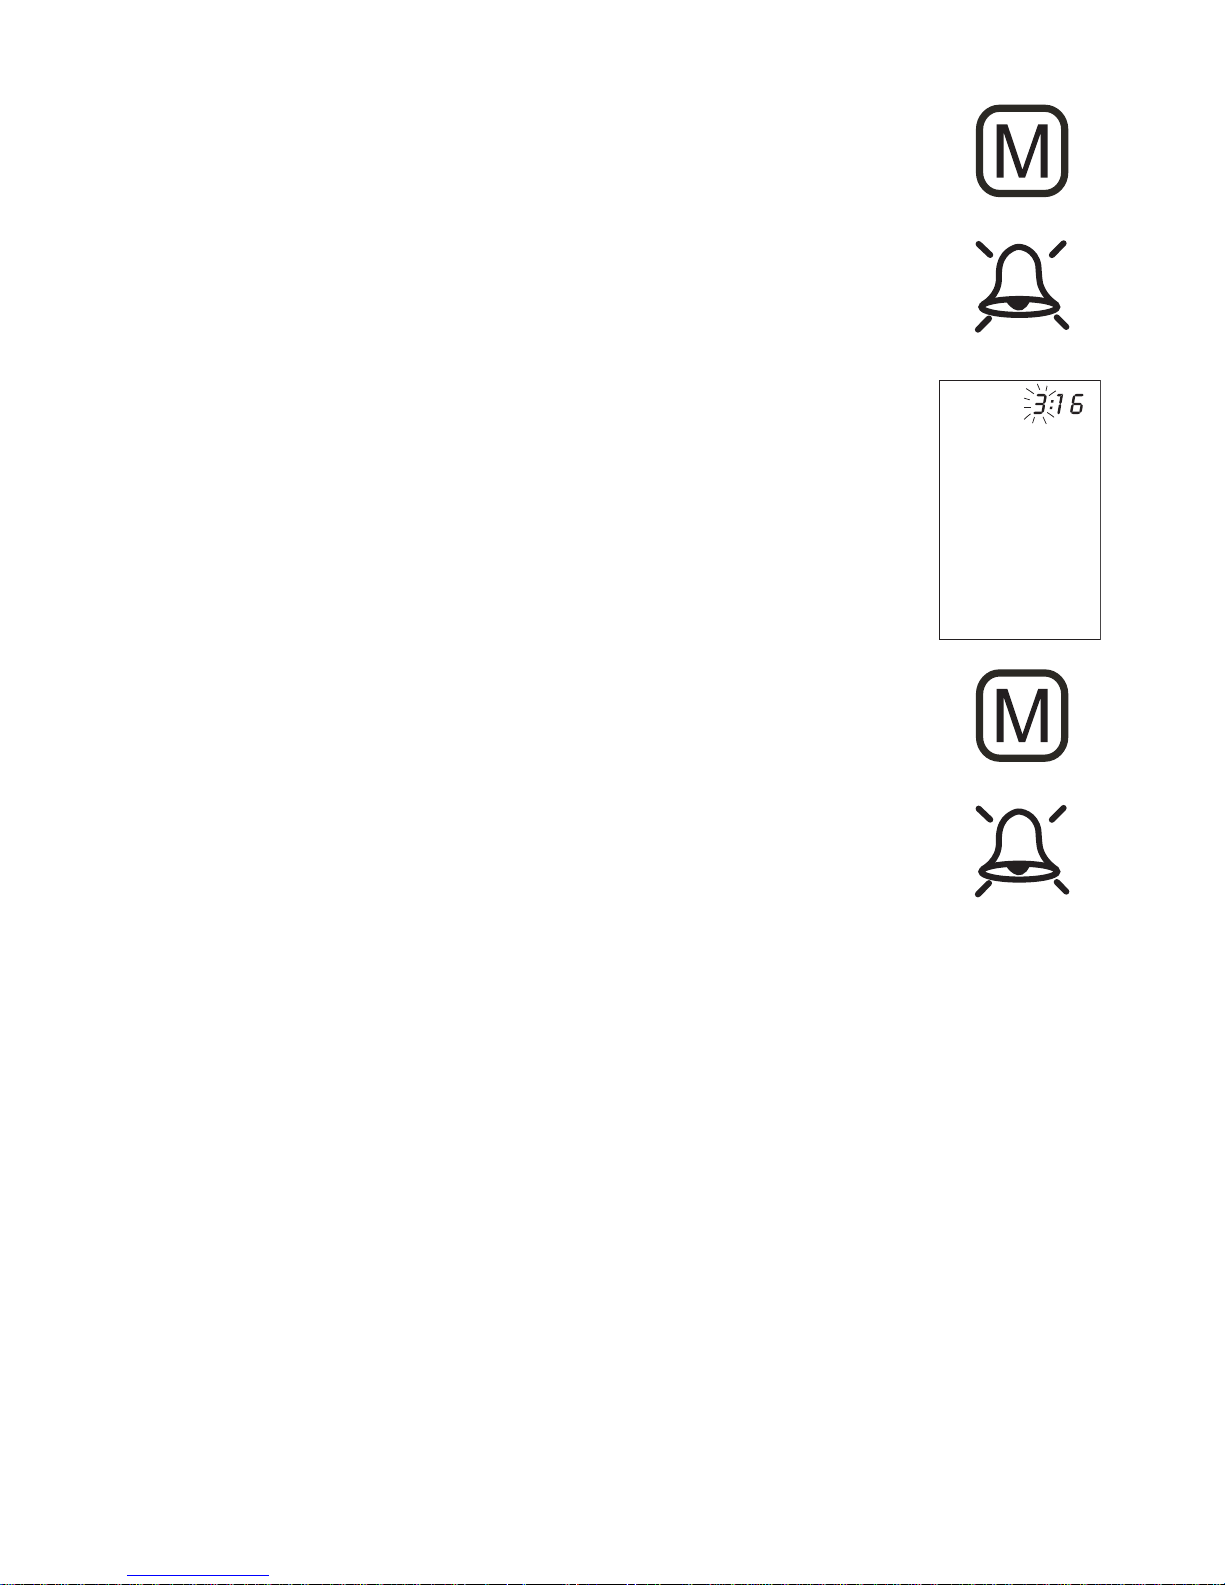
1. To set an alarm time, press the time button (the instrument must have been switched off beforehand) and
13
• Windows XP, Vista, 7
Page 15

immediately afterwards the "M" button and hold both
down until the bell symbol appears in the bottom left of
the display. Then release both buttons. The flashing "1"
in the display indicates that the first alarm time can now
be set.
2. Press the time button to set the hours – the hours display flashes and pressing the "M" button allows you to
set the alarm hour. To confirm, press the time button.
3. The minute display will now flash. The minutes can be
set using the "M" button. To confirm, press the time button again.
4. The bell symbol will now flash. Use the "M" button to
select whether the alarm time is to be active (bell) or
inactive (crossed-out bell). To confirm, press the time
button.
To set a second alarm time, proceed as above but
if the "1" flashes, press the "M" button to select "2"
and confirm with the time button.
• An active alarm time is indicated by the bell symbol in the display.
• The alarm sounds at the set time every day.
• To switch-off the alarm when it is sounding, press the START/ON/OFF button.
• To permanently switch-off the alarm, proceed as above (steps 1-4)
and select the crossed-out bell symbol. This will then disappear from
the display.
• The alarm times must be re-entered each time the batteries are replaced.
14
TIME PM
Page 16

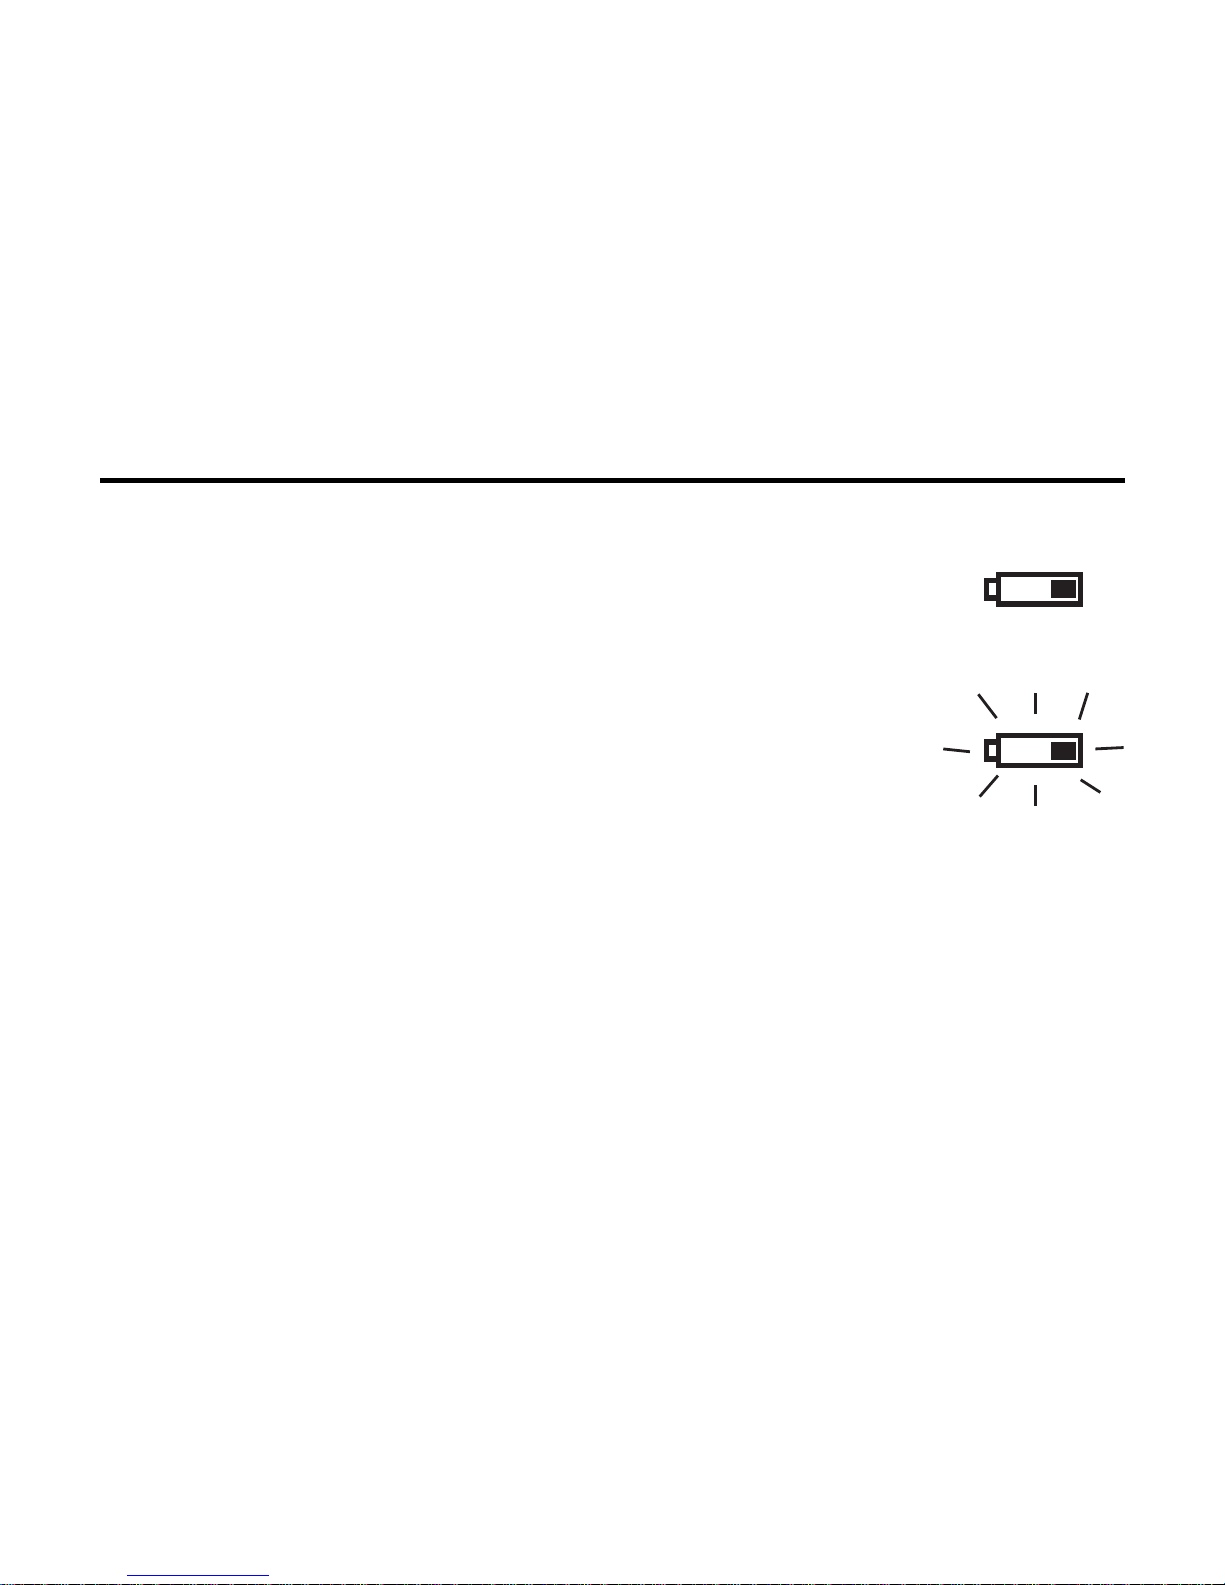
8. Battery Charge Indicator
Batteries almost discharged
When the batteries are approximately 75% used the battery
symbol will flash as soon as the instrument is switched on (if at
least one of the batteries still has some charge). Although the
instrument will continue to measure reliably, you should obtain
replacement batteries.
Batteries discharged– replacements required
When the batteries are discharged, the battery symbol will flash as soon
as the instrument is switched on. You cannot take any further measurements and must replace the batteries.
1. Open the battery compartment at the back of the instrument.
2. Replace the batteries – ensure they are inserted correctly, as shown on
the symbols in the compartment.
3. The memory retains all values although date and time must be reset -
the year number will flash automatically after batteries are replaced.
4. To set date and time, follow the procedure described in Section 4.2.
Which batteries and which procedure?
Use two new, longlife 1.5V AAA batteries. Do not use batteries beyond
their expiration date. If the monitor is not going to be used for a prolonged period the batteries should be removed.
Using rechargeable batteries
You can also operate this instrument using rechargeable batteries.
• Please use only type "NiMH" reusable batteries!
• If the battery symbol ( ) appears, the batteries must be removed and
recharged! They must not remain inside the instrument, as they may become
damaged through total discharge even when switched off. The batteries must
NOT be discharged in the blood pressure monitor! If you do not intend to use
the instrument for a week or more, always remove the rechargeable batteries!
• Recharge these batteries using an external charger and follow manu-
facturer’s instructions carefully.
15
Page 17

9. Error messages/Troubleshooting
If an error occurs during a measurement, the measurement is discontinued and a corresponding error code is displayed (Example:
Error No. 2).
Error No. Possible cause(s)
ERR 1 No pulse was detected. Ensure the cuff is properly placed on
the inside of you wrist and repeat a measurement
ERR 2 Unnatural pressure impulses influenced the measurement
result. Reason: The arm was moved during the Measurement
(Artefact). Repeat, keeping still and quiet.
ERR 3 Inflation of the cuff takes too long. The cuff is not correctly
seated. Re-position cuff and repeat
ERR 5 The measured readings indicated an unacceptable difference
between systolic and diastolic pressures. Take another reading following directions carefully. Contact your
doctor if you continue to get unusual readings.
HI The cuff pressure is too high. Relax for 5 minutes and
repeat the measurement.*
LO The pulse is too low (less than 40). Repeat the measure-
ment.*
* If this or any other problem occurs repeatedly, please consult
your doctor.
16
Page 18

Other possible malfunctions and their remedies
If problems occur when using the device, the following points should be
checked and if necessary, the corresponding measures are to be taken:
Malfunction
The display remains
blank when the instrument is switched on.
The device frequently
fails to measure blood
pressure values, or the
values measured are too
low (too high).
Every measurement produces a different value.
Blood pressure values
measured at your doctors
office differ from your
measurements.
17
Remedy
1. Check batteries for correct polarity.
2. If the display is unusual, re-insert batteries or exchange them.
1. Check the positioning of the cuff.
2. Measure blood pressure again in peace
and quiet carefully following the details
in Section 5.
1.Please read the following information
listed in Section 5.2
"Common sources
of error
."
Repeat the measurement.
Please note: Blood pressure fluctuates
continually so successive measurements will show some variability.
1.Record the daily development of the
measured values and consult your doctor.
Please note: Individuals visiting their
doctor frequently experience anxiety
which can result in a higher reading
than at home under resting conditions
.
Page 19

18
10. Care and maintenance
a) Do not expose the device to either extreme tem-
peratures, humidity, dust or direct sunlight.
b) The cuff contains a sensitive air-tight bubble. Han-
dle this carefully and avoid all types of straining
through twisting or buckling.
c) Clean the device with a soft, dry cloth. Do not use
gasoline, thinners or similar solvents. Spots on the
cuff can be removed carefully with a damp cloth
and soapsuds. The cuff must not be washed!
d) Do not drop the instrument or treat it roughly in
any way. Avoid strong vibrations.
e) Never open the device! Otherwise the manufac-
turers warranty becomes invalid!
Further information
Blood pressure is subject to fluctuations even in healthy
people.
Comparable measurements always require the same conditions
(quiet conditions)!
If fluctuations in readings are larger than 15mmHg, and/or you hear
irregular pulse tones, consult your doctor.
In order to receive market clearance from governmental bodies, this device
was subjected to strict clinical tests. The computer program used to measure
blood pressure values was tested by experienced cardiac specialists in Germany.
Never attempt to repair the instrument yourself!
Any unauthorized opening of the instrument invalidates all warranty claims!
Periodical accuracy check
Sensitive measuring devices must from time to time be checked for accuracy. We therefore recommend a periodical inspection of the static pres-
Gasoline
Page 20

19
sure display every 2 years. Call customer service at 1-800-568-4147 to
arrange the test.
11. Warranty
Your Microlife blood pressure monitor is guaranteed for five years
against manufacturers’ defects for the original purchaser only, from date
of purchase. The warranty does not apply to damage caused by improper
handling, accidents, professional use, not following the operating instructions or alterations made to the instrument by third parties.
Five year warranty only applies to the instrument. All accessories including the software and USB cable are guaranteed for one year.
There are no user serviceable parts inside. Batteries or damage from old
batteries is not covered by the warranty.
Please note: According to international standards, your monitor should be
checked for accuracy every 2 years.
12. Reference to standards
Device standard: Device corresponds to the requirements
of the standard for non-invasive blood pressure
monitors:
ANSI/AAMI SP10
IEC 60601-1
IEC 60601-1-2
Electromagnetic compatibility: Device fulfills the stipulations of the
standard IEC 60601-1-2
Clinical testing: Clinical performance tests were carried out in the
US according to ANSI/AAMI SP10 standard.
The B.H.S. (British Hypertension Society) clinical protocol was used to measure
the accuracy of this product. Blood pressure units using the same measurement technology are graded “AA” for systolic/diastolic accuracy by indepen-
Page 21

20
dent investigators using the BHS protocol. This is the highest grading available for blood pressure monitors. Please see bhsoc.org for more information.
13. Technical specifications:
Weight: 148g (with batteries + cuff)
Size: 85 x 77 x 75mm (including cuff)
Storage temperature: –20 to +55°C (-4°F to +131°F)
Humidity: 15 to 90% relative humidity
maximum
Operation temperature: 10 to 40°C (50°F - 104°F)
Display: LCD-Display (Liquid Crystal
Display)
Measuring method: oscillometric
Pressure sensor: capacitive
Measuring range: SYS/DIA: 30 to 280 mmHg
Pulse: 40 to 200 per minute
Cuff pressure display range: 0-299 mmHg
Memory: Stores the last 99 measurements
Measuring resolution: 1 mmHg
Accuracy: Pressure within ± 3 mmHg or 2% of
reading >200mmHg
Pulse ± 5 % of the reading
Power source: 2 dry cells (Batteries)
size AAA 1.5V
Accessories: storage case
Technical alterations reserved!
Read the instructions carefully before using this
device.
Page 22

21
Type BF applied part.
14. How to contact us:
Distributed by:
Microlife USA, Inc.
424 Skinner Blvd., Suite C
Dunedin, FL 34698
Toll Free: 1-800-568-4147
Email: custserv@microlifeusa.com
www.microlifeusa.com
Made in China
Page 23

Tensiómetro Reloj de Pulsera con Detector de Latido
Irregular
Manual de instrucciones
Modelo # BP3NC1-1W
22
Page 24

23
Tabla de contenido
1.Introducción
1.1. Características del tensiómetro reloj de Pulsera con Detector de Latido Irregular
1.2. Información importante sobre la automedición.
2.Información importante sobre la tensión arterial y su medición
2.1. ¿Cómo se origina la tensión arterial alta/baja?
2.2. ¿Cuáles son los valores normales?
2.3. ¿Qué podemos hacer si se miden regularmente valores altos/bajos?
2.4. Detector de Latido Irregular
3.Componentes del tensiómetro
4.Puesta en funcionamente del tensiómetro
4.1. Como activar las baterías pre-instaladas
4.2. Ajuste de fecha y hora
5.Procedimiento para la medición
5.1. Antes de la medición
5.2. Fuentes communes de error
5.3. Ajuste de la muñequera
5.4. Procedimiento de medición
5.5. Terminación de medición
5.6. Detector de Latido Irregular
5.7. Indicador de Hipertensión
5.8. Memoria - almacenamiento de las medidas
5.9. Memoria - cancelación de todas las medidas
Page 25

24
6. Programa de Análisis de la Presión Arterial
6.1. Instalación y transmisión de datos
7. Como fijar el recordatorio para la medición
8. Indicador de la carga de la batería
9. Mensajes de error/funcionamiento defectuoso
10. Cuidados y mantenimiento
11. Garantía
12. Referencia a estándares
13. Especificaciones técnicas
14. Contacto para la ayuda
Page 26

25
1. Introducción
1.1. Características del tensiómetro reloj de pulsera con Detector
de Latido Irregular
El tensiómetro es un aparato digital totalmente automático de medición
de la tensión arterial para ser usado en la muñeca, que permite medir
muy rápidamente y de forma fiable la tensión arterial sistólica y
diastólica, así como el número de pulsaciones mediante el método de
medición oscilométrico.
El aparato presenta una alta precisión de medición que ha sido clínicamente comprobada, y su diseño lo hace muy sencillo de utilizar.
Antes de usarlo, lea detenidamente este manual de instrucciones y
luego guárdelo por si necesita consultarlo de nuevo, en el futuro. Contacte con su médico si tiene más preguntas sobre la tensión arterial y
su medición.
Atención:
1.2. Información inportante sobre las automediciones
• No lo olvide: automedición significa control, no diagnóstico o
tratamiento. Los valores inusuales deben ser discutidos siempre con su
médico. No modifique bajo ninguna circunstancia las dosis de
cualquier medicamento que le haya recetado su médico.
• El indicador de pulsaciones no es apropiado para medir la frecuencia
de los marcapasos.
• En casos de irregularidad cardiaca, las mediciones realizadas con este
instrumento
deben ser evaluadas sólo, previa consulta con el médico.
Interferencia electromagnética:
El aparato contiene componentes electrónicos sensibles (microordenador). Por ello, evite los campos eléctricos o electromagnéticos
fuertes en proximidad directa al aparato (por ejemplo, teléfonos
Page 27

móviles, microondas); pueden dar lugar a la pérdida temporal de la
exactitud de medición.
2. Información importante sobre la tensión arterial y su medición
2.1. ¿Cómo se origina la tensión arterial alta/baja?
El nivel de la tensión arterial se determina en una zona del cerebro, en
el llamado centro circulatorio, y se adapta a cada situación concreta
por retroalimentación, a través del sistema nervioso.
Para ajustar la tensión arterial se modifican la potencia y la frecuencia
cardiacas (pulso), así como la anchura de los vasos sanguíneos. Esto
último se efectúa mediante los músculos de las paredes de los vasos
sanguíneos.
El nivel de la tensión arterial cambia periódicamente junto con la
actividad cardiaca: durante la impulsión de la sangre (sístole) el valor
es máximo (valor sistólico de la tensión arterial); al final del «periodo
de relajación» del corazón (diástole), mínima (valor diastólico de la tensión arterial).
Para evitar ciertas enfermedades, los valores de la tensión arterial
deben estar situados entre unos valores límite determinados.
2.2 ¿Cuáles son los valores normales?
La tensión arterial es excesiva si en reposo la presión diastólica es
superior a 100 mmHg y/o la presión arterial sistólica es superior a 160
mmHg. En este caso, consulte con su médico de forma inmediata. Valores de este nivel durante largo tiempo ponen en peligro su salud
debido al daño progresivo que ello conlleva para los vasos sanguíneos
de su cuerpo.
Si el valor sistólico de la tensión arterial está entre 140 mmHg y 159
mmHg y/o el valor diastólico de la tensión arterial está entre 90 mmHg
y 99 mmHg, consulte igualmente con su médico. Además, será necesario efectuar automediciones de forma regular.
26
Page 28

27
Con valores de la tensión arterial muy bajos; esto es, valores sistólicos
inferiores a 100 mmHg y/o valores diastólicos inferiores a 60 mmHg,
consulte igualmente con su médico.
Incluso con valores normales de la tensión arterial es recomendable
efectuar de forma regular automediciones con su tensiómetro. De esta
forma, Ud. podrá detectar a tiempo los posibles cambios en sus valores normales y actuar al respecto.
Si Ud. está siendo sometido a un tratamiento médico para controlar su
tensión arterial, lleve un registro de los valores de su tensión arterial,
efectuando automediciones de forma regular automediciones determinadas horas del día. Muestre esos valores a su médico. No use
nunca los resultados de sus comprobaciones para alterar por
su cuenta el tratamiento prescrito por su médico.
Los estandares siguientes para determinar la tension arterial alta (sin consideracion alguna hacia edad) han sido establecidos por los U.S. Institutos
Nacionales de la Salud JNC7, 2003.
Category Systolic Diastolic
(mmHg) (mmHg)
Normal <120 y <80
Pre-Hipertensión 120 - 139 o 80 - 89
Stage 1 140 - 159 o 90 - 99
Hipertensión
Stage 2
≥160 o ≥100
Hipertensión
Page 29

☞ Información adicional
• Si sus valores son prácticamente normales en reposo, pero excepcionalmente altos bajo estrés
físico o psíquico, es posible que sufra de la llamada «hipertensión
lábil». Consulte con su médico
si tiene la sospecha de que ese puede ser su caso.
• Un valor diastólico de la tensión arterial , medido correctamente,
superior a 120 mmHg requiere tratamiento médico inmediato.
* No previsto para el uso en niños 12 años de edad o más jovenes.
2.3. ¿Qué puede hacerse si se obtienen valores altos/bajos de
forma regular?
a) Consulte con su médico.
b) Los valores altos de la tensión arterial (diversas formas de hipertensión)
están asociadas a medio
y largo plazo con riesgos importantes para la salud. Esto afecta a los vasos
sanguíneos de su cuerpo, que están en peligro debido a la constricción
causada por los depósitos que se van formando en las paredes de los
vasos (arterioesclerosis). La consecuencia puede ser una deficiencia en el
aporte de sangre a órganos importantes (corazón, cerebro, músculos). Es
más, con valores altos de la tensión arterial a largo plazo, el corazón sufrirá
daños estructurales.
c) Existen muchas causas diferentes para la aparición de valores altos de la
tensión arterial. Diferenciamos entre la hipertensión primaria (esencial) y la
hipertensión secundaria. El último grupo puede ser adscrito a disfunciones
orgánicas específicas. Consulte con su médico para que le informe sobre el
posible origen de sus valores elevados de tensión arterial.
d) Hay medidas que Ud. puede tomar, no únicamente para reducir una
hipertensión médicamente diagnosticada, sino también como prevención.
Estas medidas son parte de su forma de vida general:
1) Hábitos alimentarios
• Esfuércese por mantener un peso normal que se corresponda con su
edad. Reduzca el sobrepeso.
28
Page 30

• Evite el consumo excesivo de sal común.
• Evite los alimentos grasos.
2) Enfermedades anteriores
• Siga fielmente cualquier instrucción médica para el tratamiento de
posibles enfermedades
anteriores, tales como:
• diabetes (Diabetes mellitus)
• trastornos en el metabolismo de las grasas
• gota
3) Hábitos
• Deje de fumar por completo
• Beba sólo cantidades moderadas de alcohol
• Reduzca el consumo de cafeína (café)
4) Constitución física:
• Haga deporte de forma regular.
• Elija deportes que requieran vigor y evite aquellos que requieran
fuerza.
• Evite llegar al límite de su capacidad física.
• En caso de haber sufrido enfermedades con anterioridad y/o tener una
edad superior a los 40 años, consulte con su médico antes de comenzar a practicar deporte. Él le aconsejará sobre el tipo de deporte más
apropiado para Ud.
2.4. Detector de Latido Irregular
Cuando aparece en su pantalla este símbolo significa que se
han detectado latidos irregulares que pueden causar o indicar una
enfermedad cardiovascular. Este indicador es una advertencia. El
Monitor de Presión Automático de Microlife con Detector de Latidos
Irregulares puede detectar presión arterial y pulso con especifica-
29
Page 31

ciones aún cuando el paciente está experimentando latidos irregulares
con intérvalos. Es importante que usted esté relajado, se mantenga
inmóvil y no hable durante la medición.
Nota : Recomendamos contacte a su médico si usted ve este símbolo
con frecuencia.
PRECAUCION : Latidos del corazón irregulares pueden resultar en una
condición seria que requiera atención médica. Vea a su doctor si usted
sospecha tener un latido irregular.
3. Componentes del tensiómetro
La figura muestra el tensiómetro que consta de:
Muñequera para una circunferencia de muñeca de 5.3” - 7.7” (13.5cm -
19.5cm).
30
Brazalete le
muñeca
Tapade la pila
Botón de la hora
Botón de la memoria
Indicador de
hipertensión
Botón
ON/OFF/START
Page 32
4. Puesta en funcionamiento del tensiómetro
4.1. Como activar las baterías instaladas
Tire la película protectora que sale del compartimiento de la batería.
4.2. Ajuste de la hora y la fecha
1. Luego de que las baterías nuevas estén activadas, las
cifras del año se observarán en forma intermitente en la
pantalla. Usted puede avanzar el año presionando el botón
de la memoria “M”. Para confirmar y luego fijar el mes,
presione el botón de la hora.
2. Usted ahora puede fijar el mes usando el botón “M”. Para
confirmar y luego fijar el día, presione el botón de la hora.
3. Por favor siga las instrucciones anteriores para fijar el día,
hora y minutos.
4.Una vez que usted haya fijado los minutos y presionado el
botón de la hora, la fecha y hora fijados se observarán en la
pantalla.
5. Si usted quiere cambiar la fecha y hora, mantenga presionado el botón de la hora por aproximadamente 3 segundos
hasta que el número del año se vea intermitente. Ahora
usted puede entrar nuevos valores siguiendo las instrucciones arriba mencionadas.
31
TIME PM
Page 33

5. Procedimiento para la medición
5.1. Antes de la medición:
• Evite comer, fumar, así como cualquier forma de ejercicio antes de la
medición. Todos estos factores influyen sobre el resultado de la
medición. Busque y encuentre tiempo para relajarse sentado en un sillón en una atmósfera tranquila durante unos diez minutos antes de la
medición.
• Efectúe la medición siempre en la misma muñeca (normalmente la
izquierda).
• Intente efectuar las mediciones de forma regular a la misma hora del
día, ya que la tensión arterial se modifica con el curso del día.
5.2. Fuentes de error comunes:
Tenga en cuenta:
Para poder comparar los resultados de las mediciones de la tensión arterial se requiere que las condiciones sean las mismas.
Estas son normalmente condiciones de tranquilidad.
• Los esfuerzos del paciente para mantener el brazo en la posición de
medición pueden aumentar la tensión arterial. Asegúrese de estar en
una posición cómoda y relajada, y no active ningún músculo del brazo
en el que se está efectuando la medición. Si es necesario, utilice un
almohadón de apoyo.
• Si la arteria de la muñeca se encuentra considerablemente más baja
(alta) que el corazón, se medirá una tensión arterial errónea más alta
(baja). (Cada 15 cm de diferencia de altura da lugar a un error de
medición de 10 mmHg)
• Una muñequera demasiado suelta da lugar a valores de medición erróneos.
• Si se repiten las mediciones, la sangre se acumulará en el brazo correspondiente, lo que puede dar lugar a resultados erróneos. Por ello,
32
Page 34
para efectuar la medición de la tensión arterial de forma correcta no la
repita hasta pasados 1 minuto, o hasta después de haber mantenido el
brazo en alto para permitir que la sangre acumulada fluya.
5.3. Ajuste de la muñequera
a) Retire todos los posibles objetos y joyas
(p. ej., reloj de pulsera) de la muñeca en
cuestión. Coloque la muñequera sobre
la muñeca con la pantalla hacia el lado
interior de la muñeca.
b) La distancia entre la muñequera y la mano
debe ser de aprox. 10 mm ( 1/2 in).
c) Asegure la muñequera con el cierre velcro,
de forma quede ajustado confortablemente y
no demasiado fuerte, sin que quede ningún
espacio entre la muñequera y la muñeca.
d) Ponga el brazo sobre una mesa con la palma
de la mano hacia arriba. Apoye ligeramente
el brazo en una base (almohadón), de forma
que la muñequera quede más o menos a la
altura del corazón. Tenga cuidado de que la
muñequera quede libre. Permanezca así,
tranquilamente sentado durante 2 minutos,
antes de comenzar con la medición.
33
Page 35
5.4. Procedimiento de medición
a) Una vez que haya seleccionado el usuario
correcto,y la posicion de la medicion
puede apretar el botón do ON/OFF, la
bomba comienza a inflar la muñequera.
En la pantalla se visualiza de forma continua el incremento de la presión de la
muñequera.
b) Una vez alcanzada la presión de
inflado,la bomba se detiene y la presión
va cayendo poco a poco.La presión de la
muñequera (dígitos grandes) se visualiza
durante la medición.Una vez que el aparato detecta el pulso comienza a parpadear
el símbolo del corazón en la pantallay se
escucha un bip por cada pulsación.
c) Una vez concluida la medición, suena un
bip largo. Los valores sistólicos y diastólicos de la tensión arterial medidos, así
como el número de pulsaciones por minuto, se visualizan ahora en la pantalla.
Ejemplo (fig.): sístole 118, diástole 73,
pulso 75 Los resultados de la medición se
visualizarán hasta que Ud. desconecte el
aparato. Si durante 5 minutos no se aprieta ningún botón, el aparato se desconecta de forma automática para no gastar la
batería.
34
1
El pulso detectó
1
mmHg
mmHg
1
mmHg
mmHg
Page 36
5.5. Terminación de medida
Si por alguna razón es necesario interrumpir la medición de la tensión
arterial (p. ej., el paciente no se encuentra bien), se puede apretar el
botón ONN/OFF en cualquier momento. El aparato disminuye
entonces, de forma inmediata, la presión de la muñequera.
5.6. Detector de Latido Irregular
El símbolo indica que se ha detectado un
pulso irregular durante la medición. En este caso,
el resultado puede variar su presión básica. Repita
la medición, esto no es motivo de inquietud. Sin
embargo, si el símbolo aparece con regularidad (ej.
Varias veces a la semana durante mediciones
diarias), le aconsejamos consulte con su médico.
Por favor enseñe a su médico la siguiente explicacion:
Información para el médico sobre la frecuente aparición del
Símbolo de Latido Irregular.
Este instumento es un monitor oscilométrico de presión sanguinea que
también analiza la frecuencia del pulso durante la medición. El instrumento está clínicamente analizado.
Si durante la medición ocurren irregularidades del pulso, se observará
el símbolo de latido irregular. Si el símbolo aparece con mas frecuencia (ej. Varias veces a la semana en lecturas diarias) or si aparece
repentinamente con mas frecuencia que lo usual, recomendamos al
paciente consultar con su médico.
Este instrumento no reemplaza un examen cardiado, pero sirve el
propósito de detectar irregularidades del pulso a temprana edad.
35
Page 37

5.7. Indicador de Luz de Trafico
Las barras en el lado izquierdo de la pantalla muestran el alcance de la presión arterial. Dependiendo de la altura de la barra, la lectura está dentro de los parámetros
normales; (verde), al borde; (Amarillo) on en peligro; (rojo).
La clasificación está basada en los standards establecidos por El Instituo Nacional
de la Salud JNC7, 2003
Refierase a la tarjeta en el monitor o al cuadro en la pagina 3 de este manual de
instrucciones para un detalle de las clasificaciones.
La barra del semáforo levanta según su medida.
• si su medida tiene verde, su medida está en la zona verde, o "Normal" según
estándares de NIH.
• si su medida tiene amarillo, está en la zona amarilla, o "Pre-Hipertensio'n"
según estándares de NIH.
• si su medida tiene naranja, está en la "hipertensión anaranjada de la etapa 1" zona.
• si su medida tiene rojo, él está en "la zona roja de la hipertensión de la etapa 2".
5.8. Memoria – almacenamiento de las
últimas mediciones
Este medidor de presión arterial automáticamente almacena los valores
de las últimas 99 medidas de cada usuario. Al apretar el botón de
MEMORIA, el promedio de los valores en memoria aparece en la pantalla
con un símbolo “A” y (MR) en la esquina inferior izquierda. Presione el
botón de MEMORIA nuevamente, los valores de la última lectura (MR99)
y los previos a estos (MR98, MR97,… MR1) pueden ser enseñados uno
luego del otro.
5.9.Cancelación en la memoria de todas las medidas ¡Atención!
Antes de borrar todas las lecturas almacenadas en la memoria, asegúrese de que no va a necesitar hacer referencia a
ellas más adelante. Es prudente guardar un registro escrito
que puede proporcionar una información adicional cuando
visite a su médico.
36
Page 38

Para borrar todas las lecturas memorizadas, oprima el
botón MEMORIA durante al menos 7 segundos. La pantalla mostrará el símbolo "CL" y se escucharán 3 pitidos
cortos para indicar que se han borrado las medidas memorizadas.
6. Programa Analizador de Presión Arterial
Esta unidad se puede utilizar en conección
con su computadora personal para el Programa Analizador de Presión Arterial. Su
computadora tiene la capacidad de monitorial 80 pacientes, cada una con la
capacidad de 1000 lecturas. (Nota: El
sobre uso disminuirá la eficiencia del sistema).Los datos en la memoria pueden ser
transferidos a la computadora conectando ambos dispositivos por medio de
un cable.
6.1 Instalación y Transmisión de Datos
a) Inserte el disco CD en el compartimiento correspondi-
ente de su computadora. La instalación comenzará
automáticamente. De lo contrario presione el ícono
SETUP.EXE.
b) Conecte el monitor a su computador por medio del
cable PC. Tres barras horizontales aparecerán en la
pantalla por un lapso de 3 segundos.
c) Las barras comenzarán a parpadear indicando que la
conección entre ambos dispositivos se ha establecido
exitósamente. Siempre y cuando el cable se halle
conectado, las barras continuarán viendose en forma
intermitente y los botones desabilitados.
Durante la conección, el dispositivo está completamente controlado por la
computadora. Por favor utilice la opción “Help” del programa analyzador
para instrucciones adicionales o llame al número 1-800-568-4147.
37
1
1
---
1
---
Requisitos del sistema para el Programa
Analizador de la Presion Arterial:
• Windows XP, Vista, 7
• CD-ROM Drive
• Mínimo 256MB RAM
• USB versión 1.0 en adelante
• Monitor de la presion arterial de
Microlife con la conexión de USB
Page 39
7. Como fijar el recordatorio para la medición
Este dispositivo le permite fijar dos horarios de alarma. Este rasgo
es muy util para recordarle que tiene que tomar su medicina o
medirse la presion cada dia a la misma hora.
1. Para fijar la hora de la alarma, presione el botón de la hora (el
instrumento debió de ser apagado previamente) e inmediatamente presione el botón “M” manteniendo los dos botones
presionados hasta que el símbolo de la campana aparezca
en la pantalla. Luego suelte los dos botones. El número “1”
en forma intermitente indica que se puede fijar la primera
alarma.
2. Presione el botón de la hora para fijar el horario
– las horas se verán centelleando y presionando el botón “M” le permitirá fijar la hora. Para
confirmar, presione el botón de la hora.
3. Los minutos ahora se verán centelleando. Los
minutos pueden ser fijados usando el botón
“M”. Para confirmar, presione el botón de la
hora de nuevo.
4. El símbolo de la campana se verá ahora centel-
leando. Utilice el botón “M” para selecionar si
la alarma será activada (campana) o desactivada (campana cruzada). Para confirmar, presione
el botón de la hora de nuevo.
Para fijar un segundo horario de alarma, proceda
de la misma manera pero si el número “1” centellea, presione el botón “M” para seleccionar el
número “2” y confirme con el botón de la hora.
• Cuando se ha fijado un horario de alarma se verá la indicación por medio
del símbolo de una campana
38
TIME PM
Page 40
• La alarma sonará a la hora establecida todos los días.
• Para apagar la alarma cuando está sonando, presione el botón On/off.
• Para apagar la alarma permanentemente, proceda da la misma manera
pero seleccione el símbolo de la campana cruzada. El símbolo desaparecerá de la pantalla.
• La alarma deberá ser fijada cada vez que se reemplacen las baterías.
8. Indicador de batería
Baterías casi completamente descargadas.
Cuando las baterías llegana estar aproximadamente 75%
discargadar, se podrá observar el siguiente símbolo centelleando en la pantalla al momento de encender la unidad. A
pesar de que el instrumento continuará tomando las
mediciones correctamente, usted ya debería reemplazar las
baterías.
Baterías complétamente descargadas.
Cuando las baterías están completamente descargadas, se
podrá observar el símbolo intermitente de la batería tan pronto como
usted encienda el dispositivo. Usted no podrá tomar ninguna otra
medición, las baterías deben ser reemplazadas inmediatamente.
1. Abra el compartimiento de la batería en la parte posterior del dispositi-
vo presionando en los dos extremos del compartimiento y levantándolo.
2. Reemplace las baterías, asegúrece de que estén puestas correcta-
mente conforme a la indicación del compartimiento.
3. La memoria retendrá todos los valores aunque el día y la hora (posible-
mente las alarmas) deberan ser nuevamente fijados. Los números que
indican el año centellearán automáticamente luego de que las baterías
sean reemplazadas.
4. Para fijar la fecha y la hora, siga el procedimiento descrito en 4.2
39
Page 41

Cuales baterías y cual procedimiento?
Utilice 2 baterías nuevas de larga vida 1.5V AAA. No utilice baterías que
han expirado. Si el dispositivo no será utilizado por un largo periodo, es
aconsejable que remueva las baterías.
Utilización de baterías recargables
Este instrumento puede operar con baterías recargables.
• Por favor utilice únicamente el tipo “NiMH”
• Si aparece el símbolo de la batería descargada ( ), las mismas
deben ser removidas y recargadas! No deben permanecer dentro del
dispositivo porque se pueden dañar (se descargarán completamente
como resultado del poco uso de las mismas aún estando el dispositivo
apagado. Las baterías no se deben descargar dentro de la unidad! Si
usted no tiene la intencion de utilizar el monitor por un período de una
semana o más, siempre remueva las baterías que son recargables.
• Recargue las baterías en el cargador externo y siga las indicaciones
sobre el cuidado y durabilidad.
9. Mensajes de error/funcionamiento defectuoso
Si se produce un error durante una medición, se interrumpe la
medición y se visualiza el correspondiente código de error (ejemplo: error nº 2).
Error no. Posible(s) causa(s)
ERR 1 No se ha detectado pulso.
ERR 2 El resultado de la medición se ve influido por impulsos
de presión no naturales.
Razón: se ha movido el brazo durante la medición
(artefacto).
ERR 3 El inflado de la muñequera tarda demasiado. La muñe
quera no esta colocada correctamente.
40
Page 42

ERR 5 Las lecturas medidas indican una diferencia inacept
able entre las presiones
sistólicas y diastólicas. Tome otra lectura observando
cuidadosamente las instrucciones. Póngase en contac
to con su médico si sigue obteniendo lecturas
no usuales.
HI La presión del brazalete es muy alta. Relájese por 5
minutos y repita el procedimiento.*
LO El pulso es muy bajo (menos de 40).
Repita el procedimiento.*
* Si este o algún otro problema ocurre repetidamente, por favor
consulte con su médico.
Otros posibles funcionamientos defectuosos y su solución
Si aparecen problemas al usar el aparato, deben comprobarse los
siguientes puntos y, si es necesario, deben tomarse las medidas
correspondientes:
Funcionamiento defectuoso Solución
La pantalla permanece en blanco al conectar 1. Compruebe que la polaridad de
el aparato a pesar de que las pilas están las pilas sea la correcta y si es necesario insértelas
colocadas correctamente
2. Si la visualización es inusual, reinstale las
pilas o sustitúyalas.
El aparato falla con frecuencia al medir la 1. Compruebe la posición de la muñequera.
tensión arterial; o los valores medidos son 2. Vuelva a medir la tensión arterial otra vez en
demasiado bajos (demasiado altos). condiciones de reposo y tranquilidad, observando
los detalles indicados en el punto 5.
Cada medición produce un valor diferente 1. Lea la siguiente información y los puntos
aunque el instrumento funciona normalmente listados bajo "Fuentes comunes de error".
y los valores mostrados son normales. Repita la medición.
Tenga en cuenta: La tensión arterial fluctúa
continuamente, de forma que las
mediciones sucesivas mostrarán cierta
variabilidad.
41
Page 43

Los valores de la tensión arterial difieren 1. Registre el desarrollo diario de los valores y
de los medidos por el médico. consulte a su médico.
Tenga en cuenta: Las personas experimentan
frecuentemente una cierta ansiedad al visitar
a su médico, lo que puede dar lugar a una
lectura más alta en la consulta del médico
que en casa en una situación relajada.
10. Cuidados y mantenimiento
a) No exponga el instrumento a temperaturas
extremas, humedad, polvo o a la acción directa del sol.
b) Limpie el aparato con un paño suave y seco.
No use gasolina, diluyentes o disolventes
similares. Las manchas en la muñequera
pueden ser eliminadas cuidadosamente con
un paño húmedo y un poquito de jabón. No
debe lavarse la muñequera.
c) La muñequera contiene una burbuja sensible
hermética al aire. Manéjela con cuidado y
evite cualquier tipo de deformación por
doblado o torsión.
d) No deje caer el instrumento ni lo trate con
rudeza en modo alguno. Evite las vibraciones
fuertes.
e) No abra jamás el aparato. De lo contrario, se
invalida la calibración efectuada por el fabricante.
42
Gasoline
Page 44

Otras indicaciones al respecto
La presión arterial está sujeta a oscilaciones aún en individuos sanos.
Sin embargo es importante recalcar en este punto que a fin de obtener
mediciones comparativas entre ellos, éstas deben de realizarse siempre
en las mismas condiciones, (condiciones de reposo y tranquilidad). Si las
variaciones son mayores de 15 mmHg a pesar de haber tenido en cuenta
las mencionadas condiciones y se escuchan pulsaciones irregulares
repetidamente, (señales de tono bip), acuda al médico.
Para poder recibir el permiso de las autoridades gubernamentales para merdadear este producto, este ha sido sujeto a estrictas pruebas clínicas. El
aparato ha sido probado por especialistas cardiólogos en Alemania.
Nunca intente abrir o reparar el aparato. Esto invalida automáticamente
cualquier reclamo bajo la garantía del manufacturero.
Recalibración periódica
Los aparatos de medición sensibles deben ser comprobados, de vez en
cuando, respecto a su exactitud. Por ello, le recomendamos una inspección periódica de la pantalla de presión estática cada 2 años. Llame 1800-568-4147.
43
Page 45

11. Garantía
Su monitor de presión Microlife tiene garantía por 5 años contra defectos de fab-
ricación válidos para el comprador únicamente, a partir de la fecha de adquisición.
La garantía no cubre daños causados por mal uso, accidentes, uso profesional, el no
seguimiento de las instrucciones de uso o alteraciones hechas al dispositivo por terceras personas.
Los 5 años de garantia se aplica sólamente al instrumento. Todos los accesorios
incluyendo los brazaletes, Adaptador de corriente alterna y cable USB tienen garantía por un año.
No contiene partes útiles para el ususario. Beterías o daños causados por baterías
usadas no están cubiertos por la garantía.
Nota: Conforme a las reglas internacionales, su monitor debe ser revisado para calibración cada dos años.
12. Estándares de referencia
Estándar del aparato: El aparato cumple los requerim-
ientos del estándar europeo
sobre instrumentos de control de
la presión arterial no invasivos
ANSI/AAMI SP10
IEC 60601-1
IEC 60601-1-2
Compatibilidad electromagnética: El aparato cumple las especifica-
ciones del estándar
IEC 60601-1-2
Ensayo clínico: Pruebas de funcionamiento clíni-
co han sido realizadas en EU de
acuerdo con los procedimientos
ANSI/AAMI SP10
44
Page 46

13. Especificaciones técnicas:
Peso: 148g (con pilas y muñequera)
Tamaño: 85 x 77 x 75 mm (incluyendo la muñe
quera)
Temperatura de almacenamiento: –20°C to 55°C (-4°F to +131°F)
Humedad: 15 a 90% de humedad relativa
como máximo
Temperatura de funcionamiento: 10 a 40°C (50° F - 104° F)
Pantalla: Pantalla LCD (display de cristal
líquido)
Método de medición: oscilométrico
Sensor de presión: capacitivo
Intervalo de medición:
SIS/DIA: 30 a 280 mmHg
pulso: 40 a 200 por minuto
Límites de indicación de la
presión de la muñequera: 0–299 mmHg
Memoria: almacenamiento automático de las
30 últimas mediciones / 2 usuarios
Resolución de la medición: 1 mmHg
Exactitud: presión ± 3 mmHg 0 2% >200mmHg
pulso ± 5 % de la lectura
Fuente de energía: 2 células secas (pilas)
tamaño AAA 1.5V
Accesorios: estuche de protección, software
de la PC
Reservado el derecho de realizar modificacion
es técnicas sin previo aviso.
Lea las instrucciones cuidadosamente antes de usar este
dispositivo.
Mecanografíe la partición aplicada FB.
45
Page 47

14. Contacto para la ayuda
Distribuido por:
Microlife USA, Inc.
424 Skinner Blvd. Suite C
Dunedin, FL 34698
email: custserv@microlifeusa.com
www.microlifeusa.com
Toll Free: 1-800-568-4147
46
 Loading...