

Page 1

microlife BP 3BM1-3
Automatic Blood Pressure Monitor
Instruction Manual
IB BP3BM1-3 for AP EN 3209
Page 2
BP 3BM1-3
Automatic Blood Pressure Monitor
Instruction Manual
Table of contents
1. Introduction ........................... 2.
1.1. Features of BP 3BM1-3
1.2.
Important information about self-measurement
2. Important information on the subject of blood pressure
and its measurement ........................... 3
2.1.
How does high/low blood pressure arise?
2.2. Which values are normal?
2.3. What can be done, if regular high/low values are obtained?
3. Components of your blood pressure monitor ........................... 6
4. Using your blood pressure monitor ........................... 7
4.1.
Inserting batteries
4.2. Using an AC adapter (optional accessory)
4.3. Cuff connection
4.4. Setting time and date
5. Carrying out a measurement ........................... 9
5.1. Before
measurement
5.2. Common sources of error
5.3. Fitting the cuff
5.4. Measuring procedure
5.5 Pulse Arrhythmia Detection
5.6. Discontinuing a measurement
5.7. Memory-storage and recall of the measurements
5.8. Delete memory
6. Error messages/malfunctions ..........................13
7. Care and maintenance, recalibration ..........................15
8. Guarantee ..........................16
9. International standards ..........................16
10. Technical specifications ..........................17
11. www.microlife.com ..........................17
12. Frequently asked Questions (FAQ) and Answers ..........................18
1
www.microlife.com BP 3BM1-3 Automatic Blood Pressure Monitor Instruction Manual
Page 3
3
www.microlife.com BP 3BM1-3 Automatic Blood Pressure Monitor Instruction Manual
2. IMPORTANT INFORMATION OF BLOOD
PRESSURE AND ITS MEASUREMENT
2.1 How does high/low blood pressure arise?
Your blood pressure level is determined in the circulatory center of your brain. Your nervous
system allows your body to adapt or alter blood pressure in response to different situations.
Your body alters your pulse and the width of blood vessels through changes in muscles in the
walls of blood vessels.
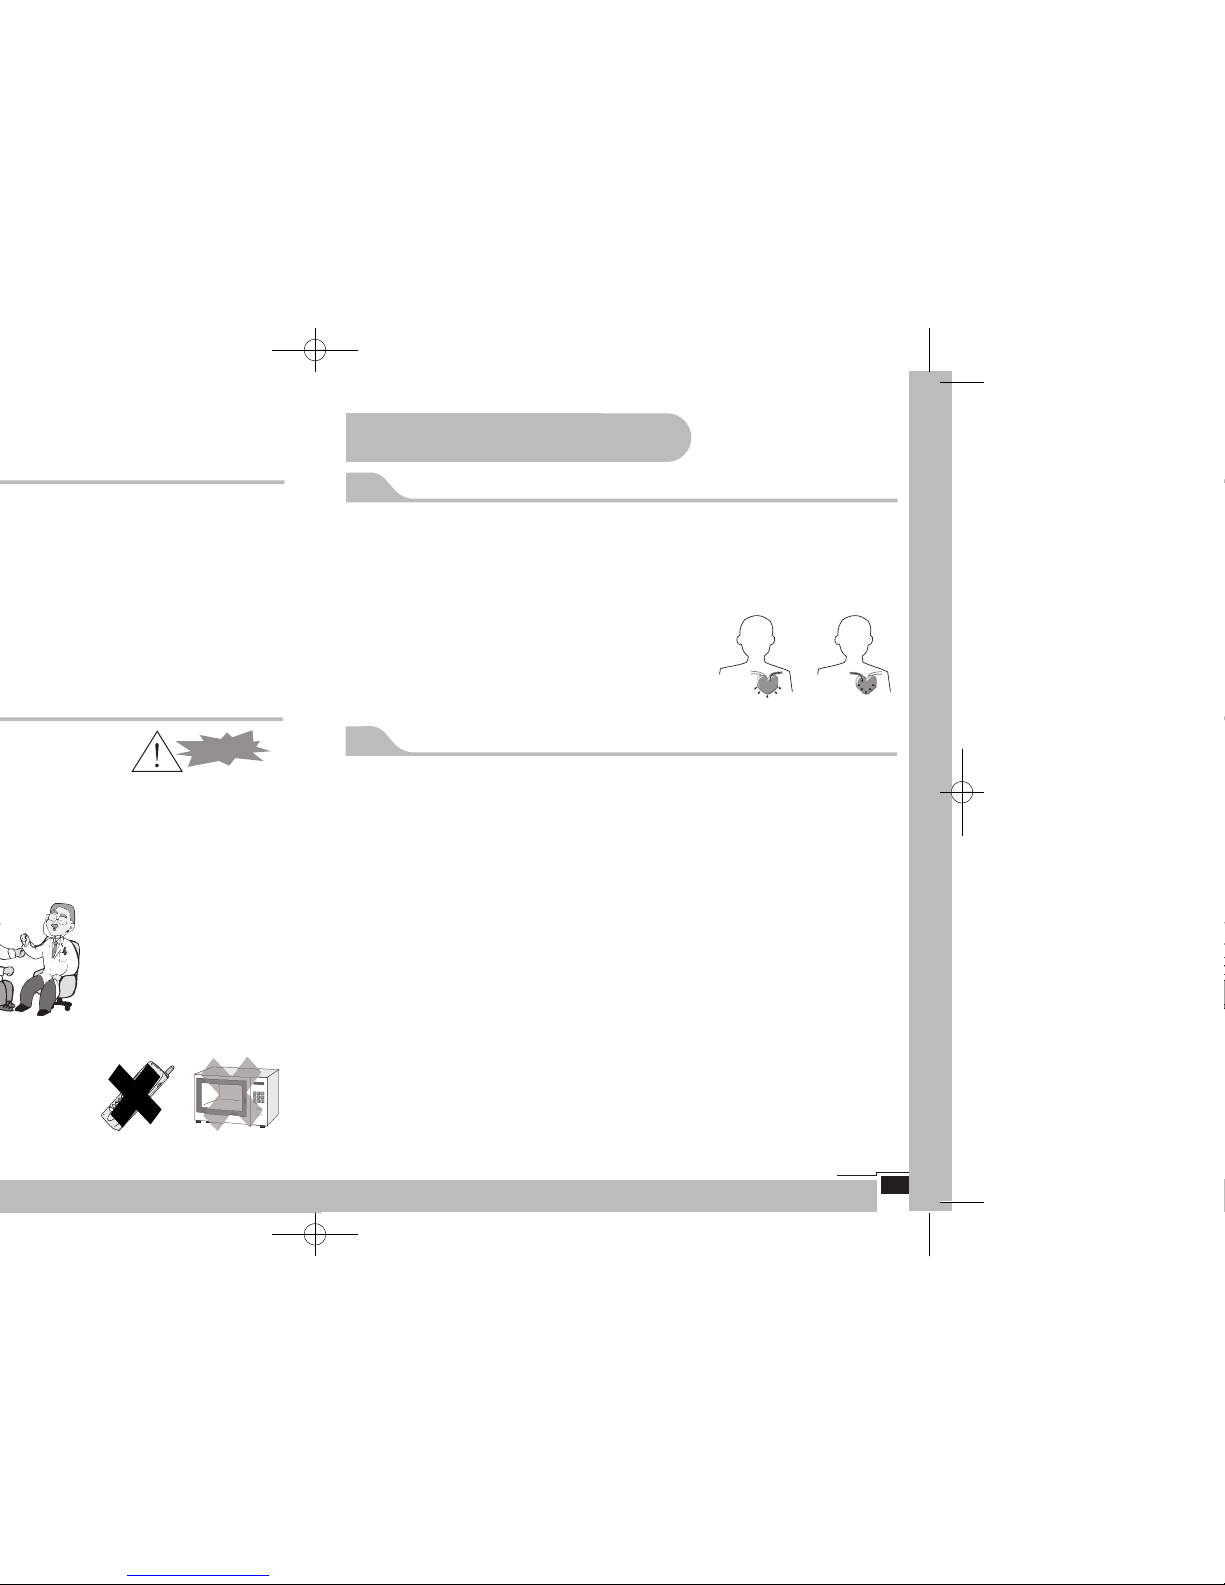
Your blood pressure reading is highest when your heart pumps or ejects blood. This stage is
called your Systolic Blood Pressure.
Your blood pressure is lowest when the heart rests.
(in-between beats) This is called your Diastolic Blood
Pressure.
It is critical to maintain blood pressure values within a
"normal" range(s) in order to prevent particular diseases.
2.2 Which values are normal?
• Blood pressure is too high if, the diastolic pressure is above 90mmHg and/or the systolic
blood pressure is over 140mmHg at rest. If you obtain readings in this range, consult your
doctor immediately. High blood pressure values over time damage blood vessels, vital
organs such as the kidney and even your heart.
• When blood-pressure values are too low, i.e. systolic values under 100mmHg and/or diastolic values under 60mmHg, consult your doctor.
• Even with normal blood-pressure values, a regular self-check with your blood-pressure
monitor is recommended. In this way you can detect possible changes in your values
early and react appropriately.
• If you are undergoing medical treatment to control your blood pressure, please keep a
record of the level of your blood pressure by carrying out regular self-measurements at
specific times of the day. Show these values to your doctor. Never use the results of
your measurements to alter drug doses by yourself without consulting your doctor.
diastolic
pressure
diastolic
pressure
systolic blood
pressure
systolic blood
pressure
A
t
t
e
n
t
i
o
n
!
A
t
t
e
n
t
i
o
n
!
Page 4
5
contain high levels
of salt
Slimming
c.)
t
Previous illnesses
Consistently follow any medical instructions for treating
previous illness such as:
• Diabetes (Diabetes mellitus or sugar diabetes)
• Fat metabolism disorder
• Gout
Habits
• Eliminate smoking
• Drink only moderate amounts of alcohol
• Restrict your caffeine consumption (Coffee, tea, chocolate, etc.)
Physical conditioning
• After a preliminary medical examination, exercise regularly.
• Choose sports which require endurance and avoid those which
require strength.
• Avoid reaching the limit of your performance.
• With previous illnesses and/or an age of over 40 years, please
consult your doctor before beginning your exercise routine. Your
physician will help you develop an exercise routine that is appropriate for you.
Page 5
7
Memory button
A
t
t
e
n
t
i
o
n
!
A
t
t
e
n
t
i
o
n
!
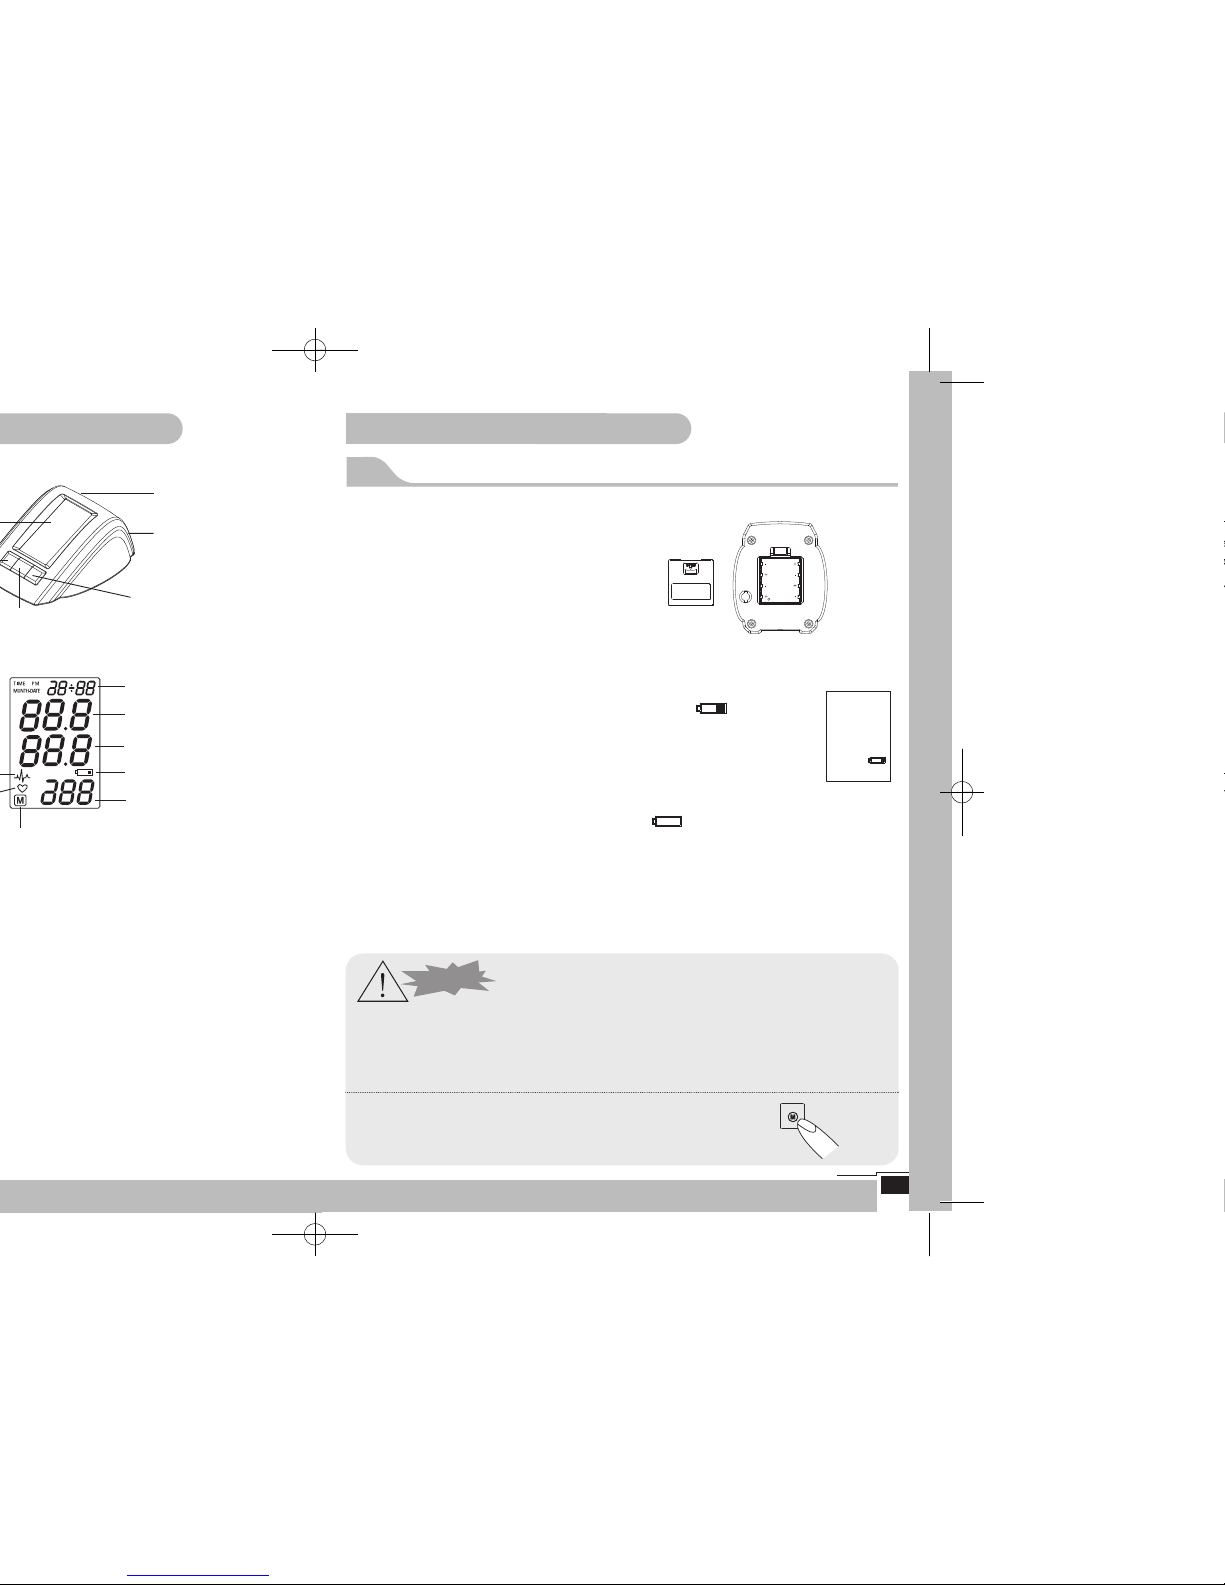
Date/Time
Systolic Value
Diastolic Value
Battery Indication
Pulse
Stored Value
Cuff jacket socket
AC/DC Power socket
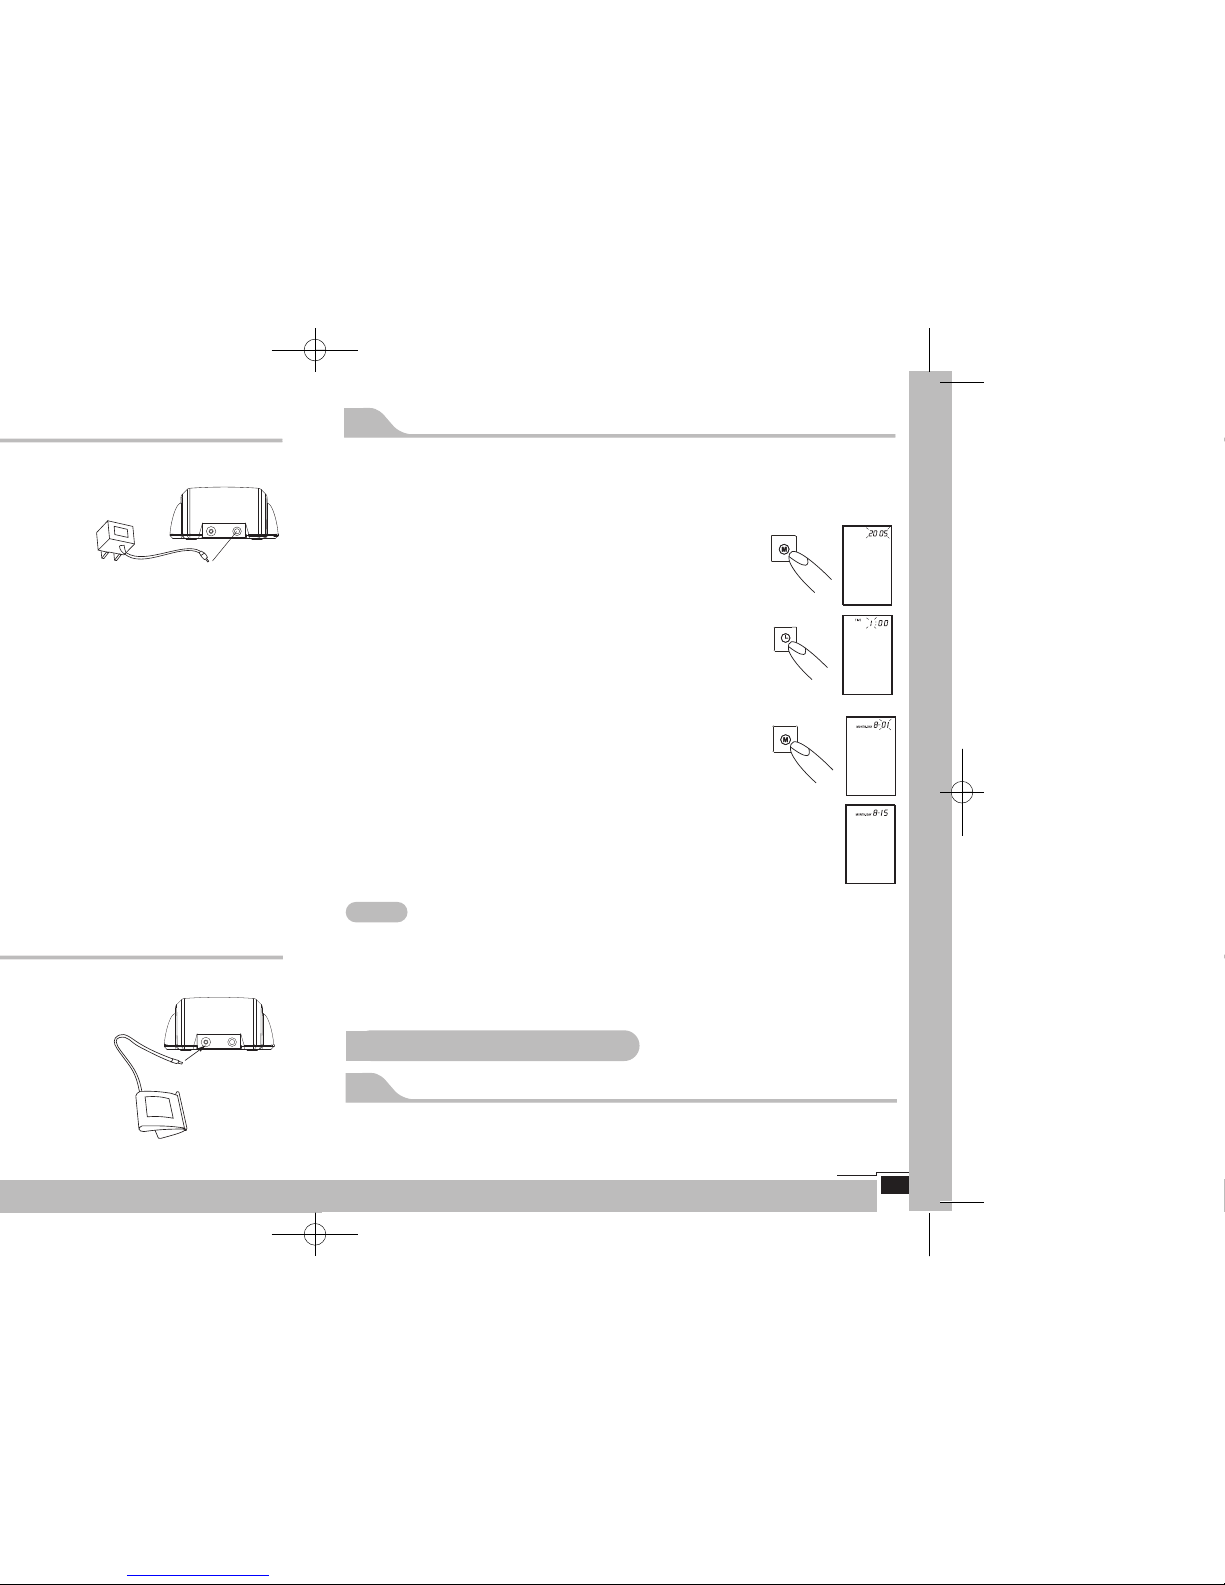
4. USING YOUR BLOOD PRESSURE MONITOR
4.1 Battery Indicated and battery change
Insert batteries immediately after unpacking the device. Battery compartment is located on
the bottom of the device (see illustration).
a) Remove cover as illustrated.
b) Insert the batteries (4 x size AA 1,5V), observing the indicated polarity.
c) Low battery indication
When the batteries are almost flat, the battery symbol will flash as
soon as the device is switched on (partly filled battery displayed). Although
the device will continue to measure reliably, you should prepare to replace
batteries.
d) Batteries flat- replacement
When the batteries are flat, the battery symbol will flash as soon as the device is
switched on (flat battery displayed). You cannot take any further measurements and must
replace the batteries.
1. Open the battery compartment at the bottom of the device by pushing inwards at the
two arrows and pulling out the battery compartment cover.
2. Replace the batteries - ensure correct polarity as shown by the symbols in the compartment.
• Do not use batteries beyond their date of expiry.
• Please use 'AA' Long-Life or Alkaline 1.5V Batteries.
• If your blood pressure monitor is left unused for long periods, please remove batteries
from the device.
Functional check
Hold on the memory button down to test all the display symbols.
When functioning correctly all symbols must appear.
Page 6
9
4.4 Setting time and date
This blood pressure monitor automatically records the time and date of each measurement.
This is very important information as blood pressure normally varies over the course of a day.
1. After new batteries have been inserted, the display will show the
year (eg.2005) and the character will blink.
2. Enter the correct year by pressing MEMORY button. Each click
will change one year. Example: 3 x press.
3. Press TIME button. The display now switches to the current date,
that the first character (month) blinks.
4. Enter the current month by pressing the MEMORY button.
Example: 7 x presses
5. Please follow the instructions above to set the day, hour and
minutes.
6. After all settings have been entered, click the TIME button once.
The date is briefly dislayed and then the time. The input is now
confirmed and the clock begins to run.
Note
• If you want to change date and time, press and hold the time button down for approx. 3
seconds till Year flashes, then you can enter the new values as described above.
• 1 x press on MEMORY button or TIME button advances one operation.
• Holding the button down speeds up the procedure.
5. CARRYING OUT A MEASUREMENT
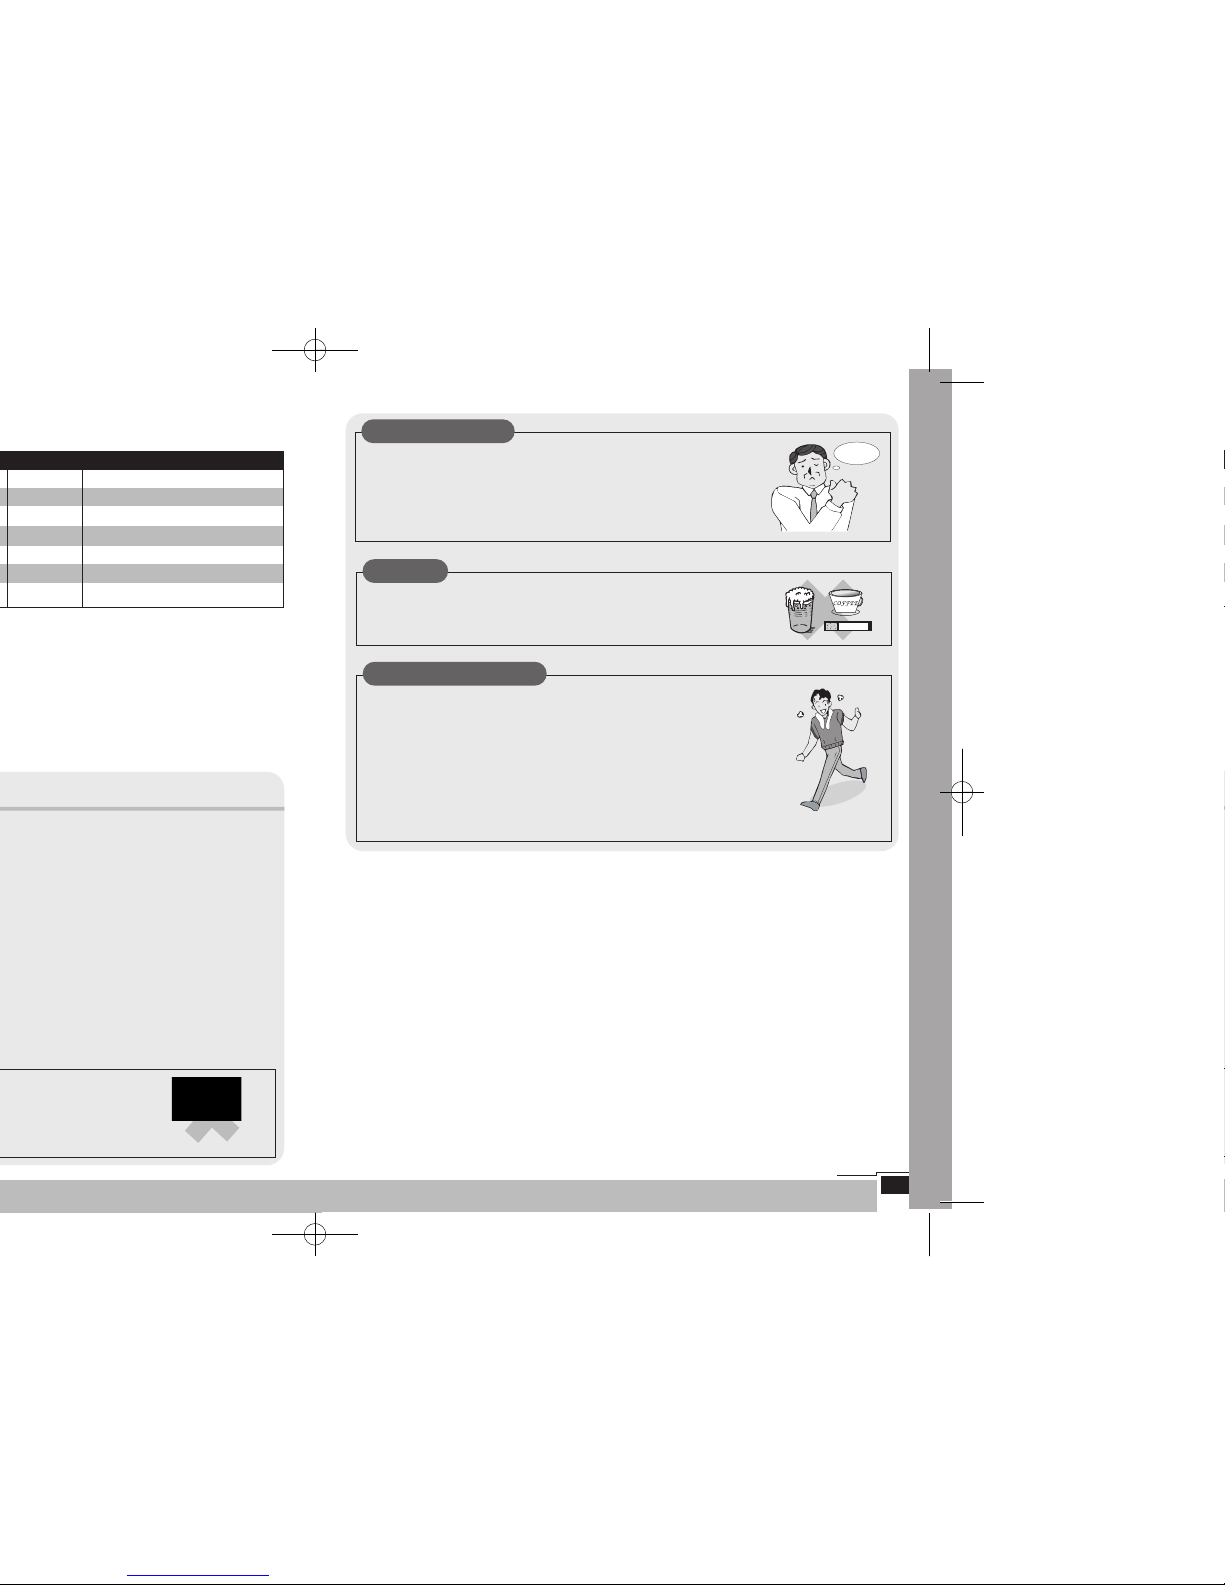
5.1 Before measurement:
• Avoid eating, smoking as well as all forms of exertion directly before measurement. All
these factors influence measurement result. Try to find time to relax by sitting in an armchair in a quiet atmosphere for about five minutes before measurement.
Page 7
11
1-2cm
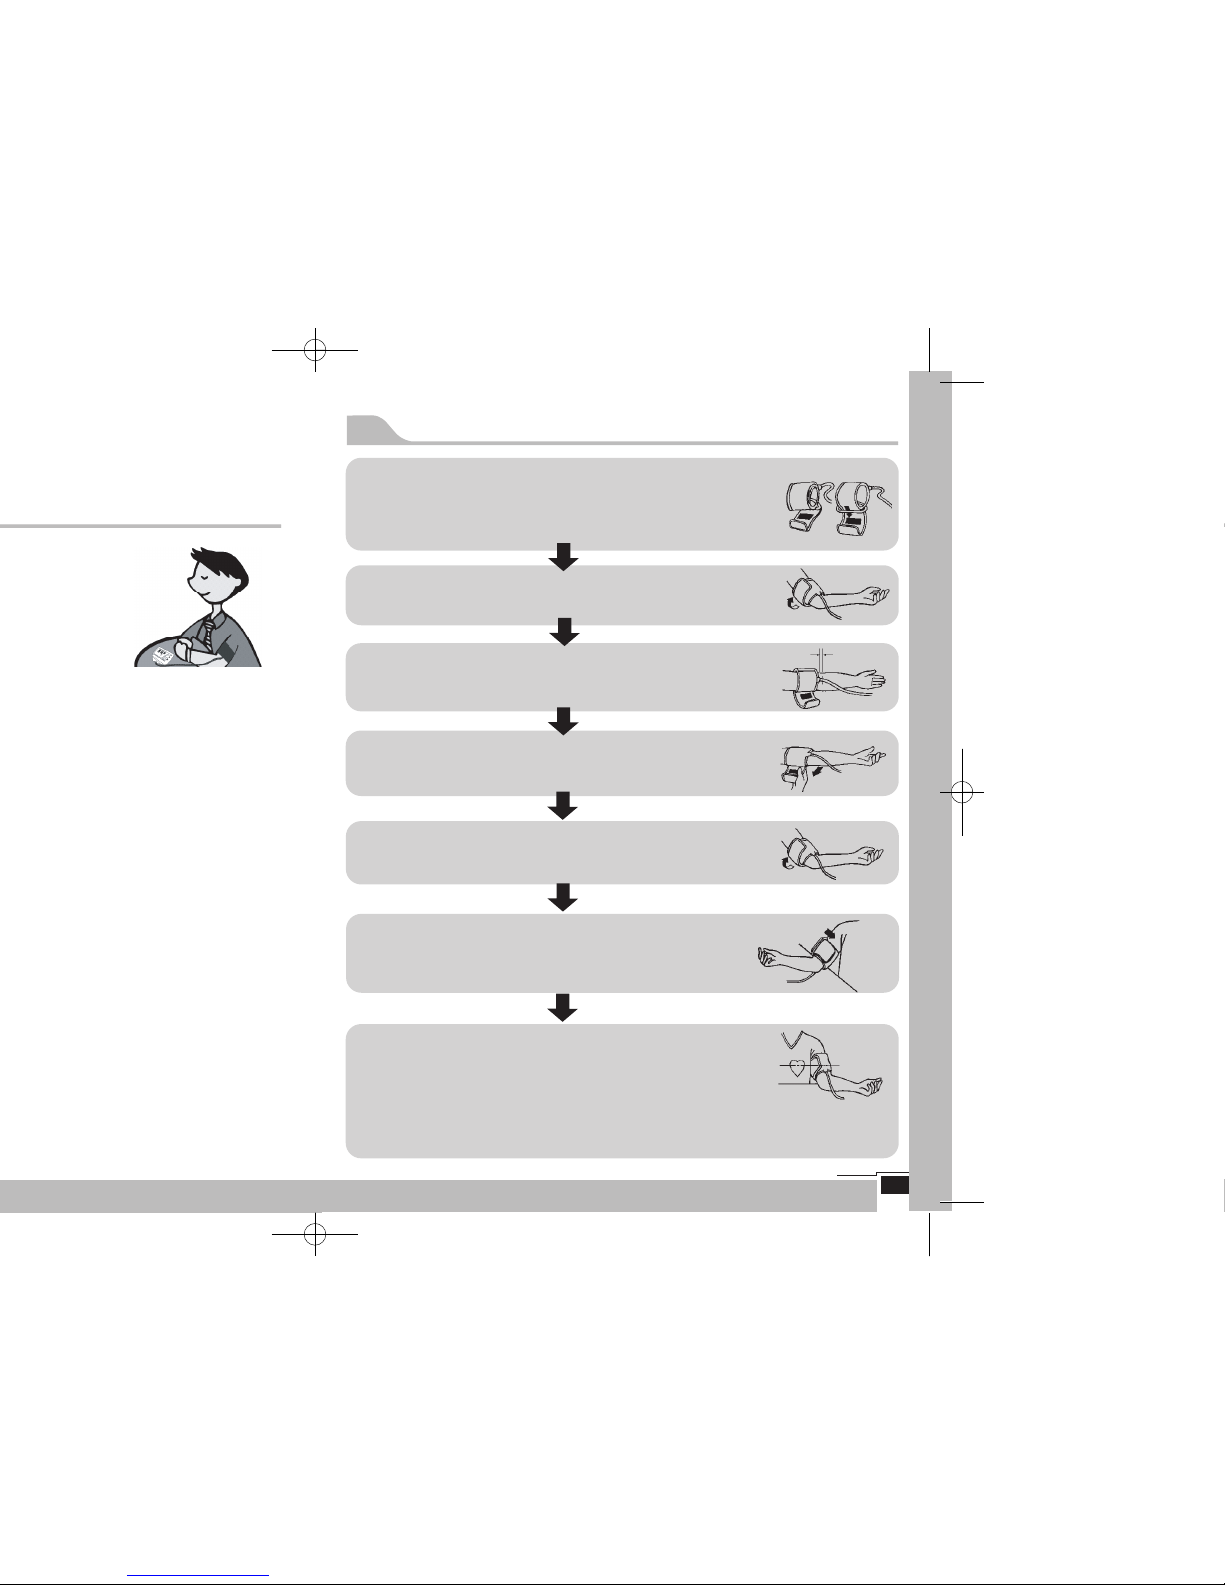
5.3 Fitting the cuff
Position the cuff flat on a table with the Velcro side down.
Pass the end of the cuff through the metal loop so that a circle is
formed. The Velcro closer will now be facing outwards.
(Ignore this step if the cuff has already been prepared.)
Push the cuff over the left upper arm so that tube points in the direction of the lower arm.
Lay the cuff on the arm as illustrated. Make certain that the lower
edge of the cuff lies approximately 1 to 2 cm above the elbow and
that the rubber tube leaves the cuff on the inner side of your arm.
Tighten the free end of the cuff and close the cuff by affixing the
Velcro.
The cuff should be snug on your upper arm so that you can fit 2
figers between the cuff and your upper arm. Any piece of clothing
which restricts the arm (e.g. a pullover) must be taken off.
Secure the cuff with the Velcro closer in such a way that it lies
comfortably and is not too tight.
Lay your arm on a table (palm upwards) so that cuff is at the same
height as your heart.
Do not bend the tube.
Note:
If it is not possible to fit the cuff to your left arm, it can also be placed on the right.
However, all measurements should be made using the same arm.
Page 8
13
inform your doctor. Please show your doctor the following explanation.
Information for the doctor on frequent appearance of the Arrhythmia indicator
This device is an oscillometric blood pressure monitor that also analyses pulse frequency
during measurement.The accuracy of this device has been clinically tested.
If pulse irregularities occur during measurement, the arrhythmia symbol is displayed after the
measurement. If the symbol appears more frequently (e.g. severals times per weekon measurements performed daily) we recommend the patient to seek medical advice. The device
does not replace a cardiac examination,but serves to detect pulse irregularities at an early
stage.
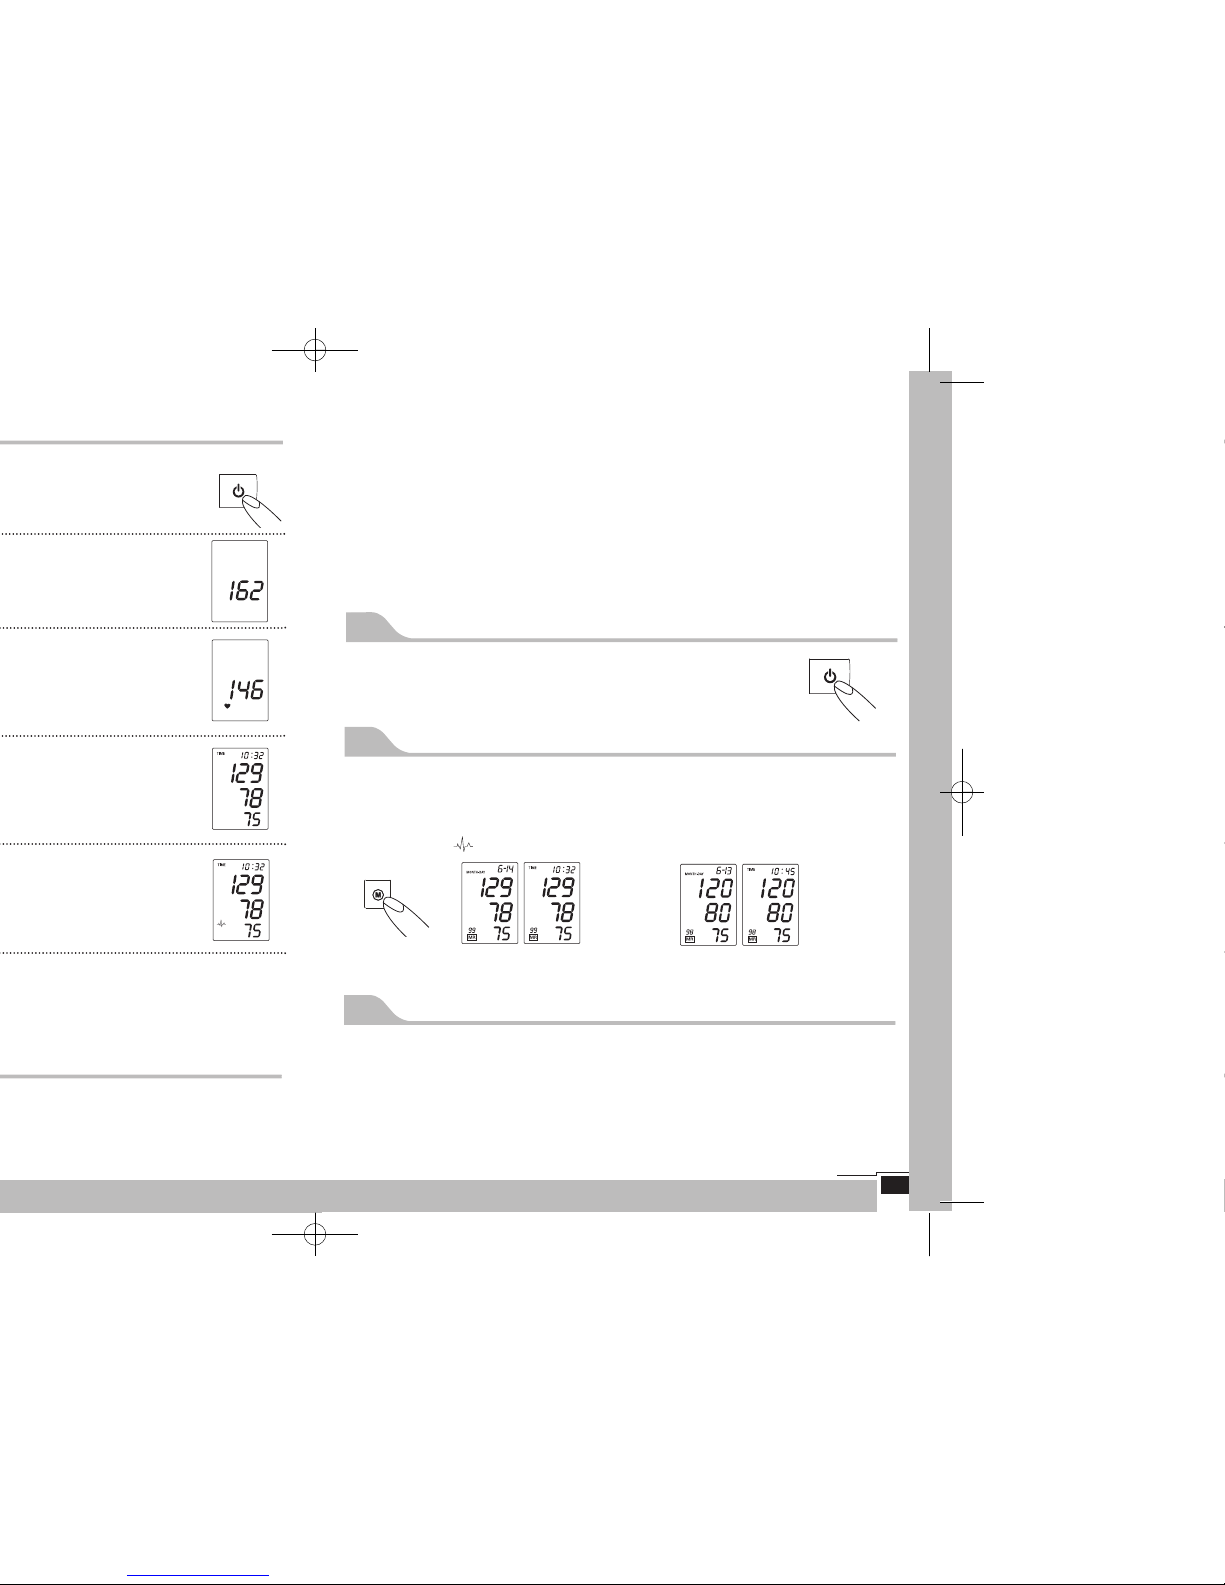
5.6 Discontinuing a measurement
If it is necessary to interrupt a blood pressure measurement for any reason
(e.g the patient feels unwell), the ON/OFF button can be pressed at any
time. The device immediately lowers the cuff pressure automatically.
5.7 Memory-storage and recall of the measurements
The blood-pressure monitor automatically stores the last 99 measurement values. By pressing MEMORY button, the latest measurement will display along with time and date. Each
time you press the memory button ,a previous measurement will be displayed along with
time and date. If an irregular heartbeat interval was detected in any measurements stored in
memory, the icon will be displayed.
Value of the last measurement value of the measurement before MR99
5.8 Delete memory
Before you delete stored memory readings,ensure that you won't need
refer to them at a later date. Keeping a written record is prudent and may provide additional
information for your doctor’s visit.
To delete stored memory readings, press and hold memory button until the LCD shows “CL”.
Release buttons, the symbol “CL” will be flashing. Press memory button again.You will hear
three short beeps, those indicate the memory readings have been deleted.
Please note you can NOT delete any particular measurement only.
Page 9

, if the tube unplugged after the systolic
Other possible malfunctions and solutions
If problems occur when using the device, the following points should be checked and if necessary, the corresponding measures are to be taken:
Malfunction Remedy
The display remains empty when the 1. Check the polarity of the batteries (+/-)
device is switched on although
2. If the display is erratic or unusual, remove
batteries have been installed. the batteries and re-install new batteries.
The pressure does not rise although 1. Check the connection of the cuff tube and connect
the pump is running. properly if necessary.
The device frequently fails to 1. Ensure the cuff fits correctly.Please refer to page
measure blood pressure values, or 10 point 5.3
the values measured are too low 2. Make sure that the cuff is not fitted too tightly.
(too high). Ensure tight clothing such as a rolled-up sleeve
isn’t exerting pressure on the arm above the
measuring position. Take off articles of clothing
if necessary.
3. Perform the measurement again in complete
peace and quiet.
Every measurement produces a 1. Please refer to " Further information" listed below.
different value although the
device functions normally and
the values displayed are normal
The Blood pressure values measured 1. Record the daily development of the values and
differ from those measured by the consult your doctor.
doctor. • Please note: Blood pressure fluctuates continually
so successive measurements will show some
variability
Further information
• The level of blood-pressure is subject to fluctuations even in healthy people. It is important to compare measurements taken under the same conditions and at the same time of
day. (Quiet conditions)!
• For licensing, this device has been subjected to strict clinical tests and supervised by
experienced Cardiac Specialists.
• This device is manufactured to meet European standards under the supervision of the
15
Page 10

17
Periodical re-calibration
Sensitive measuring devices must be checked for accuracy from time to time. We recommend a periodical inspection of your unit by an authorized Microlife dealer every 2 years.
Authorized Microlife dealer would be pleased to provide more information regarding calibration.
8. GUARANTEE
• This blood-pressure monitor BP 3BM1-3 is guaranteed for 3 years from date of purchase.
This guarantee includes the instrument and the cuff. The guarantee does not apply to
damage caused by improper handling, damage from leaking batteries, accidents, not following the operating instructions or alterations made to the instrument by third parties.
• The guarantee is only valid upon presentation of the guarantee card filled out by the
dealer.
• Name and company address of the responsible dealer:
9. INTERNATIONAL STANDARDS
Device standard: Device corresponds to the requirements of the standard
for non-invasive blood pressure monitor
EN 1060-1
EN 1060-3
EN 1060-4
IEC 60601-1
IEC 60601-1-2
Electromagnetic compatibility: Device fulfills the stipulations of the standard
IEC 60601-1-2
The stipulations of the EU Directive 93/42/EEC for Medical Devices Class IIa
have been fulfilled.
Read the instructions carefully before using this device.
Type BF applied part
Batteries and electronic instruments must be disposed of in accordance with
the locally applicable regulations,not with domestic waste.
Page 11

12. Frequently asked Questions (FAQ) and Answers
1. How do I know if the device is still accurate after long usage or
after being dropped?
• Generally, the monitor gives accurate results if it is working. If the
device has been dropped but you cannot detect any malfunction
when operating it, there is no need to worry about the accuracy.
The main component that mainly influences the accuracy is stored
in the computer program. This software either works or doesn’t.
Other parts which affect the accuracy such as the deflation valve
and the pressure sensor are very well protected against modifications by accidents or ageing.
• In accordance with international standards we recommend that you
ask your authorized Microlife dealer to perform an accuracy check
every two years.
2. Why and when should send the device back for an accuracy check?
• Microlife's blood pressure monitors are developed to remain accurate for a long product life. To guarantee this accuracy we recommend,in accordance with international standards contact authorized
Microlife dealer to perform an accuracy check every 2 years.
3. The systolic pressure measured by the Microlife blood pressure
monitor is similar to what my doctor measures but why is the
diastolic pressure about 10 mmHg higher with the electronic monitor?
• The diastolic pressure is very difficult to detect with the stethoscope and depend very much on the observer capabilities. The
correlation of the diastolic pressure is therefore typically more
difficult than the systolic.
4. How long should I wait between measurements?
• If you want to perform several measurements sequentially, you
should wait at least 1-2 minutes between two measurements. Loosen
the cuff during this waiting period to enable a normal blood flow.
19
Diastolic pressure
0/1
minutes
3
6
9
12
2
Page 12

21
3
6
9
12
Dinner time
test the blood
pressure at one hour
after the dinner
0/1
3
6
9
12
the cuff is positioned
at heart level during
measurement
120
8
0
0/1
WATER
WATER
10. Is the MICROLIFE blood pressure monitor waterproof?
• No! Also please prevent to store it above 50°C
‘
11. What are normal results and when should I see a doctor?
• The following table explains the pressure ranges and degree of hypertension according to
the World Health Organization:
Category Systolic blood pressure Diastolic blood pressure
Optimal <120 <80
Normal
<130 <85
High normal 130~139 85~89
Hypertension
_ Stage 1 :Mild 140~159 90~99
_ Stage 2 :Moderate 160~179 100~109
_ Stage 3 :Severe >180 >110
Isolated systolic hypertension >140 <90
• It is recommended that you record your blood pressure values frequently and discuss
them with your doctor. If your systolic values are frequently above 130 and/or the diastolic values above 85, you should consult your doctor. It is normal that blood pressure values are sometimes higher and lower and there is no need to worry if the results are
sometimes higher than the above limits. But if your pressure is above the limits in most
cases, you should consult your doctor.
Page 13
23
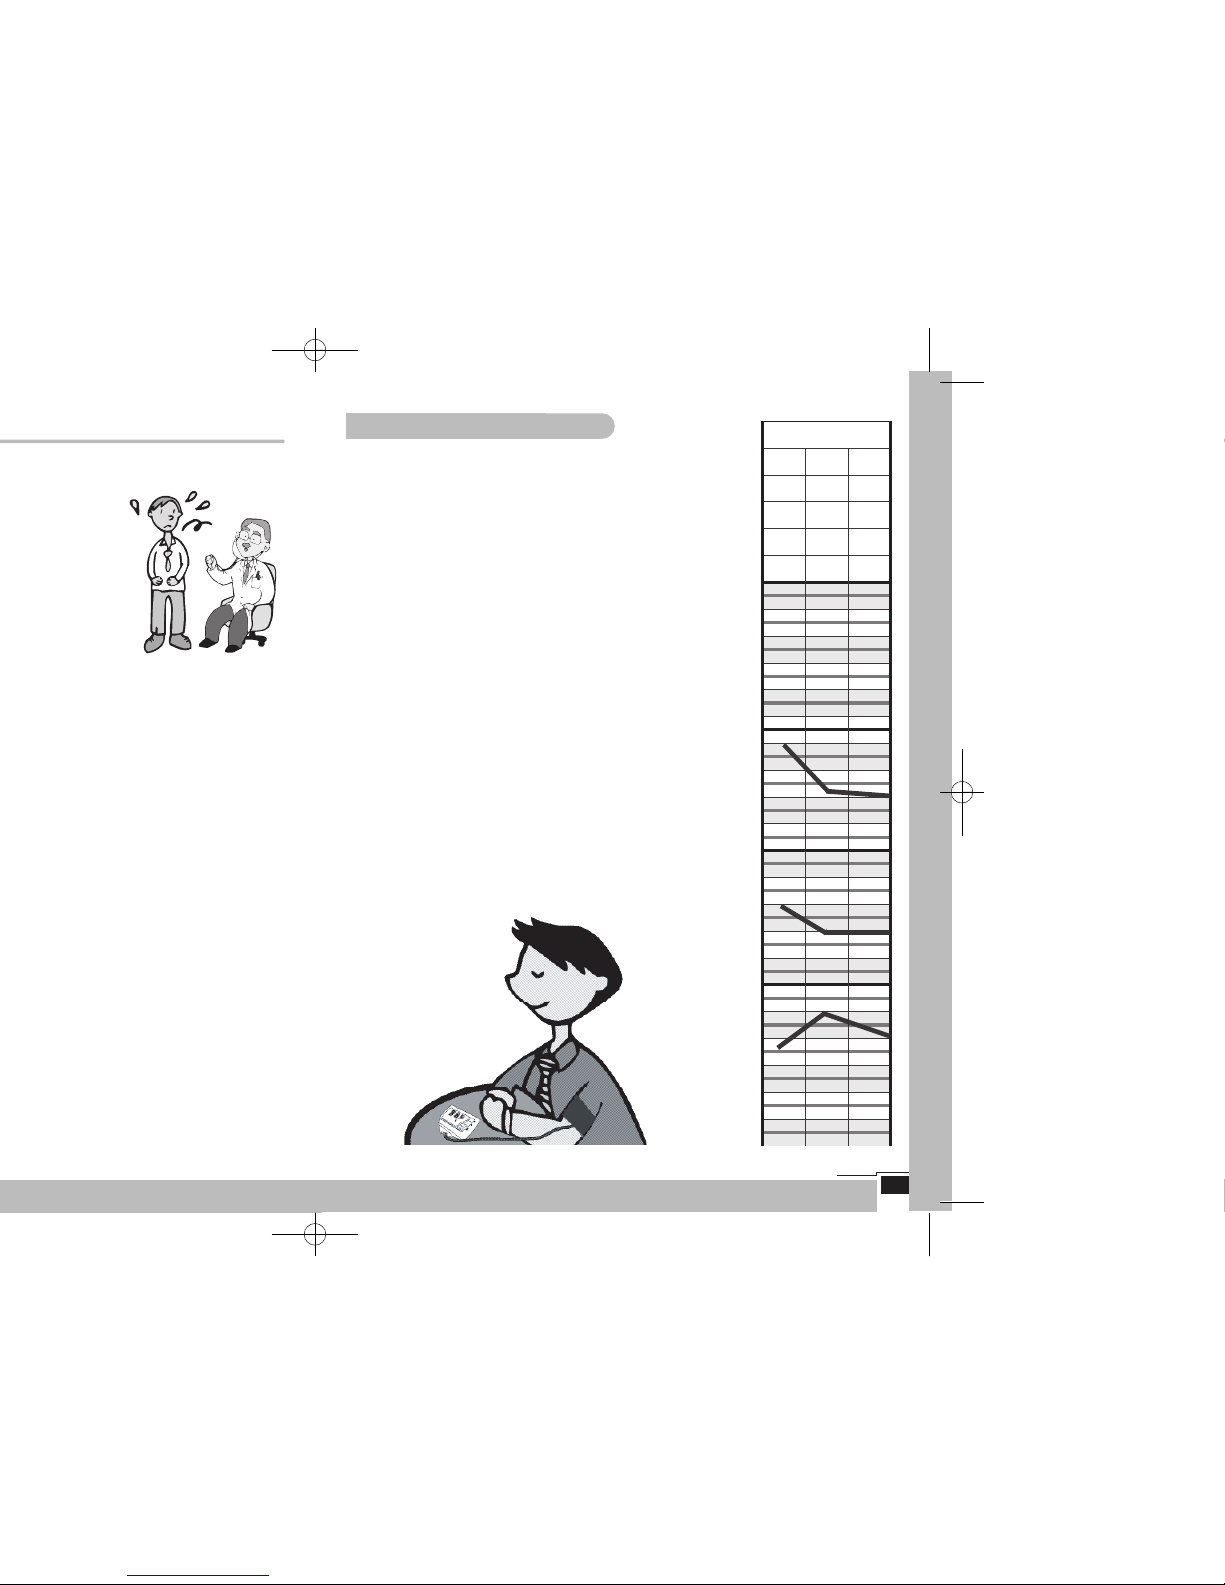
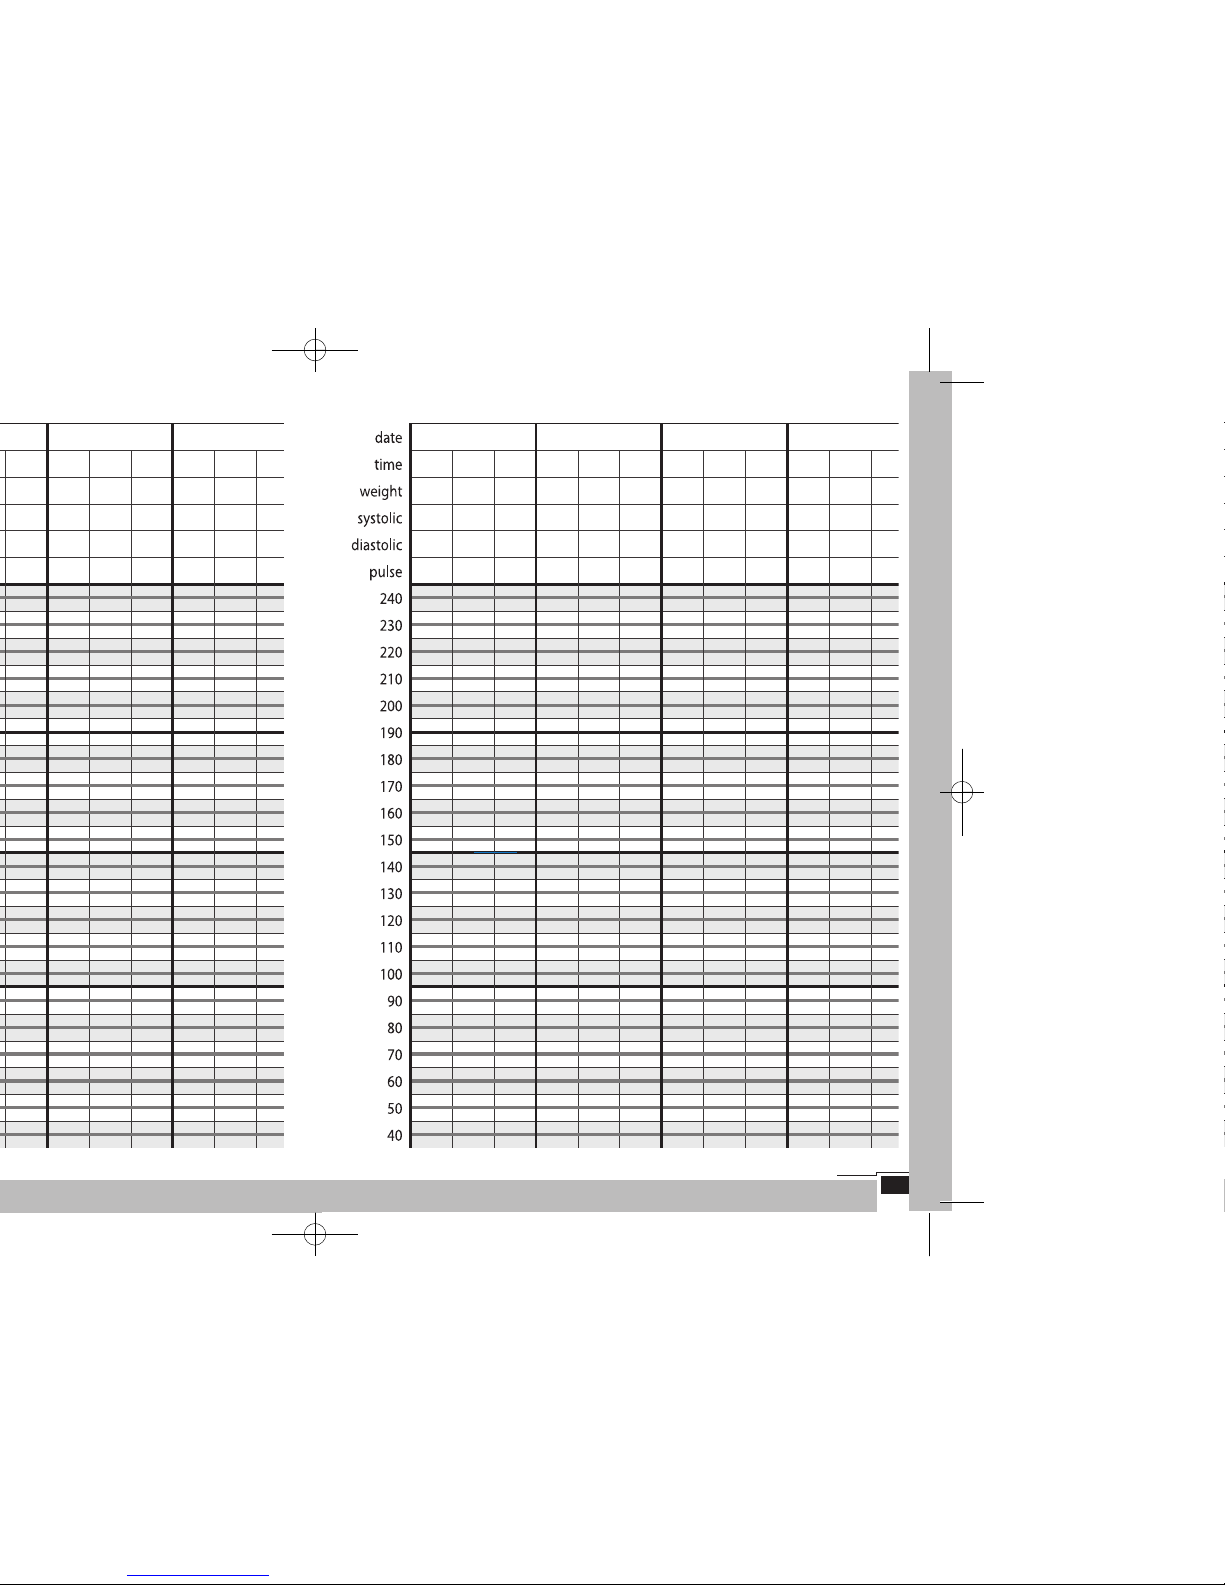
Your blood pressure passport
Kindly fill-in your personal date on the front page. On the following
pages, please indicate exact date, time and weight before any
measurements. Start with your blood pressure and pulse measurement and pulse measurement. Please fill-in your systolic blood
pressure (maximal Value), your diastolic blood pressure (minimal
value) and your pulse rate. After the measurement, kindly combine
the systolic and diastolic values as well as the pulse rates with a
line (see example). With this method, you may provide an exact
overview of your blood pressure / pulse to your doctor.
14.07.99
8.15 12.30 12.30
50 51 52
180 160
120
65 56 70
Page 14

25
Page 15
27
www.microlife.com BP 3BM1-3 Automatic Blood Pressure Monitor Instruction Manual
 Loading...