

Page 1
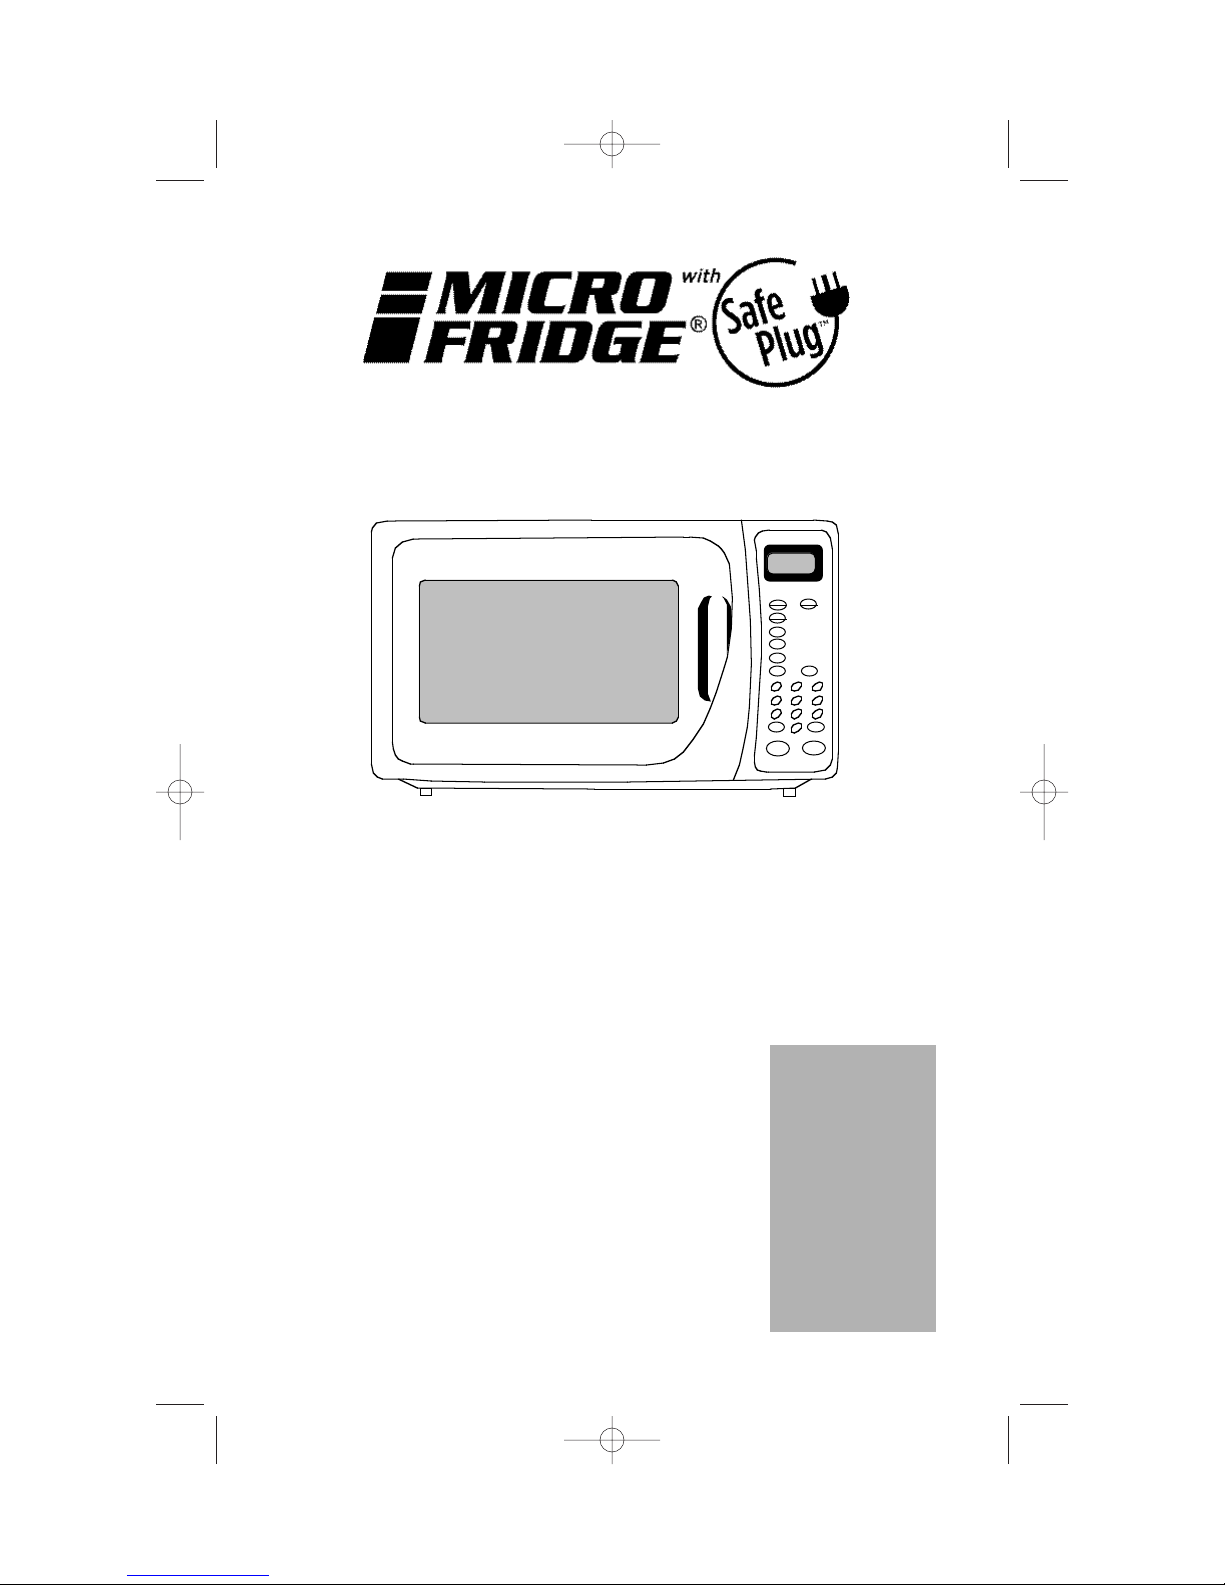
Electronic Control
Microwave Oven
Stop
Clear
Start
ClockTime 0
987
654
321
Defrost
(Med)
POWER LEVEL
(Cook)
Dinner
Plate
Potato
Hold
Warm
Beverage
Soup
Popcorn
Reg
45 Sec
Quick-On
To Cook:
1. Press Time or select
Preset
2. Enter cooking time
(except presets)
3. Select power level if
desired (except presets)
4. press Start
To Set Time:
1. Press Clock
2. Enter desired time
3. Press clock
Stage1 Stage2 Stage3
Hold
Warm
Defrost Pause
User Manual-
Model #
MHM-6TP
MHM-6TP manual.qxd 2003.11.10 14:50PM Page 1
Page 2

IMPORTANT SAFETY
INSTRUCTIONS
When using electrical appliances, basic safety precautions should
be followed, including the following:
WARNING: To reduce the risk of burns, electric shock, fire, injury to
persons or exposure to excessive microwave energy:
1. Read all instructions before using this appliance.
2. Read and follow the specific "PRECAUTIONS TO AVOID POSSIBLE
EXPOSURE TO EXCESSIVE MICROWAVE ENERGY."
3. This appliance must be grounded. Connect only to a properly grounded
outlet. See "GROUNDING INSTRUCTIONS."
4. Install this appliance only in accordance with the provided installation
instructions.
5. Some products such as whole eggs and sealed containers (e.g. closed glass
jars) may explode and should not be heated in this oven.
6. Use this appliance only for its intended use as described in this manual.
Do not use corrosive chemicals or vapors in this appliance. This type of
oven is specifically designed to heat, cook, or dry foods. It is not designed
for industrial or laboratory use.
7. As with any appliance, close supervision is necessar y when used
by children.
8. Only qualified service personnel should ser vice this appliance. Contact the
nearest authorized service center for repair or adjustment.
9. Do not cover or block any air vents on this appliance.
10. Do not store or use this appliance outdoors. Do not use this product near
water. (e. g. near a kitchen sink, in a wet basement, or near a
swimming pool).
11. Do not immerse cord or plug in water.
12. Keep cord away from heated surfaces.
13. Do not let cord hang over edge of a table or counter.
14. When cleaning surfaces of door and oven that come together when closing
the door, use only mild, non-abrasive soaps or detergents apply with a
sponge or soft cloth.
15. To reduce the risk of fire in the oven cavity:
(A) Do not overcook food. When cooking with paper, plastic,
or combustible materials, do not leave the oven unattended.
(B) Remove wire twist-ties from paper or plastic bags before placing
bag in oven. Do not heat chinese food containers or foil lined bags.
1
MHM-6TP manual.qxd 2003.11.10 14:50PM Page 2
Page 3
(C) If materials inside the oven should ignite: keep oven door closed, turn
oven off, and disconnect the power cord or shut off power at the fuse
or circuit breaker panel.
(D) Do not use the cavity for storage purposes. Do not leave paper
products, cooking utensils or food in the oven cavity when not in use.
16) Liquids, such as water, cof fee, or tea are able to be overheated beyond the
boiling point without appreaing to be boiling. Visible bubbling or boiling
when the container is removed from the microwave oven is not always present. THIS COULD RESULT IN VERY HOT LIQUIDS SUDDENLY BOILING
OVEN WHEN THE CONTAINER IS DISTRIBUTED OR A SPOON OR
OTHER UTENSIL IS INSERTED INTO THE LIQUID.
To reduce the risk of injury to persons:
a) Do not overheat the liquid
b) Stir the liquid both before and halfway through heating it.
c) Do not use straight-sided containers with narrow necks.
d) After heating, allow the container to stand in the microwave oven for a
short time before removing the container.
e) Use extreme care when inser ting a spoon or other utensil into the
container
SAVE THESE INSTRUCTIONS
2
English
PRECAUTIONS TO AVOID POSSIBLE EXPOSURE TO
EXCESSIVE MICROWAVE ENERGY
(A) Do not attempt to operate this oven when the door is open since open-
door operation can result in harmful exposure to microwave energy. It is
important not to defeat or tamper with the safety interlocks.
(B) Do Not place any object between the oven front face and the door. Do not
allow soil or cleaner residue to accumulate on sealing surfaces.
(C) Do not operate the oven if it is damaged. It is
particularly important that the oven door close properly and that there is
no damage to the; (1)door(bent), (2) hinges and latches(broken or loosened), (3)door seals and sealing surfaces.
(D) The oven should not be adjusted or repaired by anyone except properly
qualified service personnel.
Note: You should not adjust or repair the oven under any circumstances.
Adjustments or repairs must be done by an authorized service technician.
Thank you for using our
MicroFridge® product. This easy-touse manual will guide you in getting
the best use of your microwave oven.
Remember to record the model and
serial number. They are on a label in
back of the microwave oven.
Model number
Serial number
Date of purchase
Staple your receipt to your manual. You will need it to obtain
warranty service.
MHM-6TP manual.qxd 2003.11.10 14:50PM Page 3
Page 4

3
English
Arcing is the microwave term that is defined as "Sparks in the Oven."
Arcing is caused:
• If metal, such as twist-ties, poultry pins or gold-rimmed dishes
are being used in the microwave when microwave oven is in use.
• If recycled paper towels containing small metal pieces are being
used in the microwave.
• If foil paper is in the oven while oven is in use.
• Cooking times given in the cooking guide are approximate. Factors that may
affect cooking are starting temperature, altitude, volume, size and shape of food
and container used. As you become familiar with the oven, you will be able to
adjust for these factors.
• Do not boil eggs in their shell. Pressure may build up and the eggs will explode.
• Potatoes, apples, egg yolks and whole acorn squash are examples of
food with "NONPOROUS SKINS." These must be pierced before cooking to
prevent bursting.
• Popcorn must be popped in a microwave corn popper. Microwave popped
corn produces a lower yield than conventional popping. Do not use oven for
popcorn unless popped in a microwave approved popcorn container or unless
it’s commercially packaged and recommended for microwave ovens. Do not use
oil unless specified by the manufacturer.
• Do not attempt to deep fry in your oven.
• DO NOT heat liquids in your microwave oven without first stirring.
Arcing
WARNINGS
Food
MHM-6TP manual.qxd 2003.11.10 14:50PM Page 4
Page 5

English
4
PAGE
Important Safety Instructions......................................................1-3
Features Of Microwave Oven........................................................5
What is Safe Plug ..................................................................................5
Installing Microwave Oven ............................................................6
Unpacking Microwave Oven....................................................................6
Assembly Instructions ..............................................................................6
Proper Air Circulation ............................................................................7
Electrical Requirements............................................................................7
Grounding Instructions ............................................................................7
Operating Your Microwave Oven ................................................8
Setting the Clock ....................................................................................8
Child Lock-Out........................................................................................9
Automatic Popcorn..................................................................................9
Beverage/Soup ....................................................................................10
Potatoes ..............................................................................................10
45 Sec/Quick-On ................................................................................11
Reheating ............................................................................................11
Auto Weight Defrost..............................................................................12
Time Cooking in One Stage ..................................................................12
2 Stage or 3 Stage Cooking..................................................................13
Hold Warm..........................................................................................14
To Stop the Oven while it is Operating ..................................................15
MicroFridge® Patented Circuitry............................................................15
Proper Microwave Oven Care and Cleaning............................16
Food Facts In Microwave Cooking..............................................17
Language Of Microwave Cooking ..............................................18
Cooking Reference ....................................................................19-20
Troubleshooting ..............................................................................21
Warranty Information ..................................................................22
Table Of Contents
MHM-6TP manual.qxd 2003.11.10 14:50PM Page 5
Page 6
English
5
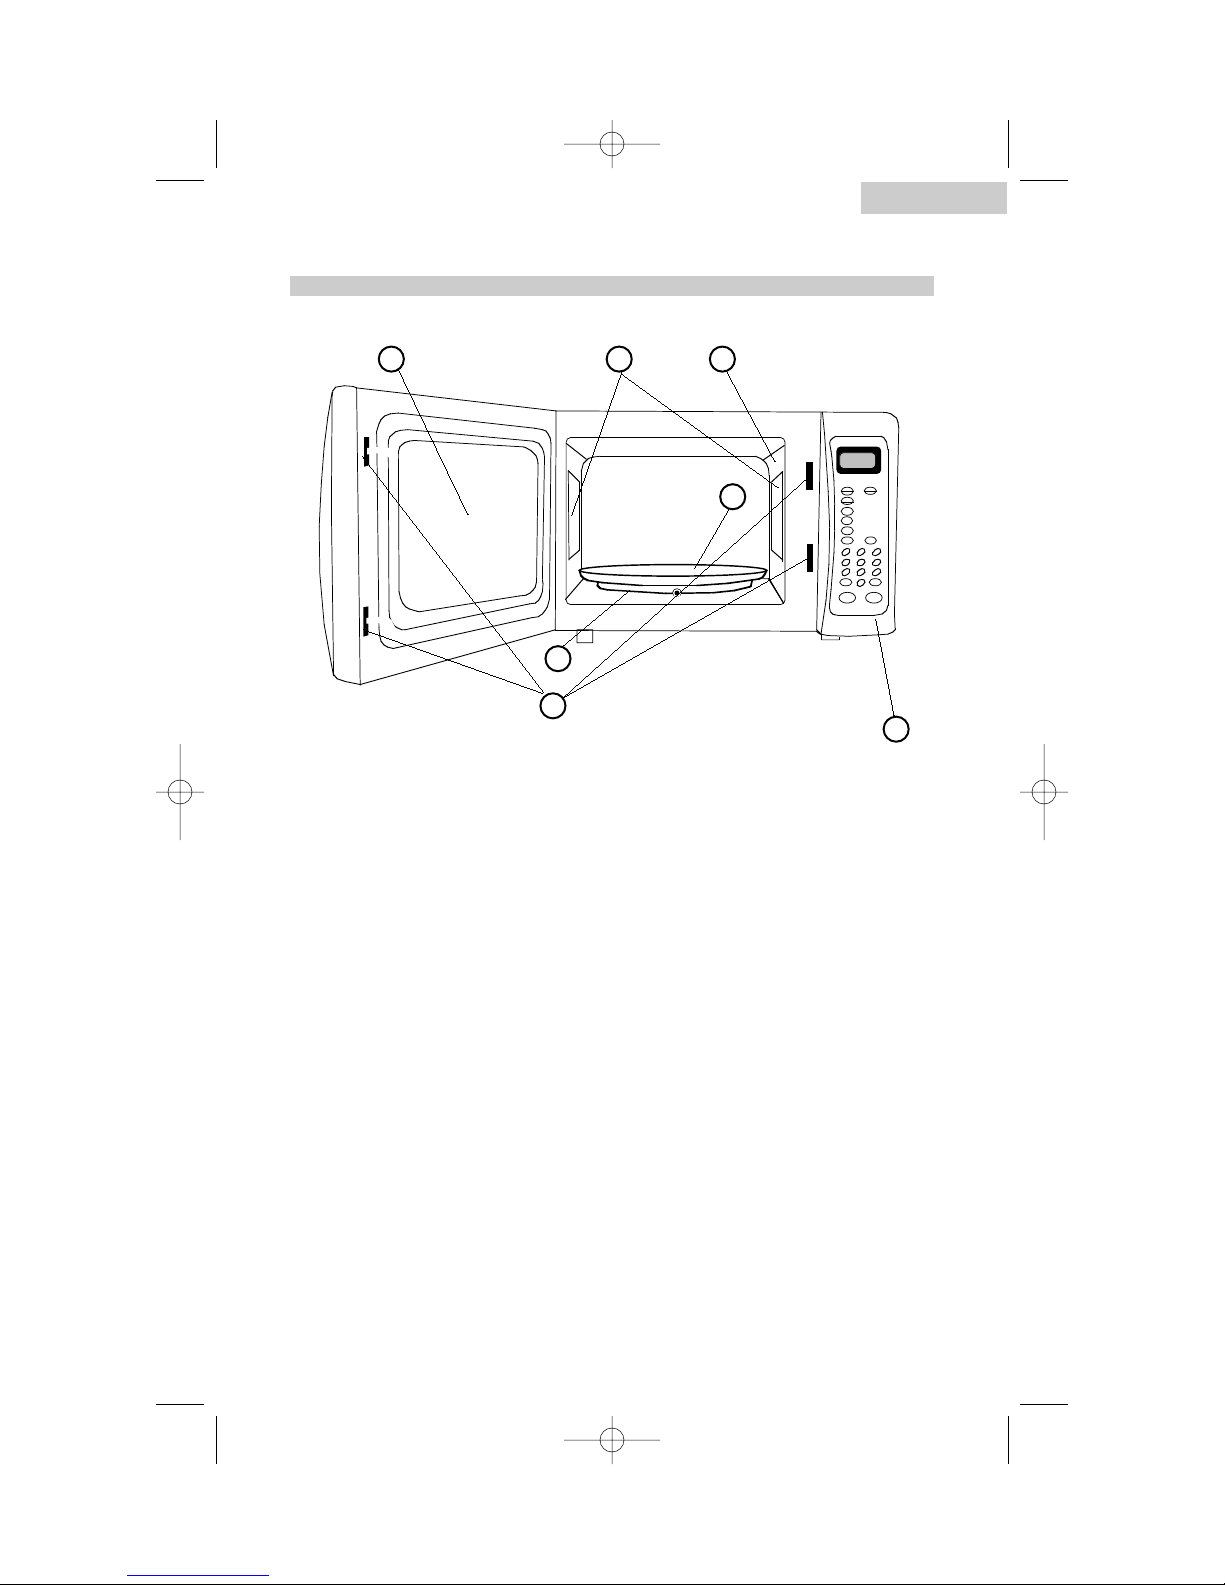
Features of Microwave Oven
Stop
Clear
Start
ClockTime 0
9
87
654
321
Defrost
(Med)
POWER LEVEL
(Cook)
Dinner
Plate
Potato
Hold
Warm
Beverage
Soup
Popcorn
Reg
45 Sec
Quick-On
To Cook:
1. Press Time or select
Preset
2. Enter cooking time
(except presets)
3. Select power level if
desired (except presets)
4. press Start
To Set Time:
1. Press Clock
2. Enter desired time
3. Press clock
Stage1 Stage2 Stage3
Hold
Warm
Defrost Pause
31 2
5
6
4
1. Safety Screen Window
2. Air Vents
3. Oven Light
4. Glass Tray
5. Roller Guide Ring
6. Door Safety Lock System
7. Touch Pad Control Panel
7
What is Safe Plug™ Technology?
In MicroFridge® combination appliances, Safe Plug™ technology utilizes
patented, internal current-limiting circuitry that temporarily shuts off the
refrigerator or refrigerator/freezer when the microwave is in use. When
the microwave is finished, power to the refrigerator or refrigerator/freezer
resumes. Our combination appliances never draw more than 10 - 12
amps and are specifically manufactured to reduce potential fire hazards
that are caused by overloaded electrical circuits.
In a MicroFridge® combination appliance with Safe Plug™ technology,
the refrigerator or refrigerator/freezer plugs into the back of the
microwave, and the microwave plugs into the wall. This one-plug-to-thewall operation conserves electricity and frees up wall outlets. Most
importantly, it allows our combination units to be used safely, without
special wiring, even in older buildings.
MHM-6TP manual.qxd 2003.11.10 14:50PM Page 6
Page 7
6
English
Installing Microwave Oven
Unpacking Microwave Oven
1) Unpack the oven, remove all packing material, and examine the oven
for any damage such as dents, broken door latches or cracks in the
door. Notify the dealer immediately if the unit is damaged. Do Not
install if the unit is damaged.
2) Inspect and remove any remains of packing, tape or printed materials
before powering on the microwave oven.
Assembly Instructions
Remove all packaging material and accessories. Examine the oven for any damage,
such as dents or broken door. Do not install if oven is damaged.
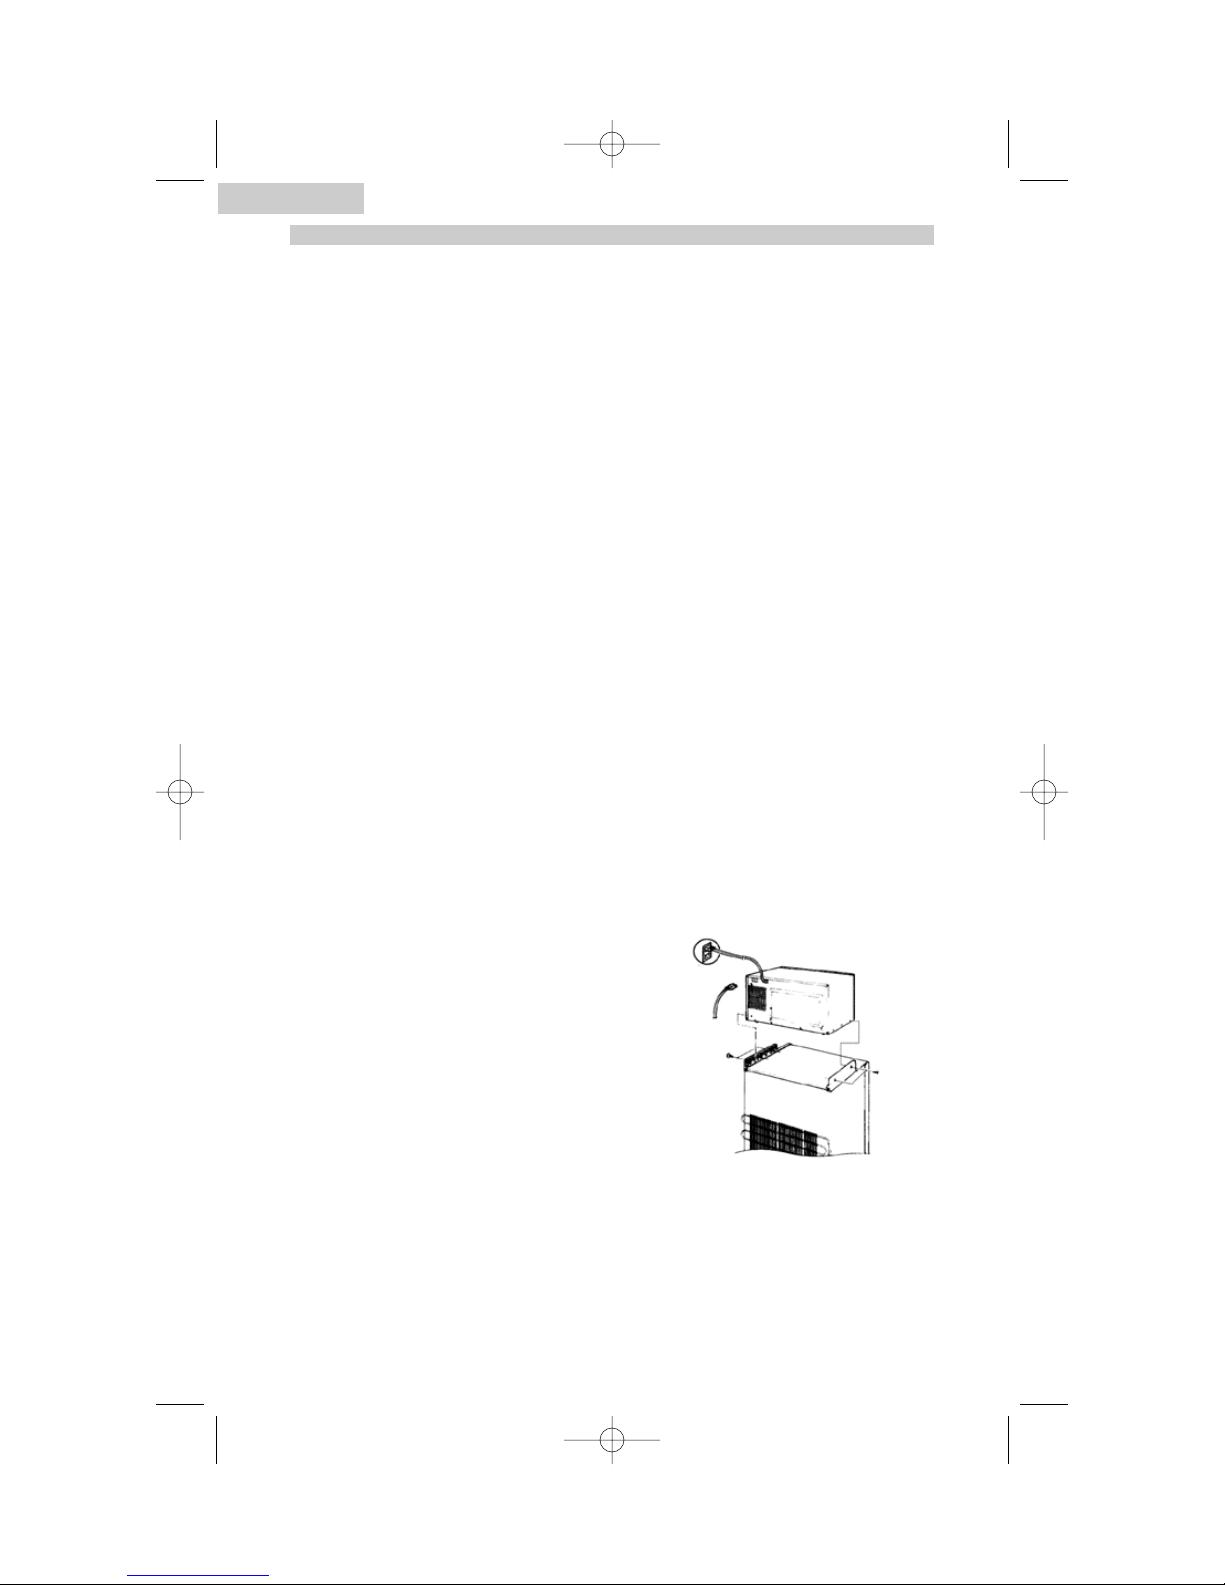
1. Place the oven on top of the approved MicroFridge® refrigerator carefully lining
up screw holes of the refrigerator sash with microwave side holes.
• Do not block the inlet and outlet openings located at the rear and bottom of
the oven.
• Do not remove the feet from the bottom of the oven.
• Blocking the inlet and/or outlet openings can damage the oven.
• The cabinet is covered with a protective film, remove the film to fully show the
intended color and finish.
2. Attach the microwave oven to the refrigerator by screwing in the 4 four side and
1 rear srews.
• Six screws can be found in the attached bag.
3. Plug refrigerator into the socket provided in the
rear of the microwave oven.
• The socket is intended for use with approved
MicroFridge® refrigerators. Use of this
socket for other appliances may be
hazardous.
• Model Number for approved MicroFridge®
refrigerator is located on the label on the
rear of the microwave oven.
4. Plug your oven into a standard 120-volt/60Hz
household outlet. Be sure the elctrical circuit is
at least 15 amperes and that your microwave
oven is the only appliance on the circuit.
The MicroFridge® combination appliance will now operate without exceeding ten
(10) amps of current draw.
Note: If your oven does not operate properly, unplug it from the 120 volt
household outlet and then plug it back in. This unit is not designed for
50Hz or any circuit other than 120 volt/60Hz AC current.
MHM-6TP manual.qxd 2003.11.10 14:50PM Page 7
Page 8
English
7
Proper Air Circulation
• For proper operation, the oven must have sufficient air-flow.
The following are recommended clearances around the oven:
Sides…………………….2" (50mm)
Top………………………1" (25mm)
Back……………………..1" (25mm)
Electrical Requirement
• Make sure there is a suitable power outlet (115-Volt, 15 Amps Outlet)
with proper grounding to power the microwave oven.
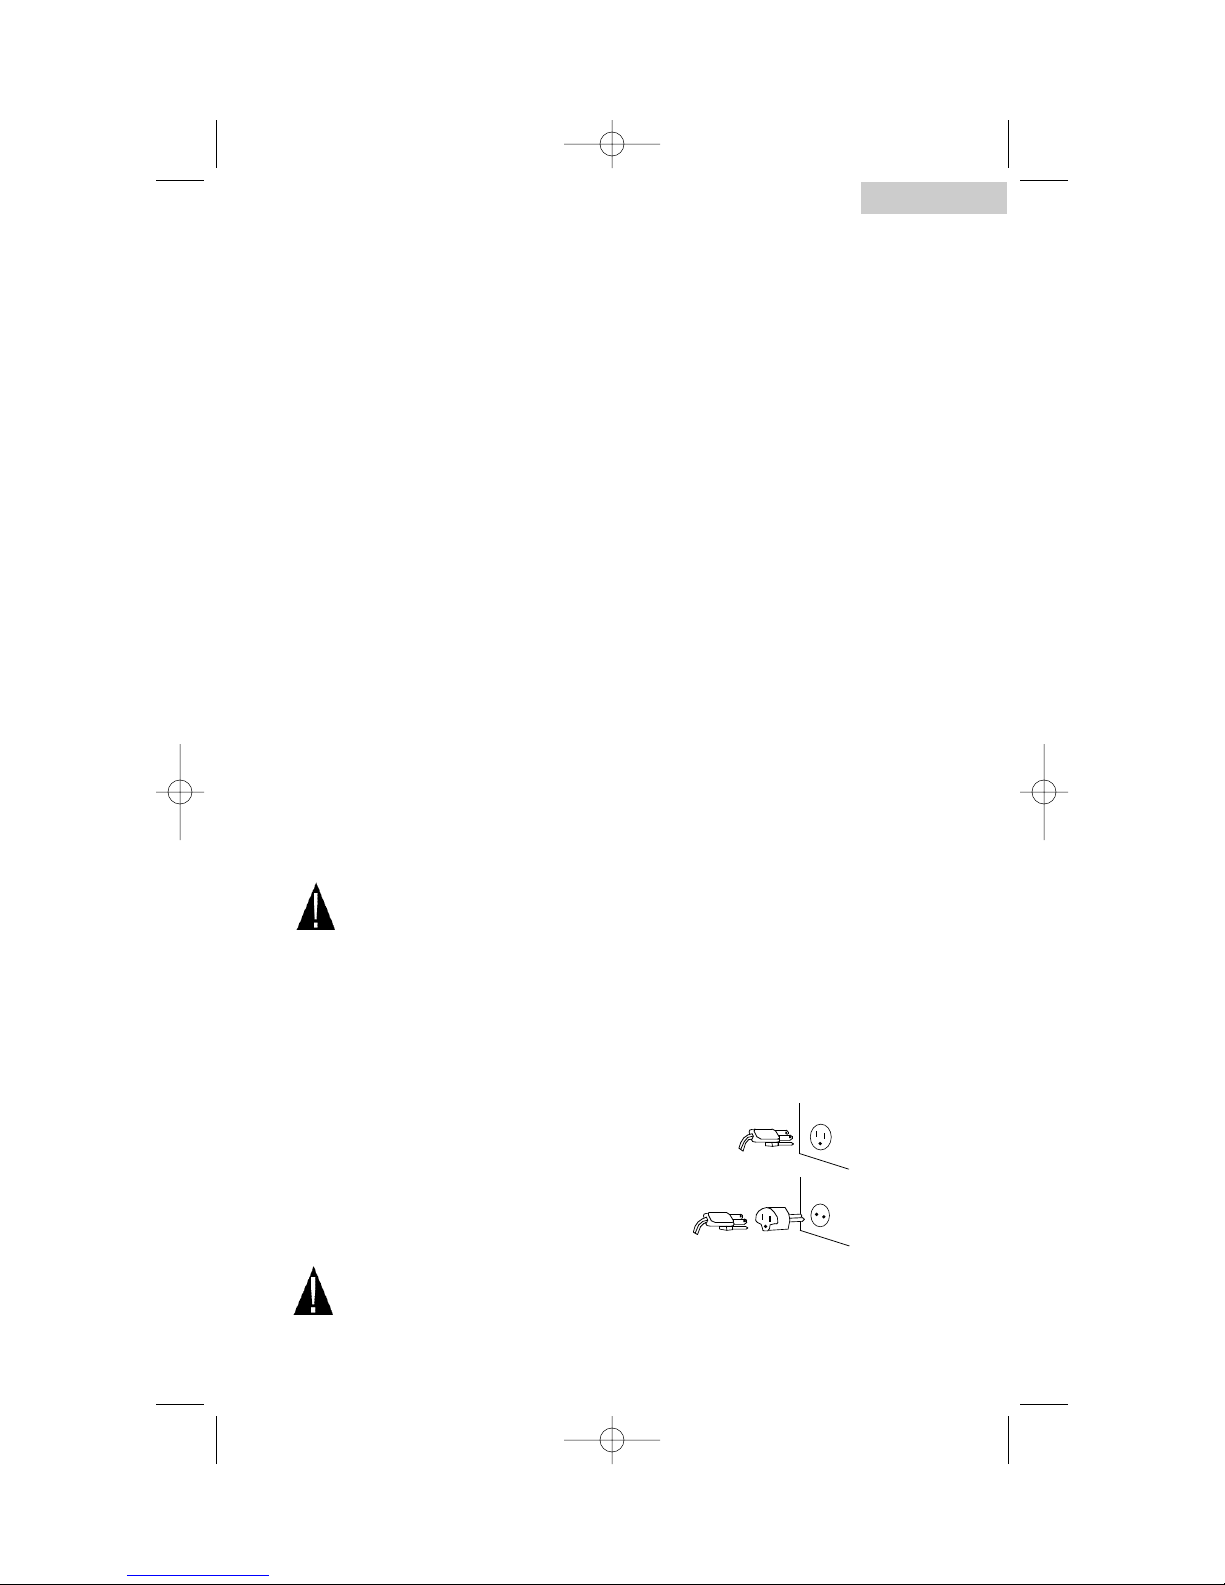
• Avoid the use of three plug adapters or cutting off the third grounding
prong in order to accommodate a two-plug outlet. This is a dangerous
practice since it provides no effective grounding for the microwave and
may result in shock hazard.
• The electrical power cord must be kept dr y and must not be pinched and
or crushed in any way.
Grounding Instructions
This appliance must be grounded. In the event of an electrical short circuit,
grounding reduces the risk of electric shock by providing an escape wire for the
electric current. This appliance is equipped with a cord having a grounding
wire with a grounded plug. The plug must be inserted into an outlet that is
properly installed and grounded.
• Improper use of the plug can result in a risk of electric shock.
• Consult a qualified electrician or service person if the grounding
instructions are not completely understood or if doubt exists as to
whether the appliance is properly grounded.
Wiring Requirements:
• The oven must be plugged into at least 15 AMP 115-120 VOLT, 60 HZ
GROUNDED OUTLET.
Note: Where a standard two-prong
outlet is encountered, it is the
personal responsibility and
obligation of the consumer to
have it replaced with a properly
grounded three-prong outlet.
Extension Cords:
We do not recommend that you use an extension cord.
X
MHM-6TP manual.qxd 2003.11.10 14:50PM Page 8
Page 9
English
8
Operating Your Microwave Oven
Please read and fully understand the instructions before operating the oven.
Setting the Clock
When the oven is first plugged in, the display will flash "0:00" and a tone will
sound. If the AC power ever goes off, the display will flash "0:00" when the power
comes back on. To set the clock under the above circumstances, simply enter the
correct time of day and then touch the CLOCK pad.
Note: If the oven is used before the present time is set, the display will show "0"
after the cooking is completed and the door is opened. To reset present time
in the display window when the oven is off, touch the CLOCK pad. The
colon starts blinking. Enter the correct present time by following the
procedures.
1. Touch the Stop/Clear pad. The display will show "0".
2. Touch the CLOCK pad. The display will flash "0:00" and a
tone will sound.
3. Enter the correct time of day. The display will show the numbers
you pressed in the order you pressed
them.
Example: To set the time to "10:12",
touch "1","0","1","2" in sequence.
The display will show the present
time and the colon will stop blinking.
The 12 hour digital clock allows you
to set it from "1:00" to "12:59"
4. Touch the CLOCK pad.
Stop
Clear
CLOCK
CLOCK
MHM-6TP manual.qxd 2003.11.10 14:51PM Page 9
Page 10
9
English
Child Lock-Out
The child lock prevents unwanted oven operation by small children. The oven can be
set so that the control panel is deactivated or locked.
To set Child Lock To cancel Child Lock
1. Touch the "0" pad once. 1. Touch the "0" pad once.
(No beep sound is heard.) (No beep sound is heard.)
2. Touch the star t pad 5 times. 2. Touch the Star t pad 5 times.
(Beep sound is only heard after the (Beep sound is only heard after
5th touch.) the 5th touch.)
Automatic Popcorn
Place the popcorn package (3.5 oz) onto a microwaveable dish in the oven and
close the door. Popcorn Reg: When the popcorn pad is touched,
the display will show "POP"
1. Touch the popcor n pad.
When the Start pad is touched, the
display will count down the cooking
time of 3:40 and will beep 5 times
2. Touch the Star t pad. when cooking is completed.
Notes:
1. Microwave popcorn bag should be at room temperature.
2. Use only 1 package (approx. 3.5 oz) at a time. Follow package instructions.
Do not increase quantity.
3. Use only a microwaveable popcorn package in the microwave oven.
4. Do not try to pop unpopped kernels.
5. Do not leave the oven unattended while popping popcorn. If the popcorn does not pop suf-
ficiently, do not press the Popcorn pad again as the popcorn may burn. Check the popcorn
bag for cooking instructions.
6. When opening the package, face it away from you to avoid contact with any steam release.
7. Popcorn popping devices are not recommended for use with this feature.
Start
Start
Popcrn
Reg
Start
The display will show "LOC" The display will return to the present time.
MHM-6TP manual.qxd 2003.11.10 14:51PM Page 10
Page 11
English
10
Beverage/Soup
Use the Beverage/Soup feature to heat up to 3 mugs (9 oz per mug) of
beverage or soup.
Note: Up to 3 mugs of beverage can be heated. Heating time is as follows:
1 MUG(CU P1):2 Min., 50 Sec. Example: To select 2 mugs, touch the
2 MUGS(CU P2):5 Min., 05 Sec. Beverage/Soup pad 2 times;
3 MUGS(CU P3):7 Min., 55 Sec. "CU P2" will appear in the display
1. Touch the Beverage/Soup pad repeatedly
until the desired number of mugs When the start pad is touched, the
appear in the display window. oven will start heating. The display
will count down remaining heating
time and will beep 5 times when
cooking is complete.
2. Touch the Star t pad.
Potatoes
Place 1-3 medium size potatoes in the oven and close the door.
1. Potato (PO 1): 5:00
2. Potatoes (PO 2): 7:30
3. Potatoes (PO 3): 10:00
When the potato pad is touched, the
display will show "PO 1".
1. Touch the potato pad once for When the start pad is touched the
each potato. display will count down the
remaining cooking time in minutes
and seconds and will beep 5 times
when cooking is completed.
2. Touch the Star t pad.
Beverage
Soup
Start
Potato
Start
MHM-6TP manual.qxd 2003.11.10 14:51PM Page 11
Page 12
11
English
45 Sec/Quick-On
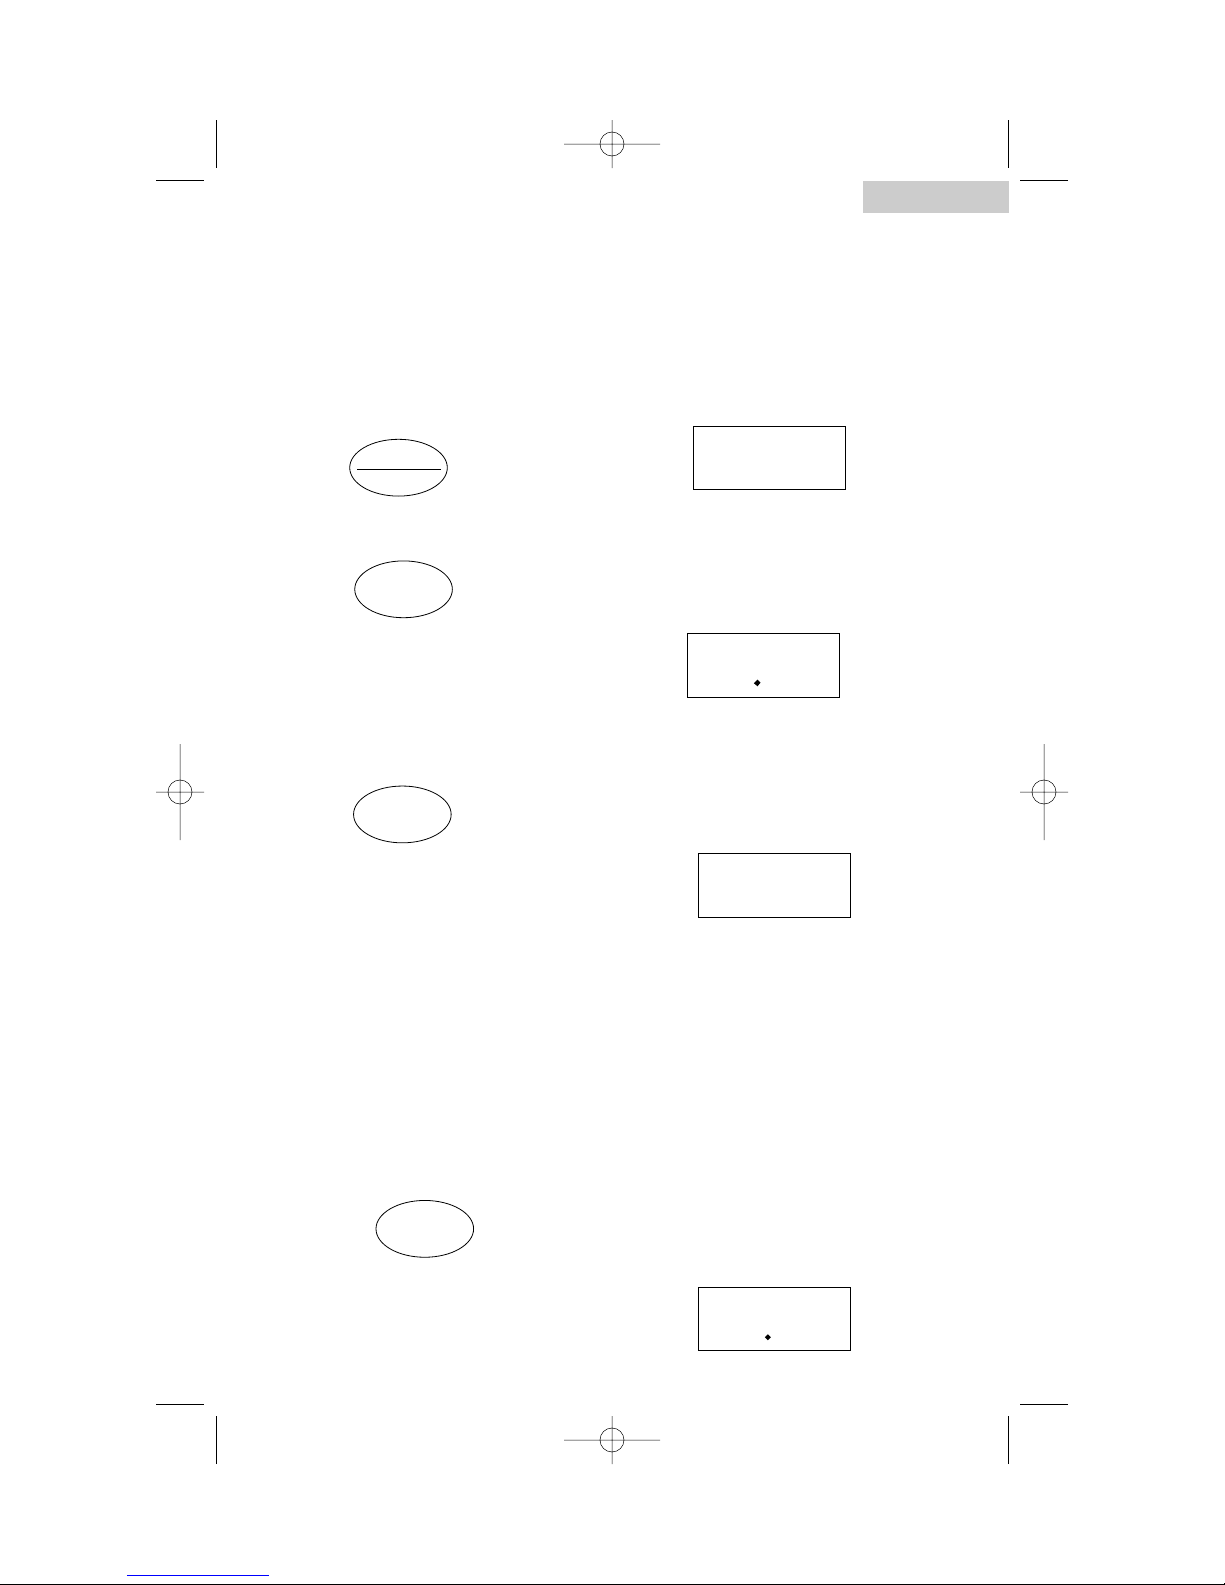
This simplified control lets you set and start microwave cooking up to 2 minutes, 15
seconds by just pressing 2 keypads. The power level is always set to HI(maximum
power) for Quick-On cooking.
1 Touch (P1): 0:45 When the 45 Sec/Quick-On pad is
2 Touches(P2): 1:15 touched, the display will show "P1".
3 TOUCHES(P3): 2:15
1. Touch the 45 Sec/Quick-On When the start pad is touched, the
pad 1-3 times display will count down the
remaining cooking time in minutes
and seconds and will beep 5 times
when cooking is completed.
2. Touch the Star t pad.
Reheating (Dinner Plate)
Use the Dinner Plate feature to reheat precooked foods from the refrigerator.
Example: For regular amount of
food, touch the Dinner Plate pad
once. "rE G" will be displayed.
1. Touch the Dinner Plate pad once for regular
amount, twice for smaller amount and three
times for a larger amount of food.
REGULAR: A regular amount of food; Approx. 9oz (for example, 4oz sliced meat or
poultry, 3oz potato or rice and 2oz vegetables or equivalent.)
SMALL: A smaller amount of food; Approx. 6oz
BIG: A larger amount of food; Approx. 12oz
Regular(rE G) 3:15 Small(SAL): 2:30 Large(bl G): 3:40
When the Start pad is touched, the
display will count down the
remaining cooking time in minutes
and seconds and will beep 5 times
when cooking is completed.
2. Touch the Star t pad.
45 Sec
Quick-On
Start
Dinner Plate
Start
MHM-6TP manual.qxd 2003.11.10 14:51PM Page 12
Page 13
English
12
Auto Weight Defrost
Auto Weight Defrost lets you easily defrost foods by eliminating guesswork in
determining defrosting time. The minimum weight for Auto Weight Defrost is 0.1 lb.
The maximum weight is 4.0 lbs. The Defrosting rate is 6 minutes, 30 seconds per
pound of food to be defrosted. Follow these steps for easy defrosting.
If additional defrosting is needed, repeat for a short time, or until defrosting is
complete. See DEFROST CHART on page 19.
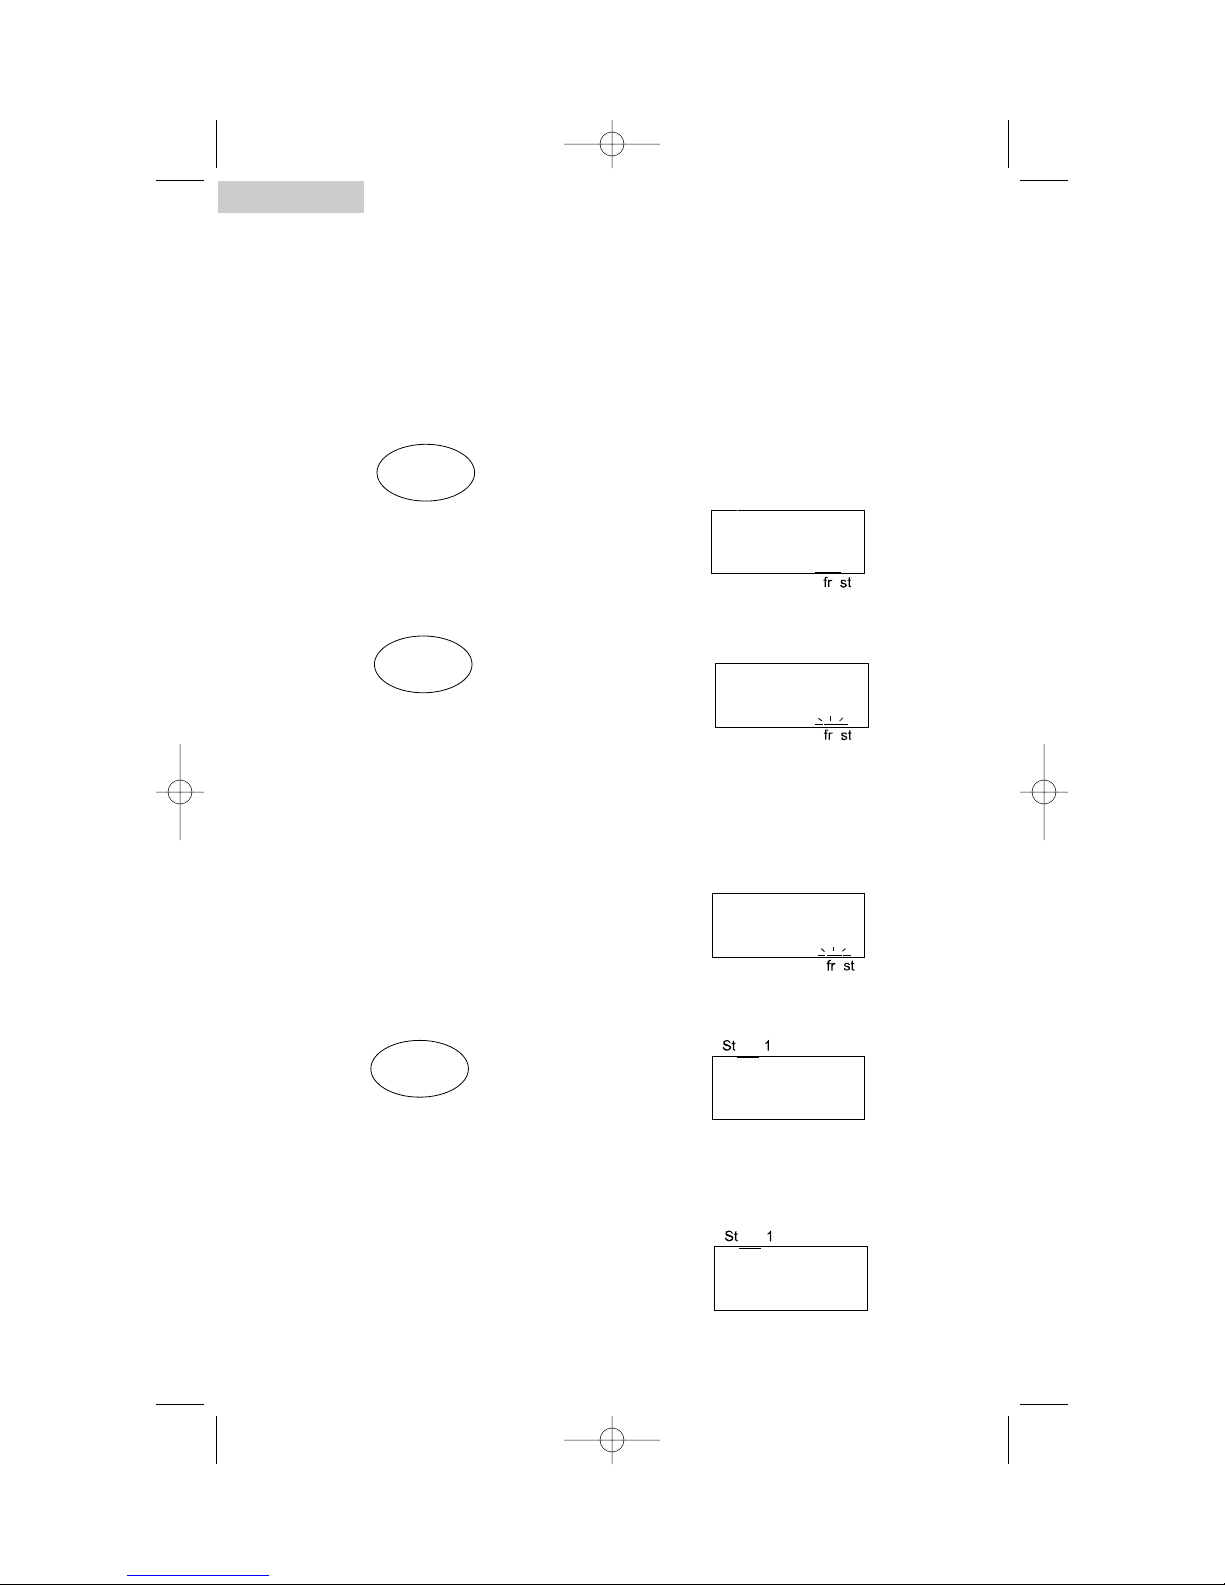
The display will show "dE F2" and
the DEFROST indicator will light.
1. Touch the DEFROST (Med) pad.
2. Enter the food weight. Example: To select 0.8 lbs, touch "8"
Range: 0.1 lb to 4.0 lb.
3. Touch the Star t pad.
When the start pad is touched, the
defrost indicator will blink, the
display will count down the
remaining defrosting time in minutes
and seconds and will beep 5 times
when defrosting is completed.
Time Cooking in One Stage
Use the 10 key pads (number pads) to
select a cooking time. The display will show "0"
1. Touch the TIME pad. Example: To set the cooking time to
"13:40", touch "1","3","4" and "0"
in sequence.
2. Enter the cooking time.
DEFROST
(Med)
Start
Time
MHM-6TP manual.qxd 2003.11.10 14:51PM Page 13
Page 14
13
English
Enter a power level using the numbered pads (1-9). Note that touching the pad "1"
will produce a 10% power level, pad "2" will produce a 20% power level, etc.,
through pad "9" which will produce a 90% power level. If the selection is omitted,
the oven will automatically cook at full power (100%). If you are using stage
cooking, you may select power levels for each cooking stage.
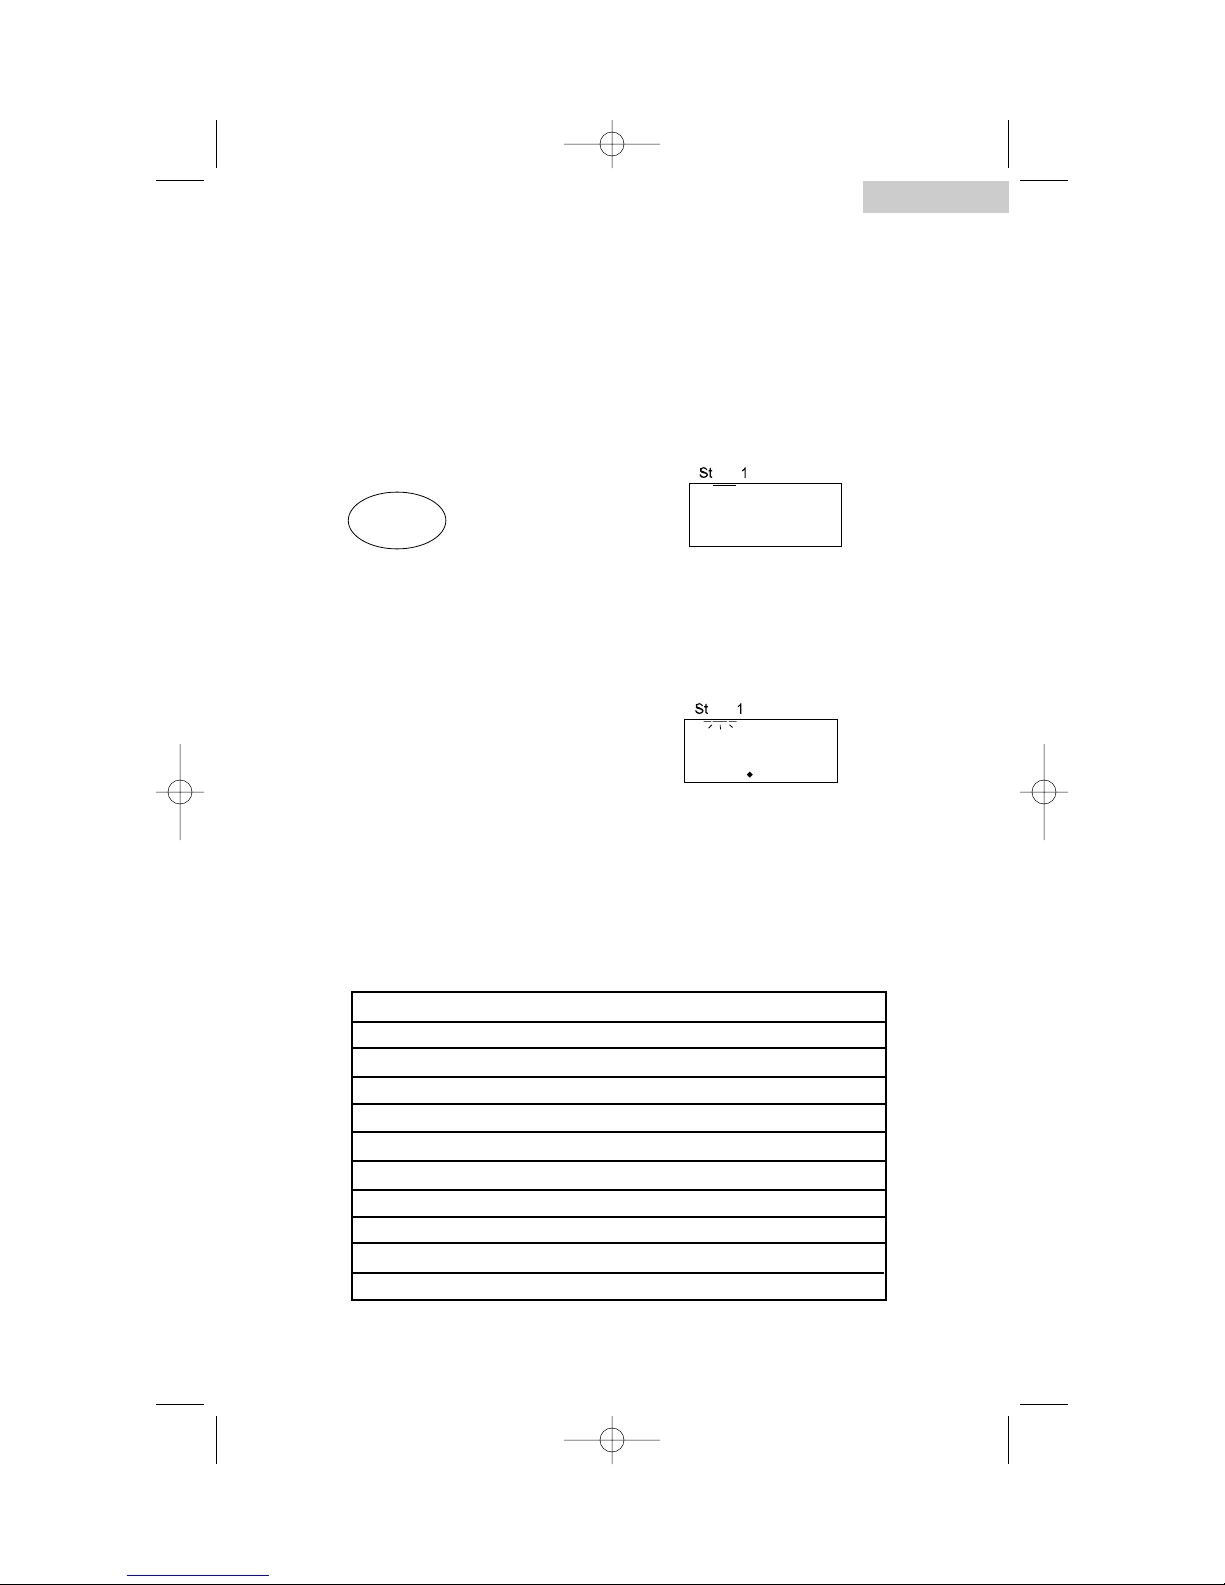
3. Enter the power level. If cooking Example: To select 30% power, touch
at full power (100%), omit this step the POWER LEVEL pad and then
and the oven will cook at full "3". The display will show "PL3".
(100%)power.
4. Touch the Star t pad. Stage 1 indicator will blink, the
display will count down the
remaining cooking time in minutes
and seconds and will beep 5 times
when cooking is completed.
2 Stage or 3 Stage Cooking
For two stage cooking, instead of performing step 4, repeat steps 1 through 3 and
then press the START pad.
Auto Weight Defrost and two stage cooking can be combined if the Auto Weight
Defrost is performed in stage 1.
Wattage Output Chart
Start
Press Power Level Wattage Output
none 10 700
99 630
88 560
77 490
66 420
55 350
44 280
33 210
22 140
11 70
MHM-6TP manual.qxd 2003.11.10 14:51PM Page 14
Page 15
14
English
Hold Warm
The hold warm feature can be used to keep food warm after microwave or
conventional cooking is completed.
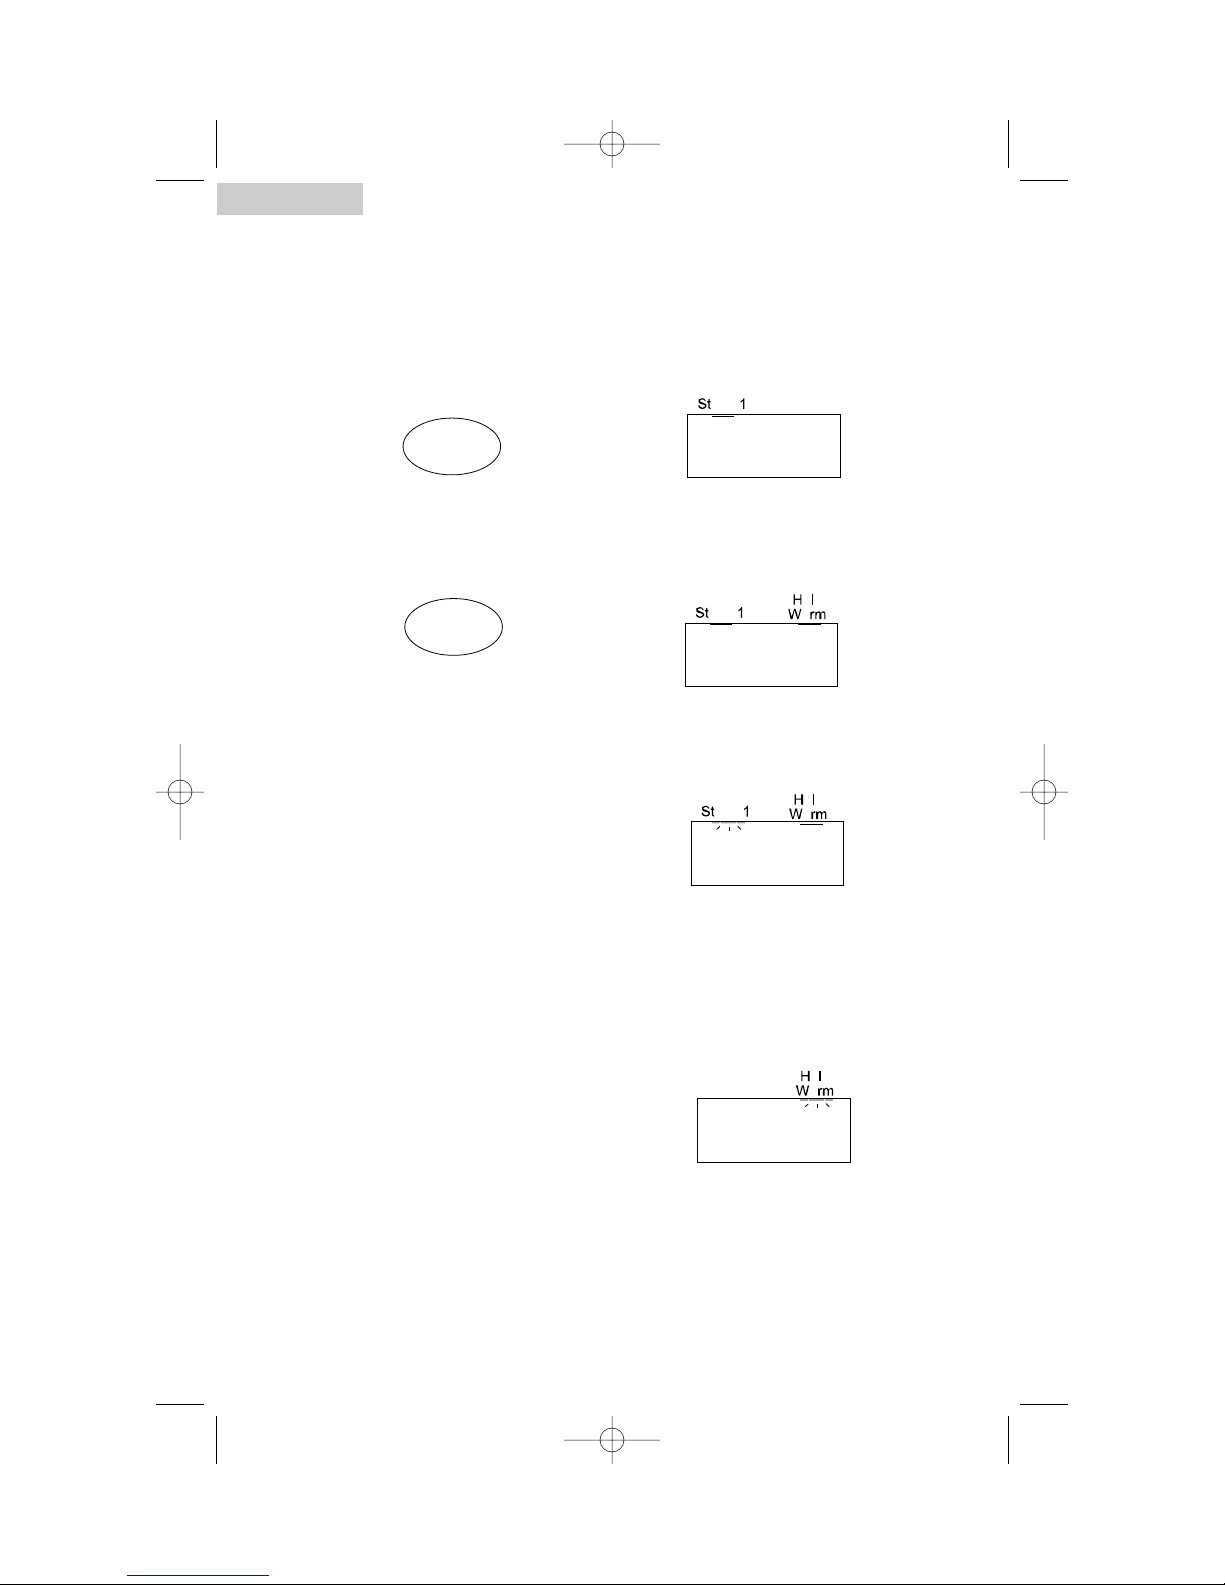
1. Program the desired power level and Example: Select a cooking time of
cooking time as previously instructed. "25:10".
2. Touch the Hold Warm pad for every Example: To select 20 minutes, touch
10 minutes of Hold Warm time desired the Hold Warm pad 2 times. The
(up to 30 minutes). Hold Warm indicator will light and
"20:00" will be displayed.
3. Touch the Star t pad; the oven will begin Example: The Hold Warm indicator
cooking as programmed in step 1. will light, the oven will begin cooking
and the display will count down the
remaining cooking time.
When the cooking is completed, the oven
will begin the Hold Warm mode as
programmed in step 2.
Notes: When cooking is completed, the
• The Hold Warm feature operates Hold Warm indicator will start
independently or together with stage 1. blinking. The display will count down
• To keep food war m after conventional the remaining Hold warm time.
When the Hold Warm time ends,
you will hear 5 beeps.
Start
Hold
Warm
cooking, omit step 1.
MHM-6TP manual.qxd 2003.11.10 14:51PM Page 15
Page 16
English
15
MicroFridge® Patented Circuitry
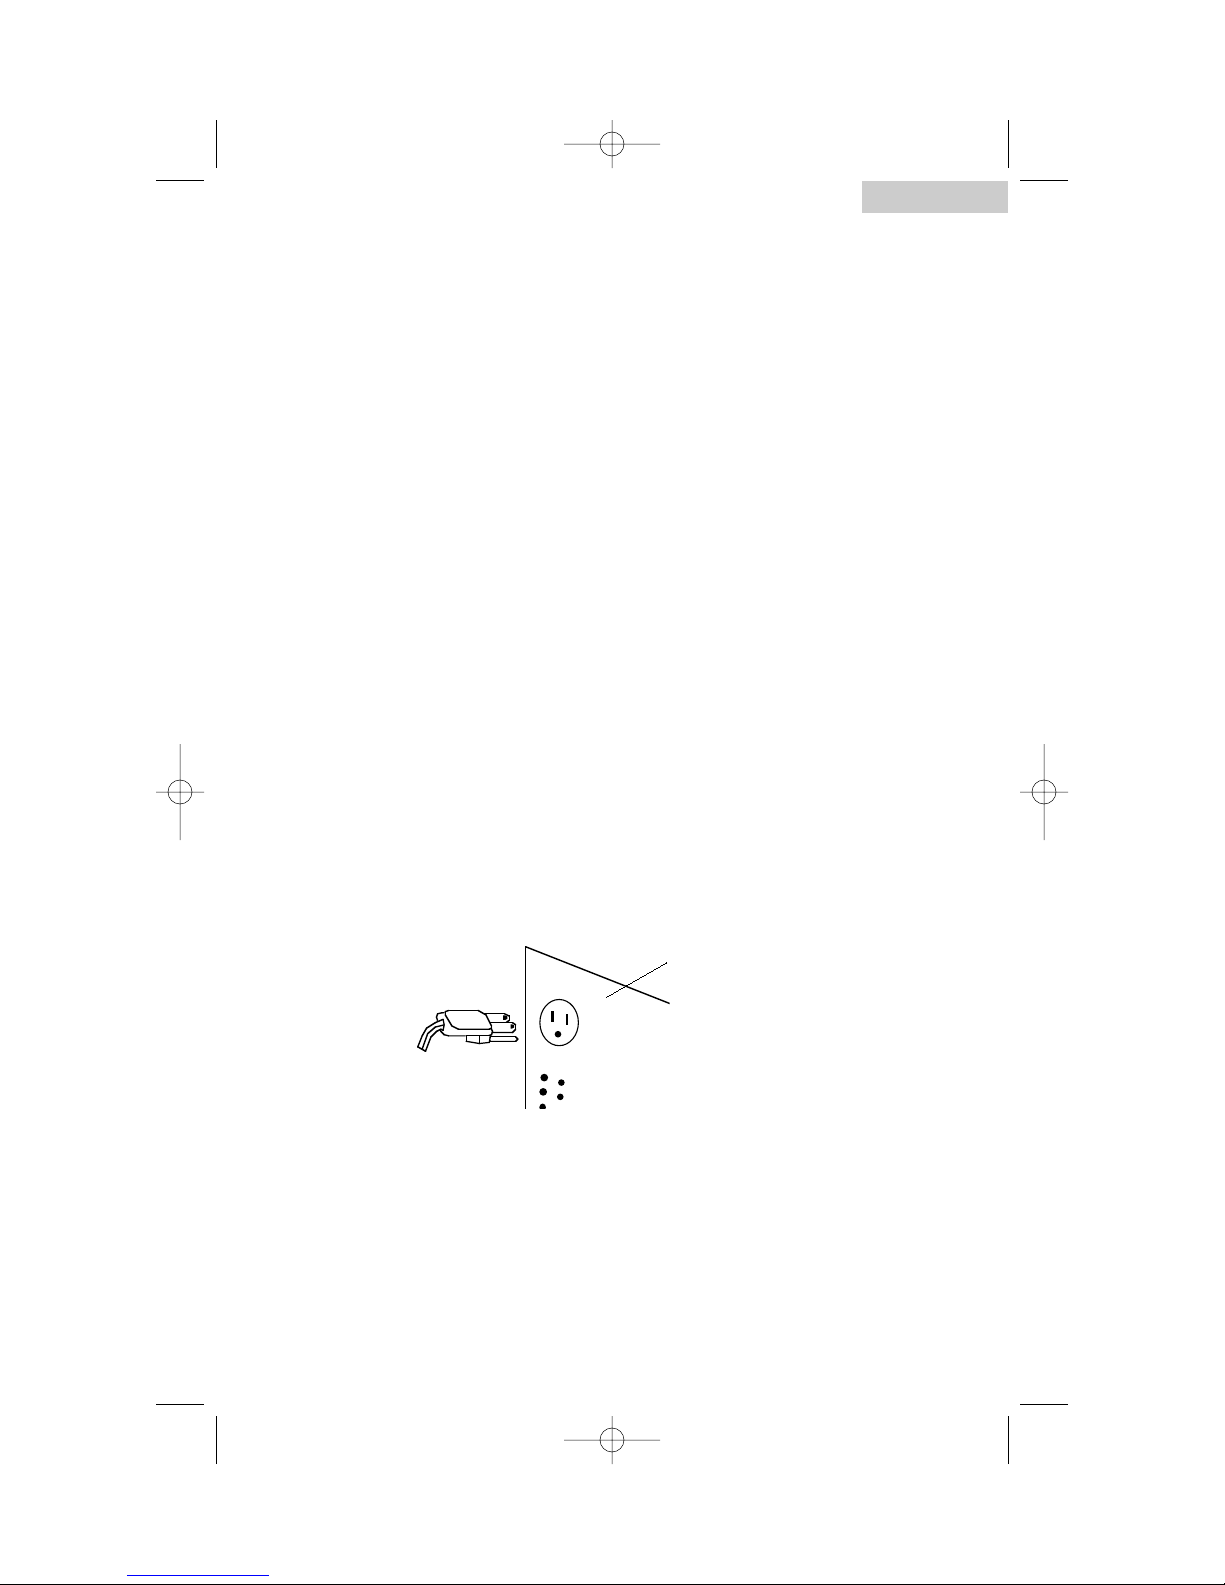
This microwave features Safe Plug™ technology to limit electrical draw from using 2
appliances simultaneously. Here, the MicroFridge® refrigerator gets plugged into
the outlet on the back of the microwave and the microwave gets plugged to the
electrical socket in the wall. When the microwave oven is turned on the refrigerator
will shut off. When the microwave cooking is done, turn off the unit and the
refrigerator will automatically turn itself on.
This patented circuitry is useful in places where the ampere usage is limited or
restricted. As either the refrigerator or the microwave oven is only being used at one
time it reduces the possible of the tripping the fuse.
Do not under any circumstances plug any other appliances to the
microwave besides an 115 voltage / 60 Hz. MicroFridge
refrigerator.
Microwave
To Stop the Oven while it is Operating
1. Press the Stop/Clear pad.
• The Pause indicator will start blinking.
• The oven can be restarted by pressing the start pad.
•Touch the Stop/Clear pad one more time to erase all instructions.
•You must enter new instructions
2. Open the door.
•You can restart the oven by closing the door and touching the Start pad.
MHM-6TP manual.qxd 2003.11.10 14:51PM Page 16
Page 17

16
English
Proper Microwave
Oven Care and Cleaning
Cleaning and Maintenance
Warning: To avoid electric shock always unplug your
microwave oven before cleaning. Ignoring this warning may
result in death or injury.
Caution: Before using cleaning products, always read and
follow manufacturer’s instructions and warnings to avoid
personal injury or product damage.
General: •Prepare a cleaning solution of 3-4 tablespoons of
baking soda mixed with warm water. Use sponge or soft
cloth, dampened with the cleaning solution, to wipe down
your microwave oven.
• Rinse with clean warm water and dry with a soft cloth.
• Do not use harsh chemicals, abrasives, ammonia,
chlorine bleach,concentrated detergents, solvents or
metal scouring pads. SOME of these chemicals may
dissolve, damage and/or discolor your microwave oven.
• Keep the inside of the oven clean. When food spatters
or liquid spills, wipe with a damp cloth.
• To prevent damage to the operating par ts inside
the oven, care should be taken so water does not sweep
into the ventilation openings.
• Care should be taken in cleaning the touch control panel.
If the control panel becomes soiled, open the oven door
before cleaning. Wipe the panel with a cloth dampened
slightly with water only. Dry with a soft cloth. Do not
scrub or use any sort of chemical cleaners. Close door
and touch STOP/CLEAR.
• If steam accumulates inside or around the
outside the oven door, wipe with a soft cloth.
This may occur when the microwave oven is operated
under high humidity conditions and in no way indicates
a malfunction of the unit.
• The turntable and oven cavity floor should be cleaned
regularly. Simply wipe the bottom surface of the oven and
dry. The turntable may be washed in mild sudsy water or
in the dishwasher.
MHM-6TP manual.qxd 2003.11.10 14:51PM Page 17
Page 18

English
17
Food Facts in Microwave Cooking
The quality of the food: Poor quality ingredients are rarely improved by any
method of cooking and this applies particularly to microwave cooking,
as the process is so fast.
Temperature: The colder the food before cooking, the longer it will take to cook.
Quantity: The cooking time relates to the amount of food in the microwave oven.
Do not overload the microwave. For very large quantities, it is better, and may be
quicker, to cook in two or more batches.
Density: The more porous the food, the faster it will cook. A light air y cake
mixture will cook faster than jacket potatoes.
Size and Shape: Uniform shapes cook more evenly. In an irregular shape, such
as a leg of lamb, the thinner parts will cook faster than the thick part. The smaller
the individual piece of food is (such as the vegetables in a soup) the quicker
the cooking.
Moisture: There is ver y little evaporation in microwave cooking so foods can be
cooked in the minimum water. Casseroles need about half the usual amount of
stock; vegetables need only two or three tablespoons of water.
Bones: Meat and poultr y bones conduct heat, therefor the areas around them will
cook faster than the rest of the meat. Insert a microwave meat thermometer into the
thickest part of the flesh away from any bone for an accurate grading.
MHM-6TP manual.qxd 2003.11.10 14:51PM Page 18
Page 19

18
English
Language of Microwave Cooking
Timings: As a rough guide most foods will require approximately a quarter to one
third of the conventional cooking time. If unsure, always underestimate the time
needed, check the result and continue cooking if needed. When doubling a recipe,
increase the cooking time by half and check the result.
Covering: Cover foods for the same reasons as in conventional cooking. This
retains moisture, speeds up cooking and helps to tender the foods such as
vegetables, casseroles and fish. Use a vented lid for foods with a high liquid
content, such as soups. This allows steam to escape and prevent the liquid boiling
over. Roasting bags may be used to prevent splattering on the oven walls.
Standing time: Due to the heat penetration it is important to let cooked food wait
a few minutes before serving.
Stirring: Food nearest the sides of the dish, cook faster than that at the center.
Stirring will speed up its cooking time and ensure even cooking.
Particularly sensitive foods, such as scrambled eggs and sauces, need frequent
stirring during cooking.
Turning: When thawing, heating or cooking large items, start off by placing
the food upsides down. Turn it over half way though the required time.
Arranging & Rearranging: the food at the outer edges of the turntable or dish
generally receives more microwave energy than that at the center, so place thicker
or large portions of the food to the outer edge. Rearranging, like stirring,
moves the food and encourages even cooking.
MHM-6TP manual.qxd 2003.11.10 14:51PM Page 19
Page 20

English
19
Cooking Reference
Meats/Poultry/Seafood
(Allow Standing Time after Cooking)
Food
Bacon
Hot Dog in Bun
Ground Beef
for Casseroles (1lb.)
Hamburger Patties
Ham Slice (1lb.)
Meatloaf (1
1
/
2
lbs.)
Boneless
Chicken Breasts
Chicken Pieces
Fish Fillets (1lb.)
Fish Steaks
Scallops & Shrimp (1lb.)
Power Level
High
70%
High
High
50%
High
High
High
High
70%
High
Time
3
1
/
4
to 1
1
/
4
min./slice
1 to 2 min.
4 to 6 min.
first side 2 min.second
side 1
1
/
2
to 2
1
/
2
min.
6 to 9 min.
13 to 19 min.
first side 3 min.
second side 2 to 4 min.
6 to 9 min./lb.
5 to 6 min.
7 to 9 min.
3
1
/
2
to 5
1
/
2
min.
MHM-6TP manual.qxd 2003.11.10 14:51PM Page 20
Page 21
20
English
Re-heating
(Allow Standing Time after Re-heating)
Food
Meat Slices
Non-Stirrable Casseroles
Pie (1 slice)
Soup
Vegetables
Applesauce (4)
Baked Apples (4)
Chocolate
(melt one square)
Eggs Scrambled
Hot Cereal
Nachos
(large plate)
Power Level
50%
50%
High
High
High
High
High
50%
High
High
50%
Time
1 to 3 min./slice
1 serving 5 to 8 min.
2 servings 9 to 12 min.
20 to 40 min.
1 serving 2
1
/
2
to 3
1
/
2
min.
2 servings 4
1
/
2
to 5
1
/
2
min.
1 serving
3
/
4
to 1
1
/
2
min.
2 servings 1
1
/
2
to 2
1
/
2
min.
7 to 10 min.
4 to 6 minutes
1 to 2 min.
1
1
/
2
to 1
3
/
4
min.
1 serving 1
1
/
2
to 5 min.
1
1
/
2
to 2
1
/
2
min.
MHM-6TP manual.qxd 2003.11.10 14:51PM Page 21
Page 22

English
21
Troubleshooting
Questions and Answers:
Q. Accidentally running of microwave oven without any food in it.
Is it damaged?
A. We do not recommend operating the microwave oven
without any food, however, running the oven empty for a shor t time
will not damage the oven.
Q. What if oven does not turn on?
A. Check the following:
1) Is the oven plugged in securely? Remove plug from the outlet, wait 10
seconds and reinsert.
2) Check circuit breaker or fuse. Reset circuit breaker or replace fuse if it is
tripped or blown.
Q. Can the oven be used with the glass tray removed?
A. No. The glass tray must be positioned correctly in the
oven before cooking.
Q. Why does warm air come from the oven vents and steam accumulates on
the oven door?
A. This is due to heat being given off from food cooking in the oven cavity.
The warm air is carried out of the oven by the airflow pattern in the oven.
There are no microwaves in the air. The oven vents should never be
blocked during cooking. During the cooking time, steam is given off from
the food. Most of the steam is removed from the oven by the air;
which circulates in the oven cavity. However, some steam will condense on
cooler surfaces such as the oven door. This is normal.
Q. My microwave causes interference on my TV. Is this Nor mal?
A. Some Radio and TV interference might occur when you cook with the
microwave oven. This interference is similar to the interference caused by
small appliances such as mixers, vacuums, blow dryers, etc. It does not
indicate a problem with your oven.
Q. Can TV dinner trays be placed in the oven?
A. Only TV dinners labeled microwave safe are recommended for this oven.
Make sure foil covers are removed from top of container.
MHM-6TP manual.qxd 2003.11.10 14:51PM Page 22
Page 23
22
English
MicroFridge® with Safe Plug™, a Division of Mac-Gray Corporation
Microwave Oven and Refrigerator/Freezer Residential Limited Warranty
MicroFridge® with Safe Plug™ is pleased to provide a comprehensive warranty on these
products. MicroFridge® with Safe Plug™ takes pride in its product and manufacturing
standards and warrants its products and parts against defects in materials or workmanship to
the original purchaser.
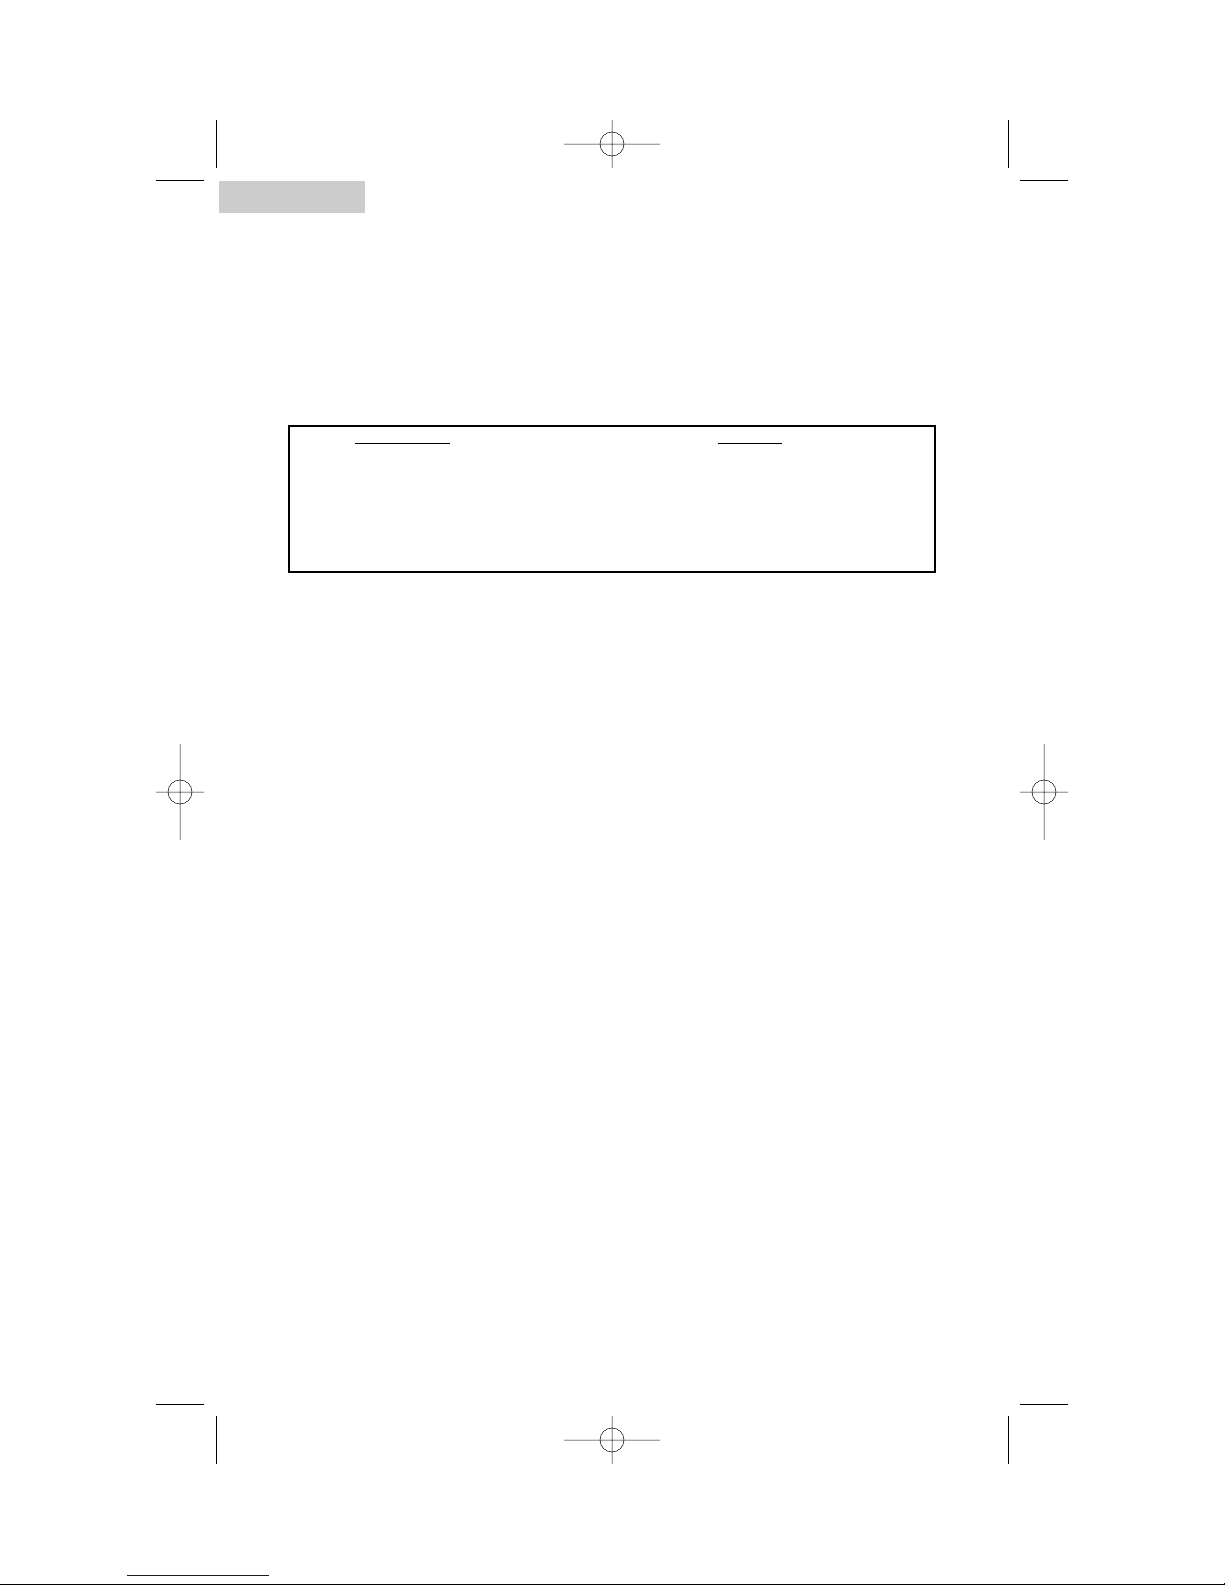
Subassembly Duration
- Microwave oven magnetron 2 years
- Refrigerator/freezer sealed system
and compressor 2 years
- Microwave oven and
refrigerator/freezer mechanical components 1 year
All requests for service should be directed to Customer Service at MicroFridge® by calling
1-800-637-7567. MicroFridge® offers a quick response customer service program.
Customer service will diagnose the problem and either replace or the original purchaser will
carry-in the appliance to an authorized service provider for repair, at the discretion of
MicroFridge®.
MicroFridge® with Safe Plug™ warranty services are performed by MicroFridge® autho-
rized service providers. MicroFridge® expects prompt, courteous and efficient service.
MicroFridge® further expects that all authorized service providers will make every reasonable effort to enhance the image and reputation of MicroFridge® and its products.
Inadequate service or customer dissatisfaction should be promptly reported to MicroFridge®.
Damage initiated by spark fires caused by using inappropriate material inside the microwave
oven is specifically excluded from this warranty. MicroFridge® assumes no liability and
does not guarantee or warrant any repairs and/or replacement parts not supplied or performed
by an authorized service provider, nor any 50/60 cycle or 60/50 cycle conversions, damage
caused by failure to follow the owner’s manual as to adjustments and/or maintenance, customer adjustments that are not covered in the instruction booklet, broken or marred cabinet,
misuse, neglect, accident, fire, flood or other acts of nature.
THIS WARRANTY WILL BECOME INVALID IF ANY SERIAL NUMBER ON THE
PRODUCT IS ALTERED, REPLACED, DEFACED OR MISSING. THIS WARRANTY IS
FOR MICROFRIDGE® PRODUCTS PURCHASED AND USED IN THE UNITED
STATES EXCEPT FOR UNITED STATES POSSESSIONS AND/OR DOMINIONS OF
THE UNITED STATES.
This is the entire MicroFridge® warranty and it may not be changed or amended by any person, agency, distributor, dealer, or company. MicroFridge® assumes no liability and indeed
specifically denies responsibility for any consequential damages beyond the repair or replacement of the product or its components.
The warranty period begins on the date of sale and proof of that date (evidenced by an original sales slip or bill of sale) will be necessary to initiate a warranty claim.
MICROFRIDGE® WITH SAFE PLUG ™, A DIVISION OF MAC-GRAY CORPORATION
10 Walpole Park South, Walpole MA 02081 1-800-637-7567
MHM-6TP manual.qxd 2003.11.10 14:51PM Page 23
Page 24
English
115V, 60 Hz
Made in China
MicroFridge®
10 Walpole Park South
Walpole, MA 02081
Printed in China
MHM-6TP
Issued: May-03
MW-9999-09
IMPORTANT
If you have a problem with this product, please contact "MicroFridge®" at
1-800-637-7567
DATED PROOF OF PURCHASE REQUIRED FOR WARRANTY SERVICE
MHM-6TP manual.qxd 2003.11.10 14:51PM Page 24
 Loading...