

Page 1

CO Check+
Operating Manual
Micro Direct, Inc.
803 Webster Street
Lewiston, ME 04240
1-800-588-3381
www.mdspiro.com
Revision 7.0 MD January 2015
Page 2

1
Contents
Package Contents ................................ 2
Overview ............................................... 3
Operation .............................................. 3
Warning/Cautions................................. 5
Calibration ............................................ 6
Setting Environment Mode (Optional) 9
Battery Life ........................................... 9
Power Saving ........................................ 10
Cleaning ................................................ 11
Servicing ............................................... 11
Consumables ........................................ 12
Specifications ....................................... 13
Appendix A – CO Check+ and Smoking
Cessation .............................................. 15
Appendix B – CO Check+ and Environmental
Capture .................................................. 16
Page 3
2
Package Contents
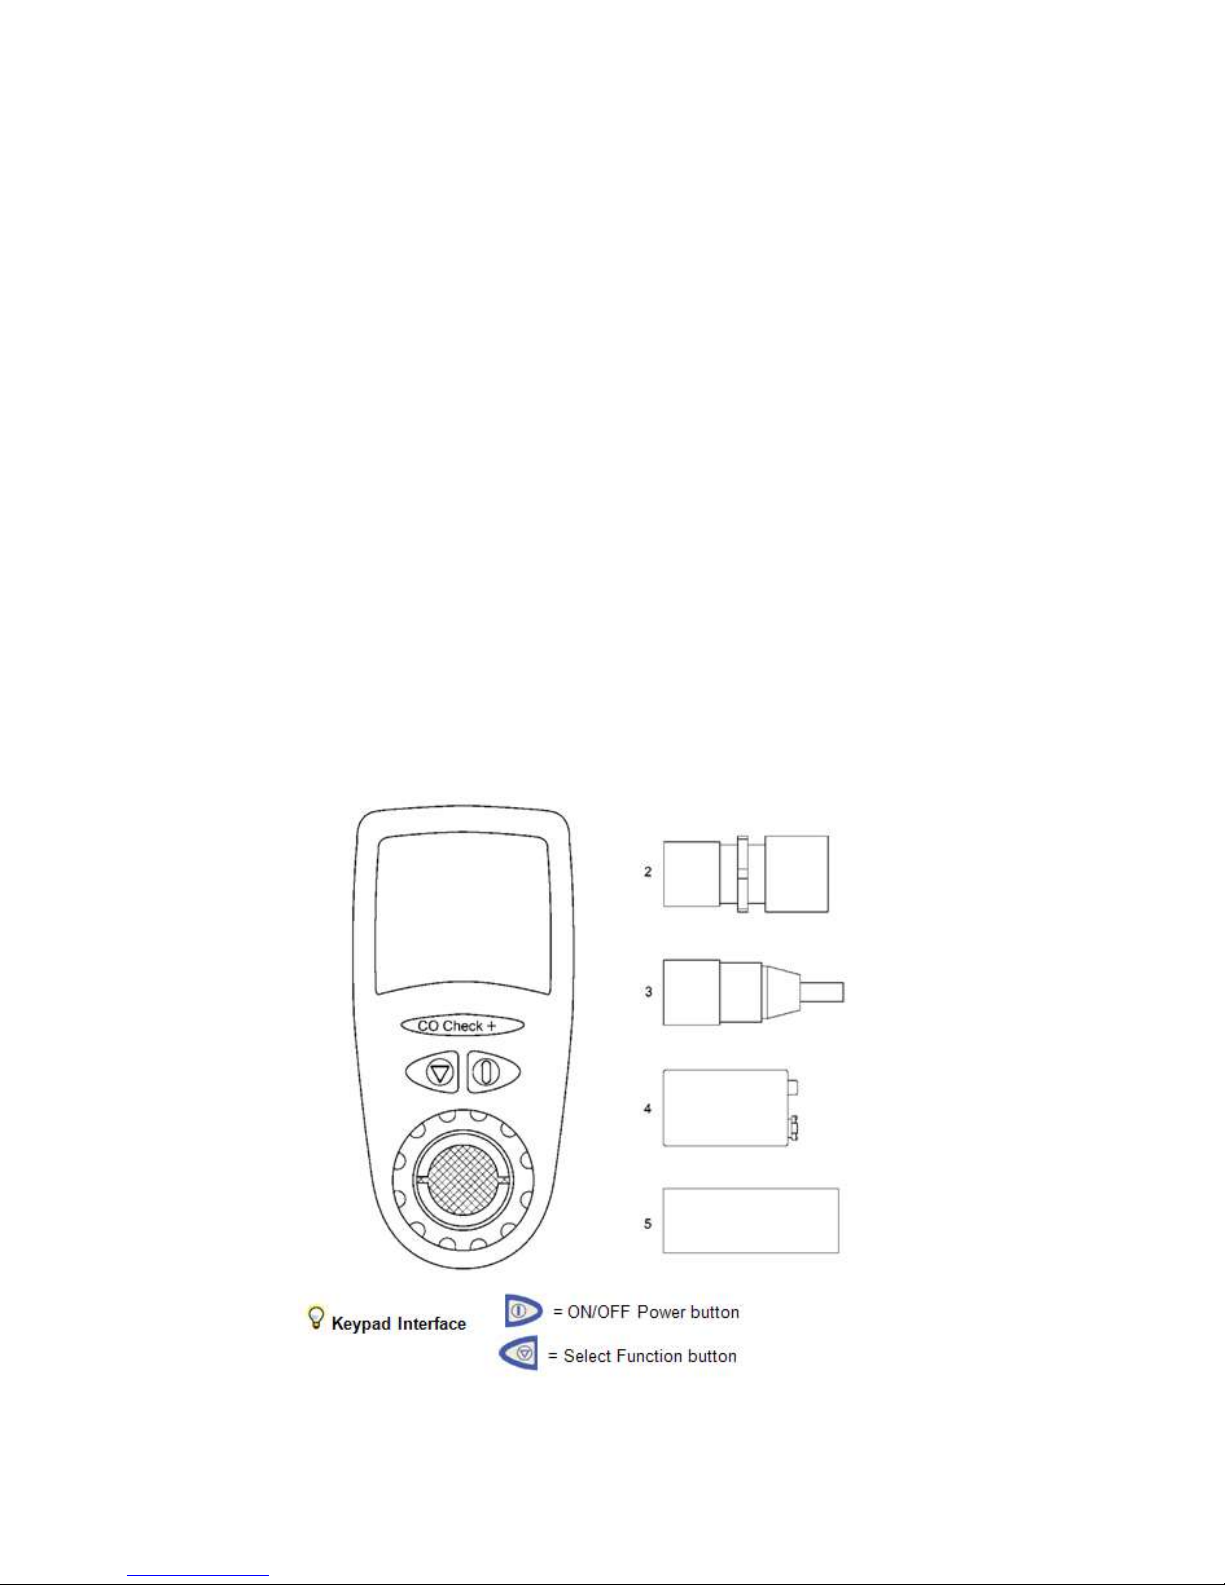
The CO Check+ is supplied with:
1. CO Check+ (Cat. No. CO10)
2. 22 mm plastic mouthpiece adapter
(#PSA1800)
3. 22 mm reducing connector for calibration
(#MEC1007))
4. 9 Volt Battery
5. 4 Disposable cardboard mouthpieces (#3301)
6. Soft shell carry pouch (# CS101)
7. Operating Manual
Page 4

3
Overview
The CO Check+ is a hand held portable battery operated
device used for measuring the carbon monoxide (CO)
concentration on the breath and calculating the
percentage of carboxyhemoglobin (%COHb) in the blood.
The CO Check+ is specifically designed as a screening
tool for smoking cessation. In smoking cessation clinics, it
is used for checking the subject’s progress and
compliance.
The CO Check+ is easy to use, very accurate and
requires a single breath into the device to display CO
results in parts per million (PPM) and the percentage of
carboxyhemoglobin (%COHb).
Operation
Insert the 9 volt battery (#4) supplied by removing the
battery cover and clipping the battery in place, replace the
battery cover. Insert the plastic mouthpiece adapter (#2)
followed by a cardboard mouthpiece (#5).
Turn the CO Check+ ON by pressing power key .The
device will display CO then the version number before
starting the countdown timer.
Page 5
4
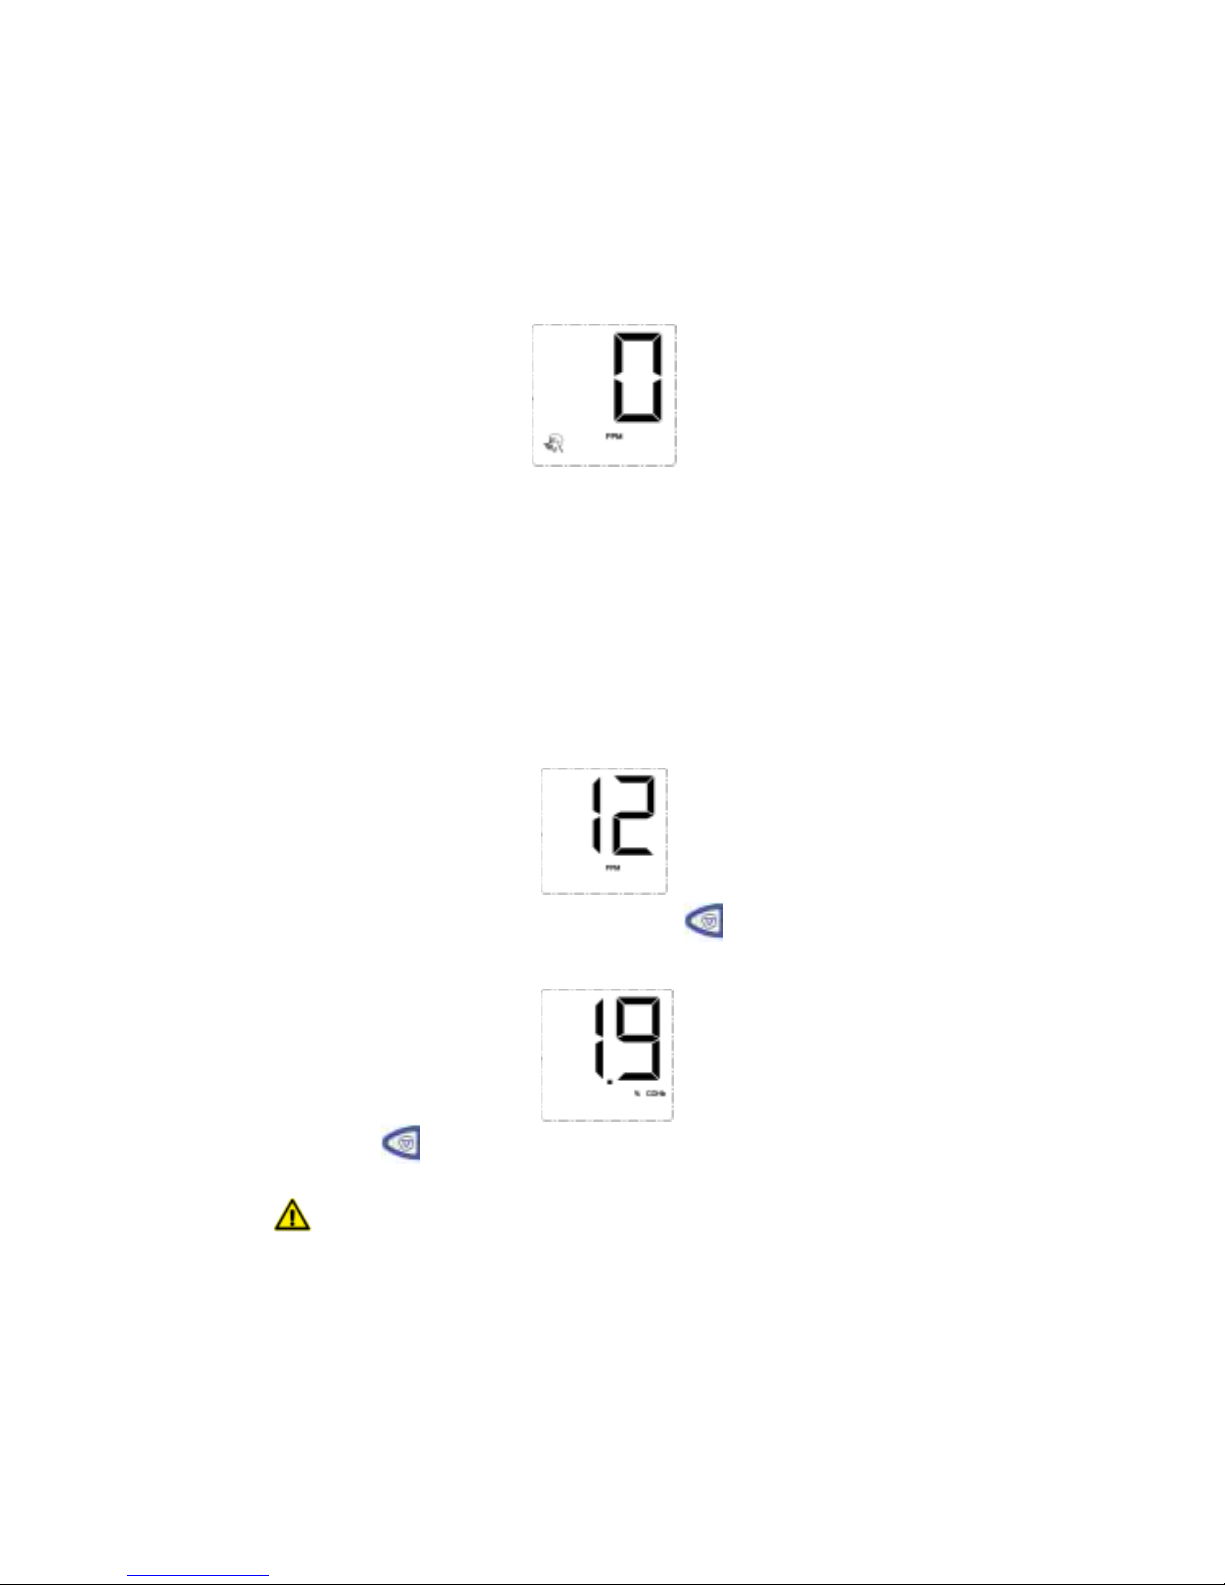
The “breath hold” timer will now count down from 15
seconds. Encourage the subject to hold the breath until
the unit beeps to start the test. The display will show the
blow icon.
The subject should place their lips around the cardboard
mouthpiece and blow gently and continue blowing until
their lungs are completely empty. CO is collected in the
last portion of the breath (alveolar breath).
Test Reading Display
The CO Check will beep and show the final reading in
PPM (parts per million).
By pressing the Select Function key the reading
changes to %COHb (carboxyhemoglobin).
Pressing again reverts back to PPM.
The maximum reading the CO Check+ can
measure is 99 PPM. Any reading above that will be
displayed as - - (over range).
Page 6

5
After examining the readings, the unit can either be
switched off using the ON/OFF Power key or another
measurement can be carried out by pressing the Select
Function key for at least three seconds.
To save the battery, the unit will switch OFF
automatically after three minutes if not used.
Warning/Cautions
If higher than expected levels of CO are displayed
this could be due to CO poisoning and medical
attention should be immediately sort.
The CO Check+ has a cross-sensitivity to hydrogen
(from some gastro-intestinal disorders) which may
affect the reading.
Cleaning with products that contain alcohol may
result in permanent damage to the sensor. (See
page 13 for non-alcohol wipes)
The battery should be changed when the word
‘BAT’ appears on the display.
The disposable cardboard mouthpieces are single-use
only. Re-use of these single use mouthpieces can
increase the risk of cross infection and the mouthpiece
should be disposed of after use by the patient.
Page 7
6
Calibration
The device should be recalibrated at least once every six
months. Calibration gas can be purchased from Micro
Direct, Inc., see page 13 for full ordering details.
Page 8
7
To calibrate the device, perform the following steps:
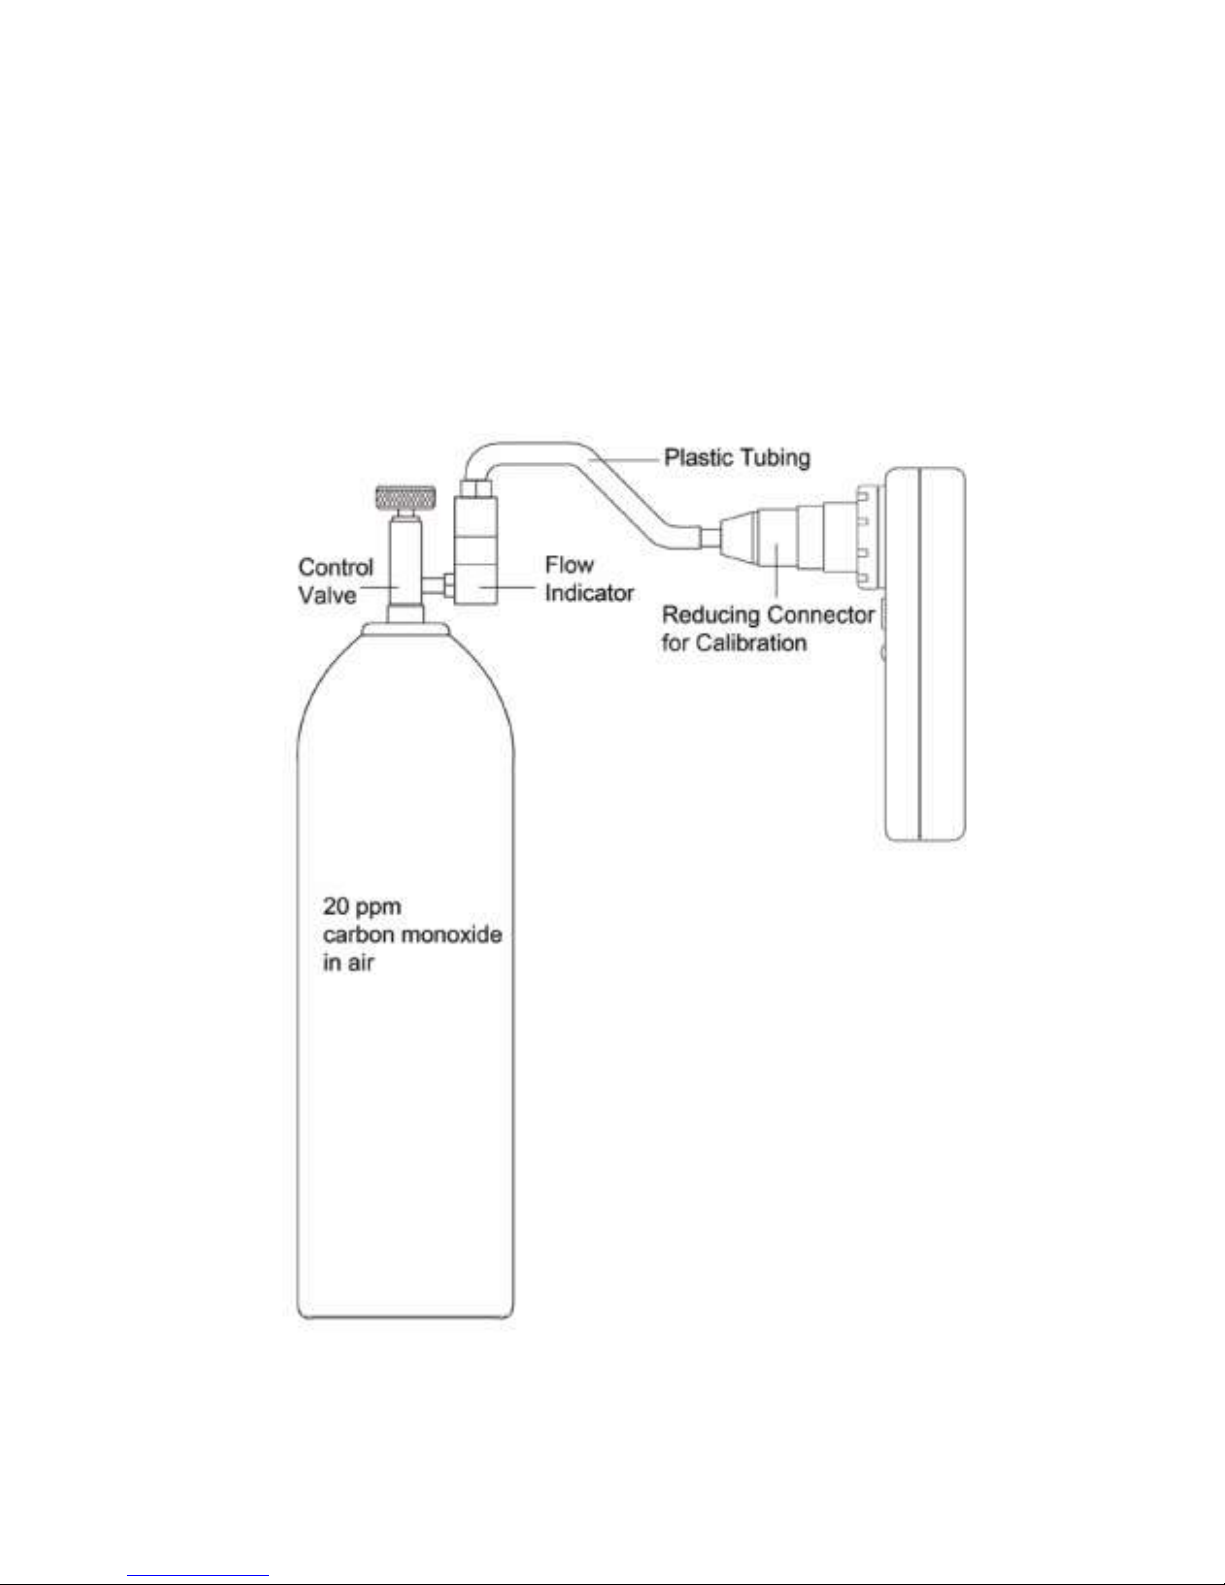
1. Connect the control valve (Cat No MC22) to the
20 ppm gas cylinder. (Cat. No. MC10) calibration
gas cylinder shown in the diagram above.
2. Connect the short plastic tubing reducing
connector (Cat No MEC1007).
3. Switch ON the device with the select key
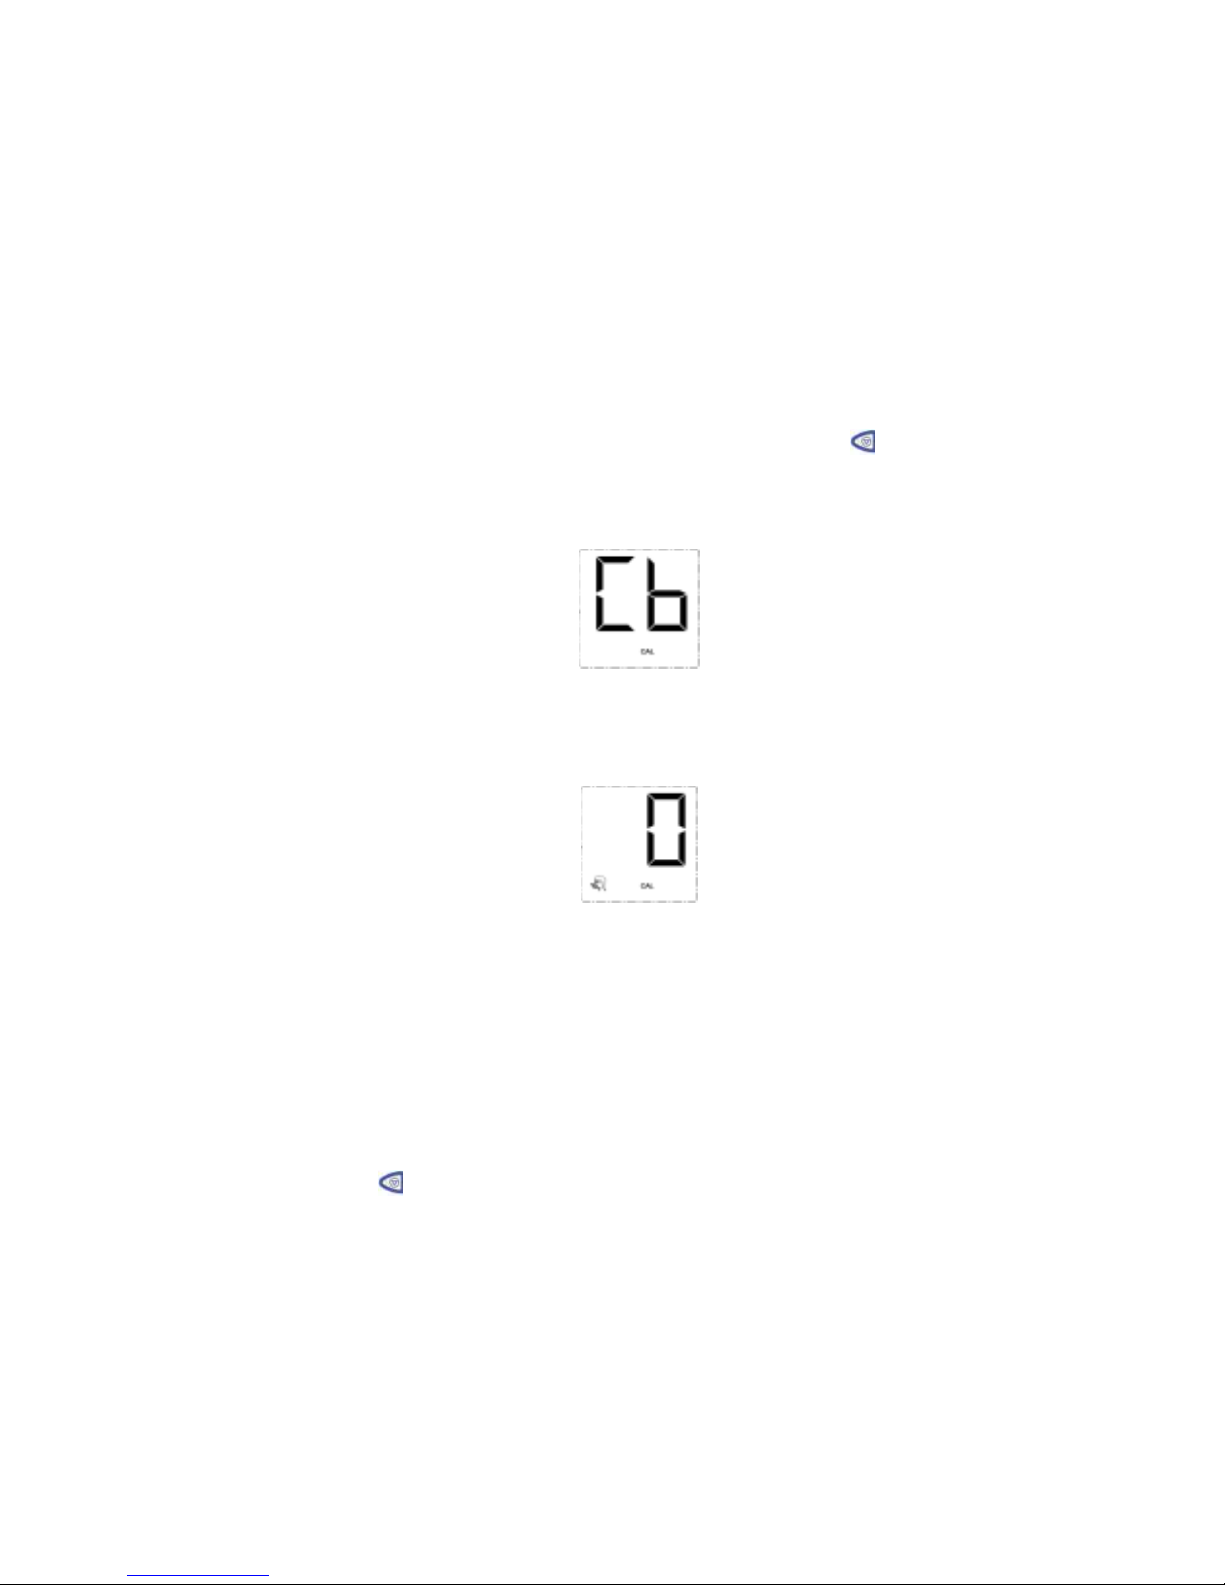
pressed until the device displays ‘Cb’. Release
the select key.
4. The device will countdown from 15 to 0 with CAL
symbol ON. It will then display the blow icon.
5. Attach the connector and turn the control knob
fully counter-clockwise until knob will not turn any
further. The supply of gas is .25 L/second.
6. Apply this flow until the device beeps after 20
seconds then turn the gas off. The device will
display the gas concentration reading.
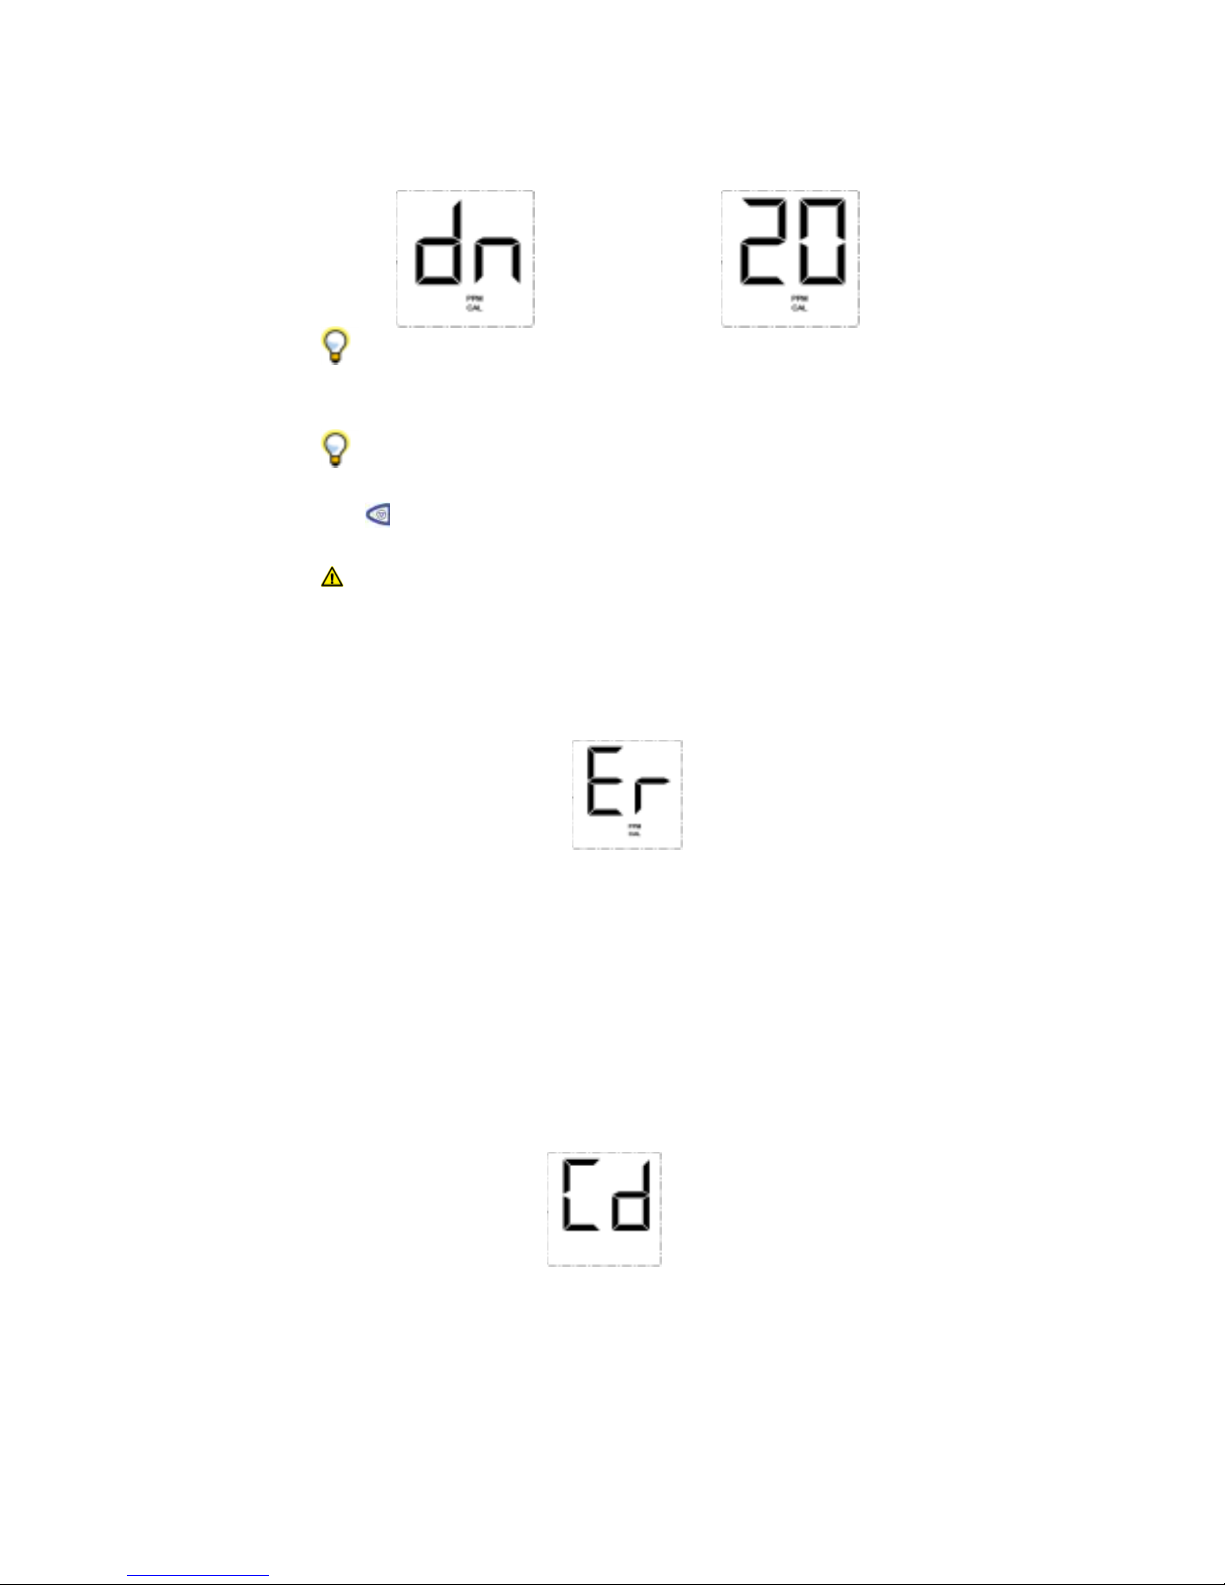
7. If the reading is not 20 ppm, press the select key
for at least 3 seconds to accept the new
calibration value. The device will say ‘dn’ (done)
and then will show 20 ppm.
Page 9
8
It is advisable to accept the calibration even
though it displays 20 ppm. This will reset the
calibration due timer.
Switch off the device if the calibration was
incorrectly performed. Do not press the select key
.
To prevent incorrect calibration, only the readings
within the range of 16-24 can be calibrated. An
‘Er’ (Error) message will be displayed if the
calibration is accepted for reading outside this
range.
8. Switch off the device; wait for a minute and it is
now ready for use.
If the device is not calibrated for six months, the device
will beep three times before countdown starts and will
display ‘Cd’ (Calibration due) for 3 seconds. Thereafter
the device will operate as normal but the reading will not
be guaranteed.
Page 10
9
Setting Environment Mode (Optional)
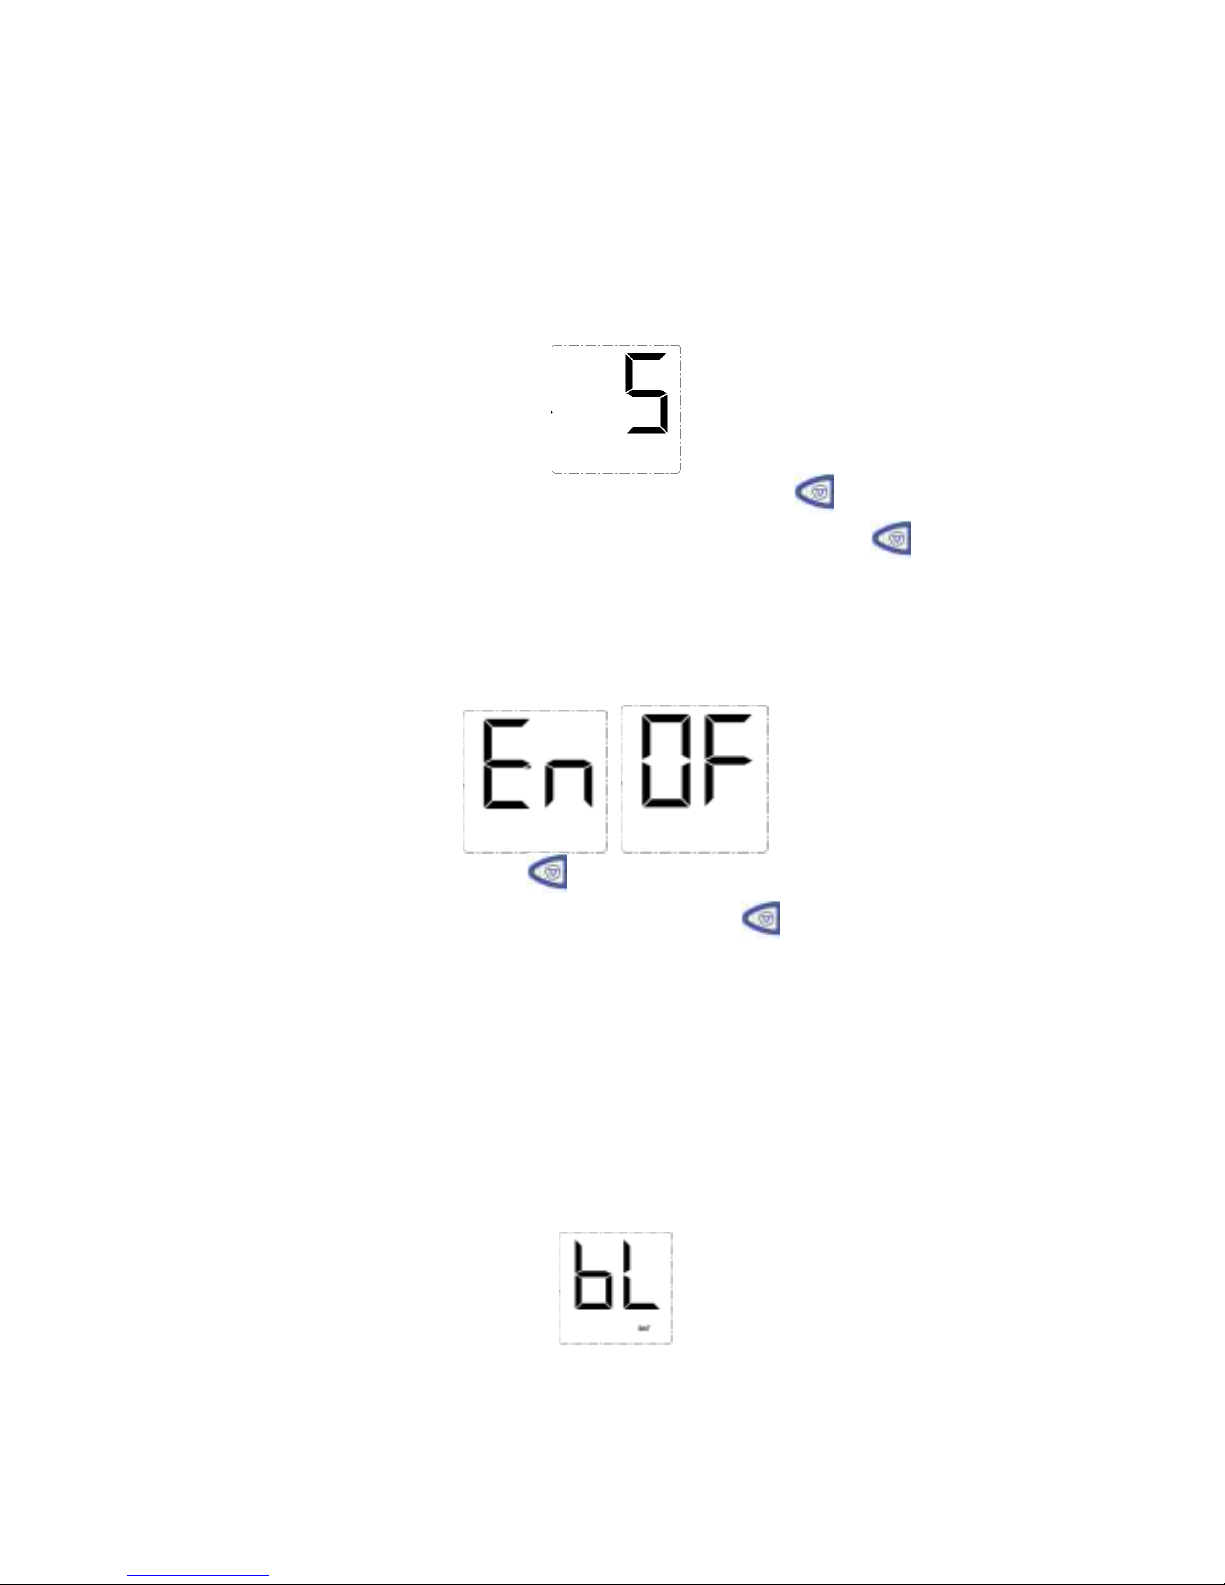
Environment reading on start-up can be enabled. Switch
ON the unit and wait for the countdown to begin. When
the number
5 is displayed, press the Select Function key
.
When
the unit beeps at 4, release the Select Function key
.
At the end of the countdown, the unit will display ‘En’ for 3
seconds followed by either ‘OF’ (Off)–
your current
setting.
Press the Select key
momentarily (< 0.5 sec), to
change the mode. Press the Select key
for more than
3 seconds to accept the mode,
‘On’ . Thereafter the unit
will restart with your selected setting.
Battery Life
The 9 volt battery should give at least 30 hours of
continuous use. When the battery is low, it will display ‘bL’
(battery low) for three seconds.
Page 11

10
The device can still be used, but it is advisable to replace
the battery.
It is recommended to use an alkaline battery.
The device will need recalibration after the
replacement of the battery. Duracell notification - alkaline
batteries can be safely disposed of with normal
household waste. Never dispose of batteries in fire
because they could explode.
If the battery is very low such that the reading is not
reliable, it will display ‘bd’ (battery dead) and will not
operate any more.
Power Saving
To save battery power, the device will automatically turn
itself off after three minutes of the last key press. Do not
remove the battery unless the device is not going to be
used for a very long time. Remember, calibration will be
required when the battery is reconnected.
To prevent the device from switching off, press the
select key within three minutes of last press or when
the reading is first displayed.
Page 12
11
Cleaning
The plastic mouthpiece adapter is recommended to be
replaced after approximately 250 tests. It can be cleaned
in mild detergent sterilization solution then rinsed with
water after use and left to dry thoroughly.
The device can be cleaned using non-alcohol wipes (see
page 13). Please be certain not to touch the surface of
the sensor or allow moisture to do the same.
Cleaning with products that contain alcohol may
result in permanent contamination of the sensor.
Servicing
If your unit requires servicing or repair, please contact
Micro Direct, Inc.
The CO Sensor should be replaced every two
years.
If the device starts with ‘Er’ (Error) message, it
should be returned for service.
[email protected]
Tel: 800-588-3381 or 207-786-7808
Page 13

12
Consumables
Catalog Number
Description
MC15
CO Calibration Kit
MC10
CO Replacement Tank (17 Liters)
MC22
Control Valve for Calibration
3301
Mouthpieces 100 per bag
PSA1800
Intermediate plastic adaptors 10 per
pack
CS100
Replacement of fuel cell, calibration,
battery and service
GC01
CO Guide chart
CS101
Soft shell carry pouch
48-70
Protex Disinfectant Wipe (100/canister)
FC50
Fuel cell for CO Check+
Page 14

13
Specifications
Gas Detected
Carbon Monoxide
Concentration Range
0 – 99 PPM
Detection Sensor Used
Electrochemical fuel cell
Sensitivity
0.1 PPM (0-10 PPM range); 1
PPM (10-99 PPM range)
Accuracy (repeatability)
±2%
Operating Temperature
41 - 95 degrees F
Operating Pressure
Atmospheric 10%
Operating Humidity
30% to 90% RH
Operating Altitude
Sea level to 6000 ft
Storage Temperature
68 - 158 degrees F
Storage Humidity
10% to 90% RH
Hydrogen Cross-Sensitivity
<12% at 68 degrees F
Sensor Life
2 years
Warranty
1 year
Sensor Drift
<2% per month
Display
Custom LCD
Power Supply
Single 9 volt battery
Weight
Approximately 5 ounces
Dimensions
5” x 2.5” x 1.25”
Page 15
14
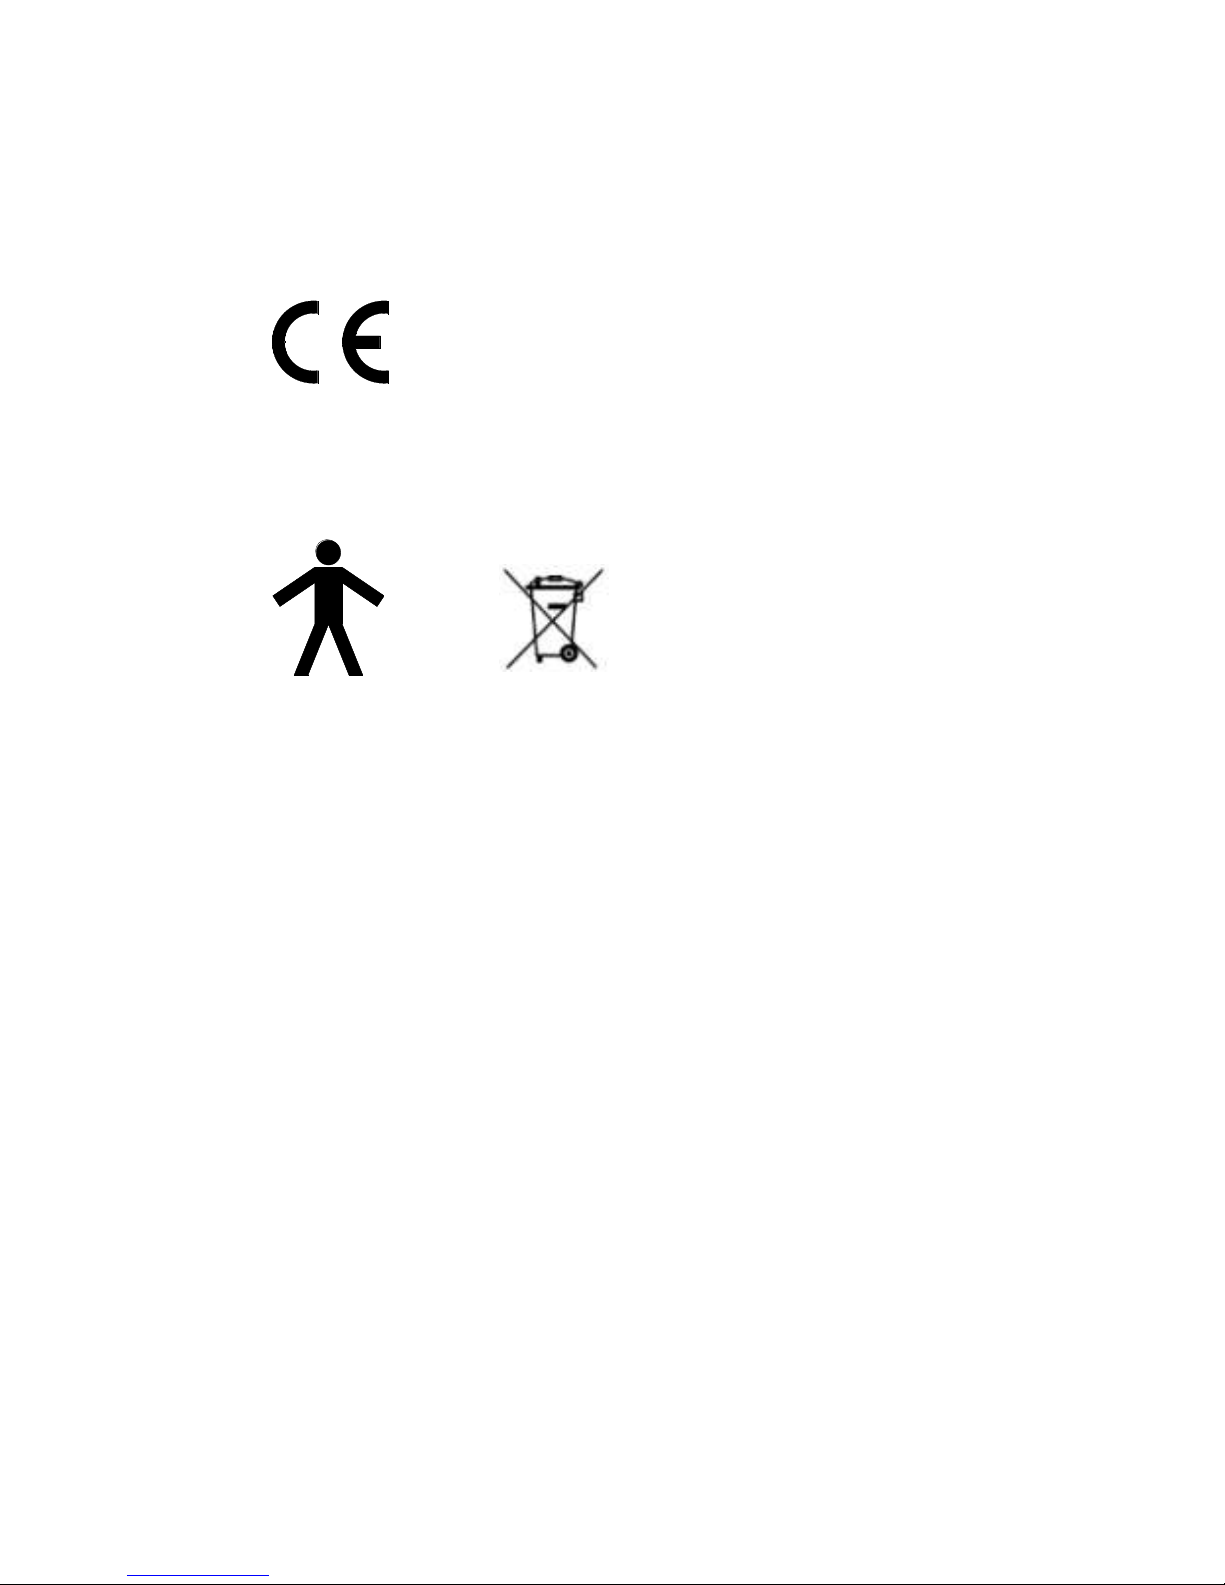
Symbols
In accordance with Directive
93/42/EEC
0120
Type B Device
Environment
This instrument complies with directive EEC89/336
electromagnetic compatibility but may be affected by
cellular phones and by electromagnetic interference
exceeding levels specified in EN 50082-1:1992
Page 16

15
Appendix A – CO Check+ and Smoking
Cessation
The CO Check+ (#CO10) is an innovative Carbon
Monoxide monitor designed specifically for use in
smoking cessation programs and clinics.
All patients attending a smoking cessation program
should have their smoking habits established and
checked with the CO Check+ at every visit. The results of
an initial test may sound alarming to many smokers but
within a few days of stopping, CO levels can drop to
normal and it is very encouraging for a smoker to see
this. CO monitoring is an extremely powerful tool for a
smoking cessation counselor, physician or respiratory
therapist.
Taking a test before a COPD patient stops smoking will
help you gauge their level of nicotine dependence, and
taking it after they have stopped will give them real proof
that what they are doing is working.
The best time to do a test is in the afternoon as CO levels
fall over-night and morning readings can sometimes give
misleading low results. High reading in the morning, on
the other hand, would be strong evidence of heavy
inhalation and high nicotine dependence.
One single breath of expiration into the CO Check+ will
give instant results in PPM and %COHb.
Page 17

16
Appendix B – CO Check+ and Environmental
Capture
When the Environmental reading is enabled, background
CO levels are taken into account when carrying out a
breath test. If the background levels are 10ppm for
example, then when the person is taking a breath test this
background reading of 10ppm will be taken into account.
For example, if the Environmental monitor is ON and a
reading of 10ppm is detected and the patient records
3ppm for example, then the measurement displayed will
be the higher value i.e. 10ppm.
Conversely, if the Environmental monitor is OFF, then the
measurement displayed will be value recorded by the
patient i.e. 3ppm.
 Loading...