

Page 1
MICROCOM CORPORATION
MODEL 405
BATTERY POWERED DIRECT THERMAL PRINTER
ADDENDUM
June 1994 Software Version 3.0
Page 2
Model 405 Addendum
1.1 SPECIAL FEATURES
! Over 10,000 linear inches of average density print from a single charge.
! Recharges completely in 14 hours. (reaches 90% charge in 10 hours)
! Removable battery pack increases printer height by only 2.25 inches.
! Uses common 6 volt lead acid batteries which are internally recharged when the printer
is connected to standard AC power.
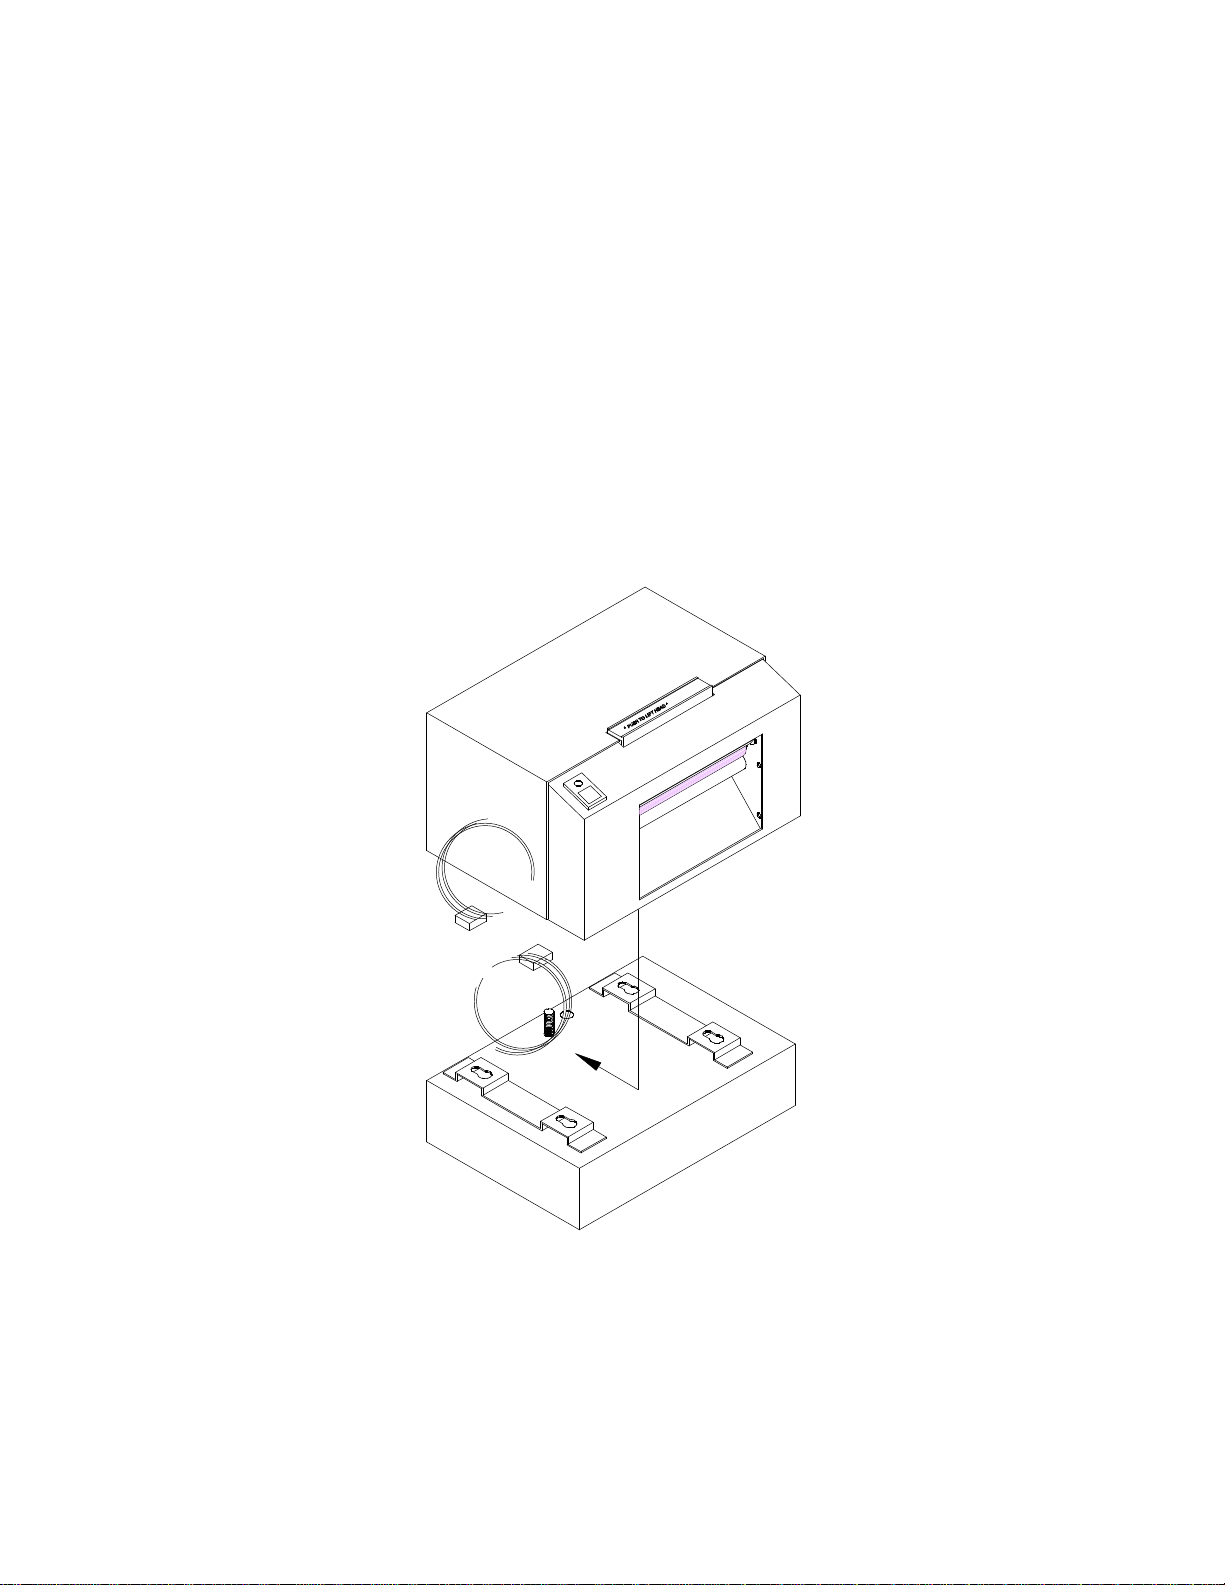
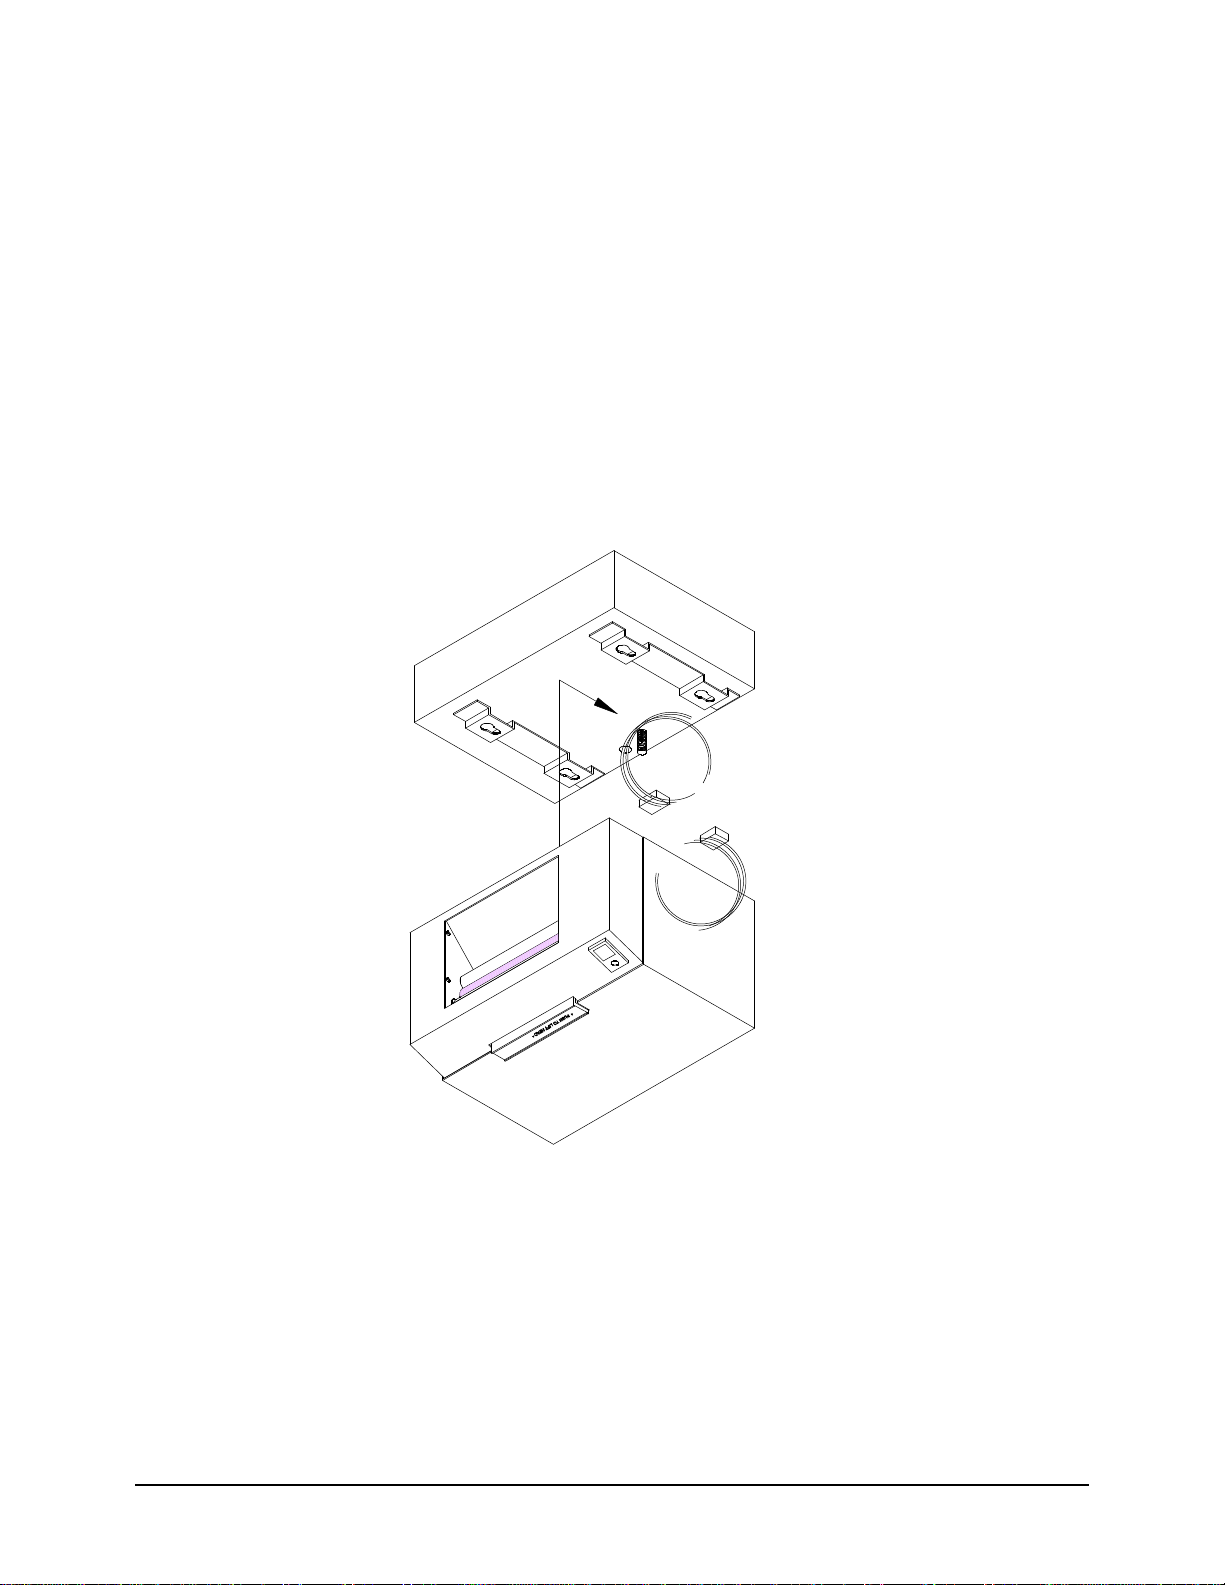
1.2 CONNECTING THE 405 PRINTER AND BATTERY PACK
1. Remove the battery pack and printer from the packing material.
2. Turn the printer upside down and set it on a soft surface.
3. Connect the power output from the battery pack to the printers input cable.
4. Pull the large screw on the battery pack while sliding the pack onto the printer.
5. Once the battery pack is fully locked into position, tighten the large screw.
6. Verify that the connecting cable is not protruding from the rear of the printer.
405 Addendum to 410 Operators Manual
1
Page 3

405 Addendum to 410 Operators Manual
1.3 SPECIAL STATUS LIGHT/TONE INFORMATION
The status light has different functions depending upon the mode of the printer. Table 1 shows
the relationship between the status light and the different modes.
Status Light/Tone
Light
Color
Green None All On-Line and ready to print
Green Double tone
Red None All Printer error:
Flashing
Red
Yellow None Tag/tear,
Tone Mode Meaning
All Battery is low, recharge the printer. At this
before print
Continuous
Tone
All The battery pack is too low for proper printer
Peel
point the battery is at approximately 10% of its
capacity and can print less than 1000
additional linear inches.
Caused by a paper-out condition or a
hardware failure. If paper is out, follow
instructions in section 2.3, otherwise turn
printer off and back on. If condition persists,
contact your service representative.
operation. The unit will remain in this mode
until the battery is recharged or the printer is
powered off.
Label present. Label is ready to be removed
from the printer mouth.
2
Flashing
Yellow
Flashing
Yellow
None Batch Printer is in standby mode and waiting for the
front panel button to be pressed.
None After
Paper-Out
Printer is waiting to continue processing. The
label button must be pushed twice to clear
yellow after loading.
Table 1
405 Addendum to 410 Operators Manual
 Loading...