

Microchip Technology AD1CON3, AD1CHS, AD1PCFG, AD1CSSL, ADC1BUF0 Family Reference Manual
...Page 1

Section 17. 10-bit Analog-to-Digital Converter (ADC)
HIGHLIGHTS
This section of the manual contains the following major topics:
17.1 Introduction..............................................................................................................17-2
17.2 Control Registers.....................................................................................................17-4
17.3 ADC Operation, Terminology and Conversion Sequence .....................................17-12
17.4 ADC Module Configuration .................................................................................... 17-14
17.5 Miscellaneous ADC Functions...............................................................................17-26
17.6 Initialization............................................................................................................17-51
17.7 Interrupts................................................................................................................17-53
17.8 Operation During Sleep and Idle Modes ............................................................... 17-54
17.9 Effects of Various Resets.......................................................................................17-55
17.10 Related Application Notes .....................................................................................17-56
17.11 Revision History.....................................................................................................17-57
17
10-bit Analog-to-Digital
Converter (ADC)
© 2007-2011 Microchip Technology Inc. DS61104E-page 17-1
Page 2

PIC32 Family Reference Manual
Note: This family reference manual section is meant to serve as a complement to device
data sheets. Depending on the device variant, this manual section may not apply to
all PIC32 devices.
Please consult the note at the beginning of the “10-bit Analog-to-Digital
Converter (ADC)” chapter in the current device data sheet to check whether this
document supports the device you are using.
Device data sheets and family reference manual sections are available for
download from the Microchip Worldwide Web site at: http://www.microchip.com
17.1 INTRODUCTION
The PIC32 10-bit Analog-to-Digital Converter (ADC) includes the following features:
• Successive Approximation Register (SAR) conversion
• Up to 16 analog input pins
• External voltage reference input pins
• One unipolar differential Sample-and-Hold Amplifier (SHA)
• Automatic Channel Scan mode
• Selectable conversion trigger source
• 16-word conversion result buffer
• Selectable Buffer Fill modes
• Eight conversion result format options
• Operation during CPU Sleep and Idle modes
Figure 17-1 illustrates a block diagram of the 10-bit ADC. The 10-bit ADC can have up to 16
analog input pins, AN0 through AN15. In addition, there are two analog input pins for external
voltage reference connections. These voltage reference inputs may be shared with other analog
input pins and may be common to other analog module references. The actual number of analog
input pins and external voltage reference input configuration will depend on the specific PIC32
device. Refer to the specific device data sheet for more information.
The analog inputs are connected through two multiplexers to one SHA. The analog input
multiplexers can be switched between two sets of analog inputs between conversions. Unipolar
differential conversions are possible on all channels, other than the pin used as the reference,
using a reference input pin (see
The Analog Input Scan mode sequentially converts user-specified channels. A control register
specifies which analog input channels will be included in the scanning sequence.
The 10-bit ADC is connected to a 16-word result buffer. Each 10-bit result is converted to one of
eight 32-bit output formats when it is read from the result buffer.
Figure 17-1).
DS61104E-page 17-2 © 2007-2011 Microchip Technology Inc.
Page 3

Section 17. 10-bit Analog-to-Digital Converter (ADC)
SAR ADC
SHA
ADC1BUF0
ADC1BUF1
ADC1BUF2
ADC1BUFF
ADC1BUFE
AN0
AN15
AN1
VREFL
CH0SB<3:0>
CH0NA CH0NB
+
-
CH0SA<3:0>
Channel
Scan
CSCNA
Alternate
V
REF+
(1)
AVDD AVSS
VREF-
(1)
Input Selection
V
REFH
VREFL
VCFG<2:0>
Note 1: VREF+ and VREF- inputs can be multiplexed with other analog inputs.
Figure 17-1: 10-bit High-Speed ADC Block Diagram
17
10-bit Analog-to-Digital
Converter (ADC)
© 2007-2011 Microchip Technology Inc. DS61104E-page 17-3
Page 4

PIC32 Family Reference Manual
17.2 CONTROL REGISTERS
The ADC module has the following Special Function Registers (SFRs):
• AD1CON1: ADC Control Register 1
• AD1CON2: ADC Control Register 2
• AD1CON3: ADC Control Register 3
The AD1CON1, AD1CON2 and AD1CON3 registers control the operation of the ADC
module.
• AD1CHS: ADC Input Select Register
The AD1CHS register selects the input pins to be connected to the SHA.
• AD1PCFG: ADC Port Configuration Register
The AD1PCFG register configures the analog input pins as analog inputs or as digital I/O.
• AD1CSSL: ADC Input Scan Select Register
The AD1CSSL register selects inputs to be sequentially scanned.
Table 17-1 provides a summary of all ADC-related registers, including their addresses and
formats. Corresponding registers appear after the summary, followed by a detailed description of
each register. All unimplemented registers and/or bits within a register read as zero.
Table 17-1: ADC SFR Summary
Name
AD1CON1
AD1CON2
AD1CON3
AD1CHS
AD1PCFG
Legend: — = unimplemented, read as ‘0’.
Note 1: This register has an associated Clear register at an offset of 0x4 bytes. These registers have the same name with CLR appended to the
(1,2,3)
31:24 — — — — — — — —
23:16 — — — — — — — —
15:8 ON — SIDL — — FORM<2:0>
(1,2,3)
(1,2,3)
(1,2,3)
(1,2,3)
2: This register has an associated Set register at an offset of 0x8 bytes. These registers have the same name with SET appended to the
3: This register has an associated Invert register at an offset of 0xC bytes. These registers have the same name with INV appended to the
7:0 SSRC<2:0> CLRASAM — ASAM SAMP DONE
31:24 — — — — — — — —
23:16 — — — — — — — —
15:8 VCFG<2:0> OFFCAL — CSCNA — —
7:0 BUFS — SMPI<3:0> BUFM ALTS
31:24 — — — — — — — —
23:16 — — — — — — — —
15:8 ADRC — — SAMC<4:0>
7:0 ADCS<7:0>
31:24 CH0NB — — — CH0SB<3:0>
23:16 CH0NA — — — CH0SA<3:0>
15:8 — — — — — — — —
7:0 — — — — — — — —
31:24 — — — — — — — —
23:16 — — — — — — — —
15:8 PCFG15 PCFG14 PCFG13 PCFG12 PCFG11 PCFG10 PCFG9 PCFG8
7:0 PCFG7 PCFG6 PCFG5 PCFG4 PCFG3 PCFG2 PCFG1 PCFG0
end of the register name (e.g.,AD1CON1CLR). Writing a ‘1’ to any bit position in the Clear register will clear valid bits in the associated
register. Reads from the Clear register should be ignored.
end of the register name (e.g.,AD1CON1SET). Writing a ‘1’ to any bit position in the Set register will set valid bits in the associated
register. Reads from the Set register should be ignored.
end of the register name (e.g., AD1CON1INV). Writing a ‘1’ to any bit position in the Invert register will invert valid bits in the associated
register. Reads from the Invert register should be ignored.
Bit
31/23/15/7
Bit
30/22/14/6
Bit
29/21/13/5
Bit
28/20/12/4
(1,2)
(1)
Bit
27/19/11/3
Bit
26/18/10/2
Bit
25/17/9/1
Bit
24/16/8/0
DS61104E-page 17-4 © 2007-2011 Microchip Technology Inc.
Page 5

Section 17. 10-bit Analog-to-Digital Converter (ADC)
Table 17-1: ADC SFR Summary (Continued)
Name
AD1CSSL
ADC1BUF0 31:0 ADC Result Word 0 (ADC1BUF0<31:0>)
ADC1BUF1 31:0 ADC Result Word 1 (ADC1BUF1<31:0>)
ADC1BUF2 31:0 ADC Result Word 2 (ADC1BUF2<31:0>)
ADC1BUF3 31:0 ADC Result Word 3 (ADC1BUF3<31:0>)
ADC1BUF4 31:0 ADC Result Word 4 (ADC1BUF4<31:0>)
ADC1BUF5 31:0 ADC Result Word 5 (ADC1BUF5<31:0>)
ADC1BUF6 31:0 ADC Result Word 6 (ADC1BUF6<31:0>)
ADC1BUF7 31:0 ADC Result Word 7 (ADC1BUF7<31:0>)
ADC1BUF8 31:0 ADC Result Word 8 (ADC1BUF8<31:0>)
ADC1BUF9 31:0 ADC Result Word 9 (ADC1BUF9<31:0>)
ADC1BUFA 31:0 ADC Result Word A (ADC1BUFA<31:0>)
ADC1BUFB 31:0 ADC Result Word B (ADC1BUFB<31:0>)
ADC1BUFC 31:0 ADC Result Word C (ADC1BUFC<31:0>)
ADC1BUFD 31:0 ADC Result Word D (ADC1BUFD<31:0>)
ADC1BUFE 31:0 ADC Result Word E (ADC1BUFE<31:0>)
ADC1BUFF 31:0 ADC Result Word F (ADC1BUFF<31:0>)
Legend: — = unimplemented, read as ‘0’.
Note 1: This register has an associated Clear register at an offset of 0x4 bytes. These registers have the same name with CLR appended to the
(1,2,3)
31:24 — — — — — — — —
23:16 — — — — — — — —
15:8 CSSL15 CSSL14 CSSL13 CSSL12 CSSL11 CSSL10 CSSL9 CSSL8
7:0 CSSL7 CSSL6 CSSL5 CSSL4 CSSL3 CSSL2 CSSL1 CSSL0
end of the register name (e.g.,AD1CON1CLR). Writing a ‘1’ to any bit position in the Clear register will clear valid bits in the associated
register. Reads from the Clear register should be ignored.
2: This register has an associated Set register at an offset of 0x8 bytes. These registers have the same name with SET appended to the
end of the register name (e.g.,AD1CON1SET). Writing a ‘1’ to any bit position in the Set register will set valid bits in the associated
register. Reads from the Set register should be ignored.
3: This register has an associated Invert register at an offset of 0xC bytes. These registers have the same name with INV appended to the
end of the register name (e.g., AD1CON1INV). Writing a ‘1’ to any bit position in the Invert register will invert valid bits in the associated
register. Reads from the Invert register should be ignored.
Bit
31/23/15/7
Bit
30/22/14/6
Bit
29/21/13/5
Bit
28/20/12/4
Bit
27/19/11/3
Bit
26/18/10/2
Bit
25/17/9/1
Bit
24/16/8/0
17
10-bit Analog-to-Digital
Converter (ADC)
© 2007-2011 Microchip Technology Inc. DS61104E-page 17-5
Page 6

PIC32 Family Reference Manual
Register 17-1: AD1CON1: ADC Control Register 1
Bit Range
31:24
23:16
15:8
7:0
Legend:
R = Readable bit W = Writable bit P = Programmable bit r = Reserved bit
U = Unimplemented bit -n = Bit Value at POR: (‘0’, ‘1’, x = Unknown) C = Clearable bit
bit 31-16 Unimplemented: Read as ‘0’
bit 15 ON: ADC Operating Mode bit
bit 14 Unimplemented: Read as ‘0’
bit 13 SIDL: Stop in Idle Mode bit
bit 12-11 Unimplemented: Read as ‘0’
bit 10-8 FORM<2:0>: Data Output Format bits
bit 7-5 SSRC<2:0>: Conversion Trigger Source Select bits
bit 4 CLRASAM: Stop Conversion Sequence bit (when the first ADC interrupt is generated)
Bit
31/23/15/7
U-0 U-0 U-0 U-0 U-0 U-0 U-0 U-0
Bit
30/22/14/6
Bit
29/21/13/5
Bit
28/20/12/4
Bit
27/19/11/3
Bit
26/18/10/2
25/17/9/1
— — — — — — — —
U-0 U-0 U-0 U-0 U-0 U-0 U-0 U-0
— — — — — — — —
R/W-0 U-0 R/W-0 U-0 U-0 R/W-0 R/W-0 R/W-0
(1)
ON
R/W-0 R/W-0 R/W-0 R/W-0 U-0 R/W-0 R/W-0 R/C-0
— SIDL — — FORM<2:0>
SSRC<2:0> CLRASAM — ASAM SAMP DONE
(1)
1 = ADC module is operating
0 = ADC is off
1 = Discontinue module operation when device enters Idle mode
0 = Continue module operation in Idle mode
011 = Signed Fractional 16-bit (DOUT = 0000 0000 0000 0000 sddd dddd dd00 0000)
010 = Fractional 16-bit (DOUT = 0000 0000 0000 0000 dddd dddd dd00 0000)
001 = Signed Integer 16-bit (DOUT = 0000 0000 0000 0000 ssss sssd dddd dddd)
000 = Integer 16-bit (DOUT = 0000 0000 0000 0000 0000 00dd dddd dddd)
111 = Signed Fractional 32-bit (DOUT = sddd dddd dd00 0000 0000 0000 0000)
110 = Fractional 32-bit (DOUT = dddd dddd dd00 0000 0000 0000 0000 0000)
101 = Signed Integer 32-bit (DOUT = ssss ssss ssss ssss ssss sssd dddd dddd)
100 = Integer 32-bit (DOUT = 0000 0000 0000 0000 0000 00dd dddd dddd)
111 = Internal counter ends sampling and starts conversion (auto convert)
110 = Reserved
101 = Reserved
100 = Reserved
011 = Reserved
010 = Timer3 period match ends sampling and starts conversion
001 = Active transition on INT0 pin ends sampling and starts conversion
000 = Clearing SAMP bit ends sampling and starts conversion
1 = Stop conversions when the first ADC interrupt is generated. Hardware clears the ASAM bit when the
ADC interrupt is generated.
0 = Normal operation, buffer contents will be overwritten by the next conversion sequence
Bit
Bit
24/16/8/0
(2)
Note 1: When using the 1:1 Peripheral Bus Clock (PBCLK) divisor, the user software should not read or write the
peripheral’s SFRs in the SYSCLK cycle immediately following the instruction that clears the module’s ON
bit.
2: The DONE bit is not persistent in automatic modes. It is cleared by hardware at the beginning of the next
sample.
DS61104E-page 17-6 © 2007-2011 Microchip Technology Inc.
Page 7

Section 17. 10-bit Analog-to-Digital Converter (ADC)
Register 17-1: AD1CON1: ADC Control Register 1 (Continued)
bit 3 Unimplemented: Read as ‘0’
bit 2 ASAM: ADC Sample Auto-Start bit
1 = Sampling begins immediately after last conversion completes; SAMP bit is automatically set
0 = Sampling begins when SAMP bit is set
bit 1 SAMP: ADC Sample Enable bit
1 = The ADC SHA is sampling
0 = The ADC sample/hold amplifier is holding
When ASAM = 0, writing ‘1’ to this bit starts sampling.
When SSRC = 000, writing ‘0’ to this bit will end sampling and start conversion.
bit 0 DONE: Analog-to-Digital Conversion Status bit
1 = Analog-to-digital conversion is done
0 = Analog-to-digital conversion is not done or has not started
Clearing this bit will not affect any operation in progress.
Note 1: When using the 1:1 Peripheral Bus Clock (PBCLK) divisor, the user software should not read or write the
peripheral’s SFRs in the SYSCLK cycle immediately following the instruction that clears the module’s ON
bit.
2: The DONE bit is not persistent in automatic modes. It is cleared by hardware at the beginning of the next
sample.
(2)
17
10-bit Analog-to-Digital
Converter (ADC)
© 2007-2011 Microchip Technology Inc. DS61104E-page 17-7
Page 8

PIC32 Family Reference Manual
Register 17-2: AD1CON2: ADC Control Register 2
Bit Range
31:24
23:16
15:8
7:0
Legend:
R = Readable bit W = Writable bit P = Programmable bit r = Reserved bit
U = Unimplemented bit -n = Bit Value at POR: (‘0’, ‘1’, x = Unknown)
bit 31-16 Unimplemented: Read as ‘0’
bit 15-13 VCFG<2:0>: Voltage Reference Configuration bits
bit 12 OFFCAL: Input Offset Calibration Mode Select bit
bit 11 Unimplemented: Read as ‘0’
bit 10 CSCNA: Scan Input Selections for CH0+ SHA Input for MUX A Input Multiplexer Setting bit
bit 9-8 Unimplemented: Read as ‘0’
bit 7 BUFS: Buffer Fill Status bit
bit 6 Unimplemented: Read as ‘0’
bit 5-2 SMPI<3:0>: Sample/Convert Sequences Per Interrupt Selection bits
bit 1 BUFM: ADC Result Buffer Mode Select bit
bit 0 ALTS: Alternate Input Sample Mode Select bit
Bit
31/23/15/7
U-0 U-0 U-0 U-0 U-0 U-0 U-0 U-0
Bit
30/22/14/6
Bit
29/21/13/5
Bit
28/20/12/4
Bit
27/19/11/3
Bit
26/18/10/2
Bit
25/17/9/1
— — — — — — — —
U-0 U-0 U-0 U-0 U-0 U-0 U-0 U-0
— — — — — — — —
R/W-0 R/W-0 R/W-0 R/W-0 U-0 R/W-0 U-0 U-0
VCFG<2:0> OFFCAL — CSCNA — —
R/W-0 U-0 R/W-0 R/W-0 R/W-0 R/W-0 R/W-0 R/W-0
BUFS — SMPI<3:0> BUFM ALTS
ADC VR+ ADC VR-
000
001
010
011
1xx
AVDD AVSS
External VREF+ pin AV SS
AVDD External VREF- pin
External VREF+ pin External VREF- pin
AVDD AVSS
1 = Enable Offset Calibration mode
VINH and VINL of the SHA are connected to VR-
0 = Disable Offset Calibration mode
The inputs to the SHA are controlled by AD1CHS or AD1CSSL
1 = Scan inputs
0 = Do not scan inputs
Only valid when BUFM = 1 (ADRES split into 2 x 8-word buffers).
1 = ADC is currently filling buffer 0x8-0xF, user should access data in 0x0-0x7
0 = ADC is currently filling buffer 0x0-0x7, user should access data in 0x8-0xF
1111 = Interrupts at the completion of conversion for each 16th sample/convert sequence
1110 = Interrupts at the completion of conversion for each 15th sample/convert sequence
•
•
•
0001 = Interrupts at the completion of conversion for each 2nd sample/convert sequence
0000 = Interrupts at the completion of conversion for each sample/convert sequence
1 = Buffer configured as two 8-word buffers, ADC1BUF(7...0), ADC1BUF(15...8)
0 = Buffer configured as one 16-word buffer ADC1BUF(15...0.)
1 = Uses MUX A input multiplexer settings for first sample, then alternates between MUX B and
MUX A input multiplexer settings for all subsequent samples
0 = Always use MUX A input multiplexer settings
Bit
24/16/8/0
DS61104E-page 17-8 © 2007-2011 Microchip Technology Inc.
Page 9

Section 17. 10-bit Analog-to-Digital Converter (ADC)
Register 17-3: AD1CON3: ADC Control Register 3
Bit Range
31:24
23:16
15:8
7:0
Legend:
R = Readable bit W = Writable bit P = Programmable bit r = Reserved bit
U = Unimplemented bit -n = Bit Value at POR: (‘0’, ‘1’, x = Unknown)
bit 31-16 Unimplemented: Read as ‘0’
bit 15 ADRC: ADC Conversion Clock Source bit
bit 14-13 Unimplemented: Read as ‘0’
bit 12-8 SAMC<4:0>: Auto-sample Time bits
bit 7-0 ADCS<7:0>: ADC Conversion Clock Select bits
Bit
31/23/15/7
U-0 U-0 U-0 U-0 U-0 U-0 U-0 U-0
— — — — — — — —
U-0 U-0 U-0 U-0 U-0 U-0 U-0 U-0
— — — — — — — —
R/W-0 U-0 U-0 R/W-0 R/W-0 R/W-0 R/W-0 R/W-0
ADRC — — SAMC<4:0>
R/W-0 R/W-0 R/W-0 R/W-0 R/W-0 R/W-0 R/W-0 R/W-0
1 = ADC internal RC clock
0 = Clock derived from Peripheral Bus Clock (PBCLK)
11111 = 31 TAD
•
•
•
00001 = 1 TAD
00000 = 0 TAD (Not allowed)
11111111 = TPB • 2 • (ADCS<7:0> + 1) = 512 • TPB = TAD
•
•
•
00000001 = TPB • 2 • (ADCS<7:0> + 1) = 4 • TPB = TAD
00000000 = TPB • 2 • (ADCS<7:0> + 1) = 2 • TPB = TAD
Bit
30/22/14/6
Bit
29/21/13/5
Bit
28/20/12/4
ADCS<7:0>
(1)
Bit
27/19/11/3
(1)
Bit
26/18/10/2
Bit
25/17/9/1
Bit
24/16/8/0
17
10-bit Analog-to-Digital
Converter (ADC)
Note 1: TPB is the PIC32 Peripheral Bus clock time period. Refer to Section 6. “Oscillator” (DS61112) for more
information.
© 2007-2011 Microchip Technology Inc. DS61104E-page 17-9
Page 10

PIC32 Family Reference Manual
Register 17-4: AD1CHS: ADC Input Select Register
Bit Range
31:24
23:16
15:8
7:0
Legend:
R = Readable bit W = Writable bit P = Programmable bit r = Reserved bit
U = Unimplemented bit -n = Bit Value at POR: (‘0’, ‘1’, x = Unknown)
bit 31 CH0NB: Negative Input Select bit for MUX B
bit 30-28 Unimplemented: Read as ‘0’
bit 27-24 CH0SB<3:0>: Positive Input Select bits for MUX B
bit 23 CH0NA: Negative Input Select bit for MUX A Multiplexer Setting
bit 22-20 Unimplemented: Read as ‘0’
bit 19-16 CH0SA<3:0>: Positive Input Select bits for MUX A Multiplexer Setting
bit 15-0 Unimplemented: Read as ‘0’
Bit
31/23/15/7
R/W-0 U-0 U-0 U-0 R/W-0 R/W-0 R/W-0 R/W-0
CH0NB — — — CH0SB<3:0>
R/W-0 U-0 U-0 U-0 R/W-0 R/W-0 R/W-0 R/W-0
CH0NA — — — CH0SA<3:0>
U-0 U-0 U-0 U-0 U-0 U-0 U-0 U-0
— — — — — — — —
U-0 U-0 U-0 U-0 U-0 U-0 U-0 U-0
— — — — — — — —
1 = Channel 0 negative input is AN1
0 = Channel 0 negative input is VR-
1111 = Channel 0 positive input is AN15
1110 = Channel 0 positive input is AN14
1101 = Channel 0 positive input is AN13
•
•
•
0001 = Channel 0 positive input is AN1
0000 = Channel 0 positive input is AN0
1 = Channel 0 negative input is AN1
0 = Channel 0 negative input is VR-
1111 = Channel 0 positive input is AN15
1110 = Channel 0 positive input is AN14
1101 = Channel 0 positive input is AN13
•
•
•
0001 = Channel 0 positive input is AN1
0000 = Channel 0 positive input is AN0
Bit
30/22/14/6
Bit
29/21/13/5
Bit
28/20/12/4
Bit
27/19/11/3
Bit
26/18/10/2
Bit
25/17/9/1
Bit
24/16/8/0
DS61104E-page 17-10 © 2007-2011 Microchip Technology Inc.
Page 11

Section 17. 10-bit Analog-to-Digital Converter (ADC)
Bit
(1,2)
27/19/11/3
Bit
Bit
26/18/10/2
Register 17-5: AD1PCFG: ADC Port Configuration Register
Bit Range
31:24
23:16
15:8
7:0
Legend:
R = Readable bit W = Writable bit P = Programmable bit r = Reserved bit
U = Unimplemented bit -n = Bit Value at POR: (‘0’, ‘1’, x = Unknown)
bit 31-16 Unimplemented: Read as ‘0’
bit 15-0 PCFG<15:0>: Analog Input Pin Configuration Control bits
Bit
31/23/15/7
U-0 U-0 U-0 U-0 U-0 U-0 U-0 U-0
— — — — — — — —
U-0 U-0 U-0 U-0 U-0 U-0 U-0 U-0
— — — — — — — —
R/W-0 R/W-0 R/W-0 R/W-0 R/W-0 R/W-0 R/W-0 R/W-0
PCFG15 PCFG14 PCFG13 PCFG12 PCFG11 PCFG10 PCFG9 PCFG8
R/W-0 R/W-0 R/W-0 R/W-0 R/W-0 R/W-0 R/W-0 R/W-0
PCFG7 PCFG6 PCFG5 PCFG4 PCFG3 PCFG2 PCFG1 PCFG0
1 = Analog input pin in Digital mode, port read input enabled, ADC input multiplexer input for this analog
input connected to AVss
0 = Analog input pin in Analog mode, digital port read will return as a ‘1’ without regard to the voltage on
the pin, ADC samples pin voltage
Bit
30/22/14/6
Bit
29/21/13/5
28/20/12/4
Bit
25/17/9/1
Bit
24/16/8/0
17
10-bit Analog-to-Digital
Converter (ADC)
Note 1: The AD1PCFG register functionality will vary depending on the number of ADC inputs available on the
selected device. Refer to the specific device data sheet for additional details on this register.
2: The AD1PCFG register is not available on all PIC32 devices. Refer to the specific device data sheet for
availability of this register.
Bit
(1)
27/19/11/3
Bit
Bit
26/18/10/2
Bit
25/17/9/1
Bit
24/16/8/0
Register 17-6: AD1CSSL: ADC Input Scan Select Register
Bit Range
31:24
23:16
15:8
7:0
Legend:
R = Readable bit W = Writable bit P = Programmable bit r = Reserved bit
U = Unimplemented bit -n = Bit Value at POR: (‘0’, ‘1’, x = Unknown)
bit 31-16 Unimplemented: Read as ‘0’
bit 15-0 CSSL<15:0>: ADC Input Pin Scan Selection bits
Bit
31/23/15/7
U-0 U-0 U-0 U-0 U-0 U-0 U-0 U-0
— — — — — — — —
U-0 U-0 U-0 U-0 U-0 U-0 U-0 U-0
— — — — — — — —
R/W-0 R/W-0 R/W-0 R/W-0 R/W-0 R/W-0 R/W-0 R/W-0
CSSL15 CSSL14 CSSL13 CSSL12 CSSL11 CSSL10 CSSL9 CSSL8
R/W-0 R/W-0 R/W-0 R/W-0 R/W-0 R/W-0 R/W-0 R/W-0
CSSL7 CSSL6 CSSL5 CSSL4 CSSL3 CSSL2 CSSL1 CSSL0
1 = Select ANx for input scan
0 = Skip ANx for input scan
Bit
30/22/14/6
Bit
29/21/13/5
28/20/12/4
Note 1: The AD1CSSL register functionality will vary depending on the number of ADC inputs available on the
selected device. Refer to the specific device data sheet for additional details on this register.
© 2007-2011 Microchip Technology Inc. DS61104E-page 17-11
Page 12

PIC32 Family Reference Manual
Acquisition Time
Conversion Time
ADC Total Sample Time
SHA is connected to the analog input pin for sampling.
SHA is disconnected from input and holds the signal.
Analog-to-digital conversion is started by the conversion trigger source.
Analog-to-digital conversion complete, result is written
into the ADC result buffer. Optionally generate interrupt.
17.3 ADC OPERATION, TERMINOLOGY AND CONVERSION SEQUENCE
This section describes the operation of the ADC, the steps required to configure the converter,
special features of the module, and provides examples of ADC configuration with timing
diagrams and charts showing the expected output of the converter.
17.3.1 Overview of Operation
Analog sampling consists of two steps: acquisition and conversion (see Figure 17-2). During
acquisition, the analog input pin is connected to the Sample and Hold Amplifier (SHA). After the
pin has been sampled for a sufficient period, and the sample voltage is equivalent to the input,
the pin is disconnected from the SHA to provide a stable input voltage for the conversion process.
The conversion process then converts the analog sample voltage to a binary representation.
An overview of the ADC is presented in Figure 17-1. The 10-bit ADC has a single SHA. The SHA
is connected to the analog input pins through the analog input multiplexers, MUX A and MUX B.
The analog input multiplexers are controlled by the AD1CHS register. There are two sets of MUX
control bits in the AD1CHS register. These two sets of control bits allow the two different analog
input to be independently controlled. The ADC can optionally switch between MUX A and MUX
configurations between conversions. The ADC can also optionally scan through a series of
analog inputs using a single MUX.
Acquisition time can be controlled manually or automatically. The acquisition time may be started
manually by setting the SAMP bit (AD1CON1<1>), and ended manually by clearing the SAMP
bit in user software. The acquisition time may be started automatically by the ADC hardware and
ended automatically by a conversion trigger source. The acquisition time is set by the SAMC bits
(AD1CON3<12:8>). The SHA has a minimum acquisition period; refer to the specific device data
sheet for acquisition time specifications.
Conversion time is the time required for the ADC to convert the voltage held by the SHA. The
ADC requires one ADC clock cycle (T
clock cycles. Therefore, a total of 12 TAD cycles are required to perform the complete conversion.
When the conversion time is complete, the result is written into one of the 16 ADC result registers
(ADC1BUF0 through ADC1BUFF).
The sum of the acquisition time and the analog-to-digital conversion time provides the total
sample time (refer to Figure 17-2). There are multiple input clock options for the ADC that are
used to create the TAD clock. The user must select an input clock option that does not violate the
minimum T
The sampling process can be performed once, periodically, or based on a trigger as defined by
the module configuration.
AD specification.
AD) to convert each bit of the result, plus two additional
B
Figure 17-2: ADC Sample/Conversion Sequence
DS61104E-page 17-12 © 2007-2011 Microchip Technology Inc.
Page 13

Section 17. 10-bit Analog-to-Digital Converter (ADC)
The start time for sampling can be controlled in software by setting the SAMP bit
(AD1CON1<1>). The start of the sampling time can also be controlled automatically by the hardware. When the ADC operates in Auto-Sample mode, the SHA is reconnected to the analog input
pin at the end of the conversion in the sample/convert sequence. The auto-sample function is
controlled by the ASAM bit (AD1CON1<2>).
The conversion trigger source ends the sampling time and begins an analog-to-digital conversion
or a sample/convert sequence. The conversion trigger source is selected by the SSRC<2:0> bits
(AD1CON1<7:5>). The conversion trigger can be taken from a variety of hardware sources, or
can be controlled manually in software by clearing the SAMP bit. One of the conversion trigger
sources is an auto-conversion. The time between auto-conversions is set by a counter and the
ADC clock. The Auto-Sample mode and auto-conversion trigger can be used together to provide
endless automatic conversions without software intervention.
An interrupt may be generated at the end of each sample sequence or multiple sample
sequences as determined by the value of the SMPI<3:0> bits (AD1CON2<5:2>). The number of
sample sequences between interrupts can vary between 1 and 16. The user should note that the
analog-to-digital conversion buffer holds the results of a single conversion sequence. The next
sequence starts filling the buffer from the top even if the number of samples in the previous
sequence was less than 16. The total number of conversion results between interrupts is the
SMPI value. The total number of conversions between interrupts cannot exceed the physical
buffer length.
17
10-bit Analog-to-Digital
Converter (ADC)
© 2007-2011 Microchip Technology Inc. DS61104E-page 17-13
Page 14

PIC32 Family Reference Manual
17.4 ADC MODULE CONFIGURATION
Operation of the ADC module is directed through bit settings in the appropriate registers. The
following instructions summarize the actions and the settings. Options and details for each
configuration step are provided in subsequent sections.
To configure the ADC module, perform the following steps:
1. Configure the analog port pins in AD1PCFG<15:0> (see 17.4.1).
2. Select the analog inputs to the ADC multiplexers in AD1CHS<32:0> (see 17.4.2).
3. Select the format of the ADC result using FORM<2:0> (AD1CON1<10:8>) (see 17.4.3).
4. Select the sample clock source using SSRC<2:0> (AD1CON1<7:5>) (see 17.4.4).
5. Select the voltage reference source using VCFG<2:0> (AD1CON2<15:13>) (see 17.4.7).
6. Select the Scan mode using CSCNA (AD1CON2<10>) (see 17.4.8).
7. Set the number of conversions per interrupt SMP<3:0> (AD1CON2<5:2>), if interrupts are
to be used (see 17.4.9).
8. Set Buffer Fill mode using BUFM (AD1CON2<1>) (see 17.4.10).
9. Select the MUX to be connected to the ADC in ALTS AD1CON2<0> (see 17.4.11).
10. Select the ADC clock source using ADRC (AD1CON3<15>) (see 17.4.12).
11. Select the sample time using SAMC<4:0> (AD1CON3<12:8>), if auto-convert is to be
used (see 17-2).
12. Select the ADC clock prescaler using ADCS<7:0> (AD1CON3<7:0>) (see 17.4.12).
13. Turn the ADC module on using AD1CON1<15> (see 17.4.14).
Note: Steps 1 through 12, above, can be performed in any order, but Step 13 must be the
final step in every case.
14. To configure ADC interrupt (if required):
a) Clear the AD1IF bit (IFS1<1>) (see 17.7).
b) Select ADC interrupt priority AD1IP<2:0> (IPC<28:26>) and subpriority AD1IS<1:0>
(IPC<24:24>) if interrupts are to be used (see 17.7).
15. Start the conversion sequence by initiating sampling (see 17.4.15).
DS61104E-page 17-14 © 2007-2011 Microchip Technology Inc.
Page 15

Section 17. 10-bit Analog-to-Digital Converter (ADC)
17.4.1 Configuring Analog Port Pins
The AD1PCFG register and the TRISB register control the operation of the ADC port pins.
AD1PCFG specifies the configuration of device pins to be used as analog inputs. A pin is
configured as an analog input when the corresponding PCFGn bit (AD1PCFG<n>) = 0. When
the bit = 1, the pin is set to digital control. When configured for analog input, the associated port
I/O digital input buffer is disabled so it does not consume current. The AD1PCFG register is
cleared at Reset, causing the ADC input pins to be configured for analog input by default at
Reset.
TRIS registers control the digital function of the port pins. The port pins that are desired as analog
inputs must have their corresponding TRIS bit set, specifying the pin as an input. If the I/O pin
associated with an ADC input is configured as output, the TRIS bit is cleared, the ports digital
output level (V
Note 1: When reading a PORT register that shares pins with the ADC, any pin configured
17.4.2 Selecting the Analog Inputs to the ADC Multiplexers
OH or VOL) will be converted. After a device Reset, all of the TRIS bits are set.
as an analog input reads as a ‘0’ when the PORT latch is read. Analog levels on
any pin that is defined as a digital input (including the AN15:AN0 pins), but is not
configured as an analog input, may cause the input buffer to consume current that
is out of the device’s specification.
2: The AD1PCFG register is not available in all the PIC32 devices. Refer to the
specific device data sheet for availability.
17
10-bit Analog-to-Digital
Converter (ADC)
The AD1CHS register is used to select which analog input pin is connected to MUX A and
MUX B. Each multiplexer has two inputs referred to as the positive and the negative input. The
positive input to MUX A is controlled by the CH0SA<3:0> bits (AD1CHS<19:16>) and the negative input is controlled by the CH0NA bit (AD1CHS<23>). The positive input for MUX B is controlled by the CH0SB<3:0> bits (AD1CHS<27:24>) and the negative input is controlled by the
CH0NB bit (AD1CHS<31>).
The positive input can be selected from any one of the available analog input pins. The negative
input can be selected as the ADC negative reference or AN1. The use of AN1 as the negative
input allows the ADC to be used in Unipolar Differential mode. Refer to the specific device data
sheet for AN1 input voltage restrictions when used as a negative reference.
Note: When using Scan mode, the CH0SA<3:0> bits may be overridden. Refer to
17.4.8 “Selecting the Scan Mode” for more information.
17.4.3 Selecting the Format of the ADC Result
The data in the ADC result register can be read as one of eight formats. The format is controlled
by the FORM<2:0> bits (AD1CON1<10:8>). The user can select from integer, signed integer,
fractional, or signed fractional as a 16-bit or 32-bit result.
how a result is formatted. Ta b le 17-2 and Ta bl e 17-3 provide examples of results for the select
results in each of the four formats with 32-bit and 16-bit results.
Note: There is no numeric difference between 32-bit and 16-bit modes. In 32-bit mode,
the sign extension is applied to all 32-bits. In 16-bit mode, the sign extension is
applied only to the lower 16-bits of the result.
Figure 17-3 and Figure 17-4 illustrate
© 2007-2011 Microchip Technology Inc. DS61104E-page 17-15
Page 16

DS61104E-page 17-16 © 2007-2011 Microchip Technology Inc.
RAM Contents:
d09 d08 d07 d06 d05 d04 d03 d02 d01 d00
Read to Bus:
Integer
0000000000000000000000d09d08d07d06d05d04d03d02d01d00
Signed Integer
d09
d09 d09 d09 d09 d09 d09 d09 d09 d09 d09 d09 d09 d09 d09 d09 d09 d09 d09 d09 d09 d09 d09 d08 d07 d06 d05 d04 d03 d02 d01 d00
Fractional (1.15)
d09 d08 d07 d06 d05 d04 d03 d02 d01 d00 0 0 0 0 0 0 0 0 0 0 0 0 0 0 0 0 0 0 0 0 0 0
Signed Fractional (1.15)
d09
d08 d07 d06 d05 d04 d03 d02 d01 d00 0 0 0 0 0 0 0 0 0 0 0 0 0 0 0 0 0 0 0 0 0 0
Figure 17-3: ADC Output Data Formats, 32-bit Mode
PIC32 Family Reference Manual
Page 17

© 2007-2011 Microchip Technology Inc. DS61104E-page 17-17
RAM Contents:
d09 d08 d07 d06 d05 d04 d03 d02 d01 d00
Read to Bus:
Integer
0000000000000000000000d09d08d07d06d05d04d03d02d01d00
Signed Integer
0000000000000000d09
d09 d09 d09 d09 d09 d09 d08 d07 d06 d05 d04 d03 d02 d01 d00
Fractional (1.15)
0000000000000000d09d08d07d06d05d04d03d02d01d00000000
Signed Fractional (1.15)
0000000000000000d09
d08 d07 d06 d05 d04 d03 d02 d01 d00 d09 0 0 0 0 0
Figure 17-4: ADC Output Data Formats, 16-bit Mode
Section 17. 10-bit Analog-to-Digital Converter (ADC)
17
Converter (ADC)
10-bit Analog-to-Digital
Page 18

PIC32 Family Reference Manual
Table 17-2: Numerical Equivalents of Select Result Codes for FORM<2> (AD1CON1<10>) = 1, 32-bit Result
VIN/VR
1023/1024
1022/1024
513/1024
512/1024
511/1024
1/1024
0/1024
10-bit
Output Code
11 1111 1111 0000 0000 0000 0000
11 1111 1110 0000 0000 0000 0000
10 0000 0001 0000 0000 0000 0000
10 0000 0000 0000 0000 0000 0000
01 1111 1111 0000 0000 0000 0000
00 0000 0001 0000 0000 0000 0000
00 0000 0000 0000 0000 0000 0000
32-bit Integer Format
0000 0011 1111 1111
= 1023
0000 0011 1111 1110
= 1022
0000 0010 0000 0001
= 513
0000 0010 0000 0000
= 512
0000 0001 1111 1111
= 511
0000 0000 0000 0001
= 1
0000 0000 0000 0000
= 0
32-bit Signed
Integer Format
0000 0000 0000 0000
0000 0001 1111 1111
= 511
0000 0000 0000 0000
0000 0001 1111 1110
= 510
•••
0000 0000 0000 0000
0000 0000 0000 0001
= 1
0000 0000 0000 0000
0000 0000 0000 0000
= 0
1111 1111 1111 1111
1111 1111 1111 1111
= -1
•••
1111 1111 1111 1111
1111 1110 0000 0001
= -511
1111 1111 1111 1111
1111 1110 0000 0000
= -512
32-bit Fractional
Format
1111 1111 1100 0000
0000 0000 0000 0000
= 0.999
1111 1111 1000 0000
0000 0000 0000 0000
= 0.998
1000 0000 0100 0000
0000 0000 0000 0000
= 0.501
1000 0000 0000 0000
0000 0000 0000 0000
= 0.500
0111 1111 1100 0000
0000 0000 0000 0000
= .499
0000 0000 0100 0000
0000 0000 0000 0000
= 0.001
0000 0000 0000 0000
0000 0000 0000 0000
= 0.000
32-bit Signed
Fractional Format
0111 1111 1100 0000
0000 0000 0000 0000
= 0.499
0111 1111 1000 0000
0000 0000 0000 0000
= 0.498
0 000 0000 0100
0000
0000 0000 0000 0000
= 0.001
0000 0000 0000 0000
0000 0000 0000 0000
= 0.000
1111 1111 1100 0000
0000 0000 0000 0000
= -0.001
1000 0000 0100 0000
0000 0000 0000 0000
= -0.499
1000 0000 0000 0000
0000 0000 0000 0000
= -0.500
Table 17-3: Numerical Equivalents of Select Result Codes for FORM<2> (AD1CON1<10>) = 0, 16-bit Result
VIN/VR
1023/1024
1022/1024
513/1024
512/1024
511/1024
1/1024
0/1024
10-bit
Output Code
11 1111 1111 0000 0011 1111 1111
11 1111 1110 0000 0011 1111 1110
10 0000 0001 0000 0010 0000 0001
10 0000 0000 0000 0010 0000 0000
01 1111 1111 0000 0001 1111 1111
00 0000 0001 0000 0000 0000 0001
00 0000 0000 0000 0000 0000 0000
16-bit Integer Format
= 1023
= 1022
= 513
= 512
= 511
= 1
= 0
16-bit Signed
Integer Format
0000 0001 1111 1111
= 511
0000 0001 1111 1110
= 510
•••
0000 0000 0000 0001
= 1
0000 0000 0000 0000
= 0
1111 1111 1111 1111
= -1
•••
1111 1110 0000 0001
= -511
1111 1110 0000 0000
= -512
16-bit Fractional
Format
1111 1111 1100 0000
= 0.999
1111 1111 1000 0000
= 0.998
1000 0000 0100 0000
= 0.501
1000 0000 0000 0000
= 0.500
0111 1111 1100 0000
= .499
0000 0000 0100 0000
= 0.001
0000 0000 0000 0000
= 0.000
16-bit Signed
Fractional Format
0111 1111 1100 0000
= 0.499
0111 1111 1000 0000
= 0.498
0 000 0000 0100
0000
= 0.001
0000 0000 0000 0000
= 0.000
1111 1111 1100 0000
= -0.001
1000 0000 0100 0000
= -0.499
1000 0000 0000 0000
= -0.500
DS61104E-page 17-18 © 2007-2011 Microchip Technology Inc.
Page 19

Section 17. 10-bit Analog-to-Digital Converter (ADC)
17.4.4 Selecting the Sample Clock Source
It is often desirable to synchronize the end of sampling and the start of conversion with some
other time event. The ADC module may use one of four sources as a conversion trigger. The
selection of the conversion trigger source is controlled by the SSRC<2:0> bits (AD1CON1<7:5>).
17.4.4.1 MANUAL CONVERSION
To configure the ADC to end sampling and start a conversion when the SAMP bit
(AD1CON1<1>) is cleared (= 0), set the SSRC<2:0> bits to ‘000’.
17.4.4.2 TIMER COMPARE TRIGGER
The ADC is configured for this trigger mode by setting the SSRC<2:0> = 010. When a period
match occurs for the 32-bit timer, TMR3/TMR2, or the 16-bit Timer3, a special ADC trigger event
signal is generated by Timer3. This feature does not exist for the TMR5/TMR4 timer pair or for
16-bit timers other than Timer3. Refer to Section 14.
17.4.4.2.1 External INT0 Pin Trigger
To configure the ADC to begin a conversion on an active transition on the INT0 pin, the
SSRC<2:0> bits are set to ‘001’. The INT0 pin may be programmed for either a rising edge input
or a falling edge input to trigger the conversion process.
17.4.4.2.2 Auto-Convert
The ADC can be configured to automatically perform conversions at the rate selected by the
SAMC<4:0> bits (AD1CON3<12:8>). The ADC is configured for this Trigger mode by setting the
SSRC<2:0> bits to ‘111’. In this mode, the ADC will perform continuous conversions on the
selected channels.
“Timers” (DS61105) for more details.
17
10-bit Analog-to-Digital
Converter (ADC)
17.4.5 Synchronizing ADC Operations to Internal or External Events
The modes where an external event trigger pulse ends sampling and starts conversion
(SSRC<2:0> bits = 001, 010 or 011) may be used in combination with auto-sampling (ASAM bit
(AD1CON1<2>) =
trigger pulse source. For example, in Figure 17-13 where SSRC<2:0> = 010 and ASAM = 1,
ADC will always end sampling and start conversions synchronously with the timer compare
trigger event. The ADC will have a sample conversion rate that corresponds to the timer
comparison event rate. See Example 17-5 for a code example.
1) to cause the ADC to synchronize the sample conversion events to the
17.4.6 Selecting Automatic or Manual Sampling
Sampling can be started manually or automatically when the previous conversion is complete.
17.4.6.1 MANUAL SAMPLING
Clearing the ASAM bit (AD1CON1<2>) disables the Auto-Sample mode. Acquisition will begin
when the SAMP bit (AD1CON1<1>) is set by software. Acquisition will not resume until the
SAMP bit is once again set.
17.4.6.2 AUTOMATIC SAMPLING
Setting the ASAM bit (AD1CON1<2>) enables Auto-Sample mode. In this mode, the sampling
will start automatically after the pervious sample has been converted.
example.
Figure 17-8 illustrates an example.
Figure 17-9 illustrates an
© 2007-2011 Microchip Technology Inc. DS61104E-page 17-19
Page 20

PIC32 Family Reference Manual
17.4.7 Selecting the Voltage Reference Source
The user can select the voltage reference for the ADC module. The reference can be internal or
external.
The VCFG<2:0> bits (AD1CON2<15:13>) select the voltage reference for analog-to-digital
conversions. The upper voltage reference (VR+) and the lower voltage reference (VR-) may be
the internal AVDD and AVSS voltage rails, or the VREF+ and VREF- input pins. The external ADC
voltage reference may be used to reduce noise in the converter.
The external voltage reference pins may be shared with the AN0 and AN1 inputs on low pin count
devices. The ADC can still perform conversions on these pins when they are shared with the
REF+ and VREF- input pins.
V
The voltages applied to the external reference pins must meet certain specifications. Refer to the
“Electrical Characteristics” section in the specific device data sheet for more information.
Note: External references, VREF+ and VREF-, must be selected for high conversion. Refer
to the specific device data sheet for more information. The external V
VREF- pins may be shared with other analog peripherals. Refer to the specific device
data sheet for more information.
17.4.8 Selecting the Scan Mode
The ADC module has the ability to scan through a selected vector of inputs. The CSCNA bit
(AD1CON2<10>) enables the MUX A input to be scanned across a selected number of analog
inputs.
REF+ and
17.4.8.1 SCAN MODE ENABLE
Scan mode is enabled by setting the CSCNA bit (AD1CON2<10>). When Scan mode is enabled,
the positive input of MUX A is controlled by the contents of the AD1CSSL register. Each bit in the
AD1CSSL register corresponds to an analog input. Bit 0 corresponds to AN0, bit 1 corresponds
to AN1, and so on. If a particular bit in the AD1CSSL register is ‘1’, the corresponding input is
part of the scan sequence. The input is always scanned from lower-numbered input to
higher-numbered input, starting at the first selected channel after each interrupt occurs. When
Scan mode is enabled, the CH0SA<3:0> bits (AD1CHS<19:16>) are ignored.
Note: If the number of scanned input selected is greater than the number of samples taken
per interrupt, the higher numbered inputs will not be sampled. The AD1CSSL
register specifies only the input of the positive input of the channel. The CH0NA bit
(AD1CHS<23>) selects the input of the negative input of the channel during
scanning.
17.4.8.2 SCAN MODE DISABLE
When the CSCNA bit = 0, Scan mode is disabled and the positive input to MUX A is controlled
by the CH0SA<3:0> bits.
DS61104E-page 17-20 © 2007-2011 Microchip Technology Inc.
Page 21

Section 17. 10-bit Analog-to-Digital Converter (ADC)
17.4.8.3 USING SCAN AND ALTERNATE MODES TOGETHER
The Scan and Alternate modes may be combined to allow a vector of inputs to be scanned and
a single input to be converted every other sample.
This mode is enabled by setting the CSCNA bit (AD1CON2<10>) = 1, and setting the ALTS bit
(AD1CON2<0>) = 1. The CSCNA bit enables the scan for MUX A, and the CH0SB<3:0> bits
(AD1CHS<27:24>) and the CH0NB bit (AD1CHS<31>) are used to configure the inputs to
B. Scanning only applies to the MUX A input selection. The MUX B input selection, as
MUX
specified by the CH0SB<3:0> bits, will still select a single input.
The following sequence is an example of three scanned channels (MUX A) and a single fixed
channel (MUX B):
1. The first input in the scan list is sampled.
2. The input selected by CH0SB<3:0> and CH0NB is sampled.
3. The second input in the scan list is sampled.
4. The input selected by CH0SB<3:0> and CH0NB is sampled.
5. The third input in the scan list is sampled.
6. The input selected by CH0SB<3:0> and CH0NB is sampled.
The process is repeated.
17.4.9 Setting the Number of Conversions per Interrupt
The SMPI<3:0> bits (AD1CON2<5:2>) select how many analog-to-digital conversions will take
place before a CPU interrupt is generated. This also defines the number of locations that will be
written in the result buffer starting with ADC1BUF0 (ADC1BUF0 or ADC1BUF8 for Dual Buffer
mode). This can vary from one sample to 16 samples (one to eight samples for Dual Buffer
mode). After the interrupt is generated, the sampling sequence restarts, with the result of the first
sample being written to the first buffer location.
For example, if the SMPI<3:0> bits = 0000, the conversion results will always be written to
ADC1BUF0. In this example, no other buffer locations would be used.
For example, if the SMPI<3:0> bits = 1110, 15 samples would be converted and stored in buffer
locations, ADC1BUF0 through ADC1BUFE. An interrupt would be generated after ADC1BUFE
is written. The next sample would be written to ADC1BUF0. In this example, ADC1BUFF would
not be used.
The data in the result registers will be overwritten by the next sampling sequence. The data in
the result buffer must be read before the completion of the first sample after the interrupt is
generated. The Buffer Fill mode can be used to increase the time between interrupt generation
and the overwriting of data. Refer to
The user cannot program a combination of samples and SMPI bits that results in more than 16
conversions per interrupt when the BUFM bit (AD1CON2<1>) is ‘1’, or more than eight
conversions per interrupt when the BUFM bit (AD1CON2<1>) is ‘0’. Attempting to create a
conversion list with the number of samples greater than 16 will result in the sampling sequence
being truncated to 16 samples.
17.4.10 “Buffer Fill Mode”.
17
10-bit Analog-to-Digital
Converter (ADC)
© 2007-2011 Microchip Technology Inc. DS61104E-page 17-21
Page 22

PIC32 Family Reference Manual
17.4.10 Buffer Fill Mode
The Buffer Fill mode allows the output buffer to be used as a single 16-word buffer or two 8-word
buffers.
When the Dual Buffer Mode bit, BUFM (AD1CON2<1>), is ‘0’, the complete 16-word buffer is
used for all conversion sequences. Conversion results will be written sequentially in the buffer
starting at ADC1BUF0 until the number of samples as defined by the SMPI<3:0> bits
(AD1CON2<5:2>) is reached. The next conversion result will be written to ADC1BUF0 and the
process repeats. If the ADC interrupt is enabled an interrupt will be generated when the number
of samples in the buffer equals SMPI<3:0>.
When the BUFM bit is ‘1’, the 16-word results buffer (ADRES) will be split into two 8-word groups.
Conversion results will be written sequentially into the first buffer starting at ADC1BUF0, the
BUFS bit (AD1CON2<7>) will be cleared, until the number of samples as defined by the
SMPI<3:0> bits is reached. The ADC interrupt flag will then be set.
After the ADC interrupt flag is set, the following result will be written sequentially to the second
buffer starting at ADC1BUF8. The next conversion result will be written to the second buffer
starting at ADC1BUF8, the BUFS bit will be set, until the number of samples as defined by the
SMPI<3:0> bits is reached. The ADC interrupt flag will then be set.
The process then restarts with BUFS = 0 and results being written to the first buffer.
The decision of which buffer fill mode to use will depend upon how much time is available to move
the buffer contents after the analog-to-digital interrupt and the interrupt latency, as determined by
the application. If the processor can unload a full buffer within the time it takes to sample and
convert one channel, the BUFM bit can be ‘0’ and up to 16 conversions may be done per
interrupt. The processor will have one acquisition-and-conversion period before the first buffer
location is overwritten.
If the processor cannot unload the buffer within the sample-and-conversion time, set the BUFM
bit = 1, to prevent overwriting result data. For example, if the SMPI<3:0> bits = 0111, eight
conversions will be written loaded into the first buffer, following which an interrupt will occur. The
next eight conversions will be written to the second buffer. Therefore, the processor will have the
entire time between interrupts to read the eight conversions out of the buffer.
17.4.11 Selecting the MUX to be Connected to the ADC (Alternating
Sample Mode)
The ADC has two input multiplexers that connect to the SHA. These multiplexers are used to
select which analog input is to be sampled. Each of the multiplexers have a positive and a
negative input (see Figure 17-5 and Figure 17-6).
Note: The number of analog inputs will vary among different devices. Consult the specific
device data sheet to verify the analog input availability.
17.4.11.1 SINGLE INPUT SELECTION
The user may select one of up to 16 analog inputs, as determined by the number of analog
channels on the device, as the positive input of the SHA. The CH0SA<3:0> bits
(AD1CHS<19:16>) select the positive analog input.
The user may select either VR- or AN1 as the negative input. The CH0NA bit (AD1CHS<23>)
selects the analog input for the negative input of channel 0. Using AN1 as the negative input
allows unipolar differential measurements. The ALTS bit (AD1CON2<0>) must be clear for this
mode of operation.
DS61104E-page 17-22 © 2007-2011 Microchip Technology Inc.
Page 23

Section 17. 10-bit Analog-to-Digital Converter (ADC)
T
AD
2 T
PB
ADCS 1+()•()•=
ADCS
T
AD
2 TPB•
------------------
⎝⎠
⎛⎞
1–=
T
SMP
TriggerPulseInterval T
SEQ
()ConversionTime T
CONV
()–=
T
SMPTSEQTCONV
–=
Note: T
SEQ is the trigger pulse interval time.
17.4.11.2 ALTERNATING INPUT SELECTIONS
The ALTS bit (AD1CON2<0>) is used by the ADC module to alternate between the two input
multiplexers.
The inputs specified by the CH0SA<3:0> bits (AD1CHS<19:16>) and the CH0NA bit
(AD1CHS<23>) are called the MUX A inputs. The inputs specified by the CH0SB<3:0> bits
(AD1CHS<27:24>) and the CH0NB bit (AD1CHS<31>) are called the MUX B inputs.
When the ALTS bit is ‘1’, the ADC module will alternate between the MUX A inputs on one sample
and the MUX B inputs on the subsequent sample. When the ALTS bit is ‘0’, only the inputs specified
by the CH0SA<3:0> and CH0NA bits are selected for sampling.
For example, if the ALTS bit is ‘1’ on the first sample/convert sequence, the inputs specified by
the CH0SA<3:0> and CH0NA bits are selected for sampling. On the next sample, the inputs
specified by the CH0SB<3:0> and CH0NB bits are selected for sampling. The pattern then
repeats.
17.4.12 Selecting the ADC Conversion Clock Source and Prescaler
The ADC module can use the internal RC oscillator or the Peripheral Bus Clock (PBCLK) as the
conversion clock source.
When the internal RC oscillator is used as the clock source (ADRC bit (AD1CON3<15>) = 1), the
AD is the period of the oscillator, and no prescaler is used. When using the internal oscillator the
T
ADC can continue to function in Sleep mode and in Idle mode.
Note: The internal RC oscillator is intended for ADC operation in Sleep mode, and
therefore, it is not calibrated. Applications requiring precise timing of ADC
acquisitions should use a stable calibrated clock source for the ADC.
When the PBCLK is used as the conversion clock source, the ADRC bit = 0, the TAD is the period
of the PBCLK after the prescaler ADCS<7:0> bits (AD1CON3<7:0>) are applied.
The ADC has a maximum rate at which conversions may be completed. An Analog module clock,
TAD, controls the conversion timing. The analog-to-digital conversion requires 12 clock
periods (12 TAD).
The period of the ADC conversion clock is software selected using an 8-bit counter. There are
256 possible options for T
Equation 17-1 gives the TAD value as a function of the ADCS bits and the device instruction cycle
clock period, TCY.
AD, which are specified by the ADCS<7:0> bits (AD1CON3<7:0>).
17
10-bit Analog-to-Digital
Converter (ADC)
Equation 17-1: ADC Conversion Clock Period
For correct analog-to-digital conversions, the ADC conversion clock (TAD) must be selected to
ensure a minimum TAD time of 83.33 ns (see 17.10 “Related Application Notes”).
Equation 17-2: Available Sampling Time, Sequential Sampling
© 2007-2011 Microchip Technology Inc. DS61104E-page 17-23
Page 24

PIC32 Family Reference Manual
T
PB
1
60MHz
------------------
2× 33.3ns==
1
1000ksps
----------------------- 1μsconverttime+=
1μs
12 1+
-------------- - 76.9ns T
AD
==
Desired ADC clock period
1μs
12 2+
-------------- - 71.4ns T
AD
==
T
AD
2 sample periods• 71.4ns 2• 142.8 ns sample time===
71.4ns
1
30MHz
------------------
⎝⎠
⎛⎞
----------------------- - 2.31=
Desired ADC clock divisor
17.4.12.1 CONFIGURING THE ADC FOR 1000 KSPS OPERATION
Calculate the parameters for 1 Msps for a system clock of 60 MHz and Peripheral Clock Divider = 2.
The calculation is performed as follows:
1. Calculate the Peripheral Bus clock time period (TPB) and the sample plus convert period.
Equation 17-3: TPB and Sample Plus Convert Period
2. Calculate the ideal TAD. The ADC requires one or more TAD (sample time) and 12 TAD
(convert time) to perform a sample/conversion.
a) Calculate the ADC sample plus convert time with a minimum sample time (1 TAD), as
shown in Equation 17-4. The ADC minimum requirements for T
sample time.
Equation 17-4: ADC Sample Plus Convert Time with a Minimum Sample Time
AD is met, but not the
b) Increase the sample period to 2 TAD.
c) Repeat the ADC clock calculation with a sample time equal to 2 TAD. This meets the
ADC minimum requirements for T
AD and sample time.
Equation 17-5: ADC Clock Calculation
3. Calculate the ADC clock divisor value using the values from the previous steps.
The closest available higher integer divisor value is 4 (ADCS = 1).
The closest available lower integer divisor value is 2 (ADCS = 0).
Equation 17-6: ADC Clock Divisor
DS61104E-page 17-24 © 2007-2011 Microchip Technology Inc.
Page 25

Section 17. 10-bit Analog-to-Digital Converter (ADC)
1
4122+()• 33.3ns )•
------------------------------------------------------ - 535.7ksps=
The resulting actual sample rate is too low. Calculate using a ADC clock divisor value of 2.
1
2122+()• 33.3ns )•
------------------------------------------------------ - 1071ksps=
The actual sample rate achieved is very close to the desired value, but it exceeds the 1 Msps
specification.
1
2123+()• 33.3 ns )•
------------------------------------------------------ - 1000ksps=
1
30MHz
------------------ 33.3ns TPB==
33.3ns 2 66.6ns=• T
AD
=
TAD3• 66.6ns 3• 200 ns sampletime===
Summary:
ADCS = 2: ADC clock is PB divided by 2
SAMPC = 3: Sample time is 3 T
AD periods
4. Calculate the sample rate using the available ADCS divisors. Calculate using an ADC
clock divisor value of 4.
Equation 17-7: Sample Rate Calculation
5. Calculate the sample time by increase the sampling time to reduce the sample rate to an
acceptable value. Recalculate using the divisor value of 2 and a sample time of 3 TAD.
Equation 17-8: Sample Time Calculation
17
10-bit Analog-to-Digital
Converter (ADC)
6. Verify the calculations of the actual TAD using the PB period and the actual ADC clock
divisor. The desired sample rate and values that meet the device specification are
calculated.
Equation 17-9:
17.4.13 Acquisition Time Considerations
Different acquisition/conversion sequences provide different times for the sample-and-hold
channel to acquire the analog signal. The user must ensure the acquisition time meets the
sampling requirements, as outlined in
When SSRC<2:0> (AD1CON1<7:5>) = 111, the conversion trigger is under ADC clock control.
The SAMC<4:0> bits (AD1CON3<12:8>) select the number of T
of acquisition and the start of conversion. This trigger option provides the fastest conversion rates
on multiple channels. After the start of acquisition, the module will count a number of T
specified by the SAMC bits.
17.5.20 “ADC Sampling Requirements”.
AD clock cycles between the start
AD clocks
© 2007-2011 Microchip Technology Inc. DS61104E-page 17-25
Page 26

PIC32 Family Reference Manual
17.4.14 Turning ON the ADC
When the ON bit (AD1CON1<15>) is ‘1’, the ADC module is in Active mode and is fully powered
and functional.
When ON is ‘0’, the ADC module is disabled. The digital and analog portions of the circuit are
turned off for maximum current savings.
In order to return to the Active mode from the OFF mode, the user software must wait for the
analog stages to stabilize. Refer to the “Electrical Characteristics” section in the specific
device data sheet for the stabilization time.
Note: Writing to any ADC control bits other than the ON (AD1CON1<15>), SAMP
(AD1CON1<1>), and DONE (AD1CON1<0>) bits is not recommended while the
ADC module is running.
17.4.15 Initiating Sampling
17.4.15.1 MANUAL MODE
In manual sampling, an acquisition is started by writing a ‘1’ to the SAMP bit (AD1CON1<1>).
Software must manually manage the start and end of the acquisition period by setting and then
clearing the SAMP bit after the desired acquisition period has elapsed.
17.4.15.2 AUTO-SAMPLE MODE
In Auto-sample mode, the sampling process is started by writing a ‘1’ to the ASAM bit
(AD1CON1<2>). In Auto-Sample mode, the acquisition period is defined by the ADCS<7:0> bits
(AD1CON3<7:0>). Acquisition is automatically started after a conversion is completed.
Auto-Sample mode can be used with any trigger source other than manual.
17.5 MISCELLANEOUS ADC FUNCTIONS
17.5.1 Aborting Sampling
Clearing the SAMP bit (AD1CON1<1>) while in Manual Sample mode will terminate sampling,
but may also start a conversion, if the SSRC<2:0> bits (AD1CON1<7:5>) = 000.
Clearing the ASAM bit (AD1CON1<2>) while in Auto-sample mode will not terminate an ongoing
acquire/convert sequence. However, sampling will not automatically resume after the current
sample is converted.
17.5.2 Aborting a Conversion
Clearing the ON bit (AD1CON1<15>) during a conversion will abort the current conversion. The
ADC Result register will not be updated with the partially completed analog-to-digital conversion
sample. That is, the corresponding result buffer location will continue to contain the value of the
last completed conversion (or the last value written to the buffer).
17.5.3 Buffer Fill Status
When the conversion result buffer is split using the BUFM bit (AD1CON2<1>), the BUFS bit
(AD1CON2<7>) indicates which half of the buffer the ADC is currently filling. If the BUFS
the ADC is filling ADC1BUF0 to ADC1BUF7 and the user software should read conversion
values from ADC1BUF8 to ADC1BUFF. If the BUFS bit = 1, the situation is reversed and the user
software should read conversion values from ADC1BUF0 to ADC1BUF7.
bit = 0,
DS61104E-page 17-26 © 2007-2011 Microchip Technology Inc.
Page 27

Section 17. 10-bit Analog-to-Digital Converter (ADC)
17.5.4 Offset Calibration
The ADC module provides a method of measuring the internal offset error. After this offset error
is measured, it can be subtracted, in software, from the result of a analog-to-digital conversion.
Use the following steps to perform an offset measurement:
1. Configure the ADC in the same manner as it will be used in the application.
2. Set the OFFCAL bit (AD1CON2<12>). This overrides the input selections and connects
the sample-and-hold inputs to AVss.
3. If auto-sample is used, set the CLRASAM bit (AD1CON1<4>) to stop conversions when
the number of samples stated by SMPI is reached.
4. Enable the ADC and perform a conversion. The value that is written to the ADC result
buffer is the internal offset error.
5. Clear the OFFCAL bit (AD2CON<12>) to return the ADC to normal operation.
Note: Only positive ADC offsets can be measured with this method.
17.5.5 Terminate Conversion Sequence after an Interrupt
The CLRASAM bit provides a method to terminate auto-sample after the first sequence is
completed. Setting the CLRASAM bit and starting an auto-sample sequence will cause the ADC
to complete one auto-sample sequence (the number of samples as defined by the SMPI<3:0>
bits (AD1CON2<5:2>)). Hardware will the clear the ASAM bit (AD1CON1<2>) and set the inter
rupt flag. This will stop the sampling process to allow inspection of the result buffer without results
being overwritten by the next automatic conversion sequence. The CLRASAM bit must be
cleared by software to disable this mode.
Note: Disabling Interrupts or masking the ADC interrupt has no effect on the operation of
the CLRASAM bit.
17
10-bit Analog-to-Digital
Converter (ADC)
-
17.5.6 DONE Bit Operation
The DONE bit (AD1CON1<0>) is set when a conversion sequence is complete. In Manual mode,
the DONE bit is persistent. It remains set until it is cleared by software. The DONE bit can be
polled to determine when the conversion has completed.
In all automatic sample modes (ASAM bit = 1), the DONE bit is not persistent. It is set at the end
of a conversion sequence and cleared by hardware when the next acquisition is started. Polling
the DONE bit is not recommended when operating the ADC in automatic modes. The AD1IF flag
bit (IFS1<1>) is latched after a conversion sequence is completed and can therefore be polled.
Figure 17-5 shows the ADC configuring for Alternate Sampling mode. Figure 17-6 shows the
ADC configuration for Scan mode. Figure 17-7 shows the ADC configuration for a combination
of Alternate Sampling mode and Scan mode.
© 2007-2011 Microchip Technology Inc. DS61104E-page 17-27
Page 28

PIC32 Family Reference Manual
AD1CON1
AD1CON2
AD1CON3
AD1CHS
AD1PCFG
AD1CSSL
Comparator
10-bit SAR Conversion Logic
DAC
AN12
AN13
AN14
AN15
AN8
AN9
AN10
AN11
AN4
AN5
AN6
AN7
AN0
AN1
AN2
AN3
Sample Control
SHA
ADC1BUF0:
ADC1BUFF
Control Logic
Data
Input MUX Control
Conversion Control
Pin Config Control
Internal Data Bus
32
VR+
V
R-
MUX A
MUX B
VINH
VINL
VINH
VINH
VINL
VINL
Formatting
CH0SA<3:0>
CH0SB<3:0>
CH0NB
CHONA
VR-
V
R-
VR+
Figure 17-5: Simplified 10-bit High-Speed ADC Block Diagram for Alternate Sample Mode
DS61104E-page 17-28 © 2007-2011 Microchip Technology Inc.
Page 29

Section 17. 10-bit Analog-to-Digital Converter (ADC)
AD1CON1
AD1CON2
AD1CON3
AD1CHS
AD1PCFG
AD1CSSL
Comparator
10-bit SAR Conversion Logic
DAC
AN12
AN13
AN14
AN15
AN8
AN9
AN10
AN11
AN4
AN5
AN6
AN7
AN0
AN1
AN2
AN3
Sample Control
SHA
ADC1BUF0:
ADC1BUFF
Control Logic
Data
Input MUX Control
Conversion Control
Pin Config Control
Internal Data Bus
32
VR+
V
R-
MUX A
VINH
VINL
VINH
VINL
Formatting
AD1CSSL
CH0NA
VR-
VR+
Figure 17-6: Simplified 10-bit High-Speed ADC Block Diagram for Scan Mode
17
10-bit Analog-to-Digital
Converter (ADC)
© 2007-2011 Microchip Technology Inc. DS61104E-page 17-29
Page 30

PIC32 Family Reference Manual
AD1CON1
AD1CON2
AD1CON3
AD1CHS
AD1PCFG
AD1CSSL
Comparator
10-bit SAR Conversion Logic
DAC
AN12
AN13
AN14
AN15
AN8
AN9
AN10
AN11
AN4
AN5
AN6
AN7
AN0
AN1
AN2
AN3
Sample Control
SHA
ADC1BUF0:
ADC1BUFF
Control Logic
Data
Input MUX Control
Conversion Control
Pin Config Control
Internal Data Bus
32
VR+
V
R-
MUX A
MUX B
VINH
VINL
VINH
VINH
VINL
VINL
Formatting
AD1CSSL
CH0SB<3:0>
CH0NB
CH0NA
VR-
V
R-
VR+
Figure 17-7: Simplified 10-bit High-Speed ADC Block Diagram for Alternate Sample and Scan Mode
DS61104E-page 17-30 © 2007-2011 Microchip Technology Inc.
Page 31

Section 17. 10-bit Analog-to-Digital Converter (ADC)
ADCLK
SAMP
ADC1BUF0
TACQ
TCONV
set SAMP = 0set SAMP = 1
Instruction Execution
DONE
AD1PCFG = 0xFFFB; // PORTB = Digital; RB2 = analog
AD1CON1 = 0x0000; // SAMP bit = 0 ends sampling
// and starts converting
AD1CHS = 0x00020000; // Connect RB2/AN2 as CH0 input
// in this example RB2/AN2 is the input
AD1CSSL = 0;
AD1CON3 = 0x0002; // Manual Sample, TAD = internal 6 TPB
AD1CON2 = 0;
AD1CON1SET = 0x8000; // turn on the ADC
while (1) // repeat continuously
{
AD1CON1SET = 0x0002; // start sampling ...
DelayNmSec(100); // for 100 ms
AD1CON1CLR = 0x0002; // start Converting
while (!(AD1CON1 & 0x0001));// conversion done?
ADCValue = ADC1BUF0; // yes then get ADC value
} // repeat
17.5.7 Conversion Sequence Examples
The following configuration examples show the ADC operation in different sampling and buffering
configurations. In each example, setting the ASAM bit (AD1CON2<1>) starts automatic
sampling. A conversion trigger ends sampling and starts conversion.
17.5.8 Manual Conversion Control
When the SSRC<2:0> bits (AD1CON1<7:5>) = 000, the conversion trigger is under software
control. Clearing the SAMP bit (AD1CON1<1>) starts the conversion sequence.
Figure 17-8 is an example where setting the SAMP bit initiates sampling and clearing the SAMP
bit terminates sampling and starts conversion. The user software must time the setting and
clearing of the SAMP bit to ensure adequate acquisition time of the input signal. See
Example 17-1 for a code example.
Figure 17-8: Converting 1 Analog Input, Manual Sample Start, Manual Conversion Start
17
10-bit Analog-to-Digital
Converter (ADC)
Example 17-1: Converting 1 Channel, Manual Sample Start, Manual Conversion Start Code
© 2007-2011 Microchip Technology Inc. DS61104E-page 17-31
Page 32

PIC32 Family Reference Manual
ADCLK
SAMP
ADC1BUF0
TACQ
TCONV
Set = 0
Instruction Execution
TCONV
set ASAM = 1 Set = 0
TAC Q
TAD0 TAD0
DONE
AD1PCFG = 0xFF7F; // all PORTB = Digital but RB7 = analog
AD1CON1 = 0x0004; // ASAM bit = 1 implies acquisition
// starts immediately after last
// conversion is done
AD1CHS = 0x00070000; // Connect RB7/AN7 as CH0 input
// in this example RB7/AN7 is the input
AD1CSSL = 0;
AD1CON3 = 0x0002; // Sample time manual, TAD = internal 6 TPB
AD1CON2 = 0;
AD1CON1SET = 0x8000; // turn ON the ADC
while (1) // repeat continuously
{
DelayNmSec(100); // sample for 100 mS
AD1CON1SET = 0x0002; // start Converting
while (!(AD1CON1 & 0x0001));// conversion done?
ADCValue = ADC1BUF0; // yes then get ADC value
} // repeat
17.5.9 Automatic Acquisition
Figure 17-9 is an example in which setting the ASAM bit (AD1CON1<2>) initiates automatic
acquisition, and clearing the SAMP bit (AD1CON1<1>) terminates sampling and starts
conversion. After the conversion completes, the module will automatically return to a acquisition
state. The SAMP bit is automatically set at the start of the acquisition interval. The user software
must time the clearing of the SAMP bit to ensure adequate acquisition time of the input signal,
understanding that the time between clearing of the SAMP bit includes the conversion time as
well as the acquisition time. See
Figure 17-9: Converting 1 Channel, Automatic Sample Start, Manual Conversion Start
Example 17-2 for a code example.
Example 17-2: Converting 1 Channel, Automatic Sample Start, Manual Conversion Start Code
DS61104E-page 17-32 © 2007-2011 Microchip Technology Inc.
Page 33

Section 17. 10-bit Analog-to-Digital Converter (ADC)
TSMP = SAMC <4:0> * TAD
ADCLK
SAMP
ADC1BUF0
TSAMP
TCONV
set SAMP = 1
Instruction Execution
DONE
= 31 TAD
AD1PCFG = 0xEFFF; // all PORTB = Digital; RB12 = analog
AD1CON1 = 0x00E0; // SSRC bit = 111 implies internal
// counter ends sampling and starts converting
AD1CHS = 0x000C0000; // Connect RB12/AN12 as CH0 input
// in this example RB12/AN12 is the input
AD1CSSL = 0;
AD1CON3 = 0x1F02; // Sample time = 31 TAD
AD1CON2 = 0;
AD1CON1SET = 0x8000; // turn ON the ADC
while (1) // repeat continuously
{
AD1CON1CLR = 0x0002; // start sampling then...
// after 31Tad go to conversion
while (!(AD1CON1 & 0x0001)); // conversion done?
ADCValue = ADC1BUF0; // yes then get ADC value
} // repeat
17.5.10 Clocked Conversion Trigger
When the SSRC<2:0> bits (AD1CON1<7:5>) = 111, the conversion trigger is under ADC clock
control. The SAMC<4:0> bits (AD1CON3<4:0>) select the number of T
the start of acquisition and the start of conversion. This trigger option provides the fastest
conversion rates on multiple channels. After the start of acquisition, the module will count a
number of T
AD clocks specified by the SAMC<4:0> bits.
Equation 17-10: Clocked Conversion Trigger Time
AD clock cycles between
SAMC must always be programmed for at least one clock cycle. See Example 17-3 for a code
example.
Figure 17-10: Converting 1 Channel, Manual Sample Start, TAD Based Conversion Start
Example 17-3: Converting 1 Channel, Manual Sample Start, TAD Based Conversion Start Code
17
10-bit Analog-to-Digital
Converter (ADC)
© 2007-2011 Microchip Technology Inc. DS61104E-page 17-33
Page 34

PIC32 Family Reference Manual
ADCLK
SAMP
ADC1BUF1
TSAMP
TCO NV
DONE
= 15 TAD
TSAMP
TCO NV
= 15 TAD
ADC1BUF0
set ASAM = 1
Instruction Execution
AD1PCFG = 0xFFFB; // all PORTB = Digital; RB2 = analog
AD1CON1 = 0x00E0; // SSRC bit = 111 implies internal
// counter ends sampling and starts
// converting
AD1CHS = 0x00020000; // Connect RB2/AN2 as CH0 input
// in this example RB2/AN2 is the input
AD1CSSL = 0;
AD1CON3 = 0x0F00; // Sample time = 15 TAD
AD1CON2 = 0x0004; // Interrupt after every 2 samples
AD1CON1SET = 0x8000; // turn ON the ADC
while (1) // repeat continuously
{
ADCValue = 0; // clear value
ADC16Ptr = &ADC1BUF0; // initialize ADC1BUF0 pointer
IFS1CLR = 0x0002; // clear ADC interrupt flag
AD1CON1SET = 0x0004; // auto start sampling
// for 31 TAD, and then go to conversion
while (!IFS1 & 0x0002); // conversion done?
AD1CON1CLR = 0x0004; // yes, stop sample/convert
for (count = 0; count < 2; count++)// average the two ADC values
{
ADCValue = ADCValue + *(ADC16Ptr++);
ADCValue = ADCValue >> 1;
} // repeat
}
17.5.11 Free Running Sample Conversion Sequence
As shown in Figure 17-11, using the Auto-Convert Conversion Trigger mode
(SSRC<2:0> = 111) in combination with the Automatic Sampling Start mode (ASAM = 1), allows
the ADC module to schedule acquisition/conversion sequences with no intervention by the user
or other device resources. This “Clocked” mode allows continuous data collection after module
initialization. See
Figure 17-11: Converting 1 Channel, Two Times, Auto-Sample Start, TAD Based Conversion Start
Example 17-4 for a code example.
Example 17-4: Converting 1 Channel, Auto-Sample Start, TAD Based Conversion Start Code
DS61104E-page 17-34 © 2007-2011 Microchip Technology Inc.
Page 35

Section 17. 10-bit Analog-to-Digital Converter (ADC)
TSMP = SAMC <4:0> * TAD
Conversion
ADCLK
SAMP
ADC1BUF0
TSAMP
TCO NV
Instruction Execution
Trigger
set SAMP = 1
ADCLK
SAMP
ADC1BUF0
TSAMP
TCO NV
set ASAM = 1 Instruction Execution
TCONV
TSAMP
ADC1BUF1
DONE
Conversion
Trigger
17.5.12 Acquisition Time Considerations Using Clocked Conversion Trigger and Automatic Sampling
Different acquisition/conversion sequences provide different available acquisition times for the
sample-and-hold channel to acquire the analog signal. The user must ensure the acquisition time
exceeds the acquisition requirements, as outlined in
Assuming that the module is set for automatic sampling and using a clocked conversion trigger,
the acquisition interval is determined by the SAMC<4:0> bits (AD1CON3<12:8>).
Equation 17-11 shows the available sampling time. Example 17-5 provides the Converting 1
Channel, Auto-Sample Start and Conversion Trigger Based Conversion Start code.
17.5.20 “ADC Sampling Requirements”.
Equation 17-11: Available Sampling Time
Figure 17-12: Converting 1 Channel, Manual Sample Start, Conversion Trigger Based Conversion Start
Figure 17-13: Converting 1 Channel, Auto-Sample Start, Conversion Trigger Based Conversion Start
17
10-bit Analog-to-Digital
Converter (ADC)
© 2007-2011 Microchip Technology Inc. DS61104E-page 17-35
Page 36

PIC32 Family Reference Manual
AD1PCFG = 0xFFFB; // all PORTB = Digital; RB2 analog
AD1CON1 = 0x0040; // SSRC bit = 010 implies GP TMR3
// compare ends sampling and starts
// converting.
AD1CHS = 0x00020000; // Connect RB2/AN2 as CH0 input
// in this example RB2/AN2 is the input
AD1CSSL = 0;
AD1CON3 = 0x0000; // Sample time is TMR3, TAD = internal TPB * 2
AD1CON2 = 0x0004; // Interrupt after 2 conversions
// set TMR3 to time out every 125 ms
TMR3= 0x0000;
PR3= 0x3FFF;
T3CON = 0x8010;
AD1CON1SET = 0x8000; // turn ON the ADC
AD1CON1SET = 0x0004; // start auto sampling every 125 mSecs
while (1) // repeat continuously
{
while (!IFS1 & 0x0002){}; // conversion done?
ADCValue = ADC1BUF0; // yes then get first ADC value
IFS1CLR = 0x0002; // clear ADIF
} // repeat
Example 17-5: Converting 1 Channel, Auto-Sample Start, Conversion Trigger Based Conversion Start Code
DS61104E-page 17-36 © 2007-2011 Microchip Technology Inc.
Page 37

Section 17. 10-bit Analog-to-Digital Converter (ADC)
ADCLK
SAMP
ADC1BUF0
TSAMP
TCONV
set ASAM = 1
Instruction Execution
ADC1BUF1
DONE
ADC1BUFE
ADC1BUFF
Input to MUX A
AN0
TSAMP
TCONV
AN0
TSAMP
TCONV
AN0
TSAMP
TCONV
AN0
ADIF
ASAM
Conversion
Trigger
17.5.13 Sampling a Single Channel Multiple Times
Figure 17-14 and Ta bl e 17-4 illustrate a basic configuration of the ADC module. In this case, one
ADC input, AN0, will be acquired and converted. The results are stored in the ADC1BUF buffer.
This process repeats 15 times until the buffer is full, and then the module generates an interrupt.
The entire process repeats.
With the ALTS bit (AD1CON2<0>) clear, only the MUX A inputs are active. The CH0SA<3:0> bits
(AD1CHS<19:16>) and CH0NA bit (AD1CHS<23>) are specified (AN0-V
sample/hold channel. Other input selection bits are not used.
Figure 17-14: Converting One Channel 15 Times 15 Samples Per Interrupt
REF-) as the input to the
17
10-bit Analog-to-Digital
Converter (ADC)
© 2007-2011 Microchip Technology Inc. DS61104E-page 17-37
Page 38

PIC32 Family Reference Manual
CONTROL BITS
Sequence Select
SMPI<2:0> = 1111
Interrupt on 15th sample
—
—
BUFM = 0
Single 16-word result buffer
ALTS = 0
Always use MUX A input select
MUX A Input Select
CH0SA<3:0> = 0000
Select AN0 for CH0+ input
CH0NA = 0
Select V
R- for CH0- input
CSCNA = 0
No input scan
CSSL<15:0> = n/a
Scan input select unused
—
—
MUX B Input Select
CH0SB<3:0> = n/a
Mux B positive input unused
CH0NB = n/a
Mux B negative input unused
—
—
OPERATION SEQUENCE
Sample MUX A Inputs: AN0
Convert, Write Buffer 0x0
Sample MUX A Inputs: AN0
Convert, Write Buffer 0x1
Sample MUX A Inputs: AN0
Convert, Write Buffer 0x2
Sample MUX A Inputs: AN0
Convert, Write Buffer 0x3
Sample MUX A Inputs: AN0
Convert, Write Buffer 0x4
Sample MUX A Inputs: AN0
Convert, Write Buffer 0x5
Sample MUX A Inputs: AN0
Convert, Write Buffer 0x6
Sample MUX A Inputs: AN0
Convert, Write Buffer 0x7
Sample MUX A Inputs: AN0
Convert, Write Buffer 0x8
Sample MUX A Inputs: AN0
Convert, Write Buffer 0x9
Sample MUX A Inputs: AN0
Convert, Write Buffer 0xA
Sample MUX A Inputs: AN0
Convert, Write Buffer 0xB
Sample MUX A Inputs: AN0
Convert, Write Buffer 0xC
Sample MUX A Inputs: AN0
Convert, Write Buffer 0xD
Sample MUX A Inputs: AN0
Convert, Write Buffer 0xE
Interrupt
Repeat
Buffer
Address
Buffer @
1st Interrupt
Buffer @
2nd Interrupt
ADC1BUF0 AN0 sample 1 AN0 sample 16
ADC1BUF1 AN0 sample 2 AN0 sample 17
ADC1BUF2 AN0 sample 3 AN0 sample 18
ADC1BUF3 AN0 sample 4 AN0 sample 19
ADC1BUF4 AN0 sample 5 AN0 sample 20
ADC1BUF5 AN0 sample 6 AN0 sample 21
ADC1BUF6 AN0 sample 7 AN0 sample 22
ADC1BUF7 AN0 sample 8 AN0 sample 23 •••
ADC1BUF8 AN0 sample 9 AN0 sample 24
ADC1BUF9 AN0 sample 10 AN0 sample 25
ADC1BUFA AN0 sample 11 AN0 sample 26
ADC1BUFB AN0 sample 12 AN0 sample 27
ADC1BUFC AN0 sample 13 AN0 sample 28
ADC1BUFD AN0 sample 14 AN0 sample 29
ADC1BUFE AN0 sample 15 AN0 sample 30
ADC1BUFF
Table 17-4: Converting One Channel 15 Times/Interrupt
DS61104E-page 17-38 © 2007-2011 Microchip Technology Inc.
Page 39

Section 17. 10-bit Analog-to-Digital Converter (ADC)
ADCLK
SAMP
ADC1BUF0
TSA MP
TCO NV
set ASAM = 1
Instruction Execution
ADC1BUF1
DONE
ADC1BUFE
ADC1BUFF
Input MUX A
AN0
TSA MP
TCO NV
AN1
TSA MP
TCONV
AN14
TSAMP
TCONV
AN15
ADIF
ASAM
Conversion
Trigger
17.5.14 Example: Analog-to-Digital Conversions While Scanning Through Analog Inputs
Figure 17-15 and Ta bl e 17-5 illustrate a typical setup where all available analog input channels
are sampled and converted. Setting the CSCNA bit (AD1CON2<10>) specifies scanning of the
ADC inputs. Other conditions are similar to the previous example, (see
Single Channel Multiple Times”).
Initially, the AN0 input is acquired and converted. The result is stored in the ADC1BUF buffer.
Then the AN1 input is acquired and converted. This process of scanning the inputs repeats 16
times until the buffer is full and then the module generates an interrupt. Then, the entire process
repeats.
Figure 17-15: Scanning Through 16 Inputs 16 Samples Per Interrupt
17.5.13 “Sampling a
17
10-bit Analog-to-Digital
Converter (ADC)
© 2007-2011 Microchip Technology Inc. DS61104E-page 17-39
Page 40

PIC32 Family Reference Manual
CONTROL BITS
Sequence Select
SMPI<2:0> = 1111
Interrupt on 16th sample
—
—
BUFM = 0
Single 16-word result buffer
ALTS = 0
Always use MUX A input select
MUX A Input Select
CH0SA<3:0> = n/a
Overridden by CSCNA
CH0NA = 0
Select V
R- for MUX A negative input
CSCNA = 1
Scan inputs
CSSL<15:0> = 1111 1111 1111 1111
Scan input select
—
—
MUX B Input Select
SB<3:0> = n/a
MUX B positive input unused
CH0NB = n/a
MUX B negative input unused
—
—
OPERATION SEQUENCE
Sample MUX A Inputs: AN0
Convert, Write Buffer 0x0
Sample MUX A Inputs: AN1
Convert, Write Buffer 0x1
Sample MUX A Inputs: AN2
Convert, Write Buffer 0x2
Sample MUX A Inputs: AN3
Convert, Write Buffer 0x3
Sample MUX A Inputs: AN4
Convert, Write Buffer 0x4
Sample MUX A Inputs: AN5
Convert, Write Buffer 0x5
Sample MUX A Inputs: AN6
Convert, Write Buffer 0x6
Sample MUX A Inputs: AN7
Convert, Write Buffer 0x7
Sample MUX A Inputs: AN8
Convert, Write Buffer 0x8
Sample MUX A Inputs: AN9
Convert, Write Buffer 0x9
Sample MUX A Inputs: AN10
Convert, Write Buffer 0xA
Sample MUX A Inputs: AN11
Convert, Write Buffer 0xB
Sample MUX A Inputs: AN12
Convert, Write Buffer 0xC
Sample MUX A Inputs: AN13
Convert, Write Buffer 0xD
Sample MUX A Inputs: AN14
Convert, Write Buffer 0xE
Sample MUX A Inputs: AN15
Convert, Write Buffer 0xF
Interrupt
Repeat
Buffer
Address
Buffer @
1st Interrupt
Buffer @
2nd Interrupt
ADC1BUF0 AN0 sample 1 AN0 sample 17
ADC1BUF1 AN1 sample 2 AN1 sample 18
ADC1BUF2 AN2 sample 3 AN2 sample 19
ADC1BUF3 AN3 sample 4 AN3 sample 20
ADC1BUF4 AN4 sample 5 AN4 sample 21
ADC1BUF5 AN5 sample 6 AN5 sample 22
ADC1BUF6 AN6 sample 7 AN6 sample 23
ADC1BUF7 AN7 sample 8 AN7 sample 24 •••
ADC1BUF8 AN8 sample 9 AN8 sample 25
ADC1BUF9 AN9 sample 10 AN9 sample 26
ADC1BUFA AN10 sample 11 AN10 sample 27
ADC1BUFB AN11 sample 12 AN11 sample 28
ADC1BUFC AN12 sample 13 AN12 sample 29
ADC1BUFD AN13 sample 14 AN13 sample 30
ADC1BUFE AN14 sample 15 AN14 sample 31
ADC1BUFF AN15 sample 16 AN15 sample 32
Table 17-5: Scanning Through 16 Inputs/Interrupt
DS61104E-page 17-40 © 2007-2011 Microchip Technology Inc.
Page 41

Section 17. 10-bit Analog-to-Digital Converter (ADC)
ADCLK
SAMP
ADC1BUF0
set ASAM = 1
Instruction Execution
ADC1BUF1
ADC1BUF2
Input to MUX A
AN0
TSA MP
ADIF
ADC1BUF8
ADC1BUF9
ADC1BUFA
AN1
TSA MP
AN2
TSAMP
clear IFS0,#ADIF clear IFS0,#ADIF
BUFS
Conversion
Trigger
T
CONV TCONV TCONV
17.5.15 Example: Using Dual 8-Word Buffers
Figure 17-16 and Table 17-6 demonstrate using dual 8-word buffers and alternating the buffer fill.
Setting the BUFM bit (AD1CON2<1>) enables dual 8-word buffers. The BUFM bit setting does
not affect other operational parameters. First, the conversion sequence starts filling the buffer at
ADC1BUF0 (buffer location 0 x 0). After the first interrupt occurs, the buffer begins to fill at
ADC1BUF8 (buffer location 0
cleared after each interrupt to show which buffer is being filled. In this example, three analog
inputs are sampled and an interrupt occurs after every third sample.
Figure 17-16: Converting Three Inputs, Three Samples Per Interrupt Using Dual 8-Word Buffers
x 8). The BUFS Status bit (AD1CON2<7>) is alternately set and
17
10-bit Analog-to-Digital
Converter (ADC)
© 2007-2011 Microchip Technology Inc. DS61104E-page 17-41
Page 42

PIC32 Family Reference Manual
CONTROL BITS
Sequence Select
SMPI<2:0> = 0010
Interrupt after every third sample
—
—
BUFM = 1
Dual 8-word result buffers
ALTS = 0
Always use MUX A
MUX A Input Select
CH0SA<3:0> = n/a
MUX A positive input select is not used
CH0NA = 0
Select V
R- for MUX A negative input
CSCNA = 1
Enable input scan
CSSL<15:0> = 0x0007
Scan input select scan list consisting of AN0, AN1,
and AN2
AD1PCFG = 0X0007
Select Analog Input mode for AN0, AN1, and AN2
—
MUX B Input Select
CH0SB<3:0> = n/a
MUX B positive input unused
CH0NB = n/a
MUX B negative input unused
—
—
OPERATION SEQUENCE
Sample MUX A Inputs: AN0
Convert AN0, Write Buffer 0x0
Sample MUX A Inputs: AN1
Convert AN1, Write Buffer 0x1
Sample MUX A Inputs: AN2
Convert AN2, Write Buffer 0x2
Interrupt; Change Buffer
Sample MUX A Inputs: AN0
Convert AN0, Write Buffer 0x8
Sample MUX A Inputs: AN1
Convert AN1, Write Buffer 0x9
Sample MUX A Inputs: AN2
Convert AN2, Write Buffer 0xA
Interrupt; Change Buffer
Repeat
Buffer
Address
Buffer @
1st Interrupt
Buffer @
2nd Interrupt
ADC1BUF0 AN0 sample 1
ADC1BUF1 AN1 sample 1
ADC1BUF2 AN2 sample 1
ADC1BUF3
ADC1BUF4
ADC1BUF5
ADC1BUF6
ADC1BUF7 •••
ADC1BUF8 AN0 sample 2
ADC1BUF9 AN1 sample 2
ADC1BUFA AN2 sample 2
ADC1BUFB
ADC1BUFC
ADC1BUFD
ADC1BUFE
ADC1BUFF
Table 17-6: Converting Three Inputs, Three Samples/Interrupt Using Dual 8-Word Buffers
DS61104E-page 17-42 © 2007-2011 Microchip Technology Inc.
Page 43

Section 17. 10-bit Analog-to-Digital Converter (ADC)
ADCLK
SAMP
ADC1BUF0
TSAMP
T
CONV
set ASAM = 1
Instruction Execution
ADC1BUF1
DONE
ADC1BUFE
ADC1BUFF
Input to MUX A
AN0
T
SAMP
TCONV
TSAMP
TCONV
AN0
TSAMP
TCONV
ADIF
ASAM
Conversion
Trigger
Input to MUX B
AN1 AN1
17.5.16 Example: Using Alternating MUX A and MUX B Input Selections
Figure 17-17 and Ta bl e 17-7 demonstrate alternating sampling of the inputs assigned to MUX A
and MUX B. Setting the ALTS (AD1CON2<0>) bit enables alternating input selections. The first
sample uses the MUX A inputs specified by the CH0SA (AD1CHS<19:16>) and CH0NA
(AD1CHS<23>) bits. The next sample uses the MUX B inputs specified by the CH0SB
(AD1CHS<27:24>) and CH0NB (AD1CHS<31>) bits.
In the following example, one of the MUX B input specifications uses two analog inputs as a
differential source to the sample/hold.
This example also demonstrates use of the dual 8-word buffers. An interrupt occurs after every
fourth sample, which results in filling 4 words into the buffer on each interrupt.
Figure 17-17: Converting Two Analog Inputs by Alternating with Four Samples Per Interrupt
17
10-bit Analog-to-Digital
Converter (ADC)
© 2007-2011 Microchip Technology Inc. DS61104E-page 17-43
Page 44

PIC32 Family Reference Manual
CONTROL BITS
Sequence Select
SMPI<2:0> = 0011
Interrupt on 4th sample
—
—
BUFM = 1
Dual 8-word result buffers
ALTS = 1
Alternate MUX A/B input select
MUX A Input Select
CH0SA<3:0> = 0000
Select AN0 for MUX A positive input
CH0NA = 0
Select V
R- for MUX A negative input
CSCNA = 0
No input scan
CSSL<15:0> = n/a
Scan input select unused
—
—
MUX B Input Select
CH0SB<3:0> = 0001
Select AN1 for MUX B positive input
CH0NB = 0
Select V
R- for MUX B negative input
—
—
OPERATION SEQUENCE
Sample MUX A Inputs: AN0
Convert, Write Buffer 0x0
Sample MUX B Inputs: AN1
Convert, Write Buffer 0x1
Sample MUX A Inputs: AN0
Convert, Write Buffer 0x2
Sample MUX B Inputs: AN1
Convert, Write Buffer 0x3
Interrupt; Change Buffer
Sample MUX A Inputs: AN0
Convert, Write Buffer 0x8
Sample MUX B Inputs: AN1
Convert, Write Buffer 0x9
Sample MUX A Inputs: AN0
Convert, Write Buffer 0xA
Sample MUX B Inputs: AN1
Convert, Write Buffer 0xB
Interrupt; Change Buffer
Repeat
Buffer
Address
Buffer @
1st Interrupt
Buffer @
2nd Interrupt
ADC1BUF0 AN0 sample 1
ADC1BUF1 AN1 sample 1
ADC1BUF2 AN0 sample 2
ADC1BUF3 AN1 sample 2
ADC1BUF4
ADC1BUF5
ADC1BUF6
ADC1BUF7 •••
ADC1BUF8 AN0 sample 3
ADC1BUF9 AN1 sample 3
ADC1BUFA AN0 sample 4
ADC1BUFB AN1 sample 4
ADC1BUFC
ADC1BUFD
ADC1BUFE
ADC1BUFF
Table 17-7: Converting Two Sets of Inputs Using Alternating Input Selections
DS61104E-page 17-44 © 2007-2011 Microchip Technology Inc.
Page 45

Section 17. 10-bit Analog-to-Digital Converter (ADC)
ADCLK
SAMP
ADC1BUF0
TSAMP
TCONV
set ASAM = 1
Instruction Execution
ADC1BUF1
DONE
ADC1BUFE
ADC1BUFF
Input to MUX A
AN0
TSAMP
TCONV
TSAMP
TCONV
AN1
TSAMP
TCONV
ADIF
ASAM
Conversion
Trigger
Input to Max B
AN2 AN2
17.5.17 Example: Converting Three Analog Inputs Using Alternating Sample Mode and a Scan List
Figure 17-18, Figure 17-19, and Ta bl e 17-8 demonstrate sampling by scanning through inputs
and alternating between MUX A and MUX B. When the Alternating Sample mode is selected, the
first input to be sampled will be the input selected for MUX A, the second sample will be the input
selected for MUX B. Then the process repeats. When scanning is combined with Alternating
Input mode, the positive input to MUX A is selected by the contents of the AD1CSSL register, not
the CH0SA<3:0> bits (AD1CHS<19:16>). For each sample that MUX A is selected the next item
in the scan list is sampled. The positive input to MUX B is selected by the CH0SB<3:0> bits
(AD1CHS<27:24>).
When the ASAM bit (AD1CON1<2>) is clear, sampling will not resume after conversion
completion, but will occur when setting the SAMP bit (AD1CON1<1>).
Figure 17-18: Converting Three Analog Inputs Using Alternating Sample Mode and a Scan List
17
10-bit Analog-to-Digital
Converter (ADC)
© 2007-2011 Microchip Technology Inc. DS61104E-page 17-45
Page 46

PIC32 Family Reference Manual
AD1CON1
AD1CON2
AD1CON3
AD1CHS
AD1PCFG
AD1CSSL
Comparator
10-bit SAR Conversion Logic
VREF+
DAC
AN12
AN13
AN14
AN15
AN8
AN9
AN10
AN11
AN4
AN5
AN6
AN7
AN0
AN1
AN2
AN3
VREF-
Sample Control
SHA
AVSS
AVDD
ADC1BUF0:
ADC1BUFF
Control Logic
Data
Input MUX Control
Conversion Control
Pin Config Control
Internal Data Bus
32
VR+VR-
MUX A
MUX B
VINH
VINL
VINH
VINH
VINL
VINL
VR+
V
R-
VR Select
Formatting
AD1CSSL
CHOSB<3:0>
CHONB
CHONA
Figure 17-19: 10-bit High-Speed ADC Block Diagram for Alternating Sample and Scan
DS61104E-page 17-46 © 2007-2011 Microchip Technology Inc.
Page 47

Section 17. 10-bit Analog-to-Digital Converter (ADC)
CONTROL BITS
Sequence Select
SMPI<2:0> = 0011
Interrupt on 4th sample
—
—
BUFM = 0
Single 16-word result buffer
ALTS = 1
Alternate MUX A/B input select
MUX A Input Select
CH0SA<3:0> = n/a
Not used
CH0NA = 0
Select V
R- for CH0- input
CSCNA = 1
Enable input scan
CSSL<15:0> = n/a
Scan input select scan list consisting of AN0 and AN1
—
—
MUX B Input Select
CH0SB<3:0> = 0010
Select AN7 for CH0+ input
CH0NB = 0
Select V
R- for CH0- input
—
—
OPERATION SEQUENCE
Sample: AN0
Convert, Write Buffer 0x0
Sample: AN2
Convert, Write Buffer 0x1
Sample: AN1
Convert, Write Buffer 0x2
Sample: AN2
Convert, Write Buffer 0x3
Interrupt
Repeat
Buffer
Address
Buffer @
1st Interrupt
Buffer @
2nd Interrupt
ADC1BUF0 AN0 sample 1 AN0 sample 5
ADC1BUF1 AN2 sample 2 AN2 sample 6
ADC1BUF2 AN1 sample 3 AN1 sample 7
ADC1BUF3 AN2 sample 4 AN2 sample 8
ADC1BUF4
ADC1BUF5
ADC1BUF6
ADC1BUF7 •••
ADC1BUF8
ADC1BUF9
ADC1BUFA
ADC1BUFB
ADC1BUFC
ADC1BUFD
ADC1BUFE
ADC1BUFF
Table 17-8: Sampling Eight Inputs Using Sequential Sampling
17
10-bit Analog-to-Digital
Converter (ADC)
© 2007-2011 Microchip Technology Inc. DS61104E-page 17-47
Page 48

PIC32 Family Reference Manual
10 0000 0010 (= 514)
10 0000 0011 (= 515)
01 1111 1101 (= 509)
01 1111 1110 (= 510)
01 1111 1111 (= 511)
11 1111 1110 (= 1022)
11 1111 1111 (= 1023)
00 0000 0000 (= 0)
00 0000 0001 (= 1)
Output
Code
10 0000 0000 (= 512)
(VINH – VINL)
V
R-
VR+ – VR-
1024
VR+
V
R- +
10 0000 0001 (= 513)
512*(V
R+ – VR-)
1024
VR- +
1023*(V
R+ – VR-)
1024
VR- +
17.5.18 Transfer Function
The ideal transfer function of the ADC is shown in Figure 17-20. The difference of the input
voltages, (VINH – VINL), is compared to the reference, (VR+ – VR-).
• The first code transition occurs when the input voltage is (VR+ – VR-L/2048) or 0.5 LSb
•The 00 0000 0001 code is centered at (VR+ – VR-/1024) or 1.0 LSb
•The 10 0000 0000 code is centered at (512 * (VR+ – VR-)/1024)
• An input voltage less than (1 * (VR+ – VR-L)/2048) converts as 00 0000 0000
• An input greater than (2045 * (VR+ – VR-)/2048) converts as 11 1111 1111
Figure 17-20: ADC Transfer Function
DS61104E-page 17-48 © 2007-2011 Microchip Technology Inc.
Page 49
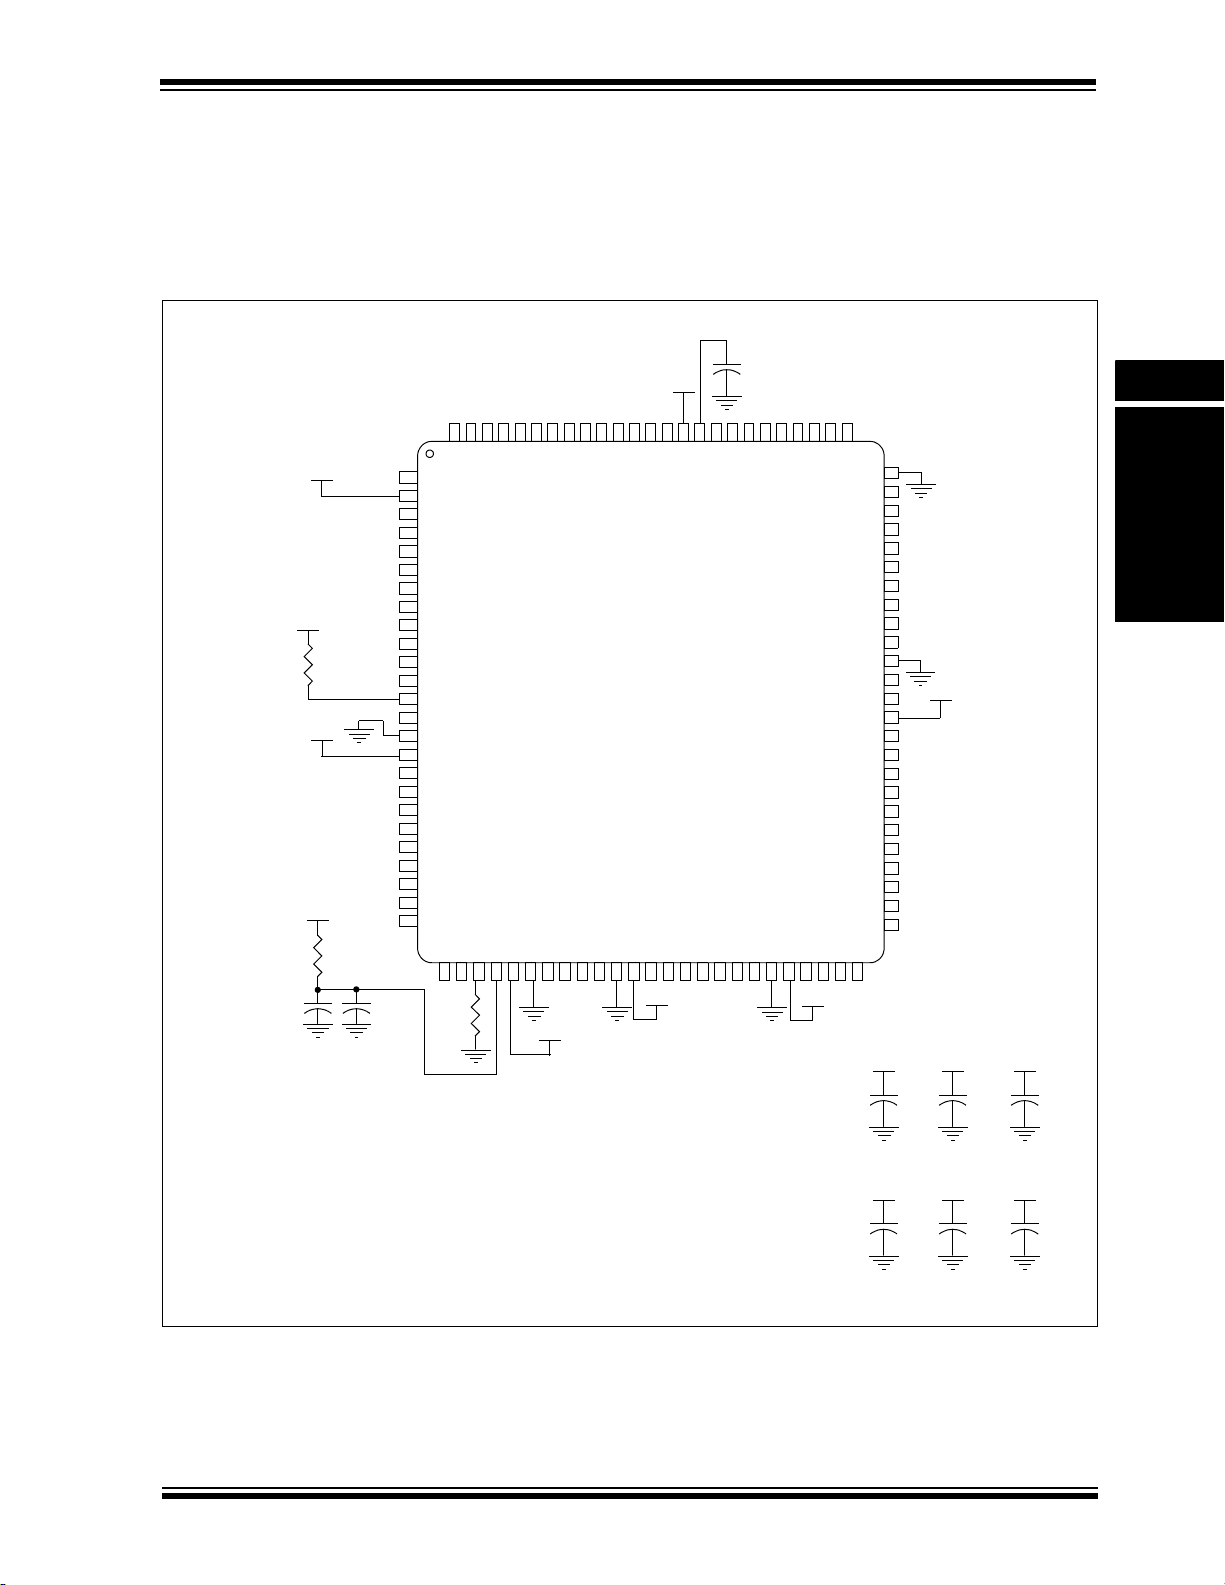
Section 17. 10-bit Analog-to-Digital Converter (ADC)
VDD
AVDD
AVDD
VDD
R2
10
C2
0.1 μF
C1
0.01 μF
R1
10
C8
1 μF
VDD
C7
0.1 μF
VDD
C6
0.01 μF
VDD
C5
1 μF
VDD
C4
0.1 μF
VDD
C3
0.01 μF
VDD
VDD
9294939190898887868584838281807978
20
2
3
4
5
6
7
8
9
10
11
12
13
14
15
16
65
64
63
62
61
60
59
56
45
44
43
42
41
40
39
2829303132333435363738
17
18
19
21
22
95
1
76
77
72
71
70
69
68
67
66
75
74
73
58
57
24
23
25
969897
99
27
464748
49
55
54
53
52
51
100
50
26
VDD
AVSS
AVSS
AVSS
VDD
VDD
10K
VDD
10 μF
AVSS
17.5.19 ADC Accuracy/Error
Refer to 17.10 “Related Application Notes” for a list of documents that discuss ADC accuracy.
The following figure depicts the recommended circuit for the conversion rates above 400 ksps.
A 100-pin PIC32 device package is shown as an example in
Figure 17-21: ADC Voltage Reference Schematic
Figure 17-21.
17
10-bit Analog-to-Digital
Converter (ADC)
© 2007-2011 Microchip Technology Inc. DS61104E-page 17-49
Page 50

PIC32 Family Reference Manual
CPIN
VA
Rs
ANx
V
T = 0.6V
V
T = 0.6V
I
LEAKAGE
RIC ≤ 250Ω
Sampling
Switch
R
SS
CHOLD
= DAC capacitance
V
SS
VDD
= 4.4 pF
± 500 nA
Note: The CPIN value depends on the device package and is not tested. The effect of the CPIN is negligible if Rs ≤ 5 kΩ.
R
SS ≤ 3 kΩ
Legend:
C
PIN = input capacitance VT = threshold voltage
R
SS = sampling switch resistance RIC = interconnect resistance
R
S = source resistance CHOLD = sample/hold capacitance
I
LEAKAGE = leakage current at the pin due to various junctions
17.5.20 ADC Sampling Requirements
The analog input model of the 10-bit ADC module is shown in Figure 17-22. The total acquisition
time for the analog-to-digital conversion is a function of the internal amplifier settling time and the
holding capacitor charge time.
For the ADC module to meet its specified accuracy, the charge holding capacitor (CHOLD) must
be allowed to fully charge to the voltage level on the analog input pin. The analog output source
impedance (R
impedance combine to directly affect the time required to charge the C
impedance of the analog sources must therefore be small enough to fully charge the holding
capacitor within the chosen sample time. After the analog input channel is selected (changed),
this acquisition function must be completed prior to starting the conversion. The internal holding
capacitor will be in a discharged state prior to each sample operation.
A time period of at least 1 TAD should be allowed between conversions for the acquisition time.
Refer to the “Electrical Characteristics” section in the specific device data sheet for more
information.
Figure 17-22: 10-bit ADC Analog Input Model
S), the interconnect impedance (RIC), and the internal sampling switch (RSS)
HOLD. The combined
17.5.21 Connection Considerations
Since the analog inputs employ Electrostatic Discharge (ESD) protection, they have diodes to
DD and VSS. This requires that the analog input must be between VDD and VSS. If the input
V
voltage exceeds this range by greater than 0.3V (in either direction), one of the diodes becomes
forward-biased and it may damage the device if the input current specification is exceeded.
An external RC filter is sometimes added for anti-aliasing of the input signal. The R component
should be selected to ensure that the acquisition time requirements are satisfied. Any external
components connected (through high-impedance) to an analog input pin (capacitor, Zener diode,
etc.) should have very little leakage current at the pin.
DS61104E-page 17-50 © 2007-2011 Microchip Technology Inc.
Page 51

Section 17. 10-bit Analog-to-Digital Converter (ADC)
AD1PCFG = 0x0000; /* Configure ADC port
all input pins are analog */
AD1CON1 = 0x2208; /* Configure sample clock source and Conversion Trigger mode.
Unsigned Fractional format, Manual conversion trigger,
Manual start of sampling, Simultaneous sampling,
No operation in IDLE mode. */
AD1CON2 = 0x0000; /* Configure ADC voltage reference
and buffer fill modes.
VREF from AVDD and AVSS,
Inputs are not scanned,
Interrupt every sample */
AD1CON3 = 0x0000; /* Configure ADC conversion clock */
AD1CHS = 0x0000; /* Configure input channels,
CH0+ input is AN0.
CHO- input is VREFL (AVss)
AD1CSSL = 0x0000; /* No inputs are scanned.
Note: Contents of AD1CSSL are ignored when CSCNA = 0 */
IFS1CLR = 2; /*Clear ADC conversion interrupt*/
// Configure ADC interrupt priority bits (AD1IP<2:0>) here, if
// required. (default priority level is 4)
IEC1SET = 2; /* Enable ADC conversion interrupt*/
AD1CON1SET = 0x8000; /* Turn on the ADC module */
AD1CON1SET = 0x0002; /* Start sampling the input */
DelayNmSec(100); /* Ensure the correct sampling time has elapsed before
starting a conversion.*/
AD1CON1CLR = 0x0002; /* End Sampling and start Conversion*/
: /* The DONE bit is set by hardware when the convert sequence
is finished. */
: /* The ADIF bit will be set. */
17.6 INITIALIZATION
A simple initialization code example for the ADC module is provided in Example 17-6.
Example 17-7 shows the Converting 1 Channel at 400 ksps, Auto-Sample Start and 2 TAD
Sampling Time code example.
In this particular configuration, all 16 analog input pins, AN0-AN15, are set up as analog inputs.
Operation in Idle mode is disabled, output data is in unsigned fractional format, and AVDD and
AVSS are used for VR+ and VR-. The start of acquisition, as well as start of
conversion
is used for conversions. Scanning of inputs is disabled, and an interrupt occurs after every
acquisition/convert sequence (1 conversion result). The ADC conversion clock is T
Since acquisition is started manually by setting the SAMP bit (AD1CON1<1>) after each
conversion is complete, the auto-sample time bits, SAMC<4:0> (AD1CON3<12:8>), are ignored.
Moreover, since the start of conversion (i.e., end of acquisition) is also triggered manually, the
SAMP bit needs to be cleared each time a new sample needs to be converted.
Example 17-6: ADC Initialization Code Example
(conversion trigger), are performed manually in software. The Channel 0 (CH0) SHA
PB/2.
17
10-bit Analog-to-Digital
Converter (ADC)
© 2007-2011 Microchip Technology Inc. DS61104E-page 17-51
Page 52

PIC32 Family Reference Manual
AD1PCFG = 0xFFFB; // all PORTB = Digital; RB2 = analog
AD1CON1 = 0x00E0; // SSRC bit = 111 implies internal
// counter ends sampling and starts
// converting.
AD1CHS = 0x00020000; // Connect RB2/AN2 as CH0 input
// in this example RB2/AN2 is the input
AD1CSSL = 0;
AD1CON3 = 0x0203; // Sample time = 2 TAD
AD1CON2 = 0x6004; // Select external VREF+ and VREF- pins
// Interrupt after every 2 samples
AD1CON1bits.ADON = 1; // turn ON the ADC
while (1) // repeat continuously
{
ADCValue = 0; // clear value
ADC16Ptr = &ADC1BUF0; // initialize ADC1BUF0 pointer
IF1bits.AD1IF = 0; // clear ADC interrupt flag
AD1CON1bits.ASAM = 1; // auto start sampling
// for 31 TAD, and then go to conversion
while (!IFS0bits.ADIF); // conversion done?
AD1CON1bits.ASAM = 0; // yes, stop sample/convert
for (count = 0; count <2; count++)
{ // average the two
ADCValue = ADCValue + *ADC16Ptr++;
ADCValue = ADCValue >> 1;
}
} // repeat
Example 17-7: Converting 1 Channel at 400 ksps, Auto-Sample Start, 2 TAD Sampling Time Code Example
DS61104E-page 17-52 © 2007-2011 Microchip Technology Inc.
Page 53

Section 17. 10-bit Analog-to-Digital Converter (ADC)
IPS6SET = 0x0014; // Set Priority to 5
IPS6SET = 0x0003; // Set Sub Priority to 3
//
IFS1CLR = 0x0002; // Ensure the interrupt flag is clear
IEC1SET = 0x0002; // Enable ADC interrupts
17.7 INTERRUPTS
The ADC module has a dedicated interrupt bit, AD1IF bit (IFS1<1>), and a corresponding
interrupt enable/mask bit, AD1IE bit (IEC<1>). These bits are used to determine the source of an
interrupt and to enable or disable an individual interrupt source. The priority level of each of the
channels can also be set independently of the other channels.
The AD1IF bit (IFS1<1>) is set when the condition set by the Samples Per Interrupt bit,
SMPI<3:0> bits (AD1CON2<5:2>), is met. The AD1IF bit (IFS1<1>) will then be set without
regard to the state of the corresponding AD1IE bit (IEC<1>). The AD1IF bit (IFS1<1>) can be
polled by software if desired.
The AD1IE bit (IEC<1>) controls the interrupt generation. If the AD1xIE bit is set, the CPU will be
interrupted whenever an event defined by SMPI<3:0> occurs and the corresponding AD1IF bit
(IFS1<1>) will be set (subject to the priority and sub priority as outlined below).
It is the responsibility of the routine that services a particular interrupt to clear the appropriate
Interrupt Flag bit before the service routine is complete.
The priority of the ADC interrupt can be set independently through the AD1IP<2:0> bits
(IPC6<28:26>). This priority defines the priority group that interrupt source will be assigned to.
The priority groups range from a value of 7, the highest priority, to a value of 0, which does not
generate an interrupt. An interrupt being serviced will be preempted by an interrupt in a higher
priority group.
The subpriority bits allow setting the priority of a interrupt source within a priority group. The
values of the subpriority, AD1IS<1:0> bits (IPC6<25:24>), range from 3, the highest priority, to 0
the lowest priority. An interrupt with the same priority group but having a higher subpriority value
will preempt a lower subpriority interrupt that is in progress.
The priority group and subpriority bits allow more than one interrupt source to share the same
priority and subpriority. If simultaneous interrupts occur in this configuration the natural order of
the interrupt sources within a priority/subgroup pair determine the interrupt generated. The
natural priority is based on the vector numbers of the interrupt sources. The lower the vector
number the higher the natural priority of the interrupt. Any interrupts that were overridden by
natural order will then generate their respective interrupts based on priority, subpriority, and
natural order after the interrupt flag for the current interrupt is cleared.
After an enabled interrupt is generated, the CPU will jump to the vector assigned to that interrupt.
The vector number for the interrupt is the same as the natural order number. The IRQ number is
not always the same as the vector number due to some interrupts sharing a single vector. The
CPU will then begin executing code at the vector address. The users code at this vector address
should perform an operations required, such as reloading the duty cycle, clear the interrupt flag,
and then exit. Refer to Section 8. “Interrupts” (DS61108) for vector address table details and
for more information on interrupts.
configuration.
17
10-bit Analog-to-Digital
Converter (ADC)
Example 17-8 shows a code example of the ADC interrupt
Example 17-8: ADC Interrupt Configuration Code Example
Note: Some PIC32 devices feature persistent interrupts. On such devices, clearing the
AD1IF flag bit will not have any effect unless ADC1BUFx register is read. Refer to
the specific device data sheet and Section 8. “Interrupts” (DS61108) for more
information.
© 2007-2011 Microchip Technology Inc. DS61104E-page 17-53
Page 54

PIC32 Family Reference Manual
17.8 OPERATION DURING SLEEP AND IDLE MODES
Sleep and Idle modes are useful for minimizing conversion noise because the digital activity of
the CPU, buses and other peripherals is minimized.
17.8.1 CPU Sleep Mode Without RC ADC Clock
When the device enters Sleep mode, all clock sources to the module are shut down and stay at
logic ‘0’.
If Sleep occurs in the middle of a conversion, the conversion is aborted unless the ADC module
is clocked from its internal RC clock generator. The converter will not resume a partially
completed conversion on exiting from Sleep mode.
ADC register contents are not affected by the device entering or leaving Sleep mode.
17.8.2 CPU Sleep Mode With RC ADC Clock
The ADC module can operate during Sleep mode if the ADC clock source is set to the internal
RC oscillator (ADRC
conversion. When the conversion is completed, the DONE bit (AD1CON1<0>) will be set and the
result loaded into the ADC result buffer, ADC1BUFx.
If the ADC interrupt is enabled (AD1IE bit (IEC<1>) = 1), the device will wake up from Sleep when
the ADC interrupt occurs. Program execution will resume at the ADC Interrupt Service Routine
(ISR), if the ADC interrupt is greater than the current CPU priority. Otherwise, execution will
continue from the instruction after the WAIT instruction that placed the device in Sleep mode.
If the ADC interrupt is not enabled, the ADC module will then be disabled, although the ON bit
(AD1CON1<15>) will remain set.
To minimize the effects of digital noise on the ADC module operation, the user should select a
conversion trigger source that ensures the analog-to-digital conversion will take place in Sleep
mode. The automatic conversion trigger option can be used for sampling and conversion in Sleep
(SSRC<2:0>
ON bit should be set in the instruction prior to the WAIT instruction.
Note: For the ADC module to operate in Sleep mode, the ADC clock source must be set
bits (AD1CON1<7:5>) = 111). To use the automatic conversion option, the ADC
to the internal RC oscillator (ADRC = 1).
bit (AD1CON3<15>) = 1). This reduces the digital switching noise from the
17.8.3 ADC Operation During CPU IDLE Mode
For the ADC, the SIDL bit (AD1CON1<13>) specifies whether the module will stop on Idle or
continue on Idle. If the SIDL bit = 0, the ADC module will continue normal operation when the
device enters Idle mode. If the ADC interrupt is enabled (AD1IE bit = 1), the device will wake up
from Idle mode when the ADC interrupt occurs. Program execution will resume at the ADC ISR,
if the ADC interrupt is greater than the current CPU priority. Otherwise, execution will continue
from the instruction after the WAIT instruction that placed the device in Idle mode.
If the SIDL bit = 1, the ADC module will stop in Idle mode. If the device enters Idle mode in the
middle of a conversion, the conversion is aborted. The converter will not resume a partially
completed conversion on exiting from Idle mode.
DS61104E-page 17-54 © 2007-2011 Microchip Technology Inc.
Page 55

Section 17. 10-bit Analog-to-Digital Converter (ADC)
17.9 EFFECTS OF VARIOUS RESETS
17.9.1 Master Clear Reset
Following a Master Clear (MCLR) reset, all of the ADC control registers (AD1CON1, AD1CON2,
AD1CON3, AD1CHS, AD1PCFG, and AD1CSSL) are reset to a value of 0x00000000. This
disables the ADC module and sets the analog input pins to Analog Input mode. Any conversion
that was in progress will terminate and the result will not be written to the result buffer.
The values in the ADC1BUFx registers are initialized during a MCLR Reset. ADC1BUF0 through
ADC1BUFF will contain 0x00000000.
17.9.2 Power-on Reset
Following a Power-on Reset (POR) event, all of the ADC control registers (AD1CON1,
AD1CON2, AD1CON3, AD1CHS, AD1PCFG and AD1CSSL) are reset to a value of
0x00000000. This disables the ADC module and sets the analog input pins to Analog Input
mode.
The values in the ADC1BUFx registers are initialized during a POR. ADC1BUF0 through
ADC1BUFF will contain 0x00000000.
17.9.3 Watchdog Timer Reset
Following a Watchdog Timer (WDT) reset, all of the ADC control registers (AD1CON1,
AD1CON2, AD1CON3, AD1CHS, AD1PCFG and AD1CSSL) are reset to a value of
0x00000000. This disables the ADC module and sets the analog input pins to Analog Input
mode. Any conversion that was in progress will terminate and the result will not be written to the
result buffer.
The values in the ADC1BUFx registers are initialized after a WDT reset. ADC1BUF0 through
ADC1BUFF will contain 0x00000000.
17
10-bit Analog-to-Digital
Converter (ADC)
© 2007-2011 Microchip Technology Inc. DS61104E-page 17-55
Page 56

PIC32 Family Reference Manual
17.10 RELATED APPLICATION NOTES
This section lists application notes that are related to this section of the manual. These
application notes may not be written specifically for the PIC32 device family, but the concepts are
pertinent and could be used with modification and possible limitations. The current application
notes related to the 10-bit Analog-to-Digital Converter (ADC) module are:
Title Application Note #
Using the Analog-to-Digital (A/D) Converter AN546
Four Channel Digital Voltmeter with Display and Keyboard AN557
Understanding ADC Performance Specifications AN693
Note: Please visit the Microchip web site (www.microchip.com) for additional Application
Notes and code examples for the PIC32 family of devices.
DS61104E-page 17-56 © 2007-2011 Microchip Technology Inc.
Page 57

Section 17. 10-bit Analog-to-Digital Converter (ADC)
17.11 REVISION HISTORY
Revision A (October 2007)
This is the initial released version of this document.
Revision B (October 2007)
Updated document to remove Confidential status.
Revision C (April 2008)
Revised status to Preliminary; Revised U-0 to r-x.
Revision D (June 2008)
Revised Register 17-1 note; Revised Registers 17-13, 17-17, 17-21, 17-25, 17-26; Revised
Equation 17-1; Added Section 17.5.6; Revised Tables 17-4, 17-5, 17-6, 17-7, 17-8; Delete
Section 17.11.5 (500 KSPS Configuration Guideline); Change Reserved bits from “Maintain as”
to “Write”; Added Note to ON bit (AD1CON1 Register).
Revision E (August 2011)
This revision includes the following updates:
• Equations:
- Added Equation 17-3 through Equation 17-9 in 17.4.12.1 “Configuring the ADC for
1000 ksps Operation”
• Figures:
-Replaced Figure 17-1
•Registers:
- Removed all Interrupt registers
• Notes:
- Removed Note 1 in Register 17-1
- Added a note about TPB in Register 17-3
- Added Note 2 in 17.4.1 “Configuring Analog Port Pins”
- Added a note about the AD1IF flag bit in 17.7 “Interrupts”
• Sections:
- Added 17.4.12.1 “Configuring the ADC for 1000 ksps Operation”
- Removed 17.8 I/O PIN CONTROL
- Removed all the Motor Control application notes reference in 17.10 “Related
Application Notes”
- Removed 17.11 DESIGN TIPS
• Tables:
- Removed the Clear, Set and Invert registers associated with the AD1CONx, AD1CHS,
AD1PCFG, AD1CSSL registers and added notes about the Set, Invert and Clear
register in
- Removed Table 17-9: ADC Interrupt Vectors for Various Offsets with
EBASE
• Changed all occurrences of PIC32MX to PIC32
• Updates to register formatting and minor text updates have been incorporated throughout
the document
Ta bl e 17-1
= 0x8000:0000
17
10-bit Analog-to-Digital
Converter (ADC)
© 2007-2011 Microchip Technology Inc. DS61104E-page 17-57
Page 58

PIC32 Family Reference Manual
NOTES:
DS61104E-page 17-58 © 2007-2011 Microchip Technology Inc.
Page 59

Note the following details of the code protection feature on Microchip devices:
• Microchip products meet the specification contained in their particular Microchip Data Sheet.
• Microchip believes that its family of products is one of the most secure families of its kind on the market today, when used in the
intended manner and under normal conditions.
• There are dishonest and possibly illegal methods used to breach the code protection feature. All of these methods, to our
knowledge, require using the Microchip products in a manner outside the operating specifications contained in Microchip’s Data
Sheets. Most likely, the person doing so is engaged in theft of intellectual property.
• Microchip is willing to work with the customer who is concerned about the integrity of their code.
• Neither Microchip nor any other semiconductor manufacturer can guarantee the security of their code. Code protection does not
mean that we are guaranteeing the product as “unbreakable.”
Code protection is constantly evolving. We at Microchip are committed to continuously improving the code protection features of our
products. Attempts to break Microchip’s code protection feature may be a violation of the Digital Millennium Copyright Act. If such acts
allow unauthorized access to your software or other copyrighted work, you may have a right to sue for relief under that Act.
Information contained in this publication regarding device
applications and the like is provided only for your convenience
and may be superseded by updates. It is your responsibility to
ensure that your application meets with your specifications.
MICROCHIP MAKES NO REPRESENTATIONS OR
WARRANTIES OF ANY KIND WHETHER EXPRESS OR
IMPLIED, WRITTEN OR ORAL, STATUTORY OR
OTHERWISE, RELATED TO THE INFORMATION,
INCLUDING BUT NOT LIMITED TO ITS CONDITION,
QUALITY, PERFORMANCE, MERCHANTABILITY OR
FITNESS FOR PURPOSE. Microchip disclaims all liability
arising from this information and its use. Use of Microchip
devices in life support and/or safety applications is entirely at
the buyer’s risk, and the buyer agrees to defend, indemnify and
hold harmless Microchip from any and all damages, claims,
suits, or expenses resulting from such use. No licenses are
conveyed, implicitly or otherwise, under any Microchip
intellectual property rights.
Trademarks
The Microchip name and logo, the Microchip logo, dsPIC,
K
EELOQ, KEELOQ logo, MPLAB, PIC, PICmicro, PICSTART,
32
PIC
logo, rfPIC and UNI/O are registered trademarks of
Microchip Technology Incorporated in the U.S.A. and other
countries.
FilterLab, Hampshire, HI-TECH C, Linear Active Thermistor,
MXDEV, MXLAB, SEEVAL and The Embedded Control
Solutions Company are registered trademarks of Microchip
Technology Incorporated in the U.S.A.
Analog-for-the-Digital Age, Application Maestro, chipKIT,
chipKIT logo, CodeGuard, dsPICDEM, dsPICDEM.net,
dsPICworks, dsSPEAK, ECAN, ECONOMONITOR,
FanSense, HI-TIDE, In-Circuit Serial Programming, ICSP,
Mindi, MiWi, MPASM, MPLAB Certified logo, MPLIB,
MPLINK, mTouch, Omniscient Code Generation, PICC,
PICC-18, PICDEM, PICDEM.net, PICkit, PICtail, REAL ICE,
rfLAB, Select Mode, Total Endurance, TSHARC,
UniWinDriver, WiperLock and ZENA are trademarks of
Microchip Technology Incorporated in the U.S.A. and other
countries.
SQTP is a service mark of Microchip Technology Incorporated
in the U.S.A.
All other trademarks mentioned herein are property of their
respective companies.
© 2007-2011, Microchip Technology Incorporated, Printed in
the U.S.A., All Rights Reserved.
Printed on recycled paper.
ISBN: 978-1-61341-575-7
Microchip received ISO/TS-16949:2009 certification for its worldwide
headquarters, design and wafer fabrication facilities in Chandler and
Tempe, Arizona; Gresham, Oregon and design centers in California
and India. The Company’s quality system processes and procedures
are for its PIC
devices, Serial EEPROMs, microperipherals, nonvolatile memory and
analog products. In addition, Microchip’s quality system for the design
and manufacture of development systems is ISO 9001:2000 certified.
®
MCUs and dsPIC® DSCs, KEELOQ
®
code hopping
© 2007-2011 Microchip Technology Inc. DS61104E-page 17- 59
Page 60

Worldwide Sales and Service
AMERICAS
Corporate Office
2355 West Chandler Blvd.
Chandler, AZ 85224-6199
Tel: 480-792-7200
Fax: 480-792-7277
Technical Support:
http://www.microchip.com/
support
Web Address:
www.microchip.com
Atlanta
Duluth, GA
Tel: 678-957-9614
Fax: 678-957-1455
Boston
Westborough, MA
Tel: 774-760-0087
Fax: 774-760-0088
Chicago
Itasca, IL
Tel: 630-285-0071
Fax: 630-285-0075
Cleveland
Independence, OH
Tel: 216-447-0464
Fax: 216-447-0643
Dallas
Addison, TX
Tel: 972-818-7423
Fax: 972-818-2924
Detroit
Farmington Hills, MI
Tel: 248-538-2250
Fax: 248-538-2260
Indianapolis
Noblesville, IN
Tel: 317-773-8323
Fax: 317-773-5453
Los Angeles
Mission Viejo, CA
Tel: 949-462-9523
Fax: 949-462-9608
Santa Clara
Santa Clara, CA
Tel: 408-961-6444
Fax: 408-961-6445
Toronto
Mississauga, Ontario,
Canada
Tel: 905-673-0699
Fax: 905-673-6509
ASIA/PACIFIC
Asia Pacific Office
Suites 3707-14, 37th Floor
Tower 6, The Gateway
Harbour City, Kowloon
Hong Kong
Tel: 852-2401-1200
Fax: 852-2401-3431
Australia - Sydney
Tel: 61-2-9868-6733
Fax: 61-2-9868-6755
China - Beijing
Tel: 86-10-8569-7000
Fax: 86-10-8528-2104
China - Chengdu
Tel: 86-28-8665-5511
Fax: 86-28-8665-7889
China - Chongqing
Tel: 86-23-8980-9588
Fax: 86-23-8980-9500
China - Hangzhou
Tel: 86-571-2819-3187
Fax: 86-571-2819-3189
China - Hong Kong SAR
Tel: 852-2401-1200
Fax: 852-2401-3431
China - Nanjing
Tel: 86-25-8473-2460
Fax: 86-25-8473-2470
China - Qingdao
Tel: 86-532-8502-7355
Fax: 86-532-8502-7205
China - Shanghai
Tel: 86-21-5407-5533
Fax: 86-21-5407-5066
China - Shenyang
Tel: 86-24-2334-2829
Fax: 86-24-2334-2393
China - Shenzhen
Tel: 86-755-8203-2660
Fax: 86-755-8203-1760
China - Wuhan
Tel: 86-27-5980-5300
Fax: 86-27-5980-5118
China - Xian
Tel: 86-29-8833-7252
Fax: 86-29-8833-7256
China - Xiamen
Tel: 86-592-2388138
Fax: 86-592-2388130
China - Zhuhai
Tel: 86-756-3210040
Fax: 86-756-3210049
ASIA/PACIFIC
India - Bangalore
Tel: 91-80-3090-4444
Fax: 91-80-3090-4123
India - New Delhi
Tel: 91-11-4160-8631
Fax: 91-11-4160-8632
India - Pune
Tel: 91-20-2566-1512
Fax: 91-20-2566-1513
Japan - Yokohama
Tel: 81-45-471- 6166
Fax: 81-45-471-6122
Korea - Daegu
Tel: 82-53-744-4301
Fax: 82-53-744-4302
Korea - Seoul
Tel: 82-2-554-7200
Fax: 82-2-558-5932 or
82-2-558-5934
Malaysia - Kuala Lumpur
Tel: 60-3-6201-9857
Fax: 60-3-6201-9859
Malaysia - Penang
Tel: 60-4-227-8870
Fax: 60-4-227-4068
Philippines - Manila
Tel: 63-2-634-9065
Fax: 63-2-634-9069
Singapore
Tel: 65-6334-8870
Fax: 65-6334-8850
Taiwan - Hsin Chu
Tel: 886-3-5778-366
Fax: 886-3-5770-955
Taiwan - Kaohsiung
Tel: 886-7-536-4818
Fax: 886-7-330-9305
Taiwan - Taipei
Tel: 886-2-2500-6610
Fax: 886-2-2508-0102
Thailand - Bangkok
Tel: 66-2-694-1351
Fax: 66-2-694-1350
EUROPE
Austria - Wels
Tel: 43-7242-2244-39
Fax: 43-7242-2244-393
Denmark - Copenhagen
Tel: 45-4450-2828
Fax: 45-4485-2829
France - Paris
Tel: 33-1-69-53-63-20
Fax: 33-1-69-30-90-79
Germany - Munich
Tel: 49-89-627-144-0
Fax: 49-89-627-144-44
Italy - Milan
Tel: 39-0331-742611
Fax: 39-0331-466781
Netherlands - Drunen
Tel: 31-416-690399
Fax: 31-416-690340
Spain - Madrid
Tel: 34-91-708-08-90
Fax: 34-91-708-08-91
UK - Wokingham
Tel: 44-118-921-5869
Fax: 44-118-921-5820
08/02/11
DS61104E-page 17- 60 © 2007-2011 Microchip Technology Inc.
 Loading...