

GX Disc Printer Quick Reference Guide
for Mac OS X
For a more in-depth look at the installation and
configuration process, please refer to the
appropriate sections of the User’s Manual.
Be sure your computer meets the Minimum System
Requirements as stated in the User’s Manual and that
you have read these instructions and the Manual prior
to contacting Microboards Technical Support with
installation or configuration questions!
GX Disc Printer Installation
1. Unpack the GX Disc Printer and place it in the selected workspace. This space
should have enough vertical space to allow for easy loading of media into the
input hopper.
2. Insert the GX Disc Printer Installation disk into the CD/DVD ROM drive on your
Mac. Open the drive after the drive mount appears on the desktop.
3. Double-click the Microboards Installer.pkg icon. Follow the on-screen
instructions, read and agree to the end user license agreement.
4. When prompted, enter your administrator password.
5. When prompted, click Install. Once the installation has completed, click
Restart.
Adding the GX Printer
1. Click the System Preferences icon in the Dock.
2. Select Print & Fax, then click the Add or + button to
add a printer.
3. Select GX Series from the list and click the Add button.
4. Once the GX Series Printer has been added, it will appear in the available
printers list.
Installation of the GX Disc Printer is complete. Next, the printer will need to be
aligned and the robotics configured prior to burning and printing disks.
Click to add
a printer
Printer Alignment
Your GX Disc Printer has been factory aligned to .1mm precision. The values
provided with the GX Disc Printer, located on the back of the unit above the power
plug, are the offset values to be used in the Microboards Toolbox.
T o set these values, please follow the steps listed below:
1. Install the drivers and Charismac Discribe, then add the GX Printer as detailed
on the front of this Quick Reference Guide, or in the Installation section of the
User’s Manual.
7. Click the Apply button to save the changes, found on the bottom of the
Microboards T oolbox window.
8. Place an alignment disc (provided) directly onto the belts below the input hopper
- the robotics will not load the disc for you. Once the disc is on the belts, click
the Print Alignment CD button.
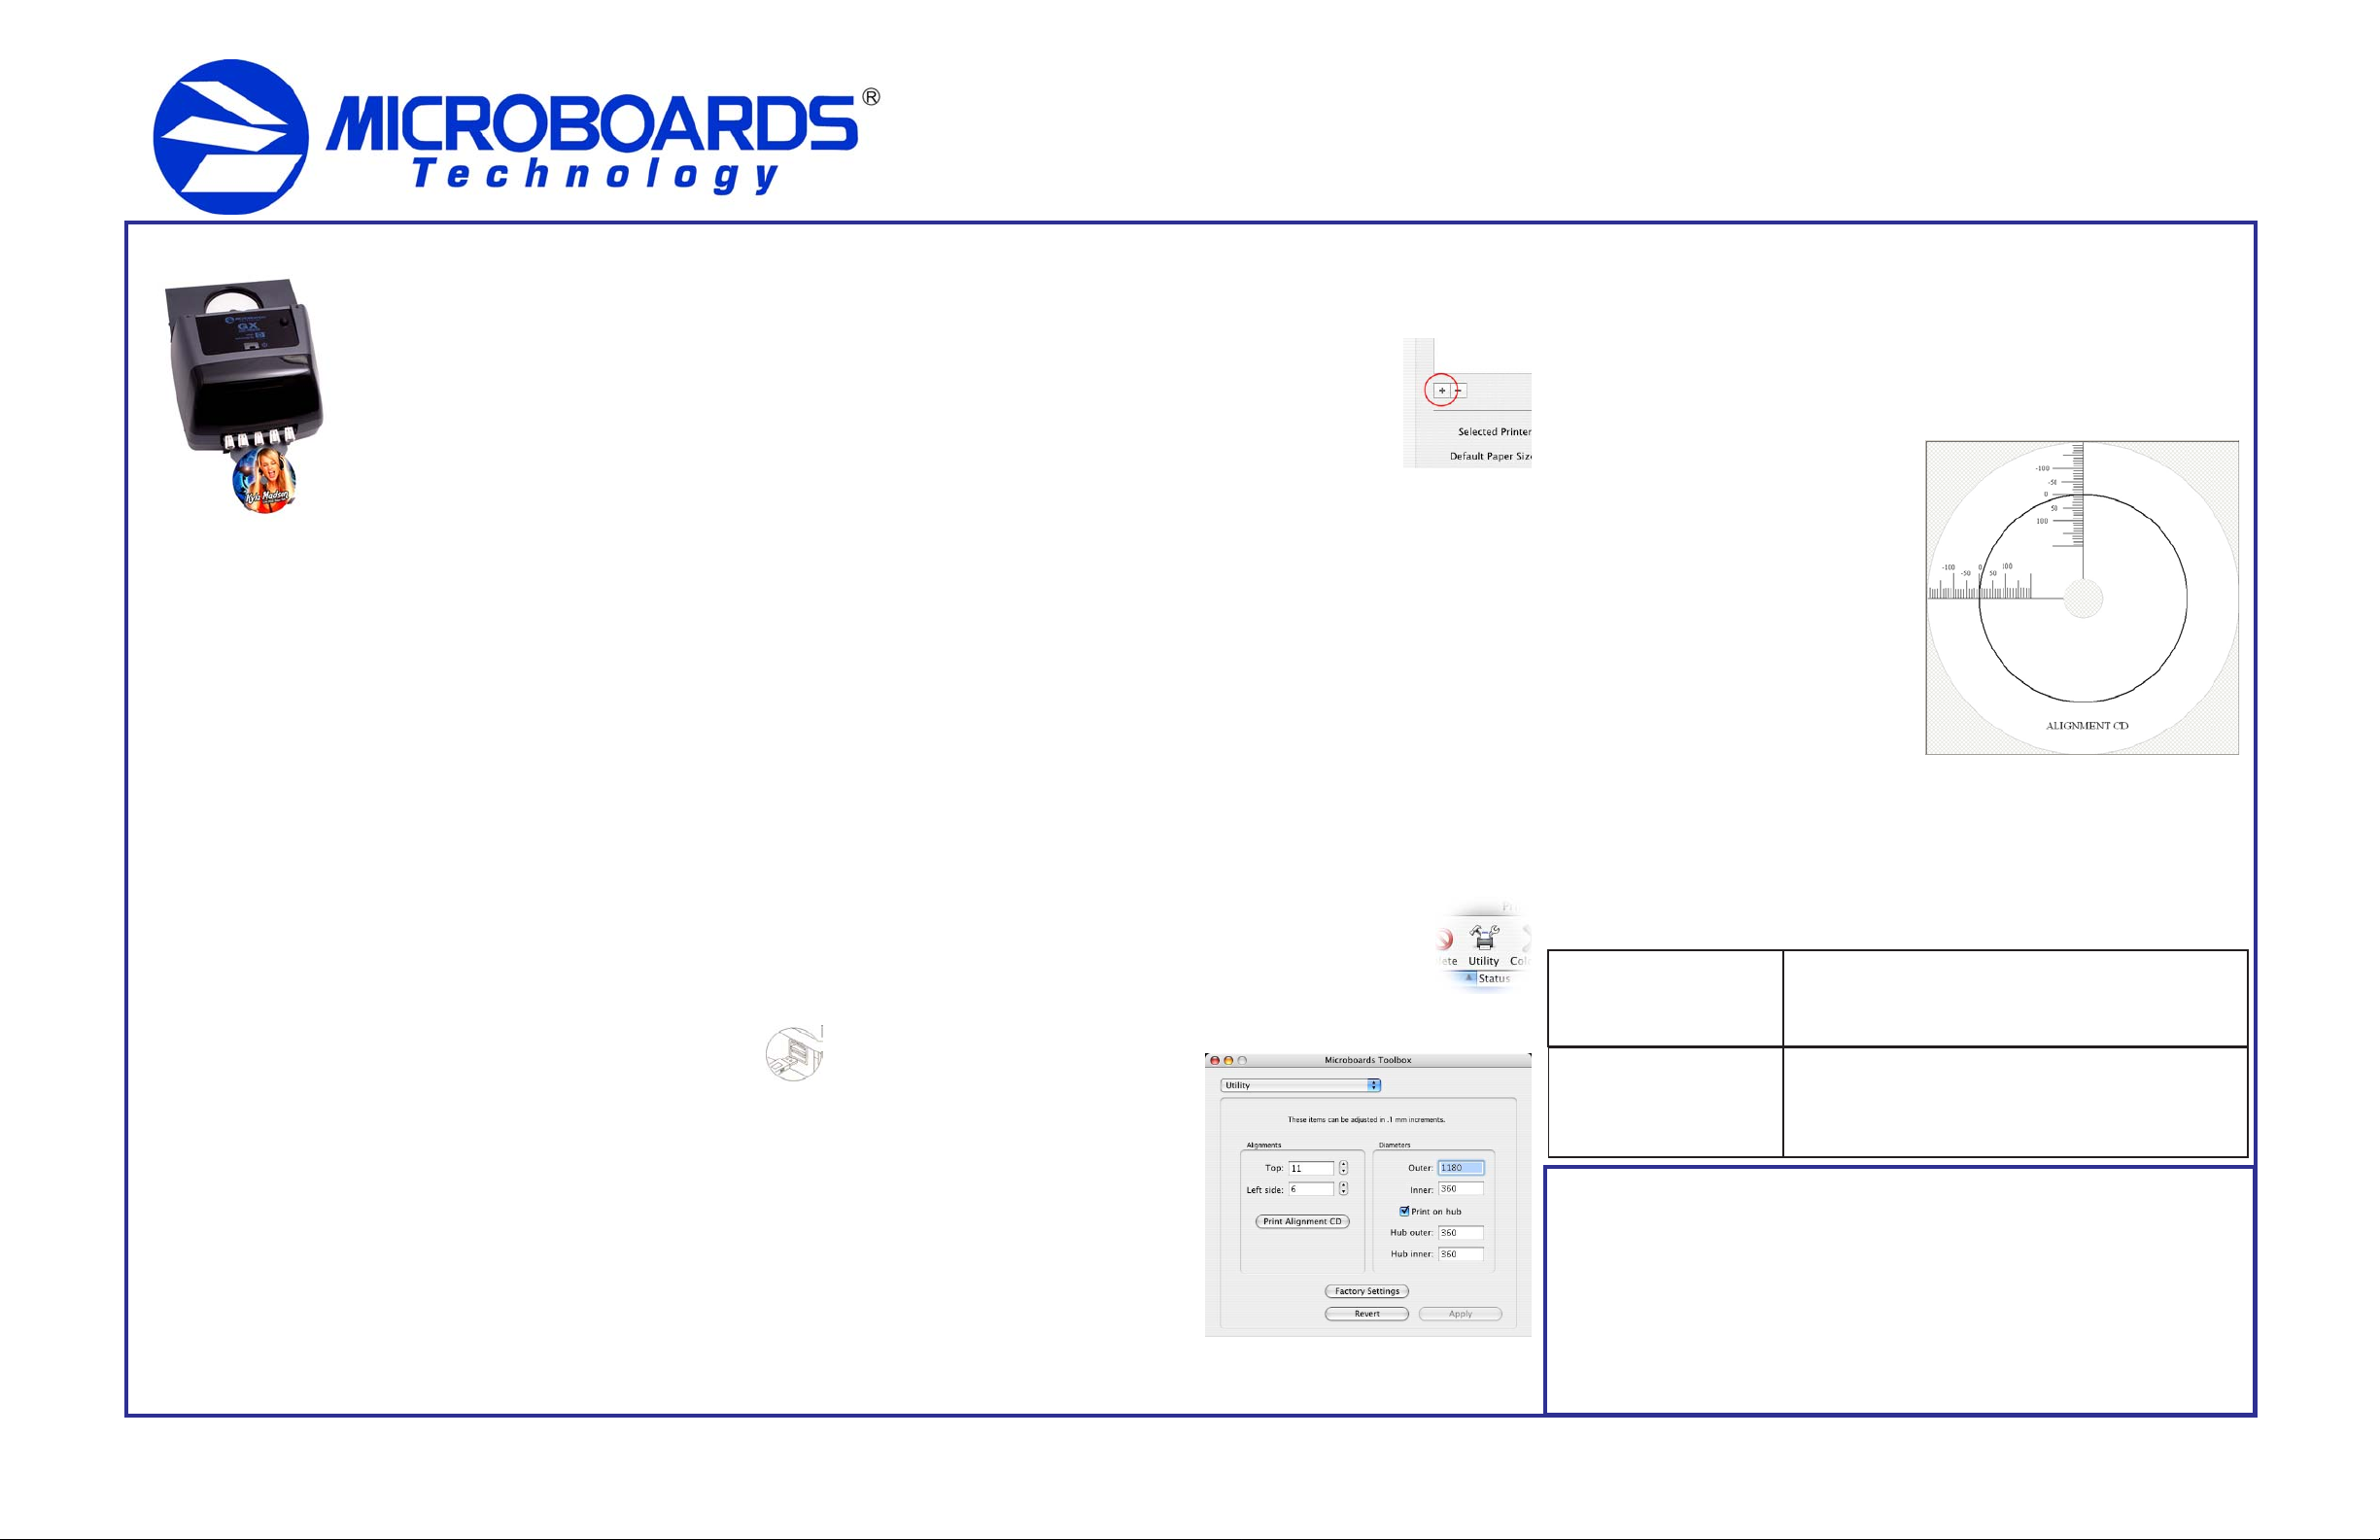
9. Check the printed alignment disc. If
the settings are correct, the horizontal
and vertical crosshairs will intersect the
printed circle at (0,0), as shown to the
right. If the circle does not intersect
the crosshairs through the two 0
points, repeat steps 6 through 8,
changing the Top and Left Side
amounts by those shown on the
alignment CD.
10. Fine tuning may be required for different
brands of media or different printing
applications to provide full surface
coverage.
For further details on these processes, please refer to the appropriate
sections of the GX Disc Printer User’s Manual.
6. Install a GX-300HC Ink Cartridge. Do not turn on power to the GX Disc
Printer until an ink cartridge has been installed.
7. Plug in the AC power cord to the back of the GX Disc Printer .
8. Connect the square shaped end of the USB cable to the back of the
GX Disc Printer.
9. Connect the flat end of the USB cable into a USB 2.0 port in your Mac.
10. Turn on the GX Disc Printer .
2. Click the System Preferences icon in the Dock.
3. Select Print & Fax from the options in the System Preferences.
4. Highlight the GX Series printer and click the Utility button to open the
Microboards T oolbox.
5. Select Utility from the drop-down list.
6. Set the Top and Left Side alignment
values to match those provided with
the GX Disc Printer.
These settings will change the size of
the top and left margins, respectively .
Decreasing the values will move the
image up or to the left, increasing will
adjust down or to the right.
Installation T roubleshooting Guide
Hardware not installing 1. Turn on power to GX Disc Printer (back panel)
2. Reseat USB connection
3. Installation completed?
Printer not responding 1. Has the GX Printer been added?
2. Turn on power to Printer (front panel). Firmly press
the power button and wait several seconds for the
printer power LED to come on.
In order to guarantee quality results from the GX Disc Printer,
ONLY MICROBOARDS GX-300HC
COLOR INK CARTRIDGE CAN BE USED!
As is true with all printers, the quality of ink cartridge and the quality of the ink
within the cartridge will affect your output. To ensure quality results, the GX Disc
Printer will not operate with any other color ink cartridge in place.
The use of refilled ink cartridges will void your warranty!
 Loading...