

Page 1
For a more in-depth look at the
installation process, please refer to
the Installation section of the User’s
Manual.
Hardware Setup:
1. Unpack the DX-2 Disc Publisher and place it in the selected workspace. This
space should have enough vertical space to allow for easy loading of media into
the input hopper and have enough room at the back to allow for any rejected
discs to exit the DX-2 Disc Publisher without obstacles.
2. Plug in the power cord to the back of the DX-2 Disc Publisher and turn on the
switch located on the back of the unit. Next, press the power button on the front
panel to turn on the printer.
3. Install the Output Bin on the front of the DX-2 Disc Publisher and tightly
secure using the 2 thumbscrews.
4. Install the Microboards ink cartridges.
THE DX-2 DISC PUBLISHER WILL ONLY OPERA TE WITH
MICROBOARDS INK CARTRIDGE MODELS PRF19ML AND PRF38ML.
A. Remove the tape from the front of the DX-2 Disc Publisher , lift the lid, and
remove the tape from the print carriage once it has moved to the center of the
printer.
B. Raise the cradle latches. Remove the ink cartridges from the packaging
and carefully remove the plastic tape covering the print head.
C. Gently push the ink cartridges into the appropriate cradles. Do not try to
force the cartridges into place as doing so may damage the cartridge.
D. Secure the cradle latches and close the lid. The print carriage will return to
the right neutral position.
5. Connect the DX-2 Disc Publisher to the computer using the USB cable provided.
Please be sure the computer is off during this process.
A. Plug the small end of the USB cable into the back of the DX-2 Disc Publisher.
B. Plug the larger end of the USB cable into an available port on the
PC. Confirm that both ends of the cable are securely connected.
USB 2.0 support on the PC is required.
6. Turn the PC on at this point.
The Hardware Setup is now complete. Proceed to the installation of the DX-2 Disc
Publisher Drivers and Software.
DX-2 Disc Publisher Installation
Quick Reference Guide
Driver Installation:
Windows 2000 and Windows XP will find the new hardware and will step you through
the installation process.
1. Once the Hardware Setup is complete, verify that the printer is fully powered on
and the connections to the computer are secure.
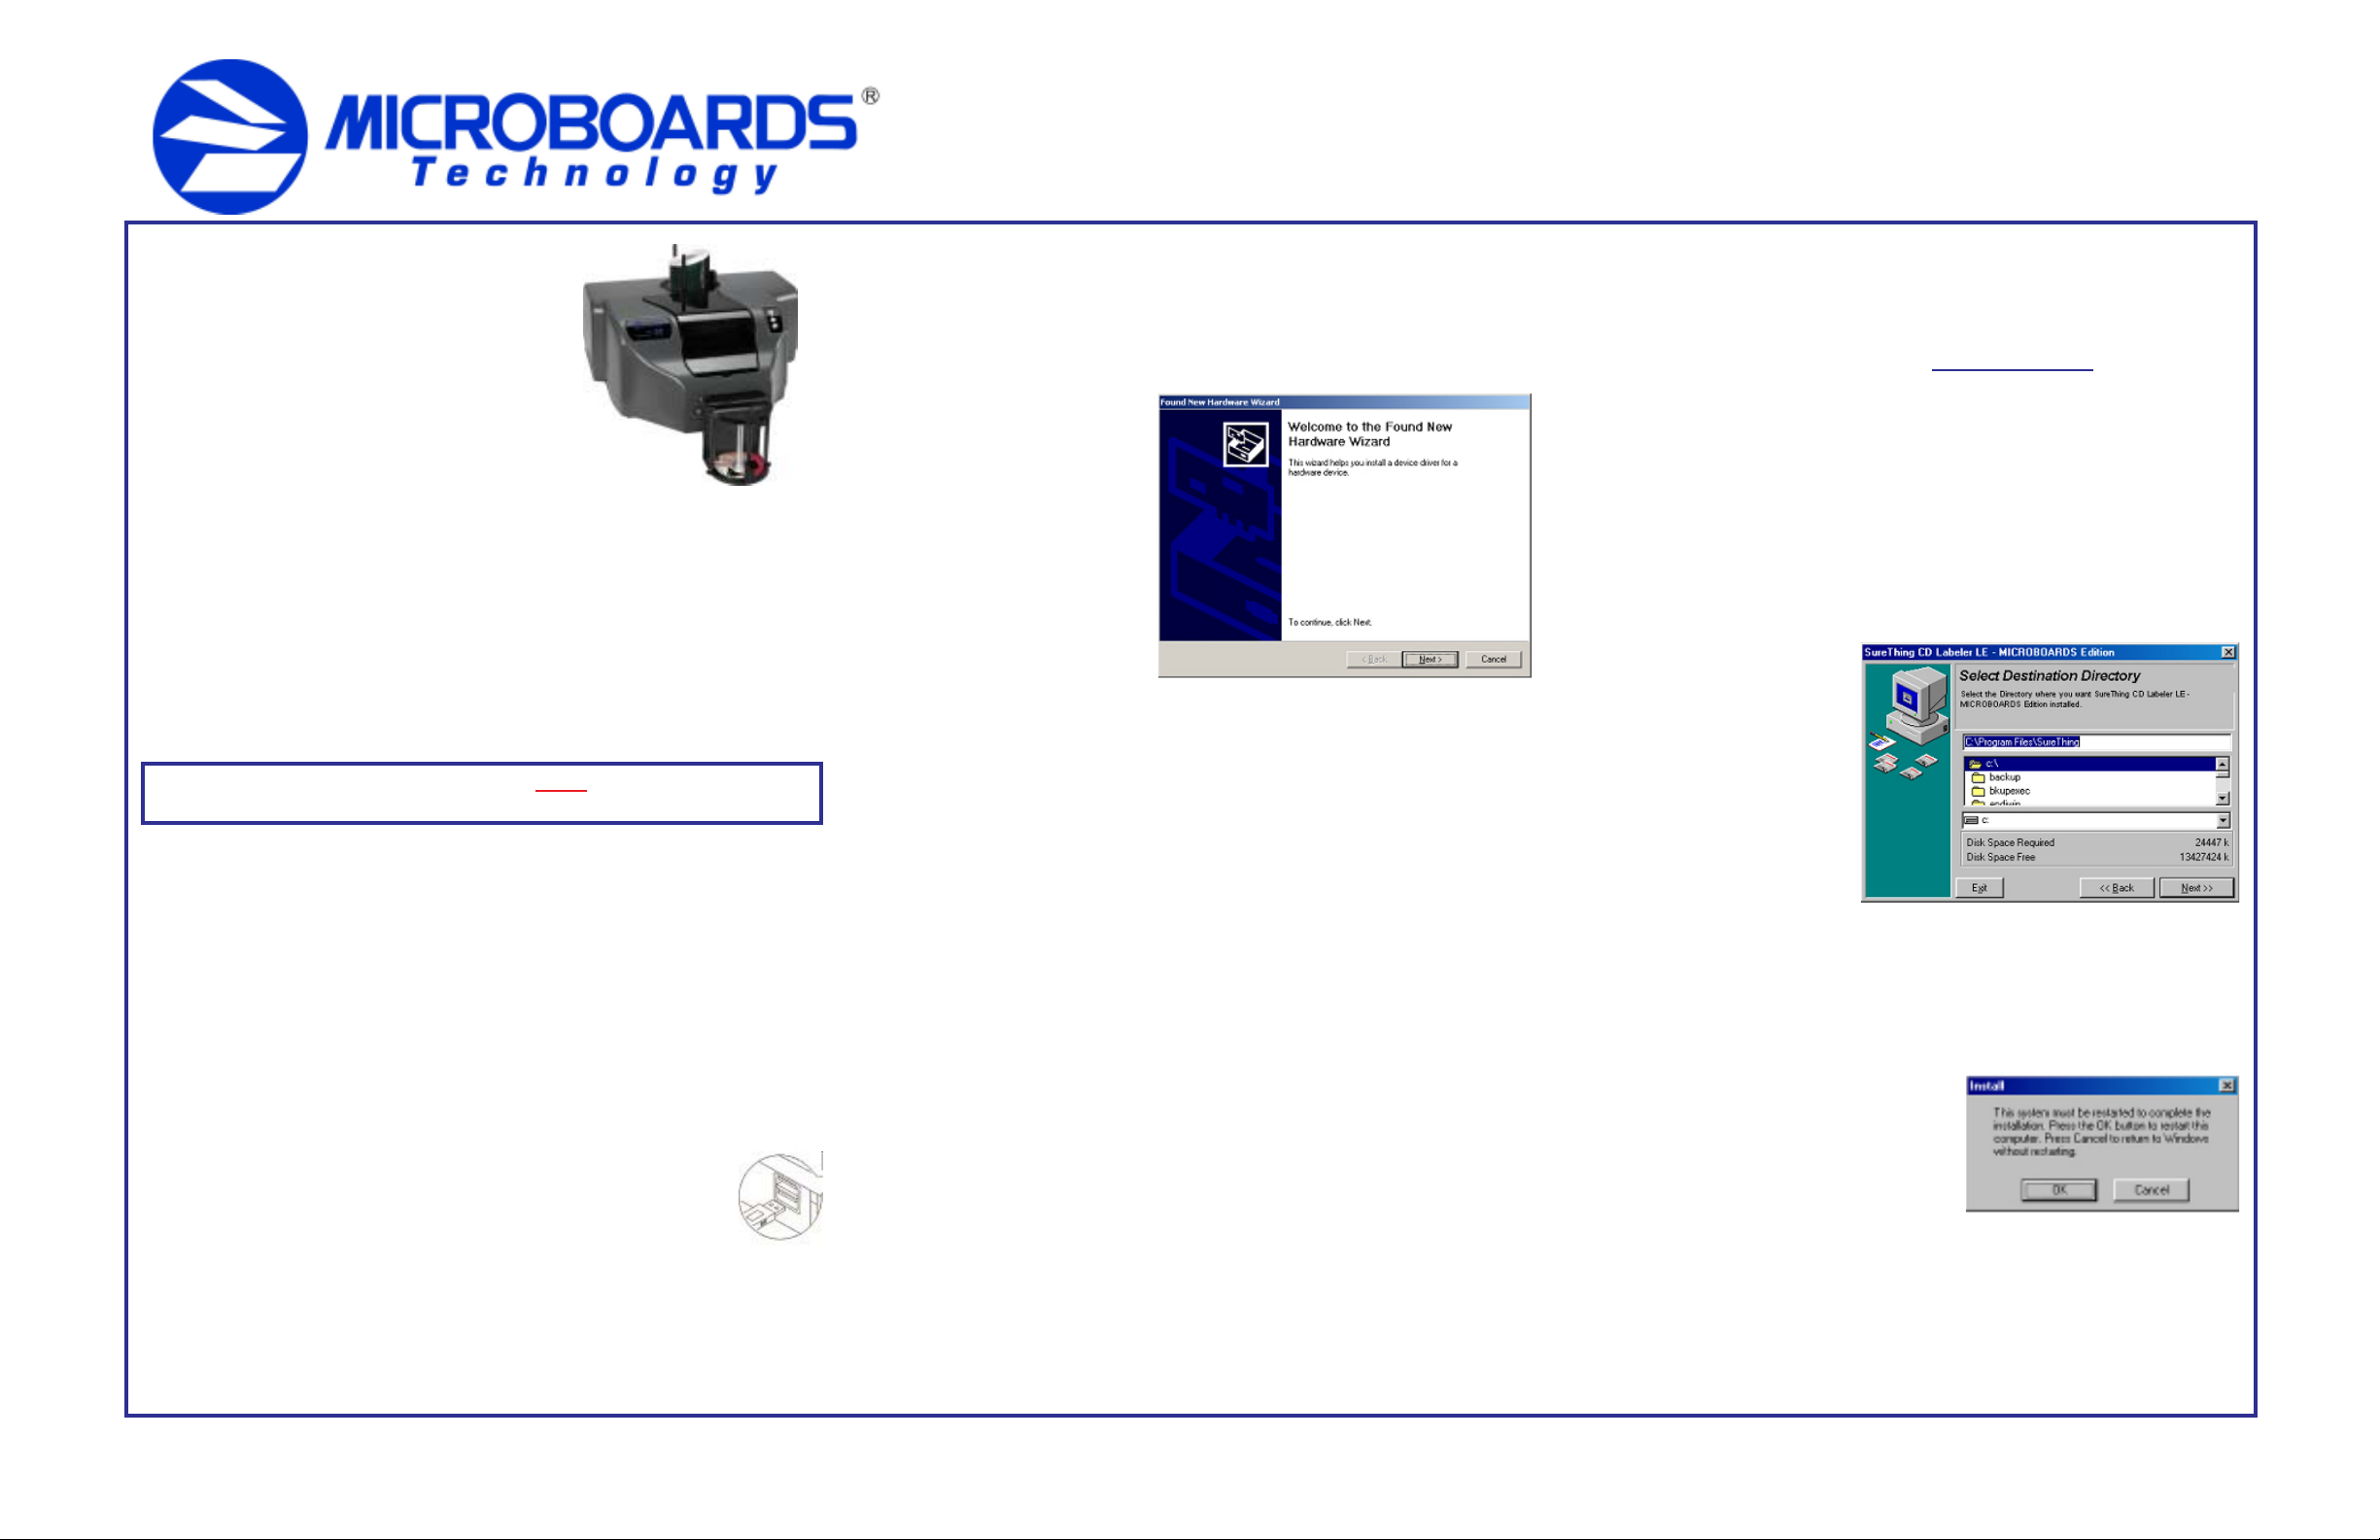
2. Turn on the computer to which
the DX-2 Disc Publisher is
connected. Once the computer
boots, you will be notified that the
new USB connection has been
found.
3. Click the Next button.
4. Place the DX-2 Disc Publisher
Software CD into the CD/DVD
ROM drive.
5.
Windows 2000: Select the option to Search for a suitable driver, and click
Next. Check the CD-ROM Drives Box and click Next. Click the Next button
again when you are notified that the driver has been found.
Windows XP: Select the option to Install from a list or specific location and
click Next. Check the Search Removable Media box and click Next.
6. The Digital Signature screen will appear . Click the Yes button at the bottom of
the screen. The drivers will then be copied to the hard drive.
7. Once the USB drivers have been copied, click the Finish button.
8. The Print driver installation will occur next. Repeat steps 3 through 7 to install
the print drivers.
9. Verify the installation of the DX-2 Disc Publisher by clicking the Start button.
Select Printers and Faxes from the Start menu, either through the Settings
menu for Windows 2000 or directly in the Start menu for Windows XP. Y ou will
see the new printer installed and available for use.
DX-2 Disc Publisher controller and Software Installation:
The DX-2 Disc Publisher controllers, PrassiT ech Zulu 2, and SureThing Disk Labeler
are included on the Software disc.
DX-2 Disc Publisher Controller Installation:
1. Click the Start button and select Run from the S t art menu. Click the Browse
button and go to the CD/DVD drive, highlight Publisher.exe, click the Open
button, then click OK.
2. Click the Next button on the next window. Once the window reads Ready to
Install the Program, click the Install button. Click Finish once the installation
completes. The Zulu2 software installation will begin automatically .
PrassiT ech Zulu2 Installation:
1. Click the Next button to begin the Zulu2 installation process.
2. After the installation process completes, remove the check from the Reboot
Computer box and click Finish. Rebooting will occur after installing SureThing.
SureThing CD Labeler Installation:
1. Click the Start button and select Run from the Start menu. Click the Browse
button and go to the CD/DVD drive, highlight
Open button, then click OK.
2. Read the Software License and Warranty information and click the I Accept
button to continue the installation of SureThing.
3. Click the Next button at the Welcome screen.
4. T o install to the default directory ,
click Next on the Select
Destination Directory screen. If
you wish to install to a different
location, select that location
before clicking Next.
5. Select adding a desktop
shortcut and the location in which
the Start Menu shortcut will be
created, or make no changes to
select the default locations.
Click Next when the locations
are suitable.
6. Click Start on the next screen to install the application.
7. Click Finish once the installation is complete. Y ou will also have the opportunity
to register the software on-line.
8. The driver and software installation is now
complete. The computer will need to be
rebooted for the software to operate correctly .
Click OK to reboot. If you choose not to reboot
at this time, click the Cancel button to reboot
later. Remember, the computer must be
rebooted prior to running the DX-2 Disc
Publisher, Zulu2, or SureThing.
SureThing.exe and click the
Installation of the DX-2 Disc Publisher is complete. After rebooting,
the printer will need to be aligned and the robotics configured prior
to burning and printing disks. Please see the DX-2 Disc Publisher
Configuration Quick Reference Guide on the other side of this page,
or refer to the appropriate sections of the User’s Manual.
820-00134-02
Page 2
DX-2 Disc Publisher Configuration
Quick Reference Guide
DX-2 Disc Publisher Controller Configuration
NOTE: You must complete the hardware, driver , and software installation
prior to configuring the DX-2 Disc Publisher and aligning the printer.
Please see the other side of this Guide for the Installation Quick
Reference Guide, or refer to the Installation section of the User’s
Manual.
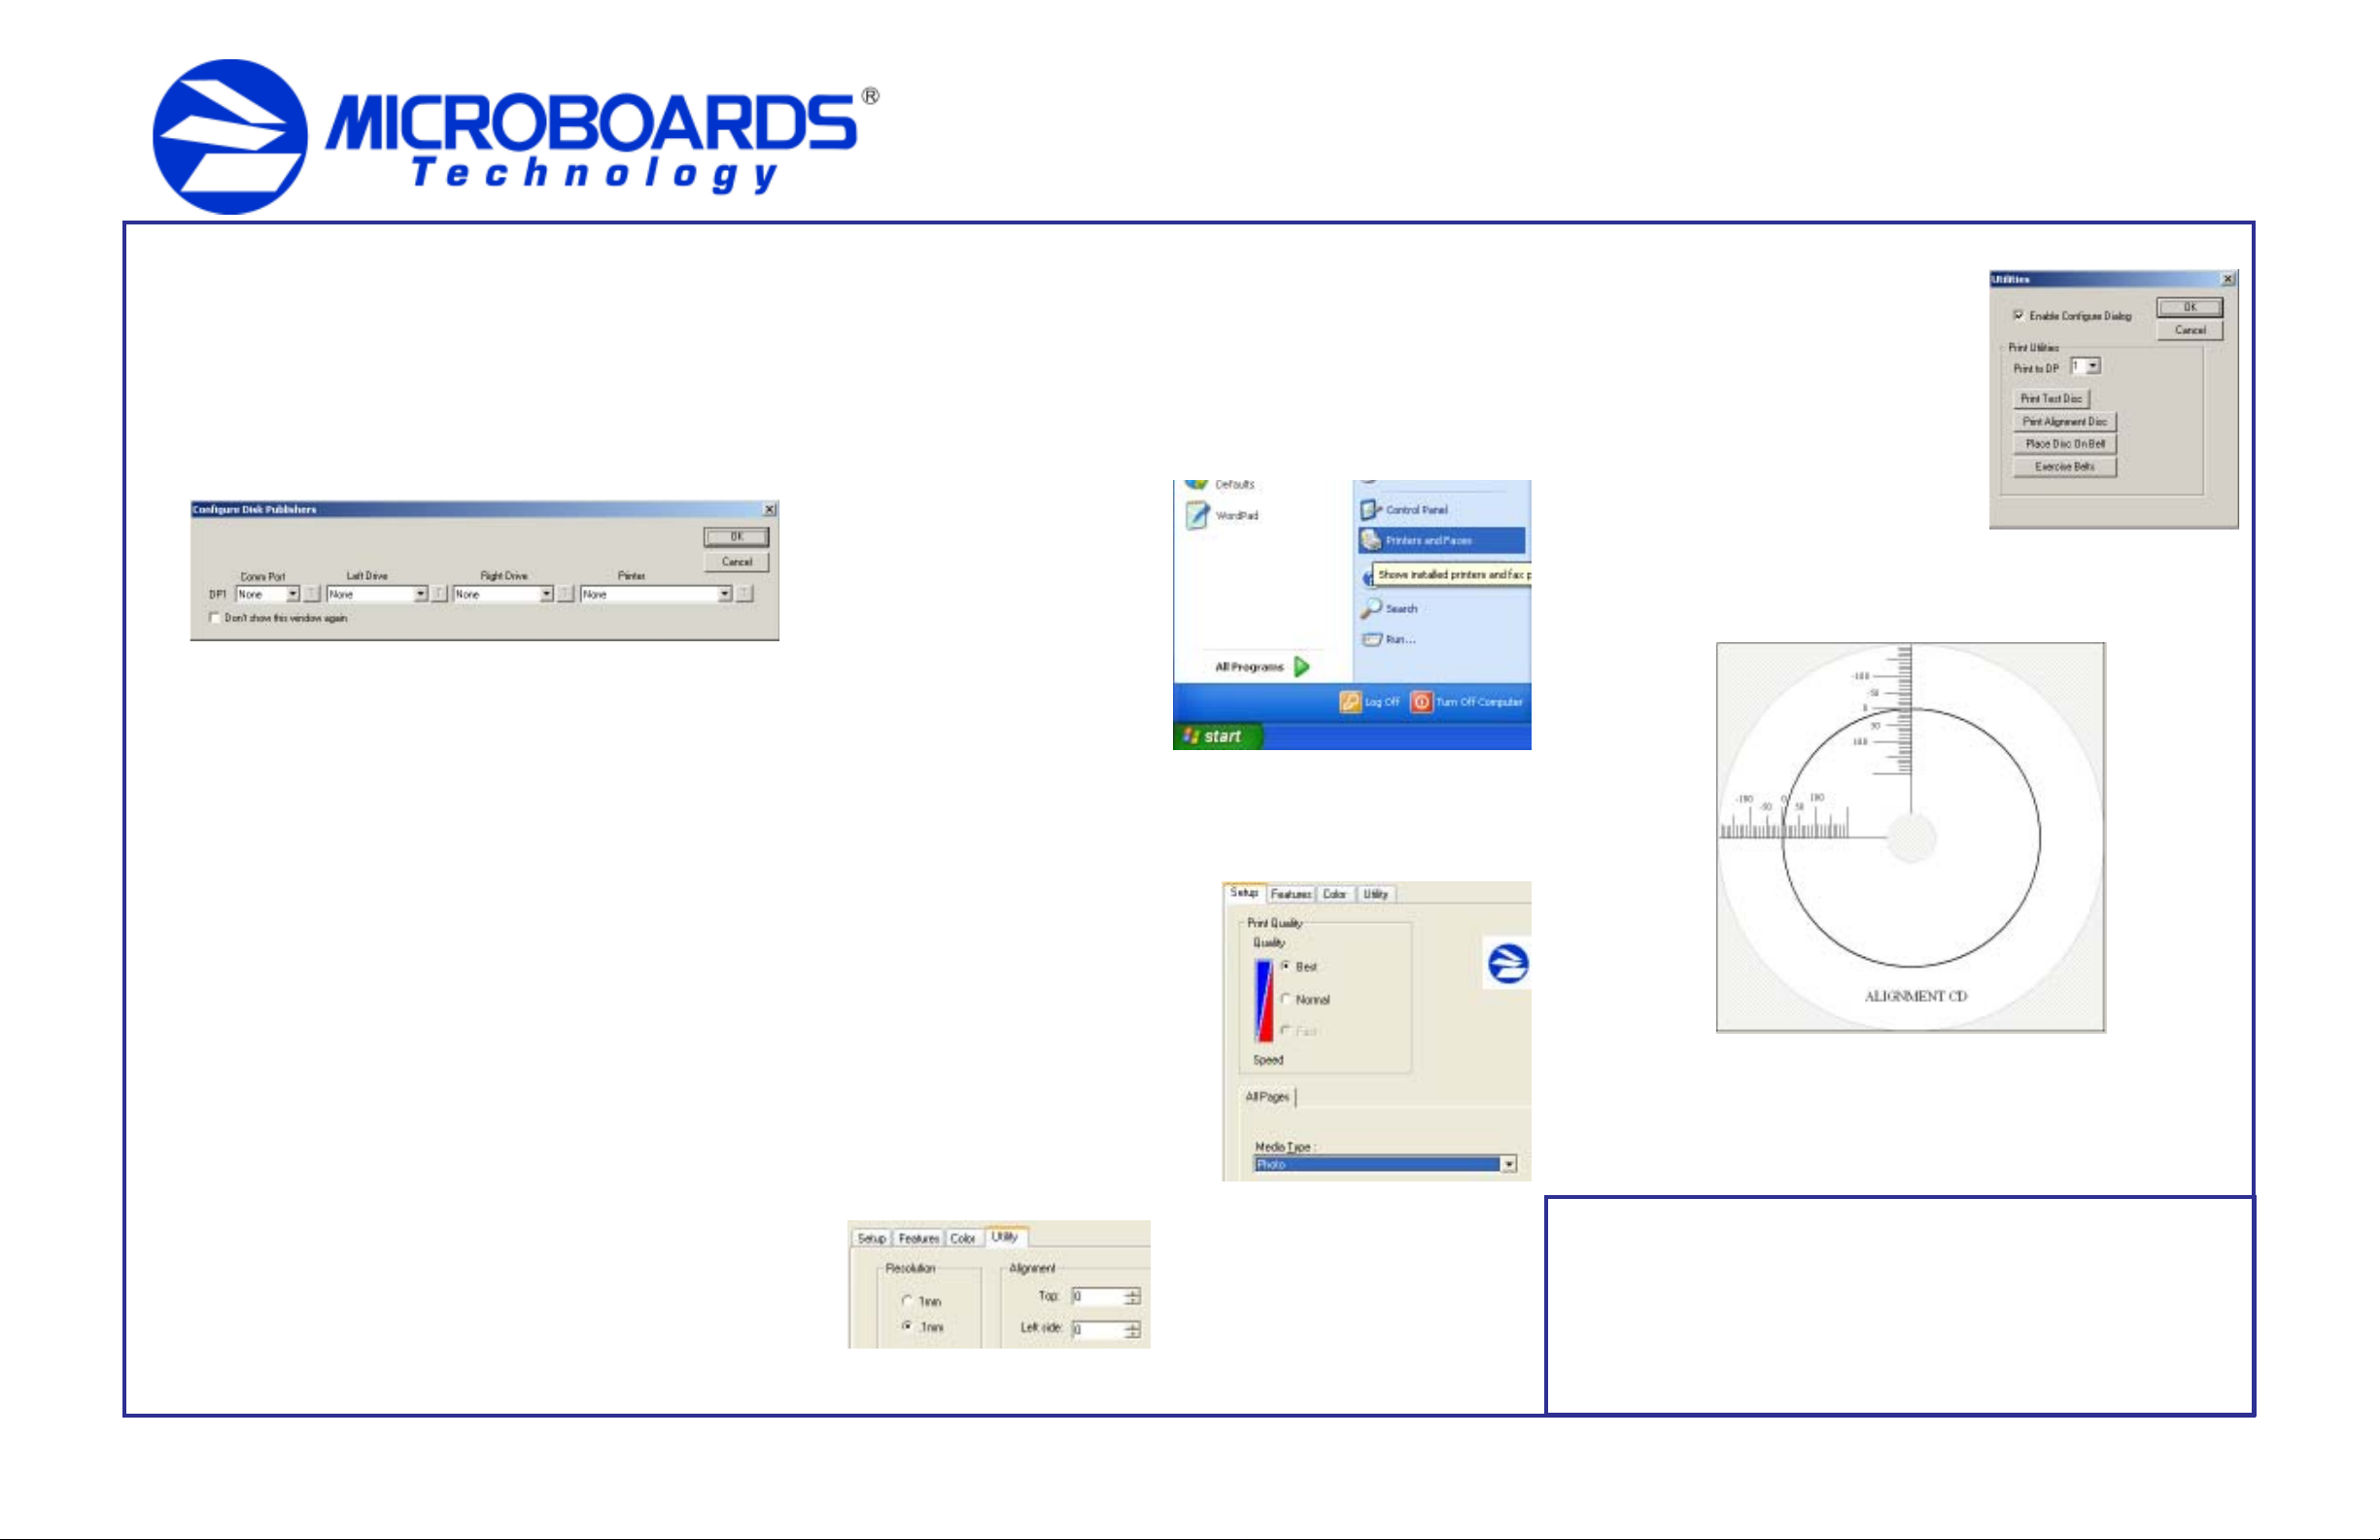
The DX-2 Disc Publisher controllers will need to be configured prior to use. When
launching Zulu2 for the first time, the following screen appears:
Comm Port: Select the COM port from the drop-down list that is specified by the
PC as the USB Serial Port in the Windows Device Manager (see User’s Manual for
more information). Verify the correct port selection by clicking the T button to the
right of the port list. The flippers below the input hopper will lift and then drop if the
correct port has been selected.
Left Drive: Select the drive letter for the left drive from the drop-down list. V erify
the correct drive selection by clicking the T button; the left drive tray should eject
and then retract.
Right Drive: Select the drive letter for the right drive from the drop-down list.
Again, verify the correct drive selection by clicking the T button; the right drive
tray should eject and then retract.
NOTE: Selecting the right drive on the DX-2 Disc Publisher as the left
and the left drive as the right will not impair the operation of the DX-2
Disc Publisher in any way.
Printer: Select MB PrintFactory Series from the drop-down list. Once selected,
click the T button to verify that the selection; the belts will run if the correct printer
has been selected.
Once the settings are set, place a check in the Don’t show this window again
box. This will bypass the controller configuration when Zulu2 is started. To
show the configuration screen again when Zulu2 is started, select Utilities from
the Zulu2 Robotics menu and place a check in the Enable Configure Dialog
box.
Click the OK button to accept the selections and open Zulu2.
For more information on the configuration of the DX-2 Disc Publisher
Controller, please refer to the Configuration section of the User’s
Manual.
Printer Alignment
Y our DX-2 Disc Publisher has been factory aligned to .1mm precision. The values
provided with the DX-2 Disc Publisher, located on the back of the unit below the
power plug, are the offset values to be used in the Printing Preferences.
T o set these values, please follow the steps listed below:
1. Install the DX-2 Disc Publisher , print drivers, SureThing labeling software, and
PrassiTech Zulu2 as detailed on the front of this Quick Reference Guide, or in
the Installation section of the User’s Manual.
2. Select Printers and Faxes from
the Start button.
In Windows 2000 or Windows XP
with the Classic Start Menu layout,
you will need to go to the Settings
selection, then to the Printers and
Faxes from the Start button.
NOTE: IN BOTH WINDOWS 2000
AND WINDOWS XP, THE
ALIGNMENT VALUES MUST BE
ENTERED FROM THE START BUTTON FOR THE SETTINGS TO BE SET
AS THE DEFAULT SETTINGS, NOT FROM WITHIN ANY APPLICATION!!!
3. Right click on the icon for the Microboards Print Factory Series and select
Printing Preferences…
4. On the Setup tab, select Photo for the
Media Type and Best for the Print
Quality.
Photo Best should always be selected
when aligning the printer, in order to
insure the greatest accuracy during the
alignment process. Other settings may
not result in the best alignment.
5. Select the Utilities tab. The
Resolution should be .1mm (see
below). Set the Top and Left Side
alignment values to match those
provided with the DX-2 Disc Publisher.
These settings will change the size of the
top and left margins, respectively.
Decreasing the value will move the alignment
up or to the left, increasing the value down or
to the right.
6. Click the Apply button, found on the bottom of the Printing Preferences window.
7. Start the Zulu2 application. Select Utilities from
the Robotics menu. The window to the right
will be displayed.
Place an alignment disc (provided) in the input
hopper and click the Print Alignment Disc
button. Remember , the alignment CD should
always be printed in Photo Best mode for the
highest accuracy.
8. Check the printed alignment disc. If the settings
are correct, the horizontal and vertical crosshairs
will have the 0 lines on the printed circle, as shown below. If not, repeat steps 5
through 8, changing the Top and Left Side amounts by those shown on the
alignment CD.
For further details on the alignment process, please refer to the
section on Alignment in the DX-2 Disc Publisher Users Manual.
In order to guarantee quality results from the DX-2 Disc Publisher,
ONLY MICROBOARDS PRF19ML OR PRF38ML
COLOR INK CARTRIDGES CAN BE USED!
As is true with all printers, the quality of ink cartridge and the quality of the ink
within the cartridge will affect your output. To ensure quality results, the DX-2 Disc
Publisher will not operate with any other color ink cartridge in place.
820-00134-02
 Loading...