

Page 1

USER MANUAL
MS-1063
Page 2

About
Spec
System: Simultaneous Channels
2 Channels, UHF
System: Analog/Digital
Analog
System: Frequency Range
540-800 MHz
System: Operating Range
200 ft. Line-of-sight
Microphone: Type
Dynamic
Transmitter: Battery Type
2 x AA
Transmitter: Battery Life
10 hours
Receiver: Antenna Type
Detachable
Receiver: Displays
Yes
MS-1063 series is a Dual-Channel, professional
UHF wireless microphone system with display
screen and detachable antenna. The system
frequency range is 540~800 MHz, which meets
the new FCC regulation.
Features
■
UHF Dual-Channel series
■
With oscillation mode of the quartz crystal
■
Strong anti-interference
■
Pre-selected frequency between 540 ~ 800 MHZ
■
The system adopts the design of dual-frequency, two transmitters working in
different frequencies
■
With audio compressing-expanding technology, the machine can lower noises
and increase the dynamic range.
■
Uniform cardioid pickup pattern isolates the main sound source and
minimizes background noise.
■
Designed for places like campus, family etc.
System Specifications
Page 3
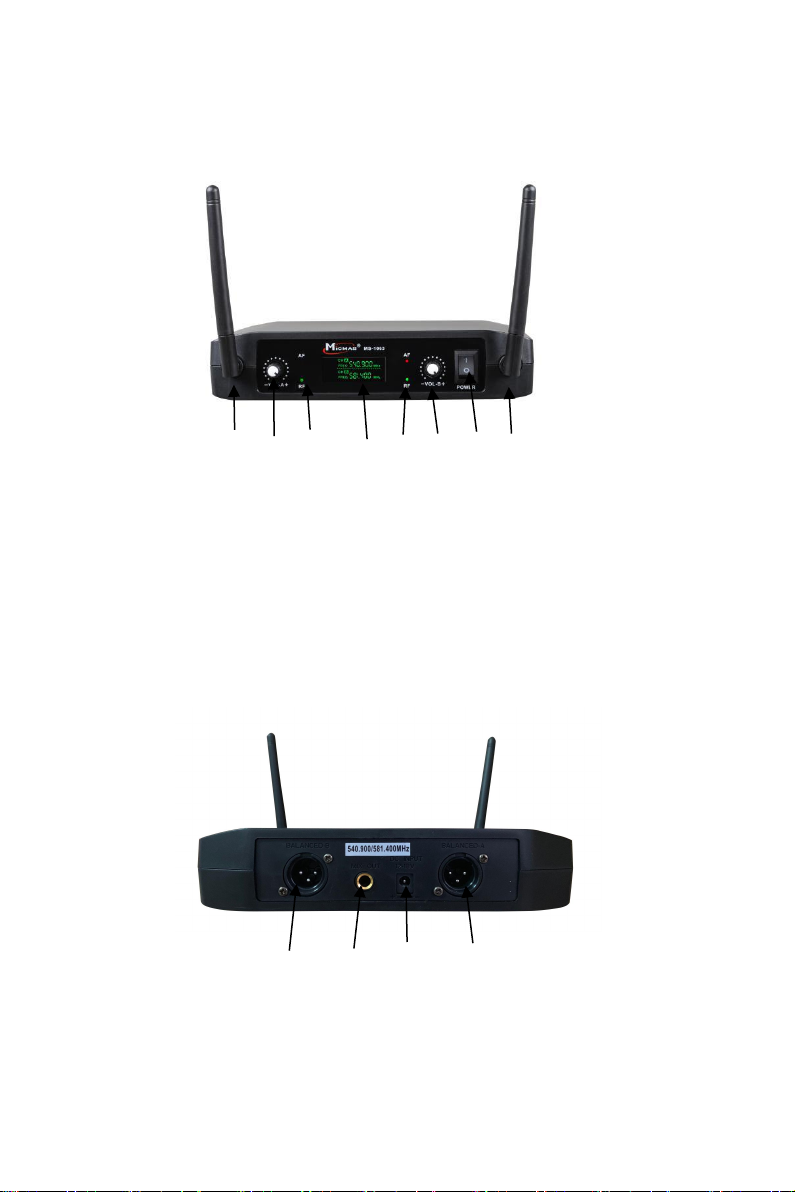
Receiver-Front Panel
9.Balanced B
10.Mix out
11.Power
12.Balanced A
3
4
1
6
2
5
9
10
11
12
7
8
1.Power
2.Volume A
3
.Volume B
4.Display
5.RF indicator of channel A
6.RF indicator of channel B
7. Antenna A
8. Antenna B
Receiver-Rear Panel
Page 4
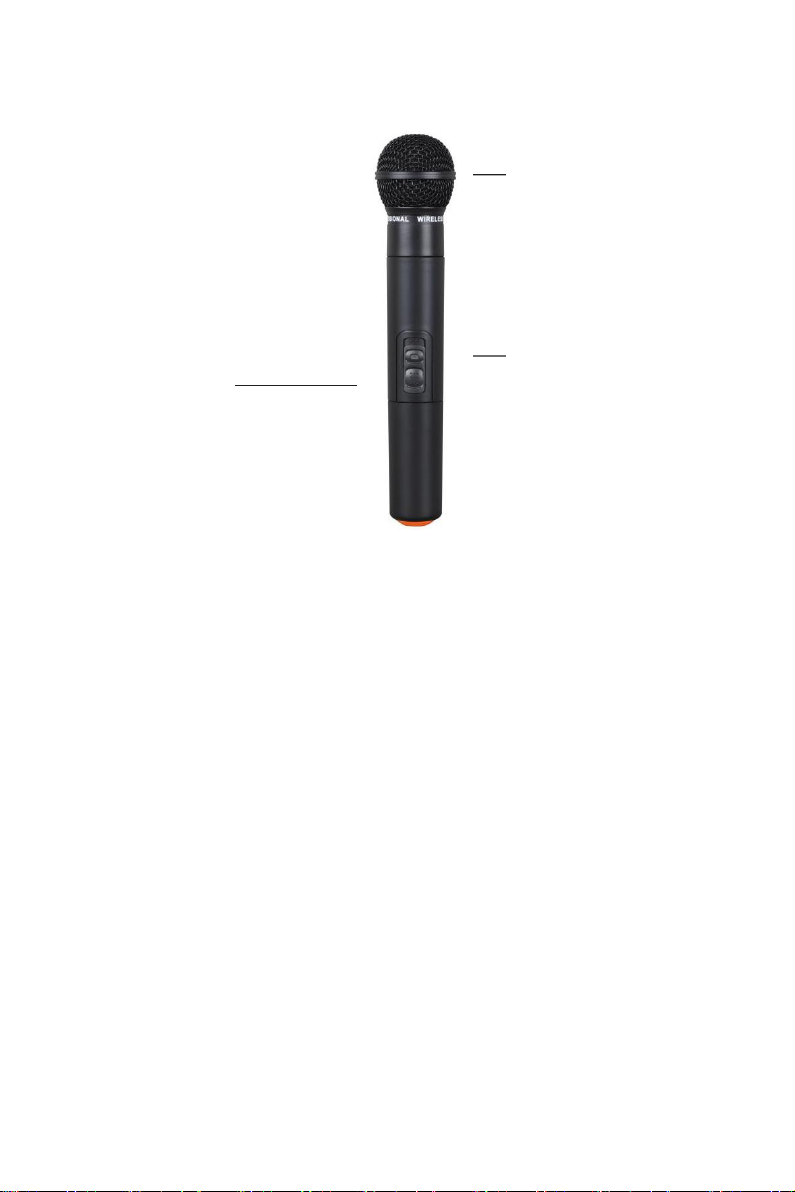
Microphone head
Slip control
for micr ophon e
When signal LED turns red,
requires battery replacement
Page 5

Note:
If the operation indicator lights red, it indicates the battery is low and should be
changed; if it comes on green, it indicates battery life is good; if it doesn’t come
on at all, it indicates the battery is dead, so please change it.
Operation:
1) Connect the receiver to a power outlet through the power adapter provided.
2) Connect the receiver to a powered (active) speaker with the 1 /4” audio cable
provided. Please make sure your speaker or amplifier comes with 1/4 ” Mic or
XLR input connectors (XLR cables are not included in the package, one 1/4 ”
audio cable is included).
3) Put two alkaline AA batteries into the battery compartment of the microphone.
Make sure the positive and negative ends are facing the correct direction.
4) Power on the hand held microphone, and use the volume knob on the
receiver to adjust the volume. For headset microphone, please connect the
headset to the body pack transmitter through the XLR cable first.
Q & A
Q: When the Receiver is “turned-on” but the indicator does not light up.
A: Ensure that the power cable is well connected and the socket in good condition. Also
check for blown fuse.
Q: Get Bad signal in safe receiving distance range.
This may be caused by the receiver not being placed in the right spot or the presence
A:
of a strong magnetic field near the receiver.
Q: Timbre becomes bad
: This may be caused by the use of the same frequency signals within the same vicinity.
A
Do not use two machines set to the same frequency at the same time in the same
place. (Two identical frequencies active at the same time require a minimum of 100m
distance apart from each other.)
Page 6

• •
• •
•
•
•
•
•
•
•
•
•
• •
•
• •
•
•
•
•
•
•
•
•
•
•
•
•
•
•
•
•
•
•
• •
•
•
•
•
•
•
•
• • • •
•
•
•
•
•
.
•
•
•
•
•
•
•
PROFESSIONAL
 Loading...