

MHP Grills W3G4DDNS Assembly Guide
W3G4DD and T3G4DD Assembly Instructions
The W3G4DD and T3G4DD feature 3 Cast Stainless Steel Burners combined with our revolutionary SearMagic® cooking system. This cooking
combination provides one of the most versatile, reliable and intensely heated grills in the industry.
SUPPLEMENTARY ASSEMBLY INSTRUCTIONS FOR COLUMN, PATIO BASE AND IN-GROUND POST
Prior to assembling your W3G4DD or T3G4DD grill
with the Column, Patio Base or In-Ground Post, the
following instructions must be followed to gain access
to the mounting holes in the grill head bottom. Assembly of grills with the WCP or WCN base begins on page
6 of the Owner’s Manual.
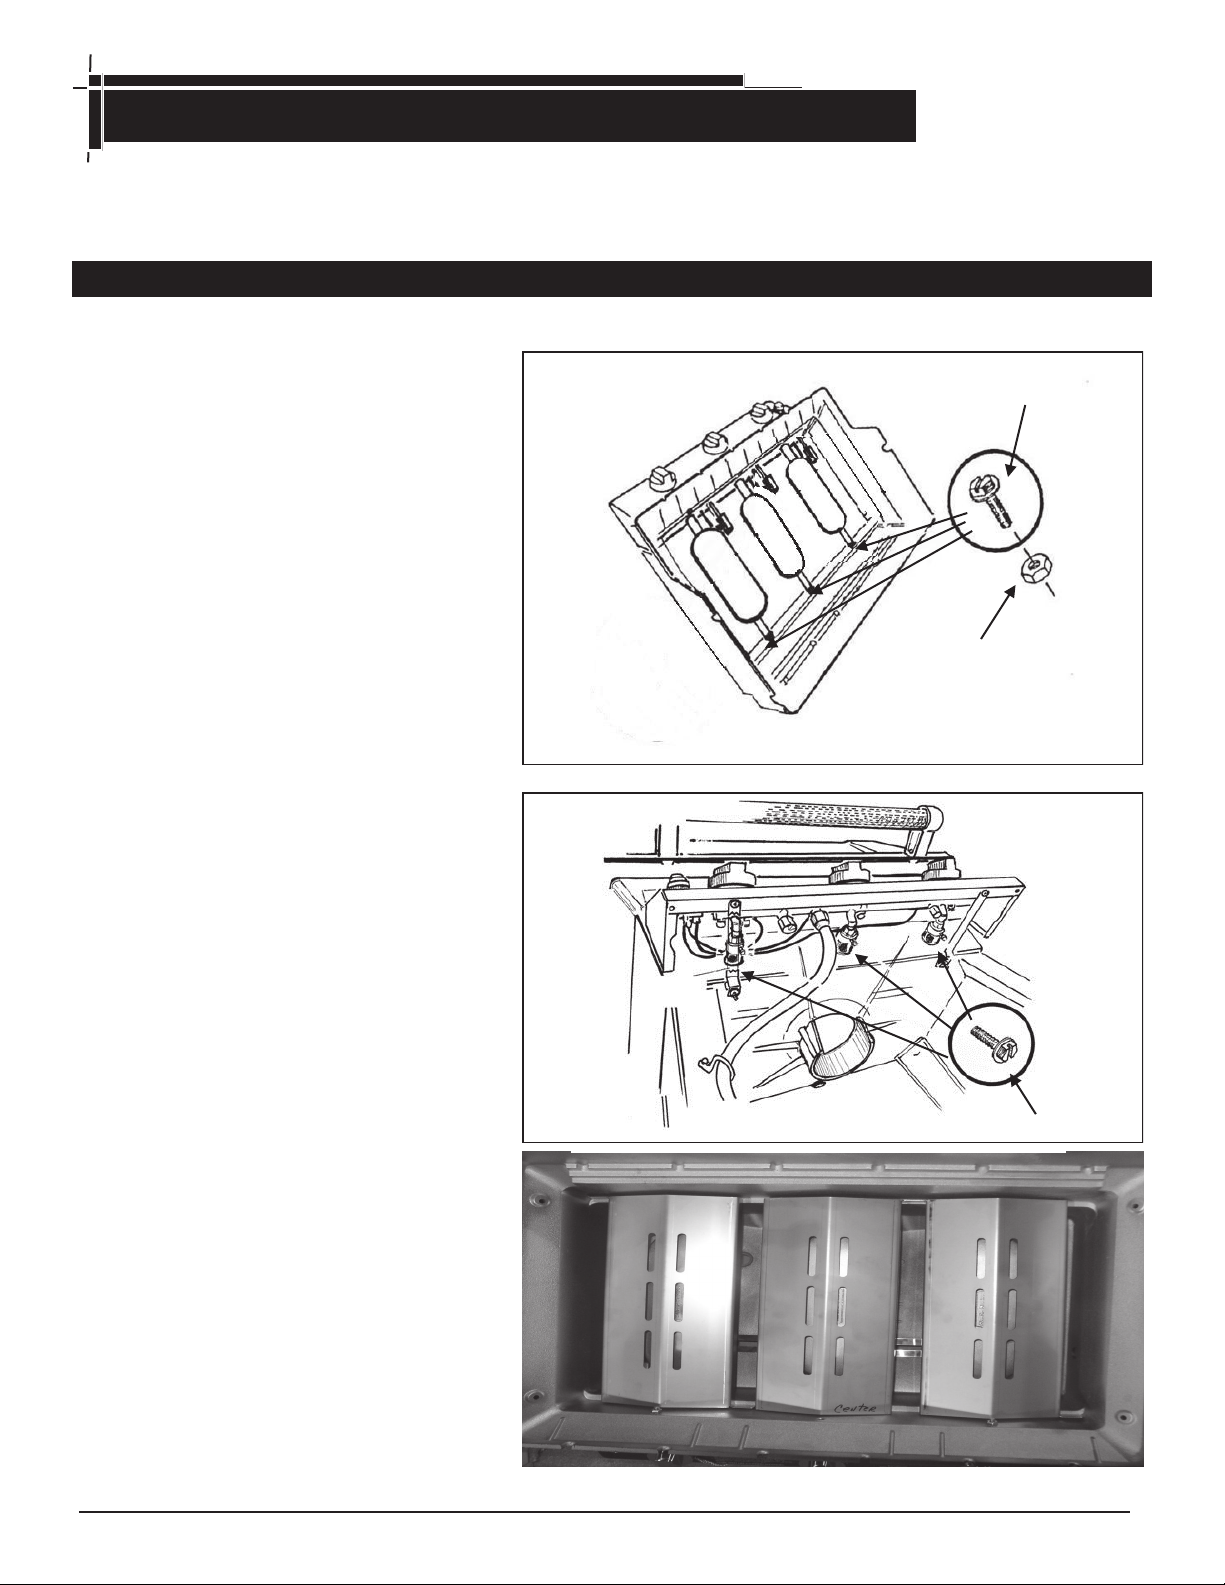
1. With a slotted screwdriver or 1/4" wrench, remove
the rear mounting screw on the back of the left and
right burner where they meet the grill head bottom. Use
a 11/32" or adjustable wrench on the nut on the outside
of the grill head bottom (Fig. 1).
2. Under the control panel, remove the screw on the
burner where it meets the orifice. Use a 1/4" wrench or
a slotted screwdriver for this. (Fig. 2).
3. Once these screws are removed from the burner,
carefully lift each out of the grill. For the Column, the
right and left burners need to be removed. For the
MPB Patio Base and the MPP In-Ground Post, only the
center burner needs to be removed.
4. For mounting the grill head on the Column, follow
the instructions on page 10 and 11 of the MHP Owner’s Manual.
8-32 x 1/2"
Hex Head
Nut On Outside
of Casting
Fig. 1
5. For mounting the grill head on the MPB Deck/Patio
Base follow the instructions on page 8 of the MHP
Owner’s Manual.
6. For mounting the grill head on the MPP In-Ground
Post, follow the instructions on page 9 of the MHP
Owner’s Manual.
7. After the grill head is mounted, reinstall the burners
into the grill head bottom. Insert the venturi tube
through the opening at the front of the grill head, and
over the orifice holder. Make sure the burner venturi is
fully engaged over the orifice holder, then tighten the
venturi set screw securely.
8. Install the (3) Flavor Plates. Please note that the
center plate does not have any protruding tabs, it
should be marked “center”. Evenly align them, the tabs
will help do this. (Fig. 3)
9. Place the SearMagic Cooking Grids above the 3
Oval Cast Stainless Steel Burners and Heat Plates.
10. The Warming Rack drops onto the top edge of the
grill head bottom. (see Fig. 35 page 18)
Fig. 2
Fig.3
8-32 X 1/2"
Hex Head Slotted
23
 Loading...