

Mgi software PHOTOSUITE SE Idea Guide
PhotoSuiteSE TM
Version 1.0
Idea Guide
MGI Software Corp.

MGI PhotoSuite SE Idea Guide
Copyright © 1993-1996 MGI Software Corp., All Rights Reserved.
The use and copying of this product is subject to the Software License
Agreement (see On-Line Help Contents, "License"). Any other use is
prohibited. No part of this publication and/or databases may be reproduced,
transmitted, transcribed, stored in a retrieval system or translated into any
language in any form by any means without the prior express written
permission of MGI Software Corp. Information in this manual and/or
databases is subject to change without notice and does not represent a
commitment on the part of the vendor.
Federal copyright law permits the purchaser to make one backup copy of
this software for archival purposes only and for the purchaser's personal use
only. Any other duplication of this software, including copies offered
through sale, loan, rental or gift is a violation of law and subject to both
criminal and civil penalties. MGI Software Corp. supports the industry's
efforts to fight the illegal copying of personal computer software.
MGI PhotoSuite and MGI PhotoSuite SE are trademarks of MGI Software
Corp. Microsoft, the Microsoft logo, Microsoft Explorer logo and Windows
95 are trademarks of Microsoft Corporation. Netscape logo and Netscape
Navigator are trademarks of Netscape Communications Corporation. All
other product names are copyrights and registered trademarks and/or
tradenames of their respective owners.
97-04 PSREF80

Table of contents 3
1. Introduction...............................................................................................6
Welcome to the World of PC Photography!.......................................6
1.1 Creative Things You Can Do............................................................6
1.2 Getting Started...................................................................................9
1.2.1 System Requirements................................................................9
1.2.2 Installation.................................................................................9
1.2.3 How to Register.......................................................................10
Why Register?...................................................................................10
2. Tutorial....................................................................................................11
2.1 Taking Better Photos.......................................................................11
Start with a Clean Lens.....................................................................11
When is the Best Time to Shoot Outdoors?.....................................11
Short Subjects? Get Down!..............................................................12
Stay in Focus.....................................................................................12
Going Lighter or Darker...................................................................12
Better Indoor Pictures in a Flash!.....................................................13
Get the Red Out................................................................................13
2.2 Putting Photos on Your Computer.................................................13
2.2.1 Getting Your Photos on Disk..................................................13
From a Hard Drive or Floppy Diskette............................................14
2.2.2 From a Digital Camera............................................................14
2.2.3 From a Scanner........................................................................14
2.2.4 From a CD...............................................................................15
2.3 MGI Activity Guide.........................................................................16
2.4 MGI Photo Editor............................................................................17
2.4.1 Button Bar...............................................................................17
2.5 Tool Bar...........................................................................................19
2.5 Detailed descriptions of some icons in the Tool Bar:.....................22
MGI PhotoSuite
TM

4 Table of contents
2.5.1. Freehand Select.......................................................................22
2.5.2 Smart Magic Wand .................................................................22
2.5.3 Clone Tool...............................................................................22
Need Help?.............................................................................................23
3. Fun with Your Photos.............................................................................23
3.1 How to Create a Photo Album...................................................23
3.2 How to Create a Photo Calendar................................................24
3.3 How to Create a Photo Greeting Card .......................................25
3.4 How to Create a Photo Sports Card...........................................25
3.5 How to Create a Magazine Cover..............................................26
3.6 How to Resize Photos to fit a Frame..........................................26
3.6.1 Manual Adjustment.................................................................26
3.6.2 Auto Fit....................................................................................26
3.6.3 Auto Fill...................................................................................27
3.7 Add a Picture Frame...................................................................27
3.8 How to Turn your Photo into a Coloring Book.........................27
3.9 How to Turn your Photo into a Cartoon....................................28
3.10 How to Turn your Photo into an Oil Painting .........................28
3.11 How to Create a Body Switch..................................................28
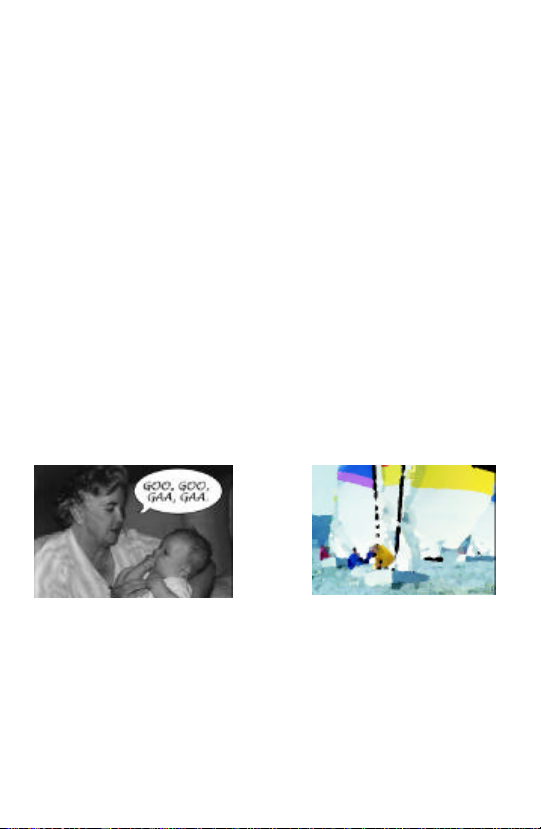
3.12 How to Add Word Balloons.....................................................29
3.13 How to Add Props....................................................................30
3.14 How to Add Text Captions.......................................................31
3.15 How to Repair Cracks or Remove Objects from Photos .........31
3.16 How to Remove Red Eye.........................................................32
3.17 How To Adjust Brightness.......................................................33
3.18 How To Enhance Colors..........................................................33
3.19 How to Change Your Photo's Layout......................................34
3.19.1 Photo Size..............................................................................34
MGI PhotoSuite
TM

Table of contents 5
3.19.2 How To Change Photo Orientation ......................................34
3.19.3 How to Trim an Area of Your Photo....................................35
3.20 Use Your Photos to Create Great Flyers and Advertisements.35
3.21 Use Your Photos to Create A+ School Projects......................35
3.22 Use Your Photos to Create Powerful Business Presentations..36
3.23 How to Put Your Photos Into Windows Wallpaper.................37
3.24 How to Put Your Photos Into a Windows Screen Saver..........37
3.25 Printing.....................................................................................37
4. Photos and the Internet............................................................................38
4.1 How to Get (download) a Photo From the Internet....................38
4.2 How to Put a Photo on the Internet............................................38
4.3 How to Make MGI PhotoSuite SE Your Internet Image Viewer.39
5. How to Get Technical Support...............................................................39
6. How to Order your MGI PhotoSuite 8.0 Upgrade.................................40
MGI PhotoSuite
TM
6 Introduction
1. Introduction
Welcome to the World of PC Photography!
Experience photography in new and exciting ways – with MGI PhotoSuite
SE it's so easy and fun for you and your family to get creative and make
your treasured photographs even more special!
Using MGI PhotoSuite Starter Edition (SE), you can transform or enhance
the pictures you take by altering colors, making collages, and more. Put
your photos into frames, like posters, calendars and greeting cards. You'll
see your photos in a whole new light. Out of a frame and into a screen
saver, or into a school science report, or wherever you'd like them to be.
Surprise yourself, impress your friends, and create your own exciting new
photo collection!
1.1 Creative Things You Can Do
There are many ways to take advantage of having your photos on your
computer. Here are some examples of what you can do with MGI
PhotoSuite SE:
Use word Balloons to make
your pictures worth 1000 & 1
MGI PhotoSuite
words
TM
Make your photo look like an
oil painting. Voilà, a
masterpiece!

Introduction 7
Create calendars with your
photos in them
Create a magazine cover with
your face on it
Make a poster to find your lost
cat or sell your home
Create personalized cards for
special occasions
MGI PhotoSuite
TM

8 Introduction
Create your own Rookie card
in the sport of your choice
MGI PhotoSuite
Create a crazy
photo collage
TM

Introduction 9
1.2 Getting Started
1.2.1 System Requirements
This is the hardware and software you need to get your MGI PhotoSuite
SE up and running:
• DX 33 or better
• Windows 3.1, Windows 3.11 or Windows 95
• Minimum 8 Megabytes of RAM
• Minimum 2 to 38 Megabytes of Hard Drive space, depending on
your version of MGI PhotoSuite SE
• Super VGA Monitor
• At least 256 color video
1.2.2 Installation
It's easy to install MGI PhotoSuite SE!
1. Insert the CD into your CD-ROM drive.
2. Select your CD drive.
3. Run the program “Setup.exe” by double clicking on this file. A
message, “Setup is initializing. Please wait” will appear on the
screen.
4. Follow the step-by-step instructions on how to install MGI
PhotoSuite SE to your hard drive.
MGI PhotoSuite
TM

10 Introduction
1.2.3 How to Register
Don't forget to register your copy of MGI PhotoSuite SE. You'll find your
product code number by selecting Help from the menu bar and choosing
“About MGI PhotoSuite SE.” Registering is easy.
You can choose online registration by clicking on the Help menu. Choose
“Register MGI PhotoSuite SE” and then follow the onscreen instructions.
When prompted, type in the product code number of your MGI PhotoSuite
SE.
Or, you could choose to register by mail, postage paid, by simply filling in
the registration card provided with this guide and sending it to us.
Remember to record the product code number of your MGI PhotoSuite SE
software in a safe place like the inside cover of this Idea Guide. You will
need this number for Customer Support and to take advantage of special
upgrade offers.
Why Register?
You will receive great benefits when you register your MGI PhotoSuite
SE!
By registering, you will receive online technical support through Internet
email or by fax. By becoming an MGI member, you'll also get the latest
information on product news, contests, promotional discounts, product tips
and more. So there are many reasons why it's a good idea to register your
MGI PhotoSuite SE right away.
MGI PhotoSuite
TM

Tutorial 11
2. Tutorial
2.1 Taking Better Photos
There are so many things you can do with MGI PhotoSuite SE. Now
taking your photographs is just the beginning – when you start with clear,
well-composed photos, your MGI PhotoSuite SE enhancements will be
truly spectacular. It takes just a minute to set up a good shot. Here are a
few basic tips for new photographers:
Start with a Clean Lens
That may sound obvious, but surprisingly, it's the one thing many people
don't consider when they are taking pictures. Even though the lens may
look clean, take an extra moment to really make sure it is as clean as
possible. Even the tiniest speck of dirt, smudge of sunscreen, or fingerprint
can ruin what might have been your most spectacular shot! So take care of
your camera with lens cleaner, lens cleaning tissue, a lens cleaning pen, or
optical cleaning cloth. And remember, never use regular cleaning tissue on
your camera lens.
When is the Best Time to Shoot Outdoors?
The least effective time of day to take outdoor photos is high noon, when
the sun is at its strongest and brightest, casting harsher shadows and
contrasts. The best times to take outdoor photos are in the early morning
and late afternoon hours. These are the times when the sunlight is softer,
casting longer shadows, and enhancing your subjects with a warm, rosy
glow.
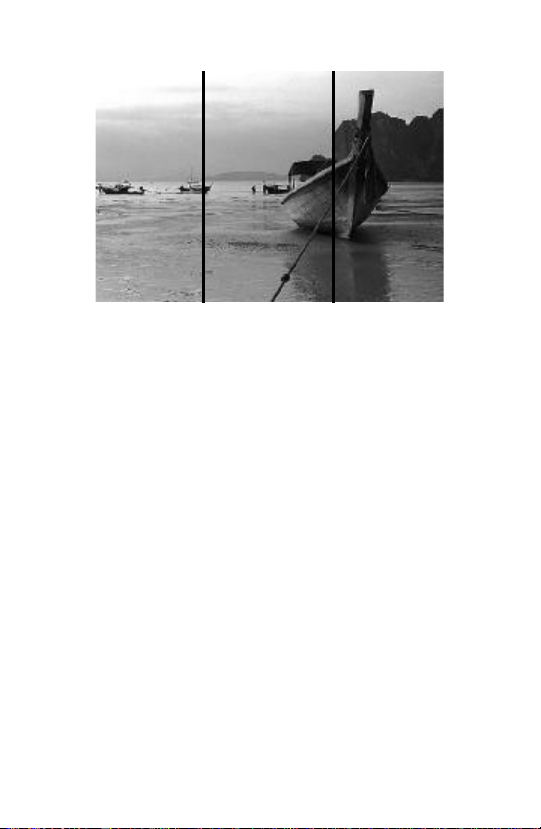
When you are composing a picture, consider the “Rule of Thirds”,
particularly for showing depth and balance in landscape photographs. Just
mentally divide the view you see through the lens into thirds, and put your
primary subject in the first or last third of your frame, balancing the rest of
your photo with the two remaining thirds.
MGI PhotoSuite
TM
12 Tutorial
The Rule of Thirds. The first or third boxes contain the
Short Subjects? Get Down!
The next time you photograph pets, children or other small subjects, try
taking the shot from a new perspective. Keep the lens at their eye level by
crouching down to get the shot. You'll notice a big difference.
Stay in Focus
Avoid taking blurred or out-of-focus shots by locking in (with an
auto-focus camera) on the part of the shot that you want to be the sharpest.
Hold the camera with both hands, squeezing the shutter button gently.
Remember, faster films allow you to freeze action (such as a swimmer's
dive) and require less light than slower film.
Going Lighter or Darker
If your photos appear too light, next time try standing further back when
using a flash. If your photos appear too dark, use a flash, and try standing
closer to the subject. When shooting with a flash, you should stand between
5 and 12 feet from your subject. Remember, always to wait for the “flash
ready” signal before taking the next picture.
MGI PhotoSuite
primary view.
TM
 Loading...