

Page 1
14
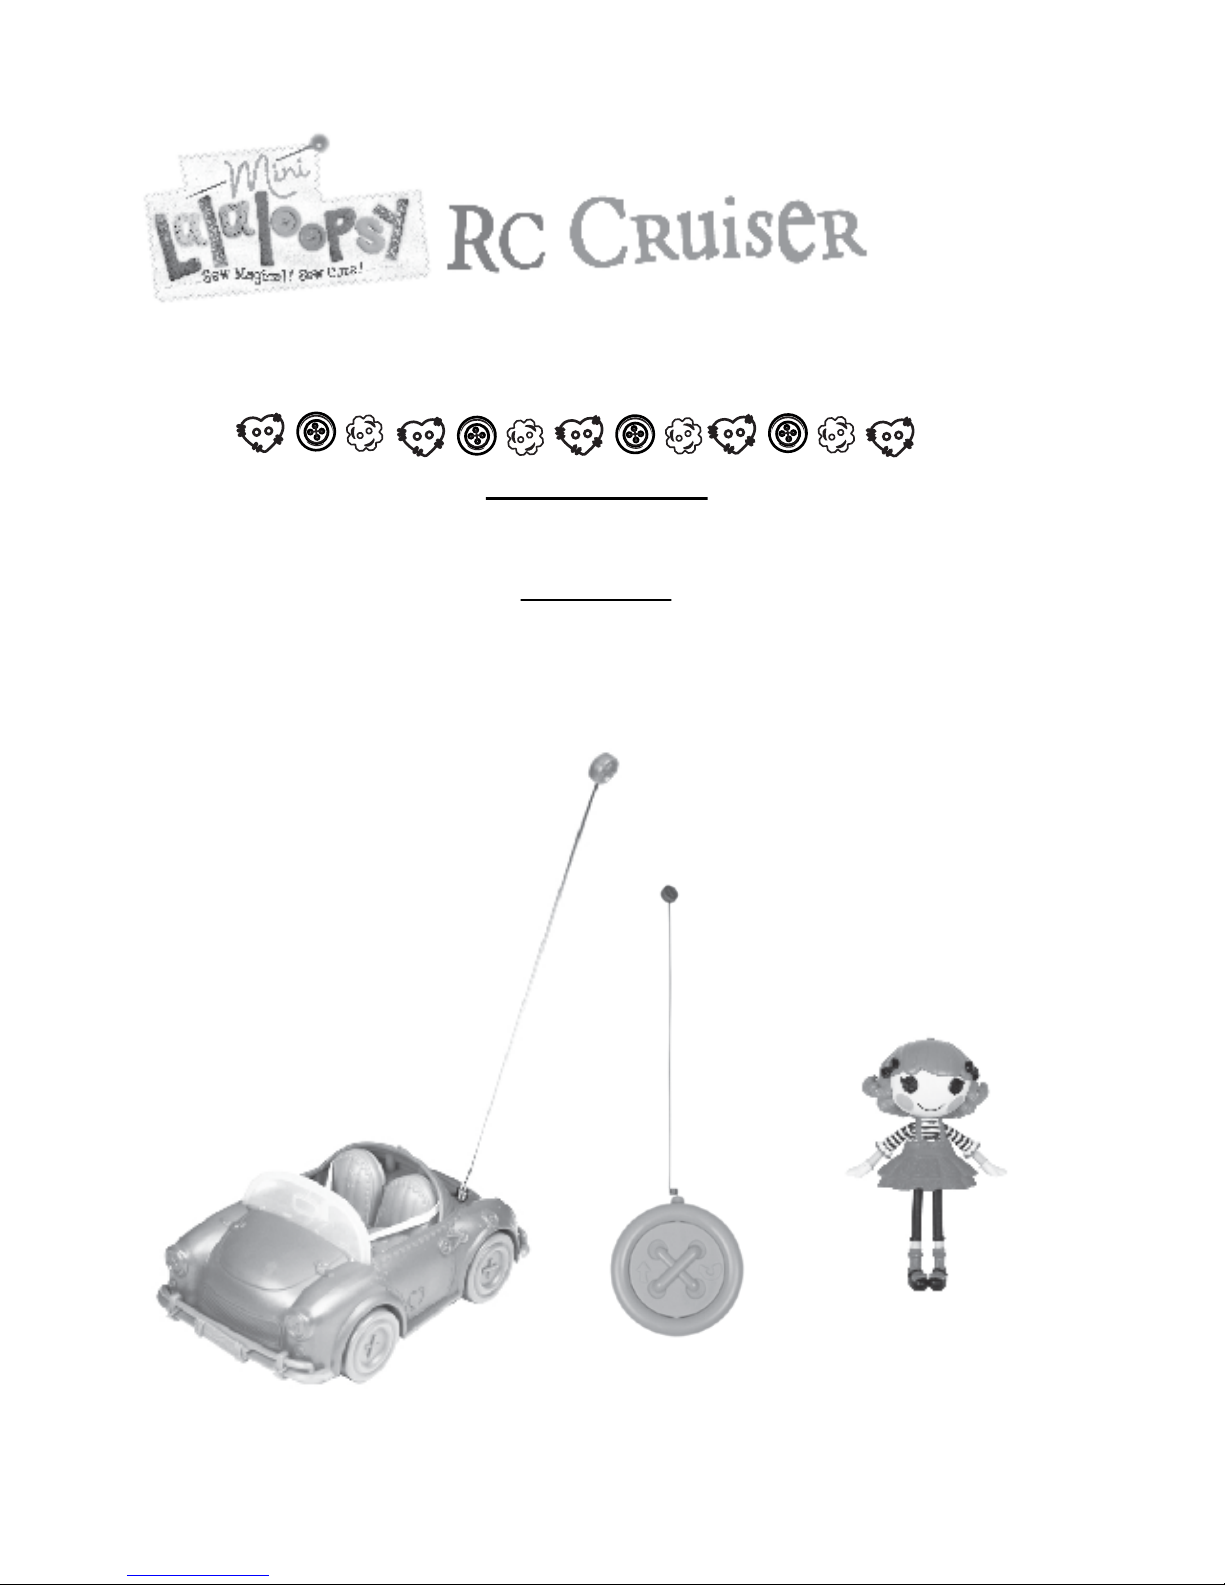
Start your engines! Because now your Mini’s can cruize to the silly, wonderful world of Lalaloopsy™ in their
very own Cruiser!
a) 1 Mini Lalaloopsy™ RC Cruiser
b) 1 Remote Control
c) 1 Mini Lalaloopsy™ Charlotte Charades™ Doll
INTRODUCTION
CONTENTS
Age 4+ years
Adult Battery Installation Required
Item No. 513032 – 27 MHz
Item No. 513049 – 49 MHz
Illustrations are for reference only. Styles may vary from actual contents.
TM
a.
b.
c.
Page 2
2 3
1. Slide the ON/OFF switch on the bottom of the Cruiser to the “ON” position.
2. Slide the ON/OFF switch on the back of the Remote Control to the “ON” position.
3. Place the Cruiser on a flat, level surface.
4. Straighten the Antenna.
5. Use the Remote Control to drive your Cruiser by doing the following:
a. Press down on the left side of the Remote Control to go forward. (Fig. 5)
b. Press down the right side of the Remote Control to back up and turn to the left. (Fig. 6)
• When driving two RC Cruiser, they must be of different radio frequencies (e.g. one Cruiser 49MHz and
one Cruiser 27MHz) or they may not perform as designed.
• When Cruiser is not being played with, turn the ON/OFF switches on both the Cruiser and Remote “OFF”
to save battery power.
• Your Cruiser is controlled by radio frequency. It may interfere with nearby devices such as cordless
phones, hair dryers, radios, walkie-talkies, or other radio controlled devices. If this occurs, move the
Cruiser to a location away from the interference.
• The Cruiser must remain in remote control range to operate correctly. The range depends on the
surrounding area and on the strength of the battery. Obstructions such as buildings, fences, etc., between
the remote control transmitter and the Cruiser, reduce the range.
• If the Cruiser runs slowly, replace the batteries.
• KEEP AWAY FROM WATER! Do not run your Cruiser through puddles, or expose it to liquid of any kind as
moisture may damage the unit.
• DO NOT sit or stand on any part of the Cruiser.
• DO NOT lift and/or drop the Cruiser as doing so may cause bodily injury to the user and irreparable
damage to the Cruiser.
• Play with the Cruiser on the floor or ground only.
• DO NOT operate this Cruiser during thunderstorms.
• Keep hair, fingers, loose clothing and other items away from rotating wheels of the unit.
Before going for a drive, make sure that your dolls are in place and buckled up:
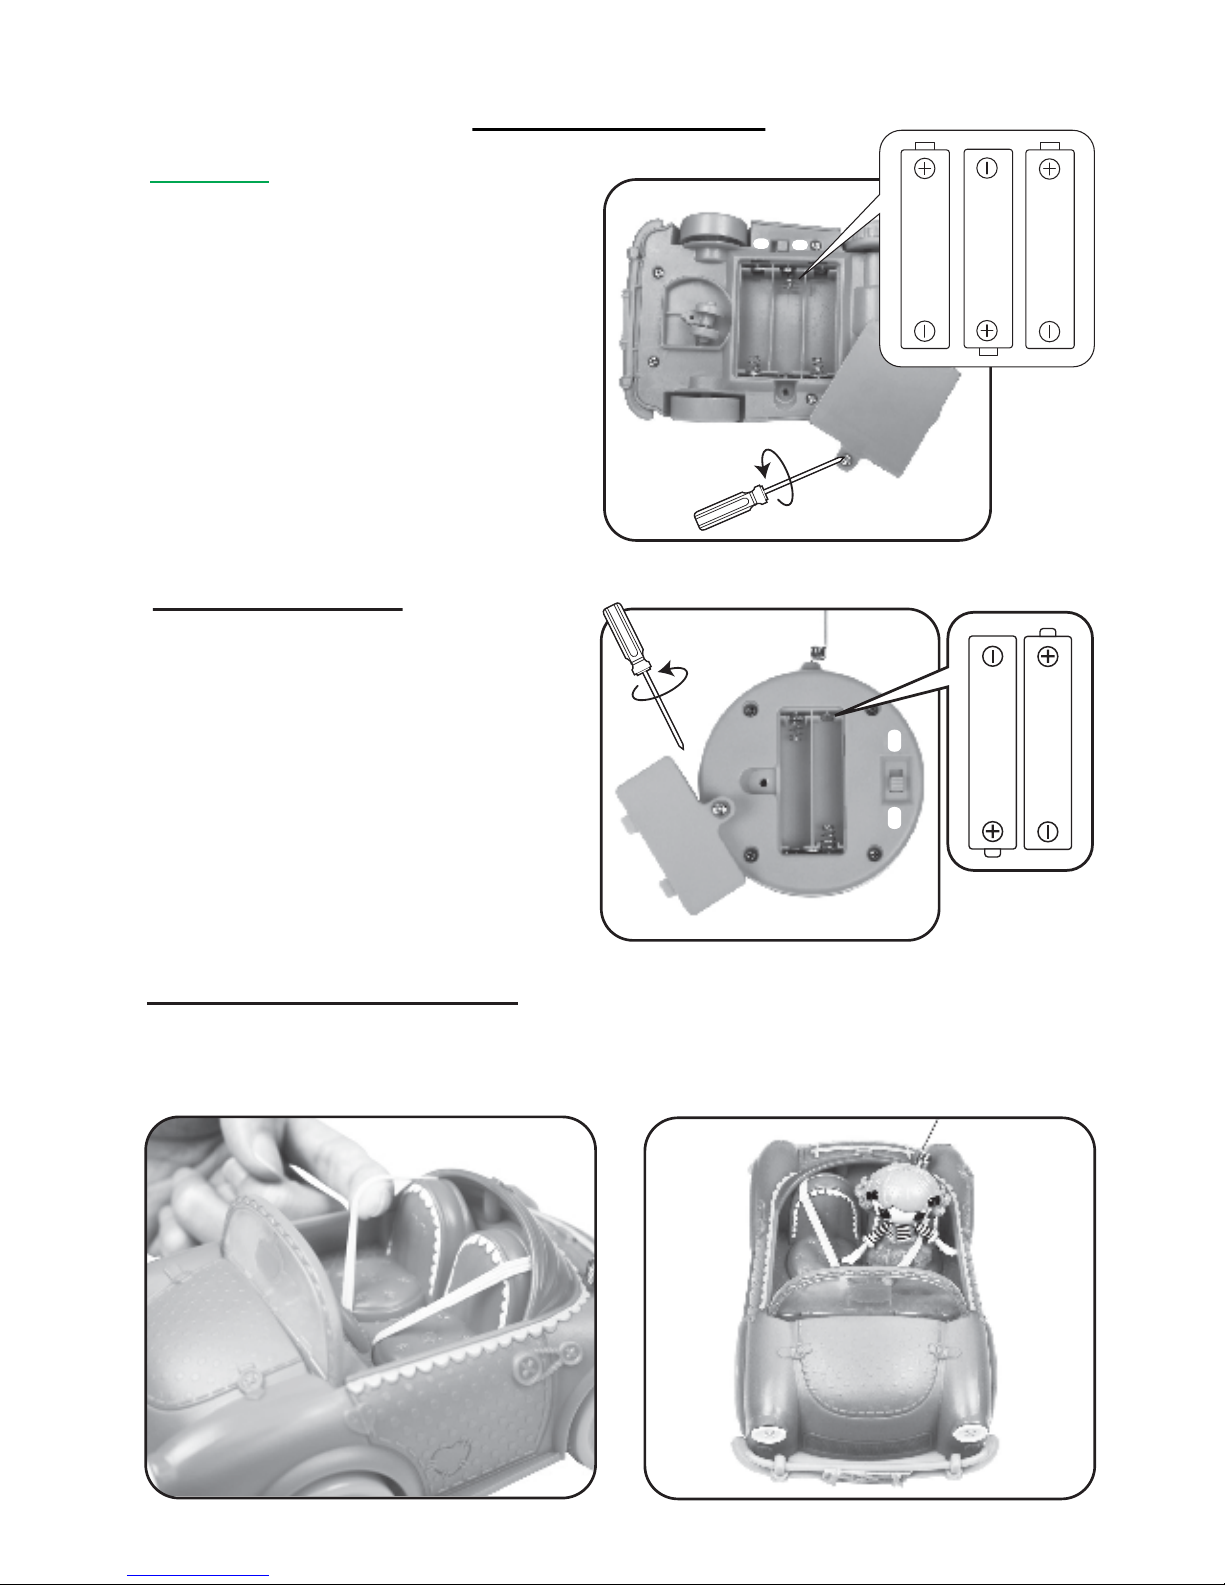
1. Lift the elastic band. (Fig. 3)
2. Secure your doll in the seat under the elastic band. (Fig. 4) Ready to roll!
BEFORE YOU BEGIN
Fig. 4
FASTEN YOUR SEAT BELTS!
1.5V AAA/LR03
1.5V AAA/LR03
An ADULT must install batteries in the Cruiser.
Here’s how:
1. Switch the ON/OFF switch to “OFF.” Using a
Phillips screwdriver (not included), remove
the screw and battery compartment cover
located on the bottom of the Cruiser. (Fig. 1)
2. Install three (3) AA alkaline batteries (not
included) making sure the (+) and (-) ends
face the proper direction as indicated inside
the battery compartment.
3. Replace the compartment cover and tighten
the screw.
An ADULT must install batteries in the Remote
Control. Here’s how:
1. Switch the ON/OFF switch to “OFF.”
Using a Phillips screwdriver (not included)
remove the screw and battery compartment
cover on the back of the Remote Control.
(Fig. 2)
2. Install two (2) AAA alkaline batteries
(not included) making sure the (+) and (-)
ends face the proper direction as indicated
inside the battery compartment. (Fig. 2)
3. Replace the compartment cover and tighten
the screw.
1.5V AA / LR06
1.5V AA / LR06
1.5V AA / LR06
Fig. 1
Fig. 2
Fig. 3
REMOTE CONTROL
CRUISER
OFFON
ON
OFF
Page 3

1. Slide the ON/OFF switch on the bottom of the Cruiser to the “ON” position.
2. Slide the ON/OFF switch on the back of the Remote Control to the “ON” position.
3. Place the Cruiser on a flat, level surface.
4. Straighten the Antenna.
5. Use the Remote Control to drive your Cruiser by doing the following:
a. Press down on the left side of the Remote Control to go forward. (Fig. 5)
b. Press down the right side of the Remote Control to back up and turn to the left. (Fig. 6)
• When driving two RC Cruiser, they must be of different radio frequencies (e.g. one Cruiser 49MHz and
one Cruiser 27MHz) or they may not perform as designed.
• When Cruiser is not being played with, turn the ON/OFF switches on both the Cruiser and Remote “OFF”
to save battery power.
• Your Cruiser is controlled by radio frequency. It may interfere with nearby devices such as cordless
phones, hair dryers, radios, walkie-talkies, or other radio controlled devices. If this occurs, move the
Cruiser to a location away from the interference.
• The Cruiser must remain in remote control range to operate correctly. The range depends on the
surrounding area and on the strength of the battery. Obstructions such as buildings, fences, etc., between
the remote control transmitter and the Cruiser, reduce the range.
• If the Cruiser runs slowly, replace the batteries.
• KEEP AWAY FROM WATER! Do not run your Cruiser through puddles, or expose it to liquid of any kind as
moisture may damage the unit.
• DO NOT sit or stand on any part of the Cruiser.
• DO NOT lift and/or drop the Cruiser as doing so may cause bodily injury to the user and irreparable
damage to the Cruiser.
• Play with the Cruiser on the floor or ground only.
• DO NOT operate this Cruiser during thunderstorms.
• Keep hair, fingers, loose clothing and other items away from rotating wheels of the unit.
IMPORTANT INFORMATION
Fig. 6
Fig. 5
OPERATING THE CRUISER
CAUTION:
Page 4

Start your engines! Because now your Mini’s can cruize to the silly, wonderful world of Lalaloopsy™ in their
a) 1 Mini Lalaloopsy™ RC Cruiser
b) 1 Remote Control
c) 1 Mini Lalaloopsy™ Charlotte Charades™ Doll
‘Let’s care for the environment!’ The wheelie bin symbol indicates that the product must not be disposed of with other
household waste. Please use designated collection points or recycling facilities when disposing of the item. Do not
treat old batteries as household waste. Take them to a designated recycling facility.
Item No. 513032 – 27 MHz
Item No. 513049 – 49 MHz
Please keep this manual as it contains important information.
0811-0-E
Illustrations are for reference only. Styles may vary from actual contents.
www.lalaloopsy.com
© MGA Entertainment, Inc.
LALALOOPSY™, MINI LALALOOPSY™ and
LALALOOPSY LITTLES™ are trademarks of MGA
in the U.S. and other countries.
All logos, names, characters, likenesses,
images, slogans, and packaging
appearance are the property of MGA.
16300 Roscoe Blvd.
Van Nuys, CA 91406 U.S.A.
(800) 222-4685
Printed in China
TROUBLESHOOTING:
IF THERE IS NO FUNCTION BETWEEN THE REMOTE CONTROL AND THE CRUISER:
• Make sure the Remote Control and the Cruiser switches are in the “ON” position.
• Make sure the batteries are inserted properly.
• Replace the old batteries with new alkaline batteries.
• Move the Remote Control closer to the Cruiser to determine the best communication between the two.
• Use alkaline batteries for best performance and longer life.
• Use only the type battery recommended for the unit.
• Batteries should be replaced only by an adult.
• Insert batteries with the correct polarity ( + and – ).
• Do not mix old and new batteries.
• Do not mix alkaline, standard (carbon-zinc), or rechargeable(nickel-cadmium) batteries.
• Do not short-circuit batteries.
• When not used for an extended time, remove batteries to prevent possible leakage and damage to the unit.
• Do not mix rechargeable and non-rechargeable batteries.
• Rechargeable batteries are to be removed from the toy before charging.
• Rechargeable batteries are to be recharged only under adult supervision.
• Do not recharge non-rechargeable batteries.
• Exhausted batteries are to be removed from the toy.
• Do not dispose of batteries in fire as they may leak or explode.
SAFE BATTERY USAGE
FCC COMPLIANCE
NOTE: This equipment has been tested and found to comply with the limits for a Class B digital device,
pursuant to Part 15 of the FCC Rules. These limits are designed to provide reasonable protection against
harmful interference in a residential installation. This equipment generates, uses and can radiate radio
frequency energy and, if not installed and used in accordance with the instructions, may cause harmful
interference to radio communications. However, there is no guarantee that interference will not occur in a
particular installation. If this equipment does cause harmful interference to radio or television reception,
which can be determined by turning the equipment off and on, the user is encouraged to try to correct the
interference by one or more of the following measures:
• Reorient or relocate the receiving antenna.
• Increase the separation between the equipment and receiver.
• Connect the equipment into an outlet on a circuit different from that to which the receiver is connected.
• Consult the dealer or an experienced radio/TV technician for help.
This device complies with Part 15 of the FCC Rules. Operation is subject to the following two conditions:
(1) This device may not cause harmful interference.
(2) this device must accept any interference received, including interference that may cause undesired
operation.
Warning : Changes or modifications to this unit not expressly approved by the party responsible for
compliance could void the user’s authority to operate the equipment.
a.
 Loading...