

Page 1
Page 2

..,
CD
()
o
3
3
CD
:::J
Cl.
Cf)
3:
o
c-
_.
Page 3

Vehicle Security G
Controls & Driving G
j~~uintenance
CI
Emergency Information G
t~f
arranty G
Page 4
Introduction
THE OWNER
'S
HANDBOOK
Thls handbook describes a
ll
of the
vehicles
and standard equi
pment
spec
ific
ations withln the mod
el rang
e.
Some
of
the informati
on,
therefore,
may
not
apply to your particular car
For your convenlence, the handboo k
is
divided into
subJect
or activity-
based
sections. The
se
are list
ed
on
the previ
ous
page
and
are mostly
sel
f-explanatory, However,
if
you experience difficulty
in
locati
ng
a
spec
lfi
c item
or
piece
of
informati
on,
you should consult the
alp
habetical index near the back
of the book.
You
should
als
o be aware that
the
fin
al
(Service Histor
y)
section
of
this
h
an
dbook
is,
in effect. aseparate public
ati
on,
wh
ich
enabl
es
arecord
to
be
kept
of
the rou tine serv
ice
s a
nd
ins
pections
can-ied out on t
he
car Thls sectl
on
also
provldes a
faci
lity
to
record brake fiuid a
nd
coo
lant changes,
and
the fitti
ng
of any major rep
lace
ment components
needed dun
ng
the life
of
the car.
F
ina
lly,
always
remember that
if
you have any queries, concerning the
op
er
ation
or
speclfication
of
your
car,
your Distributor will be
glad
to
ad
vis
e you.
2
© MG
Ro
ver
Gro
up Limlted 2004
A
I!
nghts reserv
ed.
No
part of this publica
tion
may
be reproduced, stor
ed
in a
retrieval
system
or
tran smitt
ed
in
any
fOI-m
, elect ronl
c. mech
anica
!,
recording
or
.,
othe
l-
means wlthout
prior
written perm i
ss
ion from MG Rover Group Llmit
ed
Publicatlon P
art
No.
RCL
0606EN
English
12/2004
As
part
of
the MG Rover Group envlronmental poli
cy,
this publlcation
15
printed
on
pa
per made from chlor i
ne
fre
e pulp
SY
MBOLS USED
The followi
ng
symbols us
ed
within the handbook
call yo
ur attention to
specific types
of
information.
A This warning
symbol
identifies procedures
that
must be
_ followed precisely,
or
information
that
must
be
considered with
great
care,
in
order
to
reduce
the
risk
of
personal injury
or
serious
damage
to
the
car.
~
This
recycling
symbol
identifJes
those items that must
be
disposed
\4i~
of
safely
in
order
to prevent unnecessary
damage
to
the
environment.
[(.';111"1\
[
This
symbol
identifJes
those
features
that
can
be
adjusted
or
lrl'f'i.if
disabledlenabled.
* An
aste
risk appeanng
withln the text, identifies
features
or
items
of
equipment that are eith
er
opti on
al,
or
are
only fitted
to some vehicles
in
th e model ran
ge,
S
TATUS
AT
T IME
OF PRINTIN
G
MG Rover operates a policy
of
continu
ous
product developm ent
and
Im
pro
vement and
reserves
the right to cha
nge
specifications without
notice at
any
time. W
hilst every effort
is
made
to
ensu
re the accur
acy
of the
Handbook, MG Rover
acc
ept no
lia
bil
ities for inacc
uracies
or
the consequences
thereof, including
loss
or
dam
age
to
property,
or
in
jury
to
persons except
in
respect
of
personal inju
ry
cau
sed
by the
negl
ige
nce
of
the manufacturer
Page 5
Introduction
SE
CURITY
CA
RD
The secunty card contalns Important emergency Information.
It
is
E
SSENTIAL
that
you
keep the card safe from theft
and
ensure that
It
IS
passed to the new owner
If
you
seil
the
car.
•
VIN
(Vehicle Identification
Number):
This
number
IS
unlque
to your car
and
is
essential proof of
ItS
specification (see
'IDENTIFICATION
NUMBERS',
poge
92).
•
Key
number:
This
is
the number of the starter/door
key
-
essential
if
you
ever need
to
obtain
areplacement
• Emergency key
access
code: This unique code
is
essential
in
order to start the car
if
the handset
has
been lost
or
damaged.
• Radio
se
rial number:
This
unique number
is
stamped into the
case
of the audio
unlt,
and
is
proof of the unlt's specificatlon and
your ownership
in
the event of theft.
• Radio security
code
number:
This
unlque code must be
entered into the
audlo unlt
If
the power supply
has
been
disconnected.
Wlthout this code, the audio unit
will
not operate.
A Never leove
the
security cord inside
the
cor when ;t
..
;s
left unottended. Keep
the
cord on your person
;n
cose
of
emergencies.
IMPOR
TANT
When the time comes
to
seil
your
car.
please remember
to
pass
this
handbook
and
the Secunty Card
to
the new owner. 80th
must
be
consldered part of the ear and essential
to
ItS
operation.
IN AN EMERGE
NCY
IMPORTANT
Remember
the
breakdown safety
code
If
a breakdown occurs
while
travelllng:
• Wherever posslble, consistent with road safety and traffie
coodltions, move the ear off the
main
thoroughfare.
If
a
breakdown oeeurs on a motorway,
pull
weil
over
to
the
Inside
of
the
hard shoulder.
•
SWltch
on
hazard
Iights.
•
If
available,
position a warning triangle
or a flashing
amber
light
SO
to I SO
metres
(I
SO
to
500
ft)
behlnd your vehlcle
to
warn
approaching
traffie.
Note
it
is a legal
requirement of some
countnes that a warnlng tnangle
IS
earried
In
the vehlcle,
if
in
doubt consult the
local
highways
ageney for further
Information.
•
Evaeuate the car
as
a preeaution
in
case
it
is
struck
aecidentally
by
another vehlcle.
3
Page 6

Page 7
Vehicle
Security
6 L
acks & Alarm
Page 8
Locks & Alarm
..
_------~
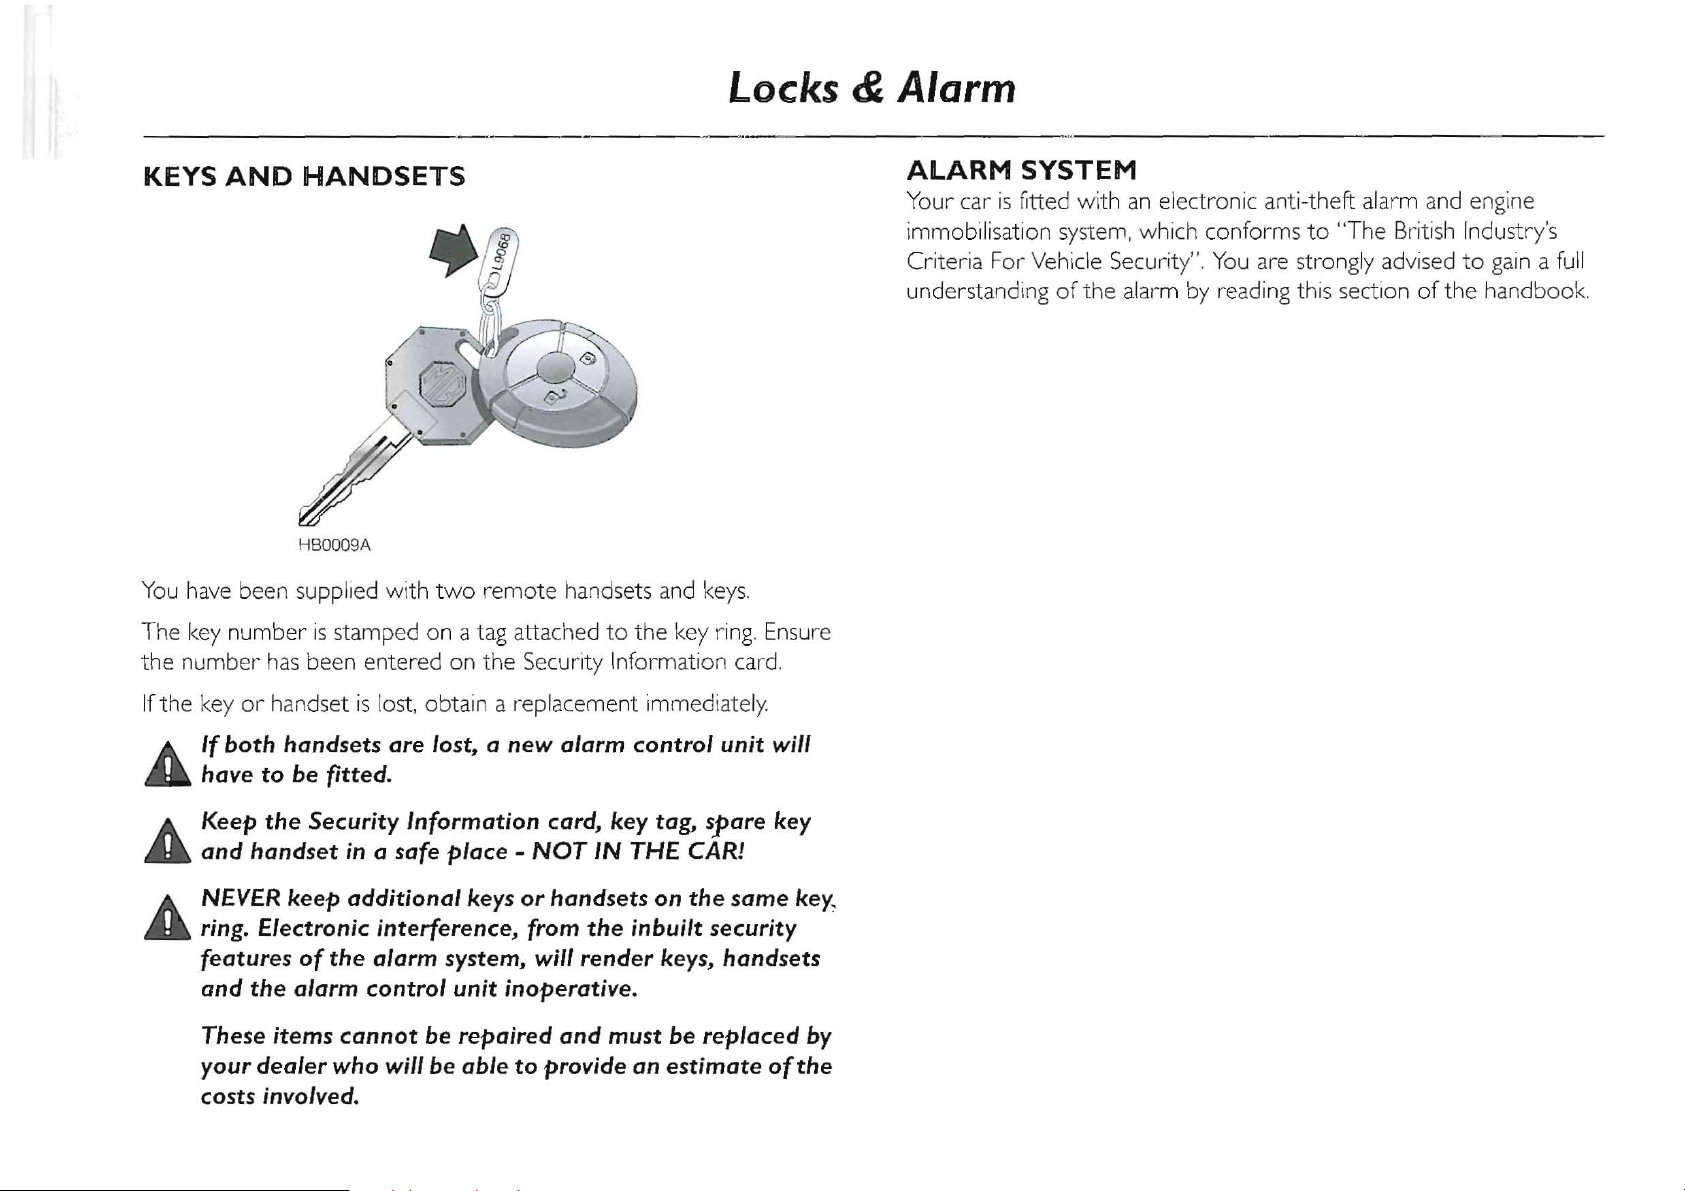
KEYS
AND
HANDSETS
HB0009A
You
have
been supplied wlth
two
remote handsets a
nd
keys.
The
key
number
is
stamped on a tag attached to the key r
ing.
Ensure
the number
has
been entered on the Security Information card.
If the key
or hands
et
is
lost, obtain
arep
lacement immediatel
y.
A If
both
handsets
are lost, a
new
alarm
control
unit will
..
have
to
be
fitted.
A
Keep
the
Security Information card,
key
tag,
spare
key
..
and
handset
in
a safe
place -NOT
IN
THE
eAR!
A
NEVER
keep
additional
keys
or
handsets
on
the
same
key
,
..
ring. E/ectronic interference, from
the
inbuilt security
features
of
the
alarm system, will
render
keys,
handsets
and
the
alarm control unit
in
operative.
These items
cannot
be
repaired
and
must
be
replaced
by
your
dealer
who
will
be
able
to
provide an
estimate
ofthe
costs
involved.
ALARM
SYSTEM
Your car
is
fitted with
an
electronic anti-theft alarm and engine
immobilisation
system,
which conforms
to
"The British Industr y
's
Criteria For Vehicle Security".
You
are strongly advised
to
gain
a full
understanding
of
the alarm
by
reading this section
of
the handbook.
Page 9

Lacks &
Alarm
LOCKING
THE
CAR
AND
ARMING
THE
ALARM
Using
the
remote
handset
The handset transmits a coded radio
signal
to
a receiver
in
the
car.
•
Press
the lock button to activate the alarm
system.
•
Press
the
unl
ock b
utt
on
to
deactivate the alarm system.
NOTE: The
lock
button
also
locks
the
doors
and
the
unlock
button
unlocks
the
doors.
It
is
not necessary
to
point the handset at the
car,
however the handset
must be with
in
range when the buttons are pressed. The
operating
range
will vary according
to
handset battery condition
and oth
er
physical
and
geographical factol
-s
beyond your control.
Locking and unlocking
the
car
Before locking the
car.
ensure doors, windows, bonnet
and
boot
lid
are fully closed.
L
ockmg
with
the remote
hondset:
I.
Press
the lock button
onee:
• both doors l
ock.
• -'door, bonnet and boot apertures alarmed.
•
engine immob
ilised.
• interi
or spaee
proteetion aetivated*
2.
The direetion indiea
tors fiash onee
and
the alarm indieatol- light
(
In
the Ins
trum
ent panel) starts
to fias
h.
Superlocking
wl
th
the
hondset:
I. Press
the lock button onee.
•
In
addition
to
the features listed above, the
door
sill
loeking
button s are inhibite
d.
2.
The dwection indicatol-s
flash
once
and
then three more times
and
the alarm indica
tor
light
sta
rts
to
flas
h.
Lod<lng
wlth
the key.
I.
Turn the d
l-iver's
doo
r lock one eighth turn towar
ds
the fro
nt
of
the
ear
:
• both doors loc
k.
•
door
, bonnet
and boo
t apertures alarmed.
•
engine immobil ised.
•
NO
INTERI
OR
SPACE
PROTECTION'
•
NO SUPER
LOC
KING WHEN L
OCKING
W ITH KEY
2.
The di
redion
Indicato
rs
flash
onee and th e alarm indicator light
starts to flash.
If the
direction indicators
fail
to flash
as
described aft er
any loeking
pr
ocedure,
am
islock is indieated
(see
'Mislock
',
poge
8).
7
G
Page 10

Locks
NOTE:
Ifthe
key
is
used
to
unlock
the
vehicle.
the
alarm
must be
disarmed
wlth
the
handset,
the
correct
EKA
code
must
be
entered
or
the
must
be
switched
on
within 15
seconds,
or
the
alarm
will
activate.
the unlock button
re-r'lObillsed.
The
alar"m
will
and
2.
The dil-ectlon indicators
sL;staln
fl2.sh
to
conf
rn
the alarm
NOTE:
If the
centra!
door
faUs
to
operate,
check
fuse
F5
in
the
underbonnet
fuse
box
and
has
blown,
the
will
remobilise
when
the
is
switched
on.
fuse
falled
when
the
car
was
locked
and
the
alarm
armed,
the
alarm
will
trigger
Im'Ylp,1,ni'p!v
the
is
Disarm
by
the
unlock
button
on
the
handset
Passenger
door
8
Alarm
Mislock
dwection indlcator
fail
to
fiash
when
Indicated
(a
door
other aperture
by
an
audible Indication
the alarm will be armed
and
imrnobiised. wiil not be
the open
apel"ture
i5
closed, directlon
Indicatol"S
will
fiash
to
confirm that the
system
nas
armed
fully.
dlrection indlcators
thel-e
15
a fauit with
to
'SE.RViCiNG
AND
ali
2.per"tures
further inforrnabon,
Alarm
indicator
light
After
the
RED
indicator
(
ashes
<\M,trr1p(l
on.
If
the
alarm
is
triggered
Oncc
ar-med
the will
be
if
any
of
the
occur:
..
the switch.
..
door
switches a
..
..
•
(interiOl'
space
Page 11

Locks & Alarm
If the alarm
is
triggered, the horn will sound
fOI-
30 seconds followed
by
a 5 second penod
of
silence. This cycle will
be
repeated
10
times,.
or
until the alarm system
is
switched
off
or
reset.
The
alarm system detectors are grouped
in
four separate zones.
•
Door
switches
and
volumetrie sensor
• Bonnet.
• Boot.
• Ignition.
The detectors
in
the zone which triggered the alarm will need
to
be
reset
befol-e they
can
trigger the alarm
again.
The detectors
in
other
zones will
I-emain
active
and
will trigger the alarm system
again
if
activated.
To
silen
ce
and disarm the alarm, press the unlock button,
or
enter the
EKA
code. If the lock button
is
pressed, the alarm will stop but the
system
will still be armed.
Interior
space
protection*
A
Do
not
activate
if a passenger
or animal
i5
to
be left inside
...
the
car -
movement
will
activate
the alarm.
Intel-ior
space
protection
is
activated automatically when the alarm
is
armed using the handset. Sensors
monitor
the interior
space
and
activate the alarm
if
an
intrusion
is
detected (entry through a wlndow,
for
example). If it
is
necessary
to
keep
interior
space
protectlon
inactive,
use
the key
to
arm the alarm.
Door
sill locking
buttons
Doors
can
be locked from inside the car
by
pushing down the locking
buttons on the
door
sills.
NOTE:
Operation
of
the
driver's
door
locking
button operates
both
door
locks.
Auto~atic
relocking
and
re-arming*
.':
Iii
'ill
This
feoture
can
be
enabled/disabled.
For
further
information,
refer
Iv!'/
W to
'SERVIC/NG
AND
REPAIR',
page
70.
If the car
is
unlocked, using the handset
or
key,
the
boot
lid
or
bonnet
is
not
opened within 30 seconds, the alarm system will automatically
lock
the car
and
arm the alarm system. The alarm status will
be
exactly
the
same
as
before the car was unlocked.
Speed
related
locking *
1
.':
1iI
~1
This
feature
can
be
enabled/disabled.
For
further
information,
refer
W-f\'V
to
'SERVICING
AND
REPAIR',
page
70.
This security feature locks
all
the doors automatically when the road
speed exceeds
approximately 8
km/ho
Note
that this featul-e
is
not
selectable
bythe
driver
and
that operation
of
the dool- locks
by
any
other
means
(door
sill
locking buttons,
for
example), will disable the speed-related locking function
for
the
I-emainder
of
the journey,
or
until the starter switch
is
turned
off
and
on
agaln.
9
G
Page 12

Locks & Alarm
LUGGAGE
COMPARTMENT
Turn the key clockwise to open (the luggage
compartment
lig
ht
illuminates automaticall
y).
The b
oot
lid locks automatically when it is
closed.
Take
precautions to avoid
aCCIdent
ally lea
ving the key
and
handset
in
the
lugg
age
compal~tment.
NOTE:
With the
alarm
system armed, the
luggage
campartment
can
be
apened without
activating
the
alarm
(the remainder
o(
the
alarm
system
remains
active,
including
engine
immobilisation).
The
alarm
rearms
(u({y
on
ce
the boot
lid
is
closed.
The
hazard
warning
lights
will
~ash
to
confirm
alarm
status.
10
GlOVEBOX
A Do
not
drive with
the
g/ovebox
open.
The
g/ovebox
lid
_ could cause injury
to
your
passenger
in
the
event
of
a
collision.
Page 13

Locks & Alarm
ENGINE
IMMOBILISATION
Engine
immobilisation occurs automatically:
•
Whenever the alarm
is
armed,
•
30
seconds after the starter switch
has
been turned
off
and
the
driver's
door
opened
and
closed (even
if
the driver forgets
to
lock
the
door
and arm the alarm),
•
Fi
ve
minutes after the starter switch
has
been turned off, provided
that the driv
er
's
door
has
remained closed,
Re-mobilisation
The
engine
is
re-mobilised
by a signa
l transmitted from the handset
to
the starter switch, This occurs automatically when the key is inserted
into the
star-ter
switch
and
turned
to
position
11,
provided the handset
rs
in
close proximity
to
the switch,
Keep
the handset on the
same
ring
as
the
star1:er
key,
Ifth
e handset
is
detached,
the re-mobilisation
signal
can
onl'y
be tr-ansmitted
by
pressing the handset button
or
entering the E
KA
code,
IMPORTANT
• If the
starter
switch is turned
and
the engine
fads
to
re-mob ilise,
a warning buzzer w
ill
sound,
To
re-mobili
se
the engine, press
the
un
lock button on t
he
handset.
• Automatic re-mobilrsation will
not
occur if BOTH h
and
sets
are
kept on the
same
keyring,
ENGINE
IMMOBILISATION
OVERRIDE
If the handset is
los
t
01'
fa
ds
to
operate, the
engrne
can
be re
-mob
ili
sed
using
the starter
key
in
the drive
r's
door
lock
to
enter the numerical
values
of
the four drgit emergency
key
access
code (recorded on the
Security Card)
as
foliows:
Before commenc
ing
the starter switch must
be
turned
off
and
the
driver's
door
locked:
I,
Inse
rt the
key
into the driver's
door
lock, Enterthe
FIRST
digit
of
the code
by
tuming the
key
to
the
UNLOCK
position the
numbe r of times indicated by the
first digit
of
the code
(e,g:
rf
the
first digit is
4,
turn the key 4 times),
FULLY
retum
the key
to
the cent re position after
each
turn.
2,
Turn the key
to
the LOCK position the number
of
times indicat
ed
by the second
digit of
the code, Remember
to
FULLY
return the
k
ey
to
the centre position after
each
turn.
3,
Turn the
key
to
the
UNLOCK
posi
tion the numb
er
oftimes
indicated
by
the
thir-d
digit
of
the code, returning the
key
to
the
centr-e
position
each
time,
11
CI
Page 14

Locks
& Alarm
4,
Turn the
key
to
the LOCK position the number
of
times indicated
by the fourth digit
of
the code, I-eturning the key
to
the centre
po
si
tio n
each
time
IMPORTANT
Each
turn
of
the key must be undertaken with
care
and
precision,
Ensure
the
key
turns through the FULL extent
of
its travel and
is
FULLY
returned to th e centre position aft
er each
turn.
Ifthe
correct
code
has
been
entered: the alarm indicator lig
ht
will
stop fias
hing
and
illuminate
for
one second, immediately
the
key
unlocks the door. A 5 minute time delay then commences, during
which the
eng
ine remains immobilised,
During the 5 minute
delay,
00
NOT
lock
or unlock the doors
usin
g
the remote
ha
nd set
or
key:
If this occurs, the emergency key
access
co
de must
be
re-e
ntered, If it
is
necessary
to secu
re
the
car.
use
the
si
lilo
cking buttons
to
lock the doors, ensuring that the remote handset
or key are not left inside the
car.
During the 5 minute
delay,
the starter key
can
be turned
to
positions
'I'
or
'11'
and the relevant electri
cal
sys
tem s operated (in position
'11'
the
immobilisation warning buzzer
will sound),
Once the 5 minute delay period
has
expired, the
engi~e
MUST
BE
STARTED within the following
10
minutes,
Failul-e
to
start the e
ngin
e
within this period
w
illl
-es
uit
in
the
eng
ine immobilising
again,
requir!ng
the emergency key
access
code
to
be
re-entered,
Even
after the engine
has
been started
and
run, the
10
minute
mobilisation
per
iod remai
ns
activeThis means that the engine will
need
to
be
mobilised
using
the emergency
key
access
code whenever
it is left, switched off,
for longer th an
10
minute
s,
Locking the car with
the handset will return the alarm system
to
normal operation,
( 7
If
an incorrect
code
has
been
entered: a warning bleep will sound
when the key
is
turned
to
the
final
unlocked position,
In
this
case,
open
and
dose the driver
's
door
and
enter the code
again,
Aft
er
three incorrect entries, a
thirty
minute del
ay
period
is
invoked
during which the security system
wi
ll
not
accept
any
fur
ther
codes,
Page 15

Lacks & Alarm
REMOTE
HANDSET
A The handset contains electronic circuits and must
be
..
protected
from
impact
and
water
damage, high
temperatures
and humidity, direct sunlight and
the
effects
of
solvents, waxes and abrasive c1eaners.
Exp
ected battery l
ife
is
approximately three years dependent upon
u
se.
The n
eed
for
replacement will be
app
arent from t
hese
sym
ptoms:
• A gradual detel'ioration in range
and
performance.
• W heneverthe handset lock bu
tton is
operated, the alarm indicat
or
light flash
es rapidly f
or
45 seconds.
Battery specification: MG
Rover
YWK
10003
or
Pan
asonie CR2032.
Battery
replacement
I. Place
the bl
ade
of a small.
tlat,bladed screwdriver
in
the slot
in
the
base
of
the handset
and
gently
push
downwar
ds
to release
the front yoke from the body of the handset.
'.
2.
Release
the retainl
ng
clips on
each
side
and carefully prise the
handset body
apal't. Avoid damaging the
sea
l between the
two
ha!
ves
of
the
case.
3.
Remove the circuit board and battery, taking care
to
avoid
touching the circui
t board
and
the contact su
rfaces
of the
battery
retain
ing cl
ip.
4.
Fit the new battery C+'
side
facing
down). Finge
r marks will
reduce
battery
life:
avoi
d touching the flat
surfaces
of
the battery
and wi
pe
the battel'y
cle
an before fitting.
5.
Reassemb
le t
he
handset. Ensure both hal
ves
of
the
case
are firmly
pressed together
to prevent the
ingress
of
dirt
and
moistur
e.
6. Slide the front yoke into position on the
hands
et bo
dy.
7.
The handset wi
ll now
lock
and unlock t
he
car
G
Page 16

Page 17

Contro/s
& Driving
16
Centre
Console
Switches
18
Exterior
lights
and
Windscreen
Wipers
20
Instruments
22
Waming
Lights
25
Steering
Co/umn
26
Seots
28
Se
at
Belts
30
Child Restroints
3 1
Airbag
SRS
34
InteriOl"
Equ
ipment
38
Mirrors
40
Windows
41
Heating & Ventilation
46
Storting & Dri
ving
48
Manual
Gearbox
49
Automatie
Transmission
53
Environmental
Drivin
g
54
Brokes
56
Fuel
System
58
Catalytie
Conv
erte
r
59
Audio
System
60
Load
Carrying
Page 18

Centre Console Switches
SWITCHES
HB0340
NOTE:
The
switch
layout
will
vary
according
to the
speci{ication
of
individual
cars.
/6
Hazard warning lights
Pr
ess
to
operate. A
ll
dir
ection indicato
rs
and
warni
ng lights
flash.
Use in
an
emergency
to
warn
other
road users when
yOUI"
car is
in
a hazardous
situation.
Window
switches
Pr
ess
low
er
part
of switch
to
open and upper part
to close (s
ee
'WINDOW
CONTRO
LS', poge
40).
Front fog
Iights*
Pre
ss
to
operate. The lights operate only with the
starter at position
'11'
and
side
or
headllghts on.
Lights extinguish
automatic
ally
whe
n sidelights or
starte, are turne d off, but illumlnate
again
whe
n
sidelights are next switched o
n,
unless deselected
manuall
y.
NOTE
: If
sidelights
are
le(t
on
when
the starter
is
turned
off,
the
indicator
light
in
the
switch
remains
on
as
areminder to manually dese/ect the
fog
fights.
Rear
screen
demister
P
ress
to operate. Demister
oper
ates only when
engine is runnin g, and switches
off automatically
after a
ppro
x.
I 5 mi
nu
tes.
Page 19

Centre
Console Switches
Rear fog guard lights
Press to operate. The lights o
per
ate on
ly with
the
st
arter
at position
'11'
and w
ith
the he
adl
ights 01'
front
fog
lights
on.
NOTE:
Rear
fog
fights
extinguish
automaticafly
when
starter,
headfights
or
front
fog
fights
are
switched
off
and
will
need
to
be
resefected
manually.
Air conditioning*
Press
to
operate (see
'A/R
CONDIT/ONfNG*',
poge
44).
Air recirculation*
Press
to
operate (see
'A
fR CONDIT/ON/NG";',
poge
44).
/7
Page 20

Exterior lights
and
Windscreen
Wipers
STALK
SWITCHES
'Lights on'
warning
buzzer
If the lights are left on after the starter
swi
tch
is
turned off, a buzzer
will sound when th e driver's door" is opened. The buzzer
ceases
when
the
li
ghts are switch
ed
off,
or
the
door
rs closed.
.,
/8
LlGHTING
SWITCH
Direction
indicators
Up
for
right
turn. Do
wn
for left turn.
Hold half
way up
or
down
agarnst
spring pressure
to
indicate a la
ne
change.
Side & headlights
Turn swit
ch
to
first posit ron
for
side, tail
and inst
r"ument lights.
Turn switch to second position for
head
light
s.
Main & dipped beams
Pull leve
r fully
to
steering wheel
to
change beams (bl
ue
warning light
indicates ma
in
beam illumination).
Main
beam
flash
Pull leve
r part way
to
steeri
ng
whe
el
and
r"elease
to fla
sh main
beams.
NOTE: The
headlighlS
fftted
to
your
car,
feature a precisely
deffned
diP-
beam spread pattern. When
driving
over
uneven
or
undulating
road
surfaces, movement of the headlight beam may seem exaggerated -
this
is
normal
and
is
not a cause
for
concern.
For
inf
orma
tion on adjust
ing
the headlight beam
for dri
ving abroa
d,
see
'HEPDLlGHT
BEIIM
SPR
EIID
ADjUSTMENT'.
poge
83.
Page 21

Exterior lights
and
Windscreen
Wipers
WIPER
SWITCH
Single
wipe
Pull
down
and
rele
ase.
(With
lever
held
down, wi
per
s operate at
fast
wipe
speed).
Intermittent
wipe
Turn switch
to
first position.
Normal
speed
wipe
Turn switch
to
second position.
Fast
wipe
Turn switch
to
third position.
Windscreen
washer
Pull
lev
er towards steering wheel.
•
DO
NOT
operate the wipers on a
dry
screen.
• Before operating wipers
In
freezing
or
very
hot
conditions, ensure
that the
bl
ades
are
not
frozen
or
stuck
to
the gl
ass.
•
In
wintel; remo
ve
snow
or ice from around the arms
and
blades,
including the wiped a
rea
of
the screen.
HORN
SWITCH
Press
either
of
the switches
in
the steering w
heel.
/9
Page 22

Instruments
INSTRUMENT
PANEL
I.
Temperature
gauge
Indicates engine coolant temperature, From col
d,
the pointer gradually
rises to
the middle
of
the
gauge,
where it should remain wh i
le
the
engine is running at normal operating temp era
tur
e,
In
severe drivlng conditions (very hot weather or exte nded hili
climbing), the pointer may
nse
furthe~
Ifthe
RED
mark
is
reached, the
(oolant is
too
hot
and severe engine damage
(ou
ld r
esult;
stop th e car
and
allow the engine
to
idle:
• If
the temperature continues
I'ising,
switch
off
and seek
assistance,
00
NOT drive, -
• If
the temperature returns
to
normal, continue driving with
caution,
bu
t contact an MG Rover Authorised Repairer'
or sui
tabfy
equipped gar
age
at the earliest opportunity.
20
2.
Tachometer
Indi
cates
engine speed
in
revolutions per minute, Spe
ed
restrietion
limi
te
rs
preve
nt
th e
engine from exceeding it's maximum operational
spe
ed (indicated
by
the
sta
l't
ofthe
RED
segment
),
NOTE:
The
range
of
the
red
segment
varies
according
to engine and
transmission
type,
3.
Speedometer
Calibrated
in
mil
es
per
hour and/or
kilometres per
houl~
4. Digital display
[p
HB0377
The display
shows:
SPORT
TRIP
000
•••
n
•• -••
,
.L....=.L....C.-.
•
To
tal distance travelled by the car
('000'
is
displayed),
• Individual journey distances (TRIP'
is
displayed),
Additional
displays for automatie transmissi
on
cars:
• Au
to
gear sele
ctor
position (
'P',
'R',
'N',
'0
')
• Selection
of
Sport mode ('SPORT'
is
displayed),
• Manual mode gear
sel
ection
('
I', '2',
'3',
'4',
'5'
or
'6'),
Page 23

Instruments
5.
Trip
recorder
reset
button
With
the starter switch
turned
on, the display shows the
odometer
reading.
Press
the button briefiy
to
toggle between
odometer
and
trip
recol-der
displays.
With
'TRIP'
displayed, press
and
hold the reset button
fortwo
seconds
to
reset the
trip
I-ecol-del-
to
zero.
6.
Fuelgauge
The pointer indtcates the fuel level, even when the starter switch
is
turned
off
When
the pOlntel- enters the
RED
segment 5 litres
(1.1
gallons) approx.
of
fuel remain.
Negotiating twisting
01- hilly telTain may disturb the accuracy
of
the
gauge.
Check the fuel when the car
is
on level, straight roads.
A
Never
allow
the
car
to
run
out
of
fuel -
the
resultant
..
engine
misfire
could
damage
thEt
catalytic
converter.
Instrument
panel
illumination
Rotate control
up
to
brighten
and
down
to
dlm illumination.
ENGINE
Oll
TEMPERATURE
GAUGE
HB0378
. If the pointer enters the
RED
segment, the oil temperature
is
too
high.
Reduce speed
and
drive gently until the pointer
falls
below
150
0
C.
If
the pointel- does
not
fall
after a few mlnutes, stop the
cac
switch
off
the engine
and
seek assistance befol-e contlnulng.
2/
Page 24

Warning Lights
----_._------------------------------------------------------------------------------------------------
WARNING
liGHT
FUNCTIONS
NORMAL
OPERATION
FAULT
INDICATION
re'
Battery
charging
(RED)
If light
fails
to
extingu ish, or illuminates while driv
ing,
there
is
a fault
with
Illuminates when starter switch
is
tumed
on and should
the
cha
rgi
ng
system. Stop
as
soon as safety
perm
its and seek
ass
istan
ce.
extinguish once engine
is
running.
-
Low
engine oil pressure
(RED)
If
light illuminates
or
flashes whi
le
drivin
g, stop
as
soon
as
safe
ty
IIluminates when starter switch
is
tumed
on and
permits.
SWITCH
OFF IMMEOI A
TELY
00
not
continue dri ving -
extinguishes once engine
is
running.
severe engine damage could res
ul
t.
-
Handbrake & brake
system
(RED)
If light
fai
ls
to
extinguish, or illuminates while drivl
ng,
stop
as
soon
as
IIlu
minates when ha
ndbrake
is
applied.
EX'tinguishes
safety permlts - a fault
with
the bra
kes
is
indtcated.
00
NOT
pump
the
when handbrake is fully I'el
eased.
bl'ake pedal.
00
NOT continue driving - seek assistance ul-gently.
~
Low
engine coolant -
(RED)
,
If
the
light
fails
to
extinguish,
or
illuminates whi
le
driving, this indicates
The
li
ght illuminates
for
4 seconds approx.
as
a bulb
that
the coolant level
is
low. Check the leve
l and
top-up
the
system. If
check when the s
tartei
' swit
ch
is
turned to
position 'li'.
the
light illuminates
again
within a
short
pel'iod
of
time, seek qualified
ass
istance.
A
00
NOT
remove
the
reservoir
cap
when
the
engine
is
hot
- escaping
steam
or
water
could cause serious injury.
22
Page 25

Warning Lights
------
,
.---_._-------------
NORMAL
OPERATION
FAULT
INDICATION
Im
Airbag SRS
(RED)
If
the
light
fails
to
illuminate and extinguish
as
described, or illuminate
s
Illuminates when starter switch is turned on and
after-the engine has started,
the
system is
faulty,
Continue driving, b
ut
extinguishes after approx, 6 seconds, seek
assist
ance urgentl
y,
111
High engine oil
temperature
(RED)
,
Illumination indicates high oil temperature, Reduce speed and drive
gently until
light
extingu
ishes,
If light
fails
to
extinguish after a few
minutes,
stop the
car.
switch
off
and seek assistance befor-e continuing,
-
Power steering
(RED)
Illumination
after-
the engine
is
started indicates a fault; steering
effort
IIluminat
es
when starter switch is turned on and will increa
se,
Continue driving, but seek assistance urgently,
extinguishes on
ce
engine is runnin
g,
~
Luggage
compartment
(RED)
Close the
boot
lid, Do not dri ve when
the
light
is
illuminated,
Illuminates whe n l
uggage
com
par
tment
is open,
-
Antilock braking system
(AMBER)
Illumination while driving indicates a f
aul
t with the A
BS,
Complete your
Illuminates when
starter swit;ch
is
turned
on
for
Journey then seek suitably qualified advice before furth
er
vehicle use,
approximately 2 seconds,
NOTE:
The
braking
system
remains
fully
operationa/, but braking distances
may
increase.
t4
Engine indieator
(AMBER)
Illumination while driving indicates
an
engine fault:
Illuminates when
starter
switch is
turn
ed on and
•
If car drives normally, arrange a service appointment.
extinguishes once engine
is
runn
rng,
•
If light fl
ash
es
and/or
car does
not
dr-
ive
normally, avoid
high
speeds
and seek immediate assistance,
•
Automatie
transmission fault
(AMBER)
Illumination indicates a transmission fault (engine spe
ed wil
l be limited
to
3,500 rev/min),
Cont
inue driving (but
with
extreme caution
l
),
Seek
assistance urgently
-
Rear fog guard lights
(AMBER)
Remember
to switch off when visibility improv
es
- fog guard lights
IIl
uminates
whe
n fog
gua
rd lights are swrt
ched on, dazzle other road users in clear cond itions,
-
Direction indieators
(GREEN)
If the light flash es
faster than
norm
al, a bulb
fai
lure is indicate
d,
Flashes
in
time
with
left
or righ
t direction indicato r
s,
and
with
the hazard warning light
s,
23
Page 26

Warning Lights
NORMAL
OPERATION
FAULT
INDICATION
-
Headlight
main
beam
(BLUE)
IIluminates only when ma
in hea
dlight beams are
se
lected.
0
Alarm
(RED)
If the light
fails
to
flash
after the car is locke
d,
a mislock is indica
ted
-
ALARM
Flashes
rapidly for
lOs
econds while the
ala
rm
sys
tem is check the
doo
rs
and
other
apertu
res
.
arming, t
hen flash
es slow
ly
as
an anti-theft deterrent If the light repeatedly
flash
es
rapidly for half a second then o
ff
for ha
lf
a
until th e ala
rm
is
disarmed. second after the handset
is
operate
d, handset bartery p
ower
is low.
If
the light
flashes
slowly (0.2 second on a
nd
0.2 second off)
aft
er
the
handset
is
used
to
disarm the alarm, the alarm h
as been triggered since
it
was
last
armed.
24
Page 27

Steering
Co/umn
HEIGHT
ADJUSTMENT
A
DO
NOT
adjust
the
he;ght
of
the
steer;ng column while
_ dr;v;ng. Th;s
;s
extremely
dangerous!
HB0349
I.
Push
the leve
r down to rel
ease.
2.
l'1ove the stee
ring wheel (up
or
down), makin
g sure the
instrument
panel is clearly vi
sible.
3.
Pull
the lever ful
ly
up
to lock.
25
Page 28

Seats
CORRECT
SEATING
POS
ITI
ON
Position the seats
as
far rearward
as
pradical. The driver's seat should
be positioned
so
that the steering wheel
can
be
held with the arms
s
li
ghtly bent and the seat back
in
a nearly upright position.
Your drivi
ng
position should be comfortable
and
enable you
to
maintain full contra I
ofthe
car A properly adjusted seat hel
ps
redu
ce
the r-isk
of
inJur
y from s
itting too close
to
an i
nfi
ating airbag
(see
'
Seoting positions
', poge 3 f
).
A
00
NOT
travel with
back
rests rec/ined
more
than 25°
..
from
the
vertical -steeply
rec/ined
seats
reduce
the
effective
operation
of
the
se
at
belts.
SEAT
ADJUSTMENT
A
00
NOT
risk losing
control
ofthe
car
and
causing
..
personal
injury,
by
adjusting
the
seats
while driving.
2
HB0344
I.
Backl
-est ad
justme
nt
2. Forward/rearward
adJ
ustment
Page 29

Seats
HEAD RESTRAI
NTS
I
HB0345
Ta
odJust
height
:
Pul
I up
(or
push
down) on the cushion.
A Adjust the cushion height level with
the
head -NOT
THE
..
NECK!
Head
restraints control rearward
movement
ofthe
head, reducing
the
risk
of
injury
in
an accident.
Ta
remave/repfoce:
Turn the right h
and
mounting
a quarter turn
anti
cl
ockwi
se
and pul I the
cush
ion u
p.
Turn the mounting clockwise
after replacement.
A
DO
NOT
drive with
head
restraints removed.
27
Page 30

Seat
Belts
SEAT
BELT
SAFETY
The
seat belts are for adult sized occupants. Each belt
shou
ld
be
used
by
one
occ
upant onl
y.
Observe
the
follow
ing
precaut
ions:
•
AD
JUST
seat
belts
to eli
minate slack
in
the
webbing.
Do
not
slacken
the webbing by holding
the
belt away from
the
body -
the
seat belt
must remain
in
full
contact
with
the
body
at
all
times.
• F
IT
the
lap strap
as
low
on
the
hips as possible
(never
ac ross
the
abdomen). The
diagonal belt should cross the shoulder without
slipping off
or
presslng
on
the
neck.
•
00
NOT
wear
seat belts
over
hard, sharp
or
fragile items
in
clothing (pens,
keys,
spectacles, etc).
•
REPLACE
seat
belt assemblies
that
have withstood
the
strain
of
a
severe
vehicle impact,
or
where
webbing shows signs
of
fl-aying.
•
00
NOT
use a
seat
belt
that
is
twisted 0 1- obstructed.
•
SEAT
BELTS
are designed
to
bear
upon
the
bony structure
of
the
body (pelvis, ehest and shoulders) and can only
be
worn safel
y wi
th
the
seat
backs
in
a near-upright positi
on
no
more
than
25
° from
the
vertical.
• IN MOST
countr
ies
it
is
illegal
to
travel without
wea
r-ing a
seat belt,
unle
ss
a medical
exemption
certificate has
been
issued.
• OURING preg nancy, women
shou
ld
wear
th e lap belt across
the
hips bel
ow
the bab
y,
with
the
diago nal belt pas sing
across.the
shoulder.
between the b
rea
sts and
to
one
side
of
the
baby -
if
in
doubt, consu lt a
doctor.
28
WEARING
SEAT
BELTS
A Failure
to
wear a seat
belt,
or
wearing a
seat
belt
....
incorrectly
increases
the
risk
of
death
or
serious injury
in
the
event
of
a collision.
Read
the
instructions
below
and
'5eat
belt
safety
' advice.
Fastening
the
belt
Pull
the belt
over
the
shoul
der
and across
the
ehest. Insert
the
metal
t
ongue plate
into
the
buckle
nearest
the
wearer
- a 'click' indlcates
that
th
e belt
is
locked.
Press
the
red button
on
the
seat
belt buckle
to
release
the
belt.
1
c
n
sr
b
R
C
Ir
If
a
Page 31

t
Se
ot
Belts
SEAT
IBELT
PRE-TENSIONERS
A The
seat
be/t
pre-tensioners will
only
be
activated
on
ce
..
and
then
MUST
BE
REPLACED. For
further
information,
refer
to
'SERVICING
AND
REPAIR',
page
70. Failure
to
replace
the
pre-tensioners will
reduce
the
efficiency
of
the car's front restraint systems.
Th
e pre-tensioners ope rate
in
conjunction with the airbag
(see
'AIRBAG SUPPLEMENTARY
RESTRAINT
SYSTEM (SRS
)·.
poge 31)
.
Activation is automat
ic
and cannot be
contr
olled by t
he
dri
ver.
Whe
n
t
he
pre-tensioners are activated, th e
sea
t belts retract. reducing
sla
ck
in
the webbl
ng
and
min imising forward movement of the occupant.
NOTE: The
pre-tensioners
will
NOT
operate
as a result
of
side
or
rear
collisions
,
or
minor
frontal
impacts,
or
if the
car
overturns.
T
he ail-bag
SRS
warning light will al
ert
yo~
to
any
malfunction
of
the
seat
belt pre-tensioners
(see
'Airbag SRS
worning
light',
poge
32).
Even
if
the pre-tension
ers
have
been activated. the seat belts will still
function
as
restralnts,
and
shou
ld be
worn
in
the
eve
nt that the car
rema
in
s In a driveable
conditi
on.
After
15
years from the initial date
of
registration (or installation date
of
re
placement pre-tensioners). the pre-tensioners shou
ld
be
repl
aced.
In addition, the appropriate p
age
of
the Service Hi story
section
of
th is book must be signed
and stam
ped once the work
has
been completed. For further informati
on.
refer to
'SERVICING
AND
R
EPAIR·.
poge
70.
Disposing
of
the
car
Inform the new ownel-
of
the pre-tension
er
replacement date.
Ifthe
car is
to
be
scrapped, pre-tensioners must be
safe
ly
deployed
in
a contl-oll
ed env
ironment
by
qualified personne
l.
CARING
FOR
SEAT BELTS
A
Replace
a
seat
be/t
assembly
that
has
withstood
the
strain
a
of
a severe
vehicle
impact,
or
where
webbing
shows
signs
offraying.
FOI
- cleaning information.
see
'Seot
belts
',
poge 91.
Three
tests
for
checking
seat
belts
I.
With
the
seat bel
t fastened,
give
the webbing nearest the buckle
a quick pu
ll
- the buckle should remain securely locked.
2. W ith the belt
unfastened. unreel the webbing
to
its limi
t.
Check
that
unreeli
ng
is free from
snags
and
visually check the webbing
for
wea
r:
Allow
the webbing
to
retr
act. chec
kin
g that retraction
is smoo
th
and
complete.
3.
W ith t
he
webbing half unreeled, hold the tong
ue pla
te
and pull
forward quickly - the mechanism must lock automatically and
prevent
further
unreellng.
If a
sea
l belt shou
ld
fail
any
of
these tests,
It
should
be
replaced
imm
ed
latel
y. For
further
Information. refel- to 'S
ERVICING
AND
REPAIR',
poge
70.
29
Page 32

Child
Restraints
CHILD
SEATS
The
seat belts are des igned for adu
lt
-sized
occ
upant
s.
It is
recommended
that
infants and younger children are re
str
ain
ed
in
a
child safet y s
eat
or restraint sys
tem
appropri
ate
to
their
age and size.
The
I-ange
of
safety seats
approved
by
MG Rover is listed
in
the
MG
Rover
accessor
ies
brochure
.
A
ll infant and child restraint sys
tem
s are designed
to
be
se cu red
in
the
car
by mea
ns
of
a standard
seat
belt. Always foll
ow
the
man ufac
turer
's
Instructions. Failure
to
pro
per
ly secu
re
the
restraint system
in
the
car
can e ndanger the
child in a coll
isi
on
or sudden stop
00
NOT
install a
rear
(acing child
seat
i( a passenger
airbag
is
fitted - an inf1ating airbag could
impact
with
the
seat
causing serious injury,
or
even
death,
(or
the
child.
The
symbo
l affixed
to
the fascia, warn s against
the
use
of a rear
facing
child seat
if
a passenger airbag is fltted.
If
a c
hild
is
to travel
in
the car:
adjust
the
passenger
seat fully
rearwards
an d
seat
the
child
in a FRONT
FACING
chi
ld safety
seat onl
y.
30
T
Ir
sf
p
'"
fa
N
pr
 Loading...