

Page 1

The MG Car Company and Its Brethren
First off it's important to announce the meaning of the MG logo.
MG stands for Morris Garages. These being named after
William Morris, who was later created as Lord Nuffield. The
marque was first used in 1924 in a bull nosed sports car, now
affectionately name Old Number One. This formed the basis of
the MG Car Company, with Lord Nuffield at its head. In 1922
management of the MG Car Company was taken over by Cecil
Kimber. Kimber was an avid motor sports enthusiast and is also
credited for introducing the classic radiator style recognizable
on so many cars such as the T-Series MG's.
The Nuffield Organization not only owned the MG Car C
but a number of other marques as well, often competing
MG over the years. These included Morris and Riley. At times it
seemed that MG could never get the resources they ne
become world leaders in the marketplace. Not only were they competing with
the likes of Triumph and Austin, but the real battle seemed to go on internally
in the Nuffield Organization. This continued right through the merger of
Nuffield and Austin in 1952 which formed the British Motor Company (BMC)
MG's were produced in
production ceased in 1980. Other cars from the Nuffield organization were
also produced at Abingdon during the years and vied for precious resources.
Abingdon, England from the early 1930's until
ompan
with
eded to
y
.
The MG T-Series
Page 2

In 1936 the MG Car Company made a dramatic change in the design of their
sports cars. In this year they introduced the MGTA Midget. The MGTA
originated the familiar T-Series design element and to the casual observer, it
is hard to distinquish from the MGTC. The MGTA sported the famous radiator
design, the swept wings, running boards, folding windscreen, and large
accessible bonnet. It was a two seater sports car with a foldable hood and
side curtains. Just over 3,000 MGTA's were produced in three years of
production. The MGTA suffered from a poor performing engine and in 1939
the MGTB was introduced with the now famous XPAG engine. Only a few
were produced as in a few months World War II broke out.
During World War II production of MG's ceased as the MG Car Company was
put into service for the war effort making tanks and airplane parts, and other
military items. When the war end
get back to making sports cars. They revisited the MGTB and made a few
subtle changes. These were in the form of a wider body and shackles
replacing sliding trunnions for the spring mounts. The Nuffield Organization
also made another drastic change. They started taking an active interest in
selling their sports cars in North America. It appears that during the War a
number of American GI's had an opportunity to experience the T-Series MG's.
When the War ended a number of these cars were imported and then formally
sold into North America, especially the United States. The MGTC was
produced from 1945 to 1949 with a total production of about 10,000 cars.
ed the the MG Car Company was anxious to
Due to the fact that the United States had much more cash available to spend
on entertainment and sports than did war torn Britain, the Nuffield
Organization made a drastic change in their marketing, focusing on North
America. In 1949 the MGTC was fitted with many elements to make it more
North American such as front and rear bumpers, twin horns, and dual tail
lamps. Even by making these changes only a fraction of the MGTC's were
imported into North America. There were still too many issues with a car of
this type for different North America conditions. Amongst those were driving
on the right hand side of the road rather than the left, more high speed
maneuvers such as freeways, a softer ride, and some additional c
comforts. What was needed was a total redesign of the MGTC if the MG Car
Company was to capture a significant portion of the North American market.
What was missing was a total commitment from the Nuffield Organization to
do so.
reature
Page 3

The Legacy of the MGTD
In 1949 a small group of MG leaders, headed by John Thornley, got together
to try to create a car that was acceptable to the North American marketplace
while at the same time would limit the investment of the Nuffield Organization.
Clearly it would be impossible to completely create a new car, not only from a
financial point but from a timing standpoint as well. What was needed was a
little of the old, sprinkled with a little of the new. Another key factor was to
Page 4

borrow or incorporate features found in other Nuffield cars of the time that
were more up to date than the MGTC.
First it was decided to start with the MGTC. It was felt that the MGTC still
provided a favorable brand image to the North American marketplace. Many
elements of the MGTC were still believed to be important such as:
• The styling
• Safety Fast engineering
• The powertrain
• The familiarity of design
What was missing was:
• More futuristic styling
• Better turning and handling
• A smoother ride
• Left hand drive
• More creature comforts such as an optional heater and radio
Quickly a team of MG personnel took inventory of the components of the
Nuffield Organization that they had to work with. They discarded the TC's
frame because it was to light and not rigid enough. They found what they
wanted in the Y types. A small modification to the frame was to have it sweep
over the rear axle rather than under. This gave them more travel in the rear
springs so they could increase the damping. In addition they adopted rack and
pinion steering and front coil springs and wishbones. This and the change in
rear end suspension allowed for a smoother ride and better handling than the
MGTC. One of the major changes was to reduce the wheel size from 19
inches to 15 inches and increase the tire width to 5.50. All of these changes
made the MGTD a superior riding car over the MGTC.
Because of the use of the larger frame the body became 5 inches wider.
Although the body increased by 5 inches, only one inch actually found it's way
into the cockpit so there is an indiscernible difference in the seating width. The
biggest change that people notice about the MGTD from the MGTC is the lack
of wire wheels. As part of the Nuffield cost cutting challenge the more
expensiv
e wire wheels of former T-Series cars were replaced by solid steel
wheels. For the entire production run of the MGTD the factory took heat for
this decision. They constantly tried to create implausible technical reasons
why wire wheels would not work but their reasons were never accepted by the
marketplace. In fact wire wheels were one of the most popular aftermarket
accessories at the time. Nuffield itself had to offer an upgrade kit to wire
wheels during 1953 because the essentially identical 1954 MGTF chassis
sported wire wheels as an option.
Other changes between the MGTC and the MGTD were more styli
zed wings,
partially due to the smaller wheels. A dual production capable LHD or RHD
model, better brakes, adjustable steering column, and an interchangeable
dashboard for left or right hand driving were also incorporated. An optional
Page 5

radio and heater, as well as many accessories designed to improve the
performance of the car were made available.
The MGTD Models
The MGTD was produced from 1949 to August of 1953. During that period the
MGTD saw many subtle changes, but nothing drastic. See the pages on
production
was offered in three basic models although no more than two were ever
available at one time.
for details on the changes of the MGTD over the years. The MGTD
TD
The original MGTD was first produced in late 1949 and had it's formal
introduction in January of 1950. There were a total of four model years; 1950,
1951, 1952, and 1953. The first model set the stage for what the MGTD was.
Because of the short amount of time from the inception of the MGTD to the
delivery of the first cars, not everything was quite as the MG Car Company
would have liked it. In fact they were still making MGTC's on the production
line when the first MGTD's were produced. Other models were also being
made on the same assembly line at the same time. This says something of
the flexibility of the Abingdon work crews and factory.
Most changes to these early MGTD's were unnoticeable from the untrained
eye. One exception to this was the change from solid wheels to slotted
wheels. Still steal and not wire, but a change nothing else. Most of this seems
to be precipitated from the fact that the brakes were fading due to poor
cooling. Another change was to stiffen the body by adding an internal under
firewall tubular frame. It helped but the MGTD body bucket still seems to flex
quite a bit when pressed into corners.
TD II
The TD II (not to be confused with the MGTD Mark II) was essentially more
refinements done to the car by the factory. Minor changes to the engine
generated the need to create a new engine type, the XPAG/TD2. This in turn
caused them to designate these cars as TD2's, although even their marketing
Page 6

materials never really mentioned this change. There really weren't any model
years for the MGTD, as changes were introduced subtly. The biggest changes
occurred during the 1953 model year as sales of the MGTD started to fall in
favor of cars like the TR2 and Healey 100. In 1953 MG introduced round
taillamps (not sure what the feature of these were), turn signals, a three bow
top or hood, and moved the windscreen wiper motor central for safety
reasons.
TD/C or TD Mark II
In the middle of 1950 model year the MG Car Company began factory
producing some special MGTD's known as the Mark II. These cars were
essentially regular MGTD's that had been given some extra factory
accessories and tuning. There was not an exact list of these features, and in
fact over the production of the MGTD the features of the Mark II would
change. It was also possible at the time to buy everything for a regular MGTD
that the Mark II model offered. Some of the changes were to increase the
base horsepower of the engine from 54 bhp to 57 bhp, larger tires, additional
Andrex friction shocks front and back, higher rear end ratios, dual fuel pumps,
and larger carburetors. Most of the features of the Mark II were a part of the
staged tuning that was described in various publications and offered as a
factory tuning manual.
From all these changes it appeared that little changed in how the car actually
handled. Many folks opted to buy a regular MGTD and go through a series of
Stage Tunings to increase the performance of the MGTD well above what the
Mark II achieved.
Page 7

The Follow-on of the MGTD
Production of the MGTD peaked in 1952 and 1953 found sales of the car
starting to fall. Again the MG Car Company found itself in need of a whole
new automobile but without the support of the parent BMC Organization.
The MG EX175
John Thornley's team at Abingdon had crafted a complete replacement for the
MGTD code named the EX175. Because of the organizational changes that
occurred when BMC took control of the MG Car Company, the EX175 was in
direct competition to it's new step cousin, the Austin-Healey 100. Since the
Healey was already committed, BMC did not want a new fangled MG to dilute
the possible sales so MG was left high and dry without a replacement for the
MGTD.
MGTF, MGTF 1500 and MGA
An effort to recapture the marketplace by doing what they had successfully
done before was attempted in 1953. Borrowing on the success of the MGTD
and Mark II as well as a little streamlining of the body, the MG Car Company
created the MGTF. The TF was immediately shunned by the public. It was
clear that all MG had done was to pound a bit on the body and fenders, add
some more comfortable bucket seats, and throw on some wire wheels. In fact
the car was worse in many ways because you could not easily get to the
engine to modify it or maintain it like you could on prior T types. The TF 1200
still performed poorly compared to other sports cars of the period. In 1955 MG
came out with a more powerful 1500 cc engine that replaced the tiring 1250
cc engine of past T Series cars.
Finish information on the MGTF can be found at this page
information on the MGTF please see these pages.
This larger capacity engine did improve the performance greatly and made
the MGTF 1500 a much better performing car on the freeways and tollways of
North America. Still the MGTF never captured the success of the MGTD and
was replaced by the MGA within two short years.
The MGA represented a significant change from the T-Series cars and
actually looked like it belonged to the era it w
much of the same chassis and drive train features as the MGTF but had an all
new streamlined body. Interestingly the car had a remarkable resemblance to
the EX175. Over time MG would make many changes to the MGA in both
styling, performance and handling. At one point they even offered a hard top,
called the MGA Coupe as well as a twin cam engine.
as produced in. It supported
. For more
Page 8

This section covers the finishes of the MGTD in type, material, and colors.
Note: It is generally not considered a deviation from the original if you
improve the finish of an item so long as you do not change the texture or
characteristic of that item.
MGTD Color Schemes
Top
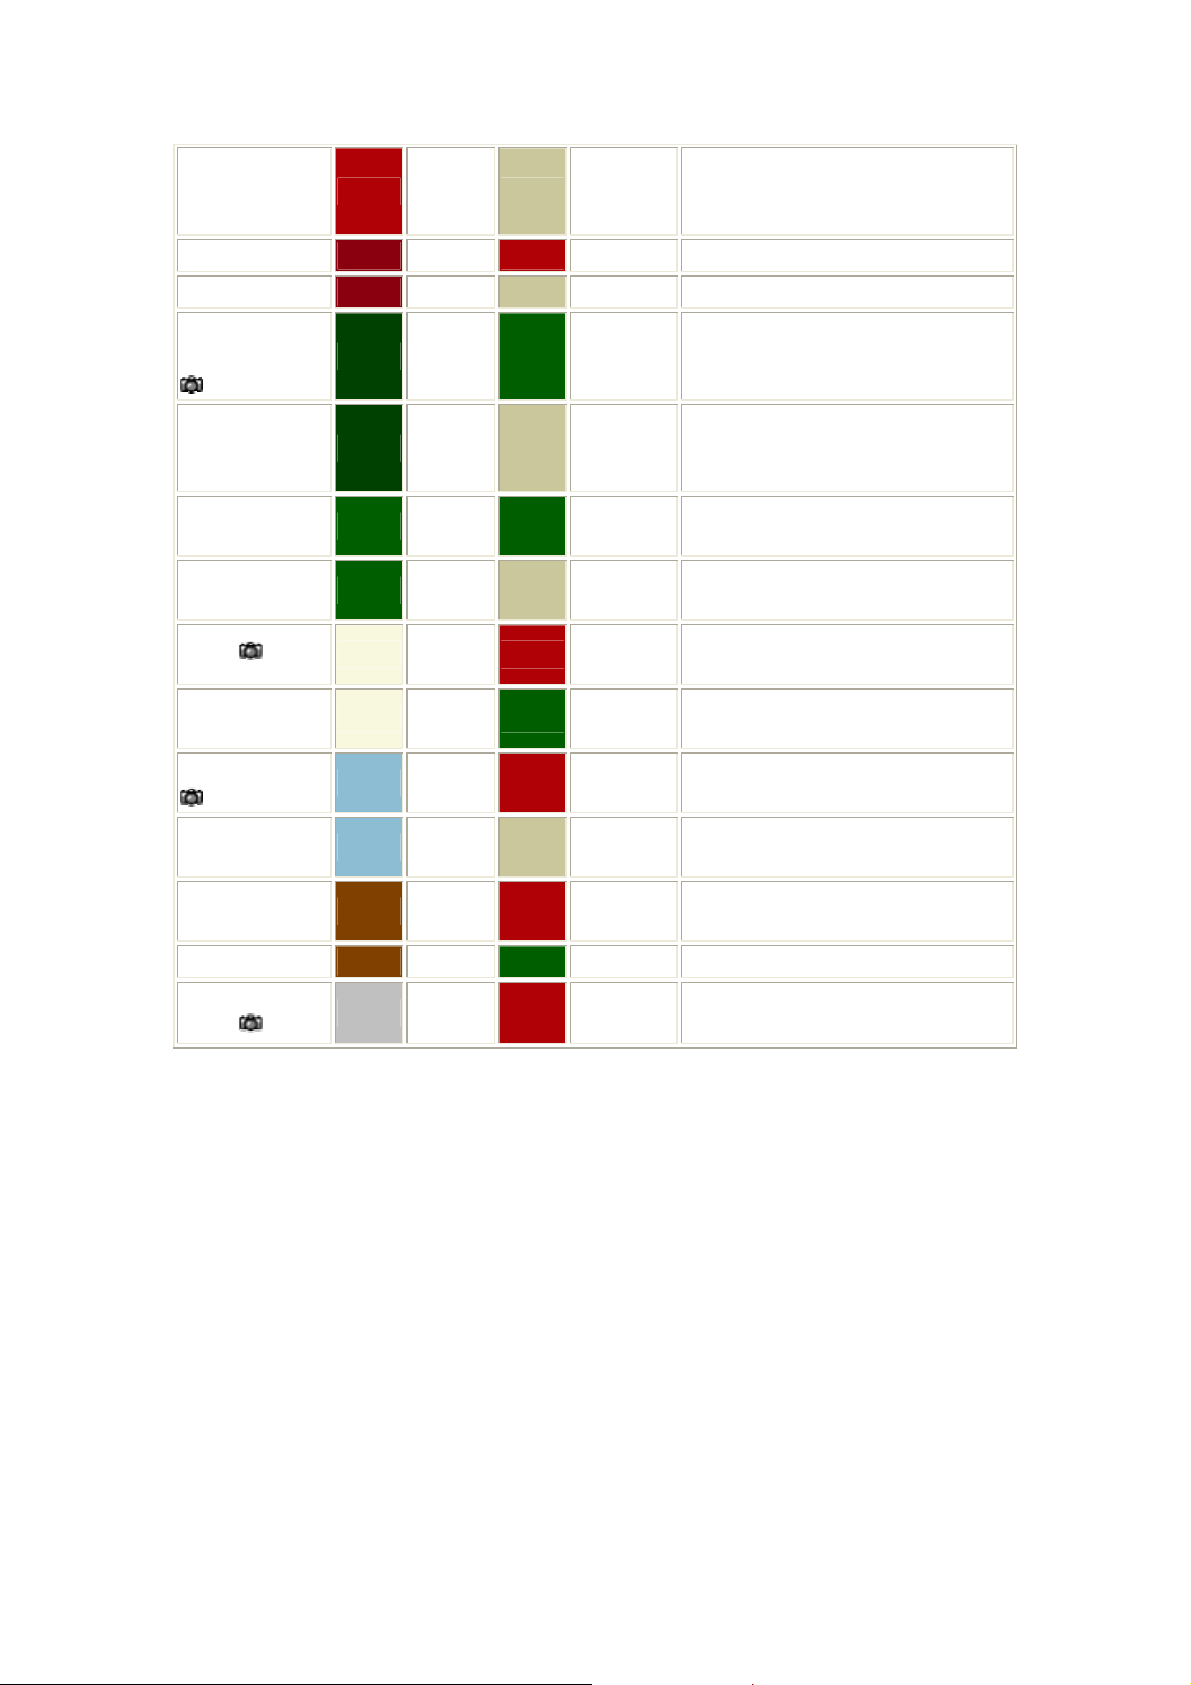
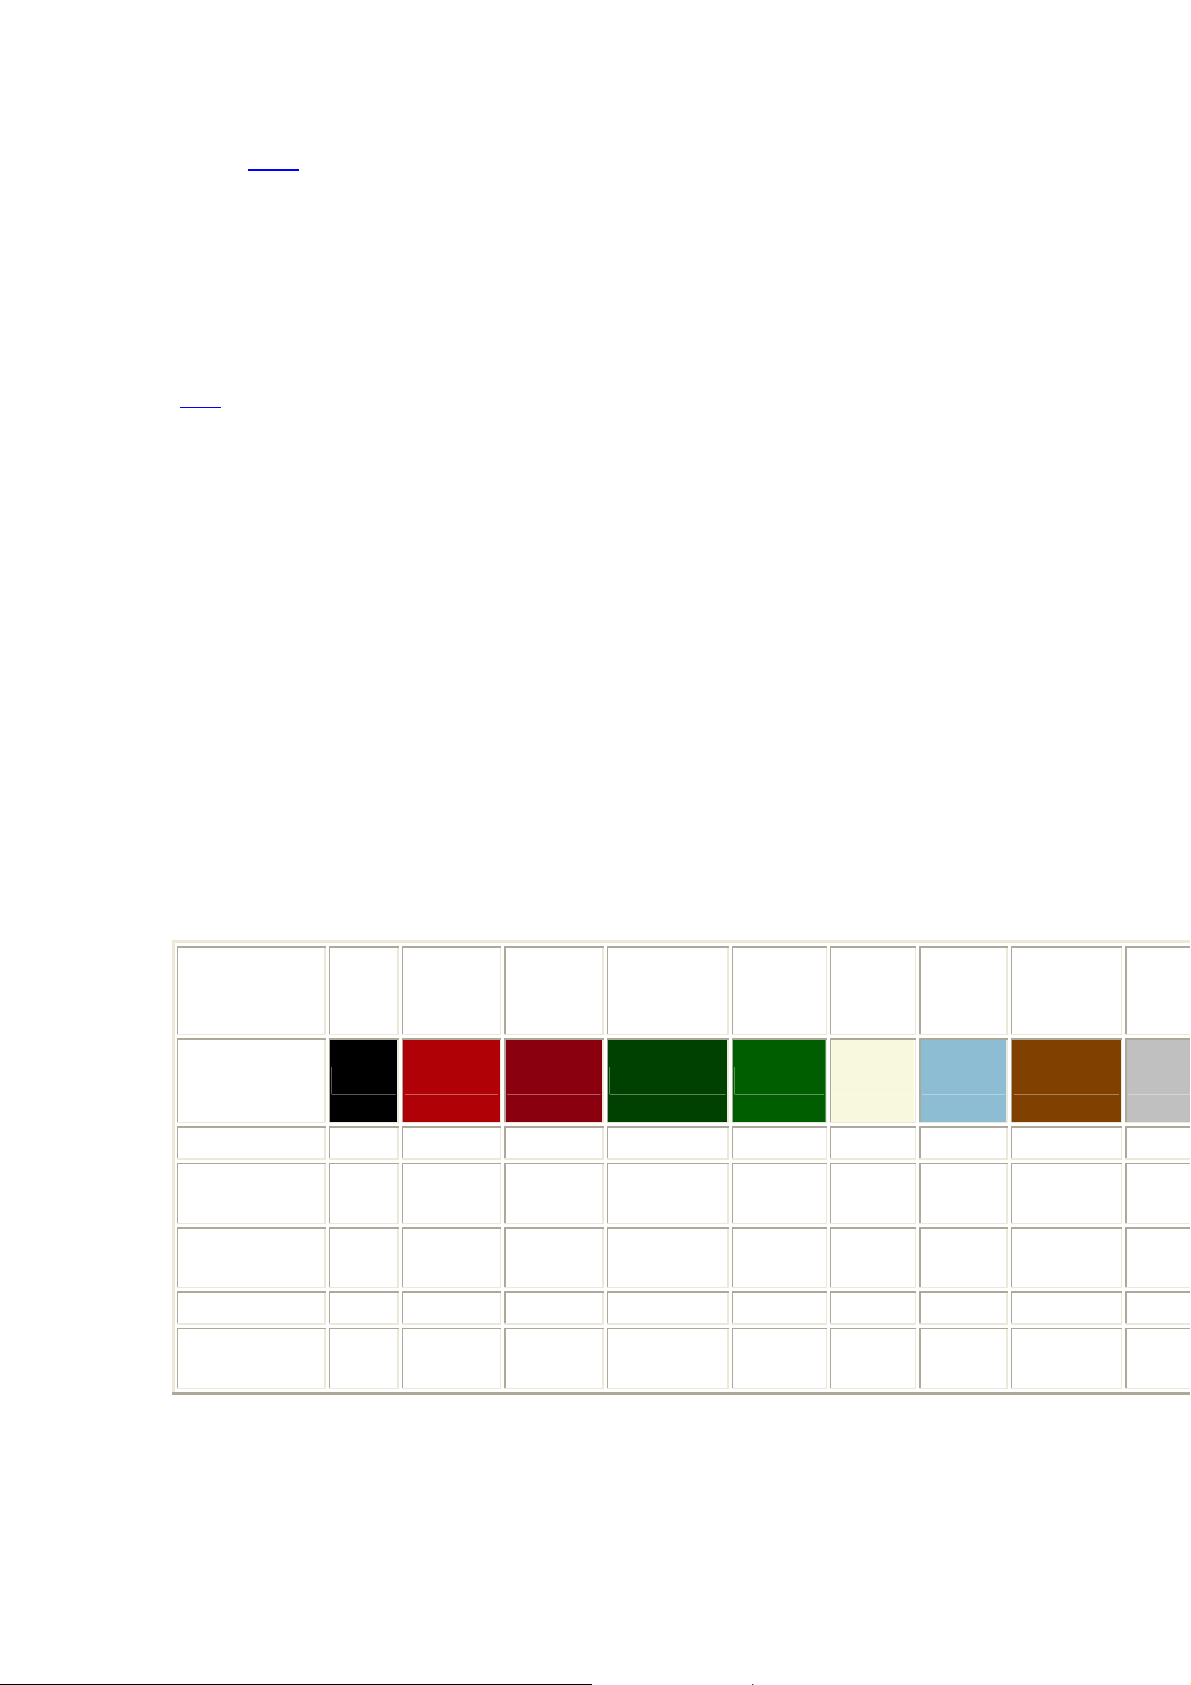
The table below shows all the body and interior colors available during the
production of the MGTD. The radiator grill slats generally matched the interior
color.
Note: You may click on the
from an original brochure.
Body Color Interior Color Dates¹ Comments
Black
Green
Beige
MG Red
Red
Red
image to see a sample of this color scheme
19491953
19491953
19491951,
1953²
19491953
Page 9
1949-
Beige
Autumn Red Red 1951
Beige 1951
1951,
1953²
On red and green cars the grill
color for tan interiors could be
either tan or the body color.
Woodland
Green-BRG
Beige
Almond
Green
Beige
Ivory
Green
Clipper Blue
Beige
Sunburst
Bronze
Green
Green 1951
Red
Red ?
Red 1951 Metallic
19491953
19491951,
1953²
19491951
19491953
19491953
19491951
On red and green cars the grill
color for tan interiors could be
either tan or the body color.
Replaced by Silver Streak
Grey
Green 1951 Metallic
Silver Streak
Grey
¹ Date information used with permission from Original MG T Series by Anders
Clausager. Published by MBI Publishing Company 1-800-826-6600.
² Only on non exported cars.
Note: The colors in this table are approximate. Due to the nature of each
computer display and the limits of the color pallet of your system, there may
be a large difference between these colors and the actual production colors.
Note: Apparently MG did not have strict formulas or consistent suppliers for
their finishes, so even during the production of the T-Series there would be
large discrepancies between cars of the same color. The cars were also not
documented with their color on an ID plate. This practice did not start until the
MGTF model in late 1953.
Red
19521953
Metallic. Replaced Clipper
Blue
Page 10
Note: CKD cars were delivered with primer only. This was also available as
A
A
y
0
6
0
an orderable option so any paint color is original on one of these cars.
Note:The exterior piping (cord filled fabric material between sheet metal
parts) color matched the body paint color.
Paint Formulas
Top
Body Colors
This table provides a list of formulas or color equivalents to the original colors
used for the MGTD. As always you should have a quart (or gallon) of paint
mixed first and spray it on a large piece of sheet metal before you decide what
color you like. Even better is to get a few quarts of paint and give your car a
quick paint job before restoration to make sure you like the color. When you
are satisfied with the color choice then you can strip all the paint off and start
over. Sounds crazy, but at least you will like the results.
If you have a car that has never been stripped of its' paint you may be able to
tell what color it was originally by taking off a fender and looking at the area
that rested against the body bucket. I was not only able to do that but after the
use of a little rubbing c
areas that a color match was done after 25 years of service. The color was
compared to other cars painted the same color to insure that I had a
reasonable match.
ompound the paint was in good enough shape in those
Manufacture Black MG Red
Color
BMC Code
Dupont
Ditzler
(PPG)
R&M
Martin-
Senour
Note: The colors in this table are approximate. Due to the nature of each
computer display and the limits of the color pallet of your system, there may
be a large difference between these colors and the actual production colors.
BK1 RD14 RD6 GN29 GN37 YL5 BU14 N/A GR25
99
9000 71993 50930
A946 BM121R BM108R BM078 BM076 BM127 BM042 BM02
25011 20216 20561(?) 20214
utumn
Red
9383450H
Woodland
Green
93-98249
6606
2246
43342
lmond
Green
9396233H
44159 81271 12297 23662
Ivory
83449
25235
23235?
Clipper
Blue
9325888
25286 2528
Sunburst
Bronze
Silve
Strea
Gre
7203
3367
Page 11

Note: Match red or green grills with body color. When body is not red or green
o
e
then use MG Red or Almond Green as appropriate.
Miscellaneous Colors
This table provides colors for the non body components of the MGTD.
Note: Many of the colors in this table are approximate and not absolute. But
then again, even in the production of the MGTD non of the colors were
absolute either, so these are all reasonable choices.
Manufacture Chassis
Engine /
Transmission²
Hood
Sidecurtain
Frame
Instrument
Panel
(metallic)
2,3
Oil Filter
Early
Color
Dupont
Ditzler
R&M
99¹ 57597H 44371 43107LH 43094L
9000 50930
A946 AC402 BM145 M63-64 FM130
¹ I like to use Dupont Imron due to it's superior finish and longevity. The
original finish on the chassis parts was a semi gloss enamel.
² Close engine and instrument panel (220-530) paint colors can be obtained
from such suppliers as Moss Motors.
3
I believe that the TD instrument panel was the same darker color as the late
oil filter canister. The popular color is widely accepted to be the same as the
TF instrument panel. The paint supplied by Moss Motors is lighter than
original for the MGTD.
Tecalemit
Oil Filter
(metallic)
Purolat
Oil Filt
3
(metalli
4
The color of the valve cover is controversial. Generally it is most widely
accepted to be the same as the wheels, a metallic gray. Other evidence
suggests that it is a pale green/gray non metallic as shown. This is the same
color that early TC engines and firewalls were painted. I like to use a metallic
soft green/gray paint which is a good compromise and believed by some to be
correct also. This is also an acceptable color for the Purolator filter canister
although it was a bit darker in shade. There was a tendency to coat the valve
color with clear paint, after repainting it silver, that often turned greenish. For
this reason many feel that it was never greenish to begin with, but just silver.
Al Moss (who serviced TD's when new) reports that the valve cover and
wheels were originally painted with plain silver paint, non glossy. Similar to the
finish you would get out of a spray can today.
If you would like to see an unrestored TF valve cover then press here
. Care of
Don Harmer.
Page 12
5
This is an Imron color and the metallic effect is much stronger than original.
Sheet Metal Finishes
Top
The following table describes the finishes on the sheet metal of the MGTD.
Item Color Comment
Fenders, hood, front and rear
splash aprons, running boards,
firewall, fuel tank, fuel tank straps,
door hinges
Body
Color
Both sides of these items were
painted with the body color of the
car. The exception would be the
inside of the toolbox which was
black covered by an off-white felt.
Note that the fuel tank side panels
Fuel tank sides
Body
Color
had the edges chrome plated. Only
the interior of the outside finish was
painted the body color.
Body color on exterior finishes,
black on inside finishes. Note that
the black paint was not glossy but a
Body bucket, doors, tool box lid
(outside)
Body
Color
semigloss or satin finish. Used as a
protective coating more than a
shiny finish like the color coat. Note
that on some cars the inside of the
panels were painted the body color.
Scuttle, side curtain box, steering
wheel column and steering wheel
extruder plate, propeller shaft
Black
Page 13
tunnel, gearbox cover and plate,
hinge for seat back, sleeve for
seat hinge, rear cross brace
assembly (behind seat), crank
clips on seat back, inside of
toolbox.
Headlamp bodies, headlamp ring
retaining screw, King of the Road
medallion
Body
Color
Note that on early TD's (50 and 51)
the headlamp bodies were chrome
plated.
Engine and Transmission
Top
See the note on Gold Seal engines.
Item Color Comment
Engine block, head, tappet
inspection cover, water outlet
manifold, oil pan, timing chain
Engine
Red
This color was similar to MG red
but a little darker.
Page 14

cover, cradle, bearer plate,
transmission housing and
cover, oil pump housing, main
pulley, water pump, water
branch pipe, throttle return
spring clip, front motor mount
bracket
Breather pipe and clamp
Inlet manifold
Exhaust manifold, manifold
clamps
Engine stabilizer and bracket Black
Valve cover
Oil canister - old style Orange
Oil canister - newer style 1952
(Tecalemit) Part number
I62451
Engine
Red
Engine
Red
Aluminized
Light GrayGreen
Bronze
Some cars may have had this
painted black.
Some cars may have had this
painted black.
This is a spray of liquid aluminum
that gives the appearance of a
white, softly textured surface.
Very hard to keep clean.
Some like to cad plate the nuts
and expander but they were all
black.
See comments above
These were through away
elements. There is a decal that
went on these parts. Cast
element housings were an add
on.
A slightly darker color than the
instrument cluste
center color.
r/steering wheel
Oil canister - newer style 1952
(Purolator
I62429
Air cleaner, starter, generator
body, fan blades
Thermostat body, upper hose
elbow
) Part number
Used on some later cars. Noted
by the large attaching bolt and
Light
SilverGreen
Black
Black or
Engine
Red
capped plate at rear of the filter.
They had no identifying plate as
on the Tecalemit filters, but were
decorated with a decal naming
the company and listing the
maintenan
This is a controversial item. Many
believe that this was painted the
same color as the engine but
replaceme
Others believe that it was
assembled as a unit with the
radiator and therefore black. All
the pictures that I have are not
ce procedures.
nt parts were black.
Page 15

clear on this as they are in
shadow.
Generator fan/pulley, distance
piece
Engine block drain, oil drain,
engine ID plate
oil line - block to head
Carburetor parts: choke
coupler, jet links, springs,
couplings, anchor clips
Most carburetor parts (see
exceptions elsewhere), air
cleaner wing nut, transmission
dipstick cover wing nut,
carburetor overflow lines,
generator lubricator,
tachometer reduction gearbox,
crank handle, distributor body,
oil pressure gauge line and
brass coupling on firewall
Engine
Red
Natural
Brass
Engine
Red
Black
Natural
Most believe these to be red but
some claim they were black.
Some paint this the engine color.
The ID plate should be left natural
but on original cars the drains
were most likely painted red.
Many like to leave the brass ends
natural. Most likey all red from
factory.
Note that some of these parts
were blued and not painted black.
Bluing is a metal treatment that
has a black, transparent type of
look to it. It is very common on
firearms.
Many like to polish these
unfinished parts for an enriched
look.
Carburetors, fuel pump base
sections
Fuel pump and carburetor
fittings
Exhaust pipe bracket, clamp
and spacer on transmission
Gearbox remote linkage Natural
Natural
Aluminium
Natural
Black
Chassis
Polishing these items makes for a
very nice effect but was not
originally done. If you do polish
these parts it is recommend that
you spray the carburetor body
with a clear sealer because it will
be impossible to keep the polish
up after the carburetor is
assembled.
Brass parts left natural. Again
polishing and coating with a clear
paint will preserve the shine of
these parts.
Page 16

Top
Item Color Comment
It appears that the green and red were the
same as the red and green body colors. If you
do not have a red or green car, and your
interior is not tan, then choose the MG Red or
Radiator grill slats
Frame, suspension
parts, rear end,
brake drums, brake
lines, springs,
shocks and all
chassis parts.
Radiator
Interior
Color
Satin
(soft
mat)
Black
Satin
(soft
mat)
Black
Almond Green as the grill color appropriately.
The color that matched tan interior was a light
tan color. It is reported that on some red or
green cars with tan interiors, the grill slats
could be painted the body color.
Note See the comment on the Mark II's.
Note most people prefer to use a high gloss
paint for all the chassis parts in current
restorations because of its look and durability.
It is not recommended to finish the radiator
fins with a heavy based enamel. Optionally
you may first paint the fins with a heat based
(exhaust type) flat black finish and then paint
the rest of the radiator with a high gloss finish.
The original was paint
of satin gloss black paint.
ed with a very thin coat
Satin
Shock absorbers
Wheels Silver
Exhaust pipes,
exhaust pipe
brackets
(soft
mat)
Black
Black
Some late TD's with Armstrong shocks were
left unpainted for the body with the shock
arms painted black.
Al Moss reports that the valve cover and
wheels were originally painted with plain silver
paint, non glossy. Similar to the finish you
would get out of a spray can today.
Most today paint the exhaust system with
modern heat paint. Originally painted with
chassis paint which und
days.
oubtedly burnt off in
Woodwork
Top
Item Color Comment
Floorboards, shelf
behind seat
Black Made of mahogany plywood.
Page 17

Dash
Battery box underliner Black Made of mahogany plywood.
Covered in interior
cloth (Rexine)
Same material as seat backs
and door panels
Wooden panel behind
fuel tank
Note: All woodwork with the exception of the firewall mounting frame was
painted black. This was often oversprayed when the body was painted.
Black
Interior/Softgoods
Top
Item Color/Material Comment
Seat tops and
outside bottoms,
seat back face,
top of map pocket,
top of door piping
All door panels,
kick panels, seat
backs and rears,
boot area
Leather
vinyl cloth
(Rexine)
Died to match vinal cloth interior. Used
where wear and tear would be a factor.
Slightly textured precursor to vinyl. Note
that the wheel wells were padded with a
thin felt. Also on some cars the wooden
area that the spare tire bolts go through
received some light padding.
There was a small length of black vinal
that was tacked to the wood floor behind
the seats that covered the ends of the
wheel wells
over at both edges to form a ¾ inch wide
strip. It started in the back corner and
went forward over the edge. It then
turned the corner to the outside of the car
and terminated at the panel. It was
affixed to a small tack strip. The tack strip
is held to the wheel well by three small
rivets.
Also to note that the piping from the rear
at the hood tack strip, down under the
doors and along the dash top, was all
one piece. This material was similar to
the piping used on the fenders. At the
location of the door strikers the piping
was opened up and the spline was
removed to allow clearance for the door
striker. The striker underplates had holes
. This material was folded
Page 18

in them to allow for tacking the piping in
place. You will see a tacking hole in the
inner metal plate for the door latch to tack
the bead down.
On many cars the hidem that was used to
hide the tacks on the panels was in one
piece. This means that the panels were
put in place at one time as the hidem
continued from one panel to the next.
This is especially evident from the front
kick panel to the door sill panel.
The door panels, the panel under the
door, and the panel around the rear
wheel arch are a three ply plywood about
2-3 mm thick. The panel in front of the
doors is a about a 2 mm thick piece of
black cardboard so it will bend over the
"scuttle" hoop. Besides being tacked on
around the door, there are two small
chromed wood screws with finish
washers at the front to hold the front
panel on.
The hidem is one continuous piece from
the door latch to where the rear panel
and the panel below the door meet.
There is a short piece of hidem from the
door latch to the top of the front pannel.
The rear pannel's hidem is sewn on also,
but it is not contiuous with the hidem of
the two other panels. The trim panels are
long enough to go clear to bottom and
meet the main wood beam across the
bottom of the car.
The floor boards are cut slightly narrow
on the outside to allow room for the trim
panels.
Dash underpanel
Glovebox Interior
Tonneau cover,
top, side curtains
Black vinyl
(Rexine)
Brown flock like
coating
Tan canvas
There was a whole under the clock large
enough for a hand to fit through to allow
the clock to be reset. Panel was made of
hard fiberboard (similar to cardboard and
the same material as the glovebox).
Must have been sprayed on.
Similar to light tent material. Side curtain
ows were made of celluloid and
wind
Page 19

yellowed immediately. Side curtain nuts
were painted tan.
Toolbox
Side curtain box
Gear lever gaiter Leather Could either be black or interior color.
Steering column
excluder
Carpets
White woolen
felt
Black woolen
felt
Tan leather
Black short hair
wool
Carpets were untrimmed. The carpet
under the seats was separate from the
carpet in front of the seats. There was no
carpeting behind the seats, over the rear
end. Under the arch of the seat back,
covering the emergency brake cables,
was a piece of cardboard covered by
carpet with the front edge bound in black
leather (black Rexene is also
acceptable). Under the drivers feet was
stiched a rubber mat. The drivers side on
LHD cars starting in the 1951 model year
had a rubber footwell with the MG crest.
This was sewn into the carpet through a
recess about halfway from the edge. On
some cars a leather patch was sewn onto
the transmission tunnel to prevent wear
from the accelerator foot.
Page 20

Brightwork and Chrome
Top
Item Color Comment
Headlamp bodies, headlamp adjusting
nuts, headlamp rings, headlamp ring
retaining screw, King of the Road
medallion
Headlamp bracket to radiator Chrome
Radiator hose clamps, air cleaner
clamps, steering excluder clamp,
headlamp bracket to radiator bracket
bolts and nuts
Oil cap, body plate, MG Car Co. plate,
patent plate
Chrome
Cadmium
Nickel
Silver
Note that on later TD's
(late 51, 52 and 53) the
headlamp bodies were
painted the body color.
Some cars have this
body color or black
Zinc plating is often
used as a substitute for
Cadmium today. Some
headlamp bracket bolts
may have been chro
or painted body color.
Note that etched writing
or background on
nickeled items were
painted black. Plates
were made of brass.
Plates held in place with
brass round headed
slotted screws with
square nuts.
med
Air cleaner manifold
Transmission dipstick, engine dipstick Chrome
Hub caps Chrome
Hub cap medallions Polished Background painted red.
Radiator shell, nose Chrome
Radiator slats Chrome
Radiator medallion Chrome
Fuel tank filler cap, bonnet hinge strip Polished Polished stainless steel
Fuel tank filler cap lever, tail light and Chrome
Polished
Aluminium
Some like to paint the
background of the MG
Logo red or black.
Some like to paint the
background of the MG
Logo red or black.
See note on hub cap
medallions
Only on late model Mark
II's
Brown MG on cream
background. Late Mark
II's had black MG on
white background.
Page 21

marker light screws, windscreen screws
and nuts
Splash pan x-screws and washers front
and rear
Bumpers, overriders, door knobs, door
latches, side curtain clamps, side
curtain nuts in door tops, seat back
adjusters and brackets, fuel tank strap
nuts, side lamps, windscreen parts and
brackets, rear view mirror, tail lamp
rings and bodies, rear license plate
lamp cover, fuel tank side nuts and
washers, dashboard edging, glove box
hinges, bonnet handles, snaps and
studs, side curtain strips, emergency
brake handle and release button, gear
shift lever
Steering wheel medallion ring, horn
base, lamp bezels, gauge bezels, horn
push ring (early cars), starter and choke
knob bases, steering column
expandable cover
Fuel tank sides Chrome
Chrome
Chrome
Chrome
The inside of the fuel
tank sides were painted
the body color with
exposed edges in
chrome
Tach cable, speedo cable, choke cable,
starter cable, emergency brake cables,
clutch cable housings, water
temperature retainers on stabilizer rods,
bonnet latches (inside), seat runners,
fuel lines (braided), wire harness
retainer straps on rear frame tube, lug
nuts, front wheel grease cap, starter
switch
Door threshold plates, running board
strips
Cadmium
Many like to use the
"MG Car C
threshold plates which
were not original to TD's
but to MGTA's. TD's had
Polished
plain threshold plates.
The threshold plates
were held in place by
slotted flat headed
woodscrews. Some may
have been brass.
ompany"
Page 22

Miscellaneous
Top
Item Color Comment
While most of the car was painted in
pieces prior to assembly, there were
a few exceptions. In some cases
items were assembled and then
Firewall bolts, wood frame
and caulking
Crank, tonneau bar, crank
clips, front license plate
brackets, front license plate
and clips, starter cable
bracket on firewall, horns and
brackets, passenger foot
ramp, accelerator peddle
assembly, fuel pump body
Body
Color
Black Crank handle was brass
overpainted with a color coat while
others had bolts and fasteners hand
painted after assembly. The firewall
and body bucket were painted as an
assembly which meant that the
firewall bolts were painted the body
color.
Rear license plate brackets, Black Optionally can be color of body.
Page 23
rear license plate lamp base
Side curtain frames, top
frame, side curtain nuts on
frames
Tan
Spare tire carrier, head lamp
brackets, hood latch screw
heads
Fuel line Black
Steering wheel center,
steering wheel cap, and
instrument panel
Fuel tank strap bolt heads
and washers, side curtain
storage lid hinges
Rear splash pan bolts and
washers, instrument panel
carriage bolts
Door checks, bonnet latch
receivers on fenders, bonnet
bumpers
Water temperature tubing Black
Body
Color
Bronze
Interior
color
Black
Black
This was part of the chassis
assembly and got painted black.
Many today polish this with copper
polish for a nice effect.
Hand painted to match interior color.
Have also seen the side curtain
storage lid hinges cad plated
Many have these chrome or cad
plated as they scratch so easily
May have been treated to look black
rather than painted.
Windscreen wiper motor
cover
Windscreen "D" washer and
locknut (under Acorn nut)
Grease gun body Blueing
Tools Black
Wiring Harness Black Black with two thread yellow tracer.
Black
wrinkle
paint
Polished
Brass
Same type of finish found on
firearms
Nitty Details
The following items are the hardest to achieve for a person who is trying to
create an absolutely original car. In a Concours d'Elegance these would be
the items that could differentiate two winning cars. Some of these items will
most likely be impossible to achieve but they are interesting goals to pursue if
you want the ultimate in originality.
Page 24
It may well be that there never was an original TD once it left the dealer
showroom/lot, especially in the United States. It appears that modifying the
car was one of the major features of the model. This is attested by all the
accessories that were available at the time from dealers and parts suppliers
such as Arnolt and others.
Note: To see a picture of the detail item in a seperate window click on the
icon.
Item
Engine number that
matches body plate
Size of front splash apron
piping (smaller diameter
than rest of exterior piping)
Exhaust pipe diameter
Original engine oil pan bolts
Original soft metal tappet
cover bolts
Original flat gray
windscreen wiper wire
Rubber rear license plate
lamp wire cover
Correct battery (series,
Lucas, vented caps)
Cap style battery cable
connectors at battery
N/A
Make it yourself by taking the cord out of
a piece of the piping that you used on the
rest of the body and replace it with a 1/4
inch diameter cord
Hardware store or automotive supply
Abingdon Spares
Moss Motors, Abingdon Spares, Rhode
Island Wiring Services
Source
Black braided negative
battery and starter cables
Rubber starter switch (not
nylon) and rubber boots
Horn wire to battery cable
clip
Original spark plug wires
(plastic coated black cloth
braided wire)
Original spark plug caps
(black bakelite)
Spark plug wire retainer at
distributor (red fiberboard)
Black painted bolts on valve
Rhode Island Wiring Services, The InPoint
Check NOS at classic car parts shops
N/A
Page 25
cover
Original black coil
Correct dates (within a few
months prior to car date) on
starter, generator, and coil
Braided and cloth covered
wires and loom, black
sheath with dual yellow
tracer
Correct (small diameter)
braided fuel lines
Wooden battery box liner Moss Motors, 407-710
Rubber pads between
battery and battery clamp
Correct profile dashboard
attachment washers
Double slotted temperature
gauge conduit clips for
radiator stabilizer tubes
Moss Motors
British Auto Electric
Rhode Island Wiring Services, The InPoint
Local hardware store
Moss Motors
Radiator drain pipe
Appropriate front rebound
rubbers (short - late or tall early)
ID plates finished in nickel
silver
Oil cap finished in nickel
silver
Correct oil cap chain
covered in rubber tubing
Etched 'Auster' windscreen
emblem
Correct nuts (fat) on
windscreen frame
Brass finished flat 'D'
washer and lock nut on
windscreen sideframe
(under Acorn nut)
Moss Motors 408-730, 408-740
The rubber cover may not be original.
Most people from the period have no
memory of it.
Dunlop tires 5.50x15
Andrex shock absorbers on
TD Mk II
British Wire Wheel
Page 26
Glass tail and side lamp
lenses
Moss Motors 157-908
Lucas "Anchor" quartz
iodine headlamps
Wide topped bumpers
No rubber packing on
bumper overriders
Front license plate with
correct 'Z' brackets to
bumper
Original ignition switch with
correct labeling (not the
'window' variety)
Original tachometer and
speedometer cables
Original starter and choke
cables
N/A
While I do not know of a source for the
switch,Abingdon Spares, has a decal for
the labels. It is part number 39/2D. You
can also retain the original facia and knob
and marry it to a replacement body and
switch.
Under dash cover in black
Rexine
Original interior materials
(Rexine)
Leather on map pocket tops
and door piping, seat tops
Correct number of pleats on
seat cushions (6) with wider
borders
Correct holes on firewall
(there were some empties,
see manuals)
Original top/tonneau
materials
Original half tonneau cover
Correct radiator hoses
(large hose pebble finish)
Correct (thin and textured)
radiator webbing strip
Abingdon Spares, Moss Motors 451-795
Moss Motors, Abingdon Spares
Moss Motors, Abingdon Spares
Moss Motors, Abingdon Spares
Tapered rubber packing
under headlamp arms to
fenders. Not straight sided.
Abingdon Spares
Page 27
Correct routing and copper
carburetor overflow lines
with clip on front engine
plate
This arcticle from Just Brits will show you
how
Original hose clamps
(radiator hoses, air cleaner,
steering column)
'Mickey Mouse' air cleaner
wing nut
Original tan marbled
steering wheel
Original steering wheel
center piece
Moss Motors 326-388
I have not been happy with the
reproduction units as I feel the color is too
dark. If you have an old wheel you might
want to check with Kimble Engineering, in
the UK. They reportedly have the original
mold tooling for the steering wheel and
has them made in the original materials
(even in the original city).
Also note that I believe the centerpiece to
be darker than what is generally accepted
today. See finish details for more
information and the attached image.
Moss Motors 262-340
Plain door threshold plates
Original width running
board strips and rubber
Original Karvel unbound
carpeting
Original transmission
dipstick cover wing nut
Mahogany marine plywood
floorboards
Tan leather steering wheel
excluder at scuttle with
correct clamp
Sewn in rubber footwell
with MG logo
Painted interior color fuel
tank strap bolt heads and
washers
Painted instrument faces
rather than decals
Moss Motors, Abingdon Spares
Moss Motors 454-040
N/A
Vintage Restorations
Page 28
Original flocked lined glove
box
Original tools and tool case
Moss Motors 454-155
The In-Point and www.britishtool.com for
reproductions
Original hand crank with
brass handle, clips on rear
of seat back
Original operation manual,
workshop manual, parts
catalog
Original dealer brochures
Original Factory
Accessories
Direction of and correct
type of bolts and nuts (see
manuals for guidance on
positions)
Note that depending on the Concours d'Elegance that you are attending,
accessories that were available during the production run of the MGTD may
or may not be acceptable. This varies from event to event, judge to judge.
Moss Motors 386-150
N/A
Replacement Parts Reviews
We are greatly in debt to the many parts suppliers the world over who provide
replacement parts for the MG T-Series cars that we love. Sometimes new old
stock parts are still available but this is the exception. Many times an original
part can be repaired to function like new again. You might also find just the
part you need from a swapmeet, on-line auction, or a fellow enthusiast. When
Page 29

these options don't provide you with the original part that you need, you must
resort to replacement parts.
Many times the replacement parts are exactly as original. In this manner one
could not tell the replacement part from a new original part. Unfortunately this
is not always the case. Many times a substitution from an original part is all
that is available. While I understand the business economics that creating an
exact original replacement may not always justify the cost, I do support any
vendor that goes out of their way to create as an original part as is possible.
To that end I have created this list of replacement parts that I am aware of
and how they compare to the original part they are attempting to replace.
Grading:
This grade is assigned to a part that
A
is virtually identical to the original
part it is replacing.
This grade is for a part that looks
like a reasonable facsimile of the
original part but there are minor
B
differences that a reasonably
knowledgable enthusiast would
notice from the original
The assignment is for a part that
looks similar to the original part but
C
is clearly different upon immediate
inspection
This classification is assigned to a
part that functions in an equivalent
D
manner to the original but does not
look original at all.
This assignment is for a part that
does not function or look like the
F
original part that it is attempting to
replace.
Part Grade Number Vendor Comment
A good replacement for the original
coil. My part was marked 9-48 for
the date and the bottom end did
Ignition Coil B+ 143-210
Moss
Motors
Page 30

Tools and
A
Tool Roll
MGA Tool
Roll
A-
A
The InPoint
The InPoint
not match the rolled edge of the
original. It also did not sport the
Lucas name.
While I have not seen these parts
in person, the pictures do
represent a reasonable
replacement of the original tools.
The tool roll may not be completely
appropriate for the MGTD though. I
prefer their MGA tool rolls for later
TD's.
For later TD's (late 52 and 53), the
MGA tool roll may be a better
replacement than the Inpoints
standard TD/TC roll.
Battery A
Battery C 459-400
Hood Latch
Handles
Original style
luggage rack
A-
C
244-500
61 003A
Abingdon
Spares
Moss
Motors
Moss
Motors
Moss
Motors
Abingdon
Spares
great replacement for the original
battery even down to the ventilated
caps.
This battery had the same
dimensions and was made of
similar material but did not have
the correct top, lugs, and was
embossed with the Moss Logo.
Use the Abingdon Spares battery
instead.
A good imitation for the handle but
they came with American nuts and
threads. You will need to rethread
these for BSF and add your own
original nuts.
While similar to the original factory
rack there are three deviations.
One is the addition of a bar at the
top front that helps keep the
luggage from moving forward
during hard stops. This was not on
the original rack. A minor but
noticeable deviation is the
elimination of two small loops in
the rear bar that accommodated a
belt or strap for securing the
luggage. In addition the rack is
made from a much lighter material
than the original.
Steering
wheel center
and
A 262-340
Moss
Motors
This part is essentially
indistinguishable from the original.
The only question comes from the
Page 31

medallion color. It is finished in the widely
accepted lighter tan color.
A good replacement part that is
hard to tell from the original. May
Windscreen
wiper arms
Front and
Rear
Bumpers
A
B
735110
735111
Abingdon
Spares
Moss
Motors
Abingdon
Spares
want to have plated for a more
uniform look as some parts are
plated brass and others stainless
steel.
These bumpers are similar to the
original but not quite exact. Upon
closer inspection you would notice
that the profile on the original
bumper has a shelf on the top side
or more projection. These
replacement bumpers have the
same projection on the top as the
bottom. Since it is almost
impossible to find a original
bumper in existence today I would
probably expect that in a few years
no one, including an expert, would
be able to notice.
Bumper
Overrider
Rubber
Footwell
Toolbox Felt B 456-420
Toolbox Felt C ASL5798
Dash Light
Rheostat
A
B
C 145-900
Moss
Motors
Abingdon
Spares
Moss
Motors
Moss
Motors
Abingdon
Spares
Moss
Motors
These overriders generally appear
as original. I have noticed that they
are a bit wider at the top than
original overriders but that may be
in tolerance with the original parts.
While this part is close to the
original they forgot one important
aspect. The original footwell was
sewn into the carpet through a
recess in the outer edge. This
version does not have the recess.
While the correct color the texture
has a woven pattern to it rather
than the traditional smooth felt like
texture.
While the correct color the texture
has small waffle pattern to it rather
than the traditional smooth felt like
texture.
The original rheostat was replaced
by Lucas over 30 years ago with a
model that has an extended knob.
The original knob had a plain face
and was about ½ inch long. The
replacement is about 1 inch long
Page 32

and has an arrow on the face.
Socket Set A 142-800
Radiator
Webbing
Windshield
L/R Uprights
B 280-010
A
408-230
408-240
Moss
Motors
Moss
Motors
Moss
Motors
Looks like an exact replacement
for the original dash plugs.
Much thicker than original and
different texture. The original was
very thin (approx. 1/16 inch) and
had a pebbled texture to the
webbing.
Similar to the originals at first
inspection. One thing to look out
for is to make sure that the
castings you receive are
symetrical. Mine were not. Might
want to insist during the order that
they are the same or you will
charge them return shipping.
Plates, Etchings and Decals
If your TD, like most others, has been refinished a number of times some of
the little details may have been lost. In fact you may not even know they exist
unless you have compared your car to another. The details I refer to in this
section are found in the form of etchings and decals. These decals and
etchings were part of plates from the MG Car Company or their suppliers.
Some of these are available as replacement parts and offer good substitutes.
Many of these parts are not available or perhaps just need to be restored.
Within these pages I will describe these decals and etchings and provide a
digital image of the item so you can create your own or restore the etching on
your original part. I will also describe how you might go about the etching
process or where you could have this done. The items that I deal with in these
pages are:
• Original Air Cleaner Decal
• Auster windscreen builders plate
Page 33

• Desmo rear view mirror logo
• Chassis I.D. plate
• Body I.D. plate
• Patent number plate
• Sidescreen builders plate
• Tecalemit oil filter plate (late TD)
• Engine ID Plate
• Oil filler cap
• Gas filler cap lever
• Radiator builders plate
• Made in England plate
• MG Car Company threshold plates
Decals
Original Air Cleaner Decal
This decal was affixed to the top of the smooth topped air cleaners. Note the
image is not full size.
The Plate Details
Auster Windscreen Builders Plate
The Auster windscreen builders plate was attached to the bottom frame
member of the windscreen via two tiny round headed rivets. Make sure that
this plate is on the inside of the vehicle as many times you find it on the
outside of restored cars. This plate is unusual in that it is done in two colors.
Bright red for the Auster bracketed by black decorations to the sides.
This part is available from suppliers such as Moss Motors and Abingdon
Spares but they did not etch the part. Instead they just silk screened the
image onto a plate. If you want a more realistic copy then you will need to
etch the image into the plate.
Desmo Rear View Mirror Logo
The original over the dash review view mirror that was used on the MGTD
was supplied by Desmo. They included their logo on the back of the mirror
Page 34

(towards the front of the car) at the top. The metal parts of the mirror where
plated chrome.
Chassis I.D. Plate
The chassis ID plate designates your car and engine numbers. There are at
least two different versions of this plate. Reproductions of this plate only
support the early version and do not have the 2 on the TD/ that later cars had.
You may need to add this etching to a reproduction plate. These plates were
nickel and filled with black paint.
Body I.D. Plate
The body plate contained the body type and body number stamped into the
surface. The plate itself was plated in nickel with filled letters in black. These
can be obtained commercially.
Patent Number Plate
This plate was a little different in that it had a painted background (black) with
raised patent numbers. The plate was done in nickel. You can obtain these
commercially.
Sidescreen Builders Plate
This plate was attached to the right hand door's sidescreen at the top cross
member. It sported a black background with natural raised lettering.
Tecalemit Oil Filter Plate
This plate was affixed to all Tecalemit filters (late TD's) and was photo etched.
I do not have an easy way to restore this plate.
Engine ID Plate
Octagonal plate with inner circle ring. Raised letters riveted to the engine
block. Includes stamped engine number that is match on the chassis ID plate.
Page 35

Oil filler Cap
Etched around the oil cap filler were popular brands (recommended by the
factory?) of oil. This part was nickel plated with etched and black painted
letters.
Gas filler Cap Lever
This one may have been stamped on but an etching may be a good facsimile
just in case. Not painted to my knowledge but you could if you wanted more
contrast. Most have this chrome plated.
Radiator Builders Plate
Found on the upper right corner of the radiator core on the engine side.
Painted with the core but you could treat it in brass and paint for an enhanced
effect. Each plate carried a stamped serial number.
Another plate found on the tank top generally on the right hand side. These
plates were soldered to the tank and painted black overall.
Page 36

Note: These plates may be available in limited quantities. Please contact Jim
Threadgill for more information.
Made in England Plate
This plate was put on some export cars. It was found on the left end of the
tool box just below the band that the clasp is attached to. The plate was made
of brass and etched with the MG logo in front with the words MADE IN
ENGLAND along side it to the right. Not all export cars seem to posses this
plate. Certainly if you do not have two little holes on the left end of your
toolbox you probably are not a candidate. Finished in nickel and black paint.
MG Car Company Threshold Plates
OK. These are not original for TD's (MG TA's?) but everybody has them.
These were not plated but were natural aluminium that was polished and filled
with black paint.
Restoring Etchings
To restore or create a reproduction you have to go through a few steps. First
you must obtain an image of the original. This page should help you in that
regard. Secondly you will need to create a mask and then etch the item. After
this process you may need to have the item plated depending on it's original
finish. And finally you will have to fill in the etching with paint to make it stand
out (or conversely fill in the background). A few etchings were really a photo
chemical coloration and are not really painted on (ex: Tecalemit oil filter plate).
This article does not cover that process.
Etching
Etching is the process of removing a specified amount of material from an
object by using acid or some sort of abrasive. Etching is generally done via
some sort of mask either directly with an acid or using the mask to
photochemically treat the material first. In the case of the MGTD many of the
etchings were done over brass but other metals were used also. A very
popular use of etching is in the creation of printed circuit boards. In fact you
may find that process most useful to you. You can find a brief overview of the
etching process at this site.
Page 37

Warning: Anyone considering doing their own etching should realize that it is
a fairly difficult and dangerous process and your results will not be
guaranteed. I would suggest that you consider sending your part and mask
template (image) to a professional when etching is required. If you do decide
to try your own hand at etching you should experiment on like materials as the
part you will be ultimately using. Also I do not recommend trying to deepen or
re-etch existing parts, at least not by a layman.
To restore etched parts requires a few basic steps. First you must thoroughly
clean all of the parts to be treated. This includes removing any existing paint
and/or plating. Plating will generally have to be removed at a plating shop.
You will need some sort of mask that will indicate where the etching
should/sho
uld not take place. One these pages I will attempt to provide you
with images that you can use to generate your own etching masks from your
computer printer. Generally the best way to mask your part is to create the
mask with your computer. If you have a laser printer you can generate your
mask directly otherwise you will have to first print your mask and then transfer
the image to the mask material with a Xerographic copy machine. You can
find photo generated mask material and instructions to make the mask here
.
Once the parts have been stripped and cleaned you can begin the etching
process. Follow the instructions with your etching materials and mask. Be
sure to take all the environmental and personal protection precautions
because ac
id is very dangerous to you and the environment. See cautions
above.
Resources for Etching
• Photographic mask materials
• Etching process overview
• Etching Machinery & Supplies in the UK
• Etching resource for making plates etc.
• Brass name plate producer
• An example of etching brass from the model railroad hobby
• Nickel stripping and etching solutions
Plating
Most of the ID plates on the MGTD were nickel plated. Nickel differs from
chrome plating in that chrome plating is usually done in three layers. The first
being a layer of brass which provides a smooth uniform surface that can also
be lightly polished if needed between the first and second platting. The next
layer is nickel which gives it the silver look. Nickel has sort of a yellowish tinge
to it. Nickel can oxidize like any silver and can turn dark yellow and even gray
or black. It needs to be polished frequently to retain it's shine. Finally in
chrome plating the third layer is actually the chromium. This is applied in a
very thin, almost transparent layer. Its' main function is to protect the nickel
from abrasion and tarnishing. It also gives chrome plating that characteristic
bluish look.
Page 38

To properly plate your etched parts just have them nickel plated, straight over
the existing brass. Be careful that you do not have the plate overly polished
first otherwise you may remove some of the etching and/or your plate will look
to shiny and be confused with chrome plating, at least until it starts to tarnish.
Painting
Most of the etched parts were painted after the plating process. Some may
have been silk screened or photo etched as reported above. For those plates
that were painted here is how you can replace the paint.
First it is important to realiz
for the letters and was actually used as a filler. In other cases the paint
actually provided a dark background for the letters to rise above the
background and stand out. In either case the principal is the same. You will
need to put paint in the recessed or etched areas and leave the non etched
areas to rise above for contrast.
Start by making sure your plated etching is free from all grease and oil. Use a
good grade of commercial painting pre cleaner or alcohol to clean the surface.
Next obtain the correct color of paint, black in most cases, in a lacquer base.
Lacquer based paints work best because they are easier to work with after the
paint has cured. Do not use a primer! You will ne
the plate. A good tool for this would be an artist or hobby airbrush. Build up a
good deal of paint because the next process will remove most of it.
You will have to experiment a little from this point but the good news is that
you can do this over and over again without hurting any
having to redo much work. The object at this point is to remove all the paint on
the surface of the etching while still retaining the paint within the recesses.
This will be easy to do on those plates where the etchings make up the text
and figures. On the plates where the paint constitutes the body or
background, this may be a little tougher.
e that in some cases the paint provided a contrast
ed to spray the entire area of
thing or seriously
There are many techniques to remove the unwanted
Each has it's own benefits and detriments. You might find one useful for one
type of plate but totally inappropriate for another. Try them as you see fit.
paint from your etchings.
Removing Paint with Solvent
The easiest way to remove paint is through the use of a solvent. If you have
used a lacquer type of paint then lacquer thinner is what you will use. Other
types of paints may need another type of solvent. Use the solvent sparingly
and remove as much of the paint on the larger areas as you can. For tools I
like to use smooth cotton such as bed sheets wrapped in a mandrel or rod. I
soak the cloth and then wrap it tightly around the rod. Then I carefully wipe
this across the surface, removing a little paint each time. After each pass I
would recommend you use a new piece of cloth or an unused portion of you
cloth. Stop just sort of removing all the paint when you can see the raised
Page 39

portion coming through. At this point you will follow up with the polishing
technique described below.
You can also use cotton swabs to carefully remove paint in stubborn areas. If
you make a mistake and remove too much paint let the part dry for a while
and then recoat again. You can concentrate your touch-up in those difficult
areas and work it until you get the look you want.
Removing Paint with Polish
This technique is much slower than the solvent method but is less deliberate
in the removal of the paint. Start with a hard surface such as a 12 inch square
plate of glass or metal. It must be perfectly flat and smooth. Cover it with a
piece of smooth cotton. You can experiment with bed sheets or cotton Tshirts. Make sure there are no wrinkles or creases.
Using a fine hand polishing compound invert the plated piece and rub it over
the hard surface covered with cloth. You will need to inspect the part many
times during the operation to make sure you are only removing the paint that
you need to. Press down firmly but evenly while rubbing. You may need to
replace the cloth and/or add compound frequently as needed.
When you get to a point that you can just see the image coming through you
should switch to a car cleaner wax or a light
finer tools such as cotton swabs or your fingered covered in cloth to work
smaller areas. Once you have removed all the unwanted paint then buff with a
clean cloth. You may optionally coat your parts with clear to keep the nickel
from tarnishing and to protect your painted areas from wear.
er compound. You may also use
Engine Fasteners
Here is a list list of MGTD engine fasteners. The list includes original part
numbers and replacement part numbers from Abingdon Spares
Motors. Also included is a table of torque values for specified fasteners. This
list was compiled by Dave DuBois, Stuart Lock and TA Terry.
and Moss
Bolts
SIZE
5 -
0.80MM6
- 1MM
LENGTH
(INCH)
5/8 2BA3/16W
WRENCH
SIZE
DESCRIPTION/USE QTY
CAMSHAFT
THRUST
PLAT
THRUST PLATE
BOLT ACTUALLY
FOUND IN 2
ENGINES
ECAMSHAFT
2 AAA2356 5 - 84
ORIGINAL
P/N
ABINGDON
P/N
MOSS
P/N
320130
5 - 0.75 1 9/16 1/8 W FAN TO PULLEY 4 AAA5213 7 - 23 320-
Page 40

Mm 120
6 - 1MM ½ 3/16W
6 - 1MM ½ 3/16W
6 - 1MM 5/8 3/16W
6 - 1MM 5/8 3/16W BAFFLE TO SUMP 4 JA5117 3 - 173
6 - 1MM 5/8 3/16W
6 - 1MM 1 ½ 3/16W
6 - 1MM 1 ½ 3/16W
6 - 1MM 2 5/8 3/16W
UPPER REAR
MAIN SEAL
ROCKER COVER
SIDE BOSSES
OIL PICKUP TO
BAFFL
OIL PICKUP
COVER (L
OIL PICKUP TO
SUMP, DRILLED
FOR SAFETY WIRE
TIMING CHAIN
TENSIONER,
DRILLED FOR
SAFETY WIRE
OIL PUMP TO
BLOCK (EARLY
TD)
(LATE TD)
E
ATE TD)
3 AAA6142 3 - 12
3 AAA6142 3 - 12
2 JA5117 3 - 169
1 HP0405 3 - 167
2 ASL5853 3 - 161
2 AAA5792 5 - 8
4
AAA5586 3 - 99
2
320130
320130
320150
320150
320160
6 - 1MM 3 5/16 3/16W
6 - 1MM 3 ½ 3/16W
8 - 1MM ½ 3/16W
8 - 1MM 5/8 3/16W
8 - 1MM 5/8 3/16W
8 - 1MM 5/8 3/16W
8 - 1MM 3/4 1/4W
OIL PUMP TO
BLOCK, DRILLED
FOR SAFETY WIRE
(EARLY TD)
(LATE TD)
OIL PUMP TO
BLOCK, DRILLED
FOR SAFETY WIRE
OIL GALLERY
PLUGS
FRONT BEARING
PLAT
TIMING CHAIN
COVER TO FRONT
BEARING PLATE
CAM BEARING
DOWEL BOLTS (
DRILLED FOR
SAFETY WIRE)
CLUTCH TO
FLYWH
E TO BLOCK
EEL
2
AAA5586 3 - 99
4
2 AAA3093 3 - 97
5 X22968 3 - 8
2 AAA5343 3 - 40
2 X15012 3 - 39
2 AAA5621 5 - 44
6 AAA5609 13 - 47
320160
320170
328100
320260
320260
320900
321028
8 - 1MM 3/4 1/4W
ENGINE MOUNT
DLE TO
CRA
4 ASL5829 3 - 42
320260
Page 41

FRONT BEARING
PLATE
8 - 1MM 3/4 1/4W
8 - 1MM 3/4 1/4W
8 - 1MM 3/4 1/4W
8 - 1MM 3/4 1/4W
8 - 1MM 3/4 1/4W
8 - 1MM 7/8 1/4W
GENERATOR
ADJUSTING LINK
GENERATOR
MOUNTING
BRACKET TO
BLOCK
CLUTCH CABLE
BRACKET TO
SUMP (EARLY TD)
OIL FILTER
SUPPORT
BRACKET (EARLY
TD)
TIMING CHAIN
COVER TO FRONT
BEARER PLATE (2
BOLTS FROM
REA
R OF BEARER
PLATE)
WATER OUTLET
ELBOW TO HEAD
(TD)
1 X15012 3 - 149
2 CA1122 3 - 146
2 CA1122 13 - 31
3 CA1122 USE 3 - 39
2 CA1122 3 - 39
4 CA1258 3 - 132
320260
320260
320260
320260
320260
320270
8 - 1MM 7/8 1/4W
8 - 1MM 7/8 1/4W
8 - 1MM 7/8 3/16W
8 - 1MM 7/8 3/16W
8 - 1MM 1 1/4W
8 - 1MM 1 *
8 - 1MM 1 1/4W
8 - 1MM 1 1/4W
AIR CLEANER
ELBOW TO
CARBURE
WATER PUMP
(SHORT B
SUMP TO BLOCK
(CENTER BOLTS)
SUMP TO TIMING
CHAIN COVER
(DEEP HEAD)
WATER PUMP
(LONG BOLT)
REAR PLATE TO
HEAD (* SCREW
HEAD)
BELL HOUSING TO
ENGINE
BOTTOM
GENERATOR
MOUNTING
TOR
OLT)
4 CA1258 3 - 62A
1 CA1258 7 - 27
10 LA7431 3 - 74
2 AAA5340 3 - 73
1 JA5052 7 - 28
4 3 - 50
10 JA5052 3 - 58
2 X22853 3 - 153/157
320270
320270
320270
320265
320625
323180
321048
320625
8 - 1MM 1 1/8 3/16W SUMP TO BLOCK 2 AAA5341 3 - 75 320-
Page 42

8 - 1MM 1 1/4 13MM
(DEEP HEAD
SLOTTED - REAR 2
BOLTS)
GUDGEON PIN
CLAMP BOLTS
(ORIGINAL BOLTS
HAD 1/4W HEADS)
4 CA1009 5 - 17
615
320890
TIMING CHAIN
8 - 1MM 1 7/8 1/4W
8 - 1MM 2 1/4W
8 - 1MM 2 1/4 13MM1/4W
8 - 1MM 3 5/16 1/4W ROCKER TOWER 4 AAA5670 5 - 57
10 -
1.5MM
10 -
1.5MM
3/4 5/16W
7/8 3/8W
COVER TO
ENGINE
TIMING CHAIN
COVER TO
ENGINE (2 LOWER
BOLTS)
ROD BIG END
BOLTS (WITH
SELF LOCKING
NUTS) (DRILLED
FOR COTTER PIN)
CARBURETOR TO
MANIFOLD
FLYWHEEL TO
CRANKSHAFT,
DRILLED FOR
SAFETY WIRE
3 AAA5286 3 - 36
2 AAA5231 3 - 35
8 AEF123 5 - 15
4
4 AAA5609 13 - 61
320300
320310
320880
320330
320510
321108
10 -
1.5MM
10 -
1.5MM
12 -
1.5MM
12 -
1.5MM
1/4 - 26
BSF
1 5/16W
3 ½ 5/16W ROCKER TOWER 4 AAA5692 5 - 58
7/8 5/8W
1 3/8W19MM
1 1/4 3/16W
STARTER TO
BLOCK
CRANKSHAFT
PULLEY
BOLT/STARTING
DOG (CAN USE 1
1/8 SAE WRENCH)
TIMING GEAR TO
CAMSHAFT (SOME
BOLTS COME
WITH THIS
LARGER HEAD)
ENGINE
BREATHER PIPE
CLAMP BOLT
(SOME OF THESE
MAY BE 6 - 1MM)
2
1 AAA5279 5 - 30
1 AAA5788 5 - 35
1 CA1263
USE 23 125
320510
320530
433450
320670
320200
Page 43

1/4 - 20
W
1 3/8 1/4W
DISTRIBUTOR
CLAMP PINCH
BOLT (EARLY TD)
1
5/16 -22
BSF
5/16 -22
BSF
5/16 - 18
W
3/8 - 20
BSF
Studs
SIZE
6 1MM
LENGTH
1 7/8 N/A
3/4 1/4W
3/4 1/4W
5/8 1/4W
4 ½ 5/16W
(INCH)
WRENCHSIZE DESCRIPTION/USE QTY
CLUTCH RETURN
SPRING BRACKET
TO SUMP
AIR CLEANER TO
CARBURETOR (TD
MKII)
TOP GENERATOR
MOUNTING BOLT
(5/16 - 18 SAE
BOLT FITS)
OIL FILTER
HOUSING
TAPPET COVER
STUDS
1 AJG6255Z 13 - 22
4 23-185
1 3H2092 3 - 151
1 300852 3 - 197
ORIGINAL
P/N
3 AAA5595 3 - 16
ABINGDON
P/N
320360
320360
322510
MOSS
P/N
8 1MM
8 1MM
8 1MM
8 1MM
8 1MM
10 -
1.5MM
10 -
1.5MM
10 -
1.5MM
1 1/4 N/A
1 7/8 N/A
1 3/4 N/A
4 N/A
5 1/4 N/A
2 N/A
1 1/2 N/A
4 3/8 N/A
WATER OUTLET
ELBOW TO
THERMOSTAT
HOUSING STUD
LONG WATER
PUMP ST
SHORT WATER
PUMP ST
MANIFOLD TO
HEA
ROCKER COVER
STUDS
CARBURETOR TO
MANIFOLD STUDS
(TD MKII)
EXHAUST FLANGE
TO MANIFOLD
STUDS
HEAD TO BLOCK
STUDS
UD
UD
D
2 CB1717 3-31
1 X20167 3 - 30
1 JB5969 3-31
4 AAA5773 3 - 47
2 AAA5552 3 - 46
4 QA11791 3 - 121
3 X15126 3 - 62A
10 AAA5512 3 - 13
328730
328750
328750
328760
328770
328810
328808
328780
12 -
1.5MM
3 1/8 N/A
MAIN BEARING
CAP TO BLOCK
6 LA7104 5 - 85
328830
Page 44

Plugs
STUDS
SIZE
10 -
1.5MM
12 -
1.5MM
12 -
1.5MM
12 -
1.5MM
12 -
1.5MM
12 -
1.5MM
21 -
1MM
LENGTH
(INCH)
N/A 3/15W
5/16 *
9/16 *
N/A 5/16W
N/A 5/16W OIL PUMP COVER 2 10798 3 - 215
N/A 5/16W
N/A 9/16W
WRENCH
SIZE
DESCRIPTION/USE QTY
CENTER OIL
GALLERY PLUG
FRONT OIL
GALLERY PLUG
(*SCREW HEAD,
STEEL)
REAR OIL
GALLERY PLUG
(*SCREW HEAD,
BRASS)
OIL PUMP BODY
PLUG (LATE TD)
SUMP OIL PICKUP
PORT PLUG
RELIEF VALVE
CAP (CAN USE 1"
SAE WRE
NCH)
1 X20247 3 - 9
1 X22732 65 - 57
1 X15393 65 - 57
1 163138 3 - 212
1 10798 3 - 215
1 AAA5628 3 - 111
ORIGINAL
P/N
ABINGDON
P/N
MOSS
P/N
328020
328030
½-14
BSP
N/A 1/2W
SUMP OIL DRAIN
PLUG
1 AAA2599 3 - 68
328120
Nuts
SIZE
8 1MM
8 1MM
8 1MM
8 - N/A 1/4W MANIFOLD CLAMP 4 CA1126 3 - 66 311-
LENGTH
(INCH)
N/A 1/4W
N/A 1/4W
N/A 1/4W
WRENCH
SIZE
DESCRIPTION/USE QTY
WATER PUMP
STUD NUT
WATER OUTLET
ELBOW TO
THERMOSTAT
HOUSING STUD
FRONT ENGINE
MOUNT CRADLE
TO FRONT
BEARING PLATE
2 CA1126 3 - 51
2 CA1126 USE 3-51
4 CA1126 3 - 43
ORIGINAL
P/N
ABINGDON
P/N
MOSS
P/N
311100
311100
311100
Page 45

1MM NUT 100
ROD BIG END CAP
BOLT NUT (ORIG.
8 1MM
NA 1/4W13MM
CASTELLATED
FOR COTTER PIN)
( SELF LOCKING
TYPE)
8 AEF131 5 - 16
311080
10 -
1.5MM
10 -
1.5MM
12 -
1.5MM
1/4 26
BSF
1/4-26
BSF
1/4 20 W
N/A 5/16W HEAD STUD NUT 10 AAA5208 3 - 56
EXHAUST FLANGE
N/A 5/16W
N/A 7/16W
N/A 3/16
N/A 3/16W
N/A 1/4W
TO MANIFOLD NUT
(BRASS)
MAIN BEARING
CAP STUD NUT
(CASTELLATED
FOR COTTER PIN)
ENGINE
BREATHER PIPE
CLAMP BOLT NUT
(SOME OF THESE
MAY BE 6 - 1MM)
DISTRIBUTOR
COTTER B
NUT (LATE TD)
DISTRIBUTOR
CLAMP PI
BOLT NUT (EARLY
TD)
OLT
NCH
3 CA1605 3 - 63
6 AEF199 5 - 5
1 CA1254
1 CA1254
1
USE 23 425
311200
311200
311270
311050
311050
3/8 20
BSF
N/A 5/16W
Miscellaneous
SIZE
2BA 3/4 *
81MM
LENGTH
(INCH)
7/8 1/4W
WRENCH
SIZE
CLUTCH LINKAGE
FULCRUM
(CASTELLATED
FOR COTTER PIN)
DESCRIPTION/USE QTY
BYPASS ELBOW
TO THERMOSTAT
HOUSING
(*SLOTTED
CHEESE HEAD
SCREW)
DISTRIBUTOR
LOCK BOLT
PIN NUT
2 AJD320 7-66
1 AAA5212 35 - 93
2 AAA5802 13 - 26
ORIGINAL
P/N
ABINGDON
P/N
311240
MOSS
P/N
323040
433530
Page 46

(EARLY TD)
1/426
BSF
3/820
BSF
1/8
BSP
1/8
BSP
1/4
BSP
N/A N/A
N/A N/A
N/A 3/16W
1 5/16W
1 1/8 1/2W
DISTRIBUTOR
COTTER B
(LATE TD)
CLUTCH LINKAGE
FULCRUM
BLOCK WATER
DRAIN TA
OIL PIPE BLOCK
TO HEAD BANJO
BOLT (EARLY TD)
(LATE TD)
FILTER TO BLOCK
OIL PIPE (EARL
TD)
OLT
PIN
P
Y
1 AAA2776 35 - 90
2 X23049 13 - 27
1 3H2724 3 - 14
2
3 X19089 3 - 86
Torque Values for XPAG Engines
Engine
X21021
AAA5
550
3 - 115A
3 - 115
433540
190390
434240
435465
435490
435480
Description Torque
GUDGEON PIN CLAMP BOLT 25 LBFT
ROD BIG END BOLTS 25 LBFT
MAIN BEARING CAP NUTS 63 LBFT
FLYWHEEL TO CRANKSHAFT BOLTS 50 LBFT
CLUTCH PRESSURE PLATE BOLTS 19 LBFT
OIL PICKUP PIPE TO SUMP BOLTS 6 LBFT
CAMSHAFT LOCATING PLATE BOLTS 6 LBFT
CAMSHAFT SPROCKET BOLT 50 LBFT
TIMING CHAIN TENSIONER BOLTS 6 LBFT
SUMP TO BLOCK BOLTS 19 LBFT
TIMING CHAIN COVER BOLTS 19 LBFT
CRANKSHAFT PULLEY BOLT 50 LBFT
CYLINDER HEAD NUTS 50 LBFT
ROCKER TOWER BOLTS (8 MM) 16 LBFT
ROCKER TOWER BOLTS (10 MM) 43 LBFT
OIL PUMP TO BLOCK BOLTS 6 LBFT
Other
Page 47

Description Torque
WATER PUMP PULLEY NUT 10 LBFT
GENERATOR PULLEY NUT 35 LBFT
TRANSMISSION OUTPUT FLANGE NUT 65 LBFT
REAR AXEL HUB NUT 170 - 200 LBFT
FRONT AXEL HUB NUT 40 - 70 LBFT
WHEEL LUG NUTS 50 LBFT
Lucas Spotlight Codes
• SFT 576 S stands for spigot fixing, found on chrome lamps.
• FT indicates flat topped beam, which I would guess equates to fog
lamp.
• 576 indicates a 5.76in reflector.
• SLR S equals spigot fixing again.
• LR indicates long range.
• CFT or CLR indicates it was designed for a commercial vehicle, and
originally had a black body.
Page 48

Page 49

Page 50

Page 51

Page 52

Page 53

Page 54

Page 55

Page 56

Page 57

Page 58

Page 59

Page 60

Page 61

Page 62

Page 63

Page 64

Page 65

Page 66

Page 67

Page 68

Page 69

Page 70

Page 71

Page 72

Page 73

Page 74

Page 75

Page 76

Page 77

Page 78

Page 79

Page 80

Page 81

Page 82

Page 83

Page 84

Page 85

Page 86

Page 87

Page 88

Page 89

Page 90

Page 91

Page 92

Page 93

Page 94

Page 95

Page 96

Page 97

Page 98

Page 99

Page 100

 Loading...