

Page 1

Page 2
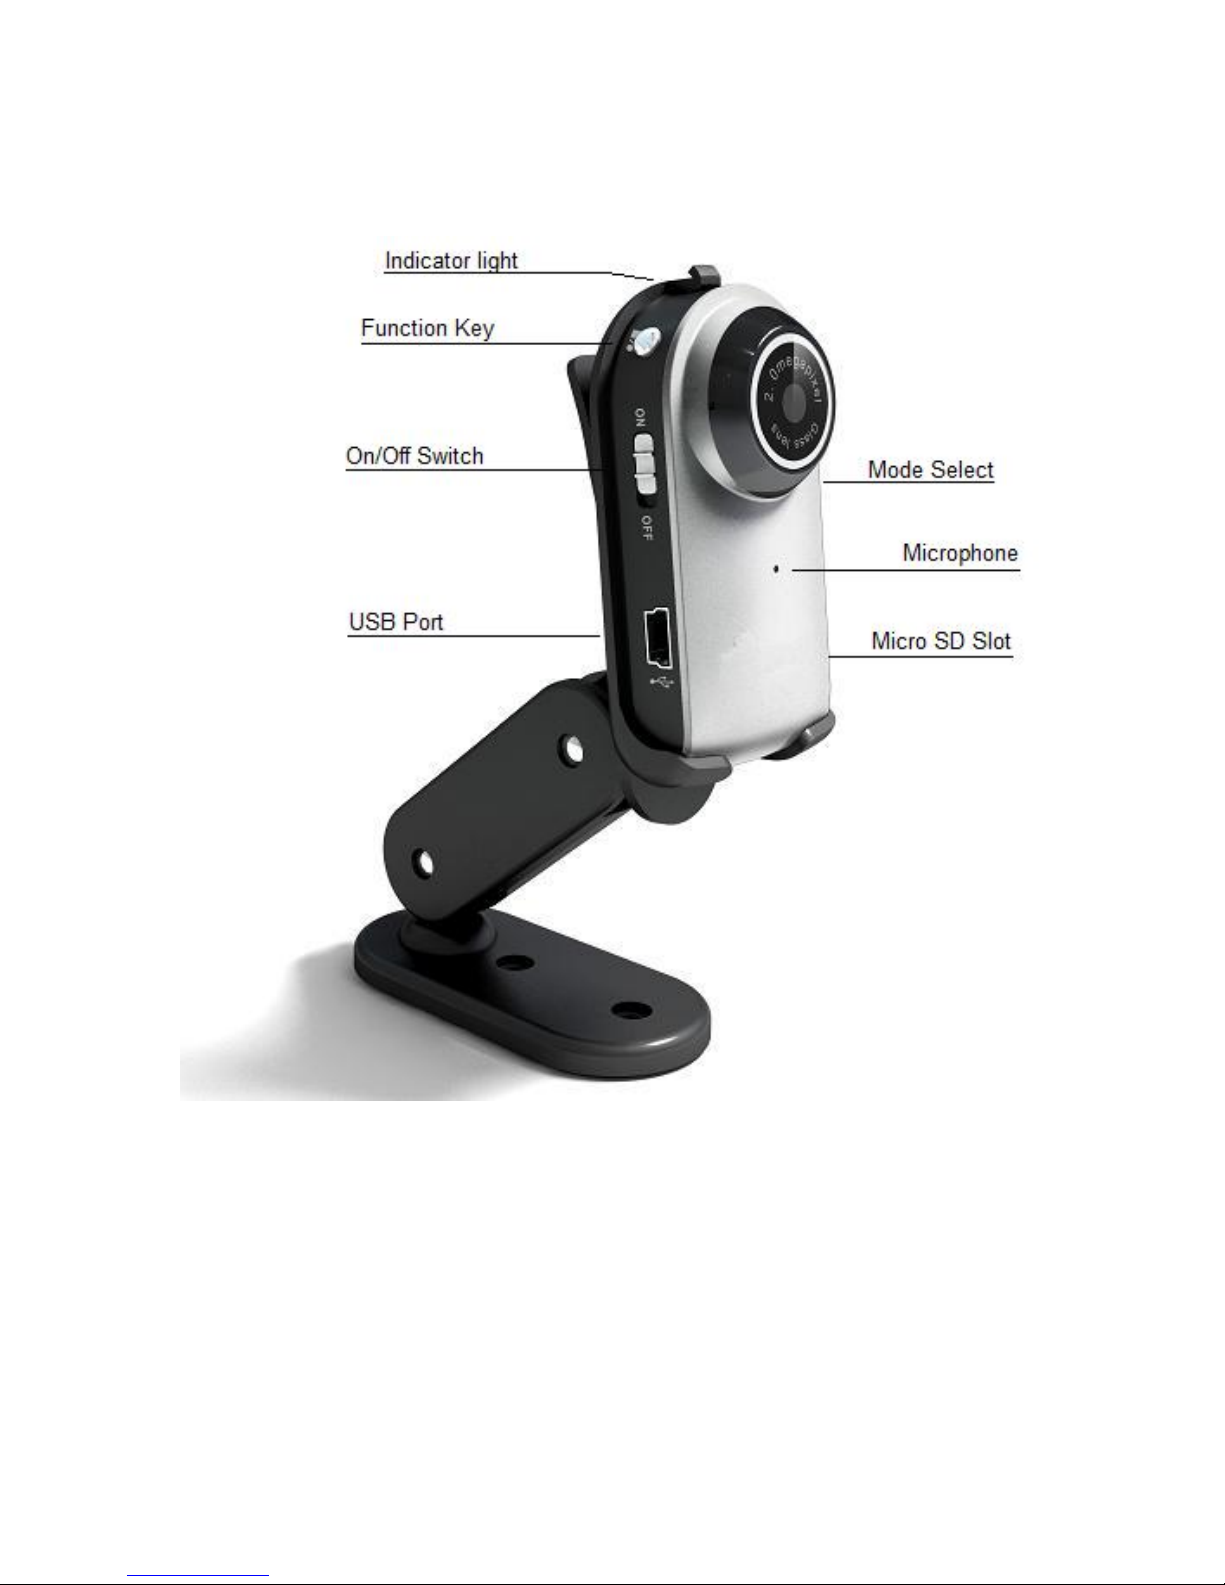
Instructions for CamStick-SD Mini DVR
Thank you for purchasing the new top of the line CamStick-SD. The
following product manual will help you to install and operate your new
device. Please be sure to fully read the directions before proceeding to use
your new CamStick-SD.
Welcome
Page 3

Operation
1.) Before using this product please ensure that all accessories were included
in the packaging and that the product is fully charged before use. You will
also need to insert the included Micro SD Card into the device before you
are able to use it.
2.) Push the power switch to the ON position, the indicator light on the
device should turn a steady yellow color to indicate that it is in voiceactivated standby mode.
Note: 1.) If the battery in the device is low, the yellow indicator light
will instead flash instead of remaining solid. After a two minute period the
device will then shut itself down.
2.) If the Micro SD Card is full, the indicator light will flash
yellow for 30 seconds and then shut itself down automatically.
3.) If no Micro SD Card is installed, the indicator light will
flash for one minute and then shut itself down.
3.) Video Recording
1. Upon turning the device on, the yellow light should remain steady to
indicate that voice-activation mode is enabled. In this mode if there is
any noise above 65dB it will begin to record automatically.
2. After a steady two minute period of no noise of at least 65dB or
greater, the device will stop recording and go back into standby mode.
4.) Manual Video Recording
1. After starting up the device, press the function key, the indicator light
should change to a blue color indicating the device is recording.
2. To stop recording, simply press the function key once more. The
footage will be saved and the device will enter standby mode once
more.
Note: If the unit receives no more commands within 30 seconds it will turn
itself off automatically.
Charging
Please ensure that the unit is OFF before connecting the battery to a charger.
Upon connecting the unit, the indicator light should be a steady red. When
the unit has fully charged, the red indicator light will go out. If you wish to
use the device while it is charging, turn it on after connecting the device
Page 4

then press the mode select button. While charging and in use, two indicator
lights will be visible.
 Loading...