

Page 1
A TNC Control Program
for the
MFJ 1278 Family
of Multimode Controllers
© 1996 MFJ Enterprises Version 1.1
Page 2

Table of Contents
1. OVERVIEW ...........................................................................................................................................................................................................1
2. INSTALLING MULTICOM FOR WINDOWS................................................................................................................................................2
3. RUNNING MULTICOM FOR WINDOWS ......................................................................................................................................................3
3.1 RUNNING FROM PROGRAM MANAGER (WINDOWS 3.1).................................................................................................................................3
3.2 RUNNING FROM FILE MANAGER( WINDOWS 3.1) OR EXPLORER (WINDOWS95)......................................................................................3
3.3 IF THIS IS THE FIRST TIME Y OU’VE RUN MULTICOM FOR WINDOWS... ....................................................................................................3
3.4 SOFTWARE CONTROL OF THE 1278: WHAT TO DO IF YOUR TNC DOESN'T COOPERATE!.....................................................................3
3.5 SERIAL (COM) PORTS: WHAT TO DO IF YOUR PC AND TNC DON’T COMMUNICATE!...........................................................................4
3.6 THE MULTICOM FOR WINDOWS MAIN WINDOW .........................................................................................................................................5
3.6.1 General Description...................................................................................................................................................................................5
3.6.2 Upper Tool Bar Description.....................................................................................................................................................................6
3.6.3 Lower Tool Bar Description.....................................................................................................................................................................7
3.6.4 Menu Bar Description................................................................................................................................................................................9
3.6.5 Hiding/Showing Toolbars.........................................................................................................................................................................9
3.6.6 Saving Screen Size......................................................................................................................................................................................9
3.7 SETTING UP MULTICOM FOR WINDOWS: BASIC INFORMATION ................................................................................................................9
3.8 FUNCTION KEYS: F1, F2 AND F3......................................................................................................................................................................11
4. SELECTING MODES OF OPERATION.........................................................................................................................................................12
5. OPERATING ........................................................................................................................................................................................................13
5.1 PACTOR OPERATION.........................................................................................................................................................................................13
5.1.1 Pactor Options..........................................................................................................................................................................................13
5.1.2 Pactor QSO's..............................................................................................................................................................................................14
5.1.2.1 Pactor FEC Mode Operation..................................................................................................................................................................15
5.1.2.2 Pactor ARQ Mode Operation................................................................................................................................................................15
5.2 AMTOR OPERATION ..........................................................................................................................................................................................16
5.2.1 Amtor Options ............................................................................................................................................................................................16
5.2.2 Amtor QSO's...............................................................................................................................................................................................17
5.3 VHF AND HF PACKET OPERATION .................................................................................................................................................................19
5.3.1 VHF and HF Packet Options..................................................................................................................................................................19
5.3.2 VHF and HF Packet QSO’s.....................................................................................................................................................................20
5.3.3 YAPP File Transfers.................................................................................................................................................................................23
5.3.3.1 Starting YAPP.........................................................................................................................................................................................23
5.3.3.2 Sending YAPP Files................................................................................................................................................................................24
5.3.3.3 Receiving YAPP Files.............................................................................................................................................................................24
5.3.4 Packet Images for Windows...................................................................................................................................................................24
5.3.4.1 General....................................................................................................................................................................................................24
5.3.4.2 Packet Images is not the same as Packet Pix in DOS MultiCom............................................................................................................25
5.3.4.3 Image Format ..........................................................................................................................................................................................25
5.3.4.4 Compressed and Non-compressed images..............................................................................................................................................25
5.3.4.5 How to Use Packet Images.....................................................................................................................................................................25
5.3.4.5.1 Sending Packet Images.....................................................................................................................................................................25
5.3.4.5.2 Receiving Packet Images..................................................................................................................................................................26
5.3.4.5.3 How to Receive and Display Pictures from Users of Other Software Packages ............................................................................27
5.4 CW OPERATION.................................................................................................................................................................................................28
5.4.1 CW Options................................................................................................................................................................................................28
5.4.2 CW QSO's....................................................................................................................................................................................................29
5.5 RTTY / ASCII OPERATION...............................................................................................................................................................................30
5.5.1 RTTY / ASCII Options...............................................................................................................................................................................30
5.5.2 RTTY or ASCII QSO's................................................................................................................................................................................31
5.6 SSTV AND FAX OPERATION............................................................................................................................................................................32
i
Page 3

Table of Contents
5.6.1 Overview.....................................................................................................................................................................................................32
5.6.2 Entering SSTV and FAX Mode...............................................................................................................................................................32
5.6.3 SSTV and FAX Windows..........................................................................................................................................................................33
5.6.4 Selecting Modes........................................................................................................................................................................................33
5.6.5 Receiving....................................................................................................................................................................................................34
5.6.5.1 Synchronizing.........................................................................................................................................................................................34
5.6.5.2 Vertical Interval Signal (VIS): Automatic Mode Selection......................................................................................................................34
5.6.5.3 Screen Display: Scrolling and Wrapping.................................................................................................................................................34
5.6.5.4 Image Slant..............................................................................................................................................................................................34
5.6.5.5 Image Edge ..............................................................................................................................................................................................35
5.6.5.6 Restarting................................................................................................................................................................................................35
5.6.5.7 Invert Image ............................................................................................................................................................................................35
5.6.5.8 Pause Image.............................................................................................................................................................................................35
5.6.5.9 Saving Images..........................................................................................................................................................................................35
5.6.5.10 Some Tips on Receiving Images............................................................................................................................................................35
5.6.6 Transmitting SSTV Pictures....................................................................................................................................................................37
5.6.7 Exiting SSTV and FAX Mode..................................................................................................................................................................38
5.6.8 Pre-Converting SSTV Images.................................................................................................................................................................38
6. CALLING CQ IN CW, RTTY/ASCII, AMTOR AND PACTOR................................................................................................................39
6.1 TO CALL CQ A SINGLE TIME, OR TO EDIT THE CQ MESSAGE:....................................................................................................................39
6.2 TO CALL CQ AUTOMATICALLY MORE T HAN ONCE:...................................................................................................................................40
7. TIME SAVING TIPS...........................................................................................................................................................................................41
7.1 SENDING AN IDENTIFICATION MESSAGE.......................................................................................................................................................41
7.2 SENDING THE OTHER STATION'S CALLSIGN ..................................................................................................................................................41
7.3 SENDING Y OUR CALLSIGN.................................................................................................................................................................................41
7.4 USING TEXT ("BRAG") FILES ............................................................................................................................................................................42
7.5 USING ASCII FILES .............................................................................................................................................................................................44
8. PRINTING............................................................................................................................................................................................................45
9. CAPTURE TO DISK...........................................................................................................................................................................................46
10. CONTROLLING MORE THAN ONE TNC AT THE SAME TIME..........................................................................................................48
11. ACKNOWLEDGMENTS.................................................................................................................................................................................49
ii
Page 4

Overview
COPYRIGHT NOTICE
Reproduction or use of editorial or pictorial content of this software product and the documentation without the expressed
written permission from MFJ Enterprises, Inc. is prohibited.
While every precaution has been taken in the preparation of this instruction manual, the author and publisher assume no
responsibility for error or omissions.
Neither is any liability assumed for damages resulting from the use of the information contained herein.
1. Overview
MultiCom for Windows is a software tool that simplifies the use of your 12781 multimode controller.
Instead of requiring you to memorize a large number of commands, all you need to do is "point and
click" on easy-to-use icons and buttons on the screen. MultiCom for Windows does all the rest for
you. If you need to enter more information, MultiCom for Windows displays simple "forms" for easy
information entry.
MultiCom for Windows lets you control your 1278 in the way that's easiest for you: "point and
click", or keystrokes. There's no need to use a mouse if you don't want to, but you can take full
advantage of the Windows interface if you want. You can choose to have all controls displayed, ready
for you to use, or you can have a clean, simple, uncluttered display if you want.
MultiCom for Windows supports the following modes on your 1278:
• Packet (HF and VHF)
• Pactor (FEC and ARQ modes)
• Amtor (FEC and ARQ modes)
• RTTY and ASCII
• CW
• Navtex
• SSTV (transmit and receive)
• FAX (receive)
Packet mailbox mode can be used by directly entering 1278 commands if you wish.
1
Refers to either the MFJ-1278 or MFJ-1278B Multimode Controllers
1
Page 5

Installing MultiCom for Windows
2. Installing MultiCom for Windows
Installation is virtually the same in Windows 3.1 and Windows 95.
To install MultiCom for Windows, simply do the following:
1. Put the MultiCom for Windows “Setup” diskette in a floppy
drive.
2. If you are using Windows 3.1, make sure either the Program
Manager or File Manager window is visible.
• select "File" from the menu bar at the top of the window
• select "Run" from the File menu
• enter: a:setup (or b:setup if you put the diskette in drive b:)
• press the "Enter" key
If you are using Windows 95, click on the “Start” button at the lower left of your screen.
• select “Run” from the Start menu
• enter: a:setup (or b:setup if you put the diskette in drive b:)
• press the "Enter" key
3. The "Setup" program will run. Simply follow the instructions on the screen. You can quit at any
time while Setup is running if you wish.
MultiCom for Windows shares some files with other Windows programs. When you are running
the Setup program, you might get messages asking you if you want to replace a file on your
computer with one from MultiCom for Windows. You should normally answer NO. This is because
MultiCom for Windows can almost always use the file you already have, but other programs on
your computer might not be able to use MultiCom’s.
Note: you must run
Setup from
Windows. You can't
run it from DOS
2
Page 6

Running MultiCom for Windows
3. Running MultiCom for Windows
In Windows 3.1, you can run MultiCom for Windows from Program Manager (the most common
way), or from File Manager.
In Windows 95, you can use Explorer, the Start menu, or drag the MultiCom for Windows icon (as a
shortcut) to the desktop.
The following sections tell you how to run MultiCom for Windows.
3.1 Running From Program Manager (Windows 3.1)
Double-click the MultiCom for Windows Icon from the MultiCom for Windows program group.
(Note that you can move the MultiCom for Windows icon to another group if you wish. Consult your
Windows manual for more information.)
3.2 Running From File Manager( Windows 3.1) or Explorer (Windows95)
Select the directory containing MultiCom for Windows (this is usually C:\MULTIWIN, but you may
have specified a different directory when you installed MultiCom for Windows). Double-click
"MULTIWIN.EXE".
3.3 If This Is The First Time You’ve Run MultiCom for Windows...
If this is the first time you’ve run this program, make sure that you have the “Setup” floppy disk
in drive a: or drive b: of your PC (this is the floppy disk you used to install MultiCom for
Windows). Make sure your floppy is not write protected.
When you run MultiCom for Windows for the first time, you will see a screen asking you to enter your
call sign. This is very important because many operating modes require your call sign in order to operate
correctly. Your call sign will be copied onto the “Setup” floppy disk.
If you do not have your “Setup” floppy disk in your PC, you will not be able to continue.
You only need to have your “Setup” floppy disk in your PC the first time you run MultiCom for
Windows. After that, you will not need to have it in your PC.
3.4 Software Control of the 1278: What to do if your TNC doesn't cooperate!
The 1278 uses "open loop" control. That means that when the 1278 receives a command (from
MultiCom for Windows, or from you), MultiCom for Windows has no way of knowing if the 1278
actually responded correctly2. It also means that MultiCom for Windows can't tell if you sent a 1278
control command directly from the keyboard (you could have gone so far as changing modes!).
If you find that MultiCom for Windows does not respond to your commands, it may have gotten "out
of sync" with the 1278. This does not happen often, but it is possible. If it does happen, you should:
-enter "CONTROL-C" from the keyboard
-enter the "ENTER" key
-select the desired mode from the Mode menu in the menu bar
at the top of the window
2
There a several ways this could happen. For example, you may have an intermittent serial cable connection
between your PC and 1278. Or, you may have turned the 1278 off and on while MultiCom for Windows is
operating.
3
Page 7
Running MultiCom for Windows
If that doesn’t work, enter the Command Key (normally F3, but may be F1 depending on what you
specified in the Setup Options) and repeat the above steps.
This normally restores control to MultiCom for Windows.
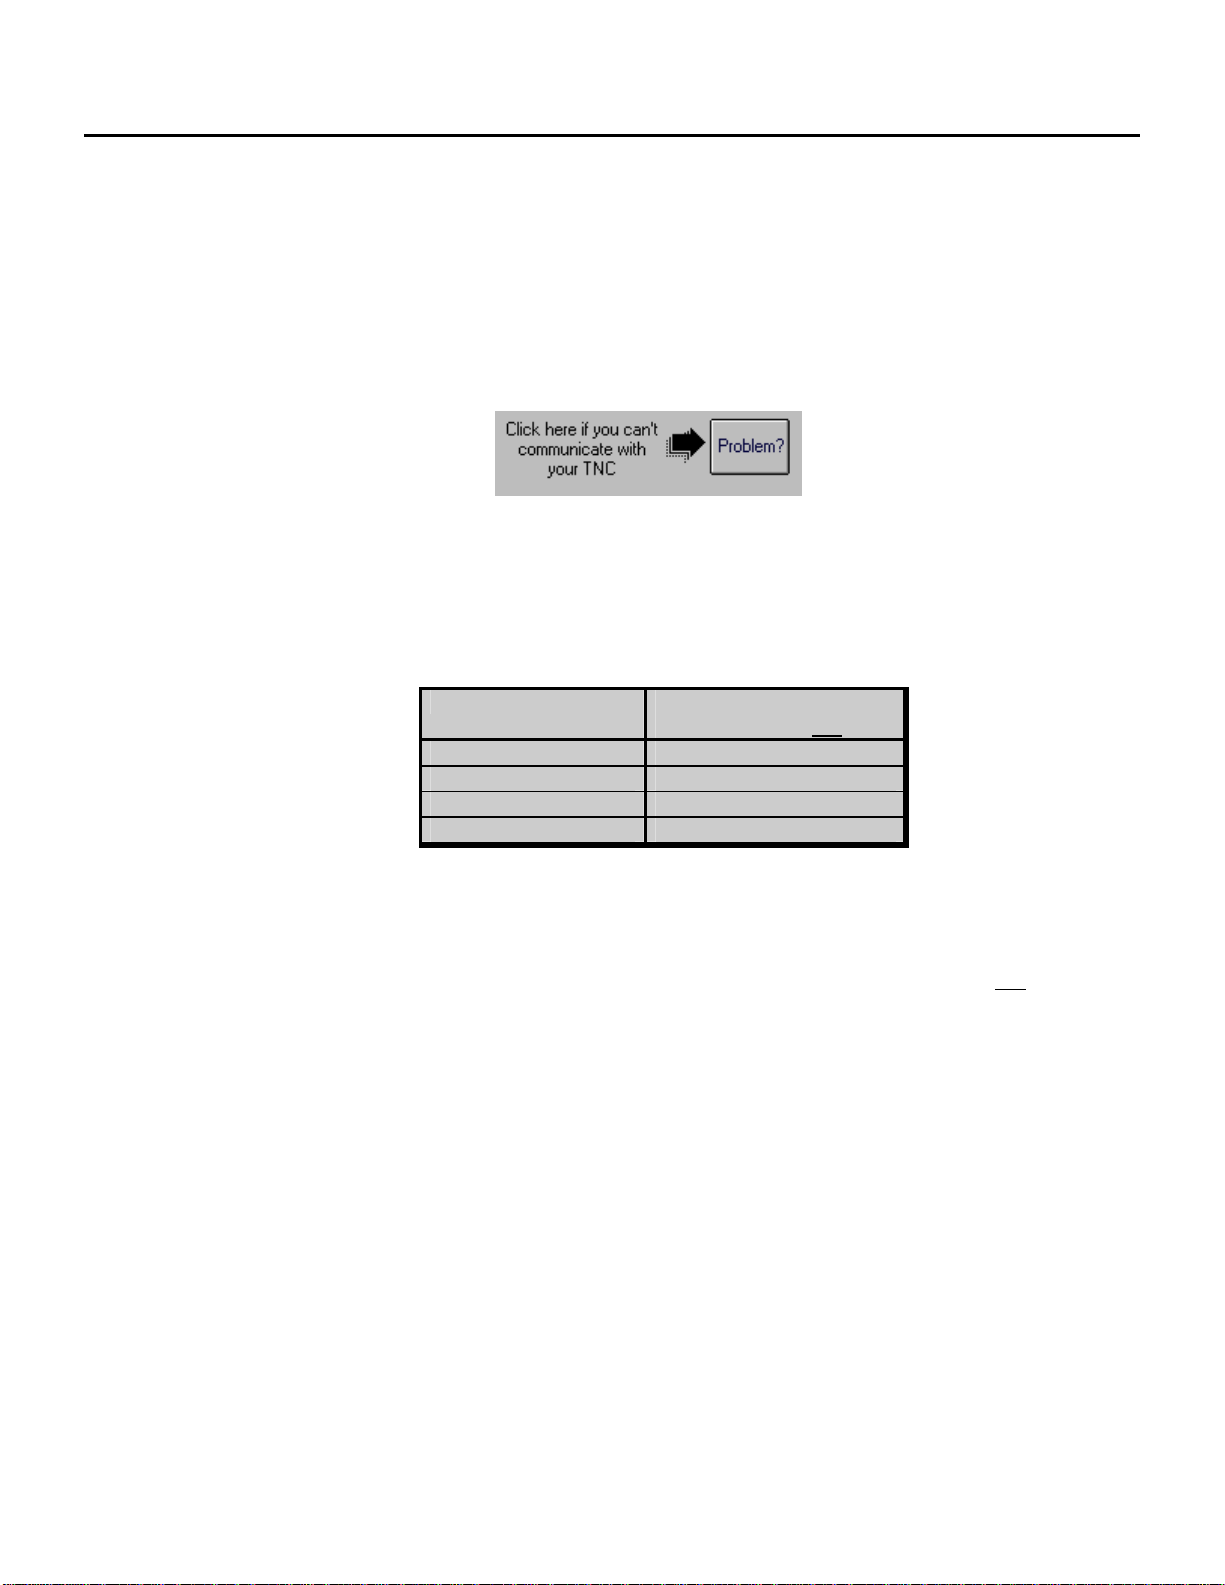
3.5 Serial (COM) Ports: What to do if your PC and TNC Don’t Communicate!
When you first start up MultiCom for Windows, you might see this symbol at the bottom of your screen:
Click on the button to get advice on possible ways to resolve your problem.
99% of the time, communications problems in Windows are due to conflicts between devices that use serial
ports (your mouse, your modem, your serial port to your TNC, etc.). Even though these devices are connected to
different ports, they can still ‘conflict’.
If you are using “standard” IRQ (interrupt) settings on your serial port --most of us do--, check the following:
If your TNC uses: then your mouse or
modem should not use:
COM1 COM3
COM2 COM4
COM3 COM1
COM4 COM2
This table is based on the fact that COM1 and COM3 normally share IRQ 4, and COM2 and COM4 normally
share IRQ3.
This sometimes can be restricting if you have more than two serial ports in use. One way around this is to setup
a serial port with a non-standard IRQ. That usually requires changing a jumper on the serial card and setting
some parameters in the “ports” section in the Windows Control Panel. If you do this, read your serial port and
Windows manual very carefully. Take care not to create other IRQ conflicts with devices like your sound card or
printer port.
4
Page 8
Running MultiCom for Windows
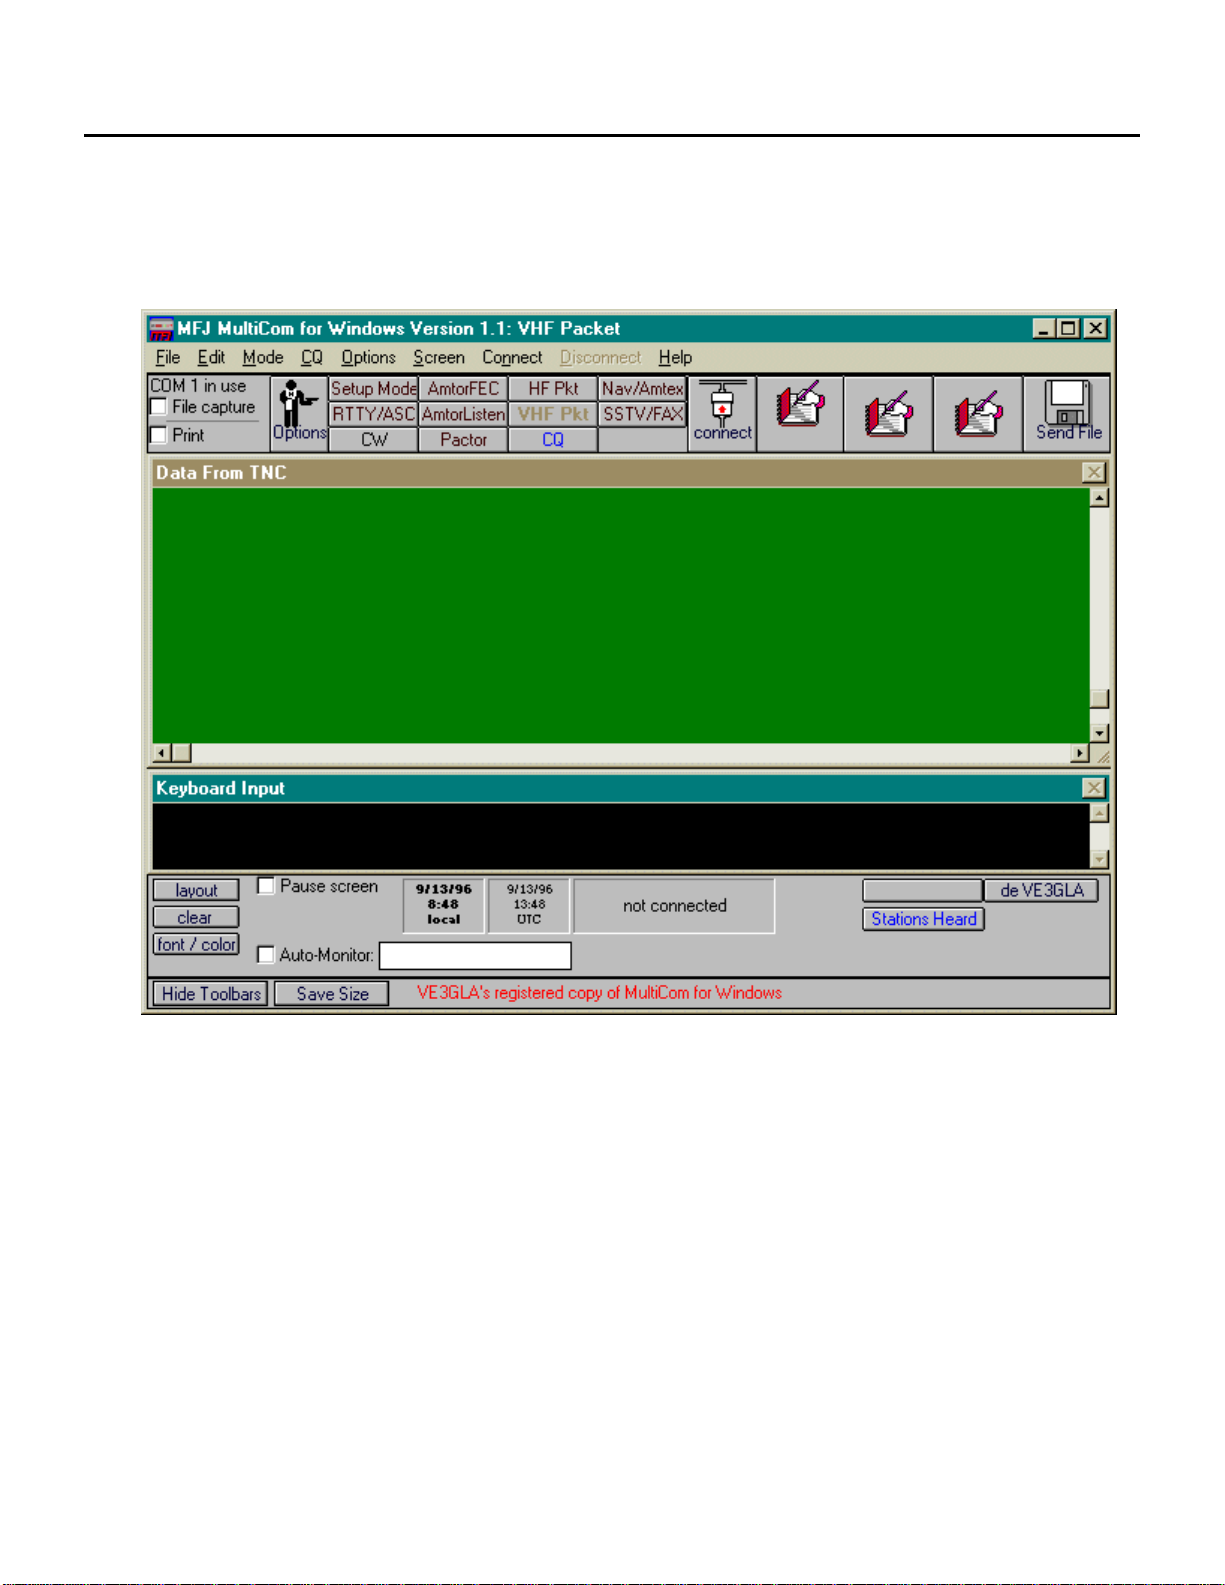
3.6 The MultiCom for Windows Main Window
3.6.1 General Description
When you run MultiCom for Windows, you will see the "main window". It looks much like this:
Because you are using Windows, you will be able to switch to other Windows programs, re-size the
MultiCom for Windows window, shrink the MultiCom for Windows window to an icon, and do
anything else you can do in Windows.
The MultiCom for Windows window has several important parts. They are:
• the "Data From TNC" subwindow
This window show the data received from you 1278. That data includes:
• information received "off the air"
• command responses from the 1278 (i.e. what the 1278 sends back in response to
commands sent to it by MultiCom for Windows)
The Data From TNC window stores the last 300 lines (approximately) of data received. You
can scroll back by clicking on the scroll bar at the right side of the window. When new data is
received, the Data From TNC window scrolls back to the last line. You can prevent this by
clicking on the "Pause Screen" button on the lower left of the MultiCom for Windows
5
Page 9
Running MultiCom for Windows
window (see "Lower Tool Bar"). Data from the 1278 will not cause scrolling when the Pause
Screen button is checked. Note: MultiCom for Windows will only store approximately the last
5000 characters received from the 1278 when the Pause Screen button is checked.
• the "Keyboard Input" subwindow.
This window echoes your keystrokes, and keeps a record of what you entered. It also echoes
any data sent when calling CQ automatically, or when text ("brag") or ASCII files are sent.
• the "Upper Tool Bar"
The Upper Tool Bar is located just above the Data From TNC window. You mostly use it to
select operating modes, establish and break links (Pactor, Packet, Amtor), manage text
"brag" files, and for printing and capture.
• the "Lower Tool Bar"
The Lower Tool Bar is located just below the Keyboard Input window. It has a variety of
functions: control of the screen, time display, entry and sending of callsigns, as well as
functions that depend on which mode you are in.
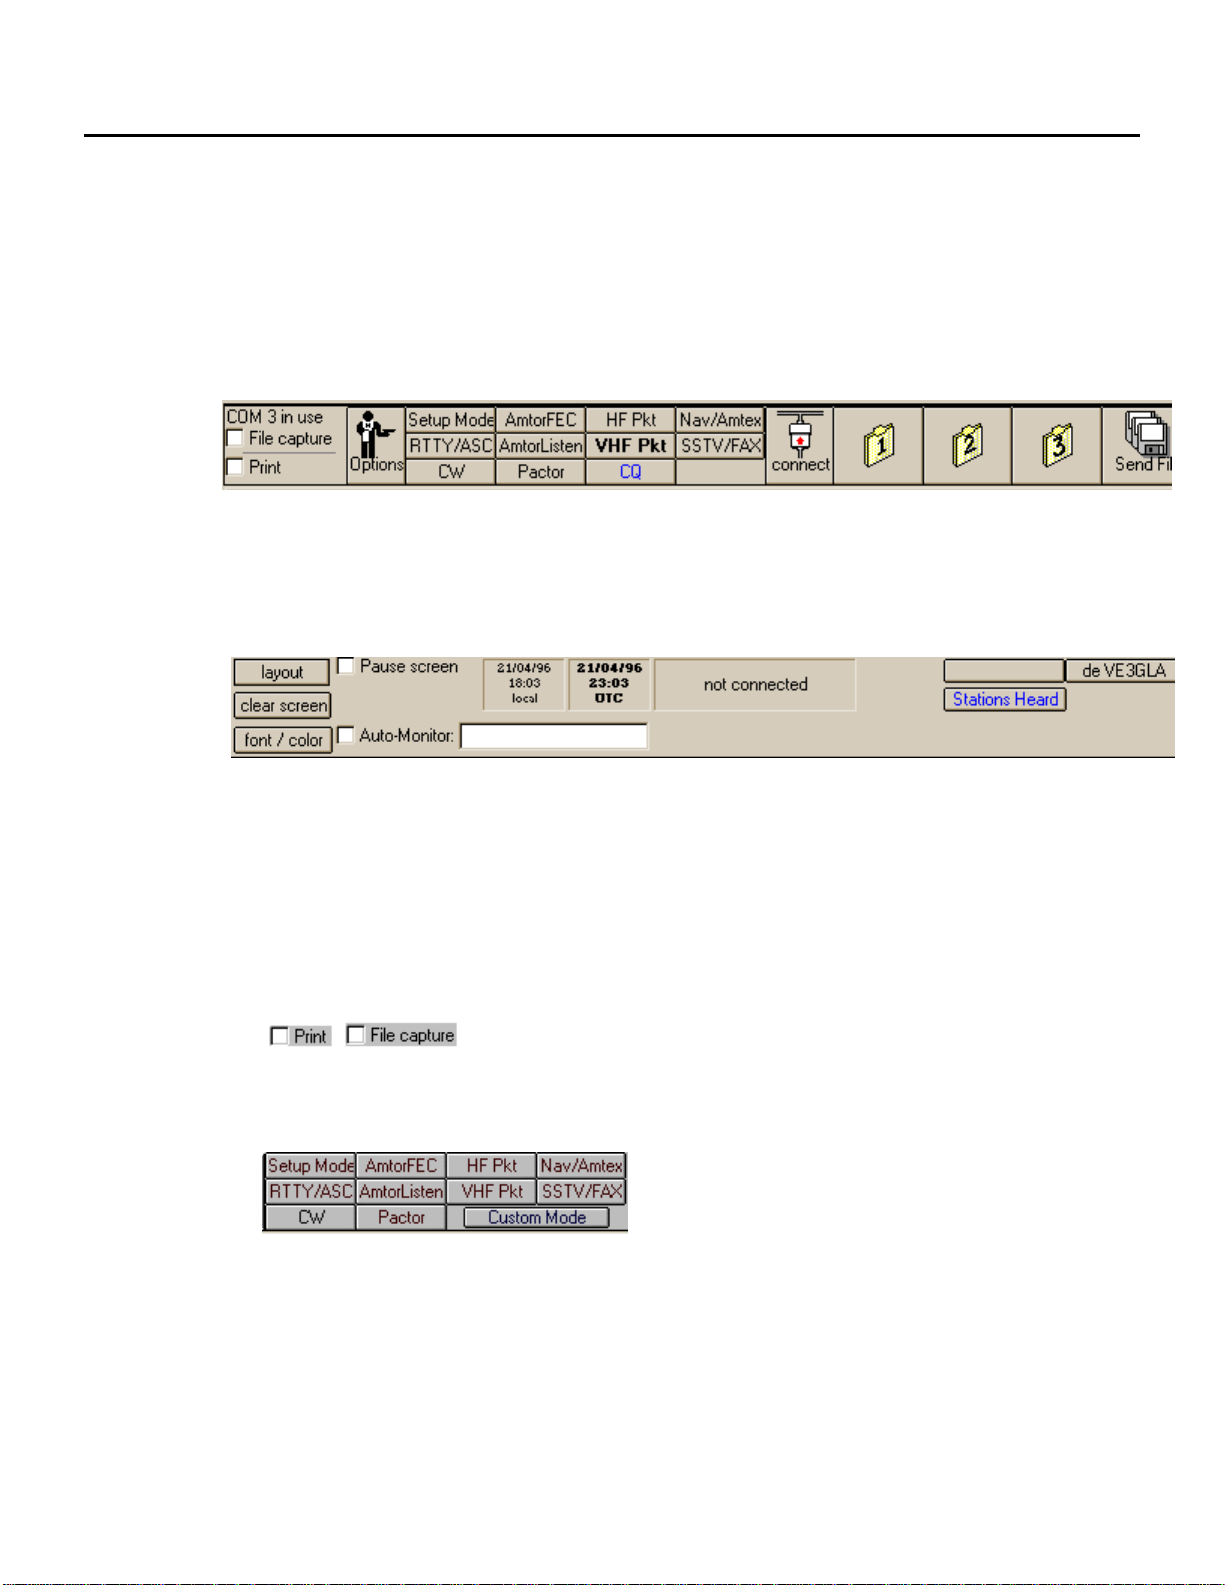
3.6.2 Upper Tool Bar Description
The functions of the Upper Tool Bar are described below:
• "Data Capture" Check Boxes:
These check boxes control capturing received data to the printer and/or the
disk. Clicking on the appropriate box causes an 'x' to be displayed. That means the function is
enabled. Clicking again on the box causes the function to be disabled, and the 'x' will disappear.
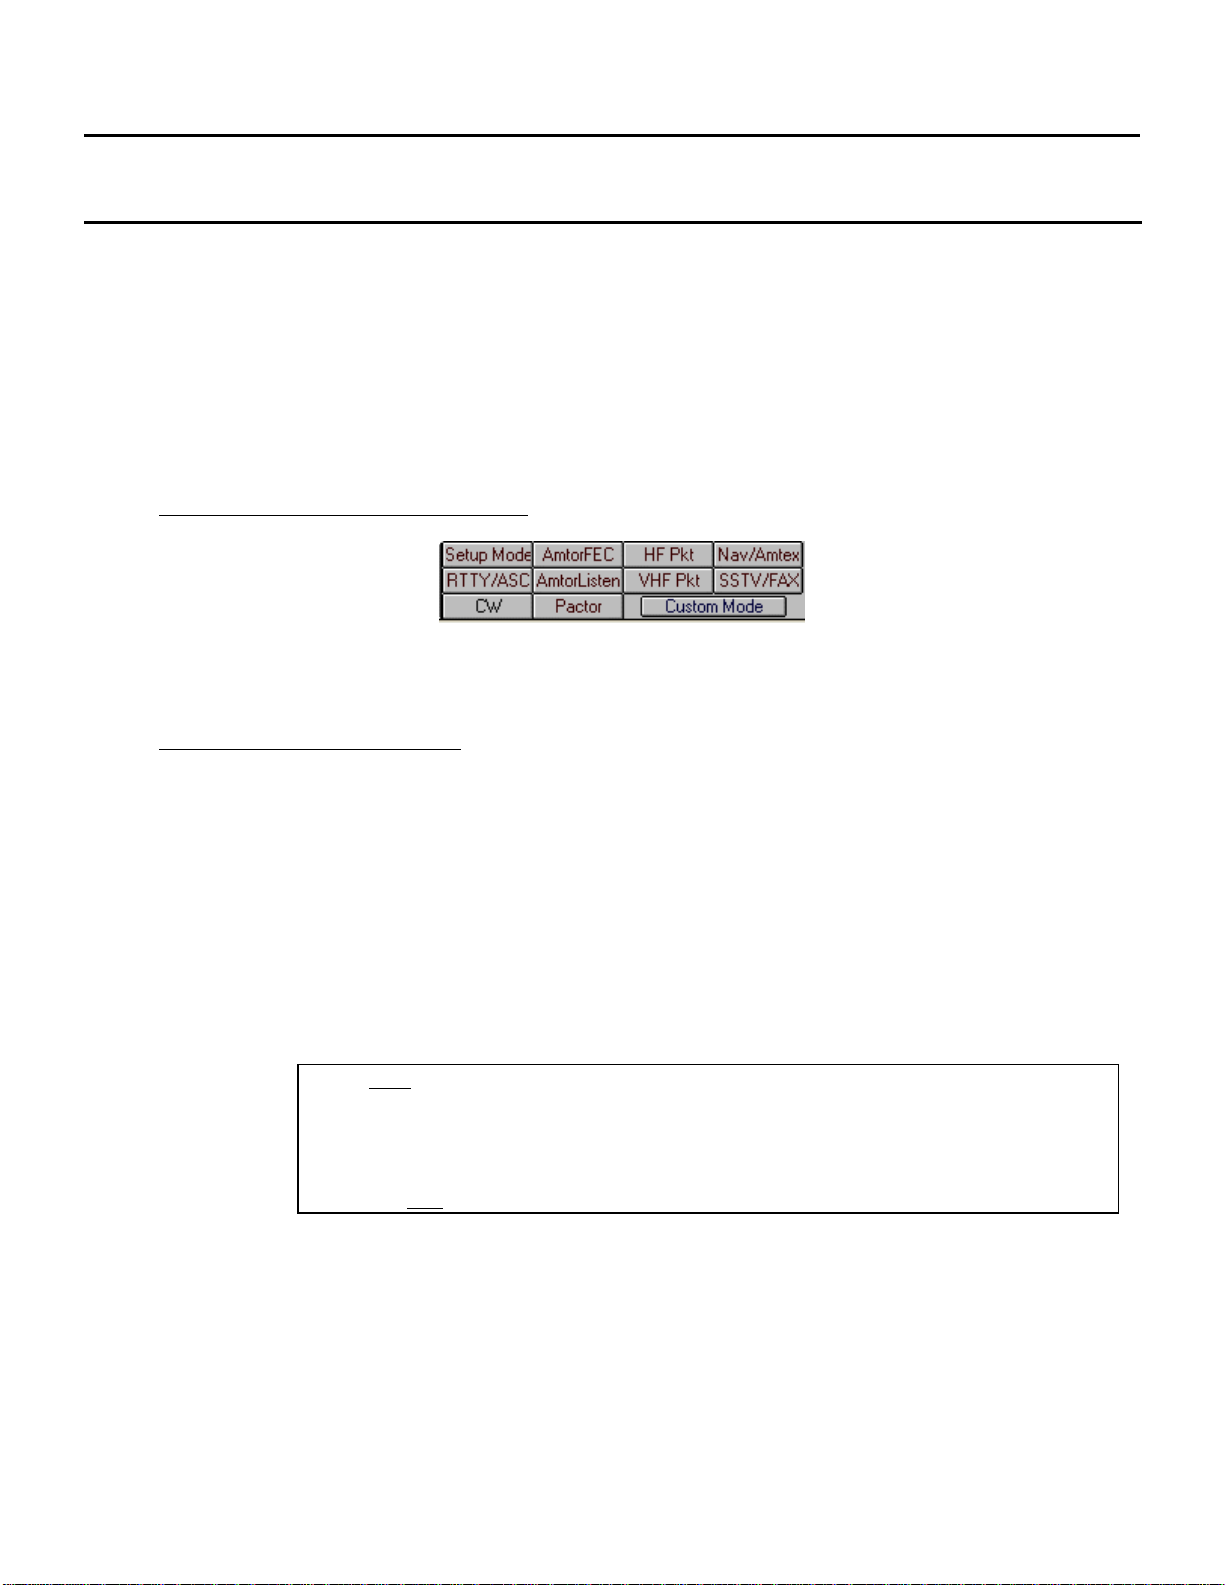
• Operating Mode Buttons:
The operating mode buttons are used to select the communication mode, and to enter the "setup"
mode.
6
Page 10

Running MultiCom for Windows
The mode you are currently using is shown in two ways:
• by the text in the main Title Bar at the top of the MultiCom for Windows window, and,
• by the "mode" buttons in the tool bar at the top of the MultiCom for Windows window.
You can easily change from one mode to another by clicking the mode buttons or by using
menus. See Section 4.
• Connect / Disconnect Buttons
These are only displayed in Pactor, Packet and Amtor modes.
When you are not connected (linked) to another station, the "Connect" button is displayed. Click
on this button to try to connect to another station. A menu will appear to prompt you for more
information.
When you a connected, or attempting to connect, to another station, the "Disconnect" button will
replace the Connect button on the toolbar. Click on the Disconnect button to disconnect ("drop")
the connection or to abandon an attempted connection.
• Text "Brag file" Buttons
The 3 Text buttons are used to enter and send short files of text (up to 1500
characters) that you create using MultiCom for Windows built-in editor. Each mode
(except Navtex and SSTV/Fax) has a different set of buttons. Graphics characters
are supported in Packet and Pactor modes.
• Send File Button
The Send File button is used send text from a file that you created with Notepad
or some similar editor Each mode (except Navtex and SSTV/Fax) has a text
button. You can have as many ASCII files as you want. You would use this button
for longer text files than you would with the Text “Brag” files.
Note that ASCII text with this button are sent just as if you had entered it from the
keyboard. No ‘file transfer protocol’ is used.
3.6.3 Lower Tool Bar Description
The functions of the Lower Tool Bar are described below.
• "Layout" button
Click on this button to re-arrange the Keyboard Entry and Data from TNC
windows. Each click will change to a different format: either overlapped, vertical tiled, or horizontal
tiled (the default, startup, format). Click until you find the format that you prefer.
• "Clear" button
Click on this button to clear the screen. MultiCom for Windows will ask you to
confirm this just to make sure you don't clear the screen by accident.
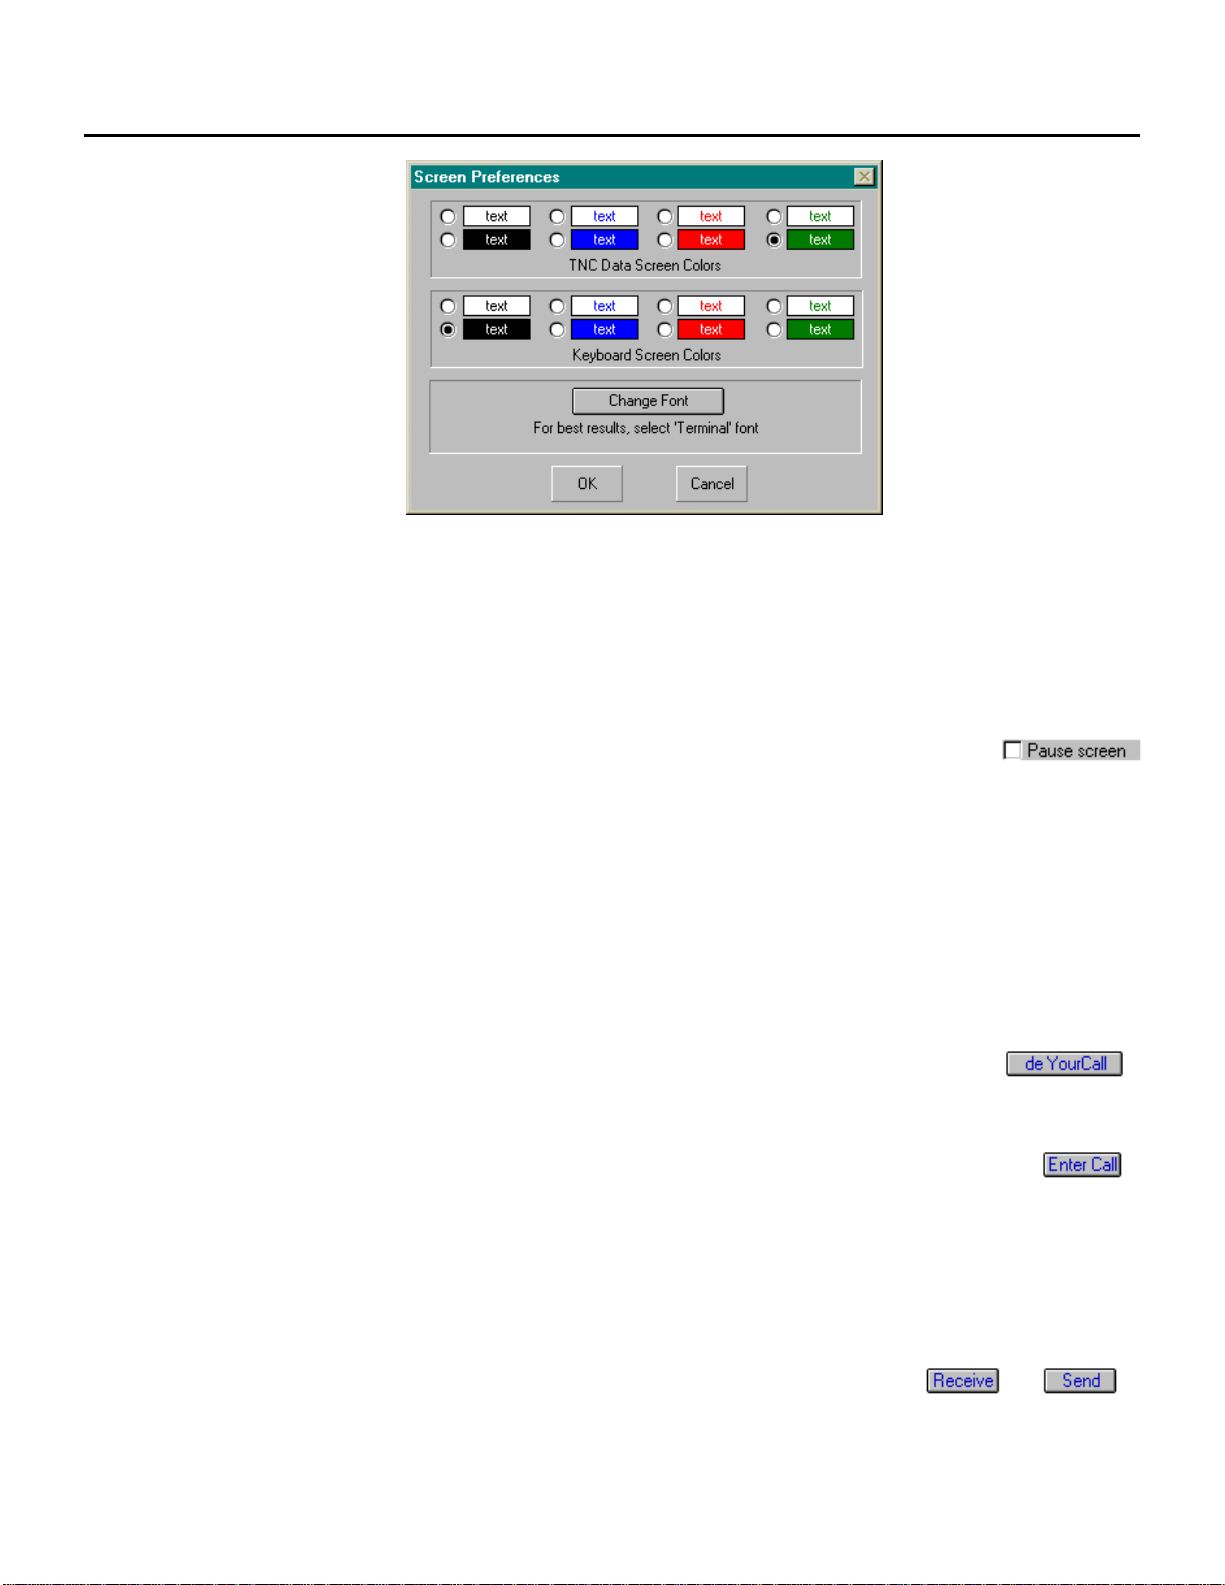
• "Font/Color" button
You can choose the colors and font for the Keyboard Input and Data from TNC
subwindows by clicking the "font/color" button (alternately, you can use the "Screen" menu,
and click on "color". MultiCom for Windows will show the following form:
7
Page 11
Running MultiCom for Windows
Simply click your color choice for each window.
Click on “Change Font” to change the font. A menu will appear to let you choose a new font.
Note: for best performance and to display ANSI graphics characters, you should choose the
“Terminal” font.
Select OK to enable your choices, or Cancel if you do not wish to use your choices.
• "Pause Screen" check box
Click on this box to temporarily stop new data from being displayed in the
Data From TNC window. An 'x' will appear in the box when the screen is paused. Click again to
display all characters received while the screen was paused and all new characters (the 'x' will
disappear). Use this function when you want to scroll through the Data From TNC window and
don't want the display to bounce around with incoming data.
Note: MultiCom for Windows will only store approximately the last 5000 characters received from
the 1278 when the Pause Screen button is checked.
• Time Display
Local and UTC (GMT) times and dates are displayed.
• Call Sign Transmission
The "de (callsign)" button will send "de " followed by your callsign when
clicked.
The "Enter Call" button will prompt you to enter a call in the button
immediately to it’s right. You don't normally need to do this in Pactor or Packet
modes, since MultiCom for Windows can automatically determine the call of the station
you are connecting or connected to.
The callsign button will send the callsign that is displayed on it. If no callsign is displayed,
nothing will be sent. If necessary, use the "Enter Call" button to enter and display a call
sign.
• Send / Receive Control
Transmit, Receive, "Over" buttons
In some modes, a buttons will appear to alternated between transmitting and receiving
8
Page 12
Running MultiCom for Windows
In Pactor, an "Over" button will appear instead which allows you to switch from sending to
receiving. It will also enable you to "seize" the link from the other station if you wish.
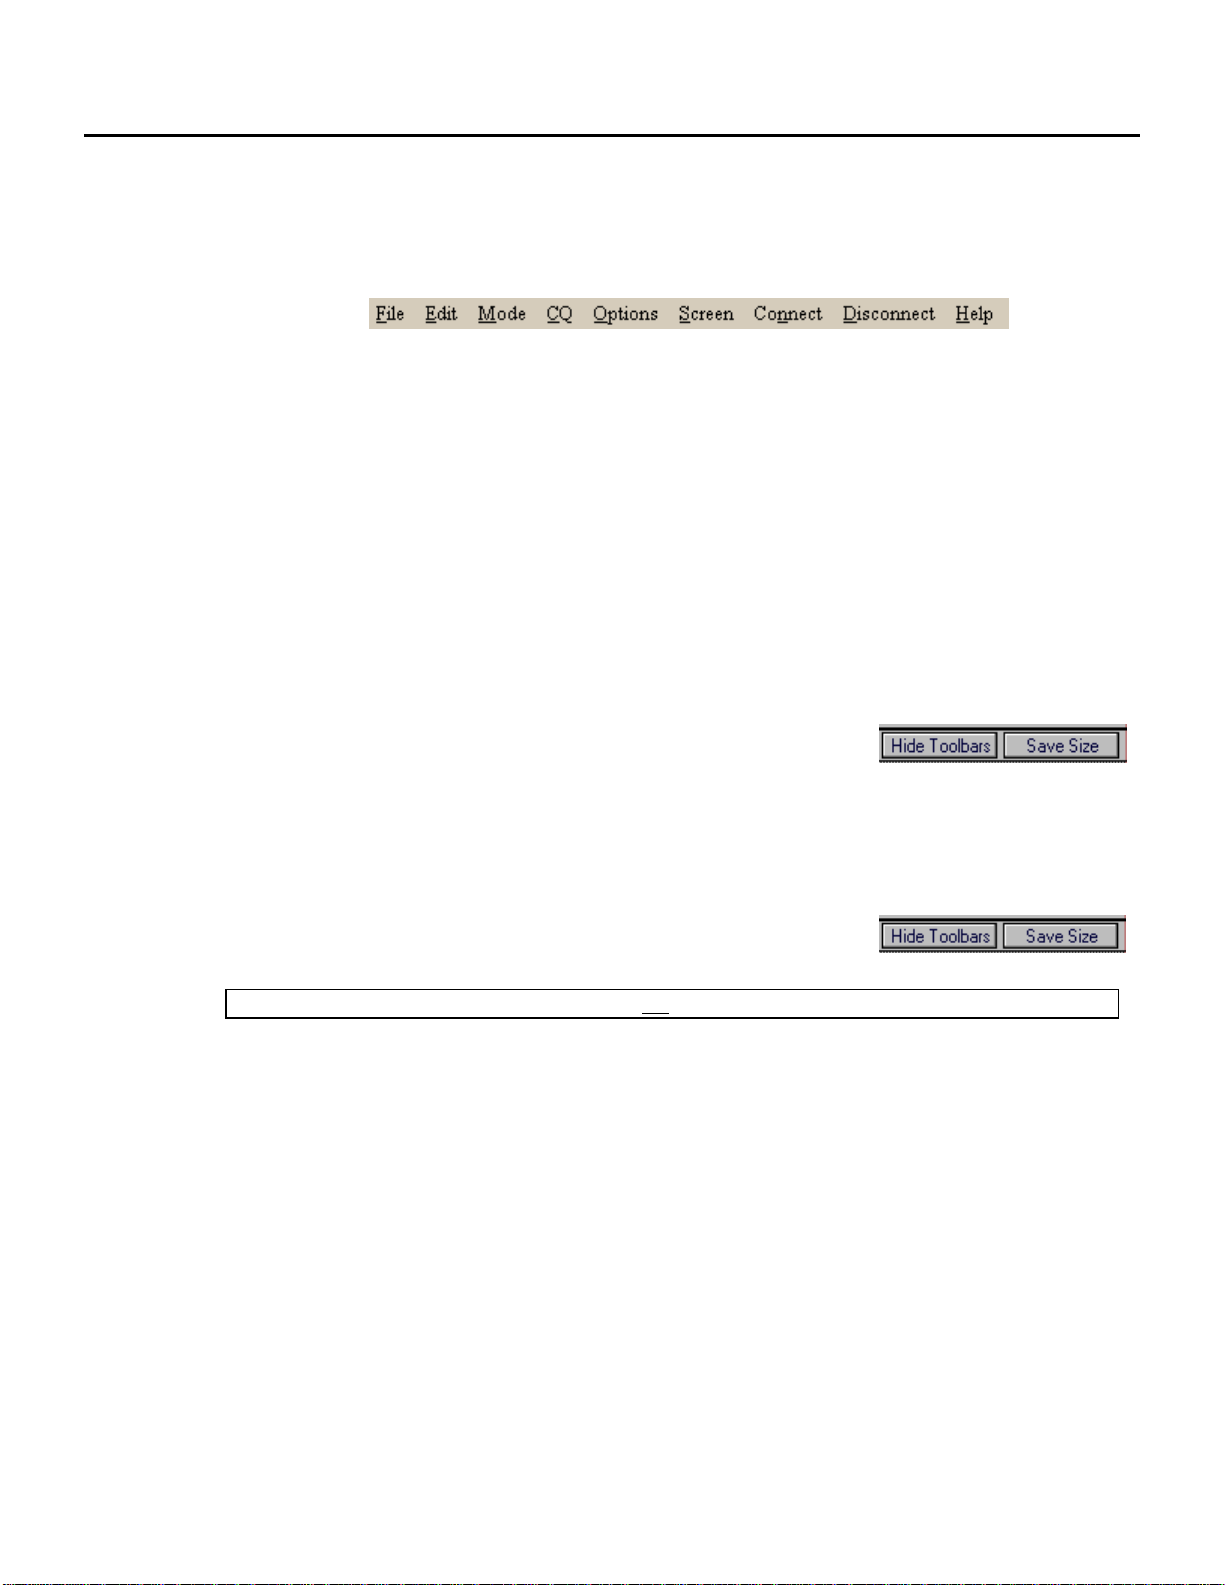
3.6.4 Menu Bar Description
The menu bar is at the top of the MultiCom for Windows window. It allows you to perform almost all
MultiCom for Windows functions with keystrokes instead of mouse clicks. Experienced users may
find this a faster way to control MultiCom for Windows. To select a Menu bar item, either:
- click on it with the mouse,
or:
- hit the "ALT" key
- enter the underlined letter of the desired menu. The desired menu will be displayed.
You can choose items from the menu by clicking on them or by using the ALT key / underlined
character method described above.
3.6.5 Hiding/Showing Toolbars
The toolbars of MultiCom for Windows help make it easy to use, but they take up screen space. You
can hide the toolbars to make more screen space available to you.
Simply click the Hide Toolbars button to make them disappear (the
button will change to Show Toolbars). Almost all commands are
available with menu commands so you can have full control over MultiCom for Windows even with the
toolbars hidden. If you want the toolbars to reappear, simply click on the Show Toolbars button.
3.6.6 Saving Screen Size
Once you have adjusted the screen size to the way you like it, and have decided if you prefer the
toolbars to be visible or hidden, you can tell MultiCom for Windows
to appear the same way every time it is restarted. To do this, simply
click the Save Size button.
Note: the keyboard and TNC windows layout is not saved when you click the Save Size button.
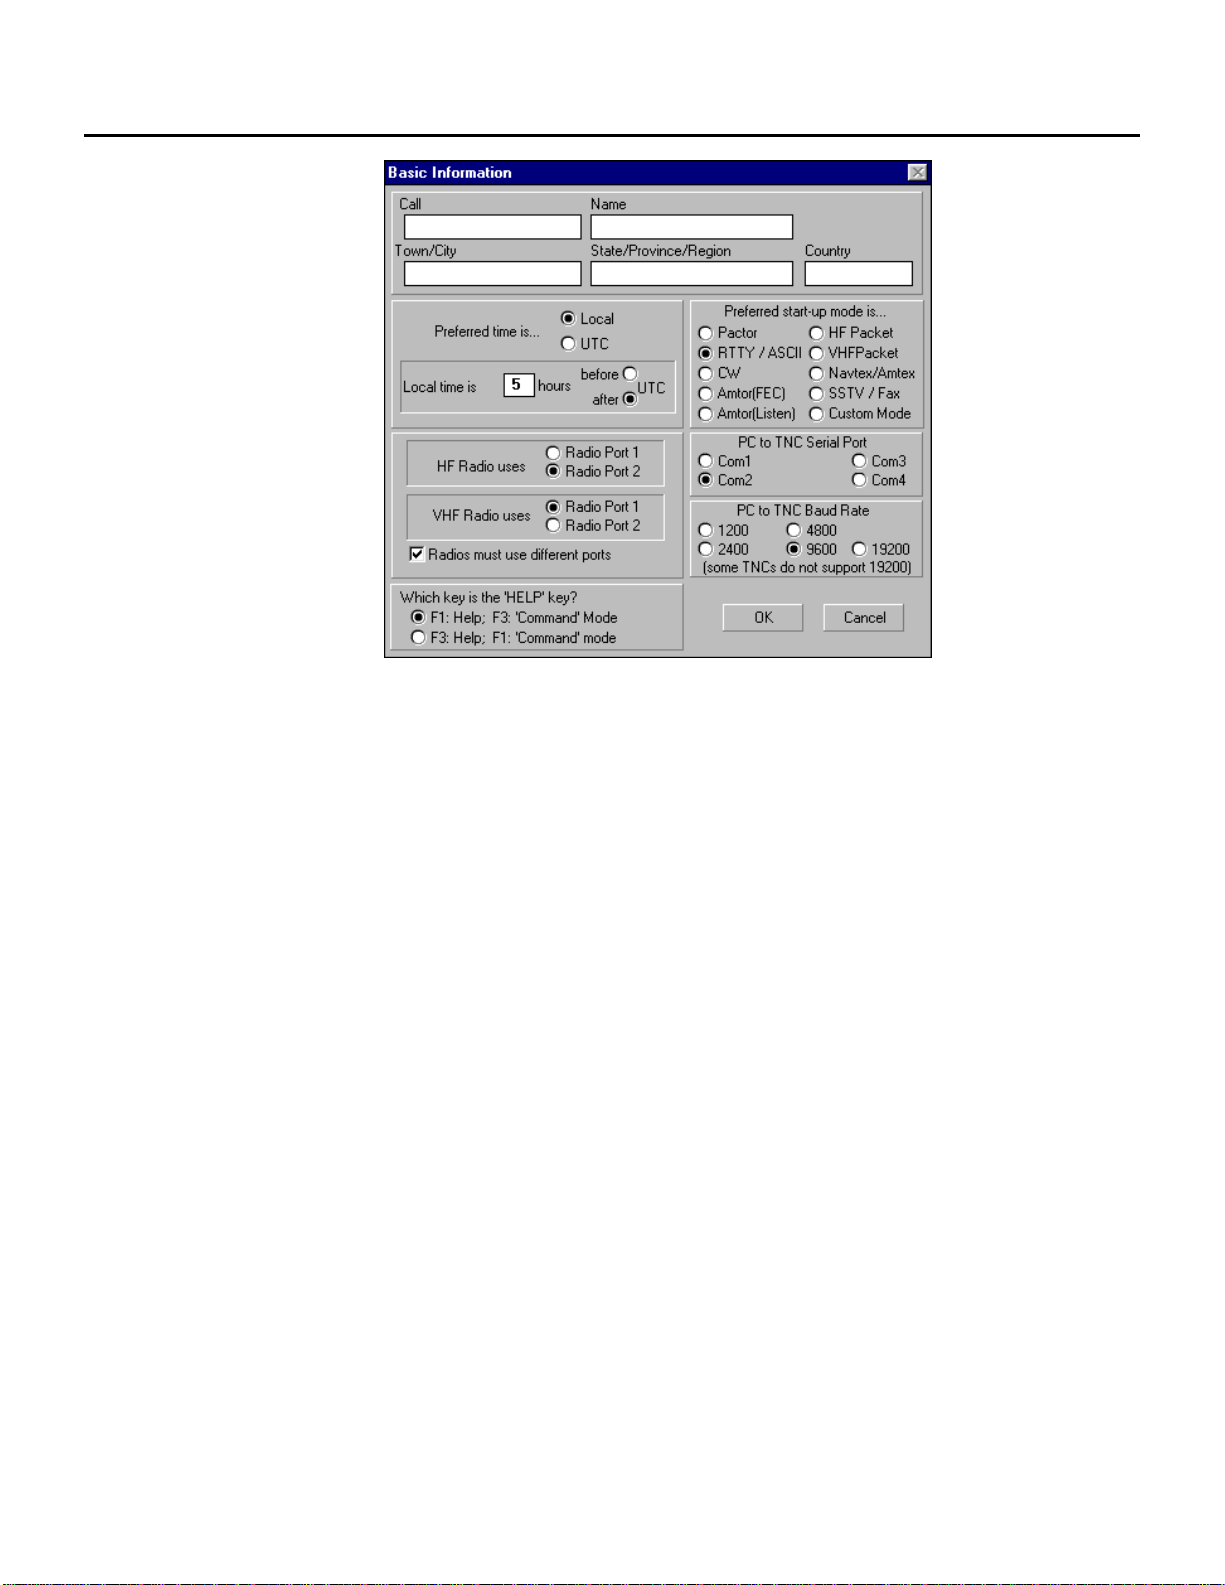
3.7 Setting Up MultiCom for Windows: Basic Information
MultiCom for Windows needs some basic information for all modes of operation.
Make sure you fill out the Basic Information form before using MultiCom for Windows. You can
change the basic information any time you want later.
You select the Basic Information Form by selecting the "Setup" mode (either by clicking the "Setup"
button or by selecting it from the Mode menu. This will cause the Basic Information form to be
displayed. The Basic Information form is shown below. Each entry is described later in this section.
9
Page 13
Running MultiCom for Windows
• Call Sign:
This field is mandatory.
Make sure you include your portable designator, if applicable (e.g. VE3GLA/4).
Do NOT include a packet "SSID" (e.g. don't use VE3GLA -15). That can be added with the packet
forms.
If you are not a ham, enter “SWL”, or something similar.
• Name, City, State/Province/Region, Country:
These are optional fields. You don't have to enter them.
• Preferred time:
MultiCom for Windows displays the time in both Local and UTC (GMT) modes. Click "Local" if
you want local time to be shown in bold characters. Click" UTC" if you want UTC to be bold. In
order to display UTC time correctly, MultiCom for Windows needs to know how many hours
your local time differs from UTC. Enter the data in the box. For example, USA Eastern Standard
Time is 5 hours after UTC.
• Preferred Startup Mode:
You can specify which mode you will automatically enter after starting MultiCom for Windows.
Simply click on the mode that you prefer. After MultiCom for Windows has started, you can
easily change to other modes.
•
• Radio Ports:
Your HF and VHF radios are normally (but not always) connected to a different port at the back of
your 1278.
Click on the port number for your HF and VHF radio. If you only have one radio, just click on the
port number you are using for that radio. Check “radios must use different ports” if you want to
ensure that the HF and VHF radios use different ports.
10
Page 14

Running MultiCom for Windows
• Computer Ports
Your 1278 is connected to your computer via a serial cable. You must specify what serial
("COM") port that you are using in your computer. COM1 and COM2 are used most often.
• PC to TNC Baud Rate
Your 1278 must communicate at the correct speed with your PC. Select the baud rate that your
1278 is set for. You will have to click “OK”, exit MultiCom for Windows, then restart MultiCom
for Windows to ensure reliable communications between MultiCom for Windows and your
1278.
• Which key is the “HELP” key
Most Windows applications use “F1” to go to the Help menu. However, DOS MultiCom users may
prefer to use “F3” for help. Select your preference. See section 4 for more details about function
keys.
• Use/Cancel buttons
Click on Use if you wish the form settings to be used.
Click on Cancel if you want to use the previous settings to be used (i.e. cancel the changes you
have made on the form).
3.8 Function Keys: F1, F2 and F3
Three keys on your keyboard are especially important: F1, F2 and F3. Through single keystrokes,
you can:
• access on-line “Help”
• go to “converse mode” (in packet modes only)
• go to “command mode” for your TNC
F1 is normally the ‘help’ key. If you press F1, you will ent er the on-line help system, Use this function
to look up techniques, tips, or answers to your questions.
F2 is the “ converse” key. If you are in VHF or HF packet mode, just hit F2 and you will be in converse
mode. Everything you type will be transmitted.
F3 is normally the “command” key. Hit F3 and you will enter the TNC’s command mode. This is useful
in packet to exit converse mode. It is also useful if your TNC gets into the wrong state for some
reason.
MultiCom for Windows lets you switch the meanings of F1 and F3. This allows F1 to have the same
function as the DOS version of MultiCom. You can switch meanings by using the Options menu in
Setup mode (see chapter 3).
The following table summarizes the three function keys uses:
Key Purpose (normal) Purpose (‘switched’)
F1 access “Help” enter command mode
F2 enter converse mode enter converse mode
F3 enter command mode access “Help”
11
Page 15
Selecting Modes of Operation
4. Selecting Modes of Operation
The mode you are currently using is shown in two ways:
• by the text in the main Title Bar at the top of the MultiCom for Windows window,
and,
• by the "mode" buttons in the tool bar at the top of the MultiCom for Windows window.
The caption for the current mode is shown in light grey. You can easily change from one mode to another by
pressing the mode buttons or from menus.
Selecting modes: Mode Button method
Press the button for the desired new mode from the tool bar at the top of the MultiCom for Windows
window.
Selecting modes: Menu method
Either:
• press: ALT-M
• press the letter for you desired mode, as shown in the mode menu
(e.g. "R" for RTTY, "V" for vhf packet, etc.).
Or:
• click the "Mode" menu item from the menu bar at the top of the window
• click the desired mode
Please don’t switch modes by directly entering 1278 mode change commands on the
keyboard. If you do, MultiCom for Windows will think the 1278 is in a different mode than
the 1278 actually is in. In that case, MultiCom for Windows will probably display the wrong
buttons and not behave the way you want.
You should only switch modes using the Mode Button method or the Menu method.
12
Page 16

5. Operating
Operating: Pactor
5.1 Pactor Operation
5.1.1 Pactor Options
Enter data in the following form to control Pactor operation in MultiCom for Windows.
This form may be accessed while in Pactor mode either by:
-clicking the Options button at the top of the MultiCom for Windows window, or,
-selecting Options from the menu at the top of the MultiCom for Windows window.
• FEC speed
• Reliability
• Speed
• Memory ARQ
NOTE: You can only transmit on
frequencies and modes permitted
by your license class. Be sure to
observe all rules and regulations!
-100 baud is slower, but may have fewer errors.
-200 baud is faster and is most useful under good signal conditions.
-choose "normal" under average to good conditions
-choose "reliable" under poorer conditions. Transmission speed will be slower,
but the other station will see fewer errors.
-choose "very reliable" under very poor conditions. Transmission speed
will be much slower, but you will have a better chance of being received with fewer errors.
Click on Automatic 100/200 normally.
Click on 100 only when conditions are poor. This will reduce time wasted switching to 200
baud.
Memory ARQ is used by Pactor to combat errors induced by QRM and QRN by combining
error packets to see if a valid one can be created. The parameters in this part of the form control
how this is accomplished.
13
Page 17

Operating: Pactor
• "Go to 200 baud..."
This number determines how many error-free 100 baud packets need to be received before
going to 200 baud. If too small a number is entered, you may waste time going to 200 baud
under poor conditions that may not support 200 baud. A number of 6 is suggested as a good
starting value.
• "Go to 100 baud.."
This number determines how many bad 200 baud packets need to be received before going to
100 baud. If too small a number is entered, you may waste time going to 100 baud when
occasional brief QRM or QRN occurs. If too large a number is used, you may spend too long a
200 baud when conditions may not support 200 baud A number of 6 is suggested as a good
starting value.
• "Use up to..."
Pactor can combine a series of error packets to see if a good packet can be constructed. This
can be very effective in getting data through in poor conditions. The number you enter here
determines the maximum number of sequential error packets are used in this way. Too low a
number will mean you don't get full benefit of this feature. Too high a number can also be bad
under certain conditions. A starting value of 10 is suggested.
• Connects
Select Normal in almost all operating situations. Select Long Path only when communicating
with very distant (over 10,000 km) stations, and only when needed.
• Use / Cancel
Click on Use to enable the changes you have made. Click on Cancel to ignore the change you
have made.
5.1.2 Pactor QSO's
There are two different Pactor methods for QSO's. They are defined below, and are discussed in more
detail in separate topics:
• FEC mode:
FEC stands for Forward Error Correcting mode. Despite it's name, it is more prone to errors
than ARQ mode. FEC is useful for short contacts, and for calling CQ in Pactor mode.
Pactor FEC mode has different degrees of error correction available. With a high
degree of correction, transmissions are slower, but the transmissions will have
fewer errors. You can specify the amount of correction you want by clicking on the
"Options" button when you are in Pactor mode.
• ARQ mode:
ARQ stands for Automatic Retry reQuest mode. In this mode, the 1278 checks each group of
characters received, and if an error is detected, the 1278 automatically asks the characters to
be re-sent to you until they are received correctly. Only then are the characters displayed on
your screen. This mode will eliminate virtually 100% of errors.
Most Pactor QSO's use the ARQ mode.
14
Page 18

Operating: Pactor
5.1.2.1 Pactor FEC Mode Operation
You can listen to, and operate in both ARQ or FEC while in Pactor mode (this is different from the
1278's Amtor mode, which require a separate 'Listen' mode for copying ARQ transmissions).
The actual speed of transmission is set in the Pactor Options form.
To transmit in FEC mode, either click on the "send" button at the lower right of the
screen, or type CONTROL-T. Your transceiver will transmit, and the "send" button will
change into a "receive " button . Everything that you type will be transmitted. Characters will be
echoed on the Data from TNC screen at the same speed as they are actually transmitted on the air.
When you are done transmitting, either click on the "receive " button or type
CONTROL-R. The 1278 will finish sending any data that has yet to be sent, then it will
switch to receive, and the" receive " button will change to "transmit".
5.1.2.2 Pactor ARQ Mode Operation
You can listen to, and operate in both ARQ or FEC while in Pactor mode (this is different from the
1278's Amtor mode, which require a separate 'Listen' mode for copying ARQ transmissions).
Another station can call you, and the 1278 will automatically establish the link ('connection').
MultiCom for Windows will display the other station's call in a 'button' at the bottom of the
screen.
Alternatively, you can call another station to try to establish a link ('connection').To do
this, simply click on the connect button near the top of the screen (or select
'Connect' from the menu bar). A form will appear, and you merely enter the call sign of
the station that you want to connect to. The 1278 will try to establish the connection.
The message "Connection Attempted" will be shown at the bottom of the window. If
successful, the message "Connected" will be shown at the bottom of the window. If you
are not successful, simply click on the 'Disconnect' button at the top of the screen (it
replaced the 'Connect' button).
Only one station can transmit at a time. You can 'type ahead' while the other station is
sending to you, and what you have entered will be transmitted as soon as it is your turn to send.
After you have finished your transmission, you turn it over to the other station by doing either:
-clicking on the "over" button at the lower right of the window,
or
-entering "CONTROL-R" from the keyboard.
When you have finished your QSO, either station can "break", or "drop" the link. If you wish to
break the link, simply click on the "Disconnect" button at the top of the window, or select the
"Disconnect" menu item.
15
Page 19

5.2 Amtor Operation
5.2.1 Amtor Options
Enter data in the following form to control Amtor operation in MultiCom for Windows.
Operating: Amtor
This form may be accessed while in Amtor FEC or Listen mode either by:
• clicking the Options button at the top of the MultiCom for Windows window,
or,
• selecting Options from the menu at the top of the MultiCom for Windows
window.
The form allows you to set the following features:
• Tones
Usually you will use Normal tones. Occasionally the station you wish to contact will use Inverted
tones, and you will need to select "Inverted".
• SelCal
Normally you will use the standard SelCal that MultiCom for Windows automatically computes
for you from your callsign.
Occasionally you may want to use a different SelCal. If so, enter a 4 letter (no numbers or other
characters) SelCal in the Optional box, and click on the button beside it.
• TX Delay
TX Delay determines how long the 1278 waits before starting to transmit. The delay primarily
depends on how fast your rig changes from receive to transmit. A value of 30 is usually a good
starting point. Experiment with other values if you are having difficulty with Amtor QSO's.
• Answer-back string
You can leave this blank. However, and Answer-back string is often useful when contacting
APLink or similar bulletin board stations in Amtor. Some of those stations send a special
command to your 1278 (you are not normally aware of this occurring) which causes your 1278 to
automatically transmit the Answer-back string. The proper Answerback string can simplify
logging on to the bulletin board. For example, a string such as: QRA VE3GLA would eliminate
the need for VE3GLA to go through the callsign dialog on most APLink bbs's.
16
Page 20

Operating: Amtor
• Use / Cancel / Help
Click on Use to enable the changes you have made.
Click on Cancel to ignore the change you have made.
5.2.2 Amtor QSO's
There are two different AMTOR methods for QSO's. They are defined below, and are discussed in
more detail in separate topics:
FEC mode
FEC stands for Forward Error Correcting mode. Despite it's name, it is more prone to errors than
ARQ mode. FEC is useful for short contacts, and for calling CQ in AMTOR mode.
You cannot listen to Amtor ARQ transmissions while in FEC mode in the 1278.
ARQ mode
ARQ stands for Automatic Retry reQuest mode. In this mode, the MFJ1278 checks each group of
characters received, and if an error is detected, the MFJ1278 automatically asks the characters
to be re-sent to you until they are received correctly. Only then are the characters displayed on
your screen. This mode will detect most but not 100% of errors.
Most AMTOR QSO's use the ARQ mode.
The 1278 has a "listen" mode that allows you to monitor other station's amtor ARQ QSO's. While
you are monitoring other stations QSO's, you will often see some errors. Error correction only
works in ARQ mode when you are linked or "connected" to another station.
Amtor FEC Mode Operation
Make sure you are in Amtor FEC mode. If you are not, then either:
• click the Amtor FEC button on the toolbar
or
• select the Mode menu, and,
• select Amtor FEC from the mode menu
To send, either:
• click the "send" button at the lower right of the screen. It will change to
"receive "
or
• enter "Control-t" from the keyboard
The green "PTT" light on the 1278 will turn on, and your transceiver should start transmitting.
Simply type the whatever you wish to send. The white screen will echo the characters as they are
sent, perhaps at a different speed than you key them in.
To receive, either:
• click the "receive " button at the lower right of the screen. It will change to "send"
or
• enter "Control-r" from the keyboard.
17
Page 21

The green "PTT" light on the 1278 will turn off, and your transceiver should stop transmitting
AFTER all data has been sent (if you are a fast typist, this may take a moment or two to occur).
• Amtor ARQ Mode Operation
Make sure you are in either Amtor Listen mode or Amtor FEC mode. If you are not, either select
one of the modes from the toolbar or from the Mode menu.
To "link" or "connect" to another Amtor station, either:
• click the "Connect" button on the toolbar
or
• select "Connect" from the menu bar.
The "Connect" button will change to a "Disconnect" button, and the "Connect" menu item will be
disabled (turns gray).
The following form will be displayed:
Operating: Amtor
Enter the call sign of the station you wish to link to. If the station uses a standard SelCal (almost
all stations do), MultiCom for Windows will compute the SelCal for you. Simply press Enter, or
click "OK". If the station uses a different SelCal, type it in the Other SelCal box and click the
Other SelCal button. Then click "OK".
The 1278 will then attempt to establish the link. Your transmitter should begin sending
and receiving rapidly to see if the other station responds. If it succeeds, you may simply
begin typing. If you cannot link to the other station, click the "Disconnect" button on
the toolbar or select the "Disconnect" menu item.
When you wish to receive, simply click the "OVER" button at the lower right of the screen, or type
"Control-r".
When you wish to end the QSO, simply click the "Disconnect" button on the toolbar, or select
the Disconnect menu.
18
Page 22

Operating: Packet
5.3 VHF and HF Packet Operation
5.3.1 VHF and HF Packet Options
There are separate menus for making your HF and VHF packet choices. The format of the forms is
identical. The VHF packet form is shown below. The description of the choices that follows applies to
both the HF and VHF packet forms.
Click on the “Options” button in either VHF or HF packet mode to display this form ( it will look
slightly different in HF packet):
• SSID
Sometimes you may wish to add a SSID (e.g. '-7') after your call. If you wish, select a SSID
number (0 to 15). Otherwise, select None.
• TX Delay
To enter the delay required for your rig to switch from receive to transmit, simply click on the
appropriate value.
• Connect Text
Click 'Yes' and enter a message if you want your TNC to send a message automatically when
someone connects with you.
• Beacon Text
Click "Yes" if you want to send a beacon, and enter the mes sage to be sent. Click on the interval
between beacon messages. PLEASE don't send beacons unless you have a really good reason
to!
• Allow Digipeating
Click "Yes" if you want to allow others to digipeat through your station. PLEASE don't allow
digipeating on HF packet! It is inefficient on that mode, and only contributes to extra QRM.
19
Page 23

Operating: Packet
5.3.2 VHF and HF Packet QSO’s
• General
VHF and HF Packet operation with MultiCom for Windows is essentially identical. First you
must have set up your 'choices' for the packet mode (VHF or HF) that you are using. You only
need to do that once, but you can change your choices at any time if you want.
• Establishing and Breaking Connections
(Only use this procedure to make connections directly to a station or a node. Do Not use this
method to connect from one node to another. Use the keyboard to enter the commands that the
node needs)
Establishing a Connection
Either (your choice):
-click on the Connect button on the upper tool bar,
or..
-select Connect from the Menu bar.
A form will appear, asking for the call of the station you wish to connect to.
Enter the call, click ‘OK (call this station)’ and MultiCom for Windows will attempt to
make the connection. If you are unsuccessful in making a connection, follow the "Breaking
a Connection" procedure.
Breaking a Connection
Either (your choice):
-click on the Disconnect button on the upper tool bar,
or..
-select Disconnect from the Menu bar.
• Auto Router (VHF Packet Only)
MultiCom for Windows 'Auto Router' capability makes it very easy to make VHF packet
connections through nodes to other packet stations and BBS's. With Auto Router, you can tell
MultiCom for Windows which nodes you need to use. MultiCom for Windows will remember
the paths, and from then on, all you need to do is 'click' on the desired path.
Up to 4 different routes, each with up to 4 'steps' can be specified.
20
Page 24

Operating: Packet
To use this feature, first select "Connect" from the main tool bar. The following window will appear:
Click on the "Use Auto Router...." button to use the Auto Router feature. A form similar to the
one below will appear:
Click on the "path" button for the path you want to use. In the form above, path 1 is selected. You
can choose any of 4 paths.
You can enter a description of the path you are setting up, to help you remember what it is for. In
this example, this is the path from the author's QTH to a local BBS.
You can enter up to 4 connections to reach your final destination. In this example, 2 connections
are used to reach the BBS. The first connection is to VE3KSR. Once connected to VE3KSR, the
second connection is to BBSRWP (the final destination). Enter the connections that you want.
Because making connections through nodes can be time consuming, you should specify the
maximum time you will allow for each connection in the box in the form. If a connection does not
occur in time, the connection process will be stopped.
21
Page 25

Operating: Packet
When you have finished specifying the connections, click on "Connect". MultiCom for
Windows will begin making the connections. MultiCom for Windows will also remember what
you entered, so you won't have to re-enter the data next time. If you don't want to make the
connection, click on "Cancel".
• BBS and DX PacketCluster Menus
MultiCom for Windows provides two menus that you can optionally display to help you use
basic BBS and PacketCluster functions.
To enable a menu, simply click on the appropriate button in the lower toolbar.
To turn a menu off, click on the button again, and the menu will disappear. They will also
disappear if you click the “disconnect” button at the top of the screen, or if you change modes.
These menus are useful primarily to new or infrequent users and will reduce the need to memorize
BBS commands. Because there is a wide variety of BBS's in use, these menus may not work in
all situations.
The menus are in the form of “tool bars” that appear near the top of the screen. You can select
either, or both, toolbars to appear.
The BBS Menu toolbar looks like this:
The DX Cluster Menu toolbar looks like this:
The BBS Menu toolbar buttons letters are black and the DX Cluster Menu toolbar buttons are
blue. That helps you to tell them apart when they are both displayed.
Remember, you can always use keyboard commands if you prefer when you are using BBS’s and
DX Cluster nodes.
• Packet Defaults
MultiCom for Windows sets the following defaults for VHF and HF Packet. In general, these
follow the suggestions in the 1278 manual. You can temporarily change these defaults by doing
the following:
-enter CONTROL-C from the keyboard
-enter the parameter you wish in the format described in the 1278 manual.
.
22
Page 26

Operating: Packet
VHF Packet Defaults: HF Packet Defaults:
NULLS 0
NEWMODE ON
CONMODE C
MONITOR ON
DELETE OFF
CR ON
PACTIME OFF
PACLEN 128
DWAIT 16
UNPROTO CQ
NUCR OFF
NULF OFF
AUTOLF ON
AX25L2V2 ON
RESPTIME 0
ACKPRIOR ON
DEADTIME 33
MAXFRAME 4
FRACK 3
ACKTIME 13
SLOTS 4
RETRY 0
DAYUSA ON
NULLS 0
MONITOR ON
DELETE OFF
CR ON
CPACTIME OFF
PACLEN 32
DWAIT 0
UNPROTO CQ
NUCR OFF
NULF OFF
AUTOLF ON
AX25L2V2 OFF
RESPTIME 0
ACKPRIOR ON
DEADTIME 33
MAXFRAME 1
FRACK 8
ACKTIME 13
SLOTS 4
CHECK 0
RETRY 0
DAYUSA ON
5.3.3 YAPP File Transfers
YAPP (“Yet Another Packet Protocol”) is a method of transferring “binary” files in packet. Using the
YAPP features of MultiCom for Windows, you can:
• send files to other stations
• receive files from other stations
To use YAPP file transfer, you must be connected to another station and that station must be able to
use the YAPP protocol.
5.3.3.1 Starting YAPP
When you are connected, you will see a Picture and File transfer button at the top toolbar (it is
only visible when you are in VHF Packet mode and are connected to another station). Click on
the Picture and File transfer button. You will see the following form appear:
23
Page 27

Operating: Packet
5.3.3.2 Sending YAPP Files
You need to tell the other station that you want to send a file before proceeding before entering
YAPP mode.
Next, enter YAPP mode.
Click on the “Upload (send) a FILE” button. MultiCom for Windows will ask you for the name
of the file to send. Select the desired file, and click “OK”.
The file transfer will begin. A progress bar will soon appear showing you how much has been sent
to the TNC. NOTE that the TNC may not have actually transmitted that much .... the channel
activity, signal strength and other factors can mean that less than this has actually been
transmitted. This is normal.
You will also see some information about the “state” of the transfer. This is normal, but not really
important.
Usually everything goes smoothly. However, occasionally either station can get out of sync. If you
think this has happened, simply cancel and try again.
5.3.3.3 Receiving YAPP Files
You need to tell the other station that you want to receive a file before proceeding before entering
YAPP mode.
Enter YAPP mode.
Normally, you will want to save the received file with the same name that it has at the other
station. However, if you want to save it with a different name, click “Use File Name Selected by
YOU”. You will be prompted to enter a file name.
Click OK when you are ready to receive. A progress bar will show you how much of the file has
been received.
You will also see some information about the “state” of the transfer. This is normal, but not really
important.
Usually everything goes smoothly. However, occasionally either station can get out of sync. If you
think this has happened, simply cancel and try again.
5.3.4 Packet Images for Windows
5.3.4.1 General
Packet Images is a new feature that allows you to send and receive images with other packet
stations that use MultiCom for Windows. You can create and modify images with many
different software packages.
MultiCom for Windows displays images line-by-line during reception. You do not have to wait for
a whole image to be received before it is displayed.
24
Page 28

Operating: Packet
You can even display pictures as they are being received from stations that do not use MultiCom
for Windows! (those stations cannot display images that you send to them while the image is
being received, however. Tell them to get MultiCom for Windows!)
5.3.4.2 Packet Images is not the same as Packet Pix in DOS MultiCom
MultiCom for Windows uses a different method of transmitting and receiving pictures than
MultiCom for DOS does.
MultiCom for Windows uses the standard uncompressed and compressed “BMP” image file
format. You can create such files with many software packages including the ones included with
Windows 3.1 and Windows 95. Because of this, you can even display images as they are being
received from stations that are not using MultiCom for Windows.
Unfortunately, MultiCom for DOS does not use standard “BMP” format. This means MultiCom for
DOS cannot receive images from MultiCom for Windows.
5.3.4.3 Image Format
Packet Images uses the Windows standard “BMP” files that many software packages create.
You can use those packages to create images that you want to send, or to view and modify ones
that you have received. Best performance occurs when using compressed BMP images
(sometimes called “RLE” images).
Packet Images cannot display images in other formats, such as TIFF, JPEG, PCX, etc.
5.3.4.4 Compressed and Non-compressed images
Images take a lot of bytes. The number of bytes depends on the amount of detail in the image
and the image’s overall height and width. By using “compression”, you can store many images
with fewer bytes. Compression can also significantly reduce the amount of time it takes to
transmit an image: this reduces the amount of traffic on a packet channel, and makes this mode
more enjoyable.
Some software packages can create compressed “BMP” files. The exact method of compression
is an industry standard. One shareware package that does this is “WINJPEG”. WINJPEG is
available from many on-line services or from companies that distribute shareware. MultiCom for
Windows can also compress images for you before you transmit them (see “How to Use Packet
Images” for more detail).
However, you are not forced to use compression. MultiCom for Windows automatically detects
whether or not an image is compressed, and displays the image correctly.
Note that you cannot use compression schemes such as “ZIP” or “ARJ” if you want to display
images while they are being received.
5.3.4.5 How to Use Packet Images
The instructions that follow assume that you are already connected to another station and that
station is also using MultiCom for Windows.
5.3.4.5.1 Sending Packet Images
Tell the other station that you are going to send him / her a packet image. The other station
must use MultiCom for Windows to display your image while it is being transmitted. That
station should follow the “Receiving Packet Image” steps described in the following section.
25
Page 29

Operating: Packet
Do the following steps:
1. Click on the Image / File transfer button on the toolbar (this button is only visible when you
have established a VHF packet connection with another station; it is invisible all other times).
The YAPP transfer form will appear on your screen.
2. Click the button to indicate that you are sending a picture. Do either step (a) or step (b) below
• Step (a): Send the Image
If you know the file name of the image file that you want to send, simply click the OK
button. MultiCom for Windows will ask you for the file name, and will then show you
the image. If that is the image you want to send, click “Yes”. If you accidentally
chose the wrong image, or you have changed your mind, click “No”. MultiCom will
then use the YAPP protocol to transmit your image to the other station.
• Step (b): View and Compress an Image before Sending
If you do not know the file name, or if you want to compress an image before sending
it, click the “View/Compress” button. MultiCom will ask you for the file name (it will
assume you want to look at “BMP” images, but you can ask it to look for other
types). It will display your chosen image. Click “Yes” if you want to compress the file,
or “No” if you do not.
If you compress a file, it will give the compressed file the same name as the original
“BMP” file, but will give it the extension “.RLE”. For example, if your image file was
called”
myimage.bmp
MultiCom for Windows will call the compressed file
myimage.rle
You will see the following progress bar as compression takes place:
After compression is complete, you can go to Step (a) to proceed with transmitting
the image.
The image may take a long time to send. The amount of time depends on the file size, the
quality of the link, and the amount of activity on the channel.
5.3.4.5.2 Receiving Packet Images
You need to know that the other station is sending you a Packet Image.
Click on the Image / File transfer button on the toolbar (it is only visible when you have
established a VHF packet connection with another station; it is invisible all other times).
26
Page 30

Operating: Packet
A form will appear. Click on the button to indicate that you are going to receive a picture.
Because images are really data files, MultiCom for Windows automatically stores a copy of
the image for you. Normally you will use the file name that the other user has given his/her
image. However, you can indicate that you want to use a file name that you select if you
want. If you select this option, MultiCom for Windows prompts you for a file name.
Click on OK. Image reception will begin when the other station begins sending it to you using
the YAPP protocol.
Everything is automatic from that point on. A blank window will appear where the image will
be displayed. You will see a series of messages at the top of that window, indicating the
progress of the image exchange. These progress steps are:
1. “Getting Ready”. The file name, file size, and certain information about the image is
being received. The size of the image form may change to accommodate the height
and width of the image. No image is displayed at this point. If MultiCom for Windows
determines that the image is not in BMP or RLE format, it will attempt to halt reception.
2. “Receiving Color Map”. About 1000 bytes of color information is received. No image
is displayed at this point.
3. “Receiving Image ”. The image is displayed as it is received. The image begins at the
lower left corner of the form, and displays from bottom to top.
Note that you can move the image form around the screen with your mouse.
The image may take a long time to receive. The amount of time depends on the file size, the
quality of the link, and the amount of activity on the channel.
The progress of the transfer is shown in the YAPP screen that is also visible.
5.3.4.5.3 How to Receive and Display Pictures from Users of Other Software Packages
Packet Images uses the amateur de-facto standard YAPP protocol to exchange images. That
means that you can easily display images from any station that sends you a picture with
YAPP. Here’s what you do (assuming you have already made a connection with another
station):
1. ask the other station to send you a picture in BMP (preferably compressed) file format.
2. the other station should start sending you the picture file with YAPP
3. you simply follow the same Image Reception procedure described in “How to Use
Packet Images”.
That’s all there is to it!
27
Page 31

5.4 CW Operation
5.4.1 CW Options
Enter data in the following form to control CW operation in MultiCom for Windows.
Operating: CW
This form may be accessed while you are in CW mode. You access the form by:
• clicking the Options button at the top of the MultiCom for Windows window,
or,
• selecting Options from the menu at the top of the MultiCom for Windows window.
• Speed
The red bar graph shows the current speed setting graphically and the option box show the speed
in words per minute. You can specify your CW sending speed upon entering CW mode in one of
several ways:
• type in a value in the option box,
or,
• click on a speed from the list below the option box,
or,
• drag the box in the bar below the speed graph to set the speed you want.
• Keying Weight
This value affects the relative ratio of "dash" times to "dot" times. Heavy weighting makes the
dashes slightly longer, and light weighting makes them slightly shorter. Most often "normal"
would be selected, but some transmitters will sound better to the station you are QSO'ing with
when you use "light" or "heavy" weight.
• Speed Style
"Proportional" means that the lengths of dots and dashes and the spaces between characters
change with the sending speed. For very slow speeds, this means very long dots and dashes
which some operators believe is difficult to copy.
"Farnsworth" uses proportional style ABOVE 15 wpm. At speeds below 15 wpm, the characters
are sent at 15 wpm, and only the spacing between the characters is adjusted. Some operators
believe that this is a better way for low speed stations to learn to copy CW .
28
Page 32

Operating: CW
• Use / Cancel / Help
Click on Use to enable the changes you have made.
Click on Cancel to ignore the change you have made.
5.4.2 CW QSO's
Conducting a CW QSO is easy. The transmission speed is set to the value that you specified in the
Options form. You can increase or decrease the speed by using the drag bar at the bottom of the
screen.
The speed in the button below the drag bar will change as you drag the bar.
When you see the speed you wish, click the button and the 1278 will adjust
speed to the selected value.
Tune in the station you wish to copy, as described in the MFJ manual.
Text will be sent as sent as soon as you enter data on the keyboard. You will be able to receive
during pauses in your sending.
This button at the bottom of the MultiCom for Windows window causes the 1278 to
analyze the speed of the signal being received.
Clicking on this button causes you to be prompted for a call sign. The call is placed in the
button immediately to the right of this button. After doing this, you can click on that button and the
call will be transmitted for you, saving keystrokes.
(your callsign will be shown in this button instead of "YourCall").Clicking on this button
will cause "de" followed by your call sign to be transmitted for you, saving keystrokes.
29
Page 33

5.5 RTTY / ASCII Operation
5.5.1 RTTY / ASCII Options
You need to make a number of choices before you use RTTY or ASCII for the first time, or if
you wish to change your choices later. Only one form is used for both modes, since RTTY is
used much more than ASCII. The form is shown below. You access this form by entering the
RTTY mode, then either clicking on the "Options" button on the toolbar at the top of the
screen, or selecting the "Options" menu..
Operating: RTTY / ASCII
• Speed
Click on the speed (baud rate) that you wish to use when you select RTTY or ASCII operation.
• Un-Shift
"Un-shift" means that the TNC reverts to "LETTERS" mode when a space or 'new line' is
transmitted. Normally you should consider setting this choice to "On" to avoid a garbled character
causing a long string of numbers to be erroneously displayed on the screen.
• Tones
You should set this choice to 'normal' usually. Occasionally, the other station may send inverted
tones; in that case you should set the choice to 'inverted'.
• Shift
Set this choice to 'narrow' if you are operating on HF. Set it to 'wide ' if you are operating on
VHF.
• RTTY or ASCII
Set this to your preferred mode. Note that RTTY is used much more frequently than ASCII on the
HF bands.
• Use and Save
Click on this button after you have made your choices and wish to use them while operating.
• Cancel
Click on this button if you wish to discard the choices that you have made. Your prior choices
(the ones made before you accessed this form) will be the ones that you continue to use.
30
Page 34

Operating: RTTY / ASCII
5.5.2 RTTY or ASCII QSO's
You must be in RTTY/ASCII mode to start an RTTY or ASCII QSO. You might want to call CQ, or you
might want to tune in another station to call. When tuning in another station, make sure the 'threshold'
control is set so the yellow LED on your TNC is on while the other station is transmitting. Refer to the
later section "Calling CQ" to learn how to call CQ in RTTY or ASCII modes
.When you are ready to send, either:
• click on the Send button at the lower right of the screen,
or
• type Control-T from the keyboard then type whatever you wish.
Your transmitted text will be ON THE AIR!
When you are ready to receive after sending, either:
• click on the receive button at the lower right of the screen,
or
• type Control-R from the keyboard.
The TNC will finish sending whatever characters have not yet been transmitted, then will switch to
receive mode.
MultiCom for Windows also makes it easy to send your callsign, send stored files, send the other
station's callsign, or send an identification message.
31
Page 35

5.6 SSTV and FAX Operation
5.6.1 Overview
One of the most important features of your MFJ1278 is its ability to receive and send SSTV pictures.
MultiCom for Windows makes it easy to enjoy SSTV operation on HF and/or VHF. It also gives you
the ability to receive many types of facsimile (fax) pictures. The sections that follow show you how to
use these fascinating modes.
5.6.2 Entering SSTV and FAX Mode
To enter SSTV and Fax mode, either:
• click on the SSTV/FAX mode button on the main screen, or,
• select SSTV/FAX from the menu bar
The following window will appear. Select the radio port you want to use.
Operating: SSTV / FAX
You also must specify what type of 1278 TNC you have. This is because older 1278’s transmit
SSTV tones slightly differently than 1278B’s and 1278/DSP’s.
After you have done this, the normal MultiCom for Windows screen will disappear and the screens
described in the following section will appear.
Note: If you have an older 1278, you must have the 16-level grey level modem installed to send
and receive SSTV with MultiCom for Windows.
32
Page 36

Operating: SSTV / FAX
5.6.3 SSTV and FAX Windows
In SSTV and FAX mode, you will see two important windows: the Image Display Screen and the
Control window.
The Control window is used to control SSTV and FAX operations. With it, you can select the mode
you wish, and control how images are displayed.
The Image Display window (shown here with “Scotty 1” in the title bar) is used to display the images
you are receiving and sending. When you enter the SSTV / FAX mode, it will be initially be blank.
5.6.4 Selecting Modes
You select the SSTV or FAX mode you wish by using the scroll box on the Control window.
Scroll up or down and highlight the mode you wish. You can change modes at any time while this
screen is visible. You can choose from:
• Scotty 1 and 2 SSTV
• Martin 1 and 2 SSTV
• Robot 72 Color SSTV
• Robot 8, 16, and 32 Black & White SSTV
• HF Weather fax
• a variety of other fax modes.
Also, under good reception conditions, MultiCom can automatically detect Scotty 1, Scotty 2, Martin
1, Martin 2, and Robot 72C modes. See “Vertical Interval Signal” topic later in this section.
33
Page 37

Operating: SSTV / FAX
5.6.5 Receiving
5.6.5.1 Synchronizing
Normally the signal you receive will ‘synchronize’ automatically. That means it will
appear starting at the top of the image, with the edges positioned correctly. When
‘sync’ is checked, your 1278 will wait until a ‘sync’, or positioning, signal is received.
No image will be displayed until sync is detected.
However, you may have tuned in a signal that is already part way through sending an image, or
the signal is too weak for your 1278 to detect the sync signal. In that case, check ‘free’, and an
image will begin to be displayed immediately.
Note: sometimes QRM or QRN will cause MultiCom to synchronize by mistake. Simply click
“Restart” and MultiCom for Windows will attempt to re-synchronize.
5.6.5.2 Vertical Interval Signal (VIS): Automatic Mode Selection
If you check “VIS”, MultiCom for Windows will look for a special Vertical Interval
Signal that most SSTV stations send. The VIS signal identifies the SSTV mode. After
detecting a VIS signal, MultiCom for Windows will look for the ‘sync’ signal, then
begin displaying the picture.
Note that the VIS feature may not detect the mode when signals are noisy or weak or if QRM is
present.
5.6.5.3 Screen Display: Scrolling and Wrapping
Some images (like weather fax images) will be too long to display on a single screen.
Also, you may want to have MultiCom for Windows keep on displaying while a
series of images are received.
• When ‘scroll’ is checked, the Image Display Screen will scroll upwards
when the screen is almost full. Any image scrolled past the top of the
screen will be lost. This only applies to Fax modes; SSTV modes fit on
the screen.
• When ‘wrap’ is selected, the image will resume displaying at the top of
the screen after the image has filled the screen. This only applies to Fax
modes; SSTV modes fit on the screen.
• When ‘single’ is selected, only one image will be shown. When the
screen is full, image display stops until ‘Restart’ is clicked.
5.6.5.4 Image Slant
Sometimes the received image may slant or slope to the right or left. If it does,
click on the arrow buttons to adjust the slant. You should click a button once, then
wait for a while to see if the image is satisfactory. If not, click again until you are satisfied.
The number indicates the approximate degree of slant correction. The correction will usually be
different for each mode. MultiCom for Windows remembers the correction that you set for each
mode.
Note: this control does not affect the portion of the picture that may have been
already received.
34
Page 38

Operating: SSTV / FAX
5.6.5.5 Image Edge
Sometimes when running in ‘free’ mode, or when the image did not synchronize
correctly, the left edge of the image will not be in the correct position. If so, click
on the edge arrows to move the edge of the remainder of the image. Keep
clicking until the image is correct.
Note: this control does not affect any part of the image that has already been
received.
5.6.5.6 Restarting
Click on this button when you want to stop displaying the current image and want
to start over. You will automatically enter the sync mode (you can click ‘free’ if you
wish).
5.6.5.7 Invert Image
When you click on this box, the image received will ‘invert’. That means that white will
show as black, dark gray will show as light gray, and so on.
Note: this option only affects Fax reception; it does not affect SSTV reception.
5.6.5.8 Pause Image
When you click this box, image display will pause until you click it again. Any
incoming picture that you receive while ‘pause’ is selected will be lost.
5.6.5.9 Saving Images
Click on this button when you want to save the image being received for redisplay or printing later. MultiCom for Windows will temporarily pause
receiving and will save the image that is currently displayed. Receiving will
resume once the save operation is complete (sometimes you may need to re-sync the image at
this point. Image files are big so make sure that you have lots of disk space available.
When you click this button, you will be prompted for a name for the image. Remember the name
so you can retrieve the image later. You should consider creating a special directory for your
saved images. You can use Windows File Manager (Windows 3.1) or Explorer (Windows 95) to
create new directories on your disk.
MultiCom for Windows stores images in the industry standard “BMP” format. That means that you
can use many other Windows programs to view, print, and edit your stored pictures. For
example, you can use the “Paintbrush” program that comes with Windows 3.1. You can even edit
stored pictures at the same time that you are receiving new ones!
5.6.5.10 Some Tips on Receiving Images
Receiving on-the-air images is one of the most enjoyable and rewarding features of your 1278
TNC. It can be really exciting to receive near-photographic quality weather satellite images or full
color SSTV images from some other country!
However, receiving images can be frustrating at first. It takes a bit of time to get the knack of
receiving quality images, but you will find it well worth it. Be patient, and practice. When you get
the hang of it, you’ll find it easy to get good images when propagation is good. Here are some
hints that the author has found helpful:
35
Page 39

Operating: SSTV / FAX
• for HF, make sure your receiver is in the Upper Side Band position when you begin. The large
majority of signals you’ll receive will be USB.
• for HF, start with your IF filters in the ‘wide’ position. If you have ‘IF -shift’, start with it in the
center position. After you have had more experience, experiment with other settings, but start
with thes e ones.
• look for strong signals (S7 or stronger). Although your 1278 can do a remarkable job with weak
signals, you’ll find it a lot easier to learn with strong signals. Image signals sound a bit like the
sound your modem or fax machine makes.
• most SSTV activity is on 20 meters, at either 14.230 or 14.233 MHz. Most of the time,
stations are exactly or almost exactly on those frequencies. Most stations will announce the
mode they are using before they transmit, so you can select the right one from the cont rol
menu.
• for FAX, you might find better reception 1 to 2 kHz lower than the published frequencies. Tune
around a bit, even if the red tuning LED on your 1278 is off center a bit.
• for FAX, you will probably have best luck with weather fax stations. Some images will be
satellite gray scale photographs (often transmitted at the start of each hour). Many images will
be meteorological black and white line drawings. The author (located in eastern North America)
has had consistent good luck on 8.080 MHz USB(again, you may want to tune 1-2- kHz lower)
36
Page 40

Calling CQ
5.6.6 Transmitting SSTV Pictures
Sending SSTV signals is easy with MultiCom for Windows.
Before starting, you need to make sure that your 1278 is hooked up to your transceiver correctly. You
must connect your 1278 output to the microphone input of your transceiver. You cannot use the FSK
connections for SSTV transmission.
Sending a SSTV picture involves the following steps:
1. Putting MultiCom for Windows into the ‘send’ mode.
2. Selecting a transmitting mode
3. Loading an image to send
4. Sending the image.
These steps are described in more detail below.
• Putting MultiCom for Windows in the Send Mode
Click on the Send button to enter the Send mode. The Fax ad SSTV Controls window
changes to look like this:
• Selecting the Transmission Mode
Click on the mode that you want to transmit in.
• Loading an Image
Click on this button to load an image for sending: . You will be prompted for the name
of the file containing the image that you want to send (the file must be in ‘BMP’
format). After you select the file, it will be shown in a window on your screen.
• Sending the Image
Click on this button to send the image that you have loaded:
MultiCom for Windows first converts the ‘BMP’ image into a form that the 1278 can use. You can
watch the progress of this conversion with the bar graph shown below:
This process will take several seconds (it can take longer on slower PC’s). If you find it takes too
long, you can pre-convert images. Pre-converted images skip this preparation step. See section
6.6.8.
37
Page 41

Calling CQ
Next you will see the following form. Click Transmit to send the image immediately. Click Cancel
if you change your mind and don’t want to send the picture.
BEFORE CLICKING TRANSMIT, YOU MUST HAVE CONNECTED THE 1278 TO THE
MICROPHONE INPUT OF YOUR TRANSCEIVER.
Next, MultiCom for Windows will begin transmitting the picture. Different modes take different
amounts of time to send. Again, you can watch the progress with the bar graph shown below:
MAKE SURE YOU LEAVE YOUR TRANSCEIVER IN SEND MODE UNTIL THE BAR GRAPH
REACHES 100%.
If at any time, you want to stop sending early, simply click the Exit button.
5.6.7 Exiting SSTV and FAX Mode
Click on this button to exit SSTV and FAX mode. The Image Display and Control
screens will disappear and the MultiCom for Windows main screen will reappear.
You will then be in Setup mode and you can select whatever mode you want to enter
from there.
5.6.8 Pre-Converting SSTV Images
It takes time to prepare images into the format that your 1278 needs ... from a few seconds to
almost a minute depending on speed of your PC. You may want to send a picture immediately
instead of waiting. You can do this if you “pre-convert” images.
Because Windows lets you run more than one program at a time, you can pre-convert images
while you are using MultiCom for Windows.
To pre-convert images, simply look for this icon in the directory or folder where
MultiCom for Windows is stored:
38
Page 42

Calling CQ
You will see the following window appear:
First, select the mode that you want to convert the image for. If you want to send the picture in
more than one mode, simply convert the picture again for each mode. Normally Scotty 1 and
Martin 1 are sufficient.
Next, click the select picture button. You will then be asked the filename of the picture you want
converted. The picture will appear in a window.
Finally, click the convert picture button. The image will be converted for you.
You can repeat the above steps for as many images and/or as many modes as you want.
6. Calling CQ in CW, RTTY/ASCII, Amtor and Pactor
You can call CQ once, or send a repeated CQ message. You can create a different CQ message for
each mode.
6.1 To call CQ a single time, or to Edit the CQ message:
• Click on this button,
or
• select 'CQ' from the menu bar at the top of the window,
then
• select 'CQ Once' from the CQ menu.
This will cause the following form to be displayed. If you have already entered a CQ message, you will
see it displayed.
If you want to enter a CQ message. press Edit.
39
Page 43

Calling CQ
Click 'Send' to transmit the CQ message.
6.2 To Call CQ automatically more than once:
• Click on this button,
or
• select 'CQ' from the menu bar at the top of the window,
then
• select 'CQ Once' from the CQ menu.
This will cause the following form to be displayed:
Enter the number of times you want CQ to be sent, and the time (in seconds) between calls. Note
that the time interval is only approximate, so you may need to adjust it later.
Calling CQ will stop automatically in Pactor mode when a connection is made. In the other modes,
click the "Stop CQ" button.
40
Page 44

7. Time Saving Tips
7.1 Sending an Identification Message
You can quickly send identification messages like:
hiscall de yourcall
For example, if the other station is K1XYZ and your call is W9ABC, then the identification message
would be:
K1XYZ de W9ABC
The other station's call must be displayed in the button beside the "Enter Call" button. That happens
automatically when a Pactor or Packet connect occurs. In other modes, you should click on the
"Enter Call" button to enter the other station's call into the appropriate button.
You can send an identification message in either of two ways:
• Mouse method
Click on:
(1) the other stations call sign button in the lower right of the screen
(2) the "de yourcall" button in the lower right of the screen.
• Keyboard method
From the File menu, select the Send Id item.
The shortcut way is to enter: ALT-F then I
Time Saving Tips
7.2 Sending the other station's Callsign
You can type the other station's call, of course, from the keyboard. You can save keystrokes, though,
by using some built-in features of MultiCom for Windows.
The other station's call must be displayed in the button beside the "Enter Call" button. That happens
automatically when a Pactor or Packet connect occurs. In other modes, you should click on the
"Enter Call" button to enter the other station's call into the appropriate button.
You can send the other station's callsign in one of two ways:
Mouse Method
Click on the other stations call sign button in the lower right of the screen.
Keyboard Method
From the File menu, select the Send Callsign item.
The shortcut way is to enter: ALT-F then C
7.3 Sending Your Callsign
You can type your callsign, of course, from the keyboard. However, you can save keystrokes by using
some built-in features of MultiCom for Windows. Your callsign is displayed in a button near the
bottom right corner of the screen.. You can send "de your callsign" in one of two ways:
41
Page 45

• Mouse method
Click on your call sign button in the lower right of the screen
• Keyboard method
From the File menu, select the Send Callsign item.
The shortcut way to do so is to enter: ALT-F then C
7.4 Using Text ("Brag") Files
Each operating mode can have 3 different files (sometimes called 'brag" files) that the user
can edit and transmit whenever needed. MultiCom for Windows has a simple editor to help
create those files. This editor can even handle graphics characters for operating modes that
can use graphics characters (Pactor and Packet).In each operating mode, you will see 3 text
file buttons at the top of the screen that look like this:
Underneath each button is a title that you can specify. There are different file buttons for each different
operating mode (except the Amtor Listen, Navtex and SSTV/Fax modes).
You need to know two things to use text files:
(1) how to edit them, and
(2) how to transmit them.
Click on the button for the file you want to edit, or select the file number from the "Edit" menu. This
will cause the following form to be displayed:
Time Saving Tips
If there is already data in the file, it will be displayed in the window.
Click on "Edit" to edit the file, or "Send" to transmit the file.
If you decide to do nothing, then click on "Cancel" or use the Escape key.
• Editing Text Files
MultiCom for Windows will display a form with a large edit area at the top. It will look something like
first picture on the following page:
42
Page 46

Time Saving Tips
You can type in data just like any text editor.
You can cut and paste to other text files using the Edit menu
Click on the "Clear" button to clear the screen if you wish.
At the bottom of the form, you will see an array of graphics characters. To insert a graphics character
into your text file, simply:
-click to the point in the file where you want the character to go,
then..
-click on the graphics characters(s) you want to go into the file.
To make it easy to remember what is in your file, enter a "caption", or title, in the box at the bottom
right of the form. This caption will be displayed under the appropriate file button on the main
MultiCom for Windows screen.
When you are done, click on the "Use and Save " button.
If you decide to discard what you have entered, simply click on the "Cancel" button.
• Transmitting Text Files
The "Send" button will cause the file to be transmitted. You will see the characters in the file appear in
the Keyboard Input window, just as if you typed them from the keyboard.
43
Page 47

7.5 Using ASCII Files
In addition to Text (“brag”) file, MultiCom for Windows lets you send text files that you have created
with a text editor.
Text files must be in pure “ASCII” format. Windows Notepad is one tool for creating ASCII files. You
can also use many word processors but you must be sure that you save files in “text” format.
To send an ASCII file, click on this button:
MultiCom for Windows will show a menu to select the file name that you want to send.
Select your file, and click OK. The file will be sent for you.
Time Saving Tips
44
Page 48

8. Printing
• Mouse method
• Keyboard method
Printing
You can have MultiCom for Windows print everything that is received from the TNC. Use either of
the following methods to turn the printer On or Off:
Click on the "Print" check box near the upper left of the MultiCom for Windows window. This
will start capturing printer data. Repeating this will cause capture of printer data to stop.
Select the file menu by entering "ALT-F”. Then, select the Capture to Printer function by typing
"P".(You can also use the mouse to select these menu items) This will start capturing printer
Data. Repeating this will cause capture of printer data to stop.
The following form will appear:
If you choose "Print via Windows", all data from the TNC is then captured for printing.
MultiCom for Windows uses the printing capabilities of Windows. All print lines will be saved,
and are not printed immediately. To have your printer actually print the captured information, you
can either:
..stop capture to printer,
or,
..click on the "Feed" button near the "Print" check box.
If you choose "Print Directly to Printer", MultiCom for Windows will send data directly to the
parallel printer port (only LPT1 is supported). This will only work if your printer can directly print
ASCII characters. PostScript printers will not work in this mode.
45
Page 49

9. Capture to Disk
You can save data from the TNC window in a disk file for later use. To do this, use either of the
following methods:
• Mouse Method
Click on the "File capture" check box near the upper left part of the screen.(Repeating this step
will cause capturing to disk to stop.)
• Keyboard Method
Select the "File" menu by entering "ALT-F".
Select the "Capture to File" item by entering "F".(Repeating this step will cause capturing to
disk to stop.)
A form will appear which will allow you to select a name for the file to be saved (the file names will
be different on your computer):
Capture to Disk
MultiCom for Windows will suggest the following name:
SRyymmdd.SKY
where:
yy is the year (e.g. 95)
mm is the month (e.g. 01 for January)
dd is the day (e.g. 25)
For example, if the date was 25 January 1997, MultiCom for Windows would suggest the
name:
SR970125.SKY
You can choose a different name, or you can choose to add the captured data to a file that
already exists on your disk. Click OK or Cancel when you have chosen a name.
The following form will then be displayed:
46
Page 50

Capture to Disk
Click "Plain text only" to save "printable" text (no control codes will be saved).Click "Binary" to
save everything received from the TNC.
If you choose Plain text only, the file is in "text" format, and can be read by any text editor,
including Windows Notepad. Rows of "VVVVVVV" in the file separate data saved at different
times on the same day.
47
Page 51

Controlling More Than One TNC at the Same Time
10. Controlling More than One TNC at the Same Time
Windows is a multitasking operating system. That means you can control more than one TNC with a
single computer. All you need to do is:
1. Install MultiCom for Windows a second time. This time, you need to install it in a different
directory of your choice (not the one that the Setup program suggests for you).
2. Connect the second TNC to a different serial port.
3. Run the second copy of MultiCom for Windows. When it starts up, click on the Options menu
to tell MultiCom for Windows which serial port it should be using. Input your call and other
information, too.
Simply run both copies that you’ve installed to control two TNC’s at the same time!
There are some important things to consider about serial ports when running two copies of MultiCom
for Windows:
• you will get best performance if your serial ports use ‘16550’ type chips. Older ‘8250’
chips will work fine, though.
• each copy of MultiCom for Windows must be connected to a different “Com” port.
• each Com port must have a different IRQ. Refer to your serial card or computer manual
to see how to set the IRQ. This may involve opening your computer and changing
jumpers or DIP switches. Be CAREFUL when doing this.
• the mouse must have a different IRQ than either of the Com ports connected to your
TNCs (i.e. there must be unique IRQ settings for the mouse, TNC #1 and TNC #2).
If you do not do this, you may get very poor response times when operating more than one TNC at the
same time.
48
Page 52

11. Acknowledgments
MFJ and 1278 are trademarks of MFJ Enterprises, Inc.
Windows is a trademark of Microsoft Corporation
Sincere thanks to the patient testing and constructive comments of the many beta testers. This
product could not have been completed without their help. They pushed, prodded and cajoled for many
of the features that are in MultiCom for Windows. This product would never have been finished
without their constant suggestions for improvement! Special thanks to Jim Shurden, KB5JNZ and
Tom Stone, AA5MT, of MFJ --- you guys were tough, but you were usually right!
Special thanks to Buck Rogers, K4ABT, for his testing and constructive comments and suggestions.
My warm gratitude to Shelby Ennis, W8WN, who patiently tested version after version. Although I
have only met Shelby on the air and on-line, he has proven to be a true friend!
Extra special thanks to my wife Jane and my children Laura, Greg and Mark for letting me have the
time to work on MultiCom for Windows. Without their love and support, MultiCom for Windows
would not exist.
Acknowledgments
49
 Loading...