

Page 1

Scribe SA Standalone Series Operator’s Guide
Document Revision: 05/31/06
Quick Setup Guide for the
Scribe SA Standalone
Series Client Application
Page 2
Utilizing the Scribe SA Standalone Series Client
The Scribe SA Standalone series has a client feature which enables a
remote user.
Configuring the Scribe SA Standalone Series
• Connect the Scribe SA Standalone Series to your network using the
RJ-45 connector on the back of the system.
• Turn on the Scribe SA Standalone Series
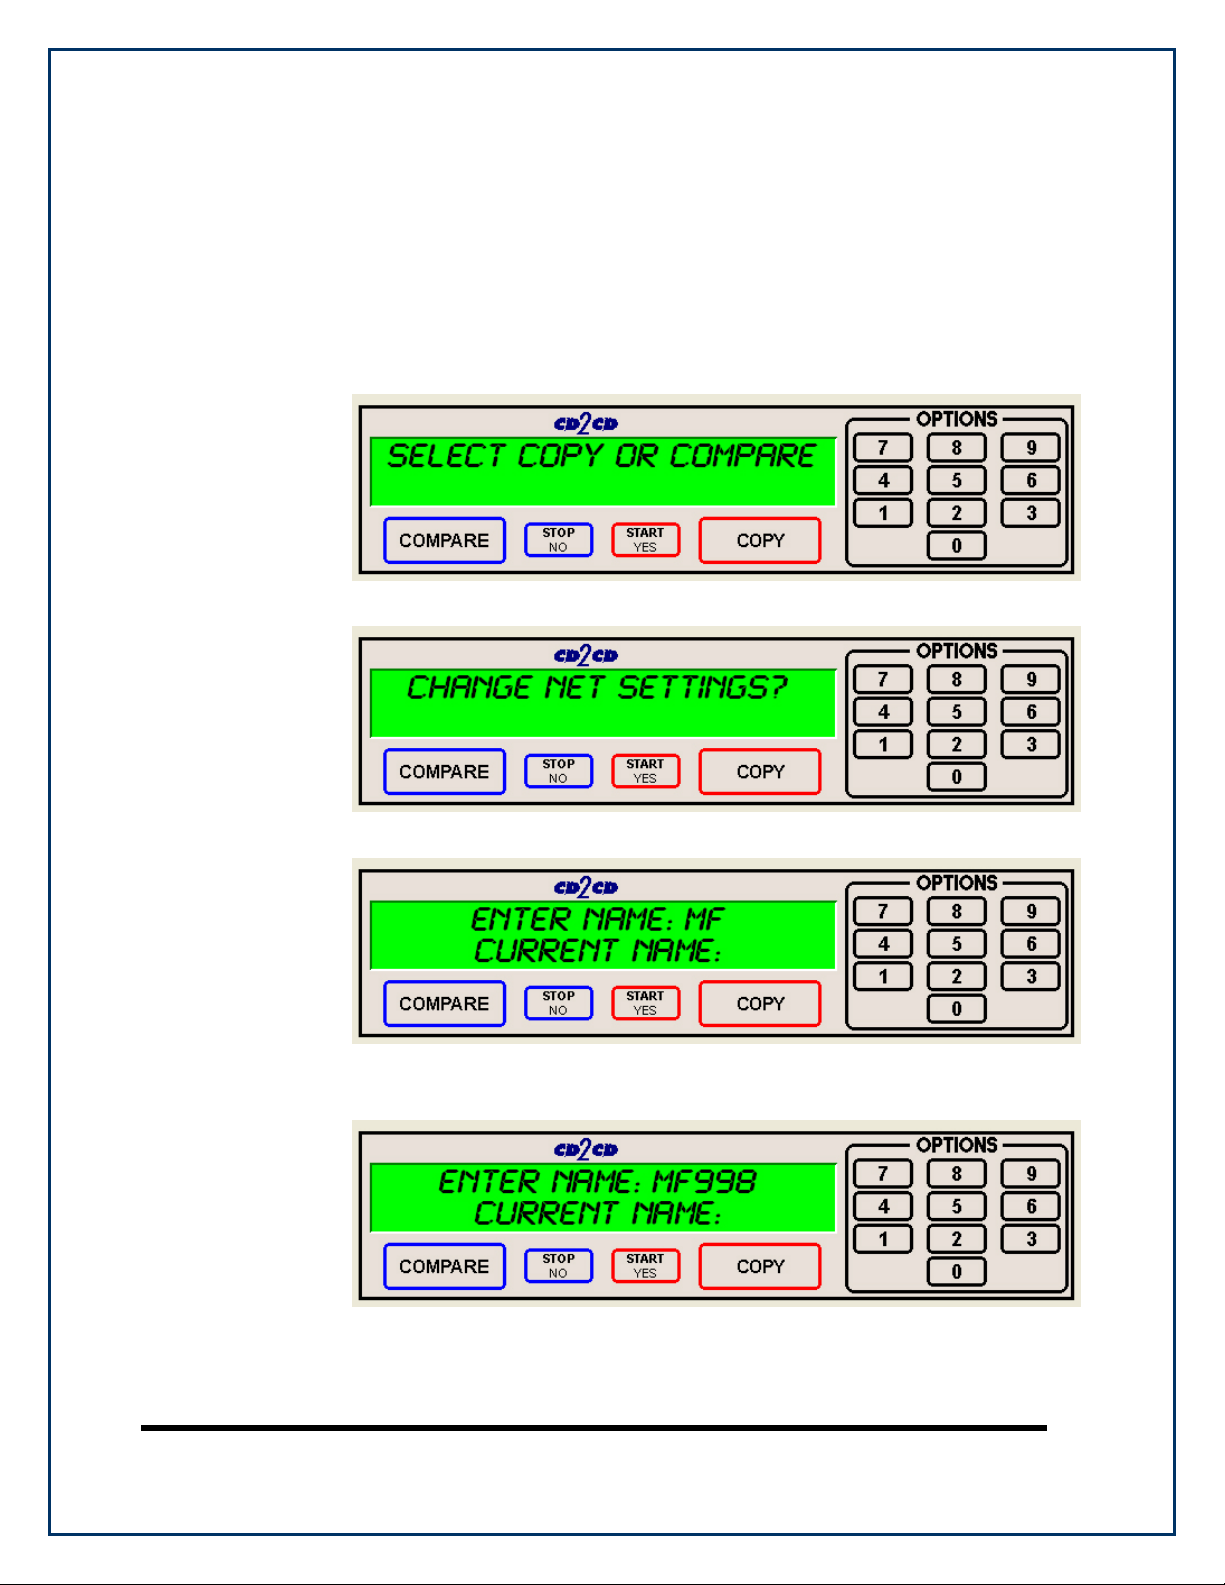
• Wait for the Scribe SA Standalone Series to boot up, you will see:
• Press the “7” key, you will see:
• Press the “START/YES” key, you will see:
• You must leave “MF” at the front of the name. You should name it
“MF001” for example.
• Press the “START/YES” key, you will see:
Page 1
Page 3
Scribe SA Standalone Series Operator’s Guide
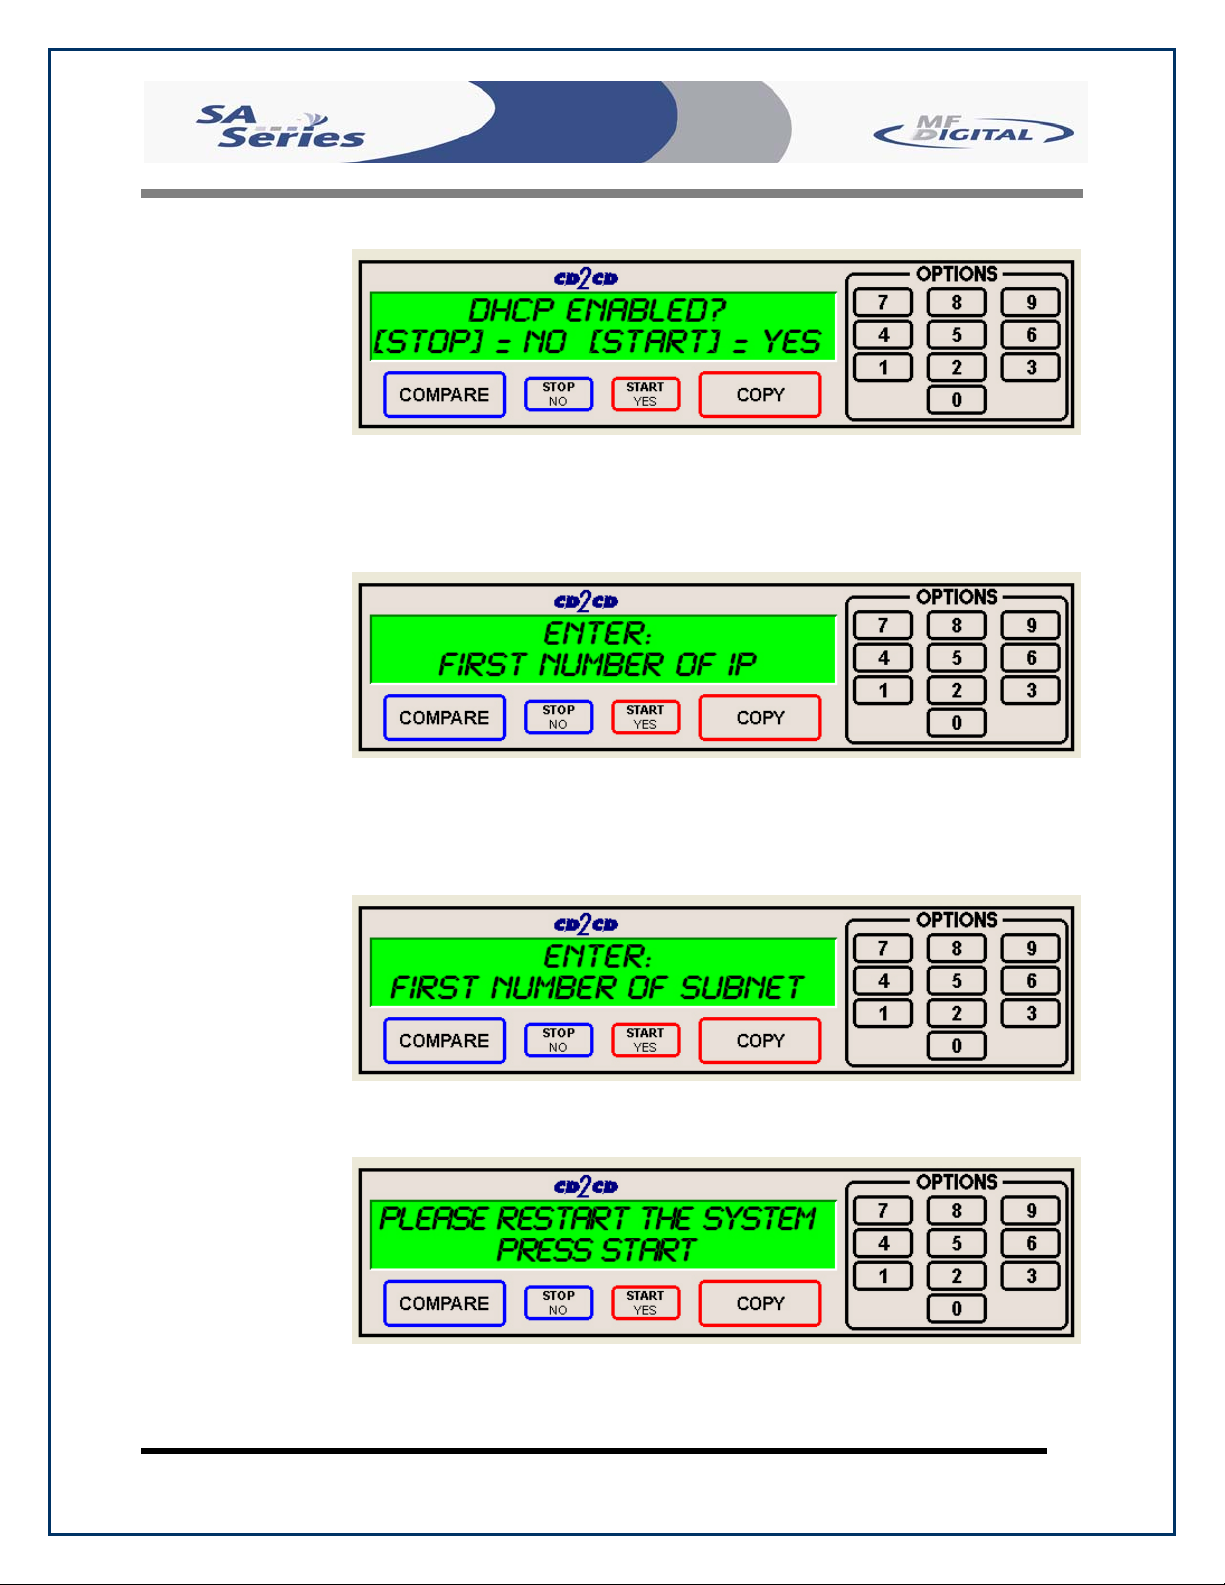
• Press the “Stop No” key if the network does not use DHCP or press
the “START/YES” key if the network does use DHCP. If you press
the ““START/YES” “ key you will be prompted to Restart the
system, if you press the “Stop No” key you will see:
Document Revision: 05/31/06
• Enter the 4 sets of numbers of the IP address, one set at a time. After
each octet press the “START/YES” key. Do not enter an IP address
of a machine that is already on the network. When you have entered
in the entire IP address, you will see:
• Enter the 4 sets of numbers of the subnet. Pressing “START/YES”
after each set. You will then see:
• Press the “START/YES” key and then Restart the system by turning
it Off and back On again.
Page 2
Page 4

Scribe SA Standalone Series Operator’s Guide
Installing the SA Client Application
• Place the firmware CD into the CD-ROM drive of your PC
• Double click on “Embedded” folder
• Copy the SaClient.EXE to the remote PC
• Once copied, double click on the SaClient.EXE file
• Press “Connect” in the lower right hand corner
Document Revision: 05/31/06
• Click in the Server Name Text Box and enter the name of the Scribe
SA Standalone Series on the network.
• Press “OK”
• For this example, a new tab will appear at the top of the screen
called “MF998”
• Click the “MF998” tab and you will see:
Page 3
Page 5

Scribe SA Standalone Series Operator’s Guide
Document Revision: 05/31/06
Utilizing the SA Client Application
• Click “Get image” to pull an image from the Scribe SA Standalone.
Give the image a name and location. The image will be saved with a
.img file extension.
• Click “Send image” to send an image to the Scribe SA Standalone.
The image may be an .img, .iso, .udf, or .isc.
• Click “Send FTP Image” to send a image to the Scribe SA
Standalone via FTP.
Page 4
Page 6

Scribe SA Standalone Series Operator’s Guide
• Click “Send Print File” to send a PRN or PDF file to the Scribe SA
Standalone.
Note: When submitting PDF files for printing via SaClient. The drivers for
the printer in which you are submitting to, must be loaded on the client
machine or workstation as SaClient.
Immediately following the submission of the PDF document, Adobe
Acrobat Reader Print Dialog will appear. Please select the printer you
are submitting to and click the Print Button.
• To start a job from the client on the individually connected Scribe
SA Standalone, click “Start job”. Click “Browse” to select an image
to burn to the Scribe SA Standalone. Select “Copy”, “Verify”, or
“Test. Enter a quantity and click “OK”.
Please ensure the Client Machine or workstation where SaClient is being used, does
not have the “full” version of Acrobat loaded. Instead please install Acrobat Reader,
v 6.0 or higher.
0 CAUTION
Document Revision: 05/31/06
Page 5
Page 7

Scribe SA Standalone Series Operator’s Guide
Document Revision: 05/31/06
The Start New Job Dialog can be accessed from the Status Tab, and clicking the Start
New Job Button on the right. This dialog is used when the remote user wants to submit a
job to multiple machines at once. Individuals who are running a production floor will
find this option useful. As you can add/remove resources(SA Units) as needed. You can
even specify a Job ID if desired. The default Job ID consists of the
Month_Date_Hours_Minutes_Seconds
Page 6
Page 8

Scribe SA Standalone Series Operator’s Guide
Document Revision: 05/31/06
The SA Client application makes it easier to now connect to many units simultaneously.
Once you connect to all your units, simply press the SAVE CONNECTIONS button.
This will make a registry entry on your Remote PC remembering which units you are
connected to.
When you are ready to reconnect to all of your units, simply press the LOAD
CONNECTIONS button, and all your units will be automatically and simultaneously
connect with just click of a button
.
Tip: Keep in mind the SAVE and LOAD Connections are saved per Remote PC. If
you want to save/load connections on multiple PC’s you will need to connect to
each Scribe SA Standalone first, then save your connections on that PC.
Page 7
 Loading...