

Page 1
Scribe EC 3000 Series Install Guide
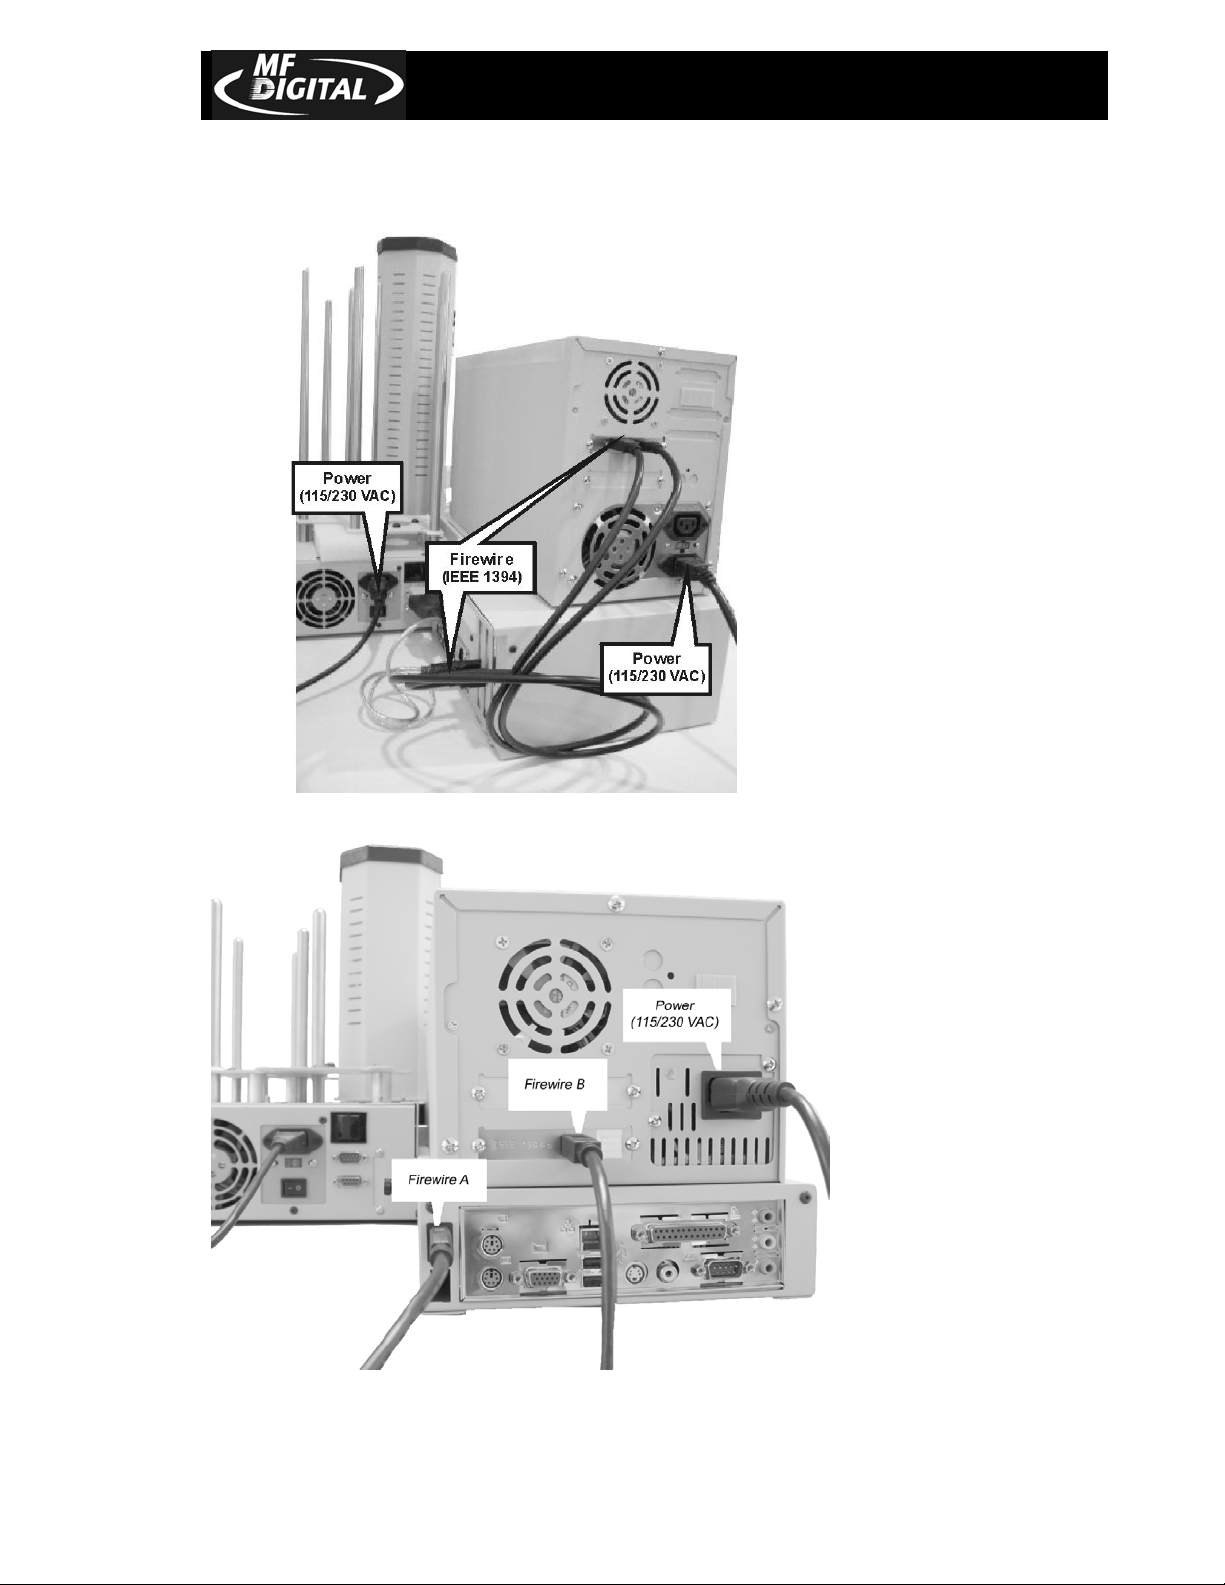
Making the USB to RS232 connection to ScribeEC 3000 SA Series.
Document Revision: 6/1
fig. 2 -- 3702EC ONLY USES 1 FIRE WIRE CABLE
Page 2
Aligning the Drive Bay
1. 3704EC & 3706EC ONLY – SKIP IF SETTING UP 3702EC AS DRIVE BAY IS
PRE-ALIGNED AT FACTORY
Please follow the instructions below to align the drive bay on the
Scribe EC Standalone.
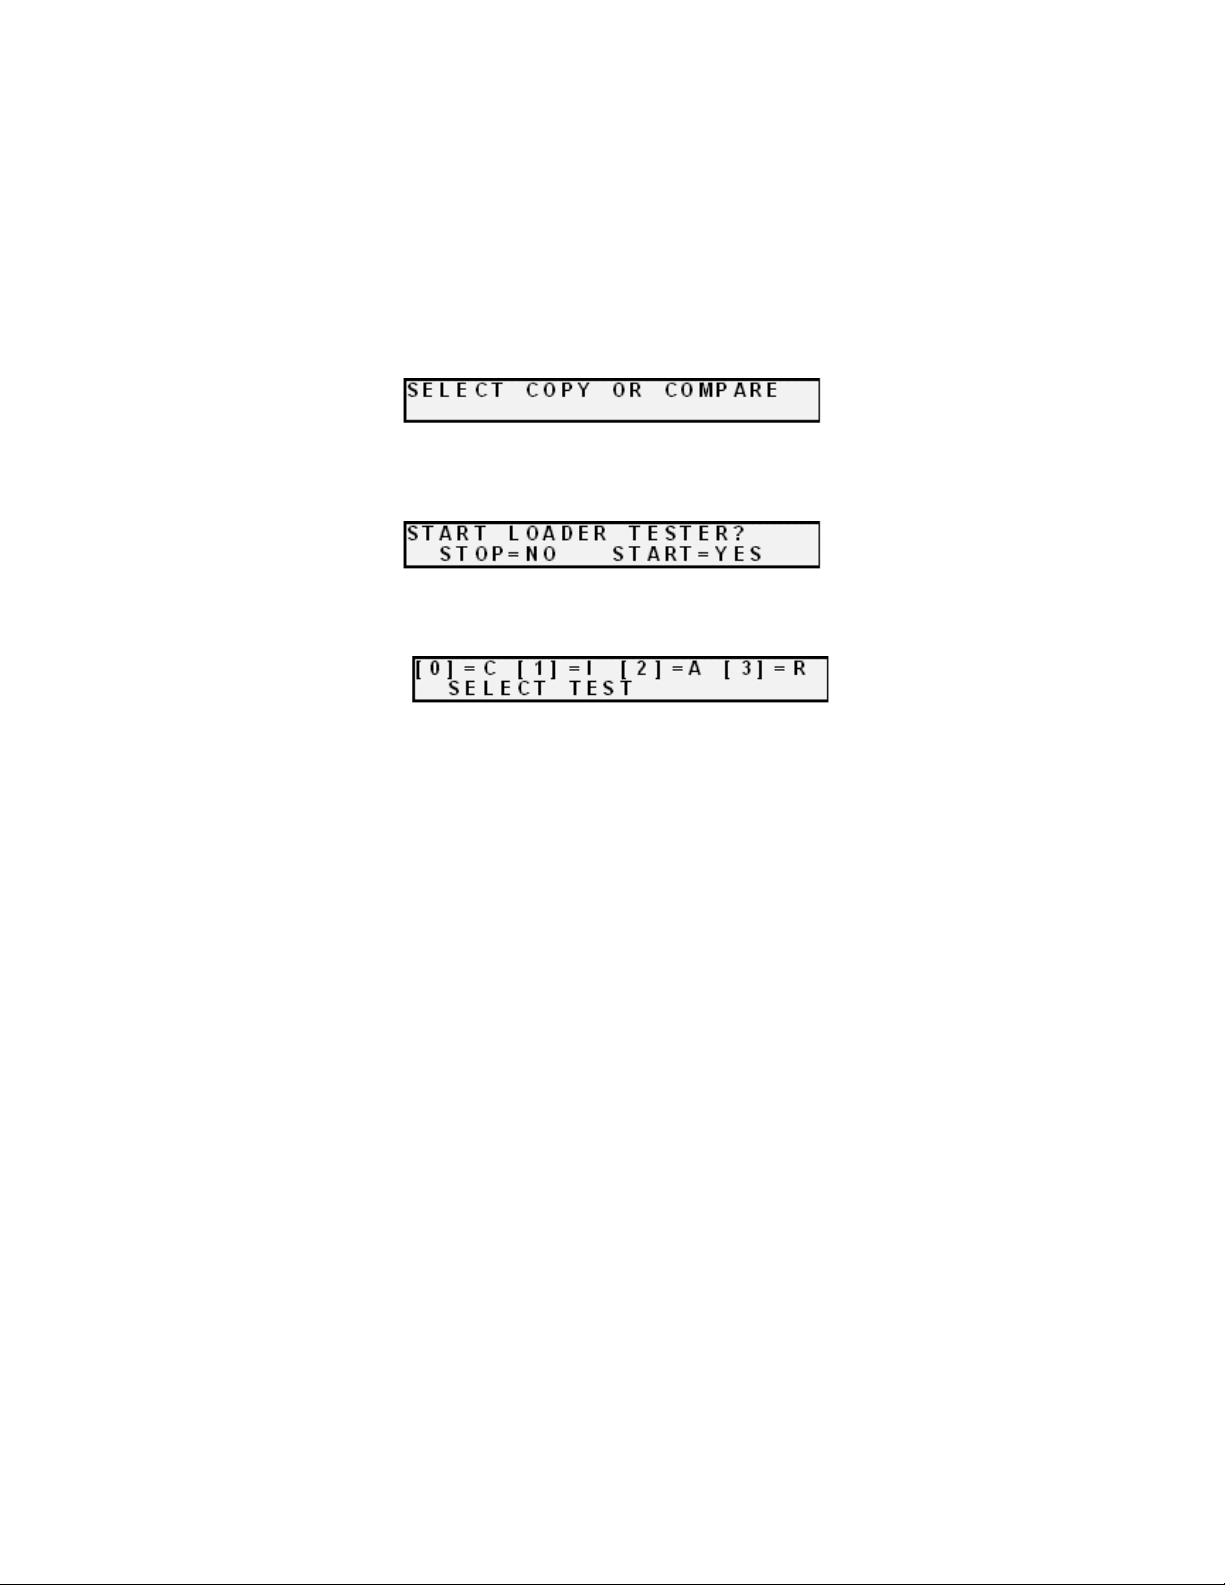
• From the main operating screen depicted below:
• Press the “4” key. You will then be prompted to “Start Loader
Test Mode?”. Press the “Start/Yes” key to enter “Loader Test
Mode”
The following screen will appear. Place a CD in the 1st input area.
•
•
To align the drive tower, first press the number with corresponds
to the “C” command for calibrate. Then press “I” for input. This
will pick up a CD from the input area and place the CD in the
drive. Inspect the placement of the CD and align the drive tower
accordingly.
•
After inserting a CD, press “A” for accept, and the arm will pick
the CD out of the drive and place on the output spindle.
Repeat process as necessary until you are satisfied with the
•
alignment of the drive bay.
Page 3

Aligning the Printer
1.
Selecting the Printer
To select the appropriate printer, do the following:
At the “Select Copy or Compare, press the “2” key
From the Options Screen, press the “5” to select the printer
Choose the printer you installed. The system will reboot.
2.
Aligning the Printer
• After reboot, the main operating screen displays below:
•
Press the “4” key. You will be prompted to “Start Loader Test
Mode?” Press “Stop/No” to bypass “Loader Test Mode”
• You will then be prompted to enter the “Printer Alignment”
feature, as depicted below:
• Press the “Start/Yes” key to enter the “Printer Alignment”
feature.
• Place a CD in the input area and press the “Start/Yes” key.
• The automated arm will pick a disc up from the input area and
place the CD so that it stops just above the printer tray. Check the
alignment of printer and adjust accordingly. After the disc has
been placed you will see the following screen:
• Press the “Start/Yes” key. The disc will be unloaded from the
printer tray. Repeat the process if further alignment is required.
www.mfdigital.com
 Loading...