

Page 1
Installing PicoJet Drivers on your MF Digital System.
Step #1
Whether you downloaded the drivers
from the MF Digital Website or
viewing from the included CD, this is a
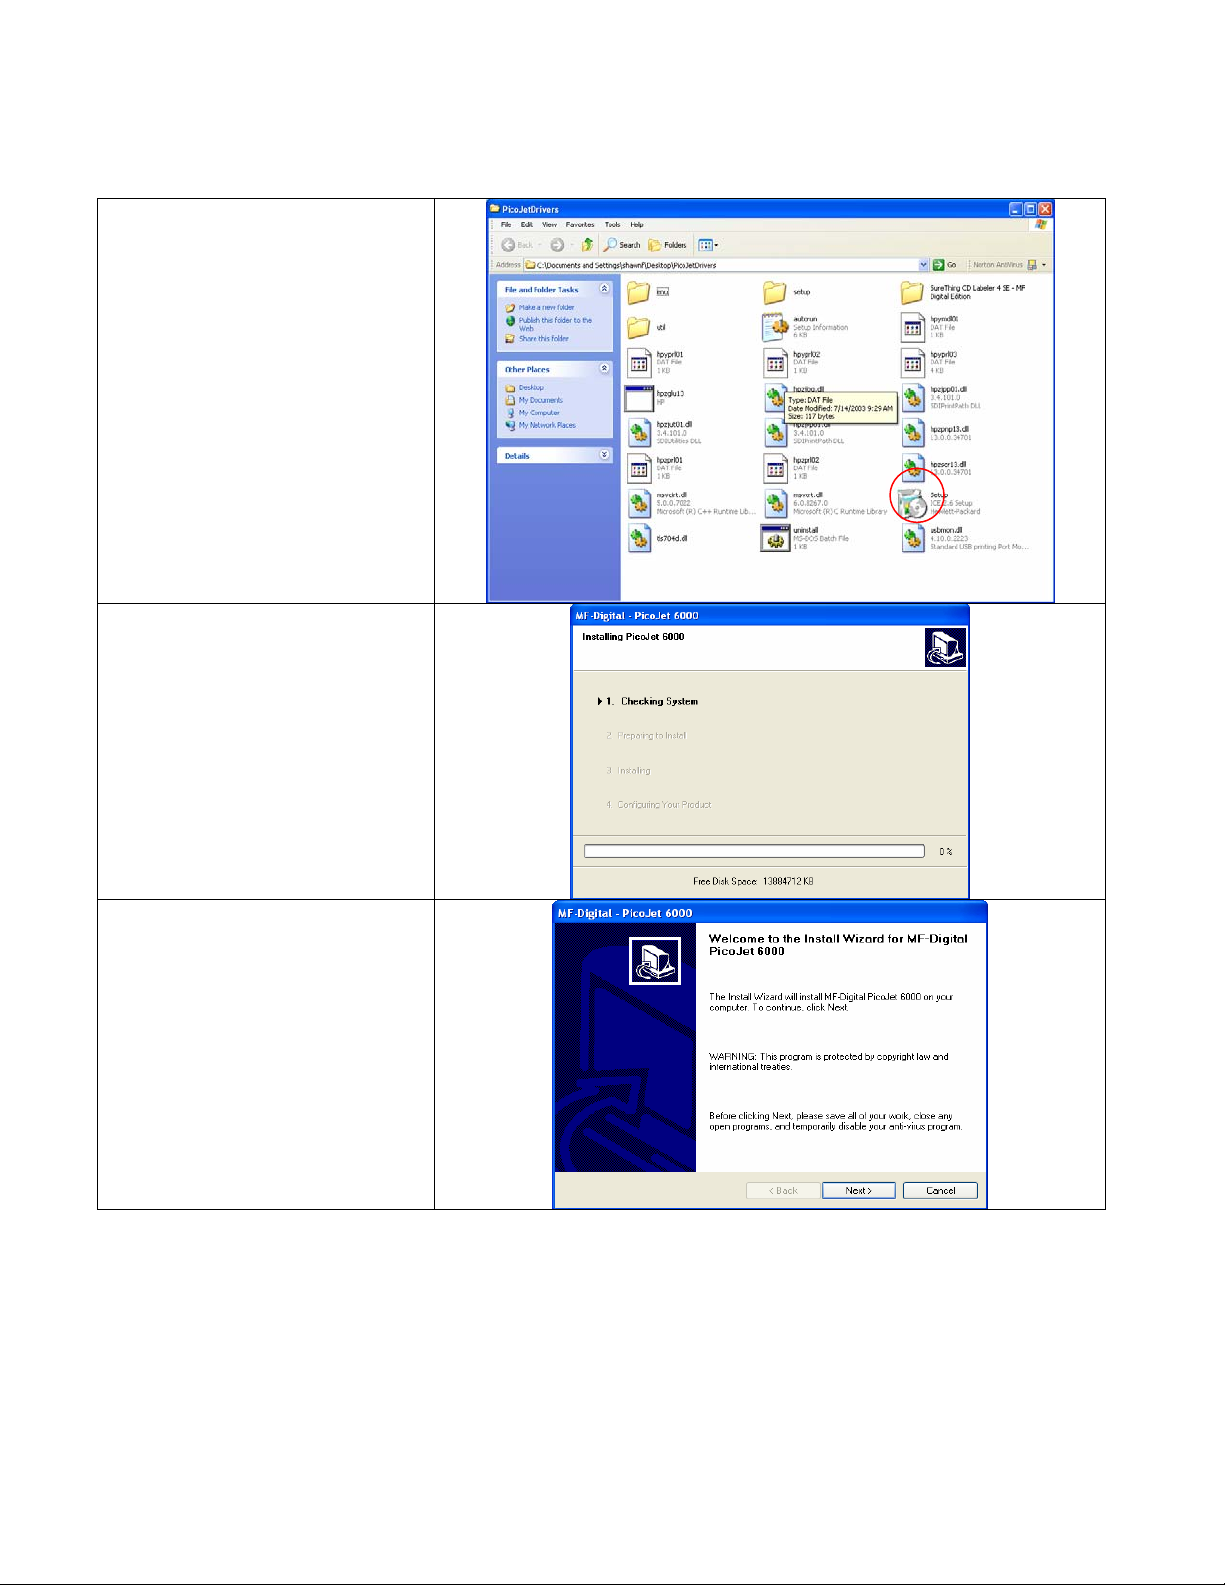
list of the files you should see.
Locate the setup.exe file. The icon is a
box with a CD in front of it. It’s
indicated here by a red circle.
When the SETUP is executed, this is
the first screen to pop up. Your system
is being checked for any previous
installation of the PicoJet Drivers.
If no previous drivers are detected, this
screen pops up next.
Please click the NEXT button to
continue with the installation.
NOTE: Should a previous version be
detected, a prompt asking you to
remove the drivers will be asked.
Please choose UNINSTALL.
1
Page 2
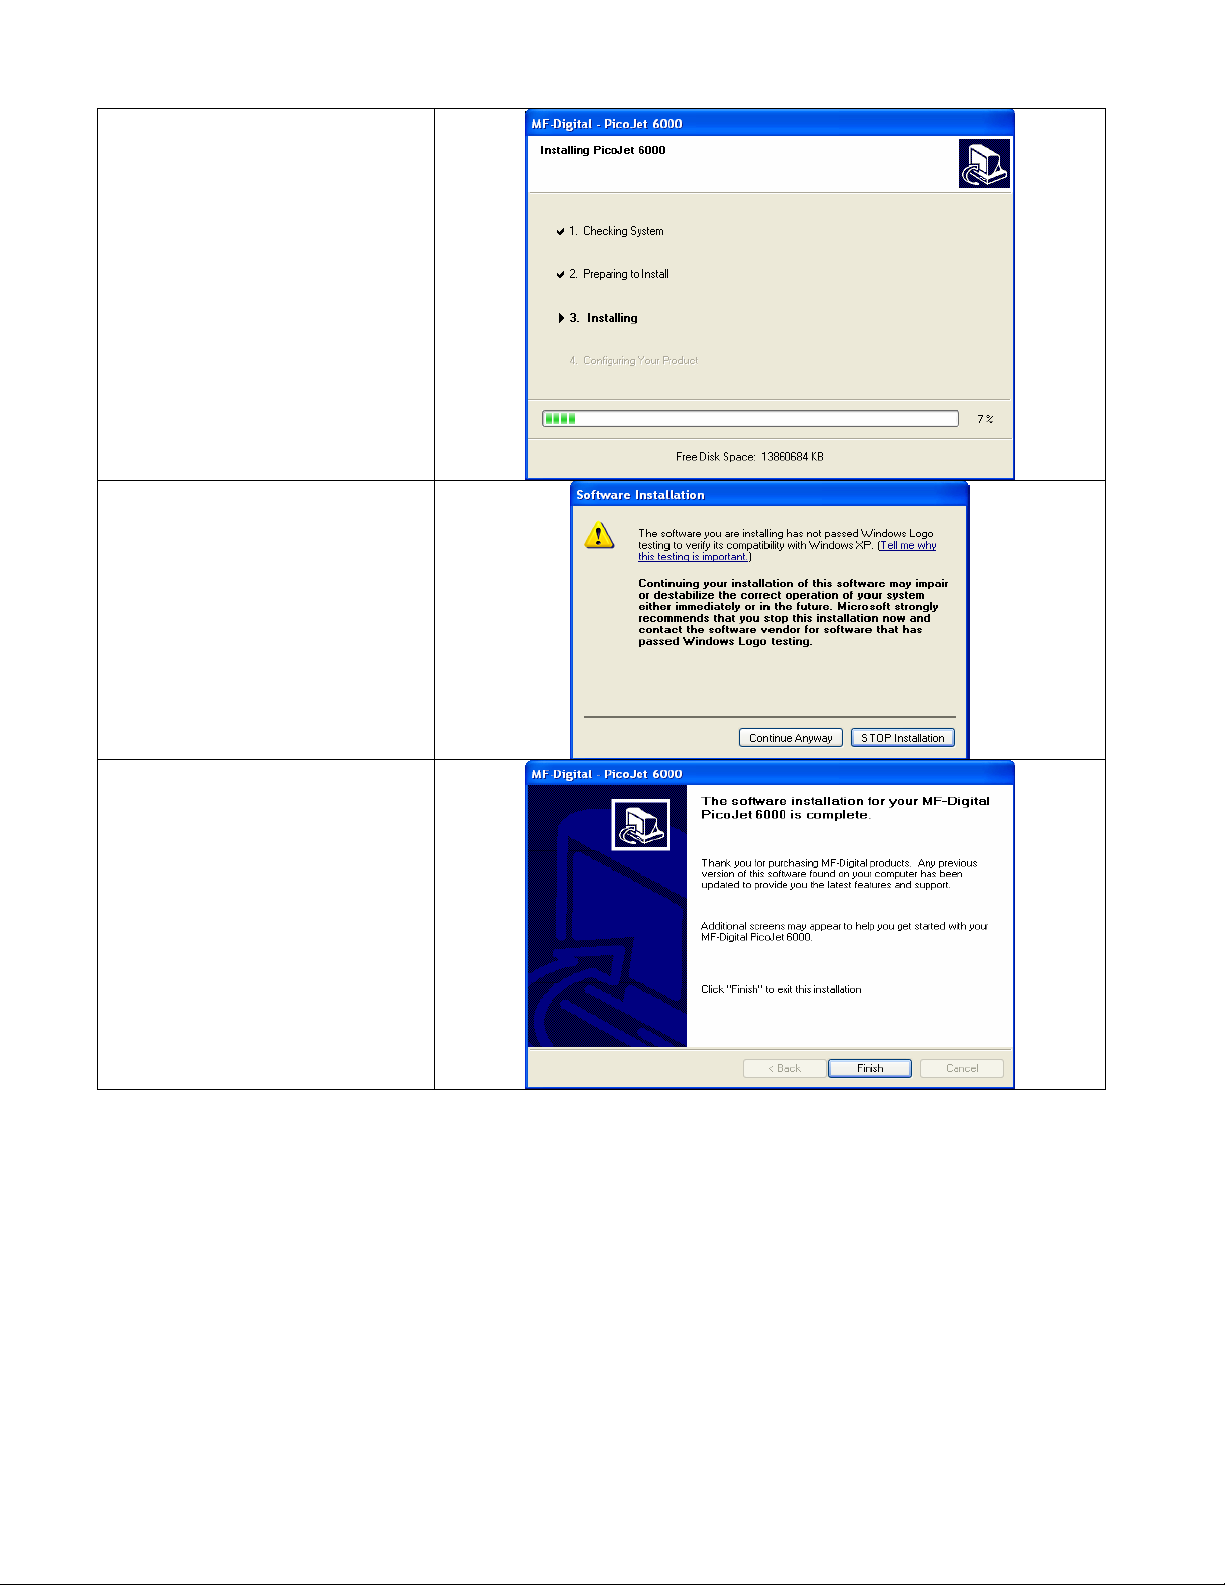
This screen indicates the steps the
installation is working on. A progress
bar is now shown as each step is
executed.
Should you receive the Windows XP
Logo Testing prompt, please click the
CONTINUE ANYWAY button.
You have completed Step #1.
Click Finish and reboot your computer.
2
Page 3

Step #2
When you’re the loader’s PC has
reloaded Windows, connect the USB
cable from your PicoJet 6000 Printer to
your loader’s USB port.
After the PicoJet is connected to the
loader’s PC. This screen appears.
Change the Option “Install from a
specific location” by clicking the radial
button.
Now Click NEXT.
On this screen, be sure there is a DOT
in the Search for the best driver in
these locations option.
Whether you’re loading the drivers
from the CD or if you downloaded the
drivers from the website, the procedure
is the same.
Click the browse button and navigate
the path below.
X:/enu/drivers/win2kxp
Where X is location of the drive,
where the drivers are stored. Then
click OK. You will be returned to this
screen. Now click NEXT.
This screen indicates the installation
will begin the copying process of the
driver files over to the loader’s PC.
3
Page 4

Should you receive the Windows XP
Logo Testing prompt, please click the
CONTINUE ANYWAY button.
The installation will now start to copy
files to the loader’s PC.
Installation is now complete.
Click FINISH.
You can verify the PicoJet is installed,
by checking the following:
XP Users: (Printers and Faxes)
Win2K (Printers)
4
Page 5

Right clicking on the PicoJet Icon and
choosing Printing Preferences, then
selecting the Utilities Tab will show
the current revision of the drivers.
Note the info above the TEST PRINT
button.
The drivers need to be set up correctly.
The most important
Directly to the Printer.
This is found by right clicking on the
PicoJet Icon, and selecting Properties.
Then choose the Advanced Tab.
Click in the circle next to “Print
Directly to the Printer.” Be sure to
click apply before clicking OK.
one is Print
Installing the Picojet
Drivers on a “Graphics
PC” for generating PRN
files.
If you are generating PRN files to print with on your PicoJet Printer, and prefer
to generate them on a separate computer other then the duplicator itself. The
other PC (“graphics pc”) will need to have the PicoJet Drivers installed as well
as the SureThing CD Labeler Application.
To install the drivers on your “graphics pc” you’ll need the PicoJet Drivers
either on the included CD-R or download from the MF Digital Website.
You can then use the Add a Printer Wizard to install the drivers, however at the
prompt asking for which PORT the printer is connected to, select the LPT1 Port.
Doing this will keep the PicoJet Printer Icon, online. Then continue with the
wizard, at the screen asking for the driver files, click the HAVE DISK and point
the dialog via the BROWSE button to the X:/enu/drivers/win2kxp folder.
Where X is the location of the drive the drivers are located on.
The prompts you will see will be those shown above. Be sure to set the printer
to “print directly to the printer” as shown in the very last step of this guide.
5
 Loading...